Transcripts
1. Introduction: Going on with your DI wires and welcome to my YouTube
master class. My name is Curtis
King, and I will be your teacher that'll guide you through not
only a solid plan for you to build
up your YouTube, but also a solid plan for you to go get monetization
for your videos, as well as to launch your
career in live streaming. I have been a YouTuber now
for almost ten plus years and your friend Curtis King learned the hard way how to find
success on this platform. I look forward to giving you all that information that I wish somebody
would have gave me.
2. Mapping Your YouTube Strategy: I'm going to ask you
a list of questions here that I do
believe you should think over before you start to recording your first videos
and throwing them up there. I know you're
excited, but chill. First and foremost, should
you make short form long form or should you go
straight to live streaming? I think it has to do more so with your comfortability
on camera. For those of you that
have some experience, I don't think there's an issue with you doing
live streaming first. Actually, I do the majority
of my content live streaming, and then I cut that into
long form and short form. Now, let's define what
those are, by the way. Long form content is
typically 8 minutes and more. You see podcasts that kind
of do that on YouTube. You see videos trials that are sitting in
that particular range, but they're videos that are
typically longer videos. Short form videos
come in the form now of YouTube shorts, right? You're talking about
vertical videos. You're talking about
some horizontal videos, but typically videos that are from 5 seconds all
the way up to, I believe, 6 minutes. But those videos are
typically for people with tension spans are
people who just have less time to
dedicate to content. Based upon your
comfortability on camera, I think that short form is a
great entry way for you to get used to things that may
irk you like your voice, like your setup, maybe perhaps the environment
that you're shooting in. I think that it's a lot less risky when you're making
this type of content, and I think you'll be a lot less critical about the content
that you've made when you have less of a sample size to actually sit there with and. Long form content
can be beneficial because you'll learn a
lot more along the way. But then again, you'll
have a lot more video that you'll be required to edit. Live streaming, I think, is where a lot of special
things happen, especially when it comes
to connecting with people, which I think is a huge
key to my success, which is having the
ability to be in a room with other people on YouTube that have an interest in a particular topic and being able to engage them
on that level, I think, has made me more
of an engaging YouTuber. So I think that they all
present their own benefits, but I would say if you're
just getting started, short form is a
lot less risky and a lot easier for you to make your entry way into the space. Question I want you
to ask yourself. What can you realistically
be consistent at? Now, this is a question
that you ask not only just about your content scheduling, but more so about your topic. Is there a topic that you can talk about until you're
blue in the face? For me, that was music. I love music so much. I didn't really matter what
subtopic I was talking about. I knew that I could
consistently talk about music for at least
the next ten years, and here we are still talking about music ten years later. To make this easier,
I'm going to give you a guide that I
studied from my guy, Roberto Blake, who's a very successful YouTuber
in his own right. He says that no matter what
category of content you make, they all fall under three
different category types. The first being hub content. Now, hub content is typically
community based content, so it's MBA highlights
for NBA fans. It's things that are
so niche that you may not have an understanding of it unless you're a part
of that community, but it's beneficial to those who are part
of that community. So that's hub content. Next, hero content. Hero content is typically content that is
very inspirational. It's things that
are meant to leave the audience feeling
motivated and wanting to move to another space in
their life or wanting to be moved to action or
inspire creatively. Third, but certainly not
least is How to content. That is the foundation of
how YouTube was built. How To Content, of course, is there to help the
viewer step by step, make it through whatever particular instructions
they looked up. Tube content, hub content, and, of course, hero content. Also, when you look at YouTube, YouTube has many
different categories for videos to fall in. I think that it's
unwritten rule or even a hidden strategy that when you start off
in YouTube and you say, This is the particular category on YouTube that I'm
going to attack, I believe that the algorithms
work in your favor. Especially if you know who you are and your actual content, your titles and descriptions and tags all align with that, I think it's a lot easier
then for you to to establish who are we going
to direct this message to? Who are the type of news feeds that we need to be in front of? Next question, you need to ask yourself, Who are the leaders? Who are the professionals
in your particular niche? I'm sure that you
have people that you're already fans of. Well, it's time to now
put your study cap on and start to understand some of the things that they
do that are habits. You probably already know these things if
you're a fan of them. You don't want to follow
everything to a T because obviously they're at a different part of their
journey than you are. But because these folks are
leaders in this category, there are certain expectations
that an audience has. Now, am I asking you to
become a carbon copy of them? No, I'm asking you to understand the rules that
have been established. So at one point in
time, like I did, you can break the mold
and do your own thing, but you got to learn the
rules before you break them. I want you to find at
least five professionals in your particular niche. If your niche is
so niche that you can't find any
professionals or leaders, you went too far down
the rabbit hole. It's time to zoom out a bit. The whole idea here
is to find success on YouTube and not
reinvent the next, what is a content upload
schedule that you can commit to? For some of you that are
working nine to five, you're going to school
or you have kids, whatever the case
may be, you can only commit to one video a week. That's right. Just make
sure that whatever it is, it's something that rain sleeps. Nothing will stop you
from at least doing that. I cannot stress how
important that is. When I first started
putting up content, I was doing five days a week. Then I said, Let's push it
to seven. Then I burned out. Then I said, That's too much.
I did three days a week. Then I did four days a week. So here's my current
upload schedule as it is on Curtis King TV. Let's actually
start on Thursday, and I'll help you to understand why we're starting on Thursdays. On Thursdays, I typically
do a live stream. That live stream typically has three topics
that I react to, content that I feel like is
relevant to hip hop culture. I take that live stream, we'll chop it down into
three separate videos. Those videos will
then be uploaded on Mondays, Wednesdays and Fridays. And, like, Clockworth,
this thing keeps going, but that's all because of
the live stream on Thursday. Live stream has been
the best way for me to build up rapport
within my community. I feel like the better that
I am at live streaming and the better I am at adjusting to the technical difficulties
that will come about, the better it makes me as an orator and a speaker
in this YouTube space. So these are the
first few questions that I think that you
should really mull over. Like, really give yourself
time to map this out. And as you start to
answer these questions, I think it'll better
prepare you as you move through these
different lessons. So that was Lesson one.
Let's move on to lesson two, where I'll be showing you
the equipment that I use to do my videos as well
as my live streams.
3. Equipment I Use: Now in Listen to, I want to run through
some of the equipment that I'm currently using to
shoot and film my videos. Keep in mind, you don't need every single piece of
equipment that I have. This has been years and years in the process of learning how
to maximize what I have. I started with an iPhone six and I maximized as much
as I could with it. What I will say is this, if you have a little bit of
a budget to spend instead of trying to
go the direction of getting the most fanciest
camera that you could afford, I think it's important that you maximize the lighting
first because your understanding of
lighting is going to help whatever piece of
equipment you start with, whether that's an
iPhone, whether that's a DSLR or whether that's
just simply a webcam. The camera that I'm currently using is a Panasonic GH four. The lens that I'm using
on this is a Sigma, 18 to 35 millimeter
lens with a F 1.8 megabons T speed boost. Next, I have a Manfrotto tripod. I have a few different
El gato Cam links. I'm using the Elgato
Calink four k, which I use this more so for
downstairs on my laptop. But then I also have
the HD 60 plus version. I found those to be
a lot more stable. They're a lot less flimsy
than these things can be. But these are so important
because they allow me to stream using my DSLR cameras. It is very important
that you get yourself a dummy battery if you're
going to be using a DSLR. A lot of these will overheat. You want to test
that out as well. I know some cannons
will overheat when you try to use them
for live streaming. That's not what they were
originally intended for. Next, you can never have too many micro DMI or HDMI cords depending on
what your connection is. Generally, these CaMlinks are taking HDMI directly
through from your came. Next lighting. Now,
we're going to go more in depth in terms of
how I light my videos. But the lighting that I
currently have right now was the newer CB 60 LED light
and a newer softbox, and then also an
Elgato key light. Also, when it comes to sound, I have a few different
microphones that I'm using. I love the shore brand when
it comes to podcasting, when it comes to
doing YouTube videos, I just find that these
just sound so close to the warmness and
the natural sound we expect from the human voice. I have, of course, the
Mike Shore SM seven B, which is the big one here, and then a smaller one for guess
that is the Shore mv76. Depending on your budget, you
could even use a USB mic, like my wife, let me borrow just to show you
the example of it. Also in terms of
audio interface, which is highly suggested, you don't really
want to be using the stock setup on your laptop or your computer if you can get your hands on an
audio interface. I would try the focus
write two I two, which is the one
that I started with. The one that I'm
using right now for myself is an Apogee
symphony desktop. Next, you have the
Elgato stream deck, and this is where I have pretty much control over everything that I need
during a live stream. Use this to change angle
sometimes for the viewers. I use it to have pop
ups on the screen. I like to use it for sound
effects and really just things that help to enhance the video and
viewing experience. So I don't know what
your computer setup is or what your budget may be, but I have two different setups. I have a desktop computer here that has served
me well for some time. For my desktop, I
have a CLX gaming PC, Intel core, I nine. As you can see here,
I max it out to about 96 gigabytes of RAM just to get as much as I can when it comes to editing
my four k footage. But I also use a laptop for any downstairs content
that I may create. That laptop is an HP
NV laptop 16 inch with 40 gigabytes RAM. Helped me shoot music videos, it's helped me to shoot
vertical videos and even do interviews in
different locations like barbershops and
things like that. It's even helped me
to do live streams remotely at places
like barbershop. I've been able to set
this whole thing up in different locations because
of how fluid the setup is, but a big part of that is
having that HP NV laptop.
4. YouTube Channel Checklist: Okay, in Lesson
three, let's go over this YouTube channel checklist of things that are
non negotiable. You do not want to skip
any step of this if you plan on finding
success on YouTube, especially if you
plan on monetizing. One of the first few places that I see people kind of mess up on is choosing the perfect YouTube
photo or YouTube avatar. This here, where I have
my hand over my face. That's me, of course, and
this yellow background is a very strategic choice. First part of this strategy
was finding out if this image is
something that's going to translate on
multiple devices. Now, we're on a
desktop right now, but most folks are
going to watch your videos from
their mobile device, which means they won't see all
this detail of this photo. It's important that you
choose a photo that if you zoom out you can still kind of make out
what's happening there. I can still see a hand. I can see the palm is over the face, and I can see that the
person is making a reaction as well as see that it's
a yellow background. Why? A yellow background? You can see it in many different
places on the channel. That was a very
strategic decision, and it was something
that I learned from marketing in my color
psychology course. Or psychology is a real thing. All these corporations
that you see have either paid millions
or have done the research and paid
millions for the research to find out what these
colors do to your emotions? Or what do they inspire? For me, I wanted to inspire clarity and warmth
in the audience whenever they saw my logo or they saw anything
associated with my brand. Optimism was very in line with the hero content I
planned on making. So it was very, very strategic. I haven't always had
the same avatar, but I've always had the
same color scheme of yellow and typically associate those with brands like Best
Buy, Hertz, IMDB, Nikon. But also we associate
that with warning, right? If we see a piece
of yellow tape, and it has a warning, it
immediately gets our attention. A bee and a beehive presents
a certain amount of danger that we're prepared for when we see
yellow and black. All these things
play into the brand and was very strategic
why I chose that. Sit with this chart and
really ask yourself, What is the thing that you're trying to inspire
in your videos? It's probably a color that's one of your
favorites anyways. Second thing we're going to
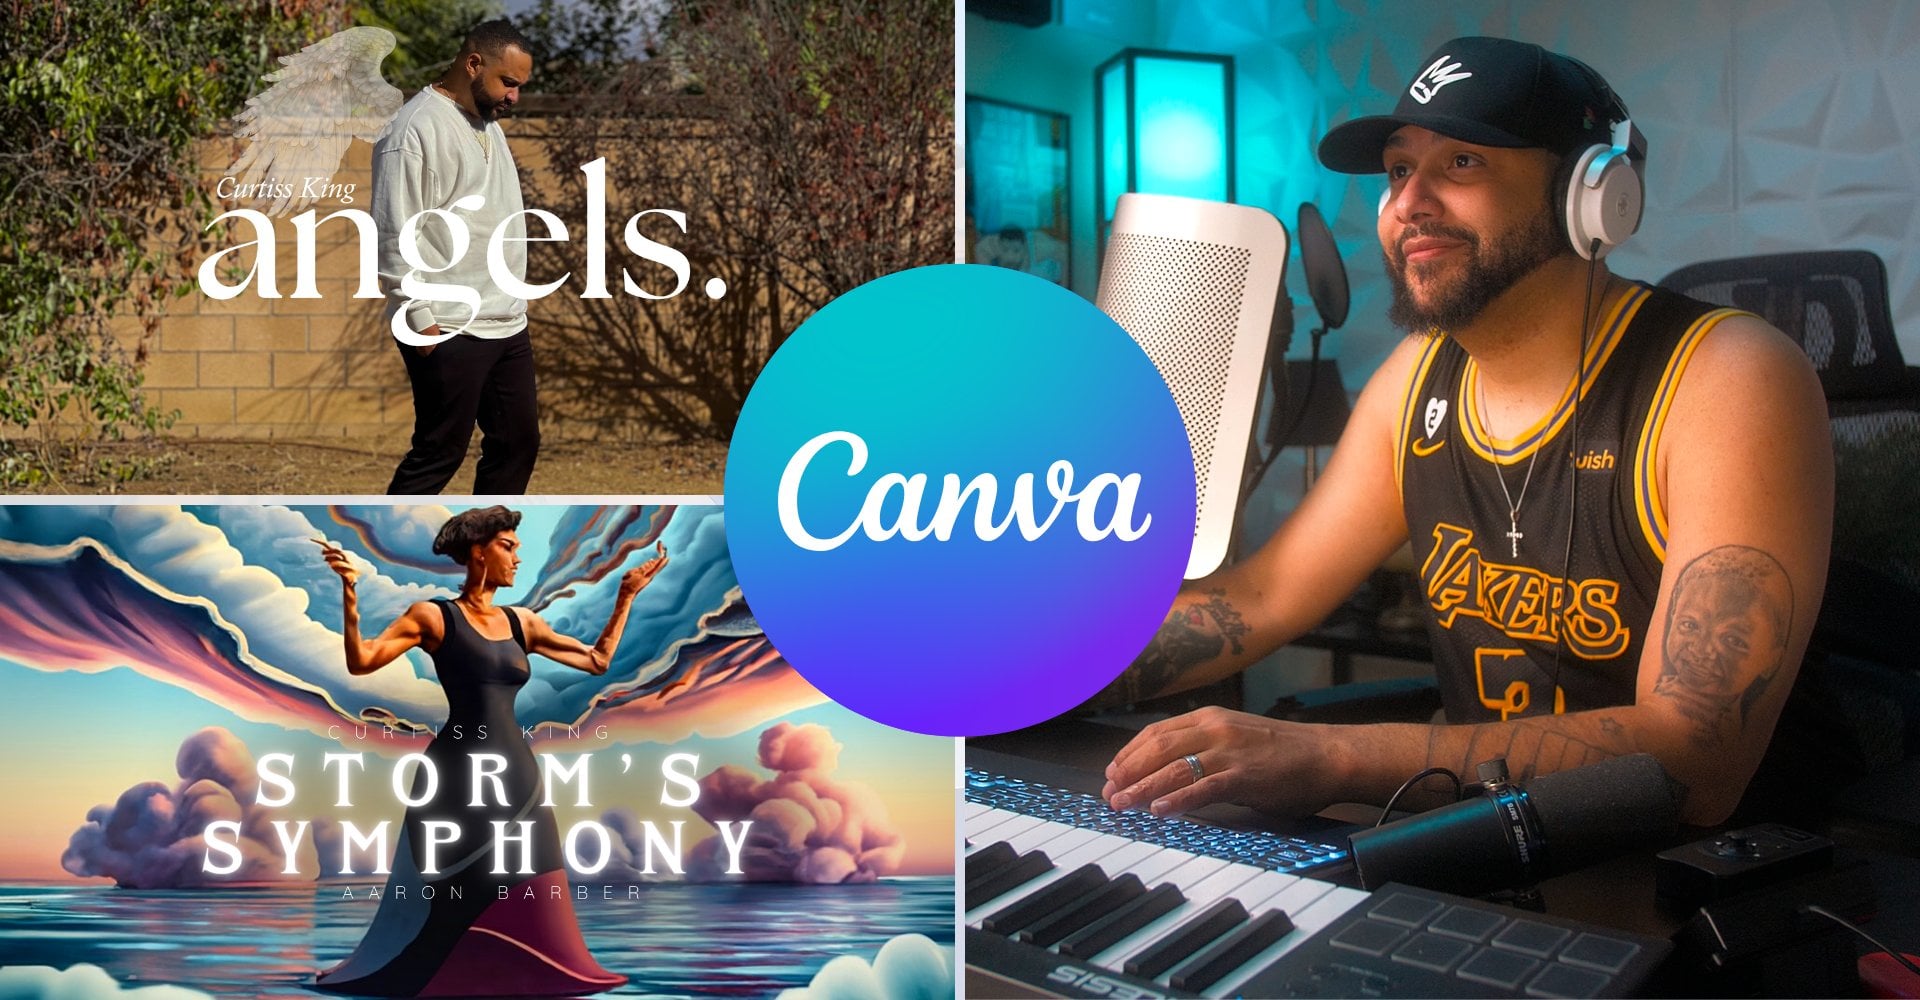
talk about is channel art. I typically use Canva
to create channel art. You can do this in many
different editors, but the thing that I
love about Canva is that they already have templates that are made by graphic designers, and I guarantee you, what you create in here
is going to be a lot less money than
what you're going to inevitably have to pay
a graphic designer. With that said, some things
that I think you really want to pay attention to
with your channel art. This is where the
expectations are established for those that are coming to visit
your channel. Ask yourself, who
are the type of people that want to
visit your channel? Somebody who is curious about what your
channel has to offer, how often it offers that. And then also, too,
your credentials and maybe some of the
things that you're offering outside
of your channel, like merchandise or products
and things like that. This is a place that
people are going to typically look second
after your avatar. Daily. Indie music motivation. That is the expectation
that I have set. What are you going to actually be talking about
on this channel? Well, I said it's going to be music making, reaction videos, and DI wires, which is the tribe that I have
established for this channel. Here I have a subscribe
graphic that leads people on mobile devices to go ahead and subscribe
to this channel. Let's get to the next
category that is so important for helping you
find success on YouTube, your channel tags and
your channel bio. And I'm going to show
you a really cool trick of how to utilize chat GPT to help you make these even better than just trying to
guess your way through it. Now first things first,
let's customize your bio. As you can see here, I have
a very long extended Bio. I have links, and I have
all the channel details. This is where you put
in information that is going to make it a lot easier
for people to find you. Google owns YouTube,
ladies and gentlemen. And that means that when
people search out information specifically to
things that might be areas of expertise of yours, Google is a part
of that process. And if Google owns
YouTube, of course, YouTube will come up in
those search results. In terms of the customization, this is where you actually
change your banner. This is where you
change your avatar, of course that's sitting here in the customization that we click is where you
establish your name. Depending on your niche,
I think it's always good to keep it very simple. When somebody says, Man, I was on Curtis King
TV the other day, it's really easy for
people to go ahead and look up and remember. Some channels are
exceptions to the rule, but they are not the rule. Try not to make your channel too long winded, not
in the beginning. Make it easy for
people to remember you visually as well as
remember you by your name. I chose Curtis King TV. This bio here is actually
something that was generated. Through the help of Chat GPT, which I highly suggest you use this as
your new assistant. If you sign up for
a free account, start having
conversations with it. So, for instance,
if I said, I need a Bo about my music
career that I can use for my YouTube channel that helps and informs
independent artists. What questions do you
need to know about me to create a 900
word Bo about me? So what you're going to do is sit with every one
of these questions, and as you answer
these questions, it will then spit out a bio
based upon your answers. The more details
that you give it, the better your bio will become. This bio is the result of me answering these
very questions. Next, you want to make sure that you provide other websites. This plays well into
Google as well. You can put your social media. You can put your
actual merchandise, you can put whereever your products are
at, I have my book, I have my music, I have my clothing, as
well as my website. Put your email in
here so people can contact you sponsors can
possibly contact you. And also, if you
want, you can have a video watermark
that appears on every single one of your
videos with your same brand. Have one up here because I typically like to
add that manual. The next thing I
want you to focus on are your channel tags. You can find that by going to your dashboard and navigating
down here to settings. Once you're here, I want
you to go to Channel, and this is where you're
going to actually add your channel tags. If you don't know what type of tags are in your category, one, you should study
the leaders and see the overlapping tags that
they use with the help of, of course, Vt IQ, which is something we're
going to talk about. But then also, you
can use hat GPT. Based upon your understanding of the independent hip hop
category on YouTube, please help me generate tags. I can use for my channel. Keep in mind, this is for my permanent YouTube
channel tags. And then from here,
it will start to generate tags that it feels
is relevant for that. And once you start getting this idea going of what
you're actually going to, it makes it so much
easier for you to then add on extra tags here. Now, last but not least, let's talk about
the websites that I use that are pretty
much my team. They are the foundation
behind quality of my channel, they helped to build my channel. One of those we
already talked about was, of course, Canva. Canva, for me is something
that I use every day. I use it for my thumbnails. I use it for advertisements,
for products that I have. I use it for my community post for channel art,
for your avatars. For pretty much anything you
can think of graphic wise, Canva is something that you're
going to want to sign up. I believe it's 12 bucks a
month in order to get that. Next, VDIQ. We're going to be talking
about VDIQ a lot here. As it shows here, it gives
you insights to a part of YouTube that you don't get simply by using
YouTube by itself. Now, I've already bought
and installed VDIQ. I believe it's
about 49 per month. But let's say we go
to this video here. VDIQs over here, and VDIQ gives me access to
so much information. If you click over
here on overview, we can see things
like the success and the age of this channel. We can also see the channel
tags that they're using. Remember when I told you to go look at the leaders
in your industry? Video tags, boom. You see it. And you can actually
use VDIQ to copy these. Already saw this in
action, but Chat GPT is going to be so important
because it's helping to close the gap between whatever specific
questions you may have that this course may
not be able to answer. Chat GPT will close that gap. It does it for me
on a daily basis. Next up is Capcut. I use this for specific edits, for adding captions to videos. I think it's a very
inexpensive way to get yourself editing
your own content if you have that responsibility. I use a program
called Vegas Pro, but I do think Capcut
is one of the best, if not the best free option
there on last but not least, you're going to want
to make sure you download OBS Studio. This is going to be
important when we talk about live streaming
specifically. This is the communication between what's going
on on your laptop or your computer and trying to communicate that
over to YouTube. Do you need this in
order to go live? No. But this helps you to control everything
that's going on. Matter of fact, these
videos that you're watching right now
are being recorded in OBS because OBS
has the ability to not only stream but
also record your screen, record your camera,
and all that stuff. I think those are the most important things to sign up for. I will show you ways around it, but I'm just telling
you right now, it's a lot easier in your journey if you
have access to these.
5. Properly Lighting Your Videos: Alright, for Lesson four, I want to show you how I light my videos
as well as stress the importance and the impact that great lighting can
have for your videos. Lighting is ultra
ultra important. And for many videos in the very beginning of
my YouTube career, I was lighting things
completely the wrong way, and it had a tremendous effect upon not only the
presentation of my videos, but also the reach of those videos because YouTube
has systems within it that can recognize
if a video was un to break down what this three point lighting
system looks like. As you can see, in this example, the camera is dead center on. Now, obviously the
camera that I use, it's to the angles like a 45
degree angle to the left. I absolutely use a key light
that is the newer key light. And then the field
light that I'm using is an Elgato field light. The back light is something
that I actually kind of cheat from the overhead light
that I have in this room. And one thing that it doesn't
talk about are practicals, but I'm going to show
you all of that. Now, what is the
purpose of this? The key light is the one that usually has
the most amount of light. That's the primary light
source of the scene, the most intense and
direct light source. I illuminates the
subject or character. If you look in any movie, you're going to notice that in a lot of the scenes,
depending on the mood, one side of the person or the subject's face is always lit a little bit more than
the other one, right? Matter of fact,
something that you'll notice is that it is called a Rembrandt effect where
you'll see sort of a triangle, like you'll see right
here, underneath the person's eye because of the angle that the
lighting is at. Also, you're going to have a fill light that is going
to fill in the space. So you can see on here, the other side isn't really
filled in that much, but there is still a bit of fiel light that
you can see on this side that is not as
lit as the left side, but the right side
still has a little bit, but it's just a
lot less intense. And then last but not least, you're going to have the back
light or the hair light. That is supposed to help outline the shape of your main
character, that being you. And it just places
a really good focus on the main subject which is. UslyT is kind of the same setup. On this side, you
see a little bit less light than you
see on this side, because I have the
main source of light here opposite
end of the camera. I can even show you
what these things look like when I turn them off. Without that field light,
that's what it looks like. Now let's turn off the
key light, as well. And this is the
video that you would have. Doesn't look
that interesting. However, when you activate, you start to see a little bit of the Rembrandt situation here. The fill light, which doesn't
have to be that incense, you get a more natural and warm look to
what's going on here. Also, what we didn't mention in that three point lighting is that for specifically
YouTube videos, you'll have something that
is considered a practical. Practicals help you to
establish depth in a room. They're also used in movies
to suggest a light source. So if you see lighting
around my head, if you really zoom in,
you might see it if I put my hands up like this,
you see, kind of the pink, the pinkish if you're
seeing that light, it's almost as if this light is suggesting why this part
of my head even has light, even though I'm not taking
light from that source, it's coming from up above. With that said, I
want to show you what this actual setup looks
like from my POV. So, here's my POV. This is where obviously all
of my videos are recorded. And as you can see,
right here to the left, that is your main
camera right here. That is obviously the fill
light here that has given me a little bit of light on the other side,
the opposite side. But you see this bright
key light right here. That's where the majority of
my lighting is coming from. If you look up here, this is
where you're getting sort of the border lighting or the
back light for my hair. Last but not least, here's the practical here on this side, but I have a few different
practicals to show you The depth of the room. Having that light behind me shows that there's a separation
between me and the wall. All of these lights play a role. Just make sure
that whatever room you choose to do your videos, you're able to
control the light. Make sure your main source
of light is not dead on. The background is going to
catch some of that bleed, and it's not gonna look good. The lighting is gonna
be flat on your face. You're gonna see bags. It's just not going to
look appealing on camera.
6. Class Project: Okay, aspiring YouTubers,
this is your class project. For this project, all I want
you to do is simply fill in the necessary categories that I outlined for you in
the channel checklist. I want you to not only get those categories taken care of, but I also want you to
upload your first video. I think sometimes we have this analysis paralysis
and hesitation towards creating content
because we can't just get the first piece of
imperfect content done. So what I'm asking
of you is for you to simply get your channel
checklist together, upload a video, screenshot it. And provide a link here in the class projects where you
submit your information. Thank you again on
to the next chapter.
7. Titles, Thumbnails, Tags, and Descriptions: A Okay, on Lesson five, I want to hyper focus in on my strategies when it
comes to YouTube titles, thumbnails,
descriptions, and tags. If you don't remember
anything else from this section,
remember this. You titles and your
thumbnail are a handshake. You got to start thinking
of these as a package. When you're successful in terms of delivering your
message in a way that creates a little
bit of intrigue that creates some tension
or some conflict, it will reflect in something called the clickthrough rate. We're going to break that
down in just a second. But just to kind of give you an example of what
this looks like, Master P claims There's no money in music
is a video title, and it's a video that actually did really well
about a month ago. Addition to the title, which doesn't really give you everything that the
videos about because, of course, I want
people to watch it. It says enough to
make someone want to look at the title and
then look at the thumbnail. I actually use a
photo of Master P, which is going to
already draw attention, this shock look, which is
going to draw attention because the eyes are something
that draw people in. We'll talk about that
when we're talking about creating eye catching
thumbnails in the next lesson. Also, the name here with the red background and the white lettering
of Master P's name. And then also, too,
the music industry is broke and broke here
in this bright yellow, which is on brand with my
colors and extremely large. Is important because no matter what order someone
reads this in, one helps reinforce the other. If somebody sees a thumbnail, that makes them say
the music industry is broke, what does that mean? Then it says in
the actual title, Master P claims there's
no money in music. Interesting. There's enough
curiosity here to make somebody really want to
see what's going on here, and therefore, click
through watching the video. Click through right here is on YouTube a measurement
or the percentage of viewers who click on a video after seeing its
thumbnail or title. Click through right
measures how often viewers watch a video after seeing
it and the search results, suggested videos or in their YouTube feed AKA
the YouTube browse. Now, this is important
because there are three primary places that your videos are going to
generate traffic on YouTube. That would be through the
YouTube browse feature. The next one being
the suggested videos. The next one is the
search feature. This is kind of the OG YouTube where when people are
searching things out, they will come across
your video because you provide an answer to
a commonly question. It says here, YouTube
makes search predictions based on factors like
popularity or similarity. Now, with all those things
into consideration, you just want to make
sure that you're taking care of your packaging. And the packaging once again being the title
and the thumbnail. If you take care of
these and you keep testing until you see a
higher click through rate, which you can see, anytime
that you upload a video, about after 2 hours, they'll start showing you the
initial clickthrough rate. If you're seeing that your
click through rate is sitting above 7% or it's
getting up to 10%, which is super high, then
you're doing your job. Let's talk about
another packaging here. And these are videos that had at least 8% click through rate, which once again is really good. If you see something
as high as that, then you know that video
is going to be suggested. In this video here, I say, the real reason Atlantic
Records dropped 50 artists. It makes the viewers say, Why would Atlantic Records drop? And then to reinforce
this point, I have me looking like I'm
not understanding the point, and then I have 50 artists dropped Atlantic
to reinforce it. But then also record
labels are over. These are basically playing upon the assumptions
of the viewer, the fomo of the viewer. And if I do my job correctly, that click through rate
will reflect just that. Now, let's zero in a
little bit more on titles. I try to make sure that
my YouTube titles are 55 characters. Do I break that? Absolutely. What I try to make sure is that the
meat and potatoes, the most important part
of the story or of the headline is in that
first 55 characters. And as you can see, it notes
it here where we're at. This is only 53 characters here. Let's see the masterpO. What is this? 42 characters. But the whole point
of it is it's supposed to grab the
same attention that, say, a magazine might grab. There was an older
news publication. It was kind of, you
know, phony news, but National Enquirer. They used to have
these headlines that were straight to the
point because they knew that you were in the checkout and that you had
very little time to read whatever message or headline that they
wanted you to see. I try to keep that
same philosophy in mind when I'm
making these titles, try to make it really easy for the person to understand
what's going on, but also in the same breath, create that conflict
or that curiosity. For those of you that went and made the
investment into VDIQ, this is where it's going
to be so crucial for. You install VitIQ, you're going
to start to see it slowly but surely take over some of the sections of your YouTube. And I want to focus in
here first on your title. This is the title
that I came up with, and it's doing really well. Don't have any
desire to change it, but VitiQ has this
AI title suggesor. If I take this title and
then I click on Refresh, it will start to give
me titles that I could use that might even improve upon
what I already have. Master P claims there's
no money in music. Five music industry secrets
that will blow your mind. Master P exposes the shocking
truth about music money. Here you can actually
get even more strategic about what you
want to happen here. But here you can
tell it. What is this video actually about? You can show it the targeted keywords you want to go after. You can even tell it the emotion that you want the
headline to exude. So they're making this
easier and easier for you to win when it comes to
your actual headline. Another che code that I use when it comes to titles involves specifically the program Capcut and Chat GPT working
hand in hand. Now, how this works is
basically you would go into Capcut,
create a new project. Next, you import a video,
click the ad button. And then what I'm going
to ask it to do is this, I want you to provide me captions to this video
as best as you can do, and then I'm going to
take those captions, and I'm going to export
them as a notepad. After clicking on
caption, click Generate. Okay, after the
captions are generated, what you want to do is
click here on Export, click off Video
and make sure that the caption is the only thing
here that you have clicked. Push Export, open up the photo
that has the actual text. This is the script from the
video that I just made now. This is the one I'm also trying to figure out a title for. So an unorthodox
way that I would use chat GPT in
combination with Capcut is I'm having trouble
coming up with a YouTube title that evokes
tension and or curiosity. Could you study the
script from my video and generate 20 possible titles
that accomplishes my goal? You paste in the
actual captions. And what this is going to
do is give you a framework. It's going to give you some
ideas of where to start from. Depending on the one
that catches your eye, that is the one that I
would probably go with. I like LL Cooja had to
relearn how to wrap. Here's why. That
gets my curiosity. Now what I'll do is I'll
take this actual title, and then I'll refresh the suggestions and see if there's anything better
than what I already have. And now that we
have a title, let's talk about descriptions. Now, descriptions
are very important because with Google
owning YouTube, you got to start looking
at your descriptions, and anything that involves
texts that can be searched. You got to look at these
things almost like blog post. If this was a
traditional blog post, you would use the title
as sort of the headline, and the description would
be some of the questions, some of the
terminology, and things that would get picked
up in a YouTube search. So what I do with
my descriptions, it's very simple is
I'll take the title, copy and paste it right
here into the description. Next step in the
descriptions, hashtags. Another place that views
are generated from and another way that helps YouTube determine where to
suggest this video, where to place this video, and who might find it
to be valuable. Hash tags are actually
searchable in YouTube. The first thing that
I'm using is LL Cooja. Next thing hip hop
and Curtis King. Next step is
subscribe to YouTube. This may feel a bit redundant because there's other
places to subscribe to, but let me let you understand why I choose to
have this go first. One way that people kill their watch time is
by placing a link to their website or to anything external to YouTube that's
going to break the watch time. So, for instance, say somebody's
watching this video on LL Cooja learning how to wrap again and say
halfway through it, I say, Oh, join my
patron and say I make a good enough case for somebody to go
click on that link. That breaks the watch time. And it's not accurately
representing the viewership of my video because then when
a person returns, the watch time starts up
again or the session time, I should say, starts up. Try to make sure the
first link that's in here that's clickable
is something that's going to keep my viewer within
the boundaries of YouTube. This will literally
lead them right back to my channel to subscribe. Next, I have a
description of who I am. Now, I place these in all
these different videos, and I'm going to explain to you a few different
reasons why I do that. Who is Curtis King? By the way, if this is your first
time watching one of my videos, my name
is Curtis King. I'm an independent rapper,
music producer and YouTuber. My goal is to make you think, laugh, and motivate you daily. If you need a channel that constantly keeps
you motivated in a good mood and speaks to deep thoughts of creatives,
consider subscribing. This is a nothing salad.
Let's just be honest. But this does reinforce
a lot of the things that I mentioned in my
channel description. And this is important because it tightens up the expectation
of the channel. It reinforces some
of the tags that I placed as the foundational
tags of my channel. Next thing that I
have in here, this is where I'll start to
put external links. I have my Amazon storefront, which gives you links to all
of my different equipment, all the different
software that I use. In turn, anytime somebody buys
something from this link, it's an affiliate page, I make some money off of them buying something from this page. Next, I have my typical social media
links, where it says, follow Curtis King has my
Instagram, my Twitter, website, my music, and
all the important links. Why does this description
stay the same, no matter what the video is? A little trick that
I found is that by keeping all of my description
similar in this way, it ensures that somebody falls down a Curtis King
TV rabbit hole. There's a high likelihood
that another one of my videos on my channel
will be suggested in the right over
here like this and like this and like this because I told YouTube, these
are all related. So this is a way for me to
stay in these suggested, even though it's all good if it goes to another video because I still get
that watch time. There's another
way for me to get more opportunities for the audience to
say, You know what? I think I'm going to
subscribe to Curtis King. Now, let's talk about tags. So what you're looking at
right now are my tags. Next to the tags,
you're seeing scores. And these scores indicate
a few different things. One, this is VDIQ in action, telling me that
this particular tag has about an overall
score of about 36. So to break down
VID IQ's tag score, this is a way to evaluate the
quality of a video tag and how well they contribute to the video's discoverability
on YouTube. Tag count the number of tags
in a video, tag popularity, how popular the tags are, tag volume, the number of
times the tags are used. The tag score is part of the VID IQ SEO score search
engine optimization, scorecard, which also includes an actionable score and
a performance score. The total score is color
coded with green indicating a good score and red indicating
room for improvement. It also is telling
me that in terms of when people search
up Atlantic Records, I'm the number 19th video that shows up in
that search result. Now, as you can imagine,
that can be really, really good for traffic because Atlantic Records
gets a lot of traffic. So with me having as much
history on my niche, as much authority in my niche, these are things that help me to rank for these
particular terms. Now, I'm not going
in here trying to find ways to purposely
rank for all of these, but if I can, cool. That's another source
of traffic that this video can find
to be successful. Let's just type that into YouTo. Boom, number one video. My strategy is a who, what, when where when it
comes to the tags. First thing that I'm
trying to establish is what is the most important
term in my title? The most important phrase in
here is Atlantic Records. Next, Atlantic Records
drops 50 artists. As you're starting
to see, these are basically variations
of my title. The more variations of your title that you're
able to make into tags, the more likelihood
that they're going to rank for that
particular topic. A lot of people make the
mistake of just making these broad *** tags like hip hop 'cause it is
hip hop related. Music. But there's a very
low likelihood that you're going to
rank for that because there's so much competition for music tag for a hip hop tag. When you put hip hop,
you're competing with every underground hip hop video, you're competing with
hip hop dance videos. You're competing in areas
where you're going to be a small fish in a big pond. But the more specific you get
with these tags, and mind, you only get 500 characters, the better it fares for you. Next tag I put was
Atlantic Records artists. And notice how even though these are just different
versions of the title, they give a different
message to the viewer. Atlantic Records drop. Okay? That could
be dropping music. That could be dropping
artists, no matter what, I'm ranking number one for that. Atlantic Records exposed. Okay? Well, that's an
extension of what it is, because it is exposing
that they dropped artists. Atlantic Records explain. Also, these next handful of
tags are my default tags. Now, that is back
here in my settings. Settings, and what
you're going to see here are your upload defaults. This is where
you're going to add the description like I told
you, the default description. This is also where you're
going to add your tags. And these default
tags are going to be there no matter what
video gets uploaded. I automatically goes up there. So I keep these pretty
consistent no matter what, these are things
that are going to be relevant to whatever
video I put up. Now, since we're
talking about using your thumbnails and using
your titles as a package, I want to put you on game to a website that I love
that I've been using for some time now to test
out what my videos are going to look like in front of viewers on different platforms. And then once you
upload the image, once you have the title, check
this out. Isn't this cool? So now you're able to
look and see this is what your thumbnail and your title is going to look like
for a new viewer. Now, this is so
important because it gives you a preview of things that may not necessarily translate well on
the other side. This allows me to
become a viewer of my own content in
different platforms. Things become problematic the more words you use
for the title. Let's just throw a random title. LL Cooja had to re
learn how to wrap or his career would
be over with. Way too long of a title. And what you're going to see
is in different formats, the title actually gets cut off. And you know how many
times I've done this test, and I've seen a video package
of title and thumbnail, and I'm like, I
wouldn't click on this. These are the tricks. These are the
strategies that I use whenever I'm putting
together my titles, my descriptions, my
thumbnails, and my tags. You stay consistent on this. I promise you, you're not
only going to see growth, but you're going to
be able to measure your growth as it happens.
8. How to Create Eye Catching Thumbnails: Okay, Lesson six,
let's talk about how to create eye
catching thumbnails. Here are some of the
things that I'm always looking out for when
creating thumbnails. I'm going to actually give you this template for those of
you that are using Canva. But as you can see,
over the years, I have been using nothing
but Canva for my thumbnails. I want you to kind
of give this bit of a naked eyeball test. As you're looking at some
of these thumbnails, what is probably the first
thing that's popping up? If it's not my image itself, then it's probably
this large text that over time has gotten
even bigger because I started to understand
the science of what I'm things that I've learned about what makes our eyes get drawn
to thumbnails, things that makes
our eyes really drawn to any photos in general. One of those things
that I've learned along the way is something
called the Rule of Thirds. The rule of Thirds is a composition guideline
that involves dividing an image into
nine equal parts, these boxes with two horizontal
and two vertical lines, bombom boom, boom, and placing the subject
want the area focus to be in one of the left or
right thirds of the image. And by thirds, they're
basically just meaning, these are the
intersection points. So wherever you see
these lines intersect, that's where you place an image. Why? Because
according to science, this is how your
eyes scan an image. There's about a 41% chance
your eyes are going to go here first if you place an
image right dead smack here. Now, I want you to keep
these things in mind as you start to see some
of these thumbnails that have performed really well. For instance, this
one right here, intersection points is going
to show you Drake's face. Matter fact, if I had
it to do it over again, I probably would find
a way to even increase the size of this so that the intersection
point falls here. But as you can see, in
a lot of these images, you're seeing,
either an eyeball, you're seeing a
nose, person are all sitting here very
strategically in these places. But the whole idea
is that our eyes are drawn to these
intersection points. As it goes here in order, your eyes are drawn here to the upper left, to
the bottom left. Upper right and then
the bottom right last. So now that we're familiar about the points that get
the most attention, we have to also focus in
on how these images that are on these lines are popping away from the
actual background. There were thumbnails
that I did in the past that weren't so good. Let me show you an example
of a terrible one. When I didn't know
exactly what I was doing, I didn't realize how much of this image we just going to
blend in with each other. Matter of fact, this is
actually an edit of one that you can't really tell
what's going on here. If you zoom out, what the
hell is going on here? Is this a stage? Is this
outside? Is this inside? Is the black hat blending
in with the Black stage? Now, even though
these are older, I kind of got it right
by trying to figure out, how do I make this image
pop over this image? One way you can do that is to
create a background that is the complete opposite color of what your actual
image is here. There's another
one that did well. Now, you can use things like shadows to help your
images pop over the top. Something that I do here
now is I started to actually add shadows
underneath my text. I think it's well worth
your time to just sit down and go
through a website like De font and really
find a font that you think stands out if you were
to have your own magazine, what is a font that
you would use that would be very clear to
read, even from a distance? Some fonts look so sexy
when you look up close, but from a distance, you can't really tell
what's going on there. Just like color
has a psychology, font has a psychology. Also, does it really stand
in line with your branding? My philosophy when it
comes to captions, I only use about
four to five words max on these thumbnails. Typically, I'm looking for ways to either use
notable names, terminology for my niche and
finding ways to highlight standout words that emphasize the point in a different
color, in my branding color. So mine happens to be yellow. So a lot of these things
are definitive statements. A lot of these things
are just me kind of emphasizing the
energy of the video. And what happens or
what you're going to find is that the
more videos you do, the more that you
can start to put even some inside jokes or things that are your common says because then your audience is going
to look forward to, like, I can't wait
to see your take on this because I just know you're going to
say something crazy. I was looking forward to
it.'s in the same lane, like I told you earlier
as the National Enquirer. Remember these magazines?
He didn't do it. That's a YouTube
thumbnail caption. House of errors. This is
literally a YouTube thumbnail, but just in a different size. As salacious and as nasty as the National Enquirer was
about people's business, this gives you an idea of how to approach your thumbnails. I literally use the same color yellow because it
gets your attention. As you'll see, I use the same
outline of red and white. That the National Enquirer, fun. Canva has options that can emphasize your text and make it look a little
bit more special. Yeah, the effects mode here, I add something
called the outline, and I typically do black
outline for the yellow writing. But I want this to pop over the top of everything
else because like I said, thumbnails are all
about contrast. So what I'll do is
I'll go here to the elements tab, click Shadow. Boom. So say, for instance,
I added this shadow. Now, add this here. If I right click, it'll show me whatever
your hot keys are, bring it to the front,
bring it to the back. Using these particular commands, you can send it to the back and align it
however you want to. But as you can see,
that's already making the text
pop out even more. Arrows is another way
that you can use to emphasize what exactly we're
drawing the attention to. Big thing that I learned
from thumbnails, eyes, catch, eyes. Now,
what does that mean? Whenever you have
eyes that are looking dead at the viewer like
these are right here, there's a higher
likelihood that you're going to stop the eyes that are just wandering on social media
wandering on the news fee. Something else that
I'm doing, as well, is I use this to highlight some other things that I feel like weren't necessarily
described here. Maybe it's an emotion, maybe it's a number, maybe it's a name in
case you see the face, and you're like,
Is that masterp? Yes, it's masterpie. Okay,
well, it's emphasizing. Or I use it to emphasize
emotion. Oh, ****. These are all, of course, not requirements for
every single video, but as you can see,
they emphasize different things depending
on what the topic is. I try to use logo
sometimes because it's something that
people recognize off rib. So that's pretty
much my philosophy when it comes to thumbnails. I do think it's
important that you also reserve yourself
a photo shoot. I've had many photo
shoots specifically just for YouTube thumbnails.
I know that sounds crazy. But I had a day
where I literally sat and I just did headshots, and I just literally made
all these different faces. Curtis is shocked. Curtis is scared. Curtis can't believe it. And you'll see, I primarily use probably only two or
three of these at most, depending on the topic at hand, but it's good that
I have these here. And this, I'm telling you,
from the very beginning, I'm not changing
too much unless I'm testing and leaving enough time for me to see the
results of that test. But I think that if you're
wanting to build an audience, if you're wanting to
build rapport with complete strangers, you
got to show yourself. And you want to show
your really large. As you see, I don't
cheat any space here. No matter who I'm talking
about, their face is going to be front and center. Why? When you zoom out, it's harder and harder to
make out who these faces are. I will make sure
that I provide you some templates for
you to go ahead and base your thumbnails off of. But I would use this as kind of just a framework
to start off with.
9. Video Upload Checklist: Okay. For Lesson seven, what I want to
show you is how to properly upload videos to YouTube by following this
easy to follow checklist. First and foremost, what
I want to do is find an intriguing title
for my new video. My video editor sent over a video that is about
an artist named Abs, as well as another artist named Daylight who are talking about some of the pitfalls of
being a West Coast lyricist. I want to make sure
that this title follows every single file that I plan
on uploading to YouTube. Usually like to use an extra video that I've
already uploaded. Maybe I made it unlisted or
just a video that I have as a placemaker that is not public
to kind of plot this out. In this one, I
landed on Absol and Daylight expose the
hidden struggles of West Coast lyrics. Let's go ahead and copy that
before we do any uploading. The thing you got to
keep in mind is that because Google owns YouTube, all of these particular items sort of have a
fingerprint to them. It's a digital
footprint, you can say. So everything that you plan on uploading is going to
somehow be searched out. And I've already applied
that here to the thumbnail. Now let's apply that
to the actual video. Now that it's applied
to the video, this thing is ready for upload. Particular window that you
have open here on YouTube, you should be able to go
here and upload video. When you select
files, of course, you want to select the
actual video file itself. And the first thing that
I usually do is I take the title and I make sure that everything is spelled correctly, make sure there's no extra
spaces where it's unnecessary. Now, if I grab this title, the first thing
I'm going to do is add it to the first line. Now, the first two
lines on YouTube generally read almost
like a blog post in that those are the lines that
are going to be likely the preview whenever somebody searches out this
particular topic. So I want to make sure
this is loaded with keywords as well as hash tags. Let's go here to the end
of this actual title, and let's put in Absol. Let's put in Daylight. And I think for this example, we'll just put in Curtis
I like to keep it to about three or four
just for my videos, typically because I want to
make sure I leave enough room for this subscribe to be
on this two line fold. Because what happens
is when you go to any typical video in YouTube, you typically have to click
the Mor to see anything else. So I want to make
sure that the most important things are up here. Now that I've added
the hashtags, can you see how
beneficial it is to have a default upload description? I'm going to upload
the thumbnail. Go to go ahead and upload
that with the title attached. And then what I'm going to
do is add it to a playlist. If you don't already
have a playlist, you can create a
new one down here, but I highly suggest
any video that you upload gets added to a playlist. This is important for a
few different reasons. One, it's good activity that's showing that you're utilizing
YouTube's features, and YouTube is always going
to give you a thumbs up. Days where you could
even go back to old uploads and instead
of uploading a new video, it's great activity
to YouTube for you to organize these
videos into playlists. Also, in your end screens, it's beneficial to have
a playlist that you can add to the up next
video that you want your viewers to watch
because then you can really get as
much watch time as possible by sending them down a rabbit hole of similar videos. Now, I'm going to add this to a playlist that
already exists called the Curtis King Reaction
Videos. Click Done. Next thing, you can set this as a default to already select
No It's not made for kids. But if you don't have that
setup in your settings, you can always go ahead and
click No. Age restrictions. Do you want to restrict your
videos to an adult audience? No. Don't restrict my video
to viewers over 18 only. Does this video include
paid promotion? No, there's no
sponsors or anything like that in this video,
but if you did have one, you definitely want to have that included because
YouTube does frown upon you having a sponsor and not making that known
to the audience, is seen as misleading. Now, click on Show More, and what you're going to see
here is a newer feature that is asking if you have any AI
type footage in the video. Automatic chapters,
you can allow that, but I typically like to add the chapters myself, so
let's keep it there. Featured places,
that's up to you, whether or not you want
to have that up there, but everything is typically from home, so I don't
really worry about that. Automatic concepts, I typically
just keep that click, but I pretty much
keep that as it is. Now, here's all my default tags. Something that I do is
I copy these first, and then I delete them, then I start adding them in the order that I shared
with you before. First things first, let's put in the most important
tag, which is Absol. Then let's put daylight. I know before I said that
you don't want to put in really general tags because you're not going
to rank for them, but I do think it's
important that at some point in the beginning, you establish what
this is really about. And I am pinpointing a
very specific individual, not a very broad category. There's a chance that
within the first few days, I found it at least with the length and the authority
that my channel has, I could rank for these names in the first few days,
and then of course, it'll get bombarded with other content that has
more authority than me, namely content from
these two gentlemen. I'll put Abso. I put daylight, I also put Abso daylight
as one, Daylight expose. I put Abso expose. And I'm really just looking for different iterations
of this title that I can add to the tags. How about struggles
of West Coast Lyrics. And then we just do
West Coast Lyrics. Expose West Coast Lyrics. Now I'm going to
go ahead and paste all of those tags that I had that are the default tags and see how many
more that I can add. Now I have 428 and 500 is the
maximum. Let's keep them. After I add those tags, I can even see if there's
more here to inspect upon, but I typically keep
it pretty close to whatever the title is unless
I plan on changing it, and that pretty much
gets the job done. Of course, I want
it to publish to subscription fee and
notify subscribers. That's very important.
Make sure you click that. Also, this is your
personal preference. YouTube has shorts, obviously. Viewers have the option
of using your content to kind of repurpose for their own channel or
remix, as they call it. This helps to not only
grow their channel, but it also helps to promote your content
to a newer audience. Now, here's where establishing your category is important. I always stay in
the music category. Comments and ratings. I keep that here on, and I sort them by the top one. Next. Obviously, I'm a partner, so I'm going to go ahead and
click on for monetization. Next, it's going to ask you about the content of this video and whether or not it follows the rules and the
parameters of YouTube. Is it inappropriate language? No. Is it adult content?
No, violence, no. Shocking content, no, harmful
acts and unreliable claims? Recreational drug use? No, enabling dishonest behavior? No. Hating derogatory content, no, firearms related content? No. Sensitive events, no,
controversial issues, no. And you want to make sure that
you're being honest about this by clicking none of
the above, because if not, YouTube has the ability to close caption your
videos and then review, especially with the
help of AI now, the content of what it finds
in that closed captioning. So if you're mentioning things like here, they're
going to know it. After that, I'm going
to go ahead and click Submit rating. Here's where you're going
to add some video elements, and I always add two particular video elements
no matter what video it. First one being the N screen. I like to go with the N screen
that includes a playlist, and I typically add it
right here at the end, where I move the circle here that has the subscribe Avatar. Next thing you can
do add a card. I have an ad about midway
through this video. And what I'll do is I'll
add a link to my patron. Or what I'll do is
I'll add a video. Say, for instance,
I mentioned or reference another video
that's about Abso. May we do that? Let's go
ahead and click that. So I'm going to look in
here and see if there's any videos about Abso
that might be relevant. You can add custom messages to really help
people get to this. For instance, you might
put, you got to watch this. Now, I typically wouldn't put this card in
the beginning of the video because you
don't want your watch time for this video to
get clicked off of. I would put it pretty much like a third of the way through
right around here. Now here is where
it's checking to see if there's any
copyright notices. Thankfully, there's none within this video. Clicking next. Alright, and last but not least, here's where we're going to
make some final decisions on the video before we choose to make it go live or
schedule it or premiere it. Now, there's, of course, benefits to every
single one of them. Obviously, by choosing to
go public with it now, you can get out there. For whatever reason, maybe
you don't want to go live, of course, you can
have this privately. You can share that privately
with other people. Unlisted as a great feature,
it even tells you here, select this setting and wait
a couple hours to see if any monetization or
visibility issues are found, then
publish your video. That's a great way to get around any particular copyrighting
issues that you may have or to just stop your video from
getting penalized. Because what happens
is, depending on the rights holder, how
aggressive they are. Some of your videos
can actually be hidden from the majority
of the world or blocked from certain countries because they want to make sure that they have control over how their content is used
or re used by you. Having this go unlisted is a good way to test
out what's going on here or to just share it with other people before
you plan to go live. I've seen people utilize this in that they'll have
a video unlisted. Share with their discord
or their Rhett community, let the numbers
populate and go crazy, and then by the time they go live, sounds like
roll over minutes, and that you're
able to take all of those views, all those likes, and it shows as a video
that is highly in demand based upon the numbers that it appears with
when it goes public. However, the way
that YouTube works, it's always my suggestion to give YouTube as much
time as possible to put your content in front
of people or to notify your subscribers
about what you have coming. The ways that you do that are typically two different ways. One, schedule this
for future time. You can go from
private to public. Today is the 28th. And for me, I typically
go about 11:15, but I do suggest testing
out different times. I landed on this
time after many, many years of testing, and I still have times where sometimes a video edit
is not done on time. And I got to readjust. But with that said, that's the
time I'm going with. Now, you can schedule that
and let that go and then just allow it to just appear
when that time pops up. But another crazy dope feature, especially the more
that you build your audience is to
set as a premiere. Basically what happens
when you set up a premiere is all that work that
you did for your tags, for your titling, you get
to kind of test it out on YouTube's algorithm and
YouTube's news feed before the videos actually live. And a benefit of that is
you're able to gauge what the viewers interest
may be in this topic before the video is actually
live and starting to make adjustments based upon
people's interests or non interest in the topic. Now, I'm pretty sure you've seen this window if you've
ever attended a premiere, but this is what it looks
like on the back end. That particular audio,
that is always determined by which countdown premiere
style you want to use. And then I said it for 3 minutes because I
want to give YouTube more time once it says it's actually live for people
to come into the audience, click the Like button, engage, and really help to
boost as much of these numbers before it actually goes live to
the rest of the world. Also, another great feature that I like here is that
I can click this ad, and I could actually redirect
people from this video to, say, a live stream that
I'm going to do that day. This is super dope
because it brings that traffic directly
into a live stream. Next, you could
even add a trailer that really teases at what
the topic is going to be. Like, for me, I
probably would end up using the intro this video. Been underground
emperor for so long, and now it's like,
you know, I'm in it. Let me challenge
myself to do it all. Long term produced by Kurt. Shut up on the so
they typically have to be at least 15 to 20 seconds, at least 15 seconds. You would cut that up,
and then you would upload that as its
own unlisted video, and then it would populate here, and then you
would click on it, and then that video would
show up anytime somebody clicks on the thumbnail
that has the video. Click Save, last but not
least, click schedule. Now that it's scheduled,
I want to go ahead and navigate here to the
actual video itself, and it's showing
that it's going to premiere in 39 minutes. Now, one thing that I always do, whether I'm live or whether
I'm doing a premiere, is that I want to
get a pole started that reminds people to
hit the like button. So I'll start a pole
and then I'll ask them, Did you hit the L button? Yes or no the default answers,
and I start the poll. Great way to get
engagement all the way through before you
actually go live. Let's actually test this
out on YouTube and see. If we type in Abso Daylight, let's just put Curtis King. The video shows up here
as an upcoming video. So anytime somebody
is searching out these different places,
this will appear. Now, let's test and see some of the things we might
be ranking for already. And it's showing
already that I'm already here for Abs exposes, Daylight expose,
Abso Daylight on number 35 ranking,
Abso Struggles. Number one, West Coast
Lyrics, number one. Good. This is all good. All of these I'm ranking for. And that's not the
number one goal, but these are things, of course, that become other
sources of traffic and other ways that we let YouTube know who do we want
to be in front of? Click Save. And that is my checklist for how to properly upload your
videos to YouTube.
10. How to Livestream on YouTube: I Okay, for Lesson eight, I want to show you
the ins and outs of how to live stream on YouTube. Live streaming for me
was a connection point, first of all, to my audience. By having to do
things off the cuff, without edits, without
any special effects, I had to really learn
how to get to my point, articulate my point, but also keep a general
audience entertained. And that's a skill set. For me, I had to learn through doing live streaming after live streaming after
livestreaming, sometimes reaching as
high as six to 7 hours. But the more that you do it, what I found is that
the better that it helps you at any
type of content, especially the better that
you are off the cuff. Benefit is that you
get the opportunity to take longer content and have
more content to work with. Last but not least, I think
that live streaming is a big, big gem when it comes to getting monetization
on a new channel. Obviously, with the 4,000 hours of watch time and
1,000 subscribers, that is going to be a marathon. I think it generally
is going to take you, especially if you do the
traditional uploading of videos, probably about 50 to 55 videos, and that's also assuming
that you're finally finding something that's
kind of taken thless, I think that you can get to
that threshold fairly quickly by live streaming and eating
up all of that watch time. Now, depending on the nature of the content that
you plan on making, here's a few things that
you're going to need. First and foremost, download
a free version of OBS. OBS is open
broadcasting software minus the screen in the middle. This is basically how I'm able
to control my live streams almost as if there are
multiple angles and multiple things that I want
my audience to focus on. This is the desktop
angle right now. If I hover to main camera.
Well, now we're back here. If I go back here, I can even show you this DI wire bumper. Check this out. DDD I wire. Last but not least,
I think the same way that you have
a packaging with the upload of a
YouTube video in terms of the title and the
actual thumbnail, I think it's important
that you have a topic that you plan on going live with so people
know the expectation, as well as a thumbnail. A lot of people go live
with the default settings and wonder why people are not interested in clicking on it. I mean, ask yourself, would
you click on that if you saw. You go through the process
the same way as uploading, but you tag everything. You add your description, you copy your title over
into the description, and you have a title
that is enticing, that is interesting, that is causing some kind of conflict, that has some kind of
question that needs to be answered or some loop
that needs to be closed. Now with that said, I
want to send you through a quick walk through
of how to use OBS, as well as profile settings
that I particularly use, the scenes that I use, and some more things
that you need to know. Here's all your drop down menus. Things that is most
important here is your profile and your
scenes collection. Your profile is basically
your profile settings. The scene selection or scene
collection is a little bit different in that these
are my saved scenes. Now, what are scenes? Scenes
are how we're basically going back and forth
between main camera. Desktop and whatever
particular scenes that we want to set. Think of this as
news broadcasts, different types of angles or different things that you want to showcase
to your audience. This is what organizes it. On every single one
of these scenes, what you're going to find
is that there are sources. These sources include
your audio input. If you click here on
this plus button, your audio input, which will
be like your microphone, as you can see right here,
have this USB microphone, which you can absolutely
use for this. It's how you import your camera. So video capture device. It's how you see these
logos that are up here. That is actually from
importing an image. Your sources can also
include the desktop preview. This is what I'm
using right now. Usually, what you
want to do to get the desktop preview
is display capture, and then you want
to select Okay. And then it'll go automatic. Going over here to this section, you can, of course, customize your sources a
little bit more specifically, let's say, your audio inputs. You're gonna go here
in the audio mixer. Anytime you import
a new microphone, for instance, this one, my USB. But as you import that now you'll get some
additional settings. Click the three dots, go to
Advanced Audio Properties. And once you here, there's a whole nother
panel just for this. On every single panel that you see or
every single source, it comes with even additional settings that you can put on it. If I click on settings, it has a bunch of different
audio filters that I can add. Now, something
else that is worth noting is that this camera
here doesn't look like this. What do you mean, it
doesn't look like this? Well, if you click
on filter here, what you're going to see
is that there's a lot of settings here that
enable me to get this look. This is what it looks
like out the box, out of the camera right now. It's no color to it. It's really nothing too fancy about it. But by adding
something called a ut, ut is kind of like a preset
or a prepacked coloring, prepacked contrast and
prepacked saturation. It's kind of like adding a preset from Instagram
over a photo, right? One of the filters
that you pick. I have tons and tons of Luts that I've
collected over the years. It's by a guy called
Where's Lugo. I love using his ut pack. And then from there,
I actually go in here to the color correction, and I boost some things here
like the Gamma contrast, brightness, saturation,
and all that good stuff. And you can, of
course, add those by clicking the Plus button here, and there's so many
things that you can do to enhance just that
particular source. These buttons here control a lot in terms of
your streaming. This is how you would
start your stream. This is how you actually record the way that I'm
doing right now. The video that you're
watching is an OBS recording. Virtual camera is more so
for, say, for instance, you wanted to use
the same setup, you could click Start
Virtual camera, and then you can import that
as a new camera into Zoom. Studio mode allows
you to really be like a TV broadcasting room in that whatever's on the left side that you're seeing
over here, right? If I'm live, I could be
editing this window, and in editing this window, it won't affect what is
being seen on this side, which is what the
stream is going to see. So just think
of it like this. This is where I tinker
with things behind the scenes until I commit to it by pushing this
transition button, and this is what they're
actually seeing. So say, for instance, I'm doing an interview and I want
to make the window bigger. Doesn't change anything until I push this transition button, and then, boom, this is what
the streamer is now seeing. Let's get here to the settings. Let's go ahead and just see
my general profile settings so you can compare and contrast and see
what works for you. I typically like to
keep these default, except in the case that
I'm not doing a tutorial, I'll hide the OBS window
from scream capture. I also like to
automatically record when streaming because it's
easy to forget to do that. Appearance, that's up to you. Some of y'all are
maniacs and you want to go to different color
ways. I'm good on this. Stream. This is going to be
important because you're going to see this
whenever you open up. I tend to like to
go to the custom. I just feel like it's more of a reliable connection for me. And so I basically
input the server. So if I go create
and then go live and schedule stream and create
and no Let's do testing. Test stream, streaming
software, no thumbnw. Let's go to next and then next and then before we go
live on any of the stuff, let's just go unlisted because we're testing
this out, right? So we can go ahead and
click Done on here. As soon as this populates, we'll get the
information we need. The information that we
need in particular is one, we need to get the stream URL that would take us right
back here to the server, and then we also need to
grab this stream key. Make sure you never display
that to your general audience or to anybody because they
can do some crazy things. So, too, I generally pick low ultra low latency just
so that there's not too much of a delay in when you do things on the stream
and when your chat is reacting to it. And then once you have this
information already situated, what I'll be able to do then
is push Okay, start stream, and then once you
start stream, Cool. Here it is. So you're seeing us an excellent
connection right now, and then it's showing exactly
here that we're here live. Now, here's the first place
that you're going to really, really want to pay attention because this is going to
be important in terms of making sure that you
have a clean stream get communicated from your
computer to the Internet. First things first, if you're going to be
doing streaming, especially the way that
I'm doing it here, you must figure out a
way to get your Ethernet from your computer directly
connected into your modem. That is something I
cannot stress enough. Not, you're going to
see a lot of dropouts and you probably are
already used to it. If you've been on YouTube,
you see what that looks like. Typically, this is not going to be sitting
in Advanced mode. It's going to be simple
mode. But if you click down here and
then click on Advance, you'll be able to access
these settings here. Now, it won't let me
click on it because we're actually here now
recording something, so it has blocked out some of the options
that I have here. The video encoder is one thing that you're obviously going to
want to tweak around. If you have an video
encoder, use that. But if not, you can use the
26264 setting the default. I typically stream 1920 by 1080, and I suggested
the same for you. I actually have my camera
profile in four K, and then I downscale it by
making sure that it's only outputting in 1080 because I'm going to get more
pixels for it to work with, and it's going to be a
cleaner presentation. You want to make
sure that rescale output for whatever
version of OBS, you either want to match
that with the 1920 by 1080 Or you want to make sure
that you have disabled that. For the rate control, you want to pick CBR. For the bit rate, you want
to pick 6,000 keyframe, zero, preset. This
is where it varies. The lower you go, the
less quality you'll get, but the easier it'll be on
your computer, your CPU. The higher you go up,
the better the quality, the more work it's going
to be putting on your CPU. Tuning, I usually
go to high quality, multi passes, two passes. Profile, I like to
be at high on that. GPU is zero. Max B frames is. That I'm recording
this right now is I'm using OBS's
internal recorder. What this allows me to do is
get a high quality output, but I had to change some
things along the way. First and foremost,
you want to make sure the recording path is
somewhere that has the space to handle these files, which
can get really large. My recording format is MP four. Video Encoder once again
is the Nvidia 264. Output is 1920 by 1080. I like to do it in
four K if I plan on doing any zooming
in, rate control. And here, I use CQP. I use 15 for the CQ level. Ask me what these things
are, I cannot tell you. I can just tell you that
these are things that I have tested and
that I have went through numerous
videos to get to these particular settings,
and they work for me. Preset is good quality, slow. Tuning is high quality, multi pass is two pass. Profile is high, GPU is zero, Max B frames is there. Audio, I pretty much
keep that default, especially for streaming because it's going to get
downgraded anyways, so I keep that pretty
much default here. Now, audio here, I don't
use that only thing that I kind of mess around with is ensuring that
my monitor device, which is how I'm hearing
all these things, is set to default. Video, my base Canvas is
1920 by 1080 once again. Output scaled is 1920 by 1080. Down scale filter is not
going to be required here. And then this is a
very important thing. When you are streaming, I have always found, and I've researched it to be true that you want to go
at least 30 frames and up. I know a lot of
videographers will tell you 24 frames is what you want
to shoot your content in, and you can do that whenever
you're shooting content. But if you're live streaming,
what happens is that if you shoot too low of a frame
per second and streaming, a lot of your videos going to be real choppy and it's
just going to look like a very unnatural sort
of movement in your video. Typically won't need 60 frames unless you're doing
video gaming. Last but not least, go here
to the advanced settings. I don't think there's
anything in here that I'm particularly
messing around with. I know I don't mess
with the hot keys or the accessibility, and
I think that is it. Now, I want to get into
some live stream etiquette, as I'll call it, so that you have the right
expectations jumping into a live stream as well as the right habits when jumping
into your live stream. And foremost, I think
it's always important that you have some kind
of welcome screen. I'll show you mines right here. Here, I have a thumbnail that is basically the thumbnail that
they see on the other side, but I use this as a way to buy a little extra
time for people to make their way in for them to be reminded what
the topic is about. You want to make sure
that, first of all, you abide by the guidelines
and they do have some very specific
things that they put in their guidelines like certain terminology
that can't be used, why you see people instead of saying murder or death,
they'll say nalive. Instead of killed,
they'll say nalive. Instead of sexual assault,
they'll say essay. You want to respect those, especially in the
first 2 minutes. It's been a first 2 minutes where you do not want to curse. You don't want to use
black listed words. But in that first 2 minutes, they're most
aggressive about it, and they're checking
out if you're using music that's not cleared. All these different things.
It's been a rumored thing. I'm not sure how true it is, but it's something that
I have been abiding by, and because of it, I haven't had any
issues on my YouTube. Last but not least, you want
to have some engagement in mind when you first
jump on the live stream. For instance, if the
live stream just started right now and I'm
looking on my screen, I'm looking at what the
chat is already saying. If the chat is not there, 'cause you're just
growing your channel, act as if they are
already there, get right into your topics, shout out the people
that may be tuning in, shout out to whatever your tribe may be minds or DI wires. If I was starting a stream right now, I'd do like this. I'd say. What's going on
with your DI wires We're getting ready to
get started right now. DDD I Y What's going
on with your DI wires? It's Curtis King
of Curtis King TV. And I just want to
say thank you for choosing to watch this video. For those of you
that choose to watch the viewing afterwards,
thank you so much. I appreciate you. Now, today, what we're talking about is
how to do a live stream. And one thing I want to do before we even get
into this topic, I want to ask you guys a
question. Where are you from? Where are you reporting
from? Okay, I see a few of you are in here. So you said, New York.
Cool. You said, New York. You said Florida,
shut out to Florida. Some of you from Cali.
Shout out to Cali. Man, how do you
like this weather? Weather's been kind
of crazy lately, huh? How's the weather where
you're at right now? I'm digging this cold weather. With that said, the topic
I want to get into, and you just kind of jump
into your conversation. Now, I've been doing
this for some time, but in doing so, and pacing yourself and
asking these questions, you give an opportunity
for the people to engage and for that
engagement to tell YouTube, Hey, people are
interested who are already in here and
what I'm talking about. YouTube, go do your job. And suggest it to more people
who are just like them. Or, first of all, to
my own subscribers. You got to make good on the people that
are already there. That's why I don't suggest
getting in there and fiddling through your phone
and waiting to see where the chat is at and
waiting I don't know, get right into the topic because somebody's going to
rewatch this video. After you're done with
your live stream, and you tell them, Hey,
thank you so much. I appreciate you for being here. I have two different tros. I have one where I
could easily go back to the waiting screen like this. I could end with the
bumper. Like this. Det. I wire. Or I could just easily go
into my Otro Det. I wire. DI Wires if you
enjoy this content, make sure that you
hit the button and maybe even
consider subscribing. Come on, man. Don't
get greedy, peace. It's really up to you, however
you want to set that up. What should you do
with your video after you're done with
your live stream? Some of you that are building
a live stream only channel, this one apply to you because you want to leave
everything up there public. For those of you
that are posting up traditional long form videos that you're looking to
get high retention on, you want to unlist
these live streams. Why? Because if it's an
hour and a half 2 hours. The retention is
going to be so bad. The rest of your
channel will then be penalized by those low
retention numbers. I've seen it. I've done it for
years where I live stream, and I saw it affect the
amount of people that YouTube chose to push my
content to for future uploads. It's not a fun game, especially when you
and your editor or you yourself are working so hard to get these
videos out there. It's not a fun so I always make the decision to go
unlisted so that those who have been notified from their YouTube
channels that I went live can still watch the
video because it's unlisted, but the low retention
doesn't penalize my channel. It's only penalized when
the video is public. To keep your retention
overall or your channel high, I suggest unlisting
these videos, recording them, and
then repurposing the content for later
on by editing them, chopping them down, and doing whatever needs
to be done for them.
11. YouTube Analytics That I Study: Okay, in Lesson nine, I want to break down the
YouTube analytics that I study, but I also want to do
this with a disclaimer. It is so easy for you
to lose your mind. When you're trying to build
a YouTube channel and you're too deep into the weeds about
what the numbers are doing, never forget that this
is supposed to be an enjoyable experience where
you're sharing your art, you're sharing your thoughts, you're sharing your
interest and whatever you choose to land on
in terms of content, make sure that you do
not fall victim to the same thing that I did and many other aspiring
YouTubers do. That you get so far
into the weeds of the analytics that loses the purpose of what
you're actually doing. Even the purpose of me
doing this video is just to more so let you know
the things that you should be paying attention to or things that can help you
make better videos in the process and to know why certain things are working and why certain things
are not working. Thing that I can
tell you that these analytics will show you, especially depending on
what video you choose. Let's just click this one as a top video in the last 90 days. YouTube analytics will
tell you what's going on with your videos and what's working and what's not working. So, this one is
showing me the success of the actual premiere
of this video. It's showing me
that I peeked out about 231 people
were there to watch. It's showing me here where the majority of the
views are coming from. The brows feature
is the majority, the suggested videos
the next one up, and then YouTube
search is only 4.0, and then Channel pages and other YouTube features are here. Key moments for
audience retention is probably the most
important thing here. And this is where
you're going to learn a very valuable lesson about any particular
YouTube video you do. It tells you here, 65%
of viewers are still watching at around the 32nd
mark, which is typical. So what this basically means is that your videos are going to be judged based upon
that first 30 seconds and what people choose to do. Most human beings are clicking off before the first
30 seconds because either they're determining
this video isn't what they thought it was going to be
isn't what it promised to be, or it's just not for them or it's not
interesting to them. So what I typically like to do, and you'll see it in this video, is that any editing
in the beginning is the heavy lifting
of this video because the whole thing is
to build up more of the curiosity of the packaging of the title and the
actual thumbnail. It's to drive them to
want to do something. When I look at these analytics, that's what I'm paying
attention to the most. Let's go ahead
and test it out. And I started selling my CDs
out the chunk of my core. And I had saved up 300,000 out. Oh. You are a hustler. You can sell anything. You could sell them ice cream in the middle
of the winter. But I'm out of the
music industry because there ain't no money
in the music industry. Mm. Streaming ain't
nothing to me. I'm not looking for that. So I'm basically just driving it home. If I had to do this over again based upon where it's showing me that the retention was
at 40 seconds, 20 seconds, I probably would have made
this intro shorter and got quicker to the video
because then you're starting to see the retention
drop off right around. This is the biggest
dip right here. Typically look here and see,
is there something I said? Is there a commercial? And
that's exactly what it is. It's a commercial right there. And based upon that,
I'll either make a decision to say,
Is it necessary? Did it kind of hold after that? Did the video do well, and it actually did
really, really well? It was just exposed
to a new audience. So I have to take
this with a grain of salt because
some of these stats will be skewed based upon YouTube choosing to
send it to new people. But look, even
though the retention for this one wasn't
crazy, right? It's a 22 minute video. Average Vdration is 611,
which is horrendous. Or average percentage viewed. But look at how many new
subscribers it brought in. 890, even generated
$946 by itself. This is why I say, Don't get
so obsessed by the analytics that you stop yourself from
taking chances and growing. So, something else to pay
attention to here is the reach. I'm really paying attention to the amount of impressions
that the video got, and this is telling
me a lot of things. If I look at this
graph, it's telling me that on the first five days, YouTube pushed this out
to about 777,000 people. And because the
click through rate was pretty good, 6.3 is decent. It continued to push
it to new people. And as it got pushed
to more people, I'm sure that the impressions, the click through
rate dropped off. It peaked at 6.9 and it starts to drop off
the more people it reaches because you're
getting exposed to people that you never
had access to also, too, it's showing me how YouTube is pushing my content by
first telling me, Hey, browse features, you're getting a lot of traffic
from the homepage, home screen, a
subscriptions feed, and other browsing features. This is excellent. This lets me know that YouTube
is working with me. This tells me that YouTube has tested out to other audiences and it's doing really well based upon what
videos they choose. Now, that's a process in itself, and you don't want to look at it the first three or four days trying to figure
out what YouTube's doing because they
got their own system. Just trust, they know what
the hell it'll even show you the external websites that your video is generating
traffic from. So maybe somebody sent this
via text message to somebody else on an Android or a
Samsung through Google Search. Music Industry is broke.
First video that pops up. It's also showing
the key search terms that this is popping up for. A lot of them are actually
for Curtis King, but, of course, the number one is the person that we're
actually talking about, which is Master P.
Once you kind of study that and you see
the habits of the video, once it gets pushed
to a larger audience, and you start to
see how that has an effect on the
click through rate, you start to
understand, like, Okay, I see what's happening here. And what some people
do is they'll change the thumbnail once they see that the video is actually
being pushed by YouTube, and they start seeing
those impressions starting to really,
really get up there, they'll change the thumbnail to be more appealing to
a broader audience. Don't typically do
that. I only change a thumbnail if it's like
horrendous numbers. Like, if it's like
three per, four, 5% and it hasn't been pushed
to a larger audience, I'm changing that
thumbnail because I know it's just not connecting. Engagement, once again,
is just showing you the different ways people
are engaging with the video. I already talked about
that and kind of where the drop off period
was that, next one. Audience, this one is
important as well because it's showing me how the breakdown
is for the demographic. It's showing me
the males that are watching this
versus the females. It's showing me the age
groups that this appeals to, the different parts
of the geographies that this is being pushed to, the watch time from subscribers. So this video has been seen by 81% of people who are not
subscribed to my channel, and 18% by people who
are actually subscribed. So this is why you
see people always suggest subscribe to my videos
halfway through the video, the beginning and the end
of the video sometimes. Now, something
else I like to pay attention to when it
comes to analytics is I want to see in
this audience tab, what other channels are
my viewers watching? This is super helpful, especially when you're
looking for people to potentially
collaborate with or when you're looking for what content people are
actually attached to. A lot of the content here is content that are from
folks that I have done content with collaborating wise or content that
I've covered myself. I love this feature here,
especially if I ever run into a situation where I don't have a topic that I
want to talk about, this is a good place to actually
go fish for some topics. Here, I can see the
biggest channels that my viewers are tapping
into in addition to mine. Else I pay attention
to down here is when your viewers
are on YouTube. As you can see, the darker
the purples become, the more traffic is actually
there for your audience. What you typically want to do is find a time period that is either before the
darkest purples or right in the midst of it. I like to do it around
11, like I said. Because that's when my
East Coast audience and my West Coast audience are both watching videos from my channel
at the same time. Now, let's talk about
this YouTube ranking by Views feature down here that gets a lot of people
in their head, especially early on
when they're creating, especially if you're not
reading it properly. But if you don't have a
one out of ten video, which is basically
your most viewed video after your last ten
uploads every single time, that is so normal,
and it's okay. There's huge channels
that struggle with this. Shouldn't even look
at it as struggle. This is just a part
of the process. Video is not the same. There are some videos that are
going to exist, of course, in the hub category versus
the hero versus the how to. Every video is not meant to
be treated exactly the same. What I'm caring about is things like average view duration. If I can get them up to
10 minutes per video, especially if I'm talking
about a 15 minute video plus, I think this one
might have been 30. I'm not mad at that
because that's going to be good in terms of just my overall watch
time on the channel. I'm stuck over here with
just the numbers and not understanding why they may be skewed or might be affected, if I'm obsessing over numbers that I have
no control over, because ultimately the
audience is making the choice. No matter what changes
I make, this will distract me from what is
the most important thing. Getting more shots at this, listening to feedback
in the comments, but also listening to the actions of your viewers is so much more important to me. Try to do your best to stick to the content that
you enjoy making, pay attention to
the things that you actually have control over, and this will be a
lot more enjoyable.
12. Final Thoughts: These are my final
thoughts before I launch you out there on your
YouTube journey. I hope that you found
this information to be informative and helpful, and I hope that you
come back to it, especially as you reach new
milestones that require a little bit of
brushing up on some of the information
that we covered. Here are some of my keys for long term success on YouTube. I started this journey
ten years ago. And had no idea that in
my ninth and tenth years, I would see the largest
numbers that I had seen. I didn't know what a
YouTube career looked like. I didn't have many friends of mines that chose to
go on this journey. But the folks that I
have met have all said similar things and
that you go into it, you give it everything
that you have, you do the content that
makes the most sense to you. You finally find a
little bit of success, and you're convinced
this is the thing you'll be doing for the next
X amount of years, and then you switch gears. You find that there's
not such a smooth road. Then you go through
more trials and tribulations that lead
you to really getting a great understanding
of what it means to create great content.
It's not for everybody. I did not think that I could stay as consistent
as I stayed with one thing for as long as I a two year process where I was stuck at 230,000 subscribers. I know that sounds
crazy for some of y'all because you're like, that's a great place
to be stuck at. But I was really
trying to figure out what was going to launch me out of that space so that I could expand
and then move on. And what I figured out is that the things that got
you to the number that you're stuck at will
not be the things that carry you on to the
next threshold. Stay flexible, stay
understanding, and patient with the process, and realize that
there's going to be a lot more things that don't
work than that do work, especially if you plan to go out this game
for a long time. Something else I
think that is worth mentioning is that
burnout will happen, especially when you work
at the pace that I have worked at and you wear the
amount of hats that I wear. This is not easy. Burnout is something that is
going to happen. I think the thing
that I do now is recognizing before it happens and taking necessary breaks, it is not going to kill
your channel if you decide that today is not a good day for me to upload
on my normal scheduling. Fact, I think that there's a benefit to taking
long extended breaks, maybe not necessarily for
the growth of your channel, but for your own mental
health and for having a clear point of view
of what your Y is, reattaching to your Y or
reconnecting to your Y. I even do it to where in December I generally
take a month off, but I have about a
month worth of content, which is about nine videos,
three videos a week, about nine videos
that are ready to go that allow me to take a long extended break and get back to learning new skills. But I use that time
to recuperate, rest, and get myself
in the right space. Rounding out, I want
to say that one of the most important
things that you can do through every one of your videos is keep
your energy high. What a crazy thing to say after the burnout conversation, right? Keep your energy high
because you never know when somebody is watching
you for the first time. And regardless of what you got going on in your personal life, know what the expectations are when you jump here on
this YouTube space. I'm not telling you
to be fake or phony, but what I am saying is that someone is engaging with your
channel for the first time. Make sure you always put
your best foot forward. Last but not least, one decision could literally change the
trajectory of your career. Generally, the thing
that you're avoiding, the thing that
you've seen do well, maybe it was too
much work to do. Maybe it was something that it didn't give you the
results that you thought the type of work you put in deserved is probably the thing you're going to be revisited to. For me, it was being uncomfortable making
videos about other people. Really was in a
head space where I felt like I'm going to meet these people at
some point in time. So I had a long standing
fear to a certain degree of making content that talked
about other people because I felt like it was
gossipy. It felt icky. But then I started
to realize there's an audience out there that
wants to hear your opinions, and it wasn't like
I wasn't sharing my opinions in private. So I just chose to do those in public, and
little did I know. Not only would it be met with
so much positive feedback, but the very people that I was concerned about
crossing paths with, they are now watching my content because I speak on these
particular issues. So that one particular decision could change your trajectory. Once again, thank you for
choosing to take my course. If you're interested in subscribing to my
YouTube channel. It is at Curtis King TV. I'll see you soon, piece.
 Curtiss King, DIY Musician, Author, & YouTuber