Transcripts
1. About the Class: Stop and smell the roses
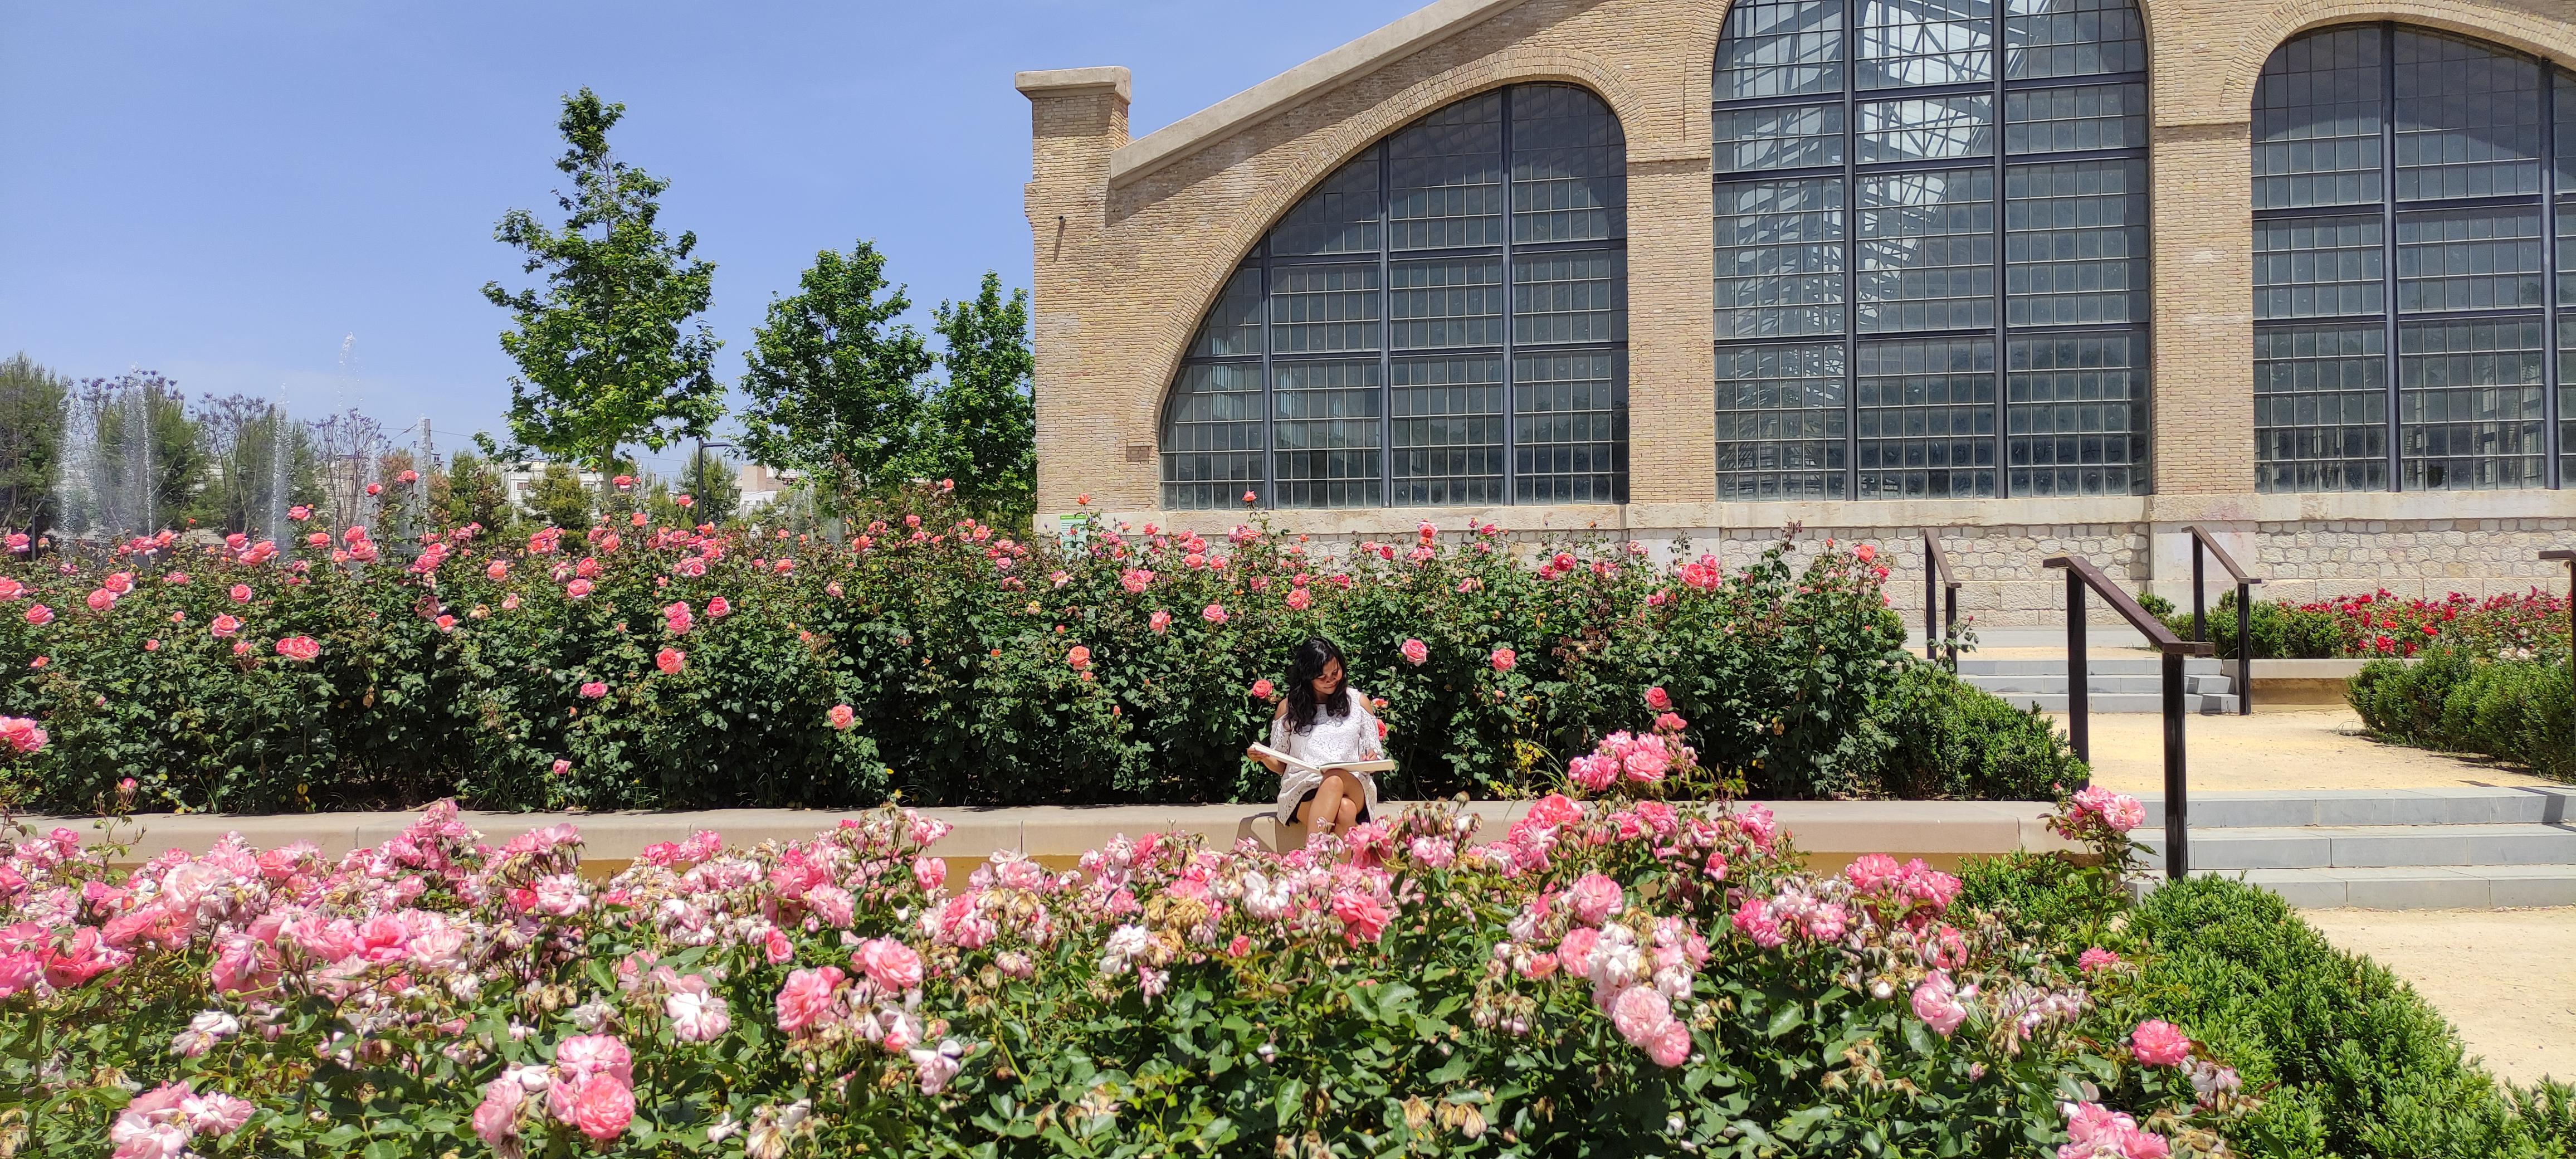
or better yet, paint them. Hi, this is Donna, and I'm a Filipino
French watercolor race. There is currently
residing in Spain. And I will be
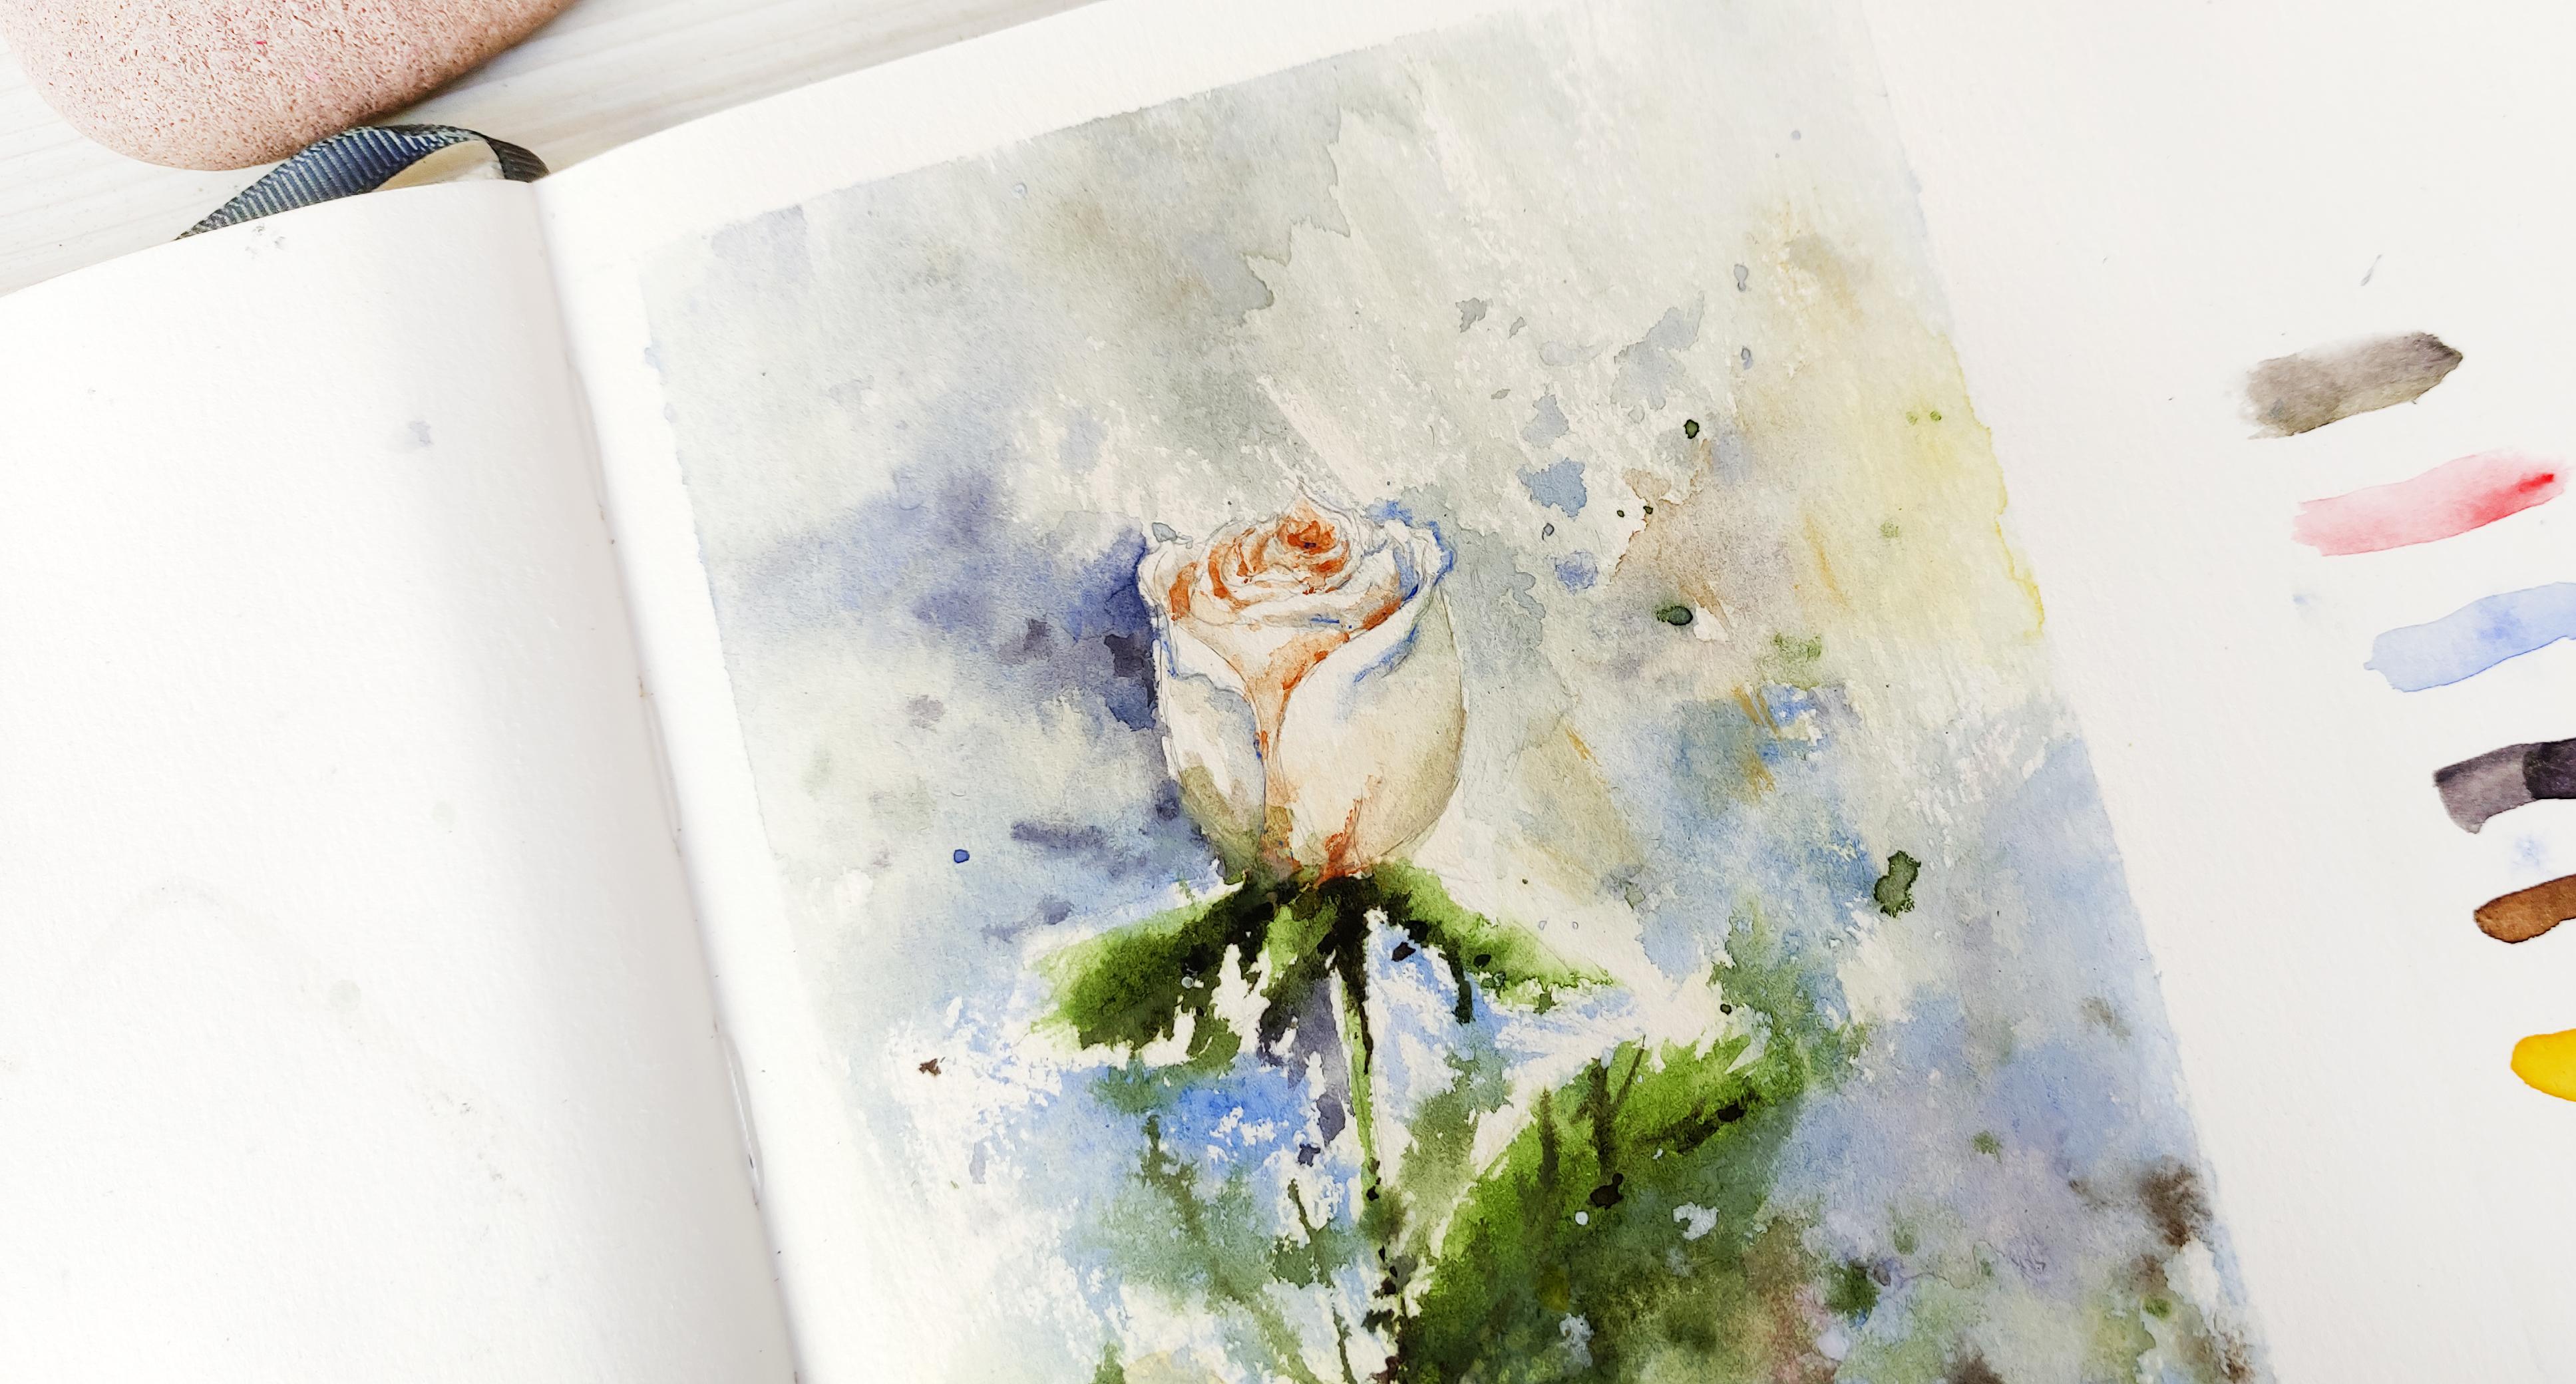
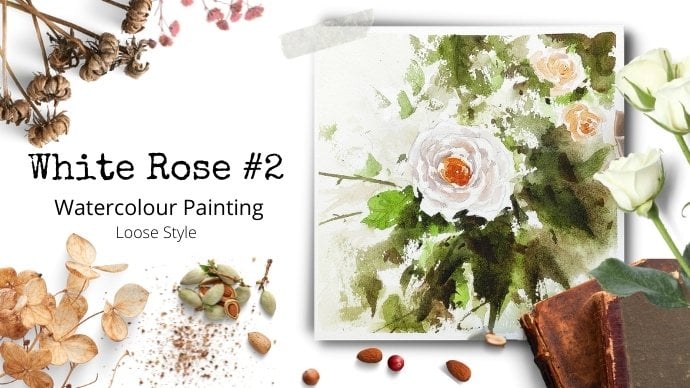
painting we do with the White Rose in loose
and ethereal style, is going to be a
magical journey. M is this beautiful
world, are roses. You will learn to practice and improve different
watercolor techniques. We focus on wet and wet, dry brush and composition. You will create a
unique piece of art and will help you
unfold your own style. Although this class
is created for intermediate and
advanced to them, I believe that all levels can give it a try and
challenge themselves. If you haven't heard about me, I've sold over 100 art
piece around the world. My paintings were also exhibited
in different countries. My goal is to create a unique piece that will
touch someone's heart. Hopefully it helps
spread awareness, it taking care of our planet. So without further ado, let me invite you to join me in painting these white roses
in fun and unique way. So I'm really looking forward
to see you in this class. And of course to see your
beautiful masterpiece. I see you.
2. Materials: Hello, thank you so much for
joining me in this class. White Rose watercolor painting. And these are the materials
that we are going to use. And this will be
made available for you to download in
your reference. So please do for this painting
will be using ish, snare, sketchbook, watercolor paper
in A4 and 100% cotton. You can use any paper that
you like as long as they're thick enough to hold the
washes of your painting. K. So for the mop brush, I'll be using my
brush number four. So mop brushes,
they usually hold more pigment and water
then your normal brushes. And then we have my
brush number two. Mop brush Cerro, I mean, that's the normal brushes 0. And your tissue paper. So we're going to need more tissue paper for this painting because
they are loose. And of course your
big bucket of water. So if you can have
big bucket of water, that will be really
more convenient. And we have your water spray. And of course, we have
Windsor watercolor is 21 ML. So it's better to buy bigger
to be precipitates possible. So we have, I have orange
bar, Van **** brown, yellow or cadmium yellow, sap green, cobalt
blue, scarlet red. So these are all
going to serve as the background for our painting. And burnt sienna, Chinese
white and neutral tent. So I have a lot of tips
about the materials. So please read and
allowed on a reference. For my palettes. I've taken pictures as well. This is the palette. It's made of ceramics. I've got to actually, and they're very convenient
to use and of course, very easy to move around. So thank you so
much and I hope to see you in the painting process.
3. Palette and Technique: So welcome to palette
and technique. This is my palette. Chinese wide neutral tint. Born sienna, scarlet, red, cobalt blue, sap green. And we also have cadmium yellow, yellow or Van ****
brown, and ivory black. We will be using these techniques and we will learn them in the
painting process. We have wet on wet. So basically your paper is
wet and your brush is wet. And we will be learning as
well and practicing wet on dry wet brush, on dry paper. And of course, dry brushing, especially at the end of
the painting process. So this is both the brush and the paper are dry
and of course lifting. So lifting is when
you use your lift, the color app, using your brush and your tissue
paper. So that's it. All of these will
be made available for you to download
in your reference. So thank you so
much and I'll see you soon in the
painting process.
4. Practice: So welcome to the practice, these White Rose
watercolor painting. Thank you so much
for being with me. Okay, so let's begin. In this class. We will be using two techniques
more than the others. So we have the wet on wet
and the dry brushing. So we have on these pods, we have dry paper and dry brush. And we, we press the brush
onto the paper a little bit more than you should have that whites on your paper retain. And we read thoroughly. Dry again the brush
and get more pigment. And make a quick straight brush to attain more whites on the
paper as you can see it now. So practice this technique
over and over and again, and you will see that
your skills will improve. Now the second one
is the wet on wet. So we wet the paper
totally with our brush. And then we apply the pigment, the watercolor paints
on your paper. So as you can notice, the pigment just flow
freely on the paper. So we'll be using this on the second wash of our background of the
White Rose painting. I always encourage my students
to have more pigment on the brush and mix the
paints very well. So now we are doing wet on dry. So the paper is dry. Your brush is wet. Now next to that is lifting. So we did wet on dry
and then lifting. So using your paintbrush, we lifted up the paper, the watercolor paints
with your tissue paper. And now we're going to do another dry brush practice because we will be using
these a lot in his painting. So I'm showing you the paint is really like
almost dry as well. We don't have a lot of
water and I'm pressing the paint brush on the
paper to have more white. So usually this method, we use this when we have, We went to have more sunlight on the water in the ocean painting. So press one stroke. And here we have more water. So as you can see,
we have less white. So less than, less water, more white on the paper. And another one. More whites in the
paper and less water. So thank you so much and please practice this
before you paint. And I hope it really
helped you See you.
5. Sketching: Welcome and thank you so much for joining
me in this class. The white roses
watercolor painting, where I started sketching
the petals of the roses. I'm using pencil number five. And notice the
position of my pencil. So I'm not really pushing the pencil really hard so it won't damage the paper. Just visible in app, the lines are just
visible enough for you to give you the guide that you need while
you are painting. So we are working on the
petals and then feel free to print your habit
copy of our model. Although I'm also showing
what we are sketching. If you feel that you
need to practice before you sketch it on
your final paper, go ahead. Because I think I understand that sketching roses
could be intimidating. And it's, of course,
it's a little bit hard to draw the roses. And so if you feel
that you need to practice while go
ahead, feel free. And you can always go
back to this lesson and do the sketching
with me all over again. So I am actually
paying the shredder sketching in real time so
you don't skip anything. And I'm sketching
as low as possible. So go ahead, observe
and follow the process. And I also hope that you
are enjoying this part. So when you paint, it's not the beginning
of the process, but it is when you sketch. Your sketch will tell you how your painting will
look like because it's the fundamental part is the trust structure
of your painting. So accurate painting, I mean, accurate sketching
is very important. When you paint. You've noticed we
didn't follow exactly. The row says on the photo, we didn't sketch the outside, but I didn't think
it was necessary. So now we are sketching the small leaves and
the stock of the Roses. This part, I'm going to
highlight it a little bit so that I will see it better when it started
for me to paint. Painting roses. Like I said, it's very challenging,
but in the end, I think it's really fulfilling. And now I'm adding some leaves. And although this
is loose painting, we still need some leaves and some shapes to indicate
the leaves of the process. So we're getting really close. Thank you so much
for patients and I really do hope that you are enjoying this process with me. I tried to enjoy your sketching as much as
you enjoy your painting. And sketch as much as possible in order to improve
your, your skills. That's the advice
that I could give in terms of improving your
skills in sketching. So here we are. We're almost done
and getting ready to paint is wonderful, white roses with me. So I can't wait to
paint this with you. And thank you so much. I'll see you in the next part. This class. Well done.
6. First Wash Background: Welcome to this class. Thank you so much
for joining me in this class and I'm so
happy to have you here. So we are starting
on the dry paper and dry brush with you
saying Chinese white, ninety-five percent of Chinese white and five
per cent neutral tint. And we are doing dry brushing. So as you can see, I'm doing the same brushstroke. Brushstroke in order to retain
the white on the paper. So this is our goal. Retain the white on the
paper for the background. And it's also follow the practice video that
we already did before the start of this painting and do it all over
again if you have two k. So I'm doing
the same brushstroke. And we are trying to leave
the white for the background. And we are trying to follow
the shape our sketch. So this method is a little bit more challenging
probably than the, than the wet on wet painting
because you have to know where the pot is sweat
and where the part is dry and what kind of brush
stroke you're going to use. Here. I'm pushing the brush
a little bit hard to have the whites and doing a really quick brushstroke
using dry brush and Chinese white
and cobalt blue. So we are avoiding the
shape of the leaves. And we're still trying to
retain the white on the paper. Now, I'm the shape of the single white
rose is coming out. And we can see that if
you have more whites, that the paint will
look more brighter. And I'm also adding Chinese white in
cobalt blue mixture on the edges of the paper. So we have to work
on the edges before the word watercolor paper dries up and add splash a little bit. So the paper on the lower
side is now a bit wet. The left upper side is
also a little bit width. So we're gonna work on
them while they are wet. And we are going to splash some colors
for the background. But first, we are going to have the shape of the rows
pop up a little bit. So we're adding neutral
tint on the paper, on the wet paper. And I'm just adding some neutral tint on
this side to indicate then a looseness and
of course to make the leaves are undecided pop-up. So I'm also avoiding this team. And what I encourage you to
do is to win before painting, you have to recognize where
the light is coming from. Some splashing water,
watercolors on the wet side of the paper
and just playing around. And this is the mix of 95
per cent of Chinese white, really thick mixture of Chinese white and a mix of cobalt blue, five per cent, of course, and a little bit at
neutral tent as well. So thick pigment of Chinese white is very
important on the spot. And this spot, I also
encourage you to play along with all the watercolor
paint on the materials. And to know, do you
own experiments if you want it more
colorful or more vibrant? Because this painting that we're doing is a bit more cool. It has a cool ambience. So go ahead and play and be
brave enough to experiment. I always encourage my students to do their own experiments. And from there, I think
you will learn a lot. No worry, you can
always go back. If you make maybe some
things that you don't like, you can always go back
and do it all over again. This is how we learn, isn't it? So now we are still
working on the background. And even if the painting and the paper is wet, we're strike, we are still trying to
avoid the whites and the paper k. So if you have
the reference with you, please have it at hand because it's very important when you are painting so that you
will be guided with what's the next thing
that you are going to do? So I'm still working on the
left on the right side, it is still wet and I've
dropped a little bit of sap green in order to indicate
the leaf on the background. So it will be loose and fading because the
paper is still wet. So we are getting closer to
the next part of this video. And thank you so
much for joining me and I'm really
looking forward to continue painting
with you and finish this project and
see your own artwork. Okay, so we are still
working on the leaves, and now I will have a quick
brushstroke on the leaf. And we're trying to avoid the white part of
the paper and to have the lights on our painting. Okay, so continue with the
process and just follow the brush stroke and
you can always go back if you want some changes, k. So getting ready for the
next part of the painting, and thank you so
much for joining me. And I look forward to be painting with you
in the next part, so I'll see you in. Well then for this part.
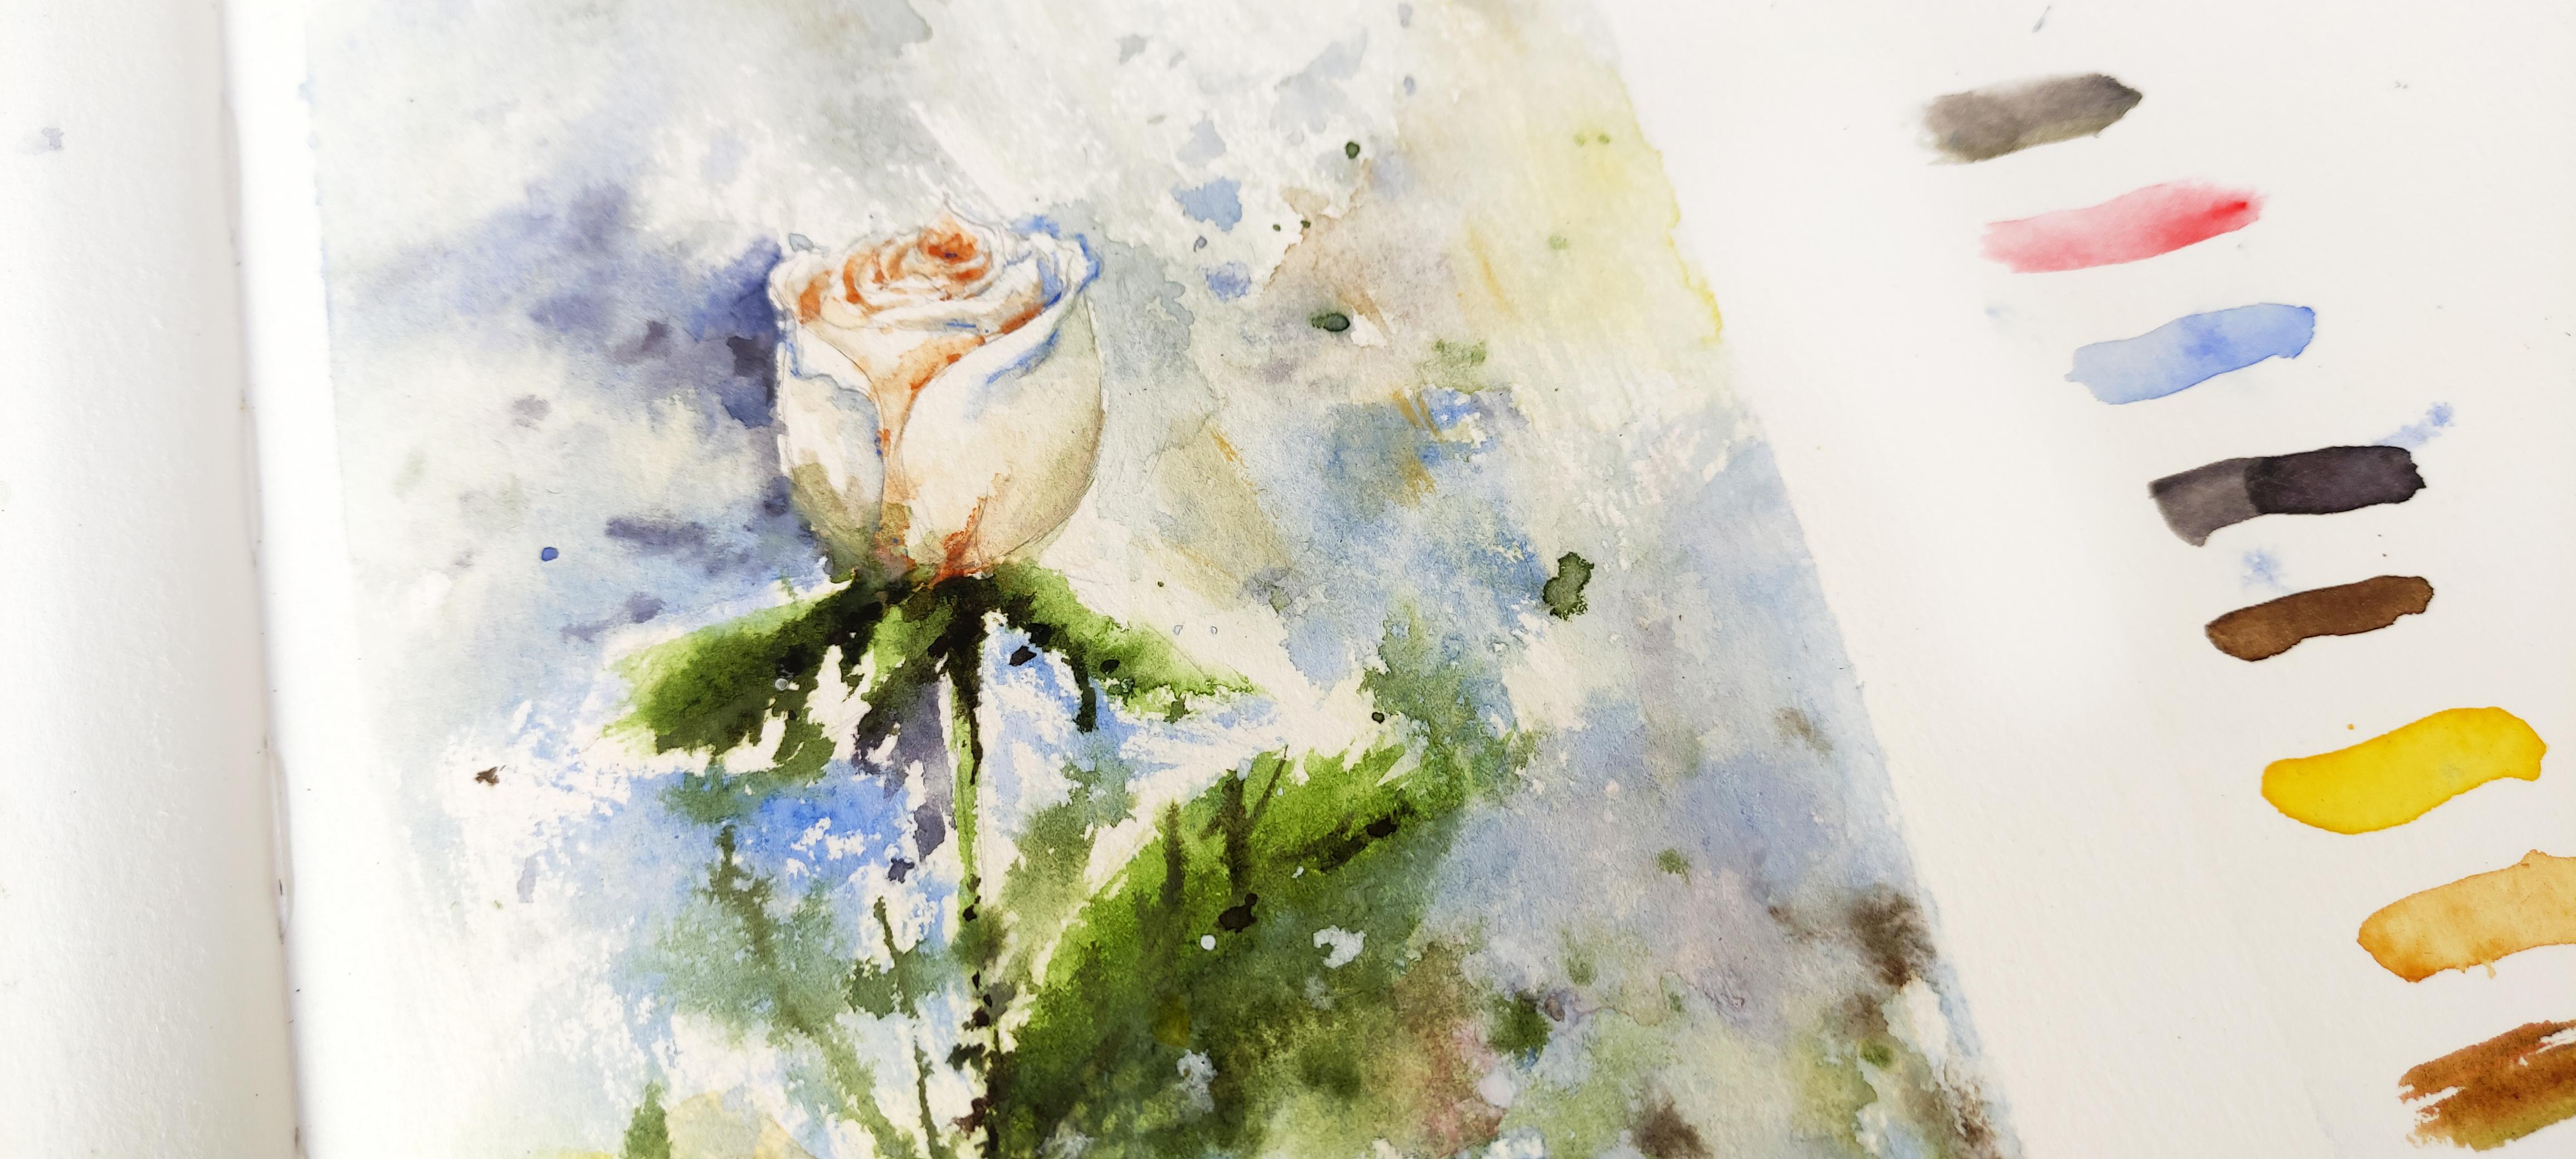
7. First Wash on the Rose: Thank you so much for painting
with me in this project. And I'm showing you
a big bucket of water to show you that we have to change
it from time to time. And we are still working
on the White Rose and will continue to work
with with the petals. And as you can see, we've already done the first
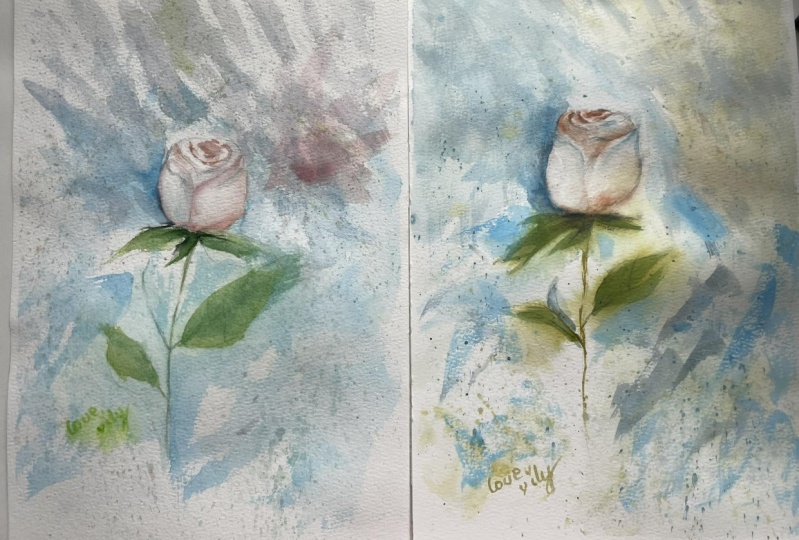
wash on the background. I'm just going to show you
how important it is to do some practice and of course, daily practice in order to achieve the goals that you have. So I've done a lot of paintings. Here, they are overdoses, so I've done a lot in
order to achieve the goals that I want that we
are painting now. I have painted 123456. I think I've done more
than that in order to achieve this goal like this. And I think this one
is closer to what we are going to do right now. Kay? So just to encourage
you that it's just a matter of determination
and right attitude. So we're working on dry paper. I'm still using the same
brush, brush number four. And I'm using paint, Chinese white, 95 per cent. That's a lot of Chinese white. To have thicker pigment
for our shadows. With the tip of my brush. I'm using Chinese white, 75 per cent mix with born
sienna and a little bit, but a Van **** brown. And in this part, you can use other optional
warm color paints that we have as long as you have the thick pigment
of Chinese white. So we're just following
the reference photo, boroughs and on this side
and working on the shadow, this has the darker parts
of the rows because the light is coming
from the top head of the rows and the right
side of the paper. So that's why it's
very important to recognize where the
light is coming from. So here I have a little bit of water on the tip of my brush, and I'm just mixing
and dragging in order for the watercolor
to fade away. So I'm trying to mix and soften the edge of
the watercolor. Suggests, observe and follow. And in this part, I decided not to use
the small brush. I'm still using the same brush. But if you feel that
you need to change into smaller brush,
then Go ahead. Okay, So still working on
the rows and the shadow, looking at the reference photo, I'm still using the same
ninety-five percent of Chinese white and Van **** brown and
burnt sienna. Here. I'm just following
the reference photo where the shadows are. And I'm using the
tip of my brush. As you can see, we're
still trying to retain and the
whites on the paper. So I'm still mixing the
watercolor paint well, tiny white, 95 per cent, with a little bit
of cobalt blue, and a bit of neutral
tint as well. So as you can see,
you can see my, my hair a little bit
because when I'm giving details and painting, I tend to get as
close as possible. K. So as you can see already, we can finally see the rows and the petals slowly forming when you add
the shadow on the, on the petals of the rows. I'm just keeping it light as possible because we are
working on the White Rose. So we'll try to keep it
as simple as possible. So as you have noticed, we work more on, we're going to work more on the background rather
than the rows. Here. I've added a darker tonal value of cobalt blue mix
with Chinese white. So I say that is 5050 per cent. And I'm just following
the edges of our roses, the edges of the petals. And here I've added a warm
color of burnt sienna with I'm just mixing it
and dragging the color. So see you in the next painting.
8. Second Wash Background: Welcome to the third
part of this painting. Thank you so much for
continuing to paint with me. And we will be working with
a second wash of the rows. And I'm still using the same paintbrush,
paintbrush number four. And we're still
working on dry paper. Here. I've added burnt sienna. So I thicker and darker value up pigment bars IANA to add more highlights and
detail on the rows. So now you can see
that the rows is coming to life with
more contrast. So I'm adding more details
to indicate darker shadows. When you're painting. Just enjoy the
process and you know, always remember that you
can always do it all over again if you
feel like you make some things that you don't like. So it's just a
matter of practice and doing it as often as again. Now I'm wetting the paper, I'm in my hands. So now I'm discovering
the part of the of the, of the paper that I
don't want to get wet. That's the rose. I would like to wet the background again
for the second one. Okay, So when you are
using watercolor paints, you really have to mix it well, mix it thoroughly as
I'm doing right now. And try to mix the color
on the paper. So try this. Try that the watercolor
will move on the paper. Here. I'm just adding randoms of cobalt blue mix with 50
per cent Chinese white. And on this side
it's already wet. So we're working on
loose technique. And we have done this on
your practice videos. So it's very important to
watch it before painting. Now, I'm protecting the
rose again and I'm still waiting the backgrounds on the upper side of the
paper so that the, the blue background,
blue paint will flow and move on its own freely to have
this loose effect. I'm just helping it a
little bit and I'm paying attention to the
edges of my paper. So you really want to
put faire attention and the edges of the paper
because they really count the moment
you take off your, off your packing tape. K. So here I've added some greens. So this is the part where we can play around with the colors. You can use, all the colors
that we have optional Paint. In this part, you are free
to do your experiments. As I've said. I've added greens and the Van **** brown
as well to add some warm. So in every painting you
should have to be a writer. You have the warm
and cool atmosphere, so that makes up them will definitely make a good painting. I'm just trying to mix these
two atmosphere together. Okay, so please continue
to observe and notice. And of course, you have your
reference photo with you to guide youth all
throughout the process. The goal is to darken this part, this side of the rows, so that the rows
will be the more prominent and will appear more distinctive
on your painting. So here I've added a darker
color, neutral tint, some more pigment and less water of neutral tint and cobalt blue. My mom won't be heavy
because if I paint, She would always tell me not
to wash the hand right away, but I'm doing it. So yeah, I think it's
better to do it then. Wetting and other paper to
protect the watercolor papers. So it's better to just wet
and dry my hands afterwards. So yes, we're still working
on the background that is wet and I'm mixing my sap green. And we're going
to add the green, so the leaves of the
arrows at the background. And I'm adding a little
bit of cobalt blue to add more darker, darker pigment. So we're working from
light to getting dark, getting too dark value
on our painting. The lighter your
watercolor paint is, the more light it will appear darker and it will
have more contrast. So we are working on the shadow and the
contrast right now. Gaze, I'm darkening my leaves. The light is on the upper side, so that's why that
the lower side, they are darker in tonal value. So tonal value, if you haven't
seen my other tutorials, is the light and
dark your painting. So don't be confused with
your paint is not the paint, but it's the light and
dark of your painting. Okay. So we still splash the greens
on the wet background. And this is the part that
you can play around. So the background in
general in this painting, this is where we
play around with all the watercolor
paints that we have. Okay? So you can add yellow, some red, some purple, and the color orange
that you want to splash on the,
on the background. This just pay attention that the splash it on
the roads itself. Okay. So I've added more
splash of colors. And this is a mix of 95% of Chinese white and five
per cent of cobalt blue. And here I'm doing some lifting. So when you're paper is wet, That's the best time to lift some color and SAP or
you have no taste. I'm trying to retain the white that we have right at the
beginning of the paper. So those whites is
indicating light and as well the magical
atmosphere on our painting. So it takes a little bit
of practice to do this. I'll see you in the next
part of this painting.
9. Details and Values: So welcome to the apart for
this White Rose painting. I'm sorry for the hair. I'm getting really close
when I'm adding the details. So we're adding
details on the rows. And I'm using burnt sienna. And now I'm using neutral tint. I'm just really
touching the tip, the paper with the
tip of my brush. And paper is actually
a little bit wet. So I'm doing it really slowly. I'm just adding more
details to have the shape of the rows
and indicate the shadow. So we're adding more
details to have the shape. So here it's, the paper is
still a little bit wet. And remember that the light
on this painting is on the, on the upper side of the flower of the rows
and on the right side, k. So we are
darkening our adding darker tonal value
on the left side. So just follow and try
not to overdo this, this part through or
just suggesting shadows and dark tonal values on the rows where there
are no less light. Now, we will continue adding
more darker tonal value on the middle of the flower between the
stem and the petal. So we're adding more
darker tonal value to add more contrast
on our painting. I'm still using neutral tint. So on this part, we will add a little
bit of detail. So I'm using Chinese white and a little bit of
neutral tint to add the details on the outer part of the petals so that we will have the shape
pop up just a little bit. But we don't overdo this
side because this is the part where the
light is coming. So whatever we do
in his painting, we always remember to retain the white that we saved
from the beginning so that we will have the light effect,
that magical effect. The last part of the painting. In this part, I'm still using brush number four, mop brush. But if you wish, you could actually change it to smaller brush
API feel like it's a bit more difficult
to work on the details. Especially that in
the middle there, the petals are kind
of really close in and soften the edge. K here. I'm trying
to do a little bit of lifting because as I said, this part is lighter because
of the sudden coming. So do your best not to paint everything because this
is still the White Rose, so we have to retain
some whites under oath. On the paper. Here, I've added some touch of sap
green, but really, really light one to indicate the reflection
of the leaves. If you notice white roses, they, they've got this green soft
color in their petals. So I really hope that
you are enjoying this very simple
painting of White Rose. And here I'm covering
my background, the background to
splash some greens. So always remember when you're
doing this to cover it, cover your, your rows. So even if the background
are still wet, wet, your rows will retain
its color and its shape. So you don't want a row in
this part of your painting. So here I'm just flushing Chinese white mix
with new neutral tint or Chinese white mix with
cobalt blue and greens. In this part. You can play along with
the colors that you want. So we have the yellows, we have the orange, we have the greens, we have
the blues, we have the reds. So all of these colors, you can play with them for your background and
your own experiment. Because this one that
we're doing is it has a lighter atmosphere. It is very light. So if you want to get the
more probably vibrant, vibrant colors, go ahead and add more colors
that you want. That's the reason why I added
other colors other than the the major colors that
we're using so that you can play with them and
that you have them ahead while you're
painting these flower. So I encourage you to be brave and just enjoy the process and play along with the colors. So we're almost done. I'm really excited to see
your painting be connected, connect with me in social media. And you can follow a lot of my tutorials in Instagram
and I'm also on Facebook. Yes, I'm really excited to see the results
on your painting. And here I'm just adding
more intricate details. I've added darker tonal
values to add more details. And that Van **** brown and
a little bit of ivory black. I'm still retaining
all the whites that blows on your paper. So it's very important to retain this white even if we
are doing wet on wet. Okay, So we're almost done
and thank you so much. And I'll see you in
the next part of this painting, getting there.
10. Your Project: So the painting is done. Congratulations, you
did a really good job. And bravo for finishing
this painting with me. I'm really looking
forward to see your painting and please
post it on the forum so that I can see it and all the other people can see it is always wonderful to hear. Other comments and opinions
are about our art. This is how we learn and
this is how we improve. We need to share. And now I'm slowly peeling off the packing
tape on our paper. Notice how I'm doing
it from the inside to the outside so that we
don't damage the paper. And also, when you post
your, your painting, it's always, you're always
excited to do another one. So it's going to
encourage you to do more. So posting and sharing your artwork is not something you have to be shy
and afraid for, but it's something you
really have to do. I really encourage
you to do that because I've learned it
when I share my painting. It's just open the world to just everything in
the world of art. The k, Well, I'll see
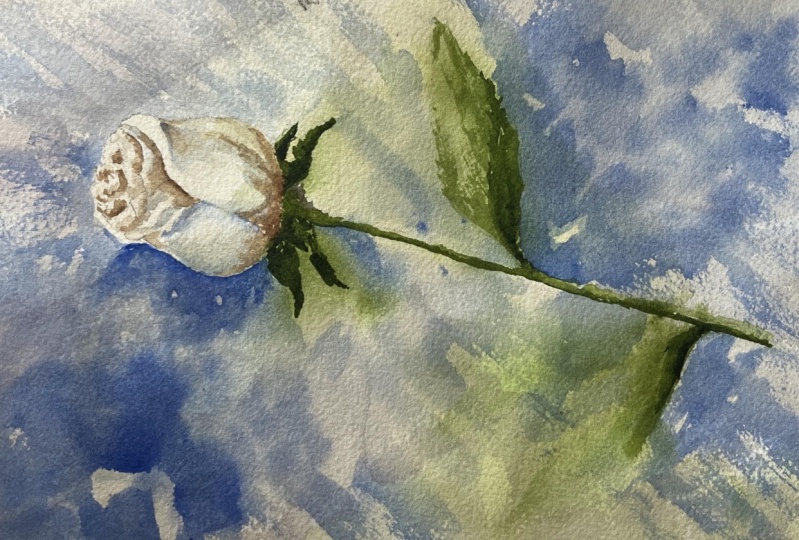
all your paintings. So what, this is, the final result of our
painting, a white rose. And where I'm going
to show you more, you can add more colors. Here. I've added yellow when
it's already dry. It's just to give more
vibrance and the painting. So play along with all the colors that you
have on your palettes. Okay, so congratulations, and I hope to see you
in my next class. Goodbye.
 Dawna Mae, Watercolor Artist & Illustrator