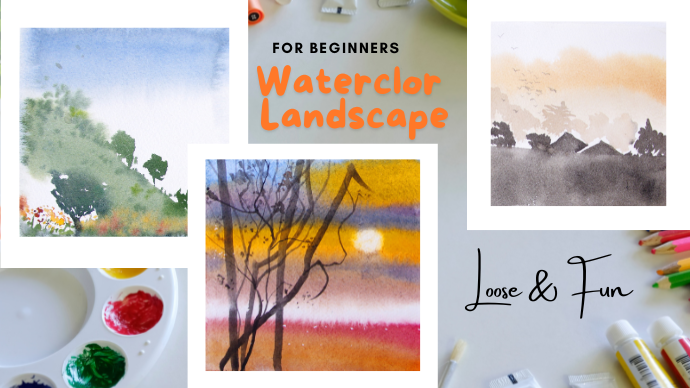
Transcripts
1. Class Introduction: Have you ever stared on a
painting and wondered how it was made so loose,
spontaneous and atmospheric? Well, in this class, I'm going to show
you how to achieve that step by step in
a simple and fun way. We are going to paint three loose and
lovely landscapes that you can be proud of. This class is focused on wet and wet technique
and color mixing, and you are also going to practice wet and
dry and lifting. Although this class was
designed for beginners, intermediate and
advanced students can also try and explore
this technique more. Bug, my name is Dona. I'm a Filipino French artist
currently residing in Spain. I've sold painting
all around the globe. I've been painting for
around four years now, parted with calories at my first exposition last year and thousands of
students worldwide. Some of my paintings
also won some awards. As a self taught artist who
started painting in my 40s, I believe that it's never
too late to achieve your dreams if you really
want to make it happen. So if you're looking for
something fun while learning, this class is for you. I'm so excited to invite
you in this class, and I look forward
to see you vola.
2. Materials: Come to this class. These are the materials that we
are going to need. Paper recommendation,
that's arches 100% cotton, Grand Arches watercolor paper in Grant Those are the papers that I'm
using most of the time. Of course, this is
really nice paper, it's very easy to work with
and it's very absorbent. I'm also using 100% cotton for this 14 times 14 ".
And for the paint. This is my palette. I'm so sorry that
looks a bit messy, but this is my favorite one. We have cadmium yellow, orange, lemon
yellow, cobalt blue, indigo, Boncana sub green, crimson, Aisarin ivory
black and van **** brown. For your watercolor paints, I usually buy in
two because I found them more cheap and
practical at the end. I have the tips on
your dip as well. This is my mixing palate,
this is ceramics, and I really like the shape of this one
because it's easier to film. Next, of course, tissue paper, and I'm usually putting it into something so it
won't move or fly away. Of course, your brushes. These are the brushes I'm
going to use for this class. This is M brush number five. My favorite one is the
bench brush number two. Is the Bnc brush number ten. The synthetic and number two. That's a normal brush. Notice the pointed
tip of these brushes. That is very important
when you are buying. Then M brush number two, we're getting small
with the brushes. These are all optional. What I can say is that your
sizes of your brushes depends on your watercolor paper sizes. And this is brush
number two zero Okay. And of course, the liner brush two and the liner
brush one and zero. So they are all available
for you to download. Let's begin. Okay.
3. Practice: Thank you so much and we're
going to make the practice of the three wonderful
landscapes in water color using
brush number eight. I'm going to mix
indigo, lemon yellow, and a little bit of bone
Ciena to make my green. Add more on lemon yellow if
you want it to be more green. There are more
green combination, but this is how I do it. I encourage you
to experiment it. Next is bone Ciena and I for a black to
make your Vandy brown. And I loaded, of course, my brush well and mixing
the watercolor paint well. This is indigo, crimson
alizarin to make our purple. Now I'm making the technique of wet on dry and wet on wet. Which we are going to use a lot in the tree
watercolor paintings. I've waited to the paper has tried and the
paint completely. Using the same brush, I'm going to add
really dark watercolor paint the ivory black to
make a tree branches. Load your watercolor
brush with a lot of watercolor paint and
paint on the tip. That's it. Now we are ready to have the fun of painting these three wonderful
landscapes with me. Thank you so much
for joining me and I'm so happy to have
you here. Let's go. Okay.
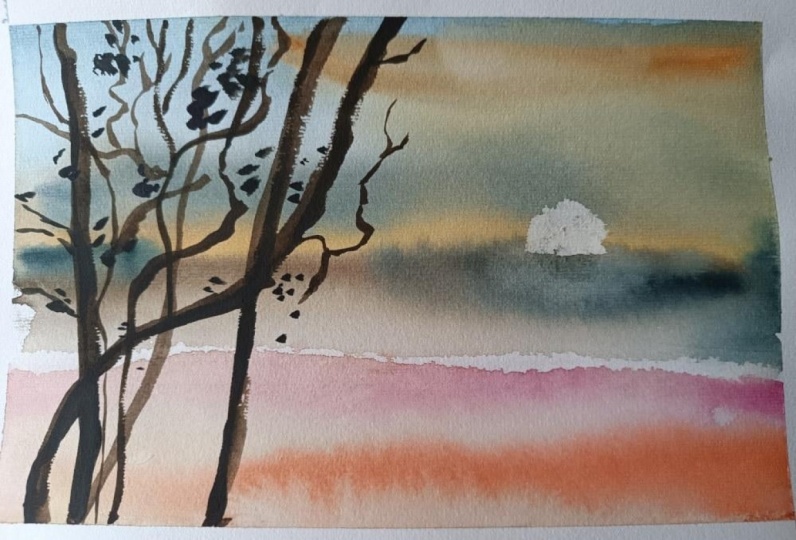
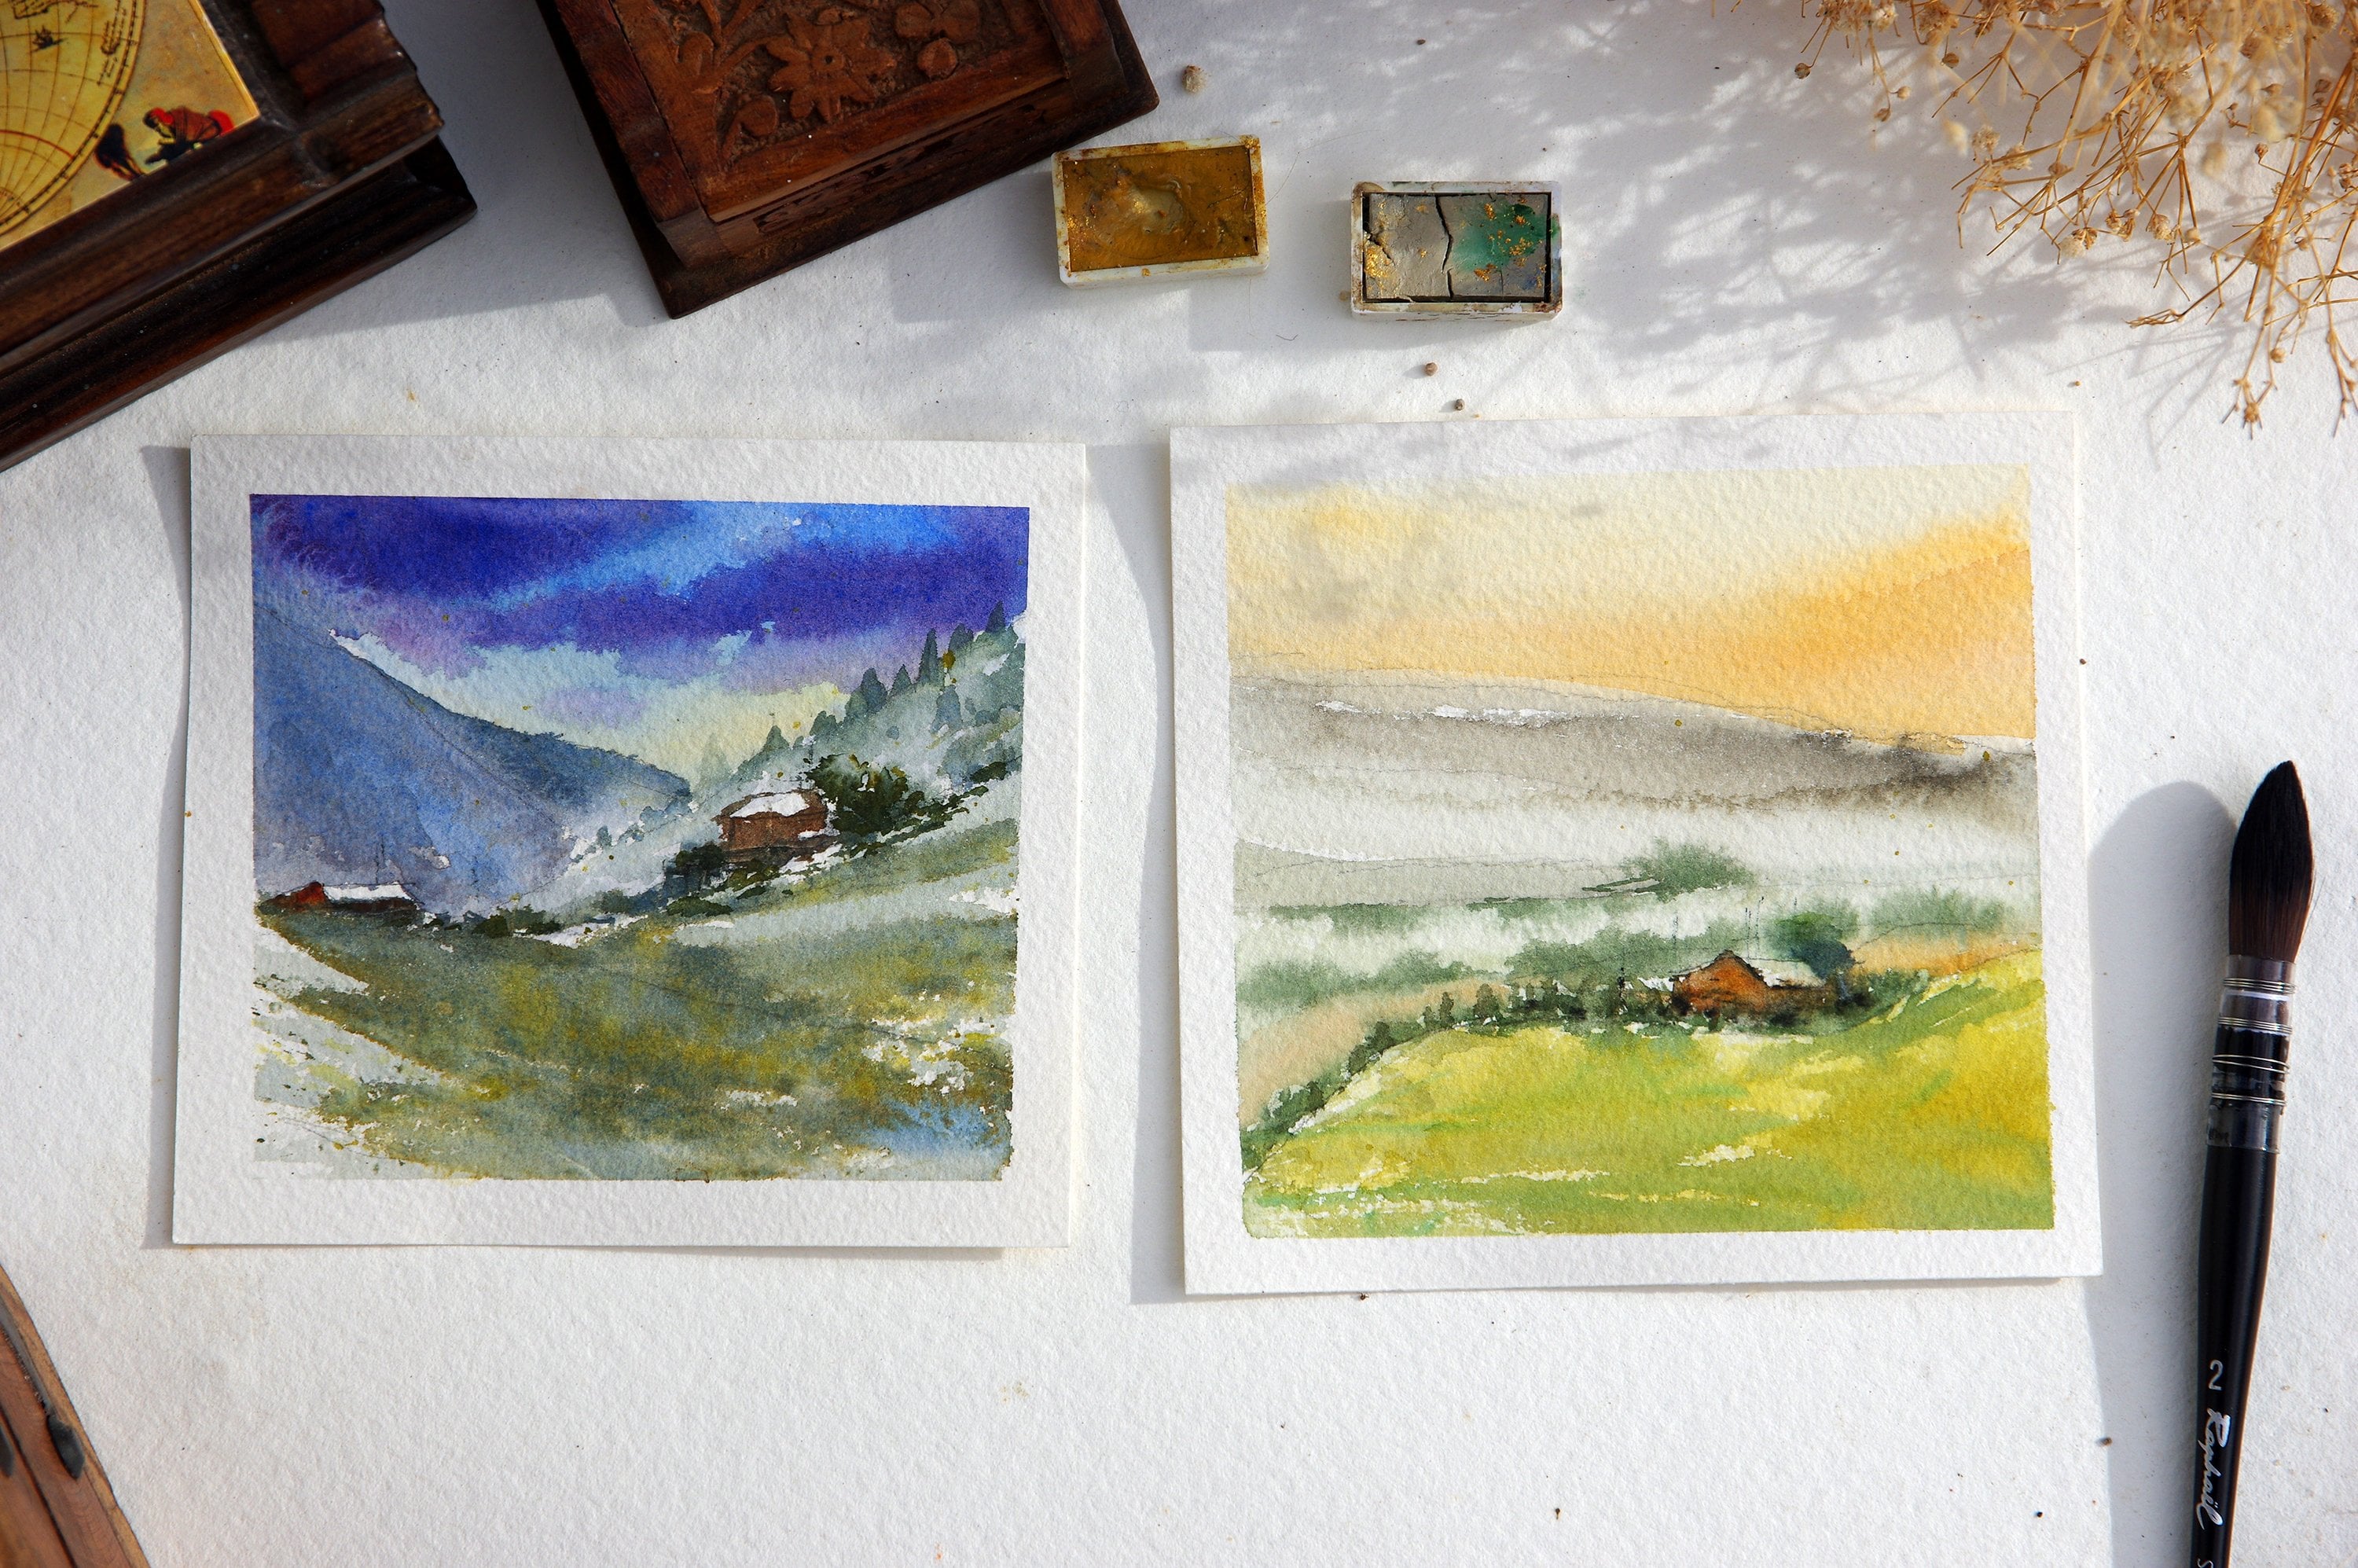
4. Colorful Sunset: Hello, everyone. Thank you so much for joining
me in this class. We are painting the loose
sunset in watercolor, and I am using i
100% cotton paper. Mruh number two, and we are wetting the back and the
surface of the paper. Here, I am using Kobalt blue and the surface
is, of course, wet. I am mixing the
watercolor paint very well and just let it
flow onto the paper. Now I'm going to add
another color that's a bright color of
cadmium yellow. I'm just doing really
quick brush stroke. I'm also mixing some um orange and I'm just
alternating the color. This is the sky and
I really want you to experiment your own
warm and cool color, and we'll see the
magic in the end. I'm still using the same
brush that's Mruh number two. Now I'm adding a little
bit of Van **** brown. And now I am adding back
blue again onto the sky. I want to have a
little bit of purple, so I mix it with crimson Alysarin I am mixing the watercolor
paint very well, and the paper is still wet. You have your sunset with you the reference photo Now, I'm mixing my orange, my ponzana here we have
some sparkles as well, and this is crimson asarin
In the middle of that, I mean, 80% of this
in the middle. I'm going to leave it white. Now I wash the
watercolor brush and I lifting here because I want
it to be smooth in this area. I'm just really experimenting
with the colors. I've added some blue, some purples, and I can do
this while the paper is wet. Here I am standing because I can see my paper much better. Now, I am going to
do something using the tissue paper for the sun while the
paper is still wet. You can also do this
when it's already dry, but I prefer to do it while
it's wet on this paper. Yes, I hope that
you are enjoying this process because I think loose watercolor
techniques is really fun. Don't be scared at all. I've waited until
the paper is 100% dry and I am using
normal brush number two. And we are adding
some trees and wigs. Notice the position of my
brush and my brush strokes. This is, of your,
your ivory black. So I change the composition of the trees from our
reference photo. Of course, again, I would like you to
experiments on this. So we are not going to paint all the trees
that we can see. We are just going to get to the message is enough that
this is against the light, so they are dark I also mixes the Van **** brown
with ivory black, and here I'm using a smaller brush
with a pointed tip. This is still brush number two, but it has different shape. And I am mudding some small twigs and
branches onto the trees. This one, I think is one of the most enjoyable
part of this video, and you know that we are almost finished when
we're doing this. Also try to vary
the total value of your twigs and your trees
because in reality, they all have different
lights onto them. That looks nice to me. I'm just going to
add a little bit more twigs and branches. One tip I could give
you when you are doing this is that try to wait until your paper
is try and not to use the hair blower because I think it's
better like that. Watercolor paper is
a bit sensitive. Especially this one is a cotton. So yes, and I am painting
outside, but it's not sunny. So the water, I mean, the paper is not drying very
quickly, so I had to wait. As you can see, we had a very nice loose watercolor
backgrounds because, of course, the paper was very
wet when we painted them. When we painted it. And now I'm using a really pointed
brush on on this one, and I am just burying the
tonal value of our twigs. I've been painting for
around five years now, and I think to be
a better artist, you really have to
practice every day and improve your
sketching because I think it's really
important to have maybe correct shapes and
lines onto your drawing. We are almost finished with
this watercolor painting, and so far I am happy with it and I hope that you are too. This is the smallest
brush I could find. I'm going to add
smaller branches again onto this one, and this is zero. This is a really cheap brush and it doesn't have
to be expensive, but I think a pointed
brush is necessary, especially with this
kind of technique. I usually paint flat and
I usually paint standing, but feel free to explore what position and
condition you prepare. Although I advise not to paint under the sun
if it's possible. My materials, they are not
really the most expensive one, although I think the
watercolor paper is something that
you really have to, you know, to invest because
it's it really matters. So my brushes and my paints, I'm using the student
grade Winsor and Newton, that's Cotman and my brushes. I've got some few
expensive ones, but I usually use brushes that are not too
expensive and synthetic. It's actually winter while
I'm filming this one. So it's kind of chilly
and I had to take off my jacket on and
off because well, it's not really winter, but it feels like winter, it's spring. So I don't know what to wear, so I'm wearing jacket
and then I take it off. Just in case you notice that
I'm changing my clothes. Okay. I am happy with how small and
thin this little twigs are. So you touch it as
slight as possible. If you want to have
really small branches, of course, seeing the
smallest brush that you have. I'm going to add some leaves and I'm using brush number two. You could also add some
birds if you would like to. But for now, I'm
just going to add some leaves onto my trees. That is it. We are finished
with this painting, and I really hope
that you enjoy this. I hope to see you in the next
painting class that I have. I would really like to see your project, please
download them, upload them, upload them so that I could see them
and we could comment. I think it's really
nice that others can see and be inspired
with your paintings. Well done for this exercise, and you really did a good job. I'm just going to
add a bit more down here and I'm varying the
tonal values of my painting. Okay, so there you go. Thank you so much, well
done for this exercise, and I hope to see you
in our next painting. Then, as I said, I'm
just going to add a bit more white for our
son, and I think that's it. Thank you, and I'll see you.
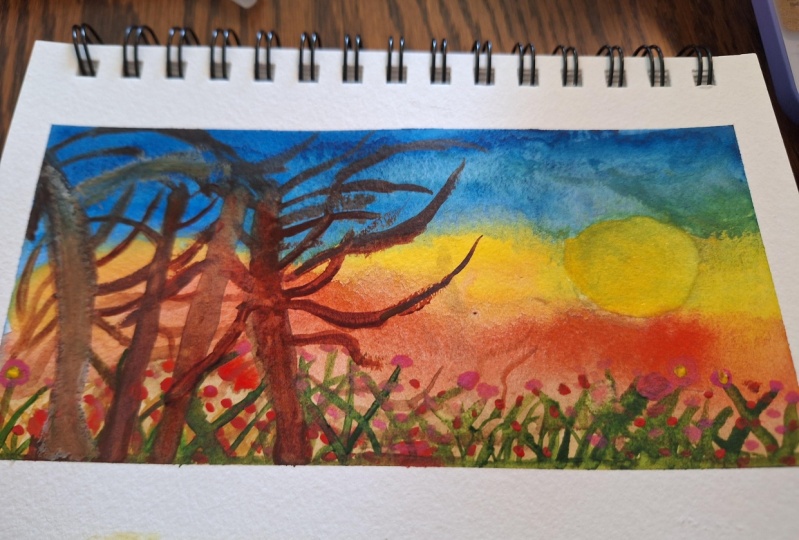
5. Green Meadow : Hello again, and we're going
to paint this lovely meadows with landscape watercolors
and let's begin. Thank you so much for
joining me, by the way. We are painting on
wet and wet paper, and this is At 100% cotton and I am wetting the back and
the surface of the paper. And I am mixing my
blues for the sky, so I'm mixing it very well, and I am using, of course, the
Bnpruh number two. Of course, you already have your reference photo with
you that you can download. So in this painting, we are going to make it
as loose as possible and it's very
important yet that you mix your watercolor
paint very well. Here, I am still
working onto the sky, and of course, your
paper is very wet. I'm just letting the watercolor
paint move and it's on. I think that is the magical
part watercolor paper. I'm painting outside my house, that's a little garden, and I waited for the paper
to be a little bit dry. I'm adding the green, and this is sub green, and we are painting
the mountain. So the paper here is
not completely dry. It's just a little bit dry. As you can see, you still have this very smooth and loose
effect on your paper. Now, I am going
to add the trees. As you can see the
texture is lovely, the watercolor is
moving on its own because the paper is still wet, although it's not very wet. I'm adding the big tree here. I mix the subgreen and Cuba blue and ivory black and I've left some
watercolor paper white. I've changed my brush
into small ones, so that's normal
brush number two, it will have less
pigment and less water, but it is a bit
heavy with paint, and I've added some greens. Those are the small plants. And flowers. And we're going to add a bit
more foreground. So notice my brush strokes, they are actually very quick. I am adding sub greens here, that's a pure sub green. I'm going to add
some trees in here. This part is dry. It's we are mixing wet on wet
and dry at the same time. This part is dry. Then in the mountain, it's wet. We're adding more
trees in here and we're doing to do
it very quickly. As you can see, it's wet, the more lose it goes. So we kind of changed the
composition of this painting. And also because we
have a little space, we have smaller paper. I like the loose effect
on our mountains, and now we're going
to add some trees. I'm just alternating
the color of sub green. I am mixing it with
ivory black cobalt blue, I'm adding some leaves in here. It's a windy landscape. I'm just going to
add more small trees in here and shrubs. I really hope that you are having fun and learning
with me in this class. I really wish to see
your projects as well. We're very excited to see that. Please applaud them. Here
we're adding more trees. Here, small plants and flowers. We're leaving a little bit of white for our flowers later on. As I've said before in
our other videos that your paper is probably the most important part if
you are a watercolorist, invest on at least 80% cotton of the paper because I think
they makes the difference. Also, having your own sketchbook
that you can practice your sketches anywhere in a
very easy and practical way. I think that's really important. Of course, learning
from other artists, So I think it's just a matter of how much you really want to
get better as an artist. I've added some dogs
here so that's sub green mixed with cobalt
blue and some ivory black, and I'm really mixing my
watercolor paints very well. It's better to mix your water color onto the
paper rather than the palate. But sometimes you
also have to do that, you also have to
mix on the palate. It really depends on what
you want to achieve. This is cadmium yellow. This is cadmium yellow, and this one is not
Winsor and Newton brand. This is a local watercolor paint in Vietnam that my
sister has given me. I really like it's
very bright actually. This is a clean brush and I'm
taking the watercolor paint straight I didn't mix
it so that we will have the bright orange and
yellows of your paint. As you can see, I've
left some whites. That gives a little bit of
breath onto the painting, and it makes your
watercolor flowers pop up and more visible. This part as well,
you can experiment, you can add other
colors that you like crimson lysine or some
purples, and to experiment. Okay, so we're almost done, and I think I'm happy with the results and I
really hope that you are as well and don't
forget to sign your painting. I always forget to sign my
painting. Here is the wet. I'm just going to add more born sienna on
this pot and adding more contrast and colors onto the paper and
onto the painting. There you go. It looks
nice to me and lose. I really hope to see
your project and I hope to see you in our
next painting classes. Well done for this painting. And it's here. It's still wet, but it's great. I can't wait to see yours.
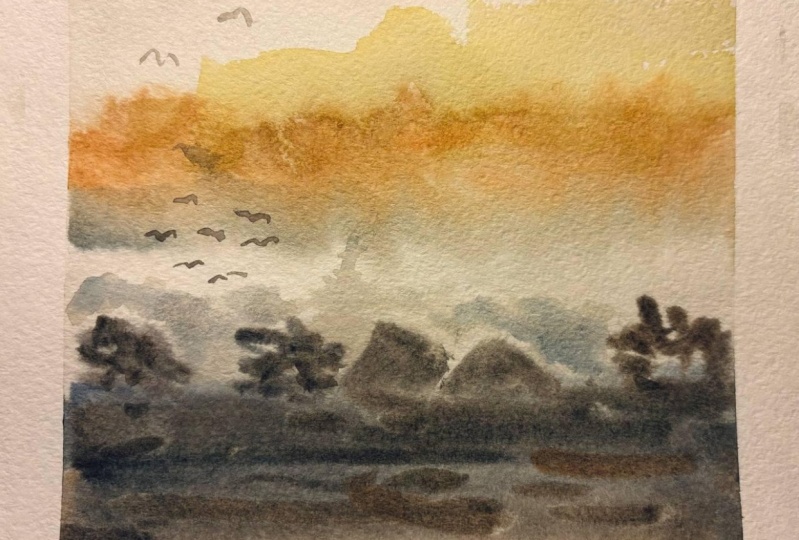
6. Sunset with Silhouette: Hello, everyone. Thank you so much for joining
me in this class. I am super excited
to have you here. We'll be painting this loose
landscape in watercolor. This is a sunset and we are working on 100% cotton di paper. We have wet the surface
and the back of the paper. I am using brush number
eight, there's a map brush. That's a normal brush,
and we are loading dmum yellow with lots of
water for the background. And we are going to add the lightest Van **** brown
onto the background again, and now a thick
mixture of pigment, ivory black, and Vandy brown. We are working on
the foreground. Notice the position of my brush. And I have mixed the
watercolor paint very well. The paper is still wet and we are working
on the foreground. We are going to
leave the middle, 80% of the paper white. Now I'm going to add more thick pigment of
the mixture of I mean of ivory black and bonana So it looks really dark because I want it
to be dark in here. We have waited for the
white in the middle to dry and I've added some trees in the middle ground and I am using the same
bruh brush number eight, and I'm leaving some white
in between the leaves and the trunks of the trees
to give it a little bit of light and some contrast. As you can see, the lower part
of the paper is still wet, but the middle part with the
white paper is already dry. The shape of the watercolor
paint retains and stays. I'm just playing around with the trees this part
is really fun. I am adding the
roofs of the houses. And another roof and I'm
still using the same brush. That's the big brush and I'm just using the
tip of the brush. That's why you notice
that the tip and pointed tip of your brush is
very important when you buy. Although these brushes sometimes the hair will fall
out, but that's okay. While it's still wet, I'm working on the
roof to give it more detail and some highlights. This is a very quick
watercolor loose painting, and I hope this can help you get over your fear of
loose watercolor painting. I've changed my brush
onto a dry paper, we are using the mixture of Vandy brown and
some dium yellow, and I'm going to drag the color, the watercolor paint onto
the background of the paper. I'm stating painting in the garden and it's
a bit warm and cold. I'm just dragging
the watercolor paint and to make it as fade as possible because they are suggesting far away
silhouette of the trees. I'm happy with the result and I'm just going to continue
to add more trees. I'm going to add a
pine tree in here with the lightest possible and brown. I've changed the color
of my reference. Then the painting
I have a bit more warmer I really encourage you to do the same
experiment experiment, and that's how we learn. Now that the paper has dried, I'm adding some birds. Notice my brush strokes. I'm painting from outside
to inside to make my birds. Also, we are varying
the tones of our birds, the same as we vary the tones of our
background of the trees. Because different tonal values will give you the impression of distance and a bit of drama. There you go, my birds and really well done
for this class. I congratulate you for doing this because
this is challenging. I really hope you enjoyed
this and I hope to see your own project
because they are going to inspire other
artists as well, and I hope to see you
in my next classes. Bravo and well done. And.
 Dawna Mae, Watercolor Artist & Illustrator