Transcripts
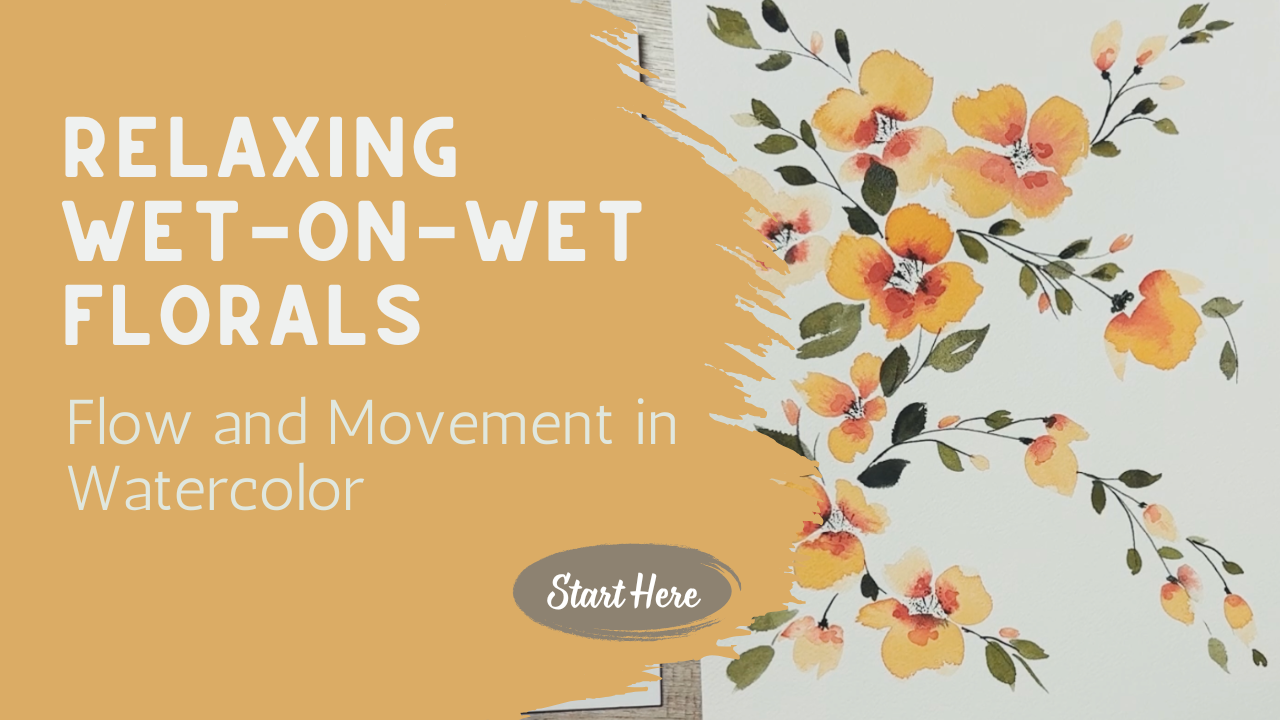
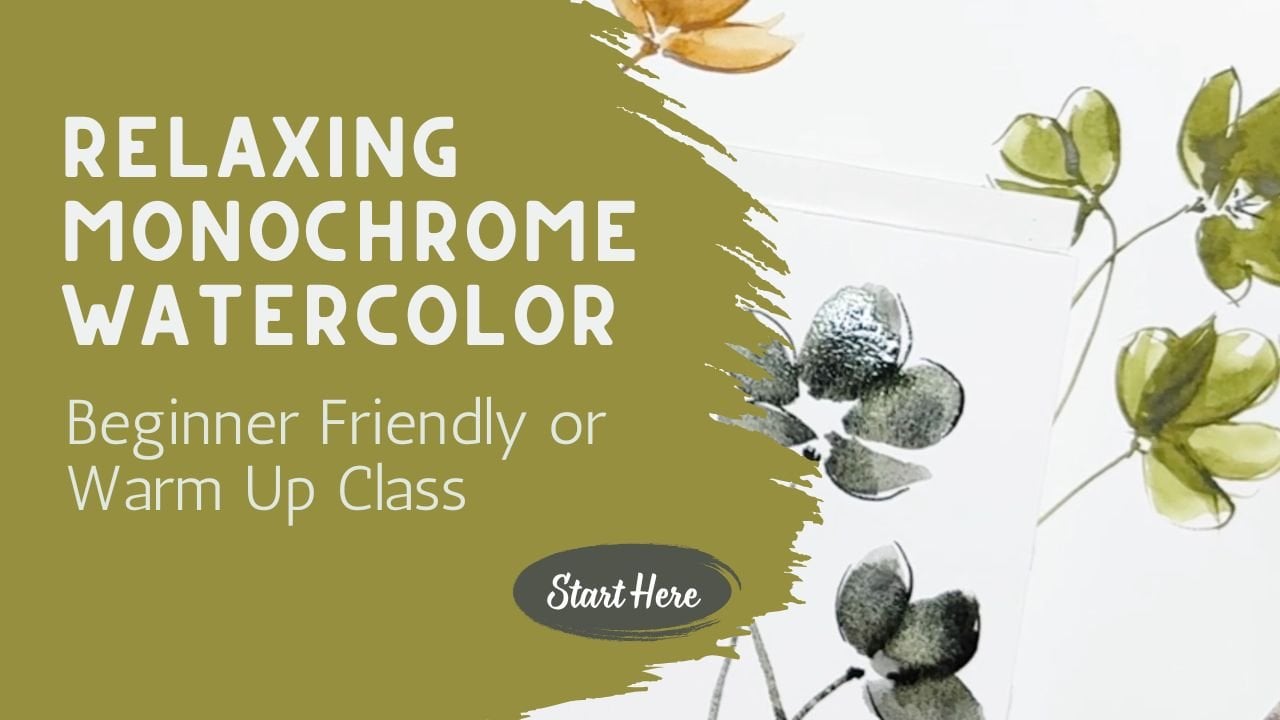
1. Introduction A Calm and Relaxing Approach to Watercolor Florals: I am so excited that you are
here and you're ready to start learning and
painting along with me. Today, we are going
to be painting this beautiful
flower arrangement, and if you have a
frame, you could frame it, hang it on your wall. This is going to be so perfect and beautiful and you're
going to love it. Just look at the
flow. Look at how the movement moves within
this flower arrangement. Look at how your eye just gently cascades down and around. We're going to talk
a lot about that and how to create movement
within a painting. Also going to look at
these flowers and how these flowers have lighter
and darker and mid tones. Look at this fun little center
here for these flowers. We're going to be
doing that with a deer foot paint brush. If you don't have
that paint brush, I'm going to talk about
that in my supplies class, but I know that you're going to be able to do something even if you don't have that
particular brush. We're going to work
through that as well. So this is the introduction. You're going to be
able to make this painting by the
end of our class. We're going to break it down so that it doesn't
feel overwhelming, and I cannot wait to get
started in painting with you. And I really hope that
you take time to upload your final project into the
class project work area so that we can take
a look at it and celebrate your work with
you because I know that you've worked hard at
this and I can't wait to see what you've done so that
we can celebrate together.
2. Supplies Using What You Have and Choosing Colors You Love: The supplies for today's project is going to be very simple. I like to keep things as
basic as they can be. I really want you to just use
the supplies that you have. If you don't have arches, watercolor paper, totally fine. Use the paper that you have. Hopefully, it is watercolor
paper because that will work differently
than other paper. But if you don't have
this kind of a brand, if it's not 100% cotton, I don't want you to
fret about that. That's not something
to stress over. Just use the watercolor
paper that you have. Same goes with your brushes. Use whatever style brushes
that you have on hand. If all you have is round
brushes, use those. There isn't actually very
much magic that comes in from the style
brush that you use, especially when
you're a beginner. It's more important that you
practice with the brushes that you have and you get
used to those brushes. Today, what I'm going to
be using is this oval mop. It's a very simple brush. It's cut pretty straight
off at the top, very oval, almost
like a Filbert brush. This is a half inch
from Princeton. I like that style, so I'm going to be using that for
some of the petals. I could absolutely do the same exact project
with a larger round brush, like a size eight or ten. Then I am going to be using
a round brush by Princeton. I really like the
Princeton brand, but whatever style you have
is going to work great. This is a size six round. I also like a rigor brush or
it's called a liner brush. I like this a lining brush. This is a fairly large one. It's nice and floppy, especially when that
gets I like that. Then I think I'm going to
actually use this one, which is a Princeton deer foot. If you get a good close up, look at this, I want
you to see this. It's chopped off at the top, almost like somebody took a paint brush and literally
just chopped off the top. See those bristles, they're
just completely chopped off. That's going to come in really handy when I go to make the
centers of the flowers. If you do not have the
style brush, that's fine. You're going to be able
to do the same technique by just using a round brush and putting in a
whole bunch of dots. I'm going to be using this
kind of like a stamp. I'm going to put paint on
the end of this and then stamp into the center
of the little flowers. So, but if you don't
have this style, just use what you have, and it's going to work
out just fine. The other thing that I'm
going to use is my palette. This is my I have a large, like, it's a 12 by 12 palette has all my different
colors in it. Whatever paint you
have is going to work. I like to use the
paint in a palette. But if what you have is paint in a tin, something like this. This would also work. So
again, use what you have. There's no reason that you
have to go out and get anything special for this. Use the colors that you have. I'm going to be using these colors where
it is kind of like a peachy yellow with almost like a darker orange
or red for the inside, and then a shade
or two of green. And then here you can see
these little centers. That's how I used
this little deer foot which be used for
that center area. This is what I'm going to
be using those colors, but if you want to
make yours pink and purple or if
you want to make your flowers in a
blue and yellow, that would be beautiful as well. So you go ahead, use the
colors that speak to you, and we're going to meet in the next class where we're
going to start talking about how to make flowers
like this and leaves and creating this shape. Can't wait to see you
in the next class.
3. Wet-on-Wet Florals Creating Soft Flowers with Water and Flow: I'm so glad you're
here to join us and we are going to get
started right away. I've gone ahead and
sprayed this down. I have a spray bottle and I just quickly spray the paint
down so that it's activated and ready and
prepared for our painting. I always also have
a cloth nearby so that I can dab off if I'm going to have a
drip or something. And of course, I have
some water ready to go. I just freshened my water. I like to have two jars. That way, I can either put one with my reds and
one with my greens, or sometimes one is
like where I use my first rinse to get off the heavy bulkiness
of the paint. And then I use the
second one kind of like a second rinse so
that I make sure that my paint brush is really
wet is really clean. So it's up to you. I
prefer two different ones, however you work is fine. So we're going to get
started on these flowers, and I want to bring attention
to the fact that they are four petal flowers is the ones that we're going
to be working on today. If you want to make yours five or six petals, that's fine. I'm going to be teaching
the four petal flower style and my flowers are going to be rounded at the end because I'm going
to be using this style, which is almost like a
Philbert style brush. If your petals are having a hard time getting
this rounded edge, it might be because of your
paint brush if you are just using something that
is rounder like this, you may have a harder time. You might be getting a
tip, which is also fine. The style of your
flowers are going to be beautiful regardless of
how they end up looking. So go ahead and just keep
following along with me, even if you don't have these
exact same paint brushes. We're going to be doing
these flowers first. Then we're going to be
talking about petals, and then we're going
to talk about leaves and then finally
talking about the flow, the movement within
your painting, and then we're going to do the final class project where
we pull it all together. So I'm going to first
wet down my paint brush. I'm going to be using this, as I mentioned before, it's the Princeton select oval mop. To start with this,
we start with a watered down version of this yellowy orange color to make that over here
in my paint palette, I put a little bit of
orange down into my center, and then I actually
added a little bit of this brown because I
wanted to tone it down. I don't want it
to be too orangy. So we're going to
just make a bunch of these little flowers. Because I'm using this
Filbert style paint brush, I can just lay my
paintbrush down and then pick it up and
that creates one petal. Then if I go around in a circle, I make a second petal, a third petal, and I can put
it in a fourth petal there. That creates one round flour, and then I'm going
to choose to use the six inch round and pick
up some of my red, which I also like to mix in just a little bit of
a brown into again, just to tone it down a little bit so that
it's not so vibrant. I'm going to just drop some into the centers of these flowers
and let that bleed out. Because I'm going to keep
going back into this red, I'm just going to
go ahead and let it sit here because I'm
going to keep using it. There's no reason to rinse it
out in between for myself. Now we're going to go
ahead and do another one. I'm going to put one here, a second one, a third petal, and then a fourth petal. Picking up this red, dropping
some into the center, you're going to have to
play around with this. Depending on how
wet your paint is, it will bleed more or less depending on how
wet your paint is on your paper and how much paint and water
you have on your brush. This is why practicing is
so important that you keep practicing it over
and over again until you get used
to the water flow. The water versus paint is
really probably one of the hardest things to figure out when you're
first new to watercolor. So if I wanted to have
these flowers facing different directions or more
closed up, you can do them. Let's take a look at this one. You can see how this one's just a little bit
more closed and maybe it's tilting and looking
that way a little bit. That's because I made
a bigger petal here. And then a smaller petal there, then I'm just creating the outside edge
to this flower and see how much more angled that is instead of big and
long, it's angled. Then when I go ahead and
I know it's only three, but that's because I'm
allowing this one to be two. This one here is actually
two different petals. But because you're seeing
the side of the petal, you can't really tell that. So I'm going to let that bleed. Now you can look back
up here and you can see how much bleeding has happened while we've
just been letting that float around there
and dry naturally. Then if I wanted to
make a smaller petal, I can always use the edge
of this paint brush. Instead of going down
on it like this, I can go this direction to
create that kind of a flower. If I go one, two,
three, and four. Then again, using my red and just dropping in some
into the center. Then if I wanted
to make some buds, here's a bud that maybe has two. It's almost starting to open, but it hasn't quite opened yet. I'm going to just again
just make my edge and then a second one here and see how I'm
just putting in two, and this is going to become the base of my
flower down in here. This is where the stem is
going to be coming out. I'm literally looking
at the side of this and then I can add in
some of this extra color. Then when we create a
stem coming out of there, that's going to look
like it's almost dripping down looking
over the edge. Then I can even make even
tinier little buds like these, which are just little
tiny baby buds. Simply, I can just press
down a little bit, press down, press down,
little simple dots. If I want to, I can come back in and add in a little bit
of that red as well. You wouldn't have to it depends on the look that
you're looking for. So now that these
are starting to dry, I'm going to go ahead
and rinse out my brush. Rinse out this one
too. I certainly don't want my
paintbrushes to dry. So if I'm laying them over here and I'm just
planning on reusing them, that's because I'm immediately
planning on reusing them. I wouldn't want to just let them sit there for hours on end, but I will just use
them a little bit. So using this deer foot cut off paint brush,
kind of like a stamp. I'm going to show you find a
scrap piece of paintbrush. I'm going to show you this is just a scrap paper
that I'm going to wet my paint brush down
but dry it off on the path on the edge of the jar. So it's mostly dry and then I'm going to dip
it into a black, but very lightly so that
when I tap down on it, it is it's almost dry and it's just creating
these little tiny dots. Do you see how that
works? Isn't that fun? I love that. So using
this paintbrush, dipping it back into the black, I can come over here back into my original flour and
just make little dots, how quick and easy it is
to make those centers. Wow. Now, if I didn't
have this brush, but what I did have was, let's say, a little
tiny detail brush. This is just see
how tiny that is, a little tiny detail brush. Putting it back into my
black or my dark colors, I can create little tiny details with this little brush too. You could absolutely
come in here and make little dots,
make little lines. I can even come
back into this one and add in some little
lines, little details. So you can keep going and
do this exact project, even if you don't have
that little deer foot. Okay, so we've kind of talked about how to
create this flower. Um, with the two
different layers, I'm going to wait for
this completely dry. In fact, I'm going
to use my hair dryer and dry it off and then we're going to add
one more layer. Now that that is dry, I do want to come in here
and add one more layer, which is just a little
bit more of this red. I'm going to go ahead
and pick up more of the red onto my little
six inch brush. I'm just going to
come in and make it doesn't have to go
onto all four of the petals just here and there. Add just one more spot for some darker petals.
Something like that. Okay, now that this
has completely dried, I really wanted to
show you really up close here how that looks because we dripped the darker
red into the yellow color, you can see how it
really bled out and almost really makes it
look like a real petal. But these are not hand drawn. We didn't draw them
first. This is not a refined watercolor. This is called loose watercolor, where the edges are
going to be jagged. The colorway is
going to be unusual. This is all going to be
jagged and you're going to get some hard edges and
then some soft edges. This is the look
I was going for, so I'm very, very
pleased with this. Come on back to the
next lesson when we're going to talk about leaves and the arching and the
flow and how we're going to create this look for your class. I can't
wait to see you.
4. Leaves and Branches Adding Movement and Natural Direction: Welcome back. Here we're
going to be talking about the leaves and these
arching vines. I didn't put this in any format. I wasn't trying to create
this into a final project. I was just using it
for my practice. Your practice page might be filled all the
way around with all the different flowers
and the petals and the buds and different shapes and facing different directions. I'm hoping that your
practice page is filled, every single inch has
a little flower on it. If you happen to
have a rigor brush, something like this,
a liner brush, this is such a fun brush to use. If I was going to be getting
two brushes in my life, these would probably be
the two that I would get a round brush in either a six or an eight,
probably in an eight. This is a six and a little
small for my only brush. But I would probably
get around eight, and then I would probably
get a rigor brush, a liner brush, something
like this, a script brush. It is nice and floppy and I want to show you
why I really like this. If you don't have this style, you're going to be able to
use a round brush to do this exact same project and I'm going to show you
and prove that to you. But here I am going to fill
my paintbrush up with paint. I know you couldn't see that. Let me spin my palette around. Now you can see my
greens and I just laid my paint brush all the way down into that paint.
This is all wet. So I have it completely filled now because
it's a liner brush, I can really create all these little beautiful
shapes with very flowy. I absolutely love this brush. If I didn't have this and
all I had was a round brush, I can do the same thing, fill my paint brush up and then do the same
thing and swirl it. See how it's really no
different. You can do both. It's just that this
one's easier to use and fun and just such a great
little brush to have. So we are going to be
looking for that kind of a looseness where you don't really know where
it's going to go. When you are adding
in these vines, you're going to want to
keep a very loose hand. I like to hold my paint brush on the top half of the
paint brush up here. I don't like to hold it
all the way down here. When I hold it all the way down here, it's very controlled. And when I am doing
this kind of work, I like to be less controlled
and so all the way up here. And then I can create
some quick little lines. I can say, well, here's a little bud and I want to bring that
down into the center. I want to bring this over here. I can bring this one down. See how I just just
quickly move it around. There's no necessary rhyme or reason or how this
is going to flow. Then I often like to even
extend it going past. See how it didn't
just stop there. I allowed it to continue. Maybe I upbring it over there
and I bring it up here. Just really flowy. Okay. That would be how I would
do these little stems. Then I also like to add
little branches off of them. Dipping it back into my paint, just realine that one. Maybe I bring another one here. I bring another one there. So I'm bringing off
these little branches. Different directions,
different flows, and how that's going to help
me is not only does it bring a nice little flow and
rhythm to my painting, but it is also going to allow me to realize that that's where maybe a leaf is going to go. Then also, that's how I
would create the flow. And then using my
six inch round, maybe using a
lighter color green. I'm going to create some leaves. Now that I've made all these
little extra branches, I can just create little
tiny leaves here and there. To create a leaf, I like to
have paint on my paintbrush, have the tip of my brush, hit the paper, and then lay down the belly of
the brush and pick back up. For this particular style leaf, that's pretty much all
I'm going to be doing. Then they can go off
of different edges. They can come off of the ends. If I want to, I
can dip back into a darker green and I can add in a couple
extra darker ones. These almost look black, but I promise you it's green, it's a granulating paint, so it's going to
just take a second. Then move back into
my lighter green. And add those back in. If I wanted to add in
darker, deeper greens, I can put in a wider branch, wider leaf there, and maybe even add in a little bit of that darker right
there at the end. Do that again to
make a bigger leaf. Let's see, we'll put a
bigger one right here. It's almost a two stroke. I make one and I put a
second one in over here. Put one and a second
one next to it. And then I can just continue. So that's generally how I like to make leaves
for something like this. We'll do it again over here
so that you can really see push your belly down
and pull it back up. Put the belly down
and pull it back up. Pretty much your paint brush is doing all the work for you. Put the belly down
and pull it back up. If you want to make
the wider leaf, you make it a two stroke, put the belly down,
come back up. I made it a little bit
higher arch on that side, and then I'm going
to make a higher arch on the lower side. Then I made a bigger leaf. I could even make
an even bigger leaf if I wanted to by
just adding to it. I made one here, and then instead of bringing this one in right next to it, I'm leaving a little
hole in the middle. Using that dark green again. Here we go again here and leaving just a
little bit of a line. Adding in just a little
white can really add in a lot of
extra texture. Okay. I think that you get it as
to how I want to do leaves. They're very simple. This
is a very organic feel. Come on back to the
next class and we're going to talk about
making this feel like it flows and there's movement and what we are looking for and
how we create that.
5. Planning Flow and Composition Guiding the Eye and Creating Gentle Movement: All right, thanks so
much for joining me in the next lesson where
we're going to talk about movement and flow
and how to make your painting allow for this movement that
you see over here. So we've discussed how
to make the flowers, how to make the centers, how to make the vines and all the different leaves and
leaves in different colors. But we really want to talk
about how to lay this out. When I went to paint this one, I did not do two
different things. One thing I didn't
do is I didn't mask out where I
wanted my frame to be. And because of that, I just
painted on the whole piece. Then I realized, Oh,
I really like that. I would love to
have been able to frame it, but I couldn't. All I did is I took
my mat and I went, do you want to hold it up
here? Do you like that? What do you like? I realized that what I really like
is that right there, that I'm okay with
it getting cut off and getting cut
off. It's totally fine. I actually prefer it
to go behind the mat. So that is one thing
that I didn't do. So if you're looking
for it to flow, then when you go ahead
and paint your painting, you're going to want to
decide what the size of your mat is going to
be or your frame and then decide if you want to
be contained within this area or if you want it
to flow outside of that area. And maybe if I was
going to do it again and when I go to do
the final project, I wouldn't have
painted all of this, because it even went
up above there. I probably wouldn't
have done that if I had been thinking this
through a little bit more. The other thing that
I didn't do with this is I did not
pre map this out. I didn't take a pencil
or pen and I didn't say, Oh, I want to make sure
that there's a flower here and that there's a flower here and a flower here
and a flower here. I went with my heart. I said, I really want to have the bulk of
my flowers here, and then I want to have
some smaller flowers and I want it to be
arching over like that. I did prethink that
part of it through, but I didn't draw it out. If you feel like you
need to draw it out, what I would recommend is just
taking a pencil and very, very lightly, make a circle, very, very lightly, and you could even make
that circle and then go ahead and erase it
so that only you can see it, only because you know it was there that you can see
it because otherwise you might be able to
see it after you've finished painting and I
wouldn't want that to happen. Very lightly, you could say
I want a flower here and a flower here and a flower there and you could map it out, but not by drawing a flower, just by making
circles so that you know this is about the
size of the flower I want, and this is about the location of where I want
these flowers to be. So that is one option for you. What I would recommend is that
you just kind of think it through and plan it without
actually drawing it all out. But, um, you need to do it however it's going
to work out best for you. So when I go to make
my final piece, I will probably just talk it through with you and say this is where I think
I'm going to put them, and then we're going
to see what happens because I'm going to just let my creative self take over
and see what happens. Then also when I'm painting
something like this, what I typically do is
I map out where I want my biggest flowers and where I want maybe
my medium flowers, and maybe I'll put in
where I want some of these dripping down flowers like the ones that
are cascading down. But then I don't go
ahead and put in any of these extra tinier flowers until the very very end where I'm looking for details
to be put in. Then when you are putting in
your branches, your vines, just think of it very cohesively and very flowing as to where do you want
these lines to go. If you've already painted a little bud down here
and a bud down here, those might be my
very first branches that I would be putting in for these little vinees
because they're going to be your primary motion, where you're going to
feel your motion from. I might put this one in and this one and maybe
even this one, and then I would interconnect
the other ones later. I hope that makes sense. This creating motion and
creating movement within your flower arrangement
is definitely something that is going to take some time and
some practice, and sometimes it works out for me and sometimes it doesn't. So it is often easier if I have some kind of a
reference sheet to look at so that I know what I'm kind of going
towards and what my goal is. So I will keep this one nearby
both for you and for me. If you want to discuss
the exact colors that I was using in this class, I can try to look those up. But really, you should just
use the colors that you have. But if you need to know
what my colors were, start a little discussion, I'd be happy to look
at that with you. Thanks for following along, and I can't wait to see you in the next class where we
work on your final project.
6. Class Project (A) Painting a Finished Floral Piece: Okay, I have laid
my frame on top of a mat on top of my paint, my watercolor paper
that I want to use. I'll just use a
pencil to gently, very lightly create my edges so that I know where my four squared edges are going to be, making sure to only
my lines very, very lightly on this paper, and now I know where I'm
going to paint within. And that is how I am
going to probably do it. I might go ahead and
mask it out as well, but that will be great for
when I go to start painting, and I know that I can
stay within those lines. Okay, like I said, I have
this all mapped out. But because I like to have my flowers kind of go beyond where the
mat is going to be, I have them highlighted here. I have just a little
quick little pencil marking to let me know
where those edges are. But while I'm painting, I'm going to allow
my painting to go outside of those boundaries
just so that I can create a little bit of mystery as to what's going
on behind the mat. So if you don't care to do it that way and you want
to keep yours confined, then go right ahead and confine yours to within where you're
going to be matting it. So let's get started on
painting our next flower. So this paper is a lot
larger than this one. I think this was
an eight by ten, and I think this
is a nine by 13. So my finished product
is going to be larger than my practice one. So that's something I
should also mention that while you are painting
and practicing this, you might go through
multiple renditions. You might practice
it like we did, and maybe you'll have
pages and pages of practice where you practice your flowers and your
leaves and your vines. And then maybe you practice it on a smaller piece of paper. Until you're satisfied with it, and then maybe you move up
to a larger piece of paper, or maybe you try it on the
same piece of paper multiple times until you find one
that you are satisfied with. There's never anything
wrong with trying the same exact piece
over and over again. In fact, I really
encourage you to do that. It's something that's going to really help you as an artist when you practice the exact
same thing over and over. If you're getting tired of
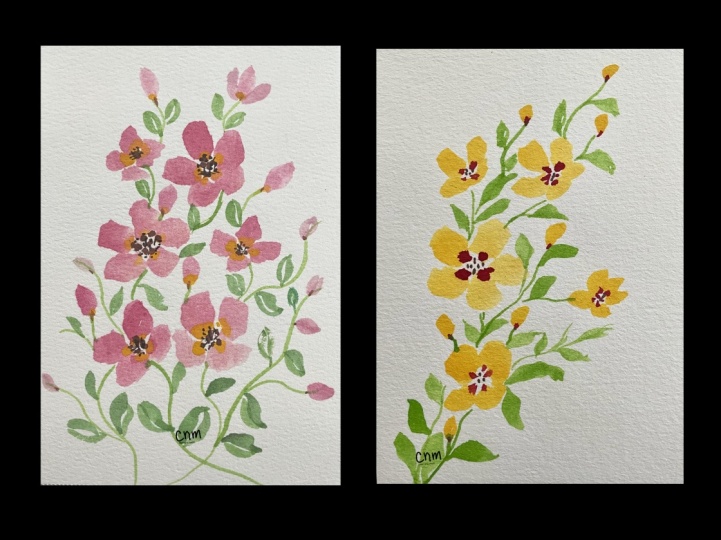
practicing the same thing over and you may choose to
change your colors. So maybe in your first one, you did a yellow and a red, but then in the next color, you're choosing a
pink and a purple. That mixes it up, but you're still
doing the same work. You're still practicing
your paint to water ratio. You're still practicing the flow of the paint how the
flower is being made. You're still practicing
your movement of the painting itself and your flowers and your
leaves, of course. So go ahead and get started
on this new project. You can paint along with me or you can do this on your own, whichever way you feel
more comfortable. I'm going to go ahead and
paint it for the class, but feel free to do yours
however you'd like. I will mention that while
I'm painting my final piece, I might not talk
as much during it because I actually do need to concentrate
when I'm painting. I can't just paint, um and talk the whole time because I do like to
concentrate on what I'm doing. I'm just mixing up
a little bit more of my orange and adding just a little bit of
that light brown color to create that base color again. So I promised that I would discuss the flow and how
I'm planning on doing this. I think I'm probably
going to start here about at the midway point of the page left and
right and put a flower here and another flower here,
then another flower here. I like that triangle effect. So I think I'm going
to start with those. And I do absolutely love
to have a flower that's cascading and another couple of buds that are going
to be coming over here, and then I'll
create that C shape down in here similar
to how I did it there. I don't like to
start smack dab in the center that
I'm going to look to say this is about the center. This is where the top of
the page is going to be, so I'm going to come
down and just right of center to start
these flowers. I'm going to go ahead and
get started with my petals. Creating the beautiful
four pleoral flour that we practiced earlier today. While that's still wet, I'm going to go ahead
and drop in my red. If I waited too long and
this yellow color had dried, this is not going to bleed well and then I
would be sad because I really like that
bleeding effect of the red into the yellow. I want to make sure that
I get that in there. And needing to make up
more paint along the way, more mix, more paint. And it's okay that it's not
going to be exactly the same. Maybe this time it'll be more yellow or the
next time it'll be more brown and more
lighter or darker. It doesn't matter because
all the flowers are always going to be
slightly different anyway. So I'm fine with that. Now I'm going to be making
my little triangle, putting another one down here
and another one up here. I'm going to put another petal. This time I'm going to
put my petal shape going that way down almost touch And maybe just a
smaller petal there. Touching in that red. This one's pretty wet, so I'm just going to be careful that I don't put in too much. Go ahead and drop that red in while
it's still wet. I'm going to wait
on that one because that one's really wet. So I'm going to
wait and not drop this red in yet because I don't want that to bleed too much. That kind of comes
from experience. You're going to want to
practice that a little bit. And then I think
I want to bring a petal that's dropping over here. I'm going to use the
edge of my paintbrush to create just the opening there and the edge
of my paintbrush, create the opening there,
little tiny petals. This is going to be
the base of my flower. The stem is going
to come out there. I'm going to allow
this to come up further because it's the
outside of the flower. It is still pretty wet, so I'm going to keep
waiting on that one. I'm just going to keep checking on it every once in a while. Another flower here
to create that little maybe a smaller one. See how I made this one so
that the petals are all different shapes and now it looks like it's
looking that direction, so I'm going to be
able to bring the base of the flower out this way. I'm still gonna wait on that. And because I want to
have it kind of come around and kind of
create the sea, I'm just going to keep going and create another
flower over here. I got to go ahead
and add this in now. Maybe a little early, but I
think it's going to be okay. A little bit more water. Creating that see
coming on down in here, putting another four
petal flower here. So do you see how this one is the largest leaf is kind
of out towards the bottom. And then these it's
almost looking like I'm looking down
straight down into it, like it's kind of
tilted this direction. And this is almost looking into the flower and these are almost
the tops of the flowers. So as I am creating these different flowers
and the petals, I'm trying to create movement within each
one of the flowers so they don't just
all look like they're straight down and looking
straight at them, but that there's some movement, that some look this direction, some look that direction,
some look this direction. So that would be another
really important way to create movement within your flower display, your arrangement here. I do want to create
some of these, so I'm going to be
bringing this flower. Again, I use the edge. The edge of my paintbrush
instead of flat on, I'm using the edge to create that and maybe I'll add
another one over here because I can see my
vine kind of coming down and dripping all the way
off the edge of the page. Maybe I'll put
another one up here. Do you see how I'm starting
to see I'll use the backside. I'm starting to see
a flow like this and down and up and I'm going to be able to create a lot
of movement within this. I think I'm feeling like I
need one more piece over here. Might be wise to wait
until I've filled in with the other leaves. But I think I'm going
to go ahead and do it, but I do want to add in my red into these before
they completely dry. I'm going to get out that fun little brush, the deer foot. I'm just going to
go into the centers and create those
little fun centers. I even let those
centers kind of go out onto the petals
a little bit. And if they're still
wet, that's fine. They're going to just
do a little bleeding, and I don't mind that at all. I got to go ahead and add
some centers in here. The ones that are petals that are buds that I'm
just seeing the closed up, you wouldn't be
seeing the center, so I won't be putting
any on those. And then I think
because I have it, I have this little
tiny itty bitty one little detail brush. I'm just gonna add
some little lines. Make it even more
realistic. Not many. Just a couple. Okay. So I'm going to go ahead and
move on to the stems. Pull this around so hopefully you can see my greens again. Using this really dark green, extremely dark, almost black. I am going to create some movement by showing where these are going
to be cascading down. I'm going to always use an arch. I'm never going to
do a straight line. Kind of thinking about I also don't want it to just
come out of the center. Want it to kind of
come the original part of the vine to be coming from
inside a pocket of flowers, not from out here where you can't really tell
where it came from. Someone is going to be
bringing out it over here and then arching
these over here, and then maybe it
continues down. Maybe this one comes over here. Not sure where that one's
going to come from yet. Then I really like to
make my base a little bit thicker where the
stem meets the flour. Because if you've ever looked
at a flower head here, this is often much thicker. I like to add just a
little bit extra thickness here to indicate that you're looking at the
back of the flower. The bottom of the flower. I'll put one here because I know it's going to come
off of here somewhere. This one's going to come up. This is just all really
organic as to how you do this. There's no exact way
that it has to be done. A lot of this just comes from practice. I'm still learning. We all have to learn
and continue to learn. It's really great to
continue to learn. I am going to allow
some more stems and branches to come up even beyond where I have
these flowers. I'll probably just
bring one up this way. Then even extend this up just to create a
little bit more motion. Then um, what I'm doing is I'm
looking for space where I might want to
put in some leaves, looking for areas where I feel like there's
going to be needed space or that I can really create more
motion or movement. Back in and add more
after the leaves are in, so I'm going to stop there
and not add anymore. I'm going to go find
my six inch round. Get my medium shade of green going just
add in some little
7. Class Project (B) Painting a Finished Floral Piece: Medium shade of
green going and just add in some little
leaves here and there. I'd like to start some down
at the base like that. The base of where the buds are where the vines
are coming from. Adds a little anchor point
to it so that they're not all just coming off of the ends of the flowers of the vines. I do have to say,
I want you to be careful not to add
too many leaves. It is actually very easy to add in too many leaves when you are doing
something like this. You can dip them both together. Make that little darker there, add in some depth, create a little bit
of a darker green. It is absolutely easy to go, Oh, let's just keep
putting in more leaves more leaves and it can actually become a detriment because
you put in too many. That is just a warning to make sure that you don't
add in too many. I do like to add in several different colors of my greens. It adds a lot of depth
into it by adding in lighter greens
and darker greens. Look, I need a bigger leaf. Maybe something bigger
over on this side. I don't see how I
even leave it open. It's not even complete. I left a lot of
white space there. It's very intentional. Looking for spaces that are maybe missing something
where I feel like I could have been adding something in I feel like I have maybe enough leaves now. So I think what I'm
going to do is add in these little tiny buds
going back over to my orange and yellow
and red and add in these little tiny ones because sometimes that's just a
perfect little touch, and that's all it's needed. Just little ones here and there, wherever you feel like it's
really gonna benefit it. So you can see, although I
use the exact same colors, this flower is a lot
lighter than this flower, and it's just the
way I mixed my paint or how much water I
had on my paint brush. I really like that. It shows a lot of
dimension and value, different shades, different
value to the painting. I actually really like that. I think what I
didn't do is add in the extra little darker layer, and I feel like that's
missing from here. I'm going to go ahead
and add that in putting my red
paint on my brush. And adding in probably would have rather if I
had done that before I put in the deer foot poka
dot things, but that's okay. I can make it work. Not
much, just here and there. Okay. Be done. See how easy it is to overpaint. So don't overpaint. Let it um Let it be done before you
actually think it's done. You can always come
back in and put in another layer if you feel
like something is missing. If you feel like there's more
leaves that could be added, you can always come
back in and add. So I'm going to go ahead and let this dry and then I'll be back.
8. Final Details and Framing Finishing Touches and Display Ideas: Thanks for coming back
to the end of the class, and we are going
to wrap this up. First thing that I'm
going to do is sign this, and then we're
going to frame it, and then discuss the ending and how we're going
to move from here. So I'm going to
go ahead and sign this down in this general area. I'm gonna look at my mat. Move my water back so I
don't have an accident. I'm gonna put my mat
down. Let's see. So sometimes I just
put it right here. We're over on this side, but sometimes I like to
actually sneak it in into part of the display of art piece itself, which
I think I'm going to do. I think I'm going to sneak
my name right in here. So as a reminder, what we did is we practiced. We went over how to make the four leaf flower,
the four petal flower, how to add in all
the extra details, doing the vines and the
branches and the leaves, how to map it out
and create flow. And now we're going
to frame this. I have this mat here, and we are going
to frame this and see how it looks. I can't wait. So I'm going to go ahead
and put in my frame, my mat, and my picture. Just upside down.
Do it this way. Then I can slide this around until I find the
spot that I really like it. So I think something like that. I'm going to carefully
lay it back down, straighten it up, keeping it
in this general vicinity. And then I'm going
to take my tape. Just put one piece of tape
here at the top so that I can verify that I have it laying out the way
I want it, which I do. And then I go ahead and just add a little bit more tape
just to hold it there. Because what I'm going to do is hang this
up in my bedroom, and then I swap it
out like every month, maybe sometimes a
couple times a month, and I will take this painting out and put a new painting in. So I don't really like
to have it paint matted permanently because I am
constantly swapping out, whether it's for the
season or because of what the painting was or what my project was or what my
focus was in the last week, I am constantly putting a new
painting into this frame, and I love that because then I can always have something
new to look at. So thank you so much
for joining me. I hope that you had as much
fun painting as I did. And please go ahead and
follow me. Give me a review. Most importantly, please take a picture of your
finished product, your project, and upload
it into the class. I really want to celebrate
you whatever level you're at, whether your very first painting or you've been
painting for years. I would really like to
celebrate that with you. I've been working with my
mom who is 84-years-old, and she started painting
just two years ago. And you wouldn't believe the
progress that she has made, and she had never
held a paint brush. And when her first
projects were being made, she was having a hard time, but I helped her through that, and now she is
painting beautifully. So it takes a lot
of practice and patience and a lot
of encouragement. I want to be here for
you and encourage you as you start your journey
or continue your journey. I hope you had fun.
Thanks so much for joining me and why can't wait to see you in
the next class? I have something
really fun planned.
 Brenda Jones, Watercolor Artist & Teacher