Transcripts
1. Intro: Hello everyone. Welcome to a new and very
intense Landscape lesson. I'm Natalie. I'm crazy about Watercolor. Also. I'm happy to share
these laugh with you. Today. We will be drove in birches in an easy
and interesting way. In spite the seeming
complexity of the task, I will explain step-by-step what needs to be done
to enjoy the result?
2. Materials: Let me tell you about the materials that I
will use in this lesson. First of all, we will
need watercolor paints, a colloquy tablet. In this lesson, I will
use masking tape. I will do the sheet of
paper to the tablet. Next, we will need water. So two shoes cause rashes. First of all, we will need to middle-sized soft brush,
for example, squirrel. Second one should
be a bit smaller. You can use calligraphy brush or synthetic brush
with sharp teeth. Will need pencil, eraser or an oak liner pen and
spray. That's all
3. Pencil sketch: Let's begin. We're going
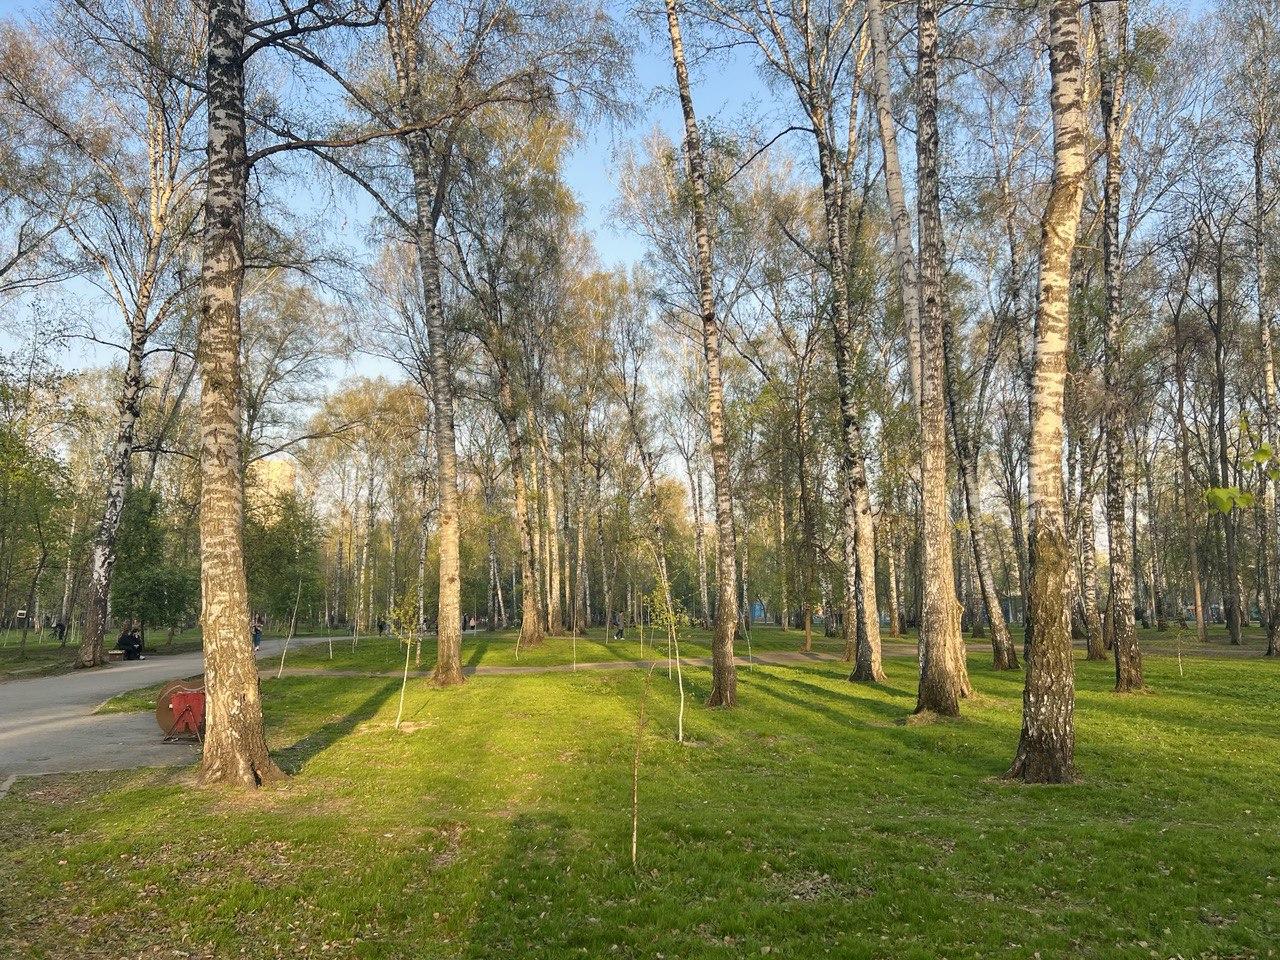
to draw a similar plot. Only simplify to be tomorrow. Make it light and sketching. The first thing we need
to do is to attach the shade to the drawing
board with masking tape. Thanks to this method, the **** will fit snugly
against the board. It won't allow the
sheet to work, as ever seen, will be secured. So therefore, it will be
convenient to work with. Also the tape will serve
a second function, the role of a stand. The first thing we'll do
is the pencil drawing. It will rely turned uncluttered. Just start, we need to
highlight a few trees and distribute them beautiful
on the sheet of paper. My first three will
go on the side here, not far from me. The second one. The most important thing
is to mark the trunks so that we can later
bypass M with watercolor. Now that Tree is in the
background a bit smaller. Let the horizon line pass
below the middle of the ****. Pay attention to the
location of the birches. Let them be at different levels. On the right, I will place
a slightly more birches. The edge I'll draw
the word is birch. Let it be a little higher
or lower than these birch. The rest will be a bit smaller. In the video about materials, I forgot to mention this object, a piece of plastic card. I will draw leaves and branches directly with
Watercolor, a liner. But if you want, you can outline sound with the pencil endeavor Snell's
will be the drone later. And with that, the
pencil drawing is ready. Let's give free
rein to Watercolor. Let it do its job.
4. Watercolor drawing: All we need to do is where
the area around the trunks, the trunks are the largest
part of our drawing. It's important to
keep some white. We carefully moisten
everything with clean water. It seems that ever seen
except the trunks is wet. You can tell the sheet make sure if there are still dry ARS, go over them again with
the brush with water. Well then let's proceed
to the actual watercolor. I'll start with the sky. I will use cerulean. You can choose a
different shade. Decide which part
of the sky will be more and which will be less. I don't strictly
follow the reference, but often rearrange objects. Adding my vision and
improving the composition. Artists, after all, are
a little bit magicians. I'll position the
sky in such a way that there is more of
width on one side. And then the other places I'll just indicate it with spots. We aren't going for a
light sketch version. So drop the importance and
draw your Landscape with this. No, take light green. If it's also very
bright for you, muted with a drop of red. I fill in the lightest places
in the clearance with it. These color can also be used to indicate foliage
and distant trees. Let's add some splashes
with this color. So we can add
individual leaves on the trees in such an
uncomplicated way. Next, I take dark green. You can make sense some loop
to create a beautiful shade. With it. I'll mark the darker places and
the background trees. I will carefully
award the trunks for the most shadowy places. I'll mix a darker color. I will let by Yann's
gray to the green. If you don't have this color, you can use regular black. Dark spots should be
unevenly distributed. I will have more on the right. If you accidentally
painted takeaway trunk, don't worry, this can be
corrected a little later. You also need to add some
dark foliage we splatters. It looks very impressive. I also want to add some
dark places. Right here. You can use a spray
bottle to create beautiful streaks and
blue are sharp lines I want to darken the edges of the shape to remove
attention from them. And of course, want her to add some
splatters to the glade. You can split a boss paint and clean water create an
additional texture. Now, I want to walk
more carefully with a trunks and emphasize
them when necessary. You also need to add details, shadows on the ground, spots on the trunks and
of course branches. For this, you need to mix
the paint thick line. I will draw with a
practical dry brush so that the details don't spread and the lines are
more controllable. Let's start with the shadows. All shadows are directed
roughly to this 0.1 point. You need to draw lines
directed to eat. You can darken some places
if you feel the need. Now, we proceed to the
spots on the trunks. We take black color
and make prints. I like to use a calligraphy
brush for these purposes. Let the sports be different. So experiment with
brushes and prints. Note that the bottoms
of the birches or darker, boldly mark them. But don't owe what
there was a details. It's better to add
the Mason wants with a liner later then to
overload the work. Now, the last lesson we will do with the watercolor is draw the tops of the trunks. And that branches. For these purposes as seen, brush with a sharp
D with suitable. As usual, I use a small-sized
calligraphy brush. I really like to use it. And no, is a perfect time
to use a sort of Scraper. A part of a plastic
card will do just fine. While the paper is still wet. You can make wary
effective scrapes. With them. You can depict
Tree trunks, all branches. Here. You can scrub the tree that
I accidentally painted over. Also, you can draw
some branches. You then discard and Watercolor. Well, the watercolor
layer is ready. Now, I will dry it
with a hairdryer. I don't have to wait long. And then I will proceed
to detail and with a liner pen so that the sketch gets its
brightness and the PL
5. Details with a liner: Okay, this **** has dried up. And now you can start the most pleasant and
meditative part of the walk. I start drawing the trees, urine them beautiful shape
and draw when branches. Let's start with the main tree. Whereas if you are as
gays will fall first. For me, it's this tree for you. It might be another one. Draw wheat in the
most careful way. So it did the most attractive
part of the painting. Green paint has run
somewhere on the trunk. You can just cover it
with a black liner. Emphasize the trunk,
make it more textured. The only saying is, don't outline the whole
tree from all sides. It will look childish. Let the watercolor feel act
as an outline in some places. Let's add a couple of strokes
to indicate the grass. Liner is very convenient for drawing beautiful
unseen branches. In the background. Let the trunks and
branches be lighter. I live in a slide here
of unfinished business. I really like how this
line turned out here. So I want to touch or corrected. And I'll make this
tall by bit narrower. So we'd doesn't complete
twist the trunk. And remember one more rule. The first step from the center, the less focus and
fewer details. Try to place the main theme
note at the very edges. I've changed their liner. The other one was running out and it was difficult to draw a few more branches for unifying
the picture into a hole. Draw a couple of lines
through the entire sketch. Also, I want to draw a few
branches in more detail. Focusing attention not
only on the trunks. Here, I will slightly darken the trunk so it doesn't
attract too much attention. And I sing, I should
finish with the branches. So as not to overload the walk. I'll just add more
detail at the bottom of the trunks to
ground them more. And now I'll introduce a bit
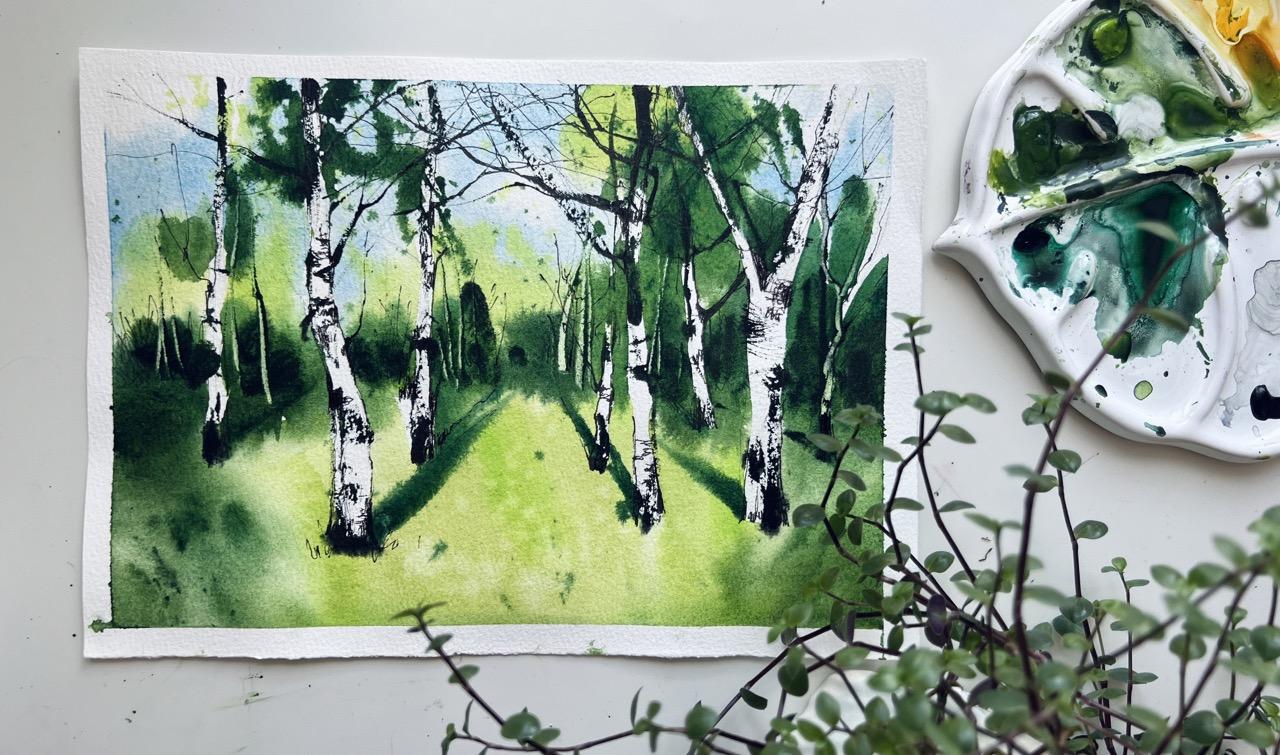
of cows to the background. And you really want to draw these dark branch. That's it. I think we should stop. We've conveyed the main idea, showing such a warm spring
summer evening when the sun is already quite low and the
shadows become elongated. Here, I've shown
how you can combine the ease and spontaneity
of watercolor, using it as a base
for the main drawing. And all the main details
are outlined with a liner. It's a combination of two
wary different materials. It's time to remove the tape, which leaves such
beautiful and even frame. The main scene is to make
sure ever sin is dry. Otherwise you can peel off the top layout of the
paper alone with the tape. Now ever seen is
definitely ready. My work is finished. You're up next.
6. Outro: Oh, lesson has come to an end. Although it was of
medium complexity, but I'm sure you will cope. Don't use a large format. Reduce the importance,
and remember, it's just as sketch. The most important thing in
learning to draw is to draw. Practice. Be sure to apply
your knowledge and practice and your
skills will grow. I also recommend watching my lesson on
Watercolor Techniques. If you haven't seen it. A lot of useful
information there, it will help you
better understand watercolor and learn the
secrets of its application. See you next time. Bye
 Natalia Nikitiuk, Capturing Life's Beauty