Transcripts
1. Intro: Hello. My name is Natalie, and I'm glad to welcome you to the lesson on
the wind landscape. Today, I want to conduct
a not quite usual lesson, but to experiment and
improvise with watercolor, creating such winter
watercolor sketches. It's possible to rely
on a certain plot. But the most important
thing I want to convey is the fact of these
white frosty trees against the winter sky. Therefore, a lot and such a matter will
depend on how watercolor behaves depending
on the humidity of the paper and the amount
of water on the brush. The result is
difficult to predict. But nonetheless, it will
be interesting. Let's try
2. Materials: Now, I will tell you
what we will need. Of course, it is a
watercolor sheet. I have cellulose here with
a density of 250 grams, and I have fixed it on such a board so that
the sheet is secure, doesn't curl and is more
convenient to work with. We will need watercolor paints. I have selected
colors that I see here, which are ultramarine, cobalt turquoise for the sky, paints gray for darkening, and possibly cobalt tread might be useful
for some accents. Of course, we will need a brush. I suggest taking two one larder for feeling large surfaces, and one smaller for details. It's important that the
brush had a sharp tip. It's convenient to work with it. A pencil and razor, a liner for detailing
at the very end, tissues, a water container. And as a palette, I usually use a standard saucer because it's convenient to
walk with a limited palette. This way, I squeeze out
four colors that I will use thus will no longer be any temptation
to reach for other shades.
3. Pencil drawing and water washing: So let's start. A pencil drawing here will
not be particularly needed. The only scene I would
like to outline for myself is where the
horizon line will be. You can make the painting a continuation of another
and start drawing. Once again, I will
show the reference. Here you can imagine how
the trees will be located, suppose on this sketch. Here, the trees will be located. And here will be
some tall trees. In general, every sin is
in your hands. Let's try. If you have a large brush, you can very quickly moisten the water
color sheet with it. If there is no such brush, then just a little more time, go into moistening
such a surface. The only thing is that the
brush should preferably be solved so that the bristles don't scratch the
watercolor sheet itself. And watch out for no
accumulation of paddles, okay?
4. Watercolour drawing: And you need to prepare
the color we will use. I immediately want to mix ultramarine and cobal turquoise, making a gradient from
dog to a lighter shade. Let a little pint absorb and we will add water
displacing the pigment. The same thing is done
with the second half. Indeed, you need to watch for it to be sufficiently moist because otherwise a pint will
immediately absorb and it will not be possible
to create theft plant. Okay. Well, roughly, I go around those places
where the trees will be. Now you can release
the brush and start carefully adding
and clean water from the edge so that it
the pigment for importance. But here it is very
important to wait for the moment when the color
has already set. Okay. Okay. Let's wait a bit. Here it is already. So probably it makes sense
to let the water go. Okay. And the water will already be displaced in the paint, creating
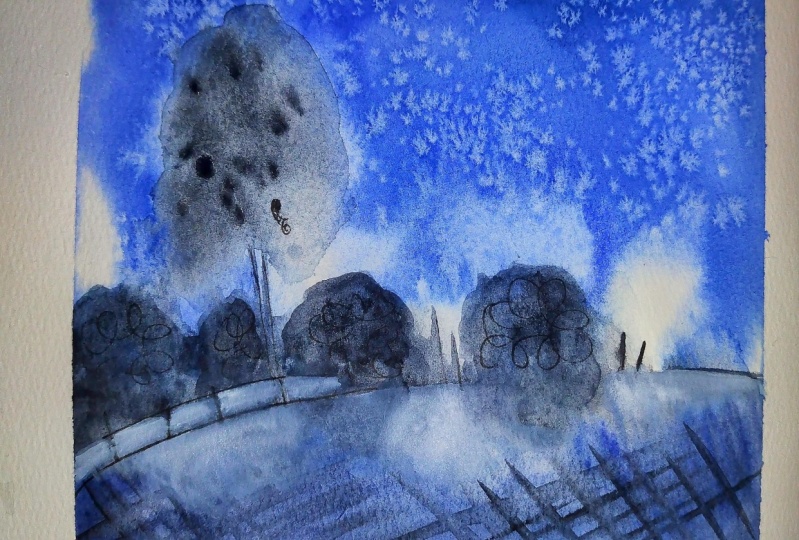
such transitions. For creating some interesting
effects, for example, such effects of glowing trees, you can use salt. Let's probably mix water and salt to demonstrate
both effects. When the pain sets, you can also make some
spray around the trees. Ammonia with water
forming our trees. A A We help to spread the paint and some silts
are already appearing. You can in some places make them manifest take an excess
pigment with the brush. M. And then we draw the ground. We'll look where our shadows
are located and depict them. I will use ultramarine
with the addition of gray to show the
shadows from the trees. The trees themselves. I will draw a later. Moist this area once again so that it's
comfortable to draw. Here are the trees, the shadow falls, and all these can be demonstrated without
any excessive detailing. Show the snow in front. You can depict such
falling shadows that go somewhere to the center from different sides so that it compositionally
looks more interesting. Then here already
take a dry brush and depict the lines from
the skis snowboarders, which remain on the
snow because it is uneven Now I'm
adding such a news. And further, we make it lighter. And then you can
remove the paint with clean brush, leaving
light traces. And somewhere I would like
to darken it in contrast. Turn on your imagination. And then we proceeded
to the trees themselves because they're
not completely white. If you look at the reference, you can see that they are
just dark gray at the bottom, and on the crowns, there are still dark spots. Therefore, you can moisten the trees and
slightly tint them. We take a gray color. Some trees are even
dark at the tops. So you can leave
dark marks there. And here with the help of
shadows from the trees, the horizon line is emerged. I want to add a bit
of red color to my paints and display trunks. If you got to harsh
edges, let's blur them. Try to add shadows in places where there are no such
beautiful effects, so as not to hide them, but on the contrary to
emphasize and reveal them. Leave such places untouched. For example, here, turned out
beautiful stains from salt. We also leave it adding
such spots around. As I already said, we don't redraw the
plot one to one. But just create and
can we this mood of a sunny winter day when the hole and scape becomes
such white and blue. You can add splashes just
in places of trees so that it looks iously Yes, part of the work
is already done. That is the most important
scene is to show to draw a beautiful sky against its background trees
and the foground. I summarize everything
that we have done, and now we will dry it
and add some details with a pen liner and maybe
a bit of color. By the way, here on the dry, you can still make a few such
characteristic stripes to diversify the foreground. You can even flow the
brush. I'll show you now. For this, and there
shouldn't be too much water. Such stripes are remain
from the snow cat. If it turned out to bright, you can always blow them above and it will no longer
be so stricken. Well, we can finish the water color pot at this
point and slightly dry it. You can wait, but I
will use the head dry so that you don't
have to wait too long. A.
5. Details with liner and conclusion: The sheet has dried. But now all this will still be such a bit row
and interesting. But the liner is able
to walk wonders. We will now add a few details also without any
excessive detailing. I just know the trunks of trees and somewhere at branches. Also, with a liner, you can darken places, show how plants are
in the distance. And you can imitate foliage
branches with tidy lines. And gradually something
understandable to our eyes. Understandable for perception
will begin to emerge. The most important scene is to show the trunks from below. Thanks to this, there
will be darkening and a more understandable and familiar picture
for our eyes. Such a combination
of spontaneity, carelessness of water color, and detailing with a liner gives such an interesting combo. And here, I also want
to draw reference as well, quick sketch. In order to make it visually. Okay. And here we
have a red sign, which I think it was drawing. On this side, let's
depict a skeer. We draw him a little lower, so they are not on the
one level with a sign. We will draw it by spots, a spot on the jacket. There is somehow shown a hand, and here let's draw his keys. We don't need too much details. I think it's rather clear now. Let's say bright notes. I know it doesn't
look too boring. Such bright colors will enlive on the sketch
and add life. There are really weren't
enough of them here, and to prevent it from
being too bright, you can blot it with a tissue. I also mix red and gray and will add a little of
the shade to the trees. So that the colors harmonious and the integrity
of the picture is formed. Such spontaneity turned out
and you really like it. Let's remove the masking tape, and the most important thing, it is to weight for drying. Otherwise, you can
spoil the paper. So remove it carefully. It turns out such a
double landscape, which already has frames. If you have any
questions you can ask. I will answer everyone. And the most important
thing I wanted to convey to you is that you can make
very quick sketches, given free into water color
and just slightly framing it. Helping it go, helping
it draw unique patterns, and it was trust in it because something
beautiful may turn out. Thank you all for
your attention. I hope you really enjoy
it because I'm making new lessons about spontaneous
watercolor drawings. I'm very waiting for your works. Draw and share your
beautiful winter and I will give feedback to each of
you. See you next time.
 Natalia Nikitiuk, Capturing Life's Beauty