Transcripts
1. Introduction: Someone rightly said, there
is only one happiness in this volume to
love and be loved. These watercolor birds are truly madly deeply in
love with each other. And I would like to share
this happiness and joy with you by creating these lovely
boards in watercolor. Hello wall. Lava Agarwal of watercolor
artists from India. I'm so excited to have you here. I will take you to a complete step-by-step
process of creating these two
beautiful cards, where we will create these floating hearts in
our Milky Way galaxy. We will also create these
love birds who are happy in their own world and enjoying
each other's company. I would love to see your creations of
these beautiful cards. So do upload them in
the project section. I would love to share my
feedback for your creation and also motivate those students to upload your occlusions. Go to the project section on the Skillshare tab and
click on the link. This will take you
to the browser. Here you can see different
tabs for giving the review, and also another tab for
the projects and resources. Here you create
this new project. You can also check the resources that I
have uploaded here, the sketch and the
sample project. And then you can create your
project by giving the name, for example, my project. And you can upload the image from your
gallery for your creation. And finally you can publish it. Thank you for joining
me and happy creating.
2. Art Supplies: Let us look at the
supplies that we need. So I have this watercolor
paper from arches here. This is a 100%
cotton with 300 GSM. In watercolor, the paper
plays a very important role. I will be using this small car, cheap paper from arches for one project and
for the other project, I will be using
this mango paper. It is Indian brand. You can use any watercolor paper that is available with you. Just make sure it is 300 GSM in thickness and it is
a 100% cotton paper. Next, we will lead a palette
for mixing the colors. I'm using this
ceramic palette here. You can use any other palette
that is available with you. We will do the color swatching in the next section and see the exact colors that I'm
using in this project. You can go with the
same colors or you can use similar colors that
are available with you. Next photo brushes, I am using this silver
black velvet brushes, size eight and size four. So you can use any brush
that is available with you. Just make sure it is a
big and smaller brush with pointed tips. And we will need a jar of water. We will need a pencil and a black pen to give
some highlights, and we will use a
pencil to sketch. Next, we will need a tape, and this will help to fix the watercolor paper on a board. Next, I will be using
this kitchen towel. You can also use
tissue papers and we will need an eraser to
clean the pencil marks. So that's it for the supplies.
3. Colour Swatches: Let us look at the
colors that we will need for these two carts. I'm using this sketch book
from Zen Sangam where I have done the swatches
from my earlier projects. So you can also maintain
a sketch book like this, or you can just on a
watercolor people. The first color that we
will try as the opera pink. This is from Daniel Smith. It is already light and
pretty vibrant pink. Next we will swatch
Alizarin crimson. So this is one of
my favorite colors and I use it in a
lot of my projects. If you're planning to buy
watercolors and invest in them. This is one of the colors
that you can go for, has a very beautiful pink. Next I will be using Road ICT genuine color
from Daniel Smith. This is again, one of the
types of pink that we have. You can use whatever pink and
red colors that you have. And you can mix them in different proportions and
try to get different shades. Next, I will use
permanent dread. This is a lovely bright red. This adds a very beautiful
touch to our composition. Next, I will take
imperial purple. Again. This is
from Daniel Smith. You can take any violet
pulpal that you have. If you do not have purple, you can mix some green and
blue to get a purple shade. Next time using
some indigo color. This I have used to create the little bowl for
our leaderboard. So you can replace this with any other color that you
want to create the bullwhip. Next I am taking Indian yellow. This is called as
Nicholas yellow in Daniel Smith and Indian
yellow in other brands. This is a very beautiful
and bright color and we have used it
for the flavors. I'm also picking some sap
green for our leaves. I will use some burnt
sienna for the branches. Lastly, I will be using this golden color
from Daniel Smith. If you do not have golden color, you can use acrylic
golden color. Or you can even use a pen with the golden glitter to give little highlights
to our project. So that is it for the colors
that we will need for this, for creating these two cards.
4. Love Birds - Sketching: Let us sketch out our
killed valentine card. Here we're going to depict two boards who are deeply
in love with each other. To simplify the sketch, we will just make two ovals. You can see egg shapes in
the center of the card. I have taken my Arches,
watercolor people. And I've just sketched these
two ovals in the center. I'm refining the rough shape
that we have sketched out. You can follow the steps and draw the boards
along with me. Or I will also be uploading this sketch in the project
resources section. You can download it from there. You can take a print and just trace it out
on your people. Now I'm creating these little
rings for our Lady board. Now I will create the
little tail for the board. Going back to the middle bird, I will create these wings. The tail in the similar manner as we did for the female bird. No, I will trace out the branch on which the
boards are happily poached. I did little beaks to our boards and also creating
small eyes for them. I'm making the eyes closed as the board sought
happily the bedside, just happy to be with
each other and they just want to shut the
world around them. Now I will draw
straight lines to depict the feet of the boards. This is not the exact
representation, it is Laker illustration. You can let your
imagination lose and be creative
with the drawing. We wouldn't draw a
cute hat for Mr. body. We will also draw
a cute little Mrs. Body. I will make small little hearts. Has love is in the air. I will also add some music notes depict a happy
feeling in the atmosphere. Now I will trace out some
flowers on the branch. It's almost a spring now. The flowers are in full bloom
for we will be creating some beautiful colorful
flowers on this branch. That's it for the sketch. See you in the
next section where we paint this lovely
illustration.
5. Love Birds - Part 1: Welcome back. Now let us
work on this painting. I'm just making some of
the lines lighter with an eraser because we do not want these lines to be
visible told the paint. I'm taking some plain
water on my size eight brush and applying it
to the female bird. I'm just applying to the
mean to the center portion and leaving out the wings
and the tail for now. Now I'm taking some
diluted Alizarin crimson and applying it to the sides. I'm spreading the color on all the corners and leaving
the center portion for now. As our basis wet, the color is
beautifully spreading. Now I will just
clean my brush with plain water on my brush with plain water and kept it on the tissue paper to remove
the excess moisture. And now I'm just spreading the color which we already
have on the paper. I do not want too much color
in the center portion. That is why I'm just
blending the colors slowly. Now I'm dropping in some
more Alizarin crimson on the corners to create a
little border. For the board. I will paint the wings with the same light that you did Alizarin crimson that we have. Now I will clean my brush
and blend this color. Also blend the
color on the wings. I'm not taking any extra color. I'm just blending it with the color that I have
already have on the brush. Now I will wet the tail area and apply the same
Alizarin crimson. I'm just creating little lines
with the alizarin crimson. I'm not covering
the entire portion. We will take some
plain water and wet the surface for the meal board. I'm also waiting
the tail this time. Now I'm taking some
imperial purple. You can take any violet or
lavender color that you have. Or if you do not have that, you can even take some
light blue color. For the middle board. I'm taking a diluted mix
of this purple color, following the same principle as we did for the female barred. By painting along the
sides of the board. I will clean my brush with
water and tap it dry. Blend these colors properly. You can see we're getting such a beautiful light
color. For the birds. With my clean brush, I will pick some color. As I can see that it's some extra Gloria in
the center portion. Now again, we will
take the purple color and put it on the corners
or the border of the board. To get a little outline
and some more shading. We will paint the wings with
the same imperial purple. I'm just giving the
shape of the wings, not covering it entirely. Again, I will clean my brush and pick some exists color
that we have on the wings. Now I'm taking some pink color
and creating the flowers. This is, you can go by
any choice of colors. You need not follow
the same colors or the same scheme for the
flavors that I have used. I am creating a simple
five petaled flower and leaving some white
space in-between. To depict the highlights. I'm taking some opera
pink and dropping in on the same dose of the flavor to give it a little dimension, it will pop out beautifully. I'm also making some small
lines with the opera pink. I'm taking pink color again
and making small flowers. These are called
the filler flowers. I'm just creating small
five petals flavors in different colors. Do you think a yellow flower? This is a very beautiful
and vibrant yellow. It is called Indian
yellow in some brands. In Daniel Smith it is
called as Nicholas. I will add few flowers in this yellow color to give a bright feeling to
our composition. I'm adding few flowers on
either side of the branch. You can see the yellow
color has blurred into our pink flower and then it is almost
turning yellow. Now, I will pick some
color with a clean brush. I will again put in
some Alizarin crimson to the petals of our flavor. Feel free to add more flowers in different colors
based on your liking. Now let us take some
burnt sienna paint. The little feet of the birds, and also the branch on which the boards
I'll happily sitting. I'm just painting on
this little branch. You can add a little
darker shade on the branch to give the
impression of shadow. Now I'm taking
some sap green and adding small leaves
around the flowers. I'm creating these simple
leaves by creating an outline first and then filling
it with the same color. You can really the
size of the leaves to create more interest
in the composition. You can also create some
dotted patterns to indicate different kinds of flavors
and filler leaves.
6. Love Birds - Part 2: Now I will take some
indigo color and create a little
ball for LED board. I'm using diluted
indigo color and I'm also leaving some
highlights as whitespaces. Now I am again taking
the indigo color and creating a little
outline for our bu. This will immediately
add a little charm. I will take some
diluted permanent red and create a little
hard for our Mr. body. I'm creating the outline
with light color and also filling filling with light color and also leaving some
white highlights. Now I'm taking a little
dark permanent red, creating the outline and
filling in some places. We will also fill the
hearts with red color. Just leave a little
white highlight. I will also make some lines on our flower with
the permanent red. So this adds a beautiful
bright touch to the flavors. You can see it is already
looking so pretty. We will add the
same rare highlight to the different flavors. I will also add this red, the center of our
yellow flowers. Will again take some
diluted Alizarin crimson apply to the center part
of our female bird. Will also apply this on
the tail of the bird. Now I will clean my
brush and gently merge this color to the entire
body of the bird. Now I will create DOL plane for the wings with the
same Alizarin crimson. Just creating a
very thin outline with Alizarin crimson
for the bird. Now I will take the
diluted purple color. I'm adding it to the tail
of the middle board. I will also apply
this as an outline to the board and also as outlined for the
wings of the board. This gives a beautiful
pop of colors. And we get nice shading by adding these dark colors
over the light ones. Feel free to tilt the
paper so that it is convenient for you to
create these lines. Now I'm adding some more purple
to the body of the board. I will blend this
with a clean brush. I'm just taking my clean brush and removing some of
the excess color. I'm just trying to give a very thin outline with the same purple
color that we have used. Now I'm just adding a few purple flowers
to balance the colors. The boats, flowers and leaves. Now I'm taking a
little dark sienna, giving some texture
to our branch. You can observe the
composition and add a few leaves or flowers. If you feel the need. I'm taking some burnt sienna and adding the lipid
beaks are bolts. Taking a black pen, carving out the little
I use protoboards. As the eyes are closed. I'm just making little eyelids that it looks very
cute illustration. I will also draw the music
notes with this black pen. I'm just giving a
little finishing and center to the purple flowers
that we added later. You can just highlight that a few places with his black pen, like the beaks and the Bose. This is completely optional. We are done with our cute
little valentine card with the little birds in love. You can just do this optional step of giving some highlights with the pen, or you can just
leave it as it is. I hope you enjoyed creating this project and I'm looking forward to
seeing your creations.
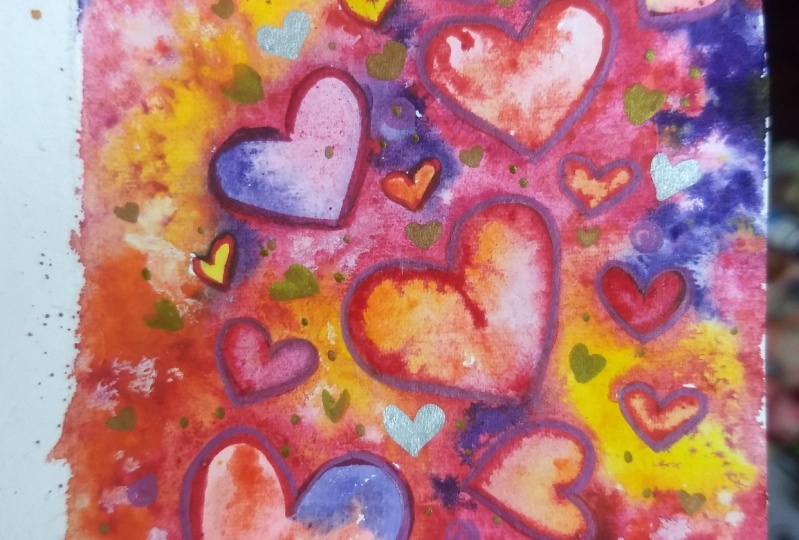
7. Floating Hearts - Part 1: Hello, Welcome to
the second project. We'll be using this watercolor
people from mangle. It is roughly of this size, 5.5 inch by seven
inch. It is perfect. God. I have stuck this paper on one of my sketchbooks
with the masking tape. So this scotch tape is
very easy to remove, so I always prefer to use this. Now let us draw the
design for our card. So it's a simple card with the multiple hearts floating in the air as if
love is in the air. And I will be creating
these hearts in different sizes and shapes and also in different
directions. As you can see, I'm
creating these hearts in an invisible diagonal
line on the paper. It's like a milky way galaxy, where our hearts are
floating around. We are done with the heart. Now I will take my
size eight brush and we will apply plain water. We will be using the
negative painting technique. We will be painting
around the hearts, Leaving the hearts
white for now. You can see I'm just putting plain water on the entire
paper except the heart. Now I will take some
Alizarin crimson and drop it in few
places around the heart. Just blend the colors around the whitespace of the hearts. Now I'm taking some opera pink and dropping it in the same way. You can just play with different colors and
different things in violates and create these beautiful galaxy
full of hearts. Now I'm taking some
permanent dread and dropping it on the
other side of the heart. So you can just
follow your intuition and the colors and create
this beautiful pattern. Now I'm taking some Nikola,
yellow, Indian yellow. I didn't get that on the hearts. It is giving such a
lovely pop off colors. In our background. I'm again adding some feminine, adding some more
realism and crimson and spreading it
around the background. Now as you can see, I have taken some Alizarin
crimson and I'm giving a little more definition to
the outline of our hearts. As a background is red. We can see the beautiful
blend of colors. I'm using some imperial purple. You can also use violet. Or if you do not have this, you can mix some blue with the red and get this
dark purple shade. Covering the other side of
the heart with the purple. It is giving a
beautiful effective. My paper has started
to dry a little. I have applied a little
water and again, I'm spreading the Alizarin
crimson in the background. We need to be quick now because the paper
will start to dry. If we do not want
the hard edges, then the paper should be wet. Now I'm adding the open Hoping to the little hearts we have. You can just play with
different colors and create the heart outline and
also the background. I'm applying little water
on the background so that we can get some
more blend of colors. And that will add more
depth to our competition. I'm gently blending
all the colors with a clean brush now. Also now the background
is wet again, as we have applied some water
along with the blending, I'm adding some more Alizarin
crimson around the heart.
8. Floating Hearts - Part 2: Now I'm pulling a little
color inside the heart. I've just wet my brush and I'm pulling the
color that is there on the outline of the heart to have a little light
color inside the heart. Now I'm just taking
some Alizarin crimson and some pulpal. Blending the background and
making the portion around the heart's a little darker
as compared to the sides. You can see with this addition
of return dark purple, Alizarin, crimson
around the heart, we are getting such a
beautiful pop of colors. Just keep blending the colors in the background because we do not want it to be very patchy. Whenever we are
adding more color, make sure you're blending
it with the background. I'm giving the outline to the big card with
the purple color. Watercolor is mostly
about building layers. First we use the
lightest shades, and then we gradually, we're building on the
darker shades and giving more depth to our composition. Now I'm adding a
generous amount of Alizarin crimson
to our background. Make it look uniform and bright. Now I've cleaned my
brush and I'm taking diluted Alizarin crimson and
lately filling the heart. We do not want
distribute very dark. I'm just lightly filling the heart with the
little purple, light purple, and light pink. I have added a little
dark pink here, so I will clean my brush and
gently blend this color. Now let us add some
gold accents to make our composition
loop Pluto jazzy. So I have taken gold, watercolor, watercolor, and I'm just filling
in some of the hearts. Also, I will be creating little, small little hearts
with the golden paint. You can see the golden color
is adding such a nice job. Come to the project. Feel free to add as many
hearts as you want. But I'm keeping it along the
same diagonal line and I'm not reading it to the other
two corners of the card. I'm just adding this golden
eggs to the different hearts. Now I'm taking some
golden color on the brush and creating splatter
on our project. This will add a
little more charm and good free look to our card. We are done with the
mean composition. In the next chapter, we will add a
little message or a little Court to
discard. See you there.
9. Finishing Touches and Final Thoughts: Welcome back. Let us write a little
message on our card. I'm using a stamp which
sees you are special. And I'm using some inks. I have mounted the stamp on acrylic block and I will
be putting the stamp. So first I will put it on
a rough paper to check how the ink is getting
a blight on the stamp. I do not want to take any
risk with the final card. So you can see the satellite. I need to apply more ink and be sure that the stamp is
working nicely. Yeah. I will again apply the ink and I'm putting it on the card. If you have a good handwriting, you can even write
message on your own. And this will be very good. It will give a very
good personal touch. I'm just making the colors
later dock with the pen. If you do not have
this message stem, you can just write the
message on your card with a sketch pen and add
to the personal touch. Now comes the most fun part
of shaping our current. Lovely, bright and
beautiful card is steady. You can even mount
this on a card stock. I will be showing you how I mounted it on a pulpal
handmade people. These are our two cards. And I wouldn't be
mounting them on a pulpal handmade paper as I thought the background
will look beautiful. I'm taking these
handmade paper with having self embossed design. And I will stick guards
on these papers. You can stick your
watercolor painting on a colorful paper, auto handmade paper,
or even a card stock. I will stick the second
card in the same manner. So there we have our two lovely projects
for the running time. For any occasion. Give to your loved ones. So I hope you enjoyed creating these projects as much as
I enjoy teaching them. I can't wait to see
your lovely creations. So do upload them in the
project section and leave a review feedback that I can
improve in my next classes. You can also tag me on Instagram at life's
little treasures. And I will be very happy
to share your creations. So thank you for joining me. Happy creating.
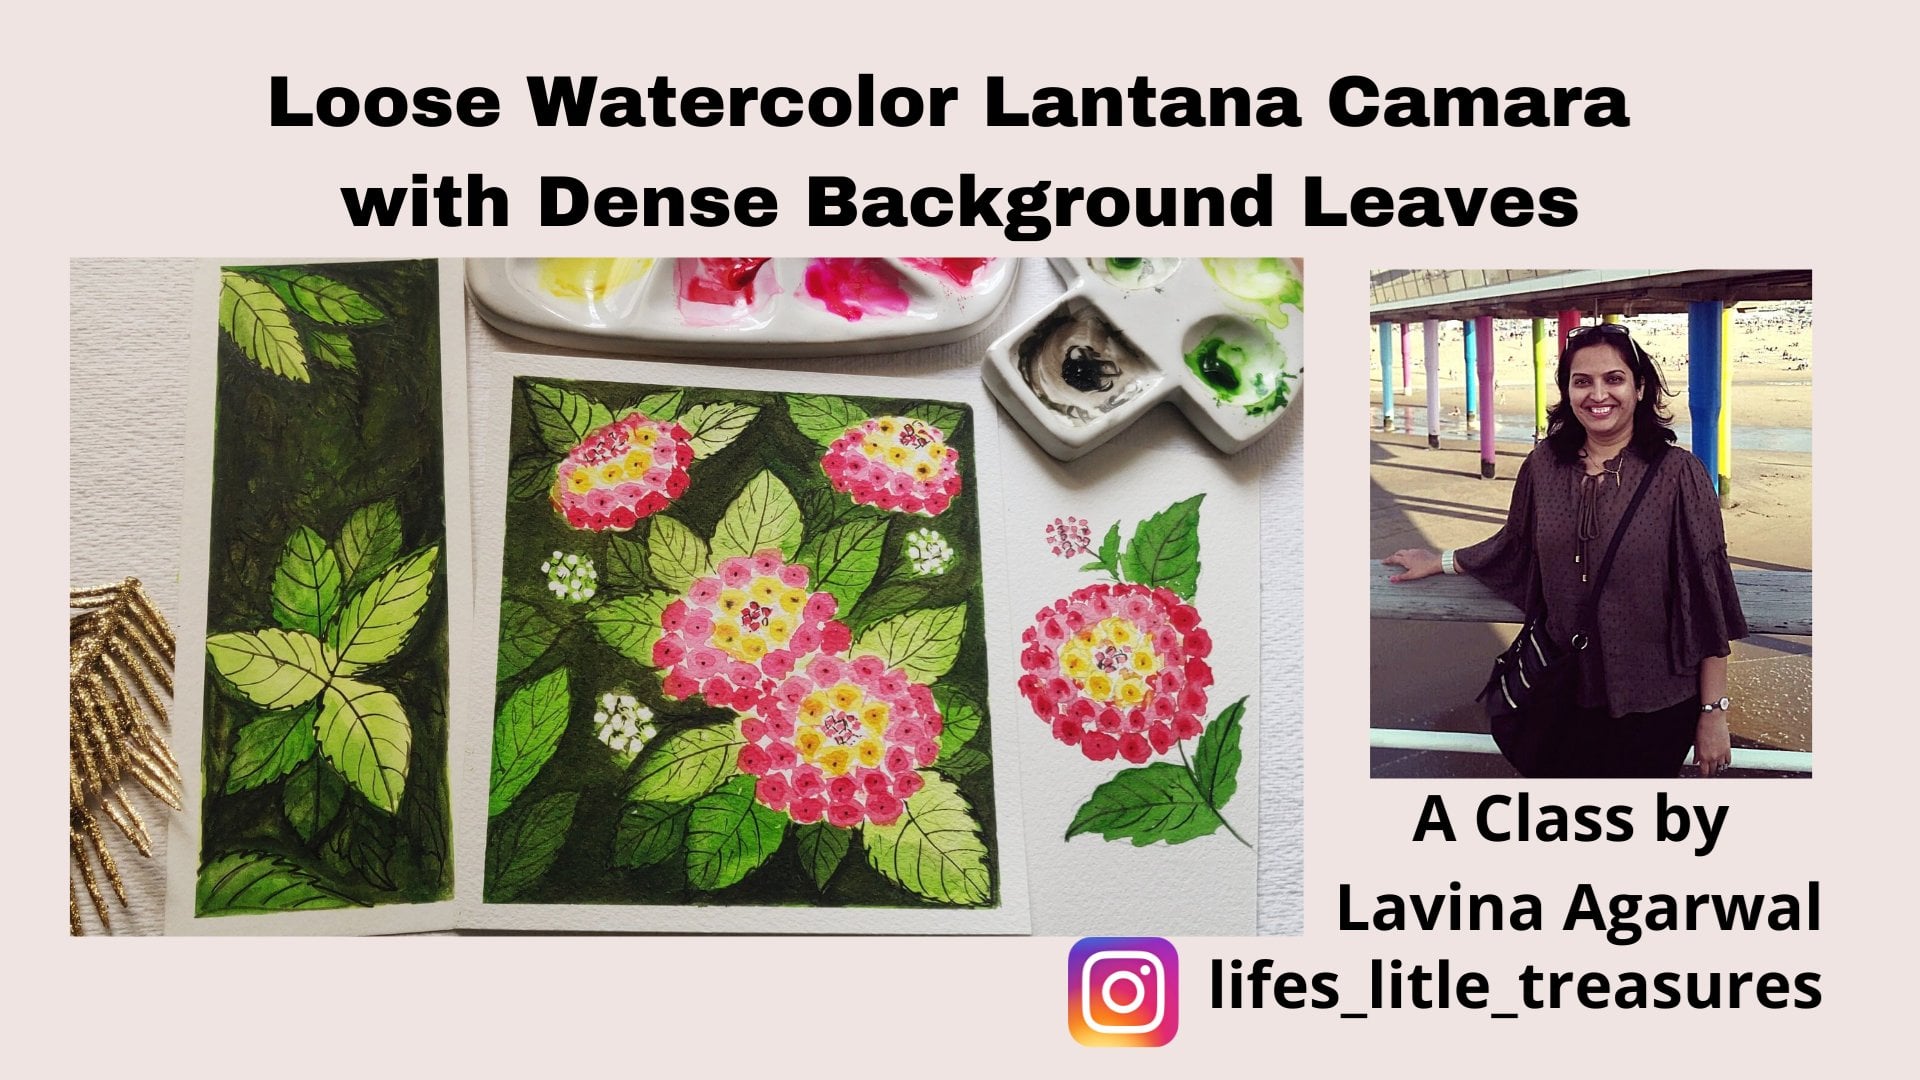
 Lavina Agarwal, Water Color Artist and Educator