Lets paint watercolor Wisteria tree in two styles | Lavina Agarwal | Skillshare

Playback Speed


1.0x


  • 0.5x
  • 0.75x
  • 1x (Normal)
  • 1.25x
  • 1.5x
  • 1.75x
  • 2x

Lets paint watercolor Wisteria tree in two styles

teacher avatar Lavina Agarwal, Water Color Artist and Educator

Watch this class and thousands more

Get unlimited access to every class
Taught by industry leaders & working professionals
Topics include illustration, design, photography, and more

Watch this class and thousands more

Get unlimited access to every class
Taught by industry leaders & working professionals
Topics include illustration, design, photography, and more

Lessons in This Class

    • 1.

      Introduction

      2:44

    • 2.

      Art Supplies

      1:36

    • 3.

      First Wisteria - part 1

      8:42

    • 4.

      First Wisteria - part 2

      3:06

    • 5.

      First Wisteria - part 3

      7:13

    • 6.

      First Wisteria - final touches

      1:48

    • 7.

      Second Wisteria

      13:35

    • 8.

      Conclusion

      1:41

  • --
  • Beginner level
  • Intermediate level
  • Advanced level
  • All levels

Community Generated

The level is determined by a majority opinion of students who have reviewed this class. The teacher's recommendation is shown until at least 5 student responses are collected.

143

Students

2

Projects

About This Class

About This Class

If you love nature, watercolor and wish to paint lovely trees, then this class is for you!

I love painting trees in watercolor and love to experiment with different colors and techniques for painting trees.

In this class you'll learn:

  • Art Supplies needed for the painting
  • Study of the tree structure and creating the sketch of the tree
  • Colors required for the class project.
  • Wet on Wet Technique that you can apply to any watercolor project! 

You’ll be creating:

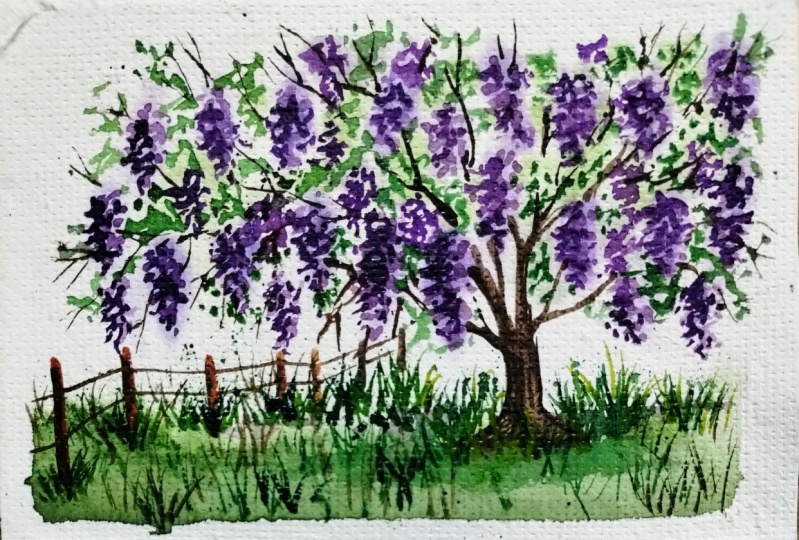
  • Two Wisteria trees in watercolor using the two techniques from this class.

This class is beginner friendly, so even if you’re new to watercolor, you will find the steps simple and you can create the class project with ease.

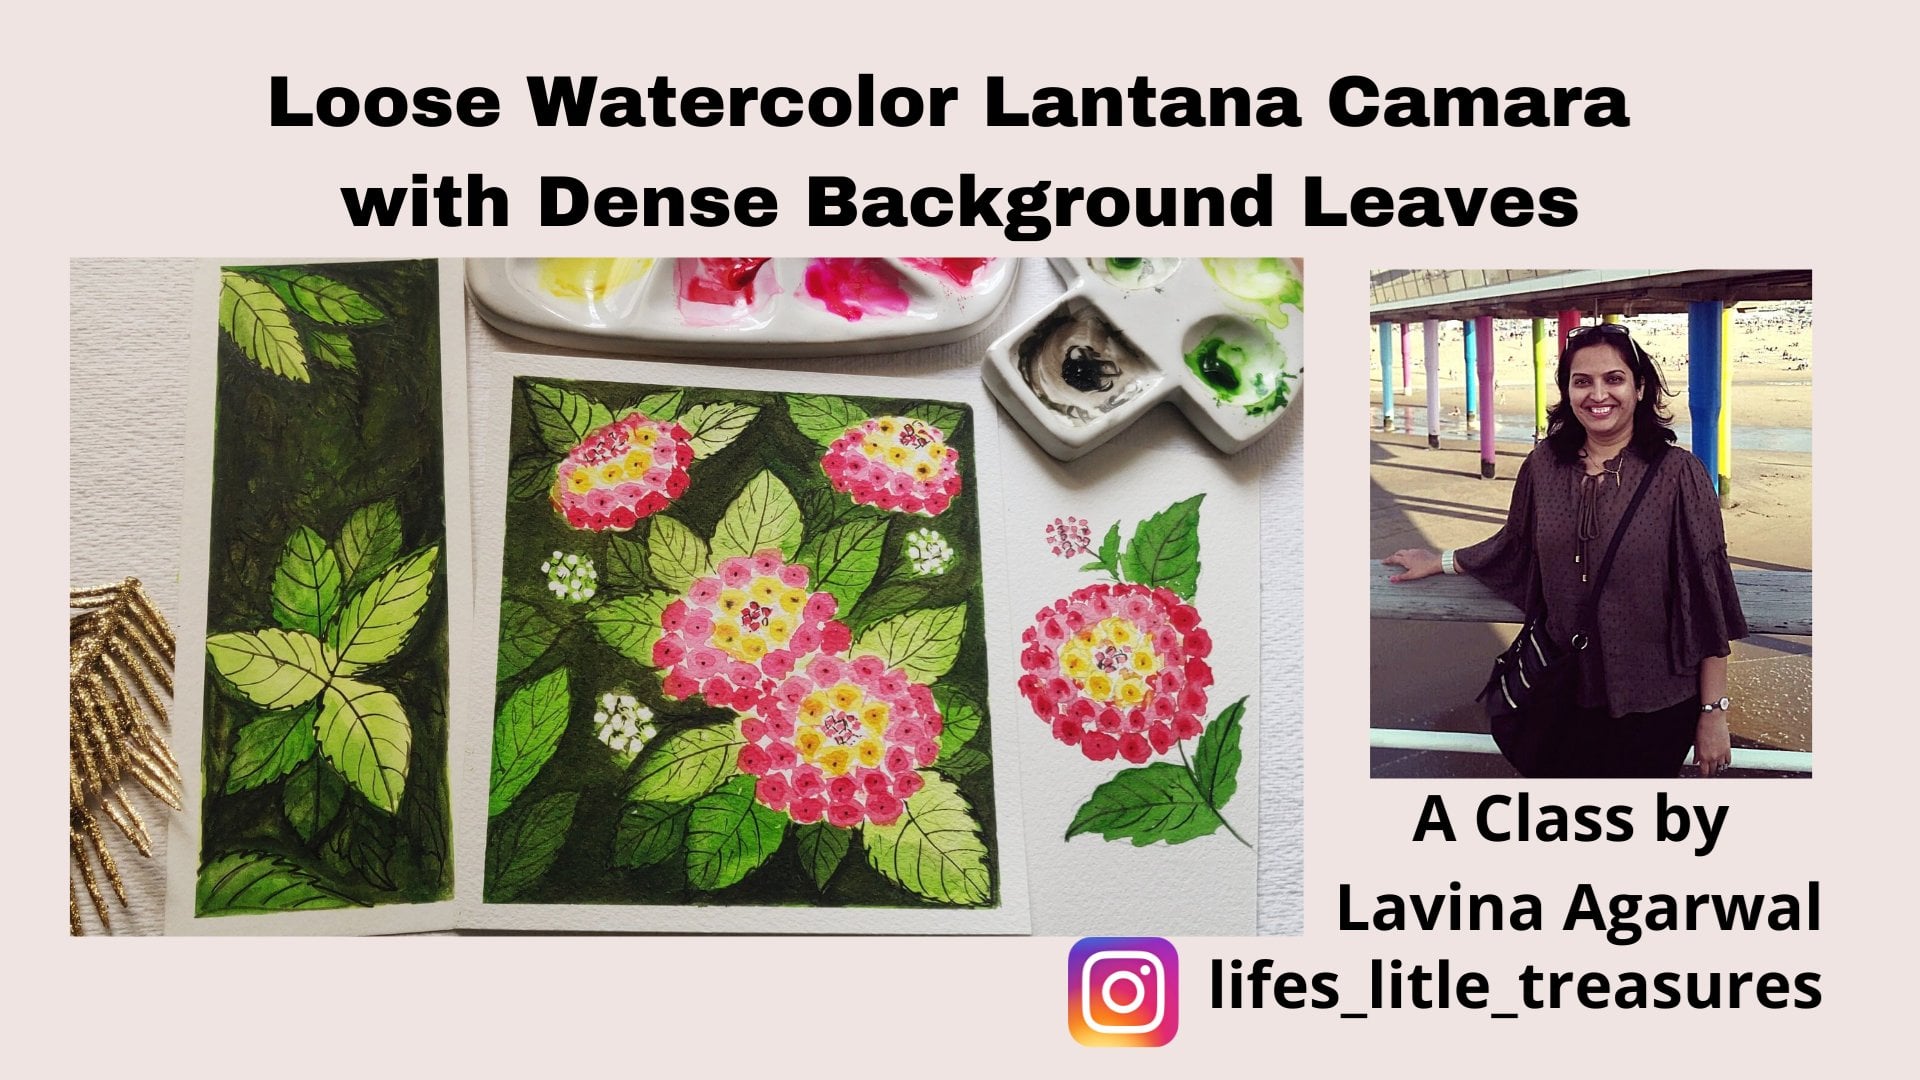
You can also find Lavina here:

Instagram: @lifes_litle_treasures 

https://www.instagram.com/invites/contact/?i=1az872vrvsnzl&utm_content=3r5ygtm

Youtube: https://www.youtube.com/channel/UCXh1cZdt7D3NXFXBhxSSosg

Background:

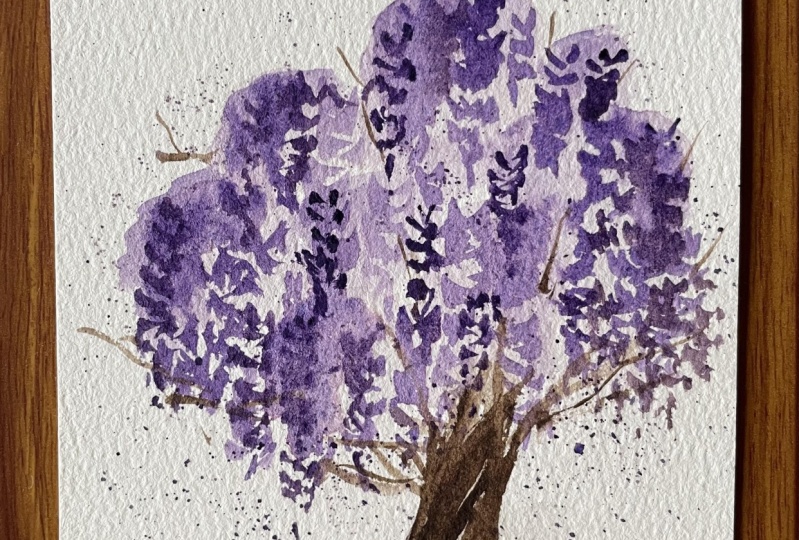
The Wisteria tree looks so pleasant and whimsical, bringing a smile on the face of anyone seeing it. The purple color is so soothing and fills the ground with a beautiful carpet of purple flowers.

I have always been mesmerized by the beauty of this tree. So thought of capturing its essence in my painting and sharing the complete process with you all :)

So let us create this gorgeous tree in this quick and fun class!  

Thanks for joining in :)

Lavina

Meet Your Teacher

Teacher Profile Image

Lavina Agarwal

Water Color Artist and Educator

Teacher

Hello Friends,


I am Lavina Agarwal, a watercolor artist from India. I go by the name @lifes_litle_treasures on Instagram. 

I am a software professional during the day, and passionate watercolorist in the evenings and weekends :)

See full profile

Level: All Levels

Class Ratings

Expectations Met?
    Exceeded!
  • 0%
  • Yes
  • 0%
  • Somewhat
  • 0%
  • Not really
  • 0%

Why Join Skillshare?

Take award-winning Skillshare Original Classes

Each class has short lessons, hands-on projects

Your membership supports Skillshare teachers

Learn From Anywhere

Take classes on the go with the Skillshare app. Stream or download to watch on the plane, the subway, or wherever you learn best.

Transcripts

1. Introduction: Have you been mesmerized by the pleasant pulpal trees by the roadside. These Wistia trees are so whimsical and mystical and yet so soothing and pleasing to the eyes. In this class, I will take you through a step-by-step process of creating these Vista area trees. In two ways. We will see all the colors that are required to create these class projects and also learn all the techniques that we will need. And finally, we will create these two lovely Westphalia trees as the class project. Hello friends. I'm loving it. I go around and artist based out of India. I love to explore different art forms like traditional Indian art forms and oil painting and accurately. But two years ago when I started watercolor, I just fell in love with this medium. Now, amazing transparency and amazing effects that we can get with watercolor or just mind-blowing. So I'm here to share my learnings with you through these different classes of mine, and just share the joy of creating. So thank you again for joining me. See you for uploading the class project. You can open the class in a browser. Here, you can see all the lessons. As you scroll down. You can see About section where you can see lots of information about the class and the project. Next is the Reviews tab, where you can share your reviews. I would love to hear your feedback on the class so that I can incorporate those things in the next classes. Next, you can participate in the discussions. And after that, you go to the Projects and Resources section. Here you will again find all the details and the material list. And you can find the resources like the sketch of the trees and the trees. You can click on the green Create Project button to upload your class project. Here you can select your class project image in the upload images. And then you can give a name to this image or the project. For example, I'm just writing my vista area. Then you can publish this so that it is visible in the class as students project. So see you in the class. 2. Art Supplies: Let us look at the art supplies that we will need. So here I have taken my Arches watercolor people, which is 300 GSM and a 100% cotton. And I have stuck it on this board using the masking tape. Next, we will need a pallet to mix the colors. So I'm going to use this ceramic palette here. You can use any palette that is available with you. Next, I will be using this big mop brush to wet the paper. You can even use a flat brush or a hockey brush to wet the paper. I will be using this Princeton size number six brush for creating the flavors and the tree. And also this thin liner brush or the rigger brush to give them my new details like creating the different branches. We will also need a pencil and an eraser to sketch the tree. I will also be using the spray bottle to wet our pins and also a jar of clean water for our painting. I will walk you through all the watercolors that we will need in the next section. That's it for this applies. See you in the next section. 3. First Wisteria - part 1: Here are some reference images for you to take inspiration from the Westphalia tree. Let us quickly sketch a simple tree which will depict our Listeria tree. So I'm making this trunk of the tree and creating long branches. I'm creating this outer edge very lightly. So it is just a rough indication for the overall structure of the tree that we are going to create. Now I'm adding a little fence. So this will give a beautiful direction to the painting. For the fence, make sure the lines that are near to the edge or bigger. And as we go for the inside towards the tree, the lines or smaller, I will erase some of the lines and make them lighter so that it is not visible through the watercolor paints. Now I'm taking my palette and we will prepare the color for the hysteria. So here I will take some Alizarin crimson. So this is the Alizarin crimson. And I will be taking some ultramarine blue and we will create a violet color. So you can take any glue that you have and you can mix it with the pinkish shade or a red shade to get this violet color. You can see it is such a pretty color. Now let us watch it and see how it looks on the paper. You can see we got such a pretty gorgeous violet color by mixing the blue and the crimson shades. You can experiment with the colors that you have and try to get different shades of violet or purple for using in the West Area tree. Next I will be using this imperial purple. This is from Daniel Smith. You can use any lavender or purple color that you have, or you can mix them and create your own pretty colors. For the green, we will be using olive green here. If you do not have olive green, you can mix a little red to your sap green and get this beautiful or the green color. Next we will require brown color. So I'm using sepia over here. You can use any or tea brown like raw umber or Van **** brown or bond tamper, CPR. So these colors will look good on the trunk of the tree. And also I will use a little burnt sienna for the fence. I'm also just watching the Alizarin crimson and ultramarine blue for your reference. Using these two colors we created the beautiful violet color. These are the colors that we will be using in both the projects where we will be painting the hysteria tree. So to start with our painting, I'm taking my mop brush to wet the surface of the paper. So you can use any flat brush or big brush and take plain water and apply it nicely on the entire surface of the paper. So this is the wet-on-wet technique of creating the hysteria tree nut. We're going to do. So. That is why we are wetting the paper entirely with water. And just wait for a few seconds so that the water is absorbed nicely in the paper. You can remove the excess water on your paper by collecting it on the brush and wiping it on the tissue paper so that you don't have any puddle of water. Now we will take a very diluted mix of imperial purple. So I'm adding a lot of water to this color and getting a very light shade. And I'm just dropping it around the outline that we have sketched. So this is to create the background effect for our Wistia, which looks like grapes hanging from the tree. We will add this purple color in the center portion as well. So this is a Wistia tree in full bloom, which is fully loaded with the gorgeous with stereo flavors. Now let us take some green. So I'm taking olive green. You can take sap green and mix it with little red to get this kind of green. And I'm just dropping small dots here and there on our wet surface. So since our paper is already wet, the leaves or the green color is spreading. And we're getting the beautiful backdrop for the leaves. I'm also adding some green to the ground. So this will indicate the grassy gland that we have. We will add more green and create more grass texture on the land. So I'm just creating little dots and patterns to create the ground. On to our first layer of green. I'm just adding some more green in this zigzag manner or in this dotted pattern to depict the grass. So this is the second layer of green that we are adding. And you can see it is already looking like beautiful grass. Now I will again take the light shade of imperial purple and add it to the ground to depict some of the fallen hysteria. So as our paper is still wet, you can see we're getting a beautiful hazy effect and we're not getting hard edges. So make sure your paper stays wet for a long time so that you're able to achieve this soft, hazy background effect. Now I'm taking some dark purple. So I'm picking the mixture of ultramarine blue and Alizarin crimson. And I'm going over to bunches of hysteria that we have created. And I will apply a little darker shade on these bunches. I'm just making little random grape like structures. So just create this dot dot pattern on all the tibia bunches that we had created earlier. Also adding field dotted patterns on the ground. So that's it for the first layer of our vista layer tree. Let us continue the painting in the next section. 4. First Wisteria - part 2: Welcome back. Now, let us take some sepia color and paint the trunk of the tree. So I'm taking some diluted sepia and tracing out the trunk with the paint. I'm also adding some branches on the top to depict the different small twigs and branches on the tree. Now I'm taking some imperial purple. So I'm taking a medium consistency of the paint. With this, I will add the similar dotted patterns on our earlier Listeria that we have painted. So this will give a beautiful color variation and it will give a fuller look to the tree. So you can see our tree has started taking shape and it is looking so beautiful and full, full of life. So keep on adding these dotted gray patterns with the two different colors that we have mixed. You can even experiment with different shades of purple and green. These hanging with stereo. Hope you're having fun creating this gorgeous yet simple tree. See you in the next section. 5. First Wisteria - part 3: Now let us take some olive green. So I'm taking a little thicker consistency of olive green here. And we will paint the leaves. So we will paint these small leaves on the earlier green impressions that we had created in the wet-on-wet technique. I'm just gently tapping the brush to create these small leaves. Now let us go back to the trunk. So I'm digging a little techniques of the brown color and working on the trunk. So I'm just giving the outline. Now I will create some circular pattern. So these are small ovals, are concentric circles to depict the boroughs in the tree. And also I'm adding some texture on the trunk to depict the age of the tree and different textures that it has. Adding few more branches and twigs to the tree. Now I will take some olive green and add little grassy effect. So I'm creating some spikes of grass and some texture on the ground. So I'm not taking too much paint on the brush. This is called a dry brush technique. So I'm just trying to create the impression of the grass with my brush and with very less paint. Now I'm taking some burnt sienna and creating the fence. The fence we have to keep in mind that the lines which are near to the near to the bottom of the page, they are longer. And as we move towards the tree, the lines become shorter. So this gives an impression of perspective. Now I have switched to the darker brown and I'm going over the fence again. This will create a beautiful texture and we will get the dark and the light shade on the fence. We will also draw the small broken horizontal line. So this will depict the small twigs or the small chord that is tied to the fence. Now, going back to the trunk, I will again take the dark brown color, consistency of the paint and reinforce the burrow that we have created and some of the textures that we have created on the trunk. So you can see we're getting a beautiful dark and light effect on the trunk. So just adding a few more dark branches to the tree. Now I'm taking some olive green and adding the grassy effect. So I have a good pointed brush. So I'm adding the grassy effect with this pointed brush so you can use a liner brush or any brush with a pointed tip. Now I'm taking some more imperial purple. So I'm taking the thick consistency of the paint and adding few highlights to the Westphalia. I'm mixing a little more pain now and diluting it so that we can create these plateaus. So I'm loading my brush nicely with paint and I'm tapping it on another brush. So this is creating a beautiful splatter and we're getting a beautiful dreamy look to our vista area. I'm taking some green color on the brush and tapping it on the grass to give the beautiful grassy effect. Also adding some more diluted purple color to the ground to depict the fallen Wistia, which creates a beautiful carpet on the ground. And I love typing again. And it feels so happy and so childish to just let your mind blues and continue tapping and creating these beautiful textures on the painting. So enjoy yourself when you're painting and have fun. See you in the next section where we complete this painting. 6. First Wisteria - final touches: Welcome back to the last section. So just as finishing touches, I will take some imperial purple and add certain purple highlights to our hysteria. So this is completely optional. You can decide when you want to stop painting and when you feel you're happy with the creation. So in watercolor or in any other art form, especially watercolor, the biggest challenge that many people face is to decide when to stop. And as watercolor is a very transparent medium, the painting looks beautiful when it is not overdone. It is very important to be able to judge when you are done with your work and when you should stop overdoing it. So adding a few highlights to the ground as well. We are done with the painting. I really liked the look of this pretty hysteria tree and beautiful fuzzy effect that we're getting in the background and the direction that this fence is given to the eyes. Now, let's tape our painting and we can observe the beauty. So I hope you really enjoyed painting this along with me. I would love to see your creations. 7. Second Wisteria : Hello friends. So now let us sketch our Listeria tree with only two colors. So this will have mostly only the purple colors and the brown. And it will be a beautiful whimsical hysteria. So here I'm sketching this trunk of the tree. So I'm making it a little bang. Now I'm tracing out the outline of the tree. So this is roughly the overall shape of our posterior tree. Now within this, I'm sketching some oval shapes. So these will represent the bundle of Wistia flowers, which is like bunches hanging from the tree. We will also trace some hanging with tibia. So this will give us an idea of how the Listeria is going to appear in the overall tree. Now with the help of an eraser, I will lighten the pencil marks so that it is not visible from the paint. Now I'm picking some imperial purple. So I'm taking a very diluted imperial popular right now to create our base layer. With this diluted paint, we will lightly paint the drooping mysterious. So I'm covering all the ovals that we had traced with this light paint and abuse like these other bunches of hysteria. Now I'm mixing some more imperial purple. We have a slightly darker tone of the imperial purple. And with this we will cover the right side of the bunches. So we are assuming that the light is coming from the left side. So that is why the right portion is little darker. So you can see we're already getting such pretty shades with just one single color and wearing the tone of this color. Now, I'm taking a very, very diluted mix of this color and spreading it on the background. So this will give a beautiful hazy effect to the tree and it will create some misty purple shade. Now we will paint the trunk with the brown color. So you can pick any or tea brown colors like Van **** brown or CPR, our bond number. So those will look good on the trunk. And here we're taking a very diluted mix of the brown color for the trunk because this is the first layer. I'm also adding this brown color to the ground. Now we will take our mix of Alizarin crimson and ultramarine blue. So this is the purple or violet shade that we created with mixing Alizarin crimson and ultramarine blue. You can experiment with different blues and pinks that you have and get different valid sheets. So with this, I am creating small dot dot patterns to depict the hanging with stereo. I'm making small group like patterns by repeating this dot dots and making the bunches out of it. So this is a round brush, is very useful to make these small dotted patterns. If we have a pointed brush, then we will not get these dots. This background which is beneath the tree, is not looking that good. So I'm just wetting the paper on this portion. And I will pick the colors using the kitchen towel. So we get very light color over there and not very prominent one. I'm using this kitchen towel and picking up the color. Now again, I'm taking the brown color. This time, I'm taking a little more concentrated brown and giving the outline to the trunk again. I'm also creating some, some branches in the tree. I'm also applying this light coat of this dark brown color on the trunk. So this is called glazing. And it gives a very beautiful effect. Like we have the background color and then we have the other color on top of it. So the background color is visible from beneath. It gives a very beautiful effect. Also, we can create some more extra, additional shoots on the trunk. And now I will use the same concentrated brown color on the ground. We can create a texture or a pattern on the ground by using a combination of dark and light shades of the same color. Now I am again taking the dark brown color and creating certain patterns on the tree. I will also make the circular pattern that is very common on the trees. So you can create these different kinds of patterns by using the dark shade the tree. Now picking up the imperial purple and creating the dotted patterns of the hysteria with this color. We want our HDRI to be lush and full of the gorgeous Westphalia. So that is why we are creating these different layers and wearing the colors a little so that we get a full complete tree which has shadows and it is full of the blossom. So painting these with the is like a meditation. You can just relax and bend them and enjoy, or maybe a cup of coffee or tea. So you can see by reading the shades are the tonal value of the colors. We're getting such pretty bunches of Listeria. If you use the same color and only single tone, it will look very monotonous and boring. So that is why we should really the tones and colors to get a very good mix of colors. So I'm adding a little darker shades now. Also adding some purple to the ground to indicate the fallen with stereo. This purple is looking bit darker. So I will pick the color using the kitchen towel to make it light and hazy. Now we will get give some more texture to our trunk. And I'm picking the darkest shade of brown, so it is the same brown. But we are taking more concentrated value now and creating this texture on the trunk. So you can see now the trunk is looking beautifully twisted and it is giving a whimsical feel to the tree. I'm also picking some imperial purple, my brush and splattering it by using another brush. So this will create a beautiful pattern on the tree and it will indicate the Listeria that is freely flowing Hawaii. I'm adding this purple splatter all over the tree and also adding some more dark shades to add bunches. We're almost done with our Listeria. Let us give the finishing touches in the next section. See you there. 8. Conclusion: Welcome back. So now we will give the final touches to our hysteria. So I'm taking this white gel pen here. If you do not have a white gel pen, you can use white gouache or white watercolor. And I'm just creating little highlights on our Listeria. This is optional. If you are happy with the tree as it is, you can avoid this step. You can also add some brown color if you do not want the white too much. So just giving little finishing touches to the tree. You see this was such a simple tree and yet it looks so gorgeous. So you can follow these simple steps and create your own masterpiece. And I cannot wait to see your creations. So do upload your creations in the project resources section. And I will be so happy to share your creations with my other students. Now, let us do the fun part of removing the masking tape and revealing the painting. I hope you enjoyed creating these beautiful with stereo trees as much as I enjoy teaching them. Thank you for joining me in this class. Happy creating.