Transcripts
1. Welcome: Hi friends, and welcome
back to my studio. Today, I'm very excited to share with you my
signature technique. It's transparent technique and
it's very, very beautiful. It looks a little bit
complex and it will require some patience because we will
paint from layer to layer. But on the other hand, this painting, this
multilayered painting, will give you time, will give you much more
room for corrections. That's why I'm pretty sure. Even if you are very
beginner in watercolor, you will manage it. And if you're advanced and you
are looking for something, you, for something fresh, you will find it very interesting and very
captivating and very, very relaxing
painting technique. I'm very, very much looking
forward to paint in with you. Let's start.
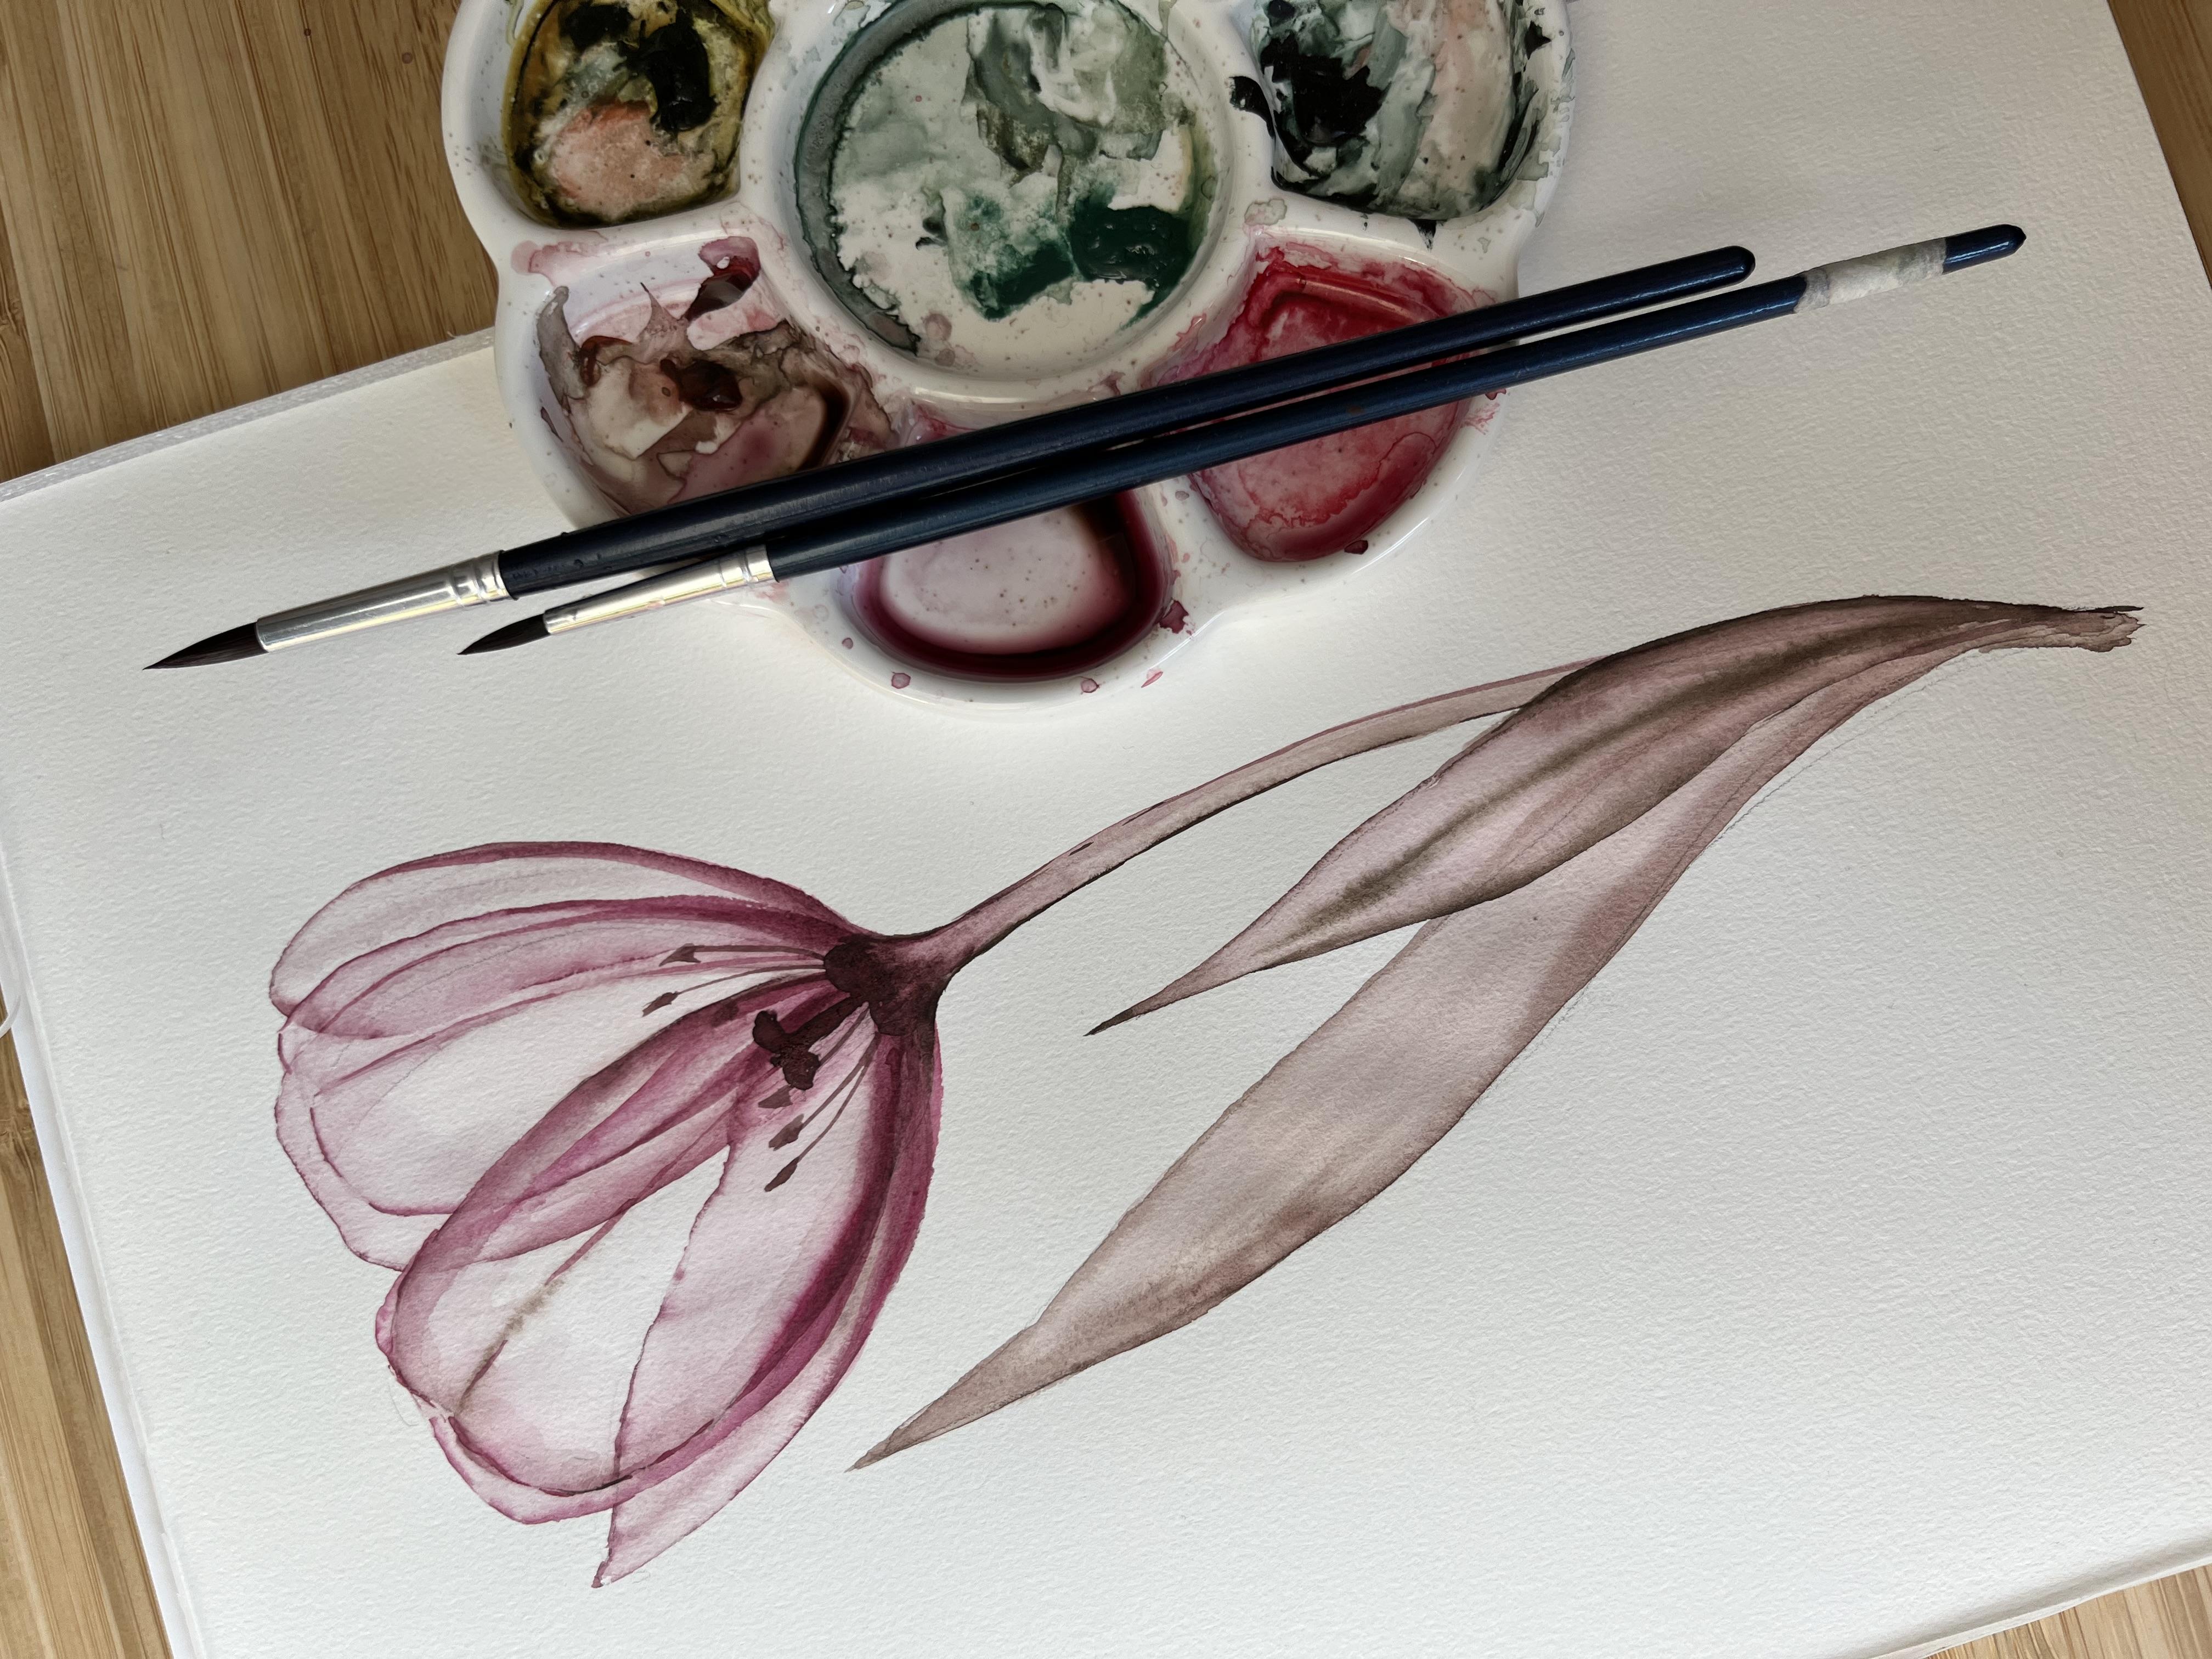
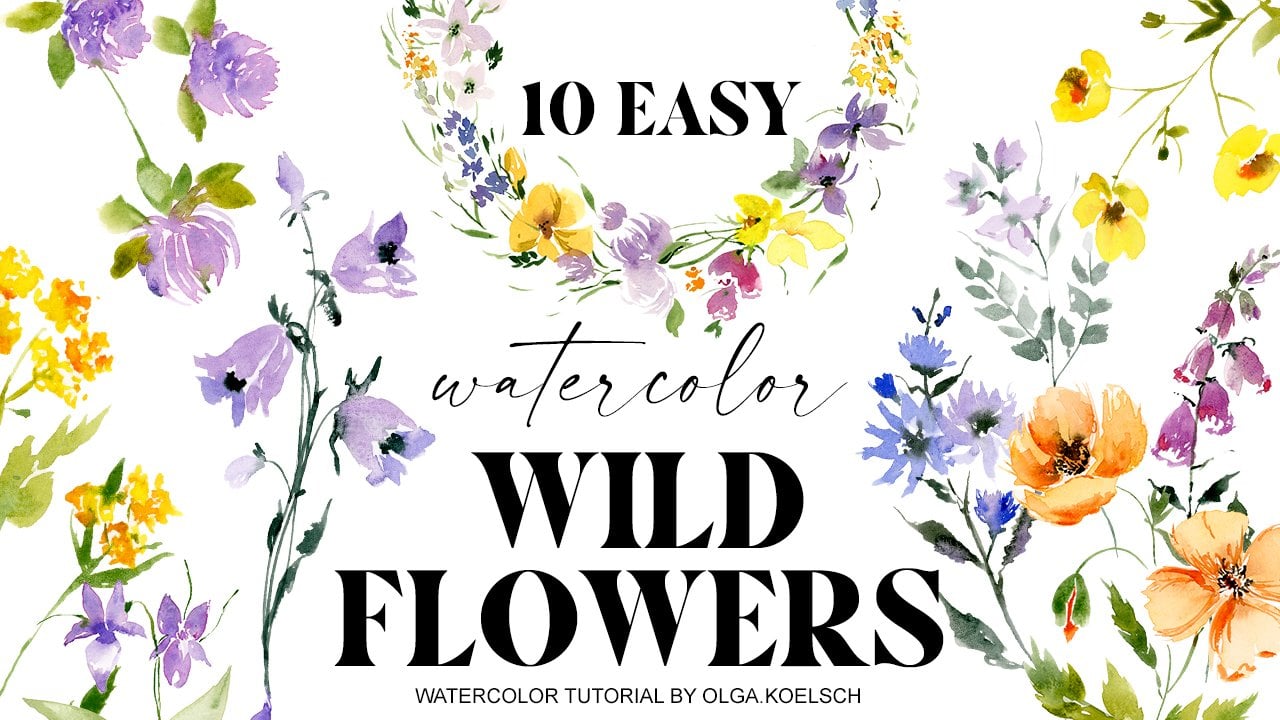
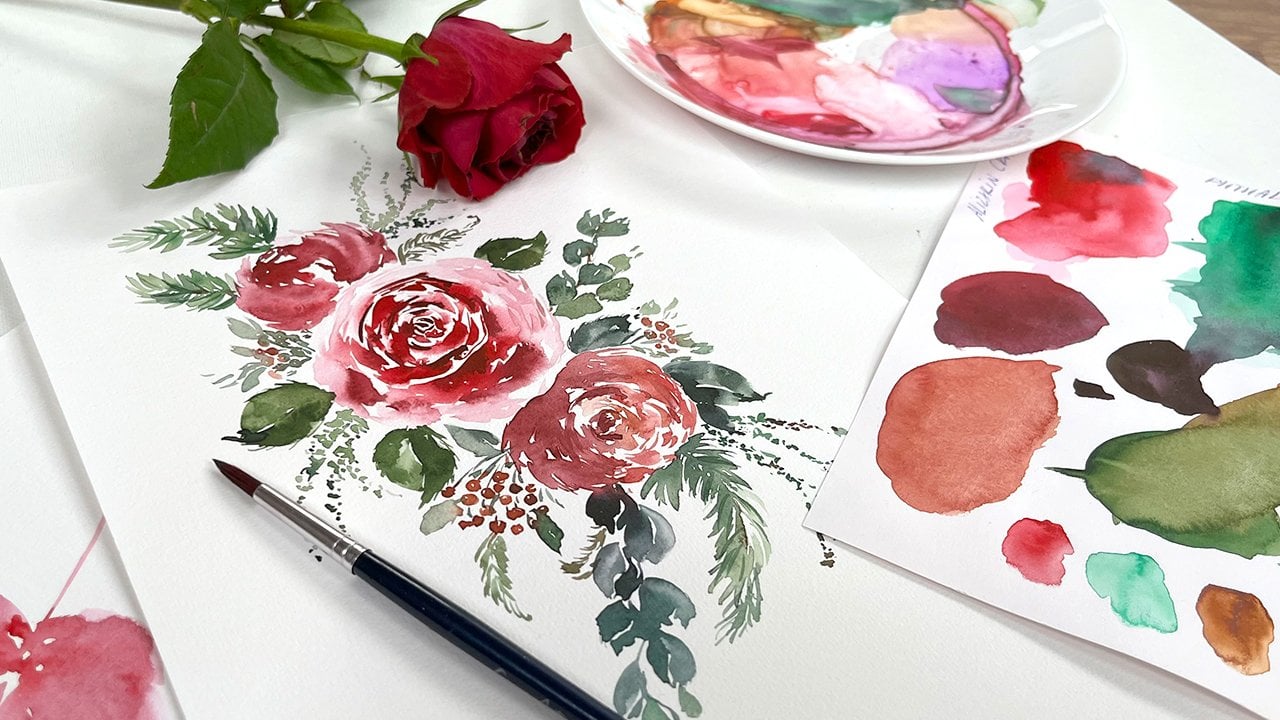
2. Colour Mixing: I will show you how to prepare colors for these
transparent technique. First, we create a bold mix. I suggest to take
quinacridone rose, very bright pink
as you could see. A little bit softer
in it with one ****. It's very dark brown color. When we stopped in it, we could get these nice
Burgundy, burgundy shade. And that's how we
get our bold mix. But for transparent technique, we need to create
two types of mixes, one bold and one very diluted. You could dilute liquid. Your mix with the
help of dispenser. Just keep adding water with
the help of your brush, like this, like squeezing
the water into the palette. For this technique, of course, it's very recommended to have
a pallet with deep space. And let's see what we got. That's our transparent. I would recommend you to have
it even more transparent. You should get that feeling
that you're painting with water or almost with
water more than with color. So it should be very, very diluted maybe about this. And you will keep these bold color in the separate, into
separate compartment. And for the greenery, I will use just
the same Van **** was small hint of
quinacridone roles. So same, same colors but
different proportions. They will give us two
different shades and actually four different shades because frost will
be very diluted. And second will be very bold. And I will be referring to these mixes during our painting.
3. Painting Technique: For painting
transparent technique, I would strongly recommend
you to get used to paint simultaneously with
two or three brushes. And adults show the
main principle. I always start with light mix. It's a light mix of
quinacridone, rose, and one **** or
any deeper brown. And I paint, let's say a petal. I glaze the petal area
with very diluted color. I distribute everything evenly and I try to avoid
the big models. Let's say that's
our future petal. Then I switch to another brush. Usually I prefer
thinner brush for that. And with the tip of the brush, I go along the edge of the
petal with the bold mix. This is the bold mix. That how it looks. With a bowl mix. I go along the edges and that's
how I add more contrast. If I need to create
middle, why e.g. tulips, they have very certain, very evident in the middle while I go with the same bold
color right into the mix. Now I switch to the
color or you could just put the brush or you
could just wash it out. And I needed dump and clean. And with a clean and damp brush, I go long these bright
edges and often that just like this. Why? Try to clean, to keep your
brush really clean and down. Always use a paper towel. And that's how you
could correct at some details while the
paper is still wet. Let's repeat once again, the main principles of
painting transparent flowers. First, you glaze with
very diluted color, an area e.g. of the leaf. Then you switch to a board, very bold mix, mix. And with the tip of the brush, you go along the edges. Sometimes you could apply a
little bit more pressure, a little bit less pressure
for the variety of the line. Then you clean your
brush with the help of a paper towel and
dump and clean brush, you go along the same route, same road, and
soft on the edges.
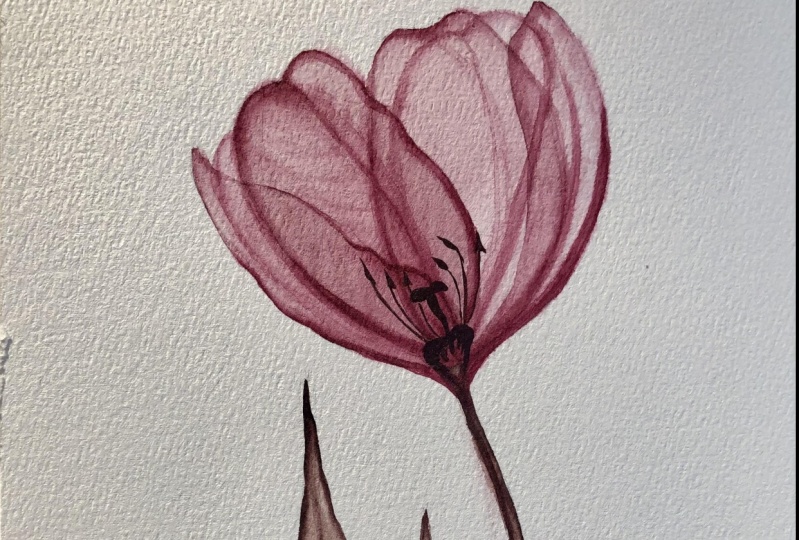
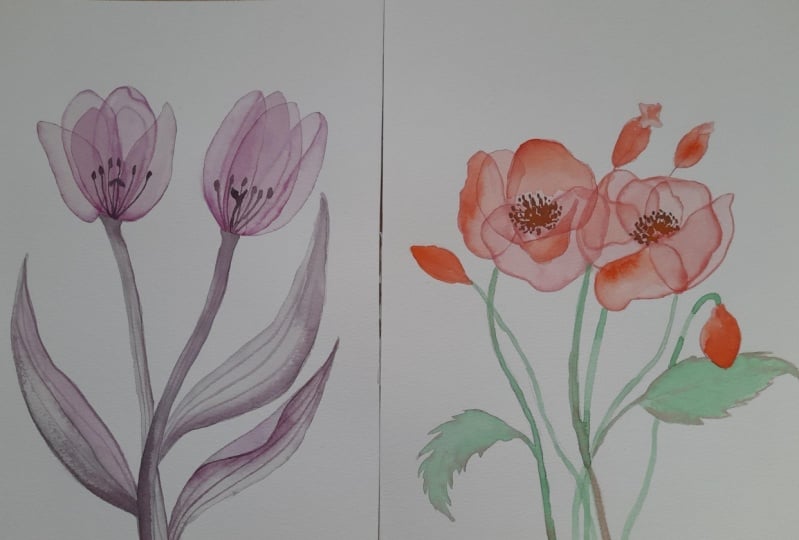
4. Drawing: For drawing a truly
bought place, the main focal point, it will be the point where
bought attached to its stem. Just find a nice place. I would recommend you to stick to one-third rule
about this area. And from this area, you map out the
outlines or for the tulip and paint a front petal. It's some oval shape. Then you paid side petal, It's like half of all. Well, it's important
that all the petals, they come to one central point. And then you paint
another side petal. You could add some variety
to the opening of the board. Then comes the trick, because we have to paint the petals which are on
the backside of the board. And usually in our normal life, when we look at the
picture, the real flower, we see just the top
of these petals. But for the
transparent technique, we proceed and draw the
outlines as we could see it, as we could see through the BOD. And if you think how can
I paid what I can see? You just stick to the shape of the front petal because front petal you could
really see well, you could investigate the shape. Just paint in the same style. All the rest of the petals
which you can't see. It's nice to start painting
in this technique with flowers with small amount
of petals like tulips, e.g. because you could still fall. And the fifth petal. It's a lot about
imaginary paint, imaginary details
which you can see. Now let's put our bot on a stem. Always nice to add
some curve Plus tab and add some
thickness to this term. And some leaves. Leaves will also paint and
transparent technique, but without big
attention to details. So we just map it out. And we will come back later. There are of course, inside part of the tulip, which we also can see
in our real life, that's the PESTEL and stamens. Usually, I do not
like to draw them beforehand because it will
distract your attention. Distract your attention. Problem of painting. Painting petals. But right now, I will just show you how
it will be arranged. You see, once I start
to add details on this, state, it getting too complex. So I would like you to stop
where we stopped before. Just painting petals. That's what we will need on
our first stage of painting.
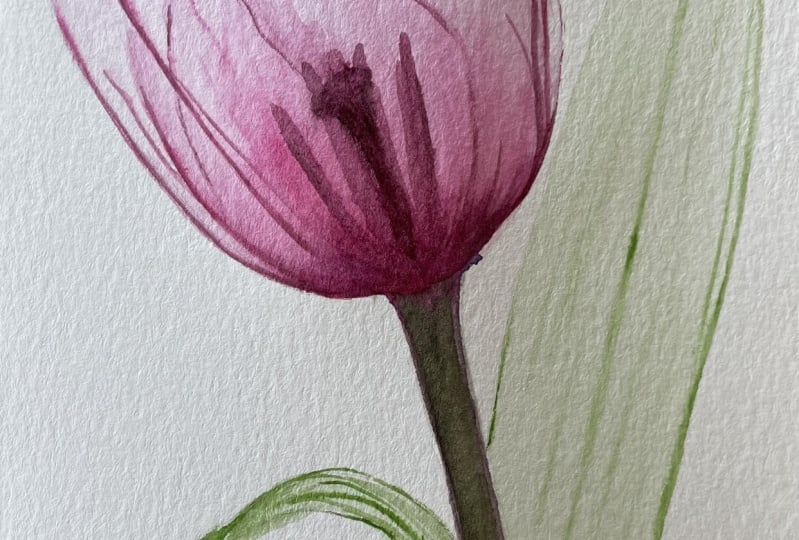
5. First Petal: Transparent flowers, you will
need a very diluted color. And I advise you to prepare
two brushes, e.g. a. Bigger brush for that pale parts and the fine brush
for the accents, it will make the process easier. So first I take very diluted color and
start with the first petal. Doesn't matter from
which you start. I like to start something a little bit of
side of the prompt. I just cover the petal with our very light color. Here I use a mixture
of quinacridone, rose, and one ****. We try to paint it monochrome so you could basically you could
take anything you'd like. And now with the fine brush, at the same moment, I go very carefully
along the edges. Just to move the edges. Sometimes it intercepts. And colors are mixing. And now I take my other brush. And the color here on this side. And I'm going to
make some accents here on the top of the petal, where the main line
of the Tulip comes. Again very carefully. I go I go along all the
bedroom right to the bottom. And approximately
from the petal, I press on the belly
of the brush to make lines darker color. I try to keep the darker part
in the bottom of the petal. And I still have something
left on the tip of the brush. And now with very
beginning, I laid by. And when it is too dry, I tried to sound. Otherwise. H goes to 0. The main fine. I do not pay much that much attention to it. We will be back here later. So let's say one petal is ready.
6. More Petals: It's important to
leave each petal dry. So for now, I will take
and paint the petal which does not intersect
with the lady one. We need much more than
I could call them. Almost Water Street View. I tried to keep them
middle of the battle line. With the other brush, with the tip of the brush. I go along the edge. I like when watercolor
distributes by itself. So I do not wait until
the petal is dry. We could try this
the other time. It will give us a very
different feeling. And on this side,
approximately from the middle, I press much more
on the belly of the brush to make the lines with the tip of the brush slightly to show the direction
of the main buying. Approximately here. This is done. We wait
until it's all dry. Petals are dry. I'm going to paint the petals. Very diluted color. Now I very carefully distributed white and Bob on
the other petals. I try not to press too
much on the faithful, not to destroy the
previous layer. This is enough. We will add all the exons on the top
being the same thing. I go. Sometimes I try to intersect
with the wet part. Sometimes a little bit nearby. Small in the Baltimore. Make it very flying. With dry, clean brush. I distribute the colors. So to avoid the dotted line filling some color on
the tip of the brush. To wait a little bit. All take on more bold. And maybe now you are
already could see these transparency feeling
centrally to the left side of this petal. Bit more. To make these, I just go again, a loan them. Petal watercolors
mixed by itself. I just help with dry and
clean. This petal now. Very, very diluted
and very careful. Here will be an
interception. Carefully. Like when I was a
little bit of overlap. Makes the painting more
artistically interesting. I like to hold the pay for, so it's convenient for me to paint and I will
start from the bottom, pressing on the roof line. And then at the
end of the battle at the top of the petal, I make very fine lines. I'm chomping with the brushes. You see it's very handy to have two brushes in book
instead of one. Saves you time,
which is precious. Protocol, to grab
every time pigment on it and just distribute. It's also nice to
distribute the collar bone, the wines alone, the place
where whites could grow. And in this battle, the main, while your fault here is to
see it because it is thin and small points this direction. Now again, we need. To dry completely. Now we have to paint two petals, which are on the
backside of our tulip. Just with the tip of the
brush very carefully, I draw the place for them. I do not cover this time. I do not cover all the Battle of the place
for petal with water. Just I watering and
little bit area, little bit around the edges. With my second brush. I can go alone. These watering part along
the edges of the petal. With clear, almost dry brush. I distribute colors and I smooth little bit. But the main purpose
is to smooth these and precise line a little bit to make it more
water Coleridge, tender. And the why, of course, we could paint wines and
details after we've done. But I like when we paid during the process than the
paper is still a bit wet. It looks more natural, more whimsical, more tender. And then they have a petal. Again, same thing. This time we do not
cover all the area. I can see how it will
look nicer because before I find a place here, but now I think this battle would be really nice
if it intersects here. Keep it here. In watering, just the area around. I try to keep it
more translucent. Like the shape. I select the shape. And our second brush
comes into the play. Seeker line in the bottom. Because the petals are
thicker on the water move to take any petal flower. Notice. They're very tender
on the top and very, very, very gentle and very, very thick on the bottom
and we want to shop. So now I would like to wait until this part
is dry to finalize, to add some accents here, but it's better to wait. So now I'm moving to the stem.
7. Leaves: For the stem, I
just take one die. One **** mixed
with Quinacridone, Rose, make the first layer
medium transparent. I would say. Just nice to the stem. Changing up. The second brush. I'm making, excellence. I go alone then this term. And this time the darker it is, the better prof to trying to do it too long. Now. Clean and almost try Prof thing. The trunk of the color. A little bit to
dry. That's okay. Let's you see, once you remove, it starts to shine. And that's the feeling we would like to get the
paint transparent. We'll all be back to this later. Now. We just paint
these two leaves. A treat. I think I will take
the bigger brush. I've got a squirrel brush
and bit weird because it one of my kids
lifted the chore. You will never supposed to do. Very diluted color. Then we fade one by one long fifth toe
and other petal when it dries
properly. And so on. And so In the patient where
almost there, almost there. Again, we darker
along the column. The press at the end. And dry and clean brush, which is Tribute, colors
and not only distributed, distributed IID
von the main wise, which makes it looks
very natural for me. So I turn them the paper and I don't go along this
edge carefully, carefully distribute to come up
some lines and accents.
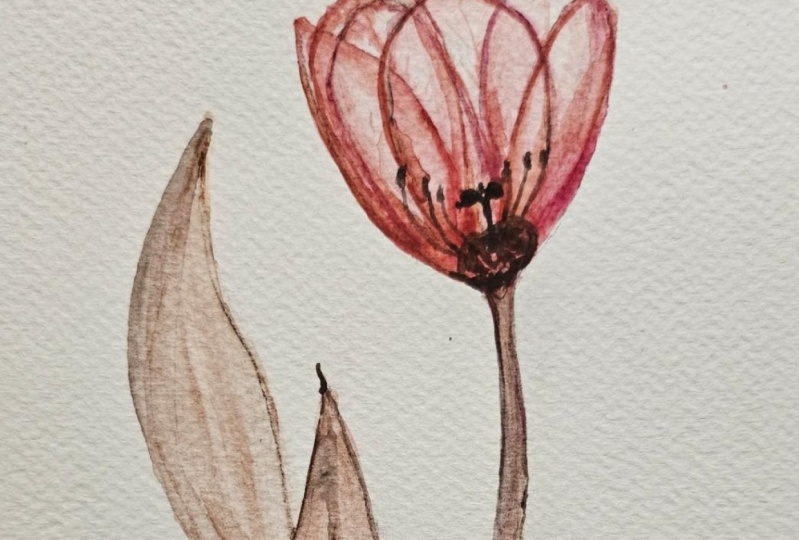
8. Details: A typical tulips pesto. I just take very bold mixture of quinacridone, rose and fungi. Mostly want to be on their side. And if you doubt how best to looks like just to google some tulips,
botanical illustrations. And they usually they have very precise pictures of
what's inside the classrooms. This part is not transparent and that's
why I wan't you to very bold column
raise some students. Very most bolt you could get two pairs. Tenants. We could solve it. Ready. So now we
have the middle of the flower and we're
back to sleep. Procedure. Cool. Let's distribute. That's, that's really enough. With leaves. We do
not want them to be the main accent of the painting. Because the flower, just tiny, fine, tiny final touches, e.g. these petals seems
to be a bit lost. I will go again, just surround. And now it's back again. Clean brush. Brush and distributed. The color, the color
from trinkets, smooth, distributed. Here. Now you see all our petals are nicely
separated from each other. And they show the structure
of the flower from the side. The main binds on, just on the front. Petals. Normally to do it
for all the petals. Would like to go one
more time and norm then bottom to make to give
it more weight. Nice. And also it brings a nice
contrast, are very light, tender on the top and
be strong the bottom. This is how I want to live.
9. Final Thoughts: Thank you so much for joining this class for painting and
beautiful to live with me. I'm looking forward
for your feedback. How did you like this technique? Which flower in this technique you would like to buy next? And there could be
so many more nice, interesting tutorials
devoted to this technique. See you next time. Bye-bye.
10. Join my Membership!: Hi friends, I'm
going to be killed. And I welcome you to
joy, to my membership. I know that we all somehow
at different stages of our painting skills
and that's fine because I split my
membership classes, my membership offers
into sudden bundles. And you could start
either from the very, very basic steps and then short-time get to another step
and then to another step. And as my favorite thing, we could paint together complex botanical illustrations or loose floral compositions. It, somehow, it takes time to realize what you're more into, either into loose painting or
some more precise painting, it's okay to give
yourself a try. And another thing I
would like to stress out that most of my classes, you could stop at
any moment, e.g. when a baby cries or
dog needs to go out. So really at any
moment and heavy, just 15 min daily practice. Good. Bring you into really nice progress with
watercolor painting, withdrawal away,
anything basically. So I invite you to
try out free classes, to try out churn
membership, e.g. for a month and feel how
how does it feel here. So I hope you will like
it and we could make, we could create a
really nice together. I hope I see you there. Bye bye.
 Olga Koelsch, Watercolor artist and Pattern Designer