Transcripts
1. Hop on the Voyage!: Watercolors see, escapes are a beautiful and challenging
subject for artists. They offer a wide range
of colors, textures, and moods, depending on the location and the
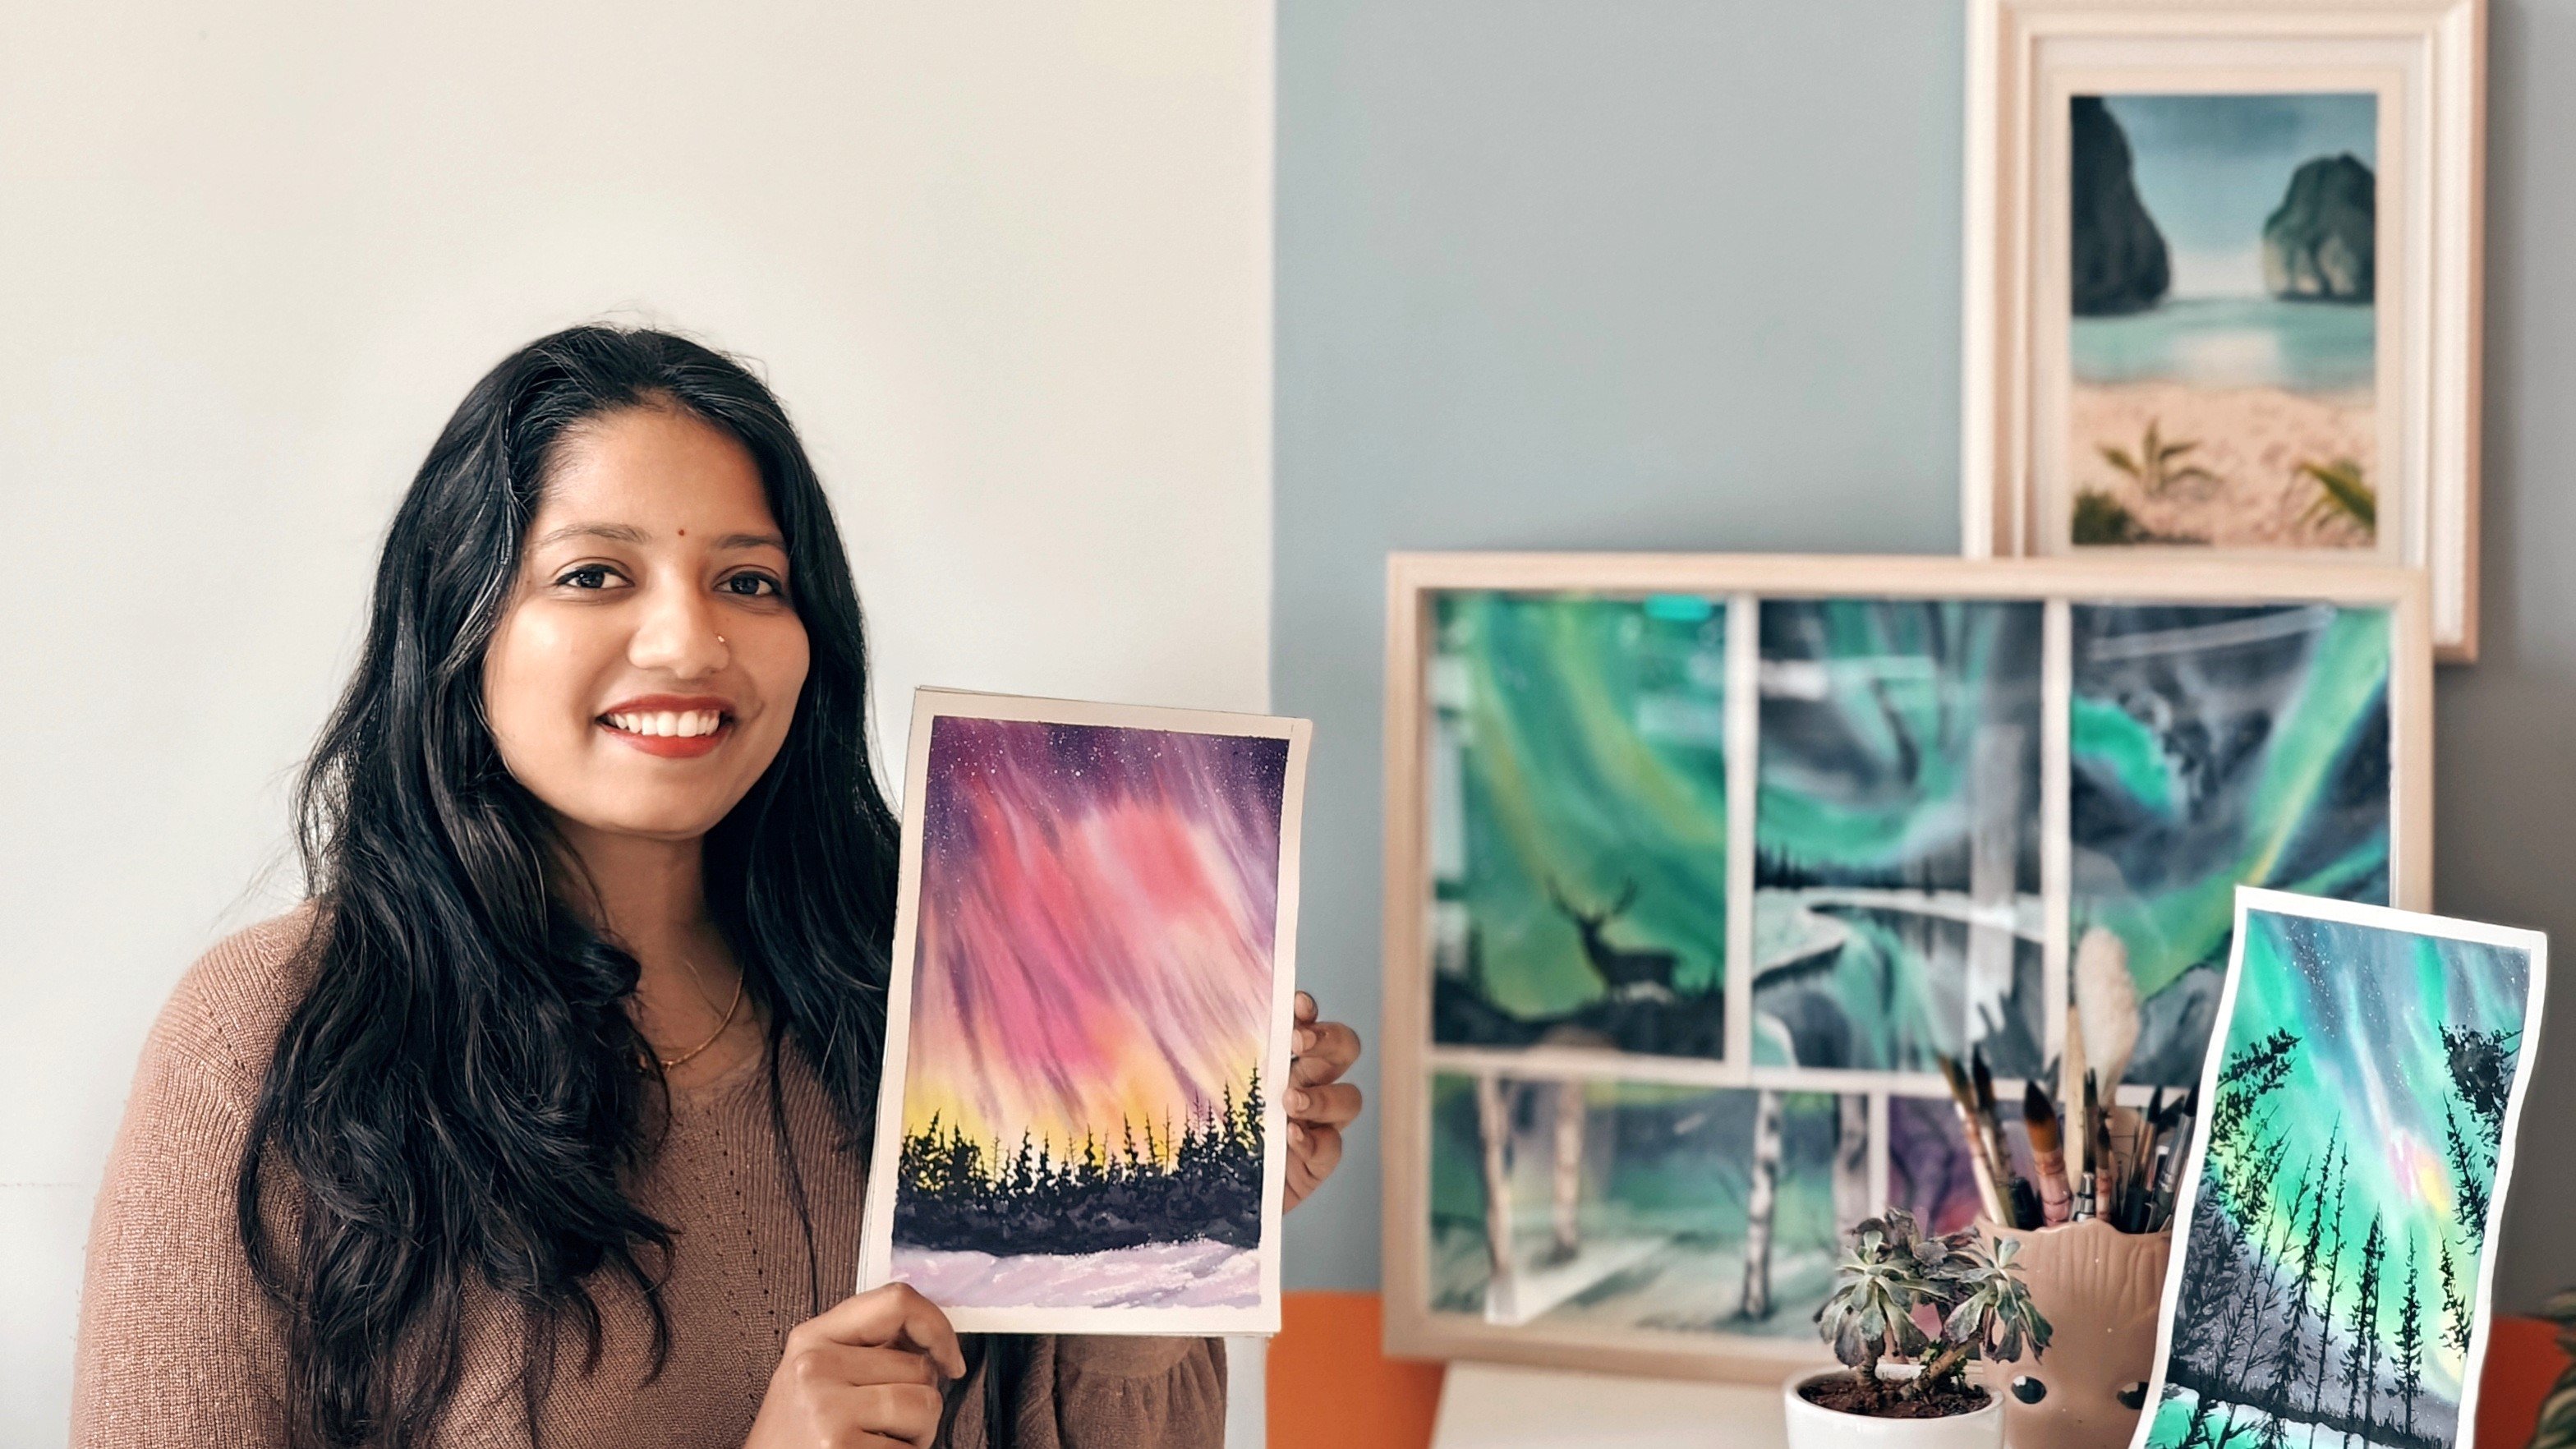
weather conditions. Hi, I'm sweaty jihadi, a watercolor artist
by passion and a project manager by profession based out
of Bangalore, India. If you're new here,
I go by the handle, tinted doodles on Instagram where you can see all my works. Oceans, caves, and waves are the main reason what made me fall in love
with watercolors. I just wanted to
explore anything and everything with the
shades of blue and water. Painting, watercolors
escapes around the world is even more
interesting because it challenges you to explore various cultures and
landscapes around the globe. From the turquoise
waters of the Caribbean to the Radcliffe's
of Southeast Asia. Each location offers
a unique challenge that would help you
explore a lot more. When it comes to painting
a watercolor seascape. We will use watercolor paints to capture the essence of C, including its color,
movement and texture, the colors of the
sky and the water, as well as the shapes of the
waves and the shoreline, are all important elements to consider when
painting a seascape. But practice and patience, I'm sure you can learn to paint any seascape out there
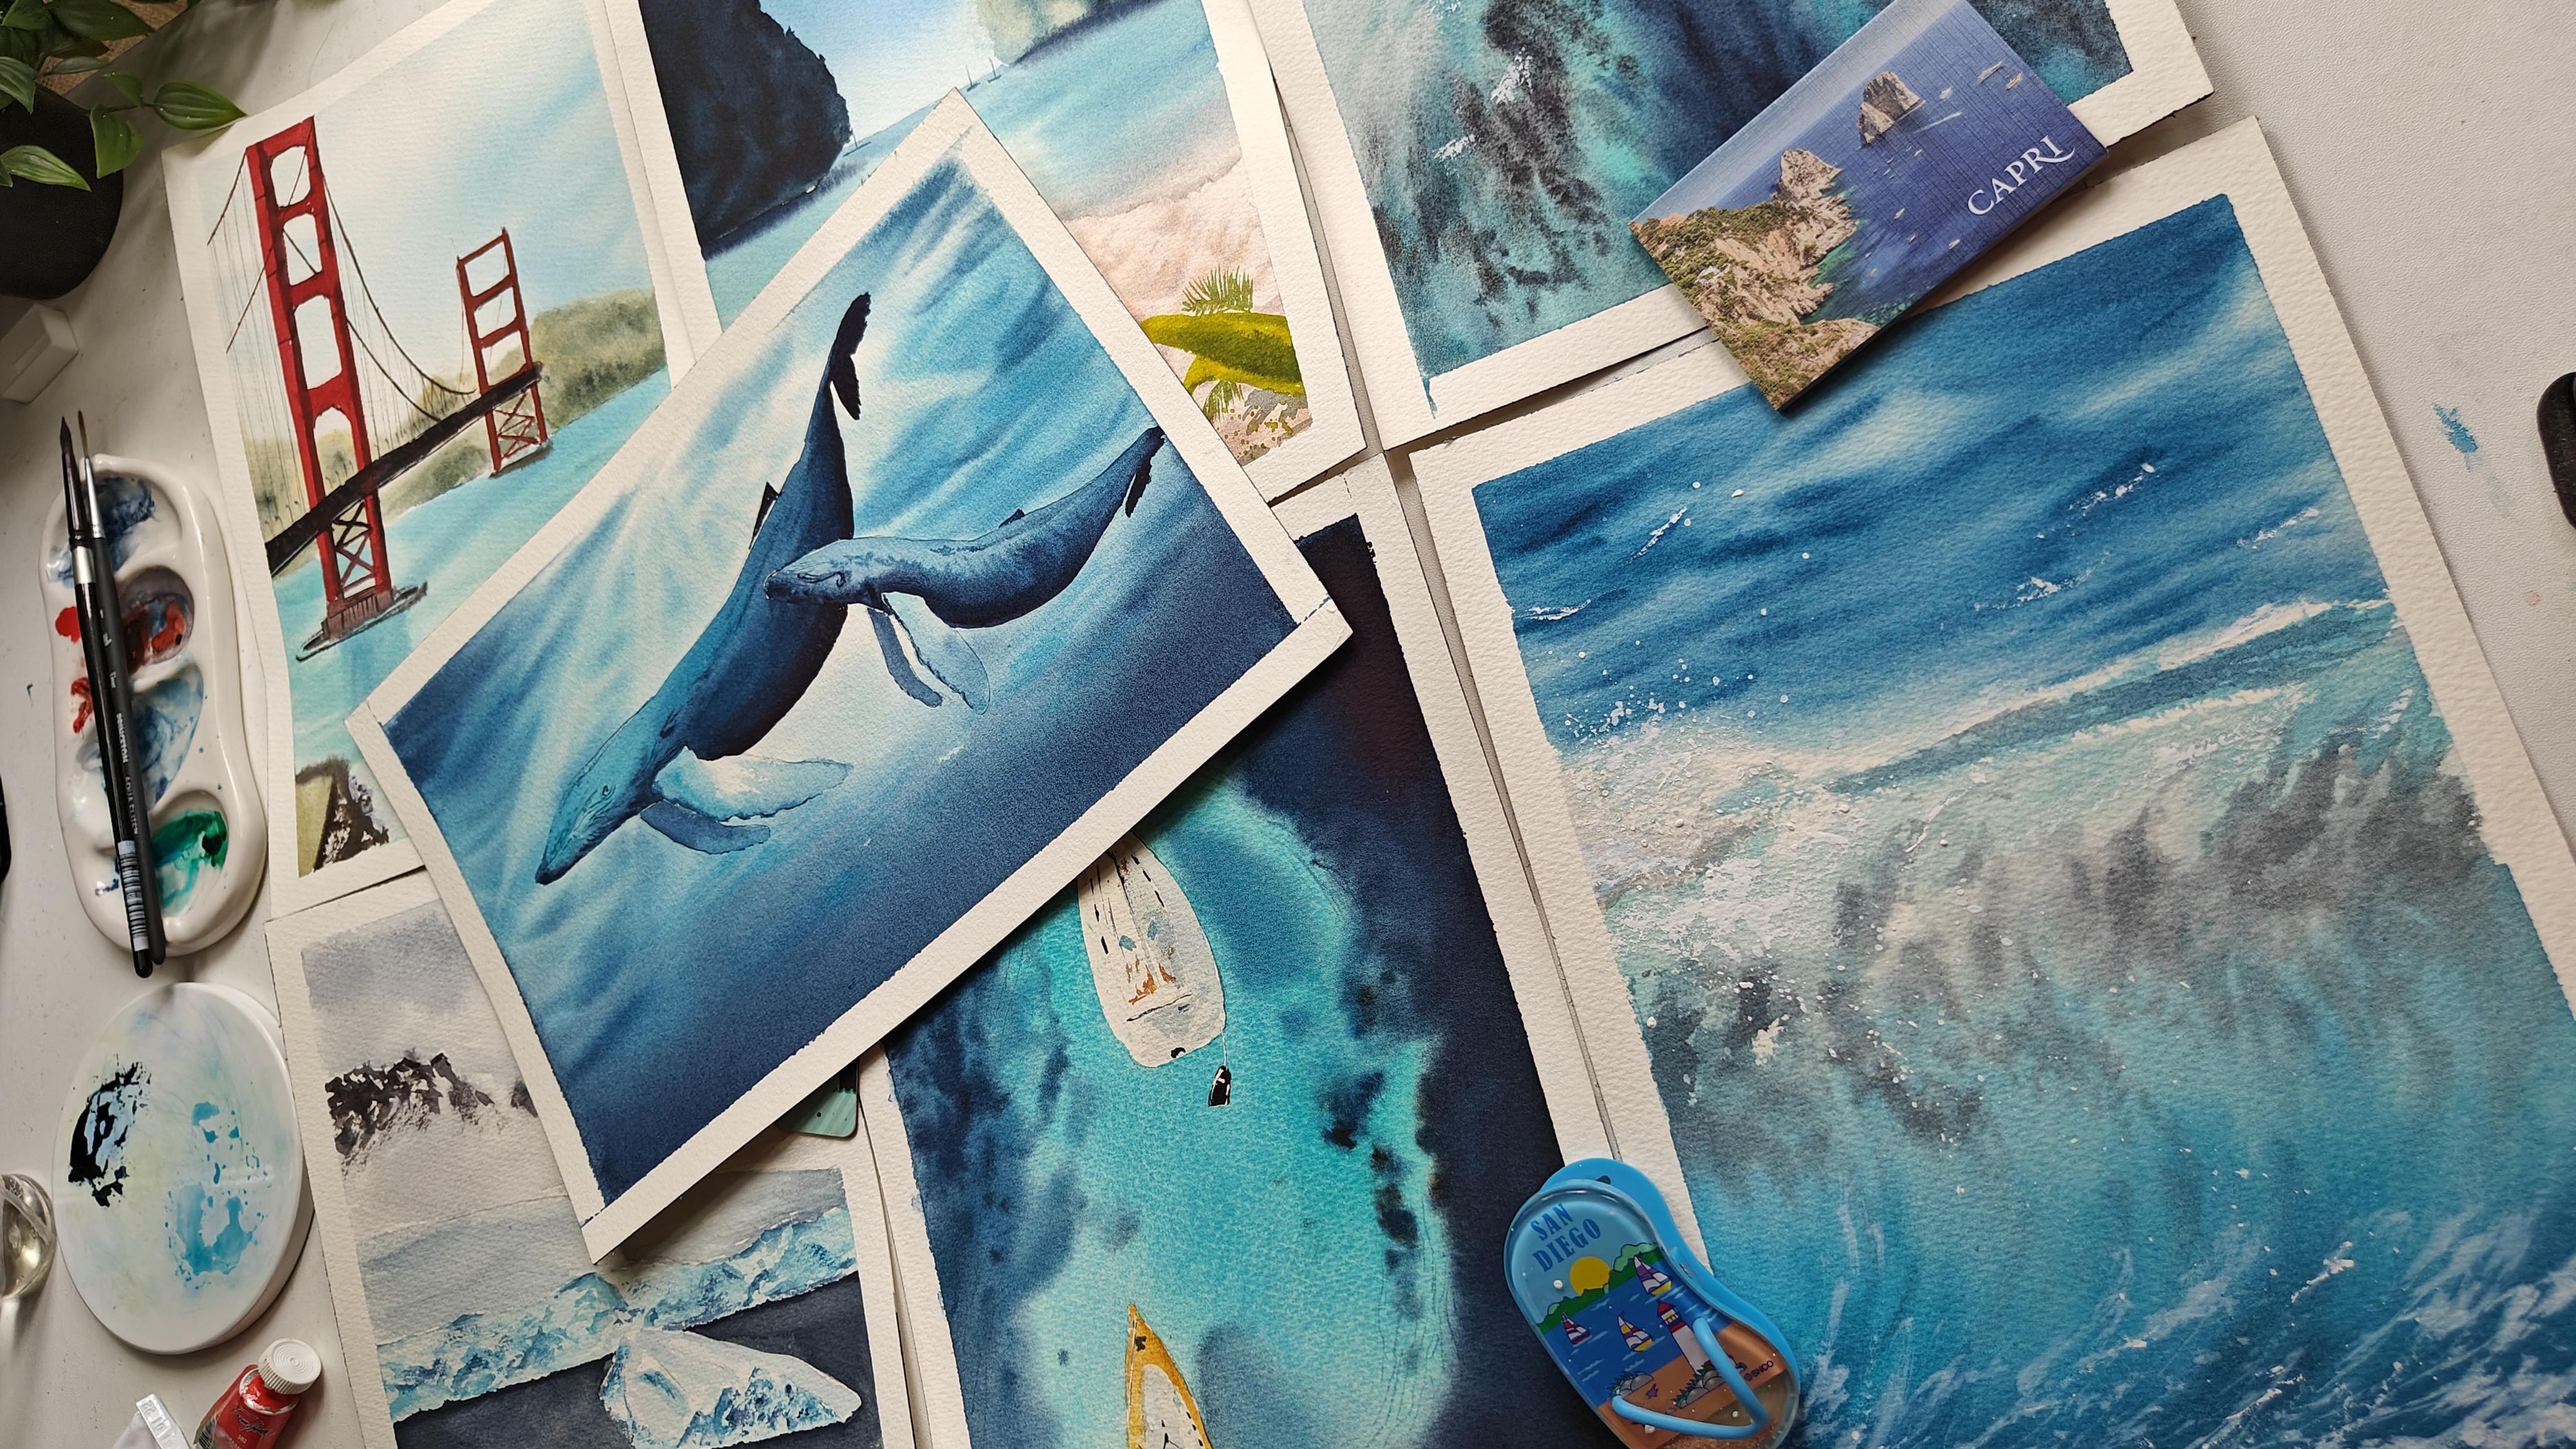
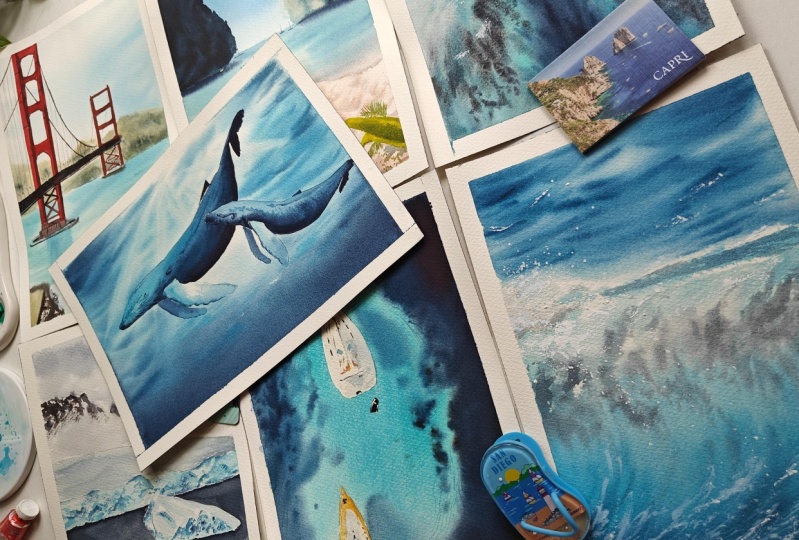
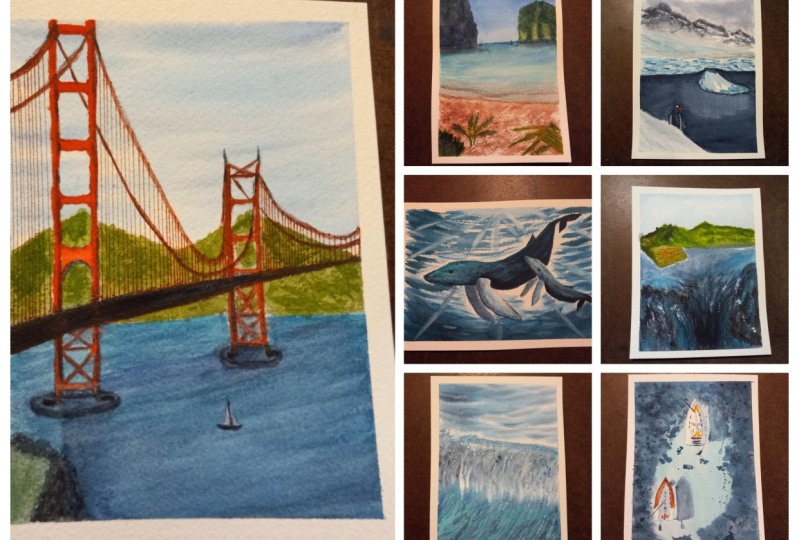
with a good reference. So in this class, we are going to hop on a voyage and start our journey from Asia, where we will go through
direct lifts off Thailand. And then next we'll move
towards Oceania to explore underwater SeaWorld along
with some of the whales. And then we will go
towards Antarctica to explore all the
beautiful ice landscapes along with the penguins. Then we'll explore how to paint a majestic surfing waves
from South America. Next we will capture
Golden Gate Bridge along shows the sunny
beaches of California. Then we'll hop on
a yard to explore the amazing blues of Greece
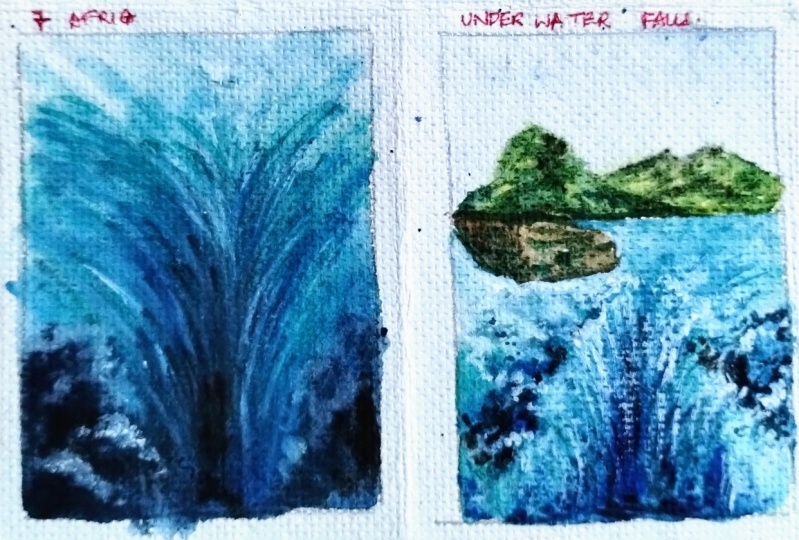
and Italy in Europe. And then we'll observe a
spectacular underwater fall in Africa. Overall, this class
aims to inspire you to explore the various
diversity and cultures of cityscapes all around the world by providing you with
practical guidance and techniques to paint watercolor paintings and capture all these beautiful scenes. So, hop on the journey with me and let's see
you in the class.
2. Supplies that you would need: Let's go through all the
supplies required for the class. Shelby, starting from paper, I'm using send cat, birds, Mel Saunders, Waterford paper. This is a cold press that
is fine-grain paper with 300 GSM or 140 LB weight. This is the structure of paper. You can see it is having
a fine tooth here. Okay. Then I'm using a spray bottle. This is from Amazon. It really helps me to re-wet at the places and the
water is always creek clean. So that helps a lot in
watercolor paintings. Two jars in which one I will remove the first
layer of pigments. And the other one is to clean the brush so that the
water is always clean. Okay. These are some of the brushes that
I'm going to be using. A tissue paper as well or paper towel to remove excess
of water from the brushes. Coming to brushes, this is a size four round
brush from the brush. It's black velvet. 3,000 as series, same one
in size eight as well. It has really good tip. You can use any round
brushes with a good tip. This is a flat brush from
Princeton, size threefold. It's really good for applying
water as well as for any flat washes that I'm going
to use in my paintings. This is from Neptune series. Here is a liner brush from Princeton at twilight, size one. This liner brush is
really handy when I want to add my new details
or waves on the paper. You can also use any other small round brush
with a good tip. This is a synthetic brush from gambling that
I would be using for applying masking
fluid onto paper. This is a small
container just to add some soap mix for using
the masking tape. Coming to paints.
These are Gosh, white gosh, I would say
it's from heavy meal. You can use any other white, goulash or poster colors. These two colors
are from the brand two-week permanent
red and bright rose. I will be showing
swatches for all of this in the upcoming class. From Daniel Smith. I have these two colors, moon glow and let's
do own genuine. These are really good
granulating pigments for adding rocks or any such
texture to your paintings. You can also skip this and use violet or brown shades
in the paintings. No need to worry about it. If you did not have the
granulating pigment from Mission Gold, I have leaf green
and peacock blue. I will be using peacock
blue a lot in the classes. Now coming to the shades
of blue from White Nights, I have a couple of these colors. This is ultramarine. Then we have cadmium red light. That's emerald green. This one is cobalt, turquoise. It's a very beautiful
color for cityscapes. And this is green. You can use any shades of green
if you want. This is CPL. And indigo. Indigo is really crucial
and I just love how smooth this pigment
is from White Nights. I have extensively used
it in all of my projects. This is bright blue or yellow, blue from Winsor
and Newton Cotman. A palette for mixing
all the paint. Here I'm using a ceramic one
because it is easier for me to activate and mix
all the pigments. Any board of transparent or
a wooden board for masking of the people and the masking
tape for sticking it. So these are all of our supplies that are required for the class. See you in the swatches.
3. Swatches of colors used: Here I have taken
down a piece of paper and noted on all the colors that I mentioned in
the supplies class. Switching off with bright rose, be villa when it's a very
beautiful neon pigment of pink. You can use any brighter
shade of pink if you do not have
this color as well. This is permanent red. This is also from
the brand to me. It's a very good opaque color of red that is very useful for filling up some
opaque places. This is peacock blue
pigment b5 and three. Having PG seven, It's a very
beautiful mix of yellow, blue and the yellow greens. So if you can also create this color if you
already not have it. This is leaf green
pigment BY three, PG 36 and p by 65. This is greenish amber. Pb 60, P became
seven, and PY 83. This is a very good dull
shade of green. I would say. This is emerald green. Pg seven are a green. If you have to say, it's, I would say most color
for paintings escapes, then this is ultramarine PB 29. You can observe a bit of
granulation in this pigment. Next is cobalt,
turquoise, PB 28. You can also get this
color by mixing. Hello, blue, yellow, green, and a bit of white. Next is Taylor blue, BB 153. It's another beautiful color. This is a bit of red
shade that I have. This is indigo, BBQ seven, people 15 and PV 23. It's a very beautiful
color and add a lot of texture and
depth to your paintings. This is CPO PR 102187 and PVA sub n. Next is cadmium
red light, PR 108. I'm using two
shades of red here. Like you can see. You can use one of the sheets
only if you want. I'm just wanted a
particular color for one of my projects. Hence, there are two
shades of red here. Okay, I'll be adding all the
color code that I have told. Now coming to the scratching
of granulating pigment. This is blood stone genuine. I'm just adding some
water here in there randomly on my swatch
show as to show how the pigments
collect together in the tooth of paper and
create beautiful textures. This is mainly useful while
adding rocks or pebbles. To add that visualization of having a texture on the
rock in the paintings. Next coming to moon glow. You can see this is kind
of in a violet sheet, so you can use any of your violet shade with
black to get this color, but it will not be having
granulating property to it. Now, I would not be swatching
the white of the gouache, but you can see I'm using, it can be either titanium
white or Chinese white. So we have done all the
swatches that we are using, we are going to
use in this class. And if you have further doubts about
what are the colors that can be used as a supplementary or in place of any
of these colors. Please reach out to me on
discussions for the same. Now, let's get started with our class using all
these beautiful colors. I'll also be telling both
colors are needed in each of the class in the beginning
of the project itself. So let's get started.
4. Preparing the paper: So here I have the paper
from Saunders Waterford. So I'm going to just
take one piece of paper and then put it
on my acrylic board. In order to do that, I'll take my knife palette. Yeah, it doesn't look
good, but it's dry, so it is not going to
affect the paper. Here. I'm going to cut it this way. And it is. Okay. So this is just one
paper like you can see here. Now. Now I go and stick it around
using my masking tape. So let me quickly do that. So how much space you need, the border you need
for the painting, you can take the call
and accordingly. Now, stick it to that level. I would take just
half an inch space and that would be sufficient. Same thing I'm going to
be doing here as well. Yeah. Perfect. So you can always see I apply in a
clockwise direction so that when I'm
removing the tape, it becomes way easier for me. Yeah. This looks good. So once this is done, either with your knee
or with the help of the knife palette. You're going to just press it across here so that it
is sticking correctly. Now, let's see how to stretch the paper a day
before the painting. This technique I have used
only for one of the paintings. You can, it is optional step, but I would prefer to have it stretched before
painting the wave. So once I have taken
out the people, I will first phase the backside
of the paper and start with wetting or
applying water onto it. I'm using a spray
bottle for this. You can also use just
the brush and water directly from your monk. Once this is done, I'm going to take a brush and spread devoted across evenly. Once it is done, I'm going
to flip it over and ticket and apply water onto
the front of the paper, again, making sure it is applied to all of
the sides and doesn't accumulate at one
particular point. Again, with my brush, I will
evenly spread it across. I'm doing this
technique only for one of the paintings
because I do want to apply a masking
tape for a definite border. So I might not be able to do this on the day of the painting, but I also want my
paper to be stretched and off so that I can get all the advantages
of having a stretch to people from both back and the
front sides of the people. This would help me to
retain pigments a bit longer and the water will
be retained a bit longer. It has all those
advantages to it. Now once this is done, I want it to dry a bit faster. So I'll just again pluck it and leave a bit of space on top. You can see you can
rest it on any of this acrylic sheet and not on a paper-based
cardboard or anything. So I'll let it rest
for overnight. Let's get started
with the paintings.
5. Continent 1 Asia - Prerequisite: In this class, I would just
be teaching how to paint a simple rock type formation that are used in our cityscapes. So here I'm drawing one of the cliff rocks are
the mountains that are usually found in
southeastern part of Asia, Thailand forget, or
even the James Bond, Ireland, if you're
familiar with it. So here I'm drawing a three
such different rocks within the same structure
to show how we can create the shadows or the
depth on top of them. While joining the sea level. I'm giving this angle to it because that is how they
usually are formed. So now I'm starting
to apply water. You can see that I'm applying only the sky part of it
and not to the docs. You can use any round brush or a flat brush that you have, or a mop brush as well. Just make sure not
to put water onto the rocks so that
when we are painting the blue sky water or the
pigments do not flow back to our rocks. Okay? Now I'm taking cobalt turquoise
mixed with emerald green. You can take any shade of blue
that you have for the sky, maybe ultramarine,
cobalt blue as well. And just apply it wherever. Currently we have added water. Since this is our wet
on wet technique, you can see that the pigments are dispersing wherever
I have applied water. And since the rocks do
not have water in it, it, the pigments will
not flow back in, hence retaining divide surface for us to paint afterwards. Adding some darker shade
of the same on top of the sky and tilting my paper a little bit so that it can flow down without
forming a harsh edge there. Okay. So now to the
sky part as well, I will be taking a mix of blue, emerald, green, or viridian and applying it onto
though, see part of it. So make sure to prepare good
amount of mix of your color. You can use one
single color as well. Now with the help
of a spray bottle, I applied some
water on the paper. You can do the same with
the help of brush as well. The main subject for me
here are going to be rocks. So I'm not focusing
more on the sleep, but it's still here with just one shade of the
color I'm going to apply. In the same shade. I'm adding
some depth in some places, leaving good bit
translucent in some places. Okay? Now when this
part is still wet, we have to make sure to add the depth of what reflects
back of these rocks. So when the variable, this rocky structure
meets the sea, it does create a very dark
effect on, on the Z line. So we have to create it while
the paper is still wet. And I'm using indigo
for same here, you can use Payne's
gray as well. So this is how we can show because there will
be a shadow to it onto the sea that is getting created because
of that structure. And once, when we apply it, when the paper is still
wet, they will eventually. Disperse it into water, forming a very
graduated effect there. Now for the rocks, I'm going to start with,
I'm applying water. Until now, the sky
is completely dry. So it will, there is no problem of the pigments
flowing back in here. I'm taking some raw sienna
and applying a very light wash off it as though
first wash on these rocks. On top of it, we'll
build couple of layers to add more texture and depth and even the
shades to this rocks. But the first layer for
me would be raw sienna. Now when it is still wet, I'm going to make some indigo
with the greenish umbo. You can take any green off your choice. With that mixture. I'm going to add the outline to our structure
that we had created. So when it dries off, it will look like there was, there is all debt. And we can see this 3rd Rock specifically coming
out in our painting. With the same mix. I'm going to just add
randomly at the places. It will add a beautiful
texture once it dries off. And some of these
places are going to be with the lot of shadows. Some of them can be at the elevated or popping
out of the mountains. So it creates those
unusual effects. And it can be a very
tandem in your paper. It may not be the same
how I'm doing it here. You can also try with
different shades. With little bit of opaque or adding more water.
You can try it. Now I'm taking some
moon glow that is a granulating color and adding it the places where I have not added
the other mixture. So why am I adding a
granulating pigment here is it adds a very beautiful
texture when it dries off. And some of the paint will dry up with together making
a clutter off it. And we can see those harsh it just forming
on these rocks, which is very much important for the texture of
the rock anyway. So even if you do not have
a granulating pigment, you can just use any
shape that you have of a violet shade in in place
of this granulating pigment? Or do you have any other
granulating pigment? You can mix it with other colors to bring it to the shade
of this violet and try it. Okay. No, I'm mixing again some of the greens and adding a lighter
shade of green as well. The leaves on these rocks always on the top
portion of the rocks. Now, there are some trees, are some plants that we can see. So I'm going to add it with my mid single light shade
of green to it here also, while adding, you
can add inliers. So my first layer would be
a light shade of green. And after this, I'll
add a darker shade randomly at some places to
show that for the mountain, they can be popping
out of the mountains or they can be in-between. So if you see any of any
of the reference images, you can always see that they
are randomly placed pop-out that are coming out of
these rocks structure that there can be these
plants coming anywhere. Now I'll gave me the
darker shade of green. I'm just adding some
lines here and there. Now, here, while I'm applying
a thin layer of moon glow, again, I'm doing it in an angle so that
when it dries off, it comes in the same way. So you can see my
brush is going in the direction or creating
a curved structure, right? So once it dries off, it will come across
in the same way. And we can see maybe there is a dent or a curvature
within the block. Once the below part is also dry, I'm adding some more indigo
onto it so that we can see that final depth to
where it meets the sea. So it looks really finished and eating some
of the drugs and, or start as well as
part of the shadows. Now we're going to do
the dry brush technique. Okay? So there is minimum
to no water in my brush. I'm taking the pigments and just moving it across in
this angle you can see how I'm holding the brush
and I'm just moving it in this angle in
a straight line. You can also curve your
brush and move it across in the angle that you want between the curves are in
the straight line, but makes sure there
is no water onto it and your paper
is already dry. Yeah, so have used all these different,
different angles here. And again the following. Similarly what I had
done previously, going it in this curved type only in the center
part of my rock. So that once it dries, everything comes across
and we can see a bulge in the rock there. Okay. So this looks good to
me. From the dark side. From the rock side.
I'll just add few birds here to complete
a mini painting. In this prerequisite class, we learned how to add these rock structures for
any of your paintings. And we will be using the same
in our next class as well, but in a very diluted
version. So let's go.
6. Continent 1 - Rocky Thailand paradise: Welcome to day one of our voyage on seascape around the world. So in this, we're first visiting Asia because that's
where I'm from. And this is a reference from
one of the Thailand Islands. Okay? So the paints required
for this class are tailored blue
or intense blue. Bright pink, raw
sienna, greenish amber, indigo, cobalt, turquoise, tailored
green, and leafy green. You can use any
other combinations of greens or blues
for this class. Here I have taped down
already the people like how I have shown in one
of the basics class. Okay, now with the reference, I'm going to draw
a rough sketch. This would be the
direction of the C part. I've attached the
reference image and resources section so you can refer it there and paint easily. And fraud the rocks part. I'm going to add one rock in, sort of a middle ground, which is a bit new row to
us and to the seashore. Similarly, how we did
in prerequisite class, the the point where it
is meeting the sea. We are going to do
it with an angle. Here. I'm going to add two such
small rocks in the background. Okay, this is a very rough
sketch like you can see. So I'm going to take my
kneadable eraser and just forming this visible angle where the rock is
meeting the sea. Now once I'm happy
with the drawing, I'm going to just run the eraser across all the variables. There is peak pencil mark. This just helps us to get
rid of the pencil mark. Once we add watercolor paint, I'm starting off with the
painting above the horizon. Okay? And then we will come
back to see later and also the beach
part later on. So applying water to
the entire paper here, taking a flat brush and
distributing that water equally. This is a rough
sketch and painting I did before starting
this, just to show you. Now, taking tailor
blue for the sky part and re-weighting
only the top part of my people where I'm going to
apply this Taylor pigment. Okay? So starting from top, you can also create an
angle for your people. And you can see that already. The rock part of it
is a little bit dry, like how we had done in
our prerequisite class. So the pigments are not
flowing back onto the rocks. Adding some more pigment
on top of the sky and gradually coming down with lesser intensity in the pigment. Now I'm creating an angle here. Taking some more water wherever I'm using the spray
bottle, if you have, you can use the same
or you can just use another brush for adding
water at that place. Now I'm adding some bright
pink to the same mixture. Or you can also use
ultramarine here. And just above the horizon, use this pigment in
a very light wash. Now that equal to no pigment in brush and with more of water, bring the same pigments down
until our horizon line. Since your paper is already
in an angle, do not worry, it will flow down and create
a very beautiful gradient. Just applying some
more here because I fear that once it dries off, it will be very dark. I'm lifting some
of the pigments. Now starting for the beach part, I'm mixing some raw sienna, wet, bright pink and apply all over the beach part with
a very light wash off it. So this is going to
be our first layer. I'm moving my brush in an
angle just so that we can add the way the sand creates a structure or the formation
of sand on the beach. Some places it is going
to be a harsh line. Some places it's going to be a very translucent
line of color. Extend the same pigment a
little bit into our C part. That is where there will be a wave that is onto the beach. In order to show that
we will be using the layering effect
once we paint the c. But for it, we need a wash of the same beach
color within there. So I've added a small wash there before it
creates a harsh edge. I'm going to lift it off with the help
of a tissue people. That light gradient, whatever we have on
the c is more than enough for creating our wave or the water on beach effect. Make these structures
here and there with help of size six. Sorry, size four, round brush, basically a smaller
sized round brush. Here might be better, is not completely dry and it is not having too
much water as well. So it is seen as
semi dry condition. Here. I'm going in one
single direction where I'm adding this
texture onto sand. In the beaches, you can
always see as you walk, there is a depression
created on the beach, right? So we are trying to depict
the same here with help of adding some depth
with the same shade of the beach color,
what we have used. But in but in a concentrated
form on specific areas. Nearby the wave. We can have very small lines or splatters of the same color. But once you are going
to end off your paper, make sure to have bigger, such concentrated depths are
the grooves in the beach. And that is how it will help you the perspective of the painting. Keep a tissue ready
to lift the splatters off as soon as it
goes into the C part. Now, the same mixture, add some blue, any of the
blue that you are having, I'm using Taylor blue only hear. You use that color into your
already created groups. Everything again in
the same direction. So this shows how deep each
of our groups are here. You can also practice these angled strokes that we
are giving with our brush. Once it dries off,
it will look really beautiful because it will dry
one or two shades lighter. And that is what we
need for our beach. Now to start off with
the rocks like we have practiced and
prerequisites class, I'm going to start
with raw sienna first. Make sure to do this once
your paper is completely dry, where you have already
added this guy. Here, I think my paper
is completely dry, but I will manage to fix
that mixed mistake later on. Now taking some greenish, amber, I think some indigo
to the steam mix and continuing to add it
as part of our shadows. Make sure to leave some white
spaces or some transparent. First wash off your rock. They're else, it will
all look simple, flat rock and we
do not want that. We need to show some depths
and structure to Iraq. We have practiced
instead of raw sienna, I'm just showing the same with different shades of
green and blue here. Since this is a very behind all, it's now very background. I won't be showing specific
plants formed on these rocks. But if you want, you can always
add that as well and keep the color composition of
these rocks same as to what we have done in the
prerequisites class. I'm also lifting some of the
pigments, as you can see, in order to create that different structures
onto my rock. Okay. Now for coming to our midground rock, it would be completely
in a darker shade because I assume
there is a lot of we can just see the reflection or the backside of the
rock where there is no sun rays falling upon. I would use entirely indigo
in order to paint this with the help of indigo and different
tonal values of indigo, we can create the textures
on this rock as well. Make sure to move your brush in the same angle in which you need the rock structures
to be visible. That will really help once your paint completely dries off. Okay, so in my first wash, I'm applying indigo in any way. You can see that the paper
was not completely dry. So some of my paints have
dispersed back to the sky, but I will fix it in awhile. My adding this rock, I'm not taking a straight line. I'm also taking
some strokes with my brush in order to show the
harsh edges of this rock. Okay. Now you can see I'm just dabbing my brush
across on this entire place. So it lists some of the
pains and it creates that it collects some of the
Payne's within its stroke, helping me to get
that effect once it dries off with a tissue paper, I'm going to remove this
and fix the mistake. But if your paper
is completely dry, you do not have to
worry about it. Taking a concentrated mix and with the smaller size brush. I'm again applying some
water where we have to paint the sea or the waves part of it. Okay. Careful enough to not bring the indigo paint
from rock onto though C. I'm going to take cobalt, turquoise here for C. And here I'm making
sure to go in just one direction and not move it in
multiple directions, like vertically or in an angle. It is I'm doing it in
a horizontal strokes only because when
the paint dries off. It also adds on to over effect
of having waves on a seat. Since we're not focusing
much on the C part, I just want to make sure
the aftereffects of drying, we'll make it work for us. I've left some place
of disease still white with no water, no paint there. And I want to
retain it that way. Now using my brush, I'm lifting off the paint
where it reaches the beach. Okay. And at that pound, I'm adding some bright pink. Okay. Basically, it's, we're trying to mix all
the three that is cobalt, turquoise, bright pink,
and raw sienna there. But in terms of
layering on top of it. So already we have two
cobalt turquoise added. And on top of it, I'm adding this mixture. And with the help
of my brush and removing it if it
is coming too dark. I'm taking some indigo and adding it to the
reflection of these rocks fan, of course, our C
part is still wet. Taking some emerald green now along with cobalt turquoise, and continuing the same. Just to add one more
small layer on the seat. He'll adding a darker
stroke offline here to depict the waves. Adding some yellow blue here directly to match
it with the sky. I'm happy with the C part, how it how it is looking, and also the beach
part of it is now dry. So I'm going to create the
border of our wave that is meeting as on the beach with the same mixture of bright
pink and raw sienna. Add this border. Make sure to leave
some spaces in middle because there is
always a reflection of water. So we might not be able to see the entire reflection
of the wave. But yes. So this adds another
layer onto the wave and helps us differentiate
wave and our beach. Okay, so now I have pulled down leaf green and cadmium
yellow as well. Just adding some of the
leaves here, tropical leaves. We can use this. Also if you are painting any tropical seascape. So adding leaf green and
with cadmium yellow, adding on top of it. Now, I'll mix indigo
to the same mixture to get a darker shade of green. And you can see this is
how I will press the brush and so that we get a
larger stroke because I'm using a size eight round
brush with a sharp tip. So with the help of tip, I will draw the
starting of the leaf and press the belly of my
brush to get a broader stroke. Tip of the leaf can be offered
darker shade of green. But The body of leaf, you can keep it in
different shades of green or a lighter shade
of green and yellow. Now, I'm adding a small
pine leaf or a coconut, leave you with the same mixture. Just add some strokes, one line and then small
strokes of it to show it. To give us the look and
feel of a pine leaf or the coconut leaf plant here. Mixing raw sienna to the same. I'm just flattering heel to create my new splatters
on the beach. Now to the left side, I'm just adding a border here
to the bottom of the leaf. Taking a darker green
shade, I'm applying some, I'm just dabbing my brush to create a pointed leafy
kind of structures here. All cluster together. Add some more indigo
to it to create, to get a darker
shade of the same green and continue along. So on top there will be lighter shade and
as I go down there will be a darker shade of the same point,
these structures. So this is any other plan
that we can see on the beach. I'm just trying to add it here. Going to add few more such coconut leaves
or the pine leaves. Pine tree leaves. Sorry,
in the palm tree leaves. Okay. Make sure to add the pointy
tip for these leaves. Now the darker shade of green, I'm randomly add the
strokes here and there. Play with tonal values
of same colors but with different ratios
of the mixtures, you will get a very
beautiful tonal value in your paintings or even for the any object
that you are using. So here I'm using three colors. That is cadmium, yellow, leaf, green, and indigo. So by changing the
how much indigo I'm mixing or how much
cadmium yellow I'm mixing. It really adds on a lot. And I get a very beautiful
cohesive palette right there for adding or
painting any such objects. Now to the same mixture I'm using for
splattering here again, adding some bright pink to it and continuing with
this flattering to our previous mix, I'm adding some indigo to get a very dark tone of it and
adding a lot of water. With this, I'm going to
be adding the shadows of these plant structures
on our beach. Okay. So adding a random palm leaf, he'll make sure to start your reflection. Sorry the shadow from where
your palm leaves are ending. You can add the leaves randomly, but makes sure to add something, at least a line or something
where it reaches the beach. Some shadows here as well. Now, with my liner brush, I'm going to add a very
distant cruise or boats. You can see how with a
long pole for there. Boot. I'm doing this with indigo color with the same liner brush. I'm adding depth again
to our wave only at very random and less
number of places with the darker shade
off burnt sienna. If you do not have
a liner brush, you can use a very
small round brush or small sized round
brush with sharp tip. The liner brush really
helps you to get the minute details
and very crisp edges. Okay, so now I'm happy
with this painting. So let's start
removing the tape. Make sure your
paper is completely dry before removing or there is always risk
of tearing it up. I heard a lot of
fun painting this. And hopefully you will
try it and post it in Project and Resources section along with the
prerequisite class. I'm really hoping for to see all your entries
there will meet in our next class and the
next continent that we'll be exploring
is any guesses. Okay, so see you
in the next class.
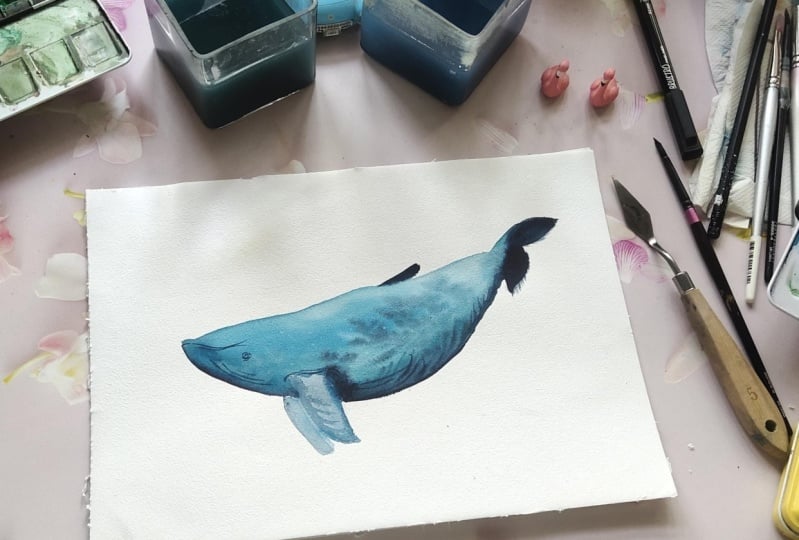
7. Continent 2 Oceania - Prerequisite: Welcome back to our
second continent, and in this prerequisite lesson, we are going to learn how
to paint a beautiful way. Okay? So here I'm taking a pencil
and a piece of paper. This is also a 300
GSM cotton people for practice purposes. So here I am just doing a
rough sketch off the wheel. This is very much
similar to what veil I'm going to draw in my
main class project as well. I wanted you all to
practice the strokes or the hand placement that would be required while painting
the actual class. So once the body is done, I'm starting with
the first flipper. And this is the second lipo, the other side of it. And this is the phi1. Okay, I have also
drawn the flakes and here I have kept body of the wheel a bit
bulge, bulging. We can take any other wheel for reference for
painting this lesson. I'll also, once this is done, I'm going to apply water. Make sure you're not
apply water onto Complete parts of the villi. It is just where the body of the wheel is and I'm leaving
the flippers without water. We will be approaching it
with two different phases. In a first, we will try
to attempt to paint the entire body with three different
shades of the colors. And then we'll come
back to flipper once the body colors
are completely dry. I'm starting with indigo first. That would be going on bottom of the main reason for
adding indigo here is because we are going to paint a underwater scenario
in the coming project. So what happens when the veil is swimming and it is
horizontal to surface? It will be in the shadows for
the lower part of it body. And I'm trying to depict that with the help
of indigo color. Okay, So starting from its face on the block until the flakes, I'm going to apply
indigo itself. Once. After Indigo is
completely one layer is done, mix it with cobalt, turquoise, you can use any other light
shade of blue that you have. This will become our middle ear. Okay? Before indigo
completely dries off, make sure you mix them
directly on the paper. This is wet-on-wet, as well as mixing the
pigments directly, smudging them on the paper. So careful along
with the flippers. Once this is done. Now for the top part of it, which is nearby
to water surface, it will be a very light
shade of the blue. I'm using cobalt turquoise here, whichever you are using
user lightest shade of it. You can also choose to leave some white spaces in between so that we can see highlights
here and there. Okay? All of it can depend
based on how the light is reflecting off
your reference. Or each wheel differs. So need not have the same scales are same highlights as how it is
coming out in my painting. Now coming back with
these small brush to add some depth and give a visible
boundary to the whale. Because we know it will
dry one shade lighter. We want to make sure
that it is having equal amount of depth that
is required in our wheel. Now with indigo color itself, I'm going to add some
pigments here and there, so that when it dries off, we get a very cool shades on
the wheel here and there. And with these circles strokes, I'm trying to depict the
shape of the veil where it converges so that
once it dries off, we feel like there is a bulge or the shape of the
wheel becomes cylindrical. Dropping some paints
here and there, and mixing it with a damp brush because
we do not want it to be very much prominent. We want it to mix and
merge with the background and just be a spot urine there. Now, again with
indigo, I'm adding. Filling up the flakes. This you can also do
once your painting is completely dry. I'm
still doing it. When the body is
still having water. It's totally fine. Now, adding those pointy
structures back there and coming to fend for these both. I'm taking the darker shade
or indigo in my case. You can use the darkest shade
of blue that you are using. If you denote, if you're
using just one shade of blue, I would say add some red or orange onto it and
use that color there. It will give you a good depth and darker shade
variant of your view. Once the body of
the whale is dry, I'm going to start with
the first flipper. This flipper is towards us. So we can see some of
the colors on the way. So I'm going to first apply a lighter shade
of blue all over, leaving some spaces here
and therefore highlights. And once it is done, little bit darker shade that
is mixing it with indigo, I'm going to add
the second layer. Okay, now for the
back of the flipper, it will be mainly reflecting back the watercolor, which is, we are going to use, assuming that it should be one
of the darker shades. I'm going to apply indigo here because backside of the flipper is usually white in color. It will just reflect whatever is the color of
underground water. Hence, I'm adding indigo there. You can also use Payne's gray
if you do not have indigo. Now I'm just doing an
outline on the flipper, those pointy
structures over there. Now with the liner brush, I'm going to add
some details here. You can use any of this
smallest brush that you have, even round brush with sharp tip. So these are the
three colors used. First is cobalt turquoise, then the mixture of cobalt
turquoise and indigo. And my last layer is indigo. We will be using these
three same sheets in the next class
project as well. But this is the color
gradient that we want. Now, I will wait for it to completely dry and
then come back for adding details.
With liner brush. I'm going to add the details. This is how, this is how
thin my liner brush is. So on the body, I'm just adding some scales
here and there nearby it's flickers as
well as the I part of it. These lines can be just outlining
the flipper boundaries. And you can add up
to five to six lines based on the size of your wheel. Since mine is a smaller one, I'm going to limit
it to five hour, I think four lines here. Now adding the outline for
iPad from the mouth of it, you drag a straight line
and create the eye. Adding some more details here. All these lines can be completely changing based on the wheel that you are drawing. Feel free to stop right here or you can also add
additional details. You can extend these lines
up to entire off its body. It's completely your choice. So I'm happy with how
this has turned out. Let's do the continuation
of it in the next lesson where we will be painting a beautiful
underwater landscape.
8. Continent 2 - Underwater with whales: Our second continent and
our voyage is ocean Neil, and we're going to paint this beautiful underwater
picture along with the wheels. So colors used in this
class are indigo, cobalt, turquoise,
and peacock blue. Here I have taped down the
pupil like I have shown in our paper prep class. Now, I am keeping my kneadable eraser
out because we need to draw two wheels, mother wheel and the calf. So similarly, how we have also practiced in our practice on the prerequisite class
before. It's same. You can also tweak the enlarge the body part a little bit in the mid portion. Or you can also keep a fence in a different
angle if you wish. I'm going to enlarge its
body a little bit more. He'll absorb my hands. They are in an angle and it's just trying
to make that arc, which comes with though
slant cove that we want. You can also tilt the
paper if you wish. If that helps with the drawing. Before drawing defense, I'm
going to draw the cough. So it is trying to swim up
the words. It's my door. So again, just with the one swift motion, you can get this done. You can also practice
these strokes if you want. I have attached the
rough sketch that my completed sketch as
part of resources section. Or you can also pause
it and trace it out. If you wish to. If you do not wish to see the
entire process of drawing, you can always
adjust the speed of video from the Settings below. I'm just making sure to keep. V structure between its flux, the fins are called flux. So I'm just trying to keep, retain that V structure, which is very much
deterministic in Wales. Fixing the flipper
for both of them. Now coming to the eyes. Here, I'm just trying to make
where the eyes would fall. And now I'm coming to the fin, adding detail with the
pointy enough cause I've pulled in all the paints
that I had told about. Now to start with applying
of water onto it, I'm going to apply water
on the entire paper because it's going to be
a wet-on-wet technique. And also, I'd not have to worry if the paints are
coming onto the wheels. Because it will be
structured in such a way that the watercolor is not overpowering when I
start painting the wheels. So you can go ahead and apply water to
entire of your people. Now with a flat brush, I am spreading the water evenly. This painting is
split in two parts. First, we'll paint
the background. That is the underwater
with the rays coming in. We'll paint that first. Once it completely dries off, then we would start with
painting of wheels. Similarly, how we had done
in our prerequisite class, just adding a layer on layer. The three differentiates
that we have seen, we will do the same for
both of the wheels. So make sure to have enough
of water in your paper. You can paint the
entire background or the underwater part of it. I'm tilting my board in an angle here so that excess water flows out and I can wipe it off with the
hypophyseal paper, cloth or tissue paper. I'm creating an elevation here with type of an object so
that excess water flows down. I'll start by taking
cobalt, turquoise. I'm applying water
onto my colors here so that they
can be activated. Okay. Starting from top
of my people, here, it is nearby to the
surface of water, so the pigments
are lighter shade. I'm also leaving some white
spaces here and there. Make sure you also leave some white spaces
because we want to detect a white
light rays coming in. So that's the reason on top, part of your people
leave some white spaces and then fill it
with a lighter shade of cobalt turquoise. Extend the same till down. Once you're coming down, you can make some of the peacock blue and continue
with the same strokes. I'm going to apply peacock blue to the bottom side of my people. Make sure you follow one single direction in
which the strokes are going. Going to add indigo to it. From the bottom of my paper. From when you see a picture
of underground water, we see light rays
coming from top and the bottom part of the
picture is a bit more darker. So we are trying to create
the same effect here by applying more and more of
indigo at the end of the paper. So we can say that my top of the paper is more of white and
cobalt turquoise, mid region of the paper is
more of a peacock blue. And as I come down, it is more of indigo. Now. Take, and now with the same fresh start applying some visible strokes so that when the
paper dries off, we can see structured
in the water created. That is starting off
from left on the slide, but gender bush in
the middle part, and again, taking it off, I'm making sure to leave
some whitespace below the body of the memorial because we want to show some
sense of light still being there with the same peacock
blue and mixture of indigo. I'm also adding the shade on
the corners of my people. These strokes will
definitely help you get that sense of underwater
once the paper dries off. So make sure to add it all
in the same direction. I mean, now we are doing
horizontal, right? So make sure you put it in the same direction
and not change or switch the direction
of your brush to vertically or in
any other angle. So it can all be in a straight
line kind of direction. But of course, of different lens and of different pressures. I'm switching to a
smaller brush now. This is size four, round brush. And I'm applying the same
technique of the strokes here with different
tonal mixtures of all these three colors. So you do not have
to worry how much I'm mixing which
particular shade here. It is with different
tonal values. Mixed all the three colors. And with different tonal values, you can just keep
adding onto it. Even if you do not have cobalt, turquoise, any blue
shade that you have, mix it with indigo and tailor
blue and yellow green, and just get different
shades of it and start applying
these brush strokes. Some darker shows. Some darker strokes in the top portion of
my painting as well. This I am doing then
maybe put a still wet, make sure your paper is wet. Else if there would
be harsh edges and it might still look
very good and underground, but it will be looking a bit different than my finish
off the painting. I'm adding this
darker shade only to the left and right of
my paper a bit more. And still retaining
the light shades off the colors in the entire
middle part of my painting. Okay, when the
paper is still wet, we will lift the brush strokes. I'm taking a flat brush. You can take any
brush that you have. And with one swift
motion starting from the white space that
we have left on top. Drag it down. Clean your brush. Repeat the same process. So we apply pressure on
the people for lifting it. Bring it down in
one swift motion, and remove the painting with
the help of paper clot. If you want, you can also take some water and so
dip it in water, remove excess of water, and perform the same activity. Once this is done, I also
want to create a border for my rays that are
coming in with cobalt, turquoise, a very light shade. I'm just adding the
Deaf Night border to the rays that are coming in. It's very lighter in she'd make sure to
keep it that way only. I'm creating some
highlights within heal by lifting the paints with help
of size four round brush. For lifting, you can always start from the
tip of the brush, apply pressure onto
it and remove it. Dab the excess of paint that is there in your
brush onto paper, cloth and continue
with the same process. Adding some strokes of
cobalt turquoise here. So that when the paper dries, it shows hint of this color. On the first layer. I will leave the people
to completely dry off. So now this is completely
dry, as you can see. And our final
strokes with cobalt, turquoise is also
completely visible. Now we can start with
painting the wheels. So first I'll start
with mama veil. So with size eight round brush, I'm going to very carefully mark the border like we had done in
prerequisite class. Okay. You do not have to vary. The paper is not wet, but we can still activate the pigments like
how we have done. So make sure to take your time. The paper is already stretched. One's it is it was completely wet and
then it has dried off, so it is stretched
at least one time. So it is okay, you can go ahead and carefully mark the outline with indigo. Retaining the shape
of flukes here. The same mixture. I'm adding cobalt, turquoise, and adding the top
layers are sorry, adding the middle layer. The only difference from our prerequisite class
to here is there is another baby whale that
is there in middle. But since we have practiced
along with the flipper, I think it is almost
similar to it. Now adding more of
cobalt, turquoise, the same mix I'm adding. A small layer above it as well. This will help us create
that radiation that we want. A smooth transition from
very light shade of cobalt, turquoise on top
because that is where our light is coming from on top. So it will be reflecting
off the whale's body. So we want that part of it
to be more lighter in shade. And then as we see down, there is no light
to reflect off. So hence, we see a darker shade and we are depicting that
with help of indigo. I'm applying peacock blue are very light shade here mixed
with cobalt turquoise. Taking some more cobalt turquoise
towards the face of it. Switching my brush to a smaller
size because I've started with the mouth part of it. So it is a bit more
detail, right? I mean, the surface
area is small, so I want to do it with
the smallest size brush, just mixing everywhere. And the same. I'm
coming back heel. Bit of indigo extending get a little bit towards its mouth curvature and
also near the flipper. Now I'm adding a few
additional strokes on the body like we have done. Um, so that when it dries off, we can see some texture or some colorfully happening
on the body of wheel. I'm applying indigo on the fin. Adding some details
here too. It's flukes. With indigo. I'm adding
some lines here and there. This can be completely
different in your painting. You can choose to not
add these extra strokes, or you can choose to
add it in any place. It is completely it
changes to each wheel. So yours can be different. Taking some cobalt turquoise to mix the excess indigo
that is there below. Now I'm switching to my liner brush in order to add the lines
that we usually see. And also the ice part. I will dab it off on my
tissue paper and also try it on the tape so that it
doesn't have more water. It is, it will ruin the
painting with water blooms. The paper is semi dry. Now. You can do this after paper is
completely dry as well. Just so that to make sure
there is no excess water flowing and beans are
not getting disperse. You can also wait till paper is completely dry in
order to make this. Adding those minute lines here. Even on top of flipper. And now to the ice part, just a tiny circular shape. Coming to fence. I'm starting
with cobalt turquoise. That would be my first layer. This is towards the outer part of flipper. There
are two flippers. One that is visible completely
to us and the other one, we can just see the
backside of it. So the backside of lipid
is usually white in color. But since it is underwater, it will reflect though
watercolor and we will paint it with our
watercolor that we have. Okay? So for this flipper, it is going to be more
of different shades of blue as it is in its body. I'm just taking indigo and adding the
border of this vent. So you make sure to add
those rough edges to its flipper fins because that's where we can show
there are there are some muscle actions or
that is going there. I have left some whitespace in the middle part there in order to give some a
natural highlight. Now for the backside
of the second flipper, I'm going to paint indigo
because our underwater here is more of
indigo on the right, so it will be reflecting
off that color itself. So I'm starting off
with indigo on top, and gradually I will mix more water to it
and reduce the tone. Here. Also, I'm adding some cobalt turquoise to
reduce the tone of it. You can just add some more
water and reduce the tone. I'm doing this with a
size four brush only. I'm happy with how
memorial has toned. Now, let's start with the cough. Okay. So again, indigo
first and with the outline, just with one single
stroke, I'm doing this. You can also take your time and get a Deaf
Night border there. Now, painting the flu, soften it with retaining
the V-shape there. That's really important guys. Now, mixing the same indigo with a bit of cobalt turquoise. I'm adding the
second part that is made region of the body. Switching back to
Indigo for top part of it to my flipper. Adding border to the flipper and extending it to the body. Taking more of cobalt
turquoise now and adding it completely on top of the body. So you can see here
also, there is water. There is sunlight or the
rays that are coming on and falling onto
this golf, right? So all those places we need to highlight with a
lighter shade and even keep some places
white in order to show highlights on its body. Creating these
scales on top of it. Adding it this way
creates a 3D effect and we get to see there is
a bulge on the body. Okay? So it will look good. Make sure to make it, make the strokes in a vertical order
perpendicular to the paper. And just make very
small strokes there. Since the wheel is
trying to reach top, we can assume that it is twisted in such an angle that we can see
bulge of its body. And that's how we can show it with the help
of small brush strokes. Adding some random
lines here and there. You can skip this and, or added any other
places as well. It is totally different
to each wheel and cough, so you can do it on your own. Switching back to my liner brush in order to add the lines or the I part of it,
testing it before. And from the mouth. I'm going to drag one straight
line towards the eye. Now to start with
the flippers again. So taking a diluted wash
off cobalt, turquoise, and adding first layer, leaving the white
highlights there. You can see if there is excess water. Make sure to quickly dab it off with the help
of tissue people. And again, for the
second flipper, we were just seeing
the inside part of it. So I'm going to apply a
lighter shade of indigo there. The head both liner brush. I'm adding details
to the flipper. Those codes that depict
their unique fins. You can do this with the help of any smaller sized round
brush with the grid as well. Only thing with
liner brushes are we retains good amount
of paint and water, but we need to make
sure that it is not adding fin to it. With indigo spelled
very small, tiny fan. You can see highlighting I a little bit more here. And some details. Make sure to add these
details as well, because once the
paper dries off, we can always see the
layers in watercolors. So we'll definitely see
those lines that are formed. Memorial is completely dry, so I'll just go ahead and add one more layer of
those lines on there. Because details really add onto the painting and
that is bought makes it more realistic and beautiful when someone
tries to observe it a lot. Adding some more details
hill towards flipper. This point D shower
flippers that they have, adding a border on to it. Finally, I'm happy with
how the half turned out. I had a lot of fun and this is by far my
favorite painting. I hope you were able
to follow and learn a lot of different techniques
along with me in this. Make sure to post your
work in the project and resources section so that we
can all admire your works. For any further queries. Feel free to reach out to me on Instagram or on the
discussions heal. Our next point and
it is going to be exploring Antarctica
along with penguins. I cannot wait to paint
that along with you guys. So see you in the
next continent.
9. Continent 3 Antarctica - prerequisite: Welcome back to the
prerequisite class of one-third continent and article. In this class we're going
to see how to paint Nice cape using just one
small reference of one of the ice sheets with the help of a tissue paper will
create textures and see how to do the wet on wet lifting with
hypoxic tissue paper, as well as layering of the
watercolors and lifting. Again. For that reference, I'm going to draw a rough sketch of one
of the ice sheets. Now adding some texture on
the eyes that we usually see. So I'm just adding some
texture on this ice sheet, assuming it is broken off
a long, long time ago. But still, it would be in a
different structured way, not with a plain, nice cut off the ice sheet. Hence, I have shown some
random grooves here and there. You can have your own designs to it or the cuttings
wherever it goes. It can also keep it to
less number of cuttings if you want and keep a
plain ice sheet as well. So starting off, I'm going to
take cobalt turquoise here. In this prerequisite class. You can try it out with other
different shades as well, like just with indigo or with
any other shade of blue. To understand how it is. Keep a tissue paper ready
because that is very, very important in this class. So here you can see, I've already used
this tissue papers, so it is completely
fine if you'd reuse one of your tissue papers, crumble it in such a
way that it creates a random texture on the
paper and keep it ready. Okay, now I'm going
to start by applying first layer of the paint. Here you can see that I
have not applied water. So it is the paper is dry but
I'm applying paint which is having a lot of water in it. Okay. So before it dries off, just use the tissue and debit. We have to be quick. So you can see it
creates this random. It lifts off the paint
at random places and giving the texture
of a broken ice effect. Now for those second, I'm remember we had drawn the pencil sketch for
some of the groups. So I'm mixing some of the
Indigo and adding onto it just a little bit so that we can see the depth in
that ice or cutting. Drawing the outline
also for my eyes heel. You can mix your
blue with a tint of orange or red as well in order to get a darker
shade of the same blue. Okay, now once I'm
done with this, I'm again going to apply
for second layer of cobalt, turquoise mixing a little bit with viridian or
yellow-green here. And you see going ahead
with the second layer, do not worry if your first layer was completely dry or not. With lifting what we had done with tissue paper,
it would be dry. So I'm just going to apply another layer and
again lifting it off. So here what we are doing
is first layer already created a very
highlight of the paper. And on top of it, I have added one more
layer and lifted it off. So there is some
pigments that are, that is cobalt turquoise from
our first layer as well. So this adds to a lot of effect of the ice structure
that I want here. Now with the liner brush, I'm going to add some random
lines here and there. So what we did is layering of the watercolors so that I can still see the first
layer of cobalt, turquoise even after I
have lifted off the pains. And the second layer, which is having mix
of cobalt, turquoise, and the yellow-green, is
also there at some places. So with the help of lifting
as well as glazing method, I'm going to get a
very beautiful texture and get the effect of the eyes which is cut using the
tissue paper once again, just to smooth out all these harsh edges
that I have created. You can try with multiple layers or stop at the
first layer itself. It is completely your choice. Now coming to the top
layer of the ice coating, it is mostly it will be
shiny white in color. Instead of just
putting it white, I'm going to give a subtle
tone of the sky color, which is, which we might add. So I'm going to add a light
shade of indigo here. Just at random strokes places, not a completely filling up, filling it up with indigo,
just random places. I'm adding this ice so
that when it dries off, we get the effect
of ice being smooth at some places and ice being
curved at some places. Again, this doesn't have
to be same as my painting. It can definitely differ
from mine to yours. Now coming to the
water part of it, I do want to keep it in a very
darker tones of the color. So if you have Payne's gray
or a darker shade of indigo, you can directly
go ahead with it. If you want to try it out with the turquoise color for the C, you can definitely go
ahead with that as well. I'm just giving different
options for you to try. But I'm going to be using
a darker shade that is a mix of indigo and dad, medium red light so that I can get a darker
shade of indigo. In fact. You can
also use Payne's gray if you do not have
cadmium red light. Again, this is not a
wet-on-wet technique, so I'm going to do wet on dry. That is, my paper is
dry and I'm going to apply the pigments directly. Make sure you keep the pigments ready before you
start with this. Lc will have to spend more
time on mixing the pigment and it might start
to get dry quickly. Now, where the place, the place where isis
meeting the sea. I'm just adding some texture
here and there because we can definitely see some cuts happening in the eyes, right? It can, it may not be
playing straight line. So I'm adding some textures. You're in there with help
of the brush itself. Now, assuming it is already having ice layer on top of it, I'm going to show
you how to create a broken eyes effect
with a liner brush. I'm taking some water
onto it and running it across the paint when
it is still wet. Okay. So since it's a liner brush, it is having less
amount of water and in the straight line it
is coming across beautifully. You can see in this way, I also get a feeling
of the rivers layer of ice or layer and it is
broken at some places. Hands giving this effect. You can choose to stop before adding this if you feel the pressure using is
not suited for it. But I would definitely
recommend a try with any round brush
that you have with the smaller size and
taking less number of, taking less amount
of water in it. Here we can stop and call it
the painting is complete. But I'm going to add something to the sky part here just to get an understanding before
my final class project of how the colors are
combining with each other, I get a sense of it. So I'm going to add
background here for a distant mountain or a sky. So let's see how that goes. For this. I'm applying water
on that only on that part of the people. This is going to be a wet on
wet and I'm just dropping some distinct maybe
ice structures already stained mountain
here and there. Okay, This colors a
bit too blue for it. So I'm going to
add the mixture of indigo and cadmium red
light again in the back. Do not worry if you have
also dropped a lot of paint. I'm going to show how to
correct it in a while. But I'm just adding, dropping the pigments
here and there, just to give a sense of something is there
in the background. So I'm digging that
tissue and removing it. Again. This is because I felt it might it might be
darker in sheets, so before it is completely dry, I'm going to lift off. So here you can see there is
a sense of some elements in the background without
being our center focus. So this is about a
prerequisite class. Let's paint a
beautiful I escaped seen in our class project.
10. Continent 3 - Exploring the icescapes: Welcome back to avert
third continent. And today we are going to paint a nice Keep along
with the penguins. And Antarctica is
required for this class are I have deep down the paper like shown
in the paper prep class. So I'm going to
draw a rough sketch of our seascape, or I escape. So I'm going to draw a line, almost half of the people. This will be our first
eyes avert it is meeting the sea ice sheet and that we also tried in our
prerequisite class. And this is the top
part of the ice. Okay? This is some distant mountains or snow field mountains at far. So just drawing a rough
outline for that too. I'm going to add one more. Iceberg Hill are very tiny one. So going to retain the
triangular structure for it. This is another ice
layer or the ice sheet. And we will be having a penguin
standing on top of this, just looking towards
the other side. Okay? Since penguin is not the major, whatever focal point here, I'm not going to
spend much time on its details just trying to
get the structure right. Once my sketch is ready, I'm going to take
my kneaded eraser and just run it
across my painting. This entire painting is going to be done on the dry paper. So I'm not applying
water anywhere yet. We will apply water only to
the places that is required. I'm starting from sky here, so only for that part, I'm going to apply water. Taking a brush and
evening out the water. I'm going to use moon glow here. This is a granulating pigment, adding little bit of indigo to it so that I can
get a darker shade. And applying here
with the strokes. This is to show if there are some clouds structure
available in there. But you can see I'm
leaving a lot of whitespace in between
and just dabbing my brush across so that we can give the essence of
clouds or sky over there. If you do not have this
granulating pigment, you can always just use any
shade of darker violet or just indigo and or
pines gray as well. Now to start with the distend or the
background mountains, I'm going to take Blackstone genuine and mix it with the
same mixture that I had. Adding some more indigo to it. I'm going to add the
existing Bordeaux with this entire mixture. Randomly adding some texture onto the mountains
here and there. This is one of the other
mountain endings that I have. I'm just going to apply onto
the top part or the peak of the mountains so that
the bottom part of it, I want to depict this. It is covered with snow. Okay. So only the peak of it or the
top part of the mountains. I'm adding this sheet. If you do not have
Gladstone genuine, you can also use a brown, any shades of brown
or CPR as well. Now, I want to add texture
onto these mountains. I'm going to do a
dry brush technique. So removing excess of water on the tissue paper
and try and get on my masking tape here. This looks good. So now I'll go
ahead and added at some random places just to
add that additional texture. Once it is done, I'm going
to use my spray bottle and add some spray, some water there so that
it so that the pigments flow along with the water and do not form harsh
edges at some places. You can skip this step if you do not have a spray
bottle or you can also drop some water droplets here and there in the
mountain region as well. Now with a very light
shade of the same mix, I'm going to cover the
entire part of the mountain, leaving some
highlights, of course, for the highlights that is
bouncing off of the snow. Now to start with the ice sheet, I'm going to apply
some water here. Make sure to not
apply water wet. The tip of our other iceberg
is just for our first one, which is at the back. In a scene. I'm going to apply water. Now, taking some turquoise, cobalt turquoise and
adding the first layer. Similar to how we had done
in prerequisite class. I'm taking wet on wet route here because this is a bit
behind in our painting. So it's in the background when compared to two
off over icebergs. So I do not want to have a
very harsh edges on this. I'm doing a
wet-on-wet technique, but I would still be lifting off or how I showed with
the help of tissue paper. Adding some pink or
blue to the same mix and applying it here and there. To add some depth to the eyes. To the same mix. I'm adding some indigo and applying
it here and there. As you can see, it's
completely random. So you can also have random
structures here and there. Now I'm taking a tissue
and dabbing it off. So this is my first layer. Now keeping the mics ready. Adding peacock blue
into it to the cobalt, turquoise max, and starting
off with my second layer. So in this, wherever I want to show there are
some cracks in the eyes or those are the structures
in the eyes that is created. I'm going to show
it with this color. I did some random lines here and they're not straight lines, but some zigzag lines
here and there. Taking some indigo to
the same and adding it on top of the lines
that I have added. This is to add some more depth onto it
because at some places that it can be a bit more deeper, the cuts can be more deeper. I just wanted to pick that here. Now for lifting off
of the second layer, I'm just applying the
paint before it dries off, lifting again with the
type of tissue paper. Make sure to crumble
your tissue paper in such a way like I had shown
in prerequisite class. Because that would give
it very unique structure. And it helps us to
achieve that effect. Now to start off
with the iceberg, which is near to us. Again, applying some water here. And you can see it's very less amount of
water that I'm applying. You can also follow
how we had done in prerequisite class without
applying water at all. So here you can see how I got a very beautiful
texture here and there. So I will work along
with it and just add some highlights with
the darker shade here. And they're retaining
the white highlights that was created
with tissue paper. Adding some more depth
through it using indigo. Again, lifting it off
with a tissue paper. Here I didn't apply
second layer of paint and just lifted it off after adding
the details itself. Okay. There is also similar breaking
off the eyes in this part. So it is having same tonal values of the
turquoise that I'm using. So going to add this, follow the same process here. I first layer dab off with tissue paper and add
some texture here and there. And again, I'm dabbing off. So you can see just
by adding this, we're getting the illusion
of the eyes has been cut off at that place and wherever I'm using
cobalt turquoise. So we want to get that effect. You can either stop
at some places, alright, wherever you want. Now, I'm taking some
peacock blue and adding the strokes on my foreground iceberg before adding indigo onto
it completely. Because I do want to show a
bright shiny structure on, on it, rather than just painting it complete indigo color
or a darker color. Now, I'm filling it with indigo color with a very
light shade of indigo, a lot of water and
light shade of indigo. Just adding it so that we can get the illusion of the
coating of the eyes on it. Make sure to leave some
white spaces there because it will not
be very even gray. It will become 2D if you put the entire book with
the indigo color. So it is just some places here and there because
there will be shiny, they will be matte surface. So wherever I want
the mat effect, I'm putting indigo and
wherever I want shiny, I'm leaving the paper as it is. So I'm using a
synthetic brush here to add some dry brush technique. So taking some pigments, taking peacock blue here, dabbing off excess of
water onto tissue paper and running it across the river. I already have the
peacock blue pigment on my papers so that I
can create the effect. Doing same with indigo as well. And I'm doing it only
at random places and limited restricting to
some of the places. Only. Okay, so this part
of it is complete. So now I'm going to go
back to the mountains. I'm going to take some
more of Blackstone genuine and going
to continue with the dry brush strokes
that I'm putting. Synthetic brush works really well for dry brush technique. You can use any of the
synthetic brush or even the liner brush
for that matter. In order to add this
dry brush strokes, make sure there is very less water in your
brush when doing this. You can test it out
by dabbing it on the tissue paper as
well as trying it on any rough paper or
on the masking tape. You can see this guy is
very beautifully dried up. And we can see the
granulating pigment there. Now coming back to the top
layer of the ice sheet, I'm just going to add
some water onto it. First layer, I'm going to
apply it cobalt turquoise, a very light shade. And then I'm going to mix the existing mix of Blackstone genuine and
just adding it here. This is completely optional. You can only use indigo here. I'm applying this
because it is nearer to our Audi Mountain,
which is their back. So I wanted to retain some of the same shapes that I've
used for the mountain. Now I'm taking indigo and
just adding the last layer. Now to start with
the C part of it, I'm going to use the
same sheet that is mix of indigo and cadmium red light. I'm going to take
indigo dark shade and I'm going to
apply wet-on-dry. That is my paper is currently
you can see that it is dry, but the paint is having motor. So I'm going to apply
making sure that it is not going into the penguin. Oops, okay, it's
already it went, but we can fix it
later on. If you want. You can also apply masking
fluid onto the penguin. But I didn't want to do that as it is not a wet-on-wet technique that
I'm going to do here. So. As you can see, it was not
a wet-on-wet techniques. So the paper is getting
dry really fast and you can see the harsh edges
getting formed easily. So I would recommend if you're not following
along with me, I would really recommend for you to have a wet-on-wet
technique for this. But I will still
show how to fix it. How I'm going to fix it in
by using layering technique. Okay? So now what
I'm going to do is I'm going to lift off some of the paints here with
help of my flat brush. This is to show a reflection of this iceberg
which is near to us. Okay. So this you can do
when the paint is still wet. Even after it is dry, you can apply water onto
it and lift it off. Now, I'm going to
apply peacock blue here because it's a really
good staining color. So I want that color to stick. Hence, I'm applying this and not applying cobalt, turquoise. Okay. So you can clearly see, I didn't use
wet-on-wet technique and currently it looks
a bit messed up. So I'm going to
show how to fix it. Make sure you have good amount
of mixed ready of indigo. And again, start from
the board from the top. If possible, avoid
adding the color on the outline off penguin. Here, I'm making
short note added where its eyes and the beak is. Okay. And applying some water so that it doesn't dry off soon. But if you're following
wet-on-wet for the same, you need not follow
the same steps. Again. Already. You are
covered and you can just go ahead and wait till the
pain completely dries off so that we can
start painting penguin. So I'm again going to
apply some paint here. If you're falling, return wet. This is how you
can just directly add the paint when you're first applying indigo and that should
be completely sufficient. Now with indigo,
I'm going to add a straight line starting the meeting point
of the iceberg. Just showed that we can see
that is a reflection of it. And here, now I'm adding some leaves or not
exactly waves, but there will be some
ripples created on water. So I'm trying to add it with the type of brush
strokes itself. So adding that
uneven outline here for the iceberg mates the
sea so that there is no Straight line onto it. Now, I feel the penguin was
not entirely necessary here. But since we have the border
or the outline available, I'm still going to show how to lift off the paint and
still have a penguin here. I'm going to lift
off only at one of its borders because this is where we need to show white
part of the, our penguin. With the damp brush, lift the paint off. So this is the mix of indigo
and cadmium red light. I had already created a mix and kept so I'm just
taking it out here. And I'm going to wait until, this is the outline
for my penguin. Now, I'm just going to wait till it is completely
dry so that I can come back and
add details onto penguin until it dries. Let me paint this
our foreground ice. Okay, so I'm just going
to apply some water and add the strokes of indigo
so that once it dries, we have a good visual effect
of the ice layer here. This is definitely one of the Moody see
escapes. I can say. You can see now it's
completely dried and it has dried two to three
shades lighter, right? So now I can start with
painting of my penguin. I would still recommend
for you to use the mix of indigo and cadmium
red light here. Because using gv Black
might reduce the or, or make your painting look dull. Adding its flipper hill. This is nothing but its wings. Since it is modified into
a paddle like structure, it's called a flipper. So adding both of
its flipper here with the same shade, you can add a darker
tone here and there, like the neck part or
some places just to show that and not have even
seen color everywhere. Now adding the outline
onto it so you can see the lifting what we had done with the brush initially that
worked well for us. And we are getting a white we are getting that white
body that we needed here. Now, I'll take cadmium red
light and I'm adding its beak. The final part is
just the details. She fixing the shape of its eye. Okay, I'm good with
the penguin now. Now with white gouache, I'm just adding some
details are that is here. If we want to show fresh snow, it will be in form
of crystals itself. I'm just adding that an even layer of this
eyes so that it seems like there is some melting snow or fresh snow on
on this ice layer. If there are any highlights
missing with white, I'm just going to enhance
it with white gouache. And going to add some reflection for those
ripples that we added here. Okay, we are done
with this painting. So this was our Exploring of Antarctica along
with penguins. In our next lesson, we are going to explore
our next continent, which is South America. We're going to explore
the beautiful, majestic surfing wave. Because painting a wave
is pretty generic when it comes to learning any seascape. So I wanted to cover
one of the topics. So see you in the
next continent.
11. Continent 4 South America - prerequisite: Welcome back to the prerequisite
class for South America. In this class, I'm going to
show how to paint any wave. This is the simple random value that I have taken as reference. So we're just going to practice
some brush strokes here. It's going to be
wet-on-wet technique. So I'm going to apply
water onto my paper. Main things to focus on this
while you're painting is the brushstrokes and after
once they are painting dries, observe how it has
turned out and how you can see the
strokes on the paper. Okay. So I'm mixing some indigo with peacock blue for the background of the wave. So this is not the wave part, but the other C which
is behind the wave. It's a freehand painting, but you can definitely draw a rough sketch of
your wave if you want. Now, I'm going to take a
lighter shade of blue here. In this case it is
cobalt turquoise. And start from one side of the wave and then expand
the same till the end. You can see that I have kept a common focal point where all the wave kind of converges. So having difference
in that line, what makes it easier
for us to define the, to define the wave. Here I'm taking mixing
some peacock blue to the same blue and
adding on top of it. Making sure to leave some
whitespace on top so that it can be
deformed part of it. And I'm just
applying some urine. They're now taking
a darker shade and just adding the
front part of oversee. That is where the wave
is meeting the sea. The end of the paper, it's going to be more of indigo. Now you can see it's
a little bit 2D. So in order to add some
more effect to it, I'm going to take indigo mix that we have right now and add some strokes in the direction of where our wave is flowing. This is most important
because this will define the wave shape here for
you once it dries off. So make sure to add this in a particular direction are the same strokes for the
entire length of the wave. This is just a practice or the
prerequisite class, right? So you do not have to worry about how perfect
it is turned out. It is just to practice how
ideally it should be there. Okay? I'm happy with how this
wave currently is there. I'm going to add
some highlights with white gouache when the
paper is still wet onetime. And once it is dry, I'm going to come back and add more highlights with white. Okay? So here the wave
is converging back, that is falling down. So I'm just adding some. And whenever that is happening, there will be a lot of foam
created along with it. So I'm just adding
it with whitewash. If your paint is
running on the paper, make sure to wait for
some time until it is semi dry before
adding white wash. Okay? Just adding random. Adding more highlight,
adding more depth to the part where
viva is converging. Now I'm going to splatter a
good amount of white gouache onto the place where it is converging or in
fact entire of the wave, wherever you want you can
splatter this whitewash. We can also use a toothbrush
if you are familiar with the technique for
applying this platter. Here, first, I'm going
to add some water to my brush and then take
whitewash and then splatter it. Now the paper is a bit dry. So I'm going to
add deformed part again with just whitewash here. Make sure you do not add
straight lines over here. They should be in, again, somewhat similar to the angle of the direction where
your wave is going. Okay? So here you can see it is inclined at about 30 degrees. And I'm going to keep the same for the entire off
right part of my paper. And in the left part, they are still a bit horizontal, so I'm going to still
retain the same. So this flow helps us give a very good visual
representation of how the wave is forming. From my left side, it is a bit horizontal and as long as it is
coming towards the right, it is going to be about the sea and it is
then converging back. Adding some highlights
with white gouache here. Wherever I feel like the
wave is coming back. You can call it as an outline
itself with white gouache. Here. When I'm
adding white gosh, I'm going to keep it
in an angle for half of the indigo where
I've applied. That is because they may, maybe there is another
set of V which is coming. Maybe if I had
people write to it, there is another such wave that is coming and it is still in the same angle off the last wave which
I have here, right? So it is not completely
straightened out. Hence, I'm still
going to add the form in this 30 degree angle so that it gives us the continuation of the endless waves
that comes in ocean. With a liner brush,
I'm going to add some minute form that gets created or the water droplets that gets created on the wave. You can see that the background water had
applied with indigo. It has created some
watercolor blooms. That is, the water has dried out coming back
onto the pigments. And so we're getting
that effect. Since it's a practice class, I'm not bothering much about it. But if you want, you can
still fix it by adding another layer of
indigo at that place. If the same has happened
to your people as well. All these white highlights or the form that we are
adding is completely optional as well as it depends on wherever you
want to add in your painting. It need not be the same
places as my painting at all. Just go crazy with
your imagination and add the highlights
wherever you feel you want to add mixture in
some places you are following the same direction of the wave in which the wave
is initially going. That's the only thing you
need to be careful about. But other than that, you
can add any amount of whitewash on your waves. Here you can observe that the initial layer of cobalt
turquoise that we added is still giving a
very good effect on the part where the wave is
converging back, right? So this layering helps a lot. Not just leaving it at white or the blank
of the people of, but adding one more
depth of color to it. Still retaining the transparency
of our watercolors and giving us the effect of there is a transparent layer
of water getting formed. If you feel that currently I'm painting with a bit
of a high-speed. You can always adjust the speed of the video from settings. You can increase or even
decrease the speed. Adding some more splatters here. Because when painting a wave, you can really add as much
as white splatters you want. Now with the same liner brush, I'm going to add some depth along with darker
shades of blue on the wave. We need to show some depth, width though background of it, because there is also a
wave behind it, right? That's the reason I'm
adding some border here at some random places and some more splatters. You can also cover
the other places of your paper with rough
paper before splashing. So this is all about
our prerequisite laws. Meet you in the class
project where we are going to pay them
logistics or Phoebe.
12. Continent 4 - Majestic surfing wave: Welcome back. And in today's
class we are painting imagistic surfing wave
from South America. Colors required for
this class are. Here. I have taped
down the paper, and this is the paper
that we had stretched. That is in paper prep class. There was a second
sheet where we had applied water
on both the sides of paper and left it to
dry for about a day. So this is that paper and I
have still taped it down. This is not a mandatory step, but definitely it
enhances the paper and allows the paper to be holding water for a
longer duration of time. And I just wanted to see
and show you how beautiful it comes out when we do
this stretching technique. Now, I'm drawing a basic
outline for the wave. You can take any
wave as reference, which is having a
curvature in it. So this becomes the
top part of my wave and this is where it is
curving towards the sea. And in this direction is
how the wave is bulging. Now the type of a
kneadable eraser, I'm just removing excess
of graphite from my paper. This would be a
wet-on-wet projects. So I'm going to apply water
using my spray bottle. You can apply water on
the entire surface of paper using a brush as well. I'm evening out the water
that I have sprayed. Now, I start from
top of the paper. I'm going to take some
peacock blue and royal blue. Royal blue is completely
optional here. I'm also mixing some
indigo into the mix. You can just go
ahead with the mix of peacock blue and indigo. The main purpose of taking royal blue here is because it's an opaque color and adds on to a very creamy texture.
When I'm painting. I'll start with the
top part of the paper, just making sure that
there is enough water before I start
applying the paints. This portion would be the
background for the wave. That is, it is in the back. There may be some slight
waves here and there. So I'm trying to show that here. Do we have to fill this color entirely on top of
topside of the people. Leave some spaces here and
there and make sure you're not filling the entire
sheet with just one sheet. So approaching it with this
type of strokes helps us get different variations in the
pigments when it dries off. We also get a beautiful
effect of something wobbling in the back or
a wave kind of effect. Now with a smaller round brush, I'm going to apply the
strokes for the wave outline. Basically, when the
paper is still wet, take pigments with
less amount of water in it and apply
randomly here and there. These are straight
strokes that I'm going to apply so that once it dries off, it will dry with a
shade lighter or so. And it will be easier
for me to depict that. It's a wave forming in the back. Continuing with some
strokes here and there. Make sure they're all
in the same direction. Because when wind is blowing, I'm assuming it's just one
side, one-sided video. So all the wave points will
be at single direction, okay, so whichever
direction you choose, stick to it and create the strokes in
that direction itself. Not to start with a very wave. I'm first going to
apply a very thin and sad tell Bosch on the
top side of the V wave, falling the pencil sketch
that we have done. I'm making sure to leave a
small outline with white so that when I'm adding the water droplets or
highlights with white, it adds up to it. So you can see that
my paper is almost dry on the bottom side of paper. So I'm going to apply
water and re-wet the entire surface. Just though. I'd not have pigments yet. Now, when applying the wave, I will make sure to have the brush movement along the direction or the shape
of the wave that I want. So it is going to
form multiple of C type of structures
along the wave, how we had done in
prerequisite class. So this is the place where
it would be lightest. I would say, where
there is a curve formed and this is the backside of that garbage is visible for us. So it is a very
transparent layer of seawater that is
getting formed here. Mixing some peacock blue,
turquoise, cobalt turquoise. And I'm starting off with
our bottom of the paper. Here. From here is where the
wave is actually converging. Okay? So this would be near to see color or the
ocean color that we want. So you can go ahead and apply darker shades are the darker
tones of your mix here. Okay, Now for the middle part, I'm diluting the
pigments a bit more. That is adding more water to
the mix and taking it up. Okay. Now to the part where this is the back of our V, where it is actually converging. There is a very good
transparent layer of water that I can see. This portion of the wave
is the top portion where it is actually converging
and forming that curve. It is mostly going
to maybe spill into form or it's
coming back to the c. So this color can be a bit
medium tone. I would say. I like to work with minimum
amount of white in my wave, and hence am trying to get different shades
and tonal values. But you can stop there and just retain the white highlight
of the people as the form. Now for sea foam
or the wave form, I'm going to take a mixture
of cadmium red light, mix it with cobalt, turquoise. And a little bit of indigo. This gives color which
is near to Payne's gray or a darker shade of
indigo mix that we have, we have already used in
our previous classes. Right? With that,
I'm going to add some random structures
here and they're depicting that
there is a sea foam getting formed on the
top part of the wave. So how my brush is
and how it is moving. You can do this with any of the round brushes
that you have, or even a flat
brush if you have. Before the wave
completely dries off, I'm making sure to retain some brushstrokes
with the direction. In fact, I'm defining
the direction of the wave with help of
this brush strokes. So as I go from down the
middle part of the people, it is in one direction and in the middle it is
completely in C, kind of a structure. In all this. There is not much
water in my brush and it is not too dry
off the pigment as well. Taking some more dark shade
by mixing cadmium red light with indigo and peacock blue,
sorry, cobalt, turquoise. Just for the bottom part. Now, I'm taking a darker
shade of the mix of cadmium red light and indigo
and cobalt turquoise. I'm going to reapply on my phone before it
completely dries. So this we're trying to
add multiple layers with the same pigments so
that when it dries off, we get a beautiful depth and
structure to our painting. Make sure to add format as
well in just one direction. If you are bringing it from
the backside of the wave, makes sure there is a curve or a C structure mentioned there, because it is curving
in that direction. Again, you can totally
skip this step and add all these highlights
with white gouache itself. It is completely optional, making sure that it is dropping and some of them as getting
merged back to the wave. Like it usually happens. Adding some droplets
here in there. Controlling the water flow
here is really important. If you have too much
water in the paints, it will spread back to your color of the wave and it might create
watercolor blooms. So if you feel that there
is too much water mixture always to use a tissue
paper because it can, we can afford to have
a dry brush strokes on our wave rather than having watercolor blooms in
middle of the wave. So make sure to use
the tissue paper to remove excess of water. And then you can proceed with
adding these structures. Now I have started
to define our wave. That is, there should be a difference from our
backgrounds D and the wave, which is actually over object. So I'm just leaving the
small white outline behind and trying to add
this structure to it. This is also part of my beef, probably coming from the side. So I'll add a form to it with
the same mix that we have. Adding some color in the
back in the effort of bringing the wave in our
frontend more clearly. Now I'm taking some white
gouache onto my palette. Having a fresh squeezed off
the paint really helps. Taking some gosh in my synthetic brush and
I'm starting to apply it. Wherever on the phone. This is completely
random and it can differ a lot from your
painting to mind. Remember how we had done
in the prerequisite class. We have to add the same
form that is getting created in the bottom
part of the leaf. Before adding a
completely white. Before, I will start
by mixing bite with cobalt turquoise and adding a layer on it so that
when it dries off, we get two different shades
on the form as well. One is white and one
is a bit of white. And with the same color
tones of our wave. Makes sure to apply white foam as well in the same direction in which you had added
the wave strokes. In the bottom part, it was all going in this 30 degree angle. So I'm retaining that. If I'm applying the same form
in middle part of the wave, which is in C, a structure. Hey, make sure to add it
in that direction itself. This also gives a very cool dry brush technique with water just being spread across
unevenly in form of the form. Now it's time for
these platters. You can use your favorite
method of using a toothbrush or using just a round brush
for adding splatters. Even splatters can be very well. You want to add, it is
completely your choice. Ideally, if we were trying
to paint a realistic wave, the form color would also be similar to what we have added in the the mix of
cadmium red light, indigo, that gray shade. But since we just want to give the effect of
form being created, I'm going to go ahead
with quash here. You can also apply masking fluid at those places
and then later on, come back, remove the masking fluid and add the
same mix there. Now for the final touches, I'm adding some white gouache on the highlights are tip off the waves to give
the illusion of water being reflected
off at certain angles. Of our first layer
of Homer's dry. So I'm going to go ahead
take a good amount of white gouache and just apply some highlights
here and there. It is really difficult to
decide when to stop when working with white gouache
and applying it on water. So just go with the
flow and you can stop when you feel
like it is complete. For splattering of white. I do have a lesson covered
in Milky Way challenge. So you can go through
that lesson to understand how you
can better splattered these white gouache if you do not know how
to splatter with just one brush and finger? I'm still using a liner brush for splatters because it gives me that minute droplets
that are required. So that's why I'm
adding with them. Okay, so this looks good. I'm really happy how the wave have turned out and I really hope you're enjoying the series and the voyage along with me. Make sure to post your work in the project section
so that you can all see an admired your work and see you in the next
continent where we'll be going to one of the sunny
beaches and California.
13. Continent 5 - Sunny day at golden gate bridge: Welcome back to voyage
around the world. And today we are in our
fifth continent, right? And this is not America. We're going to paint
this memorable scene from Golden Gate
Bridge seashore. The colors required for
this class project are, I go ahead and put it into
two speed while I draw. If you want, you can
always alter the speed of this class by going to settings. If you're planning
to trace out from the reference image
that is shared in Project and
Resources section. You can trace out the
entire drawing and then, and then apply masking
tape on all the sides. But here I'm going to just
do a freehand drawing, a very basic one. It is going to be
time-consuming if you're trying to sketch it out. I'm not that good
with the drawing. Hence, I will not be
sharing any tips here. But definitely you can
trace it out by keeping your people on top of your
laptop or system screen. But really helps to get a very rough image
of your reference. Here. My sketch is ready. And I'm going to start painting. And it is going to be a
wet-on-wet technique. So let me apply water
onto the paper. I'm using a spray bottle here, but you are free to
use just brush and water directly from your Tumblr. Okay, I have applied water. Now. I'll take my bright blue
or intense blue for Sky. I have taken the mix
of intense blue here. And starting from this side, you can use any other
bright shade of blue in a very diluted consistency
for your sky as well. Doing to revert the pupil
to avoid some harsh edges. And now what I will be
doing is I will let the paint flow on my water, what is already
there on the people. This will ensure for a
very smooth gradient. And since this color
is highly staining, even when it dries off, I will get a very good, vibrant shade that
I'm looking for. So I'm just going to add
the colors and let it flow. Taking some very light
shade of indigo, just I would say indigo and
lots and lots of water. And applying it here. Okay, turning it around so you
can see how beautifully it flows and we can continue this. Okay, I'm good with that. So now to get started with distinct mountains
which are there, I'm going to take
some raw sienna and start applying it in the bag. I want to retain a very good
read on Golden Gate Bridge, so I'm trying to avoid
painting on top of it. Mixing some greenish amber to burnt sienna and continuing. I'm having a tissue ready to remove water if it is flowing inside the boundary of
Golden Gate Bridge. Adding multiple different shades and strokes here so that we can see some texture forming
around the mountains. Now I get started with
painting over c here, because it's a bright day. I'm going to use brighter
shades for the sea as well and make sure to add reflection of the
Golden Gate Bridge. Once the paper is still wet. So I'm going to revert
the people making sure the water doesn't go back
to our mountains part. I'll start with taking cobalt, turquoise for C and applying
a light wash everywhere. Adding some peacock
blue to the mix and adding depth to the scene. Just fit some strokes
here and there. Adding paler green to do
same mix of peacock blue. And also giving shade off. Okay, before it dries off, I'm going to mix
indigo with cobalt, turquoise for our shadow part. And I'm just going
to add it Hill. We can also see there is some, you can also see the reflection of the Golden Gate Bridge here. So I'm just going to add it now with a darker
shade mix of viridian, peacock blue and
cobalt, turquoise. I'm going to add some strokes so that they are
visible like waves. Once it is dry it off. Mixing some indigo
to the same and adding it at the
corner of the paper. The liner brush. I'm
adding some strokes so that we can get the visual
effect of waves over there. I'm lifting off
some of the paint where we want to add there. We want to add the rocks
part and the waves part. You can skip this step and also use white gouache in the end. I'm taking some sepia here and adding it for the rocks part. You can also use Payne's gray
if you do not have sepia. Now, I'm going to take some
raw sienna and apply it here. Once the paper is dry here, welcome back to the
base of the bridge. You can spend enough
time here and make it completely perfect. Or I'm going to just add some structures here so that
we feel like it is the base. And I will not work
on too many details. Adding some bright pink or opera pink and permanent red here. This makes, would
give the orange, exact orange color or the
shape that I'm looking for. Painting the bridge. I start by adding the straight
line for the bridge here. You can also paint this using
a flat brush if you have. I wanted to show how to paint it also with
the round brush. So hence, I'm trying out here. If you feel that the straight line is
not easy to attempt, you can put masking
tape once the paper is completely dry
and painted here. I'm just going to turn
it around so that I have easy access to it. Yes, this looks better. I'm going to increase the
speed of this by two times. You can come back and adjust
the speed in Settings below. Now, I'll make some indigo to the same color and add it to the other side of the bridge so that we get the 3D look
that is usually there. It is just 2D with one sheet. We do have to show
the shadow part and the 3D cuboid structure. So I'm going to add indigo
for the same color and add it with the same shade. I'm adding the back of
the bridge because it is further behind and the shade will be a color
darker to what it is. They're from our foreground. Now for the road part, I'm directly going to mix the same shade with
indigo and use it here. Now very carefully, I'm adding
the connector lines here. It does have a very
specific goal, So I'm just worried that
it should not be ruined. If you want, you can do
this with the help of a sketch pen as well with the red sketch pen, oil red pen. I'm going to attempt it
with one swift motion here. Yeah. Did you see me trying to practice before the week
the way the hand goes? I would highly recommend
you also to do that. So that in the first try, we might not get the
exact curve that we want. So it's better to practice
at least in the air sometimes so that our breast
movement is recorded. And then you can opt into it. I'll take a small
liner brush off size one to add all the
suspension cables here. Okay, though straight
cable ones that are coming from the major
suspension cables here. So before you do this, I would highly recommend, again to practice
drawing the lines. If you're not
comfortable with it. You can just add
these lines with the help of a black
pen and a scale. You do not have to add the
lines through the brush. I'm going to rotate my papers to the VM comfortable with for
adding these lines. Adding some details on the road. These are mainly the lights
that are coming the road. Adding final touches to
the base of the bridge. Here I'm using
against here now with little bit of indigo to it. Seems like I have missed this small part here
while painting. So let me go ahead and
she'll have to fix it. If this issue has not
happened with you, you can totally skip this step. I'm taking some pigments
that is makes off greenish, amber and raw sienna. And adding it here where
there is whitespaces. Make sure to have
very less water in your brush if you're feeling such small spaces to avoid
watercolor blooms or water, ruining your existing painting. If you feel like
there is more water, use a tissue paper and lift
the water off immediately. Adding some final base here
for the heel using indigo. Finally, with white quash, I'm adding small boat here, adding a touch of indigo on it in order to
show some shadows. And the boat is
completely in indigo. Okay, this seems good for me. So here we have completed our scenic view
from North America, sealing the next continent.
14. Continent 6 Europe - prerequisite: Welcome back to the
prerequisite class of Europe. Here we will be painting a
small boat immense of ocean. Here. I'm also going to create
some effects using salt. So make sure you
keep that ready. I'm going to just create a small rough sketch off the boat. This one line here
and two curved lines. This is going to
be an aerial view. So this is sufficient
if you just have this basic
structure in place. When we are adding
detail to it, that time, we will make sure to add some
3D detail into it, okay. Now, I will not be adding
water onto that part of the paper so that I
can retain white. So that I can read in the
whiteness of the paper here. Okay, this is one of the ways in our main class project we are
going to use masking fluid. You can go ahead and use masking fluid here as well if
you are comfortable. But I wanted to give both
the options to paint this. Okay. This is going
to be a wet-on-wet, so make sure to apply NFO photo. Now I'm taking some cobalt, turquoise mixed with yellow, blue and starting to apply here. It creates an amazing sheet and it ran elites as well
once it is completely dry. So at one part of the paper, I'm also applying little
bit more of the low blue, sorry, little bit more
of Taylor Greene. And to the other side. I'm just adding some mix. You can use any blue shade
here for your project. Okay? So once I'm
done with this, I'm going to splatter some I'm going to
splatter some paint here. The main reason for this
is to depict there are some underground rocks and
their shadows forming. Okay, so for that, I'm going to mix
indigo with cobalt, turquoise and take
good amount of water in my brush and start
with the splattering. Make sure to cover your boat so that water so that I was
plateaus do not go in there. Now I'll also add the reflection of this once
the paper is still wet. So here I'm going to take the
same mix and adding shadow. It is completely okay if
the shadow is merging with the background because
that is what we want. It won't be, you know, sharp edges in the shadow. So that's why we are adding
it in the paper is still wet. Now onto this, I'm going to
add some salt. Just drop it. Urine. They're
variable randomly on your people are where
the rocks are created. Now with the
concentrated indigo, I'm going to splatter again. The previous platter
that we did works like the shadow of it. And these platters
will be working like our actual
rocks underwater. So there are some
splatters that went in. I'm going to lift it away with the help of a tissue paper. Okay. It looks like
they're going to stain. Nobody's let's see
how we can cover it. Okay. Let it dry for some time and then let's come back
to paint over boot. Now this is completely dry. You can see that stalled has created this beautiful
and amazing structure. And I'm going to remove all that salt using
another brush. Since we have used
just one layer of watercolor and on top of
it we have added the salt. We can see this structure
is getting created. If you had applied
a darker shade of color and two or three
layers of watercolor, the effect that you
get will be different. Okay, so if you're wondering why yours is not same as mine, That's mainly because
of the different colors or different layers of paint
that you have applied. I'm going to take some
cadmium red light and start with painting the boat, adding the tip and
the back heel, and then to Cedars, cedar planks for rowing. Okay. Now I have added though
top border for it. And I'm going to mix
the same color with a little bit of indigo to get a darker shade of
cadmium red light. And with that color,
I'm going to add the bottom part of the boat. Now, in order to
show some shadow on the boat that is getting
created with some object. I'm going to mix more of indigo to it and then add it here. Again, make sure to look out
for where your shadow is. So here my shadow is at
the right side, right? That's why I'm adding
shadows here as well. You cannot be adding
shadow on both sides of the boat depending on where
you have added your shadow, you will have to mark this. Now adding some lines with it. Using a liner brush. I will add details. Using white gouache to
add some rope structures. Heel. This looks pretty good. So see you in our class
project where we'll be painting beautiful
images and Europe.
15. Continent 6 - Yatch ride in Europe: Welcome back to
our six continents and today we are going to paint a beautiful yard on the
turquoise water in Europe. Colors required for
this class are, okay. I have taped down the paper here as shown in the
paper prep class. I have squeezed out all
the paints as well. I'm also keeping
one empty pan which would help me to
apply masking fluid. I would be taking
some supporters into this full pan and using it while applying
the masking fluid. Okay. I saw two boats here on the people. I have sped up the
process so you can adjust the settings of the speed from
fitting the option below. Now using the kneadable eraser, I'm going to remove excess of graphite and start
with the painting. So the trick for adding a
masking fluid here is use an old brush which
is almost miss. You are not using
usually depicting two, so border and then take masking fluid
with the same brush. This makes it easier to
remove masking fluid or the excess off masking fluid that is left out after the application. Okay. So I'm using a CAM Lynn synthetic brush here for applying so that I have not by mistake also affect
any of my other brushes. Once the masking fluid
is applied completely, make sure to leave it to dry and then only come
back for painting. So it took me about 1 h
to completely dry off. I didn't want to
apply water before it dries as it might
buckle up a lot. Okay. Now it is completely dry, so let me start by adding
water onto the paper. I'm using a spray bottle
here for application, you can just use any other
brush that you have. Using a brush, I am evening out the water that
I have applied. As this is going to be
a wet-on-wet technique, we need to make sure that the
paper retains lot of water. Now to get started with, I'm taking cobalt turquoise
as the first layer here. Adding masking fluid is
completely an optional step. You can also paint the boats how we have tried in
prerequisite class. Okay, so adding cobalt, turquoise as the
base layer here. This is a granulating pigment. So once it dries off, you can see a beautiful
texture created. It also gives an illusion of water waves that
is forming gone. So it really turns
out beautifully adding some yellow green to the same mix and
applying it some places. It can be random as
per your choice. If you feel like the paper has started to dry,
apply some water, they're using a spray
bottle or even just with your brush just to make sure that it doesn't dry off quickly. Now I have taken some indigo and applying it to the
side of the people. I'm doing this when my paper is still wet so that it can mix back with our cobalt turquoise
wash, which is there. These are some of the
underwater rocks that we can see from Sky View. Make sure to apply
some strokes here. Liftoff the brush once. Make sure to dab the brushes at certain intervals so that it forms bit of a structure
so that once it dries off, we get to have definite
or some shapes to the rocky structure and not
just a flat line of indigo. Now I'm adding some
cobalt turquoise to indigo here and using
that mixture for adding the under
underwater rocks for left part of the painting. This is just to show some variations in the
depths of the colors. I'm again applying some water, just bring it here and there. Since it's a
granulating pigment, the cobalt turquoise is
a granulating pigment. I want to make sure to add some water so
that it activates and settles in tooth
off my paper and gives us nice
amazing granulation. Now with the same mix of
cobalt, turquoise, and indigo, I'm going to extend these
rocks to some places, adding depth that is
using the same shade, but with different tonal values. Adding depth to certain
places is very important in these paintings where we are using just two to three colors. It enhances our painting a lot once it dries
off in watercolors. Now I'm adding some
rocky structures, heel. Okay, so now I'm getting
ready to splatter. So I'm taking some
water in my brush, dip it into indigo
paint and splatter it. Do not vary. This platters will also dry one or two
shades lighter, so it will look good ones
it completely dries off. Now I'm mixing cobalt
turquoise to the same mix, and I will continue
with the splattering. But the small round brush, I am just adding
details here and there. We need to show that
it's not 2D rock, but there is ending
to the rock as well. So there is a gradual
decrease to it. That's why top part
of these rocks can be a bit darker shade and the place where it
is mixing with cobalt, turquoise, you can keep it
a bit lighter in shade. I'm using a tissue paper
to make sure there are no blooms created
with this color. So that we do get
into finite rocks, sheep or the edgy
structure here. Okay, So I'm good with
these rocks here. Next step is to add
reflection of these boats. When the paper is still wet. It will create harsh edges, which I do not want. Since it's the shadow
will be underwater. There will be some it can
be pointy structure there. So we need to make it happen
when the paper is semi dry. Now the paper is semi dry, so it's good time to add
this reflection part. Make sure to not have too
much water in your brush. Take the mix of
indigo and cobalt, turquoise, and start adding
it in this direction. I'll continue the same
for about one as well. Here also, you can show some
differences in tonal values. One can be a bit darker, one can be a bit lighter. Okay? You can see that though. Shadows are added. Now for the next part, I'm going to add some
minor ripples with the help of a liner brush.
This step is optional. You can always come
back and add it with white quash later on, once the paper is dry. Here, I'll be just drawing some lines to show us
the ripples forming. Since it's so bird
view reference, these ripples or sorry, these waves will be very tiny. That's the reason I'm just adding some brushstrokes
when the paper is still wet. Now it is completely dry, so let's start to
remove masking fluid. You can use your favorite tool. I'm here using my flat brush, which has a pointy tip in the bag to remove masking fluid. You can use a palette knife or even the round brush tip from the back to
remove masking fluid. Okay. So I have removed
all the masking fluid from my people because I want it to retain a white boat
or Yacc structure here, I had applied masking fluid. If you are planning to have
a different color boot, you can just go ahead and paint
it without masking fluid, and then come back and add the opaque color
that you are opting for. I'm adding some structure
with the pencil, maybe a deck or the
anti-nodes, the bowl. All those I'm going to
add here for reference. Now with a very dilute
wash of indigo. I mean to say that
indigo pigment and lots and lots
of water in it. I'm going to start
painting the arch. So here's my, this board is
completely white in color. Only the shadow parts of it. I want to paint with this
light shade of indigo. So I'm just keeping all of these at one direction
that is too bad. We have added the shadow. So currently the shadow
here is at the right. So again, on the boat also shadow
will be on right itself. Make sure you keep in mind
about that perspective. Seed with just some strokes, we can give a 3D effect
to our boat, right? So that's what we
wanted to achieve. I'm adding one
genuine line here so that we know that is the structure that is
creating the shadow. I'm doing a wet on dry. That is, my paper is
completely dry and I'm using paint with a lot of
water and applying it on here. If you feel like they shouldn't
have been some paint you can directly lifted off with
the help of tissue paper. Starting off with
my second boat. Now, this is going to be with raw sienna color. So I will not be trying to retain white
colors for most part of it. I'm going to let it
dry all the shadow pass before I come
back for detailing. Okay, so now it is
completely dry. I'm going to take some
raw sienna and start with the outline off the boat. You can use any other
color here of your choice, some other easy combinations, or cadmium red light or CPL. Been Dumbo, yellow or you can use any other color for here. Or even just indigo. In the case. You want to have a single
tonal painting adding some random strokes
here because there will be places for the
poll and other things using same color on the
other boat as well, with very minimal paint. Now adding it's motor, so that is mainly
very dark in sheets. I'm just going to apply
integral all over it. I'm making sure to retain some whitespaces like highlight. You, you can come back and add it with white
gouache later on if you have already painted it
completely black or indigo. Now to add the faint mirrors
that are available on deck. So I'm just adding
some dots here. This is all done
with indigo itself, but this is with a
concentrated mix, not the dilute mix. Adding a pole here. So that looks good. You can always use of pen. You can always use
a black pen and scale in order to
add these lines. If you're not comfortable
with using brush. Adding some tiny pools
here which is embedded. Or this can also be overhead. Or this can also be
underground observers. But the transparent deck view that we usually have in boats. Okay, this looks good. I'm also adding some
other pole structures with white gouache. I'm adding some details
with lineup ratio. You can spend any amount
of time you want on details if you are a very
detail oriented person. Since we are very
less time in order to paint our background, I'm going to work
on details here. And one reflection
here of the bowl, again towards the left, sorry, again towards
the right of it. Okay, this looks good. So we are done with our
six continent painting and I'm absolutely in love with distances by
far my favorite. Meet you in the next continent. And our final continent,
which is Africa.
16. Continent 7 Africa - prerequisite: Welcome back to our last
prerequisite lesson, and here we are going
to learn how to paint and underwater waterfall. This same technique can
be used for achieving a stream step-by-step effect
where water is flowing on different steps or there is a big rock or a boulder and
water is falling through it. You can use the same
technique there as well. It's going to be a wet on wet. So I have applied water
all over the paper. And to get started with, I will first start
with where I want the darkest shades
in my painting. And then I'm going to add lighter shades
so that it merges. So for that, I'm going to take
indigo and start off with where there is no visible
background at all. So maybe this is too
deep or too much behind. And there's lot of
shadows in there. Those places I'm depicting
with the help of indigo. Okay, So for reference, you can see in my
About section or in the class project
section to see how define a look is to understand
how I'm approaching this. So I'm just adding some places where I feel there will
be a lot of depth. Mixing some cadmium red light on the way to get a darker
tone as well here. Now for the rocks, assuming there are some rocks
and water is falling on it, I'm going to take moon
glow and apply it here. Once it dries off
how we have done or learned in the prerequisites
of our first continent, Asia, it will create those structures that
I'm looking for a rock. So once it dries out, it will be giving a good
granulating effect. So I want that heel. Hence I'm adding it some places here and there where I want that rocky effect. Now to start with
cobalt, turquoise, I'm mixing it with little
bit of viridian or MNR, green or yellow, green
and mixing all together. You can see in the
direction in which I want to show that the
water is all falling. It is true that shadowy place wherein we have added indigo. So everything is coming
and converging towards it. So your brush strokes should
be in the same manner. Wherever it starts from. It should all come and then
gradually increase the angle. Maybe this is completely
90 degrees, right? It came in oh, L-shape or
probably a sub n shape wherein it is horizontal
on the top and while coming it is perpendicular
to the page. Make sure to depict that with the help of your brushstrokes. Now with smaller brush, I'm just mixing it off
directly on the paper itself. Do not worry if your
indigo is going back, it's totally expected. And that is why I
added indigo first. So you can just they
call mature indigo. You want back to the colors? I'm keeping a tissue ready to
remove excess of paint from my brush while mixing or as it keeps missing
mixing again and again, they're either not
want that to happen. Now, I'll try to add a layer
on top of moon glow vote. I've applied. It's kind of a glazing effect that I want to achieve here. So after that layer
is a bit of semi dry, I'm going to take
little bit of water, more of pigments, and just applying where I
had left some spaces. So what will happen? Even cobalt turquoise will
go there and settle down. It will give a good vision of the reserve layer of
water on top of it. Okay. Now with indigo, I'm just
adding depth here and there. We have learned that indigo dries two to three
shades lighter. Right now, it might
be looking too dark. But once it dries, you will definitely see the strokes of
brushes coming there. Make sure it is
always perpendicular because that is where the
water is getting accumulated. There is shallow region there. Now in this place
wherein here there is a curve where in
water is coming from all the places and then there is water
coming and following, falling also from the
straight line on the paper. In order to depict in a 3D way, I'm going to add some
U-shaped stroke here. This will give us
an illusion that water is coming
from either side, left and right of it. So just for that, I'm adding it here. Now at the different shades
of moon glow or indigo, I'm just adding few
strokes here and there. Synthesis, a prerequisite class. I'm not focusing much on the structure and
how it should be. Be free to explore however strokes you
want and observe how it dries and what changes
you need to do so that it helps you with your
final class project. We are going to use
the same Technique. They're just adding getWidth, just extending all the sides to, towards our final project. Now with the liner brush, I'm taking some water and
trying to show the highlight or the transparent layer that creates because of
reflection or the sun. Reflection. Basically. You can see how beautifully
this creates. If you feel like your paper
is already dry or you do not want to add water because it might create
watercolor blooms. You can also wait
for it to completely and then use whitewash and
add these strokes as well. Just make sure to add all these strokes in
the same direction. That is, it is coming from the left and then curving in the middle
and then straight line. Similarly from right,
it is coming straight, curved and then street that is perpendicular
to the paper. Okay. So I would wait for it to dry. And then adding some highlights
on the rock as well. This is because there will be some protrusions or
structures in rock. And when water
falls on top of it, it creates a mini, a collection of water and we get a lot of
reflection out of it. So in order to show that, I'm just tilting my brush in this angle and
pulling it across. So you can see how
beautiful we get this structure of water being there and the
reflection of it. Or we can assume that sun, it is around 12:00
because we are seeing reflections on all
sides of the painting. Right? So we can assume that it is evenly,
there is light. I'm adding it more with
white to show how you can also add these lines
with white gouache. Okay, this looks good to me. So make sure you wait until it's completely
dry before going into next class project
so that you can observe and learn
from this lesson. See you in the last and now
our final class project, where we will be
expanding the same and completing our scenic
view from malicious
17. Continent 7 - Underwater falls in Mauritius: Hey everyone, welcome back to our final continent
on the voyage. And today we are
visiting Africa to paint this gorgeous underwater
waterfalls Americious. Required for this class are. I have taped down the paper. Now, I will start with
a rough sketch of it. Main focus for us
here is going to be the underwater
waterfall itself. I'm adding the mountains and some land structures as a support to this
underwater waterfall. So this is my rough sketch
and I'm happy with it. Now, my underwater fall
will be the dropping 0.4, it would be here. So I'm just drawing roof
lines for it as well. Here goes some off the rocks. I have just added
the perspective so that I know where the rocks are. My brush strokes should
be therefore the rocks. I'll start by applying
water onto the paper. It's going to be a
wet-on-wet technique. So I'm going to apply water for entire surface of my people. Evening out the water with
the help of a flat brush. I'll take my time
to apply water, wet the paper and spread the
water across completely. It's going to be a bit on
wet technique and I want my people to retain water
for a long duration of time. Okay, so to get started with, I'm applying the first layer of my light shade that
is cobalt turquoise. The color of my C would
be with cobalt turquoise and blue here and there, with the hint of the
yellow-green as well. Most part of this data would be filled with a
darker shade, indigo. Okay, so I'm mixing some yellow green hill for
the other side of the sea. I'm leaving some spaces where
the rocks are to be formed. Now I'm coming back
with indigo to add the hollow part where
there is a waterfall. Okay? So we can
assume that there is a depression in the
under water land there. Hence, the sun rays are
not reaching it entirely. That's why that place is
going to be completely dark. So applying indigo there
would help with about this. I'm merging all of these colors directly on the
paper rather than mixing them outside
of the palette and just applying of one
layer of those colors. That is because since
it's a waterfall effect, I want to show
different shades and layers in form of
brushstrokes itself, the two vertical
best brushstroke. Now to add that you point where both the
sides are meeting, like we had practiced in the practice class,
prerequisite class So I have started
with the U there and I'm continuing that heel. Now in the lighter
shade of indigo, I'm adding the other
parts of my painting. You can also make some royal
blue here if you want, or any other pastry
shade of blue. So that even lavender
if you want to get a good mix that I'm
currently just using, indigo and cobalt, turquoise
mixed with a lighter shade. The exam cobalt, turquoise, yellow, green and
adding some strokes, continuing the same strokes with indigo will observe me doing this with same color palette, but different tonal values and adding different
layers of water. Here. You can, it is up to you how many
layers you want to add, or how many lines you want
to add with differentiates. To start off with the rocks, I'm taking some moon glow
and applying it here. Okay. So it's a
granulating pigment, so once it dries off, it will completely dry. But instead of just
putting moon glow, I'm applying a layer of
indigo as well on top of it because the rock is
not directly exposed. It is having a layer
of water on top of it. Okay. So I'm applying
moon Lu and I'm also applying a layer of thin
layer of indigo on top of it. Next, with the help of
Gladstone, genuine, I am trying to add the rocky formations are the
protrusions of the drug. I do the same in other
side of paper as well. So adding some rocky structures here with Blackstone genuine, adding indigo again
on top of it. If I observe that might
be bird is drying up. I'm going to add some
water with the help of a spray bottle coming back here to add more strokes of indigo before it
completely dries off. Because we know that
it will drive one to two shades lighter, right? As adding more strokes at
different time intervals will help us to retain the
intensity of the strokes. Again, going back to rocks, I'm taking some Gladstone
genuine and going back here, adding some moon glow as well. If you're not having this
granulating pigment, you can also use some
salt and apply any shade of brown or CPO and
initiate of purple. And you can splatter some
salt in a concentrated form. At some places where you want the rocky formations
to be more evident. Once the salt absorbs
all the water, it will also create the
unique texture that you can try to depict the
rocky formations. Again, applying indigo
strokes here and there. This is supposedly my
third or fourth layer. You see now might be pretty semi dry on the other colors as well. So when I'm adding indigo, it is getting mixed neatly, but it is not merging entirely
with the other color. So this is a good
time for me to extend my strokes to other parts
of the paper as well. When the paper is dry, I'm also adding some
concentrated mix of Gladstone genuine or moon glow here in there so that
once the paper dries, we do ghetto difference
in tonal values. Extending the indigo color
on top of the sea as well. So here you can see that I'm not doing the technique that we
did in prerequisite class, where I will be adding some
water with my liner brush to depict the reflection
of water on the falls. That is because
I'll come back and add the same with white gouache. If you're comfortable
doing that with water, you can go ahead and do it
when the paper is semi dry. Final highlights,
I'm taking some, I'm also taking some cobalt, turquoise and adding it as the final layer
at some places. Okay, I'm good with this
now let's get started with the other parts of
the painting as well. So for land, I'm
taking raw sienna and adding one layer of it here. You can try with
differentiates like a lower or just different
shades of green here as well. Mixing some greenish amber onto the scene
directly on people. And adding the hills part. Now taking some greenish amber for the other parts of mountain, you can continue with any
other green that you have. I think my first layer
with leaf green, and I will top it up with different shades
using greenish, amber or indigo to show tonal differences in
the mountains as well. Since these are not my main
focus in the painting, I will not be working
on too much of the details of how mountains
are going to look. Now with indigo I'm going to add some random structures
over the land part, mostly using CPR Hill. Adding indigo onto
this green mix will really help to bring the
entire palette together. Because we do have shades of blue on bottom
part of the paper. We will also have the same
in the mountains as well. Now to get started
with the Skype bot, either apply some water there, I will leave it
only that area of the sky where I want
to apply paint. I'm taking some peacock
blue here and applying it. It's a very, very light layer because it's kind
of a clear sky day. So I do not want it
to be a darker shade. So I'm just applying a very
thin layer of peacock blue. It's a good staining colors. So once more layer
should help us achieve this guy that I need. And extending it to the
other parts as well. You can leave some
whitespace is completely because we can say that there
are clouds with that color. And you can still keep white
whitespaces in the people. In order to create clouds, I will use a tissue paper and lift off some
of the Payne's. This created a very harsh edge, but I think I'm good with it. I'll just go ahead with the texture tissue
paper has created here. Once the paper is
completely dry, I'll come back
with white gouache and add some waves here. I'm using a synthetic
brush for this. This is a dry brush
technique that I'm doing with white gouache
on my synthetic brush. Make sure you do not
have much water in it. Dab off the excess of
water and then come back. I'm keeping my brush
in this almost. I'm keeping my brush in this ten degree angle
as you can see, because I want my I want to paint so that it helps me apply
paint in a very easy way. I got I get more of surface
area if I keep my hands in this angle and out. Now with the liner brush, I'm going to apply the minute details once it
is, again completely dry. So I'm taking my liner brush and adding the details first with whitewash for the
waves, distinct waves. Okay, some more ripples
on the rock formations. As you can see, I get even more surface area
with this, right? And it has very
less water as well. So I like to add these
highlights with liner brush Adding some more highlights
on the rock part so that we know that water is
bouncing off of it. Mismatch of details, look good. Now I go back to the land part because I feel it's
a bit incomplete. And add more details
with liner brush, again, taking some CPR and adding
further details onto it. Making sure there is
a specific outline and shadows to bring more
perspective to the painting, rather than just leaving it as a plane structure
in the background. Adding some dry brush strokes for the mountains part as well. You can choose to not add these additional
details and call it that your painting is done after our
first part itself. But I just wanted to add
some more details because it was not enhancing my
painting that well. Yep. I'm completely happy with this. And this was our final
continent painting. And I'm very much happy
that I'm ending it on such a beautiful scenic view and a very unique view as well. Underwater waterfall
from Africa, Mauritius. Hope you also had
a lot of fun and learned a lot of different
techniques along with me. Thank you for joining
my entire voyage and make sure to post your work in the
project section so that we can all see and
admire your work. See you in my final
thoughts video
18. Hop off the Voyage with amazing learnings: Hello. On my final loans, I want to thank each
and every one of you who have been
part of this journey. Hopefully, this
void has been very fruitful for you and
you have got to learn a lot of new
techniques and learn the different ways
in how you can capture each landscapes
around the globe. Please make sure to post your work in projects
and resources section where all of
us can admire works. Until I find something
fun and exciting. Next time, Chao
 Swathi Hegde, Watercolor artist | Aqua | Night sky