Transcripts
1. Introduction: As Vincent van Gogh quoted, great things are done by a series of small things
brought together. Let's take a small step towards learning watercolors and
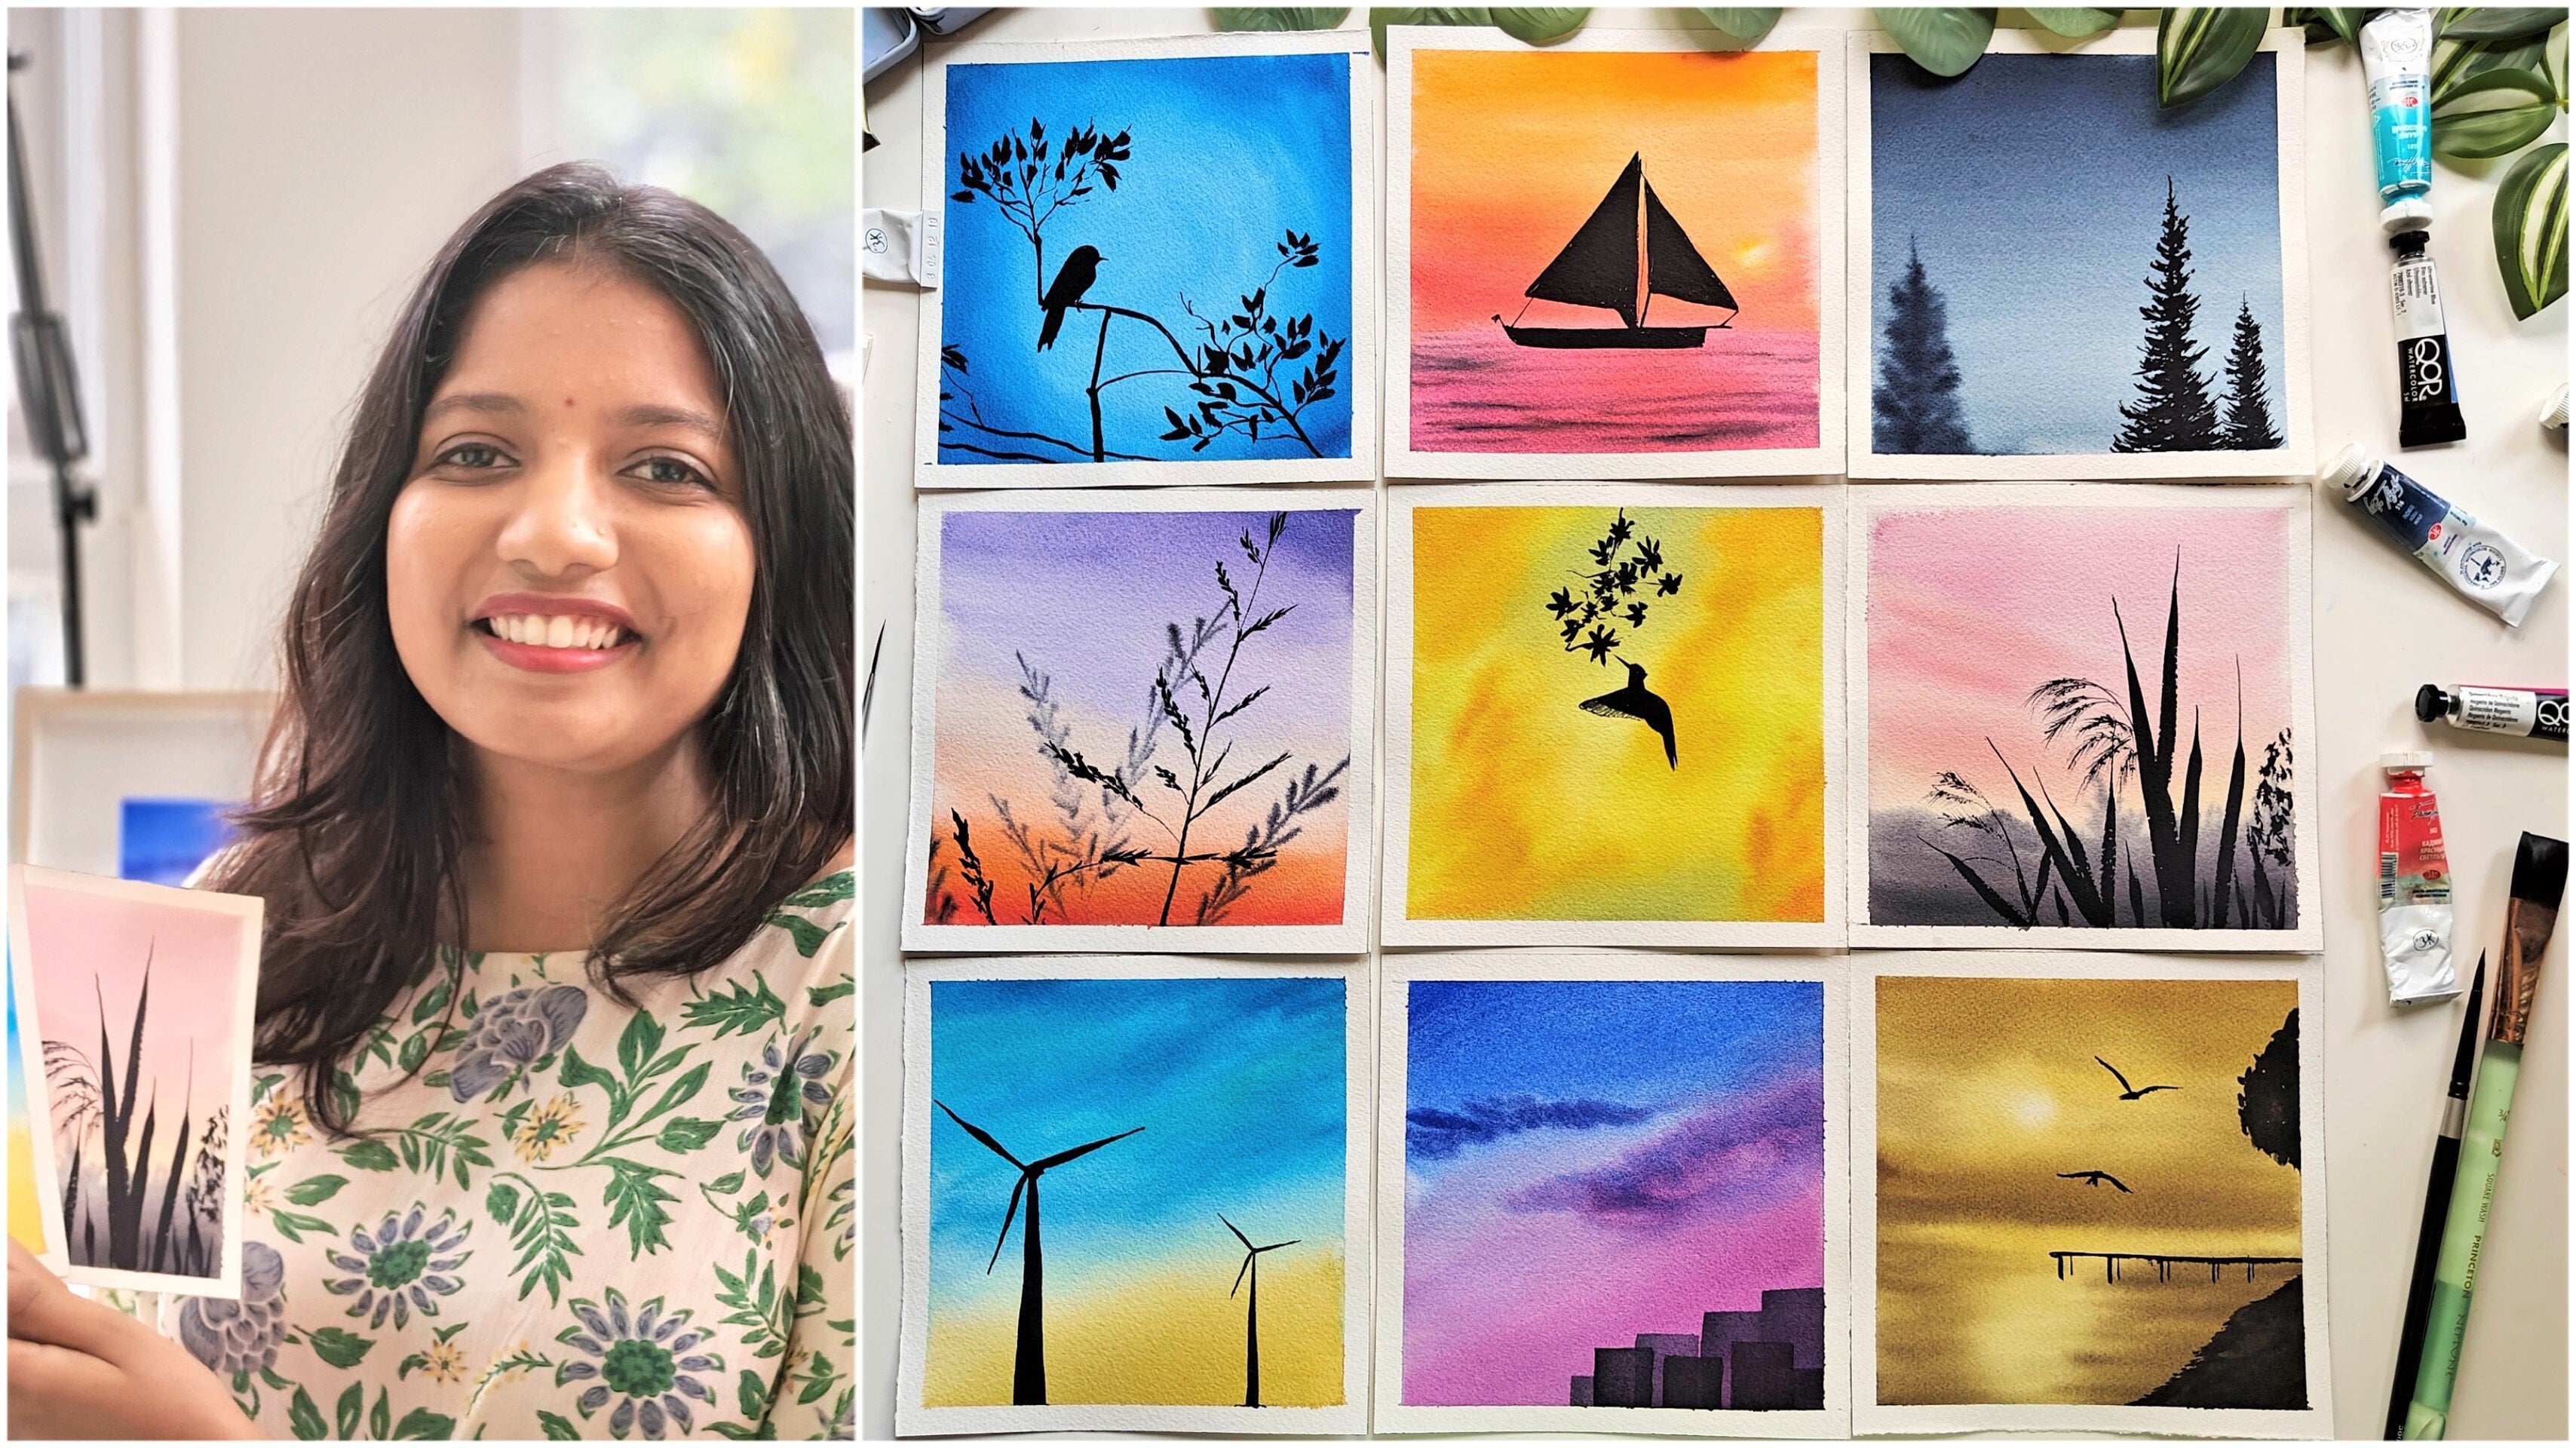
by having fun with it. Hi, I'm Swathi G Hegde. I'm an engineer and a self-taught watercolor artist based out of Bangalore, India. I go by the handle
tinted_toddles on Instagram. I do not like to restrict
myself to any style and would love to explore all
the techniques out there. Painting is like a
meditation to me and it has personally helped me in
many different ways. In this challenge,
I would love to share one such relaxing
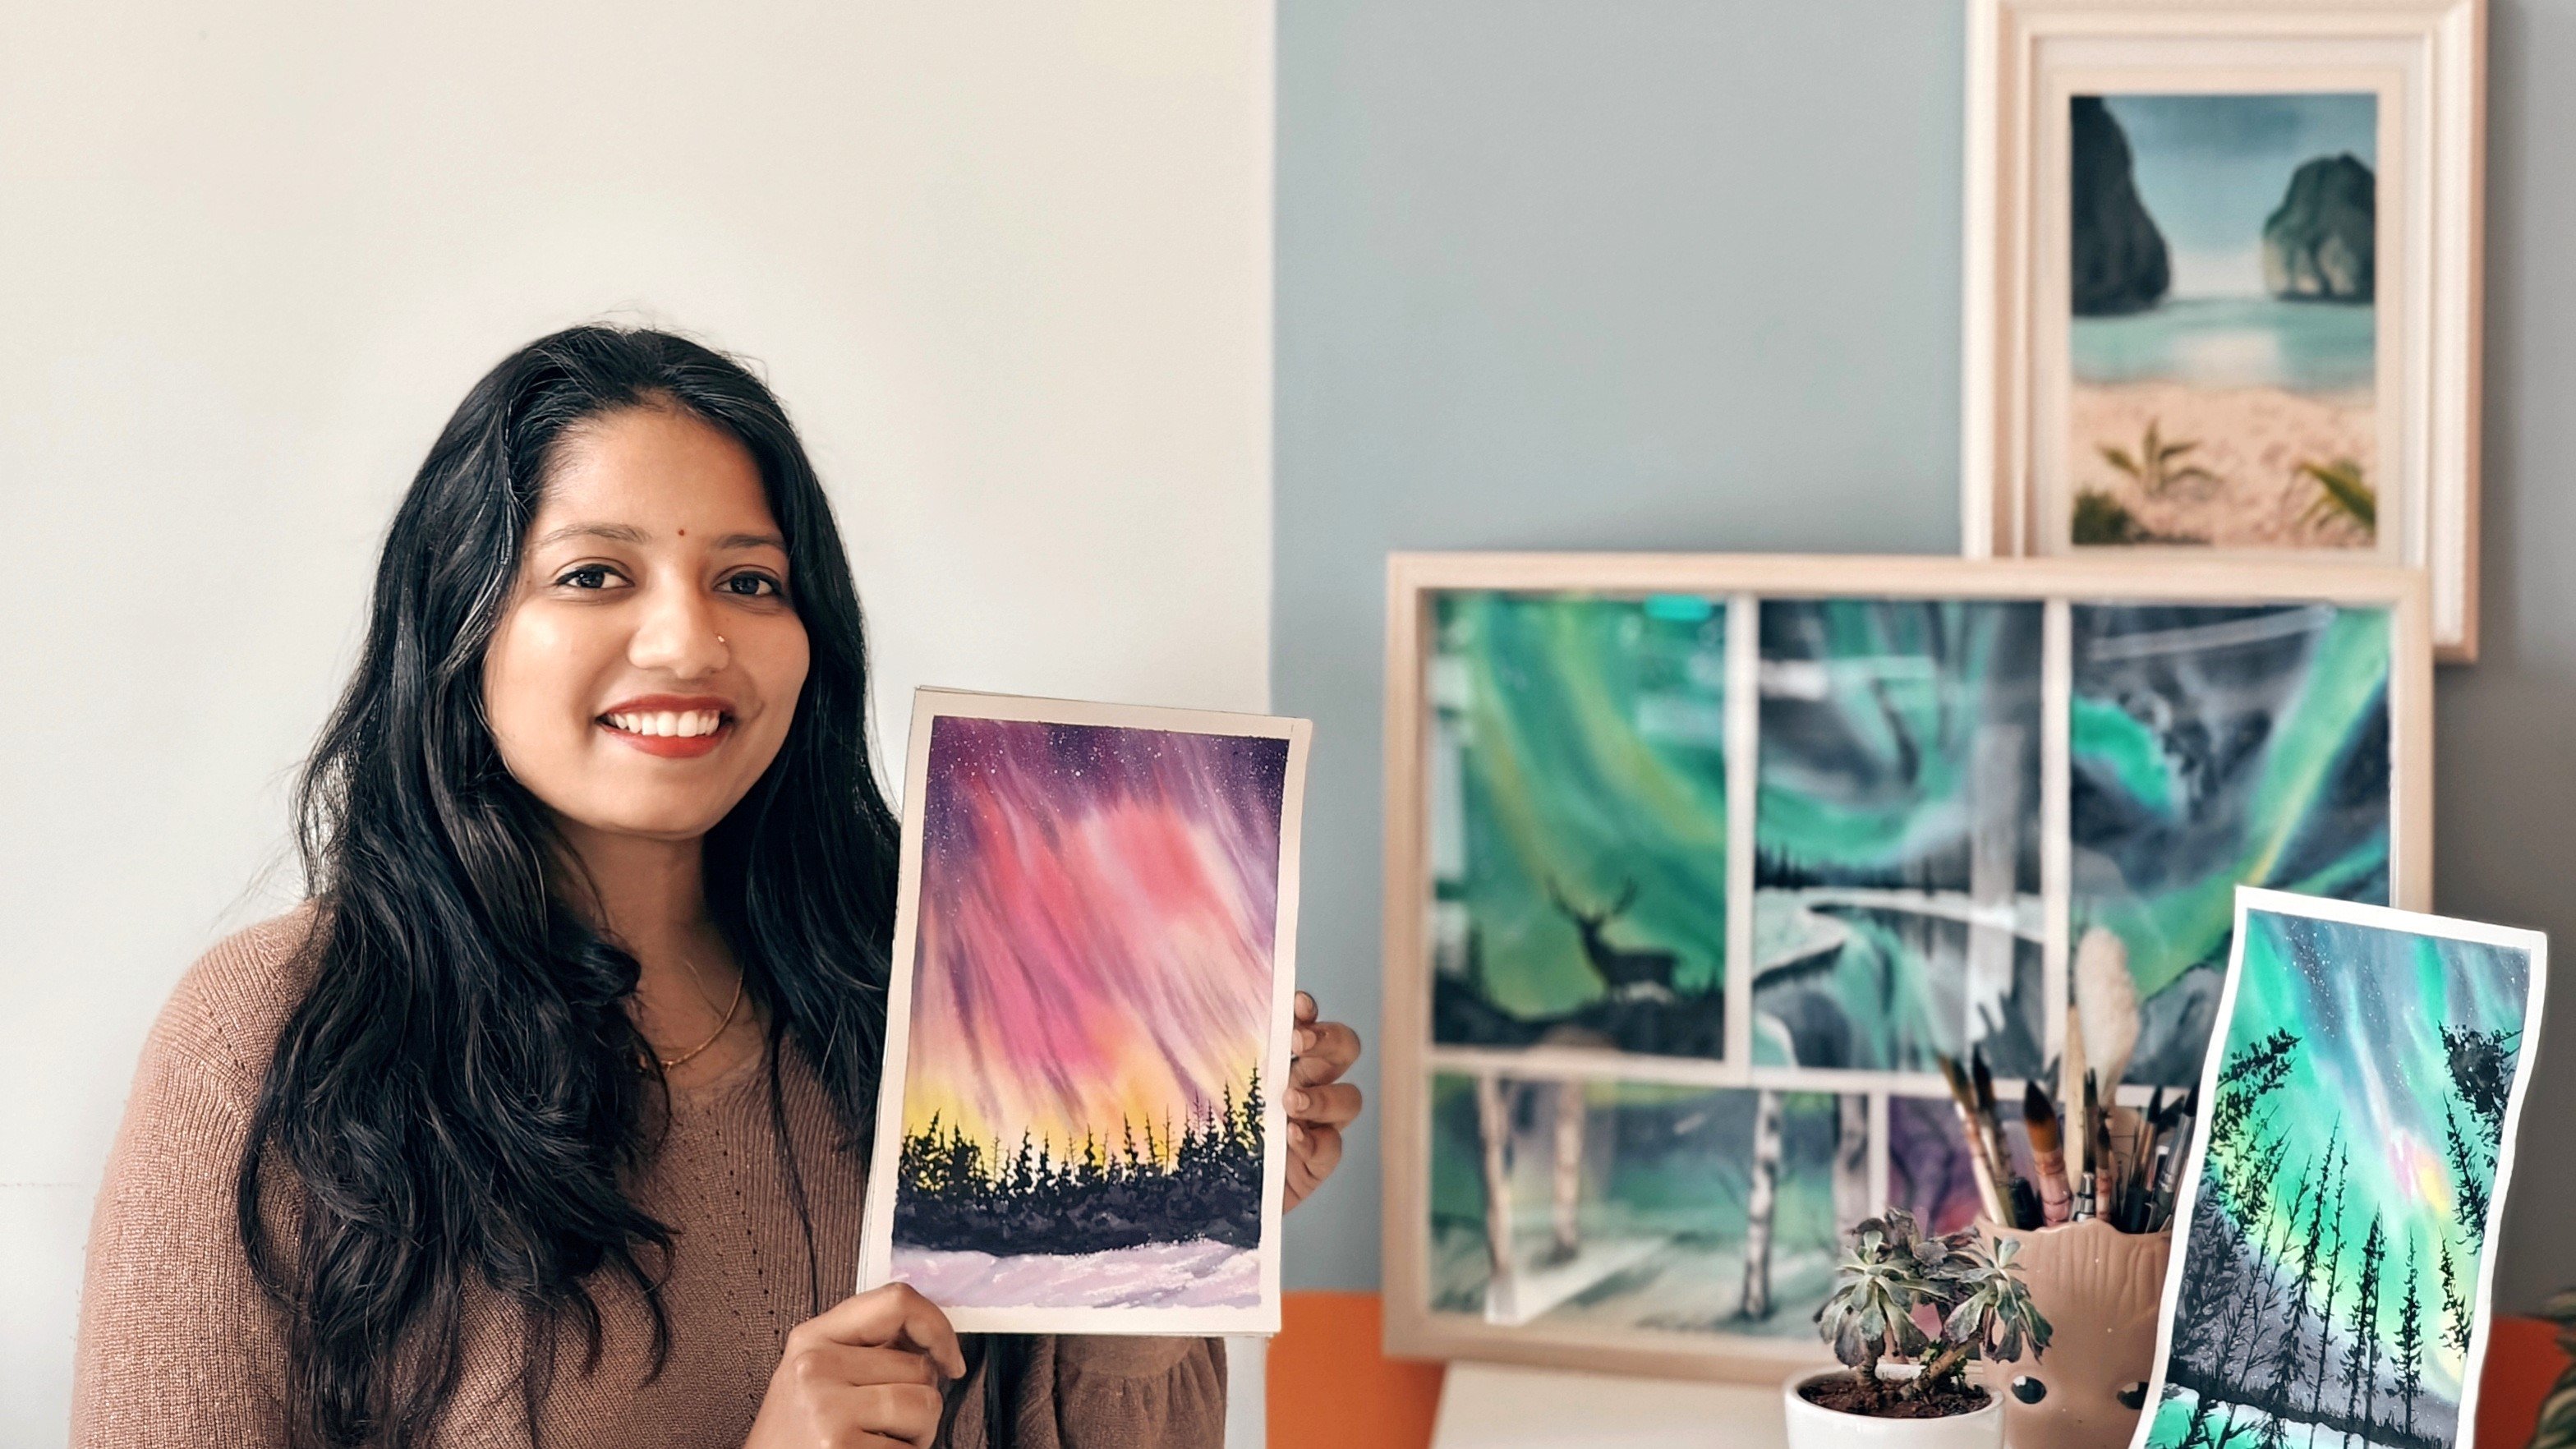
thing with you all, that would be Milky Way
night sky with watercolors. I love painting night skies, especially ones with lots
and lots of stars in it. One can just flow along with the colors and texture
on the paper as there are no limits
or boundaries when it comes to painting
a starry night sky. Pigments are free to
merge in any pattern. It's super fast to create and the color
combinations can be bizarre and yet
beautiful paintings definitely comes out of it. Any accidents that
may happen will be in your advantage and all you have to do is just have a lot of fun painting
and exploring it. We will go through a
crawl walk run approach. Crawl phase you
will get to explore the basic watercolor techniques, watercolors selections, which is best suited
for your paintings. In the walk phase,
we will start with a four-day challenge
where you would be creating four
beautiful paintings with a cumulative
palette approach. We start with just
one color on Day 1, two colors on Day 2.
three colors on Day 3, and multiple colors on Day 4. All the colors are
of your selection. Like in any other challenge, you would be learning on Day 1. You'll be taking
the learning ahead to the way to building
on top of it, and learning the way that
you are comfortable with. After you take the class, you will encounter
yourself in the run phase. You will be exploring
and experimenting to create gorgeous night
skies on your own. What are you waiting for? Let's get through
the supplies and the basic watercolor techniques and get started with the class.
2. Class Orientation: [MUSIC] This is going
to be a fun challenge where you'll be
learning how to paint gorgeous Milky Way night
skies using watercolors. First, we will
start with brushing up ourselves with few basic
watercolor techniques, like wet on wet, dry on wet gradation, and some Some the
techniques that we'll be using during the class, like lifting technique or watercolor blooms,
dry brush technique. Then I will give you a
small introduction to how I usually add
stars to my paintings. That makes my
painting just enhance a lot just by adding stars. Then we will start with painting for beautiful
night skies. On Day 1, it will be just with one color that is
usually a monochrome. On Day 2, we will
have two colors. Maybe complimentary,
maybe similar in tone. On Day 3, we will be choosing three any different colors
and painting a sky. Day 4 we will be painting with
multiple different colors. All these colors can be of your choice and of
your selection. I will also show
how I usually pick up the colors and with
the help of swatch card, that helps me to decide what colors go along with each other, and what should be
used in my painting. After each day of challenge, make sure to post your work in the project
section so that it becomes easy for others to admire your work
on this platform. Be a beginner or intermediate
watercolor artist, this challenge will definitely
help you to understand the theme into depth and would help you
enhance your skills. By end of this challenge, I'm sure you will
be able to master any Milky Way painting on your
own with just a reference. I'll also attach
few references so that you can try the
paintings on your own. What's the wait for? Let's go through all
the techniques and the supplies and
get started with our challenge. See you soon.
3. Supplies Needed : Let's go through all
the supplies that would be using
throughout the class. To get started with, I'm having two jars
of clean water. I would highly recommend
all of you to use the same. Here are some
watercolor tubes from various brands that
I absolutely love. I'll be having some
swatch cards as well as we go through the class. Here is a white
gouache from hemimia. I'll be using majorly for
adding some of the stars. Coming to paint brushes, you can use all the brushes that you are comfortable with. I would be using a hockey
brush for applying the water, some round brushes
and a flat brush. Also, I'm using a
synthetic brush for adding the details
and adding the stars, as it would help me a lot with
retaining a lot of paint. For the support of the people, I'm using a transparent
acrylic board and the masking tape
to tape my paper down. The watercolor papers that I would be using is
from the brand arches. It's 300 GSM, 100 percent cotton paper
and they are called press paper. Let's get started.
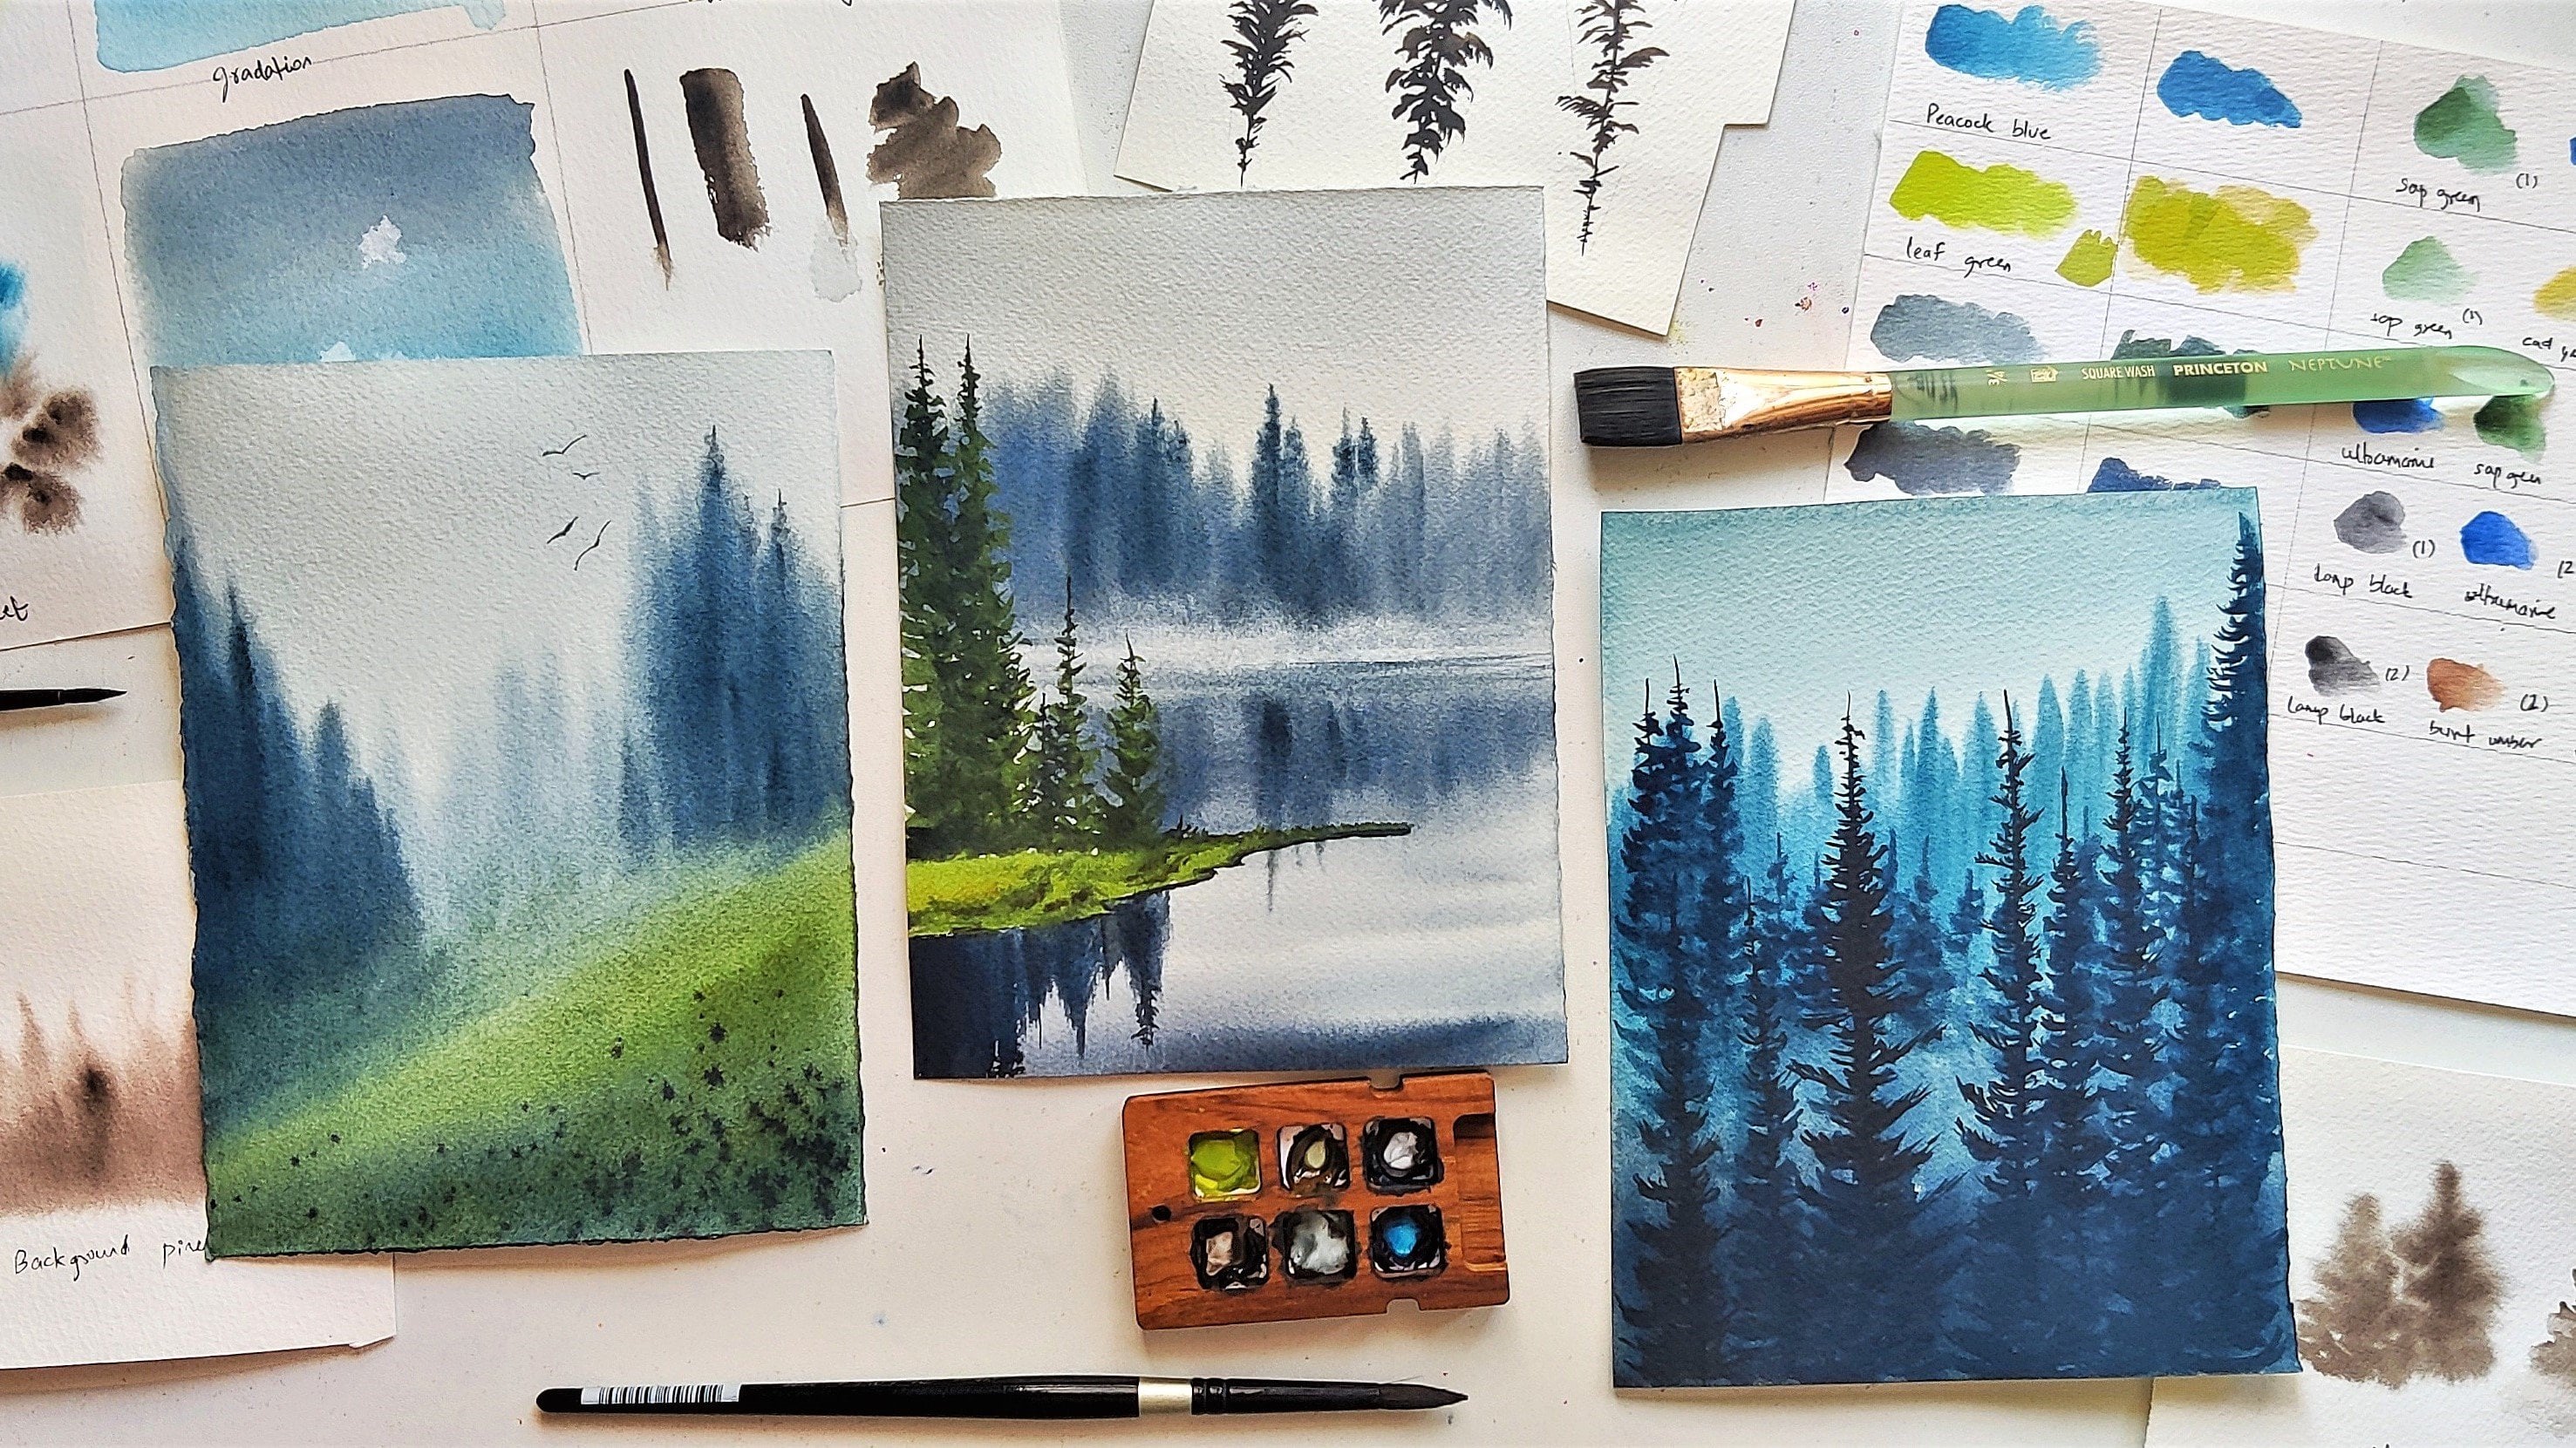
4. Watercolor Techniques : Hello. Let's get started with basic watercolor
techniques. For this, I have taken
a paper and divided into these multiple
segments, as you can see. First we'll go with a very basic one which
is wet on wet technique. It's a very basic
technique used for almost all the
watercolor paintings. Here we'll just apply a layer
of water onto the paper. You can see the water is
little bit pigmented here. I have kept it in such a way so that you can see where
I'm applying the water. Now, I'll take one of the colors that is sepia here and
apply it to the wet area. Here you can see that the color diffuses beautifully
onto the wet area. There are no hard edges to the
paper or the pigment used. I'll take and add more pigments to add more
depth wherever is needed, when the paper is still wet. This gives a very beautiful look for the watercolor paintings, the subtle look that comes from the paintings is through
mainly this technique. Here we go. This is
wet on wet technique. The next one we would
see about gradation. Here, again similarly, apply water as this is a wet on wet technique
extension to it, and here I'll be
using two colors to show how the gradation
can be achieved. I have applied enough
amount of water here. Let me take one of the colors and apply it from one
end of the paper. I'll take this color and
apply from one end of the segment until further
up from the mid portion. Here you can see how the brush
I have tilted in an angle so that I get the
small gradation. I take one more color
and from the other end, I will apply it to the
mid portion of it. You can see that
I can little bit see a line created for the
pink color over there. I'll take some water
and run along with it again until down to
dilute it a little bit. Any extra water or
extra pigments in the brush can be wiped off with the help of a tissue people, and now I'm just trying to create the gradation
look wet on dry. Here I'm just taking a paint
with lot of water in it, so that becomes the wet part
and the paper is still dry. With this effect also, we can see how more than one color can be
mixed directly on the paper. Here, I'm taking a flat brush. You can do this with any of the round brushes that you have. This is one of the
colors that I pick. You can see clearly
a difference. There is a hard edge created
wherever the pigment is available rather than
how it was getting diffused if it was a
wet on wet technique. Now I'll take another color and along with the same lines, I'll apply the pigment. You can see that even though
the paper was not wet, because the paint is wet, the colors are merging with each other without creating
that hard edge. Let me take another
color and show how we can get rid of the
hard edge, it is there. I'll take one more color here. You can see that the paint
diffuses into each other. This is the last color. I'm just showing this technique
because this can also be used if the paper is
completely dry sometimes. Now on dry or the
dry brush technique. Here the paper is dry, even the brush will not
have a lot of color in it. I'm going to mix the
choice of my color, which is pine gray, and I'll just make sure
that the paint mixture is completely dry or
it is not super wet. I'll dip my brush
into the paint, dab it onto a paper towel just to remove the
excess of water. Here I'm checking if
it is good enough. I'll take more of the paint. This is good. Stick some more. I'll remove excess of water and dab the brush lightly
across the surface here. You can see initially
there was a lot of paint, but as I move further, I can see the beautiful
texture of the paper, and also assuming there
was a paint underneath it and it is completely dry and I'm trying this
dry brush technique, it will not make my
paper muddy and gives a very beautiful
texture for a mountain or for a textured or anything
can be done with it. Here, I will just take a
brush with water and show you how it will behave
if the paint is not dry yet and you try to apply another coat
of water onto it. This is just for reference, just to see how the pigments
behave and to absolve, and if I can use this anyway in my class projects
coming ahead. The next one is the
lifting technique. For this, either you can go with a wet-on-wet
or a wet-on-dry. Currently, I'm just
going with wet-on-dry. When the paper is still wet, it's easy to remove
pigment rather than when the paper is dry
with the pigment. I'm going to show you the part where the
paper is still wet. Let me just get the
background ready. You can do it on
a single pigment or you can also try it out on multiple pigments because it always depends on how much
staining the pigment is. Now I'll be using a tissue
paper to remove the pigment. You can see that, that particular surface
is completely white, which means it has lifted
off that painting. You can use a paper towel. In the next, I will be
showing how to use a brush. Now I take the brush, the trick here is that
the brush is still damp, but not with too
much of water in it. The logic behind it is the
brush which is fully damp, but not having too
much water in it, it absorbs more water from
the paper than it releases. This helps us to absorb back some of the water
from the people. This is another technique
called watercolor blooms. This happens when a wet
paint spreads on a dry area. Currently, I'm not taking a
paint just with the water. I'm trying to show how you
can create such effects. See you in the next class
where we'll be using all these techniques to create
some beautiful paintings.
5. Splattering of Stars: This class is all
about splattering of stars onto your painting. Being our concept
of Milky Way band, it is really important to make sure we add the
stars in the right way. I have added all the tips and tricks that I usually
use while adding the stars. Here, I have taken
a synthetic brush and a white quash jelly. Also, some water. I'm dipping my brush
into my quash and into water so that I can get the right consistency
which is needed. You can also take a good amount of quash onto a palette and do this exercise but I just
like to mix it on the go. For the support,
I'm going to take another brush while splattering. Every time I splatter, I will observe how pigmented or how much take the
splatter is coming out. I'll just take some
more water onto the brush because that
creates the background stars, wherein there will
be lot of stars, but not of high-intensity. Once it dries off, it will
be a little bit dull. These are those
stars. They're tiny. But they will also dry off
a little bit dull later on. For the band part, I usually go nearby
the paper and do the symbol with the brushes, and starts to splatter. But now you can see
that currently, the consistency of
paint in my brush is not supporting for that, Milky Way band stars, which are very minute
stars that I would need. But still, I will go ahead and go with the direction
of the Miky Way band. Having the right consistency for the stars matters a lot because, in every class, we are definitely going to add a lot of stars
onto the painting. This exercise is
going to help you understand the medium
we shall be using, either white watercolor
or white quash, and what brush would
be easier for you. Now I'll take some more white
quash and start with the. Now you can see that
all the stars are little bit accumulated
towards center of the paper. I'm keeping it in that
way only so that I can understand how to
control the splattering. Now the consistency
in my brush is perfect for adding the
Milky Way band stars, which are very
minut and detailed. I'll go nearby the paper and
start applying the stars. You can see in one diagonal of the paper a lot of small stars
are getting accumulated. Imagine a milky band with
different colors being here. This is what we wanted to practice in this
particular class. Now for the other
detailing's in the sky, that is maybe a meteorite, sher or shooting stars, I'm going to show
how we can do that using the existing splatters that are already
there on your people. Some of these splatters are
having a lot of paint in it. You can just dab it with a tissue paper to
create a luminous star. I'm going to do the same
for another big star here. You can also use your
brush to even it out a bit or even your fingers you can just dab it out
and create this big star. Now to add the tail
for our shooting star, with one swift, you have to make sure
that you create the tail. You can actually also
use a palette knife if you already have to create this line for the shooting star. Now I'm going to take one of
my small synthetic brushes, which is common with
everyone to draw the line. You can see that I'm
tilting my paper that would help me to do the
swift line motion. You can also practice
doing some lines on the paper before
directly trying it out. I'll see you in the
next class where we will start with our
class projects.
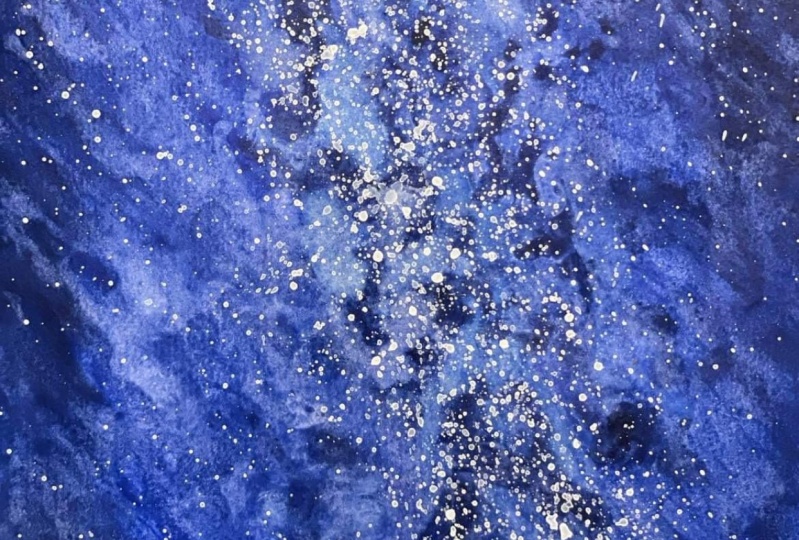
6. Day 1: Monochrome Base : Welcome to day one of challenge. Today, we will be exploring
through one color. The color that I would be using
for today is Pthalo blue, PB 15 from brand 2B. You can use any color and
shade of your choice. Let us start by applying
water onto paper. We will be using wet on
wet technique and hence, I want my paper to retain
water for a long time. I have taped down my paper on a transparent board
with the help of a hockey brush,
I'm applying water. You can use any flat or
mop brush for the same. Even a big round brush also
works for the same purpose. Make sure that there
is no excessive water accumulated on paper as it
harms the texture of paper. Keep moving your brush in
to and fro manner until you feel the water has
started to sink in. Once done, wait for
few seconds and observe if there is a shiny
layer of water on paper. Not too less and not too more. I have not done
any pencil sketch as they will be a
freehand painting. I will start by applying a dilute coat of pigment
to get this shade. It forms my background and
I will continue to add more pigments wherever
depth is needed. Feel free to create such
swatch cards for reference. I will start from top right edge of the paper and continue
till the middle. Since it is wet
on wet technique, you can see a smooth gradient
after the paint dries off. You can also use a mop
brush or a flat brush for this initial code of
applying the dilute paint. I will start applying more
pigments from the top edges. Adding a base for my
grounds object as well. Let us understand the
pigment flow here. In center I have this shade and surrounding there
is a deeper shade, which is in the shade to cut. I will continue to add more
depth to the edges and make sure that I do get all the variations in the colors that I have shown
in my slatch cards. [MUSIC] In this direction
would be my Milky Way. I'm creating just that structure for it to be painted later on. [MUSIC] You can use water to
always match the pigments. If you feel there
is any hard edge or if you feel that the
paper is drying off. I'll start on the
Milky Way band. Take size four brush or
any smaller round brush. The Milky Way is visible as
a hazy band of white light. Note the direction in
which your band is going and where all
the depth is needed. Each band is visible different, and so feel free to use
your imagination of how you are galaxy would be
piled up with the stars. Now, try to leave some
white spaces for adding the stars and add depth with darker pigments
wherever is needed. In this painting, I have kept
the band with hard edges. You can also try this with a wet on dry
technique as well as your background is already
dried up and still we are using a wet coat of paint
as the Milky Way band, but in this case my paper
is not completely dry. I still have water
retained on my paper. [MUSIC] I'm trying to
smoothen the edges wherever I feel if there
are any hard edges. With the help of just a tad
bit of water in my brush. [MUSIC] Use a tissue
paper to lift off any pigments to create a
lighter space in the band. Now I want a lighter
space on the top. I'm going to use a tissue paper
and lift the pigments of. If the paper is not wet, you might not
expect the paint or pigments to be lifted off. Make sure that you do
the lifting only when your paper is still
wet with the pigments. Now, you can add pigments as needed and merge it with
the background sky. [MUSIC] I'm trying to
give a slight definition to the structure of bank, making sure not to add it everywhere as I do not
want a defined border, but also want to emphasize
on the grooves of the band. I have put my video on 2x speed. You can adjust the speed as per your choice from the options. [MUSIC] Now my paper has
started to dry a bit, but I'm still adding pigment so that it gives a hard
edge in some places. This adds on to the texture
of my Milky Way band. For adding a lighter
tone on the band, remove excess of water and pigment with the help
of a tissue paper. [MUSIC] You can always
observe where you want to add more such details like dots. You can also stop if you feel like your band is
pretty much complete. Here, I just feel the
downer of it was little bit pale so I'm adding some
of the details into the band. Now, I will tilt my paper and see if any corrections
are to be done. If you are happy with how
the painting has turned out, you can stop at this point. Anyway, I wish to level up
these visible brushstrokes. Here I will add some water
onto the brush and smudge it. [MUSIC] Our background
is finally ready. I will keep it for
drying and I will see you in next class where we will add
the details. [MUSIC]
7. Day 1: Monochrome Details: [MUSIC] Welcome back. Now, we'll be adding stars to our paint. Here, I do see a small spot which is
not completely dry yet. It is still having some
water on the surface, so I'll take advantage of it and take a white gush in the brush. I'll apply the paint there
to create one luminous star. Now, as we have learned in the techniques and
the stars class, I would be making the
X mark on my brush and splattering a divide stars. I'm taking some water as
required so that I can get more number of white stars and that might look like they're
from the background. I will continue with this
splattering until I feel that there are efficient amount
of stars in the sky. Now to add the band
I will go towards from down to top of the Milky
Way band that I have here. Again, I'm doing the X mark and taking it really
near to the paper. Please be careful that you do not touch the brush
directly to the paper. I'll continue in this
motion so that I get this stars directly
on my Milky Way. A very minute stars
and a lot of star on the Milky Way band [NOISE]. I'm taking some
more white quash on my brush and adding
some water to it to get the exact consistency that I would need. [NOISE]. Here we go. [NOISE] While splattering the
stars if there is any splatter which is very big, you can always convert it into one of the luminous
stars in the sky or you can wipe it off using a tissue paper as
soon as it is created. Now, I'm taking
the tissue paper, and I do see and feel that
this star is a little bit big. I'm spreading it
even more to make it look luminous and
bright in the sky. This is something similar
to what I did initially with the wet background. But even with the dyed surface, you can follow this approach and create some luminous
stars in the sky. I'm just doing it very well. I feel it is there. In fact, you can dumb all the entire big star out if you feel it is
quite out of space. Now that I am completely ready with the background
and the stars, now it's the part of foreground that we will
be going on painting. I have selected mountains
for my foreground. You can select anything, either a pine tree
or a mountain, or a house which suits your foreground and which is as per your
reference picture. Let's go ahead and
paint the mountains. I'm taking my size 4 round brush here for
painting the mountain. I'm again taking the blue that I have chosen
for my monochrome. I will be adding the mountains
in the lower part of it. I'll just draw an
outline for reference. Currently, we are
following wet on dry technique because the
paper is completely dry. With a wet paint, I'm applying the paints
for the mountains. You can also do this as part of wet on wet while
your paper is still wet and you are still on the creation of wideband
for your painting. But I prefer to go with wet on dry technique because
here the mountains comes in focus while I'm trying to paint
this unknown get merged with the background. Now I'm taking a synthetic
round brush and taking some whitewash in it to add
the snow on the mountains. We should also remember that the snow might reflect
the night sky color, which is blue in this case, and this particular mountain
is very much nearer to us, so it is the first
thing in foreground. I will go ahead and add
little bit of more white quash to make it a little bit light and shade so that it gives us a feeling of a lot of snow on the mountain and a lot of reflection happening from
this particular mountain. You can pick any search
foreground object in which you want to highlight or give it a more detailed look. I will smudge the white
quash with this color to just give that our shiny
feature on the mountain. Once this is done,
I will keep it for drying off completely. Now it's completely dry. I'm going ahead and adding a rough snow textures that we usually see
on the mountains. Here I'm taking white quash
in my round brush again, and it's completely
dry on dry technique, like we saw in the class. Here there is some
more wet paint, I believe, but that's okay. I'll just smudge
it with them on. Now it's completely dry. That part, I will let it be, and I will add the rough textures again from
the side of the mountain. This time to be more short, I will just do small check on any of the rough
paper or in my case, I'm doing it on
the masking tape. It looks good. Now I'm going ahead and adding the
texture on mountains. You can see how beautifully
the texture gets created with dry
on dry technique. I think we're done
with my painting. I will start with removing
the tape from the sides. I will start removing from the opposite of what
I had applied before. That was the last day that
I had applied on the paper, so I start with that. This was the second last
tape that I had applied, so I have take off next. Make sure to peel the tape only once your
paper is completely dry. I do not have to bother
it in the top places, but in the bottom, since my paint was still wet, I will just make sure, and once it's completely dry, only then I will peel tape off. The last one, if you do
it in a particular angle, there won't be any spoil
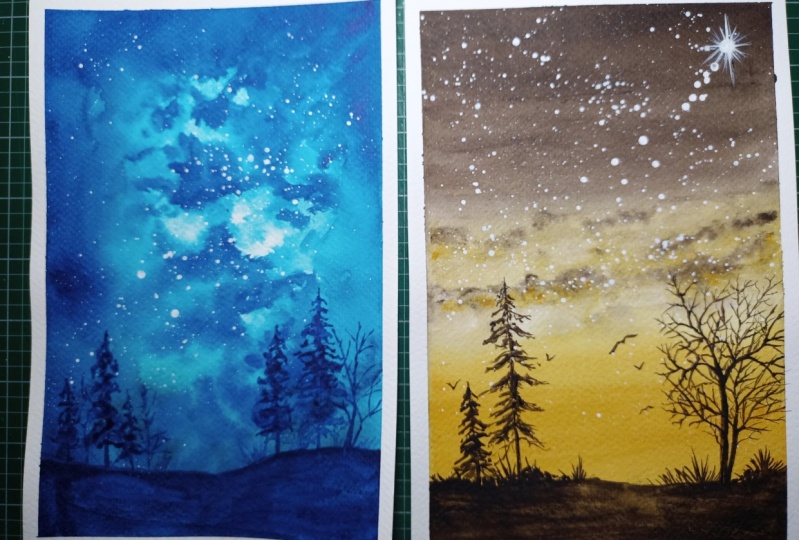
or spoilage to your paper. Great. The painting
is now ready. This is what we have
painted in day 1 of the challenge
using just one color. I'm excited to see all
your color selection, so make sure to post your
work in the project section. See you in the next lesson.
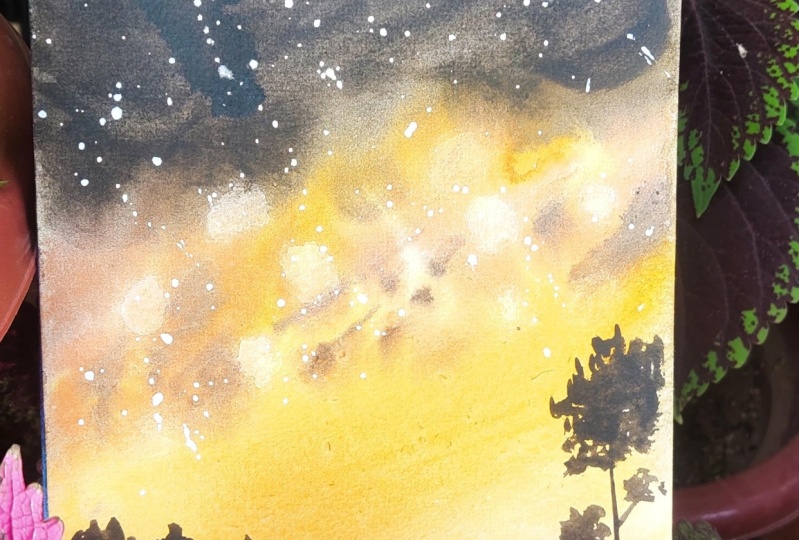
8. Day 2: Sunset Milkyway Base: Hey everyone. Welcome
to Day 2 of challenge. Here, we'll be using
just two colors that are sepia and golden deep
from the brand White Nights. To get started
with, I've already taped down my paper
to the surface, and these are the swatch
cards as promised. I will take some water
in my silver brush, hockey brush, and start
applying onto the paper. This would be a wet on wet technique along
with some gradation. I want to make
sure that my paper retains a lot of water for
a longer duration of time. You can decide where your
Milky Way band is going to be. Is it vertical? Is
it from top to down? For me, it will be horizontal one across
the middle of the paper. I have not drawn
any reference here, as it is going to be a
loose watercolor painting. [MUSIC] I'll just invert my paper so that the
pigments can flow easily, so I'm just placing it here. That's good. To
get started with, I'll take the lighter shade, which is the golden deep, and start with it. I have taken good amount
of paint in my brush. Here, the second half of my paper would be
with golden deep, and the other second half
would be with sepia. Here, I'm applying the
paints, and gradually, bringing it down to
create the gradation of technique effect that we learned
in the techniques class. You see how beautifully
the paints are also flowing down because
of the inverted angle. Now, I'll start with the sepia, and I will start from the top. You can have any two
colors of your choice, maybe contrasting all the
colors which are complementing. It's completely up
to your choice. Here, what I would do is instead of just directly bringing the sepia down in a
degradation form, I will mix both of
these colors and apply that as the base to
my Milky Way band. Before that, I'm just applying depth wherever it's
needed in the sky. Now, I'll get started
with the Milky Way band. I'm mixing golden
deep with sepia. I'm applying it
for the base here. Because it might create
a muddy texture onto a golden deep color,
what you can do, is take some water on the brush, dip it off, and again, try to mix it with
the golden deep side. This will make sure
that there are no muddy texture
created on your sky. Now, I'm starting off
with the Milky Way band. Here, I'm trying to add the grooves or the band
that actually comes across. I'm going to be doing
it completely random because none of the bands are actually very
specific in nature. I'm going to add some
high pigmented sepia in a lot of places. What I do here, is once I make the outline for where the
sepia is there in my band, I tried to merge it
with the sky above. Now, I'm taking golden deep
and adding it similarly. Here also, I will apply it, and where it is meeting
the sky of golden deep. I'll try to merge the
sky so that there are no harsh edges once
the paints dry off. Now, I'll be taking a tissue
paper and lifting off wherever I feel the grooves are needed for the
Milky Way band. You can also do
this with the help of a brush for lifting
off technique. Make sure to do this when
your paper is still wet, else the paint won't
be coming off. Now, with a very
diluted pigments, I'm going to fill in
the Milky Way band, leaving some spaces
to create the band. [MUSIC] I'll continue
this process. Now, I'm taking a little bit dark pigment
of sepia and adding it, because when the paint dries, it will definitely be three times lower tone of what paints we are
seeing right now. I do want to get that hard
edges on some of the grooves, [MUSIC] same with the
golden deep as well. Now that I do have
the band ready, I want to make sure
that the color in the band and the sky
are of same tone. I'm just going to take
the same golden deep and smudge it along
with the sky. Follow the same
technique of gradation that is in the
starting of the sky, you can add a lot of pigment, and while going down, you just have to bring
the same colors down and not take any fresh
pigments in your brush. As the paper dries, you can see where the
paints are already diluted, so then you can continue
to add more depth to the grooves or to the sky by
adding more pigments there. If you feel that the
pigments are too much, just take some water in your
brush and drop it there. It will not create
a watercolor bloom yet because the
paper is still wet. You can definitely try that if at all your
pigments are too dark. Make sure to keep some
white places as it is because instead of using white gouache in the end
to create those grooves, I like to keep it with
the paper color itself. I'm continuing the same process throughout until the papers
are dry or until I'm sure that these pigments will be sufficient and often
the paper dries off. [MUSIC] Now, I'm
happy with this. For the final touches, I'm using the tissue paper
again to create white grooves. This is good to go. See you in the next class. We will be adding lots
and lots of stars to it.
9. Day 2: Sunset Milkyway Details: [MUSIC] Welcome
back. In this class, we'll be just trying to add
lots and lots of stars to it. As per the drill, I'm going to take a
lot of gouache in my paintbrush and getting it
to the right consistency. Now, I'll take another brush and start with the splattering. [NOISE] You can see that the white stars are already
coming onto the paper. [NOISE] I'll take some
more water to it, because I feel now I can add the background stars which are a little bit lighter in shade. I'll do it in this angle
and I'm adding here, because I want it for the
stars on the Milky Way Band. [MUSIC] Though it is a sunset, you still can add
some light stars on the golden deep side
for the paint as well. Now I'll take a brush and add the luminous star
wherever is needed, brightening one of
the stars at a time. I just tap it with
my finger itself to make sure it doesn't
have a very big hard edge. Now, I'm going to add the
meteorite, or a shooting star. I would suggest this can
be in any direction, so you should explore
definitely and I'll add lots of stars and lots of shooting stars as well and just see how it brightens
up your entire painting. [MUSIC] Now to start with the foreground, I selected some trees
to be drawn here, so first I'll start
with the land part, I'm leaving some
space in the middle, because that is where the sun rays are actually
falling on the foreground, so I'll be applying different diluted medium of color there, just to show that
effect on the painting. Here, I'll mix it
with little bit of golden deep and apply that, so this technique is nothing
but we are trying to mix the colors directly on the
paper using wet on dry, because our background
is completely dry, but the current brush, it's having a lot of water
and also we are trying to mix the paints to create the gradation effect
directly on the paper. Now, to continue, this also
still is wet on dry as well, so I'm just adding some trees it may not be
with the proper definition, it's just loose watercolor,
so you can go ahead, add either these trees, or you can add pine
trees as well. You can also add mountains like we did in the last class, so you're free to add any of
the foreground objects here. [MUSIC] If I want to explain how I'm currently
painting these trees, I have taken a
size 8 round brush and I've taken a lot of
sapphire in that brush. It's not too liquid, it's not too diluted, so it has lots of pigment in it, and I'm dabbing it in an angle so that it creates
that leaf texture, you can always practice this
on a different piece of paper before you start
with this exercise. Now, I'm taking
that mixed pigment there and painting the
trees with that color. You can see that once this
land part has dried off, it looks so beautiful, having three different shades in that particular foreground area. That is how you can
create multiple visuals for your painting instead of going with complete
sapphire on the ground, just add some texture with the second color that
you have chosen, to give a different visual look, which will definitely
enhance your painting a lot. Adding the last details here, and for this, I'm taking
the dry brush technique, dabbing off the last
star which is not yet dry and fixing it a bit. This looks good, now to the part where I'm peeling off the tape, so again, I'll start with the tape
which I applied the last, and I will be pulling it out in an angle so that the
paper doesn't tear off. Make sure your
paper is completely dry before you start
to pull off the tape. This is the last one, this is what we have painted in Day 2 of the challenge
using just two colors, I'm excited to see
all your color selection and the paintings, so make sure to post your
works in the project section. See you in the next lesson.
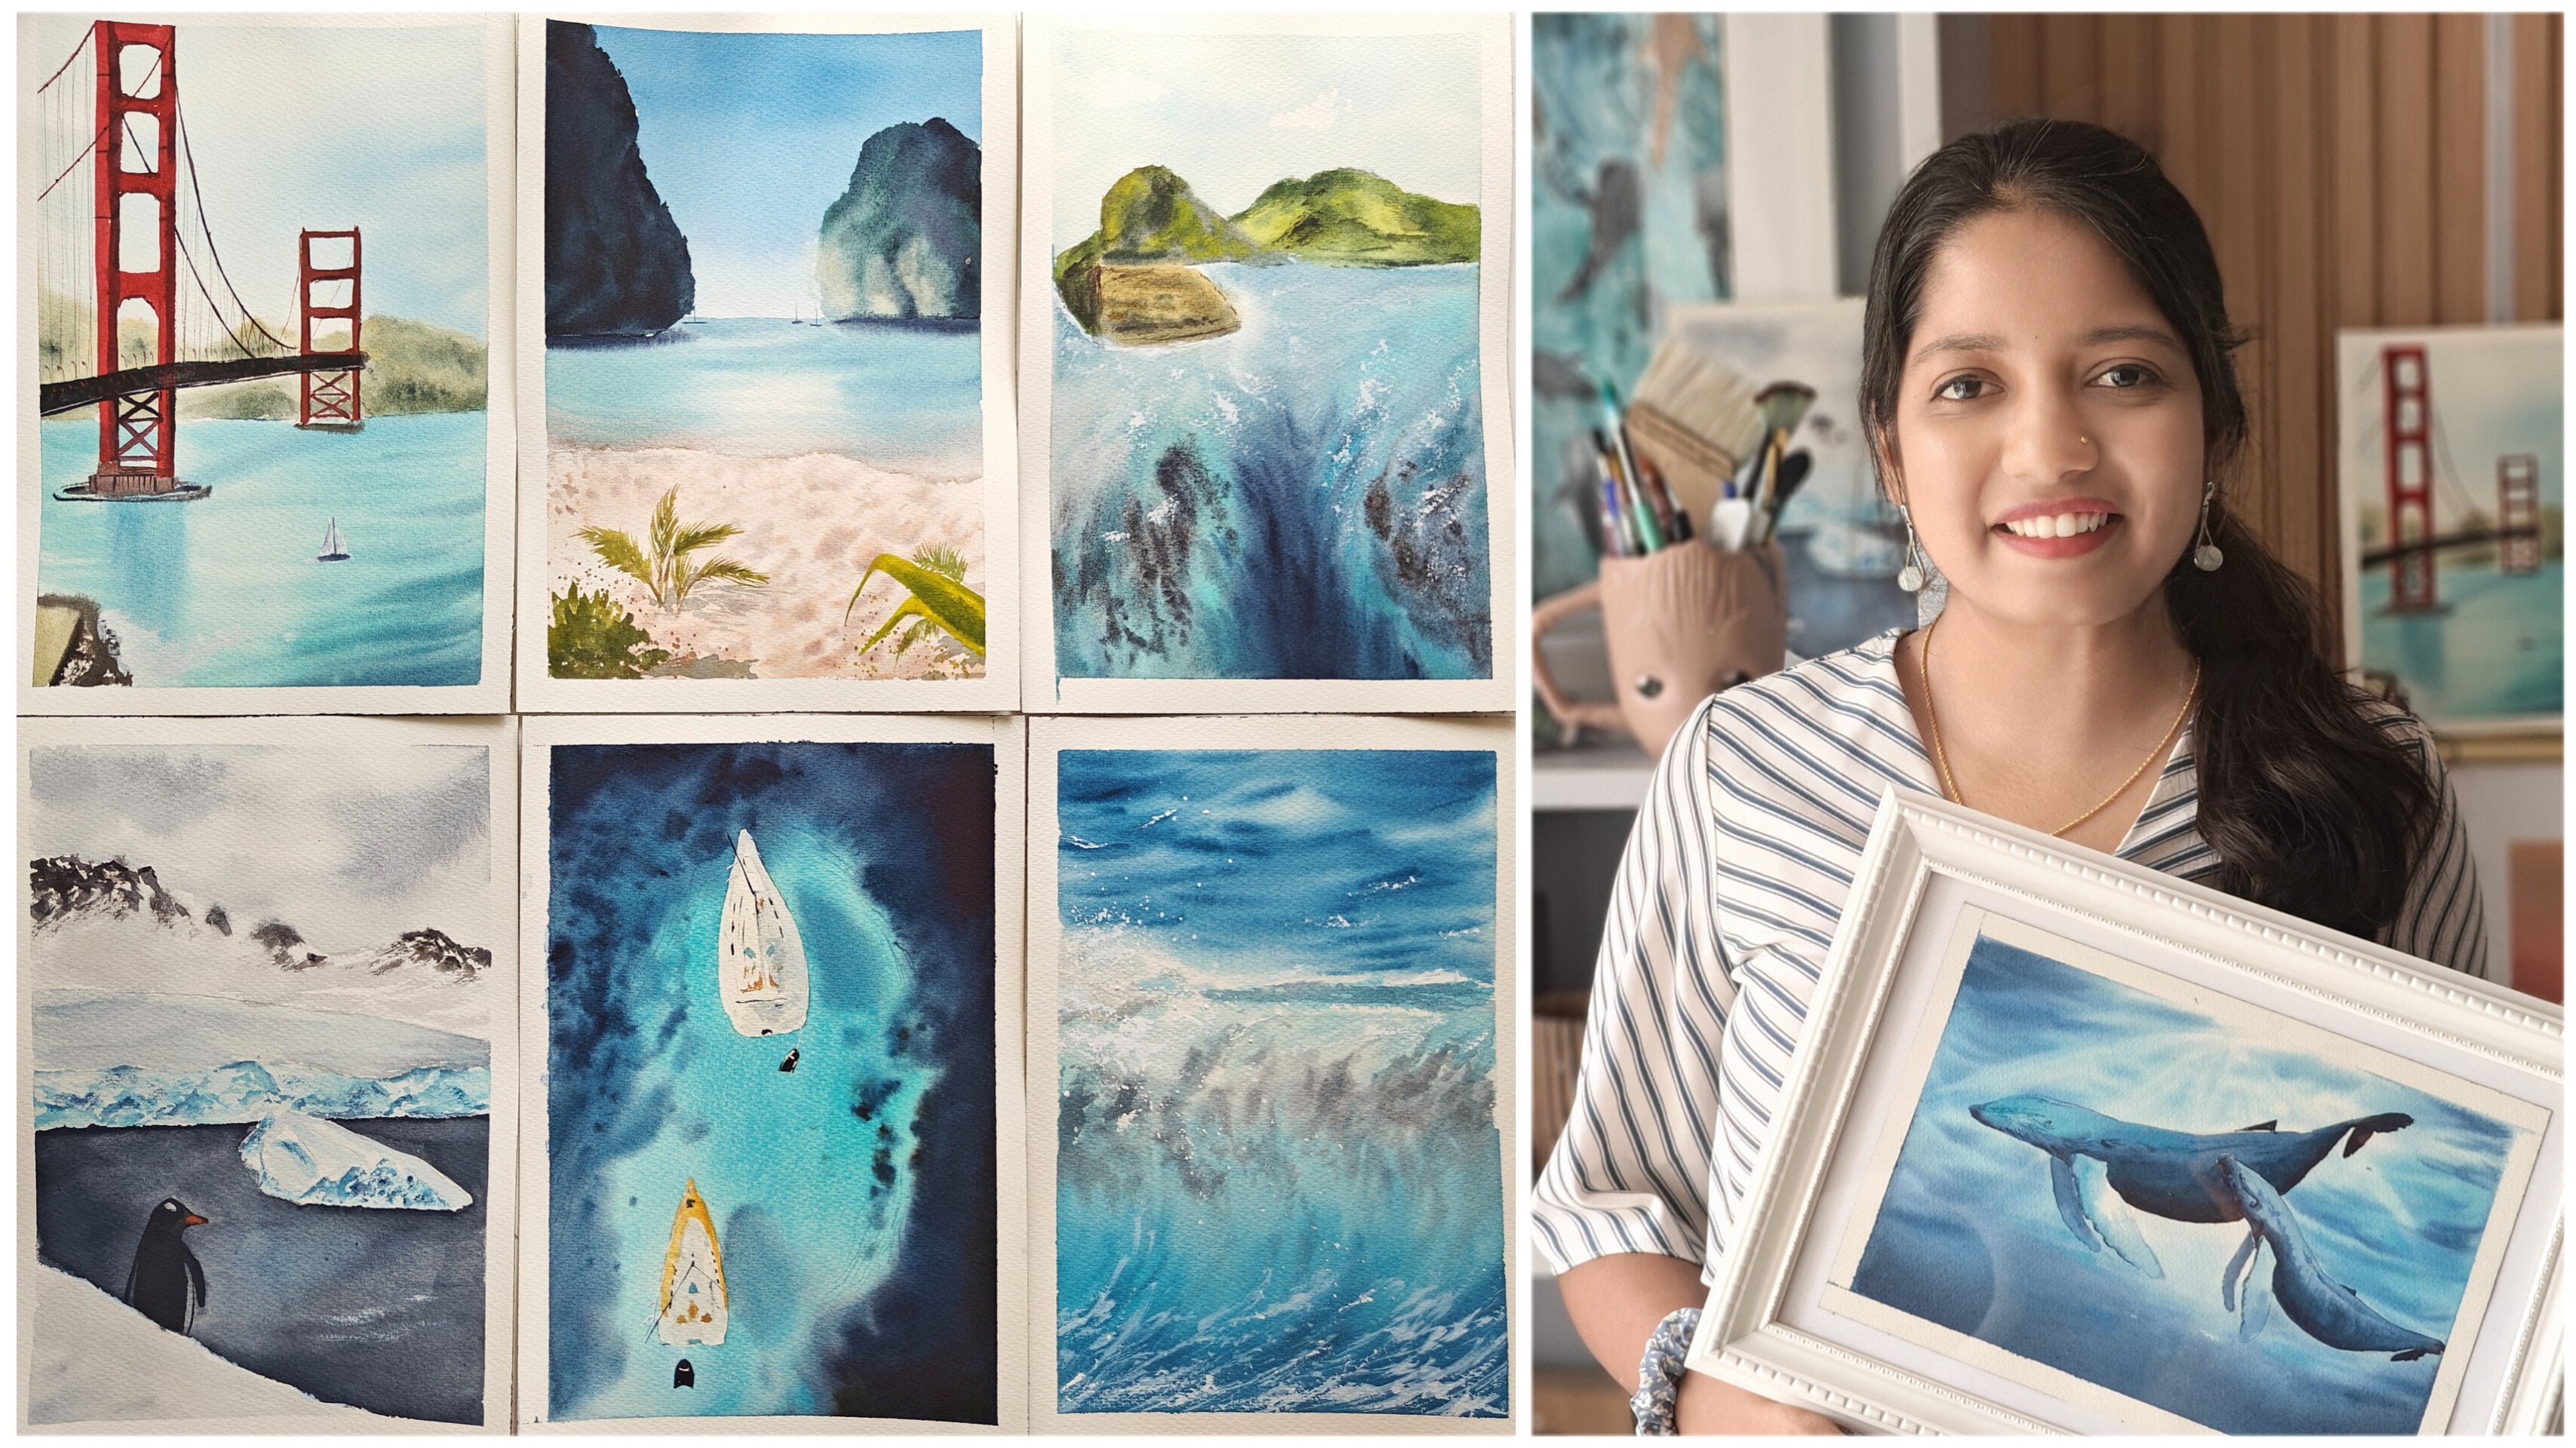
10. Day 3: Stars Above the Ocean Base: Hey everyone, welcome
to Day 3 of challenge, that is stars above the ocean. These two are my
favorite concepts. The colors we'll be using
are bright pink, lavender, and Compose Blue, and these are all from
the brand Mission Gold. You can use any of
the brands that you like or any three
different colors. I have created the swatch
cards for your reference. I have also created one swatch
card where I have mixed all these three colors on a single card to show how these three
come along together. To getting started
with, I have taped down my paper and now I've started to apply lots of water onto it with the help
of my hockey brush. I continue this until I feel
that the water has sieved in and the paper can stay wet
for a long period of time. Another tip that I can give you when to stop
applying water is you can just wait for 10
seconds and if you see a shiny layer of water on
the surface of your paper, that is when you can
decide that you can stop. It should not be too dry, even in the edges or even in the middle
part of the paper. I feel this is good enough. I'll just create the
inclination for the paint to flow with the help of my
kitty, which is here. To get started with, I would start off with
the lavender shade. I'm taking my size
8 round brush. I'm applying it from
one side of the paper. My Milky Way band would be in this direction so
I'm just making sure that I do not add
any colors in that spot. Now I'm taking compose
blue and adding it to this part of
the segment here. If I divide my paper into
three bar, three matrix, this would be the second row, first column block,
if that makes sense. For the top one, I'd be taking some bright pink and
applying it there. Here I want to mix the Compose Blue and
bright pink together. This can be a little bit
tricky, but not to worry. You just take a little
bit of water onto your brush and remove
the pigments like this. You can also just
bring it down to the Compose Blue or
you can take it up to the bright pink and
just spread it across. If it is too much, you can also take a tissue
paper and dab the paints off. But I do know for a fact
that it will dry off well, so I'm just keeping it as it is. Now to get started with
the Milky Way band, I want the background to
be of bright pink color, so I'll just apply it
until half of it there. For the other half, I would
be applying Compose Blue. Wherever it is getting connected with the
color next to it, I'm making sure to
smudge it so that no harsh edges when
the paints dry off. Compose Blue will be the
color that makes my sea, also the major part
of my ocean color, so I'm just going ahead and
applying it to the horizon. This would be the horizon. Now I'm dabbing few of
the pigment off there. I'm taking a little bit
of pink and adding it wherever I want the paint to be more prominent in the band. As the paper has started to dry, I observe that the lavender over there is too light
for the other two colors, so I'm going to make some of the Compose Blue
here and some pink. It will just give
me a darker shade of lavender and I'm
going to apply that. It's totally fine
if you are making such changes once you
already applied the paint, but here the paper is still wet. That is the main reason I'm still going ahead
and doing with it. If the paper is not wet, I would either go to the
re-wetting technique or I would just let
the light shade be. With the same shade, I'm going to add a little
bit more of Compose Blue, and that I'm taking again to add the prominent
parts on the band wherever I want it
to be available. This is one band. I'm just going in the vertical direction
from bottom to top. You can have such multiple
bands from bottom to top or if you are choosing for the horizontal one just perform the same action in
a horizontal way. This is the other one. Here, make sure that you do not merge it with the sides, sky colors, which are there. I'm trying to leave
definite whitespace there, which we already applied
to the background, that color only I'm
just letting it be. It's not completely white, it's not completely a
darker shade of pigment. To retain it more I'm
going to apply to the sky with that pigment, just adding more depth effect to it and mixing it with the sky. I would start again. As your paint dries, you can always judge
based on where, else the depth
needs to be added, and you can continue
to add that. Because this is 100
percent cotton paper, you can see this effect of
paints getting diffused and you can add more and more
depth to the same place. If you are not using 100
percent cotton paper, I would recommend
to just go with maximum two numbers
for this technique. Just the two times you can apply more pigments to it and
not more than that. Because it might
create bloats on your paper and the paper
might start to come off. Here and I'm just taking
some water onto my brush and applying it so that
when it dries, it creates that bloom effect. Adding some more paints here. This is a slow process. You can just sit back, analyze your painting where
you need to add what. I'm just doing this on the flow although
having the reference, instead of going
with a reference, I would suggest you
just absorb where you want those things to be
added in your painting. Here I'm going with a darker
shade of Compose Blue. Now, I would be lifting
it from the brush. Here is how I would do. Make it flat and
pull it of course. Again, dab it on
the tissue paper, dip it into water, and dab it. I just wanted to
show how to create the whitespace by mistake, if you have covered it
up, how to pick it up. That is using the brush
lifting technique. You can also do it with the
help of a tissue paper. For the foreground now
to the ocean part, I'm going to start with it. Let me take Compose Blue, mix it with the lavender and bright pink mix that
I already have here. I would be doing just
one swift motion to create that horizon line. In the middle, I'm going to
let it have the whitespace, so you do not have to put this entire color full
of the foreground ocean. But just with these
swift effects, I want you to create
some of the waves. Not very strong edge waves, but just this moment. You just have to create that illusion of
having the waves, but not particular waves
because we are trying to make the Milky Way band as our main hurdle here
rather than the waves. I'm just taking some
bright pink and adding it here so that it makes sure we show the
reflection of the band. [MUSIC] I'm going to be mixing a very dark
shade of the mixture of all the three colors and
I'm going to add the waves. Already the background
for that wave is created, so I'll just go ahead
and add the waves. You can see how
dark that mix is, and it's a very
opaque one as well. I'll just do the
first two stripes and I will stop it there. I think I'll switch
to a smaller brush with more of Compose Blue in it and I will be adding more
waves in the foreground. Because as you move
towards the foreground, you have more details visible, so you have more
small waves that you can see rather than
the background ones where we have the
illusion of all the waves together and it just doesn't make sense to add
much detail in there. This looks good now, I will wait for it to
completely dry off before I start to
add stars onto it.
11. Day 3: Stars Above the Ocean Details: [MUSIC] Welcome back.
Now we are going to be adding all the
stars onto this. For starters, I'm just
taking a rough paper and hiding the ocean
part of it so that none of the stars go into the ocean place and
it shows up like a snow. I'm prepping up my brush with white gouache
and good amount of water to get the
consistency that we have learned in the stars lesson. I'm taking this toothbrushes and starting with splattering. On the milky way band, I'm also adding some of the
white highlights onto it. I know before I decided
not to use white gouache, but here I feel like adding it would enhance
my painting even more. I'm going ahead and adding this just in the
curves of the band. Now, I'll just merge it
with the background, which is already white. Now for the shooting stars part, I'm going to drop
in here [MUSIC]. You can skip this
if you feel like the stars are sufficient
for your painting. As usual, I'll be dabbing the
tissue paper on to some of the stars where there is lot of white
gouache paint in it. Adding some very tiny
stars in to the band here. It's not working. I'm going to again add with the brush itself. I have taken a scrap paper and covered the
ocean part with it. Going on with the moment for adding stars onto just
the milky way band. This looks good. I'm happy with how the stars
have turned out, and for the sky, I'm totally happy with it. Now for the ocean part, I do want to add the highlights
because even the waves, they reflect back the moonlight. In this case, we have
some illumination from the Milky Way band itself. I'm just going to add that highlighter from
white gouache itself. This is a pure dry brush
technique that we have already tried in the
technique's lesson. I'm just going to add that. I test it out on my masking tape before and I apply it here. I will not overdo that. Now I'll be removing
the masking tape. This is what we have painted
in day 3 of challenge, and by far, this has
been my favorite. Let me know how
your project turns out by posting it in
the project section, and see you in the next lesson.
12. Day 4: Dreamy Landscape Base: Hey everyone, welcome
to day 4 of challenge. Today we are going to be
painting a dreamy landscape. The paints that I'm
going to be using are moonglow, bloodstone genuine, greenish umber and leaf
green. Let's get started. I have already taped down my paper and added
a horizon line. You can also start without it. I'm going to take some water in my hockey brush and
apply it onto paper. This is going to be a
wet on wet technique, and I'm making sure
that the motor is retained in paper for a
longer duration of time. You know the drill, you
have to keep applying water until you feel that the water has already seeped
into the paper, and you see a thin layer of
water formed on the paper. You can use any of
the more brushes or bigger sized round brush or a flat brush for applying water. I also have the swatch
cards here for you, just I have splashed
all the paints. I'm placing here to
create this inclination. I have poured down the
pigments into the bands here, as you can see these two, and the leaf green, and next to it is
greenish umber, and here is the swatch card. The Milky Way band
which I'm going to be doing is in this direction. I'm going to start
with greenish umber. This is from the brand
sennelier but you can use any pigments
from any brand. The next one is our
granulating pigment I'm taking moonglow and I'm using the tail. The property of a
granulating pigment is that the small pigments
actually collect in smaller groups once applied a very minute group I would say. Here, you can just
apply these and observe how the paints turn
out once the paper dries. I'm not going to apply a very dark layer
of the paint there, I'm just going to
leave it as it is. Even on the top. Now I'm taking some
bloodstone genuine and yeah. [MUSIC] Now for the band part, as usual I'm going to first
add the background for it. Already there is
a slight tint of greenish umber as well as
the moonglow on my band. I'll just work on top of it. I'm going to get started
with the lightest color, which is leaf green and I'm just going to create the
background for it. I just wanted to
create some contrast in this particular painting. I do not have a
reference as such, but I hope this comes
out really well. Similarly can explore with
any contrasting color maybe a bright pink or vermilion
or a bright orange, you can use anything here. Now again, I'm taking greenish umber and
creating the band. Similar to how we created
in the last class, we will do the same. Half of it would be
greenish umber and the next half I'm going to take
moonglow and I'm applying it. I'm just keeping the same color which is in the sky next to it, so that visually we get that continuity obvious
in the painting. Now I'm taking
bloodstone genuine and I'm applying
it at some places. Now you can see that the
other side and this side of the band is completely
having just leaf green. I'm going to take some more of blackstone genuine
and I'm adding it here. I'm still making
sure that the green background which is
there, it still retains. Now it's time to do
the lifting where I will be creating some of
the grooves for the band. Here, I'm lifting it. All you have to do is take
some water in the brush, press it along the
paper and dab it off. That will help you remove some of the pigments
from the paper. You can also use tissue
paper for the same. I'm taking greenish
umber and again just extending the band here. You can see what I'm
trying to do here is I'm dabbing the brush in certain intervals just
so that it creates that feathery texture on the
paper when the paints dry. When I do that instead
lifting of the brush, it creates a small white space because there is more
of water in that space. When the paint dries,
there will be a thin layer like a hair line structure
of that white created there. [MUSIC] As the paint start to dry, I can see where it is drying off very dull or very light, and I'm just adding some more contrast colors
in my palette, which is leaf green to
enhance the painting. I'm going to apply one
more coat of moonglow here because my paper is
still wet so I'm going to just add the border for the top off my
Milky Way band. [MUSIC] Here I would be adding
the foreground objects. It's okay that I'm not adding any more pigments to that
particular part of the sky. That is it. See you in
the next class where we'll be adding stars and
the foreground objects.
13. Day 4: Dreamy Landscape Details: Paper is completely dry. To get started with
adding the stars, [NOISE] I have white gouache in my brush and good amount
of water as well. I have caught the
consistency and I've started to apply
stars on the paper. [MUSIC] Now to start with
the foreground here, my full-grown objects
would be pine trees. You can again select
it to be mountains or even a cityscape, if you want, just with
a lot of buildings, which you can do with
say, a flat brush. But here I'm going to mix some of the moon glow
with Payne's gray. With this makes itself, I'm going to be painting
all the pine trees. This would be the land part. I'm going to be
painting it at the end. To get started with, draw one swift of a line here , one more here. Now with just as exact motion, you can start adding
though pine trees. You can practice adding the pine trees in a
different paper if you want before doing it
on your painting. But I would say it's anyways, just a loose painting
that we are going to do. If we just get the sense of
adding a pine tree here, that would be more
than sufficient. Making some more
of moon glow here, mixture of moon glow and gray, starting with the second tree. [MUSIC] Now, I will take the
mixture that we have and apply it for the
foreground line here. Just creating some grass effect so that we don't have
a distinct line. Just with this small movement, you can add that. Looks good. Now, I will take blackstone genuine and apply it to the
rest of the ground. [MUSIC] I feel it's a bit empty space here, just adding one small tree
here without the leaves. I can say just the bark
off the pine trees that we have
completely dried off. [MUSIC] I'm good with this. Let's start by removing
the masking tape. This is what we have painted
in Day For Off challenge, that is our last day. Using multiple pigments, I'm
really excited to see what all pigments and what
all granulating colors you are going to be
using in your class. Make sure to post your work in the project section. Thank you.
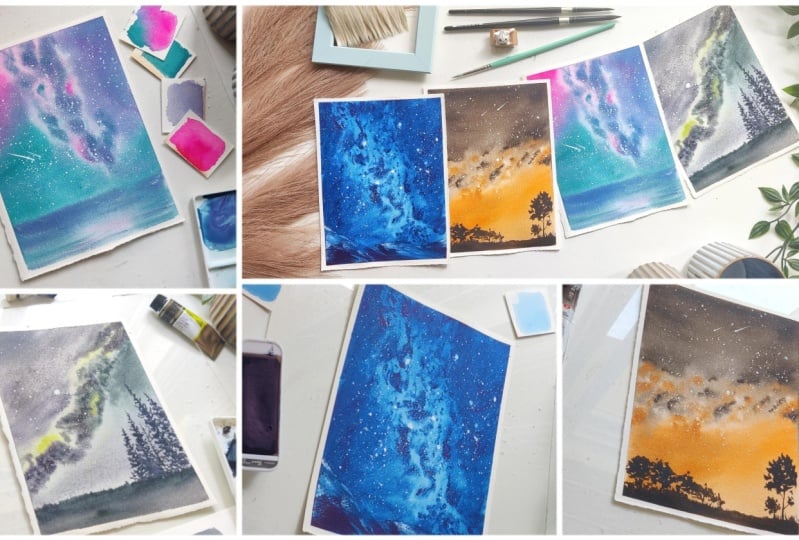
14. Thank You & Final Thoughts: Thank you each and everyone for joining the class
where we have painted all these four beautiful Milky Way landscapes
along with me. I'm sure you've had lots of
fun because I for sure had a lot of fun creating all these techniques and
all these process together. Let me know what you feel about this class by giving a review, so that I can always
learn from it, and that's the concepts that are mostly
needed by all of you. Make sure to post your works in the project section so that
we can all admire your work. If you have any doubts
or clarifications, feel free to reach out to me on the discussions or
on my Instagram. Until I come up with
something excited for your next class, chao.
 Swathi Hegde, Watercolor artist | Aqua | Night sky