Transcripts
1. Intro: Hello and welcome to this class. My name is Jaime, and today I am going
to walk you through the whole process of
creating beautiful 3D and super easy cherry blossoms affect the best
sequence of experience. I will be showing you how to
choose your color palette, how to create the
petals of peace, cherry blossom trees
throughout rigid brush. I will be so glad
to see what degree. Lithium pizza, the glass ceiling Jupiter sized integrase
is beautiful. Il hours. In the next video.
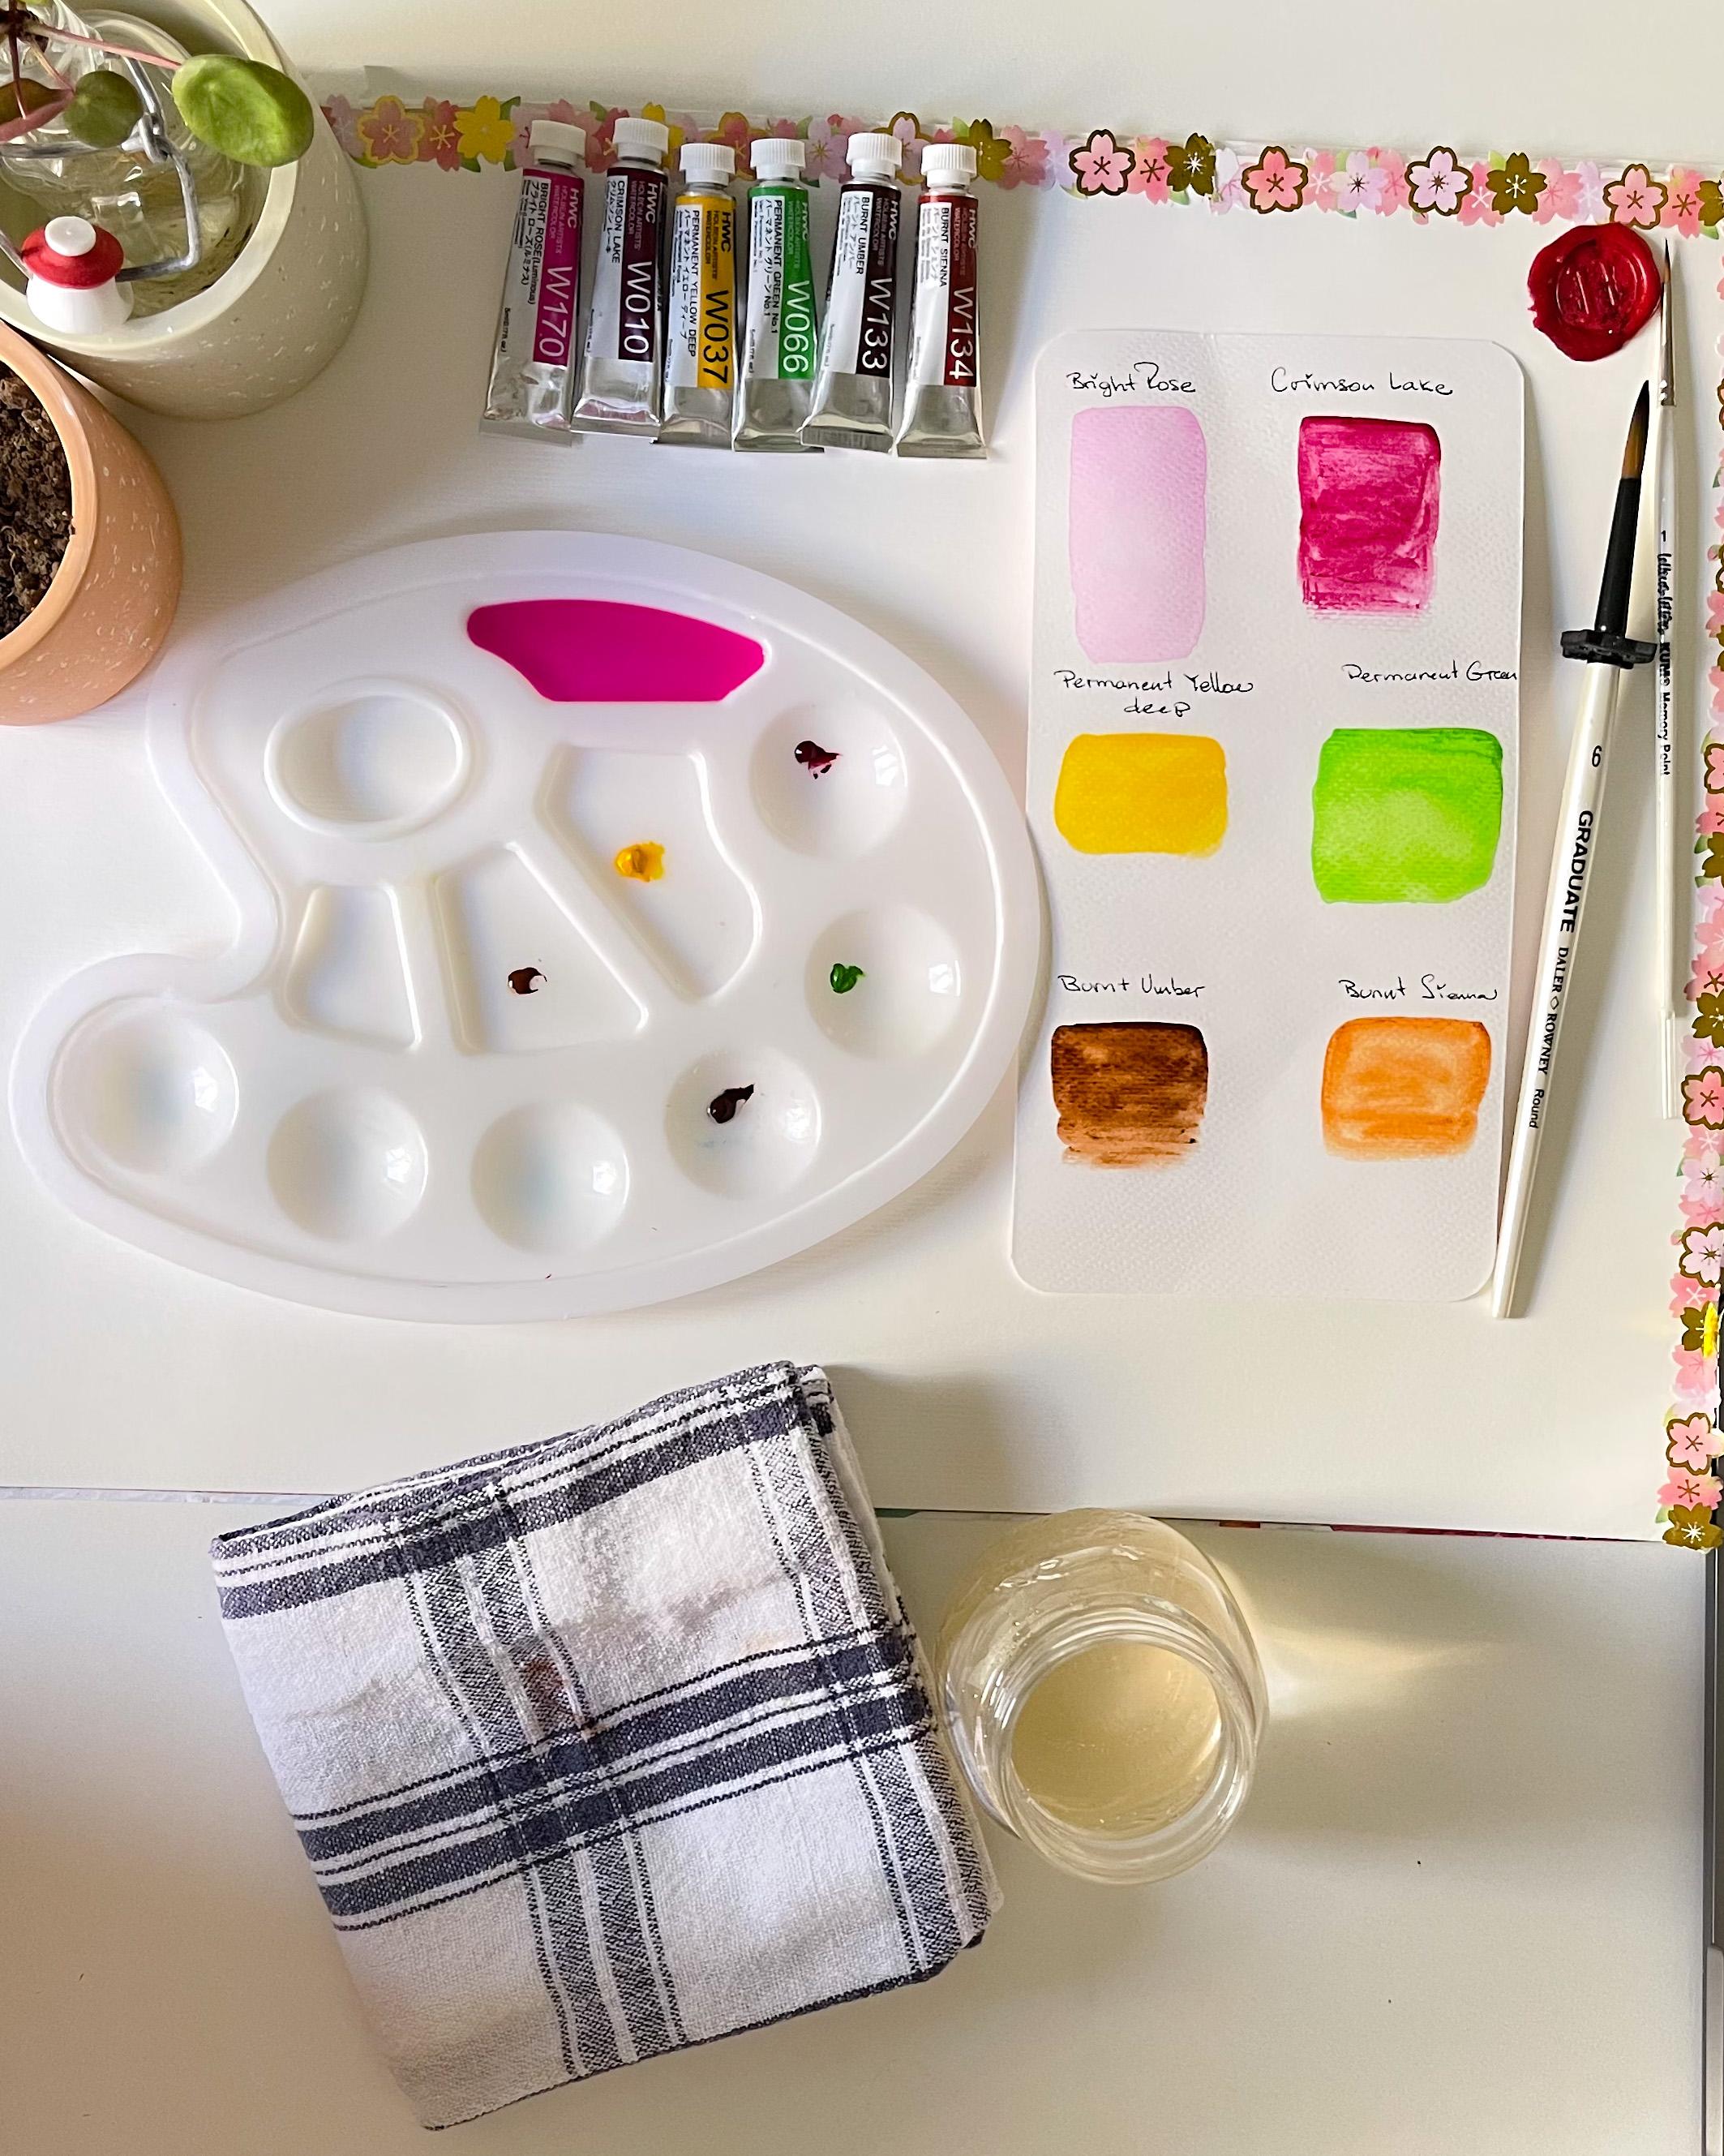
2. The Supplies: Let's take a look
at this blast that we are going to be using
during this class. We need water tower brushes. I will be using the
number six round brush. And I have another monitor
for details n other things. You will need paper,
watercolor paper. This palette that we
are going to be using, mixing palette for
the watercolors. I will tell you how I am doing. Color chat using my pen. Minute pink, Permanent
Rose, green, some lake, It's permanent yellow,
permanent green, born umber, burnt sienna. These are the codes
that we are going to be using during this class. Make your own color tab. And let's start with the glass. See you in the next video.
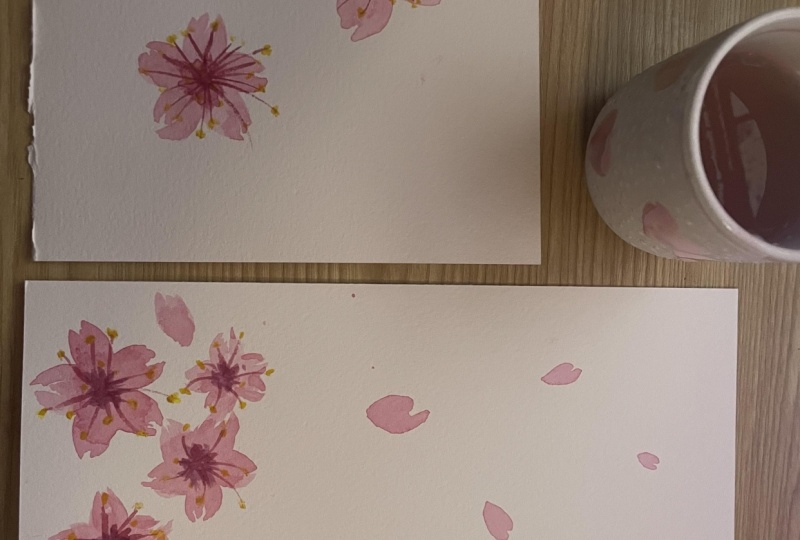
3. Cherry Blossom and Buds: This is the most important
part on this class because I am showing you how to create every petal in just three
stroke widget brush. Do pay attention and do
learn how easy it is. First take a very close look at this reference picture of
Buddha or cherry blossoms, and then we can proceed to start emulating
disputed for blooms. I am using my brush,
my round brush. Number six, I have clean water. Aim my tower. I have diluted the
watercolor, permanent rose. I get a very light pink, which is the main color
for cuda blossoms. This is how we do it. First row away from me, second stroke away from me. And then a little
stroke in the middle. Again. Fit Stroke, second stroke. The stroke. Try to live this space in
between the two fears strokes. Because this flower
has this shape, like a hurt and they don't
touch this size of the petal. We're constructing this flower and the upper side and then the two other petals are
going to be on the downside. And four to make them, we're going to do the opposite. Making this the
fittest drove me. Although what's due in the second story,
also dollars due. And then the third one, we have our famous
cherry blossoms. And this is so easy, but we need to practice. You can play with
the intensity of the rose tone or color
that you're using. But mostly these flowers are
light pink or even white. It is still wet and I am using
my green some lake to make the center of the flower pooling
the color to the center. From the side to the center. Then I will let this dry. We are going to be making
in this second try. So you can practice
a little bit. Again, I will explain
this Slow Food Drug. Second stroke. The stroke, you'll see this
a little bit more of color. Or stroke, second stroke. The stroke, you can always correct the size of the
petal with the brush. Again, we are going to be
working from up to down. We form our flowers
in this, this motion. Now we can do the
other two petals. Barry slowly, fill stroke. Then in the middle we
can fill with color. The last one. We have our second flower. These are looking very natural. The flowers in real life
are very, very delicate. They go damaged very easily. With a window with the rain. They can delete, break
down super-fast. Now they glean some
lake, the center, pulling the color from this side to the
center of the flower. Like this. Very gentle and easy. When we're ready, we're letting
this that I completely. And then we can proceed
to paint the bots. How easy it is. Now I missed paint
or bats within my brush in the water and then beginning a
little bit of color. And this is very easy. We're painting 801 and
this is a cherry blossom. You can play with the size or with the intensity
of the color. Now we're painting the stem
with our glean, some lake. Remember this is just practice. So we can see here how we want the density
of the quarter. If we need to correct,
we can do it. Now. The second one,
we can paint 801. Then this theme. Sometimes we pick up too
much water with a brush, but that is no nothing
to worry about that we'd come pick up those excess
of quarter with a brush, just placing art brush on
the due date that code, and then cleaning it with
our tower frequency. Then we can move the
watercolor detection we want. We're going to add
more Editor window of a mode of pigment in this case. Or, or well, as we want. Brushes stood best
tool in this case, you can pick up more color. And you will see that that is sort of this
buried, clean this up. But you can do the same with
the other one if you want, or you can wait until it's dry
and see how it turned out. The best. The best characteristic of a watercolor is to complete
really well with them. This is how these
look when it is dy. Now we are going to
proceed the paint, some details on the
middle of blossoms. When they glue literally that
i, with Parkinson's lake, we're going to make their filaments on the center
of the cherry blossoms. Then we will be adding the
Berlin with a deadline. Or flower will be ready. Do you can also use here
a gold if you prefer, or white it if more
convenient for you. I didn't just using the more basic colors with watercolors and I had not
even outlining my flowers. Because I just want to share
with you how you can make these little flowers just with your brush and watercolors. But of course you can go
more with your intuition and use other mixes tools
in this painting. Painting looks more your style. For the purpose of this class, I am just keeping it
very easy and basic, using only watercolors, but
I have these may better. So I hope to have fun
creating many, many, many, many petals and blossoms. Lessons. Just made one, I thank goodness, domain many blossoms and
you will see how easy, how natural it will
become for your hands to paint this beautiful
flowers. Many of them. Look at this. I will see you in my next video.
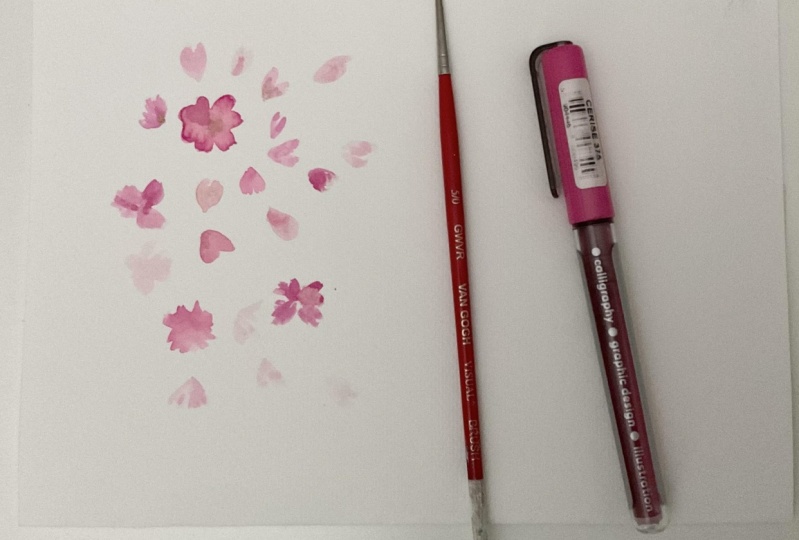
4. Cherry Blossoms : It is time to do both as your knowledge and your
learning into practice. We are going to be creating this beautiful painting
using a cluster of seven cherry blossoms
and some petals because the wind blow them away and
they are dancing in the sky. Let us start with
placing are clustered of cherry blossoms here
in the bottom left. And then some the small cherry blossom petals
flowing on the wind. As we learned in the past video, we started making our food, spit them like this drug. A second stroke, which
struck then the second one. Everyone, This is the main
part of the flower and then the other two aren't on the
down part of our flower, how easy it is. Then the center with
the green some lake. While this is drying, do we are going to proceed
painting the next six? Cherry blossoms. The first time I saw
cherry blossoms being so loved was when we went
to Japan the first time. And they have something
that is called Hannah. And thus is it like going to see the cherry blossoms
and they have like big, nice and under the
trees is so beautiful. You can feel the love for this 3s and how the culture
take care of them. It's really a nice
experience and I wish all of you can
experience this one. Now, if that painting, single petals of
cherry blossoms, you can make this
into the belief in the places you feel
like painting them and add more flowers that you
feel like you to make your picture more
cohesive and harmonic. Where we are, we are going
to be proceeding to paint the details on the center of the cherry blossoms
with my crimson lake, I will be doing the p elements and then add in the
pollen on the flowers. Before I started painting
in the filaments, please make sure that the cherry blossoms
are completely dry. If they are not dry, then the color, the
watercolor with mics. And do we need to correct
that using paper? Picking up the color from
the from the center. So now we're painting
this completely dry. And lady in, as you can see, I added some orienting the center of the flower so to
make it more beautifully. And I really liked this delegate pattern that
we created together today. I hope you enjoyed this design and I can wait to
see what you create. Please upload your design to the class project
for this class. And I will love to see blood
denote that it is beautiful. I will see you in
the next video.
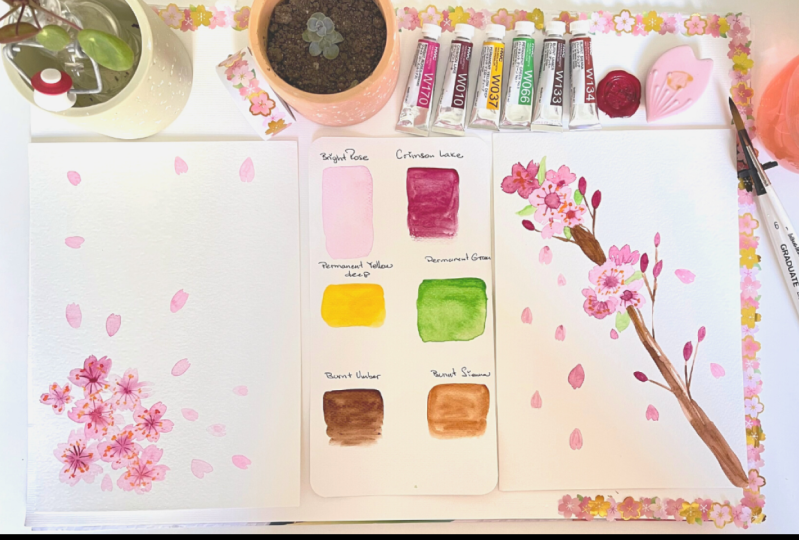
5. Cherry Blossoms Branch: Now we're going to
be a little bit further with this
design and we're going to make a branch of
cherry blossoms. Let us start by
looking at the paper and deciding how we want
to make this branch. I will be placing some cluster of cherry blossoms and then
some buds on the sides, and then the branch of the tree, of the cherry blossom tree. It is pretty simple. We are going to start
painting first the flowers. Then we are going to be placing bats and then adding
the branch between those little cluster that we are going to be forming along the side where we decide
to paint or branch. By now I do have may realize
that it is very important to practice how to
make these blossoms. Then you can start designing. What do you want to
create with them? As you can see, I'm
placing another cluster as motor one and adding the center
and just at the blossoms. While they are drying, I will be making the buds and then I
will be at the branch. We finish are designed this way. Very slow process. Take it, take your time and coordinate tasks you
need and don't rush. I think this is enough. But for the moment and now we're going
to proceed the paint, our branch using our Barn, Amber and our burnt
sienna to make the banana of the cherry
blossom cherry tree. In this case, just place your
brush on the paper and pull it down the line in
vertical manner. Then add a bear little
branches to the buds because they are just
blooming with the spring. Add more color if you need. And try to leave
some white spaces between the lines that you're making and just pull
the color down. And you will see that this will take the form morning guys. And when it dries, you can correct if you need
more pigment or less pigment. As always. You can also use a brown
marker if you prefer. But I think you can
do it with the brush. I will be adding
some green leaves on the cluster of the SEC
Buddha or cherry blossoms. It's always try to be mindful
above outer painting. And if you notice that
you need more blossoms, some world like here, I am adding some other
cherry blossoms. I have cherry blossoms on those spaces that
I think they will be vertical excessive for NA and adding them in a
little darker color. Like newer blooms. And also the wind has blown in. Some petals are flowing in the wind and dancing happily
because it is spring. Let your creativity flows. And remember this is your way of expressing yourself
and it is very important that you keep
following imagination. I think this ready now, I will be then adding
decorative leaves. In this permanent green that is very bright
and very spring like it wouldn't be make it the painting more
cohesive and more harmonized. I didn't, I did them
between the clusters, so they're blooming
dead as well. Just a little bit of color pop. When did this dry? Then I will add
the filaments and the details on the center
of my cherry blossoms. You can do the same
as I am doing here, this type of branch or you can
make a tree if you prefer. Do gun played with the
size of the blues using a bigger brush or a
smaller brush that I'm using here and
recommending you to use. But I led that decision because it do are the
master of your paintings. For me, this is done in
that very beautiful. I like the contrast
on the colors and I really like this
flower pretty much. I think are painting is the reading in a wait
to see what you create. Please share it with me and you have the suspect on the class project
section for this class. And I can't wait to
see what you create. I would say to you
in my next video.
6. Class Project: Congratulations, do the
thick glass in sub, but adopt you for your
class project is very easy. You just need to share with us in the class project
section for this class. Due process. Do your materials, Doris, get your feet with the ones. Do PFS for I'm glad for forbid, I do think whatever
lessons I'll tell you what lessons and upload
this to the glass, predict for this session
and make your comments. I really can't wait to
see what degree A1. I am so happy you are with me. I will say too in
the next video.
7. Final Thoughts: In earlier lessons, animate
favorites, flowers. So herpes is a limited
for this class. And I hope you had so
much fun as I did. And I can with this,
the way to create, please let me know if you enjoyed this class
and if you did, please follow me here on Skillshare and I hope to see
you in my other classes. I have many glasses or you
can follow me on Instagram. It needs to do upload
your board there. Please tag me so I can
see what you create. Let's connect if they creative, and I will see you
in my next class. Bye, bye. Thank you so much.
 Artjourneywithme Heidi, ARTIST AND FACILITATOR