Transcripts
1. Watercolor Postcards: Painting Your Favorite Memories: I love taking loads of photos when I travel or when I'm
want a day excursion. I also love finding
beautiful postcards and gift shops and keeping them as souvenirs to remember
my adventures. But as a watercolor painter, I longed for a
more inspiring way of documenting my
fondest memories, and that's when I decided to start creating
watercolor postcards. Hi, I'm Chris, a former fashion and Iwar retail
manager and buyer, turned full time online
creative teacher. I'm also on the design team for sustainable watercolor
Pat grab the viva Colors. I've done featured workshops for Bonnie Christine and Emily
Jeffords memberships. I've been a podcast
guest on several shows, including Scott Perry's
creative on purpose show, featuring repeat
guests at Godin. As a watercolor teacher, my goal is to teach you
how to break through the crippled effects of perfectionism and find
your creative voice. That means my classes
are no pressure learning zones where you
can come and play and explore with no judgment. Watercolors are my
favorite medium, and also perfect for making
beautiful hand painted postcards that you can keep as momentos or send to
family and friends. They're fun, and easy to create. Don't take much time.
Plus, they are much more meaningful than a photo or
a store bought postcard. And as a bonus, you get to do some fun watercolor painting. The subject matter can be
anything you like, for example, a lovely view, an
attraction you enjoyed, or some activities you did. But you don't have
to be traveling to create beautiful postcards. A staacation might
have you capturing a quick painting of your
backyard or a state park. A day excursion
could mean painting fun city scapes or
nature locations. And holiday themes are perfect for postcard painting
any time of the year. In this class, I'll show you how I choose what to paint
on my postcards, how I quickly sketch them out, and how I decide
what colors to use. I'll also show you
what techniques for quick paintings that you can complete in between
your busy activities. This class is for beginners to experienced watercolor
artists who just want to try something new and use their spare time for some
relaxing painting projects. Ready to capture your
special memories with some fun and easy
watercolor painting. I'll see you in the next video to get this project started.
2. SS Postcard Project: Your project in this
class will be to paint at least one
postcard using the following class
lessons as a step on step to guide you
through the process. I'll share everything
from the tools I'm using, how I'm getting expired
about what to paint, what colors to choose, creating a good
sketch, if needed, and tips for painting
the final project. My watercolor painting
on the go class will be a great additional
reference for lots of travel painting and on the
go painting techniques. But it's not necessary for
completing this class. I'll be using minimal
supplies, and as a bonus, I'll direct you to
a video of how I've streamlined my travel
painting kit over the years, so with lightweight and
easy to use on the go. Just to note that as you
go through this class, painting your
memories doesn't mean they have to be exact replicas. That's what photos are for. This is far more precious work, and we'll focus more on how to capture your impressions of what Your enjoyment and
relaxation are way more core than
getting it perfect. Remember to have fun in
this process and know that your final outcome will probably be far better
than you think it will be. I know this from experience. We creatives can pretty
harsh on ourselves. So keep an open mind. Once you're finished painting
your postcard, stand back. And if you don't like
what you see at first, step away for a few hours
or even a couple of days. You might be surprise
when you see your postcard pata after spending some time
away from them. And sitting back at
at least six feet, how should co see
them with fresh eyes? Please, give yourself some grace and allow your own style, color choices and brushwork
to take the four friends. Just because you don't
feel experienced or confident doesn't mean
your work isn't good. When you turn in your project, I will be honored to give
you personal feedback and answer any questions you might have to help you along the way. First, you'll go to
the Projects and Resources tab under
the Class videos. Then click the Green
Create Project button. From there, you want to upload your cover image
for your project. Choose a file. Then
click, submit. From here, if you want
to replace your image, just click the button below. Find an image, and below, you can make it larger
or smaller with the slider or you can drag it side to side
to position it. When you're happy,
just click, submit. Now your project needs a title. It can be funny, descriptive,
or whatever you like. Below is your personal
project field. Click Image to add image files. Then position your
cursor underneath the image to add descriptions. I'm adding a series of images to show my entire
process for this project. You can do it anyway you like. Below, you can also
add a video or links. When you're done, just click
the green Publish button. Once it's published,
you can go below the videos and see your project
on the right hand side. When you click on
it, you can see that all your images
have uploaded. On the right is where people can comment and
like your project. I comment on every project, so I can't wait to see
you in this space. If you need questions answered, please reach out to me
in the discussions page of the class under
the class videos, and I'll be happy help. Also, I'll be offering a new
one on one session through scale share to help you with travel peeing while
you're on the go. So if you'd like stra help, by getting my eyes on your
work to help you along, I'll leave a link
where you can book a private session with me below in the project
description. I'll see you in
the next lesson to talk about what you
need for this project.
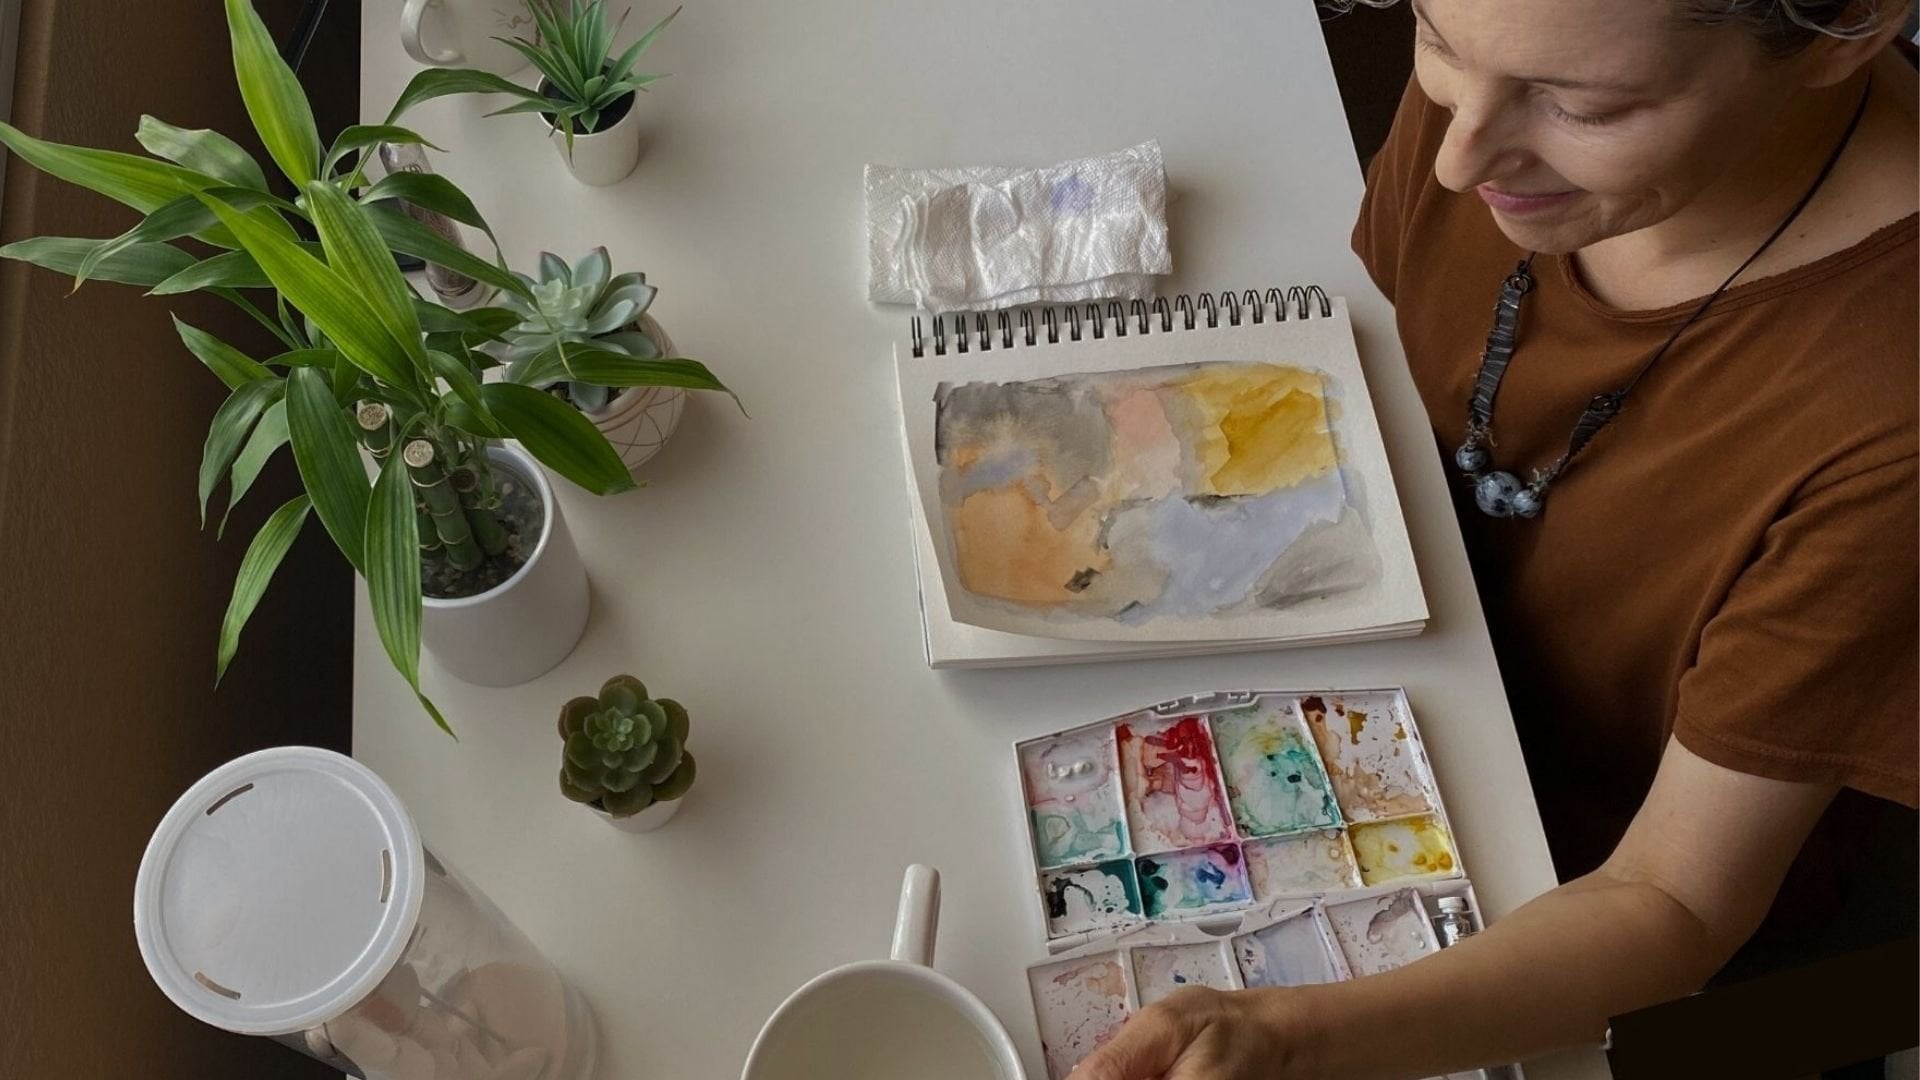
3. Tools & Materials: All of the supplies I We for this project are on
this table right now. As far as paints go, I'm going to be mainly using my iviva colors spring
watercolor pan set. This pan set is cork, and all of the colors are made with natural
dice from the earth. This paper palette is
the That's not glossy, but slick so that you can make your colors
on it very easily. This entire set is
biodegradable and comes with a color
swatching card, which is super helpful
because sometimes the pants don't look like
what they're supposed to be. I'm also going to be using a Viviva colors
color sheets set. Now, the difference between
the color sheets and the pan sets is that the
pan sets are light fast, where the paints are
not supposed to fade. I the light, the color
sheets are not light fast. However, I have a lot of my paintings out on
the wall and so forth. And I haven't noticed
much fade with them. Although they're not
in direct sunlight, but these color sheets are
just as vibrant as these. They last just as
long as the pan set. And these both last as long as a normal half pan watercolor set by any other
company I've used. So these sheets,
although they're flat and on thick cardboard sheets, these squares last just
as long as one of those. They're separated with
some wax paper so they don't mix together
or stick together. And there are quite a few
colors in here that are very basic that I might use in
addition to what's here. So that is the color sheets. This one also comes
with a fly out palette that is super handy, so I never have to carry
around a paint palette with me when I'm
using these paints. Every set they make is 100%
sustainable, biodegradable, so I feel like I'm being
really responsible to the environment
using these as well. So for paper, I'm
going to be using this artist loft watercolor
paper pad, it's four by six. And these little postcard
sizes are really, very much perfect for what
I'm going to be doing. You can see this is
a regular postcard and it's exactly the same size. So that's the paper.
I'm going to be using a medium round brush and
a small round brush. Technically, this is size seven, and this is size three. But since these sizes are not standardized internationally
or company wise, or There's no actual standard. I just call this small
and this medium sized. If you want direct
exact measurements, this is about half an inch, long, maybe a little bit
longer, but not much. And this one is about an inch. I'm also using a
pencil and eraser. This is a palmer eraser, but gummy erasers also work
well for art because neither one of these kinds of erasers leave black marks on your paper. So that is nice. I keep a little paint brush from my garage to brush
eraser dust off, so I'm not wiping my hand on my paper that might have paint
on it or dirt or whatnot. So that's what that's for, and then I'm going to be
using a ruler later on. Have two jars of water. I used to use one all the time, but then I was getting up to
change my water a lot more, and I just find my brushes
are kept cleaner when I have this additional jar
of water to rinse them. And then, of course,
some paper towels or rags to dry my brushes, pick up messes, do lifting, and so forth, which
I'll be showing you. This is a Strathmore 3.5
by five sketch book. It's not watercolor paper, it's not precious.
It's not expensive. And so if I need to test colors, this is the perfect thing if
I need to do that before I actually put the paint to paper. I've done for months and he
actually years of testing on. He I've done lettering
testing and just all kinds of little it's my scratch pad
for watercolor paintings. So this is an additional thing that you don't absolutely need, but it's very helpful to have if you have
blank paper syndrome. This is a great fix for it. Also have a black
micron size eight. This is Archival Black Ink, which means it
doesn't run if I put it down and I paint over it or fine liner of some
kind because we're going to be doing
some extra detail on the back of our
postcards later on. That will be a fun
little addition to what we're working on. And that's it. That's everything we're going to be using
today for this project. I'll see you in the next
video to get started.
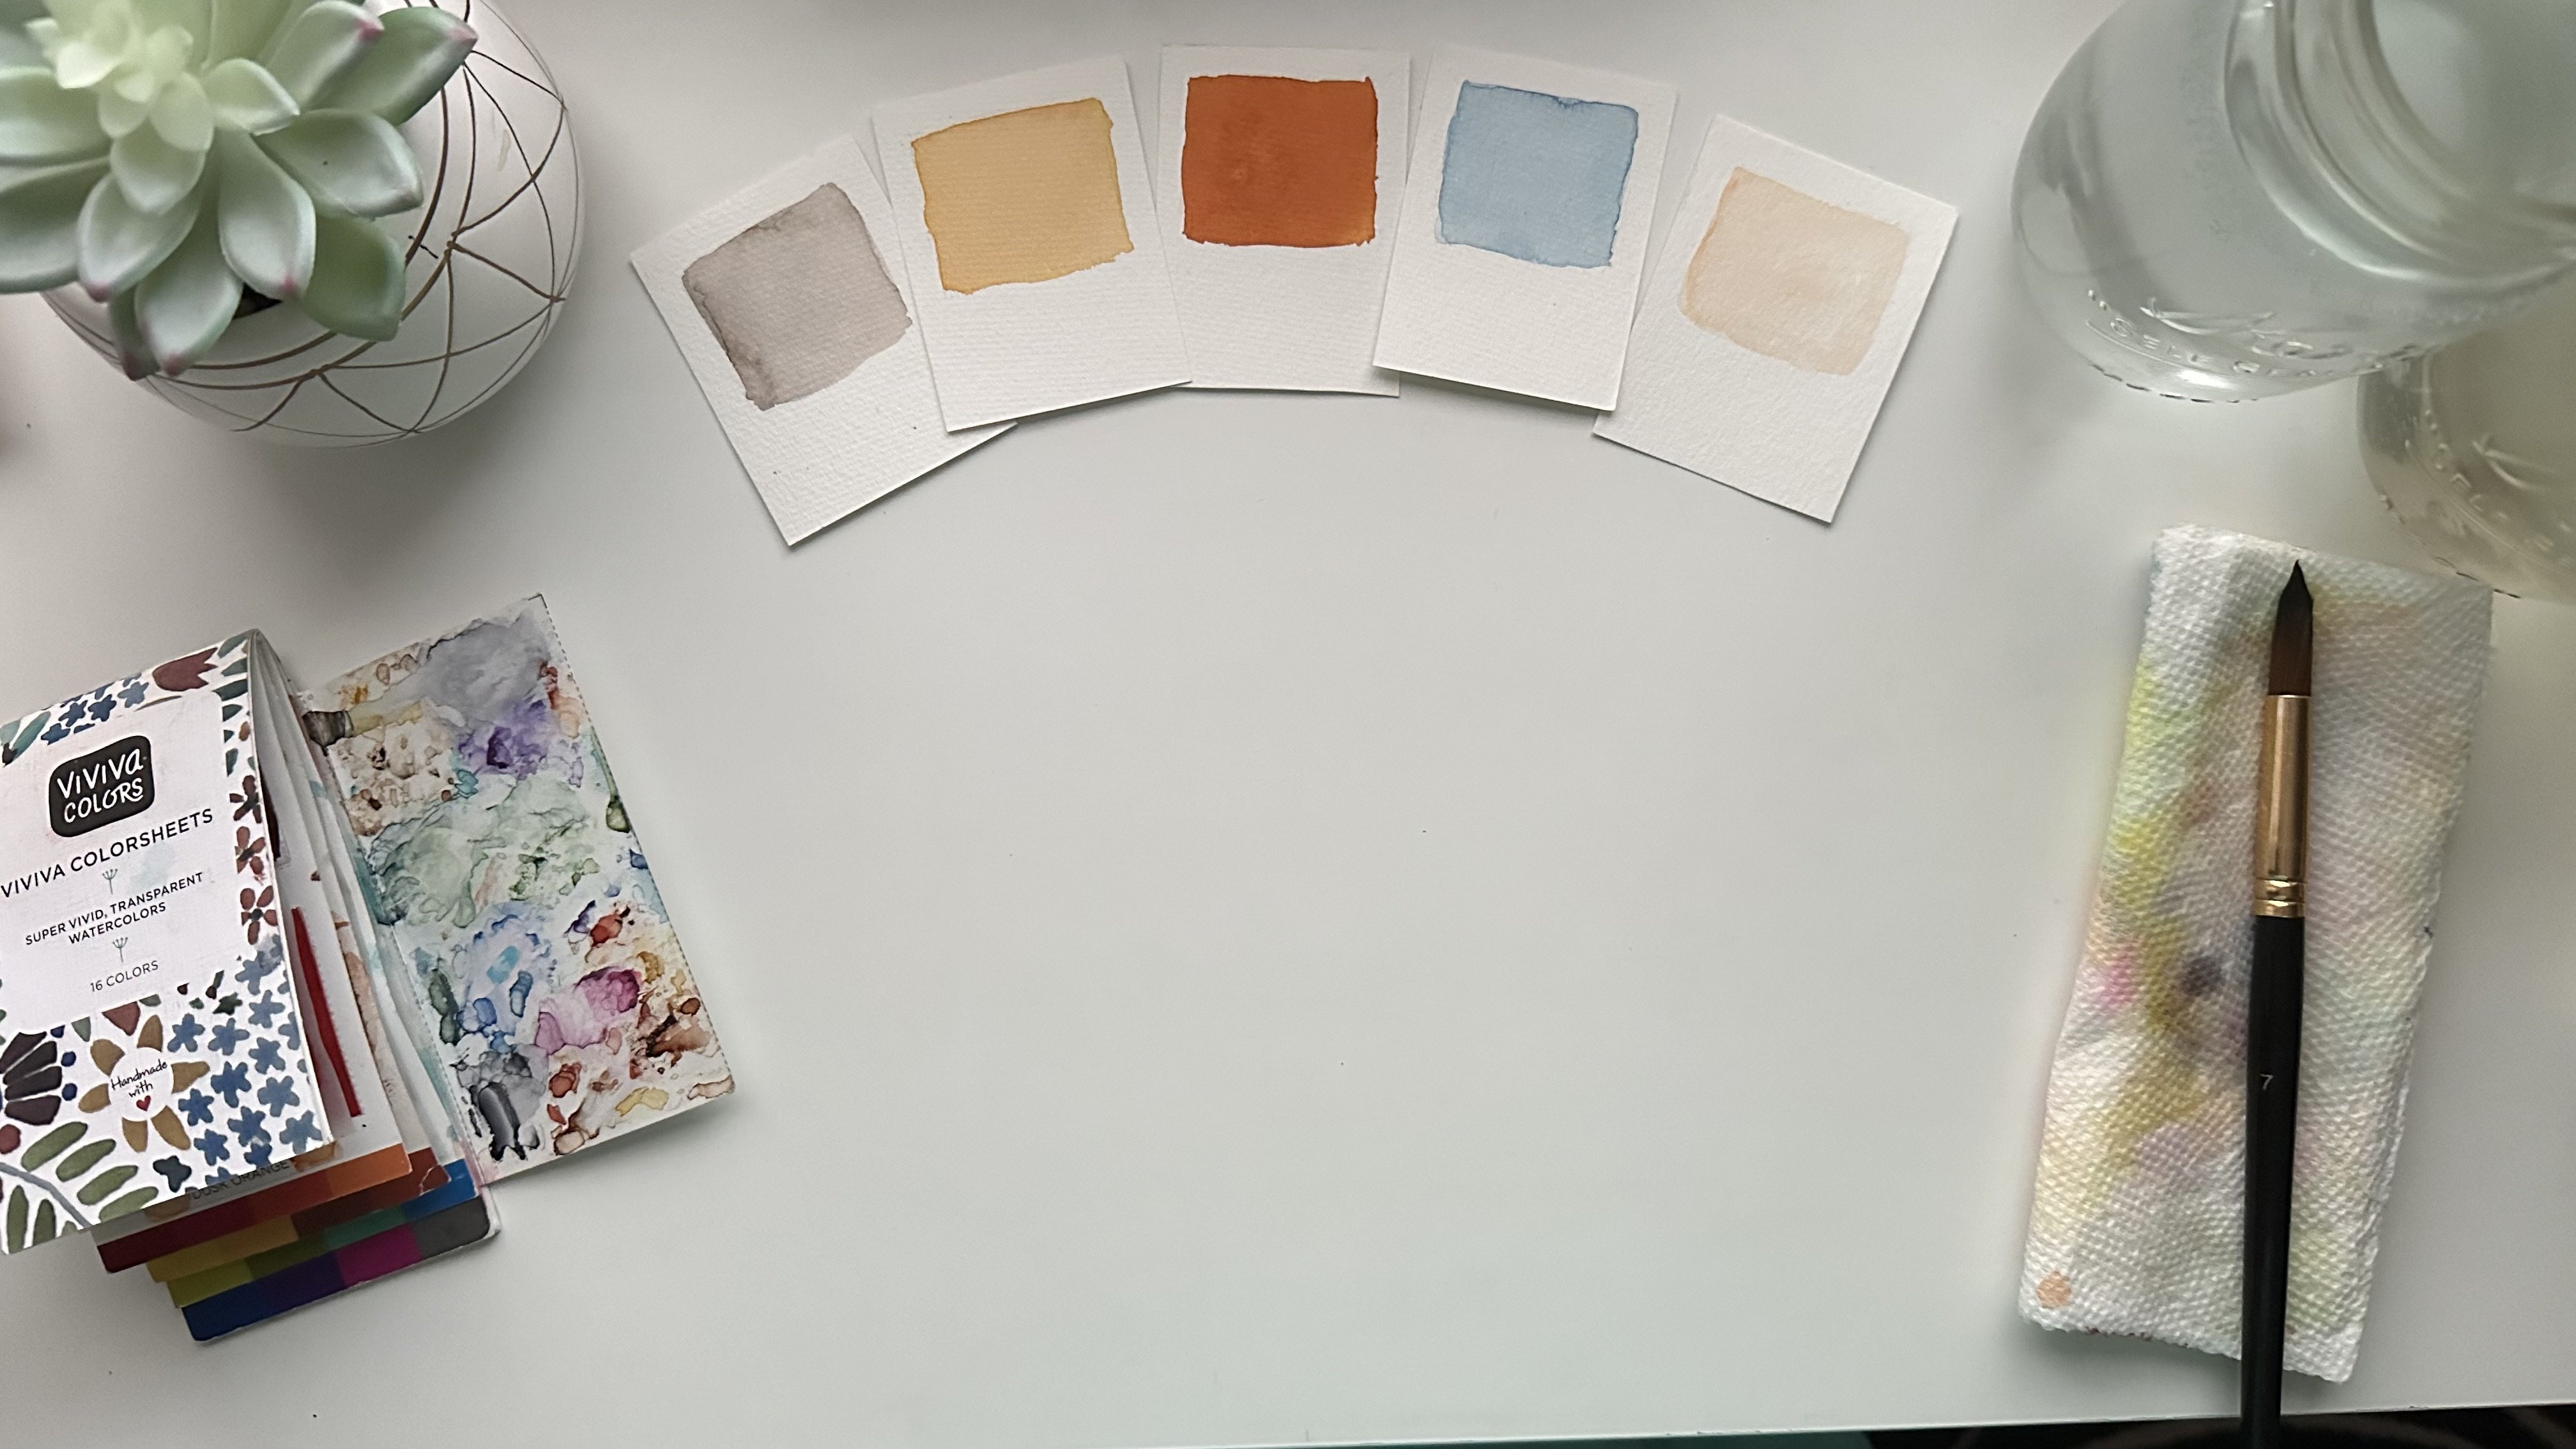
4. Color Palette: Your color palette will depend
on what you're painting. If you're painting a certain subject with particular colors, you can stay close
to those as you can, or you can be
creative and change the colors to something
else that you prefer. Because it's your paint, you get to decide now. But if you're not experienced
with using color, this can be a bit intimidating. So please note that this is not about perfection
and total accuracy. It's about expression, and everyone's expression
is a bit different. That's why so many
people think they're painting or wrong or not good, but your own unique expression is valuable and
needed in the world. And it's okay if you don't know how to mix a certain color. Just use the next best thing and don't let the
details derail you. You may want to come up with a repeatable color
palette for all of your paintings just to
keep things simple, and so you don't overdo
it on the color. That's what I'll be
doing in this class. Or you may just want to be spontaneous and paint exactly
what you see as you see it. Either way is your choice and based on what makes
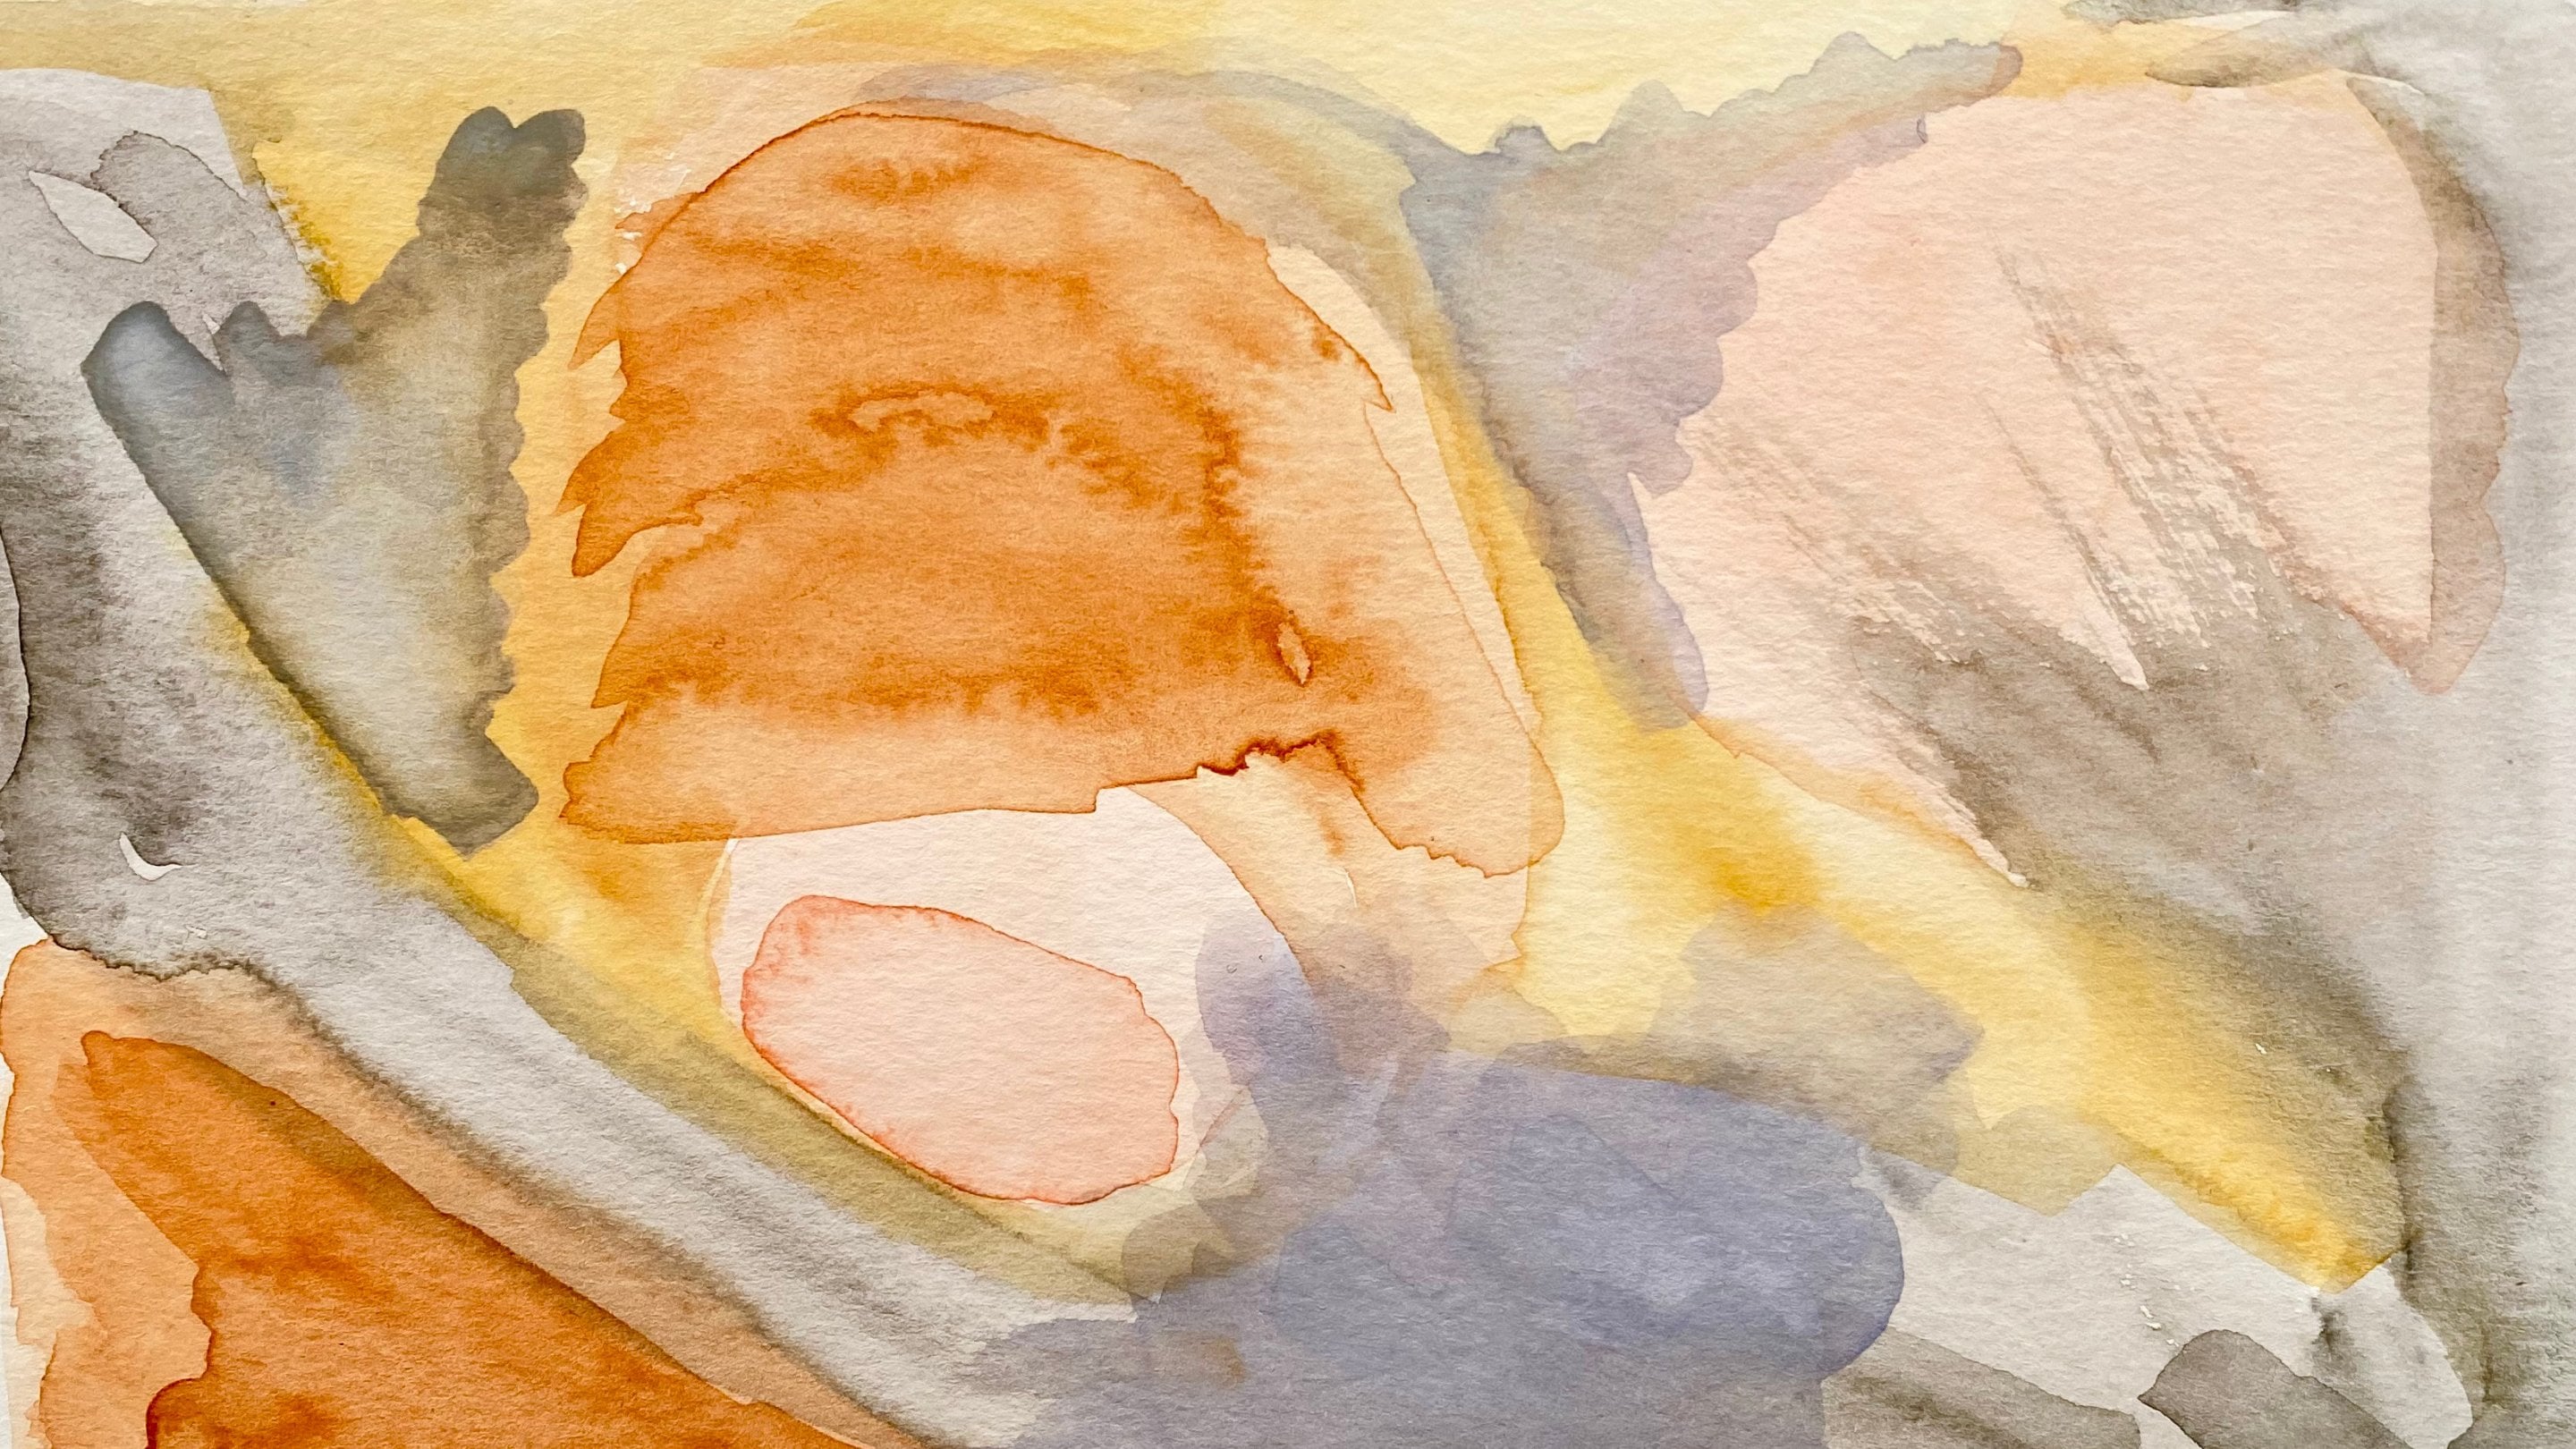
you the happiest. I'll be working with my
favorite color palette, which was inspired
by this very desert, because it obviously will
be working so in this case. Decide how you're going changes
color for your postcard, and I'll see you in the next
lesson to get inspired.
5. Postcard Inspiration: Painting postcards
may sound fun, but choosing what to paint could be a bit
intimidating at times, especially if you have
lots of options and ideas or equally
no ideas at all. I'm here to tell
you that whatever you Pete would be an amazing
gift for anyone to receive. So please take the pressure off about using the perfect
subject matter. 'cause I don't think that's
really an issue here. You're welcome to Pete
the same subject matter over and over again on
multiple postcards, if that's what you
prefer, or to keep your subject matter super simple so that it's quick
and easy for you. Whether you're on vacation, on a day excursion, or just in your backyard. It can be difficult to figure out exactly what's
seeming to paint. That's why I generally stick
to what's right in front of me and what seems to capture
my attention the most. But what if my favorite
inspiration ends up being super complicated like a lush landscape, for example? I'll show you some techniques
to simplify and reduce the time taken for seemingly
overwhelming details. I'll show you how
to naw your focus, to only see what's important to you to simplify your paints. If you're traveling as
you're watching this class, and want to do some planar
painting or outdoor on the go travel painting
for your postcards. This will be super
fun and will add even more romance
to your project. However, painting
on location is not necessary to create
beautiful postcards. For this class, I
will be pulling images of a recent trip
to a desert state park, from my photo wheel. I'll create a set
of three coast cars with different subject matters. Let me take you along while I select my reference
images for Painting. There is no shame in
painting from photos. In fact, you might find yourself more relaxed back at
your hotel or back at home where you
can sit down with access to a table,
water, et cetera. There are so many
ways to do this. And I just want you to know
that there is no wrong way. Do what feels best and most natural to you and
enjoy the process. If you're new to this, you might not know the
answer to that, right now, but
diving in and trying things out will certainly
help you get there. L et me know in the discussions tab under the class videos, if you'll be painting on the go, or if you'll be painting for photos from a secure location. Will you be painting on a
trip or was you're back home? Maybe you're not
traveling at all, and you just want to paint a location you're dreaming about. I've done this plenty of times, and it has been both
relaxing and great practice. Just to note that if you'll
be painting on the go, I have another sale share
class that you can reference, call watercolor
painting on the G, where I take you step by step. You're my travel
painting process, my travel art supply kit, and loads of techniques to help you save time
along the way. I'll see you in the next lesson.
6. Choosing What to Paint: If you plan to paint
more than one postcard, it really helps to do a
little bit of pre planning. That's where storyboarding
is super helpful. I don't storyboard
before every project, but with a project like this, it's super helpful to narrow down the choices of
what I want to paint. Otherwise, it can get
really overwhelming, and when we're overwhelmed, it's really hard to get started. Storyboarding allows me to get all my ideas down in one
place where I can see them at a glance and strategize
which projects I want to paint and which
ones I want to leave out. In other words, storyboarding is a great sorting process.
I'm going to Storyboard. A recent excursion I took to a nearby state park here
in the Mojave Desert. I took lots of pictures
to be sure I'd have a selection of fun
things to capture later on. First, I'll make a list of all the things I might want
to paint on my postcards. Then I'll use my list to sketch a thumbnail in each of
these storyboard boxes. Please know, many times
it's possible to paint in the moment and capture
beautiful memory or experience on the go. But sometimes life happens, and we don't have the
time or opportunity. In those cases, please keep in mind that painting
from pictures can be just as effective and fine
as painting on location. Be sure to snap a picture of the subject
matter you want to capture and then revisit it later on when you
have your paints. In this class, I'll be
working from these images. But if you'd like
more practical advice on how to paint on location, wherever you are, you can
reference my skill share class, watercolor painting on the go. If you don't have time
to do story pouring, another way to decide what to paint is to go through
your photo reels. Take a quick look at the images you took
and see what photos jump out at you right away.
I really like this one. And this one and this one. So it looks like I'm
focusing on landscapes because that's what's
really getting me excited to paint right now. But I really like the
wild flowers, too. So maybe I'll keep those images aside and
do them at a later time. Popping those into a separate
folder is really helpful. So I don't have to look
through all my photos to find them again when
I'm ready to peek. Then I can narrow them down
from there if I need to. Look for shots that could
be simple to paint, but mostly which ones
are your favorites? Because let's face it. Those are going to
be the most fun. Regardless of what conditions
you're painting in, the main idea is to gain clarity on how your postcard paintings
might come together. Once I have those ideas, I feel much more confident
to move forward. Go ahead and
storyboard your ideas, and I'll see you in the next
video for some sketching.
7. Sketching the Postcards: The sketching process can
be really painful for a lot of art students because
of a big misconception. Assuming that the sketch needs to be a perfect
detailed drawing. This trips up so many people so badly that they never make
it to the painting process, which is the best part, right? The tri about a sketch is that it's different
from a drawing, which is the finished piece of artwork that you
could spend hours, days or even weeks on. A sketch is simply a rough
draft of what you'll be painting moly for the
purposes of placement. That means the only purpose
of a sketch is to guide your brush and not be a perfect depiction of
the subject matter. Kick the pressure off and
make your sketch as quick and simple as it needs to be so you can get
to the fun part. I'll put a minimum
amount of lying on my postcard sketch just to
keep them super simple. In some cases, I won't
need sketching at all. For example, for large
painted areas and shapes. Be sure to keep your pencil
marks as light as possible, unless you want them to
show to your painting. If you can't quite do
that in the process, you can always lighten them once your sketches are finished. Even if your pencil
marks show true. This can be a very
charming aspect, so it's not necessarily
a negative. The main thing is to re and have fun with every single
part of this project, and don't worry about how your project will be
perceived by others. There's a good chance
whoever's getting this postcard is going to be
super impressed regardless. Ohh
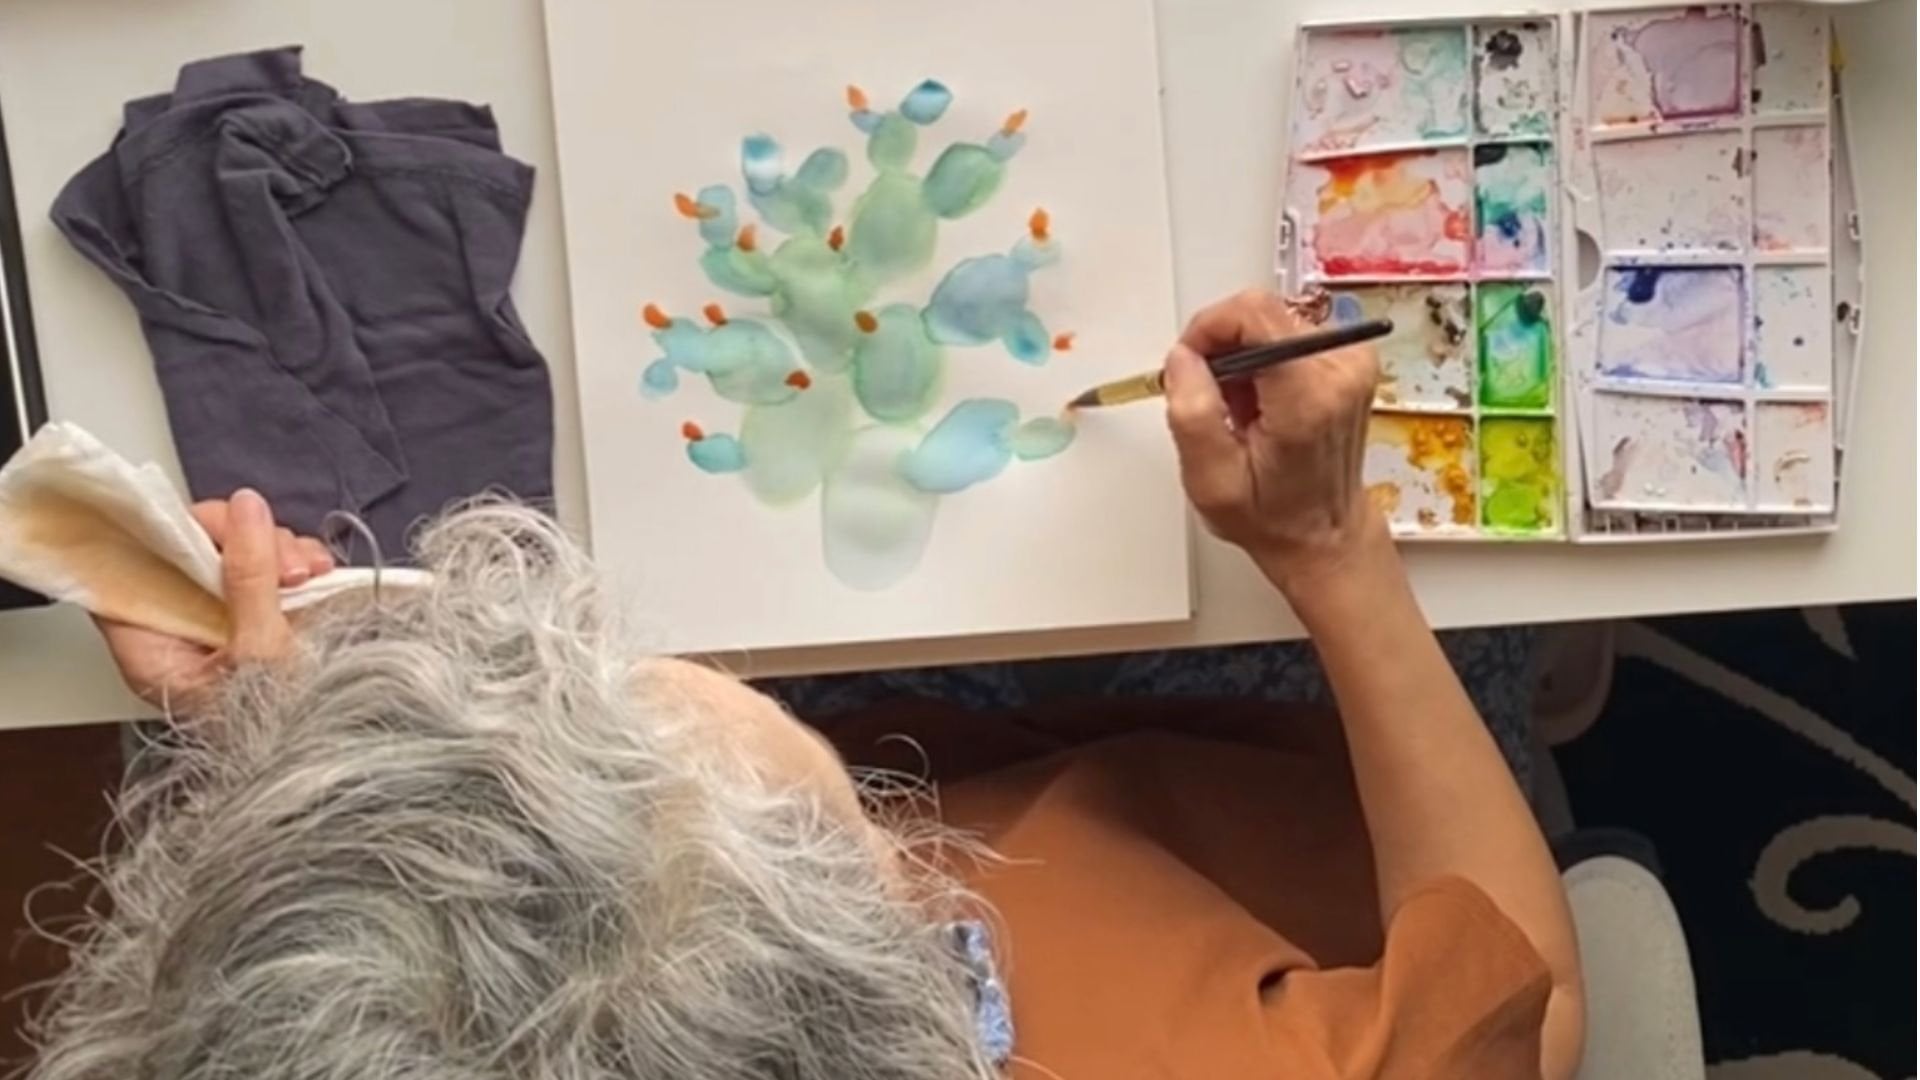
8. Postcard Painting 1: Now it's finally time to get out the paint supplies and
get them color down. If you are creative in any way, this is gonna be your
favorite part of the process because we get
to as a vote with color. Let's get this painting
part and started. I'd love to start painting
my first project. And part of my plan to
keep paintings going faster is to paint the top and then paint the bottom
and while they're drawing, start somewhere in the middle, and that just keeps my painting moving a little more quickly. I'm going to be using
my springs pan set, as I mentioned from
Viviva Colors. I'm going to start with the sky, and I'm going to start
with the cobalt blue, which is this one here. And I'm going to move
on to my shrubbery. I'm going to use a
combination which I've mixed here olive green and
then add a little bit of And just going to finish
the shrub line here. That's a than what I wanted. It's better. Darker than what I wanted. And this is still a bit
darker than what I wanted. I'm just going to rewet it, which lightens it because I
have more water in my brush. And maybe even just dab it a little, which
is called lifting. I'm also going to
do some lifting, while this paint
is kind of fresh. Right here, where the
bottom of that tree starts to show its branches there. See how I lighten that. That's all I need. So
now, this has got to dry. This is completely dry. So I can start my sandstone. And I'm just gonna
use this Indian red. Yeah, just dive right in. Is. And now that it's drying, I'm going to take
my detail brush. And I'm going to go in with
another dark layer of this. I don't leave a lot
of water in my brush. I dry it, so it's just damp, and it absorbs this paint really nicely and moves well
because it's not so dry. And I'm going to start adding
some just lobs and dots. And they'll get bigger
as they come this direction because in the
foreground things are closer, and the background
things are further. So I'm just going to just
keep it really small up here. The tip of the brush when
I start is the thinnest, so I definitely want those
to be on the outside of these tiny spiny looking
branches that go out. See, that's thicker
on the outside. I want to keep the end of my
brush on the outside of this That's That's great.
For a first pass. On the second pass, I
can go much darker. I'm going to take my color
sheets because I have a nice dark on this
one. I burnt umber. I'm going to open my palette
for this color sheet set so I can control
what color I have. I'm done. Put this one aside
and start the next one.
9. Postcard Painting 2: I'm going to go right
into this with the sky. So get into my cobalt blue. That's all the blue
I'm going to paint. And I'm going to move down here. Now, to do this, I'm going
to add a very light brown, and I'm going to use this burnt umber from my color sheets. I'm going to make it
very, very light. And I'm going to start covering
this ground over here. I'm going to leave that. I can make some more detail
with it later. Use my olive green and some and mix that lovely green
that I've been using. And there's a yucca
tree up here. I'm just going to
completely ignore. It's just not worth spending the time on
that level of detail. I am going to continue here just above the fence with
some of these ds and dots. Now that this is d,
and this is dry, I'm going to go ahead and
move on to my mountain area. I kept that for the
last part because it's kind of the smaller part
of this entire painting. And while that's drying, I can go on to my fence. So you can see, as we're working opposite sides
of the painting, I can keep the insides moving. I'm going to go
back to the brown I used in my color sheets. And then I can add
some lines here. Even though I don't see too many in the images. It's okay. Add the same kind
of texture to keep the story going and come
right down with this. It's it's going to be a
little more shaded here. So, you see, really quickly, with just a little
bit of detail, I can start telling a story that is accurate without
being too detailed. And with my detailed brush, I'm going to go back in with some olive and really touch up some of the
shrubbery and trees. I'm going to make a little
bit of detail down here at the base of this
to show some rocks and grave stuff down here. I might want to take my orange. A really concentrated amount, and just dab some
of these flowers in here that are peeking
through the fence post. And we are done with this one.
10. Postcard Painting 3: Hey, now, let's do another one. Again, I'm going to start with the sky and Cobalt
blues on and after. I'm going to pick up my
postcard and get right up to the edge and continue on down. Oh Next, I'm going to go to
the bottom because then I can let that dry safely. I'm going to go ahead
and go straight into this green here, this mixture of olive and and cover all of
this foreground with it. And I know this
paper is starting to buckle already, but that's okay. We're going to be able to
flatten it down the line. So just go to keep
right on going. And this is dry up here now because I didn't get
it too awfully wet, and that's the key to
keeping this project moving. So at this point, I am
going to use my Indian red. I'm going to start
painting these mountains right at the top
while this is drying. And by the time I get done
with the top and the middle, I should be able
to paint against this bottom part
of the shrubbery. So going right up to the blue, so I don't leave
any white spots. Going to run my brush in
sort of a jaggedy motion, making sure I get all
those spaces filled up. And I'm going to take
another pass at this color. I'm going to dab this
time because it kind of releases the pigment from
my brush when I dab it out. And because there's water,
it's just going to travel. And I'm going to go do the
same thing with the middle. Going all the way
across this time. I wish I hadn't painted
over my fence post. I could just lift a
little bit of that. It's called lifting and you take your towel or paper towel and remove the paint by
absorbing it off the page. I'm going to take the
opportunity to paint inside this fence post right now while I have this color
going, so it matches. And it stops right about here. O. This is pretty dry. So I'm going to go
ahead and paint the fence post, a lighter brown, which is going to
be a combination of brown and gray coming
from the color sheets. So I am going to put
down some burnt umber. Let me just open this up. And I really need my small
round brush for this because that is a tiny little
fence on this postcard. And that should
take care of that. While that is drying, I'm going to go back to my
olive green and Vidian. And I'm going to start down here where there
are just a lot of stems, and I need it to be a little thicker because there's
just a whole lot going on. I'm going to just make
some irregular lines and leave some of
the light showing. This is actually going to be a take off on some
negative space because the stems in this image are the
lighter color here. But that would just
be a lot to paint. It's just a lot to take on on
a quick project like this. So I am just going through and painting
some very faint lines in this darker color and leaving the lighter color to be
portrayed as the stems. Now that this is pretty dry, I'm going to come back over with some darker and give it a
little depth and dimension. Just keep my strokes light. And now it's starting to look are like it makes visual sense. I'm going to continue on
with this brush and get into this orange now. I
don't need to mix it. This is the orange I want, and I know I want it
super concentrated, so I'm gonna go ahead and
just grab it the way it is. I'm going to have to
be aggressive because these mountains have a lot
of orange in them already. And I'm just gonna just
put dots and dabs here. Time to extend these stems, so this makes a
little more sense. I'm gonna try and get
as dark green as I can. And we're done.
11. BONUS VIDEO: Postcard Backings: Now that my postcards are dry, you can see that they've buckled a little bit under the water. Not too much, really considering I put it to the test for sure, but it came out pretty nice. F a little bit of color there. And if you do get
color on the back side of your postcard and you
don't want it there, you can just take a clean brush and just give it a little wiggle and take your paper towel. And lift just dab, basically, don't rub because
you'll damage your paper. But look at that. It's gone. I mean, there's a pint of it. I can do that one more time. It would be gone for sure. And when it dries,
it'll be even lighter. So that's a tip for you. But on the curling part,
something I do is very gently, bend it back the other way, and with my fingers, it's just sort of curl it. If it's curving one way
more than the other, then I work that extra, but be very careful not
to bend your paper. This one's sitting
pretty flat now. I'm going to take and put
all three of these under some heavy books for
about half a day or so. See that's sitting
pretty flat now, too, but I don't want it
to pop back out. I could leave it curvy. And then people know it's
a real painting. So that makes it fun. But if you don't want it curvy, then you have this little tip, and you can see
they're all three of them much straighter now. So we have three nice
postcards to send. These are real postcards
from this State Park, Red Rock Canyon in Nevada. And I just want to
turn them over. These are two different
orientations. This one is portrait, and this one is landscape. But regardless of that, on the back, the actual back of the postcards is the same. So I'm going to go ahead and
do that with mine as well. And the first thing
we're going to do is grab my micron pen and my ruler. And I'm going to make
a line in the center. I'm going to make
a little bit of a mark at the three inch line. This is archival
black ink meaning. If I get it wet, it won't run, and I probably won't
on this back side, but because it is involved
with the watercolor painting, I'm just going to go
ahead and use it. And I'm going to stop just
a little short of the end. This has a little
bit of history about the park and a scan code. This used to be a little
square for the stamp, but everyone knows
the stamp goes there. I also went online and looked at some different postcard
backing designs, including some vintage ones. There were some really
fun little tricks and things that you can add
to your postcard backing. I am going to just make a general area for the
stamp, just rough it out. And guess at the stamp size. And then I want a line
here here here and here. And I'll leave this
bottom part blank. This will all be
blank over here. With my ruler, I am going to line this up on the side
and match up my marks. Now I'm going to do the
same with this stand. I'm going to just eyeball it. I'm going to try to keep this
line even with the side. I think that's a good shape. And then I'm going to
add a little bit of scalloping for some whimsy. And I have a nice,
charming little postcard backing to
send to someone. And even if I put
this in an envelope, I can put their name on here, and then write a cute
little note over here. For my next one, I'm going
to do something similar. Okay, so that's another one. And instead of just
leaving this one blank, I think I'm just going to add a little bit of flower
detail to this one. And it was an to the
flowers on the front. So you can paint
anything you want in your stamp to make it whimsical and tie into the front or do something
completely different. It's trying really fast, so I can go ahead and
keep going on this. And there's a little sort of a miniature version of
what's on the front. This one I can just leave blank and write on the entire thing, put it in an envelope
and off it goes, or even write this way. So lots of options with this.
12. Process Overview: This was so much fun. We went over a lot of
steps in these lessons. Let's do a quick overview to give you a look at all
the things you weren't. We got the tools
and materials out, and went over inspiration. You decided if you'll
paint your colors from a dedicated color palette
or more spontaneously. We did some storyboarding
to get the ideas organized. We started to sketch
out every postcard, and some might not have
needed much sketching if there were larger blocks of
color and minimal detail. Then we painted each
and every postcard. I also showed you how
to add some details to the back of your postcards to make them look like
the real thing. I cannot wait to see
your hand painted postcards in the project gallery and see
what you painted.
13. Finishing Up: I hope you enjoyed making handmade watercolor
postcards with today. It's always the joy to have
you in the studio with me. And I'm so glad you came. I can't wait to see what
lovely postcards you get inspired to paint and what
subject matter you choose. Every student will have a little different twist
of this project, and your uniqueness
is your superpower. So I really hope you'll share your project with us in
the project gallery. You could find instructions
for uploading your project in the second video of this
class called your Project. Don't forget if you have
any questions or comments, you can ask them in the
discussions tab under the class videos by typing
into the blank field. And I would so appreciate
your review so other students can find this
class and enjoy it as well. Thank you again for
being here today, and I cannot wait to see what postcard beauty you
create. See you next time.
14. Bloopers: Aka can fix that. Can try it? Oh, my God. Really? How is this possible? Allow your own style, color choices and brushwork relax back at your
hotel or back at home, where you can sit down with access to a table,
water, et cetera. There are so many
ways to do this. And as a bonus, you get
to do some fun painting. And as a bonus, you
get to and as a bonus. You get to do some fun,
watercolor painting.
15. I Have News!: Hi. I'm Chris B. Did you know I'm now offering
11 sessions? They are 1 hour Zoom
sessions that you can book to get a private lesson
or consultation with me, and you don't even have to be a skill share
member to book one. I have a few different kinds of one on one sessions
you can choose from, depending on what you're
looking to learn. So if you need some extra help with watercolor or
sketching techniques, creating a balanced
fashion illustration, a watercolor project critique to help you improve your art, or my newest, the travel watercolor
painting one on one session. This new session is perfect to help you with the
skills in this class, if you'll be painting
while traveling. And also for my class called Watercolor
Painting on the Go. Otherwise, you can sign up for a watercolor or sketching
technique session. If you need help with something
I haven't mentioned here, feel free to reply to
one of my discussions or message me in one of
my classes on Skillshare, on the discussions page, and let me know, so I can
create a session just for you. Ready to get the focused
personalized help you need to grow your art practice
in the right direction. All you have to do is go to
my Skillshare profile page, click the Book Now Leak. Choose a session.
Click Book new, select a day and time up
to 30 days in advance, and you'll even
get notifications because who doesn't
need reminders? Have you been struggling with the skill that has you stuck? Book a one oh one
session with me today, and I can't wait to
see you very soon.
 Chris V, Artist, Designer, Maker