Transcripts
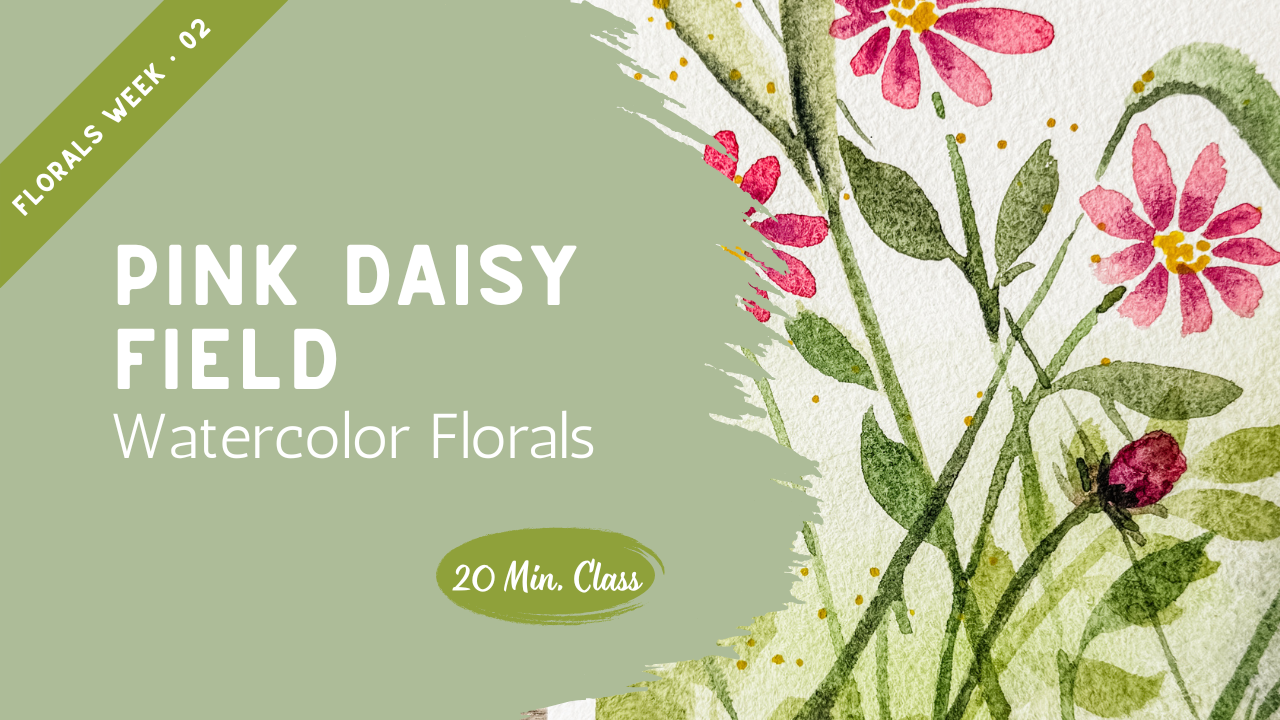
1. From Study to Field Composition: Earlier this week,
we focused on mixing natural greens and learning how leaves and stems
create movement. Today, we're bringing
all of that together into a loose pink daisy field. This class is about atmosphere. It's about building depth
with soft layered greens, allowing stems to
cross naturally, and letting repetition create rhythm instead of stiffness. We'll start by creating a light airy base so
that the field feels expansive and then
we're going to add pink little daisies with variation in tones
and direction. Finally, we'll layer
in deep greens and small yellow accents to
bring warmth and energy. This is not about
perfect flowers. It's about capturing the
feeling of standing in a field where everything
moves gently together. Let's begin. I can't wait to see what you create so that we
can celebrate together.
2. Building the Background and Placing the Daisies: So for this class, I'm going to create our class project
on this half of the paper. I did already mark
this out where I feel like the mat is going to go. And so I pre marked out
where the mat corners were. And then when I
lifted up the paper, I taped out using just
my regular artist tape. To tape that out so that I now
can have some clean edges. I am going to create a wet on wet technique on the
bottom half of this page. My daisies are going
to go up here. I'm probably going
to put three, maybe four or five little daisies
up in there, maybe some buds. Then the bottom half is going
to be where my greens are going back into
everything that we've learned this week
with our greens, whether it's mixing our greens or how to make some leaves. But I do want to create a little bit of
softer background. I'm going to go ahead
and wet down my paper. This is cotton paper. Is a paper I really like. I'm just making it it's
not like a straight line, it's just an organic line. Then I'm going to put
some soft green in here. We had mixed some of this and I just am using it with a lot of water so that I can
add in some soft green. I'm going to have my
light source from coming over here as if
the sun is this way. This will be my lighter and this corner over here
will be my darker spots. I'm just putting in some
lighter colors and then I'm just going to
start dropping in some darker shades over
here in the bottom right. Just a little bit of
darker paint over there. You can even pick up your paper. Because it's on a board, I can pick it up and move it around because I'm
using this much water, it's not going to warp
because it is on this board. So if you don't have
a paper like this, you could always tape
your paper right down to another piece of cardboard
or a cutting board. A device that you could then pick it up
and move it around. Maybe you just have
some cardboard that it would fit onto. So I'm going to do
something along that line, maybe add in just a
little medium depth of color in here in the middle. Again, just kind of
moving it around. As you can see along the top, it's just really jagged. It's not a straight line. Let that color play. Now I want this to dry, but before it dries, I'm going to add just
a touch of salt. I just have this
little container with this lid that
I keep next to me. It's a coarse sea salt. I'm just going to
drop a little bit in here around the corner edges. I'm not going to go
over the whole thing. I'm just being very strategic
with where I put my salt. The reason I use
salt is that what happens is the salt
actually attracts the pigment from the
paint and sucks in the pigment and repels the
water so that as this dries, I'm going to get a
really fun texture in this area where the salt is. Now, when you use
salt, I highly, highly recommend that
you let this dry naturally instead of using
a heat tool like this. If you use a heat
tool like that, it almost artificially dries it so that the salt doesn't
have time to actually work. So, um, I would recommend
staying away from that for now. I'm going to cut to
once this is all dry so that you can see the
effect of that salt. So this is almost completely dry and now that
it's almost dry, I've decided that actually
what I want to do is finish filling in
this plain area up here, but with extremely
diluted paint. So you may or may not
even be able to see it on camera because I barely dipped my paint brush
into the water. I mean, into the
paint. It just has the smallest amount
of pigment in there. But I decided I didn't
really like the edge here. So I'm going to
scrub out that edge. Because it wasn't
quite finished drying, so I can blend that
edge together. And let this dry
naturally again. Hopefully that works. So I want to just
show you a close up here just so
that you can see, here's white, like
completely unpainted white. And here is my very, very light background
transitioning down into this area where
I had already painted. And then here is
the salt crystals that are all the way
around the outside edge, and I'm just going
to brush them away. Now that it's completely dry, I can just brush that you could use a paper towel
if you wanted to. I find that using my
hand usually is best. It doesn't leave any fuzzies. Do you see all the
little craters in here? That's where the salt had
landed and then dried. And so it repelled the paint. I mean, it repelled
the water and brought all the pigment
right in there. So you're left with a
little white dot with a little ring of paint
pigment around it. So now we're going
to be painting our little Daisy field
in here and I'm going to make my daisies pink with
maybe a little yellow center. Then we're going to actually put in the greens
because, of course, this week we're
talking about green and mixing our greens
and everything, but I do want to have
some little pink daisies. I think I'll start with
one up here at the top. I'm just going to be facing out going to go around
in a circle like that. I might just make this side just a little bit shorter petals to indicate a direction that
this flower head is facing. Just a little bit. Then I think
we'll add in another one. Well, that's drying,
maybe I'll til tilt one this way.
Putting one here. Another little daisy
hanging out in the sun. Before that dries too much, I'm going to take
a little bit of my fuchsia purple color and drop it right into the center while
you are still wet, to create a little wet on
wet variation in my petals. Just a tiniest amount. Let that blend out
and bleed there. Coming back over to this color, I think I'll put in
another flower head here, and again, varying my lengths of petals so that it shows direction so that not all flower heads are
just straight on. Okay. Then I'll be
adding in some stems. But again, I want to come
back in with that fuchsia. Before that dries, just add it right into the center of that
petal right at that base, letting that bleed out. Okay. Now, I want to add
yellow to the centers, but I don't want to do that right now because I really don't want my yellow bleeding
into the petals. I'm going to let that
dry completely and then come back and
add in the yellow. But I will start
adding in my greens. Come on back and then we're
going to go over putting in all of the stems and the greens that
we've been working on.
3. Layering Greens for Depth and Contrast: Ohh and now that this
is starting to dry, I can add in my stems. I'm going to be creating I'm not going to come
all the way up in there. I'm just going to
start here with a really quick line,
bring that down. And then I want this one to be coming over this direction, and this one is going
to come down here. That's just starting out my
daisies with my greenery. But I am going to be
wanting to add in leaves and extra greens because this is going to
be a daisy field. Represented here.
I need to put in a little leaf maybe
another little leaf. Maybe that one has a little
extra stem off of it. And then here, I think
I'll add in a leaf, maybe a little extra. Well, okay. Didn't make
up quite enough of that. Color. We made it. Let me put in another one here. Not too many. I don't
want to have it overdone. Then I'm going to
add in a little bit of my yellow because I want to make it a
little bit warmer. I'm going to use my warm
yellow and mix it in right here to create a
new color green. Here, I'm just going to add in those little leaves that we've practiced in some of
my other classes. Just another variation. And you can also cross those stems and have something
coming up into there. I think I want to have that. Have it coming up here, having a nice long one. Showing lots of depth. Then I think I want to add in just a little bit
of a darker color. Yeah. There we go. You know, there's just little random
little guys here and there. You know what I
think I want to put in the yellow centers. Dots there in the center. Pretty. I love pink
and yellow next to each other.
Something like that? I have this one come up and then maybe branch
down over like that. Darken that just a little bit. Again, just giving it
just a little shadow. Maybe we put a bud up in here. And maybe one more over here. That's just starting out. Since that's really wet still, I'm going to have to
come back to that. And you know what? I
kind of really like that fuchsia addition
that we did in those. So we're going to add that to the bottom of this, as well. Now, I'm going to add a
little bit of a splatter. What I'm going to do this
round so you can see, I'm using this warm yellow, and I'm putting a
lot of water on it. I'm filling up my
paintbrush pretty thick. It's got a lot a lot
of paint on that. I'm going to use this scrap
piece of paper that I have and cover up that side because I don't want the
splatter to go over there. I'm going to just gently hold it over my hand and tap on it
and create some splatter. I'm just going to gently I had a little bit here,
I had a little bit there. Just very intentionally
adding it in different spots. And That way I preserve the side so that I can paint something
else over there. Everything is dried, and so
I'm going to peel this tape off and then cut it down to size and see
what it's going to look like inside of my frame. So I'm pretty
excited about that. Um, Now, I am going to remove
this from this board. I have this really nice
board that I showed you. What I do is I have
a knife like this. I could also use just
a a butter knife. I like this one better, but maybe you don't have that. If you had a palette knife,
that would also work. If you just have a butter knife, you can do it this way too. If you have a board and you're struggling to get this
off of the board, there's always a spot. Depending on the brand, it's either a spot like this or maybe on the corner or
sometimes it's on this side. You find the spot
that's not glued down. On this brand, it's up
here in the middle. Then I use this
knife to gently go around the outside
edge just like that. Very, very gently. Go around the outside
ed very slowly, not be in a rush to do this. Then I just peel this all the way around on all four sides. Then once you've gone all the
way around, this comes off, and now I can use my scissors
or I have a paper cutter, and then I can cut
this down to size. I'll use this one
for my next project or for a practice piece, but probably it's big enough
that I can use it for the next project.
Then here's my mat. Then I can put that
right in here. I can mat that. I can put
my little signature on here and have a little
painting that I could hang up on a wall,
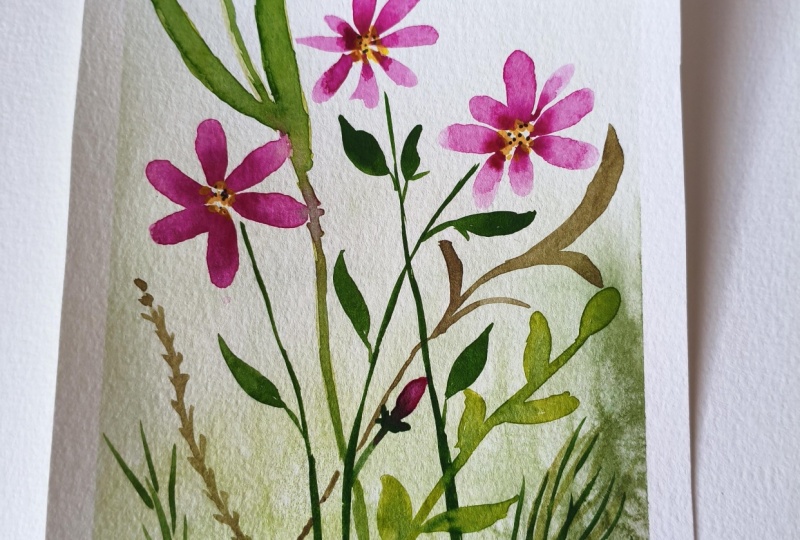
which I think is really fun. There is our finished project. Come on back to the next lesson.
4. Refining, Accenting, and Knowing When to Stop: Notice how the lighter greens sit behind the darker stems. Notice how the pink daisies vary slightly in
direction and intensity. Notice how just a
few yellow dots add warmth and life without
overwhelming the composition. On Monday, we learn to mix greens that feel more
organic and natural. On Wednesday, we explored how leaves and stems
create movement. And today, you've combined
color control and motion into a cohesive field that feels layered and alive. Now, that's growth in art. I would love to see your pink Daisy field
in the project gallery. Go ahead and upload a photo of your finished piece so
that we can all see how your greens and florals
finally came together. Watching your progress
from studies to full composition is one of the most rewarding parts
of doing this series. If you're enjoying
this March collection, please follow me
here on Skillshare so you don't miss any
upcoming classes. If this lesson helped you feel more confident layering
color and movement, leaving a review helps other students find
these classes too. I'll see you in the next class.
 Brenda Jones, Watercolor Artist & Teacher