Transcripts
1. Intro: Hello everyone. My name is Anna and money
today and water colorist. If you follow me on
Instagram or Facebook, you probably know that
I love to bake trees, but my students
were often than not told me that they have
some difficulties in painting trees, and especially when it comes
to painting trees in winter. And this was something
really difficult for me at the very beginning
of my painting carrier. This is why I decided to
film this Skillshare class. In this class, we'll
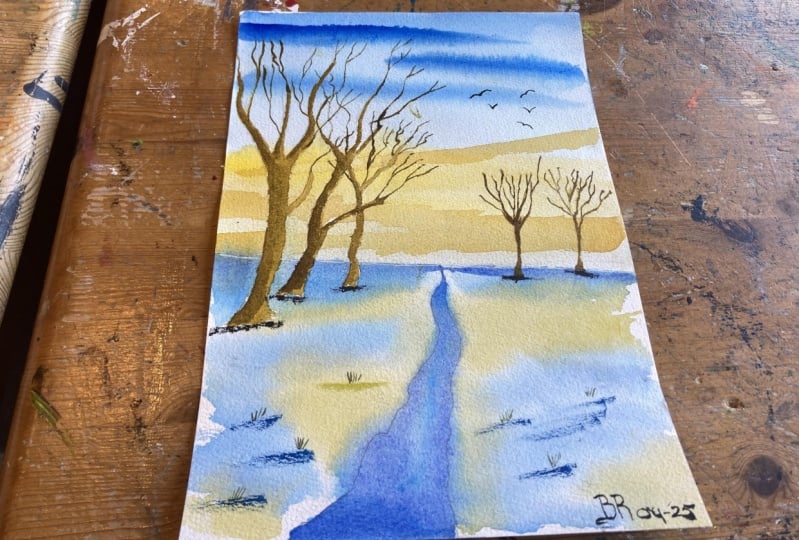
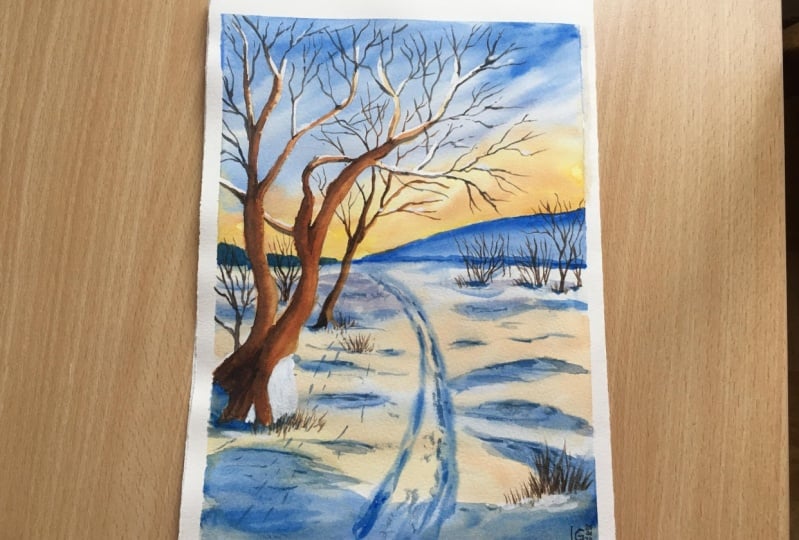
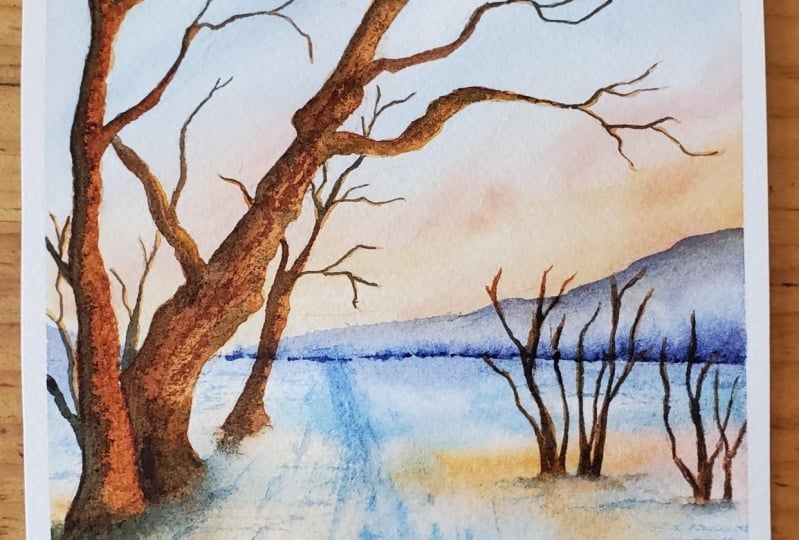
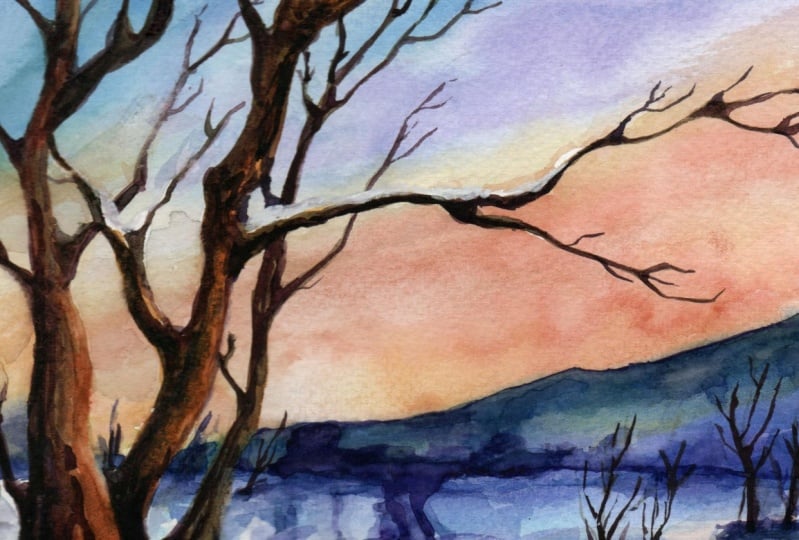
paint together this winter landscape where we have bare trees with
no leaves on them. And it is something really, really beautiful
because we can see very well the anatomy
of the trees. And I will share with you the tips and the technique
that there is behind painting your trees
so that you can learn what kind of
dimension you need to bear in mind what kind of brushes you can use to
paint beautiful branches. And I think that
you will greatly benefit from this
class and also for your projects when
you want to pay the trees not only in
winter but also in all the other season
because you grasp exactly how they are underneath
their beautiful foliage. So if you are wanting to know more about my way of painting, the trees, grab your brushes, your college, your paper, and let's do this.
2. Materials : So let's have a look
at the material that I will be using
this tutorial. As always, I will start with my mechanical pencil to be my putty rubber
and my brushes. I have a wide range of brushes. I'll tell you why in a
minute just so I have two imitation or squirrel brushes which retain
a lot of water. I have a 2030 according
to the brand. And you can choose the
dimension we choose suitable for the dimension of the paper that you're using. The air will be using them for the background and for
the foreground as well, for the sky and the
snow in the foreground. Then, for painting the trees, I have a lot of small brushes. We have a very good point, which is the most
important thing. They are all different
dimension to war. I have this one which
is the smallest one. It says zero. And it is very useful because the wind is particularly
stiffer, so it's fine. I have also note
whether Russia for applying the masking
fluid just so that if the bristle get ruined, It's not a big problem. Of course, I will be
using my paper which is harsh or 300 grounds
for square meters, not which means cold pressed. And the dimension of my
sketchbook is that 41, sorry, 14 cm for 21. And you can use
something even bigger. Be careful, because if it's your first time with the trees, don't work on a too big of a paper because
otherwise you will get lost in managing the water
control masking fluid. I have my gray one but you can use also transparent one is y. And have Andy also your kitchen roll or a
table cloth or paper. You want to use the masking
tape and S where the colors. I will show you the very few callers that we're going to use for this tutorial. So you will need a yellow. My go-to, Y'know, is
already online. As always. You can use whatever IT light yellow you have
cognitive yellow light is fine. I will be using old store, burnt sienna, very traditional. Burnt sienna is towards
the red spectrum. You can have something more
brownish that's fine as well. I will be using
also rose matter, which is the color
that I like because it gives a beautiful
orangey sort of ketones, even when mixed with our
eolian or burnt sienna. For the blue, I will
be using cobalt blue. And cold blue is my
go-to blue when it comes to painting the
skies and snow as well. It's very brilliant and I
like that and vibrant old so, and then I will use also
ultramarine blue mixed later on, as I will show you with
burnt sienna to get the darkest value
for this painting. And you can use pounds tube. So whatever you like in my case, I'm using tubes which are
squeezed in my fonts. But even if you're using student's grade or asked
artists grade is fine. And if you haven't
got arrows matter, which is a color that
I use it like you can stop with Alizarin, crimson, quinacridone, red to purple, magenta with purple
color that you have. Which is something,
it's a cool red, something towards
the violet spectrum. I'll show you in a minute, which is something it's not the scarlet, red, purple, red. So now we're ready to move to the drawing and apply the
masking fluid as well.
3. The drawing: Okay, we're ready
for the drawing, which is really, really, really simple, Sarah, as always, let's say that we
are going to trace the horizon line a little
bit more worthy half of our sheet because
it can be run on a more mess and composition. So let's place the horizon
line more or less here. And we will have a little bit of distance heels all still here. And we want to trace a nice bath covered
with now in this area. And I am using R20 pants was usually you
can use something lighter but also matching
very strong glass because I want you to
see my drawing well, but I don't want you. I mean, you can use
something lighter because although before
starting to paint, I will lighten up my pencil
lines with my pushy rubber because I don't want them
to be too heavy then once I'm starting to paint. So now we are
putting in some ways because it's probably the
best period of the year. Because we have no
leaves on the branches so we can study the trees
and autonomy really well. So let's rid of theory
about drawing the, the trees before going
into painting trees, three chunks are more and less cylindrical so they
are not straight. So you're not going to trace any straight lines because
they are not pipes. And they start
larger and smaller. When you are trying
to draw them. You'd need to go more
or less all direction, but try to stock the branches, one here and they don't create any V-shape because if you put one branch here and
the other one here, it looks a little bit contrived. So it's something that
I don't really like. You can draw as many
branches as you want. If you want to have
them as a guidance, or you can leave or
you can sell it on behind and just trace the trees that you think that
they are something that the branches that you think that you
are going to pay it. And then you can evaluate what happened
on your paper later on. And then decide if
you want to add a little bit more
branches or you prefer to keep it a little
bit cleaner and lighter. And that's a very
good thing to do, a very good strategy
because you don't want to cover up all of your
work with branch work, which is something nice and
neat to see the branches, but they shouldn't become too much to me and they shouldn't
become too many that they don't have to cover up all
the rest of the scene. Otherwise, it will be a
little bit dark and boring. So in this case you see I am
doing not straight lines. I am trying to vary
the position of my tree, of my branches. And of course, I will probably add a little bit
more later on while painting. But I don't want to draw
too many of them and just put something here and another
branch here just to create a sort of oxygen. Okay? And remember that as the trees are more distance, so you see something
for your further away. They are also smaller
in dimension, which is something that
you need to bear in mind because we want to recreate perspective on a flat surface. So we will probably put some
more branches also here, but I just want to keep it as
clean and nice as possible. We will probably out
some quick branches. Few. So she had just to
create on the albedo 3D. On the spot and some perspective
lines which has really helped for sine or resolved. So if there are any, okay, anyway, so sorry, we're saying if there
are any lines that you need to put in as a
guidance gestures. Now, if you want, you can add even more branches
as a totally big four, but add would want to exaggerate because I want to evaluate
once my painting. Is that more or less finish if I need to
add something else, otherwise, I just want to
keep it as clean as possible. And because I want
to keep it, uh, you know, airy and I don't want to cover
that up too much. So now we're going to mask
out the tree trunks of these three trees that I have just lined out
because we are going to, as eats winter, I
just want to leave some white areas
covered with snow. So and also because the onion, there are some areas like e.g. here, we say that the
light is coming in this direction from
right to left. I just want to have
this area really, really bright and full of life. So as the sky will be blue, I don't want to have to lift the economy out there
because I leave, I do. It won't be as bright as I want. So now I'm going to cover that up with a little bit
of masking fluids. So I think I have forgot to mention among them the painting materials
and stuff yourself. So I am going to wet
my old wetter brush and I am going to round it
that on my bar of soap. In this way the bristles
will be protected. And my, even if
it's an old brush, it will lost a
little bit longer. So now I'm taking my masking read
phenomena, applying that. Okay, So we go. If you want to lighten
up your pencil marks, you should do that before
applying the masking fluid, I have decided to leave my marks as they are because once I apply
masking fluid, then I know that
when I removed that, I will probably have really, really light pencil lines and I want to see where my marks are. So this is why I
haven't done that. These were these styles. So try to apply enough, too much masking fluid. And if you see that there
are some point look e.g. here we are, should
be a little bit larger because it has to
be in where in this point. So yeah, I'm obliging this area. And it's always typical for
difficult for me at least to trace very good branches and cover them on masking
fluid without doing any mistakes because you will
end up with something big. But anyway, we will try to
make it work with there any errors if there are later on when we are going to bind. Okay, So you can
rinse your brush, the masking, and it lasts long. And then we will leave the masking fluid dry while
it's drying the album. Give you some tips for
painting branches. Before starting to
paint that in the very, on these very beggars. So you can if you push, sure, you can start also to do
some exercises on us there, sheet of paper before attempting
to the final products. So let's move on.
4. Technique focus: how to paint trees: Okay, So if you are very good at that painting tree branches, you can skip the spot and jump right to the final project. So you're just giving you a little bit of
technique advices, which are the
things that I found very useful at the
very beginning when I started painting trees because I really struggled to
really, really difficult. So here I'm using not hurt you. It's not on a sheet of paper
with pumping data in Italy. Just cool magic
paper eats surface. You see you can. I'm using my my brush and just clean water and I
can use it to test e.g. my brushes. And gosh, if folks or if I want to do a
bit of idea scientists to get confident with one
movement without wasting paper. And something that I find really also really
useful and very relaxed. If you want to use
something like that, the only advice you need to bear in mind is that the water
must be absolutely clean, otherwise it will get staying. Love. This one. When it comes to trees, you need to consider
that the branches are difficult to trace. So you need to find a very good brush with
a very good point and you need to practice
and to practice the marks. So you need to go week. You need to be quick
and easy for you as you need to try
lines which are really, really fine at the very top. And branches are bigger as
they come towards the main, the main tree trunks or
the baker or the fathers, the brown, which is connected with the main tree
trunk as well. So your strokes must
be really quick. And if you use cold press paper, which is very important, your strokes will be broken
by the surface as well, which is something that
wouldn't give a little bit more of a realistic
touch in my opinion. So you will greatly benefit on practicing on cold press
Bolter and not on Hoff breast. I've pressed it's not good
for with things like this. You need a very good point. And also different dimension. If you want to paint very, very, very fine branches,
liking this way. Probably a very good rush
like this one that I have, which is a, which has
a very sharp point. And even if it doesn't retain a lot of
color, it's not a problem. You will go back and take it, but As you see e2, so if it's stiff, these are all synthetic brushes. They are stiff but you
need to vary the pressure, the pressure that you can use. I'll wide strong it. And why you can use a white
mark and a strong pressure. And instead, if you use, just write that the
point, the t puff, the point of the brush with
a little bit of pressure, just a very teeny tiny mug. You can get the marks of the very fine branches
as I'm doing here. Um, another thing that I eat really useful is to, of course, you need to test
your brushes and find out among the older
arranged vertically half of which are the most
suitable once I have that. Whereas deep point like e.g. this one a little bit
softer like the other one. And of course, you
need brushes with me. Good reserve a color, e.g. if you are painting the tree trunks because
the tree trunk is cylindrical so you will
need to wet the surface. We will see that later
on when we start to buy the the product, you will need to wet all
the surface with one color. So you will probably
benefit with something like an imitation of
square roots, e.g. this one which are
brushes that really can retain a lot of water
and allows you to eat, allows you to bind to very
wide tree trunk, e.g. if it has a very good
point, like in this case, you can start also
by the branches, but it's more difficult to get
the right dimension and to keep the right dimension
with this kind of brushes, because It's really, You must be really
good at using this n Because if queuing time, the brush in, you probably can
play very beautiful lease. But it's more difficult
if you want to buy the branches. Okay. So I think that my
best advice is to use small brushes with
soft and stiff point and try to move
really, really quick. And don't try to take too much time in
deciding walk bend. Are you need to do or not? If you walk, you can trace the lines as a guidance
as we did before. And then you can just do feel free to follow the movement of your fuzzy on the opportunity. And as a source of inspiration, It's really good if you
like to take a stroll, e.g. in the black, if you have
a bark near your house and observe nature in and to see all the wide range of branches and shapes
that the fees have in this season because in winter we can see the structure. And to practice in this way, it's really, really useful. And for examples
for your paintings, even if one in the summer you're painting old masters of
trees covered with foliage. If you know how the
structure of a tree, you can pay them more easily in all the other
season from spring to autumn. So these are the main things that you need to bear in mind. And now let's go back
to our final product.
5. The background: Okay, So now we're ready
for our background. We will start with this
side corner as usual. So let's mix the
colors for the sky. As I told you before, I'm going to use cobalt blue, a very rich, dense cobalt blue. And I will prepare us a
little bit of purple unused. We're all smarter with
my cool blue one. Just a teeny tiny, beautiful teeny-tiny
of furosemide because I want a purple, which is not to violet. This is something that we
will be using also for this now in the lower part and
also for the distance here. So on the other
side of my palette, I will mix a little bit of Oreo name with my burnt sienna. Okay? Because I want these
nice orange in the sky and I want also going
to be different orange. We'll be warmer,
so I'll be I had a little bit of rows
moderate and Arlene here. And I think I will add a little bit more
Ireland to get this one. If you haven't gotten misery and creams
and you can't really pay these water
color just by using, you see they are very, very similar, but this
one is that of a warming. I think I've pointed
the sky where to go. So here are my almost and now
I will wet the background. Be sure that your masking fluid is absolutely driving
for starting this part. And if you want, you can work full
sun on incline, which is something that I'm
not doing just right now because I want you to
see exactly the process. And I think that we'll probably put it
there on an incline. I remember it later
before putting in the course of these then heals. But anyway, I will
see what happens. So go for my little bit. Smaller brush. I want just has a base color. Yeah. She's a warm
yellow orange color. Back. Warm. Chi That's this to our coal group. Live Lock Whole
Foods, where the sky, It's really my go-to color. Even if it's something
that I really like. So very simple lines. I'm going to choose an orbital that has a little bit here. Just teeny tiny bit. And now I'm using cold, almost pure in the
upper parts of the sky because it's darker. So we get a little bit of area perspective test
and that's my middle. Yeah. Because I want to be I don't want to feel
cold even if it's winter. This is something that
I really like about the winter skies
that you can feel. The warrant. Now. All the ground. Because you have no
lighten that up a bit. I want I want to move it more. White. My sky. Orange juice. Orange clouds. Just what they go
for orange here. And you got a little
bit more contrast. So you see just
changing the colors that we are facing
a very big effect. If you want to change
the shape of the clouds, I use the tip of your brush. The color where you
feel unique to. We are says I was
studying you before, even if it's winter, if you use. A very warm Scott were very
warm color for the sky. You will get a very nice result. Get a very nice idea of the whole atmosphere
and warm, cold as well. So that you can create really very nice atmosphere
just by using five colors. You can go back to four. Okay, So now as it's a very, very quick project, Taiwan too. Wet. Also, this lower area. We will work with wet
on wet and wet on dry. But just right now I want to
put in the colors of the sky and a little bit of the
snow, soft snow effect. So I'm leaving dry this
area on the distance here. I am putting a little bit
of the warm orange color. Yeah. Because each is also present in something
that we find also in the, In the very end. This now because there
is a reflection of the sky and as we are
working wet on wet, we have a very soft color. Very soft shapes. And this is something that our cobalt blue
exactly as it sees. Then we will talk all that
just entails in a minute. But just for now, we are mixing a little bit of my purple color again, cool blue and a little
tiny shadow. Smarter. And I think that
there is a bump. Yeah. So even your mocks,
they are bigger. Nose to the foreground, to the point of observation. Should be. Boy, you are
supposed to be if you look up this water column and then get smaller marks as you move towards the horizon, toward the very end. These water color. That's because we want to create the ideas of perspective. So you see a mixture of cobalt blue with a
little bit off. Sorry. I owe you an apology
and use your coal blue. We are a little bit
off. We're all smarter. When you move towards
the the oranges spot, because you don't want
to have any green in your, in your foreground. So now we can use
can talk, cool. Okay, let me check. Okay, It's right. So we put in this purple color, a mixture, let's say a mixture. So daft brush, cobalt blue and purple color here. Then we wash our brush and we move towards
the horizon line. In this way, we have a very nice soft
Diffusion of the color. Creates also a
little bit of mist. You can add. I'm adding cobalt blue and
z cheese in the lower part. So to create the, also the idea of distant trees and bushes
and also on this side. And we are almost done. Don't cover everything. The column just use
some white areas. If you see that there
are some harsh lines. You can go in with the tip of the brush in water
and you can soften then. And now you need to, OK. So you need to leave this to dry. Color here in the very ground. Soften it. Unique to
leave this to dry. We can make so
little bit of cold, cold blue as it tastes, gives a very nice bright color. Remember that the,
the color will dry, lighter as the colony. Now very lighter tone, maybe 25, 30% lighter. So you can put in
some strong marks just right now if you
feel that there are some areas need to
increase the dark. If you use the purple color, as I told you before, you won't have any problems with the green areas coming out. Because purple, yellow, green. This is our intention. Okay. I don't want to
too many details. Just right now. And I think
I will soften this area. And we will need this dry
and come back when the sky, but to go, it's totally dry so that we can remove the masking fluid and
talk all the trees.
6. The trees: Okay, So I had moved
all of my masking and now I'm going
to buy my trees. So what are the colors
that I will be using? We'll be using a little bit of orange that I created before. We'd orienting and burnt sienna. I'll be adding a little bit more burnt sienna so that I
get this kind of color. Then we'll be mixing burnt
sienna with cobalt blue. You can use burnt sienna as a
cheese, which is something, okay, so let's put some burnt sienna as it is
on this side of my palette. That I will mix my friend Sienna with cobalt blue
and burnt sienna really. And we will get
this light brown. And then finally,
the darkest value, which is ultramarine
blue and burnt sienna. Get these really dark brown. You could use also burned tom, very few one or something ready. But as I always say, when you paint with
a limited palette, you have a benefit which she's
a very crazy final result. First in then. You have also a very nice effect due to the separation
sometimes if a pigments, so you get very
fine small details, you know that they are a bit precious and something that you want get if you use
something which is ready. And so this is why I
encourage you to try to mix different colors and to
experiment the different shades. And that's something really, really nice because it would give you a lot of
satisfactory because you have your mixes also using colors from different
brands and you will see that they have
maybe subtle difference in tones and values. And then they'll give
you a very nice effect. So we have to give
this cylindrical, cylindrical shape of our
trees are to our trees. So we are going to wet all the tree trunk. I'm moving from left to right
because I am right-handed. Vice versa, if you
are left-handed, move from right to left. So you won't smudge all of your painting
and your one pushing this orange color made with
orderliness and burnt sienna. Because we said that the light is coming in this direction. And we want to
reserve the light. Then we put in burnt
sienna as it is. And as the surface is
wet, it will spread. You see that we are already getting this cylindrical effect. You're in there. And now I'm using
my darkest value. So burnt sienna and
ultramarine blue. And I am applying that to pull the left side of my painting so that I will get the shadow. Okay, now I'm starting to add my branches as they are close to the to the base and to the trunk. They will start with
my darker color. Wash made with the burnt
sienna and ultramarine blue is pretty dense so that
it won't move too much. On my paper. Give me a solely insurance. Let's say that it won't diffuse
in the in my painting to March towards the other side does so that my side off
light will be preserved. So don't worry, if you have dark branches
at the very top. This is something really common. You can increase the
movement of painting if you see that there are some
parts which are too dark, denied them the map. And now I am using this
brush has a very soft point. And now I want
something different. I am trying to play
now some branches. My brush has a very good point, but I need to be
careful because I wasn't very fine lines. And I am using here my mixture of cobalt blue and burnt sienna. You can vary the color of your
washes so that you're not. I think I will go to my smaller brush and I will start to add all
those fine branches. Not too many though, because we want to keep
a little bit of space. As I told you before. Otherwise you will, you
will end up with everything covered with small
branches, which is fine. But we need fatal
so the atmosphere, so I think that I
am done with this. I don't want to
add anything more. So let's go to the second tree. The process is always
the sense This time, let's, I will show
you the difference. Instead of using,
instead of wetting the surface with clean water, I'm applying my very nice orange mixture dust as a background. But as you see, Oreo name is a very
bright yellow and it keeps these rightness
also to the old, all the other mixture that
we prefer using that. So now I will try to
leave a little bit of white over here because I
think that there must be some, a little bit of snow
maybe on this round. So here I will leave
the white space. So now let's go
back to our major. Wow. Okay, I am preparing
this time my medium tone, cobalt blue and burnt sienna. Because as I told you before, I want to create
sorts of variation. Because in nature, columns
maybe are similar, but also according to
the light that you have. The rounds can change. This is why observation is so important because
it will give you the opportunity to see how the colors changes
throughout the day. How you have different
colors, different shape. These are distant bushes. This joint is coming out. And as you see, as this mixture is, since you can use it, can you see appreciate the
fact that each Really Low Wang from left to right? Now I'm putting all
the sum. Ron cheese. Yeah. Even if the quantity of pigment, It's not that Mary on my brush. You see I have these
very broken effect, which is something that
I read a really light. So let's go back. We have our dark side. The few white. I see indulging, putting in e.g. some brushes here and there, and then you go up, you gave the time
off to the wash, wishes underneath
the fly out a bit. Which is something really
useful because in this way, when you are going
to apply the final, the darkest value, it
won't spread that much. So it won't cover the box
branch which is in light. And you will get
a softer result. And you will see that all the fine lines that recreate a little bit of the
surface of the trees wishes. It's not. How can I tell what
I want to set to tell you? It the surface of the tree trunk is not
linear, it's not smooth. So you are going to recreate the sort of lines that you see. It's a very fine, very natural final result. Very pleasant. See where the eyes, and it is something that
we need to bear in mind. So here we have a lighter branch and I'm
using my lighter tone. So as you see, I'm putting in branches that I
haven't drawn before according to what I what I
see that it's coming out, but I don't want them to be
too many. Just right now. Please be my results. So this one is really
in the very center. Let's use clean water. And I will try to soften and clean. Then I'm going to
dab with my tissue. Then I'm using a steeper graph. Walk the color to
go too far away on keeping these light. And it's smaller
because it's swatch. So let's go back with
our burnt sienna. This is burnt sienna. I've told you before, we need to create a sort of variation. Could use also the purple color. So we will use it to put in some very
distant fine branches. So SF and also the
base of this trees. Because they are
Fontan beam to birth. We would go back
to the Beta here. Sorry. So we Sadie, ultramarine
blue and burnt sienna. And as we have been
doing all along dressmaking it the loop
within our darkest shite. Yeah. We will move on. And now as these branches
are reading far, I'm using my smaller
brush, my brush. All the branches that I think
we're complete my tree. Remember that there
must be credible. I mean, you can use
the color that works. I'll use a lighter one here. But your trees must be credible. So not too many
branches, not too few. Good balance in between. And so if you want to stop and maybe have
a cup of tea or a, take a little break. Then you can go back and have a look at what you
have been painting. You can do that. So that no other case. So here I went on,
which is behind. So as I was saying,
you can stop. Now I'm softening these
border because I want to create the illusion of
snow on the top of this. Otherwise you can use also a
little bit of white gouache. So you can, you didn't
take a ray can watch. You're painting e.g. tomorrow with fresh eyes
and see what you got. And if you don't
like the results, because you want to
add something more, you can do that, but
you need to stop early. So don't feel all of the painting with
trees and branches. Maybe start with a few and
then have a look at them. I added with from
another point of view and see what she
needs something more. Or if it's already fine. As you've done. We would just entry
is also here. Just to counterbalance
these two. And just for the sake, i'm, I'm picking a
little bit of purple, the purple color that we mixed before we call blue
and Rose bought it. And I am auditing very fine. Distant fees, not
too many because I don't want to cover this
very narrow sphere of these. Okay, so now we have
finished with the trees. We are now putting
some final touches, and then we are done.
7. Final touches: So why, why are
our trees are dry? It's time to put in some, they stamped perspective, some
some, some final details. I'm putting a little
bit of distance, sorry, perspective lines that gave
us the idea of some traces. This now some green. Or you can trace or so. We are putting a
little bit of shadow also here at the
base of the trees. And then we are
going also to cast shadow as well because
we have the light coming in this way and the shadow
will be magical ingredient. To put everything
in the right side. We have the stresses anymore passed
here and net loss. So let me clean area. I want me to write
that down anymore. Coal blue to get clean
water, fresh colors. What I'm doing when you are painting the final
details because muddy colors are really something that can ruin
everything you have painted. So try to keep your palette for and
you have fresh color. Okay? So now I'm using my little
bit of dry brush work. Create a little bit of a
contrast here on there. Now I'm placing also the shapes using pure coal movie because I want to
read a nice contrast. And may, you may want to
offer to some final thoughts. Create a little bit of snow, the shadows in the snow. But I think that
we are done with our perspective lines
here and there. So we have a very nice concept. Respective very nice wrote. You cannot have a little
bit of shadow here with us. Now, there's the
plot that I asked. Why they felt that there was a little bit of
snow in these branches. If you want, you can add some details also with
some white gouache, e.g. Alma, the tree trunks. But I think that I
will leave that as a cheese because I don't want
to work that out too much. And see you in a minute
for some final thoughts.
8. Final thoughts: We are at the ends
of our lesson. I hope you enjoyed this class. I hope you learned something, you some tips and feed
from power today. The trees, how to pay to
cylindrical tree trunk, how to paint the branches. And we also learned on
how to paint a landscape by which a landscape
using a very limited but for a very
cohesive final result. And we learned to
also what kind of brushes maybe are more useful than others when it comes
to painting the trees. So if you want, you can share your
results with me. And especially if you have
Instagram and Facebook, you can tag me and
I will be very pleased to share your
work in my stories, but you are encouraged to post your projects in the project oriented discussion
section of this class. And if you have any question
doubts or if you have some difficulties because
there are some parts which are a little bit more
difficult than others. Feel free to ask because it
will be really beautiful for me to help you and maybe to
give a little bit of advice. Because in this way
you can improve in your painting and you can
enjoy your final results. So if you want, you can pay a visit also
my YouTube channel where you can find some
other free resources, also about painting trees. And I, we may wait for your project because it puts really beautiful to see what you realize
following my, my classes, even if it's not this kind of this
particular project, but even if it's a
painting that you do on your own with the
things that you learned, maybe from a reference
photo that you took in your neighborhood or where you live or while you
were on vacation. So I wish you as always, happy painting and I hope to
see you in my next class. Bye everyone.
 Eleonora Serra, Italian watercolorist