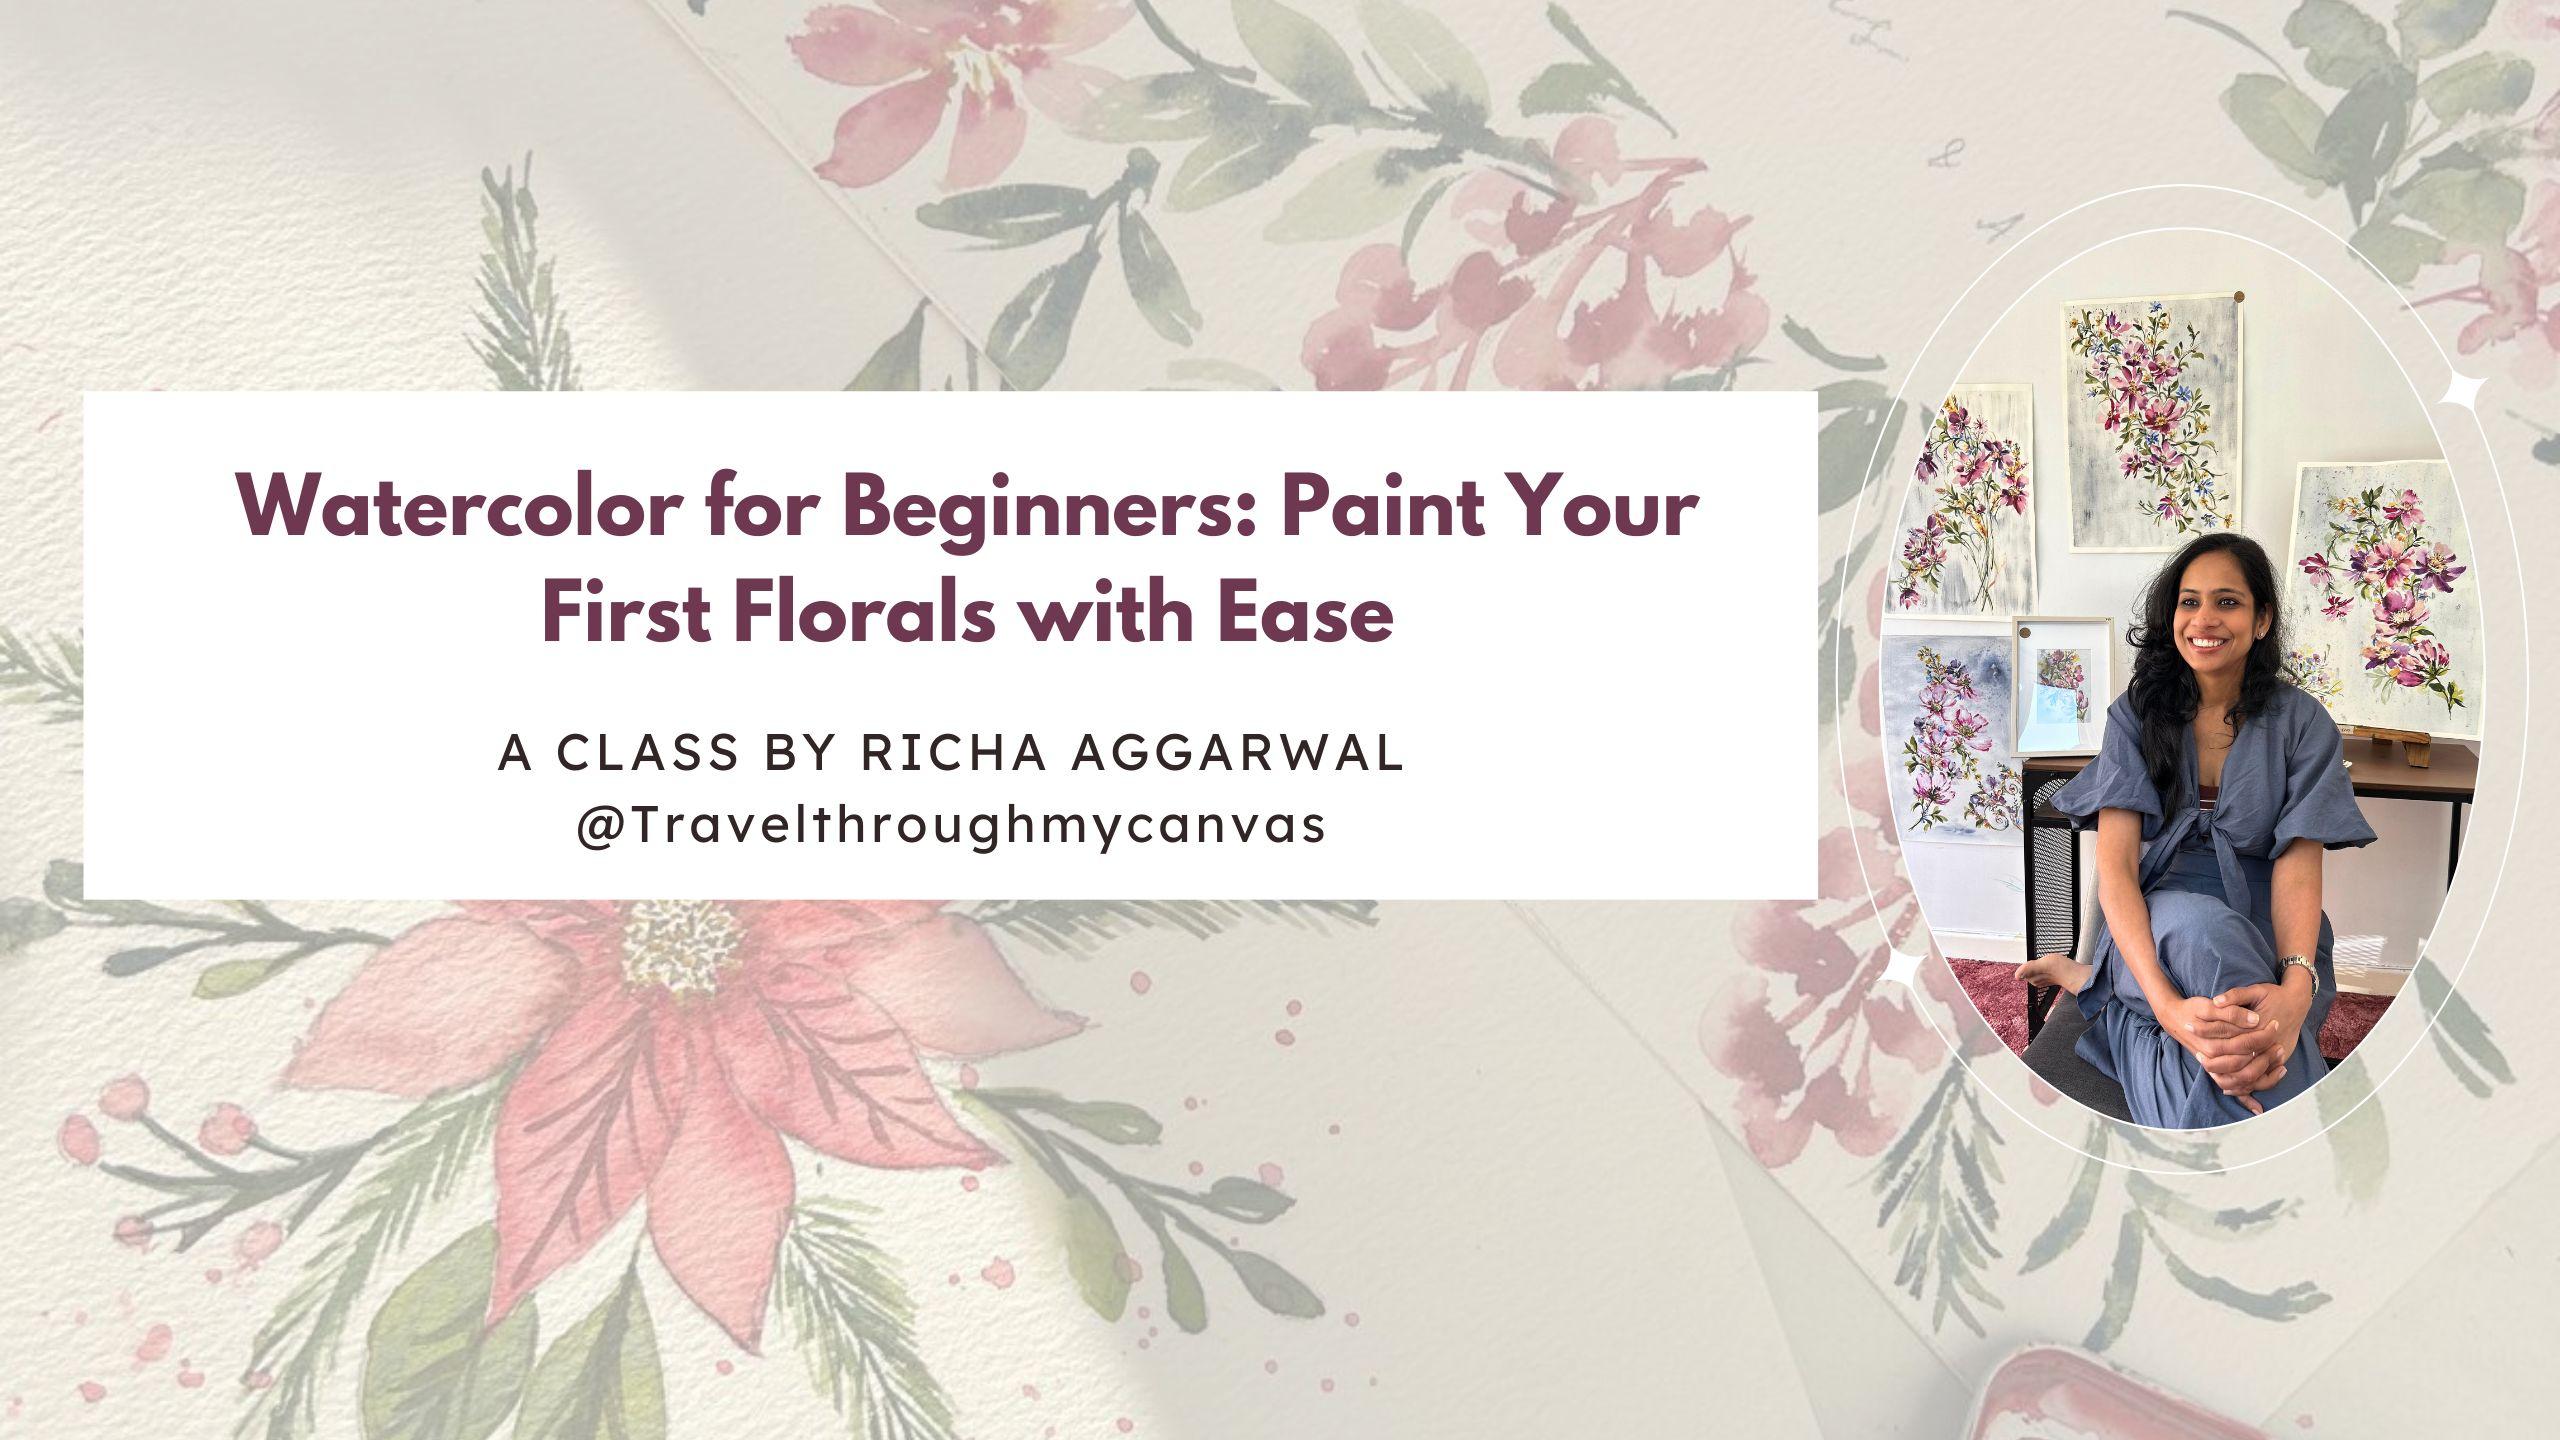
Transcripts
1. What you will learn in this class ?: Bigness. If you have just bought your
watercolor s and you're completely new to
painting or you're transitioning from
acrylics to oil, then this class is for. Starting with watercolors
can feel a bit intimating, like, how do I make colors? How do I even get this
lighter and darker shade? Which brushes should I use? And how do I even start all these pushes have been
on your mind you All right. Fun, simple, and very
beginner friendly class. I will walk you through everything you need
to confidently begin. Your body is on a journey. We will explore the basics. Of watercolor painting. Understand the brushes and
all of the supplies we need. And at the same time
and most importantly, we will also learn how to give this beautiful soft effect of watercolor and the best part. We'll be painting together in the class itself, step by step, and I will guide you in creating a beautiful floral artwork which you will absolutely love. And the best am using about this class
that in this class, I'll be telling you one
technique to paint this useful. And after that, using
that same technique, you can not only paint this one, but many more floral
designs and patterns and your own composition by learning just one technique.
Can you believe it? In fact, I created my four
societies collection by using just this one s oficHo may at the end of this class, you will not only finish one
watercolor painting with me, but you will gain
confidence to paint many more watercolor
paintings on your own. Most importantly, my goal for you is not only to
finish one painting, but to enjoy the process, to really pause, connect, and recharge yourself
through painting. So let's start and dive in. Pick up your
brushes, gay colors, and I'll see you in the car. But, but, but follow the class till the end
because we have a really, really juicy bodus for you. At the end of the class, I see there about most
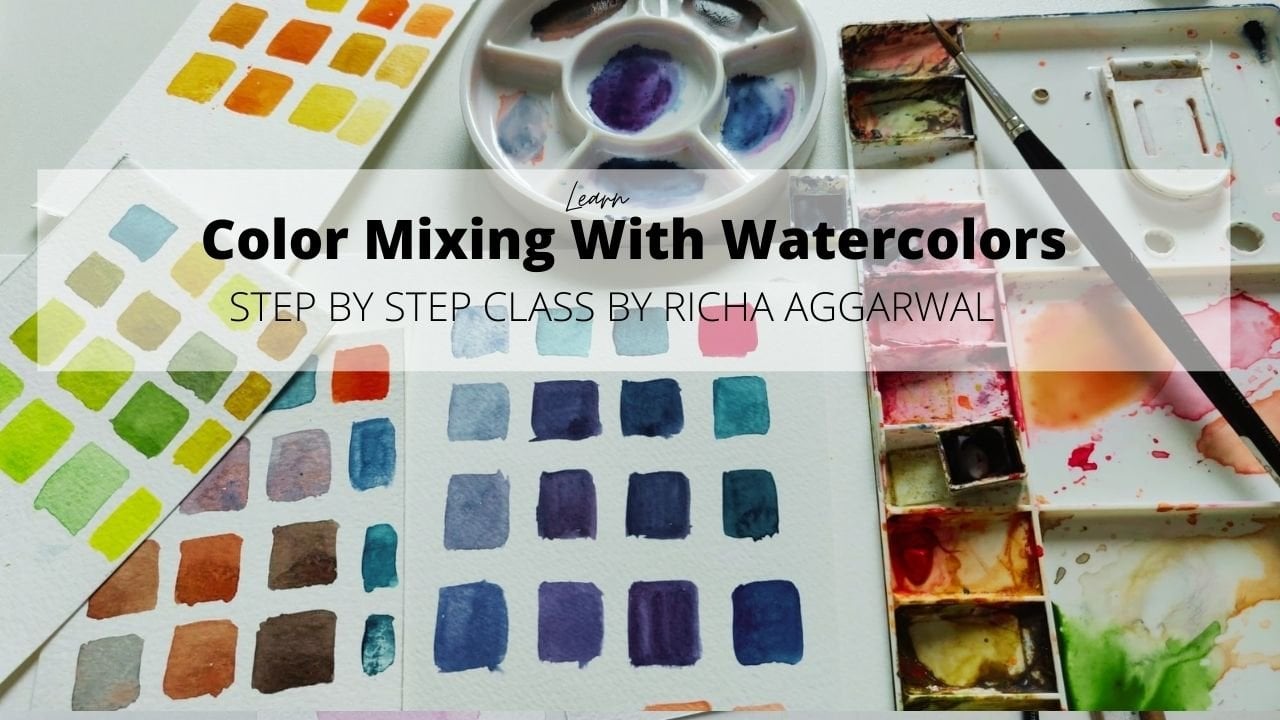
2. Essential Basics to know : Okay. So before
we start painting this beautiful beautiful
Christmas painting, assuming that some of you are complete, complete beginner. By complete bigner, I mean that you don't even
know how to start, how to start mixing your
colors and everything. So first, I want to tell
you a few important things. And the first is
the right setup. The right setup is that
always keep all of your things like colors,
brushes, tissue paper, water jar, and also
a paper to try out your colors on your
right hand side if you are a right
handed person. This is about the right setup. Now the second thing is
charging your colors. Watercolors, they
always dried up. When you don't use
them for a long time. A simple act of charging them is like this is a simple
bottle with water in it. Take any spray bottle and
just spray it on your colors. This is called charging
of your colors, and this is such
an important act to do and you really
can't mess it. This is your number two habit, which are you going to
do before starting and the other thing is
charging your brush. Similarly, you
charge your colors. Same way, take your brush and give it a good bath in water. So this is called
charging of brush. We have done three most important
things before we start. First is setup, then charging of colors and then
charging of brush. Now, my colors are charged. Now, next thing which I will
do is mixing of colors. I got this query a lot, a lot into with my students, how much water should I add? How should I guess that
I get this color or a darker color like this or a medium darker
color like this. How do you get this?
Because with watercolors, I don't want you to paint
like crayons, you know? How we paint with crayons. We paint with crayons, everything the same way. If I want to paint the flower, it is the same shade. With all the petals, if I want to paint with crayons, the same shade will come in all the petals. That's
what we have learned. As always with the crayons. There is no tonal values,
there is no difference. This is your flower. No, I don't want you to paint like
this with watercolor. I want you to paint with the
depth some lighter leaves, some medium shade and
some darker ones. That's what we need to
do with watercolors. That's what I want to teach
you so that you can have more fun and your paintings
can have more depth. For that, we're going to
learn how to mix our colors. First of all, I'll tell you, lighter mix, medium
mix, and darker mix. It is very, very simple. If you want to mix
the lightest mix, then your color, then
your mix has more water. And less color. If you're
mixing the darker mixed, your color has more
color and less water. But it should be juicy. Let me tell you with a
demonstration what I mean. We will mix three colors here of three different
tonal values. We are learning color mixing. Now get ready to learn
the color mixing. I've taken this dropper for your help so that you
can understand it better. Suppose I am putting
one, two, three, four, drops of water
in this first one. In this I'm putting
just one and two, and three. I'll make it five. In this, I'm putting
just one drop off color. Of water. This is
five drops of water. This is two drops of water
or three, and this is one. Now this is charged, my brush is fully charged, my colors are charged. Now what I'm going to do, I'm just going to take my colors. There's a lot of color
in this palette. I'm just going to take my
color and put it here. For this tonal value, always use darker
colors for the start. Now this is my lightest one. Now, the same amount of color, I'm going to take
and put it here. This is going to be my second. Can you see the difference? This is definitely darker, but both of them are juicy. It is not that this
doesn't have water, no. For the last one, either because my color is
fully fully charged, either I can put
it like this or I can take the color and there's only one drop of water
and I can mix it here. If I want, I can just take some more and then put it here. Okay. This is how we mix our colors when we need
three different tones. But the important thing is that your colors should always
be charged up with water. They're juicy, they're flowy, your brush should not
have those dry lines. It should be good and juicy. Just summarize, I'll just
tell you one more time. Then this has 70% of water. This has 50% of water
plus 50% of color and this has only 30% of
water plus 70% of color. This is a very important thing
to note down, to practice, go ahead and practice making different colors because this
is a very useful exercise. And a very good thing to know and you will
see your paintings, change drastically when you know how to charge your
color, how to mix your color. This in fills the first lesson
is so gold, I would say. So yes, these after this, you can mix the colors like
this is the lightest one, this is your medium, and
this is your darkest. You will slowly slowly,
your eyes will get better so you don't have to measure
the droplets and everything. So go ahead and start, change your watercolor
practice by right setup, charging your color, charging your brush, and how you mix it. Colors. I see you in
the next class and do practice making colors
with all of your colors. It's a very good exercise. I see you in the
next class bye bye.
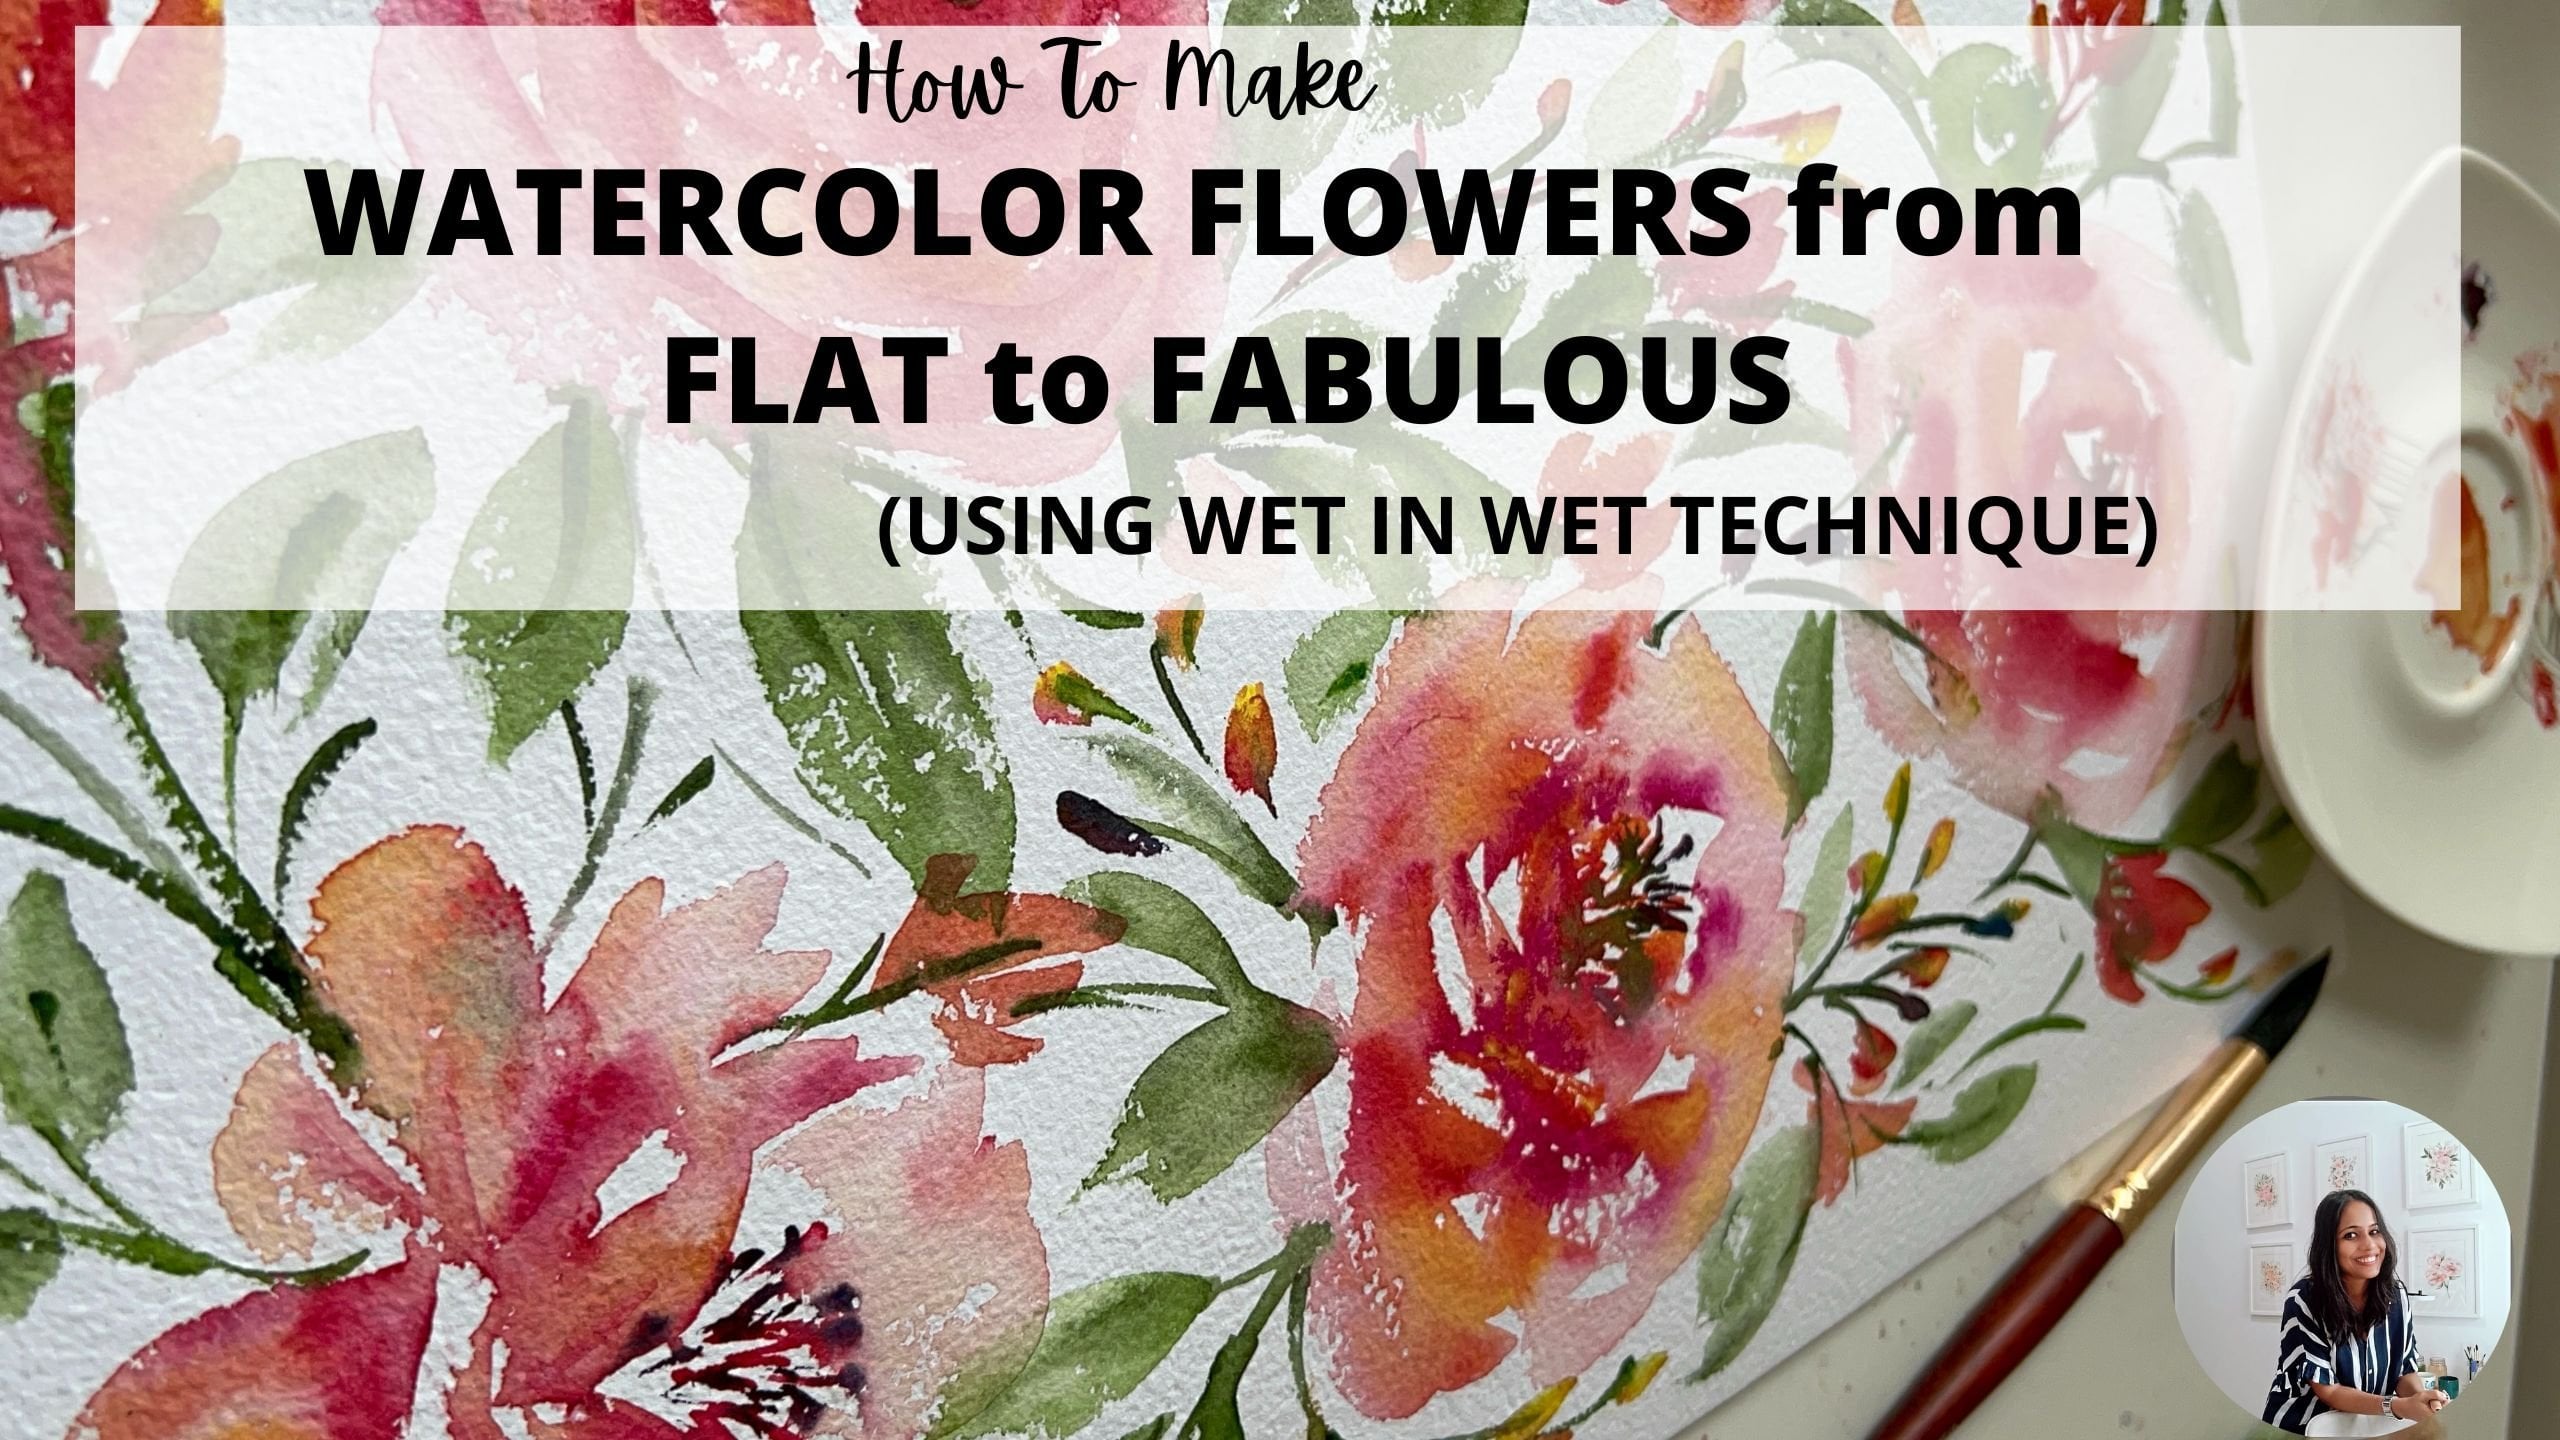
3. A simple trick you will love : Okay, so there are
two beautiful FFIs which we are going to
learn and the technique before painting this and
which you will be using in painting this beautiful
Christmas flower painting. But before that, I'm
going to tell you one of my secret and art
techniques which I used all the time to make different shades of color
without mixing them. Okay. Are you ready for this? For this, what you have to do, definitely take your
brush, charge it, and dip it you can also dip
it into your charge color, or you can take your
charge color hair and just load your brush
fully with the color. When I mean load your brush
fully with the color, let's see what does that mean? By that I mean that
don't be scary. Give your brush a full bath, all the hair. Listen
to it carefully. All the hair of your
brush should be fully fully into the
color like this. See now all of my hair of
the brush is fully loaded. This is called fully loaded. I also teach it tell it
to my kids all the time, my students, give
it a good bath. It's like a elephant
taking bath in water. I hope you remember to
load your brush and not to be scared to
load your brush fully. Swipe out any excess water if you want and
if you feel like, and then see, and then I am
putting it on the paper. This is my first darkest tone. If I want to change it, instead of mixing the colors, sometimes I want to change it quickly for a quick
floral painting. What I'm going to do,
I'm going to dip it. I'm going to take
my pater jar here. I'm going to dip only
the tip of my brush or one fourth part of my
brush in water, not full. Then swipe out the excess
water from the edge and see, I have changed the shade. Again, if I want more,
I'm going to tip it, maybe a little more half and then I'm going
to put it again, and then I'm going to put it again on
paper one more time, a full go, and then I'm going
to put it again on paper. This is how we get different tonal values
or darker medium, and lighter as well
without mixing. For this class, definitely, we will be using the
mixing technique, but I do use it a lot. I want to tell you this
quick tip just in case I use it during the class for few
things so that you know that. And I will be using this
in upcoming classes if you come with me and join
me inside my six week code, all these and many techniques I will be telling you in detail. Let's see quickly
how I use that. Suppose I want to make a rose. I'll just take my brush. Now I am dipping it and
I'm dipping it again and here's my quick rose is ready without without
mixing the colors and all. This is how I use to change
the shade of the petals. If you want to use it for
moon, this brushes off. Actually not a very I never
paint with my flat brush, my roses in anemones. But what's a ha trying. I just want to tell
you how I use it in painting different flowers. This way, I got a different shade on my petals
without mixing the colors. This is one of the technique
which you can try. You can try both of them. One is this and
the other is this. This is usually
for the fast walk or when we need small
details and thing, you will get to know it further, but just have fun with this. This is an extra
technique which I want to tell you
and I see you in the next class where
we will be learning two important techniques
called pushing and after that, making lines with the art brush. I'll see you in the
next class. Bye bye.
4. Fun Exercise-1 : Okay, so let's dive in into
a technique called pushing, which we will be using a lot while painting
these flowers. Okay. So I'll give you a handy exercise which
you can practice. This is an exercise which
you have to practice, making circles and
pushing color into it and fill your whole page
with this exercise. Okay? Fill pages of pages
of it until you get, you know, happy with it
and you get a hang of it. After that, you will
be so easily able to paint this petals and leaves with
different colors in it. It is not like one color, it is not one color. It has different tonal
values like this. Let's see how to do that. So yeah for this, first of all, you definitely have to mix your color mixing your I'm putting it here for
your convenience. Mixing color is the basis of it. Like it is a must must thing, so mix two of your colors, and I will be using two brush. And if you are a
beginner, I will suggest you to use two brush, one thick brush, one thin brush. You can even use number one brush or zero
brush with a good tip. And if you have a
brush like this, which is a good tip, it is like silver black velvet,
number six, brush. It is a very good
tip, as you can see. Use one brush with
a very good tip. And one normal round brush. Mix your colors and one mix should be 70% water
like this one. You can even go further
and add more water. Okay. And one mix should
be this 30, 30% water. For this, for the 30% water, either you can
listen it carefully. Either you can charge if
the water is finished, you can use your dropper. Either you can
charge your color in the color palette
itself like this. Just put a color into your palette or you can
mix it separately as well. Let me tell you what to
do and how to do it. I'm going to charge my
b, charge my color, then fully load fully fully
load my brush with the color, swipe out the excess water, and then I am making a circle. Just make a circle,
see this water beat, nothing to worry about
it. Just make a circle. Now with the other brush, I'll just put color at
the tip of the brush. This is very important.
I'll just push it. I'm holding this brush at around 90 degree angle
and I'm just pushing it. See? Can you see it? The color is flowing into it itself, I'm not spreading it. I'm not doing it and
trying to spread it. No, here comes the
magic of watercolors, where you just touch
it and let it spread. Were you just drop the color. This called pushing or you can say dropping and let it be. Okay, let me do
it one more time. Let me do it one
more time for you. In this case, there can be
23 difficulties, first, if you load your brush
with a lot of water and you don't swipe out the excess
water, what will happen? You will have a
lot of this color. Can you see my whole
paper has the color bead. When you push in it, in this I cannot push
because this is a puddle. This is a puddle. So if the puddles are coming, that means your brush has too
much of water, so I swipe. I swipe out the excess water. This is a thing
when you paint live with me or you are in
the community with me, you can show me your pictures, and you can tell me
that, hey, Richard, this is a problem and I'll
guide you accordingly. Yeah, if you can join
live anytime with me, it'll be great fun
if you're having difficulties in all these things because I can really
see what are you doing and how you are doing and I can guide
you accordingly. Yeah. Otherwise, just see that your paper should not
have too much of water. There is just a good glaze
and also the paper depends. I really want to know
which paper you are using. Like this I have given and now, see, I am just touching it. I'm touching only the edge. I'm touching only the
edge of the circle. And letting it flow. If I want to redo, I'll again touch the edge of
the circle and make only the edge darker and darker so that the water
is taking it on its own. Now let me tell you
how we are going to use this technique to paint
our petals or flowers, leaves, even this cherry. After mastering this technique, you can paint lots
with template, which I'm going to give
you in a free eBook. Yes, you can paint
anything with this. Let me show you how.
Suppose this is my leaf. I have made this leaf like this with water and now I'm
going to just touch it. And let it flow
wherever you want it. If I wanted it in the center, I will just put
it in the center. If I want it here,
I'll just put it here. For this, the paper should
not dry too quickly, this one dry quickly. Your brush should educate water. It should not be dry and it should not be too much of water. For this, just try it two, three times so that
you'll get to know how your water absorbing power is of your paper and of
your brush, see? Like this. We're
just dropping in. Let's take an example
of this leaf. We're just making
I think this is two less water definitely if you're working
with a good paper, you'll get better results. You don't have to do it again and again like this
on a very good paper. But I'm teaching you on this
so that I don't want you to have a mindset blog that I cannot paint if I
don't have a good paper. You can paint. See? I'm just touching the edge
keeping my brush at 90 degree angle
and just touching it. Letting the color flow. Can you see this gleate they
come very naturally when you just touch and poke and push
whatever you want to say. My color should also have
another thing is that this color should have a
good juicy at the tip, only at the tip, but it should
be good amount of color. If you don't even have
a good amount of color, then it will not spread. If you're having any trouble, let me put it down in the project section or if
you're in a community, put it down with your troubles and I'll be there to help you. Okay, do this exercise
and fill this whole page. This is called pushing
and it is so important. Fill this whole page. Remember, now I'm just going
to tell you the things. Remember to swipe out
excess water from your brush if you're getting
too much of puddles. That is one thing. Just make your colors mix your
colors very nicely. Your colors should be
mixed very nicely. You brush should be
loaded with color. It should not be like this no, you should fully load it. Like a elephant giving it
to bath, then only do it. Now your next color
should be ready, juicy, take it only at the
tip, only at the tip, but it should be juicy
and then just drop it. Just put it, you don't have
to take it further, drop it. Keep your brush at a 90 degree angle or a
little 75 degree angle, and just drop it.Tuch
it at the edge. Rewind it, rewatch it, and fill this whole page with
this beautiful exercise. It might take a
little time for you. Everybody has their own journey, but I'm sure you will
be able to get it. All of my students
get it with practice, so there's no chance that
you will not get it. If you have any problem, do let me know in the project
section in the community. I'll be so happy to help you. I'll see you in the
next class for bye.
5. fun exercise-2: I'm pretty much sure
that you have done this exercise on
pages and pages, and you have confidence in
using this technique pushing, which we will be using in there and make sure
you know, don't worry. The more you use it, the
more you will get mastery. So make sure you enjoy the
process and give your best. That is what we are going to do. Every time we paint slowly
and slowly, we will improve. So watercolor is not a monster. Don't worry and if it is a
monster, you can get it. Now we're going to make some
lines and do this exercise. For this to make it more fun, you can make it in
a entangle form, divide your paper into different paths as you
can see here a line, the lines and we'll be
drawing lines inside it. Let me show you how to do it. When you are done
with this exercise, you can make these lines inside the leaves and this element, this leafy element, the stems, and the dots and all of this. Basically in this, you will get trained how to use the
tip of your brush. While sometimes we paint with
the body of the brush like we did in this and sometimes we paint with
the tip of the brush. This is a whole
exercise to make you comfortable using your
tip of the brush. Let's see what I'm doing here. I have my brush charge, and then I'm just dipping the tip of my brush
in the color. I'm not giving the whole bath to my brush like we're
doing and just taking the tip of my brush and color in the tip of my brush and I'm
making lines with it. This might come with a
little more practice. Keep your brush,
hold your brush, listen to a few tricks. Hold your brush from
not very close, just a little far. That is one trick you
can definitely use, beat free and don't
put pressure. It is very light touch. If you press your brush, your line will get thick and
it will happen, don't worry. If you don't brush your brush, you'll just use the
tip of your brush, it will be light and gentle. Definitely, brush plays
a very important role. If your brush doesn't
have a good tip, definitely the lines
will be thicker. Don't worry, it's not
always your fault. You just buy a very
good tip brush. Now, dip it in the color.
The color should be thick. It should not be very
thin like this water. See if I draw it with water, it needs more control. I need to hold my
brush very firmly. But when instead
I'm dipping it in the tip with the color, make some lines and use. Yes, very important thing. Don't use this moment. Use your shoulder moment to
keep your wrist straight. If you need, give
support with your pinky. Try this giving support with your pinky and
then making lines. Give support with your pinky, put your pinky on the paper, rest of the things in air, rest of the hand is in
air, and just make it. When you keep this
wrist straight, half of the batter will
be wn. Don't move this. If you're in a habit
of moving this, keep this wrist straight and just make pages and
pages of the lines. Try to make thick
lines, the thin lines. Thick lines where you'll be
pressing your brush to paper. Can you see the lines
become thick when I press my brush and
don't see the line, don't see the line while you're
making check your brush. Now my brush it is bend on
the paper. The line is thick. But if my brush
is just touching, can you see it is just
touching. The line is thin. If my brush is bended, the line is thick. Secondly, I'm not
moving this wrist. If you see my wrist,
it is not moving. It is 100% straight. I'm using my shoulder movement. These tips are so important, I tell you, I try it alone, I know it takes ages. That is why I have this
full six week course for you where I can tell
you all the tips and tricks I have gathered for myself and I use
it in my painting. Try to fill this whole page, make something like this, fill this whole page. Once you have filled
this whole page, now after that, you can
try making these elements. The Christmas
elements, the color, at the tip of your brush. Take a clean paper.
I'm not using. I'm giving my
support to my pinky, I'm making a straight
line and then I'm just making these lines. Some longer, some shorter. As we go on the top, it becomes a little
shorter. Just try them. In this, definitely, I'm going to use that
tip which I told you of dipping my brush in water and swiping
out the excess water. For this, I use it sometimes. Now again, once it dry, I can This is just to give
the tonal value in this. See? It has come so
beautifully. One more time. Either you now once you're ready with this
hand movement in practice, you can just keep
your pinky hair and use very light pressure
and make space. Keep space between this. And just make it outwards. Don't worry. I have template for you if you don't know
how to make this. But the thing is
the top or shorter, middle is the longest. Then I dip my color in
my brush into the color. Ipod x is water. You can either let it dry or you can just
paint in between. And you can let it
dry and paint later. Either of the way,
you can do it. One, this thing which
you are going to use, other will be making stems
for our Christmas cards, making stems for our
Christmas cards, and the third thing which we'll be using
is to make veins. This is delicate, this is soft and it will come
with time, don't worry. If it is not coming,
all you need to do is go back to your basics
and practice making lines. That is what we do in my
course, making a line diet. I always take you back to basics if you're having
trouble with anything so that you don't hit the bush
around and blame yourself. Everything is back to basics. Just practice making lines
and once you're ready, you will be able to make it. Everyone has their own journey how much sketching
you are doing, how much painting you
have done in your life, how much you have
used this moment. According to that, you
will reach at this stage. Don't worry, do this exercise using the tip of your brush
and if you have any problems, let me know in the community. Let me know in the
project section. I'll be so happy to help. I'll see you in the
next class. Be bye.
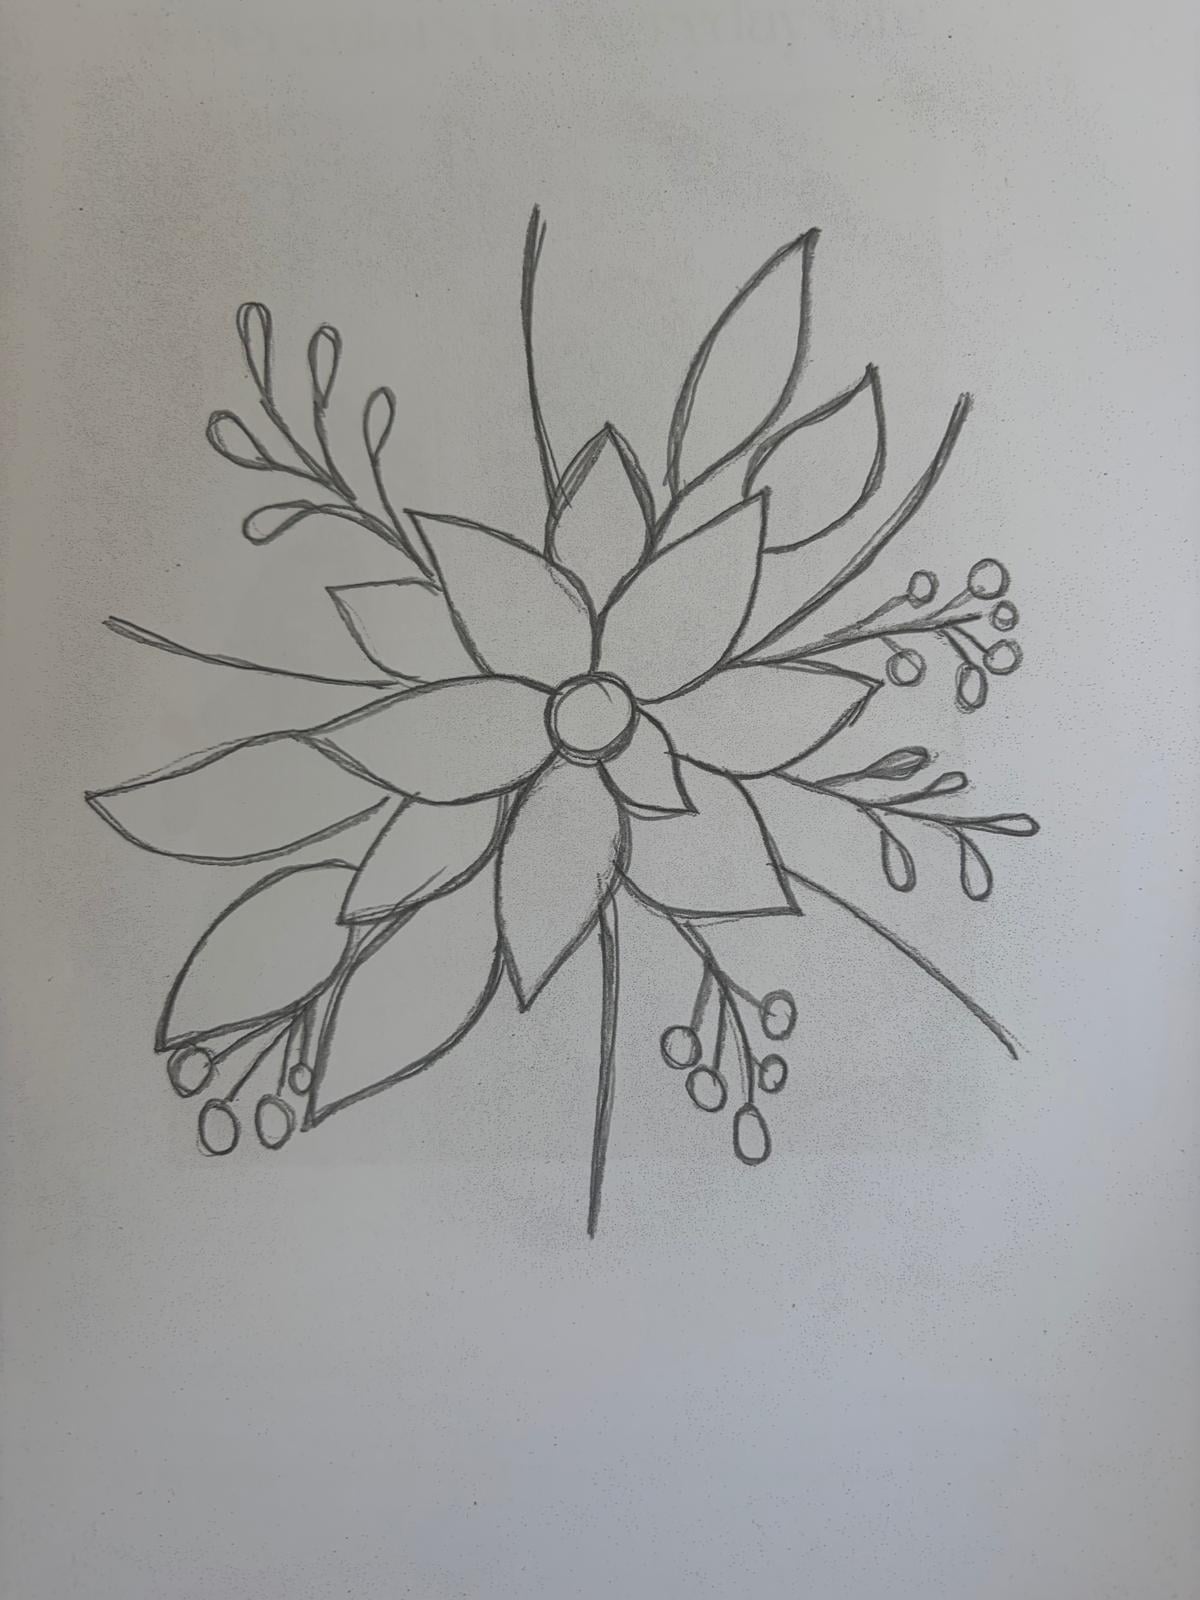
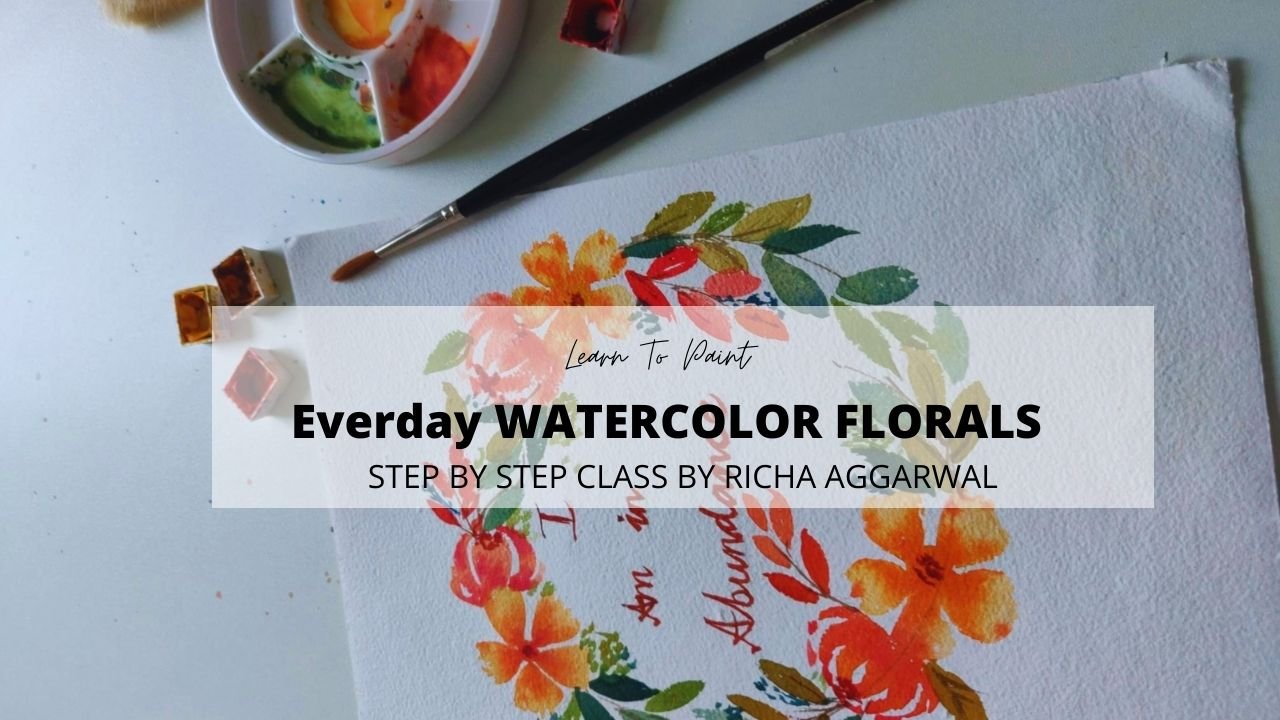
6. Painting flower elements : Okay, before we start
painting the final painting, I want you to sketch and
paint some elements with me. These are the elements I
have sketched for you. You'll get the template,
you can sketch or you can directly paint them without sketching if you're
confident enough. What will happen once you are
able to sketch all ibans, you'll be able to paint
this painting on your own. Not only this painting, you'll be able to paint
this painting as well. I have many templates for
you ready in the e book, which I'm just going to
show you in a minute. This is a template for you, which you can get and you can trace them and paint them as
we are doing in this lesson. After that, you can do this painting and all these
templates are just ready for you to trace and then you
can paint them on your own. Don't forget to
download your eBook. And paint them, continue
your journey forward. That will be the advantage of sketching and painting
these templates. So let's start first
with these templates, how to paint them. For painting them, I am using
very, very minimal colors. For this whole painting, I have used just red, crimson red, for the reds and for the greens, I have used yellow and green. And blue mixes of green.
Very minimal palette. As a beginner, I
always suggest all of my students to use
very minimal palette. First thing first is definitely
preparing your colors, which is very important. Most of the time, bigners they are not able to
paint because they don't prepare their color palettes and they don't mix their colors. Always mix your colors. I'm using this spray bottle to reactivate my red crimson red, and here are my green. I'm just reactivating them. This is going to be my lightest
tone, the medium tone, and my darkest tone will be
directly from my paints. I'm reactivating them. This step is so important. This way, I have
mixed my colors and I have got my palette ready. I don't have to go forth
and back and mix my colors. Now you'll see that it is easy. It's always the first and
most important thing we do charging of colors and
I'm charging my brush. I've already told
you that by now. Let's first paint the red ones. For the red ones,
I'm using this red. If you feel, you can mix
a little pink in it. Queen rose, if you wish. If you don't, it's totally okay. You can use either two brushes
like one with a tip and one without a tip or
just with a tip as well, but two brushes for giving the depth because you are going to use a pushing technique. Now, you can either
use other brush, very thin brush as well, whatever you feel comfortable. I'm going to use this one. So for this one, the
most important thing is definitely that you mix
it very nicely in a well, and in a juicy juicy mix. I always say lots of time because this is a
thing which we forget. Always mix it nicely, your color mixing is important and dip your brush,
give it a bath. Give it a bath in the paladin Swipot excess water if you feel that there is
too much water. Now I have given the bath
and I'm using if you see, I'm using it as a try to paint it in minimum
stroke as you can. This is done one. I
leave this petal, the adjacent petal and
I paint the next one. If your paper is good, you can paint two
petals together, and if your paper is not good, then you have to keep giving
your darkest tone together. Simultan I'm taking the color
at the tip of my brush, the dark red color. It is at the tip. Remember how I'm using and I'm
just dropping it. Can you see I'm
just dropping it? I'm not doing it or I'm just
dropping it at the tip. The important thing here
is to drop your colors. You don't have to give
it extra pressure or force to let it flow if
your water is good enough, if your paper is wet. I'm just dropping it.
This comes in a practice, don't worry, try
and give your best. Sometimes your paper is not good enough so that you
can give this effect. But yes, if you
can give and try. That is why it is so
important that you post your work in
the project section. If you're in the community
live community with me, then post your work over
there so that I can see. Now, see how I'm painting it. I'm not picking up my brush, I'm giving it in a one flow so that it doesn't have the
disturbances between. Now I'm another brush, taking the color at the tip. I'm just repeating this process. Just repeating this process. Nothing else. Now, can you see the two shades very clearly? You can easily see it. We're just going to repeat the process. Now let's do this. I'm doing the alternate petals so that it doesn't
touch each other, the color, otherwise
it will become a just a blob of paint. My brush already
has a lot of color. This second color
should be thick and should have a lot of color
at the tip of your brush. If your brush doesn't have
a good amount of color, if I show you what is the shade
at the tip of this color, it is this dark. See this much. And at the in the
leaf, I'm using this. Can you see this difference? Yeah, it should be
this shark difference. That's how it is coming. This simple technique, just
use this simple technique of pushing to paint all of your
templates and everything. By now, I'm hoping
that this must be dry, but I'm really careful
and I'm not going to touch it till the
end, it is dry. Otherwise, you can wait. And then just putting it
a little bit at the top. That's it. Simple. No
hanky panky things. We are not going to complicate your start of your journey. There's lots of things to learn and I really
want you to get confident painting these
flowers with the templates. There is definitely
a lot to learn, but not everything
in the one go. I also want you to feel confident painting one
step at a time, yes. Anything you feel that you're
not able to do or get, feel free to put your painting
in the project section in the community and ask me the
questions and I'll let you. I'll give my best. I can even make a video tutorial for you. See how I'm doing. Always keep this hand
straight and paint with your shoulder. Moving
your shoulder. I'm just giving it
in one go like this, like this and like this. This is called stroke method. And we have just done flower. Similarly, I am going to paint this berry as well and then we will be switching to green. For the berries, you
might want to use a little our smaller brush
and leave some white gaps. Can you see this white?
Can you see this white? Leave some white gaps
in between and use a smaller brush if
you are not able to paint them with a big brush. Because they are really small, so use a one number or a
two number to paint them. It's even difficult for
me to paint and then take another brush
and just poke it. Make sure that your red
color white space is intact. Just. I'm just dropping in. Try and practice it a lot of time before until
you feel that yes, I am confident and
it's coming out. It is all just practice, but you can do it. I
know you can do it. We are done with two elements
and now I'm going to mix my green and we will be doing all the
elements with green. See the next class. Bye bye.
7. Painting green elements: We have painted our reds and now we are going to
paint our green elements. Okay? So by now, you must have known that the most important thing is mixing. So always always mix your
colors like this juicy one. Check the shade. Check the
shade if you're happy. So this is the lightest tone, which I will be using and my darkest one is going
to be this green. I can also mix this green with a little blue if
you want it to be. You can do it. You can mix your
green with a blue, but make sure that you're
adding almost no water in that. Yes, now check. Let's check this shade. This shade. This will
be the difference and the effect and the depth which will
come in the paintings. I'm using this brush again with a good tip for the darker
color and this brush for my like the body
of the painting. We are just giving
two tonal values. Again, just give it a good
bath, good juicy mix. That's always be the
most important thing. Swipe out the axis. If you feel that it has too
much water in your brush, then swipe out the axes. It depends on your paper. When you submit your work
in the project section, then I might see it and then
I will be able to tell you. If you're in the
community, please submit your work so that I
can see it and tell you why it's not coming
or why it's coming, how it's coming and how you
can improve it for me to see your work and then I
can help you to my best. Now I am taking a ta carton
and I'm just dropping it. You can just drop it here and there and wherever you want. Just give it a little effects. Yeah, I'm just dropping
it here and there. It will dry up in some time
and it will just merge. Now, similarly, we
are making this. Use a smaller brush. If you're not able to do it with a thicker brush because
these are thinner things. The smaller things, you
can use a smaller brush. Just see how I'm giving
us in one stroke. This is important.
Don't give it although we learn and we have lots of exercises in my Bigginer
coats, making a line art. If you join there, where
I will teach you how to strain your hand to
develop a muscle memory so that you can paint with
strokes like I am doing. We have exercises to paint
with a tip of the brush, one we have done
together as well. You can I see how with
very light pressure, you have done that
exercise with me. Hopefully, you'll
be able to do it. Otherwise go back
to your exercise, practice that and then come. Yes, you have done this element. Similarly, make the lines here. Once you are able to
paint this element, I have almost used the same element in the
template which you can download and you'll be painting many paintings using
this elements. We'll paint the
center of the flower later when it dries completely. By the time, let me paint this one and this
one for you as well. This is simple. In this, what we are doing, just look. First of all, I'm taking
the darkest tone with the tip of my brush and
I am making few of them, leaving some gaps in between
with the darkest tone. Okay? This is the darkest tone. Now I'm washing my
brush and I'm taking the lightest tone at the tip of my brush and I'm
filling the gap with that. This will just give
it a little depth. If you don't change your color, then there is no depth. It is like how you have drawn
with a pencil or a crayon. If you feel that it is lighter, I can take more darker
tone at the tip of my brush and give a
little bit depth. Like this, I'm giving
the third tonal values. I can give some depth here. I can add few more colors, darkest tone, if you feel. Otherwise, it's totally okay. Just try this one. For this, definitely your
hand muscle should be really good to make such
delicate and soft lines. Don't be hard on yourself. It's totally okay to go slowly, but I would suggest you to go
with the fundamentals and, confidence slowly and slowly
and be gentle to yourself. Now we're painting this. Again, the same principle. Mix your brush, give a
good bath to your brush, sip out the ces from your
brush if you feel it has too much water and your
surface is not that big. Otherwise, it will
be all puddly. This will be all puddles if you don't swipe out the excess
water from your brush. By doing this simple exercise, are you seeing it
I'm taking color in my brush and
swiping out the water. There are more things
and techniques. To get the sense
of water control, which I will definitely share
with you in further classes and I share everything
inside my six week or. Now, just take the
tip of your brush. This is all hand
and muscle memory, go back to your painting
basic line making exercise. That's where you always say
and keep posting your work. Now again, I have taken
the tip of my brush and first you can either make these branches in the last or you can also make them first. This is your wish since I have the red green
color in my brush, I thought not to waste it. Now you know this, I feel that you can almost paint the
whole element yourself. Now I'm taking the
red and same thing we're going to do. For this. For this, you can also add a little darker
cherries if you want. This is a darker stone. This is another way. I don't want to overwhelm you for this, but I just want to tell you
that if you want to do, you can do the cherries in
different shades as well. If you have watched
my tonal value class and you know how to
change the colors, the tones, we have spilled a little bit beans as
well in this class. Can change it.
Otherwise, just follow the simple processor of cedars too much color
of poking like this. It depends what
techniques you're using. As per that, your painting
will come, but don't worry. The more important thing
is to enjoy and have fun and keep painting. Keep having the joy and the fun. I feel that it has dried, if you feel that it has
not come very nicely, the depth, you can
always re wet them. Once they have completely dry, just take a little water on
your brush and re wet them, and then again, you
can put color in it. Okay. Do post your work by seeing your work in the community
in the project section, I can guide you better
that what you are doing, are you taking too much
water on your brush? Are you not taking
too much water? Basically, what are you doing? Now these center
ones, the flowers, I'm taking yellow aqua color directly at the tip of my brush. It is like this color has a lot of water because
I sprayed water on it. I can take it directly. I'm just making a little
circles. Little outlines. If you want, I can do it
a little closer for you. These are very small. Leave some white gaps, tick a smaller brush
with a good tip brush. We're going to just make
some dots with yellow occur. Then I'm going to take
my dark brown color at the tip of my brush. You can take any color brown or brown will be the
best and I'm just going to poke it here and
there with a dark brown color. This is not exactly
the dog brown, where is my dog brown. You can also use Bonsiana and we're giving
similarly the two shade. Okay. Now you can see it. Yeah, we have painted
all of the elements. You can see the dots here, I have made and if I
want to make the lines, then once it has dried, this sleeve is going
to dried completely. Then I will take the color
at the tip of my brush, the darker color
whichever I want. And then I'm going to make
the lines over these leaves. For this, for making
these lines, it is very, very important that
your background color should be dried completely. If you want to give dry
strokes on anywhere, just make sure that
your previous layer is completely dry. If you want to make
lines on this similarly, this should be completely dried. Then just take the color
at the tip of your brush, and you're good to go. I'm very sure that by this, you'll be able to paint these
elements very confidently. Try them two, three times, you are not getting it
one time and now it's time to finally paint
a beautiful paintings, bookmarks, red,
anything you can paint. I'll be painting this
one painting with you, so stay tuned for
one more class, and after that, feel free to download your eBook
and paint from there. I see the next class, why?
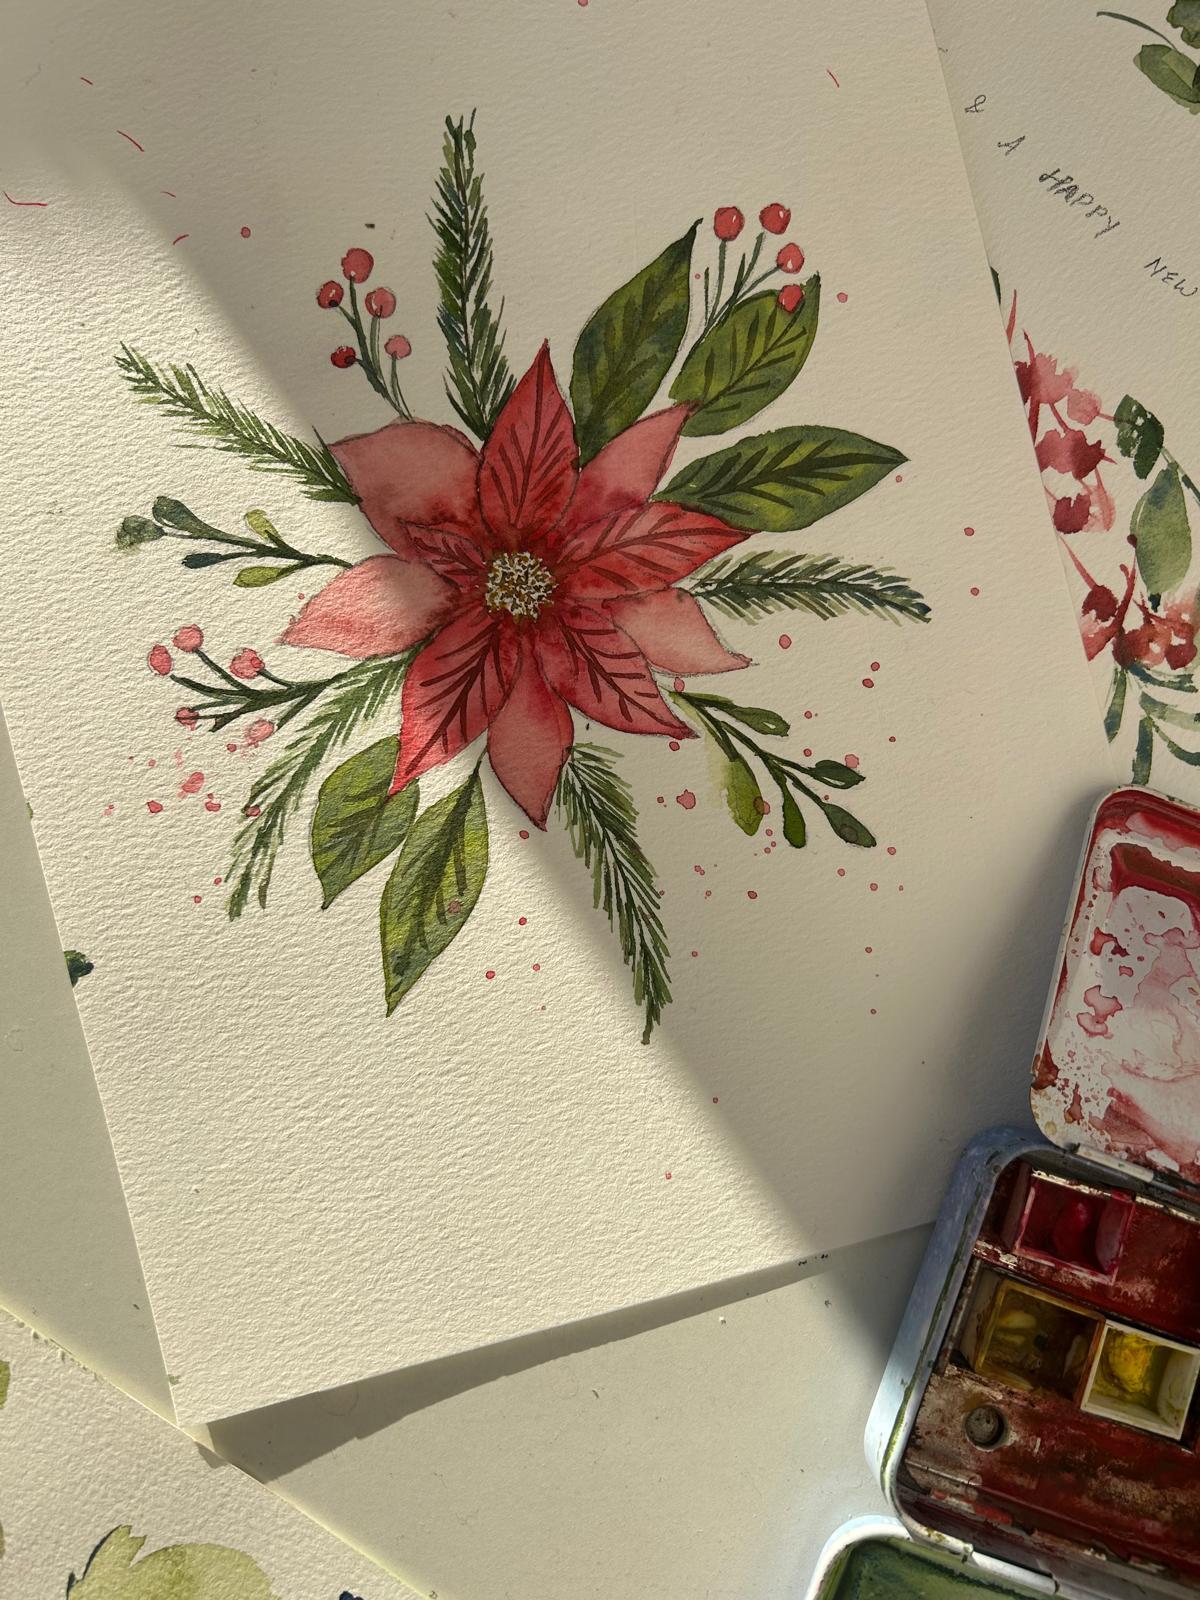
8. Painting full piece-part-1: Okay. So finally, it's
time when we are going to bring this piece to
life and just paint. Okay, let's get started. First of all, always
take a deep breath. Calm down. Put on
your favorite music. Yes, I want you to put
on your favorite music because this is a
time when I want you to go into the flow state. Whatever you have learned, whatever techniques
you have learned, whatever element
you have practiced, now it is time to enjoy that. Now put on your favorite music. Are you have traced your templates and you
have mixed your colors. I've got everything ready. Now just enjoy this moment. I have put this
reminder for you. Enjoy the process,
and I very well know that you don't need
this class as much, but I'm just putting it here so that you have something
for the guidance. All you can do now
is start painting. Either get paint with
me and if you feel that you don't know how to paint or you need
some reminders, feel free to watch this class. But yes, I welcome you to
now enjoy the process, put on your favorite music,
take some deep breath. Deep breath out. Deep breath
in, and deep breath out. Just calm your body because art is all about
enjoying the process. It's not a race. It is not a race and we are not running in a race to paint better from some
artist or something. No. Okay. So yes, the important reminders to
give you before you start, trace the template,
mix your colors well, choose two colors
choose red and green. For this piece, you
can choose any of your favorite like magenta or any
of your favorite two colors, mix them nicely in the
light tuna values. Like this is my light
tuna value for green, and this is for dark for red. And, um, this is light for
red and this is dark for red. Okay? Make sure you test them and you feel
happy about it. And yeah, and just, you know, let's get started. Okay. So let me test it for you. This is going to
be my red light, and this is going to be my dark. I'm pretty happy. I like this is going to
be a light green, and this is going
to be my dark green which I will be putting in. See you have not mastered the whole watercolor
techniques and everything. Give yourself some space, give your art some space, give your art some love and yourself some love and don't judge while you are painting. Never judge because
it's always a journey. It's always a journey.
Let's get started. This is just one technique
which I'm telling you on the basis of which you are going to
paint so beautiful. I'm so excited for
you. Yeah, because you're most welcome to learn all the techniques in my
watercolor bigner course. But for now, just
enjoy this process. I'll be using two brushes. I'll be painting first
the flower leaf, then I will painting the
green and then in the last, I will be painting the center. If you want, you can definitely see how I'm painting
and what I'm doing. I'm just using the
same technique, giving my leaf the first and be careful
about the marches. Using the brush roop method. If you don't know it, it's okay. Then depending on how
much space my paper has for me to hold
the wet things, I'm just pushing it in. Okay, push it in
wherever you feel like. I usually push it in near the center and a
little bit on the top. If you want, you can
push it a little bit on the outlines on the
margins as well. That's it. Or you can just
put it near the center. Let it flow. Now I'm going to leave one petal so that it
don't bleed into each other. This might be important
point to note. Don't just paint this one, leave this one and
paint this one. Okay. Yeah, I hope that's clear. And at this time,
your paper really, really plays a very important
role as you can see how much your paper can hold
water and flow the water. It all depends on that. Yes, if you have any questions, feel free to put it in the
comment project section. I'll be happy to answer and
I will be so willing to see your projects.
Enjoy the flows. Just really, you know,
soften yourself. Just play some good
music and enjoy it. I might go a little fast
because my paper is forgiving. So I am planning to
paint two at a time, but if your paper is not that forgiving in this sense doesn't hold
that much of water. Paint one by one. You know the drill now and
just enjoy the process. Always always remember
this, enjoy the process. That's the whole whole
point of painting. Why are we painting?
If we just forget this first rule of enjoying
the process, feeling the joy, I feel the whole aim
of painting just goes in the bin if you don't enjoy the process and
keep judging, definitely. If it is your first, second, or even, you know, fifth or sixth painting, you are not going to paint
like Monnet or im wimpy. But yes, you're going to paint like you and you're
going to have fun. Believe me, all of my
students who, you know, making a noise in the world, who are have reached to the level where they want is because they have
enjoyed the process. That's the only thing, see, I'm just floating it here and
there and don't think that, where should I put it? There is no hard and fast rules. Yes, along the center,
it looks the best. More we will study Y and
all in our further courses, in our further classes. But as of now, just
one thing at a time. I always feel that whenever we take any
tutorial, we take any class, we should learn one thing
and then practice it because what is the point of learning so many
things and not doing it? That's what I do in
all of my courses, I make so many projects
around one technique, around one thing so
that my students get to know it by
heart. All right. I'm almost done
with my red ones. After this, I'll
just wash my brushes and I will start with the green. I'll just start with the green
and then later in the end, we will come to the center. Again. I'm going to erase
these penclines later. If you want, you can make
them lighter before. Now I have to blend it. I've not told you blending in this. I just want to tell
you what's waiting for you more in the
upcoming lessons. Yes, this one, this cute
little one is left. Let's do this one using
the same technique. The adjacent petals
are almost dried, so they're not bleeding in. Okay. It's lovely.
I'm not judging here. I'm just seeing how I am
feeling and I really feel good to be able to feign this
and so much fun I enjoy. Okay. Now let me
wash my brushes, and we're going to give all of these green petals,
right? Am I right? Yeah. Yeah, I'm just, great. Let me wash my brushes.
9. Painting full piece-part-2: Okay, so my brushes are
washed and I'm ready. Similarly, I'm going to put
a lot of giving a bath. If you have not watched my basic techniques video in this sceltaw
itself, go watch it. It will give you a
lot of idea, but yes, I have a complete course on it with all the
techniques in detail. I love to welcome
you for that to continue your journey
and to take it forward. I really don't want
you to stop here. Yeah. Similarly, make
sure that your reds are properly dried before
you start your greens, or if you are starting like
me without giving them space, then make sure that you
leave a little gaps. Otherwise, there'll be a little bumps in,
although I like it. I'm just going to have
fun with this piece. I just love this technique and, you know, this is the first technique which
I love in my career. And with this, I have made a whole collection
on Society six. I was just thinking that
how bold I am in the start, I've just made the
whole collection on Society's sake you can see that fire in me of showing my art to
the world was so big. And I just made the whole
collection. It is still there. I still sell few pieces here
and there, now and then. But yes, it was just
this one technique. Now if I see that, I'm like, Oh my God, Richa. What have you done?
It's amazing. It's amazing. We have done our gracious. I would really love to see all of your work in the
project sections because I've done this similar class many a times with my
physical students. They just come out so
different and so beautiful. I would love to see
yours. However it is. If you're not happy
with one time, go ahead and paint many
time using this technique. It might not come
because I know it. It might not come, as you want. This is no beautiful
or not beautiful. It might not come as
you want in one go. Use this technique, practice it, and paint many a time
with this technique. I'm just mixing a little
darker green here. I have put blue in
the green, okay? I put I've taken my green and I have put a
little blue in it with which I'm going to give some stems
and some different elements. If you're not able to yet make these lines and all of
the things with your hand. Practice. One tick trip I'm
going to tell you here is that you're allowed
to move your paper. Just twist and turn your paper. I'm holding my brush very loose, and I'm just giving my
hand rest on the paper. This is loose and I'm not
putting any pressure. That's how I am making
and top will be shorter, middle will be the longest. That's how we're painting and my brush has really good tip. It's a very good tip
brush, if you see. Definitely, the brush has a very big role in
making these lines. I'm loading color only
in the tip of my brush. I'm using almost holding
my brush at 90 degree. Observe it. We've already done
it in the element section, so it might help you. Practice it. If you
are not comfortable with this practice will help you or you can make it
with a marker as of now, if you're gifting this
piece to someone, then you can always
make it with a marker. Initially, but I would
say that go practice it. I've changed the
tone of green a bit. I'll add a bit of this in the older ones as well just to give a little color harmony. That they don't feel that
it doesn't have this color. I don't want to make my pieces look different
from each other. This still turn your paper. Make it as you want
it as per your hand. Okay. Now we are left
with these greens. Yes. These are the cherries, which we will paint
with pink again. I'm just making their stems. Using the same technique
of making lines and making the elements. Using your brush. No rocket signs,
it's just practice. If you want, you can
use a smaller brush definitely for all of them. These are going to
be a little tricky. I'm telling you from experience,
use a smaller brush. Use a really smaller brush. I'm using a six
number brush because my hand is a little
trained painting so far, but use a smaller
brush for yourself. That'll be a good
thing to start with. I'm just painting it
lightly with my green, the lighter one, same technique. Make sure that you remove the excess water by swiping it out from the
edge of your brush. I'm just one side. I'm just putting it here. Like this. We can always come
back and when they dry and give it a little more
definition if we want. But now I'm taking my red again and doing the
similar way the cherries. See it has a lot of water. I'm swiping out the excess water from the edge of my brush. Make sure that you're having fun and you're
enjoying the process. That's really important. That's really, really important. All that matters is
that you're having fun. It's okay if things doesn't come the way
you want them to. It's totally okay. Give space, give compassion to your art. While you're
painting, just focus on observing and having fun, just seeing it, not fixing
it while you're painting. When you're done and
I fully imbibed, embrace that joy in your body, then we can always come back
to our paintings and see. Now let's see how I
want to improve it, what I can improve,
what techniques I want to learn, all those things. Now the center. For the center, I'm going to I'm just going to make dots with different
different yellows. I'm just going to make dots
with the lemon yellow, like in this combog first. It is just dots. Nothing else with three colors. I hope you can see it. Let me put my camera a
little more down. I'll just make the
dots with this one. Okay. Now, what are you going to take a
little yellow ochre. Okay. I'm just going
to make dots in between with a yellow ochre, which is little
darker than this. Now I'm going to
take this buniana this one and darker consistency. If I show you the tonal value
is something like this. I'm going to take it only
at the brush and I'm just going to put it. More on the sides because
the sides are darker. And a little bit on
the center. That's it. Now we'll wait for
it to fully dry. You can definitely
stop it here as well, or you can make these lines. These lines where it
is completely dried. Take a darker tonal
value of red and green and we will be
making these lines, giving this splatter,
all the highlights. But although this past feels really good and complete to me, I just want to for those I
want to have little fun. If you're not a big nun, if
you have done more paintings, then feel free to add more
tonal values here and there, use more colors, have
more fun with this piece. Instead of just using
one color and one petal, you can use different colors
and different petals. Just using this technique
and having fun. That's what you can do to have fun and paint this
beautiful piece with me. Let it dry completely, then we'll come back
and add these lines. Okay?
10. Final words + opportunity to paint more: Congratulations. You have
finished this piece. You have come to the
end of the class. I really, really appreciate you for coming over
till this point, making the piece,
learning something new. And I'm sure you must have enjoyed the whole
class and the process. I'm so excited to
see your assignment. So to make sure that you submit your assignment
in the project section. Also, there's a
special bonus for you. There's a complete eBook
with templates like this. And more filled
with this and more, which you can download, trace and continue
your painting journey. And if you are excited to
learn all about water colors, to know how to paint it from
references on your own, experience, I paint
many flowers. I congratulate me to JM on
Instagram or mail me after I travel through my canvas and do join me inside my bigner code. We will be painting
many more flowers together and understanding
what it colours completely. I so wish you to
see inside. Why?
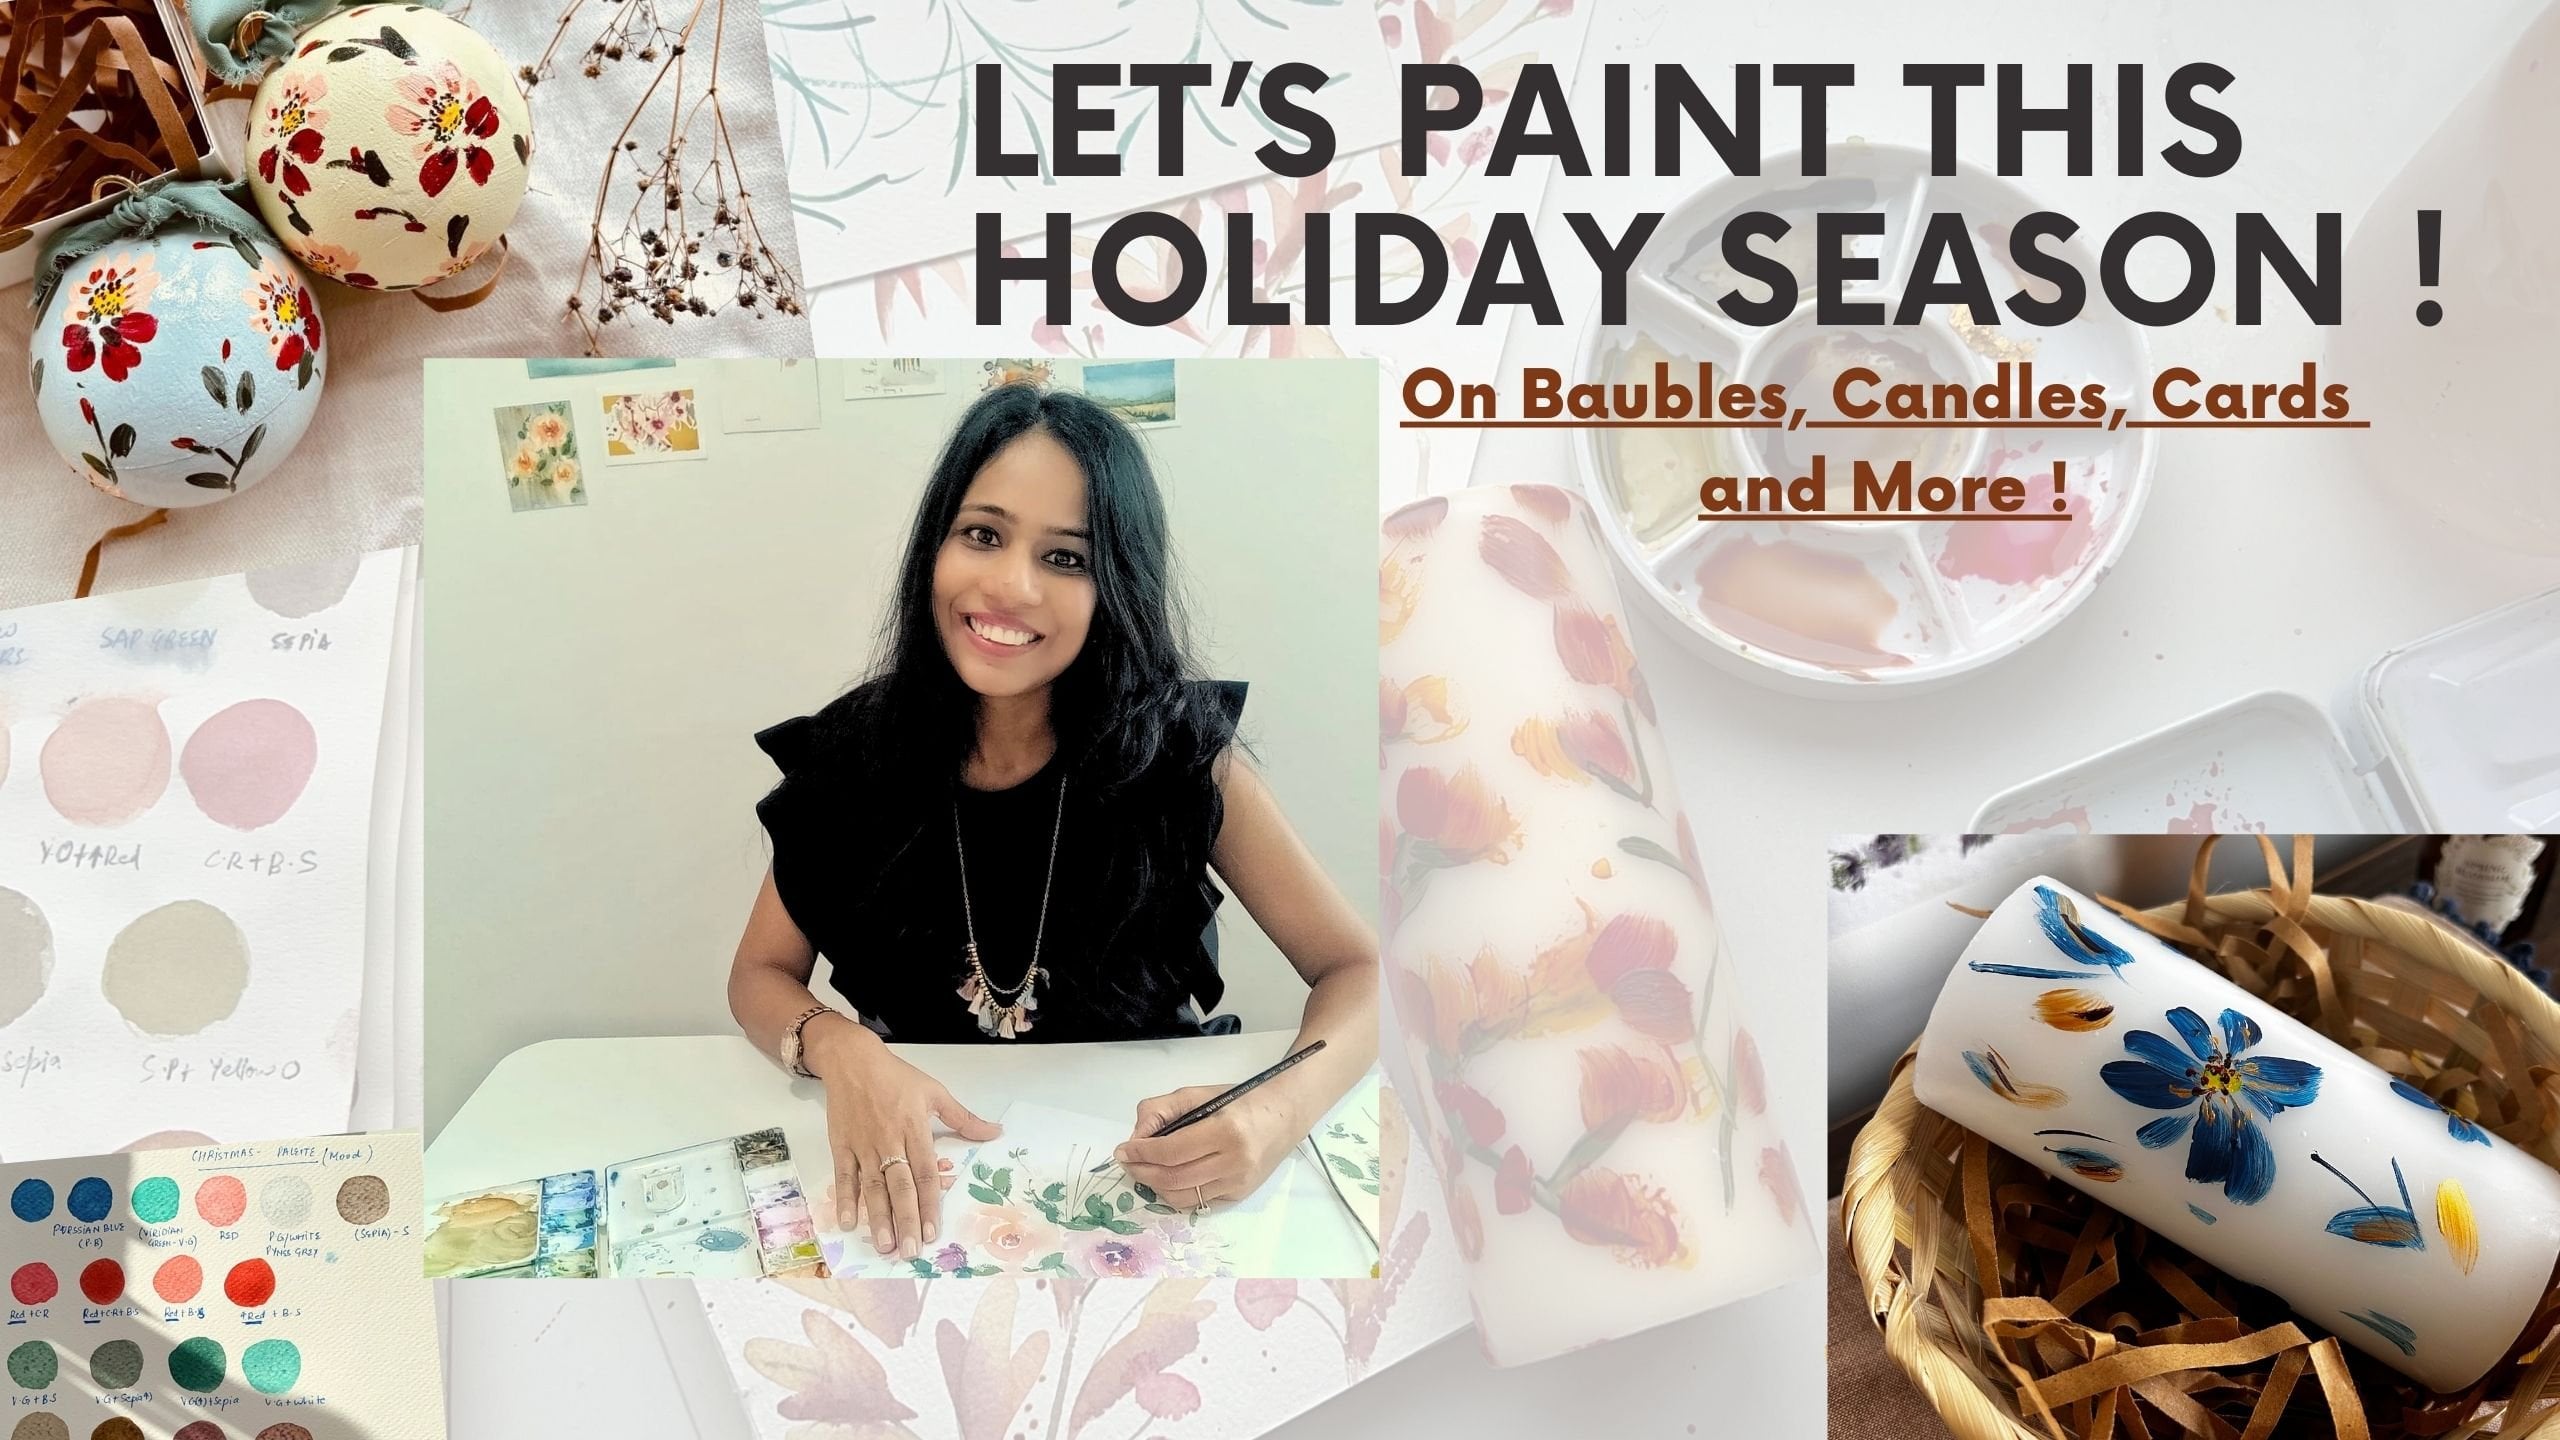
 Richa Aggarwal, Watercolor artist, educator and designer