Transcripts
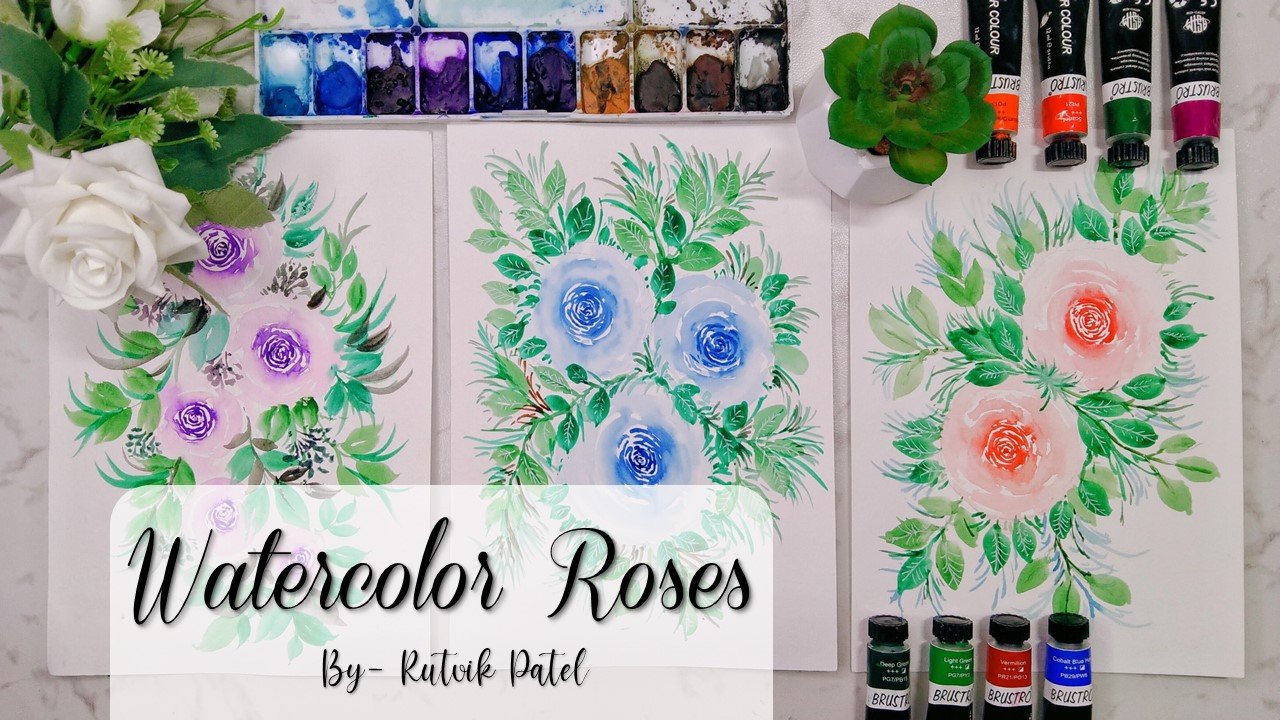
1. Introduction: Postcards are one of the most traditional old-school. They often mean a message or wishing your friends and family waters, you make your own boast done with your message. If you are an artist and want to create your own postcards, then this class is definitely for you. Hello everybody, myself, protect Padilla. I am self-taught independent artist based in Gujarat, India. I'm also a professional in DDO designer. And a lot of you who might not be knowing me and had joined me recently can find most of my art boards being displayed on Instagram. I go by the name DJ transitions. So for this class, I'll be giving you all the details amount that people are being used. We will be also learning how to tape down your paper onto your sheet. I'll be giving you each and every day daily amount the colors that we are going to use, the blending and the water capacity that you have to keep it on your brush. It'll be learning about the color palette. I'll be giving you each and every day do about the flowers that we are going to paint. We are willing to make three beautiful bulls aren't based on thorough team. We will be learning how you can give this nice, beautiful leaves in the background. And I didn't your message onto your whole sky. The techniques that you will require to demo the day. The glass is best suited for all level artist from beginners to advanced level. I'm very sure that you are going to love this class. The class is designed in a sequence so that you do not miss any step and understand everything clearly. So without any delay, grab your supplies and join me in creating this beautiful floral postcards.
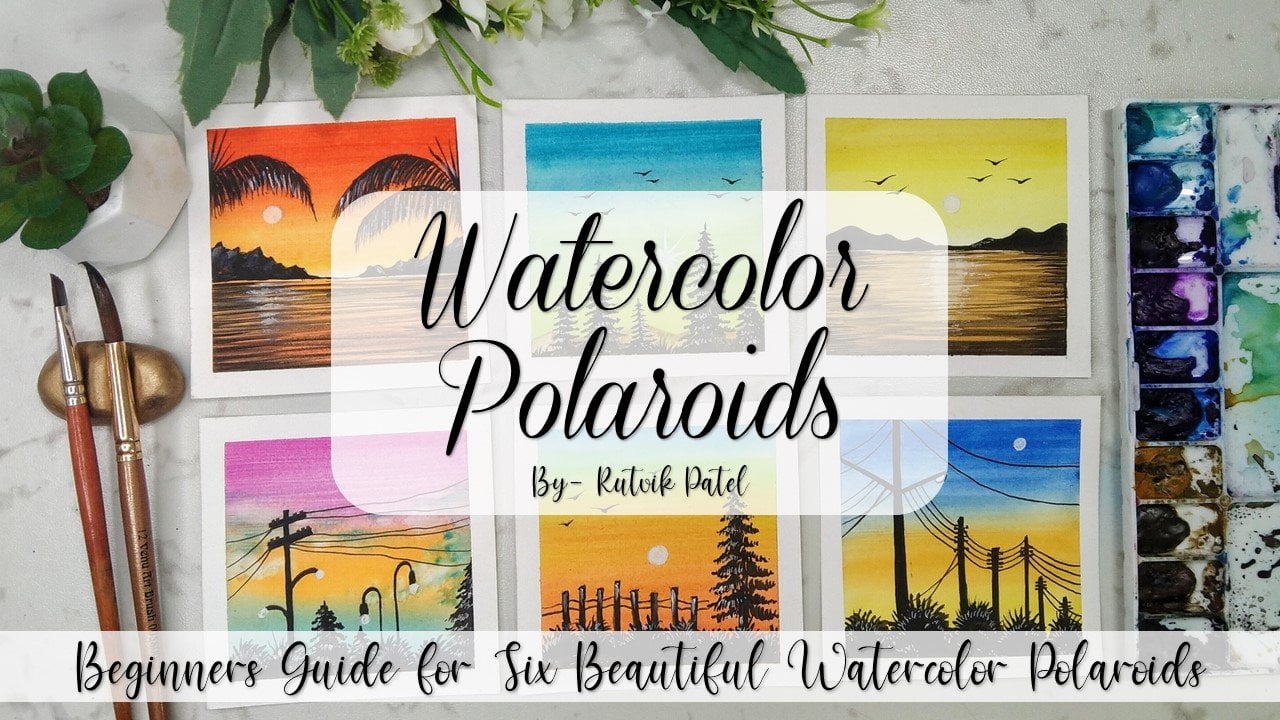
2. Art Supplies: Hey everybody, before we start making our postcards, let me take you towards all the art supplies that you will require for this entire glass. So let me first introduce you towards the people that I'm using. Canson watercolor paper. These are basically artist grade watercolor paper. And the most important thing that you have to observe is that bees are 300 GSM and these are cold pressed papers. So it is very important that you use a very good quality of watercolor papers so that you get a nice output. Now, let me take you towards the color palette. So this is basically a nice organizer or your watercolors. And you also have a nice mixing space for your colors. So it's a very handy and gone back palette. You can definitely find it on any local stationery or any art supply store. For the entire class, we'll be using a single brush, which is a round brush size 12 from Campbell. Then we will be using a black pen, which is from Jelly Roll and by Ben from Sakura Gelly Roll as well. And the basic stationary which is a benzyl. Now that everyone must be having a one inch masking tape, which we will be using for taping down our paper. Now, this is a simple spray bottle night you'll find on any local stationery, which we'll be using for loosening up our colors. A simple scissors for cutting down. Now, this is something very important. It is our simple BBC board. On this board we'll be placing our watercolor paper so that you can easily rotate it or move it according to your requirement. Definitely a glass jar with water, a nice ceramic palette. If you do not have the organizer, then you can use a ceramic palette as well. So these are all the materials we will decline for the class.
3. Taping the paper: Before we start our postcard meeting, it is very important to know, have you tape down your paper. I have simply gotten down. And if I cheat on my watercolor paper into two equal half. So only be visible. Tried to place your paper on the center so that you get the right alignment. This is a sample PVC board that you'll find on any nearby local stationery. Once you place your watercolor paper on the BBC born. So now I have my one-inch masking day, which plays on the top portion first tried to keep half portion of the masking tape on the paper and half on the BBC board. Then simply tap your finger on it and make sure that you do not leave any air bubbles between the people and the masking tape. Similarly will be pasting the masking tape on all the edges. Make sure that you do not place your masking tape, flight and an angle, try to keep it parallel with the people edge. And finally, we'll be basting the last one on the bottom. So that's it. We are good to go and we can start making our postcard.
4. Post card - 1: Hey everybody, welcome back to the first postcard, which is the purple rose pattern. Now, before starting the postcard, just take your one inch masking tape and cut it into two equal halves. With Aziza. The masking tape is sticky on one side, so you have to cut it very carefully. Try to have a straight line. And we are done. As you can see that I had cut it into half and I'm just placing it on the center portion of our taped it down watercolor paper. Now, after placing it, just rubbed down your finger gently on it. Now the colors are available well, mainly on dark green and light green that we will be requiring for this particular post car. Now, a new color palette, just simply take certain darker values of your vocal. Mix it well, now I'm having a simple round brush size stratum. And you can observe the moment I'm making. We are making our fault rules. Just below that we had pasted in the center of our watercolor paper where we are going to write our message. As you can see, I'm just making certain random down and omens bit darker values of profit. Now, I had just simply cleaned up my brush in the water last John. And diet up on your napkin. And again, make these random circular movements around the darker values. And you can observe that we had got a nice depth and the rows. Now, similarly, you have to repeat the same process we are making. Another roles about the meetings are done at random circular, baton, bit darker values of purple. And again, I'm cleaning up my brush and drying it on the napkin. Again, you have to make these circular movement around the darker values so that you get these nice depth towards your rules. If you find any difficulty in being deemed these roses. You can take a draft gray buffed paper, draft sketch book that you use for practicing and practice these roses on that first, and then you can come to your final postcard. Now, I'm willing with my third rows just below the omega-1. The method is same. You just have to simply dab your brush in the manner I'm doing right now. And it's really easy guys, you just have to practice it. And similarly, we have some more roses around. So I had just passed on up the video because the processes theme. If you want to paint between, you can slow down the video. There is an option below main shown that vile painting on the outer portion, you do not have access amount of water on your brush. Because as you will have more amount of water in your brush, then it will definitely follow your painting. And we are done with the roses. So now we're going to be taking the green values for painting our leaves. I'm taking some fab green and some light green into my color palette and mixing it well. Again, we are taking certain DACA dorms and you have to draw the leaves in this manner. So as you can observe that in any bland or in any floral gland, basically, the leaves are scattered in a random manner. So apart from the roses, you have to draw these beautiful green leaves. In the remaining portion. We are just simply filling up that gap. Now, what happens is that initially we have to put some darker values of the leaves. And then when they are coming towards the outer portion in the post can't really be going through the lighter values. Repeat the process slowly and at, not at all necessary, that you paint the same way I'm painting. You can draw the leaves any value 12. Just make sure that you paint the dark armies nearer to the roses. And the are just simply drawing these random changes so that we can get a nice dense foliage. Adding up some more leaves. And you can see how the moment is. You have to just make two simple movement. Your brush. Now to make the boards for the rules, we are just using our watermelon and I'm just taking certain darker values and mixing it in my color palette. Again, make sure that you do not have access amount of water in your brush. Now just simply dab your brush tip, which is pointed and make sudden random dots and make it towards the liberal goals so that it looks as if it's reading from the tape back we had pasted in the center. Try to keep these small buds in a random fashion so that it looks more natural. The same process you have to repeat on the above ocean. Now to make your entire floral print are little bit denser and without good folly age we are adding these extra lines. Now very carefully, remove the centrality that we visited in the center, then wit and an angle so that you get a nice crisp edge and we have a nice base to write our message in between. So use your pencil first if you are not mad much confident, writing it with your pen directly. So for this particular card, I'm guiding message of happy bought today. You can go for any message you want to. I'm just giving you an example. So with benzyl, I had just simply written happy birthday on the same data. Once you find it, correct, you can use your black pen and trace it. Bam, just simply using my black pen. Drums are pleura. It's not necessary to use the same. You can go for any other black men also. I'd simply redundant message with my black pen or pencil. And you can see it looks beautiful. Now to highlight certain portions I'm just filling up at with black color so that it looks even more beautiful. I had used are specific texts which I had only design. You can go for any other texts as well which you before. So you can see that our postcard is ready and now we'll be removing our side deep. Be very much careful by removing those are built because you can end up by during your paper also, try to demo this idea and an angle so that you can carefully do it. And you can see that we hadn't gone to a very nice and crisp edge. When the last one. And our Bose is ready with our palm oil rose print. I hope that you liked the post con. Free to add your project into the project gallery.
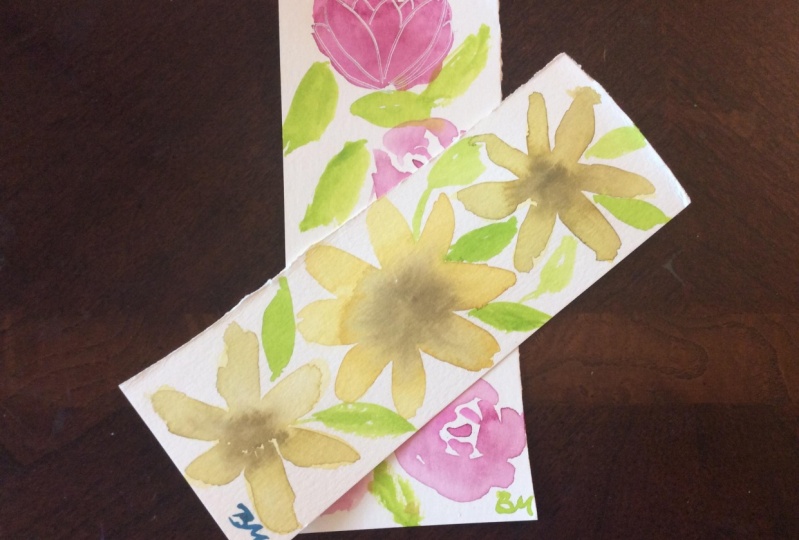
5. Post card - 2: Hey everybody, welcome back to the second postcard, which is fresh plant flowers. Among all the three postcards, this is my favorite one. So now will be simply starting with basting. Do one inch masking tape, one about the ADA. As you can see. It's very easy, no need to worry. Just take two pieces of your masking tape and based one on another. Now, we'll be simply basing it on the center portion of our watercolor paper. After placing it, just simply tap your finger gently on it so that you do not leave any air bubble in between the paper and the tape. The colors which we will require for the particular postcard is the yellow line, dream that dream and cadmium orange. Then I'll, I'm just simply digging my benzyl and we'll be drawing these unplanned. It's very easy. We are just drawing these on blogs around the central date so that we can meet the foliage, come out of the message. To beat the same process I had just passed on up the video. If you want to draw with me, you can slow down the video and there's an option below. Just randomly draw these fun class. It's not compulsory to draw that same day I am doing you can draw it according to your b. Also. Make sure that you do not draw these dyes on, doesn't flower too large. Now we are taking our pale yellow, mixing it with certain amount of water, tried to have a darker value and some cadmium orange. So now I'm starting to paint the petals. Just observed the moment of my brush. We are just simply overlapping on the benzene. And you can see that we have got a nice blend of our Bailey yellow and cadmium orange. So similarly, you have to paint all your sunflowers. And this method, it's very easy as you can see, we have just simply taken our color values and our brush with minimum water. And we have to just simply trace it on the pencil. Make sure that you do not have access amount of water in your brush that could definitely spoil your painting. Try to have our tissue napkin side-by-side so that you can tap your branch on it and access the amount of water is being removed. So repeating the same process I had just passed on up the video so that we have put time utilization. If you are painting with me, you have a option to slow down the video. So we are almost done with all our sun glass. But for you to understand even more clearly and just zoned in so that you can observe the brush moment even more in detail. And you can see that are just moving the brush back and forth. And the sunflower is ready. After painting the entire sunflower, there is these black center portion, which is the very interesting element in Northern Florida. Now, we have to just simply take our brush and dab black color in-between. Try to have minimum amount of water in your brush. I'm basically using the tip of my round brush, which is very much pointed so that you get these nice little dots of your black color. As you can see that we had done this an aldose and flowers so that it gives a nice contrast with the yellow and orange Blend. If you find any difficulty in painting these fun class, I would like to recommend you that you can false practice it on our rough paper and then come to your final postcard. And now the final one. So we are almost done. So now after putting black into us and devotion, but you can do is just simply take your brush and use it. Final tip and enhance the petals by giving these rough strokes. We're just following the pedal baton and I'm just moving my brush in this direction. As you can see. As you can see that doesn't floss are looking really beautiful. While doing this, make sure that you do not have more water in your brush, drag to have maximum amount of color. Now, after painting the flowers, we are willing to paint our leaves. There'll be, I'm just making a blend of Sap, green. And some values of our light green. Now, initially we are going to use darker values in our leaves so that we can have a nice folly edge around our message. You can absorb the moment of my brush with simple tools, strokes. We can paint our leaves. I'm giving some random branches so that it makes, are both Scott even more beautiful. No need to switch your brushes. You can do this with the same brush. You want to know that detail about the brush. Size 12 around branch. The ban I'm using is from gamble. You can go for any other good alternative as well. So I'm adding some more leaves. And as you can see that we had added darker leaves around the flowers. And then we'll be adding the lighter tone beads on the outskirts of our postcard. Adding these random strokes is very easy. You just have to use your brush tip, which is pointed and you can get these random strokes. If you find any difficulty in doing this, then you conduct as it on paper, paper fault. Now we are just putting some lighter tone leaves. I had just simply add in some cadmium yellow and orange and do sap green. And I had blended it so that we get lighter tone leaves. And as you can see that we had given DACA don't leaves New York today. And we are putting our lighter tone leaves on the outskirts of the postcard that it gets a nice contrast. And the darker values are near to the message. As you can see, it is very easy to paint these leaves. Tried to fill in the details. So the same process you have to repeat on the upper portion. So I had just felt really fast so that we can consume some more time. Now once we are done with our painting, you can just simply remove the center date which we faced in. I do use your kneel to remove this date and do this very gently because you shouldn't end up by during your watercolor paper. So the message for this particular postcard is missing you. So I just simply done it with benzyl false. And now we'll just trace it with our black pen. The black pen I'm using is from Sakura Gelly Roll. You can go for any other good black pen as well. It's always good to write the message with benzyl forced so that you do not make any mistake, but they'll bend directly. And are both Scott is ready. So now comes the last step which is removing those I taped. Be very much careful while doing this. Try to remove your thigh deep and an angle so that the genres of tearing the paper is less. No need to order. You can do this very slowly also. And make sure that you remove all these items very much carefully. And the postcard is ready and it looks beautifully. Feel free to add your project into the project gallery.
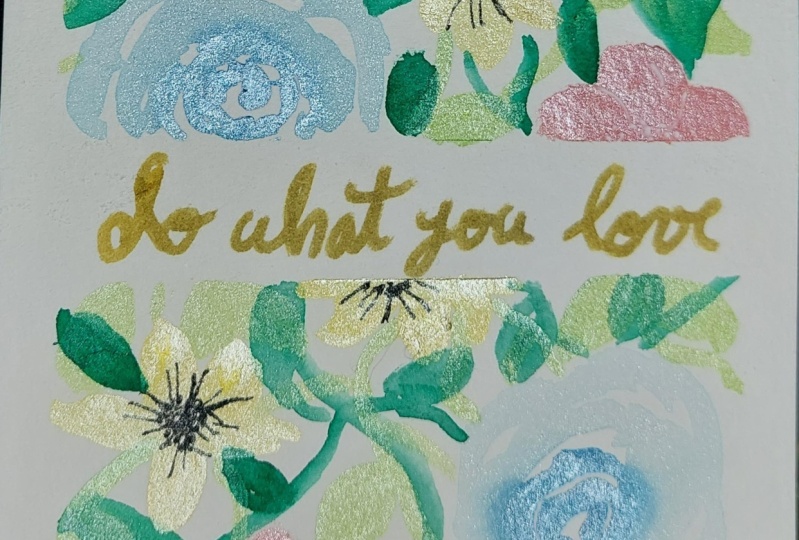
6. Post card - 3 : Hey everybody, welcome back to the purple sky, which is red periwinkle plant. I had simply Dagan do pieces of our masking tape of one edge and just pasted it one below the other. Now take a compass, which is also known as around, which is basic tool to draw circles and put it on the center of your day and draw our smallest alkyl on it. Now what we have to do is that simply cutted to put processor and we are placing it on the bottom portion of our postcard. We are not placing it in the center. If you want to paste it in the center, it is also okay. Close that we will be needing our crimson Sap, Green and Romanian. Now I'm mixing some crimson and vermilion together. Tried to have certain darker values in your brush. So we'll be starting from the edge of the masking D that we just base two. So for the Beethoven concert, larvae have basic five petals and you have to draw the lighter values cause after the blind coat of water, you can take some darker values of your color and then apply it to the first quote. So while doing this, you will get a knife. Blade. So this is basically one way of doing this beautiful flower. And now I'm taking some darker values of my crimson and Romanian together. And we'll just apply it to the flower. Try to paint the flowers around the masking tape so that we can give it a nice foliage around the message. I'm just drawing for battles because the fifth one would be going under the message so that it looks a bit more abstract. You can observe that it is very easy to paint these very wrinkled class. If you find any difficulty in painting these mini flowers, what you can do is that they scrape off paper, audio rough sketch book on which you practice on a daily basis, and try to practice these blobs on that first. And then you can come in and paint it on your final postcard. So now I'm just putting some darker values to the force plan because it looks a little bit lighter in tone. Our ways, one thing you must take get off is that in watercolors, the initial quote that you apply always comes in one-to-one, lighter when it dries up. So similarly, we are drawing the flowers. Now to get you a nice understanding of the moment of branch, I had just zoomed up. The video is a little bit faster now so that we can zoom in some more time. If you are painting with me, you have an option to slow it down. And we are adding some more believable flowers on the upper portion. Now, after painting the flowers, we have our leaves to paint. So we are mixing some sap green and light green together. And we are having certain data values in our branch. Now, try to fill in the spaces in between and make sure that you draw the darker value liens and in-between those large and nearer to the flowers also. It's a simple method. You just need two strokes domain and your leave is ready. So the process is same. You just have to fill in those spaces and make sure that to draw the leaves and lighter dawn on the outskirts and darker tone nearer to the message that we are willing to right. Now, you can draw these random changes. That we generally find in Bush's. So just simply use the tip of your brush and getting these nice pointed edges. After adding some more leaves to dot-dot portion. Now you can observe the leaves which I'm painting and even more detail. So I had just zoned in, tried to observe this drugs that we're making. And at the end we are using that tip so that we can draw these random branches. And it looks really beautiful. Venue remove this I take. Adding these random strokes will add more value to your postcard. And it would look even more beautiful. Rather than painting only the flowers and leaves. You can just simply fill up the whitespaces and also you again, just randomly make it overlap the flowers. So now I'm just adding some lighter leaves on the outskirts, but it's just a blend of that green with water. We are going to add these beautiful sap green leaves on the edge to be the same process. And the lub-dub whitespaces. Also make sure that you do not have access amount of water in your brush that could definitely spoil your painting. Now we are just removing the round masking deep battery based in. Do it very carefully, use your need and scrape it out. Now, the message for this particular post campus with love. I had just done it with pencil and we are tracing it with our black pen. The pen I'm using is from Sakura Gelly Roll. You can use any other good alternative as well. Now I'm using my white pen, which is from Sakura Gelly Roll. And via enhancing our flowers by putting some nice by dots into the center portion. You just simply have to tap your white pen and make these small circles. Do this very randomly so that you'll get a nice value to your flowers. Now we are removing does I tried to remove your side tapes in an angle so that you do not end up tearing your paper. Do it very carefully in all four sides. And our final postcard is ready. Painting this beautiful watercolor floral postcards. And gifting it to your friends and family can hold orderly special value of yours in their heart. I hope that you enjoyed the class and feel free to add your project and do the project gallery as I would love to see your artworks as well.
7. Final thoughts: Hey everybody, I hope that you got to learn something new and creative from this class. If you are a beginner and add started to explore watercolors recently. That one suggestion that I would like to give you is that tried to practice at a maximum level? I know that we all are busy in our day-to-day schedule. But you can give phi 2 10 minutes and practicing watercolors, It's really peaceful and would be really a very nice stuff. But still for you all. I also feel free to ask any questions or doubts you out regarding the class. If you'd like to make glass and got to learn something new, Lu Li will be back as it encourages me to come up with given more creative classes like this. And my glass can reach many more students like you feel free to add your products into the project gallery. Do tag me on Instagram. I would love to repost your work. And happy painting gaze.
 Rutvik Patel, Artist and Instructor