Transcripts
1. UE5 Bootcamp Introduction Video: Hello, and welcome, Evon. My name is Luke, and I'm
a free Die artist with Passion for creating stylized scenes within On real Engine. I currently work with the
amazing team at Free Di Tutor, where our focus is on
crafting online courses and tutorials to share our knowledge with
phisiass like you. We also create free Die
virtual miniature scenes, free Die assets,
material packs and a whole range of free
d related items. Today, I'm frilled
to introduce you our latest and greatest
unreal engine course that we've been working
on so diligently. So get ready to
level up your skills and join us on this
incredible journey. Are you ready to dive
into the world of game development
and level design? Embark on a spectacular
journey into the world of game development with our groundbreaking on
real engine course. This is all inclusive
immersive program that will offer you the
perfect opportunity to elevate your game
development prowess and engineer visually
captivating virtual realms. The course's ten modula
levels meticulously cover the entire spectrum of game
development design from the intricacies of Acid
setup and blending to the nuances of lighting and
cinematic mer techniques. This comprehensive guide leaves no Stern turn in its quest to impart the most
cutting edge skills in a real engine five
environment creation. Season game artists and
budding enthusiasts alike will find this course to be a gold mine of information. The meticulously crafted
curriculum is tailored to accommodate various
skill levels and expertise, ensuring a smooth and effortless learning experience for all. Detailed step by
step instructions, and expert mentorship
guide students through every aspect
of real engine five. Empowering them
with the confidence and knowledge to
excel in their craft. We'll start by teaching
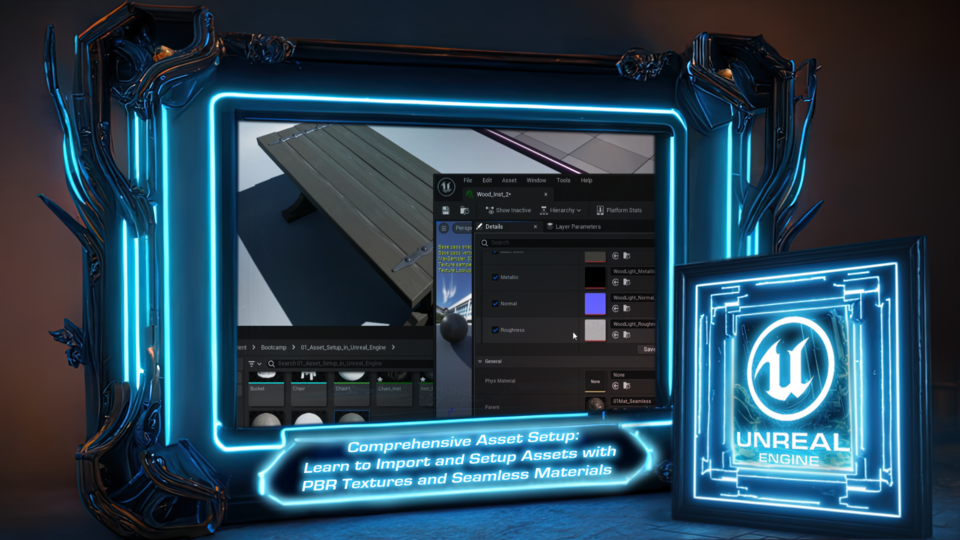
you fundamentals of acid setup where you will learn how to import and
set up FBX meshes, create materials using
FBX texture and set up your own seamless textures for a variety of controls
for the surfaces. Next, we'll dive into the
world of acid blending, discover how to create
vertex pain materials, set up physics based
object scattering, and blend materials
using distance fields. Moving on, we'll
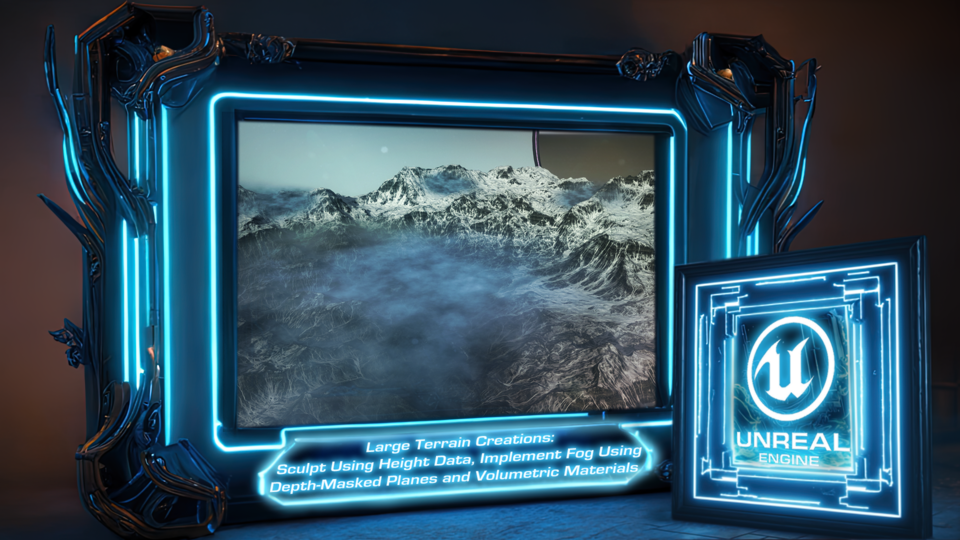
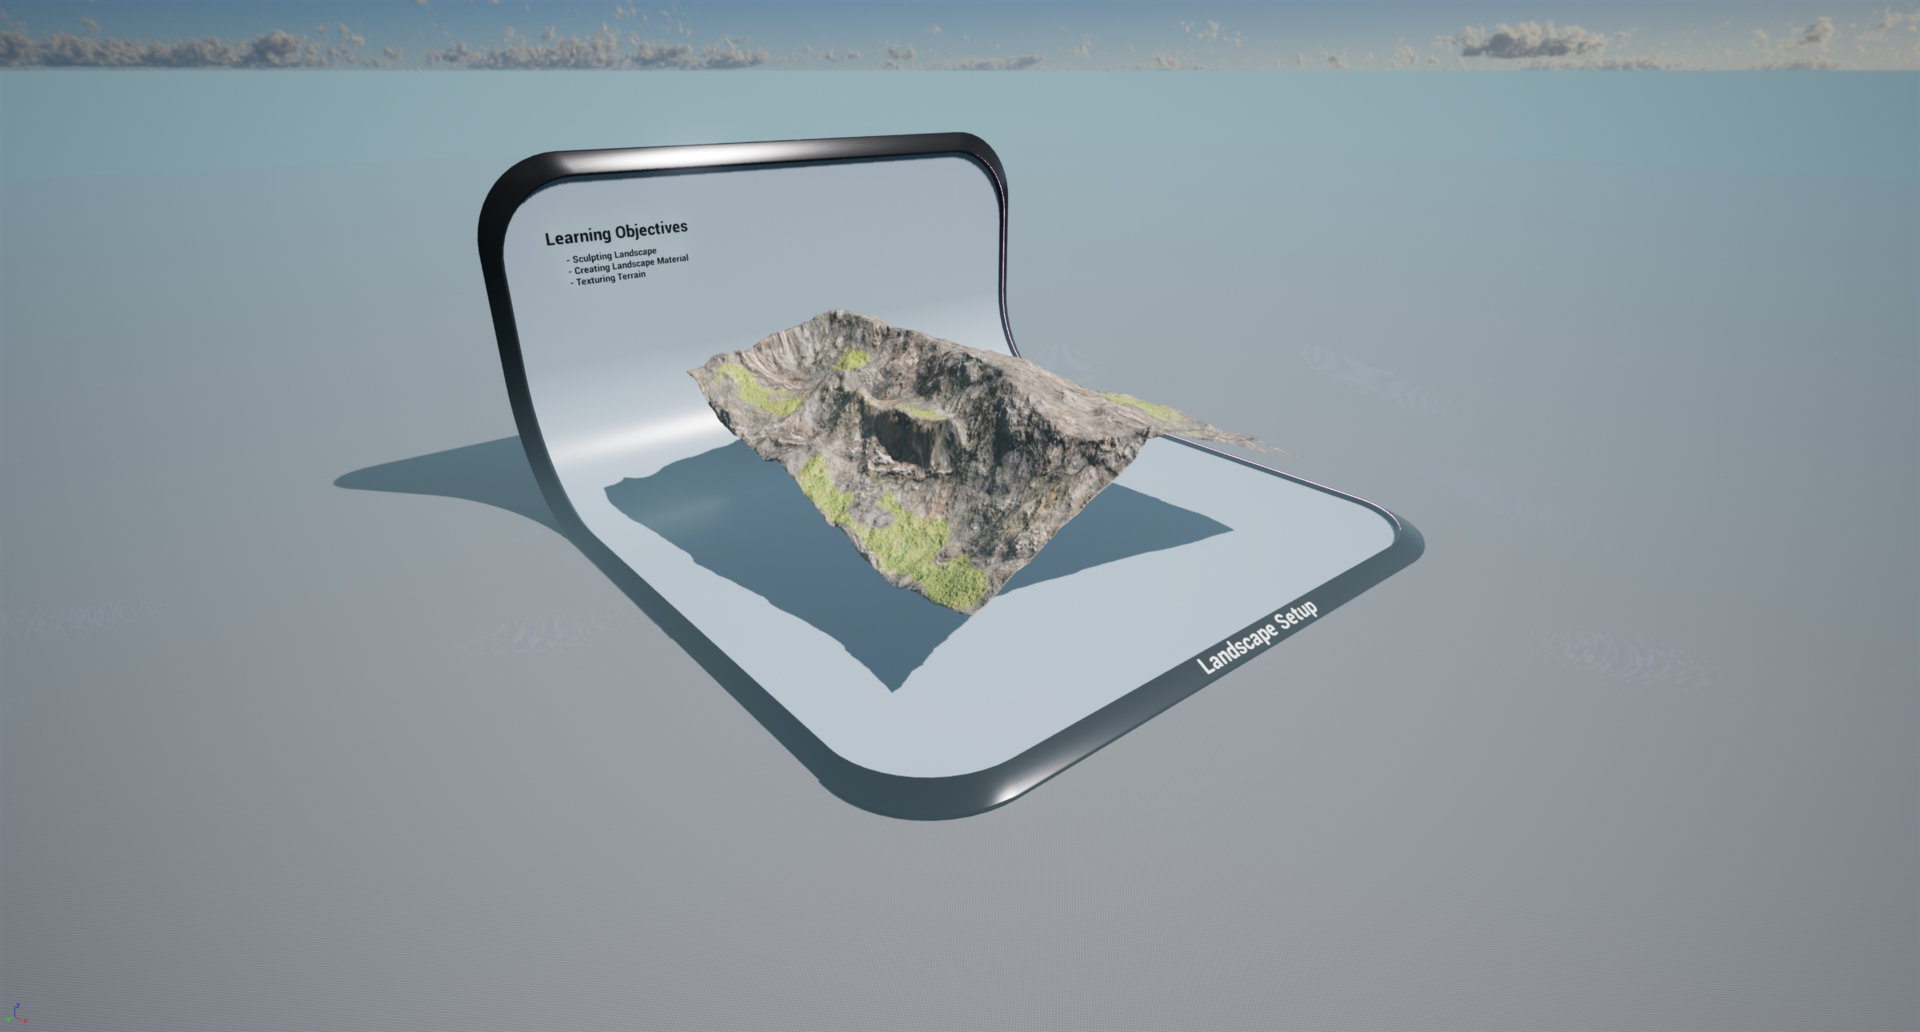
guide you through the rain sculpting
and texturing, where you'll learn how
to sculpt landscapes, create and apply
landscape materials, and blend textures for
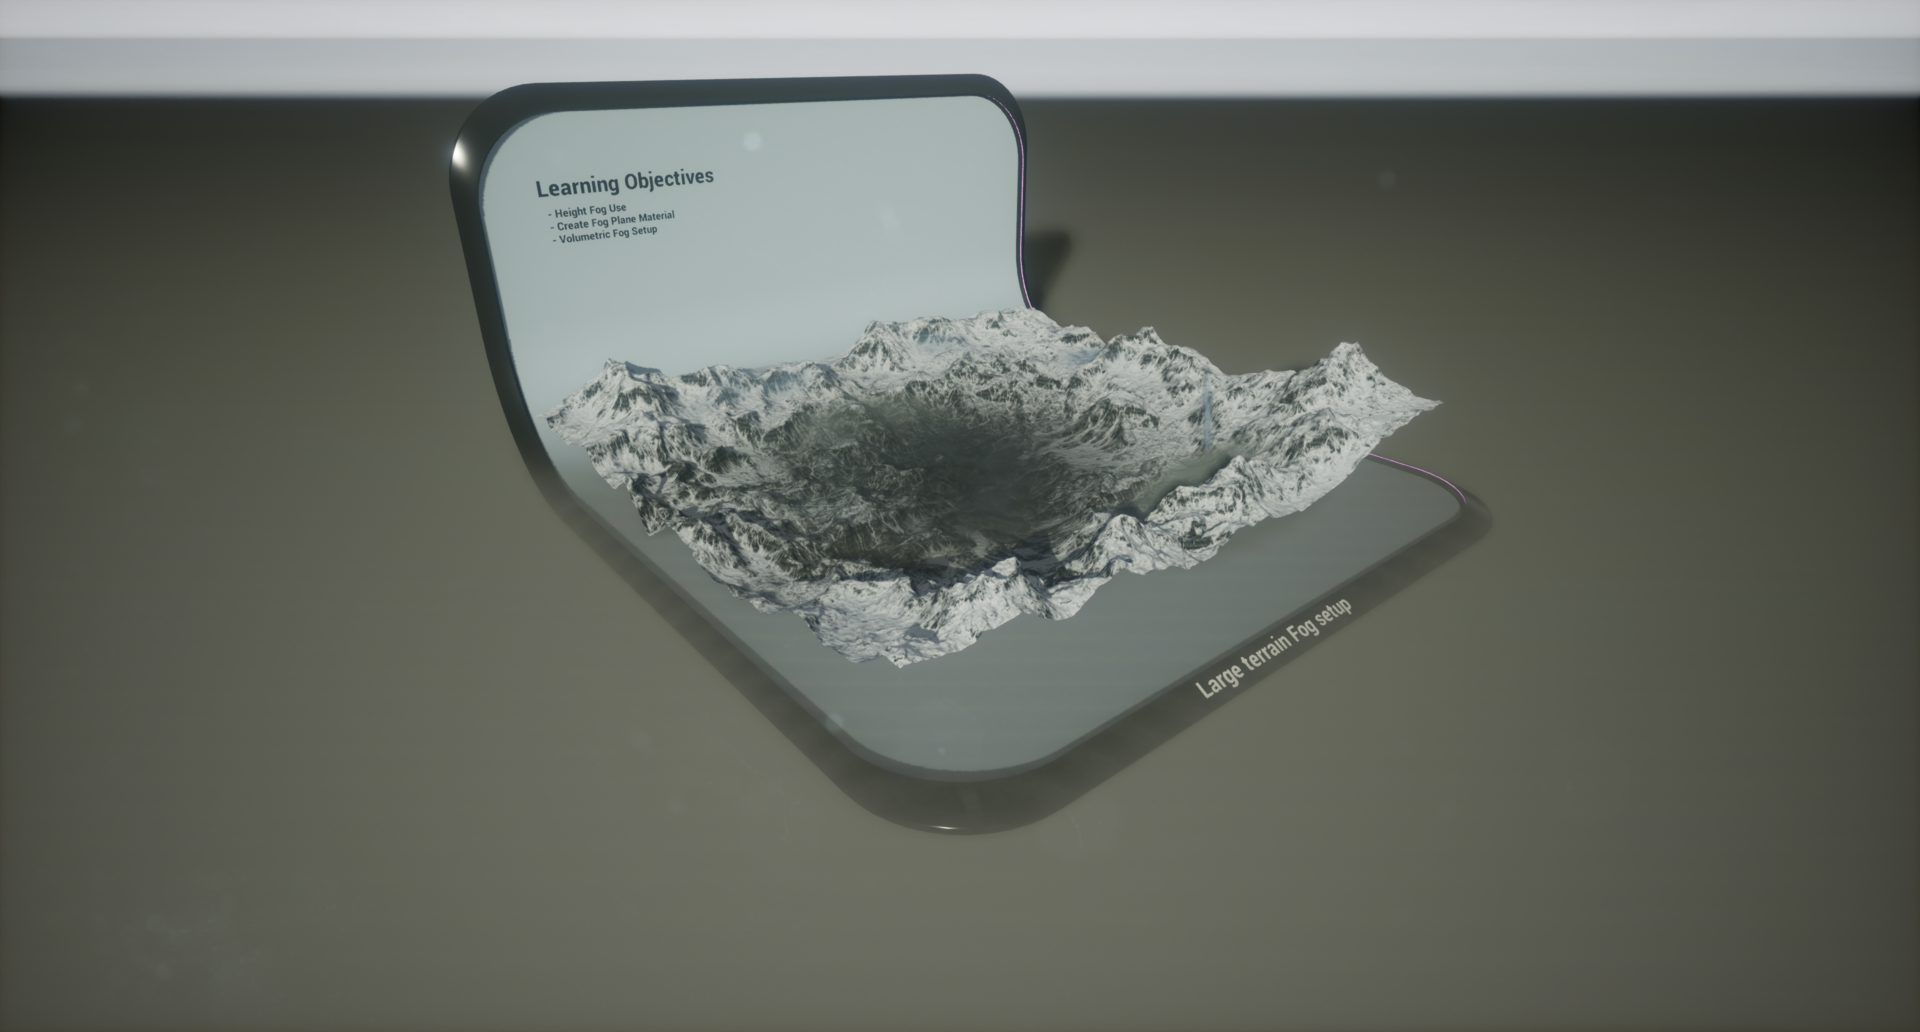
realistic terrain. After that, you'll learn the art of large terrain fog setup, learning how to use hide fog, create folk plane materials, and set up volemetric folk for
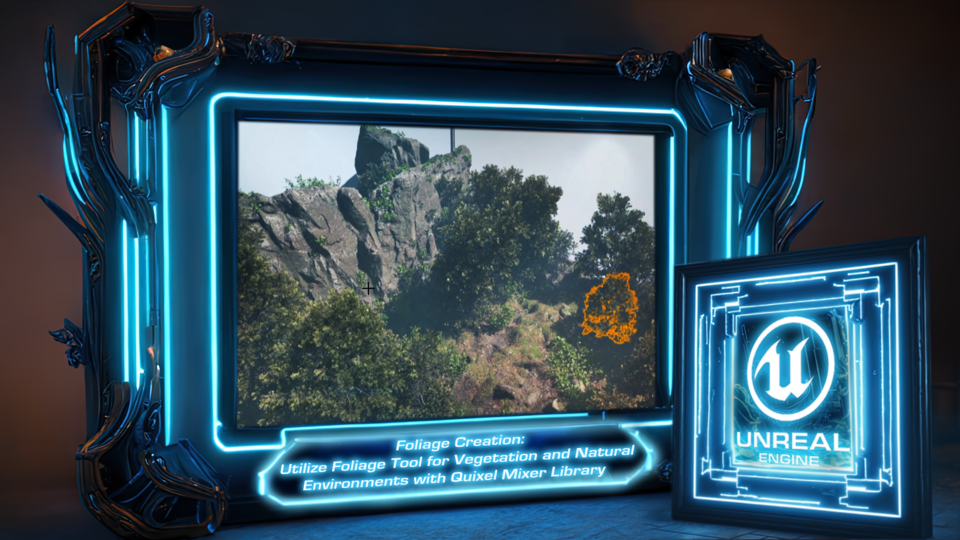
added depth in your scene. Our course also covers the essential techniques for
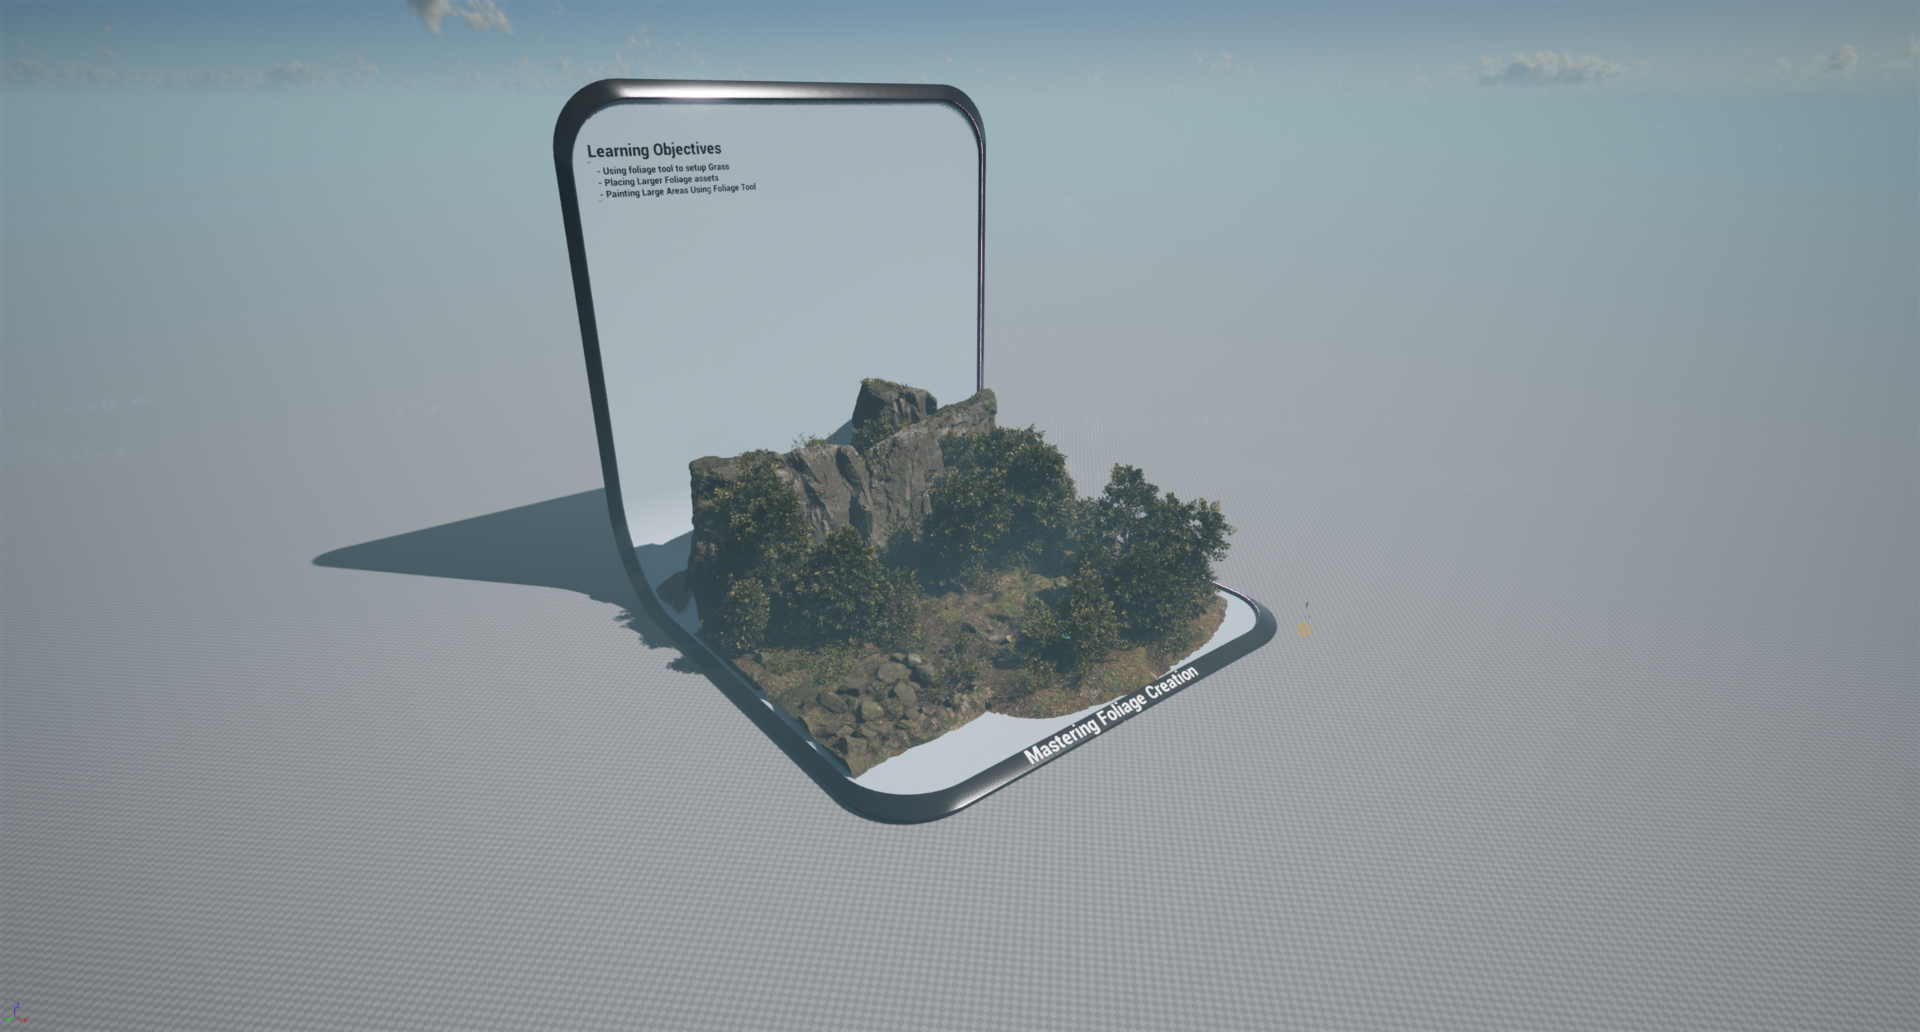
mastering foliage creation, including setting up
grass and shrubs, placing large foliage
assets such as trees, and planting large areas
using the foliage tool. Add excitement to
your environment with our module on
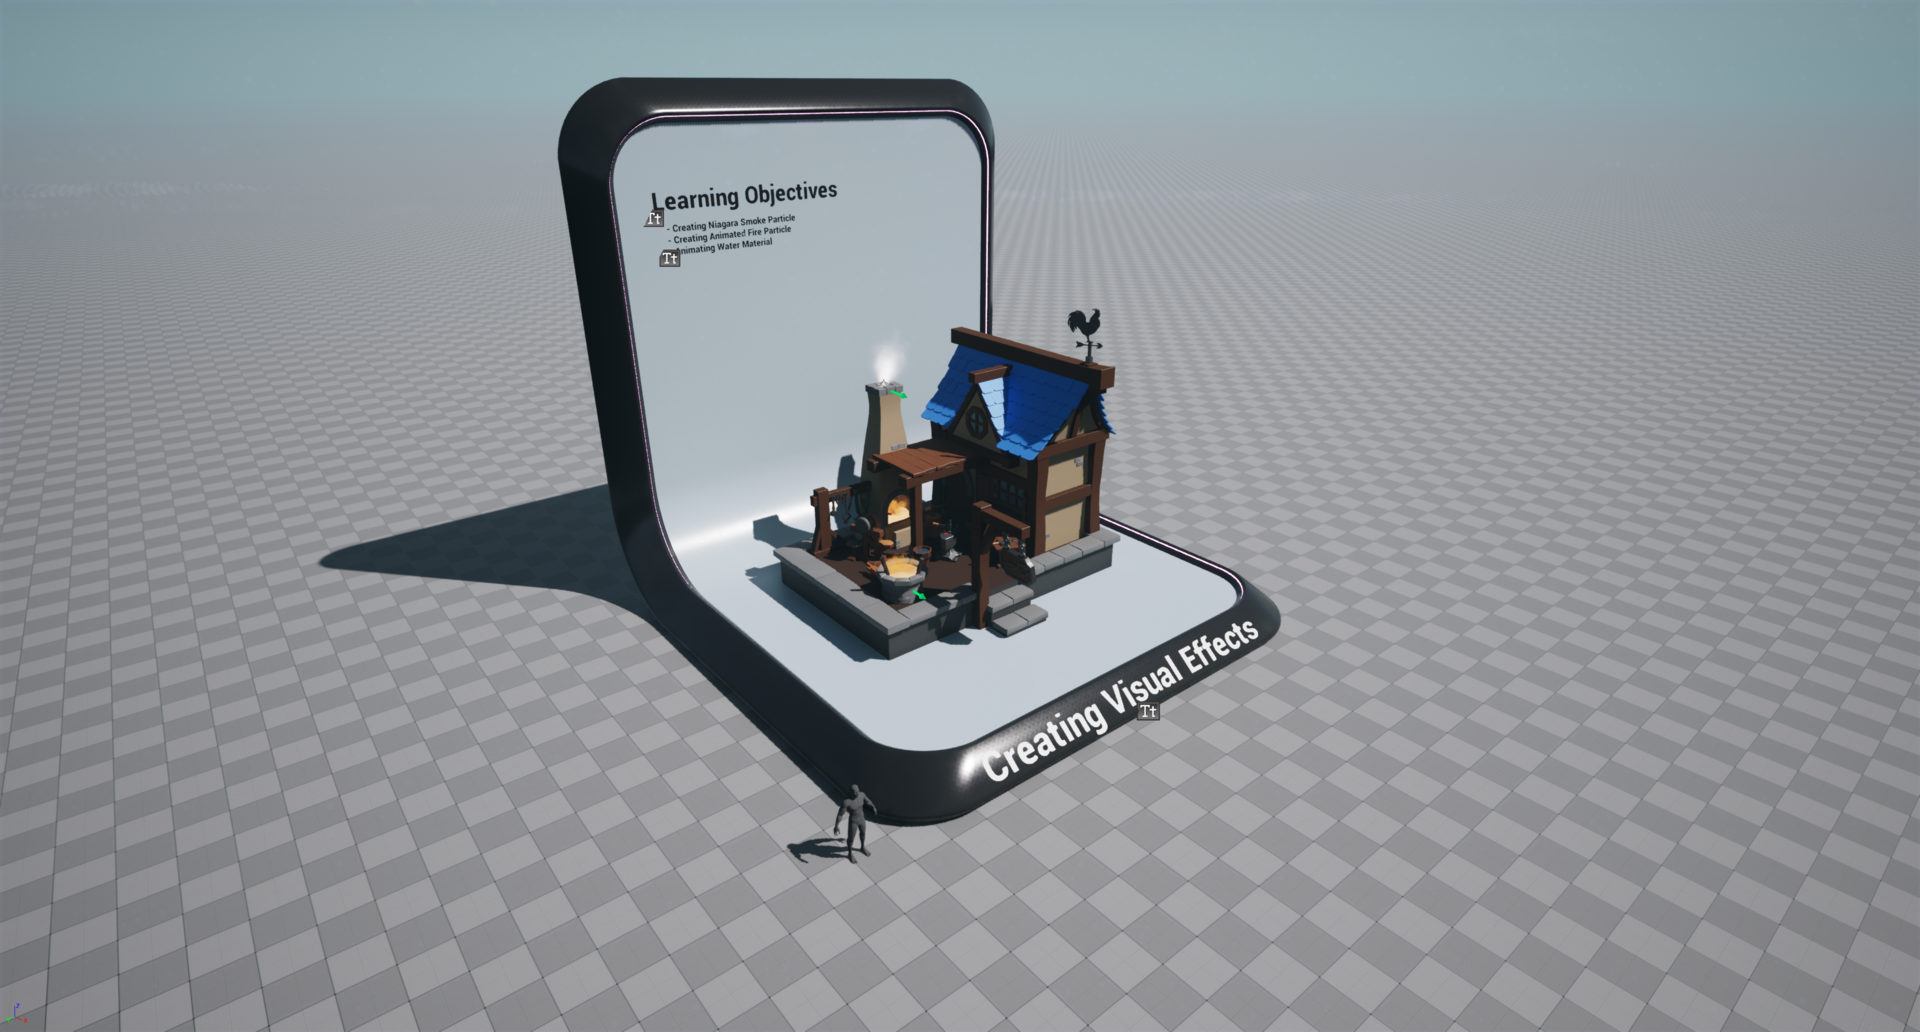
creating visual effects. Learn how to create
realistic smoke and fire using the powerful
Niagara system. And on top of it,
we'll learn how to add water animations onto
the material as well. Lighting is crucial for setting
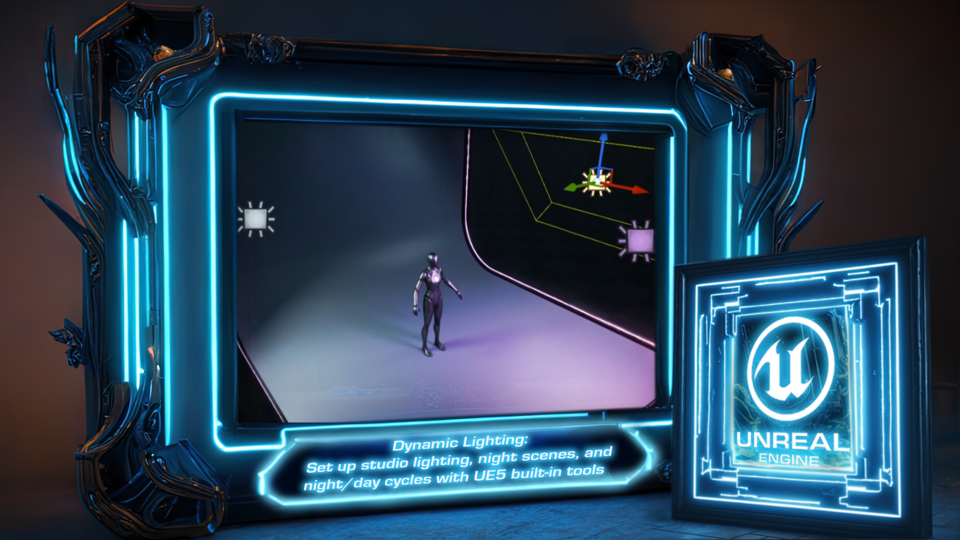
up the mood in any scene. We'll teach you how to create studio lighting, night scenes, and even dynamic
day night cycles using unreal ged
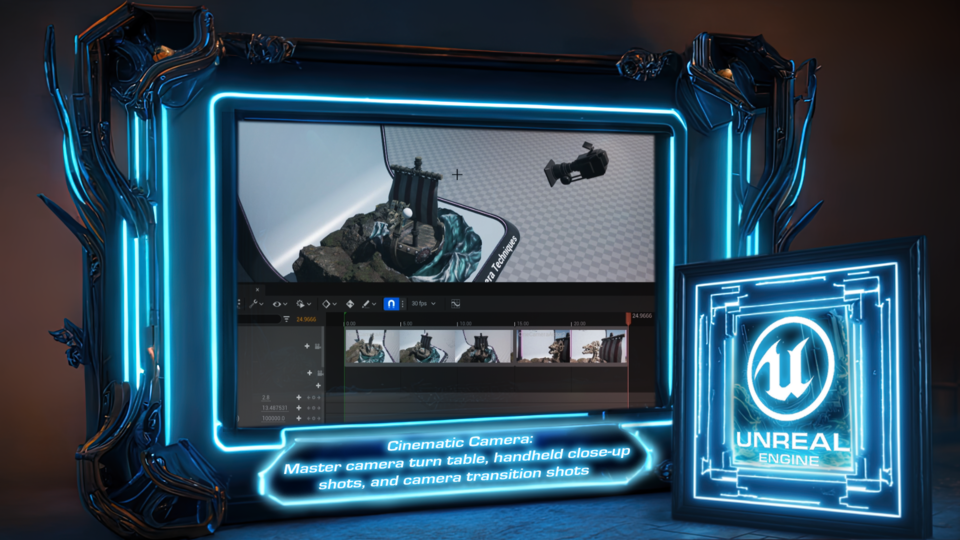
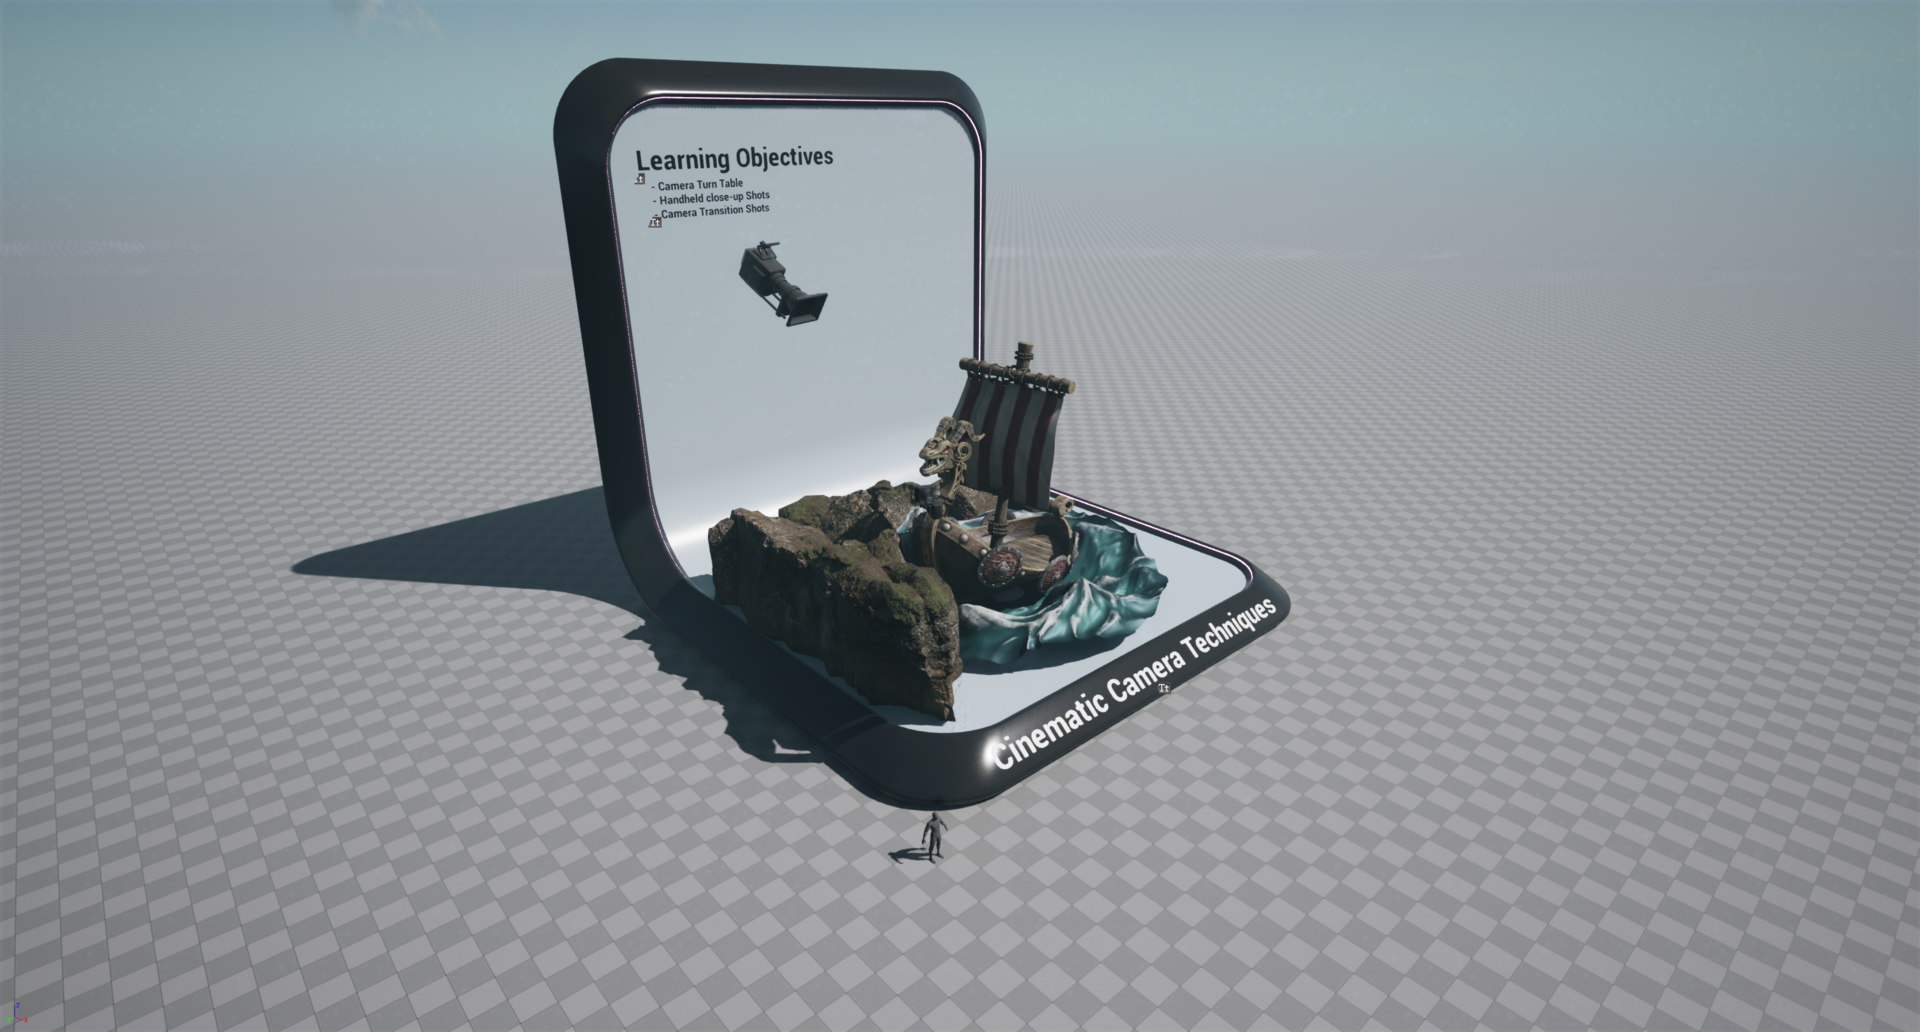
pipe, built in tools. Enhance the storytelling with cinematic camera
techniques where you'll learn how to
create camera turntables, handheld close up shots,
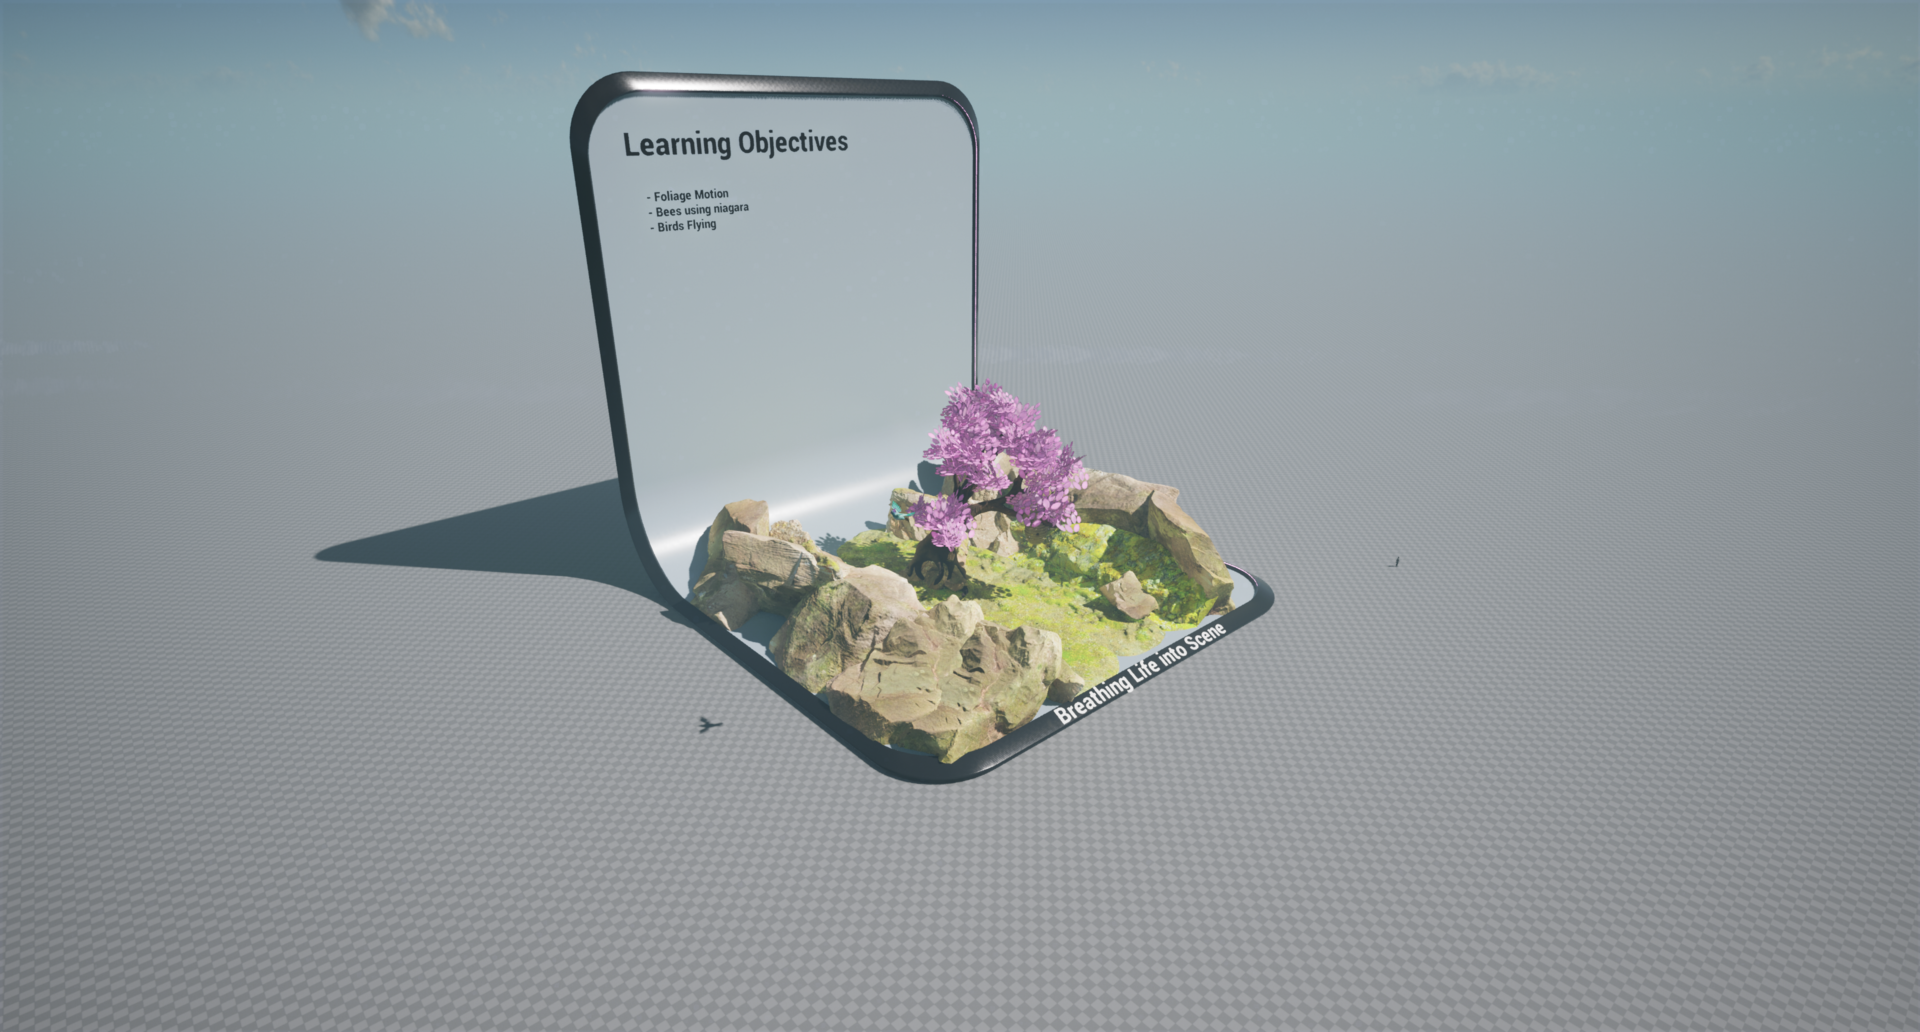
and camera transitions. In our breathing life
into the scene module, we'll show you how
to animate foliage, create swarms of
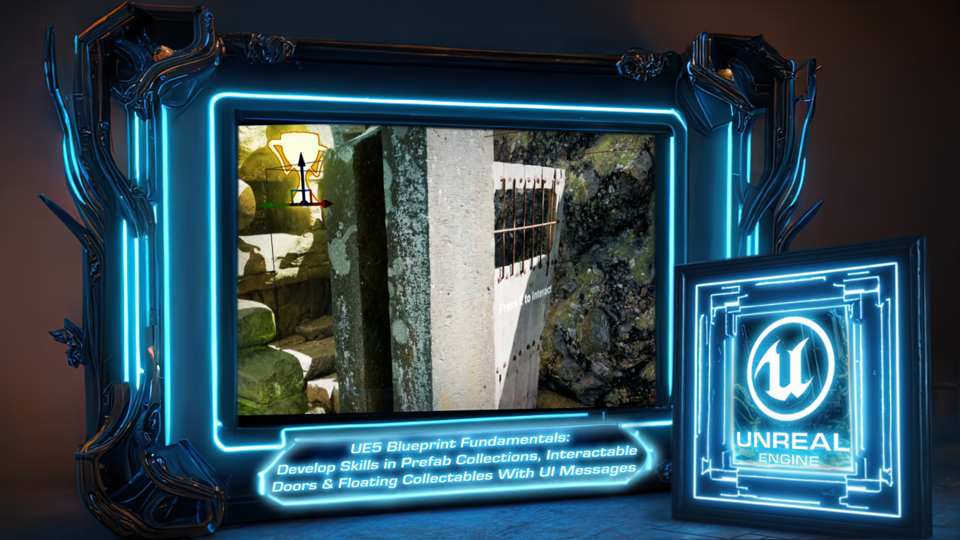
bees using Niagara, and have animated bird meshes fly across our virtual skies. Finally, we'll introduce it to the blueprint fundamentals
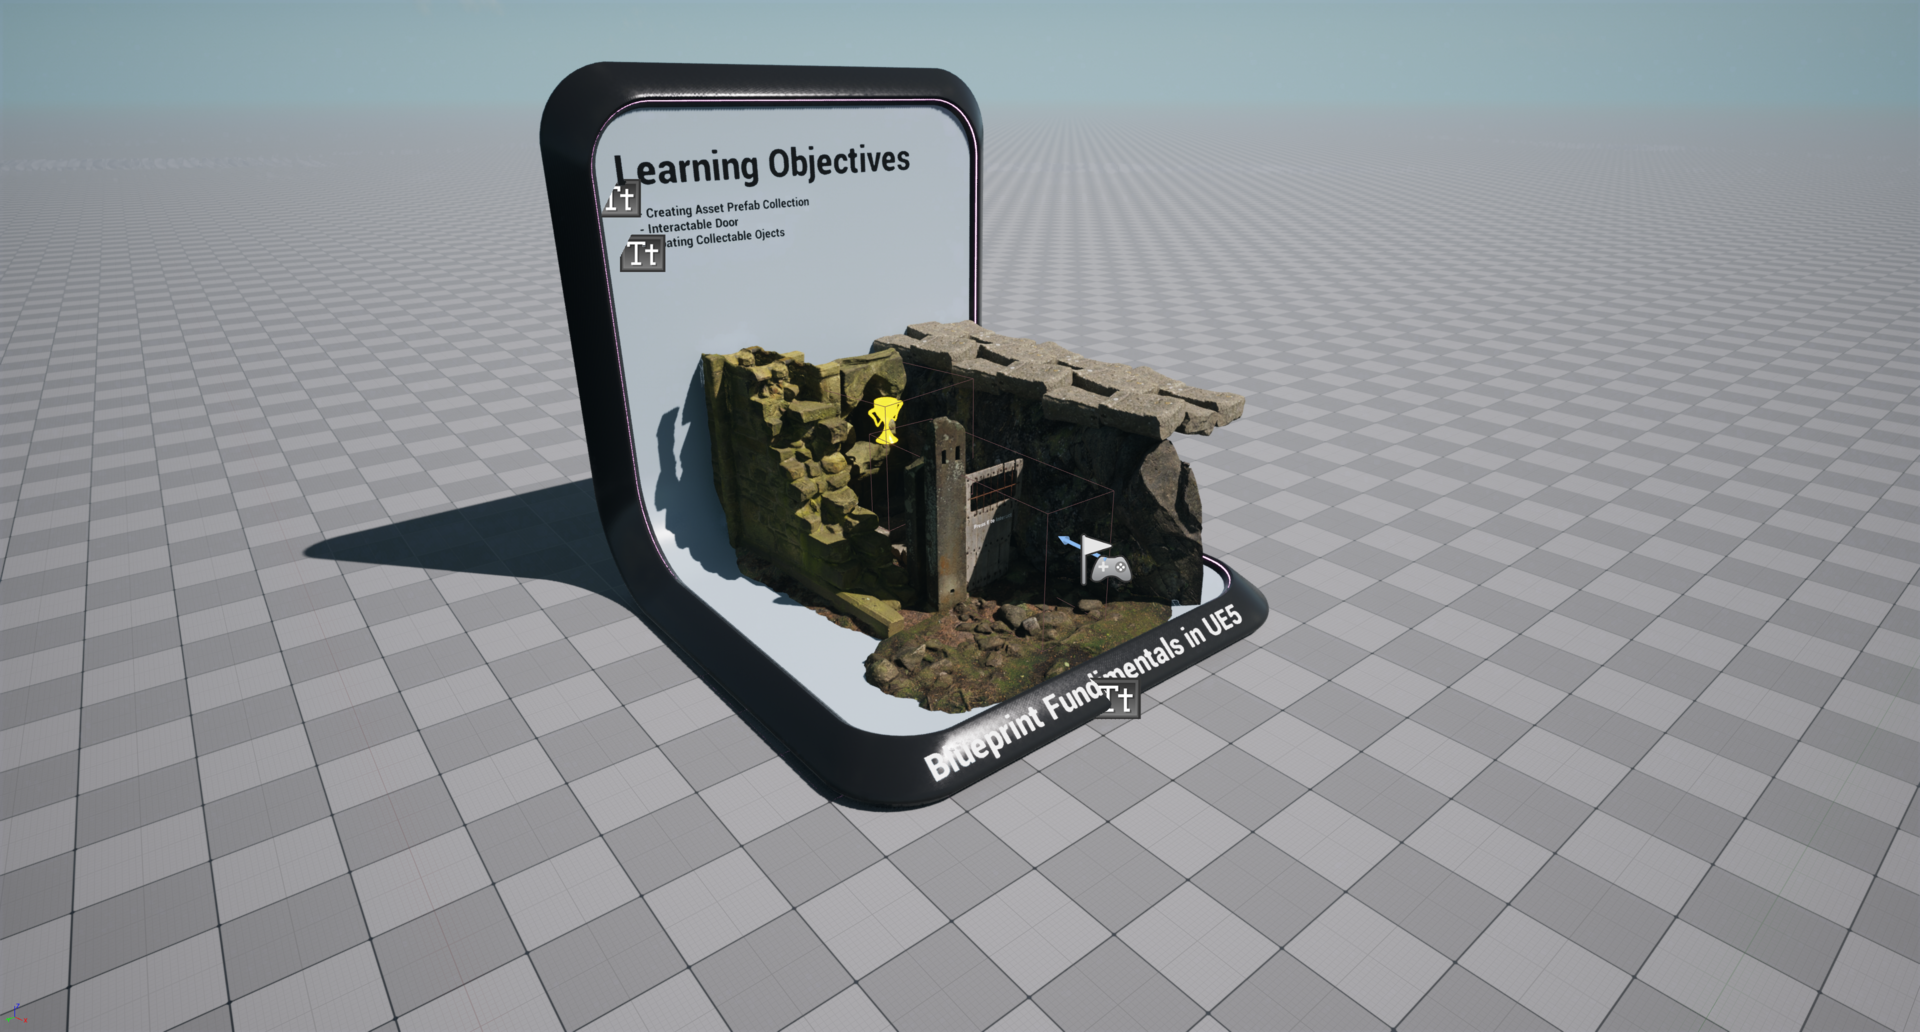
in Unreal Engine five. Learn how to create
acid prefabs, allowing it to adjust levels
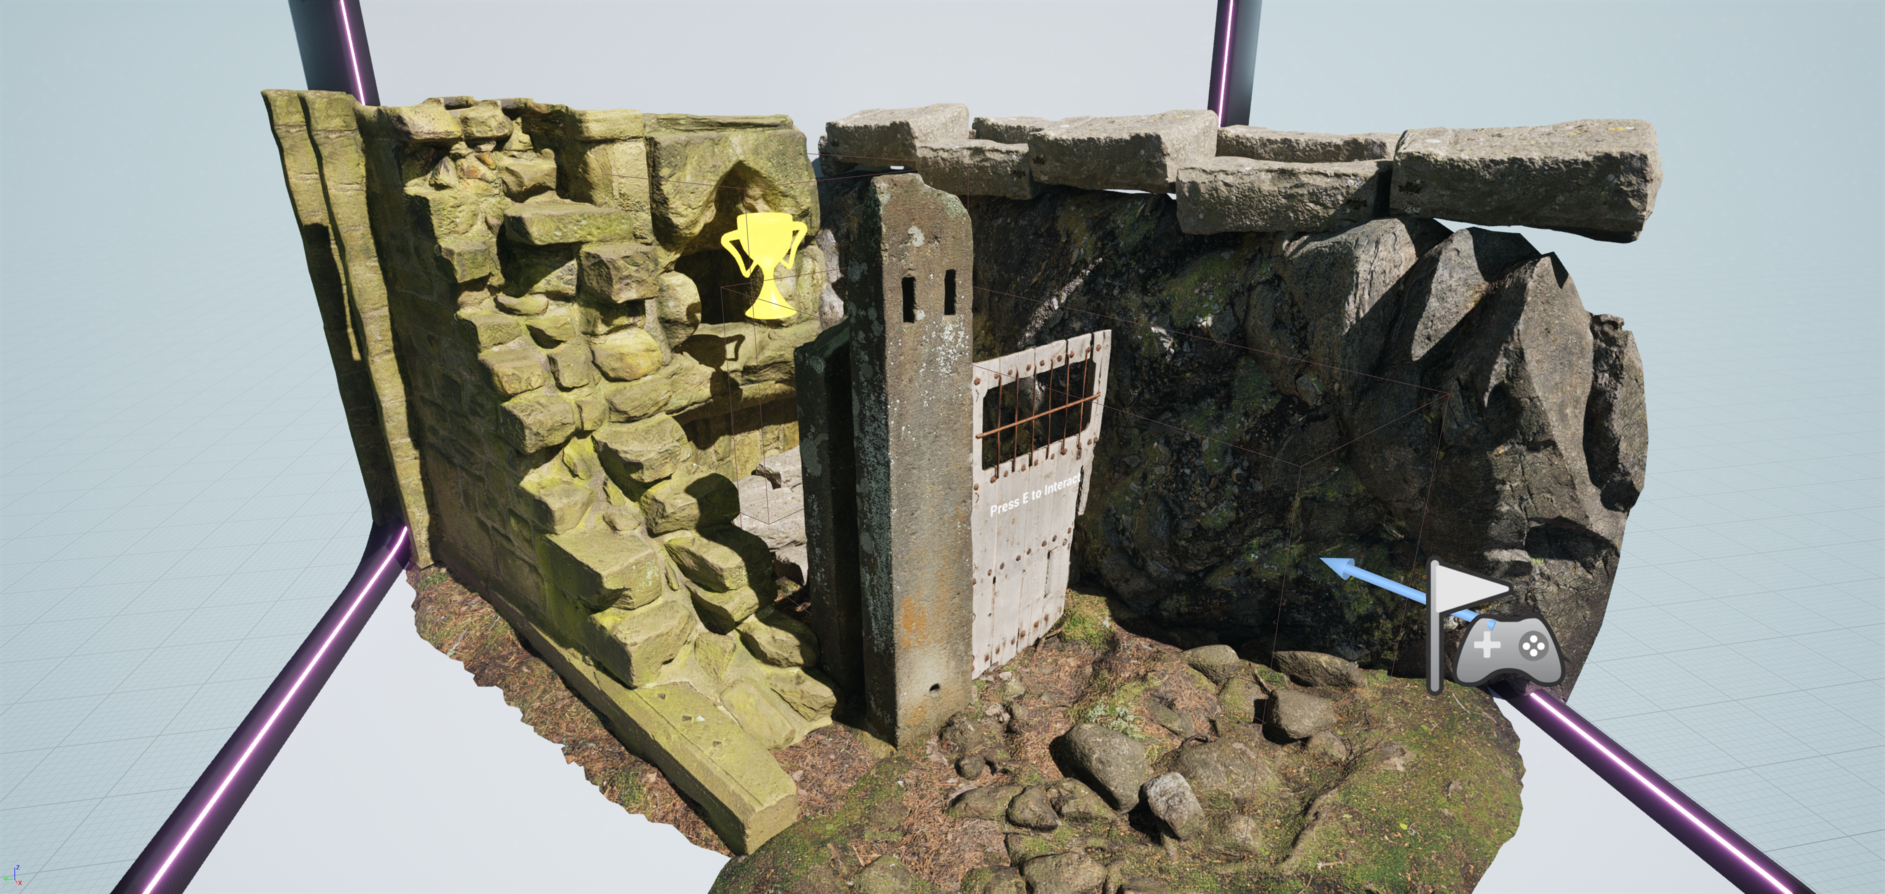
in a non destructive manner. We'll also cover settings of interactable door blueprint for a more immersive experience. And to top it all off, you'll create a blueprint of an animated floating trophy that displays a
congratulations message when picked up. So what
are you waiting for? Join us in this
comprehensive guide on creating studying environments
in unrelagedFive, a game artist boot camp, and take your game development
skills to the next level. Join us on a course
and start creating a very own breathtaking
virtual worlds.
2. Resource Pack and UI Introduction: Oh, welcome everyone to creating studding
environments and Unreal Engine five to
boot camp for artists. And now, we're going to start off by simply getting ourselves a resource pack in which you're going to find
a couple of items. You're going to find a couple of resources for some
of the lessons, which we're going to
come back through the lessons themselves. But the one that we're
looking for is going to be Unreal engine five
bootcp PTA file. So this is the one that
we're looking for. Make sure to have
this extracted, just extract it all,
and you're going to have yourself an unreal
engine five project. And once you open it up, you're going to see yourself this sort of a folder layout. Because it's a Zipp file, it's going to have
less of these items just to make sure to save
up some of the space. Since I already
opened my one up. I already have
everything generated, but you'll only have a
config and content folder, and you'll have this
file over here, which is the project
file itself. Let's go ahead and double
click on it to open it up. This process itself
for loading up the project might take
quite a bit longer for you. Since since the first
time it wants to load up, it'll need to compile all the shade is necessary
for the project. But then the next
time you open it up, you'll be much faster in regards to loading
up the project. But while we wait, we can go over the basics
of unreal engines. So right now, I'm
going to play over a video for Unreal engine
basics for the UY, which if you find
the overall project a bit overwhelming in
regards to the software, you're going to
be able to follow along the course much
easier after watching it. Yeah, without further ado. I'm just going to go
ahead and play the video. Hello, and welcome everyone to Unreal Engine five
basic tutorial video in which we're going to introduce cells to the Unreal
engine five software. So Unreal Engine
five is an engine, which was firstly developed
as a game engine. Over these days,
it's been widely used within other
creative fields as well, such as architecture
and film industries. But even with all the
versatility and design changes to appeal to a industries, a lot of the co
design photo layout has been kept as
the game engines. And right now, we're going to
go through the set layout. So it would be easier to follow
along the future lessons. So first things first, we're going to start off
with the upper left corner. And within it, we'll
find a safe button, which we can use control
and S to save our project. This, however, will only
save the current level. And if we're making changes
outside of the level itself, let's say we're having a
material or an asset edited, we'd have a different window
that we're working on, and we'd have to save
this independently. So it would have a safe button or we can click Control and S, and that would save the window that we're
working on only. Basically, if we're working
with different window, we need to make sure
that we save that out, and then afterwards,
if we're making changes for the level itself, we need to save this
out afterwards. So if we were to change this, we can only have it saved by clicking Control in
S and saving it out. You have made a new level, you'd be prompted up
with naming it and selecting for where
your location is going to be for the level. And after which we
have select mode. By default, you're going to
be within a select mode, which you'll be able to use to make selections
within your asset. You can also go ahead and use it to change it into
landscape, folage, mesh paint, and other
types of modes, just to change up your workflow depending on what
you're working on. But by default,
most of the time, I'd say 80% of the time, you'd be working
on a select mode. Moving on, we have
quickly add the project. This button will allow you to add more assets
into your project, the simple default ones. That you normally get in within any type of
rendering software. So basic lights, shapes, and such can be found here. If you want to search within
it, you can click on it. And search for
light, for example. This way we'd be able to see all the assets with
light within its name. What you need to keep
in mind, though, is that when you click on it, you need to make
sure that your mouse stays the same within
this icon over here. Otherwise, if I were
to, for example, drag my mouse to shapes and
then search for lights, you'd notice that it only searches it within
the shapes location. Whenever you're searching for an asset from within this bar, just make sure you keep the mouse table within
this icon like so. Then next up, we have an icon that if we
were to click on it, we'd be able to
have some options for creating blueprint classes. Blueprints work similarly
to a sort of a prefab. However, for the
sake of introduction to real engine five layout, we don't need to get
into it too much. So the next one, we have a level sequence and massive sequence that we can add from this
buttom over here. This is used when
we're going to be needing to set up our
project to be rendered out. But again, let's move on
with the rest of the layout. We have a play button. This will just start
off the project, and if you have a
third person template, for example, like I do, it'll just set off your character
to be played out. It'll also set up all the
simulations and whatnot. So this makes it really nice to just check
out your project. And when we click Play, we get to be loaded
in within our level, and now we get to
walk around it and actually experience what's it like to be within
or build it level. We can jump around, we can run around the way
we want it to be, and it's actually
quite nice to see what we're like within
our own built level. We also have this
free dots over here, which, if we were
to click on it, we have some additional settings like simulating the
entire project. This will just allow
you to hit play button, but without actually needing to lose control
over the edit mode. Again, we don't really need
to go too much into it. But basically, this section over here will play and
stop your project. Then after which
we have platforms, but this is only for
when we're breaking out our entire
package as a game, and we don't really need
to worry about this. So let's go ahead and move on. After which, we have
a settings button. This will include
a sort of settings like project settings
and plug ins, which can also be found within this upper left
corner over here. So basically, this just make sure that
everything is in one place. We don't really need
to go through it as they're usually not needed for when we're
creating or scene. Anyway, moving on the outliner. Outliner will have everything that contains within your level, so it'll have all the
assets within it. And right now, if
I were to select any type of an asset
from within this level, like this one over here, it'll right away, make a selection within
our outliner as well. After which we have
detailed step. Detail style will
give you all types of options for your selected asset. So I'll include all the
type of information that it requires to be
placed within the world. For example, firstly,
we have transforms, and this will include
the scale, the rotation, and location on this
specific asset. We also have the type
of static mess uses, as well as the materials. Each type of asset would have its unique type of
information set within it, which can be found
from detailed step. After which, if we go down
to the bottom left corner, we get ourselves content drawer, cluck log, and CMD. Content drawer is
by default hidden, but if we were to click on
it, we get it opened up. Now, if we click on anything else outside of the
content drawer, by default B hiding it away. We can also open up the content drawer by
clicking control and space to give us an easy access to where
our files are located. The content drawer is
basically a file manager. You keep all your folders, all your assets for
not only the level, but for the entire project
of the real ng five. We can also dock the content
drawer by clicking on this button over here
by selecting it. We simply make sure that they're always going to be
within this location, and even though we click
off the content drawer, it is still going
to be within it. Can easily do this step
by simply clicking on a disclosed minor tab and we can open up the contra and draw we
just like we used to, by clicking control in space. The output logs are pretty
useful for whenever we want to find out
some information if something is
giving us errors. If our work is not
focused on coding, we don't exactly often use this. Let's go ahead and
close this down. MD is useful every once in a while for whenever we
want to make a command. Right now, I'm not going
to go too much into it, but we can make use out of
it and do things like taking high quality
screenshots or getting a different type of view
within our viewpoard. Okay. So now we walked all
the way around our window. Now we're finally
going to go ahead and talk about what's in
the middle of it. By default, we're got to
get ourselves a preview. Going back to the
content drawer, within it, we need to
enable certain settings. By click on this
button over here. We'd be able to view the type of different
folders that we have. Usually, I recommend
you to enable the show engine content
and show plug in content. Ever get you get more out
of our unreal engine pipe. So after you enable it, you get yourself a folder, other than a content
folder, which has engine. So this will have all types
of presets and plug ins which we can make use out of and speed up our
creative process. Something to keep
in mind, though, is that this is not
part of our content. So basically, this is already
within the engines folder. And if we were to change
any one of these folders, we'd basically be changing it for entire on real engine five, meaning that even if you
create a new project, the things that we change within this section are
going to be changed throughout the entire all
the other projects as well. That is why by the
fault it is set hidden to make sure that
none of the content that is set by oral engine
five itself is changed in any way and messed up throughout
all the projects. But we can avoid this by
simply knowing that we can't change anything within
the engine folder itself, and it's better to
whenever we make use of this content folder is
by simply making a copy out of whatever is inside and
then dragging it out onto your content drawer
just to make sure that all that we use is only set
for the project itself. This way, we can make as
many changes that we want without ruining the entire unreal engine five
content files. And that is going to be
it for Unreal Engine, the UI Introduction guide. Hope you got a lot out of it, and we'll be quite
useful to you going forward in the future for
your Unreal engine projects. And now let's get back to the course. Welcome
back, Everyone. I hope that the video
was informative, and you were able to pick a couple of
things along the way. And now in the next lesson, we're actually going to continue on with the introductions, and I'm going to talk about intercar controls
for the viewport. But again, that's going to be left over for the next lesson. So thank you so
much for watching. And I'll see you in a bit.
3. Introduction to UE5 Viewport: Welcome back every on to
creating standing environments in UnreginFive to
boot camp for artist. In the last lesson, we left ourselves off with
picking up the project, loading it up, and introducing ourselves with the EUI
for the whole software. And now we're going to continue on with Integra
introduction just to be able to follow along
the lessons a bit easier. So I'm going to quickly play the viewport introduction
video, so I'll see in a bit. Hello and welcome
everyone to Unreal Engine five basic guide for
the camera motion, and we're going to start
off by introducing you to the camera type of motions
with an unreal engine five. In order to help you and follow
along the lessons easier. So to start off, within the metal section
of the software, we have a perspective
camera view by default. And using this, we can
move our camera around. The main thing that
you need to remember for when you're moving
your camera around is that by holding Alt and e
one of the mouse buttons, you'd be able to make
a certain motion. So, for example, by holding
lt and left mouse button, you'd be able to rotate your
camera around, like so. By holding old and
middle mouse button, you're able to pan your
camera around just like that. Finally, by holding old
and right mouse button, if you were to scroll up
and down using this motion, you'd be able to zoom in
and out of your view. Alternatively, you can simply just scroll your mouse wheel and zoom in or out of
the project like that. Now, if we want to zoom in
towards a selected object, what we can do is if I were
to select this box over here, for example, I can
click the letter F, and it would zoom in
right onto the object. Now we can use this to
rotate our camera around and simply see a level with the
object selected as a center. If we were to select a
different one and click F, we zoom in onto our asset. And if the asset is larger, like this ground plane
over here, for example, if we were to click F, it would zoom out and
make sure that the camera view has the entire
selection within our view. So this is pretty
good for whenever we want to zoom in
onto our selection. However, you do need to be
careful since if, for example, were to select a
sky and click F, it would zoom out all the way, and we don't really
want this to happen. So make sure that before
clicking F though, your selection is not
something like a sky sphere. Now, if you want to have
more control over camera, and let's say you want it to be similar to a first person game, what you can do is by
holding right click, you'd be able to enter a sort of a camera movement mode
within your editor. Right now, if I were
to hold Right click, I can simply rotate
my camera as if this was a first
person of a game. Now, what's nice about
it is if we were to hold Rylick and use WASD, we'd be able to move
around our Ack so. So by holding Right click and W would be able to go forwards
by holding right click. We can go backwards, A to
go left and d to go right. Also, if you want to go up
directly or down directly, you can use the
combination of Q and. By holding right mouse
button and holding Q, I can directly
dissend outter level. Similarly, by holding
right click and holding, we can go up the
level just like that. Now, if the camera is a little
bit too fast or too slow, we can make use of this icon
in the upper right corner, which says the camera speed. If we were to click on it, we can use the slider over here to set the speed off our camera. So for example, if I
were to set it to one, I'd have a really slow motion
and we'd be able to have a really fine control over where our camera with
an editor mode is. We were to set it up to eight, be able to go really fast up
and down, just like that. But by default, it should be
set to something like four. There is a value underneath
it, which is set to one. If we were to set it
to two, for example, this would multiply four speed to be all the way to eight. Right now, if we were
to go up and down, you'd notice that
it is way faster. This is quite useful for when we're working
with different scales. I personally only
recommend you to use this value or when you're
going up and down in scales. So for example,
if you're working with planetary sky of scaling, we'd want this to
be increased to, for example, like 14,
and then this way, we'd be able to go all the way out real
fast out of a level. But by default keeping
it at one and simply scaling this up and
down will do just fine. Now, within the
perspective view, we also have a couple of
over perception modes, and those would be seen on the upper left corner off the window for our
perspective camera. Right now, we have set
it two perspective. We can change those to be
top bottom left and right. What these would
do is basically it would help you get different
types of used for our level. Right now, because
I'm set to bottom, if I were to set it to left, and if you don't see anything, we can always make use of the letter F and go back onto
the level just like that. This is quite useful
for whenever we're creating environments
and assets, and we just want to make
sure they look good and proportional to rest of our level and from
all sides of angles. Again, by default, this
will be a perspective. If you do want to change it
to be into multiple cameras, though and you want to see
multiple of them at one, we can click on the upper
right within our view mode. Button over here, you click Maximize or
restore viewpoint. This way, we get three
different viewpoints, all from which are different
types of perspectives. Now, other than the perspective, all the other ones will by
default be set to wire frame. If you don't want
this to happen, we can always set
them to be lit. So especially when
designing a level, this sort of a view
might be quite handy. To go back onto one view, what we have to do is locate our perspective camera and click on this button over here. Within this perspective view, we can also change the way our camera perceives
the entire level. And right now it is said
to be default of lit, which means that all the shading would be seen with proper
shadows and whatnot. So in order to change that, we'd have to click on it, and if we were to, for example, select on lit, which would show
you all the level without any types of shadows. We can go ahead and do that. We get the sort of result. It's also something
like a wire frame which you'd see in o cameras. If we were to click
on it, we'd see the types of geometry
that we'd have. So it's quite nice to know, especially if you by
accident sometimes lick on one of them and you
don't know how to get out of, can always go on this button
over here and select lit. After which, we also have
show icon over here. This one we'll get you
different types of visualizations for your
respective camera. But what you need
to know though is if you have something that's
a little bit off, like, for example, I have
my grid right now, which is barely visible, but is often quite useful for when we're
creating our level. But if this is not
visible, for example, if I have this turned off
with this button over here, and I want it on, but I don't know which
one exactly it is. We can always go ahead
and click Use defaults. And this will bring back
all the selected defaults that is usually set up
by the default template. And that's pretty much all there is to the camera controls. I hope you enjoyed the video. And now let's get back to the course. Welcome back, veron. I hope that the video
was informative, and you were able to pick a couple of things
along the way. And now we're going to start actually going within
the course itself. So I'm going to end
the video here and pick up the course integra space itself in the next lesson. Thank you so much for watching.
And I'll see it a bit.
4. Importing Assets: Welcome back here on creating
standing environments and unrenged the bootcamp
for artist course. In the last lesson,
we left ourselves off by introducing
ourselves with the program. And now, once we have
the program itself, the project opened up, we're going to be introduced
to this sort of level. By the way, a quick tip. If you don't like the overlay
for the icons to be seen, we can click G to go into the
game view type of a mode. That will hide the icons away. So as you can see,
by clicking G, I can uncover them up, and it's easy to select
them and move them away. For example, if you wish to, I'm going to click
troll Z to undo that. And I'm going to
make sure to just click G two hide them away, so we wouldn't be able
to them for the moment. Now, for the project itself, we got ourselves
a content folder. If we were to click on the content folder
itself over here, we can see that we
have multiple folders. But I wonder if we're
going to be using is going to be just
called Boot Cm folder. That's the one that
has most of our items. We do have a couple
of extra items, but that's stuff from some examples from
MgScans for example. And that's going to
be added up as we go along the way in regards
to the scenes themselves. So once we open up
the boot camp folder, we have all the folders
laid out over here. We're going to start
with the first one called Ad set up
in a real engine. Let's go ahead and open that up. It should be already opened up, but I'm just going to double
click on it just in case to make sure that this is the one that actually
is opened up. And as you can
see, the first one is actually quite empty. So we need to make sure
we populate it first. I'm just going to go back onto the resource pack
folder real quick, like so, and we have a
couple of folders in here. The one that we're going to
be able to make use of is the first one as a set
up in real engine. Let's go ahead and open it up. We see we have a lot of
items. But now though. Which is going to
drag everything in, and we have a couple of assets parel bucket chair
and table as APX files. So these are the three
D models that we have. We also have a couple of textures that are
already set up. They are simple PNG images, and we'll be able to make
use out of them shortly. But Pardo, I'd like us to
get all of the assets, all of the meshes
into a real engine. The easiest way to do
that is simply to get ourselves a folder set to
the side of our project. Have ourselves a content
browser already in the scene. Dogged onto our viewport. And then what we can do is just simply select all of the meshes. So click and hold and
then drag it and drop it into contra browser that's
within this fold over here. We're going to prompt up
an FBX import options. So let's go ahead and go over them in regards
to what they do. Starts first things first, the option that we have is going to be called
skeletal mesh. This is for animations. We're not going to
have any animations within the assets
themselves for now. So let's make sure
to keep this off. Otherwise, you're not going to have the same type of options. Then afterwards, we
have built init. Nanite would allow us to give up some
performance in regards to large scale meshes and some
more dense type of meshes, but we're not going to
use that at the moment, since this can always be enabled from within the
project quite easily itself. I'll show you in a
second how to do that. So it's not really important
in regards to this. It's easy to disable and re enable it
whenever we wish so. So we're going to usually
leave this open as is. Otherwise, when importing
multiple assets at once, it slows down the
overall import process. So yeah, we're going
to leave this off. As for the collisions, I prefer to always generate
them since it's easier to do them all at once in regards to just going through
the objects themselves, which we're going to learn
through in our future lessons. So yeah, we're going to
actually keep this on as usually having some collision is better than having
no collision at all. And then we have
some other options. The options that
we're going to go through are going to be
with an advanced tab. So let's go ahead
and open the tab up. Usually, Unreal engine tends to hide a lot of options
behind some of the tabs. So make sure to have some of
them opened up and whatnot, whenever you're thinking
of exploring through the parameters itself
through certain options. So, yeah, for most of the part, it's going to be a
right to keep it as default static mesh LD group, we don't have any LDs. We at this point,
mainly use nit. So with unreal engine five, I tend to avoid LDs altogether. We also have vertex color, which we're going to ignore. It has no vertex information,
vertex color information. We have vertex overt
color, which is, again, just going to be the same kind of
in regards to the Vertex color itself. Usually, I tend to
leave it default white, so just make sure that we are consistent for the information for the vertex color itself. And most of the time,
it's not going to be visible if you're
applying the textures, especially, so we're
going to leave it off. Then we have removed
degenerates, build reverse index buffer. Generally, light Map UVs, one convex whole per UC x. All of these are
better to be left off. They are parameters that go more towards the
technical side, but it usually is better to leave them off to get
better visual results, especially with
the light Map UVs. Even though the
new unreal engine is using looming technology, light maps become less needed, but they're still
useful to have around. Then we also have something
called combined meshes. If one asset, if one
FBX file one mesh of a file has multiple assets within it
by having this ticked off, you'd be able to have
all of them split up. But because in this
particular case, if were to go back
to the folder, each one of these FBX files are actually set up as their
own separate meshes. At this particular case, it's best to keep it on. And yeah, when I'm doing FPX type of work
importing all the assets, I usually change this button of most often since
it allows me to have more control in regards to in regards to when I want to have them
combined and whatnot. And in regards to this,
it's usually kept as one if you have the right type of scaling set up for the assets. And speaking of asset itself in regards to the scale
in the transform stab, we're going to have
import uniform scale. This is going to be the one
that you'd want to change. I, for example, we're
working with centimeters, 4 meters, and you want to scale
it up or down the assets. So it will help you to just re import asset in
the right kind of scale. As otherwise, if you were
to just simply scale it up within the engine itself
within the scene, you'd be able to keep
the same physics, and it would mess up with
some of the lighting, sometimes as well as
it would give you some artifacts.
Throughout the scene. And as for the import normals,
when importing normals, it's quite a hassle sometimes to get the
edges to be smoothed out. To make sure we don't get
any of the sharp edges. And that's usually done
within modeling program. So for example, within blender, you're able to select soft edges and then have them
exported as phase normals. So in this particular
case, it's not needed, but sometimes if
you're getting error in regards to the edges, all of them being hard whenever you're importing the mesh, you'd want to change this
to be import normals and agents that would
usually help out for you. And As for the normal
generator method, we're going to have
it as KKT space. It gives you the best result. Then if we were to scroll down, we have some miscellaneous. So we have convert scene. We have force front X
axis, convert scene unit. Usually, all of them are
going to be all right and most of the modeling
programs these days, especially if you're
using the updated ones. They tend to use the same
standard type of setup, whether it's blender,
M and touch. So yeah, we're going
to leave it as is. And as for the material, I tend to create new materials and then replace
them afterwards. I find it to be working
the best in regards to creating assets when
working with PBR materials. So yeah, we're going
to keep it as is. Once we're done with it all, we're going to simply
click Import A. Remember, we have all of
the four assets selected. So we need to make
sure we import them all within the
same type of space. And we can just click
Import and that'll make use of the same options
that we just set up. And give us this
sort of a result. So yeah, there is that in
regards to the meshes, we can drag all of them and e the barrel bucket
chair and table, we're just going to drag
each one of them separately, like so into the scene. Just dragging and
dropping it like so, that's all we need
to do when we're setting up our scene in this
particular case, especially. Everything is pretty much nicely snapped up to the
bottom of the floor, so everything is quite nice. We, of course, don't have any of the settings in regards to textures yet or
anything of the sort. So before we move on, I'm just
going to straight up just grab all of the folders that we had with all the textures, click and hold and then drag
it into our folder links. So, and that should import everything as you can see, it's
starting importing. It says that some of
them are normal maps, and they've been
imported as normal maps. They've be detected automatically,
so that's nice for us. Exactly as we want it to be. We're going to have a bunch
of this type of a setup, and you can see that everything disappears from our folder, and the reason for it is
because it just wants to show all the textures
that have been imported. So to go back, we're going
to click on this area over here zero one as it
setup in unreal engine. And by going back onto it, we can see that we have
now multiple folders, and each one of the folders
has its own texture. And we're going to continue on with this in the next lesson. So thank you so much for
watching, and I'll see in a bit.
5. Introduction to Material Graph: Hello, and welcome back
ever on to creating standing environments in nngofi the boot camp
for artists course. And the last lesson, we
left ourselves off by setting ourselves up
with basic meshes, importing it into the project. And now we're going
to need to make sure we have some textures
applied onto them. Because as you can see right
now they're just pure white, of course, we don't want
this to be the case. We're going to make sure we have some nicer detail
coming out of them. And for us to do that,
we're going to need to create ourselves our
own unique material. So, yeah, for us to do that, we're just going to right
click on a content browser, lick on the material over here, and that's going to create
this sort of new material. It allows us to
switch up the naming. So we're going to
just simply call this 101 mat we can
just call it as is. And that's going to
change it up to that. If we ever want to change
it or rename the material, we can always select
it and click F two. That allows us to
change it up again. So yeah, once we're
happy with the name, Go ahead and double
click on it and open ourselves up with
a material graph. Not a material graph
has its own type of setup in regards to
the real engines. So before we continue on, I'd like us to go over an introduction video for
the material graph basics, which will then help you to follow along the
course a bit easier. You can skip it or play
it at double the speed. I'll recommend you
watching over him regardless since his act full of good information on how
to set up materials and what material graph in
itself is essentially. So yeah, I'm going to go
ahead and play the video now. Evon, welcome to the
basics video for Unreal Engine in
which we're going to cover the basics
of materials. So for stars, in order to create a cells A basic material, I'm going to right click
within the content browser, and I'm going to select
material like so. By doing that, we're able
to create a cells material, and we can at the same
time rename the material. So I'm just going to call
this material like so. I'm going to click Enter. And then I'm just going
to double click on it in order to open ourselves
up with a material graph. So this is the thing that
we're going to spend most of the time tweaking and
adjusting the material, which will be then
applied onto our assets. Maximize the window itself. I'm going to go
ahead and click on this button over here, like so, which will expand this entire
window and make it a little bit more clear on what
a content it has. Most of the screen is covered
with a material graph, which will allow us
to add nodes onto it. If we were to click
and hold right click, we're able to pan or
view around within it. If we were to use
our mouse wheel, we can zoom in and out. And finally, we can
make use of it to click and tap on a node using
our left mouse button. Currently, we only
have one node. This is the one where we connect basically all of the
information for a material. It will contain all the
necessary inputs for a material. If I were to zoom in, we can
see that we have base color, metallic, specular
roughness, and so on. Some of the material inputs are not highlighted in
the same way as ever. The reason being is that based on the type of material
setting that we're using, we're going to be able to have
different options for it. By default, for example, we're not able to use opacity. We can change that through
its property stab. Speaking of properties,
if we look at the bottom left hand
corner of the window, we can see that we
have detailed stab. The detailed stab will
show us all the options of a node based on the
selection that we have. Currently, we have the
material result node elected, and this will allow us to
see all of its properties. So, for example, I'm not
going to go too much into it as it has quite a
lot of advanced options. But for example, if we were to scroll down using
this power over here, we can see a lot more options. And I'm just looking right now for something called blend mode. If we were to change from
opaque to mask, for example, we can see that opacity
mask gets enabled, allowing us to
make use out of it along the other material inputs. So I'm just going to
real quick go back from mask to opaque, like so. And continue on with the
overview of the material graph. On the top left hand corner, what we have is we have a
preview of the material itself. Right now, it's
currently set as a ball. And if we were to hold left
mouse button and move around, we can see it rotating. So by using our
left mouse button, we can just rotate it around. We can use our mouse wheel
to zoom in and out, like so, and we can use our middle mouse button to pan around this type
of camera as well. So it's a little bit different
in comparison to material graph controls where
the right mouse button is the one that pans
around in this one, Using middle most button allows you to pan
around like so. Then we also have a couple of useful options on the
bottom right hand corner, which allows us to change
between assets like so. We have a cylinder,
we have a sphere. We have a symbol plane, cube as well as we can
also set ourselves up with a custom type of a mesh, which we currently
don't have, so I'm just going to
click continue, as is, and move on. I'm going to go back
onto the sphere. And also, we have options for the type similar that we could see within
our game view port, which is we can change
the lime to be lit, for example, to see
only the base color. We can also change the show to allow us to
see grid, for example, or to disable the background
completely to not get as distracted while
working on no material. And we also have
perspective which will allow us to change
the camera view, and we also have viewport
options, which again, is similar to what you would see within the viewport itself. It allows us to
keep it real time, to change the field of view,
and options like this. Again, I'm going to leave
them as is 99% of the time, you're not going to be touching them as the default viewport will allow us to
see the material we're working on just fine. And we also have a toolbar
unique to the material graph, which are located
at the top section, we have apply which
will allow us to apply all the settings
directly onto the material and update our mesh that we have
applied that material onto. We also have search which
would allow us to search the node for the specific
type of an item. Licking home will allow us to get back onto our result node. We didn't have a hierarchy, which would allow us to work with more complex
type of shaders. We also have live update, which would allow us to get real time update
for our game view. And the one that we'd
like to remember the most probably out
of this entire bar is going to be clean graph. If we have a big mess
in our material, and some of them aren't, some of the nodes wouldn't
be even used. By clicking on clean graph, you'd be deleting them, but just make sure
to make use of that when you know that
the material that you created doesn't have the nodes unused nodes that you're
planning to use later on. Previous state height
unrelated stats and platform stats all
help with a more in depth information for when
you're creating material, but we're not going to be
using them much often. So let's not get
into that too much. And speaking of stats, we do have stats at the
bottom bar by default. It will show you all the
necessary information, such as them out
of shader samples that is being used and
the shaded accounts. So we'd be able to tell how
heavy it is on performance. All right. So going back to
the material input node. Based on the type of input we're placing into these values, we'll get different
type of results. And the ones that we
can have options. The basic ones is if we
were to right click, we can search for all
of the nodes that we can add onto our
material graph. And I'm just going to
search for constant. We can see that we have
constant constant two vector, constant free vector, and
constant four vector. We're going to talk
about that in a second. But now though, I'm just
going to select constant, and we can see that we
get this sort of option. Which essentially will
allow us to change the value of our nodes. If we were to directly plug
this into the base color, we can see the direct
results of the material. It takes a bit to load up, but we can see that by default, the value zero, zero will give us a black type of a color. Over, if we were to
change this value to a one by clicking on this
type of a value over here, or alternatively, if we
were to select this node, we can see that the detail
stab has now changed. We can change the
value over here. If I were to click on this one and change this
to a value of one, like so, We can see that
the base color has now changed to be a completely
white material. One thing to worth knowing is that everything on a node when it's going to be
on the right hand side, it's always going
to be an output, and when it's on
the left hand side, it's going to be an input. So right now, this is an output. I'm able to click and
hold left most button and connect it to a base
color, or for example, I can connect it to
a roughness value, which will make this
completely rough and no glossiness would be
applied onto this material. Making the material look
quite flat in this occasion. Whilst working with these nodes, you need to consider that also in order to move
them out of the way, you can click and hold control, and holding left mouse button, you can just tap and
drag it out like tap on a screen and then
release it that way. We're able to remove the flow value completely
from the node graph. And one more thing to
also consider you can make use of it in order
to switch up the values. So for example, if I
were to connect both of these to the roughness
value and the base color, and I want them to be
onto another value. What I can do is I K and hold one, tap on a screen, get myself a new value, and now while holding control, I can tap on this, and now both of these
connectors are going to be reconnected when I release
my left mouse button. So now you can see that they go 1-0 and it turns my base color, the value of zero, and roughness
to value of zero, which, in turn, makes this quite
a shiny type of an object. Now, going back to the vectors, if I were to delete
this one, for example, if you want to get ourselves
a different type of color, what we can do is when we
hold one and tap onto graph, we can create ourselves
a constant one. And when we hold two onto
graph and tap on the screen, we can create our elves
onstan vector two. Then finally, we can
click and hold three tap on the graph and cratosells
a constant vector free. What this will mean
is that it'll touch two values at once onto
constant vector two, and three values at once
onto constant vector free. However, if we look at
the output that it gives it's giving us three different
outputs within this graph. What this will mean basically is that one output will
combine them both, while the one is going to
give us a value for x, and the third one is going
to give us a value for y. The same applies to
a constant free, whereas the first one is going to be a combination
of those free. The second one is
going to be red, which is going to
be a value of x. Then the third one is going
to be green, a value of y. And finally, Z is going
to be a last one, the value of the blue
output over here. By the way, in order
to move the graphs, if we were to click and
hold on a top section, we can just simply move
them around like so. Now what's interesting about
X Y and Z is that each one of them have the color
value assigned to them. So as I said before,
x is going to be red. It's always going to be red
in a unreal engine software. And what this will do is, it's also based on
a three D space. So, for example, if we
look at this bottom left hand corner of
our preview sphere, we can see that the z is
going to be going up, and x y is going to be going forwards and
sideways, like so. These values not only help you to get more additional
information, and also represents a
free dimensional space. And not only that, if I were to change the x
value, for example, 0-1, we can see that the
entire color changes to red. We can see this within the
preview bar over here. And if I were to connect all of these values like so
onto our base color, we can see that it changes the
entire material to be red. So what's nice about it is that by just simply
combining these values, we can simply get ourselves complete different
value, to our material. So by changing this to
0.5, and for example, changing the y value
to a 0.5 as well, we can see that we get
this sort of a result. I will change these two to one, for example, you get
a brighter and yeah, by changing them
to a higher value, we can see that it gives us a brighter type
of color as well. And yeah, by having these x and y values present
both of them at once, we can see that It combines them and changes the
color completely. So we can make use of
these float values to actually get a custom
color out of our material. We can also make changes out of this using a color picker by clicking on this constant
option over year. First of all, let's go
ahead and make sure we select the float the node value, and now we can click
on this box over year. We can see that we get
ourselves a color picker. Essentially, yeah, we can change the color to any one we want. For example, I want a
blue color or a pink one. We can click Okay,
and we're going to get ourselves a pink
type of a material. Tonight that we're done with it, I'm going to click clean graph, so to clean up my unused nodes. I'm going to click on a
top left hand corner, click Apply to make sure that my material shader
is being applied. And if I were to
close this graph, we can see that material
has been made, basically. We can create ourselves a shape. Let's go ahead and create
a sphere within our world. I'm going to just simply click
and hold and then drag it onto this object like so and
get this sort of a result. So, yeah, that's
pretty much it in regards to the material set up. That's all it takes
in order to set ourselves up with a material. I hope that the video
has been helpful, and thank you for watching. Alright. Welcome back, Everyone. I hope that the video
was informative and you were able to pick up a couple
of things along the way. And we're going to
start setting up the material itself
in the next lesson. So thank you so much for
watching. And I'll see in a bit.
6. PBR Material Setup UE5: A and welcome back every on to creating standing
environments in unrelentdFp the boot
camp for artists course. In the last lesson, we'll
let ourselves off with introducing the material
graph and what it is. Now we're going to make sure we make use out of it in order to set ourselves up
with a PBR material. So for us to do
that, we'll firstly need to grab a
couple of textures. That we have already imported. And I'm actually just going
to make this window smaller. So going to squish it down, and I'm going to grab it up, and we'll be able to see
our content browser like. So this way, we're able to
make use out of what we have. We're going to start off
with texture barrel bucket. Let's go ahead and
double click on it. We have a bunch of
options for the textures. We're going to simply click and hold shift and select all of them like so we're going to
drag and drop it into graph, and now we can simply flit
them off a little bit, like. So I'm just going to
manually click and hold and then drag it
out to the side legs. So that'll give us some nicer type of a setup
in regards to everything. And we can check which ones are which in regards to the
textures themselves by simply clicking on
them and seeing at the bottom left hand corner,
there is detail stab. If you're not seeing this tab, you might be on parameter tab, so make sure to just go
onto the detail tab itself, and you should be
able to see that the texture that we have
selected is currently, for example, roughness, and
there's ambit occlusion. We have base color and metallic. And finally, normal map. So yeah, let's go
ahead and make sure we connect all of them properly. We're going to connect
everything from the RGB node. On the right hand side, we
have every node output, and on left hand
side, we have input. So for example, right now, we're not using anything for the input for the texture samples, so we're going to
leave them off as is. But for the right hand side, for RGB, we're going to connect each one of
them accordingly. So Once we start clicking
and holding and dragging it, we can drag it to the
appropriate type of locations, like so, and we can simply connect all of them
to the way we want it. And if we are to Zoom
in, for example, we can click and hold
and then drag it, and this way, we're able to move it across the
graph as well. If we were to let go, it's going to give us a search part, but if we were to
click off of it, it's nothing's going
to happen basically. And for example, if I have something connected not to
the right type of channel, we can simply click
and hold control and then drag it out from the normal map and reattach
it to the base color, like so, and that'll
fix up the issue. Anyways, going back to this, we have metallic
and normal left. So let's go ahead and
continue on with this. I'm going to connect
this metallic, and I'm going to
connect a normal map. And once we're done with that, we should get ourselves a really nice type
of a set up click. So to make sure that it's
actually being applied, what we need to do is on
the top left hand corner, we need to click Apply. Like, so it's going to
apply it to the material. I'm also going to click
Control and S to save it up onto the material itself. Now, once we minimize this window and put
it off to the side, I'm just going to
stretch it down and put it on the corner since we don't need
it at the moment. I'm going to go back
onto the folder for unreal engine setup, and we have ourselves
a simple material. Once we were to drag this
and drop it onto the barrel, currently only on the barrel. We're going to get
this sort of result. So we can see the wood
and the metal already looks pretty nice for
this type of a setup. So that's pretty good. Everything works in order. We're going to go
back onto our graph. I'm actually just going to
maximize the viewpoint. So. So yeah, we're pretty much done with in
regards to that. We applied color information. We applied ambit
inclusion and whatnot. And we could probably make
it a bit more orderly. So I'm going to just grab the color to be at the very top. So, so it wouldn't intertwined. And I'm going to find
myself the metallic. Going to put it off
to the side link. So just going to basically
arrange it so it wouldn't be out too much in
regards to overall order. So now have we connected them all and
have everything in order, we can talk a little
bit in regards to the VL material setup and how it works
within a real engine. So first things first, we have ourselves the base
color that we have connected. This is the color information, the main channel for all of the material bases and how it's visible
within the render. So if I were to go onto the top left hand
corner for the preview, if I were to switch
this to lit mode, We can see just the base color. This is exactly
how it's going to look like for you as well, only if you had the
base color selected, and we can see just a pure color information
out of this basically. Then afterwards, once we start adding the
lighting and whatnot, it starts mixing up with in regards to
metallic roughness, normal, and even
ambient occlusion. So let's go ahead and talk over them in regards
to what they are. The metallic is
basically whether an item is either a
metal or non metal. I see often people
mistake it that you can either be zero or one in
regards to the value, and if it's a simple
material, that might be true. But when it becomes
sort of a texture for where there's
mud and whatnot, you can see the metallic itself, if you were to
double click on it. It actually has sort of a way of blending in with
the channel itself. It's not just a pure white. White would represent
the value of one while black would
represent a value of zero. So, yeah, in that
regard, if it's a zero, a metallic basically the
material would not be metal. But if it's one, it would be considered metal
type of glossiness, which is a bit different in regards to the
roughness value. The roughness value itself, is basically going to be how
non shiny the object is. If it's a value of zero, it's going to be pure black, and that's going to be super
shiny type of an object. And if you're working with somewhat of
realistic textures, going in between a
value of 0.1 and 0.9. So not completely black, not completely
white in regards to the texture itself is
usually the way to go. So you can see right here,
We have a texture that has all the color information
in regards to how glossy, how shiny an object is. Some parts would be darker, where they would be shinier and some parts where it is wider, they would be less shiny. So that's the principle
of the roughness. And once it mixes up
with the metallic, it usually creates a
different type of result. So for example,
within this area, we can see where the metal is. It gives a bit of an
extra type of shininess. So it's quite distinguishable
to when there is a metal. And once we start combining
with the normal map itself, we're going to get some
extra bump values out of it. So we're going to
make use out of them to sort of fake
additional details, so we won't have to reuse more topology to
generate some of them. So for example, these
bumps over here next to this next to the
middle section of my mouse, next to where I'm
pointing, we have some bumps and some crevices
and whatnot on these areas, and these aren't actually
part of the mesh. They're just being faked.
If we were to look at it from a bit of a
side view, like, so we can see that
they're no actually there just super flat as
we get closer to the edge. So yeah, it's able to fake it based on the
direction of the light, and you're able to tell where the slopes would be and how it would bounce in
regards to the light. So based on those
reflections of the light, you're able to get those
additional fake details out of your information
for the texture. Finally, ambit occlusion,
it's not always going to be set up,
but most of the cases, a occlusion is necessary, especially for the
props in order to fake out the crevice detail. I don't think it's
quite going to be easy to understand
just from seeing this. But if we were to look into if we were to go back out of this and
check within the scene, we can see within
the barrel itself. There is a bit of a
darker areas over here. It's actually mixed
up with some dirt, but actually is going
to be really helpful in regards to giving some
depth to the prop itself. We were to click on a top left hand corner
where it says lit. We can actually
visualize everything from within this folder itself. But for visualizations will
allow to see something like base color and areas
like roughness as well. It just needs some
time to load it up, and you can see the type
of difference it makes. So for example, this bit over
here where it's lighter. If we were to go
back onto lit mode, we can see it as it
being a bit lighter in regards to the
bouncess of the color. So if we position it, my lighting to be on
the opposite side, we can see these patches
to be less glossy. So that's what it does basically in regards
to the roughness. And yeah, we can see
all of them even at once by clicking buffer
vitilization overview, which is super useful
for what we want to indentify the problem
caused in some areas, whether it be intensity
too much on something or Some of the values
just not looking right. I recommend you checking this a little bit in
regards to what it is. And once you're done
with seeing it, you can go back onto
the lit mode and just make sure that everything
is properly set up. So yeah, that's pretty much it in regards to the PBR values. Thank you so much for watching, and I'll see you in a bit.
7. Material Instance Basics: Hello, and welcome
back in on to creating studying environments
in Unreal engined five, the Bootcamp for Artist course. In the last lesson, we left ourselves off with
familiarizing how the PBR system works within
Unreal engine itself. And now we're going to
actually make use of of it in order to set ourselves up
with material instance. So before we do that, we actually are going to play an introductiory video to the
material instance itself, which will help you to follow along this type of
setup a bit easier. So yeah, I'll see in a bit. If we were to right
click on our material, we can create ourselves a material instance by just simply clicking on
this button over here. And essentially what
it'll do is it'll create a material that gets this information based
on the material itself. So if I were to click off of
it to get material instance, like so, we can simply
apply this onto our object. I'm just going to
click on this one, the control D to
make a duplicate, put it to the side and
simply drag and drop this material onto
this object like so. And essentially, we'll see
that they are identical. And we can click on the material instance
to see what it is, which will show
us the preview of the material within
this review window. It'll also show us
that this is that the parent of this
material instance is going to be this
one over here. It allows us to make
use of one material to create multiple
material variations. Right now, we don't
have anything, so I'm going to go and
double tap on this material. To openness up. And essentially,
what we'll need to do is we just simply
need to convert some of those options that
we have applied onto our material and make
them as parameters. So, for example, by right clicking on
the roughness value, we can select convert
to parameter, and it'll allow us to make
a choice on the name. So if I were to call
this one roughness, like so, we can just simply have a parameter
name as roughness. Now if we were to clear
control on S to save this out and apply our material, like so, we can go back
onto material instance. Now, we see that we have
a value for roughness. By default, it's going
to be ticked off. And if we want to
make adjustments to the value of this material, we need to make sure
that this is ticked on, and this will allow
us to make changes to the material instance
parameters, essentially. So if we were to
change this to a value of one and make this
completely rough like so we can now close
this down and see that this material is now a
different roughness value. So one is shiny and although the upper one is using
exactly the same material, it's going to give us a
different type of result. And if I were to go onto the material and take
it a step further, I can right click
on this base color. I can change this to a parameter and call this color like so. I can now close this down, and let's make sure we
save this out like so. I can go back on to
material instance, and I can see that we have
a color option over year. If we were to tick this on, change this to a different value like so and close this down, we can see that we
have a different type of result completely. But if we have a look at
the material instance, the parent is still the same. So it's still being used
in the same kind of way. This allows us to make quick changes to a
material itself. It also allows us to save up on the performance of
our game engine. One thing that I'd
like to say as a quick tip is if we were
to go back on the material. So for example, we change this up to a value for a parameter. But there are certain
shortcuts that allows us to create
parameters right off the bat. So by clicking and holding S on our keyboard and then tapping
on our screen on our graph, we're able to share up Crato
cells a constant one node, which then automatically
gets changed to a parameter. So I'm just going to change up the name to something
like metallic, for example, I can set this
up to a metal, like so. And also, if we want to change
the naming, for example, afterwards, what we can do is we can change it
within a detailed stab. So by simply selecting this
and changing this over here, we can have any
name that we want, so metallic, I can
call it value. So then I'm going to click Control and S to save this out, which, if we have a look
at it, close this down. The original material
is not going to be changed
because by default, the metal value is set at zero. But if we were to go on
to material instance, we can change the
metallic value. Finally, one thing
that I'd like to say, I'd like to mention
is that if we were to make this window
a little bit smaller. What's nice about material
instances is it doesn't require us to compile anything
to save out material, and we can just simply see the changes within the material instance
right off the bat. So if I were to enable
this metallic value, And change this into
a value of one, like so, and maybe I'll change the roughness to a value of 0.3. We can see that we automatically straight off the bat,
change the values, and we can even click and
hold on these parameters like so and change
them up like so. And it gives us direct
type of a result onto our Vport which
is quite nice. So, yeah, that's pretty much it in regards to the
material set up. That's all it takes in
order for us to set ourselves up with a
nice material instance. Yeah, we can create
multiple materials, material instances out
of a single material, and it'll give us a completely
different type of results. So right now, I'm
just applying this on to this type of sphere and changing the color to any type of a color that I
want, basically. So yeah, thank you so
much for watching. Now, let's get back to
the video. All right. Welcome back, everyone. I hope that the video was informative, and now we're going
to continue on by setting up the
material instance itself. We actually have some
times of think we're going to continue on
within this lesson itself. We're going to click on each
one of them and rename them. Right click, convert
it to parameter, call this one base color. So make sure that the naming for each one of them are set up properly in close to it as possible as the
texture has itself. So for example, this one
is called base color, so I call it base color, this one would be
underscore metallic, and this one would be
underscore roughness. The reason I'm doing it is
because at the very start, each one of the namings is set up as barrel
bucket underscore. Okay. Or in other areas, it would be something similar. And then the only
difference in between those textures is underscore and the naming of the channel. So metallic, whether it
be roughness and whatnot. And yeah, we want to
match them because the unreal engine is basing the naming system on
alphabetical order. So in feature, it's going
to be way helpful for us, way more useful for us if we have it set up
in the same order. So we're going to learn
that about it in a bit. But now though, let's go ahead and continue on
with the process. We're going to set this
one up as metallic. So. This next one is going
to be set up as roughness. I'm just looking at the
texture name bottle on the left hand corner,
underscore roughness. I'm just going to set
that up as well. Like so. And it's quite
tedious sometimes, but this is only going to
be just one type of a deal, and then afterwards,
we're going to be able to rename them easily and switch up the
parameters and whatnot. And this one is
ambient occlusion. To again, in this particular
case, for example, I could set it up as
a ambient ccusion, but I'd prefer to call it
ambient occlusion fully, just to again match up the
naming a little bit more. Now I'm going to
go ahead and click Control and S to save it out, like so, and start
saving everything out. We can close this down. And once we click rate material, and we can just leave
it as is actually, or actually, I'm going to
rename this one as viral. It so underscores. For instance, I'm going to go ahead
and then drag and drop it into material
for the barrel. And you can see that
this is identical, actually, nothing is change. Everything is the same. It is exactly as we want it to be. We're going to go into the options and settings for it in the next
lesson though. So thank you so
much for watching. And I'll see in a bit.
8. Reusing Material Instances: Hello, and welcome back.
Ever on to creating standing environments
in Unreal engine five, the boot camp for Artist horse. In the last lesson, we
left ourselves off with setting up a material instance, which we just
applied it directly onto the barrel by dragging
and dropping it like so. And now we're going
to double click on it to open ourselves up, and we see that we have
some parameters within it. By default, it should
be kept as the same because that's the original
texture samples that we use. And we can't change it because
we need to enable them. And actually, for
the barrel itself, we don't need to do anything. We can just leave it as is because that's how it is set up, and it's going to
work quite well. And I think it's also set
up for the bucket itself. If I were to click and drop and drag it onto the
side of the bucket, we can see that it is being
working quite nicely as well. It's not going to
work anywhere else. For example, if we were
to drag it on the sheare, it's going to mess it up. So the reason being is
that this entire texture set is set up for the
bucket and the barrel. And it's not set up
for the water itself, we're going to come
back to that in a bit. Now though, we're going to set ourselves up with this chair because if we have a look at the folder and
the next folder, we have something
called texture chair. Of course, we need to set ourselves up with
a chair texture. And if you were to double
click and open it up, we can see the textures
are pretty much identical. When using material instances, it's important to
keep consistent in regards to the texture channels as we are not able to exactly use anything
else in regards to that. So for example, if we have if we don't have
a color and we'd want to just use a sample type of a
color for the material. We wouldn't be able
to just use nothing. We'd need to put
something in upwise. It's going to give us
quite a bit of a mess, and it would give us
similar results basically. So we want to make sure
that the textures match up so you can see that we have five textures for preclusion, base color and whatnot,
for the barrel. And it's pretty much the same five textures for
the chair, except, of course, for the
different type of textures that are
going to be set up. So For us to do that, we're going to just
right click on the material zero one
material that we created. We're going to create
material instance. And I'm just going to rename
this one as a. There you go. Care. I actually
renamed it wrong, so I'm going to click F two, and I'm going to
call this one there. There you go. Now the next step is if we were to double
click and open it up, I'm going to minimize
this window a little bit and put it off to the side. I usually don't use this
type of a preview as much. So what I tend to do is if we have to look at it,
we can by the way, click and hold and drag corners like s to make them larger
and smaller and whatnot. And I prefer to just lick a hold the details tab
itself and just drag it out, so we'll get the
preview much smaller or we can even squish
it out completely, but I personally just
like it to do it like so. Then we can just squish it to the side and we have these
parameters next to it. So once we apply the chair
incense onto our object, we can see how it looks
like, and of course, it's going to give
us the same type of result because we have
not changed anything. So order to start changing
up the parameters, we need to enable
these ticks over here. We're going to tick everything on and now we're able
to change them up, so we can see that
these are being highlighted, so
that's pretty good. We are going to go back onto
the texture chair folder, which has everything
set up for us. And you can see now because we renamed everything
as amb occlusion, based color, metallic,
normal roughness, in the same way as
underscores named up here, they're actually aligning
perfectly to the same order. So first one is going
to be med occlusion, color, and so forth,
and so forth. So, yeah, we're going to
start off by clicking and holding and then dragging it
into this area over here, and we can do it, like so, and then clicking and
holding and dragging and you can see it's
starting to change. Of course, it's not
completely there just yet because we have
messed up normals and whatnot, a lot of things are still
needed to be fixed. And yeah, one way is to just simply click and
hold it and drag it. Another way would be to just click on these
boxes over here, and then buy detectus
from within here itself. And finally, one more
way that we can do it is we can select the metallic,
for example, over here. And we can use this
button like so, to use selected asset
from the content browser. So with the selection, we can just click on
this one over here. It'll change the
texture automatically. And I honestly, when working
with a lot of assets, I prefer this way instead. So this is probably the fastest way that
I personally use. And yeah, we can
just replace it all of them just like,
so we can see that. We have ourselves a
nice setup for a chair. So that's really good for us. As we have everything
already set up. And now, as one
more final tip in regards to just basic setup
for material instances, when we have already set ourselves up with the
material instance, for example, for this chair. And if you have a lot of
assets within the scene, and we want to keep reusing the same material instance and
just reapply the textures. The easiest way instead
of just to creating a new material instance
from material itself, I to close down this window. So by recreating
material instance every time from
material instances, you can see if I were to double Every time we create a new one, it's going to require us to enable each one of
these individually. However, if I were to
just delete this one, we are deleting, by the way. We can delete all of them, and if it just says delete
instead of force delete, we know that none
of the material is being used within the thing. I'm going to come back
to it in a second. For now, let me just go back and Go back to my point on what I mean in regards to
creating duplicates. So now, once I have this chair, because we have
everything tikton all of the parameters set up pretty
much as we want it to be. We're going to select the chair. We're going to hit Control C, Control V to make a duplicate. We can select it,
and we can just call it whichever way we want, whichever object to match it. Once we're done
with that, we can double click on it
and we can see that everything is already tikton and the parameters are pre set. So we'd be able to easily change up the textures
as we go along. And in my opinion, that's
a bit faster when we're creating multiple material
instances for multiple assets, So yeah, keep that in mind
whenever you're creating this. Now, going back
to the materials. If I were to click and hold and then drag it onto this
chair to assign it, like so, and if I
were to select this, click delete, you can see now it's asking me to
forcefully delete it. The reason being is
that this material is being used being referenced within the scene
within the project, one time by another object. So yeah, for that, we can either check which
ones are being used. And once we check it, we can, for example, be okay
with deleting it. Or we could try to link it. But anyway, if we were
to click force delete, it starts just deleting it and unlinking
it from the chest. So now you can see
the chair went back to the original because it doesn't have that
type of a setup anymore. And I'm going to click
and hold and then drop the chair instance
back onto this, and now it's going to be fine. So, for example, in
this particular case, if I start to want to delete all of these
materials all in one go, it's going to ask
the forceful delete. We can see all the referenced
materials over here. Now, though, I'm not
going to touch it. We're going to come
back to this in a bit. I'm going to show you how
to link all the materials. Yeah, I think we're going to continue on with
the texture set up. First, we're going to
make sure that we have seamless textures set
up for the table, and we have some
customization for within them using the
material instances. So yeah, that's going to
be it from this lesson. Thank you so much for watching, and I'll see in a bit.
9. Seamless Textures and Parameters: Hello, and welcome back
everyone to creating standing environments
in unrelinged pipe, the boot camp for Artis course. And last lesson, we
less ourselves off with setting up a material
instance for a chair. And now we're going to continue on with the in
regards to materials. This time, however,
we're going to make use out of seamless sectes. So in regards to setting up additional color
information materials and whatnot, for assets. You can either A have already preset type of materials for your assets that
just basically has coll information purely for the UV based type
of coordinates. And that's helpful for when you want to get some additional, for example, detail
on your area. So for example, this grain over here would be a
little bit different and you'd be able to control the edges to be set up
differently as well, for example, we have some
edgeware and whatnot on this edge, for example, here. But let's say you want
to have some control from within the asset from
within the project itself, you're totally able to do
that with seamless ra. So we have three
seamless tras over here. We have one for metal, one for water, which we're going to come back in the
future and one for wood. And this will allow you to
create some really nice type of setups for your basic
seamless material. So for that, we're going to grab our material or our
initial material that we created
zero one material. We're going to hit
control C control V to make a duplicate out of it. So this way, we don't have to redo this entire
setup over here. That's going to be pretty nice. I'm just going to rate a
material Sam out of it. But before doing that, I'd probably want to set up
a different name for this. So actually, I'm just going to call this one
underscore seamless. And that's going to give
us a better result. Now, if we were to
double click on it, and it's going to be
simple and still the same, and we can make use out
of it by right clicking, creating material
instance, and that's going to give us
this sort of result. So yeah, we're going to create ourselves a first
setup for the wood. And yeah, for us to do that, we're going to have
it name differently. We're just going to call
it woods and there you go. Now we can double click on it and make sure we change this up. And if we were to click and drag and drop
it onto the table, we can see that we're going
to get this sort of a result, which obviously is
not what we want because the textures
are still not set up. So right away, we're going to go onto the material instance. We're going to make
sure that everything is enable just like
we had previously. We're going to go onto the wood. We're going to start
getting ourselves up with a nice type of
a set up for wood. Amber occlusion, then wood, metallic, and the rest, like so. So just by changing all of
them, like so we can see, we are getting a real nice
type of setup for the wood. So this is already
looking pretty nice. Of course, we want to have some control over
the grain itself. The main selling point of
the seamless textures is that you can upscale the UVs in regards
to the grain itself, and you can have
as much detail as you want in regards to
the texture itself. So first to make use out of it, what we're going
to do is actually, we're going to set
ourselves up with a nice seamless type of
settings. For the material. So we're going to go back onto the seamless
material over here, and we're going to expand
this entire thing, and we're going to
start setting ourselves up with texture
coordinate settings. So as you talked
about it before, we have on the right hand side all the outputs for base color
and on the left hand side, we have the input information for which you can make use of. So we're just going
to make use of the UV type of information, but we need to set ourselves up with a couple of notes first, and that's going to be
actually quite easy to do. We're going to right
click. We're going to search for coordinate. We're going to find ourselves
texture coordinates. So this will need to be used in order to control
the U V coordinates. And if we were to select
it on the left hand side, we have UV tying, so we could change
these from here, and that would give
us good options. But if we wanted to make use of our material instance and have more control out of
our type of a set. What we need to do
is we need to set ourselves up with a parameter. So we're going to hold S. We're going to tap
on a material graph, and that's going to give us a float parameter,
simple float parameter. We're just going to call
this one scale, like so. And now we're going to hold M. We're going to tap on a screen. We're going to connect
both of these up. To a multiplier
node just like Tat. So it's going to by default B set up with default
value of zero. So once you multiply with zero, obviously, you're going
to get a zero, nothing. So we want to make sure we
get a default type of a look, a value of one
will do the trick. We're going to then attach this to all the UV
coordinates like so, and as you can see,
nothing is going to change within our preview
for the textures. The reason being is because
we are multiplying it by one, and that's not going to change
anything at the moment. So once we're doing,
we're done with that, we can go ahead and apply
this material, save it out. I'm going to click
Control S. Actually, to save out this material, I'm going to minimize
this and Actually, I'm going to close this down, and now we're going to go
back onto our wood instance. This time, because we
created a float parameter, we can see that there are
parameter values over here. We can click on it, and now
we can make use out of it. We can either tap on it once and change the value manually ourselves to something like two. We can see that it changes
the amount it has. Or alternatively, if I
were to deselect it first, just tapping it off from it. Then I can click and hold and use it as sort
of a slider and then increase or decrease
the value manually myself. So I can change it to
whichever way I want and adjust the values
to the way I'd want it. So for now, I think I'm
going to keep it as 1.2, just a bit more in
regards to the grain. I think that looks
really nice, actually. I might lower just a little bit, so I could have more
variation there go. So some of the grain
would go on edge. I think that's going to
look quite nicely like so. And that's pretty much it in
regards to the scale itself. We can now go ahead
and set ourselves up with metal as well. So for us to do that, we got ourselves a simple iron
to make use of it. I'm actually just going to click Control C Control B to make
a duplicate out of the wood. I'm going to click
F two to rename it. Going to call this one iron so. And I'm going to just simply call it iron
underscore instance. Double click on it to open ourselves up with
its parameters. And now we're going to go
into the iron and simply just reselect every single
one of them, like so. And we're going to get ourselves a real nice type of a
result for the values. So just like that, we got
ourselves the result. I'm going to go back
onto the folder itself. Going to scroll all
the way down until we get to the iron,
which iron intense. Now we can drag and drop
this onto our area, and we can see
that we're getting ourselves some real
nice results already. We can play around with the scale a little bit,
maybe increase it. So value of 2.5. I think that's going
to look quite alright. So yeah, it's already
looking quite fine, but we only have
one on material, and if we were to apply
it on to the bolt itself, it's not going to be quite as distinguishable for
the overall setup. So we obviously need to fix it. And the way we're going to fix it is actually
we're going to add some minor adjustments
in regards to the parameters of
the material itself. And yeah, the way we're going
to do it is actually we're going to go back on
to material seamless, the material itself to
this one over here. We're going to open it up,
and now we're going to make some additional
parameters for this. Okay. So the very basic that we can do
is if we were to hold, we're going to tap on a screen. We can just set ourselves up
with a multiplier parameter. So by holding S and
tapping on the screen, we can call this color
multiplier like so, and add this up to the
multiply default value. Make sure it's set up as one to get to default type of setup, and we're going to attach
it to the base color. Click Control and
S to save it out. Now we can see how
it looks like, and if we were to
actually lose this down, or I'm going to instead just
close this down like so. Can make use out of
color multiply to make the metal even brighter
or darker, like so. So we have a lot of control
over this metal now. We can make it darker
or brighter, like so. But of course, we need to make sure that we set it up
for the bolt itself. So for that, I'm going to find
the iron instance like so, going to hit Control
C control V, make a duplicate out of it, and now I'm going to open it up, and that the tone to multiply
it to something like 0.7, and drop this into the hinges, and maybe lower it down even
more, something like so. And that's a little
bit too much actually. Yeah, 0.7 0.65 value. So it's going to the trick
is going to be looking much, much better in regards to that. So, yeah, it's already
looking pretty good. But for example,
what about wood? We also have table legs. And if we were to just
apply this wood onto here, it's going to just look too generic in regards
to the table itself. We can work with in the same way with the darkness of
the material itself. Or alternatively, we can set
up with a color multiplier. So for us to do that,
we're going to go back onto the seamless material. We're going to open this up. So the other way which we can
have control over material is if we were to set ourselves up with a
vector free value. By simply holding free and
tapping on a material, we're going to get
this sort of result, which allows us to control X, Y, and Z, and these actually are set up with
color linked values. So x would be red, y would be green
and would be blue, and these can also
be used as colors. So if we were to
select this node and tap on this constant
box over here, we can increase the
value to like so and then change the color picker and then it'll click
Once we click Okay, we can see that this value
has been changed to this. So by making use out of it and holding and using multiply it just
like we did before, we can combine these with
what we had before and making use out of it in a similar matter that we
had color multiplier value. The downside of this, though, instead of using
the color multiply is that we cannot
make it brighter. The maximum color of this is
going to be set as a one. So if I were to just set the
saturation all the way down, and value all the way up, we're going to get pure white, and the value itself is going to be presented
with this value itself. So you can see if I
were to click two, for example, and click Okay, it's going to give us this
sort of result, but often, what I find it is that
it doesn't quite like to work with in regards to
how I wanted it to be. So Yeah, I personally prefer
to just not use this at all, and just have this value set as a maximum one,
and as you can see, it's going to only go 0-1, and that's probably the best way of making use out
of it, honestly. I find that otherwise through the parameters
of material instance, especially, not going to give you the right
type of control. So yeah, just make sure
to set this up so. And yeah, by multiplying
it by a value of 111, we're going to get exactly
the same type of result. We're going to click
control S to save it out, and this should also apply
the material, which it did. I'm going to close it down. And now, if we were to go
back on to the wood instance, I'm actually going to make
a duplicate out of it, hitting control C control V, drag this out on the table, double clicking on it, and there we go at the very bottom. Now if we were to scroll down, we should have ourselves
nothing because I actually forgot to change this to
a material parameter. So I'm going to go
back on the material, going to open this up, going
to right click on this, so, change this to a parameter. And now we're going to
call this color, like so. Control and S to save it out. And once it's saved out, we can go back and
actually go back onto the wood instance that
we made a duplicate, make sure we apply it,
put it up to the side. And now if we were
to scroll down, we have a global
vector parameter. If we were to change
this up a little bit, we can change it to be a
little bit more brown, purple, blue, whichever
color we want. I'm going to make it a little bit type of a yellowish tint. So you can already see the
difference in regards to the variation between the legs
and the top of the table. So Yeah, that's going
to be it in regards to the variations of
material instances. We still have more
and more material to go, which is
going to be water. That's going to be left
off for the next lesson. So thank you so
much for watching, and I'll see you in a bit.
10. PBR Water Opacity Setup: Welcome back here
from to creating studying environments
in Unreal engine five to boot camp for artists
course. In the last lesson. We left ourselves
off with setting up some seamless
textures for the wood, and it looks pretty
good for the table. So we're going to continue all now with the bucket itself. It's still missing in
regards to the water itself. Let's go ahead and fix that. We're going to simply make sure that we find
ourselves to water. So we're going to make use
of these textures over here. We have pretty much
everything the same except that we need to set up
an opacity channel. So we're going to do
that in a second. We're going to first of all,
make a duplicate out of a seamless material like
so click in Control C, Control V. We're going to
rename this one as a water. I think we can just call
this water seamless. That's going to be
all right. Let's go ahead and double click
on it to open it up. We should have all the
same parameters as we did previously with the color
with color multiply, and whatnot, and
everything should be already pretty good to set. But if we were to
make use of it, I'm actually going
to set up with the water textures right away so we could see
how it looks like. I'm going to click create
material intense out of it, like so or alternatively. I think instead of
doing that, I'll show you another
way of doing it. What we can do is also we can close down this
graph real quick. We have everything enabled in this area over
here, for example. If we want to make
use out of it, we can just click Control C, Control V to make a duplicate. Obviously, it's going to
have everything set up. But once we start
setting up the water, it's going to have a
different material. So this is not going to be used within this
material instance. If we were to scroll down,
we can see that the parent, of this material instance is actually this
material over here. So material seamless. We want to make sure that we are using water seamless sture. So we're going to
click and hold and drag it onto the
parent area like so, because it's
identical currently, nothing else is going to change, but we still have
those tick marks on. So that's sometimes useful tip
in regards to when we want to make use out of all the parameters
that we already have, but we want to have a
variation out of our material. So, yeah, going back to this, we're going to quickly add everything up for the
textures of the water. We're going to quickly
add everything. You notice that the metallic or the water is set to
a value of 0.7 0.8. I don't quite remember
the exact value, but it's usually between
those values for whenever you want to set
up a nice water material. The reason being is that water, if it's not set in regards
to metallic value, it's not going to have a
liquidis form looking. It's not going to have
the right type of a reflection for them. But now, once we
have some metallic, if we're to click and hold
and drag it onto our bucket, we can see that it
actually looks quite nice. It looks quite balanced. So actually, I'm going to take off the metallic value
to show you what I mean. So by default,
it's actually just going to give a really
bizarre type of look. I'm going to make it black. So it has no metallic
value at the moment. And you see it looks a
little bit plasticy. So that's why the reason for adding a bit
of metallic value, if I were to click
control is to go back on its went back a
little bit too far. It's not getting me
back the same material. I'm going to real
quick drag it back on. So yeah, as you can
see, right here, we have more bit of reflection in regards to the
water, it looks liquid. Looks like it actually
is a body of water. But of course, we
don't have the set up for the translucency, we don't have any opacity value. So we need to make sure we set that up and
for us to do that, we're going to go onto our
water seamless material. We're going to open
this up completely, and the first things first. What we need to do is we need to select the material itself. We have blending modes
within a material area. So based on the
selection of a node, we have different
selections of noticed. So by selecting the
material node itself, we have options
for the material. And yeah, the ones that we need to change is going
to be blend mode. If we were to change this
from opaque to translucent, it'll give us a nice way to transition the material itself. But once we selected,
we'll notice that a lot of the material notes
end up disappearing. The reason being is that
it's set up by default as somewhat of a performance
saving type of a material, and it's usually pretty
good for the basic type of translucency when we want partial translucency for
something like class, for example, or whatnot. But if you want a bit more, we'll want to make use automatolic roughness values
like we did previously. So for us to do
that, we're going to select back onto the
material itself. We're going to
scroll all the way down until we get to
the lighting mode. If we were to change
the lighting mode from volumetric non directional it's underneath
translucency type, just make sure you
have this opened up. If you were to change this to a surface translucency volume, you'll get these
PBR values back. So now we can go ahead and make use out of
a pacity channel. And this way, we'll be
able to make use out of our partial type
of pacity again. So before we didn't have this, now that we have a
translucency turned on for this and for
this blend mode, and the lighting
mode changed up, we'll be able to
make use out of it. We're going to set
ourselves up with a simple parameter holding S happening on the screen
and calling this opacity. Like so. We're going to set the default value
to something like one. We're going to drag this onopacity control
S to save it out. Once it start saving out, we're going to take some time, obviously, to compile
all the shaders. Now go ahead and
close this down, make this window smaller. Get it back, and now we can see that we have opacity option. If we were to select it, we
can start dragging it down and you can see the entire
thing disappearing. So yeah, that's pretty much it when it comes
to the water itself. If we were to set the
value to something like between 0.5 and a value of 0.9, we'll be able to get nice
type of a set up for a water. So I think at this point,
I might use value 0.8. The closer we get
to a value of one, the less transparency
we're going to get. Usually, we just want to
make use of it to get some nice volume for
the water itself. And that looks quite nice. We also have the scale itself. We can make it larger,
we can make it smaller, depending on the type
of water we want. So yeah, that's pretty much in regards to
the water itself. We're pretty much done to that. The only thing
that we're left to do is actually cleaning up the project because
right now it's a bit mess in regards
to the materials. And as you can see the
materials themselves, if we were to drag
out the static table, it's still not going
to be applied. It's only going to
be applied onto the one that's been
within the scene itself. So we're going to work on how to set that up properly
in the next lesson. And yeah, thank you
so much for watching. And I'll see in a bit.
11. PBR Material Cleanup: Hello, and welcome back.
I were on to creating standing environments
in Unreal Engine five, the boot camp for artist course. In the last lesson, we
left ourselves off with creating some water material
to be used within the scene. Now we're going to make use
of all of the materials that we created basically to
set it up within meshes. So we're going to be basically cleaning up this entire project that we created. So yeah, for that, We can just double click
on the static mesh itself, so by double clicking on it, we go into the parameters into the settings of a
static mesh itself. And on the top right hand side, we can see that there
are material slots. Currently, for the
barrel, there's only one material slot. That makes it quite easy
for us to set it up. So we can make this quite a
bit smaller just like we did previously with
the material graph for the material instance, all the parameters were
on the right hand side. We're going to make use of
the same type of setup. So we're going to locate ourselves the barrel
bucket instance. We can hold and drag it onto
the barrel bucket like so, and that pretty
much solves it in regards to the setup
or this barrel. So now, once we drag this
barrel onto the scene, it's going to be already preset
with the material itself. So that's rather
simple thing to do. If it's only one material, it's quite nice and easy, and we can do the same thing
for the chair as well. That's going to be
a chair instance. We can drag it and it's going to give us a nice preview as well. Already looking pretty good. As for something that has
more type of material. If you double click
on it, we can see that it has two material slots. So in this particular case, it's quite easy, et cetera, because it's already
saying the barrel bucket and water already named, so it's quite nice and simple to have the
materials dragged across. And actually, we're
going to do just that. We're going to barrel bucket, add this onto the
first material slot. And as for the water, we're going to drag this out as well. I'm just in just in case, going to drag it out onto the scene to check
out it looks like, which looks all right. Going to go ahead and delete it. And yeah, that's pretty much it in regards to
the multiple slots. So what happens when
we have more slots. So I'm going to double
click on the table itself, we can see that we have
four different slots. So what happens then. And yeah, basically, the
best way to approach this, especially if we
don't have the naming for the materials themselves, if we were to, for example, have worked on the
mesh and couldn't be bothered to rename
all the materials before exporting them out. We'd have a bit of
a mess in here. So, luckily, it's quite easy to see which of the materials
are being used where. For example, wood planks. We can click on the
left hand side, those tick boxes to
help us out with that. We have either highlight, which will allow us to
highlight it within a mesh or alternatively,
we have isolate. The isolation is really useful
for whenever we want to see which pieces exactly
use these materials. So right now, we can see it's only the top section of the wood and the bottom pieces over here. So that's quite
easy to set it up. We can also go into the material tab itself over here and just
search for wood. And we can find the wood
variance that we had. So this one over
here, I believe, or actually, I think
it was the upper one. Yeah, it was the
second wood like so. So that's pretty good.
Then we have iron as well. We can just change this
to iron that's dark. The second one was dark,
I think that's the one. Actually, that's the light one, so I'm going to
change it to this and change up the iron instance to the second one over
here. Yeah, there you go. That looks pretty good. And yeah, again, by
just clicking isolated, we can see which ones
are being used, where, I should have
probably done that, but I went with the guessing
in this particular case, and it turned out
quite all right. Well, the wood itself,
the final piece, we can see that
these are the legs, the supports, and whatnot. We can go ahead and use wood. And we are going to
search for wood legs. So find ourselves the
material instance that we created is going
to be this one over here. Go ahead and select it, and now it should
be nicely set up. So there you go.
We have ourselves, the table nicely set up. Everything's in order. And yeah, what happens now
with the leftover materials, the ones that we were generated. Basically, we can go ahead and select all of them
using control. We can go ahead
and click delete. And it's still asking
for the reference. So what's going on here?
I'm going to real quick, check the bucket, for example. See that it's not
being used over here, so I'm not sure what it is. And whatever the over one was, I think it were two ones. I'm going to go ahead
and click the lit again. So there's one for a chair. We can open it up and
see which one that is. Again, there's nothing
is being used over here. So finally, the table itself, we already replaced it all so In this particular
case, I'm just going to go ahead and
click force delete, and that should give me a nice type of a
result barrel bucket. Let's not forget to
delete that as well. We probably go over them
as well just to make sure nothing is being used. And also, one more
thing that we can do in order to see the
references as well, real quick. We can right click on
the material itself, and there is something
called a reference viewer. If we were to click
on it, we can see which references which
items using this reference, so we can see that barrel and a bucket both of them
are being using it. But I think we just pretty much replaced
for both of them, so I'm just going to go
ahead and click Delete. Click force Delete,
and there we go. We don't need to go into
too much stuff into that. We just need to know
that there is a way for checking the references and
seeing if it works or not. But again, now we
can just drag them out like so and see
how it looks like, and everything should
work quite fine. And Just like that, we can go ahead and set ourselves up with
the first scene, and I'm just going to
click to change my gizmo, rotate the stable around, like so, put it up to the side, just like that, have
a couple of chairs, like so at the back. And that's going to be
pretty good. By the way. During this whole process, I'm using snapping for
grid angle and scaling. So at the top right end corner, you can see all three
of these options are turned on, like so. We can turn them off and on, we want to have more or
less control, but usually, if it's within a
larger type of scene, it tends to help
out in regards to getting a nice symmetry,
for example, and whatnot. And yeah, I'm just going to set up a nice type of a scene, like so, getting maybe a
bucket to be a bit smaller. Like so and something like this. And quick thing when
we want to have multiple assets be
real quick duplicated, we can hold old while
dragging and that way, we'll be able to
duplicate out assets. So that's quite useful
for whatever we want to just move
them out of the way. So It's rather simple
and easy to set up a basic type of prop
scene by just clicking W and we're able to go
between the gizmos to help us rotate to help us move out of the way
and inwards like so. And just using the arrows, we're able to just kind of
bring them out and inwards, and using the cubes in
between the arrows, we're able to affect the Mo
only for those two arrows. For example, the x
is the blue arrow for affecting it up and
down type of an elevation. For this object, so it wouldn't be going inwards
to the flooring. So we wouldn't be able to move
it if we were to just have it using this cube over here next to the
center of the gizmo. So by using this, we're able
to move it left, right, forwards and
backwards without it affecting it the
height of a chair. So that's pretty nice. And yeah, that's pretty much it in
regards to this lesson. Thank you so much for watching, and I'll see in a bit.
12. Vertex Color Material Setup: Hello, and welcome back on to creating standing
environments in UnregFive to Bootcamp
for artist course. In the last lesson,
we pretty much left off the first ten setup, and we got everything
that we needed to do in regards to bringing our assets
onto Unreal Engine scene. Now, we're going to continue on moving with the next level. So let's go ahead and go out of this folder back to
the bootcamp folder. We're going to start doing
the asset blending section. Let's go ahead and
open this folder up. We're going to load
up the scene like so. Make sure that we
click Save selected. Otherwise, this scene
that we just created, is not going to be saved up. Let's go ahead and click
Save selected, like so. And it's going to load
us in with a new level. If by moving this scene, you have some sort of
frame issues and whatnot, I recommend you changing up the scalability for
the engine itself. Within the top left hand corner, we'll find ourselves this button over here that says cinematic. If you don't have this
button by the way, you can always go to the top right hand corner
that says settings, and you'll have engine
scalability settings over here. It's going to give you
the same options in here. Once you start changing them up, you should be able to see them on the top
left hand corner. So anyways, by
changing this from cinematic to lower
quality options, you'll be able to get yourself more performance
out of your engine. So if you're working
with a computer that has less performance, you might want to change
these options over here. Alternatively, we can also
get even more performance in regards to this setting if we were to change
the top left corner, if we were to change it
from lit mode to unlit, We can take off
all the lighting, and we should be
able to work with the entire engine
itself just as well, but it might be a bit harder to distinguish what type of settings are being
used within the scene. So yeah, that's also an
option over here as well. And yeah, going
back to the scene, we're now going to make
use out of some of the unreal engine setup in order to get more variation
within the scene. So vertex paint to
set up the moss. For us to do that, we're going
to go onto our textures, and right now we have
a nice scene set up, but as you can see,
the textures might not quite match up with the
overall scene aesthetics. We might want to make some
of the rooms, for example, to be overgrown with
moss and whatnot, and we're going to
learn how to do that. So first things first, we're going to need to
locate ourselves up with a material or which the
castle is being used, and best way to do that is if we were to select
the castle at link. So we can click on the material elements over here and search it within
the content browser. By clicking this
parent over here, we'll be able to
find it where it is. And there's a lot of materials right now because there needed to be a lot of asset parts
to be set up separately. We're going to come
back to it in a bit. Although right now, we just need to find the
material instance. If we were to open it up, we're going to then find ourselves a parent
for the material, so this one is going to be it. And just like we had
in our previous level, we're going to have ourselves basic set up for a PBR setup. But now we need to get
ourselves a nice type of a variation that will allow
us to paint over the moss. The way we're going
to set it up is actually going to
be rather simple. We'll need to first
of all go on to textures folder
and find ourselves moss folder within the
acid blending folder, acid blending folder. Let's go ahead and
double click on it. We have a lot of
variations over here. We're going to start
setting them up. We're just going to
select all of them, drag and drop it into this material over
here. Open this up. We're going to now make
some settings to it. And yeah, I'm just going
to put it off to the side. This I don't know. Yeah. It doesn't have the
height map, this one. It has five texture differences. We're going to make sure
we make use of it all. We're going to simply just make sure we
reposition everything. So I'm going to have
color at the very top. Then the next one is
going to be metallic. So that's actually
ambentclusion that I have. I'm going to put it all
the way down the blue one. The purpish blue one
is going to be normal, so I'm going to be putting it next to the upper normal legs. And finally, this is
the roughness value, and the roughness is actually, this is the roughness value. So, we're going to
set that up as well. We're going to put it up next to the roughness and
ambient occlusion, we're going to pick
it off to the side. So in this particular case, we have a little less in regards to the textures that we're
using for this castle. It does not have
ambent occlusion. And it might look like a bit of an issue in
this particular case, but it's not much of an issue
because ambit occlusion, by default, it's going
to be a white color. So it's actually rather
easy to fix that up. And we're going to do that
in a second for now though, let's go ahead and
get ourselves in regards to adding up something
called vertex painting. So how can we do that? Actually, I also
have height channel. I'm going to put
it off to the side L. So yeah, we have color. We have only one metallic, which is fine. We have two normals and we have two
roughness, just like that. Of course, at the very bottom, we have ambit declusion.
That's what we need. The way we're going to
make use of out of them all is simply by making
use out of something cold, if we were to right click
and search for vertex color. If we were to just click on it, we're going to get
ourselves vertex color. This node will allow us
to make use of or mesh vertex color and each one of
the vertice, if I were to go out of it real quick, out of the material graph and put the review from
lit to be wire frame. Each one of these
vertices, as you can see, each one of those points that the lights intersect within. It might be a bit harder to see, but I hope it's quite visible
enough within a video. There are points, basically, and each one of these points has its own color information. By default, when we
were importing it, usually we keep it
off as white color, as we talked about it before
when importing meshes and that's usually
enough that we don't really need to use
them within texturing. But when we want to use it
within a vertex painting, we need to make use out of them by painting it
in custom values. And I will show you how to make use of it properly by
setting up material first. So going back onto the material, we have a couple of options. We have the top channel, which is RGB, both all three of these values
combined basically. We then have red,
green, and blue. And then finally, is
the Alpha channel. And usually, what
I tend to do is just simply make use out
of one of the channels, instead of just having
this first one, I use the red one to simply allow me in
case I wanted to come back in the future to allow me to make use out of them
later on if I want to. And yeah, it's best to just
use as little information as possible as we can make use out of this
channel later on. So Yeah. Going back to this, in order to actually
make use of it, it's going to be quite simple. You combine these two, for example, right now. I'm also not going
to change them to be a parameters
for a moss ever, I'm going to be
using the same moss sample the entire parameters. So I'm going to keep it is. And yeah, for us to make use of them and combine
both of these textures, both these color
textures right now. We're going to search
for something called. If we were within a
graph search for p, we should be able to find linear interpolate. And
I think if we were to We can hold Alt and
tap on material graph, we'll also be able to get the same node,
which is pretty good. Now, with this node, if I
were to put it on the side, and we can now combine all
of them into one texture. So the way we're going to
do it is we're going to combine the first one to A and the second one to B like so. And now, if the Alpha
is set to zero. Sorry, if it set to zero, and if we were to right click and we can preview the node, by the way, we can click
Start Previe mode. We can see how it
would look like. So because it's set to zero, it's going to give us the
first one, the first texture. But if we were to
set this to one, it's going to give us
the second texture. So that's pretty
good. Zero, again, is going to represent black
and white is going to be one. So if we go back onto
the vertex color, we remember how by default, we import the vertex color to all of them to be
replaced to white color. Usually, that's so
it is within meshes, so we're also going
to make use of that. Of course, we're going to only use the channel for the red. So if we were to
just simply combine this into the Alpha for the lub, we can see that it by default is going to give us the one value. And that's exactly
what we need to get the default color as is. We're now going to be able to connect this to the base color, and we should get ourselves
some nice results. Although we now need
to set ourselves up with the metallic, the normal and roughness
and also ambent occlusion, we're going to come back to this though in the next lesson. But in essence, that's Pretty much it in regards
to the vertex color setup. We use alert value to control the blending
between those two textures, and then we use vertex color to control where we want
it to be applied. And yeah, that's pretty
much it in regards to that. Yeah, we're going to continue on with this in the next lesson. Thank you so much for watching,
and I'll see it in a bit.
13. Understanding Vertex Painting: Hello, and welcome back.
I've run to creating standing environments
in Unreal engined five, the boot camp for
artists course. In the last lesson, we
left ourselves off with a nice vertex color node and
b setup for the material. And now we're going to continue on with the process,
and actually, we'll need to set everything up in regards to the
rest of the material. So for Sutters, We're
going to continue on with the b setup, and we actually have a really nice type
of a setup for it, but we'll need to, of course, make it suitable
for PBR texture. So for us to do that, we're
simply going to copy and paste this b on next to
the rest of the area. So whenever we hit Control C, and then if we were to hover our mouse over the area where
we want to paste it in, then we can click Control B. And it'll paste within the area where we have
our mouse covered. So we're going to just past
it next to the metallic, next to normal, next to roughness and file
next to med occlusion. We're going to leave out
the metallic for now, we're just going to
do the same thing as we did for the
color for the normal. So we're going to simply
connect them all up together. And I'm just looking how it looks like we
want to make sure that these setups are
placed in the same area, so the most would
be at the top and the base would be
at the very bottom. And I'm just making sure
that this is the case. So in this particular area, we want to be
switching them around. So I know that they are
different ones because the one that's connected
currently is the one that's being
affecting the castle. And that's the one that we
want it to be at the bottom. So we're going to make
sure that they are actually placed like
that, and there we go. I'm just going to switch
them around, like so. So we'd have it more consistent. And now that we have
it more consistent, we can go ahead and just simply do the same step that we did previously so and that's going to give us the
right type of a choice. And actually. Instead of just doing it like
this all the time, for us to simplify this
because right now you can see that these nodes will be going all
over the place. It's very hard to keep track of, and it'll look more
like a spider web. So yeah, we're going to make use of a named reroute
declaration node. So for sta we're going to simply drag out from
the vertex color. So we're going to
search for name, and we're going to add named
reroute declaration node. It's a bit more
advanced in regards to when we're making
the materials, but this is very good for when
we want to keep it order, more orderly type of a setup. So now we have this attached, and we can click F
two to rename it, and that will give us a
nice type of a setup, so we can call this vertex info or vertex alpha,
something like that. So. Then the next time, we're going to just right click. We're going to search
for vertex Alpha. Like so we can see that it's
underneath named reroutes. We can click on it, and it's
going to give us the output. The first one that we
create always going to take input and output notes. The second one we
create is going to only take the output. So We create this is
the orgonal basically, and the one alternative, the ones that we create afterwards are going to
be the outputs always. So that way, when we
connect this through here, it essentially creates
sort of a portal, a gateway through
this entire thing. And this helps us keep
it a bit more organized. At the same time, we
can now probably just copy these entire sections and just replace it for the alpha. And that's exactly what
we're going to do. We're going to copy
this vertex alpha. We're going to paste it in,
and we're going to apply it onto all of these
Lp values slips. So this will give us nice
results. Just like that. Final, this is the final piece, we're just going
to make sure that we combine the
roughness now values, so once we have them combined, we're going to
basically get them into the areas for the material. This goes into the normal
material value like so. This is the normal alert value. This is going to be
the roughness value. Let's go ahead and connect
this to roughness, just like that. So. And finally, we have a
dclusion as well as metallic. And because this is metallic for the castle alternative that we want it to be is
going to be moss. Moss is, of course, going
to be non metallic. I'm just going to click one, click and hold one and
tap on a screen to get a simple float value
that'll give us zero value. And then I'm just
going to connect them to metallic for B, and the mass value
which is zero, going to connect it to the A. And this way, I'm can
connect them to metallic, so and it's going to give
us the right result. Opposite on the opposite end
we have ambit occlusion. Ambit occlusion, by default, when it's set as a color
one, complete white color. It's going to give us just a
normal type of an outcome. When it's starting to darken up, then going to get more
depth information in regards to when the light is being shining onto an object. So in a way, it
helps us with depth. But for this case, the castle
does not have any depth, but we are also just happy
to have a moss information, which we're going to make use. We're going to connect
this to the Alpha, A, sorry to A for the lb, And then as for the B, since we don't have anything, we're going to hold one,
we're going to tapo screen, and we're going to change
this value to one, since it's going this way, going to give us a nice neutral white color
for amber occlusion. That's not going to mess
up our information, and it's going to nicely help
us with the most itself. So, we're going to combine this to the
ambentclusion, like so. And yeah, once we're
done with this, we can go ahead and test it out. We're going to clear control
and S to save it out. I'm also looking
at top left corner to make sure it applies
it, which it does. So that's pretty nice. And this way, we
should have ourselves a nice setup of going
to close this down, actually, going to
make sure that we are within lit mode like so, so we could see
the castle itself. Now we can talk a
little bit more about in goertic painting. Oh, yeah, vertex painting. In order to make use of
it, top left hand corner, if we were to change
the selection mode to be changed to mesh paint. Like, so, we're going to have ourselves a bunch of options, and we're not going to have much of a difference
right now because in order to see what color
vertices it's using, what sort of items
we can paint or not. We can click on Color
V mode and change this to be for
SATs RGB channels. By changing it to RGB
channels on this castle part, we can see that the entire
asset is set up as y. And Yeah, by default, it's going to be set as white, which is going to be using
default type of material. We'll want to make use
out of red channel only since that's what we set up
basically for the material. And yeah, we're going
to set it up to red. If we want to, we can set it up in the same way for green, blue for other
materials as well. I recommend you to just stick
in it with red for now. And yeah, we're going to
select this castle piece. We're going to start
clicking paint. And we can see that all of these vertices now can be painted on. We're going to come
back to the painting itself in a second. For now though, I'm
just going to make sure that my paint
color is set as black, which, as you can
see, secondary color, the race color is set as black. And to switch them around, we can just click on this button over here or alternatively, we can click on X. By clicking X, we
switch them around, and you can see them
switching around like so. By default, it should
be white and black, and we can make
sure that we have the first color set
as black this way. When we start painting it, we are going to get
this sort of a result. And actually, we're painting all of the colors at the moment. I just realize that
we're going to scroll down and we're
just going to make sure that only channels that arctic ton is
going to be red. This is a way we don't
affect any other channels, even though we don't
have any information in regards to connecting them, we still want to
see how it looks like only for this red channel. In case, we want to in the
future, like, for example, add additional best
practice to not add any information in regards to the rest
of the channels. So yeah, Keeping it as red
is going to be doing well. Once we paint out this
sort of information, we can go back to the normal color view mode by just switching
over color view, like so, and we can see that it starts painting in
detail just like that. So right, we're
getting something, but it's still not quite there. And first things first, we need to talk about how
this paint is being applied. So the way the paint
is being applied onto the castle itself is actually
kind of interesting. If we were to go onto wireframe mode from
lit to wire frame, you can see that these, although the walls are somewhat plain, they still have a
lot of vertices. So whenever we are
doing texture painting, we need to make
sure that we have enough vertices for the
detail because each one of these vertices are going
to help us with in regards to texturing
color information. So you can see these over here are highlighted, each
one of those dots, if I were to go back
onto the lit mode, we can still see those
dots being highlighted. And each one of those dots, if I were to make my
brush super small, So we can change
up the brush size, by the way over in
this corner over here. We're going to come
back to it in a bit. But once I start painting
this in, you can see, I'm not painting anywhere
except for this dot over here. The moment I start
going to the upper dot. You can see I start
painting it in as well, but I cannot go, for example,
in between these dots, I can I can click x to go
back to the white paint, and I can just
remove it like so, but there's nothing in between
these values over here. So if I were to make my
brush super small like so, I cannot paint anything out
in between those values. I can only do color information in those areas where
the vertices are, and then they're going to have a nice transition in between. So for example, if I
were to make this just a little bit type of
additional alpha, if I were to look at a
red channel like so. So it's only barely highlighted. You can see the type of
mask is being applied. It gives us a nice transition, but essentially,
this is what it is. This is the type of a
mask that it's using to portray our texture
information from the moss. Yeah, that's how it works in regards to the
vertex painting. We're going to
actually set ourselves up with some nice painted
results in the next lesson. So yeah thank you so
much for watching, and I'm just going to go back out of the red channel like so. And yeah, I'll see in a bit.
14. Moss Height Blend Controls: Welcome back on to creating
studying environments in real ng pipe the boot
camp for artists course. In the last lesson, we left
ourselves off by getting some basic vertex painting and introducing ourselves
to the concept itself. Now we're going to
continue on and make sure that we have
it set up properly. So for cars, we need to
make sure that the scale of the moss is a bit better
in this particular case. We're actually going
to go back and find locate the texture that
we were working on. This is going to be this one
of year, Castle Parts Mt. We're going to go
ahead and open it up, go back onto the LPs and everything that
we created before. And yeah, we're going to
set ourselves up with some simple scale in regards
to the overall setup. So I'm going to move
everything back. Go to then add
texture coordinates. Let's go ahead and click, search for coordinates.
Texture coordinates. There you go. Let's go
ahead and add this up. We're going to hold tap
screen to get multiply. We're going to hold
S, tap on the screen. We're going to call this
one most scale, so. We're going to now combine
both of them just like that. And we're going to
start combining it onto the UVs itself. So let's go ahead and do that. And I'm thinking whether or not we want to set up
this type of note, we might make use of it. And
actually, sorry about that. Let me just click
control. I just realized that was combining it
into the castle itself, which obviously we
don't want to do. We just want to make sure we
keep it onto the mots only. And yeah, we might
as well create similar to this named re route. So let's go ahead
and right click, search for name rear route. This time, we're going to add new name rear route
declaration node. We're going to call
this one moss scale. So we're going to add it up onto here and give us
the right result. And for this particular case, I actually just want to
move it off to the side. So this time, we're
going to search for most scale and add it on top. I'm also going to change
up the most scale, default value to one, so we can change it back later. Actually, I'm going to
change it to two since I know it's going to be
too large by default. Might as well fix
that right away. Go to control C Control
V next to the metallic. Actually I realized that metallic does not
have a mass value. Let's move downwards. We're going to change this
up to a normal map lex. So we're going to
change this up to a I think it was a
roughness value. Yep, it was okay. Then finally, ambit declusion let's change that up as well. Go to clear control and S,
see how that looks like. Let's wait it out
for it to compile. Like so. I'm going to go back and see how it looks like it's still a
little bit too large. So I'm actually going to sorry, I'm going to put it up
to the side, like so. I'm going to go back
onto the most scale and change the default value to something like five, even eight. Something like that. I
think that's going to be much much better in regards
to the overall set up. So there we go.
We've got to sell a nice way of working
with the most itself. Now, what about the overall
it information, for example. By default, this type of
setup looks quite nice. But as you can see, the way
it links up with the rest of the texture just blends in kind of a soft type
of a blend way. So we want to be able to have more control overall
in regards to that? So for us to do that, we're
actually going to make use of the hight information
and we're going to locate the vertex
color over here. So this is the vertex color. We're going to click
and we're going to search for overlay
blend overlay. So this is what
we're looking for, to be able to make
use out of it. And then we're just going
to simply combine them links and add it onto
the vertex Alpha. So this way, we're
going to get to sell some really nice result. So yeah, vertex color
goes into the base, and the height value is going to go into the
blend value like this. We're going to connect everything
onto the vertex Alpha. We're going to save it out, and then we're going to
see how it looks like. And actually, I just realized
I made a bit of a mistake, which I'm going to talk
about it in a bit. But you can see this is how it's going to
look like right now. And actually, I just realize
that we might need to have more strength in gas
height information or actually. I think it's quite right. I was thinking that
maybe we can have a multiply regaortexure
sample for the height value, which, in some
cases it's needed. So it would be pretty much similar to what we
have over here. But for this particular case,
I don't think it's needed. I think we're going
to leave it as is. The only thing that
we need though is to make sure that most
scale matches up. So let's go ahead
and add mo scale. I'm going to hit control C. To go down all the
way down, like so. Go to hit Control V.
Face this into the UVs. So and it control and
S to save it out. Now we can go ahead
and close it down, and this is what we should
get ourselves with. So as you can see here,
some of the areas, some of the bits are
seen being seen through, which is looking quite nice. Although now they to look at it, we might need to fix
that up a little bit. Yeah, I think we're
going to go ahead and go back onto the height map. We need to make sure that
this has more contrast, basically, which is
actually quite easy to do. We're going to right click, we're going to
search for contrast. There are a couple of versions, but we want a cheap contrast because it's only
black and white image. We're going to apply this into. As for the contrast itself, we're going to just click
and hold S, tap on a screen. We're going to tap
in Ms contrast. So and add this onto the value. I think we can just set it
up at default value of one, so, add this onto the blend. It control an S, save it out,
and see how it looks like. It should by default, give us the same result. But now we can go into the
material for this castle. So I'm going to select
the tower itself, going to go into the materials
bottom right hand corner. Happens, we have a couple
of options to work with. So for cards scale. We can change up the scale, however we want it to be. Actually, we're going to
go into seven for value, and I think that
looks quite nice. Now, what we also need
to do is the contrast. So by increasing
this, we are able to blend it in in regards
to it being sharper. By lowering it, we're
able to have it, as you can see, blend it in so. So we can make use of it in order to have a nicer
type of transition. Of course, the most control is going to be with
the paint itself. So we're going to work
on in regards to that. Yeah, I think we'll need
to spend one more lesson in gosites because
we also need to make use out of
the vertex colors and make sure that
they match more in regards to the color of the grass that's on the
ground and terrain. So yeah, we're going
to continue on with Inergosites in
the next lesson. Thank you so much for watching, and I'll see in a bit.
15. Vertex Painting Castle Ruins: Welcome back ever into creating studying environments
in Unreal G five, the boot camp for
artists course. In the last lesson, we left
ourselves off with setting up the moss material
that we're able to make use out of it and set ourselves up with
vertex painting. So now we can actually go into the vertex painting itself
and make use of it too, get ourselves some
nice. Overgrowing moss. Actually, before doing that, what I'd like us to do
is go into the moss itself by double click
on it. We have a moss. And you can see that it
doesn't quite look right in regards to the color
next to the rocks. We need to make
sure that it looks a bit better in regards to that. So for us to fix that, we're going to double
click on a base color, and we're going to open
up the texture itself, and then within the
bottom right hand corner. Whenever we want to fix up
the texture for, let's say, a moss or for just
texture in general, we have adjustment
tab over here. So make sure we have
this opened up. We have brightness,
we have saturation. We have all sorts of
things to make use of, and I'm actually just
going to set it up so I could see the
texture next to it. So we can, for example,
make it a bit darker. And yeah, by just making use of of these by
playing around, we have a lot of control in
how we want it to set up. And I'm actually just going
to darken it up a little bit. So I think that's going
to look quite nice. Maybe lower down
saturation, perhaps. Yeah, saturation seems
to do the trick. So yeah, a lower down the
brightness to a value of 0.9 and saturation
to point in as well, and that seems to
look much nicer. Although now, I can
see that the scale of the material is a
bit a bit different. I'm actually going to go into
moss the material itself. Going to actually get into
the material instance, like so and increase the
scale. I increase it. I'm still looking making sure
that it looks quite nice. If we're actually going to go increase it to something like 42, this would look like. Maybe something like
that actually might look a bit better in
regards to the scale. Honestly, more or less down
to a personal preference, how you wanted to set it up. Maybe I even try 64
64 is way too much. So yeah, 32 seems
to do the trick, and it's looking
quite nice, actually. I quite like that. Okay.
So going back to this, we're going to go
ahead and make sure that we are within
the mesh paint mode. We're going to go ahead
and click on select, select this material, only
this mesh itself right now. We're going to click on Paint. And then we're going to
start painting it around. Starts, we have
controls for the brush. We have size strength fall off. So the size is self explanatory. It controls the size of a brush. The brush size, it always
depends on the scale of a mesh. So for example, if I were to try to paint out this is
going to have this brush. But if I were to select this
mesh and click on this, you can see it slightly
changes the scale. If it was a bit larger in
regards to the overall setup, it would be a bit
different as well. So that slightly changes up in regards to the
scale of a mesh. Okay. Then strength. This is how fast it basically
changes up the mask itself. I'm going to go ahead and go to a red channel or actually, I'm going to leave it as it is with only the red
channel ticked on. I'm going to go
ahead and leave it as is because it's
easier to see. So we have strength set to
something like super low. We're able to click and hold, and then see it gradually
coming up like so. So we're able to blend in some masks quite
nicely like this. Alternatively, we can set it
to one and click x to invert this paint color and
just kind of cut off this mass completely or click X. We will start adding
black mask and just kind of straight up add all
this type of mask. Fall off is quite nice as well. I'm actually going to change
this strength back to 0.5. Fall off helps us with in
regards to transition. I'm going to just
delete some of this. So with zero fall off, what I'll do is
basically it'll give us as sharp as edges as possible, like you can see over here. Although it looks like
there's some bits growing now over here with
some interesting transitions, you can see that
there's not much of a mass transition
in regards to that. With follo off
setting set to one, we have much nicer type of edges when we're
brushing it off. So really depends
on the preference in regards to what kind of
mask you're trying to get. But I recommend you for most to set it up some to value of 0.4. It usually gives us a
nice type of result also. It is being affected by
the size of the brush. So for a smaller brush, you might want to have a larger
fall off. There is that. Okay. So now that we have the bases covered for
the vertex painting, we can go ahead and
start painting them up. So we're going to have
some bottom pieces painted off, like so. We're going to have
some pieces over here, for example, on a castle, and it looks really bizarre
to the way we're painting. So for example, if
we're not starting painting on the
edges of this mesh, we're going to start
moving the camera weights. So make sure that you start
brushing it off on the side and I might even to help me with the shadows go on to unlit mode. And that's quite useful as well, sometimes when painting
with such areas. We want some areas in here. Also, in regards to
the mesh itself, I mentioned it
before a little bit. We have a lot of vertices. When you're painting when
you're using vertex painting, just make sure you have
enough vertices on your mesh. Doing that, don't be afraid to add a bit more
in regards to that. And you should be fine overall. So I'm just adding
some bits over here, maybe make the size of
a brush a bit smaller, as well, add some
bits on the edge, like so maybe some of a year. Just by doing that,
small detail in corners and whatnot,
for the legs, we are able to break off the shape completely
and get some really, really nice results in my
opinion, so there is that. And yeah, I think that
looks quite right. We can add also next to the
line, for example, as well. If we want to texture multiple objects at once,
we can totally do so. We can go back onto
the selection mode, have this selected
while holding shift. I'm going to select
this line head, for example, this piece, and this over here, and now
we can go back on to paint, and this will allow us
to paint it all at once. So in some cases, when we
want to do it all at once, we can totally do
so just like that. And for example, if we
want to the texture not to go all the way to
just a complete mass, we also have options to
change paint colors. So right now, it's set
to white and black. As you can see if we open it up, we have value over here and we have the value number over here. So if we were to change
something like 0.3, It's always just going to go down to this value if
you were to click. So it's always going to be, as you can see, semi
transparent type, and some of the bricks are a little bit
more seen through. So that's an option
you might want to consider when working
with vertex painting. Most of the time,
though, I just set it up to white and black
and then just kind of blending in regards to
using just the strength value. And that seems to be
doing quite well. And yeah, we're just
going to make use out of it and just
break off the shapes, get some nice results over
on the side, like so. And sometimes don't be
afraid to be tapping out a little bit as
well, multiple clicks, instead of just
clicking on a holding, that sometimes gives
some nice control over the overall setup clicks. So I think that's going
to look quite right? Just like that, I want to have some bits over
here, perhaps. Maybe some over here. A little bit over here. And some perhaps over here. I'm not going to
spend too much time, take as much time as
you'd like to be honest. Personally, I quite
like this process, but I don't want to
spend too much time in regards to this particular
task at the moment, since we still have
a lot of to cover. It's still our second level
that we're setting up. But yeah, as you can see, looking from a
distance, it looks way better in regards
to the overall set up. So, yeah, that's going to be it in regards to the
vertex painting. That's how you get
some nice transitions, for example, from the grass, you match up the color with
the texture of the moss, for example, and you get
really nice type of setup. And I hope you
enjoyed the video. I hope you enjoyed a lesson. And then the next
one, we're going to continue on with
other techniques. So yeah, thank you so much for watching, and I'll
see you in a bit.
16. Physics Based Object Scattering in Unreal Engine 5: Hello, and welcome back
everyone to creating studying environments
in Unreal engine five, the boot camp for artist course. In the last lesson, we left
it off by setting ourselves up with a vertex
painting or our castle. And now we're going to
continue on with this. And this time, it's going to be a rather short comparatively
shorter type of setup. We're going to get ourselves a physics based type of
scattering for the rocks. You can see that
some of the rocks already been scattered around. They actually been placed by hand and I just duplicated them around just to kind of get a nice type of a setup
for terrain. Okay. But we want to make
it a little bit nicer in regards to
the overall setup. So we're going to make use of physics based
type of scattering. And the way we're going
to do it is actually we're going to enable
physics fold the rock. And I think if we were to go back onto our assets
blending folder, we're going to go
onto assets folder. We have a couple of
assets to work with. So the rock, for example, let's go ahead and grab this and drop it into the
sceal links. So, If we were to simply
make use out of it, nothing will happen
because we need to well, if we were to hit play, we can see that nothing happens. It still floats in the air. We need to set it up
as a physics object, but we cannot set it up as a
physics object right away. If we were to search within the detailed stab per rock
with the rock selected, We can see that we
cannot simulate physics. The reason being is that this firstly needs
to have a sort of a collision that will
help us create physics. And for us to do that,
we're going to go into the static mesh itself.
We're going to double click. We can see that if we
were to maximize this, we can preview the collision. So I'm going to click on show. Go to click on simple collision, we see that there's
no collision. We only have complex collision. Complex collision is
basically the mesh itself. So it's not going to be used within the physics
type of a set up. We need to make sure we
set up simple collision. For us to do that.
We're going to actually I'm going to
click on simple collision, going to keep it on so we
could see what it looks like. Go to then go onto
collision itself, and we have options to create
a simplified collision. If we were to just
select the largest one, I think in this case,
is going to be okay. We can make some variables
with smaller ones, but I'm going to just add 26
D OP simplified collision, and it's going to
give me this result, which in some cases,
it might be right. But in other cases,
we might want to grab a bit of a better
type of collider. So the alternative
version to this is to actually generate it
using autocvex collision. Were to click on it. We're going to get ourselves a menu at the bottom right hand corner as a lot of options.
Well, not a lot. It has free options, I count for when we want
to add more for example, detail within our mesh. So if we have an arc wave, for example, we'd want to generate a sort of
an arc within the mesh. I'm going to explain it a little bit more in detail in a bit. For now, though,
we can just simply click Apply and see
how it looks like, and you can see
that it generates this sort of a collision. It might be a bit. Harder to see in
this particular case because it's so
close to the mesh, but we can see the
green box being applied all over the rock. And in this particular case, that's exactly what we need. That's all we need
to make use of it. We can go ahead and exit this, and now we can simulate physics by clicking on
this button over here. And now if we were to hit y, we can see that the rock actually goes down
and falls off lakes. So and it's raver
easy and simple set, but we, of course, need
to fix up some things. First things, first,
we got to check how it behaves in
regards to collisions. And yeah, when we're
simulating physics, we've got to make sure that
the other objects that we're trying to collide it with
also has collision colliders. So we can see within the level, if we were to click Show, we can go ahead and
click on collision. We can see that this mesh in particular has already
a collision setup. So it's already nicely
placed for the terrain. It has a collision on
this area over here. Although you can see that
this collision does not have an area over here that
would allow us to place objects within it. So if I were to, for
example, hit play, we can see that it's
actually just going to sit or actually float at
the top, like so. Actually having a
collisions visualized like this is super useful whenever we're playing
around with them. And whenever we're finished, we can simply go back on to show and just use default ones. If we were to click
on it, we're going to just simply get a nice setup. So like the usual type of setup where we don't
see the collisions. And yeah, going back
to the collisions, generated collision itself,
I'm actually just going to go ahead and generate one wagon. I'm going to turn off this and go back onto
the static mesh. And yeah, going back to this
generator, if, for example, we have a lot of holes
like in this over year, if we were to hit apply, we can see that it
does not generate the nices of the mesh. So for example, this
hole over year, we probably want to have
it a bit more flatter. So this is going to be affected by the hole vertices
and hole count. And whole precision
is actually just how close the vertices that are
generated with the collision, how close they are going to
be next to the mesh itself. So, for example, you see some of the vertices are too
close to the mesh itself. Some of the vertices are
floating outside a little bit. Usually, I keep the
whole precision as is because increasing this will increase the computation speed. But for now though, we're going to just
increase whole count, which we're going to increase the amount of holes it perceives it
detects within a mesh, if we were to change
it to something like 30 and hit Apply. It starts a bit longer
process in this case, but you can see that it fixes
up this area over here. It tries to pick up some of those holes in this
section as well. So in this case, I prefer to actually keep it to a
bit of a lower value, maybe 15 is going
to do the trick. I'm just worried that
this needs a bit more in regards to the setup in regards
to this hole over here. So maybe something like 22, And that looks quite alright. And then in regards to
the maxol vertices, we can see that
sometimes we want to increase them and sometimes
we want to lower them, but increasing them
would give you essentially more complex
type of a collider. And I think in this
particular case, we're going to lower
this down to 14. And yeah, I think that's
going to be right. It looks a bit messy, but when we're using it, it's
actually more than enough, We're not going to have
any holes here or next to, for example, the wheels. But we just want to make sure that the overall shape
is going to be quite right. And once we're happy with
that, we can, for example, have a couple of rocks and
apply it onto this area. So if I were to
make them smaller, like so, we can set them all up. If we were to hold old, we can have them duplicated
a couple of times, like so. Just like that. So
we have some of them right above this
wagon over here, and I might even duplicate
it one more time, actually. I think that's going
to be quite okay? Yeah, I think that's
going to be quite okay. I'm going to hold duplicated a couple more times
there you go. We're going to have
a bunch of rocks. I'm going to make sure that all of them are being selected. So I'm going to
hold shift and just simply re select them all
after the duplication. Just like that. Like so. And now, once we hit play, we're going to see
that these rocks fall into the wagon really nicely, and they look quite
nice within the scene. But the thing is that
once we hit escape, it's going to disappear. So what do we do about that? Well, first of all,
we're going to switch the play mode
to be simulated. We're going to click on
these free dots over here. We're going to simulate this
entire setting, like so. So we're still
within our editor, but it's going to be simulated. Even now, if we were to
click stop simulation, it's still going to go back
to the usual, like so. But what we can do is once
we click simulate, like so. We can now go ahead and
have the selection as is. So we still have our selection,
as you can see over here. We can now click K, which will save the
state of all the actors. So by clicking K, it saves
the actors as they are. And once we stop simulating it, we can see that they're actually stayed within the same position. So that is how you
save out your assets basically after the simulation after they're being
fallen down by physics. This is pretty nice. And yeah, one thing
that I'd like to the final thing that I'd like to mention is once we
have a lot of rocks, for example, and
you want them to, for example, fall down nicely. So I'm just going to
duplicate them like this, make some of them smaller, some of them larger, like so. To have them fall
over like this. Okay, so that looks reasonable. I'm going to grab all
six of them like so. And now, if you want to have
a bit of a nicer simulation, if I were to simulate it, because the last time
we selected simulate, we can just use this
this pattern over here. This is the last type
of a played setup. And actually, right
now, I need to I just copied the rock that
has no simulation, so I need to go on
to simulate Again, Simulate physics
and click on this. Going to hit play, and it's
going to give us this result. So you can see, they don't
behave like heavy objects. They need to be a bit heavier. I'm actually going to put them
a bit closer to the edge. But they don't look like they're all that heavy. We
need to fix that. We're going to
search for physics. Again, we're going to go
back on to simulate physics. This time, we're
going to manually tell what kind of mass it has. By default, it should have it based on the scale of an object. That really is hard to say depending on time
of object you have. So obviously, a stone would be heavier than a bag of
feathers, for example, right? So if I were to change
this 100-1 thousand, now, if I were to simulate, we can see them instead
of just bouncing around, they're actually falling down
more behaving like rocks. So that's much, much
better in regards to that. We can see them acting
out a little bit better. We can now hit K and
save out their state. We can go stop simulation, and where you got ourselves
the entire set up done. And if for example,
we don't want them to move ever again
from these positions, with all of them selected, I'm still having them
selection off the rocks. I can click off simulate physics now I'm going to hit
play and they're still going to be within
the same position, and they're not going
to be changed out. And also, after we're done with simulation,
we, of course, can move them
around, for example, in any shape way of form, or for example, I don't
really like this rock. I'm going to just
simply delete it, and we're going to get
this sort of a result. So that's pretty much it in regards to physics
based scattering for objects to blend in the a little bit
better with the props. In the next lesson,
we're going to continue on with material set. We're going to blend in
some of those rocks to be better in regards
to how they look like. We see some really
hard edges over here, for example, we're going
to go ahead and fix those. Yeah, that's going to be
it in regards to that. Thank you so much for watching, and I'll see you in a bit.
17. Setting up Object to Nearest Surface Masking: Hello, and welcome back everyone to creating standing
environments and re langonFive the boot
camp for Artist course. In the last lesson, we left ourselves off by
creating some of the collision based type of
way to scatter our props. Now we're going to continue on in regards to
blending in some of those assets and making sure that they blend
in a little bit more with ing to the
environment itself. So for us to do
that, we're going to actually just grab
one of the dones. I think we can just
grab the darker ones. We're going to make use
out of them this time. We're going to first of all, make sure that it's not
within the simulation mode, so let's make sure that
we stop the simulation. We're also going to close down
the detail tab or physics. I'm going to click
on this x over here. And then I'm going
to scroll down until we get to
the material tab, we're going to just click
on content browser. We're going to
find the instance. So this is the Forest
boulder instance. Let's go ahead and open it up. We'll want to open
up its parent. And by default,
this was originally a Quixil type of
material, which, if you check the
Quizil materials, they actually are very complex to give you more freedom
for control and whatnot. But I've broken this
down a little bit to make it a bit
easier to control. Although the next step
that I'm going to show would pretty much
work within Quisil itself. So yeah, Going back to this, we're going to be
setting ourselves up with a sort of divering effect. So for us to do that,
we're going to make use out of our pasity mask. But before doing that,
I'd like us to go over the basics on what we're
going to use a type of mask, which will affect
that divering effect. So for us to do
that, we're going to basically right click, and we're going to search
for absolute world position. Actually, we're just going to
search for world position, so we're going to open this up and you go absolute
world position. Then we're going
to drag this out. The next one we're
going to search for is going to be distance to nearest Sorry distance,
nearest surface. There you go. That's the
one we're looking for. This is going to help us get a really nice and
basic type of mass depending on where or how close the object is in regards
to the other objects. So now I'm going as an example, going to add this onto a
missive color like so. And if I were to make use of
it, we'll see what it does. I'm going to click Control on S to show how it looks
like at the moment. We can see that this is
what we're going to get. And the reason being is because multiple objects are actually making use out of this. So it might be
actually better for me to make a copy out of this and just work with the
stone for the moment. I'm going to undo the step, going to hit control at S. I'm going to weigh
it out a little bit. Go to find cliff material
that we have over here. So that's going to
be cliff material. There you go, going to make a
copy out of this Control C, Control V. Going to go back onto the forest boulder
instance, like so. And for the Cliff
material O two, I'm going to just drag it into
the parent just like that. This time, it'll be a bit more isolated and
controlled type of workspace. We're going to open up
Cliff material zero two. And now we should have the same position for
the nodes that we had. This time, we're
just going to add it onto a missive
color, like so, going to hit controlling
S. And yeah, this is the type of mass
that we're going to have. It's going to be like this. If we get it closer to
the edge of our the rain, we can see it being affected. But although you can see that the mesh itself is
currently white as well. The reason for it
is because the mesh also creates that sort of a distance to near
surface field. So we need to make sure
we disable that within the area itself within
the object itself. So, for us to do that, we're actually going
to make this window a bit smaller again. I might as well close
this down for now. And yeah, let's go ahead
and select the rock. We're going to search for light. So we should give
us a lighting tab. There you go, lighting,
And we should be able to find
distance lighting, which I think it might
be better if we were to just search for distance
field lighting. Distance field. There you go. So we've got an option that says effect distance field lighting. That's the one we
want to turn off. Once we turn it off, we're going to get this
sort of a result, which is going to make it glow because we set it
up with emission. But once we get closer to
another objects, and whatnot, we can see that the objects
themselves are getting sort of a line next to it
next to the objects that were Touching basically. But
that's exactly what we need to use in order to get a nice
type of way to blend it in. Of course, this is
only a mass that's being applied onto emission. So we need to make sure that
we change it up basically. We're going to go back onto the cliff material, the
one that we set it up, and now we're going
to start working on this type of a setup. Yeah, first things first, we're going to make
sure that we have a nice set up out of a mass
for regards to the controls. We're going to move
this out of the way. Tip this off, so we only have absolute world position
and distiners surface. The first control that we want
to make use of is going to be setting ourselves up with a nice control for an offset. We're going to clip, we're going to get ourselves
a subtract type of a node. Add this to A, and we're going to hold as
tap on the screen, create ourselves an offset, L and add this to value of B. Now, the offset itself, by controlling this, we'll be able to control
the edge overall. We'll come back
to that in a bit. But now though we'll want
to clamp down the value, that will allow us
to control well it eases off in regards
to the mask itself. We're going to drag
this from subtract, we're going to search clamp. We're going to grab
or elves clamp. What clam does is basically
going to clam down our entire value of a mask
to a value 0-1 by default. The entire imagine
entire information of a mass zero being black
and one being white. This clamps it down to
these values exactly. And if there is a value that
goes over the whiteness, for example, when you saw the glowinss out of
our emissive color, this lamp would just make it
so it would just be white, but it wouldn't make
it so it would glow because whenever it was
going over the value, it was causing the
glowinss itself. In this particular qusethough we don't want it to be just
clamped down to a value of one. We want to allow us to
control the distance itself. We're going to hold
S. We're going to tap on a screen
for a parameter, we're going to just create a
distance parameter like so. We're going to attach it to a clamp value like
so, and there we go. We've got to sell
a basic type of a setup for a nice mass control. The only thing that
we are missing perhaps would be in a way to control the strength of
the transition itself. And I think the best way
for us to do that is going to be if we
click social power. We're going to make
use out of a power, and that's going to just
help us to amplify the mask, transition and whatnot and give us a nice type of contract. So yeah, we're going to hold S. We're going to tip in contrast. So we're going to just add it onto the exponent,
and there we go. We got to sell a nice mask. Next thing that we want to
do is make sure that we are able to make
use opacity mask. We're going to select
the material itself. And this case, instead of
changing it to be translucent, which would allow us to get semi transparency arm material. We want to make sure
that we still contain the quality of a PBR
material itself. All the light bounds,
all the shininess, we still want to contain that. And the best way to do
that is if we were to use mast type of opacity, we're able to make use it. Get good results out
of our material. But the downside of opacity
mask is that it only allows us to either have
material or item of material. So either make it
visible or invisible. The way to work around
this is actually by making use of a div
temporal and a leasing. So if we were to scroll, drag this out from
power and set up div diver temporal
AA. There you go. Okay. We can make use of it and set it up with
a opacity mask. Now, once we have set so, we should get ourselves
a nice setup. I'm actually just
going to change the contrast value
to one as a default. And I think that's
going to be quite okay. Let's go ahead and click control on S and see
how this looks like. Oh, actually, I forgot to set up the parameters for
distance and one. Let me just go ahead and
change this up offset. Let's keep it as zero distance and keep it as
one. There you go. Okay. Contrast, we
can change it to two, and we can see it starting
to dissolve on itself, the type of result
that we're getting. If we were to change it to five, you can see the type of
result that we're getting. You can see the type of
delivering that's creating. It basically allows us to
create a sort of a transition, even though we're
using opacity mask. So that's pretty useful
in regards to that. And sometimes it's a bad type of an effect because it looks
like a sort of a noise. In other cases where we want
to blend in the values, it actually works really well. So I'm going to go ahead
and save out this material, going to close it down, going to select this stone over here. Yeah, I'm not sure why it's not selecting the stone itself. But we can already see the
effects of it being on stones. Some of them are blending
in or trying to blend in, but not in the
right kind of way. We need to make sure
that we fix them all up, which I think we're going
to do in the next lesson. So yeah, I think that's going
to be it from this lesson. Thank you so much for watching. And I'll see in a bit.
18. Blending Objects Using Masking Techniques: Well, and welcome back
everyone to creating studying environments
in engine five, the bootcamp for artist course. In the last lesson, we
lost ourselves off with almost set up material
that allows us to blend in some of those
rocks a little bit better. And we're getting
these kind of results. So obviously, we need
to fix it first. And yeah, first things first, we'll notice that
we can't exactly touch them at the moment. The reason being is that because of the
delivering effect. Rocks now are way
harder to touch. So we can ever try
to, for example, switch up a lighting mode, so maybe changing it to lit, it wouldn't work, but changing it to wireframe, for example, would allow us to touch it back and select back
onto an object. So that's one of
the ways to do it. Another way to just use the top right hand
corner outliner and just select the rocks
themselves as well. That will also work. And Yeah, by just doing that, we're
able to set everything up. And I think yeah, the first thing that we're
going to do is firstly, we're just going to grab all
the mossy forest boulders. So within the search part, I'm just going to
search for boulder, like so, and we should get all
the boulders just like so. Going to grab every single
one of them, like so. And this way, we can just simply turn off the
distance surface. So let's go ahead and
search for distance light. There you go. We're just
going to make sure that everything is disabled for
all of these, like so. So now you can see that
rocks are back to normal, the ones that we apply
the mesh onto still. Find it difficult to
select them, though. Tough that's going
to be an issue. But now, if we look at it,
next to the base of the mesh, we can see that it has started doing the delivering effect. So now we can go ahead and actually make es out of this to grab ourselves a nice type
of setup out of a material. We have all the controls
already set up. So let's go ahead and do that. I'm just going to
quickly navigate onto the forest boulder instance
material instance, like so. I' going to put it
up to the side. I'm going to go back onto
the lit mode, like so. And we can play around
with the setting. So contrast,
distance, and offset. We're going to start
off with the offset first and see what it does. And yeah, the offset, what
it'll essentially do is it'll increase it all over this type of align as
you can see over here. So this is working
pretty well, like so. And we only want it to be going off from the ground
just a little bit. So it almost looks
like an invisible. We need to play around
with distance and contrast first before continuing
on with the step. So yeah, next step is the the contrast will
allow us to right now not do much because
we need to play around with the distance
value, and there we go. We're going to have some control in regards
to the distance itself. It starts making the
whole rock disappear, actually, which is not
what we want to do. Instead, we want to make sure that the contrast
maybe is a bit lower. I'm just going to lower
down the contrast quite a bit, how
that would behave. Yeah, delivering effect
works quite nice, but we have an issue in
regards to the distance, no working out properly, it doesn't allow us to have
a control over the blending. So I'm just going to check
what it is about the material. I'm going to go real quick into material itself, see what it is. And I actually I made a quick
mistake in regards to that. Let me just go ahead
and fix that up. We basically need to
make sure that we use the same distance material, the same value for it to divide the overall
value afterwards. So let me just go ahead and do that real quick,
going to right click, search for divide, add it up onto our
materials like that. And what will basically do is not only will it
clamp down the value, it will also divide the
overall type of a mask, which, in turn, should give us a nice type of
transition in between. So let me just go ahead
and save this out. Let's see how this
would look like now. Okay. Now that's saved out, let's go ahead and check how it looks like. Now we can go. You can see how once you
start increasing the value, it gives us a nice type
of transition in between. The gradient in between the values is going to
be much much better. We also have a contrast as well. The contrast will raise it to the top in regards to
the mask and you can see it basically cutting
off the type of texture. By just using these values, we're able to have a really
nice type of control. We're going to first of
all, reset the values, we're going to fix
up the offset, so it would be just off the
ground a little bit like so. For the distance,
we're going to want to increase it to the point
where from a distance, it looks a bit more blended in. So in this particular case, it really depends on
a type of a distance, you're planning to have
your camera, for example, set up and whatnot, you're planning to view
the environment. So for example, all
the way from here, you might want to increase it
a little bit more like so, so it looks like
really nicely blending in to the grass itself,
as you can see here. But once you start
going a bit closer, you can see it just
looks invisible, doesn't look quite nice. If you're planning to
have closer upshots, just make sure to not
increase this value too much. But I think having a
value something like 15 will give us a really
nice kind of result. Again, it's really dependent on the type of
scene you're doing. As for the contrast itself, we usually want to
keep it somewhat low, but also increasing
it to a value two, I think keeping the default is going to be good
enough for us because we obviously want to
have a more organic type of a look within this
particular case. Upside of this
type of a setup is that we can blend in our
material of terrain, for example, with assets in a much more
organic kind of way. The downside of
it though is that it actually makes it invisible. We can see through
the objects like so, and this might not be something that should
expect or want, but surprisingly enough, when you're making
games and whatnot, when you're making
environments and scenes, It's all about tricking the eye. So it's all about making sure we're making use out
of all the tricks, all the bills we have at
our disposal in order to make the environment
more believable. And in some cases, that's what you've got
to do in order to make use of your assets
to the full extent. And yeah, We could probably
set up the same type of material for the
other rocks as well. I think we can actually do that right away. We might
as well do so. I'm just going to go ahead
and select the rock like so. I'm going to simply double click on the
material instance for it, so we can just replace
the parent material. I'm actually going to go
ahead and go back on to this. Um, material instance that
has differing effect already. We're going to right
click, hit copy, go back onto the rock material. We're going to make
sure we change this material to be the one
that has delivering effect. So we're going to paste
in all the values, and this should give us
the same type of a result. And we probably want to take it off from the card
as well, but maybe not. Maybe it might look right. No. I reckon we need to take
off the light mask as well. So let me just go ahead
and search for it and distance Feel lighting.
There you go. Let me just go ahead
and take that off so rocks aren't going to be blending in with
the cart, as well. And yeah, that's going to
be it from this lesson. Thank you so much for watching. And then in the next lesson, we're going to be
able to start off.
19. Creating Terrain Using Height Map Data: Welcome back and
go on to creating studying environments
in Unreal Engine five, the Bootcamp for artist course. In the last lesson, we've pretty much finished off
with this scene. So now let's continue on and
move on to the next one. We're going to go back
onto the bootcamp folder, going to open up
the third level, which is going to
be landscape setup. Let's go ahead and open this up. And the purpose of
this is going to be to create a large
terrain or a scene. Before we actually get into it, I'd like to firstly mention in regards to the
camera movement. Because the scene is so large, if you were to move around, you can see how slow
it's going to be. So I'd like us to change
that up and it will help us to just move around
the entire environment. For Cyte, we're going to go onto the top right hand corner. We're going to click on this
camera button over here, and we're going to
change the camera multiplier to
something like six. This way, you're able to move
around a little bit better. But now, the next step that
I'd like us to do is going to be make sure that we have
control over the camera. So by simply moving around,
when we're moving around, we can use our mouse wheel to, for example, scroll up and
speed up the camera like so. So you'll notice that
whilst I'm moving, I'm scrolling up my mouse wheel and that increases the speed. Alternatively,
it's going to slow down the speed if we are
scrolling or mouse down like so. So by just using
this type of method, we're able to have a
really nice control over this entire viewpoint
type of a movement, and it works in unison with
the camera speed multiplier. So this way, it just gives us a really nice type of control over this large type of scenery. So anyway, moving on, in order to create
now a new scene, what we're going to do is we're going to go to the
top left hand corner. We're going to change
the selection mode, change it from selection mode, onto the landscape mode. By changing this, we're
going to get ourselves a preset landscape mode. And it should look
something like this. This is going to give us a
real nice type of a diagram, how big our terrain is
going to look like, how it's going to look like
generated and whatnot. And before doing
that, we're going to go over the settings that
we're going to need. And yeah, we have firstly,
new landscape setup. So if we were to want to
create a fresh landscape, we could use create
new landscape tab, and this will allow us to firstly make a
couple of options. We're going to make
sure that enable edit layers is died on. Within a langer five, it helps us to overlay multiple terrain information
with this setting on, and we're able to basically have more control over the
terrain building itself. The afterwards,
we have material. We can assign a
material later on, so we can leave this as is. Location, rotation, and scale
will allow you to basically control the initial starting
point of your setup. I wouldn't touch the scale
itself because the best way to do it is actually by using
number of components. By changing number components, for example, four by four, we can see that we made
it in half, and this way, we're able to get the
right kind of dimensions. This also works in unison
with the section size. Section size, however,
if we were to change to let's say
seven by seven, you can see it
getting it smaller. But the way it actually
works is actually when we want to have less
density within our environment, this is being used to get less
basically of the squares. You can see within
those larger squares, there are smaller squares. And because now it's
set by seven x seven, we can see that we get
this type of a grid. So we get less dense
of a mesh this way. And if I were to set
it back to 63 by 63, we can see that each one of those large component
terrain squares has 63 by 63 squares, and that's pretty much how
it works in regards to that. We can also set up the amount of sections per component
a large square. But I recommend you
leaving it as this, yeah, that's pretty much it in
regards to creating a terrain. But in this particular case, instead of just creating
one from scratch, I have some textures for
the height map prepared, and we're going to
go all the way to the top to import from file. We're going to make sure we
use height map file for this, which right now it's set
up within texture folder. However, if we look at the
height maps over here, we see that they are set up within the unreal
engine itself. So if we were to right click and click on Show in Explorer, we're going to be opened up with a explorer view
of the project. So you can see that this
mountain height map is set up as dot U asset. So all the unreal engine
items that get imported into the scene get automatically converted into this
type of a file. So if we want to make
use out of something that's within the setup itself, we can see that to actually
make use out of it, it has to be either
Rw or PNG format. So basically, to
make use out of it, we'll need to export
this out first, and I'll show you
how to do that. So in the future, it's easy to go back and
forth from the project, for example, and make use
of the assets from within. Yeah, let's go ahead and make
use of the hype Map one. We're going to right click. We're going to go ahead and use asset actions and click Export. This way we can then select
where we want this to be. I'm just going to set it up within the prep
folder over here. I'm going to go ahead
and save this out. Now, once we have a look at it, we're going to see that it's going to be saved
out within a folder. We can go ahead and access
it now with this button over here and click making sure
that we select this image. You can see that it's
been saved out as PNG. Format of an image is really reliant on the type of a format, it's been imported
into the project as. If it was imported as a
different type of a format, it would be a different image. So yeah, we're going to go
ahead and click open to make sure that we have this
imported into the scene. We can see there is a bit of a exclamation mark that it's not a gray scale because we've been exported out
from the Unreal engine. However, what we're
looking for is that it's set up within
the same bit rate. With the height
maps, what it is is basically in order to get
the right kind of values, in order to get accurate data, we need to make sure
that it's not been compressed in any sort
of way otherwise. We're not going to
get this kind of detail out of our terrain. And if you were to just
use a simple image, they're going to be quite blocky when you're importing
terrain into it. It's easy to get
the terrain values, the height maps online. And usually when
you're finding one, you need to or generating
one for that matter. You need to make sure that
you have a 16 bit rate type of an image saved out as that'll give
you the best result. So yeah, once we have it, so we can see that this is the type of a hologram
that we're going to get. It's only giving us small bumps, so let's go ahead and
fix that up first. And it's a little
bit too big for us. So let's go ahead
and go all the way down to make sure we have
the right type of settings. Yeah, for Ss, we're
going to flip around switch up the number
of components or actually, looking at the quote size, it's set up to the
maximum amount, which would give us a
really nice resolution. But for the sake
autorial I recommend you keeping this down
to a lower amount. As otherwise, it might be
quite a bit performance v. Let's go ahead and
take it as 63 by 63 as that is a default
nice type of a setup. And for the component amount, I think we can make use out of eight by eight
type of a setup, but even though this
is still too large, so I'm just thinking if it be better to make use of something
like four by four maybe. Okay. Go ahead and see
how this would look like. It looks like
something like this. I'm going to just drag it
out from the bottom section, so be nicely placed
within the world. And then the next thing
that we need to do is just check the
overall resolution. So right now, it's also relied in regards to the quartz
or the size of the setup. This is a four k
image, actually. So actually, this first
one is eight k even. So we could totally set that up, but that would be, again,
quite performance heavy. I'm just going to set
it up as 2047 by 2047. I'm just going to
increase those values. But just by looking at
this terrain, normally, what I tend to do is the terrain itself would be just big
enough for the entire setup. So I would tend to just keep it as is in
regards to the scale. And as you can see, by
increasing number of components, we're going to get
ourselves higher value. But to increase the
resolution afterwards, what I tend to do is just increase the amount
of components, so we can see the type of
value that we want to get. And if you worked with textures before you'd notice that it works in a bit of
a different way as in with the textures, you'd have 10204, 2048
type of resolutions. But with this high data, you can see that it goes in a bit of an odd type of a way. And in order to offset that, what I'm going to do is firstly, I'm just going to
remember the values of 16 by 16 component, and this is going
to be 2017 by 2017. I'm going to go back on to
the four by four components, and I'm going to change
this to 2017 by 2017, like going to change these two eight by eight type of resolution or actually
four by four even, and this is going to give
us this type of a value, going to make sure that it
sits nicely on the side. And actually, for
this particular case, I think it might be best to just ail this entire
project down, so it would fit nicely
within our platform. I usually tend to just work
with the components itself. But as you can see, by
changing the components, we also get lower
overall resolution. So we got to make
sure we consider that when we're setting ourselves
up with the hide MAP data. And by increasing the
resolution, for example, 16 by 16, you see that the resolution is going
to be way higher. And actually, I'm going to go
ahead and make use of this. Going to make sure
that this is set 16 by 16 with 63 by 63 quarts. And in this particular
case, again, I don't recommend you to do this in your usual projects,
but right now, I'm just going to go ahead and lower it down to
something like 20 by 20, like so, and that's going to
give us the nice results. And one thing before we move
on is that the Z value is actually going to allow us to
create some nice high data. So you can see over
here that we're getting some really nice results
already because this is different proportions
in regards to the self in regards to the
width and length. So I also personally like to make use of
of this in order to, for example, expand
this to something like 200, something like that. You can see how much
it gets affected. You can see that the values of the mountains
get way higher up. And that's actually really good for us when
we're working with our settings because we're able to expand the
mountains themselves. We don't need to worry about
it being, for example, too flat, because we can
control the flattens later on. Just make sure it's
going to be high enough, and I recommend
you to even extend this a little bit even
if you wanted to. And yeah, once you're
done with that, all we got to do is
just click import. And that way, once
it starts importing, you're going to get yourself a really nice type of a result. So give it a second to load
it up, and there we go. Also, just for the sake of it, I'm going to go back
onto selection mode, select this entire landscape
and bring it upwards. So just so we could
see how it looks like. This is set up with Pit extended or exaggerated
the height value. I'm going to go back
to landscape mode, and we're going to go
into this a little bit further in the next lesson. But for now though,
you should know that by going back to the managed tab on the top left hand corner, We have layer stab now. So layer stab will allow us to make use of the
overall sculpting. If I were to actually go
onto the sculpt mode, you can see that we are able to make use out of it over here and change this value
to something like 0.8 0.5, something of the sort. And this way we'll get a much
nicer type of transition. So maybe 0.8 will be quite nice. I think that looks quite nice. I'm going to go ahead
and keep it as this. But yeah, that's pretty much
it in regards to how to generate yourself really
nice type of rain. So that's going to be it from this lesson. Thank you
so much for watching. And I'll see in a bit. Oh.
20. Sculpting Out Terrain: Hello, and welcome back.
Ever on to creating standing environments in Unreal ngedFive the boot camp
or artist course. It last lesson, we
left ourselves off by creating a nice
high detailed rain, and now we're going
to make use out of it in order to continue building up on it and
actually setting it up nicely within the scene. So first things, if you're having some
performance issues, just make sure to change
up your scalability. Again, if you're not seeing the scalability button over here, just go to settings and change the scalability from
this menu over here. I'm going to change it to
Epic back to Epic by default. It's epic, so it's not
going to be shown up again. I think that's going
to be much better. Now, to continue
on, we're going to make use of the
scope tab itself. We're going to make
sure we selected. And now, instead of just heading additional
value over here, we're going to make a new layer. So we're going to right
click on a layer, we're going to create ourselves
a new layer on top of it. Make sure that goes on top of it because that's
the way they go, they stack one with another. We're going to actually double
click on the previous one, and we're going to
rename this one as height data, like so. And we can just keep it Layer
one as the original one, the one that we just created. I'm going to go ahead and
lock the height data like so, going to go on to Layer one, and I'm going to start
explaining in regards to the rain sculpting
brushes that we have. And in regards to the brushes, the main ones that
you're going to need is going to be scalp, smooth, arrays, and flattened. These are actually
all four in line. These are the best ones to
be used out of whenever we want to just sculpt
out the terrain. So first of all, sculpt, what it is, is basically, it allows you to heighten up the value data if I were to
go all the way to the back. It allows you to heighten
up the value data. If you click and
hold, you can see it going upwards, like so. It also allows you to lower
down by holding shift. You can do the
invert effect type of a setup and you can see it going down and we can create
a sort of a grader, like so. Of course, it doesn't
look quite nice. So I'm just going to click
Control and Z to undo it. But we have some options in
regards to its detailed tab. So once we have
the tool selected, we have some options
underneath it. And we have brush type, for example, we can
change the Alpha. Usually, I just keep the same circle of brush
and make use out of that. The brush follo
off will allow us to control the fall off itself, which is going to
be linked up with the brush settings tab
brush fall off setting. This is what allows us to
create a nicely favored effect. So for example, now,
if we start creating sort of a bump with a brush
follow set like that, it's going to be really smooth. And we can also have different follows as well as for example, this tip will allow us to create some interesting
shapes itself, like so as you can
see over here. And this brush fall off
setting is going to be a simple some of a multiplier
for these settings. I usually keep it again as the default one as I
prefer to work with this. Then moving on in
regards to the size, we can control the size itself, but I also like to use
shortcuts of brackets. The square brackets that we
have on our keyboard next to enter button allows
us to make it larger, make it smaller like so. It's really useful to know that because when you're
working with a scale, and general, you
don't want to just go back in and out of the settings. And what's neat about it is that once we create
some sort of sculpting, we can use this lier data
to just lower this down, for example, to a value of 0.1, and you can see it pretty
much disappearing. If you set it to zero, it's going to be disappearing, and if we set it to
a negative value, it's actually going to invert
the data of the thing. So the way the
sculpting works in the terrain setting is that it makes use out of the
height map data. What this means is
basically it just is a sort of up and down push. So what you'll notice
with the rains, you kind of have sort of caves
going inwards and whatnot. What you would need to do in that particular
case is actually, I will show you right away, what you need to do in
order to create a cave. You'd need to go back
to the managed section. You need to select the
go on to select tool. You'd need to just
select the areas that you don't want to or
you'd want the cave to be For example, this part of the year, you'd
want to select it, and then you just click Delete and just delete it like so. This way, you're able
to grab make yourself a hole and you'd be able
to create some mesh, some rocks around it and just have sort of additional mesh, either using an
external program or just using some Quixel, for example, assets to create. But as you create basically
a nice cave going inwards, and I'm going to actually click Control Z in regards to that. So we could go back onto
the sculpting mode, and I could continue on
with explanation itself. So let's say you're
working on this layer. I'm going to make sure that
we see what we're doing by making sure that capacity is set to one for this layer. And let's say we just have too much detail
in regards to this. So race brush will
basically erase the entire hide map
data information from the area itself. But, of course, it's only deleting it from this
layer over here. It's not going to
touch of layers. So what we can do
is basically we can nicely blend in with the original data over here and kind of just take out
this information. And this way, we can create some nice and
interesting shapes. So, and that's pretty much
it in regards to that. But the sculting brush, we don't mainly use this brush to create any of the
additional data. Instead, what we
do is we determine the height value of
a certain position. So for example, we want to have a sort of
a platform over here. And we just want to have an ideal height of that's
actually a little bit too high. We have to hold shift
and lower it is down. And yeah, this is going to be the type of
height that we want, and we just wanted
to make sure that it connects nicely
with the rest. So the next step is going
to be flattened tool. The flattened tool
will basically be like 80% of the time
you're going to be using that because
this is the one that allows you to nicely
blend in the values. Once you start
clicking and holding, you can see that it starts
flattening this area. Going to take the center
point off your cursor and it's just going to apply it
to the rest of the section. This way, by clicking a holding starting from this center point, I can just drag it out and build myself a really nice
type of a setup. And yeah, by just doing that, we're able to get ourselves a
really nice type of a look. And then alternatively,
we can just remove some of that
from here, for example. We can just flatten
this bit out as well. We can see how nice it
works or alternatively, we can use a race brush
like we did before and just kind of get this nice detail
inwards just like that, just to kind of
blend in the values. So, yeah, this is pretty much it in regards to the
flattened brush. We also have flattened mode, by the way, which allows us to, for example, only make sure that we raise the parts in here. So, for example, if
I were to click and hold with the race
flattened mode selected, it's not going to go
into the mountain. It's not going to lower
this mountain itself, it's just going to
raise specific parts. And I think that's
what I'm going to use, and the thing that I actually forgot to mention is
going to be tool strength. This tool strength controls how fast your brush
is being applied. So by setting it
to a value of 0.5, you'll see that it's much much faster in regards to
the overall setting. And yeah, I'm going
to make use of it in order to create a really
nice type of a ridge, sort of a platform
overall in this area. And then I'm going to use a race and just kind of
erase this area. And if we were to have usually with in
regards to the brush fall off, mix them up, depending on a brush scale, if we were to have it
like so we can just make ourselves a real nice type of a ridge just like that. The one thing in regards
to this moving brush, think of it more
as in regards to just blurring out the
detail or taking it off. So for example, on here, if I want to just kind of take off this height
map and removing, let's say some
additional detail, I can click and hold and just
kind of lead in this value, and you can see it kind of
takes off all the detail, and it sort of it works in a
way that's like an eraser, but in a much softer kind of way while keeping
the overall shape. So it's sometimes nice, but
in this particular case, I don't see much of a use, but usually it's also
something that I use as well. At this point, I'm going to
go ahead and make use out of these brushes to just create a sort of a platform all
the way around, like so. And in regards to
the ridge itself, we've got to make sure
that we don't make it complete vertical
kind of cliffs. With the height
type of a terrain, we don't make completely
vertical cliffs. We always keep a bit of a slope. The main reason for it is, as you can see those
squares over here, they're going to be
affecting the texture, let's say the oral texture
when we're applying them. And if it's a complete
type of a drop, let's say I make use
of a flatten tool with a brush fall
off set to zero. And if I were to
make it like so you can see this entire thing
get stretched out this is, it's going to look like with the texture stem cells as well. So just make sure to avoid that. If you want to completely
stiff steep type of hills, I recommend you to just using some rock overlay assets and whatnot to just add it
on the side as well. Is going to be it
in regards to that. Now, in order to add
some additional noise, some additional
type of functions or detail for the terrain, you'll need to make use
of either erosion or hydro or even noise brushes. I'm going to show you
the erosion because this is the one that I use
mainly for the set up. But basically, if
you click on hold, you can see what it does, and it kind of brushes
everything off. And actually, I'm
just going to click Control t because I forgot to take off the brush follow or increase
the brush follow up. I'm just going to
set it to 2.8 leg. So yeah, by clicking a holding, we're able to add some
really nice type of noise data onto our
settings. Like so. And I usually just go around
the edges and crevices, and you can see how
it creates a really, really nice type of a setup. And yeah, that's pretty
much it in regards to how we set ourselves
up with the data. We're going to continue on with more advanced tools
in the next lesson. So thank you so
much for watching. And I'll see in a bit.
21. Advanced Sculpting Tools: Hello, and welcome back. I go on to creating setting environments and Unreal engine pipe
the BootmF art discourse. In the last lesson, we learn
how to make use out of the sculpting
brushes in order to further add detail
onto our terrain. And this is not quite there just yet in regards to
the terrain itself. We need to make sure it looks a little bit better
in regards to that. So we're going to make use of
a couple of other options. First of all, we're
going to go back onto the sculpt brush, and we're going to make
use out of a brush type. We talked a little bit in
regards to the brush type, but we kept ourselves mainly to the simpler circular brush. We can make use of it to just create a simple
stamp brushes, for example, or we can make use out of it in
order to add noise, for example, to our setup. So we're going to talk about it, how to make use out
of it in a bit. Now, let's go into the
brush type and set ourselves up with
a simple stamp. So yeah, basically, Alpha
brush stamp is going to work similarly to
the brush texture, the brush tile, in which it's
going to make use a Alpha, and you'll be able to add
it onto your terrain. The only difference is
that the Alpha brush, it starts orientating
yourself with a brush itself in the same
area, whereas for the tile mask, it will
basically create a sort of a tile based out of the
high texture itself. And that's really good for when we're using a noise, but
for this particular case, we're going to use
low resolution folder to stamp out some detail. So let's go back
onto the Alpha brush and we're going to just simply drag and drop one of the brushes set up over here
onto the texture. They're basically the same ones that we're using in regards
to the detail itself. The difference being is
that the low resolution is a smaller resolution
overall because using eight k resolution
four k resolution, you know, It's a little bit too much in regards to the alpha
stamps themselves. So just make sure to use less resolution in
regards to that. I'm using 10204. If I hover over, you can see the dimensions in
the list itself. So yeah, I'm just going
to click and hold and drag it on to the asset itself. And now the way we make use
out of it is first of all, we make brush a bit larger, then we click and hold and we
start making use out of it. And it might be a bit easier to find out how it works
in regards to that. If I were to actually
click off the high data, it'll turn everything
back to the way it was. So now if we were
to click and hold, we can see that the mountain is being emerging from itself. So it's a really nice type of a setup for whenever we want
to add some extra detail. If I were to click and hold, you can see that the mountain itself is being reapplied
multiple times. And that's pretty much it in regards to how to
make use out of it. We're going to also
make sure that we have a direction
properly set up. So for example, if I were to
move it diagonally across, you can see that mountain is
actually facing sideways. If I move it up and down, you can see that the
mountain is going to be set up in a
different direction. That's it in regards to that. And yeah, that's going to be
what we're going to use now, we're going to go back
onto applying high data. I'm actually going to go
back onto the layer one. We're not going to
create additional layers for this creating too many layers can also be problematic in regards
to the overall setup. The reason being is that when
we create too many layers, it's going to give us
on performance issues. So over using layers
is also not good. I'm going to make this
brush just a bit larger, like so brush size. I think to make it even larger. For example, right now, it's maximum, to make it even larger. We can manually
type in the value. So, for example, one of
10,000. I can do so. And I'm just going
to click and hold. Sorry, one thing that
I forgot to mention. The brush size is
also going to cause performance issues
in regard to that. The larger brush
is going to affect a lot more vertices overall. So just keep in mind
while working with that. So yeah, just make sure to not make the brush size too large and only do
it when necessary. For example, this
is a nice setup, and maybe I want a bit
of a mountain over here. I'm actually going
to make the brush smaller. Something like this. And that's how we break it up. Now, obviously, this
is way too high up, and we probably don't
want this to be the case. We're going to go
onto a race brush, and we're going to take
off the tool strength of something very
small 0.1, I'd say, we can now make use of it in order to just casually take down this overall setup
and just bring down the value and yeah
just having it like so, it's going to look
quite nice overall. And maybe going to go back onto the sculpt brush and make it even smaller and
just kind of want a bit of a bump over
here, actually. And that doesn't seem to go. The tool strength, by the way, is being applied
throughout all the tools. Just make sure to keep going
back and forth with them. Something like this.
Perhaps we do the trick. Also going to use race
brush a little bit in regards to making it smaller and just kind of blending in the values a
little bit better in regards to the overall stage in regards to the overall area. And I think Yeah, that's going to be quite right. For example, this actually
is a bit too much. I'm going to take down
the tool strength 20.1. Us kind of start blending in the values a
little bit better. So it doesn't look
like it's just, you know, straight up
flat from the get go. And yeah, that's pretty
much it in regards to that. The other thing that we
can do is actually make use out of the terrain
values itself. It's actually probably my most fun tool to
make use out of. There's something
called copy tool. If we were to click
on it and select it, we're going to get this sort of a box on our screen
or our terrain. I'm going to click
W. It works as just any object in a real
engine where you can click, WE and r to move between the Gizmos and make
use out of it in order to position
it accordingly. We're going to get
a simple frames. I'm now going to click
R and just expand this entire box leg going to set it up with a
partial amount of a terrain. Make sure not to set it up
with too much of terrain. Otherwise, it's going to be
a bit more performance by. But we can make use of
it in order to copy, for example, this
part over here. And we just got to make
sure that the section that we want to copy is
inside of the box. Once we're done with that,
we're just going to click on the button that says
copy data to Gizmo. Let's go ahead and click on it, and we'll see that we
get this sort of result. So I'm just wondering
why that is the case. Maybe we just need to
lower it down copy data, and that still seems
to be giving me this. And I'm just wondering
why that is the case. You can see there's a grad top. It's completely flat. This
should not be the case. I'm going to make it a
bit higher. There you go. So yeah, I think,
yeah the reason being for that we need to go back
onto the hight data like so. Going to lower this down now. And now, when we copy
the data to Gizmo, we're going to get
this sort of result. This is exactly what we want
when we're setting it up. We're now going to go
back onto layer one. Move it accordingly. You can see there's
a hologram of this entire data set up for us. So we can actually make
use out of it in order to get a really nice
type of a setup. I'm just wondering how we can make use of it in
this particular case. For example, if I wanted to
be attaching it to sideways, and just have it split off, we can do so by
rotating it around. That's exactly what
we're going to do. I'm just going to move it off to the side position this angle
a little bit just like that. That's going to be
really nice for us. We can now make use out of it. So in a similar way
to the scalp brush, we are going to have ourselves a small brush that we
can make use out of. And I is going to start applying
this data on top of it. But once we click and
hold and drag it around, Letm just going
to check the tool strength is a little
bit too small. I'm going to set it up to
a bit of a higher value. 0.8. Once we click and
hold and drag it around, we should get ourselves
a nice type of value, but I actually forgot to
change it back to Layer one. Make sure that we are
within layer one and now, once we click on it, we should get ourselves
a nice setup, but it's not giving us that. Probab probably because
the high data is, as you can see, over
here at the top, we need to make sure
we reattach it. So it's a bit finicky when we are exaggerating the
high value data, for example, but
that's the way it is. And I'm just going to
make this a little bit higher in regards
to this area over here, going to enable back
to high data like so. And I'm going to go back
on to height layer one. Then we're just going to start clicking on holding
and dragging it, and we should we should be getting some really
nice type of mountains. This is a little bit too high, so I'm going to go ahead
and lower this down. Usually, when you're not
overly extending this, you'd get a real nice
type of a setup, so we could overlay this, but this is a sort of work
around in regards to that. And, but just
clicking on holding, you can see that this value for a ridge gets applied nicely, and we can just move it
out a little bit upwards. Again, and just kind of
get ourselves a really nice type of way to
work with the setup. So for example, this maybe
is a little bit too high up. I'm going to click Control Z. And another thing that we can do is we can scale it
down, basically. We can scale out
this entire box, we can get a total
different value. We can even squish this
around so or actually, it's going to be squished
based on a local data, so we can squish it and get ourselves a nice type
of a thinner line. So Again, this is a
little bit too high. I'm going to go
ahead and click W, move this a little
bit down like so. Now, I'm just going to
try to There you go. Now I'm going to
start adding it up nicely onto the side, like so. And just like that, we're
able to get ourselves some really nice type
of values over here. And yeah, that's pretty
much it in regards to that. I might get a bit
of additional type of detail by just moving up, so having a bit
of extra control. Just like that, so
we're able to blend in some real nice height
values and get ourselves some interesting shapes out
of this entire environment. So that's going to be
in regards to that. Maybe I just want to make it a le bit more in
regards to this area over here. Like, so. Maybe I'll want to lower down the brush strength as well
to something like 0.2. And then we're able
to nicely blend in the values a little bit
better just like that. And Yeah, that's going to
be it in regards to that. It's a really nice
type of a tool. Really fun to make use of, and you're able to get a
really interesting results so you can see how it blends
in with the entire terrain. This perhaps area is a
little bit too much. I'm going to go ahead and
make use of the eraser tool with a small tool strength to kind of lower this
down a little bit, to make it less
thick, let's say. He goes something like this. And this is going to look
really nice overall. And, that's going to be
it from this lesson. Thank you so much for watching.
And I'll see in a bit.
22. Setting Up Landscape Material Attribut: Okay. Hello, and welcome back everyone to creating
standing environments in Unreal engine five. The boot camp for artist course. We crafted a little bit of
a platform for terrain, and we're pretty much
finished in regards to setting ourselves
up with a nice system. Although in this
particular case, I'd like to just slightly
erase this bit over here, just kind of latten it down a little bit. There
you go. All right. So going back to what I was
saying in regards to rain, we're pretty much done in regards to this
sculpting it out. Now we need to go ahead
and create ourselves an actual type of material
for this to be used on. So, let's go ahead and go
onto our landscape setup. There is a textures folder. We're going to have
grass and rock textures. So these are the ones that
we're going to make use of in regards to setting
ourselves up with a material. But before setting ourselves
up with a material textures, we need to make sure we
create the material itself. We've been a landscape folder itself. We're going
to right click. We're going to create
a simple material. We can call this one landscape. Matt, like so. Out
of it, right away, we're going to click, create a material instance, like so. And now we're just going to
apply this on to our terrain. I'm just going to make sure that we go back
on the selection mode. We're going to
select the material, the landscape itself that is. We're going to go all the
way down until we find ourselves landscape material
to bottom right hand corner. We're going to click and hold
and drag it onto the setup, so to get this sort of result. Of course, because there's
nothing there yet, we're going to get a complete
black type of an outcome. But now, we're going to start setting ourselves up
with the material. We're going to go onto the
material tab, just like that, make this to
maximize the window. And first things first that
we need to do is going to create a layer
blend for landscape. We're going to just
simply right click, we're going to search
for landscape, and there's something called
landscape layer blend. That's the one that we're
going to make use out of. But as you can see,
the output for it is just one type of a node. To make use out of
it and set it up for PBL materials with
all the roughness, normal maps, and whatnot. We need to make sure
we set this up as a material attribute
because this is what a landscape material uses. We're going to click on this
material type of settings, and we're going to
make sure that we take on this something called
material attributes. Let's go ahead within
the detail steps and enable this like so. This is going to transfer all the information into a
single type of an input, and we can right
away connect this, but you can see that this is
going to give us an error right now because we don't have anything within this layer. So, of course, we
need to set ourselves up with the textures and
everything and whatnot. So I'm actually just going to minimize this window for now, make this a little bit smaller, like so, track it upwards, not all the way up, so
make it full screen. So, so I could just see
the content browser. Actually, instead
of doing that, I'll show you another
way of doing it. We can click within
the window itself. We can click control and space. You get ourselves
the window itself, and that might be a little bit
easier in regards to that. I prefer to often use just a dot one contra browser myself since I'm
quite used to it, but you might find it a bit easier in regards
to setting this up. I'm going to go onto the grass, going to hold shift, select
all of them, drag and drop. Into world, select one section,
put it off to the side. So. Now, the second one, control space, go
back onto the rocks. Select all of them,
drag it out like so. And for now, I'm
not going to worry about the order or
anything of the sort. I'm just going to make
sure that everything is just in line, like so wouldn't be overlapping. And this will help us to just move on with the progression
a little bit easier. We're going to
continue on with this. Sure we are setting
it up nicely. Again, we're not worried about
the order itself too much. But we just need to
make sure that it is set up nicely in regards
to the textures. Also, just real quick. I'm going to double
click and open ourselves up with
the material itself. I'm just going to make
sure that they are set up both to normal maps. Sometimes going to cancel that, going to just close
down the stab. Sometimes normal maps don't get compressed to
the normal map. You can see this one over here. So I just have a tendency
to check them even though I know that they
are set up as normal maps. Otherwise, they
don't get properly blended in and we sometimes
get errors out of that. Okay. So now that we have
it set up like this. We need to first of all, convert this entire material information
into material attribute. The way we're going to do
it is by right clicking, we're going to search for
material attribute layers, and we're going to get ourselves make material attributes. Let's go ahead and do that. We're then afterwards going to connect everything into this. Ambit declusion goes into here, base color goes into
here, the height value. We're going to leave it as this. We're actually going to
sc put it all the way to the bottom so it
wouldn't get in our way. This is going to be
set up separately. The normal map is going
to be connected like so, and we're just
attaching everything. This is the final one is
roughness. Yes, it is. Just a quick reminder, bottom left hand corner
is where I'm looking when I'm checking
for their names. So you can see here,
it says roughness. That's exactly what
I'm looking at. And there we go. We have
everything connected. We'll be able to attach that, and I'm just going to select
this click Control C, Control B, however
over my mouse, bit lower and just
paste that in. This height information is going to be at the very bottom, and I'm just going to set
up the order like so. So again, height information
at the very bottom, everything else does
not really matter. Okay. So now I'm in inclusion. Let's go ahead and connect
it all base color. Let's go ahead and add this in a normal map to normal map. And finally, roughness value. Let's go ahead and
connect it up as well. So now, how do we make
sure we blend it in? Well, going back to
the layer blend, we'll see that once we selected, there is a layer
element array elements that we can add manually. By clicking at
element, we're going to create our cells new layer. And it's going to give us
a new index to work with. By expanding this index,
we can change up the name. So for example,
first of all, we're going to change it to a rock. And then we have blend type. Blend type will
allow us to blend in the weight type of
information with one another, basically, we'll have
more natural type of a set up out of textures. We're going to
change this one to hide blending. There you go. So this is where the hide
blending value will go. But for now, we can make use of the material attribute that
we created for the rock. And we're going to attach
it to the layer rock. Then the height value is going to be attached to
the second one. And we're going to do the same
thing for a second array, we're going to add element. So we have this layer
blend selected. Adding a new element and
opening up this index. This one we can call this so we're going to make sure that it's
blended in with height. So we're going to get
ourselves more natural type of a way to blend these
two materials in. We can have as many materials as we want basically
in regards to that. It works really nicely
when we're setting it up. But one thing that you should
know when creating this, you can have up to, say, if I remember correctly
12 materials, so it's a really high number. But once you get
past four textures, what you need to do is
you might get yourself an error in regards to adding
new materials over here. So in case you're
planning on having a lot more materials
onto your terrain. Just make sure to go select
your texture and change the sampler source from just a texture asset
to shared warp. And we'd need to change shared warp to every
single texture we'd have. This way, we'd be able to
blend in more of these values. But because we don't have a lot of materials that
we're using at the moment. We're just setting ourselves
up with a basic one. It's going to be fine to
just leave it as this. Once we're done with
this, we're going to now go ahead and click
Control and S to save it out, make sure that it's applied. So I'm going to wait for it
to prepare all the shaders, like so, and we should get ourselves
a nice type of alley. For now, I'm going to close this down to get back
onto the terrain, going to end up going back
to the landscape mode. And this time,
we're going to make sure we are within the pain tab. We're going to also
make use out of the same layer that we had
previously, Layer one. That's going to be quite right. I recommend you just again, keeping the layer amount
down to a minimum, and you can reuse the same ones that we use for sculpting
to do the texturing work. Though, right now, we
don't have anything. The layers, as you can
see over here is empty. The reason being is that
it needs to be refreshed. So for us to do that,
I'm just going to real quick reattach
this layer instance, and it doesn't seem to work. I'm going to attach
the landscape material first and then attach the
landscape material instance, and that should
refresh the layers. Now you can see the rock
and grass layer over here. So it's just a way of quickly updating it
onto the terrain. And now, what we need to
do is you can see none. We need to make sure
that we actually give in weight properties
first to the materials. So it's actually
quite easy to do. We just click on this
plus symbol over here. We're going to select weight
blended layer normal. And then afterwards, it's going to automatically
select the folder, a new folder next
to the level scene, in which case, it's going to be a landscape set up folder. So it's going to create
a new folder over here. And as we just leave it as is. We're going to click Save. And we're going to make
sure we do the same for the second one as
well, normal over here. Click Save, you
can see it creates a layer landscape information. We still need to work on this because it's all over
the place still. But it's a good starting point, and we can continue on with
this in the next lesson. So that's going
to be it for now. Thank you so much for watching,
and I'll see in a bit.
23. Texturing Terrain: Welcome back
everyone to creating standing environments
in real engine five. The boot camp for art discourse. It allows lesson, we
created ourselves up with a material attribute that we're able to make use of it
within the landscape itself. But it's not actually
quite done just yet. As you can see if
we were to zoom in. The entire terrain has a very small type
of material on it, and we need to make
sure that it's being applied properly
on a terrain. We're going to go ahead
and fix that first. We're going to locate ourselves the material
that we created. So, we're going to
go back onto it. And yeah, first things first, we're going to set ourselves
up with a proper scale. For, we're going to
just right click. We're going to search
for landscape. And it should give us one that says a landscape
layer coordinates. Let's go ahead and
make use out of it. This is the one
that we use when we try to create different
landscape sizes. So now we're going to
hold, create a multiplier, multiply this by one another, hold Shap on the thing, call this one rock e, like so, and attach
it to the multiply. And this way, we're able to get ourselves a real
nice type of setup. By default, I prefer to have this value somewhat of
a low value, so 0.001, and this will give you a real
nice type of setup usually going to go ahead
and attach it to every single rock
piece, just like that. And this will give us nicer type of scaling results. And finally, we need to do the same thing for
the bottom piece. I'm going to copy this
entire selection, like so, going to go all the way down, hit Control V, and make
sure that we reattach it. And actually, one thing I forgot to mention is
the parameter itself. The parameter itself right
now has a rock scale. We need to make
sure we rename it. Otherwise, if we, for example, change it back to 0.1, We can go all the
way up and see that this is changed to 0.1 as well. The reason being is when the
parameter has matching name, it's actually going to be one and the same type of parameter. Although they look like
two different nodes, they're going to be identical. They're going to be
the same. So the moment you start changing one, the one is going to be changed. We can avoid this by
changing the name off it. So grass scale. Now we can go ahead
and change it 001. You can see the other one is
not going to be affected, and I should have had
it changed beforehand. 001, like so. So now we can go ahead
and continue on with applying this to the UV scales, which is a rather simple
project process that is. So let's not forget
the high maps as well. So we're going to have
ourselves a consistent value. Now if we were to click, I'm actually going to put it down like if we were to click
Control and save it out, we're going to see
a bit of an update in regards to the scale
itself, so there you go. And it's looking much
better for the rocks. Now, as for the steepness
of the texture, as I said before, we need to make sure we avoid
the steep kind of slope. As you can see over
here, it starts stretching out over here. There are ways to avoid it with setting up like train plain
projections and whatnot, but often it's best to try to make use out of
the terrain in regards to just having an overall type of some hill areas and
whatnot in regards to that. Basically not making two step of hills or if you are
making steep hills, just cover it up with some additional cliffs
and whatnot on the sides, and that would fix the issue. But in this particular case, it's going to be
quite well enough. We're still not done with that. We have grass to consider. I'm actually just going to
close this down for now. Going to add some grass, for example, at the
very base over here. So the way we add the texture is if we were
to go all the way down, we can select between layers. So it's going to work
in a similar way to what we had with vertex
coloring in regards to that, it's going to apply
as sort of a mask for the vertex painting. But instead of just using the
RGB just to four channels, it can use 12 channels for
different types of setup, and it uses each
one uses unique. Type of a weight
paint information. So that means that we could have more layers with its own unique. You see, we have
grass layer info. We have rock layer info, we can have lots of layer information for the
weight painting, and that makes use of it too, just add in texture like so. We can hold shift to just
kind of remove it as well, and right away, I can see that the grass itself
is way too large. So because we set ourselves
up with parameters, we can go into
material instance. We can enable grass
scale and rock scale, and I'm just going to change to grass scale since
I don't like it, going to make it a bit smaller, maybe 0.4 or 0.6 even. Go ahead and see that. I'm
going to keep it as 0.4. I'm just whenever I'm working with the term frame
texture itself, my primary concern is how it's going to look
like from a distance from the furthest point available
of my initial idea. So for example, if I have, from a spaceship kind of
setup, you know, we want to make sure
that it looks quite nice by the texture
having it repeat itself, or if were to real close. We can see that it might
be a little bit too large. So there are ways
to, for example, use distance blending in in regards to blend in multiple textures
based on a distance. When we get close, you
change up the scale. We're not going to go too much into detail in regards to that. We're just making sure
that it looks quite nice from one type of area. Yes, I forgot to mention one more thing is
that while painting, you can hold a shift to invert the process
and just take it out. If we want to if we
had multiple layers, we'd go select the double layer, for example, we can also
we can select the rock. We can also add the
information like this. Yeah, we're just going to make use of it to start painting it over real nice and easy
to make use of it. We can change up to brush size, fall off and tool strength and just by combining
all of these together, we're going to get ourselves some really nice and
simple type of results. Let's say we want to have more control in regards
to how it's blended in. We simply just don't want
it to be tapping out, we want to blend it in nicely. We can make use of
a target value, which enables you to get a very specific type of amount that you
wanted to set it up to. So for example, this, if
I were to set it 2.2, we can go ahead and just make
use of it click and hold, and actually that needs
to be a bit higher. I'll try with 0.5. You can
see if I click and hold, it's only going to give
us to this amount. It's not going to be completely
covering up the rock. So that's quite nice for whenever we want to
make use out of it. And we just need to
have a perfect spot. So this looks like some grass
is coming out and whatnot, and it's actually really nice when we need to
have more control. So for example, closer
to the bottom piece, we want the grass to
be a bit more visible, like so next to this cliff
areas as well, perhaps, not in this area, so
I'm just going to go ahead and hold shift,
remove it completely. And to remove it, we
actually need to take this off and just go ahead
and remove it like so. And yeah, that's the basics
of the terrain in essence, that is how we can
set ourselves up with some real nice type of
setup for the terrain. I'm just going to go
ahead and move around. And when we are
working with terrains, we just go to make sure
that we consider in regards to the
height of a terrain, for example, in regards
to how high the area is. So for example,
closer to the peaks, we wouldn't want to
have as much grass, we want to have a
more rocky terrain. But in regards to
the lower areas, we'd want to have
plenty of grass, so we can just go ahead and just cover this up in
patches of grass, like so, and that's going to give us some really
nice results. So yeah, that's all there is to it in regards to the
basic setup for the terrain. We can make use of it to grab
ourselves a terrain setup. That's actually a
little bit too high. Going to lower down the
tool strength actually and just play around with
values a little bit more. To make sure that we have maybe some extra
patches over here. Maybe we can just break
off the surface a little bit of these sections, photographs, and not going
to spend too much time, but we're going to move on with the next lesson in which we're
going to learn how to set ourselves up with the
landscape and whatnot and make sure that we have
some depth out of our terrain. So yeah, thank you so
much for watching, and I'll see in a bit.
24. Height Fog Setup: Hello, welcome back.
You've go on to creating studying environments
in LNG five. The bootcamp for Artis course. In the last lesson,
we'll so elves off by texturing over a terrain. And now we're going to continue moving on in regards to that, we're going to learn
how to set ourselves up some height folks
general fog and some of ways to basically make more
depth out of a terrain. We're going to go back onto the boot camp type of a folder. We're going to move on
to the number four. And actually, before doing that, I'm going to go ahead and go
back to the selection mode, going to open this up, this map, going to make sure
that this map is saved out. And now the next step
that we're going to do is going to be once
everything loads up. Let's just give it a
second for it to load up. And this is what
we're going to get. We're going to get ourselves
a large scale type. And again, we're going to set up make use of this
setup to add more death. So by default, you see that it looks nice bot flat
at the same time. If we were to look
at overall setup, it's not quite there just yet. So let's go ahead and fix that. So yeah, first things first
hide fog and its use. To create a hide
fog within a scene, we need to click on this button over here, search for hide fog. Exponential height
folk. There you go. We're going to click and hold
and drag it into the scene. So to create or selves
a new fog system. By default, this scene does
not have any hide folk, we can see the edge
of the border. So usually within our levels, we had a nice transition
with the background. The reason being is that the
hide fog was already set up, and this type of scene has
not got any hide folk. So let's go ahead and
talk about it first. And, the hide folk, the way it works is, firstly, it is dependent on the
height of the gizmo. So you can see it being going up and down within the scene. We also have control a bunch of controls on the bottom
right hand corner. When we have the
exponential height, folks elected, there is a
lot of settings to that. So let's go over them first. Think by default,
the color should be on most of the project
should be something like this. It's going to be giving
you an scattering color. But honestly, we're going to set it up as just pure black. The reason being is
that we're going to make use of volumetric fog. By volumetric fog. What I mean is that usually
the color is just being applied in regards to
the depth of the scene, and the further you go
away with the distance, the more of the color
is going to be applied. So it's going to look quite
okay in regards to that, but it's still not going
to be quite there. We're going to set it up
with the allometric fog, which will allow you to
inherit the color of the sun, inherit the color of the sky itself to get more of a
nicer type of a look. So for us to do
that, we're going to go all the way down
right off the bat. We're going to make sure that we have volumetric fog ticked on. After applying the
volumetric fog, we need to make sure that it's set up within a project itself. We're going to go
onto the top left hand corner onto edit tab. We're going to go onto
project settings, and within the project settings, we're just going
to look for fog. This should give us support
sky atmosphere affecting height fog tick in other projects, this
might be ticked off. So make sure to have
this ticked on. If we're using a
volumetric high fog, it's honestly best to keep the
scattering color as black, as well as the scroll
all the way down, the albedo value within a
volumetric fog as white. So basically, we're
just making sure that, also, let's not forget the directional scattering
color to be black as well. This way, it's going to inherit the original colors
within the scene itself. And now it's still quite a bit heavy in regards fog itself. So a few ways to control it. Other than just going it up and down is if we were to
scroll all the way up, there is a fog height fall off. I really like the
setup as we're able to have a really nice type of
transition within our scene. So, for example,
if we were to just scroll a bit to the
left while holding it, clicking on holding,
we're able to get ourselves a real
nice type of setup. And just for the sake of
this type of environment, because it's more of a
cold type of environment, we're going to make it a
bit more of a bluish tint. And actually, I'm going to
increase the fog density. So if we want to
increase the fog density to be going over the
fog density threshold, we can just manually
click in the values, and that's going to
give us nicer results. Although this is not quite as this is a little bit too much
in regards to that. I'm going to set it
up to a value of 0.1. And then another thing
that I want to do is actually make use
of a start distance. Start distance functionality is really useful for whatever you don't want the fog to be
quite as visible next to us. So let's go ahead
and change that up. And if we were to change this
to this is basically units, if we were to change
it to something like 1,000, for example, that might give
us a nicer result or actually instead of 1,000, let's go ahead and into two
10,000 or I'm just going to keep on adding zeros until I
get this sort of a result. That's exactly what we
want. So from a distance, it's going to have
a bit of a fog. But as we get closer, it's going to look
something like this. So it's already
looking pretty nice. We just need to make
sure that we have a bit of a control over
the fog color itself. Fog and scattering color is going to be helpful
in that regard, which is going to make it
with a bit of a bluish tint. Something like this,
perhaps even brighter. And that's going to give us some really nice type of results, although in this
particular case, I think that the fog
density is too much. So I'm actually going to lower this down that's a
little bit too much. So something to this amount
is going to be quite nice. Saturation perhaps.
There you go. And I'm going to click G to get out from all of
these type of icons, so we could see how it looks like within this
type of a setup. So yeah, but just
playing around, we're able to get a real
nice type of a scene setup, which is pretty nice. Maybe I'm just make it
a bit more stylized, a bit thicker at the
bottom, like so. Then one thing that we need to do is we need to make sure that maximum fog opacity is perhaps a little bit
lower to a value of 0.5. So it wouldn't just
completely cover up this area in the front. And maybe I'll just
make this even brighter like comping to this type
of a value. There we go. So just by clicking
on the landscape fog, we can go ahead and
make it high and high, and you can see
before and after, and just straightaway, it's going to look so much
better in regards to that. It's going to give
us more depth to the mountains as well,
so that's quite nice. Let me just go ahead
and purch the fog. And that's pretty much
it in regards to that. It's a basic type
of functionality, we're able to make
use out of it to get some real nice depth
in regards to the terrain. I recommend you using it, especially when working
with larger scale type of projects to get more type of control in regards to
the visual For example, when I'm closer
to this mountain, you can see it being closer up, but as we go further down, it turns into bluish kind of
a tint with the atmosphere. That's really, really
nice in regards to that. And, yeah, in the next lesson, we're going to
learn in regards to the fog in regards to
the plane material. So that's going
to be pretty fun. Thank you so much for watching,
and I'll see in a bit.
25. Creating Fog Plane for UE5 Scenes: Welcome back everyone to
creating studying environments in rengedFive the boot
camp for artist course. In the last lesson, we left
ourselves off by creating some extra death out of our environment by making
use out of a height fog, and now we're going
to continue on adding additional detail onto
this setup and making sure that we use dumping called fog planes to make sure we
set it up within the scene. We need to create a new material. Let's
go ahead and do that. We're going to
right click, create a material within a
fog setup folder. We're going to call this
one fog plane Mt So. And right off the bat,
I'm just going to right click create material
incense out of it, and I'm going to create
a simple plane for this. So we're going to click on
this pattern over here, go to shapes, create a plane, and just going to put
it on the ground leg. So it's really tiny, so we got to make sure
we make it larger. I'm going to go onto
the detailed tab, bottom right hand corner. Going to make sure that this is locked in
for the proportion. So we wouldn't have to change
it across all of them. We can do it all at once. I'm going to change
it to thousand and see if it's big enough, and I'm going to add another zero that's a
little bit too big, so I'm just going to
make it to a $5,000. I think that's going to
be good enough for us. Actually, let's go ahead
and make it to something like 3,000 perhaps or 4,000. There you go. 4,000 is
just the right amount. Okay, so to make use out of it, we're going
to first of all, just apply this onto our material instance
onto the plane, like so, and this is going
to be the result right now, we're just going to cut off
the entire section for us. We're going to go onto
the material itself. Now to make use out of it, we'll need to set ourselves up with a couple
of settings first. And for that, we're
going to make sure we go onto
the material tab. We're going to change
the material domain. If we were to make
this a bit larger. We're going to change the
blend mode from opaque. We're going to make sure
it's set to translucent. So we'd have partial
transparency within our plane. Then the next step that
we need to do is we'll need to be able to control
the color of the fog. We're going to hold free, and we're going to
tap on the screen. We're actually going to attach this instead of the base color. We're going to attach this
to the emissive color. The reason we're doing this is because we want to make sure we have control over
how bright the fog is, for example, we're
going to in a way, fake the lighting results
onto this fog instead. Since this type of a material
does not get affected by the lighting from the sun and whatnot, from
the environment. So this allows us to quickly have more control
over the entire fog setup. We're going to change this
to be default kind of white. And actually, instead of white, we're going to set it
up to a value of 0.5. So yeah, we're going to go onto the constant by clicking
on the square over here. We're going to go
onto the value, and we're going to
set it up to 0.5. We can see it to be right
in the middle over here, so it's going to be a real
nice, good starting point. And just to make
sure that we can use it within our
material instance. We're going to right
click and we're going to set this
to a parameter, and we're going to
call this color. So Then the next
thing that we need to do is we need to set
ourselves up with opacity. Capacity will allow
us to basically control how transparent
an object is. The thing that we need to do
is we need to right click. We need to search for fade, and we're going to get
ourselves depth fade. Depp will allow us to get a really nice type of
control out of our setup. So I'm just going to make this connection onto
opacity like so, and I'm going to click Control and S just to show
you what it does. Go to just wait it out
until we get to this setup. So Right away, we're going
to get this sort of a look. It might not be quite as clear, but you can see there is
a bit of a transition in our plane right now
instead of it just being cutting off
the terrain itself. It's a bit small at the moment, so we need to set
up the controls. And for that, we're
going to hold S, and we're going to
tap on a screen. We're going to call
this one opacity. So this will basically
allow us to control the maximum opacity
of the fog plane. So for example, if we were
to have this set as one, the opacity is just
going to end up being completely maximized type of opacity is going to
be just this color. If we were to set it up to
something like 0.5, let's say, and click Control S. Maximum
that it's going to get onto, as you can see, is going to
be just half of the capacity. So we're still going to
somewhat see this kind of area, but it's going to start
getting a bit better. We're going to control
this later on, so we're just going
to leave it as one. The next thing, the
main thing that we need to control is
the fade distance. This is going to allow us to get more clear transition
in between here. So let's go ahead
and fix that up. We're going to create
a parameter for it, so we can control it from
a material instance. Let's go ahead and
create parameter by holding S like we
did with apacity. This time, we can call this
fade distance like so. We're going to attach this
to the fade distance, and let's set up the base
be like 1,000, like so. We're going to click
Control and S, and we can see that
it right away is going to help us out to
get a nicer transition. So, This is the main thing for depth fade to create
a nice fog plane. It's already looking much, much better, and we can have
so much control with this, you create some real nice
stylized environments within our theme in regards
to the depth itself, but it's still not
quite done just yet. If we have a look at it, once
we start getting closer, we're going to get this sort of a bizarre result when we're
passing through this plane. So it's although it's
looking quite nice, if we want to just cross
over this type of a setup, We need to make sure that it works really nice in regards
to the camera itself. When it gets closer
to the camera, it's going to fade out nicely. We're going to set
ourselves up with another functionality
with this opacity. We're going to right click. We're going to search for camera depth camera depth fade there you go. That's the
one we're looking for. This is going to help us in regards to making sure that it fades out as close as
we get to this plane. To apply the camera
depth on to our opacity. We're just going to make
use of a multiplier node. Let's hold M to grab our
cells multiply node, and we're going to attach
both of these together, like so, and we're going to then combine
it onto rapacity. Of course, we need
a couple of options to be able to control
the camera that fade. We're going to hold S to create fade length for C. So actually, I'm just going to
put in fade length. Like, so we're going to
attach it to the fade length. We're going to then
create a new parameter to call it fade offset. So, and reason I started
off with the title with camera naming is that because they're going to be alphabetically ordered
the parameters, they're going to be
one next to achover. So that's going to be paps. We're going to now
clear control and S and see how this works. Okay. Actually, I
should have changed it up in regards
to the parameters, but I think that's going
to be quite right for now. And yeah, once we get closer, it should start disappearing,
as you can see over here. Not quite working quite
as well because we need to go onto our parameters. We're going to start
playing around with the values for the
length and offset. All the length, if we
start increasing it, you can see that it starts disappearing as you
can see over here. So it's quite nice to have it close to this
kind of a value. 2000 for value is going
to be quite nice. And the offset should give us a real nice ability to control how close and
how far it is actually. So, but just using these
two values together, we're able to get ourselves
a real nice type of a setup. And actually, I'm just playing
around with the values, making sure that it
looks quite nice. And we just want
to make sure that this transition is
not quite as visible. I'm just going to increase this to a larger value actually and then start making this a
little bit smaller perhaps. And yeah, there you
go. That's perfect. The reason The thing that
I'm trying to do with this particular thing is that I'm trying to make
sure that as we get closer, it starts disappearing, and
that's exactly what we want. So that's already
looking pretty nice. And thing that we can do is we can go back onto the
material itself. We can select it,
and we can make sure that we enable
it two sided, and we can click control
and S to save it out. Final thing that we need to
do is just make sure that we have some variation within
this type of a fog. And the way we're going to do it is by adding texture
onto the color. So let's go ahead
and hold T and click on our material graph. We're going to change
this texture sample to be a parolin noise. Go ahead and search for
paroling mask lick. So with this, we'll be able to have a really nice
type of a control. Let's go ahead and multiply
this with a noise value. We're going to hold S tap on
a screen, hold this noise. Multiplier. And by default, we can just leave it as one. We're going to
attach this to the multiplier to the noise like so, and now we're going to hold and attach this with the
color itself, like so. This where we're going
to get ourselves a really nice type of a setup. The noise itself, we can control its scale with the
UV coordinate. So let's go ahead and do that. We're going to create a
texture coordinate like so. And attach it with a multiplier or a
parameter for a scale. Just like that, we're going
to leave it default of one. Although keeping it a
zero is also an option, as you'll see in the
bit, and there we go. We're going to click control
and S to save it out. And we are pretty much ready in regards to setup
for the fog itself. We're going to continue on with this though in the next lesson. So thank you so much for
watching, and I'll see in a bit.
26. Fog Plane Setup for Mountains: Hello, and welcome back
everyone to creating studying environments
in Unreld Pi. The bootcamp for artist course. In the last lesson, we pretty
much set ourselves up with a nice folk panel that we're
now able to make use out of, and now we're going
to continue on and actually set it
up within the scene. So right away, we're just going to go on to the
material instance. We're going to play
around with the settings. We're going to enable everything
that we have over here, and we're going to, of course, enable the color as well. I'm going to change
the color a little bit to a bluish tint and that will give us
a really nice type of cold look within the scene. I'm going to perhaps increase the lightness
for it, like so. And that looks
pretty good already. We might as well play
around with the fade multiplier and a noise scale. And yeah, I think using a
noise scale would be better. I actually just forgot to rename this to be a noise scale
instead of just scale. So let me just go ahead and go back to the material real quick. Going to find a noise
multiplier noise scale. There you go, going
to change this name to noise scale instead. So it would be more readable
and a bit more orderly. So let me just go ahead
and save this out. Right now, it's going to give us the same type of a setup. Except right now as you
can see noise scale and noise multiplier is going
to be within the same area. I'm going to increase
this noise scale to be around the value two. I think that's going to be quite right for this particular setup, as in for the noise scale
noise multiplier, that is, we are basically going to
be working with values 0-1 in order to get a setup. Otherwise, it's going to
start glowing for the scene, and we don't want
this to happen. So just make sure that
you're working with noise multiplier 0-1 values. And yeah, by this, we can just grab ourselves a nice type of contrast
that looks pretty nice. So yeah, we're
going to use this. Then we can finally go ahead and make use of the fade distance. And It's opacity. And for the phase distance, we can increase this value
to a much higher amount. So we'd be able to see quite a bit more in regards
to the setup. Something like this, perhaps. Is looking pretty nice. Going to play around with the height for the
fog itself first. So something to this amount. I think that's going
to be quite okay. I'm going to put
it up like this. It's going to give
us this a look. And once we get closer to it, it should start fading out
because of the camera setup. So it's looking pretty nice. The campad length can
be a bit higher up. I'm just going to take
off the pad offset for this around 200. This is looking much
better right now. Still a bit off in
regards to when we have some of the
fog going under. So that's going to make
it look quite empty. So one way to fix it
would be to firstly add another fog plane underneath that would allow us
to have control. But as you can see,
from a distance, it's looking quite
nice for this setup. It looks like there's some
clouds and whatnot over here. I actually am going to
change up opacity as well. I don't want this
to be completely just a filled with color. And for that, I'm just
going to limit the opacity. I'm going to change it to a
value, something like 0.5. So this way, it's just going
to give us that bit of an extra control in regards
to the opacity of the scene. And it's looking really
nice apparently. But what I personally like to do also is just make
another duplicate, so I'm going to
hold old going to create another duplicate
for the plane, as you can see over here. So now we have a
second plane under it. I'm going to make a copy out of our material instance,
hit Control C, Control B with a selection that applied this fog copy over here. You can see that this is being applied onto
the second plane. We can see we have two
planes over here like so, and it's a bit hard to see maybe it'll be easier
from a distance. You can see that
this is over here. Anyway, going back to this. We're now going to have
more control in gods that, and I'm going to go
ahead and change this maximum opacity to be
something like a value of 0.1. Then the phase distance, I'm going to increase
this, sorry, not the noise, I'm going to increase or lower
the phase distance. It'd be something
like 200 perhaps. Let me just go ahead and
have a look at this. I'm actually going to change
this opacity back to one, so we could have a better
look on what we're doing. And then we're going to change pad distance to
just play around with it. I'm going to change it
to somewhere like 3,000. We're going to get another
layer basically underneath, that's going to look
something like this. The texture then is not going to be needed to be
quite as contrasty. What I'd like to do in
regards to noise scale is, I like to change it to a zero, that's going to take off
the noise completely. But that's going to
look quite nice. Going to take off
the saturation, going to make it quite
a bit brighter as well. And this is how it's
going to look like, and I think we can also change
up the noise multiplier, so it would be something like A one, like so. Now we can finally go ahead and change the capacities
to be 0.1, like so. So you can see
before and after it adds just a bit of an extra
depth to the height itself. It gives us a real
nice type of control, and we can see sort of clouds
forming up in this area. So it's looking really, really nice in regards to that. Of course, when we go too low, it's going to start
disappearing, and we still have that
height fog left over. But the planes themselves
are not going to be there. I'm so I also tried to keep
this project quite orderly. So I'm going to go ahead and
change these plane fogs to just call it fog plane like so, and the second one as well. Fog plane this should be renamed the Fog
plane underscore one. I'm going to go ahead
and just select the go for plane
and Fok plane one. So we have two
different fog planes. One is going to be
quite a bit more for the cloud type of a setup, and another one is
going to be more for just a depth
type of a setup. And that's not going to
affect the area outside. We also have these
lines over here. So in order to fix those
lines, what we can do. One way we can fix it is if
we were to go onto this. Back onto the material. We're going to create
ourselves a radial control. So to create radian control,
we're going to right click. We're going to search
for radial grade in exponential. This is
going to give us this. And with this, we're going to be able to create
ourselves a sort of a bubble for a multiplier
of the opacity. So let's go ahead and just
put it up to the side. We're going to
straight up just use multiplier to attach
this that already created opacity
channel onto A and B with the radial
exponential, like so. And if we were to
look at it with right click star previe
mode is going to be a little bit hard with the
sphere to see what it is. But by just clicking
on the square, we can see that it is
basically just a circle. We can control the
circle radius, we can control the density, but honestly, just
keeping it as a default one for this
particular case is going to be more than enough. Let's go ahead and connect
it back to opacity. We're going to just apply as
a simple type of a setup. Now if we were to close it, we can see that these areas at the side have
completely disappeared, and we're going to get ourselves a real nice type of transition
for the middle section. So I'd say we could make it even bit more in regards
to the first plane. So it's going to go ahead and that up more of
a capacity, perhaps. Tough 0.8, since now we have some bits underneath controlled, but we can see it looks like we have some partial clouds
and once we get closer, should start disappearing
and whatnot, and it's going to look really, really nice in that regard. So And that's pretty much it in regards to the
setup for the planes. We can also make use out of them in regards to it
being horizontally. So what I mean by
that is if we were to select this plane and just make a duplicate by holding Alt and dragging it out
to make a duplicate, and put it sideways like this. And you can see it's going to give us this sort of a look. Which is not going to
look quite nice at the moment because
we need to make sure that we set up a
different scale. We're going to set
it up to something like 500, for example. And at this point, the ratio
can be slightly different. So let's go ahead
and untick the lock. And now we're going to change this to something like 1,000. So 1,000 by 500 is going to give us this sort of a
shape. You can see like so. We can put it next to
some of the mountains, and I'm actually going to
make a duplicate out of this like so and apply
it onto this plane. Can play around a little bit
with in regards to that. Right now, it doesn't
look quite as nice. I'm going to go into
it. Going to make sure that we have a real
nice setup for this. Going to make sure that
capacity is set to one and fade distance is also
changed up a little bit. We can have a we can see a little bit
more of what's going on. The multiplier, we can increase this a little bit
in this particular case, and you can see
that we're getting some really nice
cloud type of setups. Now we can play around with the fade a little bit like so, and you can see that it's looking pretty nice
in regards to that. Okay. So just by doing
a couple of options, by fixing them up, we get
real nice results, opacity. I tend to keep this value
between 0.7 and 0.9. I never go to a value of one, so we could have some
partial transparency. And now because we set it up with a camera type of a phase. So whenever we get
close and past it, it's just going to start
disappearing, basically. So like us getting it close, you can see that we
can see a bit more partially through it.
This is pretty good. And just with those planes, we can populate this
world with them and get some really nice kind of results over the
entire environment. So yeah, that's pretty much
it in regards to that. The way I tend to
create those clouds is I prefer to just have some variation in regards to
that height a little bit, and I try to give them a bit of a way to break off the mountain
heights and elevations. For example, this one over here, I'm going to put it
up a bit closer so we can even put it partially
in the mountain as well, so to be broken up this entire fog plain
by the terrain itself. And yeah, that's all there
is to it in regards to that. We can just place it around and have a really nice
type of a setup. The downside of it, though, is that AL doesn't quite work quite as nice in regards
to the overall setup. So I got to make sure I type in the values manually myself. Something like
This, for example, over here in the corner, is
going to look pretty good. And it's pretty simple. It's pretty basic, but it works really nice when
you have it all set up. It's going to do it on
the upper end as well, and to be quite nice. And I'm just wondering in regards to the
planes themselves. So, for example, maybe
we don't want it for a person to see them when
they get too close to them. So what I'm going to
do is real quick, I'm just going to go onto
the material instance, going to change up the
material camera length self. Something length. And I think that'll work much
better. There you go. When we get close, it starts disappearing. That's perfect. That's exactly what
we want. So, that's going to be in regards to that. I'm going to maybe
place another one on our end as well, so. And, yeah, that's
all there is to it in regards to adding
some additional detail, adding additional
death to our setup. A little bit brighter,
perhaps, maybe more bluish. No. That's the color
like. And yeah. We can spend a lot longer in regards to time itself
by tweaking the values, making sure that they're set
up properly and whatnot. But in essence, that's all there is to it in regards
to the whole setup. There's nothing much to
the planes of the fog. We're going to continue
on with this set ourselves up with volumetric
fog in the next lesson. So thank you so
much for watching. And I'll see you in a bit.
27. Volumetric Fog Material in UE5: Welcome back
everyone to creating setting environments
in real engine five. The boot camp for artist course. In the last lesson, we
ended up creating ourselves some fog planes to place it
the next in the mountains. And now we're going
to continue on working with this setup
and make sure that we have set ourselves up with volumetric fog
within the scene as well. So for us to do that, we're going to start off by
creating a new material. So we're going to call
this one volumetric. Matt. So we're going to right click on it and create a material instance
right off the bat. Then we're going to create
a simple shape for a cube, just a simple one leg. So we're actually just
going to start in a smaller scale and then
work our way upwards. So I'm just going to place
this small cube over here. I'm going to click F dg
just to zoom into it, and maybe we can just make
it just a bit bigger. So I'm going to
go ahead and make it to a size of
ten by ten by ten. And we're going to apply the volumetric
material instance, like so right off the bat, and we're going to
start off by going into the material to start creating
the material that we want. So right. You start off, we'll need to go ahead and
change up the settings. We'll need to make sure that
we go onto the settings, change up the material domain to be volume since we're
creating a volumetric fog. Then as you can see, it can only be additive type
of a blend setup. So let's go ahead and
change the blend mode to be additive. Let's
go ahead and do that. Right out of the bat,
we're going to get ourselves to sort of a setup. Then we're going to
straight up want to be able to
control the color of this lemtric fog. We're
going to hold free. We're going to tap
on the screen. We're going to click and
change it to a parameter, calling it color, like that. We're going to apply this to albedo and the starting color can be a value that's
close to white, like so. It have to be
completely accurate. It just has to be white
color, just like that. And the next thing that we need to do is going
to be we need to start ourselves by setting
up a volumetric parameters. So for us to do that,
we're going to create a quick preset that's really
good for volumetric setup. We're going to click.
We're going to search for absolute world position, which is going to be just the world position this
one over a year. Then we're going
to drag this out and we're going to
search for transform. Position, like so, and we need to make sure that
we change the settings by. So let's go ahead
and select this. We want to change this from absolute world position to a
local space. There you go. Make sure you change
this otherwise, it's not going to work properly. So that's quite important. Then we're going
to make sure that we have this from subtract, and we're going to
just drag this out, search for subtract
the thing that we're going to substract is going
to be object local bounds. Like so. We're
going to make sure that we get minimum
we subtracted from, and then we'll also want to
connect subtract to a divide. Like so, we'll want
to make sure we are dividing this with
the local bound size. So that's going to give
us the right type of a setup for a nice
volumetric base. And of course, we'll need to go ahead and continue
on with this. We'll need to drag this out this time to get ourselves distance. Make sure we scroll down. We're going to find
ourselves distance node. Let's go ahead and add this on. For the distance, we're
just going to half it. So let's go ahead and hold
one, tap on the screen. Put the value of 0.5,
add it to the B. And we're going to multiply
it overall value two. So we're going to
hold, tap on a screen, add it in, and just
multiply this over here. So instead of just
adding a float value, we can just type in the value
over here if we need to. Going to be quite all right. And actually, we'll need to
invert this entire value. So I'm going to drag this out. Set up one minus so.
And there we go. We got to sell a nice space, which if we were to plug in,
we can see what it does. We can and click Control
and S. And wait it out. We're just going
to check it once, how it looks like,
and then we're going to continue on with the setup. But you can see it creates a real nice type
of a cloud setup. So it's looking like a
nice type of a shape. So yeah, let's go back onto it now and continue
on with the work. Next thing that we
need to do is set ourselves up with a
simple noise texture. We're going to hold t. We're
going to tap on a screen, and we're going
to grab ourselves a parli noise out
of this Sample. Let's go ahead and
do that. Noise is really useful for when we want to create a sort of a noise for fog or anything
of that sort. And I'm now going to go
ahead and attach this to a free point type of a node. So free point, if we type it in, we're going to get ourselves
three point levels, which is really useful for when we're working
with volumetric fog. There are ways to
set ourselves up with three dimensional type of noise if we type in three D. We should get ourselves
volumetric noise erosion. It's really good,
but it's very costly in regards to the performance
for our environments. So we're going to make sure that we use three point levels. It's a really nice kind of work around for that
kind of an issue. We're going to then get controls for the black,
middle, and white. We're going to just
click Hold S. Actually. We're going to create
a simple parameter. So we're going to
just call it free 0.3 point black I'm actually just going to copy the
name and place it in here. Then we're going to hold S, pace this in and instead of black, we're going to call it middle. Set up with the
middle, and finally, we're going to do it one more time to set
it up for the white. The values don't
really matter as much, so we can keep it as is. These are the main ones
to control parameters. This white, we can just
start off as one and middle part can be set up
as one half point 0.5. So, so basically, it'll give us the same kind of exact
results as we had. I'm going to now hold M and connect them
with a multiplier. So the settings that we created before and the noise
that we have right now. We're now going to be able to
connect this to extension. We're now going to collect
control on S. And actually, I totally forgot we
need to make sure we have controls over the settings. So just give it a
second to load up. We need to have
additional controls over the entire setup. But since we're
running out of time, I reckon we can continue on
with this in the next lesson. So thank you so much watching
and I'll see in a bit.
28. Placing Volumetric Fog in Mountain Terrain: Well, I welcome
back on to creating stunning environments
in real engine pipe. The boot camp for artist course. In the last lesson,
we left it off by setting ourselves up with
volumetric material, but we need to continue on and add a bit of an extra parameter, so we're going to
continue on with that. We're going to create
ourselves a texture scale. But instead of using
texture coordinates, we're going to make use
out of world position, so we'll have a greater control over this entire parameter. Go to right click, we're going to search for
world position, like so. But then going to make sure that it is being able to be used within our simple two
d texture because by default world position is
set up as a free deordan. If we're trying to
set it up like this, it's going to give us an error. So what we need to do
is we'll firstly need to drag it out and search
for component mask. And this by default will just mask out the
red and gray channels, the blue channel, which is
responsible for Z value, which you can see at the bottom left hand corner
within the preview. It will not be affected
basically by our scaling, so we can keep it as is. And then we're just
going to start off by getting ourselves a
nice type of a multiply. We're going to hold. We're going to grab a simple
multiplier value. But then going to
hold S and type on a screen to get
ourselves a scale. We're going to just attach this and set the
default value to 0.001 because the world
position is actually quite big. So we need to make sure we have that accounted on
in regards to that. Then we can just simply
attach this to the texture itself and it's going to
give us nice results. And finally, we also need
to make sure we have control over this entire
opacity off the fog. We're going to hold
M on the screen, we're going to attach this to B. We're going to hold S and
create an opacity panel like. In this way, we have
the final controls basically for this entire setup. We're going to attach this and clear control and
S to save it out, and now it's going
to start compiling everything. So just
give it a second. And I just realized I
forgot to change up the scale for this
final multiply, which is okay because we can do so in the parameters themselves. I'm not going to do it anymore
because I'm not going to touch it here because it just takes a bit
of an extra time. So I'm going to go onto
the parameters within it, and I'm going to make sure
that everything is ticked on. Then for the pace,
we're going to start with a value of one, and we're going to see
how it looks like. So this is what we're going
to get at the moment. It's going to look like this. We can make use out of middle
and wide points to have a greater control in regards to how the noise is being affected. So that will allow us to
get a bit of an extra type of way to control the
curvature of the noise. And if we were to play
around with the scale, actually, it was set up 001. There you go. That's what
we should be getting. And if we were to now make
this a little bit larger, just something like 100, like so, we should get
ourselves something like this. And right now, it's still not quite there in
regards to the setup. So first things first, we need to think about in
regards to the visibility. The way the volumetric
material works is that the volumetrics are
actually making use out of the exponential
height volumetric setup. We need to go back onto
the volumetric height fog. We need to go all the way down, make sure that the volumetric
fog tick is ticked on. And then the view distance, we're just going to increase
it by a couple of zero, and that's going to give
us this sort of a result. So it's already
looking a bit better. Although we need to make
sure we go back onto the material instance and have some control over
the entire section. Four this fog. So scale, we can make it 0.001.
Something like this. That's already
looking a bit better. Going to change this parameter for the point wide as well. And we're going to just
by playing around, going to get ourselves
some nice type of values. Really depends on the type
of a fog we're trying to get on in regards
to the scale. I'd like to get a bit of a larger type of a fog.
So that's what I'll do. First of all, I'll change
the name of this fog cube to just the fog volumetric. Then the next thing
that I need to do is make sure that we
have the right scale. So I'm actually just going to
change it to 100050005000. Like so. Oh, actually, mess it up a little bit. There you go. Now this is
what we're going to get. We're going to get ourselves
a really large cloud that we can make use of, and we are going to
be setting ourselves up with a nice
scale for it first. And for that, we're going to change up the
scale to this area. I'm going to add a couple of
zero, see how that looks. It's not going to be quite
as visible. There you go. That's going to
be helping us out in regards to the visibility
itself or the scale. So we want it to be a little bit smaller in regards
to the scale itself. And that looks quite right. So what I did,
basically, I changed up the third point it
sections to be a negative. That helps us to get a
nice kind of a setup. And now I'm just going
to play around with the values that are going
to be a bit closer to zero. So something like this. Middle Point is also going to
be helpful in that regard. And we just playing
around with these values, we're able to get ourselves
a real nice type of a cloud, something like this, perhaps. You can see it has
some lymetric shape, but now we can see that. We probably want to make it
a little bit more noisy. So I'm just going to play
around with the value itself. When working with
this type of setup, it's best to just
play around with the values and see how it looks, see what the extreme parts do. So for example, this black would be most often
kept the same actually. I tend to leave it as zero. The middle part is on
the other end just going to help us get a
nicer type of transition. And finally, the white point
is going to make sure that the overall opacity for the mask is going to be
basically changed up. So that's the way
to think about it. And that looks quite right, maybe a little bit
less in regards to the setup. A little bit more. Something like that we're
able to make use of. And once we're happy with this, we can also change up
the color a little bit, for example, to be a bit bluish. So we're going to save this out. We're going to change up
now the scale of this to be like $3,000 I think
that's a nice value. And by just using this
type of vlometric fog, we can add these
areas where we have more clusters of volumetric fog. The difference between this is that although it doesn't
have that kind of a texture, cloudy texture as
the two d planes, it doesn't have as much of
a control over the noise. The nice thing about volumetric is that when we get into it, we can see that it actually
looks really nice. It looks like there's fog
proper fog fog within it. We just need to go and actually adjust a pass a little
bit as well, perhaps. Okay. So, so when we
actually get into it, it's just not going to look like a total mess in regards
to the fog itself. This is looking quite nice. I just want to make sure
that the middle points now and the top points are
set up properly as well. It is not negative. We try to avoid negative
values, by the way, with these three
points, and it's going to give us a
nice kind of result. And yeah, that's
pretty much it in regards to the setting
up of volumetric fogs. We can just apply it in the
areas that we want them to be in thing like here
here and here, for example, And, yeah, that's all it takes to set ourselves up with a
nice volumetric fog. I hope that the video was
informative and productive. And now in the next lesson, we're going to continue
on with the next scene. So yeah, thank you so much for watching, and
I'll see in a bit.
29. Foliage Asset Setup: Hello, and welcome back
ever on to creating studying environments
in unreal j Pi, the boot camp for artist course. In the last lesson, we've
pretty much finished off all the techniques
for the fog set up and to just get better
depth out of our terrain. It looks quite nice. And actually, we can
see how it looks like before and after in
regards to the fog itself, if I were to select it all. So this is how it
looked like before. And this is how it looks after. So you can see it looks way nicer overall with
this whole setup. Maybe the only thing
that I would say, maybe I would just lower this
a little bit down like so, and that looks so much nicer. So going now with
the next level, we're going to go ahead and
go onto the foliage creation. Let's go ahead and open
up with that scene. We're going to save this out and move on with the next level. Within this level, we have a basic set up for the terrain. We've got a simple mesh. We need to make sure that
we have a camera speed slow down all the way back
to the multiplier of four. So now we'll have better
control over the scene. And now we'll be
able to make sure that we have some nicer organic
shapes within the scene. This is more of an organic
realism type of a setup. We have some quicksil acids that are blended in together
with one another, kind of mashed together. We need to make sure we populate it with some nice foliage. And for that, we're
actually going to make use out of our Quixel bridge. So top left hand corner,
if we were to click on it, we're going to over ourselves
up with Quixel bridge. So it's a free acid kind of a place that unreal engine owns. That allows you to grab any type of assets
from within it. We're going to make
use out of it within the top left hand
corner off the window. We got ourselves home button. Let's make sure to click on it, and there is a section
that says three D plants. Within a three D plants, there is a whole bunch of different plans that we
can make use out of. And I'm just looking for something called
European spindle. This is a very nice type of
bush and grass combination. We're going to learn how to set ourselves up with
some trees later on. But just make sure
to grab it and we're going to use
medium quality for it, so we don't need to go in
regards to high quality. We're going to make sure
that we have it downloaded, and after we download it, we can add it onto the project. And that's pretty much it. It'll just straight up attach everything onto your assets. I'll create new materials and material instances
for you to use, and you'll be able to just simply grab and drop
it into your scene. So just to check it out, we can go ahead and
just grab one of the assets and drop it
into the area, like. So we can see how it looks like. It's a very nice type of bush, although we will need to
adjust the color for it. But before getting
ahead of ourselves, let's go ahead and
work with a nice tool, something called foliage tool. Let's go ahead and open that up. So top left hand corner where
we had a landscape tool. We're also going to find
foliage tool as well. Let's go ahead and open this up and see what's
that all about. And because we already
have quick sill bridge, it's going to straight up assert all the free Die
foliage free plants onto the foliage tool. And it'll give us
everything set up. But if we did not have
everything in here, we would have to basically grab everything that
is static mesh. If we have over, we can see in a brackets next to the name. It says static mesh. We would need to basically
grab everything and drag and drop it like this
into the foliage type, and that would automatically assign something
called foliage acid. So if we were to go
into this folder, we can see that it is now static mesh foliage in a
brightens next to the name. So that's what it
basically creates. This allows us to set up some settings for
the folage that we can make use of and create
some nice type of foliage. So yeah, right away, we're
going to make use out of that. We're going to simply make sure that everything
is selected first, and we're going to click on
this tick mark over here. And if this does not
have a tick mark, it won't be able to be
placed within the scene. So let's just make sure
that as a tick mark on. We're just going to
tap on the grass, and we're going to see
how it looks like, and this is what we're going
to get ourselves with. We're going to wait for
the shades to load up. So I'm just waiting making sure that we have all the
shades loaded up. Once it's done
preparing the shades, I'm just going to
click control Z and go back onto this setup. And then the next thing
that we're going to do is we're going to go
back onto folder. We're going to hold shift, select all the static meshes and the quick tip
for static meshes. If you see the blue kind of underline next
to their icons. You see, just above the text,
there's something blue. Those mean that they
are static meshes. So that's nicely color coded. We're going to select them all. We're going to click, and we're going to enable
Nite for selected. This will make sure that it is enabled for them
because by default, the ninit is not enabled, so we've got to make sure
that they are stat properly. Like so. And once it's
done, setting it all up, we're going to be
able to drag it out and it should give us a
nice type of a setting. I'm going to also
make this window. You'll notice rough
this entire setup that I'm dragging the
window up and down for the content browser just
by clicking this bar over here at the top when
my arrow gets to this kind of a symbol,
I'm able to do that. And the reason for it is
because it's really hard to see the bar at the
left hand corner for the foliage if it's
not done like that. So yeah, otherwise, we can also just take off the content
browser from the content tab. We can click control and space. And that would also open ourselves up with
a content browser. So that's another
way of doing it. But anyways, now that
we have it set up for the folliage and all the
shaders are pretty much done, we can see that a huge
performance boost in our setup. And before we actually start
setting everything up, I'm just going to
place them all. I'm going to go and dock my
content browser actually. And I'm going to find the previous leage
creation over here, going to go onto its assets, which I just realized because we got ourselves the
quick sales setup. I created ourselves a new
folder called Mega Scans. It is going to have
all the assets within here that's needed. I use some of the Quixel
assets from here, so the ones that are within it are going to be
used within the scene. But anyways, the
Freed plant folder is going to have just
this folder over here. We're going to go back onto it, and we're going to
start off by changing the color the overall
color of these assets. So right now it looks way too bright for
this kind of a scene, although when you zoom out, it looks quite a nice. But when you zoom in, yes,
it's a little bit too dark. The way to fix it is going to be by going into the
material instance. We're going to locate
this one over here. We're going to go
onto the albedo, and there are
options that we can make use of in order
to change the color. So by just clicking
on color overlay, we should be able to open
ourselves up with this. And just by clicking
on this box over here, we'll be able to
change the color. I'm actually just dragging
the window to the side. I'm going to click on
this box over here, and I'm going to lower
this down as you can see it changed the color
straight off the bat, and that's going to look much better in regards
to this overall setup. So, yeah, I think that's going to work out pretty
nicely for us. We can now go ahead
and talk a little bit in regards to the
foliage mode itself. I'm going to hold shift real quick and delete
everything like this. And yeah, let's go ahead and
talk about the foliage mode. We're going to close
down the contra browsers and we can see it all. We got a lot of tools
on the top tab. We got select, which will allow
you to select the assets, the foliage within
the scene by itself. We're also going to
select all foliage, but we will allow you to
select all the foliage based on the tikton folage.
We got the select. We got the select
invalid foliage, instances, lasso for
selection as well. All of these are for
selection, basically. Then we have ourselves
the paint tool, which will allow you to populate the scene with the
painted foliage. We got reapply, which
will allow you to reapply the settings
for the folage as well. We've got some settings which we're going to go
into it in a second. We've got single,
which would allow you to place all the single areas, all the single type of
foliage, just one by one. And right off the bat, I'm going to let you know that this single is going to be best
used with a different mode. So single instance mode
will be best to be used with a single
cycle through selected. Instead of placing all
of the assets at once, it's just going to start
cycling through them. I'm just letting
you know for that. I'm not sure why by default
it's to all selected. And then we got
ourselves fill tool. The fill will allow
us to just fill an entire acid area with foliage as you
can see over here. It looks quite insane. Luckily, for us,
the nit allows us to have a lot of
folage oil at once. But yeah, moving on, razor razor is never used as is. We always just use paint brush, and then while holding shift, we always as you can see, changes to a razor right off
the bat while holding shift. So that's the best
way of using a razor. Tool. Remove is just going to be just removing
a selected folage. And finally, move is going to be in regards to just moving
the folage most of the time, you won't be using this anyway. So that's pretty much it in regards to the
tools themselves. We've got some options
that we'll need to set up, but we got the foliage into the foolage tab,
and that's what matters. We're going to continue on
with this in the next lesson. So thank you so
much for watching, and I'll see you in a bit.
30. Painting in Cliff 3D Plants: All right, welcome back
everyone to creating stunning environments
in unrelented pipe. The bootcamp for Artist course. In this lesson, we're going
to continue on talking about the foliage and how to
lay it out on the scene. And now we're going to go
a bit more in depth in regards to the options
for the foliage itself. Since it's quite necessary
to know about it. It's useful for when you want to populate your scene
with the foliage. So yeah, the brush size. Brush size is going to
control the scale of a brush. It's going to be better to just use open brackets,
the square brackets. I'm not sure what
you're called exactly, but as you can see in
the symbol over here, that they make it
larger and smaller, and that's what you're
going to control. Most of the time your
brush. Paint density. So paint density,
the way it works is it takes the
value at the bottom, as you can see, with all
the meshes selected still. You can see the
density over here. Underneath the painting
tab, it says density. This is going to be multiplied
with the paint density, and it'll allow you to paint in more or less amount of
foliage, basically. So if I were to change
this to a value of 00.01, we can put it and
you can see that it's going to be much
better spread out. So yeah, the way this works is going to be in regards
to the density itself. Usually, if I want
to have density, I'll change up the
paint density. And if I want to
have more variation, I'll select specific
folage, for example, we can select multiple
folage by the way to change the settings or
the parameters of them, and then I'll change this
up to for example 50. So everything will be in 100, but these are going to be in 50. That means they'll spawn less. So that's pretty useful to know. As for the eraser density, what this will do is once you start spawning in the stuff, if you have this set up
as 0.5, for example, it'll only just
delete half of them, or actually, in this
particular case, because the pain
density is set at 0.1, we need to be just
lower than 0.1. If we set it to 0.1 with
the eraser density as well, I'll start deleting it, but it'll try to keep it to the pain density that
we have over here. So usually we need to think
of a raised density in the context to the
pain density as well. So there is that. And usually by just keeping it at zero to just delete
some of the parts and using the erased density to just trim some bits
out is quite useful. But anyways, enough
of all of that, we're going to start
changing up this because also when we have
all of this selected, I just selected one, click Control A to make
everything selected. I'm going to change the density, even though now it
says multiple values, we can change it
to 100 and it'll change everything back to 100. And Another thing
that we need to do is make sure that we
only use specific parts. So for example, right now, we have bushes and we have some spindles selected the
smaller type of grass. I'm going to delect everything, and I'm only going to
select a smaller grass. I don't know if it's as visible. So I'm going to make this
a little bit bigger, and I'm going to
increase the scale for the thumbnails and make it a little bit more
visible, like so. And just by selecting them and making sure
that the tick is on, we're going to be
able to paint all of the foliage that's only
selected with a tick mark. And The one thing that we need
to talk about is filters. We got to make sure that the
static mesh is ticked on. Otherwise, it's
not going to work because these meshes that we're going to be painting on are
actually just static meshes. So without this, we're not
going to do anything on it, but with this on, we'll
be able to paint it on, and we're going to
start doing just that. And actually, I'm going to click Control Z to undo my
foliage real quick. Going to make this actually
quite a bit smaller now. Now that we don't need it, we're going to put it off to the side. And yeah, going back
to the options. The dean density,
we have radius. We usually don't touch radius. There's no need for that. We
have a lot of other options. But the main ones
that we need to know is going to be scale. Scale is going to control
how large the object is. If we were to put it a value between two and let's say four, we're going to have various of scale in 2-4 up to the scale. Actually, I'm going to
put it up to something like five and ten for
this particular setup. Um, might be right, although, I think
it's all right. We're going to go
all the way up and change up the paint density
to something like 0.2, start painting it and
see how this looks like, and you can see that
this looks pretty nice. Okay. Then the next main
thing that we need to know of is going to be
when we scroll down. The align to normal. A Lign to normal photograph
works very well, there you go next to
replacement, align to normal. But if we tick this off and start painting
this over here, If we start painting
this over here, we'll notice that this is just always going to
be facing upwards where these ones over
here when they're facing a bit more of a corner. If I were to find
something like this, you can see it tries to align to the angle of the slope and
goes a little bit sideways. It might be a little bit
easier to understand if I were to have this
aligned to normal ticked on. And if I were to go
all the way down, there is something
called ground slope. So with ground slope, if we were to set the maximum value for a bit larger of a value
to something like 80, we'll notice that it
starts placing them in regards to the edges
of the slopes. And this is quite
useful for when we want to have more on the
slopes themselves. But as you can see, once
I start building it here, it looks like it's growing
out of the edges now, and that obviously is not
what we want for this moment. What I tend to do for the slope
is just keeping it 45-80. And for example, 60. If we start clicking on it, we'll notice that it doesn't go on super steep type of slopes, but it does go into
crevices and whatnot, and that might look
quite nice sometimes. So I tend to do that when
I'm setting this up. And it looks really,
really nice, actually. So I'm just going to make
use out of it and set it up. And actually, one
thing that I forgot to mention is going to be
a random pitch angle. By default, random
yaw means that it will rotate the
plant randomly, and that's actually what we want in regards to making
it look more organic. Make it to go even further in regards to making
it look more organic. Random pitch angle will
allow you to angle your plant in the direction
based on randomss. For example, if I were to change it to a few hundred,
for example, we'll start seeing that
some of the plants are actually facing
sideways and whatnot, they're going into
the setup itself, and you can see some of them are even going all the way around. So the reason for it
is because it just tilts them in an angle
based on randomness. And I recommend you having
this two something quite low between a value of two
to ten is quite nice. So maybe something like four at this point is
going to give us more randomization in regards to an angle itself. So
that's quite nice. We're going to make
use of it to just paint it over these
rocks over here. And in regards to when
we're painting it, we just don't want
to hold and just paint it all in like
this at random. We want to make sure we have a certain amount of flow to it. So what I recommend you
doing is spend some time and just add some bits in and make
sure that some bits would, for example, be clustered
up whilst go in upwards. So it would look like
there, for example, might be some roots that we're not seeing that go underneath the rock and that are
connecting these type of lands. So for example, this is a
bit of a cluster over here. This is going to be
a bit of a cluster, but I don't like the
shape over here. I'm going to make the
brush way smaller, just going to delete it like so. And just maybe add a bit of a cluster over here and a
bit of cluster over here. And just like that,
we're able to make some small clusters of plans in regards to setting
it up photo cliffs, and they look real
nice and helps us to break off this
entire terrain. So yeah, that's pretty much
it in regards to that. I'm going to spend
some time now to just add some bits on the
top as well, perhaps. We're not going to add it on the supers cata slopes because we don't want it
to be looking odd. But I'm just tapping
real quick, and if I, for example, don't like this, I'm going to hold
shift and delete it. And a quick thing about
eraser as well, This eraser, the way it works is
roll all the way up and change the scale of the
fab nails a bit smaller. The way it works is the eraser only erases the ones that
have the blue tick on. So, for example, if I
were to select everything and take everything
off, and let's say, I take only one thing on, So I have the selected,
I'm going to take this one thing on. I'm
going to hold shift. Try to erase these all. You'll see that none of
them just get erased or actually only one type
of species get erased. In order to start
erasing everything, I prefer to just keep everything
on for the erasing part, and then while holding shift, I start erasing them like this. Oh, yeah, that's a useful
information to know. And that's pretty much it in regards to just setting
up some smaller foliage. We can make use out of it
and actually set ourselves up with foliage in here
as well, for example. But we just got to
make sure that we painted in nicely in regards to. It doesn't seem to be working. So I'm trying to figure
out why that is the case. And I just realized
that it is working, but the scale is actually set to the default one and we
don't want this to happen. We're going to make sure that the scale is set to five to ten, just like we did before. And yeah, this is a bit of
a larger scale in regards to comparison to the human
reference, for example. But I think all in all, we just need to make sure that the references are
set up properly, and it's going to look
quite all right for us. And yeah, five to ten. Making sure that it's
set up properly. Now, it should be all right.
There you go. Maybe density. Again, one more thing
before we move on. In regards to paint density, the more plants you're
going to have selected, the more foliage, you're
going to have it selected, the less of a pain
density you'll need. So for example, right now,
I have only free selected, but the paint density
is still the same, and you'll see that the
density in comparison to the left side is going
to be much thinner. So if we go to compensate that, we got to increase
the pain density and now it's going to be a bit
better in that regard. But it's all about playing
around with the values and making sure that We get
the right kind of results. So I'm just going to
make sure that we have a bit of a
bushes over here, like so, and maybe change up the ray density to 0.1,
something like that. This whole shift,
start just leading some bits like so
around the folliage. But that way, it has
a nice transition from less dense to
higher density areas. And yeah, we're going
to leave it as is, thank you so much for watching,
and I'll see in a bit.
31. Growing Trees in Unreal Engine 5: Hello, and welcome back
everyone to creating standing environments
in Unrelnged pipe. The boot camp for
artists course. In the last lesson,
we set ourselves up with some nice shrubs
within the scene. And now we're going to continue on with a larger
type of foliage. But right now if we were to look into the
Quicksal bridge, you'll see that there's only in regards to the foliage
that we have options from. We have a look at
the free D plants. There's only like shrubs
and plants and bushes, and we need to go
grab some trees. So for us to do that,
we're actually going to need to go onto real
engine market store. By going into the real
engine picams launcher, we're going to go
onto the top section, the tab for marketplace, and we're going to get
ourselves this window. If we were to
search for Quiksil, which is the Quiksil bridge
that the same company has, we're going to be able to go
onto the Quiksil mega scans. So we can click on
any one of those, and we should be able to
get onto the product. And we'll see that they have Quiksil megascan
publishing profile. So if we were to go onto that, we'll see that we have
some megascan trees. So these are set up individually outside
of the Quiksil bridge. And I'm not sure why
they hide it like that, but it's a really
useful type of an area. One that we're going
to grab is going to be the European type of a tree. This one is really nice pack. It has some real nice
summer and autumn type of variances that
we can make use of. So once we have downloaded, which is going to
click Add to Project, it's totally free, set
up by Quicksil bridge. So permanently free
type of a collection, and we're going to
go ahead and add it onto our project on real
engine five, boot camp. Let's go ahead and
click Add to Project, like so going to start
loading everything up. So let's go ahead and
wait it out a little bit. Okay. And once it's done, it should be within the project. So let's go back and
clear control space to dock the content
browser onto your area. We're going to go
onto the content, and that's the folder that we're going to get black Alder. This is going to have a
geometry, foliage and whatnot. So there is a foliage
folder like this. We have a pivot painter
and simple wind. It's best to use
simple wind honestly, so let's go ahead
and open that up. And we're just going
to grab all of these and drop it into the
foliage typelik. So actually, before
making use out of them, we need to set
them up to be nit. So for us to do
that, we're going to go back onto Black older. We're going to go onto geometry, simple win, and we're going to select all of them right click. And then once we're done with the loading for the
foliage import, you go. And now, again, by right
clicking on everything selected, we're going to go onto Nanite and enable Nite for selected. So this will make sure
that every mesh that we have over here is going
to be with Nite enabled. And again, because we have
everything important, we can go ahead and close down the browser window for this. And this should give us a
nice setup for the trees. Let me just go ahead and
have a look at them all. So we have a lot of them. And keep in mind that
although it might look like it's a bit
underly in that regard, keep in mind that
everything is set up in regards to the
alphabetical order. So I'm just going to first
of all, select everything, make sure that I have
everything ticked on and off, make sure that everything
is ticked off. And now just by hovering it, we can see that some of them are called black older sapling. Some of them are going to
be forest and whatnot. I'm just going to select
a couple of trees, maybe the first line of trees, like so and just
have it ticked on. And now if I were to click We're going to have a very
luscious type of a forest. So we'll first of all,
need to paint out the trees with a smaller
amount of density. We have five trees in total. Selected, we're going to
have a paint density at 2.1. Let's see how this
would look like. This is still too much. Let's go ahead and go
even lower to 0.01. Something like that, perhaps. That's still too much I reckon. So let's go ahead and go 005. Something like that. I like that much better in that regard. Let's go ahead and
make use out of that. And then another thing that we need to do is set
up the scaling. So the minimum of one is fine. Maximum can be
quite a bit higher, one, two, five, and
that's actually too much. Let's go ahead and lower
this down to one perhaps. That's too little. So 2.5, I think, just a bit
of an extra day ago. We're going to get ourselves a nice variation in regards
to the height for the forest. So The way we're going
to paint it out, actually, I'm going
to hold shift and just take everything out. And that doesn't seem to work. I'm trying to figure out
why that is the case. I'm going to click
Control Z, do it, and now try to remove it. And I'm actually going
to go all the way up. I'm trying to figure out why it's not working
with their eraser. And I just realized that the race entity is still set 20.1. I'm going to set it up to
zero now holding Shift, I'm going to take it off. And when I'm working
with foliage in regards to just
setting up foliage, Area, an environment of sorts. We always need to think
on the composition. We also need to consider how the larger folage is going to
affect the ones around it. Usually, when I'm working
with the foliage, I prefer to start off with the largest folage
which in this case, is going to be trees,
and then afterwards, is going to be
shrubs and whatnot, and afterwards, it's just
going to be some grass. And yeah, by just doing that, we're able to set ourselves up with some nice tree variations. So from trees over
here, for example, maybe, I can even try setting
up some over here as well. Corner in between
just like that. I'm going to check how they go. That's perfect. That's
perfect placement. Actually, it looks like
more of a bush shrub. That's a really
nice. I'm going to place some over here as well. And I don't want to take off a lot of various
variation out of this. Just making sure that
we have some clusters. And yeah, instead of just
placing the trees individually, I prefer to have some
clusters like this. This makes it look like
there is, for example, more fertile solar something
of the sort, especially, we also need to consider the overall environment in regards to the static measures. So for example, right now,
these areas over here, it wouldn't look quite
as nice if we had a lot of trees that up in the rocky surfaces because
obviously the trees wouldn't be growing quite
as well in the area. So I'm just going to go ahead and real quick
just set it up like. So you can see how how
clustered the trees are, and I'm just looking at
this area over here. Maybe it's a little bit too
much in regards to that. Maybe I'm just going to
take it off a little bit, something like that, perhaps. So a couple of smaller trees. I think that looks way
better in that regard. I just wanted to
have some variation. And if we want to actually have some
variation within trees, we can do manual selection. We talked about
tools a little bit. So let's go ahead and
make use out of them. So for example, by
just clicking select, we can go ahead and select
the indi individual tree, and then we can just
move it around like so, and it will help us to
move the tree around, and we can click, for example, even to make some rotation and grab much nicer type of a shot. So just like that, we're
able to make use out of it. And for example, I quite like the rest actually
the way it's set up, so I'm going to leave it as is. Maybe this one over here, for example, tree
or to select it. I think it's just
behind another section. So I'm just going to
get a bit close, sir. I don't want to seem
to be selected. I'm trying to figure out
why that is the case. Oh, sometimes when it looks like you're not
able to select anything, just click G to make sure you see the highlighters
again, and that way, you can go ahead and just
switch up some selection, and that should give us
some nice type of setup. And there's also a bug
in regards to foliage. I should mention
that. So for example, right now, if I were
to select this tree. And so even though
this is highlighted, it's still going to affect
the different tree. So it is a bit of a bug
in regards to that. So my suggestion is just to go to paint and remove
the tree, for example, and then go on to single
mode and then paint in the tree manually
and just kind of get the right type of a form. And, yeah, that's pretty much
it in regards to the tree. So we still are
going to continue on in regards to setting up the
folage in the next lesson, and we're going to learn how to blend in the values a little bit better for the overall
foliage type of a scene. So that's going to be
left for another esson. Thank you so much for watching, and I'll be seeing you in a bit.
32. Foliage Controls and Nature Scene Setup: Welcome back and into creating standing environments
in reged pipe. The boot camp for
artists course. In the last lesson, we left
ourselves off by creating some nice foolage trees and making use of them to
populate the terrain. And now we're going to
continue on with this. I'm going to show you a
neat little trick before we continue on with the
setup for the foliage. I'm going to go onto the
content browser and within it, within the trees
that we created, we're going to find ourselves
controls for the trees. It's going to be
within mega scan. Presets. I think it's
going to be MS presets. Let me just go ahead and have
a look at it real quick. There you go. That's
the one we're looking for MS foliage material. We're going to access it, and there's something called
global foliage actor. That's the one we're looking
for. This is the blueprint that will allow us to have some nice control over the trees. We're going to paste it in and just drag and drop
it into the scene. You get this nice
type of a gizmo. We're now going to actually
go back onto the selection. Make sure we have the selected, drag it out a little bit and have it in
front of the scene. And with this, we can
control some settings. So, for example, we can
control the wind speed and get ourselves more of a
windy type of turbulence, more windy type of a scene. So that's quite nice and actually just keeping
it as a low value of 0.3 if I it to work much better in regards
to the whole setup. We could also
control wind noise, strength of it and whatnot, but I prefer to just switch up the wind speed a little bit, and that seems to do well
enough in regards to that, in regards to the setup
of our noise for the wind Then the next thing that we have is going to be
season and health. Season is going to be
allowing us to just switch up the overall
color of the leaves. So for example, once they
change up the health, we can see it lowering
down the tree colors, lowering down the tree leaves, or the colors, and
we can make use of it to grab to make it basically either kind of an autumn look or we can
make it look super green. So that's quite nice. Then we have afterwards season
saturation, for example, so we can make it a bit bright and whatnot.
We can increase the brightness or decent strength. That's the one
we're looking for. That's going to allow
us to basically make it a bit more kind of colorful, let's say, currently
experimental too much. I'm going to go ahead and just reset everything
to defold first. I'm going to lower the
health by a little bit, like so the value
of 6.5 that I'm going to increase the
seasonal strength a little bit as well. And that's a little
bit too much. And as for the brightness
and saturation, we can also slightly adjust them just to get a nicer
type of a setup, although these little strength is a little bit too
much right now, I'm just going to
continue on lowering. I still want to keep
it somewhat green. So I'm just going to lower
it to a reasonable amount. Something like this
and then a brightness, I want to increase the
brightness by quite a bit. You get this sort
of result, although Looking at it, I
just realized that it might be better to
just increase the health, a little bit of this. Basically, these are going
to allow you to control the color of your leaves the way it behaves
within your setup. So yeah, having a health setup for 7.5 will allow you to just have a bit of a darkened up leaf look instead of just completely
green and fully saturated. I think that's going to be much better in regards to
the overall setup. So that's a neat little trick to make use of in order to have more control out
of your trees to make use out of a
global foliage actor. So going back to the
foliage in regards to the folage set up within larger type of
scenes, for example. If you want to set up
larger environments, I recommend you to just kind of bring your camera all
the way to the back, like so grab yourself a paint brush and just
do it from a distance, basically in regards to the trees and
everything themselves. Make sure you set up such
clusters like these. And only after you set up
yourself with clusters, then just take everything off
like I'm doing right now, elect a couple of
shrubs and then start building in regards to the
medium kind of detail as well. In regards to medium detail, if I were to just select a
couple of bushes over here. I'm using the variation 16, 15, and 14 at the moment. Going to tap real
quick on the screen, see how they look like, and I think, yeah, they're
super small, I'm just going to make it
much bigger in that regard, going to go all the
way down minimum, maximum five and eight,
something like that, perhaps. But I'm looking much better. They look like nice bushes, going to go ahead and
start building them up. And when we start
building these, we want to basically build it in similar areas to what the trees are in areas that
are close to it. So Look like for example, they have more nutritious
areas in the trees around the areas or where the trees can actually
grow quite large. But then in areas
that are next to it, it's still pretty good
for the bushes to grow. So that also allows us to have some nice shaped transitions in regards to this organic
type of a setup. And for example, in
regards to this area, we can grab a
couple of bushes as well and just set it up like so And I think that looks
already pretty good. In regards to that,
I'm not changing the random max alignment for this particular one because
they're still quite big. They're going to look
very unnaturally, if I were to change it too much in regards to
the setup for that. So I'm just making
sure I'm adding in the areas that are
next to the trees mainly. Maybe I'm adding
some bits next to the cliffs themselves just
to help us break that down. And maybe I'll add just a
couple over here as well, just going to see
how it looks like. Now, from a distance,
as you can see, it looks way out of position. I'm just going to try
adding a couple more in different kind of
positions, like so. And I don't like
the way they look. So what I'm going to do
for this particular slope is I'm actually just going to
turn off a line to normal. So this way it's
just going to be always facing upwards as
you can see over here. I think that's going to help us get a nicer type of an
angle from this setup. I think that looks much
better in regards to that. I'm also going to just
go on to single mode and just manually add in
the shape a little bit though that's looking much better in regards to that
a bit over here as well. That doesn't look quite nice. I'm going to click Control Z. And, yeah, it's all about just fine tuning the overall shape, making sure that we
always go back and forth in regards to the overall setup, so we could check how the
overall in looks like. And then once we're
done with that, we don't have to worry
about too much in regards to the foliage
and not matching the colors because
we can always go back onto the color
setup itself. We're going to go onto content. We're going to go onto
mega scans folder, freed plants, European spindle. And we are going to go back
onto material instance. There you go. And we're going to play again with the color, overlay. Let's go ahead and try darkening this
down a little bit. Thinking if this
would look nice. I'm also going to make it
a bit of a browner tint. So for example, if I
were to change this up to have a bit of an
overlay like this. I'm not sure if it's
quite a sin there you go, that's more obvious. So it changes the color as well. So we don't only change
how it's dark or bright. We also can change
the color as well. So I'm going to make
use s in order to get ourselves a bit of a
brownish type of a tone. Not too much. I'm going to still want to keep it more green, and then I'm going
to lower this down. You get this sort of result. Again, I'm mainly looking at it from a distance if it blends in with the environment itself, and this looks quite nice, so I quite like the
overall result. And yeah, that's pretty much it in regards
to how to set up the environments with the folage With the nonide with
the help of a ninit, it's really, really simple. You get nice performance
out of your foliage. All you got to do
just make sure that your static mesh is enabled, and you'll be able
to just create large type of terrain
with the foliage mode. So, yeah, that's pretty
much it in regards to that. We're going to leave
this scene as is. And then in the next one, we're going to continue
on with our boot camp. We're going to continue on with the visual
effects this time. We're going to learn how
to animate it through the visual effects and
Niagara particles. Thank you so much for watching, and I'll be seeing in a bit.
33. Material for Niagara Particle Smoke: Hello and welcome
back to creating studying environments
in real j Pi. The bootcamp for Artist course. In the last lesson, we
left ourselves off by creating a nice foliage
setup within the scene. And now we're going to continue on moving with the next level. So let's go ahead and go
onto our bootcamp folder, and we're going to go onto
creating visual effects. And let's go onto the folder, open up the level and
wait for it to load up. So we have ourselves a very
nice type of a hot set up, but it lacks a bit of
animation for this. So we're going to
make sure we have some animation within it
using the visual effects. And within real engine, if you'll have a look
at it within a board, even, it says that
we're going to be creating a Niagara
smoke particle effects. So let's go ahead
and get started. Unreal engine itself, before, used to have a very clunky type of a set up for particles. But now with the Niagara
particle effect, type of a system. It's actually really easy
and simple to do that. So yeah, we're going to go
ahead and look into that. But before actually starting it, we need to make sure we
set ourselves up with our own unique type
of a particle setup. So what I mean by
that is that in order for the particles to
actually have a nice texture, we'll need to set ourselves
up with a material for it. We're going to click and create ourselves a material
for the particles. We're going to call this
one smoke, like so. And we're going to go ahead and double click
on it to open it up. We're going to make sure that we have the material selected, like so, and we're
going to change the blend mode from
opaque to additive. Usually, most of the time is, this is what you're
going to use. Additive is really nice and very light in regards to performance when setting it
up for particles. The downside of it is that it actually just adds color
value on top of it. So if we have a black
type of a texture, it's not going to work
within this type of a scene. For the color for
stars in order to control the color, what
we're going to do is We're going to click.
We're going to search for something called
particle color, like so. This is the node that
will allow us to do most of the heavy
lifting for the Niagara. So all we've got to do
is just firstly put it up to RGB seta for
the base color so. And then it will allow
you to see what it is. By default, you can see it's nothing here because the system, the Niagara system is going to allow you to make use out of this to help you just
control the particle. And of course, this is
going to be by default. It's not going to be
just a splan color. We're going to need to
add a texture onto this. Let's go ahead and do
that. I'm going to minimize the window real quick, make this a bit smaller. So we're going to go
onto the VFX folder, and we have ourselves something
called a cloud texture. Cloud texture is very useful. Just have this sort of a
texture for when we want to have extra detail out
of our particles. We're going to just
simply click and hold and drag it into the
system, like so. We're going to make sure
that it is expanded. And then the next thing
that we need to do is just simply we need to
multiply those two together. So we're going to hold. We're
going to tap on a screen. We're going to connect
both of these up together, and now we're going to
connect it to the base color. So this way, we're going to get ourselves this sort of result. I'm going to change the preview
to just a simple square, so we could see it a
bit better, like so. And, yeah, that's all there is in regards to the
basic material set up. We're now going to just simply attach this particle color, A, the one that says A onto
the channel as an opacity. This will allow you to
control its alpha levels, its opacity as is for
the particle system. That's as basic as it gets for the particle system set up. We're going to now
close it down. I, and we're going to move
on with the next step. So now we are going to have ourselves a simple
material, but of course, we're going to need
to create ourselves a Niagara particle. So for us to do that, we're
going to right click, and there is Niagara system. We're going to go ahead
and open this up. It's going to ask what type of a particle we want to create. We're going to start off by creating new system
from selected emitter. It's usually the
easiest way to go for. We're going to click next. And then there are a bunch of presets that we can make use of, which we're going to
start off with a simple or to look for it. There you go. Simple fountain looping
fountain spray. We're going to select it
and click Add button. You can see that it gets added
onto this bar over here, and just make sure to just have fountain and nothing
else for the moment. We're going to now click Finish, and it's going to create
ourselves a particle system. We're going to call
this one smoke like so Particle that is like that. And if we were to drag it onto our rolled, just like that, we're going to see
that it starts spraying out particles
so obviously, we don't want this from the
smoke from the chimney. We're going to need to
fix that up real quick. So for us to actually make use
of of the particle system, we're going to go onto
the nigra system itself. We're going to double
click on this, and we're going to
be opened up with a particle system graph. So it's Add similar to the material
graph where we have ourselves in the middle of the screen system
graph over here, we have a preview window
on the left hand side. At the bottom dough, we
have a timeline that shows the constant playing
off the particle setup. And it's going to be
constantly looping, so that's quite fine.
We have particle, properties that
would allow you to make some custom
variations and whatnot, through some blueprints,
through some coding, and we're not going
to touch that. We're just going to focus
on this graph over here that is basically in charge
of the entire particle. And the way we got to look at this entire list is basically
it's going to start from the top and move
itself all the way down in regards to the
priorities on how the particles work
and how they behave. So of sars is going to get
itself and emit state. Then it's going to decide the spawn rate
of the particles. And then afterwards, you can see there are multiple
tabs, by the way. So this was only for
the emit itself. Afterwards, we're going to
have ourselves particle spawn. It's going to basically
tell the particle what kind of settings it
needs to have when it spawns, and afterwards, it's going to tell the particle how
it needs to behave. Once it pawns every frame if it needs any changes or
anything of the sort. And we're going to come
back to that later. Finally, we have
ourselves renderer. The renderer will allow you
to basically tell what sort of particles we wanted to look like exactly
at the very end. This is where we attach ourselves the particle
that we created. We're going to make this
a bit smaller, like so, and we're just going to with
the render render selected. We're going to have ourselves the detailed step on
the right hand side. You can see there is a
material set up over here. We're just going to drag or smoke into the
material like this. And just by doing
that, you can see the particle starting to
update its shades and whatnot. And once it updates, we're going to get ourselves
this sort of result. So, of course, it's
not quite done. It looks more like a cotton
candy and whatnot, for sits. We'll need to work
on it a little bit. But yeah, in regards
to the sprite render, the main settings that you
need to know is how to change the material and
the facing mode. The facing mode would
allow you to switch in between whether or not the particles are always going
to be facing the camera. For example, if I were
to rotate it around, in the preview mode, you can
see that these particles are always going to be just
facing towards the camera. And most of the
time, that's what you're going to
use at the moment. We're not going to switch it
even because for the smoke, it's actually really good for you because you
want to make sure that all of these
textures are facing you. So yeah, that's pretty much it in
Regards to sprite renderer. We're going to go ahead
and go back to the start. We're going to start
off with a spawn rate. This spawn rate is going
to be way too big, although right now
it looks quite okay, not even filling up
the entire chimney. At the moment, though
it's quite small, so we're not going to have
the right type of particles. Anyways, we're going to go ahead and change the spawn rate. We're going to keep
them state to be constantly spotting
our particles, basically, so we're
not going to touch this or the spawn rate, though, we need to go
ahead and change up. We're going to change it to something like 20
for the moment, so we're going to get
a very sparse type of a look out of this particle, as you can see over here, and that's going to be
quite okay for us for now. And we still have
particle spawns and particle updates to cover. So we're going to come back
to this in the next lesson. Thank you so much for watching,
and I'll see in a bit.
34. Working with Velocity Particle Velocity: Well, welcome back on to
creating studying environments in RlngedFive The bootcamp
for artist course. In the last lesson, we let
ourselves off by creating a very basic type of a
fountain looking particle, which allows us to spawn some of particles coming
out of the chimney. Of course, we still need to do some work in regards to that. It's firstly too small, and we'll need to work on in regards to
the speed for them. But for now, let's
go back onto this. We're going to start off by actually making them
quite a bit larger. And for us to do
that, we're going to go move on onto the
particle spawn. There are a couple of options. We're going to start
with initial particle. This is the one that controls the main particle functionality
within this entire setup. We have a way to
change the color, the initial color for it. We have the amount it takes for the particles to disappear with the lifetime
minimum and maximum. We have the mass, for
example, for them, if you want to be more accurate in regards
to the gravity. And now, we're going
to just change the uniform sprite size. So minimum and maximum, that's the ones that we're
going to be changing. We're going to make sure
that the first one, the minimum is going to
represent how it looks like. So I'm actually just going to change both of them all at once. Going to see how they look like. And right now, it's not
looking quite as well. I'm going to go ahead and
change it to 100 by 100. Let's see how this
would look like. And yeah, this is
looking quite nice. But of course, to make sure
that we have that bit of an extra type of
variation out of smoke, we're going to make
sure that the minimum and maximum has some variations. So 100-150. What this will basically
do is it'll make a random size based
off a range 100-150. And you can see that
it's going to give you a much different
type of an effect. If I were to, for example, make this 1,000, for example, you can see that some smoke
would be super small, some would be super big. So that's what it
basically does. And actually, just
looking at this, we can probably
make it up to 200. So it could have a more
fluffy type of a look. When we have more variation, it's easier to
distinguish some of the detail within a texture. So that's why we're doing this. And then the next
thing that we need to do is instead of just
changing the mass, what I prefer to do is
change the velocity overall. I'm actually going to turn off all the particle updates for now and everything except for
solve forces and velocity. I'm going to change all of
them and make them turn off, so we can see what the
add velocity does. And actually, before doing that, we skipped out on
the shaped location. This is quite a crucial one it allows us to control how
well it spawns, right now, it's almost perfect in
regards to the chimney, but we can control, for example, the radius of this. If we were to change it to 100, you'll see that spawning the overall spawn is going
to be much, much wider. We also have a way to change
the shape, for example. So in this particular case, even though the chimney, as you can see over
here is square, I am going to leave it as a
sphere as most of the time, it's going to be quite fine. I'm going to go ahead and
change it to a value of 15, going to see how
this looks like. Actually that's too much. So
let me change it to a five. And this is looking much better, but we need to probably change
it down to a value of two. Like so, and I just realized that the
size now is going to be much too big in regards to
the chimney or maybe sorry, yeah, from a distance, it's
going to be quite right. Although particles, you can
see them overlapping from a distance is actually
going to work out for us. We're going to continue on
in regards to the scale itself also though it's
not too much of a problem. As we can control the scale as we go along with the
particle update as well, which I'm going to
show you in a bit. The next thing though
that we need to do is go on to add velocity. Add velocity will
allow you to basically tell where the particles
which way it's going. So right now, if
I were to change the velocity speed to 100100. It's going to stay stationary, as you can see over here, it's going to spawn a
bunch of clouds. So this is what
basically it does. We can make use of it
in order to just get ourselves some nicer
type of a speed. I'm going to change it 10-500 or ten and 50 and see how
this would look like. Going to look like this, so it's already
looking pretty nice. And this is only
going to allow us to make use of it in order
to have it go upwards. If we want to change
the velocity, we could change this to be With in regards
to the cone axis. So right now because it's
only has a value of one. You can see the cone basically would be just completely
facing upwards. If I were to change
this to something like for a value of y of one, it's going to start going
diagonally like so. So yeah, it's quite useful when we want to have some
small control to this. We're going to make use of it
actually to make sure that the particle goes slightly
outside of the rib, and we're going
to make sure that the hut has a priv directional
smoke coming out of it. I'm going to make
sure it's a bit smaller in regards to the
angle itself, though. I'm going to set it up to 0.2 and see how this
would look like. And it might look quite right. Although the angle of itself in regards to the composition
is going to be affected. I'm wondering maybe it would
be better to go the way. It doesn't look like
it would be going this way because there is a bit
of a roof covered as well. So probably going to
go ahead and do that. In order to change basically the angle on which
side it's going, all we need to do is just make sure we change the value to a negative and that's going
to go into the direction. That's pretty much it
in regards to that. We're going to get
ourselves a nice smoke with just a simple
particle spawn. The next ones are going
to be particle updates. The difference between
particle updates and particle spans is that particle updates
gets updated every frame, basically in regards
to the values. So, for example, we got
ourselves particle gravity, Gravity will allow the particles to be dragged down as
you can see over here. It's not quite as clear if we keep it as such a huge value, so I'm going to lower
this down to negative. And you can see the particles. One the spawn in they
have sort velocity. I'm actually going to
lower this down even more. Something like one. Let's see
how this would look like. Maybe it's a little bit
too small for an example. But basically, what this will do is once it gets
spewed out like this, it starts getting affected
by gravity constantly. So every time the
longate reaches out, the further it goes off, you can see that the gravity
starts pulling them down, and that's actually quite nice when we're setting
up some of the particles. As they try to start
going downwards, it might be better
forward set up as 0.5 0.3 actually.'s making sure
that it looks quite nice. It has a really nice type
of a way to make use of the overall values to just bring everything down to spread out the smoke, as you
can see over here. Although the smoke right
now, this is way too much. So yeah, we're just
going to keep it as 0.1. So a minimum amount of value, but it helps you to break
up the smoke a little bit, so some of the particles
will try to go down based on their
velocity because of course, some of the particles
that we set up in regards to the velocity, if you have a look at it back, onto add velocity, we
had a random range. So the ones that have
a smaller velocity, they're going to
start trying to go downwards even faster
than it did before, which is quite nice. And now that I look at it, now that we added gravity, we need to make sure we readjust the overall need basically
of these clouds. We're going to make sure that we increase the minimum because I can see that some of
them are starting to go down really fast, and we need to go
ahead and fix that. First things first, we're
going to change this to a 30, so we have a bit less of a
variation in regards to that. Then the next step
that we need to do is fix the length of
these particles. They're spawning, they're
staying there for too long in regards
to the entire setup, we're going to go back
to initialized particle and change up the lifetime. So the lifetime is
going to help us to get these to be cut off in a
bit earlier type of stage. I'm going to set up to 0.5, and let's say one,
something like that. Let's go ahead and see
how this would look like. And you'll notice that instead of just looking at the preview, I prefer to look at the
overall scene itself. I prefer to have a
bit of a context in regards to the scale and
how the particles behave, and that usually is
very beneficial to you. So make sure to make use out of that instead of
just the particle itself. If at some point you have
some performance issue, what I recommend you doing
is within a preview tab, I just recommend you
just to make sure that this is set
from lit to lit. And this way, you'll save up on the performance
while still be able to check the particle
itself basically. This point, it seems
like the particle is still staying up too long. I'm just wondering
why that is the case. I'm going to set it
up to 0.1 and 0.2. Let's see how this would behave. And I'm just trying
to make sure that the shape itself is not
staying up for too long. A voice is not going to
give us the right results. And I just realized the
mistake that I made. The reason being that the initialized particle is not affecting the lifetime is. I'm actually just going to click control z and make sure that lifetime is back to 0.5 point. One. The reason
being that nothing happens is because
after lifetime is over, we need to update
the particle itself, and that was with
the particle state. If we check on it, we can see that there's
skilled particles. Basically, when they're
time with their lifetime, we need to make sure that
we update the particle with disling it basically. So we need to make sure
that this is enabled, and now once we have this tk, we'll see that this is the type of result that
we're going to get. So that's the way we're going to control ourselves with
the lifetime itself. We're going to change this
back to one and one point. Five, let's see how
this would look like, and it's still not as
long as I want it to be, so I'm just going to change
this to free and two. And let's see how
this would look like. It's making sure that we
have some nice variation. We're not worried about them popping in and out like that. So I'm just making sure that
we have enough variation. If we want to have more
disparity at the very top, the more texture type, we've got to make sure
that the lifetime between minimum and maximum is set
to a higher variation. If we want for it to
be a more of a fluffy, more dense type of a look, we'll want to make sure that
these values are closer. Well, yeah, just by
having it like so we can see that they're already
looking pretty nice. We also are going to enable
drag and what drag does, similar to gravity force
is going to lower down the overall the velocity
for this entire setup. But instead of just trying
to grab it in one direction, what it'll do is just
it'll gradually start slowing down the overall
velocity itself, stopping it to a hold. And that's quite useful
for when we want to make sure that we have some nicer motion at the very start, and then it's gradually
slowing down. I'm going to change
this to value of 0.1 because I think the default one is a little bit too strong, but it's particular
fluffy type of a look. And yeah, it's already looking quite nice in regards
to its length, but we don't have anything
in regards to shape. It's just a nice kind of a
cylinder fluffy cylinder. So we need to make sure we
adjust that with in regards to going to be scale
color and scale size. But I just realized that we
are running out of time, so we're going to
have to continue on with this in the next lesson. So thank you so much for
watching, and I'll see in a bit.
35. Setting up Niagara Smoke VFX: Welcome back into creating setting environments
in Andre Engine five. The boot camp for
artists course. In the last lesson,
we left ourselves off by playing around
with the velocity, making sure it looks
quite nice overall, but we still have
some work to do in regards to the overall smoke. Right now, it's just popping
in and popping out and the overall shape
doesn't look quite as nice in regards to
the width of it. So we're going to go
ahead and fix that. We're going to start off by fixing this overall
popping in and out. This scale color is what's
going to help us out. We're going to go
ahead and enable this. And right away, we're just going to see this sort of result, which I don't think it's going
to change much, actually. It does change at the very end, as you can see it fading out. The reason being is the
way it fades out is because if we have a look
at this type of a setup, if we have the scale color selected at the right hand side, for the detailed sty we can see we have a couple of options. We have scale RGB and
we have scale Alpha. And with these two, we have control over how
it behaves over time. So right now, the default setup, as you can see, photograph, for the Alpha is set up, so it starts at a value of one. It actually starts
at a value of 1.11, which is an interesting thing. I've never noticed
that. And yeah, it goes just down all
the way to a value that's zero or a value
that's close to zero. By the fault, they
should be set up as a bit of a better
type of a setup. I'm not sure why they're
set up like that. Anyways, moving on,
we have a couple of presets in regards
to the templates. As you can see, these lines represent how they're going
to start off and end. If we were to select
move ramp up and down, I'm just wondering
they go with now has proper values
of zero and one. So I reckon that
the template for the fountain has had them
a bit off in that regard, which is totally okay because we're going to be
using a different template. The one that we're
going to be using is, if we were to click on
that spartan over here, it's going to be
ramp up and down. Rp up or down will allow you to initiate a particle with a
value of zero for the Alpha, making it invisible, and then it'll start gradually
getting some color, some visibility, and
it'll go back down. It's going to look like this. And if we have a look
at the value overall, we can see it being
like this actually helps out overall because it
starts gradually appearing. Actually sorry about
that for smoke. We're going to use a different
one called pulse out. This is my actual
favorite one when using it within smoke
particles and whatnot, because it just pops
in really fast. As you can see over
here on the side, we're going to fix
that, by the way in regards to the scale. It pops in and then it starts gradually just fitting
out at the very top. So I really like this
type of a setup. And if you're able to
visualize a graph, then you're able to then add your own ones and
whatnot by clicking, adding key, and whatnot. But I'm not going to
focus too much into that because that's another
depth in regards to that. But if you do have
time, I recommend you just playing around with
the graph and worse case. You can just go ahead and click back on the template
photo pols out, and it should give you
the same type of a graph. And yeah, going back to this, we pretty much got
ourselves set up in regards to the scale Alpha. We're not going to
focus on this too much. We're going to make sure that we set that up for the flame. We now need to make
sure though that we set ourselves up in regards
to the scale itself. For us to do that,
we're going to click on Add New Module. We can click on this
plus symbol over here. And by clicking on this, we're going to get
ourselves search bar. And if we were to
search for scale, we're going to get ourselves something called
scale price size. By clicking on scale price size, we're going to be able to see
this type of a variation. And it's actually already looking quite nice
in regards to that because it starts off
with a smooth ramp up. So this value over here, it starts by just having no scale at all as you can see at the very start, like so, and then it gradually
gets ficker. So it's actually going to
give us this sort of result. I think by default though, this tiny type of a value is a little
bit too small for us. We're going to need to
go ahead and fix that. Actually, what I'm going
to do is I'm going to just hold down the
window over here, and I'm just going to
manually tweak this value. I'm going to click on
this type of a key. Roll down a little bit
until we get two A values. Actually, I'm just
going to drag this out as well. So we
can see the values. Anyways. By selecting this key, what we can do is we can specify the value for it in regards to its time and in
regards to its value. So if I were to click
this that is two one, you can see this is
affecting the time in regards to it horizontal value. And if I make this a bit bigger, like so, we can see that by
changing the second one, to have something like point. Three, I'll start
this smoke effect already large type of a size, which is actually going to
work out much better for us. I'm actually just going
to make sure that we set it right at
the front like so. Get this sort of result. So yeah, that's all there
is in regards to the smoke. And just to make it a bit of an extra type of an
extra touch I'd say. We can also add randomization in regards to the
particle velocity. For us to do that, we're going to click on a plus
symbol over here. We're going to just search
for noise, like so, and there is some be called a
curl noise or vector noise, both of them work quite well. And we're going to make
use of the vector noise. Four, and by just having this, if we were to increase
it to something like 2000, we can
see what it does. I just start scattering
everything all over the place. Tough yeah, by just
making us out of this, we're able to get ourselves
some real nice variation. Although 200 by default is
a bit too large of a value. Changing it to
something like 50, I'd say would add a bit
of an extra detail. You can see some of them
being scattered around, and that's exactly what we want. We're going to get ourselves in much more randomized shape. Although even 50 is a
little bit too much, we're going to go down to 30. We want them to be somewhat
clustered up a little bit. But you can see how much it does in regards to
the shape itself, some we're trying to go one way and then they kind
of curl up and whatnot. And it's really, really useful, especially for the
smoke when it's getting affected or when we're trying to
make it look like it's getting affected
by the wind. And yeah, that's pretty much it in regards to
the smoke itself. We can now even just hold alt and duplicate it
all over the place and make it look like the entire building is
on fire and whatnot. But of course, we're
not going to do that. We're just going to
make sure that we have some chimney smoke over here. Next thing that we
need to do is we need to make sure we
set ourselves up with some fire particles for the
area within a blacksmith, and we have a bit of
a bucket over here, which we're going
to set ourselves up with some water, basically. But again, we're going to continue on with this
in the next lesson. So thank you so
much for watching, and I'll see in a bit.
36. Creating Animated Fire Particle: Well, I welcome back ever go on to creating standing
environments in lang Fiive the boot
cam for artist course. In the last lesson, we
set ourselves up with a nice smoke particle
within a scene. And now we're going
to continue on working with this scene
and make sure that we have some nicer type
of a fire system in this type of a fiery pit and in the back
as well, perhaps. So let's go ahead and
make use of the fire, which, if we look
at the VFX folder, we can check the folder. There is something
called fire SUV. This is going to be a bit of an interesting texture
in regards to particles. As you can see over here, has a whole bunch of range, which once you start
stitching them up together, they're going to create
a sort of an animation. This is what we usually use when we want more
animated particles, when we want to have more
visuals in regards to them. So yeah, let's go ahead
and make use out of that. We're going to create ourselves a new particle system this time. We're going to right
click. We're going to firstly create a material. We're going to call
this one fire. Matt. So we're going
to double click on it, and we're going to do
similar things to what we did with the smoke itself. We're going to grab our
elves this particle. This time, however,
we're going to change this material from an
additive to translucent. The reason being we're
doing this is that we want to have some control
over the color itself. We don't want to be just kind
of a light type on overlay. It's a bit more bit more of
a performance consuming, but it gives you control over
the darkness of your color, which I'll show you
what I mean in a bit. We're now going to go ahead and just grab ourselves
particle color. Like so. We're going
to make use of that. We're going to multiply the texture with the
particle color, so. And of course, we're going
to make sure that we grab ourselves an Alpha Alpha facity. Again, we're not going to go too much in depth
in regards to this. We can leave it
pretty much as that. We're going to save it out. And we're going to get
ourselves some nice results. And actually, sorry about that. I totally forgot this is
going to be a bit different. The basic is not going to work because you can see it
has a black patches now. Actually is going
to be the opposite in regards to the multiply. We're going to attach
the base color with RGB itself, like so. As for the Alpha,
we're now going to mix up Alpha and this texture. The reason being is that this is now just a black and white. When it was additive,
all the black spots were just simply removed. But now we're just going
to make sure that we use our texture sample just to extract the opacity
layer out of it. The RGB itself, we're
going to keep it as a way to control
our particles. And with this done, we're now going to go ahead
and close it down. But you can see that it has now transparency in exactly the
same way that we wanted to. We're now going to make
use of this particle that we created for material that we created
with the particle. We're going to right
click, create nagrosystem. And just like we did previously, we're actually going to go
back and set ourselves up with a simple fountain
looping fountain lek. And we're going to call
this one fire particle lik. We're now going to go
ahead and open this up. We're going to make sure
that the window is smaller, and we're going to
go ahead and well, first things first,
we're going to change the sprite renderer to be with a fire
material, just like that. And now we're going
to get ourselves this bizarre type of result. So we need to make
sure that we fix it. And actually, before doing that, I'd like to visualize how
this looks a little bit more. So what we're going
to do first is we're going to blow down
a spawn right to a value of ten and increase the initial size
to be much larger. I'm going to just set
it up to 100 by 100. I' going to take
off gravity force and add velocity, like so. We're just going to have
this sort of a look. You can see what it has. We can see what it looks
like whilst spawning. You can see that it spans
all of the particles all at once all of the
things on the sheet. We need to go ahead
and fix that first. We're going to go to the sprite
renderer, and within it, there is an option called
sub U V. This is what is going to allow us to control the particle, how it behaves. We're going to be able to
make use of the split. Before doing that,
though, I'm going to go onto the texture itself, and we need to just count how
many of them are in regards to the row in regards
to the row and columns. And that's going to be
basically six by six. You can see one, two, three, four, five, six, and by six. So 36 in total. We're going to go ahead
and close this down, go back to this, and
sub UV image size. We need to make sure
that this is set to six by six, just like that. And you can see just by simply realigning and
showing the program, how many parts it's split into, it's going to give us
this sort of result. Currently, though, it's
only spotting one particle. So that's not quite as good as the reason
being that we need to make sure that we have variation of the animation
going throughout. So let's go ahead and
fix that right away. We're going to go on to
the particle update. We're going to click on a plus, and I think there's something
called sub UV animation. There you go. That's what
we're going to make use of. Let's go ahead and choose that. This will allow you to get a start frame
and an end frame. We're just going to go ahead
and enable both of them. So which is going to give
us this sort of result. It might be a bit harder
to see what it is. We're going to slow down
the spawn rate to a value. One, I'd say, and you can see that this is what
we're going to get. It's going to spawn a
particle that's going to just go through
this entire animation. By default, it's going
to be zero to 63. I think it's based on the sprite renders
options that we set up. But instead of it being 1-36, it's going to give us
this sort of a result. And we need to fix this first
because as you remember, we had six by six, which is going to be 36, because again, the start
frame starts at zero, that's going to be zero to 35. So we're going to just
make sure we have this set up properly,
and there we go. That is what we're going to get. Type of animation we're going
to that ourselves up with. We're also going to
change the sprite render to be sprite
renderer like so, and that should fix the
error just like that. As for the overall type of a setup in regards to
the animation itself, if you want to have a
faster type of animation, what you'd need to
do is you'd need to go to initialize
particle spawn rate. So initialized particle. We're going to
basically change up the minimum and maximum
four the lifetime. By changing this to
something like ten by ten, you can see that
it starts really slow and the frame rate is
going to be very bizarre. By switching this to a
value of 0.1 and 0.1, you can see that the
frame is actually very, very short, so I'm
going to change it to a one by one to
show you what I mean. But you can see that the frame rate is going
to be much faster, the whole flame animation
is going to be much faster. Actually, we can use the star
advantage because it will allow us to make more organic
looking flame out of this. And actually, before doing that, I'll switch up the color
right off the bat. By going to initialize particle
and setting up the color, we can change this color
to be, for example, red leg so we can
change it to be more orange or alternatively, in order to set up
variation between colors, what we can do is
we can click on this arrow over here
next to the color. Which will allow us to have additional options
to set up with this, and there is something called random arrange linear color. If we were to select
this, you can see minimum and maximum, we can set a minimum
to be a bit more reddish or just
to exaggerate it. Also, let's not forget
to increase the value. Otherwise, you're not going
to see the color itself. Also, the maximum, we're
going to change this to be, for example, blue,
just to exaggerate it. And what you should see
basically or pink, actually. What you should see is that some colors are going to
be pink, some are orange, and they're going to be going in between those types values,
which is pretty nice, and for that reason,
I'm going to set up this one up to be a
bit closer to yellow, but not quite something like this to get this
sort of a result. I think for the fire prt
is going to be perfect. I'm actually going
to put this type of a particle fire particle into the fire prt over here just
to see how it looks like. And you can see this
is what it looks like, and it's already
looking quite nice, but we don't have all the
control set up just yet. We still need to work with in regards to the way it fades in, in regards to
direction it's going, and finally, the spawn rate. And while not only spawn rate, we also need to make sure that the shape location of the
spawn area is set up properly. But we're going to continue on with this in the next lesson, so thank you so much for
watching, and I'll see in a bit.
37. Niagara Fire Color Variation: Welcome back everyone
to creating studying environments and reg at Pi. Food came for artist course. In the last lesson,
we set ourselves up with a nice fire
particle animation, and I just realized
that I still want to tweak out the values a
little bit for the color. I'm going to make them a bit red in regards to both of them. Like so. And I think
that's going to look a bit better in regards
to the scene itself. Yeah, I think it's going to look much better in regards to that. Although we'll say that I want to add a bit more
yellow tint to this. There you go. That's
going to be better. Now, the next thing
that we need to do is we need to, of
course, add velocity. We're going to add velocity
in regards to that. And we are actually
going to make sure that we have high enough
of velocity like this. We want to make it look
like it's shooting out quite fast from the heat,
and then afterwards, we want to make
it look like it's just lows down
straight up kind of a thing after it gets that gust of heat
puling it upwards. So yeah, we're going
to make use of the velocity to just
make sure it kind of spews it out really fast at the very start likes this,
as you can see over here. Even faster, actually,
we're going to change it to 20020050. Though, though,
something like this, as you can see over here,
it's looking quite nice. Of course, we need to make
sure that we set ourselves up with a way to slow this down. So in this particular case, we're going to make
use of a drag force. We're going to make use out of a value of
something like 0.8. Let's go ahead and see
how this would look like. And that's not it's nice. Let's change it to a value
of two, for example, that's a bit more better, but it's still not quite
there in regards to that, so I'm going to change
it to a value of five. Let's see how this
would look like. That's something a bit better. Although right now it's being speed up a little
bit too high up, maybe we want to
lower this down in regards to the particle
itself, and there we go. We're going to have it
like it's just being spewed out and then
slows down at the end. That's exactly what we want. The next thing is
in gravity force. If we were to enable
the gravity force, of course, it's going
to start falling down. But if we were to change this to a negative or a positive value of a gravity, something like 20. I think that's going to be
good enough of a value. So it's going to help us slow down with the drag force,
but at the same time, it's still going to
try to keep raising up because the gravity is going
to be pulling it upwards. But that's actually quite nice
trick to make use out of. And then in regards to
the overall setup, well, we need to set ourselves up with the scale color and scale size. Scale color in regards
to the Alpha itself, we can turn this into a
simple ramp, I reckon. It's going to appear
and disappear, and I think that's going to be much better in regards to that. We're also going to make
sure that the spawn rate now is a bit higher
in regard to values. We're going to change it to.
Not 20 and maybe not ten. Maybe something like
this. There you go, that's going to
look much better. I'm still thinking it's
a bit too high up. So going to lower
down the valume. And the animation right now, it looks like it's a little
bit too fast for us. So what I'm going to
do is I'm going to go on to initialize particle. I'm going to go ahead and change the lifetime minimum
and maximum, going to change this to
something between 1.5 and three. This, and this should give us a nice type of a really
nice slow type of a setup. We're also going to go ahead
and change the spawn shape. For the spawn shape, by default, it was set up as a sphere. I'd like to change this to
a disc usually or a ring, which I would you prefer because the alternative to this is going to be a cylinder. Cylinder would be a three
dimensional shape of that. But as you can see over here, the ring, if we look at it, it creates a sort of a ring
all the way around it, and we can have a disc
coverage, for example. Which would. Sorry about that. Going to put it back to zero. Going to get closer a little bit to show
you what it does. This coverage, if
we set it to one. It's going to cover
this entire area. It might be a little bit faster if I show this
with a value of ten, just real quick, just to show you what it does,
going back to this. This coverage will allow you to just cover up this
entire section. If we were to set it to a zero, it's just going to spawn
all the way around, and we don't want
this to happen. We want it to be in
this area. Saw rate. Let's go ahead and set
it back to normal value. I'm just going to click
on Trot because I don't remember the value
that I set it up with. It's actually five, and
then going to go back onto the shape location
or shape location, going to make sure
that this ring is set with this
coverage of one. And for the rate is,
we're just going to depend this on the actual scene. So if we were to set it
to something like 30. Let's go ahead and see
how this would look like. Let's see if this looks good. Yeah. I think this looks
good. So it's alright, as you can see, it
looks like that. And yeah, that's how we set ourselves up
with the particle. We're going to have a really
nice type of a setup. One thing that we need
to do is, of course, change up the scale color and
the particle size, perhaps. We're going to go on
the scale color first. So as you can see, scale color RGB within a particle update, it's only these
values over here. We're going to go
ahead and change it to be more of a curve. We're going to click on this
litter arrow over here. We're going to change this
one to be vector from curve, and this is going to give
you this sort of a value. And actually, I'm going to click Control Z because
one thing that I should mention is if I were
to show you the graph itself. As you can see, it
has x y and z values, and that makes it quite a bit harder to control for
us to simplify this. What we're going
to do is, firstly, we're going to convert
x y and z values, which represents a
whole RGB spectrum. We're going to change
this up to just be a simple type of a vector first. So we're going to make use of
a vector from float first. As you can see, changes
down to this value, and this allows us to change, for example, if we were to
change it to a value of 0.5, you can see it super dark, and then changing it up
to a value of three, going above the value of one, it's going to just basically
amplify the entire color. And this is quite
useful when we want to set ourselves up with
some nice flames. It allows us to have
a nicer control over this a little
bit in regards to the brightness of a color. We're going to then change
this value to be a curve. So we're going to
collect this and change it from curve like this. And this is what it's
going to give us. Of course, this is
not what we want. We're going to start off by having ourselves a bit
of a brighter color, and then it starts like
darkening down afterwards. So for us to do
that, we're going to make use of a drop
off like this. The drop off itself
is quite nice, but I think it darkens up too much in regards
to the vary end. We're going to select
this last type of key. Then we're going
to change this one to something of a value of 0.5. And also, we can probably
adjust the bits as well. We're going to right click
to this type of key, and we're going to change
it from user to automatic. That's going to just ease out this entire curve over here
to a set of automatic values. That's going to be giving us a really nice type of a
result for the flame. We're going to now close this down and see how the
flame looks like, and you can see this
is what it looks like. So by having this
type of basic setup, it's already going
to look pretty nice. We're going to just duplicate this piece and put it
on the back as well. Just like that, and it
should be quite nice. And yeah, there you
go. We're going to get ourselves a real nice
type of set up, maybe. I'm just going to lower
it down a little bit. It wouldn't look too hot
in regards to the flames. And I think that's going
to be pretty good. One of my thing
before we move on, I realized that
the play might not look quite as bright.
I realize that. And often what I end up doing is just setting up
a light source and a quick tip before we actually go into the
lighting stage itself. If you were to click and hold L, you can tap on the screen, and that would give you
a nice light source, and if I were to lower the intensity a little
bit and see that overall flame would be looking much nicer with the extra
light affecting it. But here's the thing though. I realized that not always you're going
to make use of that. And of course, it's better
to have more options in regards to especially
the particles themselves, to have more control over them. So I'll show you
a real quick fix for that in regards to the
brightness of the flames. We're going to go
onto the VFX folder, sorry, not VFX folder, we're going to go onto
the fire material. There you go over
here. And instead of just having it set
as a basic color, what we're going to do,
we're going to hold control. We're going to set it
up to emissive color. If we were to click
Control es to save it out, it'll update the
entire emission, and you can see it looking
much much brighter. You don't need any
additional light sources or anything of the sort. And this will allow
your entire setup to glow a little bit in
regards to the heat itself. So, yeah, I hope that the
video was informative. And now, all that were
left to do is set ourselves up with a bit of
a water particle system. So we're going to continue on with this in the next lesson. Thank you so much for watching, and I'll see in a bit.
38. Creating Water VFX Material: Welcome back
everyone to creating standing environments in unreal anched five boot
camp for arts course. In the last lesson, we
left ourselves off by creating some nice fire
particles for the scene. And now we're going
to continue on working with this and
set ourselves up with some ice a bit of a nicer type
of water within this area. So we already learned
how to create a transparent type of materials
within the first scene, but we're going to
real quick reset that, and I'll show you first of all, how to make some animation from within the material itself, since I reckon that's quite
useful information to know. And yeah, we're just going to right click create a material, make ourselves water
material, like so. We're going to
double click on it, grab all the textures from the water setup for the
material for the water. So these ones over here,
we're just going to drag this into the
scene, like so. We're going to make
sure that we attach them accordingly, so
this is the water, and the base color,
this is metallic. We're going to make sure that
metallic is set up as well. And then we're going to
have ourselves normal map. Finally, it's going to
be the roughness value. So. All right. So by default, if we
were to just simply save this out and put
this onto our setup. So I'm actually just going
to find the water material. Going to create a real
quick material instance, like so and apply
this onto our bucket. We're going to get the
usual, and of course, I totally forgot to set
ourselves up with an opacity. So let me just go ahead
and real quick, do that. We're going to go onto the translucency for the
option of the material. We're going to make
sure that it is set with a surface
translucency volume, like so, so we could make use
out of all the PBR values. We're going to hold
S. We're going to create ourselves opacity
channel, like so. The default value,
we're going to change it to value of 0.8. We're going to attach this
to a normal s two opacity. Channel like so.
We're going to save it out and just real quick, we're going to check
out it looks like. So yeah, this is going to be a simple opacity type
of a water texture. But let's just say
we want to have some animation of it being
flowing a little bit more. We're going to go ahead
and do that first. The best way to make the motion within the material is going to be by making
use out of something, if we were to right click,
something called Panner. This pattern note is
really useful for when we want to have a bit of an extra motion
within the scene. I'm going to go ahead
and attach this to all of our textures
just like so. And this is going to help
us get some nice animation. So we have for stars coordinate. For the coordinate, we're
going to set ourselves up with a simple texture
coordinate, like so. We're going to search
for coordinate, find your cells texture
coordinate and have this multiplied. I'm
going to hold M. Going to hold S and
going to a great scale. We're going to have ourselves a nice scale for the texture. So this is what's going to
go into the usual UVs that allows us to make a nice control over the scale of
this parameter. I'm going to set this up
to value of 0.5 to make it just a bit larger for
this particular water. So As for the pattern
itself, though. In order to make use
of it and control it. What we can do, right now, there is nothing going on
in you can see over here. Make use of it, we can use out of the speed
component over here. To actually set up
with custom values instead of just writing it down in here and setting it up within the
parameter values, we're going to create a
cells couple of parameters, we're going to hold S and call this one X speed or
actually sorry speed x. We want to make sure
that it's set up within the same alphabetical
order to make it a bit easier to follow
within parameter set up. We're going to hold S and
call this one speed y. And then we're going to make
sure that we append them and combine them both
together to make sure that we only get one value. This is a vector
two for the speed. So in order to combine
these two and have it have two vectors
within our information, we're going to click, we're going to simply
search for append and we're going to get
ourselves a pend vector. This will allow us to connect both of them together
just like that, and the outcome is going to
be connected to the speed. This will allow us to control the speed as for
the time itself. By default, it's going to be
just a simple time itself. And sometimes useful to add a nice controlling
multiply with this for when we want to just be able to slow down or
speed up the thing, the panel itself,
the motion of water. But actually, just having the values of speed
x and y separate, that's going to allow us to
have control on that anyway. So I personally don't create the time type of an input
itself and just leave it as is, as it's actually
quite a bit easier. Now we have it set up like so, we're going to go onto
the water intense, we're going to learn
a bit in regards to the speed x and y. I'm
going to enable one. And speed X, if we were
to set this to one, we can see it start moving all the texture type of
information in one direction, which is pretty useful. We can make it go the other way by going with
the negative value, and y is going to just
give us the sort of result which is going to now go diagonally because
we had speed X. But yeah, with
controlling those, we're able to get ourselves
a real nice type of setup. And for now though, I'm
just going to set it up to 0.1 and actually 0.03. No, and it's going to give us a real nice type of a
motion going one way. And another thing
that I'd like to talk about is in regards to making use of the noise to
distort the UV coordinate. So if I were to move
this out to the side, we're now going to set ourselves up with something
a bit of an extra. We're going to go ahead and hold T and create
a texture sample, within a texture sample, we're just going to
search for noise, and we're just going
to get ourselves low res blurred noise. Just a very basic type
of a noise like this. And if we were to just plug
it directly onto our UVs, we were to just plug it like it's going to
give us an error. The reason being is
that we need to just use a simple channel like so. But if I were to plug in
red value just like that and make sure that we plug it into all of
them as an example. So, we're going to
see that this type of a water is now really,
really distorted. So we can use a sort of a
noise to distort our textures, which is sometimes very
useful for creating some nice effects within our animation of water
in this particular case. This is a little bit too much. I'm going to go ahead and click control to make sure that
it sets back to a pattern. But we're going to make
use of this in combination with the per to get
a nicer result. I'm going to hit Control C, Control V to grab
myself a Panner. I'm going to attach
this over here. And as for the pen, I can
probably make use of this, but it's going to be a bit
of a different rename. So I'm going to go ahead and just click F two to rename it, and I'm going to call
this one speed x noise. And second one is going
to be speed y noise. So, this will be two
different values. Then what we need to do after
we have this in motion, we need to make sure that
we have some control of the overall type of a set up for this amount of
it gets amplified. So we're going to hold
M. We're going to set ourselves with noise scale, or sorry, not noise scale. It's going to be called
noise multiplier. So we're going to attach
these both over here. And I think it's best
to just keep it as 0.1, something low of a value. And then afterwards,
we're just going to add this onto our patter. So by holding A and
clicking on material graph, we're able to add the value. So by just having this as a starting point and adding this later on afterwards
on top of it, we're able to get ourselves
some nice values. We're going to just attach this all and actually,
sorry about that. We're getting an arrow
because the reason being is that I set this
noise with RGB. We need to make
sure that this is set with the red channel, which is going to get
this wavy effect. This is exactly what we want, so we're just going to
make sure we do that. The easier way instead of
just re dragging it all, it's going to be by
holding control, putting it from Panner
onto the value of A, and that's going to
set it all up for us. We're going to get this sort
of a result as you can see, it's very nice and the wavy. Like that. We're going to hit control and S
to save it out. And just by going back
on to the texture, you can see this is how
it's looking like for now. We need to make sure we set
it up a little bit better. We're going to go into
the water itself. We're going to make sure that the noise multiply is actually set to a bit
of a lower value. Something of value of 0.5,
perhaps. There you go. That's looking much
better. Then we also have noise scale of x and y. I'm going to just set
it up to something of a low value of 0.1
for both of them, and that's going to
give us this kind of nice ripple motion effect. So But just having it pan in one area while
at the same time it's kind of going
between the waves itself is making it look really, really nice in my opinion. And just like that, we're
able to set ourselves up with some nice water type of waves. It's been done without
any visual effects or anything of the sort, but just using material itself, we're able to create
motion within it, sort of visual
effects out of it. So that's also
quite nice to know. And yeah, that's pretty much
it in regards to this setup. I hope you enjoyed the video, and then the next
one, we're going to continue on with
the next scene.
39. 3 Point Light Setup: I'm going to welcome back
everyone to creating standing environments
in unrelanged five. The boot camp for artist course. In the last lesson, we left
ourselves off by creating some nice animation
for the water and completing the overall
animation for this environment. So let's go ahead and move
on on to the next stage. We're going to go ahead and open ourselves to seventh one, which is lighting
and post processing. And you'll notice that there's only three levels within it. There's nothing
else to do within that area other than working
with the levels themselves, and each one of them
are going to be isolated in their own
individual scene. So we'll be able to
work through it nicely. Once we open this up, we'll see this is completely
pitch back. We might be able to get
some outliner out of it. And you'll see that there's
no lighting, no nothing. We're going to set
that all from scratch. If we were to click on the top
left down corner from lit, if we were to change
it to lit mode, we'll notice that there is
some bits in the scene, and this is for lighting
and post processing. We're going to first
of all start off by creating ourselves
studio lighting itself. Which is going to be
quite nice to begin with. And yeah, let's go ahead
and get right into it. We're going to go back
onto the lit mode, so we'd see this kind
of a darkened up scene. And we could tell where
our light sources are. And to set up a nice
studio lighting, what we'll need to do is
firstly, we'll need to, of course, grab ourselves
a light source. We're going to quickly
add the project. There is a light section, and usually for a studio setup, you'll want to make use
out of a rectangle light. If we were to click and hold
and drag it into the scene, you'll notice that this is
what we're going to get. We're going to get
this sort of a square with an icon in the middle. Which you can make use of to
get some nice light source. You can see the shadows
bouncing and everything. Most of it is already set up, but we need to make
sure that we have some control over how it actually behaves
within the scene. And first things first, We are going to go
into the detail stab. There is sort width and height, which will allow us to control
the height of this light. You can see us expanding this entire square
and this square will represent where the light begins in regards to the source. We can make it super small, and that would also be affecting the way the light
starts off from. And yeah, by default, I prefer to use
it something like a value of 200, let's say. This is a nice type of a setup. So a simple square 200 by 200. It really depends on a scene. But in this particular case,
because we're just trying to light up this silhouette, this mannequin will just use
200 by 200 type of a setup. Then the next thing
that we want to do is make sure that we change
up the light color. We're going to be able to do that by clicking on
the square over here. We can change it to any type of color that we want to be honest. But personally, I
prefer to keep the one, the first one as a bit of
a saturation with blue, and not too much, but
you can see the old and a new one is going to
have a slight blue tint, which works really nice with
a studio type of a setup. After which we'll want to work with door angle and door length. These are basically,
you can see it expanding over here visually, but essentially what this is, if we were to put it to the
side, the camera like so. So door length will allow
us to control the angle, the amount kind of like a bevel. And then door angle will
allow us to make it so we'd have more of a
source coming out of it. So once we get close, you can see the way it behaves. It basically creates a light source from
the center point, and then it gives us a nice control over
the overall angle of the light using the barn
door angle and door length. So with this in mind, we're going to make this setup with 50 in regards
to its length, and in regards to its angle, we're going to keep it
at something like 45. So it's a nice dingle
type of setup. I'm going to click W
two, move it sideways. And in this particular case, because we don't want
it to be snappy, we're going to take off
the snapping pools, basically, we're going to go on to top right hand
corner and take this off. So now we have more control in regards to how the
lighting is set up. And Speaking of
lighting motion itself, we also have a couple of
controls in regards to that. So right now we can move
our light with the gizmo usually if we want to
go in between x and y, for example, we'd use
the bit in the middle. But let's say we wanted to rotate this at an angle as well. If we were to click simple, we'll see that it's also right now aligned to the
world position. So if we were to start
rotating it from this angle, it'll start doing those kind
of with types of angles. So to fix that kind of an issue, there is a button over here that changes the world
gizmo to local Gizmo. If we were to change
this to local Gizmo, we'll notice that this gizmo, It's going to be aligned
to the object over here. So now that we
rotate this around, we can see it to be rotating it nicely in this kind of way. So that's a nice thing to know. And one thing that I'd like
to talk about is going to be in regards to
indirect lighting. So if we were to scroll
down within a sense within the detail tab
itself for the lighting, there is something called
indirect lighting intensity. If we were to increase this, we'll notice that there is more bounciness
coming out of it. So if we were to
change it to something like 100, something extreme, we can see the lights coming and just shining up the body,
the silhouette itself. By default, I prefer
to keep it at one. But when we want to get
some nicer light bounces, for example, I recommend you tweaking this value to get
some nicer shines out of it. And in general, going back to the overall setup
for the studio lighting, what you want to have is
basically going to be a free point light
system where you have free lights set
up in the scene, and then you're able
to make use out of them in order to
light up the background, the foreground and whatnot. And Yeah, just by doing that, we'll be able to get
ourselves a nice setup. I'm going to go ahead
and simply go out of my local gizmo onto
world gizmo first, and now I'll be able to move it nicely in regards to
just rotating it around. I'm going to hold
going to just drag this around and going to
click, rotate this around. And first things first, we just want to just pick up
the angles of our lighting. So once we have it set up in a triangular type of base shape, it's quite actually easy to
readjust the lighting itself. And I'd say we can keep
it something as this. We can also just
select all of them. By the way, if you're not seeing these gzmos you can click G to make sure you're seeing those gzmos for light sources. And then once we have
them all selected, we can just click E
and then rotate them around based on a last option. So if I were to have this
selected as the last over here, You can see that
this is going to be the rotating factor
for all of them now. So that's quite useful
information for where we want to readjust and
rotate all of them around. And then the next thing
that I'd like to talk about is in regards to
hiding lights away. So right now, the
scene is quite empty, it's quite easy to set it up, but once we have light sources, I recommend you to
have them selected and creating yourselves a new
folder photo lighting. But this way, when you
want to find it easily, you can just go ahead
and have them in a small type of a
folder and have them all easily to
be able to select. So after which, once we
have a nice organization, we're going to go ahead and just disable all the lights first, we're going to just
enable one of them, so we're going to start
with the first one. We'll want to make sure that we control in regards to
where the camera is. I'm going to position my
camera over here, like so, and it's best to have
a main camera set up when you're working
with this type of work. So instead of just
going back and forth for our scene for our lighting,
What I'm going to do is, I'm just going to real quick
position my camera so, and I'm going to
click Control one, which will add a s of a
bookmark to the camera. Now, when I go out of it and
just click one by itself, it's going to go back
onto this camera save up. So we can do that
with Control two, control free and so forth. With saving out multiple
cameras, for example, from this angle as well, I
can click Control two, as is. So now I can go click
one and click two, and it's going to rotate
between those two angles. It's going to snap
between those two. And this is quite useful
for whenever we want to get different lighting from different types of
angles visible, so we can just go out of it, readjust the lighting setup
and then go back into it. And yeah, for cars now to
control the intensity, the main thing of
the light itself, we're going to make use of
the intensity over here. We're going to set this up to, well, something very low, something 0.1 for stars and we're just going to
play out from this. And before setting
it all up, actually, I'd like to real
quick talk about in regards to the post
processing itself as well. We're going to have some
issues if we were to just make use of this type of
a setup because by default, unreal engine has auto exposure. This is quite
troublesome because auto exposure will mean that
even if we have a set 0.1, I'll style to brighten it up. If you set this to
ten, you'll see it gets super bright and
then it just dims it down. So we can't have good controls in regards to lighting setup, especially within
the scene because it tries to kind of
rebalance it out. So for us to do that, for us to actually take that off
from unreal enter, we're going to go ahead and
quickly add to the menu of quickly add and add ourselves something
called post processing. If you don't move your
mouse, once you click on it, you can just type in the words itself
within the search bar, and then you'll find
post process volume. We're going to
click and hold and then drag it into the scene, like, so it's going to give
us a simple box, which, by default, within
the box itself, everything is going
to be affected, but it's only going
to be in the box. I recommend you changing this option with the
box selected, that is, I recommend you going into
the detailed steps and changing it to infinity inbound, sorry, infinity
extend unbound box. If you were to click on
this, we'll be able to make use of the dosed process volume
forgot the entire scene. So that's really,
really useful or when we want to make sure that we
have some nicer controls. And at the moment,
we're not going to go too much in depth in sites, we're just going to make sure that we turn off the
exposure options, so it's going to be
exposure over here. If we were to type that in, we're going to scroll down, we're going to see
minimum and maximum, we're going to make sure we
have both of them ticked on. And we're going to
set them both to one, which is going to give us a really dark type of
an outcome because now we need to go back on
to exposure component. And just to rebalance that out, we're just going to
increase this value to something like
let's say eight, I usually go with eight, and that seems to give us a
real nice type of a set up. In order to go between the
visibility in both process, we can make use of
the infinite extent. The reason being is that it's probably the easiest
way to just go between them in and out because if we were to have
this exposure, as you can see, over here, for example, if I were to
make this something like 20, super bright, And if
we want to see it, how it looks like
before, by disling this, sometimes it doesn't
seem to want to work. I'm not sure why, but I personally got
used to just making use of this infinite
extent unbound just take it off and on, and that seems to update it much faster in my
personal opinion. I think that's much easier
to make use out of. Plus, if you have multiple
post process effects, it's just easier to just
split between them. And In regards to that, you will also mention that well, of course, we need
to go into exposure, make sure that exposure
is set to eight, and make sure that
infinity is turned on, so we could have a
nice type of preset. And yeah, we're still not done with IRgars to
lighting itself. We're going to continue on with the scene in the next lesson, but pretty much, we got ourselves a nice
post process volume. We've got a couple of lights
which we're still going to be working on I regards
to the lighting setup. But again, that's going
to be in the next lesson, so thank you so much for
watching, and I'll see in a bit.
40. Skylight and Ambient Lighting Adjustments: Welcome back and front to creating standing
environments in unreal engined fib the boot
camp for art discourse. In the last lesson,
we left ourselves up with creating a nice
post process effect, which allows us to
control exposure. We also created ourselves free variations of
lighting like so, but we're not still
quite done with them in regards to
the overall setup. We need to make sure we have them all nicely
set up first. So we almost got
the first lighting in regards to how it looks like, and I think it's looking
quite nice overall. Like this, it has a
really nice type of aide, kind of a highlight that
are quite like actually. So we're going to actually turn this off and go onto
the second light. The second light, I'd
want to ideally be a bit more of a softer light. So what I tend to do
with regards to this is I tend to just bring
it a little bit back, maybe something to this area. Turn it sideways a
little bit more, and even sometimes I
would extend its width. So if we were to set
it to 300 to widen up, we can see it's looking. It's just highlights
a little bit better in regards to its
cotter. Over like so. If it had a nicer face, you'd see more of
its facial features. And afterwards, if we want to, of course, fix up the intensity, we need to go ahead and do that. We're going to set
it up to a value of 0.1 as well, probably. We're going to see how it looks like in combination to this. So is going to help us out. But I reckon now that I combine
it with the second light, it needs to be a little
bit more facing forward. So I'm actually just
going to move it to the front and rotate
it slightly like so. This way, it's going to give us a really nice type of light. Although this one, I'd
like to have it more dim. I'm going to set it up to
0.5, something like so. And I think that's going to be a bit better in that regard. And finally, we have the
third light, main light. So let's go ahead and make sure that every
light is invisible. We can turn this one on and
see how this would look like. This one is going to look
really nice overall. I'm not going to
switch up the angle. I think the angle is
looking quite okay. I just need to make sure that the overall lighting is going to look quite nice in
regards to its brightness. So something like 0.5, perhaps, Something soft, I want to make sure that it has a soft effect. And actually, one thing that I forgot to mention in regards to the lighting setting is
going to be at tenucy radius. At tenuci radius is going to
be this detail over here. It will allow you
to make use out of lighting in regards to how
much of a space it affects. If I were to just lower this down to quite
a minimum amount, you can see that,
The light actually ends where the ten
engine radius ends. And you might think of it
in a way in which the light itself is going to be just
applied onto the scene, and it's going to
have, of course, indirect bounces and whatnot. So even if I were
to increase it, you can see light being
bounced off in here, but it's not going to do any of that if we were to just
have it this sort of a light. So it's sometimes
useful, for example, when we want the background
not to be lit up, but it's also useful in regards
to optimizing a lights. If you have a bunch of lights
in your scene, of course, in this particular case,
which is a studio setup. It's not going to
matter as much, but if you have a bunch
of different lights, you'll want to make
sure you optimize this option as well. And I reckon, for
this particular case, I'm going to go ahead and just increase it again
for studio lighting. It doesn't matter
as much, but maybe. Actually, it will matter in this particular case
because I don't want this ground to be shown with
such a massive spot light. I'm just going to go ahead and turn this down a
little bit, like so, and that's going to just give us a nice lighting for
the four foreground. We're going to enable the
rest of the lighting, like so and see how
this would look like. And this is quite all right. I think it needs though some optimization in regards to the intensity for
the third light, we're going to
change this up 2.3. Let's go ahead and see
how this looks like. And yeah, just by doing a
couple of options like that, we can see that we're getting some nice silhouette,
nice lighting out of it. And yeah, that's pretty much it in regards to the
lighting itself. Unreal eng it makes it
super nice and simple for the lighting itself
to make it real nice. The only downside in
this particular case is that the lighting right now does not have any
nice reflections. We can see that this body
is actually quite shiny, but even if it's shiny, it's not going to have
anything other than the studio lights
being bounced up. So it becomes quite a problem
in this particular case because we don't get as much of a realistic type of shine
out of this metallic body. So to fix that, I recommend you in
pretty much any of the studio type based lighting
that you're setting up. You set up sort of a sky
box that will allow you to reflect the lighting
within your objects. The way we're going to
do it. I'm actually just going to show
you right away. The way we actually do it is we're going to go onto
the top left hand corner. We're going to add
ourselves something called Skybox. Sorry, skylight. There you go. We're
going to click and drag and drop
it into the scene. I'm going to click G
so we can see the Giz We're going to get
this sort of a result. By default, this should
not give you much of an impact because this
scene is pitch black. It's completely empty,
so it has nothing in it. But what we're going to
do is we're going to set the skylight
up with a sort of an indirect light
source that will allow you to light up your
reflections and whatnot, with sort of a fake map. So for us to do that, first of all going to go
into the details, with this selected,
we're going to go and change the source type. We're going to change
the source type to be specified cube map, which will allow us now to
make use of a cube map. Okay Make use out
of the Que map. We're going to just simply
click on this box over here, and there are a couple of presets for the Que map texture. We're just going to select a simple daylight
ambient que map, which once we select it, is going to give us
this sort of a result. Because the overall setting is more or less dimly
lit within our scene. It's actually going to
expose it way too much, and we can actually control the overall setting out
of this entire scene. I'm going to go ahead and
turn off all the lighting first so we could see how the
skylight would look like. And yeah, in order
to control this, we're going to scroll a little
bit downwards like snow, and there is something
called intensity scale. By simply changing
this to a 0.1, we can see it lowering
down and it's going to look much
better in that regard. We want to lower it down
to the point where we are satisfied with dark
shadows that we're going to get out of this
as it will make sure that the areas that are actually darker if I was now to
enable all the lights, like so, They aren't going
to be as dark anymore. So we need to lower this down to the point where we are
actually happy about it. So I'm going to turn off
the lights just real quick. I'm going to play
around with this, and I'm going to
set it up to 0.01, perhaps, maybe even lower. And I should probably
show you how it actually works with in regards to the skylight so
we can visualize it. I'm going to set it up back
to 0.1, actually real quick. And in order to visualize
the skylight itself, what I personally
prefer to do, also, just a quick trick in regards to the overall setup is if
we were to right click, we can go ahead and create
ourselves a material. And for the material itself, I'm just going to go onto it, going to make it metallic. I'm going to hold one,
going to create a value that's going to be
having a value of one. Then for the roughness, I'm also going to
create a value that's going to be close
to non rough value, so a value of 0.1
will do the trick. And we can create it as a
neutral kind of a color. Value of 0.5 in
gas or base color. So it's going to
give us this kind of reflection for material. We're going to go ahead and
save this out, like so. I'm going to close this down, and now we can actually make use of this to visualize
it within the scene. We're going to quickly
add a basic shape, which is going to be a sphere, and I'm going to go ahead and
add this onto the sphere. So now we can see that
this is how it looks like. So with us disling the light, even if we were to have all
these erect angles turned on, we can only see the light
sources themselves. But with the skylight turned on, We have a sort of
a basic reflection that we can make use
of it in order to reflect some of the
extra detail onto our metallic surfaces or onto our glossy
type of surfaces. And yeah, setting up
this material is really useful for whatever you want
to work with alt itself. Now we can make use of this
to set it up with a nice, kind of a skylight bound. We want to make it look like
an evening type of a scene. I'm going to keep
on darkening it until I like the overall result. Okay. Something like this, super dark type of
cloudy atmosphere. I think that's going
to be quite right. We can now go ahead
and delete the sphere, and you can see
how it looks like. So before and after, you can see that some of the shininess on the
sides of the shoulders, for example, even over here. I'm actually going to lower
down the camera speed. I just realized that we
kept it on we lower it down and just use mouse wheel to scroll in and out
just like that. And yeah, the skylight, before and f can
see that it gives you some bit of an
extra ambient lighting, which is really,
really nice overall. So, yeah, that's
pretty much it how to set yourself up with
some nice lighting. We can even make this
different colors, for example. We can get this bit more to be, for example, more orange, let's say, or more blue even. Like the sci fi looks, I'm going to go with a bit of a more pinkish type of
a color even, like so. We could match the side
lights for these neons. And yeah, that's pretty
much it in regards to that. I really hope you
enjoyed the video. And in the next one, we're
going to continue on with some larger areas so we could
set up larger environments. Thank you so much for watching,
and I'll see in a bit.
41. Night Scene Lighting: And welcome back
ever on to creating standing environments
in Unreal engine five. The boot for Artist course. In the last lesson, we
set ourselves up with a nice three point
lighting within the scene. Now we're going to continue on within the same stage
but a different level. So let's go ahead
and get started. We're just going to
open this part up. We're going to make
sure we save the one. And again, we're going
to have the same type of a result in regards to
the lighting itself. So in this particular case, instead of just creating
the light horse ourselves, We're going to
actually make use of the tool within a
real engine itself. We're going to go onto the
window tab and within it, there is something called
environment light mixer. It's a really nice type of a window to make
use out of it. Once we open it up, we can see it's completely empty except for a
couple of buttons. And actually, I'm just
going to make use out of it and click and hold and then drag the stab over here, which allows us
to reposition it. I'm going to drag it next to the content browser and that's going to just attach
it over here. I find it to be way
more easier to work with after I get it set
up in here in this area. So yeah, first things first, we're going to, of course,
create ourselves a skylight. We're going to just
click on it as is and that's going to create
ourselves in a fault skylight. We're not going to
change any Q Map or anything of the sort
because we're going to be able to make use of atmospheric skylight and
whatnot within the scene. So so creating
atmospheric light. If we were to click on
this pattern over here, we're going to get ourselves
this type of a look, which looks a bit
bizarre at the moment. And the reason being is that the light source is actually
facing the other way. Control the light. We can
alternatively just select it, click F, and we can
see where it is. We could just click and just rotate it around so you can see it switching around or
alternatively, or to do it. We can click and hold control
and L on our keyboard, and that allows us
to get a nice gizmo which if we were to move
our mouse left and right, it allows us to change the
angle of the light source. Also, if we were to
move it up and down, it allows us to change the location if it's lower
or higher up, basically. So with that in mind, we can just set ourselves
with a nice lighting. So again, left and right to just change up the angle
in regards to direction and up and down in regards to its entire
slope and whatnot. So how high the
light is basically. And yeah, we're with this, we're going to set it
up something like this, put it up to the side a
little bit more like so. And then the next
couple of steps is going to be as the tabs suggest, create a sky atmosphere for now, it's going to give
us a nice sky. We're going to create volumetric
clouds to make sure we add some bit of detail
within the background, and we're going to
create a Sels hide fog. So the hide fog is what blends
in regards to the depth. We talked about before when we were setting
up the mountains. But in this particular case, we're just setting it up for
just a kind of a background, so it's not going
to be affecting the area where we are working with as it's a little bit too little in regards
to the density. Of course, in this
particular case, we're going to set ourselves
up with a night scene. And you might be thinking,
what are we going to do with the night scene?
How do we set it up? And I saw a lot of people actually struggle
with that on Internet where they just try
to lower the sun down and it's going to be
pitch black and whatnot. And if they try to
make it kind of dawn, it kind of works, but
at the same time, it's just not a night scene. So what do we do with it?
Well, the easiest solution is to just actually
fake the night scene. And what I mean by that is we're going to make
use out of the sun. In order to get a much, much nicer type of a set
up for the overall scene. So we're going to make use
of that and environment, light mixure by the way, allows you to have nice
controls within the area. Right now, I have
this stab set up. It's minimal. Usually, I just
keep it as normal advanced, which will basically give you all the detailed stabs
the R. But for now, it's good enough to just keep
it simple at the moment. We're going to change
up the lighting to be a bit more of a bluish,
not completely blue, but just a little bit,
and we're going to then afterwards change up the
intensity to be a bit darker. So something like this is
going to be quite right. So by changing a couple
of those options, it's going to make it
look a bit better. And one final thing that I
want to say in regards to the lighting itself is going to be indirect light intensity. But I noticed with the kind
of night scenes is that it has much harder shadows in regards to the
overall environments. So I tend to change this indirect light
intensity to be much less. So if I were to set it to zero, you can see very hard shadows. If I were to set it back to one, it's going to give us a bit of softer shadows. So actually, Might be a bit easier to see if we were to
have a nice bounce, you can see the light
bounces back really nicely. But with night scenes, usually you want to have
a bit more contrast. So usually what I tend to do is at this value to a value of 0.5, and that seems to get a bit of a nicer result for when I
want to set up a night scene. Then afterwards, for
the night scene itself, what we basically
need to do is just simply change the post
processing effects. If we were to go onto the cube on to quickly
add button over here, we're going to simply
search for post processing, we're going to add it up
just like we did previously. We're going to make sure that
this is set with infinity, the tick box that is then going to actually
keep the rest as is. And the thing that
we need to make sure that we change the
most is going to be. If we were to scroll
all the way down, it actually has a
lot of options. I'm probably going
to just type it in within the search part
there you go. Temperature. Temperature is the one that will allow you to get a nicer tint. If we to have this enabled, and we can control how hot or basically how cold the
overall environment looks like. And just by changing
the temperature, you can see how blue tint affects the
overall environment, and makes everything so
much colder looking, which is already
looking pretty nice. The only thing that
we need to do is right now change
up the exposure. Changing up the exposure, we can go onto
exposure settings over here and just turn down
the overall darkness. So it really depends
on the type of a dene you want in regards to how bright
you want it to be. I recommend you not
to make it too dark because in virtual world, we don't need to make it look as realistic to the
night scene as possible. All we care about is just
making sure that it is close to just making it look
like it's a night scene. So for example, even
in movies and whatnot, they don't use actual night natural light scene
from the moon. They just make use
out of it in order to make it with the background so they'd have some
additional lighting those areas. And
I'm just going to set it up maybe a
bit darker, like so. Again, it really depends on the type of setting
you want to have, but just by doing it like this, you see a couple of steps, a couple of adjustments
will allow you to make it look quite dark
and quite nitish. And furthermore, to extend
this type of settings, we can go onto our
global color parameters. We can go all the way down. The main options within
the area of f A nicene is going to be if we were to scroll down a little
bit, global parameters. These are the options that
you'll basically want to make use out of in regards
to the color grading. You've got contrast,
for example, if you were to take
this on, by the way. You can see we have
sort of a color occur over here that if
you were to control it, you can adjust a sort of tints. Resample, this is
only affecting it for the contrast in regards
to the contrast itself. Usually, part of
contrast, though. I'd prefer to keep it
at a value of zero. If you want to reset it, we can click on this button over here. And then afterwards, we can just change up the contrast
in this section over here, make it super contrasty, make it non contrast, and
something of the sort. I'm just going to
change this to 1.2 as that's going to give us
some nice hard shadows. Of shadows, though. If
we were to go down, we also have options for
shadows and highlights, mid tones, and whatnot, which gives us some
additional type of control. We can turn on,
for example, gain, which will allow you to just play around with the value and get some real nice results. I'm actually going to
just change this up to this kind of result and just play around with the
value a little bit, just to get nicer
type of a setting. It really is up to
you to what sort of a look you want in
regards to the color coding. I'm going to
recommend you to just go into them and
play around with all of these values that would help you in regards
to the understanding. But I would personally say not to overdo it in regards
to the values themselves, as you can get some
really good values afterwards in regards to if, for example, setting up sort of a film recording or
something of the sort, you'd want to do
post processing, a lot of the post processing
within an editing software. So these are like they're there
within the unreal engine, but if you're working in
regards to just setting up a sort of a real time
rendered film or animation, you'd want to do most of this work to be honest
within an editing software. And yeah, but other than that, it's really nice and simple to set up a sort of a night scene,
as you can see over here. The clouds and the sky actually adds up
to the atmosphere, and it's looking pretty good. So we're pretty much done
with the night scene itself. Next one is going to
be the night scene, which we're going to work
on in the next lesson. So thank you so much for
watching, and I'll see in a bit.
42. Starry Night Material Setup: Welcome back into creating standing environments
in Unreal Engine five. The bootam for artists course. In the last lesson,
we left ourselves off by creating a nice night scene. But this time, I'd like
us to go a bit further and take it to the next level by setting ourselves
a day night scene, a sort of a cycle, if you will. We're going to go ahead and open ourselves up with a
new level, like so. We're going to then add a
plug in that will allow us to get a nice and accurate type of position for the sunlight. We're going to go on to edit
tab over here, plug ins, and we're going to be
looking for something called sun position calculator. So if we were to sty in within the search
power over here, we'll be able to enable this
sun position calculator. Once we have it
enabled, let's go ahead and restart the engine. After which your sun
should be enabled. So let's go ahead and see
sun position calculator. There you go. It's now enabled. We're
now going to go ahead and go back onto our scene,
actually. There you go. And the next step
that we'll need to take is to make sure that we have sun sky blueprint placed
within our unreal engine. And for us to do that,
we're going to make sure firstly that we are
within our content browser. So just make sure you
have this enabled. Previously, we were using
environmental light mixer. For now, we're just
going to go ahead and close this down, like so. We're going to go back
onto the content browser. We're going to now
make sure that we have engine and plug in
folders enabled, which we can do so by going
onto settings over here, making sure that
show engine content and show plug in are enabled. Otherwise, we're not going to be seeing the folders that we need. If we were to scroll
all the way down, like so, there is a
folder called engine. If we were to open this up, there are more
folders, actually. One of which is going
to be plug ins. Let's go ahead and
open this one up, and we'll see a bunch of folders that real engine the plug
ins themselves provide. This point, we are looking for somebody called sun
position calculator content. We're going to go ahead
and open this up. And then we're going to have
ourselves blueprint for the sun position and the
sun sky blueprint as well, which not only will
have the sun position, but it'll have the whole
setup ready for us. We're going to go ahead and
firstly just select this, hit Control C and make a copy. We're not going to go back
all the way to our folder. Actually, we can click on
this button over here to just drag it back to the lighting
and both processing. Like so we're going
to hit Control B, just like that, to get ourselves this blueprint within
this area as a copy. Because we're going
to make a couple of adjustments to it. We don't want it to change it up within the engine itself. Otherwise, it's not
only going to change it within a level within the scene itself
within the project. But whenever we're
going to be able to be using the same
type of plug in, it's going to be
changed as well. So we've got to
make sure that it's properly set up in
regards to that. Once we drag it into the scene, we're going to get
this sort of a set up, which is going to basically
give us a nice environment, nice basic environment
for the stun for the sky and whatnot. And what's nice about it is
that if we have it selected, we see that we have some
details within the tab. We have a lot of control
in regards to how accurate we want it to be in
regards to the sin itself. So right now, the sun is
facing right above us. The reason being is
that if we look at it, there is something
called solar time and it's set at 1:00 daytime. So if we were to start
dragging this down, once it gets to 4:00, it's
going to be over here. We have a lot of controls in
regards to the sun position, and in regards to its accuracy. We can set the specific month and day of the
date that we want. We can also go to advance and set up a lot of extra options. The ones that we need
to worry about though, the most is in regards to
latitude and longitude. These are going to control in regards to how fast the sun, for example, sets
up and sets down. So if we have a latitude
to very high of a value, it's going to start setting down for the sun at 4:00 as
you can see over here. And you can see the sun being
very low in that regard. It's going to start
rising only at 8:00. That's something to
be worth noting. I'm going to set it to a
value of a default value. The one that we're going
to be controlling the most is probably going
to be the longitude. We need to adjust this and we can get ourselves
a nicer type of a setup in regards to where the sun or when
the sun would go down. I want it to be going down at, like, for example, 8:00. I'm just going to lower it down in regards to that to 8:00. So 8:00. So, and I'm going to go ahead
and change to longitude. So it would just be going down
just like that. All right. So now we have
something like this in which when it reaches 8:00, it's going to start going down. In regards to the
morning itself, it's going to start raising the sun at 6:00 in the morning. So I think that's a reasonable
time in that regard. Once we start
dragging it around, we can see it going up and down in regards to
the sun itself. I'm also just going to
add some clouds as well, and we can do that without
the blueprints help. We can go onto the project
quickly add button. We're going to search for cloud. And we're going to get
ourselves volumetric cloud, which we can drag it in and get ourselves a nice
type of a setup. And we also, by the way, have some options in regards
to the clouds themselves. We can change the layer of bottom attitude
and layer height. You just control the amount of clouds that we're
having within the scene. So I'd like to default height. I think was quite nice,
maybe a bit lower, and bottom layer is going to be raised up a
little bit as well. So I think that's going to
give us some nice kind of contrast in regards to
the clouds themselves. Going back to this
option, the sun sky. If we were to start
playing around with this, we'll notice that once it
goes down to the night scene, it actually just turns black. So, of course, we're going
to go ahead and fix that. The easiest way to
fix it is going to be by creating a starry
night for our scene. And the way we're going to do it is we're going
to right click, we're going to
create a material. We're going to call
this one Starry Night. And we're going to go
ahead and set this up as a material for our sphere, for our skybox sorts. We're going to create ourselves a custom one for this
particular case. We're going to go ahead and open it up right away
for the material, and we're just going to
make it large like so. And first things first, what we need to do
is make sure that it doesn't change up
any lighting itself. It doesn't cast any shadows
or anything of the sort. So for us to do that, we're going to go
ahead and select this. We're going to change the
blend mode from opaque. I'm sorry, not the blend mode, we're going to change
the shading model. Default lit to unlit. So this will make
sure that we only make use out of the
emissive color, which is exactly what we want
for this particular case. And yeah, in regards
to the texture itself, we're going to hold
T. We're going to tap on the material graph, like so, and going to
select the texture sample. Going to make sure that the
texture that we're using is going to be a star
type of texture. You should be able
to get yourself a nice star knit setup from this texture over here
from an unreal engine engine, going to click, going to search for coordinates,
texture coordinates, going to hold, and multiply this with a
scalability parameter. Going to call this one scale V, stumping short, combine
these two, just like that. And we will have ourselves
the value of four for now. Going to now combine
this on to vs. Then we'll want to have a sort a multiplier for
the missive color, we're going to hold M and S and then call
this one strength. So we're going to just
attach it to a value of P and combine it with texture
that we have over here. We're going to start off with a simple value of one, like so. So we're going to get
ourselves this sort of a look. And as for the movement
itself of the sky, we want to make
sure that the stars are somewhat flickering, and for us to
achieve that result, we're actually going
to set ourselves up with a quick panic motion. We're going to hold the
T. We're going to create a selves a noise
material like so, and apply low resolution
blurred noise. With this, we'll be able
to just pan it around. We're going to then create
ourselves a pattern. I'm going to right click, search for pattern, so. This will allow us to make
motion within our material. I followed long from within
the VFX part of the course. You'll find this
part quite easy. Instead of just creating
our own parameters, I'm just going to set it up with a value that's quite low. Dumping of the sort.
I'm going to click. Actually, going to change it to a parameter and I'm
going to see sorry, not the parameter of my pad. I'm going to click Control Z
and do it, going to click. And instead of changing
it to a parameter, I wanted to preview the node. So once I do that, we're going
to see how it looks like. And right now, it's a little bit too big in regards
to the scale itself. I'm going to use
just this value over here to set up
something like ten. Actually, that's not
going to work for that. I'm just going to quickly make a copy out of this like so, and I'm going to attach it to the coordinate for
the scale name. I'm going to call it
scale noise, like so, and this is going to
give us a nice result, changing the value of
six, something like that. It's going to give us a really nice and simple
type of a result. I'm going to hold and attach this value to the
overall scale over here, and we can do it like so and attach to final result to the multiplier
with the strength. So what we're going to get is if we were to
right click now, stop the parameter preview mode. We're going to get this sort
of result where the stars are actually somewhat flickering.
So that's quite nice. And now one final thing that we need to do
is before we make use of it is we need to make sure that
we have the selected, and we need to make sure that the two sided option is enabled. So let's go ahead and do that. We're going to enable to
two sided functionality. After enling I'm just going to save it out and close
down on material, and then we're going
to make use out of it. But we're running out of
time, so we're going to continue on with this
in the next lesson. So thank you so much for
watching, and I'll see in a bit.
43. Adjusting Stars for Day Night Cycle: Hello, and welcome
back on to creating studying environments
in Unreal engine five. The boot camp for artist course. In the last lesson, we
left ourselves off by creating a nice starry
night material, but if we still haven't had
a chance to test it out. And before doing that, I'm just going to go ahead and click, create a material instance. And after which we're
going to make sure we apply it onto an object. So the object I'm talking about is just going to be
a simple sphere. We're going to create
ourselves a simple sphere. So drug interworld
and it might not be quite as visible
because we need to make sure we set it up to
unlit mode for now, we're going to
make sure we don't have any light
sources from a day. Yeah, let's go
ahead and do that. We're going to just
expand this type of a box over here once
we get inside of it. We'll see that
nothing is going to be visible because
by default materials that use default materials that are being used with
an unreal engine, it's actually one sided. But once we start applying
this because we applied a two sided type of a material, we're going to get as this
result where from outside, it's not going to be visible, but from the inside, we're
going to start seeing the sky. So if we were to set it to lit, we can see that it's
being visible now. And I recommend you
creating this type of a scale for a sphere
as large as you can. So going to set it up something
like $10,000 by $10,000. I'm actually going
to reset it all and just make sure that
I have this locked out. So $10,000 by $10,000
is going to be good enough for a
type of a sphere. Next thing that we need to do is just we need
to make sure that the collision turned
off because by default, these type of spheres
will have collision on. So for example, if we were to set up a player here or
something of the sort, that will cause some issues. So I recommend you just turning out off
right off the bat. We can do so by going onto collision presets and
setting up to no collision. And afterwards, we need
to go onto shadow. So search for shadow. There you go. And we need
to take off gas shadow. And with that done, we're
going to get ourselves in really nice and simple
type of a sky box. And of course, we need
to do some tweaking. So let's go into the
material instance for now. We're going to make sure that scale noise and UV strength, all of them are ticked on. We're going to start by probably just taking
on the scale for UV. So let's go ahead and just
play around with the values. Maybe something of the sort. We'll do the trick. Maybe
that's a little bit too much. Seeing how it looks like. So something like
ten, for example, might be a bit better. And then in regards
to the strength, I wanted to lower it to as
little amount as possible so we could get
just a bare amount of minimum in
regards to the sky. Tough we're only
using this just to get a basic kind of a
gradient out of the sky. And I think, yeah, value of 0.05 is going
to do the trick. And as for the scale noise, we can go ahead and just play around with
that a little bit. I'm going to make it up to something like
a value of eight. And this should give
us a nice result. Although just looking at this, I realized that the speed
might not be fast enough. I'm going to go into
the material itself. I'm going to check for the
speed within the patter, and it set to a value of 0.1. So let's go ahead and set
this to a value of 0.3, and all of them, they
go 0.3 for the patter. So, let me just go ahead and see how this
would look like. Probably too much, actually. It's just the right
amount, I think. It really depends on how sparkly the sky
you want it to be. The faster this is, the more sparkly it's
going to look like, but as you can see, it's
a minimum kind of amount, but it's just the right amount
to make it look like there is some movement or some light
thereans out of the sky. And that's pretty much
it in regards to that. We can now go ahead
and make a use out of the blueprint
that we had. So this is the blueprint
that will control your setup in regards
to the night day cycle. We can now go back
onto the default. Wait, give me just a
second. There you go. We're going to go back onto the sun sky that we placed
already within the world. We're going to check the
time itself, so solar time, if we were to make it a daytime, it takes a bit of
time to readjust. I can see that the sphere is still a
little bit too small. I'm going to go ahead and
go back to the sphere. Actually, I'm going to go ahead and rename the sphere first. I'm going to just
double click on it and call it sky sphere. So I'm going to select one of the things in regards to what we have
within the settings, going to click F to
just make sure that we reposition the entire setup. So by clicking F, we can refocus our camera
based on a selection. So just make sure
I have the sun sky selected, and that's that. And in regards to
the sky itself, let's go back onto
the sky sphere. Change this up to add an
extra zero. There you go. And now, in regards to
the overall setting, what we need to do is we
just need to make sure we add a height fox to this way. It'll change the overall
sky to be more bluish tint, while at the same time, during the nighttime, we'll
be able to see it. So let's go ahead and do that. We're going to add a height fog, like so, and right away, we're going to get
this sort of a result, which is already looking nice. We can even increase
the density, for example, to make
it more bluish, and we can even use sky
in scattering color to just kind of take some of that value a little
bit ourselves. So we're going to get
ourselves a real nice type of a setup so a bit
of a bluish color, bit of a nice setup. Also, let's not
forget to turn on volumetric in this
particular case, well. So it'll be adding in to the
realism of the background. And now, once we start changing up the sun sky blue print, we were to switch them over. We can see when it turns
to dark night sky. This is what happens. It
starts brightening it up and getting to
this peway setting. So right now, I
think we still need to play around with
exponential height fog. The reason being is we're not seeing anything
at the moment. And first things first, I'm going to go ahead and play around with
the fog density. I'm going to change
this 20.05, like so, so we'd have more strength
in regards to that. Then afterwards, we're
going to go ahead and change up the starting distance
to quite a large value. We're going to set it up
to something like 500,000, like so, and now we start
seeing the sky itself. And as for the sun sky, the sky sphere, that is, I'm going to actually make
it molar in regards to that. So it would be a little bit
closer and there we go. That's what we're going to
get. That's exactly what we're looking for out
of our night sky. And actually, one
thing that I forgot, we do need to set ourselves up with a dark type of
exponential fog. Otherwise, it's not going to
give us the right result. So the reason being is that
we firstly need to fix that up for the night sky and then it would work quite nicely
for the day sky. So I'm just making
sure that we have mold bluish type of a tent
at the edges of the corners. Small amount, like so. It's actually still too large. So I'm going to go
onto the value changes to a zero of a value, then add a couple of zero and going to be zero,
one. There you go. Something like so, and that should be well
actually too bright. I'm just going to
add another zero, like so, and that's exactly
what we're looking for. We're just looking
for a background that doesn't cut off
with just darkness. So that's going to make
it look much nicer. And when we go back
onto the sun sky, changing up the solar time. So it's going to take
some time to readjust. And yeah, if you're
still getting some areas where some bits in the
daytime is a bit darker, make sure to go back
onto the sky sphere, go and add a couple
of zeros, like so, and it should give us a full spectrum of the
horizon just like that. And this being really large type of an area mesh is going to allow us to have a nice atmospheric skylight,
so that's quite nice. As in regards to the
skylight itself, if we were now to go
onto the sun sky and change the solar time to a
nighttime, a pitch black, it should start going
up in regards to the brightness in
regards to the exposure so so we should be
able to see some of the scene in
regards to the stars. And I'm just going to
wait it out a little bit. There you go. It starts popping up. So it's really nice and simple
type of a setup. And yeah, now that
we have ourselves a nice day night kind of look out of this
type of a setup, We're going to make use
of it in order to set ourselves up with a nice
cycle within our scene. So let's go ahead and continue on with this in the next lesson. Thank you so much for watching.
And I'll see in a bit.
44. Setting Up Sky Cycle: Welcome back everyone to standing environments
in Unreal j five. The boot cam for artist course. In the last lesson,
we left ourselves up with a nice setting
for day night scene, and we can just play
around with it a little bit. The outlooks like. I'm going to first of all, just go to unlit mode just
to see where this guy is. So Sun Sky. That's the
one we're looking for. Let's go ahead and make
use of it to see what looks like with a
day night cycle. And you probably at this point, might have guessed
that we're going to make use of a solo time in order to adjust overall
daylight cycle, to make sure that we have some motion in regards
to the day itself. And yeah, that's
looking pretty good. We're going to go ahead
and continue on with this, for which we will
need to make sure we actually edit this blueprint. We're not creating a blueprint
from scratch just yet. We're going to do that in
one of our other scenes. So for now though, we're
going to go ahead and click select this
Sun Sky Blueprint, we're going to click
edit in blueprint. And now at this moment, it doesn't really matter in
regards to its complexity. All we're going to
make use of this is to just quickly
create a nice setup. You can see that we have a
blueprint graph over here, and we just got to make
sure that we are within event graph tab at the
very top over here. Then we'll want to make sure
that we begin an event. To an event begin play.
We're going to right click. We're going to search
for event begin play. That's the one
we're looking for. Let's go ahead and add this
to our scene onto our graph. But then I'm going to drag this out and search for timeline. Again, we're not going to focus too much about in regards
to how they work, we're just going to make
sure that we set this up, as we're going to
cover this type of subject in the next thing. And for this one,
we're going to make sure that we have
this opened up. We're going to make this loop
itself, so there you go. We're going to click on
this part over here. We're then going to
change the length, so it's going to be a
normal type of a value. Hanging it to 20 seconds is
going to be quite right. We're going to add a track a
simple float value like so. And we're going to add and we're going to add two
key points on this. So similarly to what
we had we have fx, this is also going to be working in the same
way photograph. We're going to add a key, the stym from scratch, and we're going to add a
second key next to it. And we're going to go ahead and go on to this part over here. We're going to make sure
that the time is set to zero and the value
set to zero as well. On this particular key. And for this next key, we're
going to make sure that this is set to the amount of
length we want it to be. So I'm going to zoom
out sorry real quick, so we can see this
entire length, so we can see it 20 seconds, it's going to be changing
the cycle itself. We're going to change
this up to be 24 hours. So let's go ahead and do that. We're going to change this 20
and change the value to 24. So it's going to be
going 0-24 over this. After which, we're
just going to go ahead and close this down, and it should be saved up. So I'm just going to double
click, just to double check. It is saved out. A is good. After that, we're
going to go ahead and locate ourselves a
solar time parameter. We're going to go
within the variables at the bottom left hand corner
for the variables over here. We're going to search
for solar time, so it's going to be
underneath time. And we're going to click
and hold and drag it out onto the blueprint. We're going to set
the solar time links. So we're going to make sure that it's being updated
every time this loops, which is going to
be indefinitely. Then the solar time itself, we're just going
to connect it with the new track like this. Finally, we're going to go
ahead and update the sun. So for us to update the sun, we're just going
to drag this out. We're going to search for
update sun. This one over here. This will make sure that it is updating the direction
of the sunlight. And yeah, that's
all we need to do. We're going to go ahead
and save this out. We're going to close this down, and it's pretty
much ready to go. We're going to just simply
stimulate this viewport, like so, so we could
see how it looks like. And by default, it
should be pitch black, but then it increases
in the sun. The sun is going over and we're going to get
ourselves a really, really nice and simple
type of a set up. And yeah, of course, because this is a
little bit fast, it might be harder to
see the night sky. But once the exposure goes down, we should be able to see it. So I might just do a quick
test in regards to that, going to go onto the sun sky, going to change up the timeline. So if we do want to
change up the timeline, we can go into it and
change the length. So for example, for 20 seconds, we can just make it
to 60 seconds and basically 1 minute will
be an entire cycle. Changing it time to
60 seconds, like so. I'm going to click Save
Control and S save it out. Close this out like Now, once we hit simulate, it should give us
a better result. So again, I'm just waiting for the exposure to
kind of settle in, like so, and we should start seeing
some of the night sky. Like, so. And yeah, that's all there
is in regards to the sun sky type of a day cycle. We got ourselves some
nice starry night, and we got ourselves a really quick and
simple type of a cycle. That's also going to be quite accurate in regards
to how we set it up. So that's going to be
it from this lesson. Thank you so much for watching, and I'll be seeing it a bit.
45. Creating Cinematic Camera With Rotatable Anchor Point: Hello, and welcome back
everyone to creating standing environments
in reelngedFive. The boot camp for Artis course. In the last lesson,
we created the elves a nice night sky with
a day cycle within it. And we're going to continue
onto the next level. So let's go ahead and go back
onto the boot camp folder. We are going to go onto the number eight cinematic
camera techniques. Let's go ahead and open this up. We're going to
load up the scene, and let's not forget to save out this previous level as well. So this is the level we're
going to be working with. We go ourselves a
nice viking boat that we're going to present it
using the camera shots. But before we go into
the camera shots itself, what we need to do
is actually set ourselves up with
a level sequencer. Level sequencer will
allow us to put in cameras into it and have it
animated within the scene. So yeah, let's go ahead and
create that right away. We're going to right
click on our folder. We're going to hover my mouse on the top and just search
for level sequencer. Level sequencer, so, going to
click on a level sequencer, and we're going to
keep the name as is. Then the next thing
that we need to do is just simply double click on it, which is going to open ourselves up a level sequencer tab. It's going to be put in the same area where the
content browser was. So keep that in mind. If you want to go back
to the content browser, you just have to click
between those soup tabs. So. Now, although we have this type of a
camera set up over here, I'm just going to go ahead and delete this and
start from scratch, so to be a bit more clear in regards to how we created
from the very start. So yeah, for us to do that, we're going to click
quickly to add to project. We're going to go all the
way to cinematic tab, and there is cinematic
camera actor. We're going to just
simply click and hold and then drag
it into the scene, like so, and you see we have ourselves a nice camera setup. That's a real quick tip. We can make this icon
larger or smaller. And if you're not seeing
this icon, by the way, you can click G, you go out
and into the game view. And yeah, by making this larger by clicking R
and just scaling it up, we can make it a bit easier
to see where the camera is. It's not going to affect
your camera view in any way. So for example, if we click, we can rotate the
camera around, like so. I'm going to actually
rotate it in an angle. So at the top right hand corner, we've got angle snapping. We're going to enable
this, and I'm just going to keep it at
ten degrees like so. This way, we can just turn
around and you can see it turning around in one 80
degrees, just like that. We're going to move
it up to the boat, and you can see
this is the type of a setting we're going
to get for now. We can click r to scale it
up and down the camera icon, and you can see that at
the bottom right corner when we have the
camera selected, the cinematic camera
preview is not going to be changed based on the scalability
of this camera icon. The next thing I want to
talk about is real quick, just going to be about in
regards to the sequencer. When we create a sequencer, when we create new objects
from within sometimes it likes to just create
new keys and whatnot. Just make sure to have
them deleted for now, and we're not going to
worry about it too much, and actually just going to reset my camera, as you
can see over here. I'm going to just
replace it over, so, and that's going
to be fine for now. Because the next
thing that we need to do is just we need
to make sure we set ourselves up with a sort of a pivot point
because right now, what we want to do is
we want to make sure we set ourselves up with
a camera turntable. It's going to be
the easiest one, but probably the most used
one in regards to presenting your type of assets and whatnot. So I'll go ahead and
show that first. And yeah, we got to sell
a nice camera setup. We'll also go ahead and talk about in regards to the
detail tab as well. We got a bunch of options
for cinematic camera. We got a way to change the lens. We got a way to change the focus of the lens
and aperture as well. And these are very
useful for when we want to make sure we have
a nicer type of a setup. I'm going to change the
current focal length 35-20, so we get more field of vision. But that changes the way the camera blurs
out the background, which we are going to
come back to it later on. But for now do, let's focus on the camera set up
for the turntable. And yeah, once we have ourselves a change of current
focal length, we're going to go
ahead and shred up, set it up with a rotable
section for the camera. The way we're going to do
it, my personal favorite is just simply attach it
to an object and use it as a sort of a I would point to just rotated
around the scene. So the way we can do it is by simply creating
ourselves a basic shape. I use here because it's really nice and
simple to set it up. And the next thing
that I'd like us to do is just simply make sure that we attach this to the
right side of camera, so we have a really nice type
of a position out of this. We're going to go ahead and go back onto the camera real quick. We're going to go all the way to the top and copy its location. We're going to right
click, hit copy. We're going to go
back onto the sphere. Right click hit paste. And this way it's
going to be right in the center where
the camera is. But then going to go out
from the camera, sideways. So we're going to make sure that it is set within
the world position, so we have everything
properly set up. So no rotation, no difference in regards to that for both
the camera and the sphere. And we're going to just simply
double click on the sphere itself to just rename the
sphere to a focal. Point. We're going to call
it focal point A k. So then next thing that
we want to do is just basically going to be attaching the camera itself
tra focal points. So as you can see, I have
the camera selected, I can see the focal point of the sphere to be in this area, and I'm just going to
be within an outline, are going to just
drag and drop it tra focal point k. So and
that's going to attach it. Alternatively, I'm going
to click control to do it. We can also if we are struggling to find
it within a scene, we can also right click onto an object and select
attached two. And then if we search
focal point, like so, we can just select this like so, and it's going to do
the attaching for us. So if we have a lot of
items within the scene, that's probably the
best way to do so. Now, once we have a set like so, if we start moving the
focal point itself, we can see that the
camera and a focal point, both of them move at once. And that's exactly
what we want to have. The next thing that we need to do is we need to make sure that this sphere is not actually
visible within our view, which is actually
relatively simple to do. All we got to do
is just simply go into the search par
for the focal point. We're going to search for game, and there's something called
actor hidden in game. If we were to have
this selected, you can see this disappearing, and if we were to click
G to go into game view, we're going to just make
this disappear as well. And Yeah, once we have
it set up like this, we can now go ahead and move our camera around in any
way of shape or form. I personally prefer to in
regards to the movement, make sure that we are only using angles for the
pivot point itself. And then as for
the camera itself, we're just going to
make sure that we have it set in regards
to its distance. So when we have
the camera set up, I go on to the local Gizmo. So now, when we are moving this sphere around, as
you can see over here, We can go back onto
the camera and just move the
distance in regards to the local orientation
to the camera. So to speed up the workflow
in regards to going between the world position
and the local position, I use control and a dot
next to escape button. I'm not sure what it's called. It's a console command
button. So I just use that. You can see it's
switching between those, buttons over here,
which is really useful. So now I can just
move this around. And if I were to for example, click back on the focal point and want to have a
bit of a nicer angle, I can click E with the
local point selected. I can just rotate this around, make this from a bit
of a higher distance, like so, and it's going
to be nicely positioned. But now, for example, I
want it to be rotating all the way around like
this section over here. We can now go back
onto the world type of Agismo and it's going to
help us rotate this around. So this is pretty nice. Also, if you want
to see the preview in regards to the camera, not just switching
out like that. We're going to turn off the
snapping grid, like so, and that's not going to help us out because when it moves, it's not going to preview
the window itself properly. So what we're going to do is just we're going to
select the camera, and there is a small
button over here next to the preview that's called pin preview. If we
were to click on it. Now we can go back on
to the focal point, and you can see that
there are two windows, one for the attached
window over here, and the other one for the one that we actually
pin to our view. If we were to click,
we can see that one of them is going to just be constantly in motion and properly updating
within our section, so we can actually make use out of that to correct
our turntable. And before doing
that, we're just going to go ahead and fix in regards to how close we want it to be next
to a boat and whatnot. But one thing I should
mention is that attaching multiple cameras
onto your viewport will affect your performance. So if you want to, for example, work with a better performance, you can go onto lit mode
and change this two lit. So your main view, is your
part is going to have a less performance
impact whilst you can still preview your
cameras in your corner. So that's one way
to go around in regards to fixing up
your performance. And yeah, another way would be to change up the scalability of engine scalability to
something of medium or low. And that would also
be helpful as well. And yeah, we're going
to continue on with setting up the animation
itself in the next lesson. So thank you so
much for watching, and I'll be seeing you in a bit.
46. Creating Turn Table Camera Animation: Now, we welcome back
every on to creating standing environments
and relanged vive. The boot camp for
artists course. In the last lesson, we left
ourselves off by creating a nice setup for a turntable and we can make use out of
this pivot point over here. Just rotate our camera
around, although, as you can see, some of the parts are going
behind the wall. I'm going to make sure that
we go back onto the camera. We're going to change the
global Gizmo to be to local, going to click W and just kind of get it much closer
in regards to that. As for the angle and
the overall setup. What I'd like to
do is just go back onto this focus point. I'm going to just click back
to the world type of Gizmo. Lower it down, perhaps, like so a little
bit, and now click, go back to the local point, and this is going to allow us to just change up the angle
a little bit, like. So I think that's going to be quite a nice angle. Let's
have a look around. And there we go. It's actually still getting stuck in the wall. I'm just going to go
ahead and fix that. Going to go back onto this, go back to the local gizmo, get this camera a
little bit closer. Now I'm going to test
it out with again, the world gizmo by
rotating this around. This is looking quite nice, quite like this overall setup. If, for example, normally, if you're having a nice
type of a setup scene, you probably wouldn't
have this sort of a wall in the background, so you wouldn't have to
worry about it too much. But alternatively, the
way we could fix it is if we were to go back
onto the camera, if we were to just remove
it from a search bar, we would have just a simple way to just change up
the focal length, and we could just zoom back out to capture the entire shot. But honestly, having this type of a setup is quite
good as well. I'm just wondering if
that's going to work. And yeah, it looks
like it's nice, but we'll need to
click W and just move this to more of a
center of the boat. And yeah, I will actually change up the focal
length a little bit. Like, so it's going to now
be something like this. And it's looking quite nice
in regards to the setup. Let's go ahead and
actually set it up within the area over here. And it seems like I moved the transition and now we created again another transform. I'm going to go ahead
and just remove it, see how that would behave. And now I'm just
going to move it So sometimes annoying that it automatically
creates it like, so I don't like it
often when it does it, but I think it's back in
the same area, it is. All right. So yeah, the reason this
happens is because when we double
click on it and we try to just move it
out to the side, it's going to create
transformation, and then it becomes troublesome. So just make sure
that doesn't happen. But va way, we will need to create a cells as
sort of an animation. In regards to an
animation itself, once we are within a
sequencer by the way. Once we are within
a sequence of tape. If you're not seeing it
in the sequence of tape, just make sure to
double click on the sequence that we
created previously. We're going to make
use of it and set our cells up with a
camera rotating around. So first things first, in order to visualize the
size the space time itself, we're going to go
ahead and change the frames from first
frames per second. We're going to go
ahead and change it to show it as seconds. Showing it as seconds will
help us visualize it better. I recommend you doing that. Then we're going to change the working range at the bottom right hand
quarter off the sequence. We can change this
option here to have wider type of a range. Basically, we're going to
change it to something like 60, so it's 60 seconds, which you can see changed up this part to be much smaller. Now we can grab one end of
this and make it like so. At at this moment, though, I reckon we can change this overall setup for the camera to be going
on to 15 seconds. 15 seconds for rotation.
I think it's a good time. Let's go ahead and firstly, switch up how long it takes for the time quincer
to reach the end. We're going to make sure we
use this red part over here. As you can see, there
is a red type of a bar, which if we were to click
and hold and then drag it, we can change the time for it. So we're going to
just set it up to a value of 15, like so, Now, if we were to hit play, it's going to go all the
way to our value of 15, which if you look at
this arrow over here, you can see it moving
when we press space bar. So by pressing space bar, we can start initiating
the level sequencer. So you can see it moving
in regards to seconds, and when it reaches the
end, it's going to stop. That's exactly what
we want for now. Get back to the original
starting point, we can click on this
button over here, which says to front. By clicking on this,
we're going to go back on to the very start. There is an alternative to
go to the end over here. So by just going through this, we can go ahead and just
set ourselves up with a nice type of a
keyframe animation. Um, yeah. So make
use out of this. We're going to just
simply click and hold and then drag our focal
point to the area. In case we don't have this
focal point already set up. We're going to
grab get ourselves a focal point with
transformation. Transformation, if we were to
click on the key over here, is going to allow us to
create initial point. And then once we go
to the end point of the transformation and
start rotating this around. So we're going to hit. Start rotating it with
a world gz mobile away. We're going to make
it would rotate. So once we rotate it
to a different end, we're going to hit
Add key again. And we're going to see
that now it starts moving our initial
entire section. So the camera starts moving, we're going to get ourselves
a real nice type of a setup, and we're going to pose
it for now because we haven't set ourselves up
with a nice rotation. We need to make sure that
it rotates 360 degrees. So for us to do
that, we're going to go onto the transformation
tab itself. We're going to break
up all of it and only worry about
rotation itself. Now we're going to
go onto rotation. We can see there are
roll pitch and ya, we're going to check which
one is going to affect what? So pitch is not the one
going to click controls. Ya is the one that's going
to affect how it rotates. The way I'm going to
do it is actually, I'm going to go to the very
first key point over here. We're going to just
add three 60 to it. And actually, we can just set up the point to be
set zero, like so. Then the final point is going to be set to a value of three 60, like so, and it should be
rotating the boat around. You can see it's going in the direction that
I wanted it to. So what we're going to do is we're going to go
to the very end, and we're going to set it
up with a negative value. So negative three 60, like so. It's going to now go in other
direction just like that. If we wanted to speed it
up and have it faster, what we can do is just we
can go at the very end, and we can even
double this value. So three 60 times two is
going to be them and 20. So we're going to go
ahead and write that in. Now, it's going to
be the double speed of that and just going to make two complete circles in
the span of 15 seconds. One thing that we also need
to do is figure out how we're going to set it up so it would be rotating at
a constant speed. As you notice, at
the very start, it's being rapid slow, and then it speeds it
up as it goes along. The reason for it is
because by default, the key interpolation is
going to be set as automatic. So it's going to try to ease in and out in regards to
the animation itself. What we want to do is we want to grab all of
these keys like so, we want to click on them, and we want to make sure that key interpolation
is set to linear. This way, the overall
setup is going to be nice constant speed in
regards to the entire setup. We are now going to go ahead and drag the camera itself
into the level sequencer, and now we see this
type of a result. We want to start off by just making sure we eject
our camera from the viewpoard so we can do so by clicking this type of
a button over here, which is going to unlock
our camera over here. And if we were not using the camera and had
no key points, what it would have
done, basically, if we started moving around, it would move our
camera as well, which would be
quite unfortunate, especially if we had already
a nice setup or a key shot. The O one that I'd like to talk about is going to be this
button over here instead. If we are within the button, you can see because the
camera is already set up, it's not going to allow us to
move the viewpoort itself. But once we hit play, we can see that
it's actually just showing reviewing
the camera itself. So it's going to show
us the entire shot. It's going to look quite nice. It's going to rotate it all the way around just like that. So it's pretty good
in regards to that. And yeah, that's
pretty much it in regards to how to set
up a nice turntable. We, of course, will need to render everything
out and whatnot. But we're going to
focus on how to set up the rest of the
camera shots first. I'm going to show you how
to just make it look like it's more of a handheld
type of a camera. You have a nicer type of a
closer composition shot. So, yeah, we're
going to continue on with that in next lesson. Thank you so much for watching, and I'll see you in a bit.
47. Creating Handheld Camera Effect: Hello, and welcome back
everyone to creating studying environments
in Unreal Engine five. The boot camp artist course. In the last lesson,
we last ourselves off with getting a nice type of a turntable going all
the way this boat, like so. Now we're going to continue
on with the process and grab ourselves a nice setup for
a bit of a closer shots. We're going to start off
by just simply making a duplicate out of
the focal point and a camera that
we already have. We're going to hit Control C, Control B, like so, and this should paste everything in that we already had before. That's going to
be a bit nicer in regards to us continuing because these already have a nice setup in regards to their
angles and whatnot. We're just going to
go ahead and for cars reset the
rotation of focal 0.2. So we're going to
just make sure we are going to a
rotation over here, we're going to reset it to
a default apple rotation, and we can see it
looking much better. We're going to now get
the camera much closer. I'm actually going to
click r to scale it down a little bit so it wouldn't get
in the way of our preview. And I just realized that we have this pin preview still
up from the last camera. I'm just going to
untick this over here. So that should disappear now
that we have it de selected. So, and just looking at it. I realized that it
was the original one, so let me just go ahead and make sure that this
is on, like so. Anyways going back to this, we're going to just make sure
we have a nice camera shot for our frontal section. So this part over here, it's going to look quite nice. We're going to just grab
it onto the focal 0.2, position it to the
very center like so, and we're going to
start by making sure that we have a nice
animation out of it. The way we're going to do it is, we're just going to make
a simple panning motion. We're going to rotate
our camera accordingly. So at this sort of an angle. And I'm just going to start by having this sort of a result. We're going to go to the
end point of the red line. We're going to start by making sure that the focal point
is within the setup. So I'm going to drag and drop
this over here, like so. So you can see it's
already getting a bit bigger in regards
to the sequencer. We're going to make
sure that we simply add a key onto our,
have a look at it. This was a A bit harder to see because
there is object selected. I'm just going to go
ahead and the selected. So Onton transform,
we're going to make sure that we start
off the key over here. I'm also going to make use of this bar over here, probably. Make sure it doesn't reach more than 15 seconds in
this part over here. So 15 seconds, I'm
just setting it up, making sure that I'm
resetting it all, like so in regards to both the key frames and
the Amer cut itself. After which we're going
to make sure that we have the transformation from vocal 0.2 set up at the very start, like so, and we're
going to go to the very end of this setup. We're going to make
sure that this is set up to 15 seconds, like so, so I'm just
going to drag it. I'm actually going to move the red line out
of the way first. I'm going to make
sure that we have a nice setup for
this 15 seconds. Lumping around this. I think it's going
to be quite right. We're going to move it back
in regards to the red line, so it's going to
snap to the arrow. And the next thing that
we want to do is just make sure that we have
a nice motion to this. We're going to go
to the local gizmo, and we're just going to move
the camera sideways leg. Then we're going to add a new, which is going to give us
this sort of a motion. Previously, we set it
up to a linear motion. And in this particular case, I think we can leave it as is. I think it's going
to look quite nice overall in regards to that. And once we're done, once we're happy with the motion of a shot. We can also add a camera onto
this onto 15 second area, like so, and now it's going to give us a really
nice type of a shot. We can even preview this and
see how this looks like. Now, yeah, this is looking
pretty good for us. I'm quite liking
this although it can probably start
a bit later on. So I'm going to show
you how to start this entire sequence
in a later section. We can move it, for
example, the arrow, I'd wanted to start in let's
say this area over here, so it wouldn't be too
far out of the shot. What we can do is we can
go all the way down, we can add a key now
onto the focal 0.2. We can delete the original key, and we can just move this back to the point of 15 seconds. And now, it's going to start a bit later in regards to that, and it's going to
be much better. So this is one way that we
can tweak out the values. And once we have
a shot like this, we might want to add a bit of a handheld type of a motion, but is to make it look a little bit more
natural to the shot. To do that, we're going to
go onto the content browser. We're going to click. We're going to go onto
the blueprint class, and we have selections. We're going to now at this
time, go onto all classes. We're going to search
for camera shake, and we should have ourselves
camera shake actor. So this is going to be
it, camera shake base, we're going to go
ahead and select it, click Select, and we can
call this one camera shake. So now we're going to
double click to open it up, which is going to give
us this sort of a view. Don't be surprised
by it. It doesn't need to be this complicated. It doesn't need to even
have all of this menus on. We're going to close it down, and now the second
time we open this up. It's only going to be
this sort of a result. So that's exactly what we
want in regards to that. And now we're going to make sure we set up a root shake pattern. We're going to open this
up. We're going to click on P noise camera shake pattern. It's going to give us a real
nice natural type of a look. We're going to open up
these windows over here. When we get a nice Perlin noise, what we'll need to do is also we'll need to make sure
that we go to rotation. This is what we're going
to use to make sure we have some camera shake. And the starting point is going to be actually
at a timing point. The timing point has to set
up with the duration itself. We're going to set
it up at a zero. Otherwise, it's
going to just move for a 1 second, and
it's going to stop. We want to make sure that
it moves indefinitely, so we'll always keep
that on and we'll be able to control this from
the camera level sequencer. So after which we're going
to just play around with rotation amplitude multiplier
and rotation frequencer. Rotation amplitude
multiplier will allow us to give more of a strength
in regards to motion, how much it gets rotated. So we're going to
get ourselves a nice multiplier for ampitude. We're going to set this to two. The frequency is
going to give us the camera shake about
how shaky it is, basically, the frequency
of the shakiness. The more you have of this, the more of shaking
you're going to have. And for now, we're
going to keep this as one. That's all
we need to do. We're going to now click
compile top left corner and hit Close button. Now we're going to go back
onto the level sequence, so we're going to find
ourselves the camera actor two. We're going to click the track, and we're going to get
ourselves camera shake. If we hover over it, we're
going to be able to select it. Let's go ahead and select it. And now let's go
ahead and make sure that the camera shake
that we have over here. We're going to just make sure it moves the very
start of our frame. We're going to then
make sure that we move it throughout
the entire section. And now once we move it around, we can see the type of a
motion we're going to get. So this is what
we're going to get. It's a very nice and simple type of a seta for a camera shape. To make it more organic, though, we need to tweak a
couple of values and make sure that we
set it up properly. First thing first, though, is we're going to go onto
the camera shake itself. I'm going to make the
window quite a bit smaller, I'm going to squish it out
into the corner like so. And I'm going to just
make sure that we have a bit more control in regards
to how the camera shakes. So right now, as you can see, it shakes quite a lot. I'm just going to
make sure that we do it to the viewpoart in
regards to the camera. And yeah, it shakes
way too much. I think the frequency
though is good. If we set it up
something like ten, we can see that it's very,
very fast like this. So usually having it as
a starting point of one, pretty good going
to set it up as 0.5 in regards to
that because we only want a paramount small
kind of shakiness, like so. So it's pretty good
in regards to that. We need to make sure
we don't overdo it. There is no urgency in
regards to the scene, no, explosions or something
going on in the background. So there's no need for
the camera man to be scared or shaking the
camera in all directions. So this is. This is pretty good. But we need to make
sure that we also add an additional type
of a camera shake. I'm going to go ahead and go
back to the content browser. I'm going to hit Control C Control V
for the camera shake. We have a camera shake two. Going to double click
to open this up. Now we can see it's
that up within my tab be here on
the right hand side. And I'm going to for starts lower down this
frequency to something like 0.3 and increase the amplitude for the multiplier to
something like 0.8. Something like this will give
us a nice type of setup. I'm going to go ahead and
make sure we compile it. Go back on to the level
sequence like so, make sure that we are
within a tab like this. Then we're going to go ahead
and add another tracking. We're going to add
another camera shake, and we're going to get ourselves
the second one as well. The reason we're doing this is because it's not going
to be as varied. Otherwise, we got
to make sure we have a little bit more
of an extra control. Now you can see
it starts moving. I'm actually going to table
the upper one by just quickly deleting it so we can
see how the one looks like. I'm just not going to do
anything at the moment, just going to preview this
camera simple camera shake. So you can see it bit going
up and down a little bit. That's all we need
in regards to that. Going to clear control and see to make sure the one is back. And by combining these
two camera shakes, we can see them giving us a very natural type of a look
in regards to this motion. And, yeah, that's pretty much it in regards to the setup
for the camera shake. That's all we need
to do to give us a really nice type
of emotion for it. So yeah, in the next lesson, we're going to
learn in regards to the transitions and how to set it up for emotion in
between the cameras. So yeah, thank you so
much for watching, and I'll be seeing you in a bit.
48. Camera Transitions and Video Export: And welcome back Ebron to creating standing
environments in nnginFive the ButamF
Art discourse. In the last lesson, we left
ourselves off by creating a nice camera shake
handheld type of a setup. And it's already looking nice, but now we can see that
between the turntable, if I were to click G actually to move out the focus points. So between the turntable, if we were to click
space and between this and that we can see
there is a clear cut. So we got to make sure
that we fix that up. And for us to do that, it's
actually quite simple. I'm going to go
ahead and close down the windows on the right
hand side for now, like so, and going to go out of the viewport
for the cameras. So now, in order
to make sure that we have nice transitions,
what we're going to do is, we're just going to fade the
camera out into black and then make sure that they
turn into another shot. And the best way to do that
is actually going to be to make use out of
our post process. We're going to make use out of the post process that's
within a level already. So let's go ahead
and locate that. It's going to be
this box over here. I'm just going to double
check if it has infinity extend up on here, like it does, which on and now we're going
to make sure that we have some control over this
post process setup in regards to the
level sequence. So it's actually quite
easy and simple to do. What we're going to make use out of is going
to be exposure. So let's go ahead and have
this opened up exposure tap. And by making use
out of exposure, we can just darken everything
down to nothing and then kind of increase
the brightness up. But that's going to be quite
easy and simple to do. Let's go ahead and
do that actually. Also, another thing to
consider is going to be in regards to minimum
and maximum exposure. So I recommend you instead of, for example, changing minimum
maximum exposure for these, we can also change up
speed up and speed down, which will basically make you transition faster
in between those. I'm going to set
them up both 2.1, like so now when we are changing the minimum
exposure minimum, um darkness and exposure, it's going to be much
slower, actually. We need to make sure that
we do the opposite of that. We need to make sure that
we set them both to ten, and now it's going to be much faster as you
can see over here. So that's how we're going
to make use out of that. And now, in order to make use of it within a
level sequencer, we're going to make use of
this tiny icon over here, which will add a key
frame to its property. By clicking this
button over here, we're going to add it at the very bottom onto
our level sequencer. And we're just going to
make use of that in order to add ourselves up
with the values. We can once we have the
level sequencer opened up, we're going to be shown these buttons over here that
will allow you to pretty much add any type of a
property in regards to the number values onto our level sequencer, which
is pretty good, actually. It's pretty nice
way of doing it. We're going to start by setting ourselves up with a
nice key frame at the very start before we
actually hit the other shot. Then we're going to
hit Control C and move this to the side
and hit Control. So we have a nice type of a
frame in between this setup. So in between here, you see there's an empty part, and we're going to fill that
in with a lower exposure. We're going to darken this
down to when it turns black, completely pitch
black, there you go. My understanding we
can use this value, and we're going to add
this onto our key. At this point,
because we already added a level sequence
with this key frames, we can just simply click
on this button over here, and that's going to make
it just darken it down. At this point, what we have is basically we have a
turntable that's going to darken down and
it's going to go onto the camera shake
type of a motion, which is pretty
good for our setup. So yeah, once we're
done with that, we got ourselves a nice type of a motion for the transitions, and we can work on a
couple of extra ones. We can, for example,
make do with in regards to just the camera
blurring in into the scene, and we can go ahead and actually
set that up real quick. We're going to make sure
we do that as well. There is an option within
the lens camera itself, if we were to go
onto cinematic mera. Once we go onto the camera,
we can have a look at it, and that's going to be the
sinematic camera actor one. We're going to make
sure we are at the very front of the
sequence like so, so we can go ahead
and play with that. And yeah, by just clicking
on the camera itself, we're going to go
onto its options. There is an option
called current aperture. And taking the current aperture, if we have a look at it, we
can take it down up to 1.1. But this is going to give you
only a good depth of field. If I were to zoom
in, for example, we can see a bit more
clearly what it does. It just blurs everything out
in regards to its depth. But we're going to make sure we use that in regards to just setting it up for a
quick blur effect. So for us to do that,
we're going to go a little bit up onto the section
for lens settings. Make sure to have this on, and there is a minimum f stop. We're just going to set
this up down to zero, so now we can have full control in regards to this
because otherwise, it doesn't go lower
than a value of 1.2. So now we start setting
it up to a value of zero, or a value that's close to zero, let's say, it's going to give us a super nice
blurred out effect. So actually, I'm going to
go ahead and set this up as the nice key point with
2.8 of a value by default. I'm going to move this a
little bit to the front. So I'm going to go back
to the original one to the front of the level
sequence this time, and going to go back
onto the camera, going to find the lens options
for this one over here, going to set it up to a value of 0.001, something like this. So nicely blurred out, going to add another key. And now we're going to
get this sort of a shot. So it's going to
start of blurred out, and then it's going to give
us a nice type of result. Although just by looking at it, I realized that it's going to be a little bit too fast
in regards to that. I'm just going to give it
like this type of a result, and it's still a little
bit too fast in regards to it going blurry. I'm going to basically set it up other type of a key frame that's going to be close
to it afterwards, like so, going to add a new key frame in regards
to this value over here. I'm going to lower this
down a little bit. Again, something like this and just move it a little
bit to the front like so. This way, when we're actually, I'm going to hold old, and I should be able to
zoom in and Actually, I'm going to go in a bit closer, and I should be able to just
move it in regards to that. We can also turn
off the snapping as well to just have a greater
control in regards to that, and this should give
us this result, which actually it goes back to the bouncing
this type of a setup. I'm just trying to figure
out why that is the case. It shouldn't be the case. I'm just wondering why that is. Not quite sure why
that is the case. I'm just going to delete
the original one and just replace the one
that we previously, and it should give us a really nice type of
a blur out result. So yeah, just by doing this, we can see that the
type of difference that we're going to get
is much nicer, and this allows us to set ourselves up with a
nice camera sequence. And once we have
a 25 second video of a multiple camera shots, we can go ahead
and render it out. The easiest way to render out a simple type of a video with an unreal engine is
just to simply make use of the render this
movie to a video button. This one over here, if
we were to click on it, we're going to get
render movie settings. We're going to make sure that the file image output format is AVI as this is going
to be a video sequence. We don't have any audio
but for resolution. Let's make sure that
we have it set at ten 80 pixels resolution. Compression quality, I
recommend you keeping it to a low valume something like 45, just a bit lower down, so we'll get a better
quality result. And as for the video itself, we're going to make
sure that this is set a cinematic mode. This will give you
the best video available with an unreal engine. And finally, the only
thing that we need to set it up is going to
be output directory. Output directory
will allow you to just click on these
three dots over here. We'll allow you to make
a nice video out of it. I'm going to just simply set it up within one of the folders, and it should give me a nice result after
I'm done with it. I will need to check, of
course, how it looks like, but let's go ahead
and at this movie. Once we're done with it all, let's just make sure
that the animation is set up properly. And the final thing
that we need to do is actually going to
be warm frame count. Usually, how it works is when
we're capturing the film, we're capturing a video is
it needs some time before it starts actually the whole video to load everything
into the scene. So we're going to give
a nice frame count. I usually give it something like 42 frames to make sure
it loads everything in, and that usually
gives a nice result. So once we're done with that, we're going to go ahead
and hit capture movie. We're going to save
out the whole thing, and it starts setting
everything up. And yeah, that's pretty
much it in regards to that. Once it's done at the
bottom right hand corner, it says capturing the video. So this is not only a preview, but also a video capture. And that's going to be
it from this video. We got to set up some
nice camera transitions. And also, let's not forget that we created ourselves
a quick video. So this allows us to create some nice and interesting
presentations for our setups for
our environments. And yeah, that's going to
be it from this video. We're going to move on to the
next scene in the next one. So thank you so
much for watching, and I'll see you a bit.
49. Creating Motion in Foliage: Welcome back onto creating standing environments
in region pile. The boot camp for artist course. In the last lesson,
we left ourselves off by creating a nice
level sequencer, using some nice transitions, creating a turntable, as well as a close up
type of a shot. So we get ourselves a
nice video overall. And yeah, we're now going to go ahead and move on
to the next scene. Let's go back onto
the bootcamp folder. We're going to go
onto the folder nine, breathing life into the scene. We're going to go ahead
and open this one up. We're going to get ourselves
this sassin in which we have a nice bird a
behave in a tree, but the tree itself doesn't
have any sort of the leaves. So let's go ahead
and fix that first. We're going to make
sure that we have some nice motion from them. We're going to go onto
the texture staff. You're going to find yourselves a couple of leave textures. So we're going to make ourselves a texture for that first, and we're going to apply
that onto our area. And yeah, let's go ahead
and start off with that. We're going to right click
create ourselves a material, call this one leaves Matli we're going to go ahead
and double click on it. And start creating ourselves
a At for a nice folage. So for us to do
that, we're going to go ahead and firstly, grab all of the leave textures. I'm just going to
make this window a bit smaller by grabbing
it to the side. So I'm going to grab all of these textures that says
leave front of them, and I'm just making sure that
these are the only ones. So we have five textures in
total, which is pretty good. We're going to go
onto the textures photograph itself and just
drag it into the area like so. So most of the time,
we've had four textures, but in this case, we have five. The reason being is that because we have ourselves
on a pacid mask. So we're going to
make use out of that. We're now going to just simply split everything
off just like that. And I'm going to have
ourselves the base color at the very top
roughness or sorry, this is ambit
decusion since we can see it at the bottom
left hand corner, it is ambit decusion over here. We know that this is going
to be at the very bottom. Then a normal and, of course, roughness values are
going to be like this. All right, so now that we
have it set up like so, we're going to go
ahead and simply start by attaching every
single one of them. So we're going to
create ourselves a nice VR material out of this. For the Normal itself, I recommend you making
more of a strength kind of a value in regards to the
normal type of a setup. Usually, if we were to
just attach it as is, you can see that it gives
us a nice type of a setup. But if we want to have more
control over these leaves, if we want to make sure we
control somebody detail, What I recommend you doing is I recommend you creating
a normal flatness. So by clicking and
typing in flat, you can see that there's
flat and normal. This is a very useful
shade of when we want to control the intensity
of the overall setup. So by just attaching
this and setting it up, we're going to hold S, we're
going to tap on the screen. I'm just going to call
this normal flatten, like so, and I'm going to attach it onto the
flatness, just like that. By having a default
value of zero, it should keep the
same, so that's that. But by moving it
to a value of one, it's going to take off the
normal value completely. However, if we were
to make it negative, you can see that
the intensity of a normal map is going
to be amplified. So this is a very useful
type of a setup to use, especially for the
leaves whenever we want to have more
motion in them and we want to have some of the light bouncing off
a little bit more. So next is going to be amp
in declusion And finally, we're going to have an opacity. As you can see for the
opacity, this particular case, we're going to set ourselves
up with opacity mask, but it's actually lured out. And the reason being
is that we of course, need to change
ourselves to material. We're going to go
onto material itself. We're going to change the
blend mode from opaque mask. Like so this will enable
us to use opacity mask. And then we're also
going to make sure that it's two sided type
of a material. So we're going to
go ahead and use two sided tick over here, like so, and this is going to give us this
sort of a result. The next thing that
I want to do is, I'm just going to first of
all clear control and S to make sure it
saves out like so. Then the next thing
that I want to do is I want to make use of that sum of the color to just set it
up with a emissive color. By just setting up
with emissive color, we'll be able to make the
leaves themselves look a little bit more cartoonish
and a quite result. Let's go ahead and
hold M and just attach this color
onto the multiplier. We're going to hold
S, and we're going to hold this mission multiplier. Soap. And yeah, for now, we're going to keep it as zero. We're going to attach
it to a emissive color. But once we start playing around with the
values themselves, you can see it brightening
up do side as well. And it's a real nice way to control the brightness
of your leaves. Now, of course,
we're going to go ahead and create some
motion for the leaves. So for us to do that,
we're going to make use of a world position offset, and this allows us to
offset the vertices within the material that will make a certain motion within a mesh. So for us to make use of it, there is a very nice type of
a node called simple wind. If we were to just type in
wind within a search bar, we're going to get ourselves
simple grass wind. And although it's
simple grass wind, it can be pretty much
used within anyway and it's a really nice
type of a setup to add a bit of a motion within the So just by attaching it
to the world position offset, it's going to give us an error. And the reason being
is that we haven't set up with the parameters
for the settings. So first things first,
wind intensity. We're going to go ahead and
create a parameter for that, and the wind intensity
is going to be giving us strength in regards to
the jitter in regards to how much it's being
offset for the vertices. We're going to start
off with zero, and then we're going
to move our way up for the wind weight, that's where we would
use our vertex painting. Control where we want it
or where we don't want the weight of a jitter to be, and we're not going to
use this at the moment. We're just going to keep
it as a simple parameter. So let's go ahead and set that up as a simple wind weight. But by just having
a vertex painted node and having some
vertex paint on this area, it would also work pretty
well in regards to that. Wind speed in regards to
the wind speed is just going to be the
frequency of the jitter. We're going to hold
S, creocells wind so. We're going to go ahead and
attach to stir wind speed. And finally, additional BPO, we are going to
keep that as zero. Most of the time, it's not
going to be relevant for us. Instead is for additional
tweaking of the motion. So yeah, that's pretty much
it in regards to that. We're going to go
ahead and click Control on S to save this out. And now we can finally go into our settings and create a
material instance out of this. We're going to go and right click out of
the leaves material, create material
instance like so. And of course, we need to
apply this to certain mesh. We're actually going
to go ahead and create a simple shape for the leaves, we're going to create
a nice plane like so. We're just going to
make this bigger for the moment so we could
see what we're doing. There you go. We're
just going to make it bigger across the
entire section. Now, we're just going to apply this material intense like
so, so we can work on it. We're going to
double click on it. We're actually just going
to set ourselves up with the wind speed for now and
wind intensity, like so. And once we start increasing this these both, for
example, wind speed, we can keep it as 0.5 and wind intensity if we
were to set it as ten. We are not going
to get anything. The reason being is that the
wind weight is set as zero, so that's not going to be affecting anything
at the moment. We need to make sure
that it is set to one. So we're actually
just going to change this around and set it
to one, and you can see. This is the type of wobble
that we're going to get. It looks very interesting in regards to when it's
only a single mess. So we're going to go ahead and create certain bushes to make sure that we get ourselves
top tree leaves set up. So for us to do that, we're
just going to first of all, probably take off
the wind in density, set it down to zero, and now we can work on it
and set ourselves up with some nicer variations of shape. So we're just going
to hold duplicated, rotated around and
make sure that we have ourselves some nice
variations out of this. We're just going to go
ahead and duplicate another one, create another one, and like this, we're
just going to make a really nice and
simple type of a setup. Just like that. One
more time, perhaps, going to rotate this around, make this a little bit
going upwards, perhaps. So, and put it in. We're just going to
have a simple cluster of leaves just like that. Now what we're going
to do is actually, we're just going to grab this whole plane
section like so. We're going to click Control G, which groups up all the
area of the selection. So if we were to now click
G without control G, we're going to be
able to go into the game view and see that there is a green type of highlight going
all the way around. So now we can just select it
and select it back on and it's going to select all of these planes for
the tree leaves. By just having this,
we're able to grab or selves a nice type of a
setup for these leaves. I'm just going to populate this section entirely, like so. It going to make sure
that these areas have more nice type of a variation, mainly putting them at the end, but we can also have some more interesting
in regards to the Size, for example, we can make it a little bit
larger, not too large, though because we want
to have the variation of the leaves to be kind
of like the same size. So it wouldn't look too often
in regards to the pattern. And I'm just going to rotate
this around, for example. Go to actually duplicate
this entire section, multiple groups like so and put it up in this
area over here. I'm not going to spend too
much time in regards to that. We just want to make sure that we have some nice
type of leaves. Maybe you can have it in between the sections of the
tree branches as well. So it would look like there's
smaller branches over here, and something like this
will do the trick. I'm going to make
sure that we have ourselves a nice enough of a variation in regards
to that. Okay. And after we're done, we're going to get
something like this. We'll actually put
one more over here, so we could have a
nice overall shape. Going to look like
they're a bit floating, but when we connect
it to the clusters, it's actually going
to look quite right, and maybe one more
actually over here, so we connect them just
a little bit more. Like so right, so next
thing that we need to do is we need to make sure
that one more over here. I think it's going
to be quite right. So we can form the shape in any way that we want.
But anyway, moving on. The next thing that we
need to make sure that we fix up the intensity
for the wind. We're going to start increasing it and see how this looks like. So a value of 1.6 is a
little bit too much. Let's go ahead and
set it up with 0.8. So a small slow kind of jitter, so it would look like
there is a small wind. And in regards to
the speed itself, we can make it super slow, or we can make it super
fast, but honestly, I recommend you keeping
it down to a value of 0.3 for a nice simple
type of a wind motion. As for the normal flatten
and emission multiply, we can work on that as well. We're going to start increasing
the emission multiply, and you can see that the
leaves are brightening it up. This is a very type
of a simple setup. In regards to when we want to
just lighten up the leaves. The alternative
would be to make use of something like stub
surface scattering. But in this particular case, it is going to be enough
just to lighten up leaves. As for the normal flatten, if you were to just
drag this down, you're going to see that the
intensity of the leaves is going to be a little
bit stronger. And that's actually
going to help us out in regards to making it more intense
depth of the leaves. And yeah, that's pretty
much it in regards to that. We got ourselves a nice setup. I'm actually just going to grab maybe a couple of more leaves, going to put it up to
the side, like so, and just make sure that
the last branch also has a couple of leaves just like
that or something like so. And this way, we're able to hide the behave over the leaves. So anyway, that's going
to be it for now. Thank you so much watching,
and I'll see you in a bit.
50. Bee Wing Flap Motion: Welcome back on to creating
standing environments in rengedFive The boot
Cam for artist course. In the last lesson, we left
ourselves off by creating a nice tree leaves that has a bit of a
motion within them. I'm actually just going to
maybe add a bit of a more of a cluster just to fk up the overall shape.
And that looks good. We have a nice roundish
kind of organic shape. Anyways, now to move on, we're going to go ahead and go onto our older for breathing
life into the scene. We're going to go
onto the assets, and we're going
to find ourselves a little be to make use out of. So by simply dragging it onto the scene, we can see
what it looks like. I'm going to click F to
also zoom in onto it, and you can see this
little guy is going to be quite useful buzzing
around the Behave. So for us to actually make use of this and having
it flying around, we'll need to firstly
sort out its wings. So just like with the leaves, what we're going to do is we'll get ourselves a nice
material setup. This only has simple basic
materials on top of it, since it's such a small guy, and you can see it split up into just simple basic
color materials. We're going to make
use out of the wings. We're going to
double click on it, and we'll see that it just
has a color for the wings. And yeah, we're just going
to make use out of that. Just liquid it with leaves. Of course, we're
going to make use out of world position offset. Over, in this time, we're
going to set ourselves up with a bit of a
different type of setup. So for starts, we're
going to right click, we're going to get
our elves position, world position, so. This will allow us to
control the motion of the wings in regards to
the position of the world. And we want this to
be added with time, so we're going to click
search for time, like so. Of course, we'll want to make sure that we have
control over this time. So what we're going to
do is we're going to hold M. We're going
to tap on the screen. We're going to hold
S, tap on the screen and call this time multiplier. Like, so we're going to set this up to a bit of a
faster speed since. I want to straightway, be able to have a nice
fast motion for the wings. And we're just going to add this with in regards to
the world position, but we don't want to add it
to the entire world position. We just want to make
sure that we add some offset in
regards to one axis. So what we're going
to do is just we're going to grab this out. We're going to grab
component mask. Like so. And with the component mask, we're going to make sure that
we only use our red axis. And this way, we're going to now add it all up to the time, we're going to hold A,
add it to the area. We're just going to
connect them both like so, which we're then going to output this onto the sine value. So the sine value
is really useful as it creates a sort
of graph motion going up and down so
that allows us to control this overall value. In regards to the entire time. And then we're
going to make sure we have control over
this entire parameter. We're going to hold,
tap on the screen and connect this with a
simple wing flap amount. Like, so we're going to set
the default value to one. Just like that. And now, we're going to
determine which axis it actually is
setting it up with. So for us, we're going to
set it up with Z axis. We're going to firstly tell which axis it is by
using vector free. We're going to hold free
and tap on the graph. We're going to make
sure that this is set up with a value for the Z. So it's going to be going
up and down, like so. But I'm going to
make sure that this is transformed from local
axis to world space. So for us to do that,
we're going to grab it out from this node. We're going to search
for transform vector. So transform vector, it's
going to be just transform. We're going to go
ahead and click on it. There we go. And
now we're going to make sure that it's
set up properly. So just make sure that this is going to be the source
that we're taking, is going to be set
up as local space, and the destination for it is
going to be a world space. It's quite important
for this to work. Otherwise, it's not going
to be set up properly. So just make sure
it's done like that. And, of course, we're
just going to multiply the value like so with in
regards to the whole set up. Finally, what we need
to do is right now, if we were to just
connect this to the whole position upset, we can see that the entire thing just nicely wobbles like so, and we can control
the value as well. In regards to the flap amount, if we were to set this
to something like five, you can see that this
is the type of emotion where we're going to get
the real nice type of a setup to get a B
buzzing type of emotion. The one thing that we need to do is just we need
to have control. We don't want the entire wing to be flapping around like that. We just want to make sure that a specific tection flaps around. So for us to do
that, we're going to make use out of
the vertex color. We're going to right
click. We're going to search for vertex,
color like so. And then we're just going
to use red vertex data. We're going to hold
M, and we're going to multiply this with
the red like so. We're going to then attach it to the world position offset. And we're going to get ourselves this sort
of result back. We're going to now
click Control and S to save it out,
just like that. Then we're going to go
ahead and close this down. We're going to click. Actually, we're going to
just select the B itself. We're going to go
onto the wings. We're going to just select it within a content
browser, like so. We're going to click on it, and we're going to go onto as we're going to create ourselves a material
instance, like so. We're going to go onto the B
itself within a static mesh. So it will be applied, and we're just
going to switch up the wing material with wing
material instance, like that. So changes it for all of the
static meshes for the Bs. Then we're going to go
onto the wings themselves. We're going to start
playing around with a flap amount and
a time multiplier. So for us to do that. We're
going to switch these around. So by switching the
time multiplier, you can see that it starts
flapping around much faster, and by lowering down, you can see the motion being like that. And the difference between
a simple wing motion and what we set up just now is that it only
moves up and down, whereas in comparison to the
leaves as a motion all over. So it's a nice literal
functionality to know about. And when it moves around, you can see it just moving around much faster because it's also combined in regards to
the speed of a B itself, so that's pretty good
in regards to that. Although it's only using
one axis in reference, it's still pretty nice
when it moves around. We can set this up to, for
example, be like this, and you can see it's quite a bit messy in regards to that. But Yeah, having some
bit of a motion is going to help us get a
nice type of a setup. We're going to set this
up for cars as free, and then we can come
back to it later on when we are working with
the particles themselves. Now though, I'm going
to go ahead and make use of the
vertex painting to set the B wings in
regards to the motion. So win wobble next to it. We'll have a nicer control
over the entire setup. We're going to go onto
the selection mode and change it to be a mesh paint. Then we're going to be selected. We're going to go
onto the pain mode. And we're going to
just switch out the paint color from
white to black, just like we had with
the blending part of the video for a scene where we set ourselves
up with the castle. In this particular
case, we're going to make sure that
the red channel, if we were to actually do
non red channel over here. I just going to have
a bit more of a darkened on at the
very start, like so. So it doesn't wobble as
much at the very start. And then it has a nice
gradual change afterwards. We're going to change the
size a little bit as well. We'd have a more type of
this look over here like so. So again, a bit more
gradual type of an exit and it's going to be quite right in
regards to that. And I think that's
going to be quite right. Let's go
ahead and check out. Looks like we're going to
go off the red channel, and you can see that this is the type of motion that
we're going to get. But of course, let's
say that the voble is a little bit too intense in
regards to the motion. We don't want it to be
just kind of b like that, making it look like wings
are partially liquid. We're going to go onto
the wing material itself. And within the sign value, we can adjust the period that it rates by setting
this up to 0.1, for example, and
saving this out. We can see that it creates a
much wider type of a range, and it should or actually,
sorry about that. We need to set this up to a ten. Instead, by setting
this up to a ten, it's going to have
a broader range by setting it to a 0.1, it's going to have a And yeah, having this is going to
give us a nice result. I'm actually just going to try changing it to 100, for example. See how this would look like, and by making sure we
compile the entire shader. We're going to get ourselves
this sort of result. So you can see that it's
looking a bit more like a sign away at this point by just checking the
wings themselves. But of course, we need to now
readjust the flap amount, for example, because it's
very slow in that regard. So I'm going to go back
onto this going to go onto the wing instance and adjust the flap amount
a little bit more. And probably have a bit of
a t multiplier as well. Again, I'm not going
to worry about it too much at the moment
because we have the wing set up in regards to the
speed of the way it moves. So when we have it set
up with the particles, it's going to have
a much nicer type of a motion, as you
can see over here. So yeah, we're going
to leave it as is. And then the next
lesson, we're going to continue on with this crass a nice particles that will allow the bees to be
buzzing around the beehive. So thank you so
much for watching, and I'll be seeing in a bit.
51. Bee Mesh Particles: Hello, and welcome
back into creating standing environments
in rengonFive. The boot camp for artist course. In the last lesson,
we'll create ourselves a nice B wing animation, and now we're going to
continue on with this. And although it looks slow now, once it starts moving
around and buzzing around, we're going to look much
better in that regard, we're going to go
ahead and go on to the breathing life
into the scene folder. Then we're going to
right click and create ourselves Aniagra
particle system. We're going to start off with a simple type of a
fountain or actually, in this particular case, I
think it'd be better with just creating ourselves a
hanging particles template. This will allow us
to just populate the area nicely
within the scene. We're going to click Finish, and we're going to get
this sort of result. And right away,
I'm just going to drag this into the
scene so we could visualize the best later on once we start
setting them up. We're going to now actually
start setting them up. We're going to go onto the
Niagara particle system like. So yeah, first things first, what we need to do is we need
to make sure that we use this B type of a setup for static mesh onto the
Niagara particles. So for us to do that, what
I'm actually going to do is I'm going to move
to the side like so, so we could see the
preview onto our B hive. For us to do that,
we're going to change the sprite renderer from a sprite renderer to
be a mesh render. We're going to go ahead and
delete this render over here. At the very end. We're
going to add ourselves a new render called
mesh renderer. So this is the one that's
going to be allowing us to apply a mesh onto
the particle system. We're going to go all
the way to the top and there it says,
mesh renderer, we need to make sure
that we set this up with a nice mesh, which is going to be within
this array over here. So by default, it should be just a simple type
of a default setup. We're going to
click on this, and we're going to search for B, and we should find
ourselves a nice B static mesh that we
set ourselves with. And this is the type of result
that we're going to get. By default, it's going
to be a bit clunky, a bit chunky, and we
need to first of all, reduce this phone rate. So by changing it down to a ten, I think that's going to be a
bit better in that regard. Then the next thing
that we need to do is change up the
shape location. We're going to go onto
the shape location, and we're going to change
this to be not a box. We're going to change
it to a sphere. So it will spawn in a nice area. Then we're going
to make sure that we use a sphere surface, which will allow us to not spawn the things
inside of the sphere, but outside of it. So by changing it
to a value of 0.7, we should be able to spawn them like the speritus is a
little bit too small, so I'm actually just
going to increase it to a value of my choosing. So I want it to be boning all the way around
the beehive like so. After which we want to make sure we add some motion onto them. So for us to do
that, we're going to go onto the particle update. We're going to add something
called gravity force. So if we were to just
search for force, we have a lot of different
options for the force. And actually, the one
that we're going to be using is going to be called
point force at a moment. Since this allows us to just
grab everything and kind of pull towards or from
the same section. And that's exactly what we want. If we set this up to
a negative value, so we can see that the
bees are actually trying to go to the center
of the point, like so. And that's
what we want. We want to make sure that
the bees are kind of gravitating towards the
behave just like that. Of course, right
now, it's not set up quite in right set up just yet because we don't want them
to be just clustering around in the middle
section of the beehive. We actually want them to
be going towards the be hive and then kind of getting
pushed away from the hive. And for us to do that, we're going to create
ourselves a new force. We're going to add
ourselves a force. This time, it's going to
be point attraction force. So point attraction force works in the same way as point force, except this time,
we don't only have an attraction type
of a strength, we also have a radius. So this radius will create only the force within
a specific area, and that's exactly what we want. Once we start pushing
the bees away, as you can see over here, you'll see that they go
inwards or actually, it works in the opposite way, so we need to make sure
that this is also negative. So although this force of strength by setting it up to a negative value is
going to attract, this one, by setting up to a negative value,
it's going to repel. As you can see, they're not able to move closer to this section. So that's exactly what we want. And we want it to
be just pushed out a little bit further
outwards like so. Something to a value of 400. Let's go ahead and set that up. And we should get ourselves
this sort of result where it's just trying
to go into the B hive, but it's not going too close. Actually, a little
bit too far off, I'm going to change
it back to 200. I think that might
be a bit better. And we just want to make
sure that it doesn't do motion too close to
the center of the Bhive Point. Now, if you were to leave this entire be high just as is, it's just going to
attract to one area. But once we start moving
around this particle, you can see that he's
being bounced around. So what we need to do
is actually we need to make sure that for Ss, the force that gets
repelled is going to be kind of equal in regards to the first point force
that we had before. So the point of I'm referring
to is going to be -3,000. That's actually
quite a high number. But then afterwards, we can
go ahead and make use of it. Inside of our point
attraction force, and I'm just going
to lower this value to something of the
similar amount. I'm just going to change
it to 2000 negative 2000. And now we should be able
to get ourselves a sort of a look that just makes them bounce around
a little bit less. And that makes them bounce
a little bit too much. I'm going to change this
to negative thousand. I'm going to see how
this would look like? And it starts attracting
them to the center point, but it still repels them enough, so not going to give us too much in regards
to the overall setup. Once we start
moving this around, you can see that bees are not just being repelled too fast and they're going
to be quite slow. We're just going to
make sure that we move them around later on, and it is going to give us a nice type of a setup
in regards to that. One more thing
that we do need to fix is in regards
to the position, the location of the bees. So right now, the bees are
set up in a way that's just going to be facing
a random direction. We can fix that by going on
to the mesh renderer and changing the facing mode from
default to velocity base. Velocity base will allow
you to move the bees around in regards
to their velocity, which is actually not doing the right kind
of a motion for us. So I'm trying to figure
out why that is the case. It's trying to follow along in regards to the motion itself, but it's still trying
to rotate it around. And that's probably because of the reset that it has
for the dust particles, and we're just going
to go ahead and remove the aerodynamic drag, like so and wind force. We're just going to go ahead and remove all of them
and there you go. We're going to start getting this sort of a motion, like so. Be start going to go
in the center area, but they're going to be
just stationary if we were not to move
this article point. But once we start
moving it around, we can see the best to be just playfully going
around and whatnot, and it's actually really
really nice type of setup. So for us to actually make it move in regards to
this particle area, what we're going to
do is just simply we're going to set
ourselves up with a nice level sequencer that will allow us to just
move it within a level. And although it's
not going to be usable in other level sequences are real nice for
setting ourselves up with basic type of a motion. We're going to make use out
of this in here as well. We're going to create
ourselves a level sequencer. I'm just going to call
this B level sequence. Okay. And I just realized that we
have not renamed the Niagara particle system. I'm going to call
it the particles. We're going to open ourselves
up with a level sequencer. We're going to make
sure that we have the B placed within
the sequencer itself. So for us to do
that, we're going to open ourselves up
with a sequencer and just drag the selected Niagara particles from
the level itself, drag it onto this area. We're going to start
tracking the transformation, which will allow us
to make sure that we get ourselves
a nice location. We're going to just
create a couple of location points in
regards to its time, like It's going to move in
regards to the time frame. Then move this over here, for example, and
move it like so, and finish it off with probably getting it at the very end
as well, just like that. So now, when it moves, it's going to look
something like this. And yeah, that's pretty
much it in regards to that. We can make more
complicated motion to have more organic
type of a look. But just by setting it up, like, so we are going
to have ourselves a really nice type of a setup. And to finish it off, what we're going to do is just
simply we're going to make sure that the
level sequencer is going to be dragged with
into the scene, like so. And it's also going
to set set up with automatic play at the
bottom right in the corner. And furthermore, it's going
to be set up with a loop. So it's always going to
be looping indefinitely. Now, once we hit the
simulate button over here, we're going to see that
this entire section is going to just give us a
nice motion for the bees. The bees are going to
be buzzing around. They're going to be slightly
aggressive perhaps. And I reckon though it's going to be quite
nice looking overall. We might though need to
take off some of the bees. It's a little bit too dense in regards to the bees. I don't
quite like that. I'm going to take off this
small be as well that we had placed within the scene
to set up the material, and now we're going to lower the count in regards to
the bees buzzing around. We're going to go onto
the particle setup. We're going to go
onto the spawn rate, and we're going to just
make it slash in half. Now if we were to clear
control it S, save it out, we can go ahead and simulate this and see how this
would look like. And yeah, just moving
around, buzzing around, like so, it looks
really nice overall. So yeah, that's going to be it in regards to the
setup for the bees. Thank you so much for watching, and I'll be seeing you a bit.
52. Animated Bird Setup: All, welcome back everyone to creating standing
environments in real nginFp the
bootcamp for Artis course. Within the scene where we create ourselves motion and life
within the environment. We're going to now make sure
that we grab ourselves in nice animation of a bird
flying across the scene. And so for us to do that, we're not going to actually make use of this static mesh as you
look at the assets folder, you see that This bird
is just a static mesh to actually make use out of the bird with all
of its animations. We're going to import it
from the resource pack. So let's go ahead
and open that up. We're going to just drag this bird into our
folder, like so. Drag and drop it.
It is an FBX file, which means that we're able to save out
animations within it. So the bone set up and effing of the sort is already set up, and unreal engine
is not really good with weight ainting the bones, so the stretch of a motion within the bird itself
would be properly fixed. But anyways, for us
to make sure that we have the bird
properly imported, we're going to make sure
that the skeletal mesh is properly placed
within the scene. So this should be by default already ticked on because
the reason being it detects that this mesh has bone structure
within its FBX file. So it's going to be
ticked on by default. Another thing that we need to
do is go down to animation. We also got to make sure that
we import animations and the animation length is going
to be set as exported time. So with these settings, we're going to be
able to rob ourselves a very nice type of setup of animation
for the bird blank. We don't need to change any
of the settings anymore, we're going to keep them as is. We're just going to make sure
that the skeleton is being imported and everything
is set up as is. Once we do import our
selves up with a bird, we're going to get our elves
this sort of a result. And as you can see,
it doesn't have anything in regards to
the colors or textures. We're going to quickly
change them up first. We're going to make sure
that this is nicely set up. We have four
variations of a bird, and you can see
underneath the fum nail, there is a sort of
aller stripe which identifies and shows you in regards to what type
of a set up it is. So the first one is going
to be skeletal mesh. If we have it over,
we can see in the bracket it says
skeletal mesh, Then the second one
animation sequence, physics assets and the skeleton. All of them are necessary to set ourselves up with
a nice animation. But before we do that,
we're going to go ahead and open ourselves
up with the mesh. And if we have a look
at the asset itself, we're just going to change
the materials real quick. It's going to give us
this sort of window. It's not going to do anything
at the moment, but yeah, we're just going to
make sure that we are within assets detail tab. If you're not seeing
this detail stab, just make sure to go
onto windows and just make sure you have this
assets detail stab ticked on. And then afterwards, we're going to change
them up real quick. We're going to go
on to the textures, like so we're going
to find ourselves the bird material that's
already preset for us. And I'm just looking
for where they are. They're going to be over here, and I'm just looking at
right type of a setup. Okay. First one is going
to be if we isolate it, it's going to be the body
itself. This is the body. It should be renamed a bit
differently for you to make it easier to follow this along. But I'm just going to quickly
attach all of them like so, and the eyes, I know
they're purple. They should be these
ones over here. Final these ones for the
bird wings, and there we go. We got ourselves a nice set
up for the bird itself. And if we were to just
drag and drop this, we can see that this
is how it looks like. It looks identical
to the mesh before. We're going to now delete the mesh that was
within a scene. And continue on
with the process. So now, the skeletal math, basically, if we were
to double click on it. This is the main one. The pink highlighted one is
going to be the main one. And as everything already attached in regards
to the bones, all the bones are set up. If we were to try to move
them, for example, click W, we can just them moving
the bird type of a wing. Of course, it's not set up
for this type of motion, it's set up for rotation. So to flap the wing
around a little bit. And the motion itself where it's saved up is at the very
top right hand corner. If we click on this
button over here, we can see the motion
being set up over here and it's just flapping its wings
around happily, like so. So for us to actually have
the animation in here, we'd need to go on to the preview and change
the animation over here. But personally, I
just prefer to go within the scene itself
once I drag the bird. So we're going to be on the
bottom right hand corner, we're going to see
the same type of set for the animation mode. We're going to change this
up to be a custom animation. So use animation asset,
this one over here. And then you can see there is a green highlight
for the selection. We're going to make
sure that to grab and drag and drop it into
animation play like so, and it's going to give
us this sort of result. It's actually going to be
quite small in regards to that in regards to
the bone setup. We're going to make sure
it's a bit bigger like so. And now we're going to check
if it's actually working, and we're going to
make sure that it's a to looping because this is a nice looping animation
of birds flapping around. We're going to make
sure we simulate this, and it should give us
this sort of a motion. So it's going to
have a nice type of a bird flying around like so. And yeah, in regards to that, we're going to make use out of the bird to just fly
across the scene, and I will show you how
to set it up using again, level sequences since it's
easiest kind of a way. If you're working
on multiple levels, it's not recommended
to set it up like that because this type of a motion within
a sequence can only be used once per level. And if you're doing it again, you'd have to set
up a fresh type of a level sequence from
scratch, so there is that. But it's very useful in
regards to getting control over a nice type of a
set up for an animation. We're going to set ourselves
up with a new sequence, call it bird animation sequence. So we're going to double
click to open it up. And for now, we're just
going to grab ourselves the bird and drag it in just
like we did with particles, and it's going to give us
a nice transformation. So for the transformation, we're just going to make
sure that we click at the very start and go to the very end by clicking
this button over here. So now we're going to
drag it across the scene just like that and lick the
transformation tab again. So it's going to give us
this sort of a motion. Of course, it's not moving now because it's not simulated. So we're going to
fix that in a bit. By seeing it with a simulation, we can do it by going back
to the content browser, adding the bird sequence
animation onto the scene. I'm going to click
G, so I could see where it is. Here we go. That's icon. And
I'm going to make sure it's set to
autoplay as well. And we're going to make sure it's also looping
indefinitely do. Right now, when we're setting it up in regards to
the motion itself, if we were to just click Play, going back
to the sequence, if we were to just hit
play, And actually, we're going to play by making sure that we play
within a selected viewport, though it plays
all the sequences and animations all at once. It's going to give us this sort of result where the bird is flying across and then it
just kind of resets itself. So in order for us to fix
that kind of a flickering, what I recommend you doing is, first of all, make sure it goes outside of the camera in
regards to the final shot. So we might want
to take this bird and just extend this
overall flying process, like so, I'm going to
go ahead and do that. Extend this for the very start. So I'm going to go onto the very start as
well on the front. I'm also going to make sure that this is set all the
way to the back. So again, I'm making
sure that this is set up in regards to the
very start of the sequencer, and now I'm going to
reset it like so, and now I'm just
going to play it like this and it's going to be
flying across like so. So actually, it's a
little bit too far off. I'm going to go ahead and just reset it in regards
to the motion itself. I'm going to make
sure we have it a little bit closer in
regards to when it starts. I think it'll be better in regards to that. Let's
go ahead and do that. I'm also going to make sure
it's set as a linear motion. So we have a constant speed
in regards to the flying. I'm going to select all
of these key points, going to right click. Set it up as a linear. And then the next
thing, one final thing that we need to talk about
is how it would look. By default, if we
were to just have it reset, it starts off. Every time it resets, it goes back from the first
frame to the last frame, and it can be instantaneous, but sometimes when it does
that, it has a quick, kind of a smush motion
across the scene, and we usually don't
want this to happen. So in order to avoid
that kind of a motion, what I tend to do is at the very start, and
at the very end, I tend to just lower
everything and make sure that the motion itself goes
across underneath the map. So what I mean by that
is at the very end, instead of just the frame ending at the end of our sequence, I'm going to move the
sequence a little bit back. So at the very end, it's going to then go
into the ground itself. I'm going to just drag this entire bird all the
way to ground like so, to make sure it goes
underneath the scene, going to add a keyframe
just like that. So you can see there
is visual lines that makes it go straight
it down like so. Going to make sure
that we have it as close as we can in
regards to the frames, which is going to be
instantaneous like so. And then in regards to
the starting point, we're going to pretty
much do exactly the same. We're going to make
sure that the key frame starts like so, and then the very starting
point is going to be dragged down underneath
the scene just like that. It's going to give
us a very fast type of emotion in regards to that, go to make sure that we also just zoom in in
regards to the bar itself and get it as close to it as possible,
just like that. And I think that's
going to be good for our animation for our setup. Going to make sure
that we have it set up nicely in regards to it, again, being as close
to it as possible. So basically, what
we did is we ended up making animation Actually, I just realized you
can see there's a massive triangle over here. I realized that I
mixed these two up, so it's going to give us
the wrong kind of result. We need to make
sure that the frame is set up in regards
to the motion itself, we to be going underneath
the map afterwards. So I just ended up switching
them around as you can see. This is the frame
that it gets cut off to the very end of
the environment. And then the next frame is going to be underneath
the environment itself. So what I did was basically
with these controls, you can see the type
of emotion it has. It goes up, appears
at this area, and then flies across
and then goes down. And with this kind of emotion, when we have it set up like so, We have a sort of
a constant loop of the bird flying across the
sky, if we were to hit play. We can see it flying around. And once we have the camera
kind of set up in this area. So we are not going
to see it appearing. It's just going to
be flying in and out of the environment
just like that. And that's actually exactly what we want in regards to animation. We want to make sure it loops
nicely in regards to them. And it's having some nice
flicker for the leaves. It has the bees buzzing around, and of course, the bird flying
across our environment. And yeah, that's
pretty much it in regards to the setup
for this environment. So thank you so
much for watching. And in the next lesson, we're going to
finish ourselves off with a blueprint
type of a level. We're actually just
going to go ahead and open this up right away so we can start this off
in the next lesson. So thank you so
much for watching, and I'll be seeing you in a bit.
53. Setting up First Person Gamemode and Blueprint Basics: Hello, and welcome back
everyone to creating studying environments
and real Engine five. The boot cam for artist course. In the last lesson,
we last ourselves off by breathing in some life into the environment
by setting up some nice foliage animation, as well as bees
buzzing around and the fly of a bird going
across the environment. And now we're going
to continue on with the setup in regards
to the next level. We're going to work on
the blueprint stuff. I think it's essential to
learn the blueprint setup for unreal engine in regards
to making use of of it for an
environmental artists, for example, or just if anyone is using unreal
engine in general. Anyways to start off, we're going to go ahead
and actually start by setting ourselves
up with a character. It's by default going
to be played out, and nothing's going to happen. The reason being is that we need to grab our selves a character to replace
within the scene. So it's actually rather easy to set up with a
different game mode. We're going to create ourselves a first person character
that will allow us to open and close the doors and just to
interact with the scene. So to do that, we're going to
go on the left hand corner. We're going to go within a content browser and
click Add button. To add this game mode, we're going to go onto the
add feature or content pack, like so, and this gives us
a lot of different presets, and we just want
to make use of of a blueprint for a first
person character. So let's go ahead and select this and add it to the project. By simply adding on it, we are going to be able to just grab it right into
the content browser. You can see if we were to enter ourselves the content folder. We're going to have
ourselves first person arms, first person, and just new
folders within the scene. We're going to open ourselves
up with first person. We're going to find
ourselves blueprints. And there are
multiple blueprints. But first of all, we'll
need to go ahead and create ourselves a age
of different game mode. So whatever we play,
we're going to be able to just spawn
as a first person. So for us to do that, we're going to go onto
the top left hand corner. We're going to go on to edit. We're going to change the
project settings like so, and we're going to go on
to just search for mode. By searching for mode, we have ourselves default gay mode. We're going to change this
now into the first person. I'm going to find the first
person gay mode over here. And by just clicking
on this window, we should be able to find
person in this section. If you're not able to find it, just make sure to
click and drop and then drag it into
this area over here, and it should give you
the right results. Now, when we have this
saved out and close it, we should be able to play it
and it should spawn us into the scene. Like so. And now we're able to walk around the scene and
make use out of this. That up. And I'm going to go ahead and stop
the simulation. So we're able to now go ahead and make use
out of the scene. Make sure we actually spawn in area where
we want it to be, which is going to be
in front of a door. We're going to
first of all create ourselves a player start point. So it's actually
quite simple to do. We're going to click
on this button over here, top left hd corner. We're going to
search for player, and we're going to just
click and drop and drag it into the scene
for the player start. The area for where
it says the arrow. Well, first of all, let's go
ahead and fix the bad size. The reason this
happens is because it was within a collision. We're going to make sure that it just goes right
above it like so. There is a blue
arrow which shows which way it's going to
be facing for the player, so we want it to be
facing the door. I think that's going to be much better in
regards to that. We're going to now hit play,
and it's going to show you that we are actually
starting in this area. So no matter how we
position our camera, we're going to start in
this section like so. All right. So now that we have the basic
type of a game mode setup, we're going to go over
the basics of blueprint, an introductionory
type of a video to just get you more
familiarized with the setup, and that will help
you to just be more knowledgeable about
what a blueprint is. So yeah, without further ado, let's just get into the video. And, welcome, every on to the
basic video for Blueprints, in which I'm going to explain you everything there
is a need to know about blueprint system
within Unreal engine five. So to side of, what
I'm going to do is, I'm just simply going to right click on our content browser, and I'm going to select
blueprint class, which by default is going to
give us a bunch of options. In order to get ourselves a fresh and empty
type of a blueprint, I'm going to make sure
I click on actor, and this will give me an empty actor that we're
able to make use out of it. We can also change up the name, but I'm just going to
click off of it to get ourselves a new blueprint. And essentially, if we were to double click on
it to open it up, what this will do
is, it'll give us an editor for the
blueprint itself. And yeah, what blueprint is it's a combination of
a code asset and everything you want to have
within a single bundle. It's a sort of a pretty
fab for unreal engine. So if we were to change
this within the editor, it's going to be changed
within unreal engine itself. Currently, I'm just going to
close this down real quick, and I'm just going to bring this onto our game engine, viewport. I'm just going to
drag this outle so, and we can see that
it's completely empty, and we can click G two, see the icon itself, and I'll go even further and just make a
duplicate out of it. So we can see how
it behaves when we're adding a couple
of items within it. I'm going to click Control D to make a duplicate,
put it to the side, and now we have two separate
icons that don't have anything if you
click the G to go into our game view and
hide all of our icons. We can see that
there's nothing there. So with that being said, I'm going to go back
onto the blueprint. I'm going to double click on it, and I'm going to see
what's up we've done. I'm going to be greeted
with this window, which is essentially because
we don't have anything within this blueprint and to open a full blueprint editor, which is going to click
on this text over here. But click on it, we're going
to be able to open ourselves up with a proper full
blueprint editor. I'm going to maximize this. And now, the main things
that we need to know is essentially there are free
viewports within a blueprint. There is something
called viewport, which will show
us a free D space of the blueprint itself. There's also a
construction script, which will allow us to add options and settings
onto our blueprint, which would work not only when the editor is
played or simulated, I will constantly be working. And finally, we
have event graph, which will allow us to do
coding for the blueprint. And we have a couple of
options that allows us to potentially start the code
whenever it's being played, whenever the unreal
engine gets hit play. It also has an option to
overlap, and finally, it has an option
to run the code on every single pick or
frame of the engine. But now though, we're going
to go back onto the viewport, and we're going to
talk a little bit more of the other options as well. We have components tab which
will show us everything in a similar manner
to an outliner within our game engine. We also have graphs
options, macros variable. So this is everything
for coding, essentially. Then on the right hand side, we have options detail tab which essentially will work
in the same way as for materials or for just objects
within our unreal engine. I'll show us details based
on a selection that we have. So for example, If
I add a component, which we can do so by
clicking a button over here, we can search for box like so. We have a couple of
options to pick from, and one of the options we can
choose is going to be cube. If we were to select
cube like so, we're going to essentially
create or sells a cube. The options for the V port are pretty similar to the
ones that we have. Within the game engine itself, and by holding
right mouse button, clicking and holding
right mouse button, we're able to move
our camera around. Cicking WASD will allow us to move our camera
around like so. We can also use our
scroll wheel to move it out and in
and out like so. And by clicking and holding
middle mouse button, we can simply pan our
camera around like so. Alternatively, left mouse button is giving us this
sort of an option. We can click F to recenter onto the center
of the selection. So yeah, going back
to the detail stab, we have cube selected, and we can see the detail
stab for the cube in here. And that's going to give us all the necessary
information and control over the viewport
that we have over here. Now, for example, if I
were to close this down, we can see that we have
cubes in our level. And these cubes are
basically blueprints. So what this will mean
is if we were to select this and we can click edit in blueprint
within a detailed stab. We can change the options
from within here, and if we were to lower
this down a little bit, were to select this object,
we can, for example, click art to go onto
our scale mode, and we can now simply drag this out in
and we can see that both of these objects are
being scaled upwards, like so, So, yeah, anything that makes use out of the blueprint will
be changed like so. And, yeah, that's
essentially it for the basics of blueprints. I hope that the information was informative and how let's
get back to the video. Alright, welcome back, everyone. I hope that the video
was informative. And now in the
next lesson, we're going to continue on with the scene and actually start setting ourselves
up with blueprints. So thank you so much for
watching, and I'll see it a bit.
54. Creating Blueprint Prefabs for Asset Collections: Hello, and welcome
back on to creating studying environments
in unrelented five. The boot camp for Artist course. In the last lesson, we
introduce ourselves with the basics of a blueprint. And now we're going
to continue on by actually starting to
make use out of it. And the first use
out of the blueprint is to make use of it to
create a collection. That will help us to
just populate the scene. So within assets area, which have a simple
type of a castle break, we're going to just
drag it into the scene, and this is how it looks
like the very basic type of a mesh that's really nice
for us to make use of, we can set it up, for example, to create ourselves
with some tiles. But before actually
we start doing that, what I'd like us to
do is just to make duplicates out of it in
regards to this area, and I'll show you how to use it in regards
to the components. We're going to hold Alt, we're just going to duplicate
a couple of them. And if I were to make a little bit more
of an extra duplicates, just like that I'm
going to get ourselves a really nice type of
a setup or the bricks. And to have some variation,
what I'm going to do is, I'm just going to rotate them around a couple
of them like so. I'm going to just
bring them out. I'm not going to worry about in regards to how they're
laid out and whatnot, going to have some of
them going inwards, going to have some
of them rotated completely around like so. And by setting it up like so, we're able to get ourselves some nice variation
within just this part, but doing it for
an entire path in entire area would be just
way too long of a process. So instead of just remaking it and just duplicating
it and whatnot, what I prefer to do is just
have this selection selected, like so, the entire
selection selected. And instead of
just grouping them up by clicking Control and G, We're going to go into the
top left hand section. We're going to go onto
the blueprint stab, and we're going to convert
the selection of all of these six bricks
that we have over here. We're going to convert
it to a blueprint class. And this way, we're going to get ourselves
a new blueprint. We're going to make sure
that we harvest components. And this way, we're
going to keep all of its names and all of its
assets properly set up. And then for the blueprint name, we can change it over
here to something like tile VP,
something like that. We're going to make sure that
the path is set to assets, and we're going to click Select. And once it's done loading up, this is the result that
we're going to get. We're going to get pretty much the exact same type of a layout. Which we now can
make use out of. So if we were to
close this down, we can see that this is the
blueprint that we created, and we can pretty
much have ourselves just a duplicate
out of these and create a nice tile in the area. And we can make use
out of these to just create a nice
pathway over here, for example, and will
look pretty nice overall. So something like that, perhaps is going to look quite nice. And maybe actually
lower these down. No, that's not going
to look it's nice. I'm just going to
go ahead and use this for the backside over here. I'm going to just rotate them around a
little bit like so, and I will show you how to
make a better use out of them. And actually, I'm going to make them a little bit
smaller, like so. And yeah, we're going
to have a nice path going towards this
overall section, like so. And as you can see, just
by having it like this, it might look quite nice, but if we want to make a couple of additional adjustments, what we can do is we can go onto the blueprint class itself
by double clicking on it, and we can go onto the
viewpoar tab over here. And just by making use of these, we can adjust them afterwards within the blueprint itself. And as you can see,
if I were to make this smaller window to the side, we can raise this and all of the blueprints that make use
of this blueprint setup, it's going to be
changed as well. So with this in mind,
we can just make some adjustments within
this tab over here. We can have some of the tiles, for example, more rotated, some of them more
inwards, like so, and it's going to just update it instantaneously
within the scene. And so it's really useful
for when we want to create some nice
variations of presets. That will allow us to make some non destructive type
of adjustments afterwards. We can even, for example, make this tile bit
larger and smaller, and it works pretty
much in regards to the blueprints the
same way as it does for the scene
where we can click WE and R to just
make use of gizmos, to just rotate it or
move it around like so. And One of the
things that I'd like to mention is in regards
to this overall setup. If we want the setup to
be different variations. For example, if I'd like to have this setup over here for the top of the roof tiles or
not the roof tile, sorry, just the
top of the cliff, just to make it look a
little bit more interesting. I'm going to add it. So
if we like for example, make use of this and you can
see that it doesn't look quite as nice and we
want to adjust it. We don't want to adjust the tiles that we have
at the very bottom. What we'll need to do is basically we'll need to create a duplicate out
of this blueprint. So I'm actually just
going to go ahead and delete this out real quick, make a duplicate control
C control V there you go, and now we can just
put this at the top. And again, the reason
I'm doing this is because if you want
to make adjustments, but this we'll need to make sure that we have a nice
setup like so. We can now go ahead and
open this blueprint up. Go to the viewport,
and now once we start adjusting these over here, for example, if I want to lower the down at the very side, so and do so. And you can see that
these are changing, but the ones at the bottom, because they're different
type of a blueprint, they're not going to be changed. So it's a quite nice type of a way to make use of
this entire setup. And something like this
might look quite alright. Just like that, we
were able to make some nicer variations out
of this entire setup. And yeah, that's pretty much it. We're going to go
ahead and delete this one over here on the side. It was a rather short lesson, but now in the next lesson, once we touch the
blueprints a little bit to just familiarize
ourselves with it, we're going to continue
on with this and make ourselves a door that opens in regards to
this section over here. So, yeah, thank you
so much for watching, and I'll be seeing you in a bit.
55. Blueprint Door Animation: Okay. Hello, and welcome back everyone to
creating studying environments in
Unreal engine five. The bootcamp for Artist course. In the last lesson,
we loss ourselves off by creating some nice
blueprints that we're able to make use of for
acid collections to generate some nicer
environment detail, and now we're going
to continue on in regards to the
blueprint setup. And this time, we're going to make sure that the
door that we have over here actually allows us to be able to open it
up and close it. So right now you
can see that if I were to click and select
on a door and click, we can just rotate this door and open it and
close it like that. Of course, we'll want to set it up in regards to the
blueprint itself. But for now, first
things first is that we need to make sure
that the origin point, the pivot point that
we have on a door is actually set up in
regards to its hinge, because we're going
to be making use of this pivot point to rotate the door just like
we're seeing over here. So, in case you're
using a custom door or something that allows
you to open and close, you'll want to make sure that the pivot point is
set up properly. Luckily, it's rather easy to do that with an
unreal engine itself. If you were to go onto
the top left hand corner, you're going to
be able to change the selection mode
to modeling mode. If you don't see
the modeling mode, just make sure to go to edit logins and you'll want
to search for modeling. Like, you should have yourselves something called modeling
tools editor mode. Just make sure to
have this enabled and then restart your engine. Bottom right hand corner
should have that option. And then afterwards,
you should have yourselves a modeling
tool kit mode. Once you go inside of it, you'll have a bunch of options, but we're going to be only worried in regards to
where the pivot point. Is. And for that,
we're going to go all the way down to the
transformation tab. Within the transformation tab, there's something called pivot. Once we selected,
we're going to have ourselves a b different gizmo, so this gizmo is a sort
of all in one type of a functionality that allows us to rotate it
and move it around. We only care about
moving it around, so we're just going to
make sure that this pivot is basically set up to
the corner of our door, which it is at the moment. I'm not going to be too
concerned in that regard, as it's mainly to
show you that type of a way to basically change up the pivot
point if you need so. And once you're happy with it, just make sure to accept, and you should be
able to just have a nice pivot point that allows you to open
and close the door. And yeah, in regards to
that, that's pretty much it. We're now going to go back
onto the selection mode, so we wouldn't have the
menu on the left hand side. We're going to make use out of this door and set it
up as a blueprint. We're going to select
the door itself, going to convert this
door to a blueprint. So let's go ahead and convert
it to a blueprint class. We're going to
harvest components just like we did with the slabs. And we can call this one a door P so Let's go
ahead and click Select. And this is what
we're going to get. And yeah, within it, we're going to have ourselves a viewport with
just a static mesh. Of course, we'll need to
set ourselves up with a nice blueprint that allows
us to open up this door, which in this case, we're going to
make use vv graph. So let's go ahead
and go into it. This will allow us
to call up a script, a blueprint script that
will open the door. So for us to start off, we're going to make use of the then begin play type
of a executable. We're going to drag
it out of this, and we're going to set
ourselves up with a timeline. Let's go ahead and
search for timeline, and we're going to create
ourselves a new timeline. This is how it gets usually animated in
regards to the blueprints. We're able to make
use of a timeline to determine the type of motion
that we're going to one. Now we're going to go
back onto the viewport, and we're going to
just select on a door. We can see that this is being selected, static mesh component. That's what we want in
regards to the selection. So we could just rotate
the door around. We're going to go back onto
the event graph and drag and drop this static mesh
onto the area like so. So this is our door. Then we'll want to basically set ourselves up with a
rotation from this. We're going to drag this
outwards like so and just get ourselves a set relative
location, sorry rotation. So let's go ahead
and look for that. Relative rotation. There you go. Is that relative rotation? We're going to go ahead and just add it onto our blueprint. And we'll want to make
sure that it gets executed the moment the
timeline gets laid as well. So we're going to use the update to just attach
it onto the graph like so. Then we'll want to go ahead
and actually make use of this set relative rotation to make sure that we rotate
our object around. We're going to firstly, right click on the
new rotation and split it construct because we only want to be rotating
it in the Z axis. So it would be rotating
the door to open it up. Like, so. As for the
animation itself, we're going to go
onto the timeline, and we're going to
just double click on the event timeline, and within it, we'll
see this type of a sta. By default, it's going
to look quite empty. So we're going to
add ourselves track. We're going to add a flow track, which will allow us
to get ourselves this sort of a graph. And this graph is very
useful when we need to make use of more fluid motions
within the scene. And we're going to zoom out
first using our mouse button. And we can see that it has
a highlighted area 0-5 because the reason being
is that the length that we have of this graph
is actually set two five. We're going to want to set
it up to something smaller. For now, we can just
set it up to something like 2 seconds is good
enough for a door. It really depends on the speed of the door that you
want it to be opened in. But yeah, having it set as 2 seconds for the door
to completely open. I think that's going
to be quite right. Then afterwards, we're going
to right click on the graph, we're going to add a key,
and we're going to right click on another end
and add a key as well. So we have two keys. Of course, we need to make sure that we set them up properly. So for starters, we're going to select the
one on the left. We're going to then adjust
the options manually. Instead of just clicking
on holding and dragging, we're going to be
using the values on the top to change
the time to be zero. So the first value will be
starting at the very start. And then the value is going
to start at zero as well. Now, the second key is
going to start or sorry, at the time of two. So it's going to be played
at the very end, basically. And the value's going to
be is going to be one. So once you start off
in regards to the time, it's just going to be played at the timeline and it's
going to gradually go 0-1 in regards to
the value itself. Of course, we don't
want it to be just a gradual kind of
increase, just a constant type. We're going to go ahead and
select both of the keys. We're going to make sure we click and use automatic
interpolation. So now you see that the graph starts off slowly
and then kind of speeds up in regards to the way it moves
within a timeline. And, yeah, that's pretty much it in regards
to this setup. That's all we need to set it up. We set ourselves up
with a value 0-1, so we can now go ahead
and close this down. And if we were to just simply use the value of zero to one, we could just attach the
new track type of value, which is over here to
a value of z rotation. But the thing is, we only set ourselves up
with a value of one. The reason being is
that we want to have a bit more control for the door in regards to how it opens up. So we can actually on the
bottom left hand corner, great ourselves a variable, which is going to be,
we call it angle, like so, and we can change
the bully in to a float. There you go. And now,
once we drag this out and get ourselves an angle, we're going to be able to
control the angle of the door. And we're going to
also make sure that this over here is tick toon, which will allow us to
change this type of parameter from within
the port itself. And let's say an angle
is going to be at 90 degrees and the final
timeline is a value of one. So it's going to be
just a 90 degrees type of a way for a door to open. But of course, it's
going to start at this value of zero
within a timeline. So it's going to
gradually go upwards to a value of 90 0-90 degrees. And the way we're going
to do it is, of course, we're just going to
set ourselves up with a simple multiplier. Like so. We're going to click Enter
and grab our selves a simple, very basic type of a multiplier
to combine these two. Then afterwards,
we're just going to attach it to the rotation. We're going to click Control and S and see how this
would look like, and I'm going to make
this a bit smaller. We're also going to need
to before I forget. We also need to make sure we compile the blueprint itself. If we don't compile
the blueprint, the ads that we
added onto the door, the code itself is not
going to be played out. So that we hit play, it should start opening
up, but, of course, I forgot one more tiny detail, which is going to be that angle. So the angle, by default, we left it as zero, zero. Now, if we have the
blueprint selected and go onto the bottom
right hand corner, we're going to have an
option called angle. If we were to change this
something to 90 degrees, we should have this
door opening up. So that's pretty much
it in regards to that. If we wanted to go up way,
we can do so as well. And I'm actually just going to lower the angle to
something like 70. I don't want the door to
be opened all the way. But as you can see,
changing it to a negative value is going
to open it up, like so. And I just realized that it
might still be not enough. I'm going to change
it to negative 85. Let's see if we're able to squeeze through in regards
to the door itself. And that looks quite right. Let's go ahead and
move on with that. We're going to now
close it down, so we have a way to open a door. And of course, we
need to make sure we set ourselves up in regards to the blueprint being played when an action
key is being hit. So we're going to do
that in the next lesson. And yeah, thank you so much for watching, and
I'll see in a bit.
56. UE5 Interactable Door BP Setup: Hello, welcome back
everyone to creating setting environments
in re engine five. The boot camp for Artis course. In the last lesson,
we set ourselves up with a nice animation
play for the door, and now we're going to
continue on and make sure that the door is actually
interactable within the scene. So for us to do
that, we're going to make sure that we go on to edit. We're going to go onto
the project settings, and we'll need to set ourselves
up with a new input key. So that's going to
be rather simple to do for a basic type of a door. We're going to go all the way to the input section over here. We're going to then cick on
action mapping, like so. It's going to create ourselves a new action mapping button. We can call this one action
button, just like that. And we're going to
then make sure that we expand this and
set it up with a key. So I'm going to click on
this keyboard over here, click on my keyboard, and then it's going
to be applied like. So After we're done with that, we're going to go ahead and
close this down, like so. Then we're going to go back onto the Blueprint event graph, and we're going to right click and we're going to
search for button. Or not button, sorry,
action button. So we're going to
get ourselves an executable out of the setup. And yeah, by just attaching this executable with the door
type of a blueprint. I'm actually going to grab
all of this blueprint setup, and I'm just going to attach
it when it's being pressed. When it's being pressed, it's going to activate this door. I'm going to take it
off by holding control and just removing it from
the event play itself. So only now it's
going to be executed. I'm going to hit control and S and see how this
would look like. We're going to hit play, and then when we hit E, it's going to start
opening the door. Which is actually not
going to be playing because I just realized
we forgot something out. I'm going to hit escape, and the reason it's not playing is because
we actually need to make sure that we
enable this input. And yeah, the way
we're going to enable it is from begin event play. We're going to cast it to a blueprint for a third
person or a first person, that is, we're going
to drag this out. We're going to just search
for BP first person, and we're going to get
our sell as a character. So Cast BP first person
over here, like so. Then as for the input, we're going to then drag this to execute and enable input. So enable input, if we
were to set that up, so, we can now hit control and S and see how
this would look like. We can now hit play. And now the door is still not
going to be working. The reason being is because we don't have enable
input set up, which would allow us to enable
this button to begin with. Luckily, we can make use out of this not only in regards to
just enabling the button, but making sure that the
button is enabled only when the person is getting
closer to the door. So yeah, we're going to
make use out of that. We're going to
make sure that the door is being set up with it. And so for that, we're going to go back onto the viewport, and we're going to create
ourselves with a trigger box. We're going to add a new item. We're going to start by just
having a collision box, which we're now going
to be able to make use of to set it
up as a trigger. So first of all, we're going to need to make sure that
we have ourselves, the box placed directly in front of the door.
We're going to expand it. So on both ends,
the player could be able to open it up, like so. And I'm going to make
it just a bit smaller. Don'th of the sort will
work quite enough for us. And yeah, after we're
done with that, we're now going to go
back to event graph. And if we look at
the box itself, once we have the box selected
within its component steps, we can go all the way to the bottom right hand corner
within its detailed steps, and there's a bunch
of component events that we can make use out of. The one that we're going to
need to use is going to be starting off with
component begin overlap. Let's go ahead and click
Plus symbol to add it onto our blueprint event graph. And then we're also going to
go back onto the box itself, and we're going to make
sure that we add overlap. So this way, we'll
have control in regards to when a player enters
and when a player exits. We're going to start off by just getting
ourselves a blueprint from this to be casting it to
our first person character. So let's go ahead and
search for first person. We're going to cast it to the blueprint first
person character, like so, and we need
to also make sure that we attach our actor to this
object, just like that. Afterwards, we just need to make sure that from
this character, we enable the input, enable input like so. So this way, we're able to enable the input for
the interact button. And after we leave the box, which is going to
be on end overlap, we need to make sure that
we have this disabled. So we're going to just
click Control C, Control V. With the selection
for these two, we're going to attach
this over here, like so. And instead of enable, we'll want to disable
input, actually. So we're going to
go ahead and click search for disabled
input like so. We're going to grab
ourselves this blueprint, and we're going to attach it
over here just like that. Now we're going to go ahead and compile it and
actually just realize that every actor within this object needs to
be attached as well. One of the final
thing that we're left to do is we just need to make sure that we get
a player controller. We're going to right click. We're just going to get
player controller like this. Player controller,
this one over here. We're going to attach this
to the player controller, and we're just going to do
it for both of them like so. And now we enable and
disable the input. We're going to save
it out, compile it. Everything looks good. And if we hit play, we're going to stand inside
of the box of a collision, and we're going to be
able to open the door. Of course, now we
just need to make sure that we close the
door when we click. So what we're going to
do is we're going to just inverse the timeline setup. This is already set
up quite nicely. We just got to make sure that
every time it hits play. The next time it hits play, it's going to invert
this animation. For us to do that, we're
just going to right click, search for a flip flop, like so. We're going to add
it onto our project, and we're just going to
attach it to the value of A. And then for the A itself, we're going to
attach it to play. O B, we're going to
reverse the animation. And this way is going to do 1-0 instead of the vice versa. We're going to compile onto
the upper left hand corner. And now, once we hit play, we can open the door and
hit to close the door. And that's pretty
much it in regards to the setup for
the door animation. We can make it a little bit
more intuitive in regards to the player area by going
back to the viewport. We can attach ourselves
a simple text that says press to open. Let's
go ahead and do that. We're going to click
Add button over here. We're going to just search
for a text render, like so. We're going to just
add it onto the scene. And we're going to first of all, rotate it, so it
would look better. I'm going to click Control. Is that actually going
to make sure that we have the napping tool selected, and it will allow us to
rotate at 90 degrees. We're going to just put this in front of the
door just like that. Then with the text selected. On the right hand side, we
can change the text and just press to interact like so. And now we can click
itself on the viewport. We can actually click sorry r. You just make
it much smaller, like so, and that's going to look pretty good
in regards to that. We're going to now make
sure that we click and hold and then drag it onto
the static mesh component. So whatever it rotates, the text, it's going to
be rotating as well. We need to make
sure that we set it up in regards to
it being rendered. So we're going to go back
on to the event graph. We're going to get ourselves text renderer to just be
placed within the scene. We're going to then
drag this out and set it to be invisible
in game view. So if we were to just search
for game view or sorry, just game, there is an
option set hidden in game. We're going to go
ahead and select this. And now we'll firstly want
to have this on by default. We're going to go
back to the viewport. We're going to firstly
make sure that we have the text selected, like so, and we're going to search for the game view in game
the option over here. We're going to make sure that by default, it's going
to be ticked on, and this is going to be
making sure that whenever we click G is going to
make it invisible. That is within the scene. So as you can see over here, it's going to be
invisible by default. But now, when we go
to the event graph, we are going to make this visible when the
player enters the box. So it's actually quite
nice and simple to do. We're just going to drag this
to the side and place it into the game event area or
where the box trigger is. So whenever the player
steps into the box trigger, it's going to make it visible. And afterwards, we're going to copy and paste this set
up for the text renderer. We're going to do the
opposite of that. We're going to disable it. So is it hidden? It's going to be hidden
afterwards. So there you go. We're going to make sure
that we have this stick on, and now we can click Control
on S and make sure that, of course, we compile
this blueprint. And now, once we hit Play, we can see that it's looking
like it's visible and then it's invisible when we
get a bit further down. So it's a real nice
and simple type of a setup in regards to
an interactable door. Yet it works really nice
within the unreal engine. So that's going to be
it from this setup. Thank you so much for watching, and I'll be seeing in a bit.
57. Creating a Floating Trophy: Welcome back here into creating studying environments
in unrelentpive. The bootcamp artist course. In the last lesson, we set ourselves up with a
nice interactable door, which we can now go through and open it up and
close it down. So it also has an interactable
text, which is nice. But we now need to make sure
that the trophy that's in the back is actually going to be able to be pickable object. As in the player we'll
be able to approach it, and then he'll be able to pick it up and we'll have a sort of a windscreen on the
front of our menu. So for us to do that, we're
going to first of all, get ourselves a trophy. We're going to change
this into a blueprint, so we could have it more unique looking
more interactable. Let's say, we're going to create it as a blueprint. Let's
go ahead and do that. Convert the section
to a blueprint class. Then we're going to
harvest its components, and we can just call
it a trophy BP. So we're going to go
ahead and click Select, and this is what
we're going to get. It's a simple type of a setup. And first things first, what I want to do is just
make the object to rotate to make it look a little bit more presentable
for the viewer. So let's go ahead and
actually do that. Actually super simple
to create a rotation. All we got to do
is just click on an add button and
search for rotate, and it should be a rotating
movement option over here. Now, with this motion, if we were to click Play, nothing's going to happen at the moment because the
reason being is that we need to make sure that we set it up with some options for it. So let's go ahead
and do that first. We're going to go
ahead and just close this down and make sure that we set up ourselves
with a rotation. So by just clicking start, we're not going
to have anything. The reason being is that This
object, this asset itself. If we have a look at it,
if we have it selected, you can see that we have
a static motion for it. And actually, just looking
at this static mesh, it's set as movable, but the mesh component itself, it's set to static. We're going to change
this to movable. We should now get ourselves
no errors in that regard, and that's going to
be a good start. But within the area itself,
if we were to hit play, nothing's going to happen because the reason being is that we need to go onto the area
itself onto the scene itself. If we were to hit play, we can see that the object is actually rotating pretty nicely. So that's a good start. We can control the rotation using the rotation
movement detail tab. And there are rotation rate. So this is going to be x value, y value, and z value. That value is what controls
that go in around it, self. So let's go ahead
and just change that down to quite a low value, something like 60.
We'll do the trick. Let's go ahead and see
how it looks like, and you can see it lowering down completely or
not completely, but much, much slower
in regards to that. We can also go ahead
and add ourselves a bit of a bouncy motion
with an event graph. We're going to go
onto the event graph, and from begin play, we're going to drag
it out, create ourselves a timeline. Like so. We're going to add a timeline, and we're going to go right away into the timeline itself. We're going to create a new
flow graph just like that. We're going to keep
the length as five, or actually, at
this point, let's go ahead and change it to six. We're going to be having
it a bit larger variation. Like so, and then we're
just going to zoom out. We're going to start by
creating a key point at the very start with a value
and time set to zero. Then last key point is going to also be in regards to
time is going to be six. The value dough is going
to be set as zero. And then we're going to create a new new keypoint
in the middle, which is going to be set in
regards to time set to three, like so, and a value to one. And then we're going to
grab all three of them and set it up with
automatic parameters. So we'll have a nice
interpolation of the values. Then we can go ahead
and close this down. And sorry, we're going
to go back onto this. We're going to make
sure that this is set with loopable animation. So in order to make
sure that this loops every time
it's being played, it's going to need to have a timeline enabled with
a loop functionality. So this button over
here is what makes sure that it loops the
overall animation. Then we're going to
close this down, and now we're going
to make sure that we grab ourselves the
static component mesh. We're going to just
drag and drop this out. And then we're going
to make sure that we just get this component, which is the trophy
to make sure that we are getting its
transformation value. So we're going to transform relative transform that is
onto the area, like so. We're also going to set
relative transform. So we're also going to drag another one out
relative transform. Relative transform.
There you go. And we're going to make sure that sorry, that's
the wrong one. We're going to go ahead and delete this relative transform. We're going to drag it
out, and we're going to set relative transform. That's going to be for the
static mesh component. So there you go. That's what we're looking
for. We're going to then make sure that we
grab ourselves a value. So now we're going to simply
make nice executable. We're going to make
sure that the return value is actually split. So we're going to just
split structure pins. After we split it up,
we can see that we have a variables for location,
rotation and scale. We're only going to make
sure that we use a location. We're going to right
click, promote a variable or sorry,
no, promote a variable. We're going to right click and just split construct.
There you go. Then we're going to just
affect the location. We're going to do
the same thing for the setup of the b one. We're going to split it,
and we're going to get ourselves lit into
location as well. There you go. Now we're
going to be able to just affect that location
of the asset itself. We're going to make sure we create ourselves
a multiply value to be able to multiply it
with the timeline itself. We're going to set up
a nice float variable. Let's go ahead and
create a variable for a prop intensity. So we can just call it
intensity, like so. We're going to just make it into a float value and attach
it onto our blueprint. So we're going to get an
intensity value like Of course, we're going to
click on this over here to make sure
that it's public. We're going to then attach it with the new track
that we created. And this way, we have a lot of control in regards to that. We're now going to go
ahead and basically add the z location of the
object with this new setup. So we're going to add basically
a value on top of it, which is going to
help us out to get a nice type of
visual aesthetics. We're going to just create
ourselves ad and we're going to add it onto our
setup or the Z location, of course, since we want it
to be bouncing up and down. Now we're going to attach
it to the transformation Z. And yeah, that's pretty
much it in regards to that. We're going to now go
ahead and compile it. I play and see how
this would look like. And of course, It one more
thing that we need to do is we need to go ahead
and change upentnsity. We were to change
this two a ten. There should be some motion, but it's not happening. So I'm going to go back onto the blueprint class
and see what I missed. And I just realized now
that the thing that we missed is basically going
to be this executable. We're going to grab it
from the timeline and make sure we update this every time the timeline
is being played. Now we can go ahead
and compile it, and this should give
us a nice result for the thing to disappear because we're using the value that's
a little bit too intense, we're going to set
it up to a value of 0.1 and see how this
would look like. It looks like it disappears. But actually, when we
look at it behind us, we see that there is
a trophy in the back. And the reason it's
doing that is because if we were to go back
onto the blueprint, we got to understand
the way the coding works in regards to
the blueprint itself, we lay the timeline, which just makes a sort of animation for the value itself. Then we change that
up with an intensity, multiply with that, and
then we get ourselves relative transform
for the location. But when we are setting it up after the timeline
is being played, when we're setting that up with the relative rotation
for the transform, we've got to make sure
that we also update the transform locations with the previous ones to
get the results back. We're going to start off
with x and y values for these and we also are
going to do the same for transformation
rotation and scale. So we're going to get
this sort of a look. Which basically it grabs the same type of result
as we had previously, but we change up the
rotation, sorry, not the rotation, but the
location for the z value. Now we can go ahead
and compile this, and if we were to hit play, it should give us the same
result. So there we go. We're going to get
ourselves a nice type of rotation while it's bouncing up and down in regards
to the whole setup. And it's not bouncing
up and down. It's actually just
constantly going up. The reason being is
that we only keep on basically adding on top of it in regards to
the value itself. We want to make sure
that we're able to also then take it down as well. So it's actually
quite an easy fix. We're going to go back onto
the timeline, like so. And instead of just having
it set as value of zero, zero, we're going to set these values two
minus one, like so. So it's going to be
bouncing up and down in between the values of
one and minus one. And now, once we have
a set up like that, it's going to give us the
right type of results. We're going to go ahead
and close this down and hit play and see
how this looks like. And yeah, that's pretty
much it in regards to that. We're going to get
ourselves a very nice type of interactable. But we still need to work on in regards to
making use out of it. And so we have to make sure that the player is able to
pick the trophy up. So we're going to continue on with this in the next lesson. Thank you so much for watching,
and I'll see in a bin.
58. UI Text In Unreal Engine 5: Hello and welcome back,
everyone to creating standing environments
in Unreal entered Pip. The BookmF artist course. And last lesson, we'll create ourselves with a
nice trophy that's able to be just
floating around within the back side of our door. And now we're going to
continue on with this and make sure that whenever
we get close to it, we get a sort of a reward. In this case, it's
just going to be a simple text over the screen. For us to do that, we're going to firstly create ourselves a UY type of a text
or the front screen. For us to do that,
we're going to just simply right click within
our content browser. We're going to go ahead and make use of the user interface, and we're going to set ourselves up with a widget blueprint. Let's go ahead and create that. We're just going to create a
simple user widget, like so. We can just call this top text or actually top text overlay.
That would be better. Let's go ahead now and
just double click on it, and we're going to get
ourselves introduced with the blueprint or the UI. So if we were to maximize this, we can see that this is
what we're going to get. It's going to be
completely empty, and it's actually going to be in a sort of a graph
type of a setup. But in this particular case, it actually is more
of a two D view. Or the UI. So for
us to start it off, we're going to first of
all, get ourselves a Cavs. We're going to just type in Cavais to get ourselves
canvas panel. By simply click and drag
in and dropping it, we're going to get ourselves
a screen Cavas leg, so, which we're going to
be able to make use of, to create ourselves a simple
layout for the screen. So the next thing
that we want to do is going to be a simple size box. If we were to just
search up for size box, we're going to be
able to click and hold and then drag into the area legs the size box will be basically attaching
whatever is inside of it in regards to the
alignment of the entire screen. So for example, Right now, if I were to just
simply set it up to be over in this section on
the bottom right hand side, it wants a sort of
an anchor point to be able to tell where
it is in regards to the whole of the screen
because usually when you are within a computer within
different monitors, you'd have a lot of variables that need
to be accounted for. So, Easiest way to do
that is just simply to make use of the anchor points
top right hand corner, and we have a bunch of options
that we're able to make use of in order to
anchor our entire setup. In this particular case, if I was to have it on the
bottom right hand side, it would be this one over here, the bottom right hand one
that would allow us to basically anchor it to the
bottom right hand corner. But because I actually wanted to set it up within the middle section of this area over here, which is going to make use of the anchor point
off the middle one. So, and that's going
to be better for us. And we're just
going to set it up to the middle section like so. I'm going to go ahead and
simply reposition it using the corners of the box to just to the center
of the view. Okay. After which I'm
going to make use of this box to actually set
ourselves up with a text box. So the text box, if we were to just
simply type it in text, we're going to simply grab
our selves not a text. We're going to grab
ourselves a text box. We're going to drag and drop
this into the box over here, and you can see it
filling it in like so. And all we're going to do now is just type in a text on
the right hand side. For now, we're just going
to type it in test like so, and it's going to
show up over here. To make sure that it's
fully centered though, we're going to make use out of a center aligned horizontally. That up over here. That's going to give us a nice
type of result. Also, in regards to the
size as well for the text. We're going to find that
within the text style. If we were to just simply
click on a text style, we're going to grab
ourselves a font, and then the size can
be adjusted over here. So I'm just going to
make it something to 70 at the moment
just to test it out, and we're going to be able
to adjust the text itself from within a
blueprint of an asset. We're going to go ahead and
click this off and actually, one thing that I forgot to mention is in regards
to the color. If we were to just
simply change this up to be a dark type of color, you can see it being black. But if we don't want
any type of a color, we're going to just
fix up the Alpha over here Alpha node. And we're going to just
lower it down to a zero to get a completely
transparent type of a box. So now we're just
going to get ourselves a simple text or a UI. Now we can go ahead and click on the top left corner compile and it's going to compile
everything in for us. And actually, before moving on, since we're going to do
this in the next step, we might as well
do it right now. We're just going to go
ahead and select the text, and underneath the
text section where we wrote down our own
type of letters. We're going to go ahead
and click on byte, and we're going to create
ourselves a new binding lek. So this will prompt up
with a blueprint coding. We're simply just
going to make sure that this is set as a variable. We're going to right click
on the return value over here and just promote
it to a variable leks. And this is what
we're going to get. We're going to just simply get ourselves new variable for it. We're now going to go ahead
and actually rename it. So real quick, we're
just going to select this and call this
whichever way we want. In this particular case, we can just call it UI text. So let's go ahead
and select this. We're going to just
use variable name on the left hand side to
call this a UI text. Like so, and we can go ahead now and finally compile it
and close this down. So now what we're
going to do is we're going to get ourselves
a simple widget, but by just simply playing
it within our scene, you can see that
nothing's happening, and the reason being is
that we actually need to apply this onto our level. So for us to do that, instead of just applying it
onto a blueprint, we're going to apply it onto a blueprint of a level itself. And if we were to click on
the blueprint icon over here, you can see that
there is something called open level blueprint. So not only does
asset blueprints have sort of a section where you can place assets and decoding. You also have a level
blueprint itself. But anyways, as far
as to get into it, we're just going to go on
to open level blueprint, like so, and this is
what we're going to get. We're just going to get
ourselves a simple event graph. We are within the
level blueprint. Let's go ahead and drag
it out from the event begin plate to
initialize our wigit. We're going to search
for wget create, and that should be
at the very top. I'm actually just
going to type it in W create wget instead. There you go. And we're going to select the class
that we're using. So that's going to be
the one that we created. We're going to click
on this box over here. We're going to type in
top text box overlay, which is going to allow us to select our wgit that we created. Afterwards, we're just going to drag the return value from this to get ourselves the
UI string that we created. So that's going to be this
variable over here, UI text, we're just going to drag it
out from this return value, set ourselves to UI text, and we're going to make
sure that it's get executed once we start
up playing this level. Now, within here, you can see that there is a box over here, which we can change
what text we're using. For example, we can
do test one to three, and it will be playing
this type of text. But actually, before
we continue on, we need to make sure that
it's added to the viewport. To actually add this
to the viewport, we're going to drag this
from the executable. We're going to just
simply search for add to viewport, like so. It's going to add
this to the viewport. We also for the
target need to make sure that we target this fidget. Let's go ahead and just
target it like so, and that's going to
fix our problem. Now we can go ahead and check it out how it looks like,
we can hit play, and we can see that
we have some text at the very front of our screen. So we can make this at
the very start to ever say nothing by just deleting this and keeping
this empty, like so. Or we can just type in something like find or get a trophy, and then it's going to
remove itself afterwards. So it's actually
quite easy to do. We're going to start by just typing in find trophy over here. So then we can just from
the last piece of a widget, get ourselves a slight delay. Like, so a delay for this
can be something like, let's say, 5 seconds,
something like that. And again, we can just go
ahead and use this widget to create a simple type of a text that's going
to disappear afterwards. So with this, we're just
going to make it disappear. We're going to, of
course, make sure that it targets the widget
itself. Like so. And now we can go ahead and
hit compile and hit play. And now we can see that
it's as fine trophy. It's going to get
5 seconds with it, and then it disappears. So that's one way of doing it. And then the next thing that we want to do is just we
want to make use of the same wget to tell congratulations when we
approach the trophy. So we're actually going to continue on with this
in the next lesson. Thank you so much for watching, and I'll be seeing in a bit.
59. Trophy Congratulations Message: Welcome back
everyone to creating standing environments
in Unreal Engine five. The bootcamp for arts course, and this is where we left off. In the last lesson, we ended up just setting ourselves
up with some text that appears at the start
of the level and then ends up disappearing
by the end of it. And now we're going
to make use out of the same widget to make sure
that we apply some texts, whatever a player
approaches the trophies. So, for us to do that,
what we're going to do is just we're going to go onto the trophy blueprint, like so. We're going to just
maximize this. We're going to go onto the
viewport, and for starters, we're going to make sure that we create ourselves a
simple collision. We're going to just
add a collision, so let's go ahead and do that. A simple box collision will do. We're going to make this
collision a bit bigger. I think it's actually
quite small. There you go. We're going to make this
quite a bit bigger. Once we add in a box,
something like this, what we can do now
is we can go onto the event graph or actually before going
onto the event graph, we're going to go ahead
and select the box. And now with the box selected, we're going to scroll
all the way down until we get onto the
component overlap. We're going to begin an event. So let's go ahead and
grab this one over here. Then we're going
to grab ourselves an object for the third person
or for the first person, we're going to just drag it out, and we're going to cast to
first person character. Then we're going to make
sure that object is also connected to the ver
actor, just like that. And this will allow us on
beginning the overlap with the first person character to allow us to begin the event. And the event that
we want to do is simply grabbing yourselves
the widget variable. So we're going to create
a widget from here. Let's do it like so. We're
going to select the giary one, which is going to be the top text overlay, just like that. Let me just grab this
from executable. Set UX set UI text, and we're going
to make sure that this target gets selected. And the text itself, what it can be is we
can set it up to be a choice to be done within the blueprint itself within the viewport of a level
within the scene. If we were to create this
instance as edible over here, So we can simply right click
promote this to a variable, and this should give us
this sort of result. By selecting this UI text, we can go ahead and make
sure that this is set as edible, like so. We'll need to expose
this on a spawn, so we'll be able to edit this. Once we go ahead and compile it, we can now close this down
and with the blueprint selected for the trophy
within our area over here, we can find ourselves UI text. Now we can just type
in congratulations. So. And when we
actually hit play, we should be able to
interact with it, and when we get
close to the trophy, nothing's going to happen. And the reason being is firstly, we need to add to viewport. So, now we're going
to go ahead and make sure that this is being
targeted, just like that. We're now going to go ahead
and compile it hit play, and once we go inside of this, we're going to see
congratulations. Although right now it's overlaying with the
introduction text. Once the text disappears, which we can lower down is delay properly for the
level blueprint. I'm actually going
to go ahead and do that to fix this issue. So going back onto the
level blueprint over here, We're going to go ahead and make sure that this is set
to a way lower value. Something like two second, I think is going to be enough. But when we hit plate, it's
going to say pine trophy, and it's going to say
congratulations when we go into it. Of course, we need to
make sure that we set it up with a nice type of a setup. Once we pick the object up. We don't want this to
be constantly over it, so we're going to go ahead
and just simply drag ourselves to mesh for a trophy. We're going to grab ourselves this trophy static
mesh onto here. We're going to set
the visibility for it by dragging this out
and setting visibility. Like so, and we're just
going to make sure that the new visibility is going
to be that as invisible. Now once we actually enter
the area for a trophy, is just going to make it disappear and it's
a congratulations. You picked up a
trophy. And that's pretty much it in regards
to the entire project. In this unreal
engined five course. We have explored
the intricacies of setting up assets from
scratch, blending, t texturing, creating
studying environments, and adding visual effects to make your scenes more immersive. You've also learned how to use different
lighting techniques, camera angles, and animation to create captivating
cinematics. Finally, we delved into blueprint fundamentals
to give you a solid foundation for creating interactive and
engaging experiences. So thank you so
much for watching. Thank you for joining me on this journey Frau ten
Real engine five. And I hope you discovered
something new and exciting to help you elevate your
projects to the next level. It's been a pleasure sharing
this knowledge with you, and I can't wait to see the incredible creations
you'll bring to life. So until next time,
see you soon.
 3D Tudor, Bestselling Blender Author & 3D Educator