Transcripts
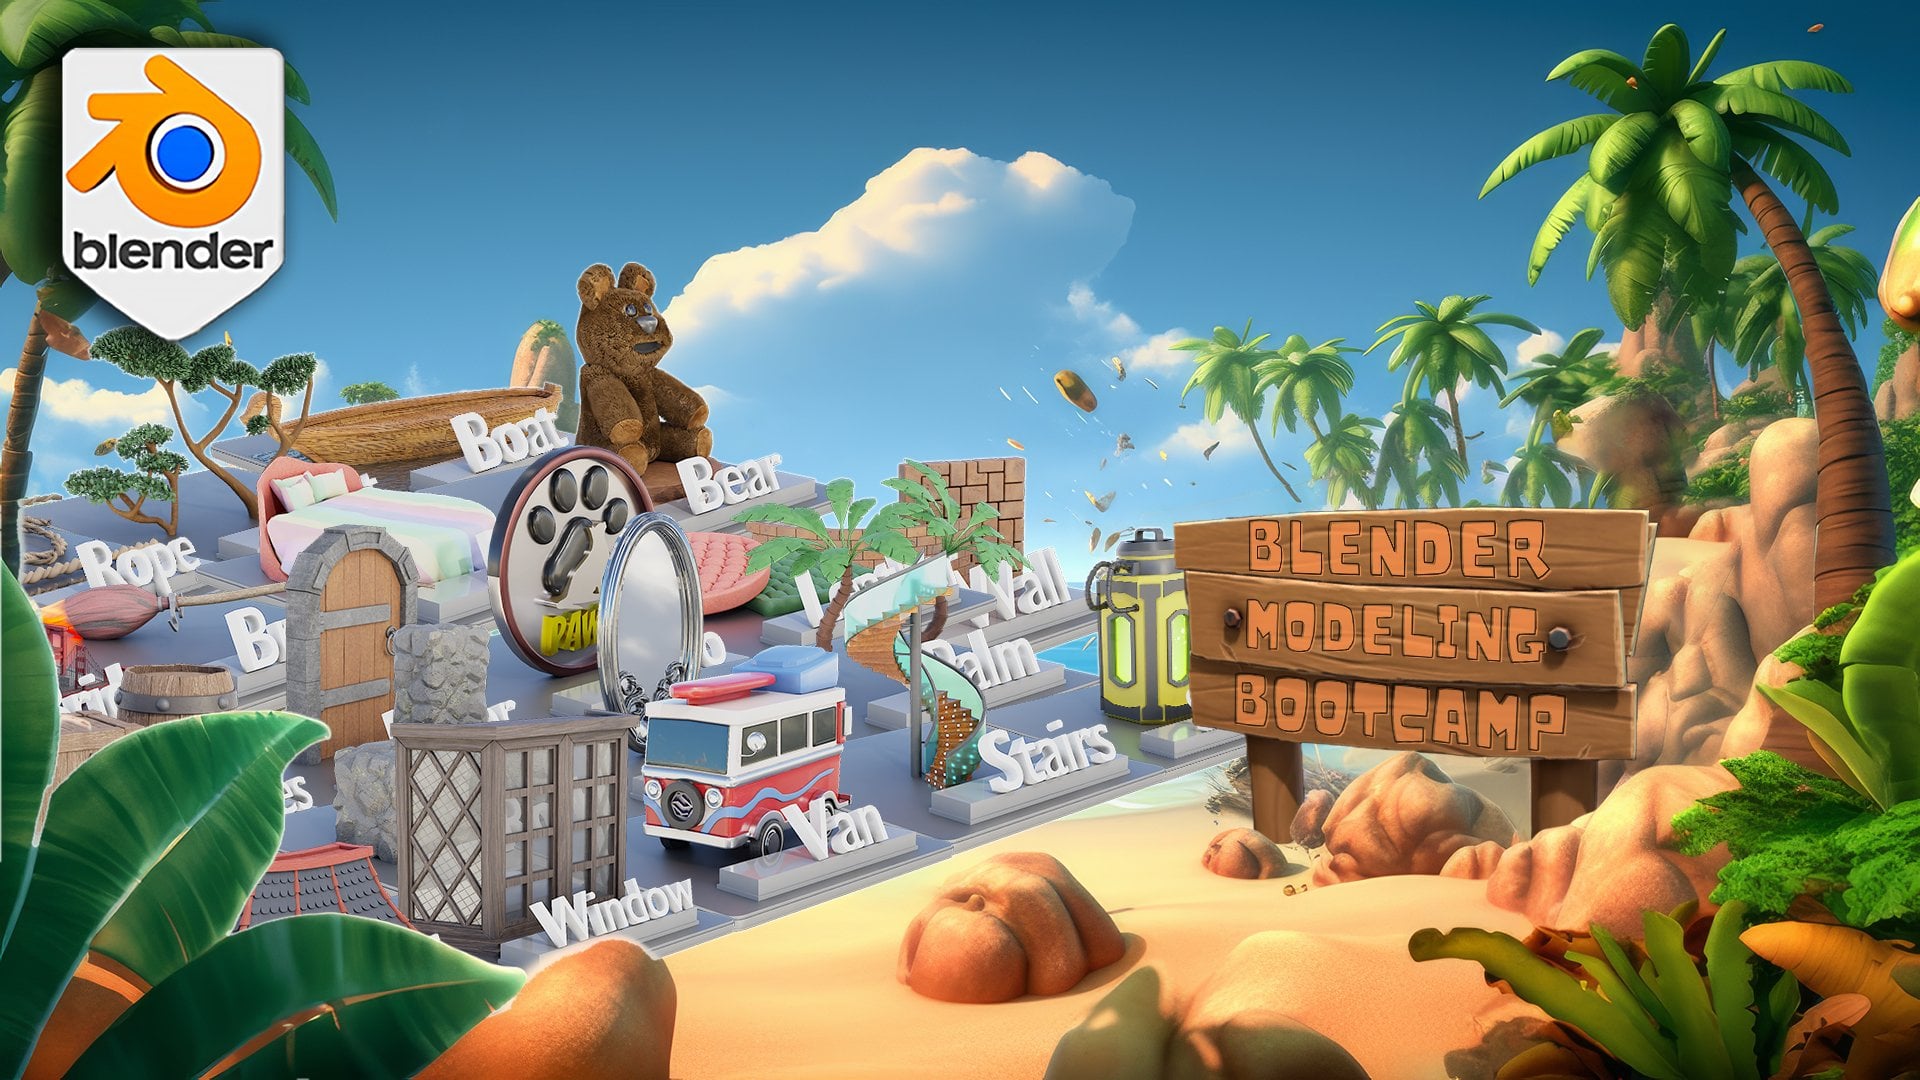
1. Blender 3 The Ultimate Medieval Scene Course: Welcome everyone to
blend the three, the ultimate medieval
seeing class I've tried to take just
about everything I've learned about Blender
over the past day is unpack it into
one great class. If you're anything like high
walls in the beginning of my 3D modeling journey
and dreaming of creating amazing look in scenes
like you see in professional renders from
social media to Hollywood. While in this class is gonna be something absolutely want to check out the current through everything from start to finish, to create this amazing
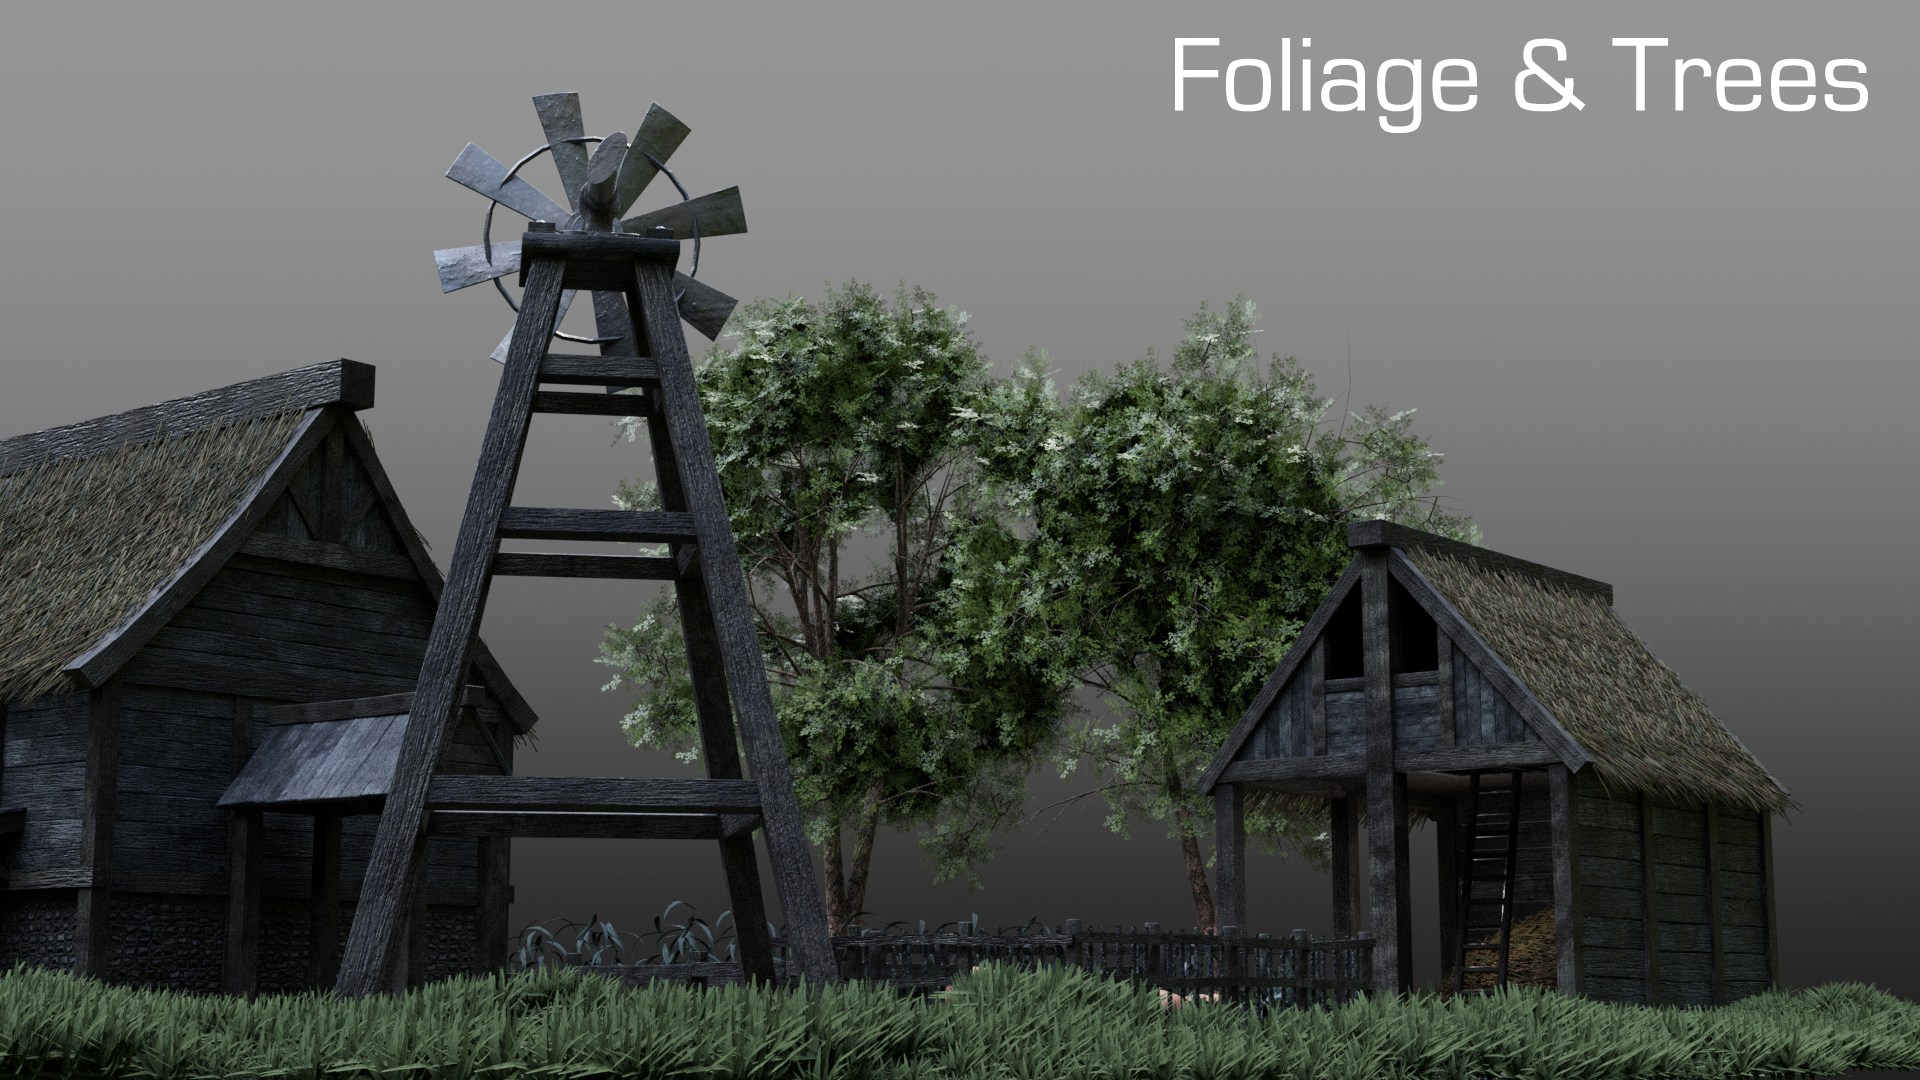
looking medieval farms in exactly the way
you see it now, we'll be using the brand
new blend, the three, and most of the
features that come with this powerful 3D
modeling software. In other words, will
be image create a scene that looks like
it fell out of any game. You can find out that right now. I will just create a
class where anyone, whether you're a 3D
modeling beginner, all a season blended
Jedi can follow along and then out to Craig
are very own realistic. See, that's the goal and I
think I have achieved it here. So let's take a look at some of the skills that you'll be
learning on the class.
2. Learning the Basics of Blender: Welcome everyone to
blend the three, the ultimate medieval sinkholes. As you can see, I am using
Blender three-point. Oh, you can use anything really from blender
to 0.8 onwards. For those of you that all use in Blender below 2.8 or 2.6. So 2.7. I don't know
why I still use in lab. Boy, if you liked
the actual version, then you can still
probably follow along. There will be some
things missing, like EV, for instance, that won't be in a lot of the actual viewport options
will actually be different. You might melt, follow along, but I do recommend anything
from blender to 0.8 onwards. Okay, the next thing is you can see on the left-hand side, we've actually got
key casting on. If you're ever not sure of
what I actually pressed, all, you'd call
on my accent too. Well then just hold down
the left hand side. You will say whatever
key strokes I'm actually pressing down
on the right-hand side, you'll see animations telling you exactly what bonds depress. These will actually be there for the first time that
we learn about a new keystroke or anything
like that within blender. The other thing is on
the right-hand side. If something needs more
of an explanation, then that will also be down on the right-hand side
the first time that we actually use it. Now we blend the three comes
the blender asset manager, which is all new
to blend a three. And it's something
really, really great. And it's something
I really want to get into and show you. So we will be making a
lot of use of thought. So let's start off
nice and steady. I might start off on creating something with this
actual course, you will actually
have a download pack. So just make sure
you've got it out. Pull my node now, here
is the download pack. As you can see, we've got grass, we've got HDRI, we've got references, and
we've got textures. And the first one we're
going to actually make use of is the actual references. I'm actually going to
build one of these out and then we're going to save it out as a blended asset. Before we do all
that, of course, we need to go through
the blend, the basics. Now some of you may already know all of the Blender basics. And for those of you that do, just head on over to lesson. Alright, so everyone
else, here we go. Then I gave you
blend the basics. Thanks a lot and I'll see
you in the next lesson. Hello everyone and welcome to the Basics of Blender
part of the course, I recommend grabbing
a pen and paper or a Word document and joined
down these keyboard shortcuts. Here will be going through
the very basics of blended and the keyboard
shortcuts you will need. We've all that said,
let's get started. On the left-hand side, you'll can't say I
have key casting on. This will show you the keys
and pressing in real-time. And this will be on pretty much, if not all of the entire course. The next thing I'd like to show you is any new keys we use. There'll be a small animation Delpit down at the
bottom right corner. This will only appear
the first time we use that particular new key. And I think it really
helps keep the flow of the lessons to a decent rate, both for beginners and those
more familiar with Blender, because they only appear once. They won't pull up the screen. And there's always
screencast into rely on. Also down the bottom
right-hand side, you'll see a detail animation of anything that
needs more contexts. This is useful if you're new to 3D modeling
in particular, because there's a lot of jargon and technical terms that needed Dietz an explanation or more contexts of why we
are doing something. I recommend. Then if you need
more information, jumping onto the blender
website and checking out that detailed explanations or pretty much anything
blender related. So now when we mentioned
blend the viewport, this is actually viewport. You can see all of this gray area here is
actually the viewport. Now if we go to the UV
Editing ball or peers, you, you'll see the
overlap downside. It's now on two screens. And if I say the UV
Editing viewport, all that means is just
this gray box over here. Now let's go back to modeling
and let's go a little bit further into how to move
around in actual blender. So the first thing I will discuss is the
middle mouse born. Actually, if you hold it down, you can rotate anywhere
within the blend of viewport. And then if you want
to zoom is just scrolling in and scroll in back. Now you can also press Control Shift and
the middle mouse, hold it down and then
just push it forward. I'll push it back
and you can scroll in very, very slowly. Now to pond or you need
to do is you need to hold Shift born and
the middle mouse. And then he compound
from left to right and to zoom to the object, which is very handy. Let's say you're really far out and you really
need to zoom to it, or you need to do
is press the dot on the actual number
of pod and that will zoom your rights in to the objects and you
want to Zoom too. So for instance, if I'm zoomed out and I want to
zoom to my life, for instance, it's
very easy then it's come across
DCMP collection. Click on your light, press the adult
on the number pad and that will zoom you write it. Now the next thing
we need to discuss is just deleting objects. To click on an object
is just left-click. And then where you
can press as you can press the Delete key, and that will just
delete out of the way. So I've just laid
to my light there, and now I'm gonna come across to my camera and actually delete that out of
the way as well. So the next thing I want
to discuss is if we click on this queue and
when you press shift D, well, you'll notice if
you move the mouse now, it's actually going
to make a duplication of my actual cube. If I don't actually click
anything on my mouse and I just clicked the
right-click bond, it will drop. In place. Now you can't see
there's actually two cubes and here
at the moment, well, there actually is. So we need to bring in a gizmo. And the gizmo is basically something that we
can move things, let them rot opened
down, things like that. So if I press Shift Spacebar, come down and you'll see
we've got one that says Move. And now we actually
have our gizmo. And if I pull this to
the right-hand side, you can see now we can pull this away and now we're able
to move this around. You can also freely
move this as well. If you press the G key, you'll notice if you've got
selected now you can move it basically anywhere
around the viewport. You can't drop it back
with a right-click. Or you can put it
wherever you want to, g, and then you click,
left-click and it will put it wherever
I wanted to do. Now also why the dartboard on the Zoom to burn is important
is if a person dot bar. Now you will say
that if I just zoom out and hold the middle
mouse and rotate around, you'll see that I
actually rotate around the origin of this actual q. Now if I click on the other queue and
oppress the adult bone, you can see now
that I'm actually rotating around the
origin of this cube. Now the next thing
we want to discuss is object mode and edit mode. At the moment we
are in object mode, we can't really do a lot with these cubes except
move it round. Now if I press the top bone, we will then go into edit mode. And in edit mode,
we can actually do a lot more things
with this cube. Up on the top
left-hand side here, you will see that we've
got three different icons. One of them, this one here is
versus the next one across these edges and the next
one across his face. Now if we're on vertices and we come over to this
vertex, for instance, I then if I press Shift Spacebar to bring
in my gizmo again, I then can move this around. Now if I come into Edge Select, I can grab the whole edge and
move this around like so. By never come into face select, I can now grab a whole phase
and move it around like so. Now the other thing
is if we come to, are there to select, I can select a versus. You can also select another
vertex or another object, awesome denounced like that, just by holding the Shift
button and actually click in on the other vertices
or the other object. If we come to face
like for instance, we can grab this phase shift, select the second phase, and this is how we can
select multiple objects. Now the next thing we need
to discuss is the axis. We can see we have a red
axis and a green axis. Now, just to show you what
this actually relates to, if we come up on the top and
I'm right-hand side here where you've got these
two interlocking balls and you click this
little down arrow, you will say that we can
turn on the zed axis. Now we're just going
to turn this on, just to show you why me, I will turn that
on now you'll say another axis appears here. Now, the green axis is
representation of the y. So if I want to scale
this out on the y, all I would have
to press S and Y. And now you can see I can
scale it out along the axis. Now if we wanted to
scale out on the x, so that's the red axis. I'll press S and X and I
can scale it out along 56. And again, the same thing. So S and Z, the up-and-down axis is dead and its essence add and then you can scale
it up and down. Finally as well, this also important if we
actually wanted to rotate it because we're
rotates it on an actual axis. So what I'm going to do is I'm
going to grab the whole of this by pressing the a button. Then I'm going to
rotate it around. So I wanted to rotate
around the y-axis, so it's all y. And then you can see it will
only rotate on the y-axis. And no matter where
I put my mouse, it will always rotate on my axis to click it back to where it was just again, the right-click. And if you want to turn it all, you need to press
these all and Y again, and then let's give
you a degrees. What we're gonna do
is we're gonna press 90 on the actual number pad, so 901, now you'll say it's
rotated by 90 degrees. So just to summarize that S
is scale and all is rotate. Normally when we scale something or a room
takes something, it's followed by
the actual access, and then it's
followed by a number. Specifically when we
rotate something, normally when we scale
something we just hit scale, pull them outside and
we'll scale it up. When we rotate,
something is normally all followed by the access, followed by a number
on the number pad. Now the last thing
I wanted to discuss is if we go to object mode now, we need a way to
actually view this a little bit easier than the
way it is at the moment. Let's first of all
turn off the z axis. And what we'll do
now is we'll use the pneuma pad to
actually view this. If I press one on
the number pad, that will go actually into this front view of our viewport. If I press three on the NOPLAT, that will go into the side view. And if I press seven
on the number pad, that will go into the
top view of our pupil. Now the opposite to
get to the opposite, all you need to do is
you need to hold control in this occasion will
press control and seven, and that will bring
us to the bottom of this object in the
viewport control one is the rear of the
object and controlled Three is the opposite
side of the object. Now before we finish this
section of the course, I need to show you something
that's also very important. So if we come up to the
top left-hand side, you'll see if golf ball
near that says Edit. And if we come down
to Preferences, one thing they should always do that when you first
download a blender, you should always put
on the status bar, which is this button here. If I click all of these on, you will see now, if I click them all on
and I close that down, down at the bottom
right-hand side here, you have all the
details that you need. So for instance, we've got how many phases and how many triangles are
actually in the scene. I'm the objects
during the scene and the memory and v round
lights actually take note, this is really important if you wanted to get a good idea of how much power you
computer is actually using and how many polygons and
triangles are in the scene. Polygons and triangles
you'll learn more about as we progress
through the course. And that pretty much COVID
is the basic blender. And I hope you all found that both helpful and informative, but more importantly,
easy to understand. Now as they say
on with the show.
3. Setting up Blender Asset Manager: Welcome back everyone
to blend the three, the ultimate medieval sinkholes. And this is where we left
off absolutely no way. So let's actually get started. The first thing we want
to do is just click this. And what I want to do is
I want to show you how to say your asset
manager ready then to use that for
all your models or textures or even HDRI
and things like that, which we're gonna get into
a little bit later on. So first of all, let's come
in and we're going to delete our camera and then
delete our actual light. And I'm gonna delete
the default cube. So let's leave that
out of the way. The next of all we
want to do is want to head on over to
this little plot. Now you can see on top of it, if I click on each one of these, you can see it takes you into
different kind of viewports of within blender to make it easy then
to navigate around. So let's say you want
to unwrap your model. You can then go to the UV Editing straight
into the UV editor. Let's say you want to do
some actual sculpting. There's actually one that's
actually sets up here with a nice viewport
frictional sculpting. Now, normally we will be
working mainly in modelling, because modelling is
basically just a viewport. We've nothing really in it and
it settled basic modeling. If you have layout, you can see here that you've
got a timeline down here. And that's not
something particularly you're going to
want all the time. It may as well start
off in modeling. So that's the first thing I want to do is we want to bring
in a new one of these. Now what we want to
do, as you can see, if we come over to
the right-hand side, you can see I've got all
these options on here. Now you may have one on the
ear actually called assets, but I've actually
not going to do is I'm gonna come over and
I'm going to right-click, I'm going to click duplicate. And you can see that
we've got this here. Now if you double-click that, we're going to rename
this and we're going to call it assets, like so. And then what I'm going to do is I'm going to right-click, I'm going to pull it
out, reorder two. From there we go. I've got
my assets now at the front. Now anything we do within
this viewport now, when we click on assets, it will actually be
that we're gonna do is you're going to come down
to the right-hand side here. You can see a little kind
of cursor appears it. And if you click
and drag this up, you can see now that we've got, she'd gotten on the screen, what we want to do
is we want to sell these assets for all
actual asset manager so that it's ready to rock and
roll for when we want to send things through the blend
files and things like that. What we now need to do is come over to the left-hand side. You'll see you've got this
little drop-down menu here. And if you click on
There, we go through, we've got one called
asset browser, and that's the one
we need to click on. Now the moment you can see that nothing is
actually in here. And why would it be? Because this is
not actually sets out to actually have assets in. So how do we get around that? So I'm going to pull
that down a little bit. And then what I'm
going to do is I need to save out my blend file. So the first thing
I'm going to do, I'm gonna pull this back
on mobile in first. I'm gonna go across the file.
I'm going to come down. And what we're gonna
do is we're going to come down to where
it says default, I'm going to save this file. Now what that means is
it's actually going to save this starter file
without the camera, without the light with APA
cube and things like that. And it's basically
going to open up exactly as you see now, albeit as well with the
asset's actual top in. That's great, that's exactly
what one. So let's do that. So file, default, saved
starter file, like so. And when you make a
change this default file, just make sure that
you re-save it out because we all going to
make some changes to this. We are going to bring in some
Adams and things like that. So we do want you want this to be our default file with
the Adams and things out. So let's come in now. What we'll do is we'll
go to Edit and we're gonna come to preferences. Now you will notice down at
the bottom here on my screen, I've got a load of options here. Tell me how many visits,
how many objects, things like that
within my screen, and you might not
actually have that. Let's come over to interface
and you'll see one that says status bar
in the status bar. And just make sure that
all of these I take Tom and then you should
also have these down here. Now again, once
you've done that, close it down, come to File. And then what you're
gonna do is default, Save Startup File. You can see that
in quite save it, save stock pile a. Now every time you
open a blender, you actually going to
have those there as well. Now the next thing we want to do is we need to tell blender where to actually look for all
blend assets manager. I'm going to quickly
explain this. Well, I'm going to do is I'm
going to open up my desktop. Here. You can see my desktop
bit of a mess. So now I'm going to do is I'm actually going
to right-click. I'm going to create
a new folder and I'm going to call this
blend the assets. So blender assets. There we go. It's just an empty
folder at the moment, and that is exactly what album. Now let's actually put this down among went to do now I'm going to
save out this file. So I'm gonna come
down to Save As. And then we're going to find
that on my desktop now. And you can see it's
it blend the assets. I'm going to call it,
let's just call it Blender assets so we know exactly what
we're doing with it. Like. So there we go. Now I'd say dot and you can
see up at the top here, it should say bled into assets
or whatever you called it. Now what we need to do is you need to actually tell blender, this is the place
where we need to go to actually and look for different models or different textures
and things like that. Any assets that you want to
bring into another blend file needs storing within this
actual file on your desktop. So that's very important because what we're gonna do
now if it comes to Edit Preferences and
you need file paths. And you can see now that this is the file path
where he's gonna log. Now you can see
that I've got mine set up on a different one. And the reason for
that is I'm actually already been using
the blend assets. You might not have anything you wanted to do then
is go to the plus. Click the plus, and
you're going to come to desktop and you're gonna
click the blending assets, an asset library like so. And there we go. Now you can't give
it a name as well, so let's call it
just blend assets. In fact, I'll call
it pharmacists because that's their short
course. It's about farms. So let's call it farm assets, like so. And there we go. Now, all you need to do
now is close that down. And then what we can do is
we can come to our assets. And you can see now that
we've got two files, farm assets, and
we've got 3D 2D. And you can see
into my 3D 2D it, I've got all of these
already in there. Now you can see how easy
that is to actually do that. Now let's go back to modeling and then what
you're gonna do is file. You're gonna come
down to default, safe starter file again. And now blending knows exactly where to go to look
for all those assets. So a bit long-winded, a nova hopefully now that you
actually understand that, I will just show you
quickly how it works. Now, let's say I want
to bring in a doll. Doll from one of the previous
things I've actually made. I'm just going to drag that in. And you can see it comes in. Now, vegetable, not only
does he come in, well, if we go over to the
right-hand side here, which we will go
into more detail. So if you're new to
blend and don't worry about this too much
of the moment. But over on the right-hand side, you can actually say that we've got materials on this as well. And if we come up and
we click on our image, say Rows button here, you can see that they all the material, not only have we got an actual dollar comes in where we've got the
materials as well. I'm gonna do is
I'm going to just delete that out of the way
with the delete button. I'm gonna come back
over to my modeling. And now we're going to actually
get some modeling Donna, and I'm gonna go through
and show you how to create. Alright, so we'll stall out in the next lesson. I
hope you enjoyed that. I hope you call it out and
I'll see you in the next one. Thanks a lot. Bye.
4. Setting up References within Blender: Welcome back everyone
to blend the three, the ultimate medieval sinkholes. And this is where we left off. Now let's think about
actually create to know first actual model. Let us create
something very simple, which will be one of
the wall barriers within the actual phone. So I want to do is
you actually want to bring in an actual reference. So how do we do them? First of all, what I'm going do is I'm going to print
a press Shift a, and then I'm gonna come
across and you can say that we've got one where
it says image. And what I want to bring
in is a reference image. Now I'll show you the wrong
way to do this first, and then I'll show you
the right way to do this. There's come across reference and then you want
to go across to your resource download
Power BI came with this course and we're going to bring one of the references in. So here's my resource pack. And you can say that I have one that says references here. And then you can see what
we've got a load names here. Now if you wanted
to view of these, all you need to do
is click on this. And what it'll do
is it'll show you the images which
sometimes is much, much heavier than the other way. You can also come down and
click this and you can actually change the size so you can have that
on large as well. So you can really say
exactly what you're doing. Now the one that we're
going to pick is this one that says what way you can
say it's pretty simple, just a few pieces
of wood and that's the one that we're
actually picking. The other ones you might want
to bring it into the same. So you just have an
idea of what you actually creates
an if you've not seen it yet or
something like that. Now let's double-click this. And you can see that at
the moment we bring it in, it comes in a really,
really funky angle. And that's not something
we're particularly one. And the reason it's
done that of course, is because when we brought him, we will look in at this angle. We don't want that, so let's
delete it out of the way. Let's press one on the key, on the number pad and
then we'll give you a central view
looking straight on. In other words, if
you press three, you can go to side view. If you press seven, you
can go to the top view. If you press Control and warm or controlling three
or control and seven, it will basically
go to the opposite. So if I press Control and seven, I'm actually then
coming from the OEM, the sign of whatever
I'm looking at. Again, let's press one and
then we're in front vehicle. That's exactly what we're
going to press Shift, come to image reference. And let's bring in that walkway
image which is X1 here. So bring it in and there we go. Now you can see
that we've actually got reference image bolts. We don't actually
have a human to give as an actual scale of this. And that's something
we actually want. In other words, we
want to bring in a reference that tells us, Hey, this is the scale of, hey, human for instance, and we
need to build around that. Do we have a human? Yes, we do. Let's come up to File. And then what we're gonna
do is it's going to come to impulse and then you're
going to go down to OBJ. So let's click on the OBJ
and now you're going to go back to your download
pack and there is mine. You'll notice that we have one
that says human reference. So that's bringing in
all human reference. So double-click it, double-click
the human reference, and there we go. Now let's grab our
actual image first. And what you need to do
is you need to press Shift Spacebar just to
bring in your move tool. So you're just going to come
down to where it says move. I'm gonna move it
over to that side. So here is our human reference. Now you will notice
that each one of these squares is a
meter in height. So you will see that E is
around 1.8 meters tall, which is around the average
height for a human being. And that is why we use them. Because it gives us a
really good idea then of how tall were actually
making something. Now the moment you
will see that it is orientation is over here and that's not
something we want. We want these orientations
be pretty much in the center of it,
all down on the flow. But I think for now what
we'll do is we'll just move the orientation
into the center of him. I'm going to right-click Set
Origin, origin to geometry. And that's quite right
in the center of him, and that's exactly what we want. Now, before we move on, let me just show you them out. The assets actually works. So you can see over here, it
says human, 1.8 meter group. Let's just actually rename that. So we'll just call
it human reference. Like so. What we'll do
is we'll come up on your right-click
and you'll see one that says mooc as assets. Now if I'm mark
that as I've said, and now you'll see that
we've got this here. Now actually, if I come up
and I save out my blend file, I want you to do is
I'm gonna come up and we're going to save
out this blend file. Let's call it following
assets, so we'll call it up. So let's come down to
where it says save us. You can see here blend that assets blend is
actually what it saved us. So we could actually
save it over there, but I think we'll
just save this out as assets, something like that. And let's just save it out. Now one thing I did forget to
do before actually putting my origin back is
inch press Control a, and come down to where it
says reset all chromosomes. This is very important
with anyone you build or anytime that you move the
orientation of something. Because if you don't do this, then blender still views this as a certain size or certain scale or even the rotation coming
around and things like that. So always make sure that your reset all the trunks
forms with Control a and then right-click and set origin to geometry like so. Now let's save this out. So I went to Save
As I'm going to save it as my farm
assets like so. Now what I want to
show you now we've saved that and we've actually made it as a actual assets. I want to actually
show you how this works and in real-time. So if I come down and I
open up a new blend file, we all my new blend file and you can see
itself with no camera, no lights, no cube as
we actually saved out. And then what we're going
to do now we're going to call them to where
it says Assets. You'll notice that
I've got all of my assets in from 3D derivative. And then what I want to
do is we want to come down and click on
the palmar side one. There it is. There's my human,
as you can say, we bring demand and
he's ready to go. Now the thing is you might
want to actually also make some extra options here. So you can see here
we can change this. I'm told there's two
reference for instance. And then what we can do
is we can actually drop our human actually in
it and save it out. So you can see it's really, really great to have loads
and loads of access. And for HDRI is all
materials or humans. Whatever you need
to have in there. All right, everyone, so
let's close that down now. I've finished explaining that. Hopefully you understood
it and hopefully now when we actually use it a little bit later on in the course, you're actually going to
be able to use your own. Alright, so this is
where we left off. Now what we want to
do before we start is we want to make this
actual reference as big as this human so that we can see the
actual scale of this. Because you can see at the
moment, if I made this, this size is head will be
binding on the bottom of here. And that's not something
we want to do is I'm going to grab
actually this reference. I'm going to press the exponent. I'm going to scale it
all until this human here is about the right
size as my human here. So you can say for bringing
them over is a little bit too big and we scaled
back a little tiny bit. Let's see if it's
the right size. Now, bringing them
over. There we go. I think that's going to
actually do We don't need it perfect or anything like
that. All right, everyone. So what we can do now is
we still want to keep this year when I
want to keep them in the same because it's very, very honored to have
while we build out all of our farm buildings
and things like that. And then what we'll do is
on the next lesson now, while actually finally stopped
where now the thing is, this course, unlike
other courses where a belt the
whole building out, and then we put materials
on and things like that. We're gonna do this a
little bit different. That's all I'm going
to show you some really easy ways of actually putting materials and textures
onto the actual models. And second of all, we're
going to build something. We're gonna actually
texture and material it. And then we're going to animate
it if it needs animating. And then we're gonna move
on to the next building. And that's where you're
going to do it because then it's gonna keep
things a lot more interesting than just building a whole scene out and then
doing everything at the end. All right, everyone.
So I hope you enjoyed that and I'll
see you on the next one. Thanks a lot.
5. Creating the Walkway Greybox: Welcome back everyone. It's a blend of three, the
ultimate medieval seeing costs and this is where we left off. Now, let's bring
in a cube first. So what we're gonna
do is you can see at the moment I've got a
cursor in the middle. Yours might not be in
the middle if you shift right-click, shift,
right-click it. Yeah, there we go,
shift right-click. You'll see that we can put
our cursor anyway, won't. Now this is really handy, but not handy for when
you want to do right now. So let's, so Shift S.
So the world origin, It's gonna break buying
in the Center for us. Now let's bring in a cube. So shipped a mesh and come
down to where it says q. And then longlines
do is I'm gonna grab my cube in object mountain. Now, what is object mode? We have object mode and
we have the edit mode, as you probably saw
in the blender basic. So if I press tab, we can go
into object and edit mode. Now in object mode, I
want to scale this down, so I'm going to press
S, scale it down. What I wanted to do is
I want to get round about the same size
as these parts here. And then we're going
to build this out. So let's bring it over. I'm gonna come in, scale it down a little bit more, like so. And I'm gonna bring you
all to the bottom of that, like so now the next thing I want to do is I
want to press top, constant phase select grandma. Top phase shifts baseball
because we all in edit mode, so we need to bring in
the move tool again. I'm going to press
one again the moment. I'm just going to
bring that to them. Now I'm going to
press Tab again. And you can see at the moment
that might orientation is right down the bottom of here because we've reached,
scaled it up. The best thing you want to do is control all trunks, foams, right-click set origin to geometry is going apart
right in the center again. Now we need to duplicate this. I'm going to press Shift and then I'm going to
bring it over like so. Now just be careful
that you only press shift D one so you'll end up with multiple duplications and you don't really want that. The next thing I want
to do is I actually want to join these together. So I'm going to
grab this one with left-click shifts like this one. And then I'm just going
to press Control jag and not then it's just going
to join them together. Now I want to twist these round, so I want to turn them around basically so I can get the kind of how far away
each of these all. So I'm going to
press all zed 90. And now you can see that because we're actually from this view, we've actually turned it
around and there we go. We've got how long
it actually is, but we don't have how the
width of it basically. So try press will now come in, bring this down to here. And now I've got both of them. So now all I can do is
I can press shift D. I'm bringing them
to the other side. Like so. Don't worry if it's poking out over your
route for anything live. I'm just making
sure that the both in the rack position lab that we're going to
actually solve that out. So don't worry too
much about them. Okay, so we've got basically all actual first
ball, ball building. Now we actually need
to put a roof on here. Let's make a simple rule. Again. I'm going to press one. I'm going to then
grab them both now. So Shift select them
both, Control J. Let's join them all low. Let's now reset the transformations that
we've talked about. So all transforms,
Let's right-click then and set the
origin to geometry, putting it, finding
the sentence it. Now let's make our
actual roof off. So I'm going to do
is I'm going to bring in another queue. Let's bring in a cube. So shift a bringing cube and you'll notice that
my cube came over here. I don't really want that, so I'm going to press Control Z. I want my cue to
come right in here. So you'll see that wherever
we bring something in, wherever I'll cursor is, normally, that is where
it's going to come in. If I press Shift S and go cursor to select it,
this one down here. You'll notice my
cursor then comes to the orientation of
these actual blocks. Now I have a pressure
if day mesh tube, my cube comes in
exactly where I wanted. So now we're going
to shrink it down. Bring it all a modern-looking to do now
is I'm looking to bring you out to round about the same size as this
actual roof here. And this is why we
picked this reference, because this one is pretty easy. So we can actually
really like nail down our actual skills before moving on something
more complex. So let's press S and X. I'm
just going to bring them out. So that roundabout here like so. And then I went
to do is I'm just gonna come around and I want to join these two together now,
so we want to press top. And I'm going to call him too. I'm gonna come to that. Select click this and
this. In a moment. There's want to right-click,
come down and merge vertices and at the
center, like so. And I'm gonna do is saying
where these tables, so select this bit
shifts like this, but right-click measured
says at center line, so fresh one on the number pad. And now I'm going
to do is I want to really bring this down
to get the right height. So I really want to go
into my head select now grabbed the top of
the airway, Black Plague, press one on the number pad
and let's bring it down to where they are so you can
see if I approach somewhere, live on pretty much
halfway through, maybe a little bit further down, nice halfway or
all the way along. And we can hide that from that. Now the next thing we
need to do is rarely. And we need to bring this
out a little bit because at the moment not actually
being supported on anything. So let's solve that out. So I'm going to grab it with L. I'm just pressing L and
grabbed all of this. And then I'm going
to press S. And I want to scale it
on the actual y. And I'm going to
scale it on the wine because it's already
in the center now you can see I can
bring it out like so. All right. So we've actually
got the basis there of it. You'll know as well how far it comes out this way because
it wasn't the center. It will also come out
on this way as well. So that's perfect. That's
exactly what we want. Now we do have a
few problems with all bits of wood
sticking out here, but we don't actually want to
do anything with those yet, because we want to actually
create this first. If it creates this first, then we'll have a
good idea of how far out are actual posts
sticking out here. So that's what
we're going to do. Now, let's press tab. Let's grab them both. So I'm going to
grab this and went to shift left-click base. And I'm just going to move
them to the left-hand side just so and I have an idea
of how it actually looks. You can see at the moment our roof should come
further down here, for instance, on our panels they're a little bit
cell pass the root. So that's what we're
actually looking at. Now let's actually
create these panels. First one went
today is I'm gonna grab the top of my roof, press the Tab bone comb to
my actual face, select it. And then what we're going
to do is I'm going to press Shift D to duplicate it. I'm pulling out like
so now there are many, many ways of doing these things. And at the moment I'm
going to show you the wrong way of doing it and why certain way of doing it. You can say at the moment, if I do it like
this and I want to make these lines across here. If I come in and try bringing an edge loop in, I
can't bring it in. So if I'm pressing Control law, you'll notice it
won't come in yet. If I come to this side
and press control law, you can say that we can bring edge loops and how
am I doing that? I'm pressing Control Law. I'm moving the
actual mouse wheel opened down and that's bringing
in them more edge loops. The problem is, we
can't actually bring edge loops in to something
that has a point. Now in other words, a triangle or a pyramid can't
bring edge loops in. What we need is something pretty flat and then to bring
orange loops in. So let's actually leave this. So I'm going to grab it, press Delete versus I'm
going to then come in, grab this face here, Shift S cursor to select it. So that puts my cursor
right in that press Tab. Then we're in object mode. And now I'm gonna
bring in a plane. So shift day, come
over 26 plane. And now let's spin
this flame around. So all why 1990? And there we go. Now
what we need to do is make sure that this
plane is the right side. So if I press one at the moment, as you can see, I
can't see anything. So what it needs to
do is I need to press Z and go into wireframe. So I would come into wireframe. Now, you can say I can
see right through that this is the size of this
actual triangle here. Now if I grabbed my axial plane, press S and scale it down, what I want to do
is I want to scale it just enough so
it actually fits. Well, I'm going to do is I need now to grab the bottom of this. So I'm gonna press top
going into edit mode, edge select, grab this edge, pull it up just to the
bottom of that, like so. Now if I press Control, all you can say I can
actually bring live soon. How about that? That's gonna make it
much, much easier than. So let's have a look.
We've got 1234 edge loop. Let's hover over the left-hand
side and then scroll on Maslow 23 full times,
something like that. And then what are
you going to do is you're going to left-click. You'll notice when
you left-click now you've got freedoms. Move these wherever you want. Now we don't really want that. We want a problem
buying in the center. So it needs to do
is just right-click and I'll just drop them
right in the center. Like so this is exactly
what we wanted to. The only thing is of
course you can say that we've got
massive, massive gaps. I'm going from
here, for instance, and we don't really
want that thing is, when we've got a roof on, we want these to be a bit longer. In other words, we
want to be able to control how far these actually stick out here because
we don't want them sticking through the roof
or anything like that. So that's kind of important. So what we're gonna do
is we're going to grab the whole thing
without having to press S and X and just pull them out just a
little bit further. And now they're ready to
actually create our actual root. Now let's press that and
go back into solid mode. And then what I'm going
to do now is I'm going to actually create
this actual room. I want to create one side
of this first and then duplicate onto the other side because I feel that's
much, much easier. Let's press top. I'm just going to pull
this out and then come to my roof among went to do now is I'm
going to press Tab. I'm gonna come in. I'm going to grab this
part of the roof first and I'm going to press pay more. That's gonna do is it's
going to basically separate it out from
the rest of the roof. And that's exactly what the
reasonable nice because if a separate now pay selection. And now we can grab the
other part of the roof, which is this part here. Just press Delete. Now what you should end up
with this piece of wood here, which are going to
use to the sides. This piece of wood here, which we're going to use
obviously for the top. And now we can start creating
something with this. All right, everyone. Again, I hope all
that makes sense. It will be harder
in the beginning. But as soon as you've got the actual workflow that
we're going to do here. You'll really be able to create the bond and things
that fairly easily. All right, I'll see you
in the next one. Thanks. Bye bye.
6. Working with Planks of Wood: Welcome back everyone
to blend or three, the ultimate medieval
scene calls, and this is where
we left it all. Now let's actually
create a roof. Let's do that first.
So what I'm gonna do is I've got pretty
much the sizing. This at the moment. I really don't really
need anymore of this. I don't fail, so I'm going to actually delete my
actual reference. I've still got my
Monday near as well. So if I need to reference the size or anything
like that icon there, I think pretty much I've got
everything I need from this. I'm going to delete
that out of the way. Then that's going to
free meal to actually build around what I've got here. So let's first of all
come to our roof. A moment to do is I'm going
to actually press Tab. I went to press Control Law. I don't want to bring
in some blue coats that are basically
going to enable me to create the
actual roof panels. So I'm gonna scroll up. I think I'm going
to have something like that that
looks about right. If I left-click, right-click and I look at my
man from here you can see these are fairly
size planks of wood. They're going to make a
good route of ethane. Now the next thing you want
to do whenever you do this is right-click and come
down and democracy. And the reason we do not then
is because it's going to make it really easy to
actually split these up. So I always get into habit
of actually mark in a scene once I've actually brought
in my loop clock course, now I'm only marking seams on the way that the
actual words go in. You know, these
are going down and wouldn't marker scene
going this way, for instance, now I'm
going to do is I'm going to bring in
some more edge loops. I'm going to press Control all. I'm going to scroll up once. I'm going to left-click and right-click and drop them
right in the center. Now what this enables me
to do now is it enables me to make these very
varied between each other. And that's exactly what we want. Because now I've got
actual edge loops in here. I can actually bend
These little bit. If we don't have these
edge loops in here, we can't actually bend them all. So that's why I've done that. The next thing then I
tend to do is split. These'll come in now because we've actually
marked to seem, it means that I can come in
to each of these and press L, and it will only
actually go off and grab the island up
to the mark scheme. As long as you're
in face selected. If I'm in Edge Select
and acclimate in, press it out, it will
grab the whole thing. If I'm in face-like,
grab the top one, press L, then L, and then L, then L and an L on
every other one, you can see how it only
grabs them up to the seams. And that's perfect because
that's what we actually want. Now I'm going to do is I'm
going to press the Y button. And what that's gonna do is
it's actually going to split these off of these other
pieces of geometry. Press Y now, then a press
G, which is free movement. You can see that
the role split off. As long as you don't click
on anything on your mouse, you will be able to move
these wherever you want. And if you press right-click
on your mouse and I'll drop them right
by chins place. Now the moment they don't actually a lot
like to split off, but they actually
fell on Wednesdays. I'm gonna press a
to grab them all. Then I'm going to do
is I'm gonna come up to my two interlocking
links here. Click this down arrow and I want this on individual origins, and I'll show you the reason is if we have this on medium point, if I press S and Y
and scale these, you can say, see we can scale
them right from the center. And that's not very
useful to us right now. But if we put this onto
individual origins, an interest, that's why I can scale these in individually. That's perfect because
we want to create these into plants and water if
our scale these in very, very slightly, you
can see now how easy it was to actually create
these as planks of wood. Now the next thing is
we don't want all of these planks of wood to
look exactly the same. The moment you can say
they look exactly the same and that's not
very realistic at all. So let's actually create these to make it look a
little bit different. I'm gonna show you a really easy technique to actually do that. What I'm gonna do is
we want to press Tab. I'm gonna come up and put
on my proportional editing. And warmer today is I'm going
to click this down arrow. I want to print on
a random like so. So we've switched on, we've got a random, a knife or come and
grab one of these. I'm going to grab this one
here and I try and move this now you'll see that as
I tried to move this, all of them move. You can see that I've
got a circle and I have a scroll out my
actual mouse wheel, you can see now I can pretty
much move all of these. Now we've set it to random
because what it does is it grabs and moves them
this way and this way, and it's very, very randomized and that is exactly
what we want. So what we're gonna do is
I'm just gonna go in and slightly move them very, very slightly to give
them not random log. Normally do is I'll
come to the left, I'll come to the right
and move them sideways. And then I go in and actually
move them out of it. So I'm gonna pull it out
a little bit like so. And let's come to
this one and pull it in a little bit like so. And you can see
how easy it was to actually get that real
randomness go in. And if I press Tab now, you can say the
look fairly random. Now the one thing you can say is that they're all
straight at the bottom. So that's the next thing that
they're so first of all, I go in and I move them
sideways and then he pulled them out a little bit
and then move them down. Now I went to go in and you'll notice that if I click on here, it's going to move out
here and that's not something they want or maybe
it's something you want, but I particularly don't
really like doing that. What I'll do is I'll come up and I'll change
where it says global. And I'll probably some novel. Now you'll see pretty much it's following the way
that we wanted to go. So now I can pull this down. Like so I'm bringing
this one, for instance. Like so. And you can see now
that the fairly, fairly on the event, and that's exactly what one. Now the next thing you want to do is you want to actually make these into a solid
piece of mesh. So how do we do that? First of all, you want to press Control a and reset or
your Trump's foams, then you want to write plate
set origin to geometry. And now we want to bring
game office modifier. Let's come over and
add in the modify it. And what do you want to
do is you want to bring in solidifying, more solidified. Does this basically
turns a 2D plane into a 3D cube or anything to d can be turned into
something that is 3D. The moment you can say it's fairly thin because I'll
thickness is very low. But if I bring this out, so you can see now
how we rarely, rarely stopped to get thickness. Now the best thing about this is you want to bring game you all month and just pull him over to where you
actually build in. And the reason is because
you wanted to just have an idea of how thick
the actual wood is. So that's why I tend to do
go back to my actual panel and then probably bringing
it out a little bit more. The other thing is
you can really, really slow this down
if you grab it and just pull it to the left or
right, hold the Shift button. You'll see that really
slows that down. How fast you actually
pulling that out. I'm gonna say to something
like that thickness. That seems about right to me. Yeah, I think I'll be
actually happier with them. Alright, so I'll think I'm
happy with how they are. Now the next thing we wanted
to do is have courses. We want to bring
them a little bit closer together now
because we don't actually want to see in
that, how do we do that? So again, what we're gonna do
is I'm going to press top, I'm going to press a
to grab everything. And then now I'm going to
set this back onto Global. I want to set my
interlocking links onto individual origins just to make sure
they're on that, I'm going to press seven
square over the top and now can see in-between those. And then while I'm going
to do is I'm going to press needs tech
fortunate it's enough. So just take that off and
then I'm going to press S and Y and just bring them
a little bit closer. Again, you can use
the ship bonds, real slow it down. So just bring them
closer together. Just saw the nearly
touching not so they overlap in just so
the nearly touching. Now the last thing I want
to do is I want to make sure that I bring in
my bevel modifier. And the reason for that
is because in real life, nothing is ever a straight
re physical side like this. Normally, especially
on would you have a bevel going along here whether
they're plants wherever. It's sometimes very slight, sometimes like with things
that you'll see on railways. And when they have
those planks of wood, the very, very actual
big bevel on the edge. What domain? Let us, let me just
show you what I mean. If I come over to where
it says Add Modifier, come down and you'll see you've
got one that says Bevel. And as soon as I turned on, you can see exactly what I mean. All this looks a bit crazy
because he's set too high. So just come down
to where it says amount a normally naught
point, naught one. Like so is normally an open. You can see now they've
got a slight bevel on them and it makes it look a
whole lot realistic. You want to really
be doing this, but every piece of wood
in this actual scene. And then it's gonna
turn out really, really nice when
you actually get your materials on the textures
and things like that. All right, So we've
done that bit. Now let's think
about our next base. We'll come to this side panel. If we press tab, we can
see that we've already got in these actual
pulse ready to go. The one thing we do need is we need some loop costs
coming down here, just so we can bend
these out a little bit. Library did this and I said this technique we're gonna be
using over and over again. Now first of all, we
know that we need to really have some seams on here, so it makes them very, very easy to grab all my
news and went to right-click come down and
you'll see Mark seems is here. And then I want to
bring into more regular I'm going to
press control law. Let's try. Let's try three,
something like that. So left-click, right-click, and then we want
to split these up. So I'm gonna come
to Face Select. I'm going to grab this
one hand, press L, L, Y, G, just to make sure the split right-click
drop them in place. That's the second time we've
done this technique now. So you can really
actually get a good idea of what we're actually
trying to do. All right, so now we
don't have a problem in the never going
to fit in here. As you can say, I didn't
grab them all when I press the top and
then pull them back. So you can see that
if I pull these by something like that, probably going to have to
pull them out a little bit further just so they're
not going over here. I'm gonna solve out and I'm
just going to pull them out. I'm going to stick them
actually against that. And they'll say I
followed that, come out when we've got oscillate, if I want to think that'll
be the best way to go. So something like that. Let's start with that.
Now. Let's split. Now they all split up as we can see if I press G,
they're all split. Welcome to do that
is I'm going to grab them all and we're basically going
to do the similar thing to what we did on this. I'm going to press one moment that doesn't
want to come on. It's where these
interlocking links off, make sure they're on
individual origins. Press the S and Z. And now you can say I can make them on each one of
these and actually give it as though the illusion that planks of wood and
they've got gaps in between. Next fall I want to do
is I want to bring in my actual proportional editing. Switch that on, come
to edge select. Let's grab this one. Pull them off very, very slightly user shipboard. And if you need to again, pull this one out very, very slightly like so, then I'm just going to pull them out a little bit from mainly from something like map and then pull this one
in. Something my mom. All right. You can see how quickly and
easily now you can do that. Now we do have a problem
in these, as you can see, that not correct
because going way, way over here, and if I try and call them from these points, you can see we'll still
Absalom WHO ranks. So that's something that we
actually sold need salts out. Before we do that though, we might as well
pull all actual top. Hello won't weight
onto the other side. So we got basically a
roof. At the moment. We've only got half a room. That's something we'll
have to actually do the next lesson. All right everyone.
I hope you enjoyed that and I'll see you in
the next one. Thanks a lot.
7. The Powerful Bisect Tool: Welcome back, everyone
has blended three, the ultimate medieval seen costs and this is
where we left off. Now, we've got these a bit
uneven and things like that. We just need to bring this
over to the other side. Now the thing is, we can
actually duplicate this. So if I click on it, I could
actually duplicate it. It will make it a
little bit harder because I've got to
actually fit into place. I don't, I don't really
want that. So what I want to do really is
I want to mirror it over to make sure it's buying in the right place
now, how to do that? If I'm narrating, I need to make sure that wherever I have golf, my origin, this little
yellow thing here, that is why it will
be mirrored over. So I'll just quickly show you if I can move to add modifier. Come over to where
he said he's mirror. You can say it
mirrors from hand. If I pull this across, it'll just move the
whole thing ends up a little bit of a mess so I
don't actually really warm. I'm going to scroll down and
just click off my mirror. And then while I
want to do basically set the origin then to the center of this
actual walkway and then mirror it over.
So I didn't do that. Well, let's come to actually
these blocks here because we know that these are all basically the center of what
we're trying to build here. So we can see that this
is the center here. So if I press Shift
S to select it, my cursor that is
going to come to the center of these blocks because that's where
the origin is. If a comeback now to the roof, select it and press right-click
set origin to 3D cursor. Now my cursor is gonna be
exactly where I wanted to, because it's gonna be
right in the sentence. It, I haven't come over to add, modify it, come
down to mirror it. And now you'll see that
that was as easy as that. We've just put it
over the other side. Now the thing is, you
don't need to worry really about this side
looking like this sudden the reason
for that is when we bring in all textures
and materials and things that we're going
to actually apply different areas of the texture
amount to these plants, would they're going to actually look very different
from each other. So don't worry too
much about that. Now let's actually crack home with making
these side panels. And what we need to do
now is we can say is we need to cut them away because at the moment they're way, way out here and that's
not something we want. We can also see the bottoms
up here in the right place. So let's solve the office. So it comes outside, Paul,
I'm gonna press one. I want to pull it up
very, very slightly. And then what I'm
going to do is I'm just gonna pull these out now. So I'm gonna press S on
x and pull those out, making sure that the ring, these pieces of wood here. Now, realistically, if
I want to call this, I need to call them
probably about halfway where my
actual bodies here. So halfway along here, then that'll make sure
that we can't see in the gaps here because
we didn't rather warm up. So let's say I press tab. Let's press a to grab everything unless
come over to mesh, come down to a button
that says bicep. And I really like this tool, so I think you're also
really going to like it. So let's click on
the bicep tool. Let's come over to the bottom now of this actual roof here, left-click and drag
it to the top. Like so. Now you'll
see nothing happens. Both actually, there is a
coat actually in there. So I'm going to now come down to the bottom
left-hand side and we've got an actual menu here. And if I click this open ankle
down and clear the inner, like you can see that all I
can clear the outset and you can see that now it's actually cut out wafers and
that's perfect. That's exactly what I wanted. Now how did they
actually worked? I'm going to show you how
that actually works now. I'm going to just come in,
Hi my roof all the way. Just to show you, I'm going
to grab my planks of wood. They can see now that if I grab, let's say I grabbed these, I'm just shift clicking. I'm going to grab
all these lives. So then what I'm going
to do is going to come up to my mesh dissect. I'm just going to
coat from here. So let's call it from here. You'll see that only cuts
away basically the ones, first of all, I had selected. So you can see it's
actually let these on here. You can also say how it actually works with the actual
code follows the mouse. You can also see
once you've done that now we can move
this backwards and forwards and pull it
left or right and actually caught
further or more in. We can also play the init
or we can clear both. Or we can clear that
out to all we've been clear norm and actually just
pull an actual alignment. Now let's press Control Z. Among these days,
I'm just going to bring back my roof now, so I'm going to press Alt H. So it's hard my roof and
press H to all night. It would press Alt H and I
want to come back to my side. I'm gonna cut this part away. So I'm gonna come in, I'm
gonna grab the whole roof. It just makes a little bit
easier with the airborne. I'm gonna go to Mesh, come down to where
it says bioseq. I'm going to grab it
from here and put it straight down to
the bottom off here. And then I'm going to clear
the DNA play at the outset. And there we go. Now
we've managed to cut this away from this roofs and answer the in
perfectly in place. Now we do have a few problems
as we have with this roof. First of all, the
god knows thickness. Second of all, they've gotten no beveling or
anything like that. And that's something else
we need to look out. So first of all, let's bring
them closer together though. So what I'm going to do
is I'm going to press, Okay to grab them all. One, I'm gonna press S and Z, takeoff from our
proportional editing. I don't need that on, make sure they're on
individual origin, so we're pulling them together. So S and Z pulled them together. Like 70 can see we've
got a few gaps in that and that's fine
with the side panels. You can have a lot more gap
in the side panels and you can't be taught to make it
look a bit more real estate. Alright, now, something
else we've not discussed. As you can see at
the moment on here, we've got some lines. They don't want
realistic and you'll also see if we come around it, that we've also got some lines on this piece of
wood here as well. We really don't want these, so how do we fix those?
What's causing it? Actually, the thing that's causing it at the
moment is not blend. It is just basically
flattening out all of these. So it's flattening them out. And that's not realistic. We need things based on the angle of how flat
something needs to be. You'll notice if
something's very flat and you don't
really get these. And it's because that they do with the shading is
how they are shaded. So for instance, if I come in, I'm right and I shade smooth, you'll see that it basically rounds everything on that again, it's not something we want. Always though you
have to shade smooth, so you need to
right-click Shade Smooth. Then come over to the
little triangles over here, come down to where
it says normals. And what we're gonna
do is we're going to actually ask blended to Altos, move it based on an
angle of 30 degrees. And now you can say they look under actually perfectly smooth and that's exactly one. So now let's do this
to the side panel. So I'm gonna grab it,
right-click Shade Smooth. Ulcers may. And there we go. Now we're ready to rock and roll with all solidify and bevel. Exactly the same thing
as what we did before. We're going to grab
it, multiply it, solidify, come underneath just so we can
see what we're doing. Let's bring it out. Let's first of all pull
it back a little bit just so it's nearly
flat against these. Then what we'll do is
we'll bring this out now holding the shipboard. And you can see that it's
gonna be a little bit thick and it's gonna come a
little bit over our roof. Well, we're not going to
worry about that now. That's probably a
little bit too thick, so let's bring it
back a little bit. Something, something
live, are things fine? Then what we want to do
now is bring out our roof. So I'm gonna grab our roof. I'm going to make
sure this time among medium point because I wanted
to pull from the center. I don't actually want to
pull these individually. And then all I'm going to do
is I'm going to press S and Y and pull it out just
so it goes over those. And when I hold the
Shift button as well to make sure that position it
exactly where I wanted. And I think something like
that is absolutely perfect. Alright, so I'm really,
really happy with that. Now I want to do finally is
I wanted to dabble these off exactly the same
way as we did our roof. So I'm gonna come over and
modify and come down to bevel. And then we're going
to put this dot point. No one is upset and double-tap. And then we go, now I think we can bring these a little
bit closer together. It's a little bit too much
a bit of a gap there. So I'm gonna grab
them, make sure I'm on individual origins, press the top bone, bring them close together, double-tap. And there we go. Okay. So
now I'm happy with that. I'm happy with my roof, but I just need to put this now on the other side as well. So I'm going to do about now. So I'm going to grab this side. I can see that I've still got my cursor in the
center of these, which is basically the
center of the whole model. So I'm going to Control
all transforms. I went to right-click that. And I'm going to set the
origin to 3D cursor. Now you will notice when I reset the transforms that
this actually altered. And the reason why is
because I was suddenly, and when I actually
finished building this, I didn't reset the transform. So now every set
of the Transforms, It's slightly pulled it out
a little bit as you can see. So let's go back to our roof and just pull it out a
little bit more. So S and Y holding
the Shift button, pull it out a little bit more. So it's going over those lines. So now let's go
back to all sides. And now let's bring in a mirror to pull out running on the side. I'm gonna come over on modifier. Condemnatory says,
where is it, merit? And you can say,
nothing's happened. Well, if I scroll down,
I need to put on the y, take the excess off, and now we're right
on the side and he shook be perfectly in place
on this side as well. Alright, let's double-tap. There we go. You should
have something like knot, which is exactly what you want. Now you will see that
we do up some problems. If we, for instance, a walking in a
game or something, you can say that all
planks award the, these posts are old now. They come up to here that's
not really where warm because it looks like It's basically floating on top of it. So let's fix up before
we end this lesson. I want to call them to my posts. I'm gonna press tab. And then I'm gonna
come in to this one. And this one just
come around this one and I'm just Shift selecting
each of these this one. And then while I'm in today
is I'm going to call them, grab my open, just
pulled them up. They actually fit in
place and you can see now they look
really, really nice. Alright, so now we do not. Let's reset the transforms because we've moved them
around a little bit. So I'm going to press Control. All transforms right-click. So origins geometry. And now finally,
I'm also going to bring in a bevel on
these as well because the moment they've
got raises signs on them and that's not something one as we've already discussed. So let's consume. I'd modify it, come down to where it says
Bevel and that's pulled these naught point, naught one. Oops, I'll put it on. There we go. Now you can see it
looks really realistic. Double-tap the egg
and there we go. Now in the next lesson, all we need on land is
the top of this roof. And then finally, we
can actually work on bringing in all textures and materials and things like
that and saving this out as an actual asset because
that's the main point of this. All right, everyone, so being enjoyed that and I'll
see you in the next one. Thanks a lot.
8. Learning about Textures and Materials: Welcome back, everyone is blend the three the ultimate
medieval scene calls, and this is where it left off. Now let's bring in the top of our roof and let's
bend it a little bit. We don't want to be perfectly straight or anything like that. So long lens theories, I'm
gonna make sure first of all, my cursor's in the center
which you should pay. I'm gonna press your day and
just bring in a simple cue. I'm gonna pull it up
and I'm going to press the X bar just to scale
it in a little bit. I'm gonna say raw on top. Like so. Basically why we don't want
referencing as well at this point is because
I wanted to give you some freedom to create it, how you want to create it. So you might want
this a little bit thicker and I'm on board
mine a little bit, they know or
something like that. You might want to scale
it in on the z. I said, just scale it in and just create your own
actual walkway here. Now let's trust S and Y and play out over the end of the year. And then you might
want to also bend it a little bit just to give it a little bit
of a curve on there. Think i'm I do though, so
I'm not gonna do that. I want to press top, I
want to press control law. I want to bring in
three edge loops. So scroll mouse three times,
left-click, right-click. And then when I went
to there, again, I'm going to use my
proportional symbol this time instead
of an LME random, I'm just gonna say on smooth. And that makes now a nice
smooth gradual bend in it. So if I come in and I press Alt, Shift and click twice, you'll see that I
grew up the edge loop going all the way round. Now if I come in
and pull this down, you can say I pulls it in nice and smoothly
unless exact role on. So I'm just going to pull
it down very, very gently, just to give the illusion
of a slide bowing of the actual wood because it's weathered and
things like that. So we want this to look a little bit wetter
than VT to know. The other thing is, of
course you can come into your posts and you could bend these out a little bit
and things like that. Now I tend to actually leave postdoc going
straight so I don't really bend them too much unless it's something
with the law of weight. So something like this, it hasn't gone away. The chance of it bend in a
post like this is very remote. You don't really
get this on kind of a roof or something where
this older floors on it, all the actual weight of all those taus of the room funding or
something like that. So really think about
that before Boeing, something the reason why
this would be bowed out is that festival is pointing
sideways. So it's sideways. Is that a lot or
rain coming down? They're cold and warm makes
it warp and things like that. So that's why the top
of them would be Ben, same as these pieces
of wood here. Exactly the same reason. And the side piece was a lot of range or pin
on them and things out. So all that to think about. Alright, so now let's come in. And again, we'll go through, I'll set routine of what we do. If we right-click. First of all, Shade Smooth, also smooth on. And then let's control
all transforms. Right-click Set
Origin, geometry, come over to modify
it and modify it. And we're going to bring in not solidified because
it is a 3D object. So all we need to
bring in is a bevel. Bringing out Bevel, set this
naught point, naught one. As I said, it's normally
not pointing out one, but not always
don't guarantee it. So when you put it in whole
point and just make sure that you check it and you can see at that mine is located. Absolutely perfect. Alright, so that is basically the walkway pretty
much modeled and done. So now we want to do
is we want to actually apply all of our modifiers, join it altogether, and
then bring in all textures. So let's do that now. So the first I'll click
on the top of it, I'm going to press Control leg, all inconsistent
little down arrow and click Apply control
light to apply it, come to our actual roof. And then one link
today is I'm going to scroll down to the bottom. I'm going to apply the modifier. So Control a, I'm gonna hover
over the bevel control leg. And then finally I'm
going to hover over the Slidify Control a, and now just go and make
sure that it's correct. And you can see
here that it's not, it's actually missing
the bevel of fear. So I'm going to press Control Z, control Z, control Z. And you can say that I need
to go the other way round. So I'm going to come to
the top control light, comes to the bevel intro leg, and finally come to the
merit control light. I'm just showing you that how the way that you are applying these actual modifiers
really makes a big impact on whether they actually work or
whether they don't. So just take that into account. So now we know that we can
come to our site, Control a, Control, a, Control a, and then come to our
posts and control. Finally, now let's
join all of this soap. So I went to come in and went
to join it all up together. So Control J joining, all look like so now on
Wednesdays I'm going to press Tab and I'm going
to actually get rid of all of these seems close. I'm gonna show you a
really easy way in this course of how
you can actually unwrap things really,
really quickly. Now because we're
basing this in Blender, this actual technique
you can use, as long as everything
looks correct, there is no reason why
you shouldn't use it. You can go in and Latvia, the courses show you how to unwrap things and things like that, which
I'm going to do. And actually, once I've got through this small speech
that I'm going to make. But basically if you
keep it something in blended and you're not
sending it through, and you basically
going to be putting on a seamless materials
and things like that. But now I would actually
use this technique. What we're going to do is
we're going to actually grab everything. I'm going to press Control a, because rain, because we want to actually take
away these themes. Now I'm going to come down and
we're going to play seems. That's basically going to
get rid of all those seams. Now I'm going to do is
I'm going to show you a short video of materials and scenes
and things like that. So I'm going to play that now. So you're going to watch that and then you're gonna combining, understand how we're
actually going to add seems and
things like that. And then we're gonna
totally turn it on his head and not actually
use that technique. And the reason I want to
show you that is because you still need to know
actually how to do it. But the way we're going to do
it in this one is a really, really fast and
simple technique. All right, everyone,
so I'll see you on the other side of that
on the next lesson, and I hope you enjoy it. Cmax one, thanks. Bye bye. Welcome everyone to the
short introduction to marking seams and shopped
part of the course. Before I give you examples of what makes you talking about, let me just briefly
explain what they are. Seams you can think of like
seams on a piece of clothing, like a ship, all
pair of trousers. The main job of seems
is to make sure the texture that
you're trying to place on your mesh goes on correctly. But more importantly, gives you control of how that
texture will look. Chops them out like seems, but save an entirely
different purpose. We use sharps to
give us control of how sharp and soft angles
off on all meshes. This makes them look realistic. It is also important we do this not only for
rendering in Blender, but also sharps carry on
through till the software or games engines we really want to use like substance painter, or Unreal Engine as an example. So with all that said,
let's get started. So here we are in blended
with our star n cubed. Now if I click on my cube
and go to my UV Editing, you'll see that the cube is basically unwrapped
in this actual way. So basically it unwraps
like president. Now if I come across and I grabbed this cube
and I press Shift D, and then we press Shift
Spacebar to bringing out gizmo and we move it across. And now let's say I wanted to alter this cube a little bit. What I'm gonna do is I'm going
to press the top button. I'm going to go
into face select, click the top face Shift Spacebar to
bringing the move tool. Bring it all like so. Now let's say I want
to unwrap this. Now if I grab this with L, just to grab everything and I press the button for unwrap. You'll see that it unwraps
exactly the same way. Even if I reset the
transformations of this, it will still on-ramp
exactly the same way. Now let's mark some
seams and say how the US is an actual effect
on our actual home route. Let's grab the top and we'll
come down to the bottom. What we're gonna do is we're
going to press Control a and then come down to
where it says mop seems. Now it's important to
remember that it's controlling to mark
seams in face-like. But if, for instance, when edge like, so if
we come to this edge, if repressor control,
you will get this optional as well,
mock seams bolt. You can also right-click in Edge Select and
you can also say, we can mark scheme
this way as well. So for now though,
I'm not going to actually melt the same. What I'm going to do
is I'm going to grab the whole thing with l, like so. And I went to press
on rap and you can see it unwraps
completely different. Now let's bring in
some textures so you can say what exactly
I'm talking about. If I press a top a Como to my materials panel OPIA and I'm going to
give this material, I went to come out across
to the right-hand side, click on my material button. Let's now bring the material
I've already prepared. So I've got to come
across this little down arrow coming down, you can see I've got
one here called Wood, and let's click that on. Now you can see what's happened. We've actually applied our
material to this object. We can see it's
pretty much a mess. The top of it looks fine. We'll debate going around the
side is all Ben and skewed. So if I zoom out and
I press Tab now, you can say that
the reason is that It's not actually UV
unwrapped correctly. So how do we fix that? If we come up to edge select,
let me grab this edge. And now I'm going to do is
I'm going to right-click, come down. Tomorrow seems. Now grab the whole thing again. I'm going to press U on rap, and now you'll say it unwraps. Absolutely fine. You can see that world
is looking really, really nice actually
on this mesh. Now, what this does, the seams do is actually
gives you control of how this actual texture is
placed on this mesh. You also need to take into
account that this is, they say an infinite loop. So if I come around and I look at this face and this face, you can see that
the going round, if we have no sane, when I talk about
infinite loops, It's basically going around
and around and blend. It doesn't actually
understand how to unwrap it. So you'll end up with
that mess we had before. Now the other thing
to take into account is if I turn this
around, for instance, while I'm going to
do and when to come over to the left-hand side, the viewport of my UV Editing, press a to grab everything, all 90, spin it round. Now the other thing
I want to show you is that where we join these actual seems old is also really important
because you'll never, ever gay, perfect, on here
where there's an actual C. Let me exaggerate
this a little bit. So I'm going to do is
I'm going to press top. I want to make this a lot
smaller and I'm going to move it into the center of my UV map. I'm then going to press Stop. Now you can see that
these edges don't line or whatsoever against
this other side. This texture here doesn't
line up with this texture. And the reason is because
we've got a scene down. They're not as actual
break in the texture. Yeah, If we come around to
this side, I spin this round. So if I grab it all z 90 and now go to this
one where we can say, you can say that these
lines are perfectly, the reason is because
obviously there's no seem that the seam is here. So you need to take
that into account on your own meshes and
objects that when you're applying textures and materials that try and put seams where you're not
going to see them. If it's on a door
handle, for instance, and put them on the inside where no one's actually
going to see them. So always bear that in mind when you're actually
marking it seems. Now let's discuss sharps. If I bring in a new primitive. So if I press Shift a and I'm going to go
across the mesh, I'm going to bring
in a cylinder. Now you'll notice that this cylinder as all these
little edges around there. And let's say you wanted to
make a couple of something. The last thing that you want is all these hard edge
faces in there. Now they're all things we
can do to sort this out. So the first one we can do is we'll bring in
another cylinder. So I'm just going to move
this one out of the way. So Shift Spacebar,
bringing my gizmo, move it out of the way, shift a, bringing in a, another cylinder. And this time I'm going to
come down to where it says Add Cylinder and turn up
the vertices to 100. Now you'll notice that we
do have a rounded edge, but the problem is
that we brought in a 100 volts is to
actually achieve that. And that's not
something we want. We want to use as
few polygons as possible while still getting
a really good-looking match. So how do we achieve that? Well, there are a number
of things we can do. First of all, we can come
across to this right-hand side. What we can do now is
come to where it says normals and click on
auto smooth them. We can right-click on the
viewport and click shades moon, and now you'll notice is
actually been smoothed off. Well, the problem with this is if I turn up my auto smooth, you can say for turning
or pulled away, it goes really, really funky. And that is because
170 degrees blended decides that these edges along
here needs to move it up. So it doesn't give us a lot of control if we do this
on the other one, server grub, this one, right-click shapes,
move, alters, move on. You can see again, even with lower amounts of polygons were still able
to smooth it all. But if we turn this off, we still going to end up with the same problem as
what we had before? How do we solve that? Well, if we come in now press
the top button, come to the top, grab the top, shifts
like the bottom, press Control E
because we are in face-like and will
command a marker shop. Now you'll notice if
I press Tab Not now, he's got hard edges on there. This gives us control. So this is why we
actually use sharps. No matter what I turn
this up to 180 degrees, which is the highest it goes, it will not get rid of
those shops that we mark. We can also mark shops
around the edges as well. So if I grab this
one and this one, and now of course
we're in edge select. We can right-click, come down, Market shop, press the top bond. Now you'll say you've
got hard edges on that. It's very important
that you mark sharps where you're gonna
actually warm hard edges. It's also important that
against the habit of marking sharps when you're
actually marking seams. And then what happens is
when you join two objects together and you turn off
the auto smooth if needed, you're not going to end up
with some meshes like this. Okay, everyone, I
hope you enjoyed the introduction to
marketing scenes and shops. And as they say
on with the show.
9. Applying Materials & Textures: Welcome back and runs
blend the three, the ultimate medieval sinkholes. Now the next thing
you need to know, of course, is how to
bring in materials. We know about the seams and we know about the shops
and why we should use them most of the time we can get away without
using the sharps. To be honest, it seems
a very important if it's cycling through to
another games engine, are you taking it
through to something like substance
payments dependency or something like that. But as I was saying, this one, we are going to get
away with using a automatic way of
unwrapping within blender. Well, you still need
to know all about materials and textures and how to actually bring them
in and things like that. All right, so Wolman's
disease, I went to play that. Now, go and watch that. And I'll see you
on the next one if you know already how to do that, then move on to the next lesson
and we'll see your over. All right, thanks. Bye bye. Welcome everyone to the
short introduction are important texture maps and creating materials
within blender, he will be going through
basic materials setups and easy ways to import your
texture maps or within blender. Then we'll be moving
on to an explanation of what maps do and
why they're important. So with all that said,
let's get started. So in this basic scene
that I've set up, you will say that I've got these three objects and
the role UV unwrapped. So now let's come to our first object and let's say we've already marked OSCE
seems as you can see. Now let's come up to Edit. First of all, what we're
going to be bringing in is a add-on called
Node Wrangler. And this is gonna
make it very easy to sell materials
within your scene. So let's come to edit, come down to Preferences. Come over to where
it says Adams. And then we're going to
search for node NOD. You'll see one called
Node Wrangler. Make sure that's ticked Tom. And then let's close this down. Now I want to do is actually
create our material. If we come over to
the right-hand side, you'll see this little
football kind of icon. Let's click on the plus. And then what that actually does is create a new material. And let's click New
and give it a name. Let's call this would because I've already
created awarded welcome up as water dot 001. If you've got a 001, it will come up as a Word
doc zeros 02, and so on. You'll notice as well
that this is command as a principle, BSD F, and this basically is
the magical node shader within blender
that makes it easy to import all your maps
and things like that. So now we've got this. What we need to do now
is we need to head on over to our shading panel, which is this button here. Once in the shading panel, you'll see basic setup same as what we had in
the modelling panel. And now if I zoom out
here a little bit, you'll see that we've actually
got a basic setup already. We've got our material
output and of course is where all the nodes
ended up in the end. Then we've got our principled, which is why I told you about is the magic kind of
blend the node. And if we zoom in a little bit, you'll see we've got all of these things where it
can plug things in. All we can mess around
with these without actual math plugged in. Now let's come and
click on our principal, BSD f, and what we're going
to press Control Shift and t. And that then will
open up the file of where you want to
actually find your maps. So make sure you store them in a place where you know
where they are going, find them, and then you
should end up with five mops. Normally it's five maps that
actually you can download. One is the base color, the next one down is metallic. Next one down is roughness. The next one down is height.
And then you've got normal. They're normally the
basic five maps. So now what we need to
do is come to the first one and shift select
the bottom one, and then I'll select them all. And then come over to where it says principle texture sets. And click the Home.
And there you go. The vault actually come in. You'll notice blender was ultimately set
everything up for us. This is part of what the
Node Wrangler actual dose. Now if we zoom in a little bit so we can
see what we're doing. And now we can actually
go through some of these notes over here. So let's zoom into here as well. The first one we've got
a texture coordinates. Basically this node tells Blender whereabouts to place
this texture on this object, you'll notice that the moment is basically clubbed
in from the UV. Now if we quickly
just go over to the UV and I grab everything, you can see this is
our UV map and this is how basically this
texture is placed on this. So for instance,
you can see that this one has been termed round. It's going the correct way. Now let's go back over
to our shading panel. And if we plug in the
generates and instead to the vector, let it load open. You'll see now that blend
it is trying to generate how this texture is
actually going to go onto this object. This is useful for
when you create textures within blender
itself without maps, but useless if you're actually
bringing in your own mom. So let's put it back on UV. Next one them across
is called mapping. This basically is how this texture is mapped
onto this object. You can see here that
we can actually move the location of our actual
texture and this space, these kind of move
in the UV map. Now if we call me, you can also scale this up as
well as you can see. So you can stay like
smaller and bigger. And it gives you
a lot of control within actually the shader, to mess around with the
scale and things like that. Normally, I would actually
do this in the UV map. But if there's any small
details that I want to make, a little bit smaller or
something like that. I will do it within the shaded. Moving across, you can see that all of these nodes over here, which are all maps, are
plugged into our mapping node. So let's come to the first one. The first one is color. And basically down on the
right-hand side here, I'm going to be showing you
exactly what they mean. And then if you want
more information, you can go onto the blender
website and find all of the rest of the
information now about all of these maps that
we're talking about. As I say, the first
one is the color. And if we unfold that, it's basically
what we can say is it's just the base color. Now sometimes you will
get college where the commitment with
ambient occlusion. And I'm going to talk about ambient occlusion just
in a few minutes. If we plug this in, we can say, we can actually
alter the color with other nodes that we can
kind of slide into here. So I'm quickly going
to show you that. So if we press Shift a, do a search and we're
just bringing a gamma, which is going to lighten
or darken all actual color. Now, I've pulled that in nine. You can see if it
bringing that down. I'll bring you up. I can make it much
darker, much liked it. That's something that
we can actually do. And the Node Wrangler
enables us to bring in a new node and just
drop it in there. So I want to do now, I'm
just going to delete that and I'm gonna plug that in. Now to go on to the
next map is metallic. So I'm just going to head
on over where I've actually brought in a metallic texture. So here we are in
our setup now with our actual and metal
texture and material. So if we zoom in now, we can say that we have the next one down which is metallic. And we can see that if we calm
and actually unplug that, you'll see that
not a lot happens. And this is because
this metallic is very close LI based on the metallic that's
already there, which is 0. It's quite a dull metal. Now if we come in and
return upon metallic, you can see that it goes really, really, really metallic like so. And you don't have
to actually use a map to make
something metallic, or you need to do is
turn off this metallic. Now normally when we're
doing things like using this slider
here and no math, even something is metallic. So if I turn this down
or it isn't liked, so we don't really have anything in-between when we don't
actually use an amount. So if we plug this
back in now to our metallic and let it
load open, There you go. Now the next one
down is roughness. And roughness is basically if you think of a sheets of glass, when you look at it, it's
not completely see-through. You might have certain
scratches on there. You might have
things like smears, Han mark, things like that. Basically that is what
the roughness map doors, basically the roughness is
determined by this map. If I'm plugged this map, you can see we've got
a lot of the kind of shinier parts and
dolor parts on here. So let's unplug this
and then you'll see that it's pulled
one kind of shine. You can also save a
command and actually turn the roughness
up, alternate down. I can make something like ice or I can make something
very, very dull. This is why we use this
map because it gives us a lot of control of how much smearing and things like that and makes it look
a lot more real estate. So now let's move over
back to our wood. And what we'll do
is now we'll come down and look at our normal map. If I double-tap a
quick play that I'll just highlight this. And then we can just
zoom in a little bit and look what this
normal mount those. As you can say, the normal
map always plugs into a normal map node and then we can mess around
with the strength. So if I turn the strength right, you can see now
we've got a lot more pushing through of
the actual texture. Now just be very careful
when using this node. You can turn it up
too high and it will, it will look, it
won't look very real, in other words, so try and
just get it somewhere where you're really happy
with it and it still looks realistic,
for instance. And you do get some wood
which looks like this, where it's really kind of
elevated from the base. But I wouldn't go again
to high witness. Okay. So that's the normal map. And now let's move to
the displacement map. For displacement map,
I'm actually going to bring in a new material now, so I'll head on
over to that one. So here we are with our
cobblestone texture, which we're going to use for
our displacement example. What displacement does is it basically gives this texture. It basically pushes it out. It's like using tessellation, as you'll see shortly. The one thing is if you're
using this displacement map, you really need to, you really need to
know two things. First of all, it
doesn't work in EV. Second of all, it really needs a lot more geometry than what
you would normally have. So here we can say we've got a flat plane and we can see
that they're slightly pushed. And you can still
see that this is a basically a 3D texture. How do we create and
displacement on this? First of all, we're going to
do is you're gonna come out with two alleles fauna. So first of all,
we're going to do, we're actually going to sub-divide this a
couple of times. So let's press tab and
what we're gonna do is right-click and subdivided. Right-click sub-divide. Now what we're going to
do is I'm going to press Tab and we're going to
bring in a modifier. And what we've done
now is basically increase the geometry a lot. So let's come over
to add, modify it. We're gonna come down to where
it says multi-resolution. I'm going to soak divide, sub-divide and again
and again all times. And if you press Tab,
you'll see that it's still actually looks like this. So you can't really see all
the subdivisions on here. But when we finish this, I'll actually apply it and then you'll be able to see them. Next of all, what we
need to do now is we need to put this on cycle. So if we come over
here and we change it from EV and we put it on cycles. And then what we can
do is we can come down now to our material, which is this button here. Scroll down and you'll see
one where it says Settings. And under settings you'll
have one that says surface. And what you need to
do now is change this. It should say Bump only change this to
displacement and bone. Once you've done that, then
all you need to do is go to your cycles shader,
which is this button here. And there we go. You can see now how actually
realistic that looks. Now you can actually mess around with these, so it can really, really bump up the
scale is you can say I'm we can also change
the mid-level, like Sir. I rarely push it out off. You can rarely pull
it in as well. Okay. So that's a bit of an
explanation on there. Now as I said, I will
move over now to the actual Spanner
where a modifiers on, I'm going to press Control a to apply that, I'm
going to press Tab. And now you can
see just how much geometry that actually taught. Now you can get away with a
little bit less geometry. So I have a press
control Z and just bring it back and just
bring it down one. So if I bring this down one, like so, and you can say that it's still
looking quite good. If we put the viewport
level up a little bit, it's nowhere near
the level of this, so I didn't put it on
three press Control, a president tempo. And you can see now there's
not so much geometry, but we're still getting
a pretty decent effect. So the last thing
I wanted to show you is if we come back to our material shader and we put this back on EVs overcome
to our computer. I can't put it back on EV. And now we'll just
scroll around and zoom in to this word. Now what does ambient
occlusion do? So I'll pull a brief
explanation down the right-hand side of what actually ambient occlusion is. What we can actually enable it by coming over to our computer, putting us on eBay. And you'll have one that
says ambient occlusion. When you click this
on, you can see already that we really, really get much more
shading on here, much more realism and
things like that. Now as I said, you can get
textures where they are. Ambient occlusion
already built in, but I find actually
doing it this way generally gives
you a better result. The other thing you
can do is you can mess around with the
ambient occlusion. I'm rarely bringing up or down mesh around with factors
and things like that and really get the
shadows that you really want on the surface
of the actual object. That concludes the
material and texture introduction part of the course. And I hope you all got a
lot out of it and have a much better understanding of maps and materials
within blender. With that said, let's
get on with the show.
10. Working with Nodes Hue & Saturation: Welcome back everyone to blend the three the ultimate
medieval sinkholes. And I hope you enjoyed that. I hope you got a lot out of it. So now let's actually crack
home with doing that. First of all, though, we can see that this is not
in a good place. It's actually below the
actual viewport line here, so we don't really want not. Also the orientation is
right where the roof is. That's also something
that I don't want I wanted to do is I want to come in,
the Press Control, lay all transforms and
always get used to doing this before you
unwrap anything and bringing materials
and things like that, then what we're gonna
do is gonna right-click set origin to geometry. Then momentum is going to
bring it all and just sit it. So the actual posts a juice
below this line here. Think of this line here. So if you press one, this
red line, I'll press three, this green line, the
one that goes sideways, Bass lake as your ground. So if you're bringing
in this here, you basically want this part here is set below the ground. That's very important. I'm also going to
bring up my mom. I'm gonna put it in
just on the ground. So he was actually
walking on that line. So you can say now a nice
That actually looks alright, so back to this race,
our orientations. Now on the actual lesson that you watched
previous to this one, you will have sold
that we brought in something called the
node run lab on. And it's very, very handy
for bringing things in. So let's do that first. Let's come to edit, come down to Preferences. Let's go to where are they? Unless put a node, just made sure I was tiktok, you can see no rank
lit tick Tom, great. That's what we actually want. Now let's close this down. Now. I want to start
bringing in my materials. So I'm gonna come in on
bringing a new material. So this bone here, click on New, I'm gonna double-click
this and call this Main. And I'm going to press Plus, I'm going to bring
in a new material. And Nicole days would. Now as you saw on
the actual lesson, we can actually go in and alter materials and
things like that. And even based on the textures, like warm sap textures. And that's actually what
we're going to do in this. In other ways, you can bring in five texture maps
and you could create ten different materials
out of it ulcer knowing exactly how nodes
were contains like that. So now let's come
to our Woodman. And then what we'll do is
we're going to head on over now to our shadings panel, which is this one here. While I went to do is I'm
gonna make sure first of all, it should be on material so you can see
what you're doing. Now we don't have a light source in here
or anything like that. We're actually going
to come to that next. Well, first of all, let's get our textures and materials in. So let's come over to our principled and like you saw
on the actual tutorial, if you press Control Shift, you can now bring in if you
go to your resource practice, I'm just going to go
to my resource part. Here is my resource pack. I'm going to go to my textures. I'm, what I'm looking
for is the one near the bottom that says
what we can see. I've got one that
says wooden planks. We just want the one that says, what did the moment an ARR, five textures, these
textures, all 2048. So two k textures I used
to do to caring for k. But to be honest, people's
machines were an opt to have in the scene
full-up for k textures. We weren't getting a
lot of value from it. I actually brought these down
now to just do k texture. And I think the much, much
easier to work with if you do out problems we've seen loading or something like that, then just convert
these to warn k as many resources online
where you can just bring in files across
and just quickly convert them to wear one K
textures instead. Alright, so now we've got
these, let's say grab them all. So I'm gonna select this one, shifts like this one. Click the principal
texture bond. There we go. Look
an absolute mess. That's not what we want. Let's come in now and
actually do some UV unwrapping because clearly these aren't new VM run correctly. Clearly we've got pieces of wood down here and
things like that. What I tend to do
is attempt to split these open on rub
them separately. Let's come over to UV editing, which is this bone here. You can see this
is the reason why we haven't run home routes
anything basically. Now we call it rarely
see anything UV map. So Watson to do is I'd said it's a set this all ready to use. So I'll pull this over video. I will then come up to where it says material,
then click them. And now what I'll do
is I'll let come in with edge legs and I'm going
to work on the sphere. So again, it's a real quick way of
actually working with these. So if I come in and grab each of these and then come in
and grab each of these. Then one went to do
is I'm gonna press U on ramp and you'll see
nothing happens here. What we need to do
instead of doing it that way is you smart UV. Press OK, and there we go. We can see the ballroom
routed really, really nicely, albeit they're all going
to the actual runway, which is not something
we want to do now is I want to come over to the left-hand side to my UV map. I want to press a To grab everything. I don't want to
spend them around. So all 90 spin them around now because we're in a
2D plane over here, we are not going to
be able to spin them around the z axis or the y-axis. All the exercises or
something like that. We basically just
spend them around. So it's all 90,
spend them around. Now we do have a problem in, you can say that don't fit
in the actual UV space in. Well, let me just pull
this out a little bit because responded around then
they don't fit in there. So we need to fix that. So first of all, you
can see that I've got my proportional editing on, just gonna turn off
or don't need that. Then I want to call it
to where it says UV. And what I wanna do
now is pack islands. So once I pack islands, it should repack them
within this UV space. And that's exactly what
one I could come in and make them scale them
smaller and things like that. But I find this is an easier technique of
action doing so cool to UV, come down to where
it says Pascal and we've got a problem. It's Pac-Man, but it's turned
them all around again. I don't want that. Now if
you come up with this menu down here and you
click on rotate, that will then stop blender packing items and
rotates in them. Now once you click this on, whenever you do the
next one's a short, not actually rotate them until you actually
reload blender again, so bad I mount you
reload blender, it will start spinning
around again. Also, we aren't saved
out in a while. So let's come to file and we're just going to save that out. All right, so now you
can see that we've got these dawn and
they look really, really nice, actual
realistic piece of wood. And it was really,
really easy to just make sure that these sides as well, going in the right way,
which you can see mine off. Now, don't worry about
the lactone yet. What we're gonna do
is we're going to get the materials and
textures on this one. And then we're going
to bring some lights. And in that we've got our lighting setup as well so we can bring that through to
our actual fall moment. Actually call them to create it. Now the thing is at the moment, I call wood and it all
looks pretty much the same. I'm gonna pull this across
this way now because we don't actually really need to
see too much of our UV map. You can see that the world
looks pretty much the same. Now as I said, I want to use this word and turn it
into a different word. In other words, I
want to basically use these texture maps but have two different color
variations of the world. If I come over to my material, you'll see that we
create something called main and we created
the wood line, I will say that would
mean has an icon now that is not Blanco White because actually we brought our materials in. What I'm going to do now
is I'm gonna come over. I want to click this
little down arrow. Copy material. I'm going to call them
to mom would lie. I'm gonna come down. I want to paste material that you can say that they're
both exactly the same. Now what we wanted to
do is I want to come in grabbing all these because
I've already got them grab on to want to assign them. So the worldline,
even though I'm not changed that yet,
so I'm going to assign. And you'll see nothing
really happens. Now let's press the top and
go over to our shading panel. And this now is where we just going to change
this world a little bit. So I'm going to come in. I'm gonna move my material
output over here, move my principled
over ALL that. And all we're going
to bring in is just a very simple change Today's which is a
U and saturation. So if I press Shift a
to do a note search, I want to click on search. I'm gonna put it in. And you'll see hue and
saturation comes on. Now if I just drag
and just left-click, it will drop it into place there and you'll see
nothing happened jet. Now let's turn down the
saturation to nought, 0.1. Now you'll say there's a
huge difference there. Now, I'm going to do is I'm
going to put the volume up to 1.390, like so. And then I'm going to
leave that at one. And now you can see of the
same actual texture map. So same texture maps. We've got a huge
variation in the ward. And the reason I've
done essays because I like this would look
like this because to me, these flat piece of wood
there gonna be a lot more weathered than these parts. For instance, these parts
of fairly sheltered. Now the top pulse normally
treated all that. They're flattened
normally do a lot better actually than these
ones that are really, there are a lot
chunkier as well. These thin pieces, there gonna
be a lot more discolored, there's gonna be a lot
more broken because they really actually open to the elements and
things like that. Alright, so now let's
work on the next pulse. So I'm going to do is
I'm gonna do my side, my top, Let's do the top first. I'm just going to crop the top. I'm gonna press element. I'm going to go over to my
UV editing because I've got my actual materials now, all it needs to do
is unwrap and apply. I'm actually not going to use the woodblock on any
of the pulse of this, just these policies.
So that's fine. You can also save the press
tab from here to here. They're all looking
very different. And that's why I'm saying about, even though we've married
it over the other side, they look really different now and they look in
rarely realistic. And that's the actual
points of this. Alright, so let's come
into the top pop, impress you come down to
Smart UV project. Click okay. And number something like this. Again, let's spin them around. So a 90 UV and
let's pack islands. And let's make sure yep, it is. Some would manage. You can say a naive looking
really, really nice. Now the one thing
is you might want to spin these parts rounds. Sometimes I do that. So I just go in, grab the edges and
then press OK. 90, spin them around because
sometimes to me they look a bit better that way
than the other way. All right, so now let's
come into the sides. So we'll do exactly
the same thing. So I'm gonna come
in, grab my sides with L and just
work my way down. Come to the other side. Like so, press the U
born smart UV project. Okay, and let's see if they're
going in the right way. No, they're not. So we need to spend
these rounds. So a 90 UV islands. And you can see now
the way that I'm showing you this
technique is really, really easy, really
straightforward and gives you great techniques and it's
really fast, really fast. Where Club, Alright, so
let's come into walkouts. Just make sure you
always grab them with edge just to make sure
you're grabbing everything. So LLM, you smart UV project. Click Okay, Let's
spin this around now. So 890 UV pack islands, top. Double-tap the eye. Then we go. Now, before we finish this, let's come up at the moment. This is called a cube. We don't want that
and we're gonna call it a wooden walkway. And then we're gonna come up, right-click,
Right-click and Mock. As I said, No, you need to do is you need to
come up to File. Let's go down to Save and just save out of the way a knowledge. Come back to modelling. And let's put this on material that we're
going to do is on the next lesson is
we're gonna work on our HDRI to bring some
light into this thing, but also to make
those assets as well. So that if we need to bring our HDRI into another scene
or something like that, it's very easy to do. This is a fact, UH, DRIs, I've got four
actually didn't this course and an HDRI setup, which you're going to
find really, really nice. All right everyone, so you enjoyed that and I'll
see you in the next one. Thanks.
11. Creating HDRI Assets: Welcome back everyone
to blend the three, the ultimate medieval
seeing costs. And this is where we left off. Now the thing is we
want to bring in some lighting into our scene. And eventually when we
create our farm scene. But the other thing
is we actually want some lighting where we can
put it into a blender. I said packs and
things like that. And then just bring and drop illustrates him without having self any HDRI is or
anything like that. So how do we do that? Well, that's what you're
going to learn next. So the thing is, you can see at the moment where
I'm material, if we put this though
onto our render. Now, the moment if I come
over to this little TV, you'll see that we've got our
EV render on at the moment. Now, I'm just going to
leave this on the EV just for now while we
actually build these out. And the reason for that is because we're gonna
use cycles in the end, but to just see our
HDRI and things that we really don't need
to change away from even. Now in the bottom
right-hand side, I'm gonna pull
what exactly EVAs. And then when we move on
to the Cycles Render, I'll actually pull all
that noise as well. Now there is another
thing as well. To use cycles rendering, we are going to have to
actually sets up a few things. We're gonna do that a little
bit later on in the course. So just for now, just having uneven and just let us see what we can
actually do with that. So let's come up now and
put this on our render, which is this bond here. And you'll see at
the moment, well, we can't really say
anything because we have no light sources in
the same whatsoever. So the first thing I tend to do is when I'm actually
craved thanks. I always tend to
bring in the plane. And the reason for
that is because the plane actually
bounces light off it. If you don't have
a plane in that, the light comes down, it basically goes infinity, basically just carries
on straight going. That's something
that's not realistic. It's not really
going to give you an idea of what your actual models are
going to look like. So let's press Shift S cursor
to weld origin shift a. Then let's bring in a plane, and let's make this
play much, much bigger. So we're gonna bring you
out like so you can see all guys a little bit washed out that actually
there's a plane. No, it's not raw material alone, so that's absolutely fine. Now let's do what
I talked about. So I want to bring
in now our HDRI within the resource packet is actually a blend file as well, which contains the HDRI
sets off the offsets are ready for you
to actually use and you can check out and
see how it's actually don't. So what we'll do now is welcome
to file and we're gonna go and come down something
that says append. So here's my resources. And you can see I actually
have one that says HDRI. If I double-click on here, you'll see that there is
a blended day HDRI setup. Double-click that. And then you can
see that these are all the files within
that blend file. We're not interested in
any of the other ones, except the one that says, well, within the world you'll
see there's a HDRI setup. So if I come to this
now and bring that in, you will see nothing happens. And that is because we haven't
actually said this OBS. So now we've got the ability. So if we come over to our world, which is this one here, and we come down and click
this little down arrow. You'll see that one
that says HDRI setup. That's what you want
to actually click on. I'm going to actually
keep this name as well. And you can also see it's saved it out
as an actual asset. Think you can clear our set Right-click Mark as
I said. So there we are. We've got an asset actually
already marked for us. But hey, it's pink. This is not the line that
we want them, right? Yes, that's right. But what we need to
do is we need to actually set this
up a little bit. What I'm gonna do now
is I'm gonna come over to my shading panel. I'm also going to
put this on world. You can see it says HDRI setup. I'm actually going to
rename this in a minute. So what I'm going to do now is I'm gonna come over to where it says objects on here
and put this on world. If I zoom out now, you will see this is
this HDRI sets all. The moment doesn't really
look like anything. Let's pull this. Evie again. Unless come in now and you can see we've got
environment texture. Now. This is why it's pain. It hasn't gone
environment texture. And what you need to do
is you need to bring in HDRI, environment texture. Make sure that you're
not bringing in any old, just any old texture. It won't work because it
doesn't actually have the light actually
built into it. So that's why you
need to use HGRI. I'm going to click Open. I'm gonna go back to
my resource part. You'll see in my resources
that we have them called HDRI. And now you can say
these are the HDRI that come in free with the course which
I've found and download, and these are free to use. So you can see we've
got a cloudy field, we've got a hobbit, we've got our sunny Paul
and we've got stung well with some god rays
coming through that. Now again, if you
can't see yours, just make sure you put
new size on regular and also makes sure I think actually that's saying you should be able to
see them from that. So let's bring in our first one. I'm gonna bring in
field cloudy HDRI, double-click it and hey
presto, There we go. We've got our HDRI ed, and you can now see that all of this scene is lit
from this HDRI. You can see it's slightly overcast and many other
courses we used to use it a day one probably
helped secure using that one. So I've got four different
ones for you now. But this setup isn't the best
thing about this sets off. The best thing about
this setup is that we, first of all, we'll
call this so we can see its field cloudy. So let's call this HDRI
setup and we'll call it, we'll just call it
filled cloudy so we'll know which one it
is field cloudy. And what we'll do is
now I'll show you actually how to use this setup. If you come into this, you'll notice that the
morning it says HDRI options. Hdri BG, call it BG gradient BJ, if I plug in this color instead, like so, you will see now that the lighting
is still there. Both. We have a collar around
me and if I change this BG color to red, you can see that we can change our color of our
background book. Keep all item. That's rarely great, right? The other thing you can
do is instead of that, you can actually plug
in a grade here. While I can now do is I can put this onto white, for instance, it a bit lower down, put this one on doc,
Put it on white. Now you can see we've got a
beautiful gradient there. You can see that these
two probably the same, nearly the same color. So let me just darken
or lighten one. Oh, there you go. You can see how easy and how
beautiful that gradient is. And best of all,
we actually keep all lighting and that's
exactly what I want. This is what I've actually gulps and actually gave to you. Again if you just want
your actual HDRI. So plugging your NHGRI. There you go. The other thing is
how this is set so we can actually change
our light source around. So if I just come up to here, just turn this hey presto, we can actually you
can see the lights on. Turn this around to where we actually wanted
the lighting as well. So really, really nice that now we need to where we've
got three of HDRI. We might as well use them
because this is going to be our blend that asset part. If we use them, we can
just then drop them in. All right, so let's
do that then. Let's come down. What we'll do is we
will create a new one. So you can see this here. So new world, create a new one. And then what we'll do is before renaming it will
bring in new one. So if I get rid of
this cloudy field, click the Open
button, go to HDRI. So always on the left-hand side, a lab where you went
last space lease. So go to this one
and let's pour in. This is the Hobbit. So double-click.
Here's your Hobbit. Let's rename this now. So I'm just going to
rename this hobby. Like so. Then I'm
going to right-click. I'm going to mark as I said, and I want to come
again to a new one. I'm going to minus this off. I'm gonna open it down to
the left unsigned again, this one is Sunny Park, so we'll double-click
it as your Sony park. Let's change the name. Sunny. Like so. Let's mark as I
said, so right-click markers. I said, There we go, go there, they're like on that. And then finally, let's
make another one. So we should have clouded field harbor and then
we will want moles. So I'm going to
click this again, come down minus this off, and then I'll open the soap down the left-hand side. And
we'll just call this. God raises something like
that because you can say, it looks really, it's
a bit more subtle. This one in mind be really
nice for actual farm. The point is though, took our assets and we can just
drag them and drop them, drag them, drop them
really, really easily. And that's exactly where I want. I'm just going to come in now. I'm just going to call it Sony. God. And of course you can call
it whatever you want. Right-click. Let's
mark, as I said, let's find the goal
to File and Save. And now we've pretty much
got all our lights in it. You're able now to quickly select through them
and change the lights. In our view, one
can God raise on, or also napalm, which is the
cooperates there it says. And we can also then spin this around to
change the lighting. Alright, so I hope you
really enjoyed that. I hope you've really going
to make use of this. You can see how handy
this really is, and I'll see you
on the next one. I have wrong. Thanks a lot.
12. Creating the Barn Greybox: Welcome back, everyone
is blended three, the ultimate medieval
seeing costs. Now, before we go on, I just want to show you why
we've done all that way. So let's go back to modeling. First of all, we've
got are rare seen in, I'm gonna leave it as
this is the moment. I don't really want
to change that. The other thing I forgot to
show you is you can actually turn off the strength
of the HDRI. Just turn the soap
and you'll see it gets brighter or not, but it still keeps
the actual light. And so I'm just
gonna leave it out. I've got a really good idea then allow this actually looks. Now if you're not happy with the light and the
other thing you can do is you can press
shift and you can, I think I'm actually
on Edit mode. Let's press top, Let's press
Shift and he now come down. We've got one that says light. Let's bring in a song
just so I can show you, there's a fair amount of lives saying you might want
to bring one of these and I'm going to bring in
a song, bringing it all. And I'm gonna rotate it around, so all y rotates it around. And now you've got some shadows. And that's the main
thing about HDRI. You really want to bring
in some shadows in with a simple song or
something like that. So I'm just going to
bring in this song. I'm gonna spin it around a bit. So all zed makes some
nice shadows that, and then what we're going
to do is I'm just going to turn this down just a little bit and you can
really see what they looked like. And there you go. You can tell it looks really, really nice and
regard shadows in. All right, Well, the best thing is now what I'm going
to show you is if I open up a new blend file now and going actually
save this file, save, right-click open
a new blank file. Here is all salts ope c. Now let's come over
and give this a try. So come over to our offsets. Click here. You can see I've still got
my 3D Tutor assets into amplify Como and come down to
where it says farm assets. Now you can see
that if I bring in this wooden walkway,
Let's zoom out. And there you go.
Comes in with all of the materials and
everything like that It's bringing
online as well. You go, you can see when
we come to build that, I'll see now how easy this
is actually going to be. You can also say that if I come over and put this onto an EV, let's bring in our
HDRI said, drop it in. Presto. There we go. It's as simple as that. So let's bring this
one in. There we go. You can see now how easy is
I wanted to change my line. And let's bring in this one. Let's bring in this one. You can see you've
got a real light load of lights that you can
bring into things. And this is why it's so
handy to IV like this. Alright, Once I thought
I'd show you that, Let's close that
down now and let's go back to our main belt. So when we're comfortable
that our farm, you can see just how
easy it's going to be. Now the other thing
is before I go on, you can actually, if you
don't like seeing the HDRI, you just come over to
the right-hand side, go down to where
it says, though, we're under this
computer icon here on the film and then just
put it on transparent. And then you can just see this, which sometimes I find is a little bit easier to work with. They were thing is the
sun at the moment, it can say is kind of
in where we build it. You can just really
put your sunrise over it because it is an
infinite light source. So I never, it's not like a Canada where only
likes a certain area. It just shines forever so
you can put it right over that doesn't make any difference to the shadows or
anything like that. All right then so that's
the first-world way belt. So let's put that over
to the left-hand side. And now let's think about what they'll direct you
going to build next. I'm not going to be working on their particles or a
smoke or anything lambda. We're just going to get
the main buildings done, although we are
actually going to be working on a little bit of animation for the actual wind melting
and, and things like that. So the reason I, it's,
it's very basic animation. It's really good if
you can actually learn just the
basics of animation, saying up a simple rig
and things like that. So I would either
recommend doing that, but for now we don't
want to do that. What we're gonna do is
we're going to press one to go into front view. We're going to press Shift
and we're gonna bring in, whereas we're gonna bring in
an image and a reference. And we're gonna go
to our references. I'm going to make this
bigger, the reference that we want to bring in now, let's bring in, um, something that's yeah,
let's bring in our barn. I think that's gonna be
the next one because our actual house is much harder to build on
our actual bond. Although these ones are simple, they require a lot
more techniques and these are also animated, so we'll leave those to last. So we'll bring in our barn
now, let's bring that in. And again, what we're gonna do is we've got our
little man here. Let's make him the
right side sphere. So I'm going to scale
this up and fight. I'm gonna pull it
back a little bit. So he's actually
informs of that. I'm gonna press one then
we're really scale. They saw the size I'm
a mom wants to be, So I'm gonna pull this down. You can see stay law smallest
bring him down again. That was a giant Nearly
there, bringing them all. I do want him to be pretty
much the right size, so I'm gonna move
them across now. And there you go. Can see he's nearly, they're not quite
but nearly there. Let's bring them all.
But I wanted to get this as close as
possible to be honest. Let's bring him down. Yeah, and there we go.
I'm happy with that. Alright, that's given as
a real dangled scale. Now the problem is, if
I move this one across, is that going to be the
right scale as well? Just always make sure that
when you've got a rep and you can see it's
roughly the right scale. So we can actually
work with this. You can also say, well, no reference who golf full kit. We've got a ladder here. You can see it for care. That's something
else we're going to have to make as well. We're not going to
worry as a say, about the the hay or
anything like that. We're basically
just trying to make the base of our actual involved. Alright, so let's get started. So the first thing we want to do is I want to actually hide this sound wave,
this actual plane. And then I want to
do is I want to make sure my Kirsten Center. So Shift S cursor
to world origin. Press one. Nice Bring gain a cube. Let's press Shift a
and we're gonna bring in a mesh and a cube. I'm going to put the
cube, roundabout it yet, because I want to base it on here how high this is going on. Alright, so let's press S, make it smaller and let's put it in its place,
something like that. We can see that this
is all line hand. So basically want
to make sure this, as you can see, is about
on this line here. So then it's easy to build from. Now I'm going to do is
I'm gonna press top. I'm going to grab the top
of that with face-like. I'm going to press one. I'm gonna pull it up to the top, then something like that. And now base I've got the
center of my actual bonds. So anything to
build on this side, I can actually mirror them over to the side based on this. That's why I've
pulled item first. Now I'm gonna do is I'm
gonna press Shift a. I'm gonna bring in another
queue and then make this a little bit smaller
than the first one. Like so. I'm going to press Tab, want to call them around, pull this whole bringing, something like
that, you can save the difference in the size here. Now we need to think
about the roof now. And then finally, we can turn it around and
actually work on this way. So we need this size. So let's work on the roof, all the parts of the world
that make up the room. So I'm gonna again, you can see that this course is over here now and I
don't really want that. So what I'm gonna do is I'm
gonna come to my center Shift S because it's
a selected tap shift. Let's bring in another cube. Something I brought in the
plane that don't will not. So let's leave that says, Let's press Shift a, bringing in a cube. Let's bring it up. Make it smaller with the spawn. So let me pull it up. Then I'm going to pull it out. So S and X, let's pull it out. Like so. All right, so I'm thinking
that these pieces of wood are probably going to fit just
under those perfectly. So that's quite nice. So let's again now press Shift S because it's selected
announced bringing another piece of Q onto
the piece of wood, basically shift a,
bringing a cube. Let's make it smaller. And let's say bring
this into place now. So I'm going to bring
you in to here. I'm going to rotate it. So
all y to rotate it round, like so I'm gonna make it smaller just so it's
round about the same as this because I know that this is a really nice size. So something like
that you can see sulfate and in really
nicely and then moment. So I'm gonna press the top. I'm going to make
sure I'm on facelift. I'm gonna grab this face then
when we first one again. And you'll notice
that the moment that this is pointing this way, and I don't really want that. So I'm gonna put
this on normal and now it's pointing the
way that I needed. So you can see it ends somewhere around here and then the
hate carries on after it. So I'm gonna pull
this down to here. Then I'm going to pull it up
here, something like that. Alright, I'm really,
really happy with that. Now we need to get
things in the right way. In other words, this should
be a little bit behind it. This should be in front of here. So let's come to this 1
first and pull this out. Let's make sure that
I'm happy with it. So that's coming out of there. Then this thing needs to go a little bit closer,
something like that. Then finally this, yeah,
it needs to be the end. They're like, alright,
that's really great so far. Now we need to basically
mirror these over to the side. We also need to, as you can see,
bringing this, all, we need a piece
of wood that goes out just to give
us this base here. So let's do that first. We'll bring out
this piece of work. So I'm going to press
one. Again. I've got my cursor in the center. Let's pull this back on global. Let's press Shift day now, bringing a cube, Let's
make it smaller. Bringing it down. Let's
make it smaller still. Like so let's bring
it over into place. Let's also pull out because we want it to cover this
all pull this one back. So I'm gonna pull this out probably to there,
something like that. I want to make sure there's
probably a little bit more of a gap them while
there is a moment, I'm gonna grab both of these. We've Shift Select and then just pull them both back,
press the top bone, grab this one, and
then just pull it into the center
of here, like so. Let's go back now and
see where we are with this double-tap the ages to say. And I can see Maps rarely, rarely coming along
really nicely. Now we do have these
parts to build out, but rather than do those, Let's get the actual
overall base of this ball and actually sell
and then work from that. So what I tend to do is
I've got these parts. These parts are gonna
stay in the center. So it tends to do now
is I grab all of these. So grab them all. Control J, joining
them all together. Control layer, Let's reset all the transform,
so all transforms. And now we know that this
cursor is right in the center. So we're gonna right-click
the origin to 3D cursor. And now finally, let's
bring in a mirror modifier, modifier, bringing a merit, double-tap the Amiga, you can see how
quickly and easily it wants to just get this part
of the bond nailed down. What we're gonna do
that on the next one is we'll start working, as I say, on the
sides of the bomb. And then we've got
the overall size, and then we can start
building this out. All right, everyone,
so hope you enjoyed that and I'll see
you in the next one. Thanks a lot.
13. The Art of Creating Roofs: Welcome back, everyone
has a blend of three, the ultimate medieval sinkholes, and this is where we left off. Now we've got all
mirror modifier in. And let's actually apply that. And then we can spin it
around and make this longer. So the length is going to be
an M. Really start working on how this is going to slow the actual
front of the bomb. I want to make a
little bit different. The back. You can also see the bond. We've got a wall
going across here. We've got a wall at the back, as you can see in
this part here. And then this part
is pretty open. You can see that, Hey
man, things like that. So that's exactly what we're
trying to replicate it. The whole them. Let's come onto our
American press Control H. Let's then join all
of this together. So I'm going to press Control J once I've shipped
selected everything. And now I'm going to do is
I'm going to spin it round because the center of this
is actually in the middle. So just make sure
you all sensors in the middle so that
when you suppress all and zed is actually
turning on the center of it. So if I now press Alt Z 90, that's my side view now. And now I can do is
I can bring this the place I want it
somewhere like that. Now can work on bringing this
a little bit further out. So let's say grab the front
of the ear, press one. You can say we're
a little bit high, but let's not worry about that. It doesn't need to be perfect. So I'm gonna bring this
out a little bit like so. And I want to come to the
back of it, press worn again. I'm gonna pull this
all the way back when something like that. Now, we know that we've basically got the structure
of the actual from, so we basically need to just
bring this to the bank. So all I'm going to do is
I'm going to grab all of these without press one. I want to press shift D. Not lying, not us. I'm going to press Shift
D and then just drag them all the way to the back. Like so making Show him
happy without ball. That's actually,
you know, fifth. And I'm gonna press one again, just make sure they actually
happy when they say, you can say that we have
two strokes in here. Now I'm one store in here. And we can also say that
we need a stroke going underneath each one of these just to make
them look realistic. Okay, so let's make the
strokes first of all, on this part here, this roof Paul here. So we need a stroke
realistically going from the and
it's gonna be the, the support of the actual R2P. We can also see here that because we just
brought this out, that this is a little bit out. So we're not going to worry too much about what we told
simply going to do is you're gonna grab both of
these and we're just gonna pull them back on
the interplays. And then I'm just probably
going to just grab this and pull it by just a
little bit, like so. Finally then I'm just going
to probably also pull this back just a tiny bit and
then grab the top of here. I'm polyphonic just basically
getting everything. So, all right, so
I'm happy with that. Now let's come in and
bringing a stroke along here. So I'm simply gonna grab
this one and this one here. And I'm going to
press the F button. So I'm not gonna make
that stroke for me. And then I'm going to press
Y. And as I always do, press G and then you can see free movement and it's
actually explode. Now find the wall
wants to do is I want to make this a
little bit bigger. So S, pull it out
little bit like so. And then I'm going
to extrude it up and turn this into an
actual piece of woods. So I'm going to press
E, pull it up, like so. Then I'm going to grab it
all and put this into place. Now I find normally this will be stuck out
a little bit over here. So in other words,
if I pull this down, like so, and then if I pull this a little bit
this way, like so. So you can see now that the woods slightly
overhanging here, here and here, and don't forget, we also need the actual
roof going along here. So we might need to lower
this down just a little bit. So I'm gonna come
to Face Select, grab it, and just lower
it down, like so. Now let's create the
roof and then we'll say exactly where we need this. And the roof is
important on this part because we're gonna have an
inside top part on here. So it's quite important, Let's actually do that now. So to create the roof, I'm simply gonna come
in and grab this one. And this one because I know that these are exactly
the same level. So when you go to open again the bending or
anything like that, I want to press F
and there we go. Then I went for us, y and g. And there we go,
We split you all. Now we want our roof not to come right down
to the bottom. So I'm gonna grew
up this bomb here. I'm going to come in making
sure that I'm on normal. Then I'm gonna pull
this up a little bit and just try
and print place. Now you can see it
wasn't going exactly. Don't worry too much about that. It doesn't need to be fits in exactly because it needs
actually pull it in. Now, if I grab the whole room, I need to pull it
by a little bit. And this is why I'm saying the roof knees pulling
back a little bit. So we've got a tiny gap going
to make it look realistic. But you can now see that we do have a problem in this piece of wood is actually overhanging a bit and we don't really well, not the only thing
is as we go further, if I zoom in, you can
see that we've got a bigger gap here and
a smaller gap pulpit. I'm going to do is I'm just
going to grab the top of here with how I went to press H. And then I'm going
to command the top. And now I'm going to move
this a little bit away, like so, creating a much
more even gallop, like so. Now finally, let's bring in
now this down a little bit. You could even probably
bring it to the left, just the top of it. But I think actually,
let's think about this. The rate should be doing
it that way, I think so. Let's just pull it over and then it's been a
little bit on that logs. Absolutely fine. Now finally, what I want to do is I
want to extrude this out. So I'm gonna put
this back on global, makes your mom face select, grabbed my roof face and now I want to extrude it
out because we want this not to be a 2D plane.
We wanted to be 3D. And the reason I wanted
it to be three days, I might use palsy
is to create a hay, but also the inside of the roof. We're going to have a
fluorine here where the mind key bales of hay and things like that based on where
the ladder goes up. So what I'm gonna do
now, now, grabbed that, I'm gonna press
the IBA And you'll notice when I press it
you get a line that, and as I pull this out now, you'll see now that I've created an actual 3D cube because
it's extruded out like so. Now, the next thing
we need to look out because it's always a good idea when you extrude anything. Let's press Alt H,
bringing up the top of it. But what? You need to check, the
normals are normals. I'll put a description on
what normal is all done on the right-hand side and
how we check the maze, we come up to the
children's Lockean links, click the little down
arrow and go down to where it says
face orientation. And you'll see exactly
what I'm talking about. Whenever you extrude anything, it's very easy to bend
it inside and out. So if you have extrude anything or when you finish a model, makes sure that you actually check in your actual normals. You can see here that
this one's perfect. We didn't extrude anything yet. I'll not one, but you can see on this one it's absolutely wrong. So all you need to press a just to grab everything
he doesn't mind. You don't need to just
grab the ones that are red and then you
just press Shift N. Elders blend of them
will recalculate normals and spend
them by around via, and you should end up
with something like this. All right, So now I'm
fairly happy with this. I just need to turn off my
face orientation so that I can count on where can
so I'm just gonna turn this off and
went back here. And let's just have a quick look round and take stock
of where we all now of course we can say that
we need this over the side. We need the roof over the assigned before we can carry on. So let's do that now. So I'm just going to grab this without going to grab my roof. I'm going to press P then
and separate them out. So selection, top,
grab them again, control a less resell
the transforms. And now hopefully
if I press three, you can see not
quite in the center. We need it in the center
to put it over this side. So I'm gonna come to
my main support here. So I'm gonna grow up
it Shift S because it's a selected come
back now to my roof. So this Paul here. And then I went to right-click
set origin to 3D cursor. And now it's in
the center base of the building and exactly
where I want it. And now I can bring in a
merit mirror modifier, put it on y tilde x. There we go, bang in the centre. Let's actually apply that
because we've done that now. And now we need to do
is we need to work on these posts coming down here and these
posts coming down here. So you can see the actual bomb. It only has on this side, one more post, and then the backside it
as two smaller posts. So let's do that first, I'm going to actually
hide my reference all the way just for now. And then when I went to
do is I'm gonna call, I'm gonna use this postdate. So I'm going to
command, grab this one. I'm going to press Control. Want to go round the back of it. And then Wyoming to
do now is I'm gonna pressure date, duplicate it. Let's put one somewhere here. And don't worry too
much about the spacing. We could go in and make the
space in absolutely perfect. But generally with
things like this, we don't need to do that. I'm going to press
shift D again, bringing it over and then put it in that you
shouldn't know if it's something like like bow
and just making sure you're happy with everything. I'm just making sure about this. Say it looks a bit sharp. Let's say we're just making sure that these
are underneath it. Okay, we can see that
the coming out here, but we're going to
have a floor on here, so we should be okay. So now let's work on this side. So I'm gonna grab
one of these and then shift date and
pulled them over. I'm going to put this right
in the center of like so. And then we should
be able to see that, hey, that we're going
to put in that. Alright, so now let's create the actual floor on top of the, while we've got
this in the center, we might as well let you stop. I'm gonna do is I'm
going to press Shift. I want to bring in a
cube, press the spawn. Bringing it up. I'm gonna pull it
out a little bit just so I can see
what I'm doing. And there we go. The thing is about this floras. You're not really
going to see how thick is or anything live, but only where they actually go. Sorry, so we don't need to
worry about that either. So let's make it a
little bit thinner. You can see though, that
I'm making it thick enough so it's actually
believable and realistic. Now let's press S and Y and pull it out to
where it needs to go to. So you can see it needs
to go into these here. The thing is that don't really do I want it
poking out above that? Actually might work
out better lie that I've pulled it out a little
bit, just a little bit. Grab it with Alec M
and then S and Y, pull it out just so it's
right tucked into that. And I'm going to grab this end. And now we're gonna pull out and actually turn into the floor. Pull it out into
this other pole. Now you can see the
problem we have besides dropping down here. But the thing is we're going to have planks of wood in here, so we're gonna hide
out of the way. So nice little trick to
just hide out of the way. We're also going to want to hold in there
eventually as well. I think for now, if we start working now on the outside
because it's pretty much sorry on the planks because we've pretty
much got everything. Don't know, unless we can actually start turning
this into a building. So I think we'll start
on the actual letter. Next lesson. All right everyone,
so I hope you enjoyed that and I'll
see you in the next one. Thanks law online.
14. Adding Realism to our Models: Welcome back everyone
to blend the three, the ultimate medieval sinkholes. And this is where I left off. Now let's start making
this did not realistic. So what are we going to
do is I'm gonna come to, you can see at the moment
we don't have a problem in the front view is the
actual side view. Don't really want that as well. I'm going to do is I'm
just going to grab the whole press Control a. I'm just gonna make sure
actually if I press G first, you can see I've not actually
grabbed you all there. So what I'm going to do
is I'm gonna press B and just click and drag to make sure that great
all I'm going to press Control J to grab it all. And I'm hoping it
actually have no, he didn't he didn't have
a mirror modifier on. So that's fine. Now
I'm going to do is I'm going to press Control
a while transforms, right-click, sorry,
geons geometry. And I'm going to press one,
I'm gonna spin it around. Minus 90, minus 90. There we go. Nice face in the right way and not then it's gonna make it much easier. I'm also going to prey
on material mode, because working on material
mode is much easier actually than trying
to work and in the EV renderers.
So there we go. Now go really good view. The other thing is
you might want to put it on object mode. Sometimes when you're
looking at, you know, these groups and
things like that, it just makes it much
easier if you can see them. For instance, I
know the item one, my roof on this bit to be this fall down and
being as this part is open and I really
want to hide out the way I'm gonna do that
first before I start anything. So I'm gonna call him my
planks of wood and I'm gonna pull them down
below maximal roof. I also want to make sure that these policies are a
little bit further back. They're a little bit
too close to it. And you can see that these parts here on coming out far enough. So let's pull these back first. So we'll grab both of these, pull them by like so. Then do is now I'm going to
grab both of these policy it, I'm gonna grab this one, this one. I'm going
to pull them out. So S and X pulled them out. And if it doesn't pull out, the reason is young
growing medium points. So just proud medium
point and the next, next, and pull them out
really, really easily. All right, so let's start with, if I press one now I can start
work on this from again. What I'm gonna do is
I'm gonna grab this. I'm gonna press out Shift
S cursor to selected. I was gonna prove
bang in the middle, even though when we wake
and on the other side. So that's exactly
where I wanted. All right. So let's bring in first of all, a nother plank of wood. So I'm gonna press
Shift a in object mode, bringing a cube,
make it smaller. And let's bring it over here. Like so. I'm gonna make it smaller. And I'm also going
to grab my mom, pull him over, putting in place, let's say stored on
top of the ball. He wants to be able
to basically look over here down to the floor. So that's why I'm
going to work on. So I'm going to grab my cue. I'm gonna pull it up. Like, I don't want it big enough so the gap
wants to be randomly. It's like a little type
of window or something. I'm on Windows, I'm
going to press S, make this a little bit smaller, and I'm going to press S
and X and pull it out. Like so probably it's
something like that. It makes sure that it's
actually into the woods. So something like
that I think is absolutely finding Kinsale
guys ride bike violence. Just pulling pulling it a little bit further
forward so you can actually see out there
something like that. Yeah, okay, now let's
drop this cube again. We'll use it for the big
going down he announced, so I'm going to press
Shift date and then all why 90? Spin it around. And I wasn't this rather
than seen that flushing because they're exactly the
same on the x and y-axis. Let's just make it a little
bit bigger, like so. And then let's bring it all
down into the floor first. So into this over
here, let's press Tab. Grab this face, and let's
pull it up into place, making sure it
doesn't go through. They're all coming out of the back of it or
anything like that. Alright, so I'm pretty, pretty happy with that. Now. We need to actually make
the planks of wood so you can see he's got enough
room to lock down there, shine to his workers
or something like that and kind of build up a story and you had a y is
actually doing this. It makes him which
actually easier. Alright, so now let's calm and make these plants would first. So how am I gonna do that? Again, if you remember on one of the first or second lessons, we call an actually loop
coat to make planks on board if it's actually a
triangle or something like that. So we need to bring in
a plane. Always easy. It's bringing planes, it through planes just makes
things much easier. So I'm going to press
Shift, bring in a plane spinning around, so I'll buy know all x 90. Let's put this into play. So I'm gonna put this
first plane in here, making sure that it's going
to fill out this part here. This part here that's the
main pile and I'm gonna call takeaway here,
like we've done before. I'm also going to
use this plane and do this part here as
well. I might as well. I'm going to press
shift D, bringing it over this into place. Now we know it's right
this side and this side. So minus will press top then
grab it, bring you down. Like so and then grab it. And I'm going to
just leave it there because I want to be able
to see what I'm doing if I pull it further across and I'm gonna be
having a problem of trying to work with this because I love
to keep hiding this part, so I'm just going to
leave it there. Now. Let's work on this pathway. So we'll come back
to this plane. Press one, I'm going to
press Control a control law. And based on what I'm looking
at is this bottom one here. So what do we mean by that? If I left-click now and then right-click drop
those in the center. You can see that my
smallest plank of wood would be over
here and that's fine. You don't want it search
right in the edgy, just a tiny piece it because you'll have to delete it
because there'll be too small. Something like that, I
think is absolutely fine. Now, once you've
done that again, get into the habit of right-clicking a mocking
seems straight away. And then you're
going to be able to separate these
very, very easily. Now let's press Control Law, and let's bring in a
few more edge loops. So left-click, right-click, and then I'm going to do now
I went to call this away. Alright, so again, we'll
do what we did before. We're going to grab the
whole thing with a gonna come to mesh bisect. And I want to catch
it probably a little bit closer to this because we know this is
actually sign in there. So I'm going to call them
probably it's around here. Called say something like that. And you can see because we
were at edX itself is cleared, the outs are on there anyway. Now we've got
something like that. So let's come in now. What we'll do is
we'll split these up because we've got
all our edge loops. So again, gall seems on, you can see how easy it is
now split result like so, press Y, press G just to make sure there's flit
to grab them all. Make sure that your own
individual origins press one and then we're
going to press S on x, bringing them in. And you can see how easy that was to make those lines a woman. Now let's pull them out, make them a little bit and
even like we have done before. So I'm gonna grab this one here, make sure I'm on random.
I'm gonna press one. And then I'm just going to
pull them over very gently. I'm gonna bring in a little bit. You can see that was a
little bit too much, so something like that. Let's come to this
one, pull them over. Let's say as well,
bring this one out. So I said left and right first, then pull them out, bring it in a little bit, pull them out like so, and then pull this one in. And it's just a very fast
way getting things on even. Alright, That's something
I'm really happy with. Now again, the next
thing we do is we right-click Shade,
Smooth, Altos, move on, control lay, right plague set
origin to geometry. And now we're just bringing
a modifier, so modify it. Bringing in first of
all, the solidified. Let's bring it out now. So for bringing out that way, this way, like so you can
see how thick roughly. Let's say nothing. Another modifier, which
would be the Bevel, set this to no point, no one, so no point, no one likes double-tap the eye. And I will look at that. And there you go. You can see how easy
that was to do it. And that's exactly workflow
we're always going to follow. Now let's crop these again, tap age just to grab everything and I'm
just going to bring them a little bit
closer together without my proportional
editing on. So I'm gonna come down
individual origin, press one, and then press S and X
because we don't want that gap to be so
much tap, double-tap. And there we go. You can sit really
coming together already. All right, I'm going to actually leave those
modifiers on at the moment while I build
out the rest of this. So now we're gonna come
to this and you should be able to work really
fast now actually, you just really based on how
thick you want these planks. So something, Let's have a look. Something like that. I'm looking where the bomb
plant kids and top plank kids. So I think something like that. I'm going to left-click,
right-click along, want to do on these
actually I'm going to right-click against
multiple seams. I'm gonna come in with
face like I'm going to grab the top and the bottom one. I'm actually going to
leave them so ugly faces. And then I'm gonna come
back, grab them all, and then put this onto Medium
point S and Z and just pull them into place now
because they didn't want the two small planks
there like that. So something like that I
think is absolutely fine. Now in which there isn't gonna bring in some more edge loops. So controller, I want
to bring in three, and I'm gonna pull them over to here, left-click,
right-click. The reason I'm doing
that is because obviously over the side,
we're not gonna see them. We're only going to
save from the air. So that's why I'm
actually doing that. Now finally, while
one studies I want to grab them all. So
I'm gonna repress. I'm going to press S
and X, bring them in, pull them over, them
in place, like so. Alright, now we can
come up to face legs, grab one of the faces, dropped the one after l, want after l, y, g split them up. And then let's
individual origins. Essence zed makes them smaller. Propulsion, let it in
and let's say pull the edge like Let's pull this
one off just a tiny bit. Like so pull this one down. So let's pull out. Pull the same, like sir. Alright, control
layer will transform, drive clicks, origins geometry. Let's right-click Shade Smooth. Let's now move. Let's then bringing a modifier. So we'll bring in
festivals solidify. Let's pull it out into place. Round about. Let's then bring in all
devil will pull this point. You can see here that these, as I said, normally it's
okay, no point, no one. Sometimes you'll get
where it's just too much on this one
here is too much. So let's put it on no point. No, no, fine. And there you go. Now you can see that
looks March, March back. Alright, so now let's press one. Let's bring them
closer together. So I'm going to put this
on an individual origins top, grab them both. S, Z without the hall. Said, bring them
closer together. Tap, double-tap the eye. There you go. You can see how
easy that is right now let's say the mirror
them over the other side. So let's grab this one. We can say that our
cursor is in the center. We can actually right-click set origin to 3D cursor,
same with this one. Right-click origin to 3D
cursor, modifier and merit. So noun to where is it? There we go, unless
now call him too. Yeah, we need to
also do this one, so we'll do as they sexually. Yeah, we haven't
actually got that. So control a Ultron Psalms, right-click Set
origins geometry. I'd modify it. Where is it beveled? That's my bevel. There it is. No point. No one. Now let's right-click
set origin to 3D cursor modifier mirror. And now let's do the
same for this one. We couldn't have done
this at the same time. Kinda joined the up to this one. I'm gonna, I'm gonna press
Control eight all transforms. And then I'm going
to grab this one, Shift, select this one. I'm going to press control jag, join them together and hopefully it should bevel
them which asked, I'm putting over the other
side, so that's really cold. Now let's grab this one add
modifier mirror. There we go. You can see now how
quick and easy that actually is to do that once
you've got materials on, you really see how you can really motor along a really cool things
like this together. All right, everyone, so
I hope you enjoyed that. A bit of a long one, and I'll
see you on the next one. Thanks a lot.
15. Filling in the Barn Frame: Welcome back everyone
is a blend of three, the ultimate medieval seen costs and this is where I left off. Now we've got a lot of
modifiers on April. We know we're gonna
worry about those yet. What we're gonna do
now is we're going to probably work on, Let's start work on the virus. So we've got our cursor
in the center here, but let's bring it around
to this side instead. So I'm gonna grab this one. I'm going to press
Shift S because it's a selected tap shift a. Let's bring in a plane,
let's spin it around. So all rags, 90,
let's press Control. Want to go around to
the rear of this. And now I'm gonna do is I'm
just going to bring you up just so it's going to
sit on the bottom of that. I want to press S and X and just play around to
where I want it. So something,
something like that. I'm just going to pull it
up a little bit higher. And then finally, I want this top to come
up to you because obviously the plants award
in one of them to be a little bit different
from the front of it. So I'm gonna grab the
top of it, pull it up, something like all right, now let's make these
into clients and what exactly the same process. So Control Alt, left-click. Let's bring them down again. Make sure that, you know
Andy no, with a really, really tiny piece over here, you can see these near enough
fit perfectly into it, which is exactly what one. Now we're going to do
is again before we do anything,
right-click moccasin. Now let's bring in the edge
loops going the other way. So control all left-click, right-click,
something like that. And now let's call it this
way and then split them up. So let's come in and mesh. Bisect. Cool, way. Like so, that's that
side done knowledge come in with the other side. So mesh bisect called these way you can see it's
going the other way this time. So I just need to
change these around, like so now let's
split these up. So I'm gonna come in with l. Think there's one
in the middle as well, and we'll solve
that in a minute. So I'm just going to split
these authors like that. I'm going to press Y
G, split the mole. Now, I'm just going to come in and just hide this out
of the way just for now. So I'm gonna press
Hake to hide it. Come back then to this and I
can see that this one here, I really don't want,
so I'm gonna grab this one without delete that. And you can see if the belief versus they actually
got rid of that. So I don't really
want to do that. I wanted to delete faces and then that's going
to get rid of it. I'm going to grab
this one then just make sure that split off. So all these should
be split off now, which means that if
I grabbed them all with make sure that I'm
only vigil origins, press S and X and the shield shrinking all
differently like so. And that's exactly
what you want, exactly as we've done
many times before. Now let's command and
put it onto random. Make sure when I select, grab this one unless
just pull them, pull them out.
Sideways, load it. So let's grab this. Like so now let's do the
back as I've showed you. So we're gonna
grab this, pull it out, bringing you, we'll, oops, let me to do lambdas, pull it out a little bit, bringing your wheel
a little bit. Let's do the top of this one. Let's do now this one. There we go. Alright, let's say I
right-click Shade, Smooth. Also smooth. Let's now bring back
the rest of all bombs. So I'll take, I think they'll
still keep our reference. So I'm just going to hide the
reference out of the way. So now I'm gonna
come back to here. I'm going to pull them out with a modifier so I'd modify it, solidify them out like so. Let's bring in now bevel. So add Bevel modifier. Let's put this on naught
point, naught one. And I think the thing is, did I reset all the Trump's
forms? I don't think so. So control a ultrasounds homes
soured June to geometry. Now they should look fine. Obey the gulp too big of a gap. So control one, top, a takeoff, proportional editing. Make sure run individual origins and pull them closer together. So double-tap the a, you should have no picked
something like that. Alright, we're really
getting somewhere now. Basically all we need
to do is we need salts out of the little
hole in our flow. We also need to put a in Psalm would go in this
way and going this way. So let's do this side first. Let's press three and I can
go to the sign-up thing. I'll do is I'll grab one of
these planks of wood first. So I'm gonna grab this one. I'm going to press Shift S
because just like to tap, Let's press Shift a, bringing in a plane. Let's spin it around. So I'll wine 90. Let's press three, and
let's start all playing. Kind of halfway in here. So go nearly to
the bottom of it. We do want a little bit of gap. This is actually in the
flow, so that's fine. Let's then grab the top. And polyols, just so it's
in just like the top of it. And then let's bring
this probably to here. Like so Let's now grab, I'm thinking whether I
do this all in one go. Probably, Probably, Probably. I'm I'm just going to pull it I think called the bomb selected. I'm just going to
select this side. I'm going to pull it all
the way over here, like so. Yeah, I think I'll
pull it all the way over to that corner. And then what I'll do is
I'll grab the whole thing, press Shift D to duplicate, and then I'm gonna
spin it around now. So all zed 90, let's pull this one
in place as well. So something like that. Let's play over. So it's right in
the center of that. And then let's first
of all bring this up. And then let's bring
this this way. Like so. All right. So we've pretty much
got all that laid out. I think I'm happy with that. Okay. So now we need to hide the floor away just to make it a little bit easier
to see what we're doing. Now we need planks
of wood in here. So I think what we'll
do first days will make the goldfish way first
and then split them up. I think that will be
easier if I press three. Basically, I press Tab and
now press Control Law. And I bring this up to
the size of the planet. So one of them, so
something like that, fairly chunky
plants, they're all denote the ball and after old. And then there's comrades
to the other side now and grab these and press Control. In this way, they're not
gonna be exactly right, but just make sure
the roundabout the same width as the plants
on the other side. So left-click, right-click,
something like that. Now we wanted to
do, as you can see, I'm going to have to go in
and Alt Shift click again because I forgot my workflow, which is right-click, I'm oxy. Alright, there we go. Now first, let's say putting some
edge loops going this way. So control are just
bend them out. So yeah, that should be enough. Something like that.
Left-click, right-click. Let's go to this side. So control law,
left-click, right-click. All right, Something like that. Now the thing is,
we might as well use the plane going
all the way over here. There's no point really
split in the mall because you could split
them up into each one, their management individually, but it's just gonna
take a lot longer, severe we really wanted to do, but I'm fairly lazy
on most people. So I'm gonna do is
I'm just gonna come down, split them all. Ok, So I went to
come to this one. Split all these
up like so why G, make sure to split, drop
them back in place? Now, the thing is I need to
say where bend them on the Z. Luckily for us we can
do them altogether. If I press this little icon
and if I press my links, an individual origin, S and Z should be able to
do that with them. Now let's put our
proportional and Denon and let's
go through these. We'll come to this
1 first on edge. Let's make it a
little bit bigger. I don't want to go
and pass directly because I would do one of
them is doing individual. In other words, I
want to bring these down or rope without actually altering and this
side or this side so much I'm just going
to pull that back and grab them in more in the middle. Like so. And you can see that split them a little
bit too far away. So it's a little bit hard to tell how much we're
actually doing it. Not to worry, we'll bring
them back with that anyway. I'm just gonna do this side. It is very subtle, as I've
said, it's very subtle. Let's pull these out. Let's pull the xin
out, some of them. Now let's do this side. Pull those in, pull this
one out a little bit. Let me just pull this one in. Them, pull this one out
and maybe this one in. And I think that
should be good enough. All right, so now
we've got them. Let's press Control
a or transforms, plague, origins, Geometry,
right-click, Shade Smooth. I'd modify it and we'll
bring in a solidified. And we can see we didn't
process to move on. So let's move on. There we go. Now the low back. Now let's bring in our solidify or out. I'm going
to bring it out. I think something like that. I'm looking at both
sides just to make sure that I'm happy with it. So we can see this
is the thickness of the wood and I'm fairly
happy with that. The one thing I'm not
happy with is that these are little bit
too far as you can see. What I'm going to do is I'm just going to come
to the back of these and just grabbed
all of these like so. Then I'm just going to pull them without proportional editing on, hold them back this way just
so that kind of halfway, these ones look absolutely fine. The thickness of the world
looks absolutely fine. So I think I'm happy with that. Alright, now let's
bring in a Bevel. No point, no one has normal. Let's see if that works. That's absolutely fine. I'm finally now let's grab
them all in edit mode eight, grab everything, press three, and then let's press S and Z
and bring them all together. So S and Z bring them all
together, double-tap. And there we go. They look absolutely fantastic
because you can say, alright, so you can see we've
got really big gap here, which actually
looks really nice. Sometimes it works
out like that. So hopefully you ohms
worked out as well. Okay, So we've done
the whole bond. The only thing that we're
actually missing then is the hole where the
actual load is going up. But the thing is, we also
need the Hadean ear as well. So how do we make the height? Well, let's make now in the next lesson because
it's a little bit more complex than just making a cylinder or
something like that. All right, everyone,
so I hope you enjoyed that and I'll
see you in the next one. But before we leave, make sure that I keep forgetting.
Say evaluate. Always say about you
wake after every lesson. Alright, wrong, Sam,
excellent, Thanks a lot.
16. Working with Dissplacement: Welcome back everyone to blend the three the ultimate
medieval scene calls and this were left out. Now, we need all hanging here, so let's actually sold out. So what I'm going to
do is I'm going to actually, where's my cursor? My cursor is way over
there for some reason. I don't know why, but I'm going to put my
cursor around here. I'm gonna grab this again, shift S because it's selected. And let's now bring in my head. Well, bringing something,
Let's press Shift. I mash, come to UV sphere, and I'm gonna leave this on 32. I need Allows segments
to actually pull this out and you'll see why
in a minute plus all. So I'm gonna leave the bottom
and this bottom one here. So now I'm going to call
this exactly in half. So let me show you what I mean. If I come in now, I come to, you can see the halfway point, of course one is here,
going across here. I don't want to come to that.
What I wanted to do is I want to come down
to this one here. So it's one below, grew up this with Alt Shift
and click press delete, faces come to the
bottom, press L, delete and verts isn't the reason person
versus on this time. Because if you press faces, sometimes you end up with
some little versus leftover. And I try and eliminate as
much as that as possible. They're called MTS.
Normally, when we finish building everything, we always check to
make sure if you're going to empties and
things like that. So just bear that in mind. So when you first
delete this line, press delete faces, bottom
line, press Delete. Alright, so you shouldn't be left with something like this. Now let's bring
this out a minute. So I'm going to grab this. I'm going to bring down, going to press S just to make
it a little bit bigger. Now the moment you can
see that just looks like a UV sphere that's been
quite off basically, let's say right-click
Shade Smooth. Let's press Control
a or transforms right-click set
origin to geometry. Again, I'm going to show
you a really easy way to do things like this. What do you need to
do? First of all, come off, do you modify it? Bringing the displays,
it'll just get big. It doesn't really do anything. And that's because
we've not really displaced it on anything. In other words, you need to
use something to say, right? You want to displace
it in this way. That's normally a noise texture
or something like that. So let's actually do that. Come out of it to
checkered flag. Click on it, click New. Now go back to normal
because it's like, oh, you want to displace
this on something. Now you're gonna do
is where it says Open, click the Open. Now what you wanted to do,
you want to click New. We don't know what
you want to do. You want to come to where
it says image or movie. Click the down arrow
and click one of these. Basically I have
picked the clouds because that's the easiest one to displace it on to make it look the
way I wanted to. If I click clouds, you'll end up with something like this. Looks really good, right? But not quite there. Now I want to do is I
want to turn down alter the size of the displacement dependent where you want
to displace it against, for instance, with hay
and things like that. We don't really want
that much displacement because it's just little
bits of hanging over. A lot of normal maps are
gonna do the work and also we're going to have a
political system on top, so we really don't want
to turn this opportunity. And so what I'm gonna
do is we want to turn it up a little bit. And as you can see,
as it turns though, the clouds get big, which means that the
displacement gets bigger. Also, we've got to
remember, if I press top, we've only got this many
polygons and it can only bend to the east wherever
there is a little liberty. So it can only bend to that. So the more polygons
you got on here, the more displacement
you're going to get. But we really don't
want a lot on this. Let's put it on that. Let's thank
comfortable modifiers units called displacement on. And let's turn down
the strength to something like 0.1 or
something like that. Now you can see we've got a
tiny bit of displacement. Let's put it on no points,
a little bit more, and that's all we
rarely going to need. Now what else we need
to do is we need to put this in place and
then bend it around. So I'm gonna pull this into
place to where I want it. I'm going to press one just
to get the right height. I'm going to drop it in
just below the floor, so it's bending out like
that. Put it into place. I want it right pretty much in the corner that now this is the moment is a little bit big, so I'm going to make it
a little bit smaller. We don't want to pile the same size as the barn
or anything like that. So I'm going to drop it
down millions place, like so pull it over
and there we go. Now let's actually
move this out. So again, we can make use of
all proportional editing. Let's put it on smooth. And among Wednesdays,
I'm just going to drop this part here. I'm just going to
press the G bar and pull it out a
little bit like so. If you're worried
about the bomb, just make it smaller a
little bit and then just stopped holding out. Like so. When you press Tab,
you'll notice that you've also still got your
displacement on it, which is still displacement, which is really cool because
it's like an extra kind of manipulation to it makes
it look a bit better. Now I'm trying to series. I'm just trying to get them back to the barn walls, for instance. I'm just making sure that I
don't want to talk to you. Go through the bombard, do want to make it
look like a pile of pay someone to shovel over here. We don't want to round a
definitely not too rounded, so we wanted to look
a lot more organic. So something like that. Pull it in its place, like this press tab. And there you go. That looks really nice except they didn't bother width for new up
against the ball molar. And if a knight can
say that looks much, much better, now one thing, just make sure it's not
sticking out there. We're all going to have to
come in and probably cut away the hay and
things like that. I would also just pull
these back a bit as well, just to get a tiny bit better
in a place. Like soap. Alright, that looks
really, really nice. Pop and let's put,
let's put it back. Here. We go. Double-tap, and then we go. All right, let's
stop. That's done. Now let's make a hole
in our actual roof. And for that we really need to first of all create
some lattice. So I'm going to bring him
down my little ma'am, because I need to say
he's width base layer. I need to understand. If he's walking up alotta, he needs to be able to walk
up and it doesn't need to be a massive ladder, anything. It doesn't need to be
too short where you can actually gaze feet in
or something like that. Now, to do this,
I'm actually going to use my cursor against my mom. So I'm gonna press
Shift S because it's a selected when a friendship
day bring in a cube. I want to press S and bring
this cube right down. Like so. I'm going to break the
size of the lattice. So if we press S, bringing
it down to his feet, that's come around now
to the other side. There's also a
little tree you can do instead of trying to zoom in to your cuboid, but you can just simply place the little dot and
the number path, and that will zoom in
and it's much easier. Now we're going to do is
I can see this is my lab. I can see that I'm going to have to pull it out a little bit. So something like that. You can see I've got
proportional to its own. I'm going to pull
it out a little bit like that. That
might be perfect. Let's try. We want
to obviously to be higher than the actual bodies
to be a fairly highlighted. So I want to pull it. Remember it's going to be
actually rotate a little bit. I think something like that is a really, really good Stop. Now we've got all
this in the middle, so we might as well use this to mirror it
over the other side. So now if I press Control Alt
Trump's foams right-click. So origin to 3D cursor
modifier, bringing a mirror. There we go. Now being miserable
cursor in the middle, we might as well bring in
another piece of words. So let's press Shift day, bring in another cube. Let's press S. Like so, let's press S and
X bringing out. And you can see this
is way, way too thick. Let's bring in again.
So S then S and x. Like so you can see now we're starting to
actually get somewhere. This is actually
starting to look a little bit like a ladder, albeit this needs a
poly bag. Little bit. You can see I need to
move my guy forward. So Connection, see wondering,
Let's pull it back. Like so. So there we go. That's looking pretty nice. Now the one thing
we need to wear realizes, well, you know, how, how I hope a lot of risk
because it's not so easy of just putting
wooden mean, you need to make
sure that his legs, he's going to bend enough to step on this
piece of wood here. Because, you know, if you have a knee
height, your margin, you have to lift your kneel to basically where your waist days to actually step
up each pod these, it's not very realistic. So what I tend to do
is I tend to just make this at the bottom
of the coffee. You can see here
this muscle here, that's where I tend to
put it around there, and that is about
them, the right height of the actual ladder. You can look up the ladder and you can see how you wanted, but that's what I tend to do. Now we need to obviously this going all the way up to the top. So the way we're gonna
do is I'd modify it, bringing in an array,
make sure it's on the X. Obviously we want it on
the z-axis, not the X. I'm gonna put this on 0. And then when I went to do
is I'm gonna pick up the x. Like so again, if this is on the call but they wanted to about the same for
me. It's in here. So something let's say from
yes, something like that. Let's try now. Let's pull this up. You can see we get more of these like so
generally the top one, you get one right on the top is actually going to step off of
that onto the actual room. Now let's say just make sure
that we're happy with this. There's a few things
I'm not happy with. First of all, a ladder
to cut down awake. Normally they actually bevel these off of that
day on each side of these normally bevel
off the actual atom. These parts here as well, the actual where the actual
load guys want to step on. So we need to solve that, but we'll still out
in the next lesson. I make this little
less trunk because at the moment is looking at
a little bit too chunky. All right, everyone,
so I hope you enjoyed that and I'll see
you on the next one. Thanks a lot.
17. Creating the Barn House Roof Entrance: Welcome back everyone
to blend a three, the ultimate
medieval seen costs. And this is where I left off. Now let's do what we said. So let's come in
and first of all, in salts out of
the other moment, as I've said, these need
bevel enough because they, you can see we've got mirror on that, so that's really good. So what I'm gonna do
is I'm just going to select each one of these. I've just got these
sides selected. I'm going to press Control D, and that then is going to enable me to actually bevel them off. So you can see now already and he's looking now a
lot more realistic. And now I want to do is I
want to work on these policy because these again are
too thick now, while, once theories, I
want to grab this, I'm gonna grab each one of these and I'm gonna
do the same thing. I'm going to press Control
and Bevel them off. And you'll notice
there's a pull these in. All the rest of them get
beveled off as well. So now you can say probably a little bit too much on these. So let's press Control Z. Unless press control They
just a little bit like so. And then we'll grab them
all. So l and then S and why and pull them in
and then S and Z, like so you will notice
because I'm still not that this has been now pulled down and we
don't really want that. We need to get back
up to where it was. It's all you need.
So you just need to call pull it back coal. And there you go. There you go. Now you can say that
looks a lot more realistic of a ladder. Now the thing is as well, the tops and the bombs
would also be leveled off. They wouldn't be flat like this. So let's come in. Top graph the top there, you need to grab it
on my side actually because we've got a mirror up. Then we're going to crop them, press Control big like so. Now you can see that lead is
looking much more realistic. Now the thing is all the tops. I'm going to actually properly change this because this
actually is an angle. Really don't want anything guns. And in my scene,
I want to call it down as much of
those as possible. Down on the right-hand side. I'll explain exactly
one Anchiornis. But the problem is if
you have any guns, it can affect your animations, can affect your lighting
and things like that. So realistically
lazy and get away from having any
incomes in your scene. The bedside, all sorts, good practice in case
you want to send it through to Substance Painter. Zbrush. Zbrush is a
real pain actually, if you send me through with
angles and things like that, the mesh, I'll just
come through invisible. Then it's very, very hard to add subdivisions and things on camera during guns is
always the best thing. So what I'm gonna do is I'm
just going to right-click. And the very easy to get rid
of right-click come down triangulate faces and
they go and GMS gone. Alright, so that's that. Now this ladder you can say
it's looking really nice. So I want to do now is come over to the mirror control Lei, come over to the
array control leg and then just join
them both together. Control jag, like so. This one, we don't actually
need to bring any bevels in now because we've
already gotten enough pebbles in here anyway, the one thing we do want to do is right-click, Shade, Smooth. Altos move, right-click and
control leg ultrasounds, right-click, salary
June to geometry. And the one thing
I do want to do is seen as a finish
these near enough. I just wanted to
rename it to ladder. Like so. Now I'll undo is also right-click and I'm
gonna mark it as an asset. And of course, we need to add some materials and things out, but
we're gonna do that. So now let's work out
where we want this. I think something like that. I'm going to rotate it. In fact, to not gonna
do that because we're going to bring this thing
into our main scene. So it's probably better
off rotates and, and things like that once we've got it into the scene,
the reason is of course, if I rotate this, then he's gonna be rotated whenever bringing
into our scene. And maybe you don't
want this ladder rotates it in your actual scene. So I don't want to
do that right now. So what I'm gonna do is I'm
going to just bring my mom. I'm going to pull
in to the ladder. So let's put them
to the ladder so that you can see the latter is looking
really, really nice. Let's call him up now. And now what we're
gonna do is I'm gonna bring in a cube to make sure the ladder
and the man are here. So let's do that. So I'm going to press Shift
S because it's selected. Bringing in a cube, make the cubed smaller. How big do you want
the whole thing? Actually, that size is kinda because you wouldn't have
a whole open the bond. That's absolutely huge because you won't be able to support it. You will not be really tiny, so you can just guys
had to read it. So I think this is
about the right size. So I'm gonna do now, I'm
just going to go in, having a look around. I think I'm happy with
the place that it is. I'm hoping that if you
saw as you can see it, if I'm taking a view for me, we can actually see that
gap and a lot of PO cow, that's the main thing
that I'm looking for. So something like that. Let's grab all bomb. And then what we'll do is we'll
come over now, modify it. And we're going to
bring game a Boolean. And the boolean of course,
is gonna be this cube. So I'm gonna come in
where the object is. Click on my cube. We can see everything
disappears. The reason for that is I think
that we've got some load. Well, as the flow goes, Was it during it must be because we haven't
reset that Trump zone. So let us press
Control light, Ultron, Psalms, plagues,
origins, geometry. Then let's come in and
add in Boolean again, what we're going to pick for it. Well, it's going to be the cube. It's there now again,
both require fast. Hopefully that should do it. I'm hoping we can see we've got a little bit
of a gap in minutes, so I'm hoping out there. So let's say now from fast because we don't need to
worry about being exact. It's just a hole in the flow. So all it needs theories
just come over, press Control or MAC, you hide out of the way. There we go. Hey, presto, you've got hauled in there,
so that's really good. That's exactly what I wanted. Now let's press Alt H. Bring back this. I'm just going to
hide all the way on the floor, out
of the way again. And then I'm going
to use this cube. So I'm gonna pull
this cube down. Just want the top of this cube, a little technique and
you're going to learn here. So grab the top of
it, press the Y, move it over, grab the
rest of it, press Delete. That says make this
a little bit bigger. So click on it, press the, I now, bring it in and you can see what I'm actually
trying to do here is for a piece of wood that's
gonna actually make it as though like it's the frame Alltop hole that
we've actually worked on. So that's exactly warm, tender. Delete the center, delete. This one, this one, y g, split them up, press
a, E, extrude. Remember what I said?
You want to turn these around just to make sure the rise coming
into Luckin links. Thanks, orientation.
They're absolutely fine. So that's good. Take that off. Now we're gonna do is just make them a little bit smaller. And the reason for
that is because on each split these
up to the moment, it just looks like that and
that doesn't look realistic. So we want to split these up. So I want to press Alt Shift and click Alt Shift and
click on both of these. I'm gonna press Y G, split them off as you can see, to grab everything S
make them smaller. And now you'll say that we
don't have a problem in, well, these avant-garde fits
it 20 things Let's see. Although so delete faces
to grab everything. I wanted to fill these holes in. They don't look very realistic. If they've got holes in
them, in the piece of wool, going to mesh, cleanup, fill holes, and there you
go, they're all filled in. Next thing we want to
do, and it's bevel. These also control light
transforms, right? Plagues origins geometry
at modifying bevel, no plain don't warm
that, see if that works. Like so. And now let's press Tab S, bring them out
towards each other. And there you go. Now you can actually say as someone's com and
actually built a frame, exactly what we're trying to do. Let's come in now, press
Control legs, grab them again. Press Control a or transformed takes the
origins geometry. And now finally, let's
put it in place, making sure that it fits. Now you can see we
do have one problem in that I didn't
measure on my floor. That's because I need to
bring this floral pits way, way too thick
because you can say Walmart instead is I'm going
to come to the top first. Make sure I'm happy
outfile this is Stoke out, which a ham. And then come to the
bottom of my grandma flow. What I'm gonna do now
is grab the bottom of it and put it into place. Like so. What I'm
making sure of as well is that this
round here is correct. So you can see that this is the backup this and it's
not far out, far enough, so I'm just going to
pull it out a little bit further on both sides. So this side I'm just trying to find actually,
this is not the right. Yeah. There we go. There we go. Play out a little bit. Finally, let's now just finish these parts so you can see that these stoke allo bit to false. I'm going to just grab
this one, this one, this one properly, this one. Bring them back just so
they're in its place. Just bit of tidying up. That's what I'm
trying to do now. Just tied and it
will look like so. I don't want you thinking
that would be alive. I think I'm just going
to leave it lot of time. It will tell me,
no one's gonna see around you my milk to
see it through here. That's the problem of goal. All right, so now I'm looking at that and making sure
I'm happy with it. We can show my guys in place. Yes, I think I'm actually
really happy with this now. All right, so on the next one, what we need to do is then
just having a look at this. What we need to do
then is obviously bringing in all
of our materials. That's really,
really fast job with techniques that I've
already showed you. So we shouldn't have any
problems with this whatsoever. And finally, the last
thing is probably to do is we'll just create a, a quick Pitchfork or
something like that. Now the ladder at the moment I'm probably just going
to bring out here. I'm going to bring my
mom down now because we don't actually need him
that pull him over. Like so. All right. I
hope you enjoyed that. I've gone and I'll see
you in the next one. Thanks a lot.
18. Applying Materials to the Barn: Welcome back everyone
to blend the three, the ultimate medieval sinkholes. And this is where I left off. Now let's bring in
some materials. We've got a few different
materials here actually. Let's bring in those first. So welcome to the roof. This part unwrapped certain parts of it and
height of the part. So I'm going to think I
think let me have a look, see if it's all joined. Yeah, I think I need to
join it altogether first, it's gonna make it much easier. So I'm gonna hide this part out. I want to grab these parts, then I'm going to
actually come in first control and just
join them all up together. Same for these like so. I'm just looking around
now making sure to hit Control a, Control eight. That wasn't Gandhi. And now I'm just going to
join them all together. So I want to grab all of
these making sure that there was no modifiers on when I
was doing a press Control J. And let's press Alt H. We're going to hide the floor again. And I'm gonna hide this again. Now I'm going to
show you as well, I'm a bit later on how we actually keep those
hidden because I don't want to keep bringing them back already easy way just to
hide them out of the way. So now we've got this, Let's
put it on material first. And then what we'll
do now is we'll come in and join them
all up together. Let's see. We need to join these
links Control J, G, make sure it's all joined up. And then what we'll do is
we'll right-click Shade Smooth will make sure ulcers
movies on which is a. Now finally we can come in, start actually working on this. Let's do these, these planets
would first, will come in. I'm gonna grab this one, this one, this
one, and this one. I'm gonna come in and bring in my face material which
will be what main? I'm going to press U and
smart UV project on wrapped. You can say I gotten
the wrong way. Obviously, let's
go to UV Editing. Let's spend them around. So a all 90 UV pack islands
press adult bond to zoom in. And now they should be absolutely fine really
up to with those. Let's hide them out away. Now let's come to the next one. So this really, really
big chunky bond, you small UV project
90, UV pack islands. Now one thing I should mention, this material is near
enough, seamless. It is a little bit
out, but you can, if you want to get away with just making this a
little bit bigger. And you will see that you
do have some joins here. And this is the thing
I'm talking about. You can bring your own and you can see now I've moved the old, I've actually gotten rid
of those in the woods. Look in a little bit bad. As long as you're
careful, you can actually get away
with doing that. Alright, so let's hide. Those aren't the way I'm just going to press
H to hide those. Let's now grab these ones. I'm going to grab these. I think I'll also
grab these as well. I'm going to press you
smart UV project, okay. In 19. And you can see
that I'm workout, so let's go back. So controls it all. 90 UV CG-islands. Have a look at those either way. Now let's come to these. So I'm gonna grab this
side, this side of thing. I don't want the same
time, like search. Make sure you grab those
little pieces that you smart UV, UV and CG-islands. And then we want to do is
you just want to close down arrow would
light like assign. And there we go. You can see, wow, they look
really, really cool. Alright, let's say
how those other way. This, you can see the way I
do is I just UV unwrapped, hide out of the way,
and then just check on the actual object mode and
then just rinse and repeat. So you smile UV
project, okay. 90. Uv islands assign. You go. How cold does download? Rarely, really easily. It looks like he goes
together so well. All right, so let's press Stop. Now we can see this flaw. First of all, has
some problems in that it is a n gone and
we don't want that. First of all, I'm going to
do is I'm gonna right-click. I'm going to, you can see at the moment that I don't
have triangulate faces. And the reason is I'm
actually on edges and each me on faces, right-click
triangulate faces. And now you project from
view. And there we go. Now we need a new material on this one. So
let's bring that in. So we're gonna click
plus new planks. Like so. Let's go over now to our shading panel just
while we're bringing it in. Make sure this is on an
object instead of world. Let's come around, actually
zoom in so it connects. You. See what I'm doing. Click on my principled. Make sure you're on
planks which I am control shift T with the
Node Wrangler, click hold. And if you scroll down, you should have worn
that says, where are we? Have a look, Tree bulk
wooden wooden planks. There we go. This
one here you can see these little like planks. Shift, select the first one, shift, select the last one, click the principal button, and press the tuple one, and then click Assign.
And there we go. And you can see they look
really, really nice. One problem we do, Abe's way, way too big, so we need
him much, much smaller. So let's go back
to our UV Editing. And then that's grabbed him and press S and
pulled them out. And now you can say
that looks really, really nice to look really
good in that they actually live is slow pieces
of plants and that's exactly what
we're looking for. All right, so now what we can do is we can hide those other way. I actually forgot to hide
these out of the way, so I'm just going to grab
these in Edge Select. You can see also that I'm
not actually got rid of my seams because we don't really need to get
rid of them actually, because when you smart UV and Rob Fleming doesn't take into account the seams or
anything like that anyway, so we might as well
just leave them. You don't want to
get rid of them if you send it out to
another piece of software, for instance, both for this, you should be absolutely fine. So let's come to
this top plank now. We're going to press out
you smart UV project. Spinning around on 90 G, G. Let's make it big. S kinda get away with making
it a little bit bigger tab. Just going to have a
look at that on hand. Not really happy
with how this looks. I'm just going to move
it up a little bit. I'm not happy with I don't think I can get
away with this so much. I'm going to press S and
bringing in a little bit. I think I'm gonna make it
just a little bit small. I'm going to pack it in
place against pack islands. Think actually is going
to be absolutely fine. I just want to
turn these around. Let's have a look at this. You can sell as well. The other thing is, I have not done something
which I should've done. So I'm gonna have to go back
and actually look at that. I've actually not
beveled off these, which is something
really important. I'm going to press off
90, spin these round. Then what I'm going to do
is I'm gonna press tab. I'll take bring everything back. And what I wanna do now
is I just want to go and Bevel off all of these
before I actually carry on. You can see that all
of these in a beveled, it's just these are the goals. So unfortunately, I
have to go back in and grab all of
these pieces here. Beveled off, although
they're all done. I'm going to also bevel off, not those these ones in here. I wish I had stopped doing that. I don't know why
it's doing that. There we go. These ones here. All right. Okay, So let's split though, was this one here as well. Let's split these
off just for now. So P selection, grab them, Control a or transforms right plane region to
geometry and modify it. Let's just bevel. We'll put them on naught point, naught, one, naught
point, naught one. Simple open making sure
that bevel or an object. Now that build off control, put it back onto materials. And now let's have a
look at that double top. And there we go, the beveled
off now and then load much, much better always, rarely, rarely to shop those edges. All right, so now let's come in and hide the ones we've done. So we know we've
done all of these. We can also see that
the split off still, I'll leave them
split off for now, it should be absolutely fine. So now we can come to these
which told us this flow. You can say actually it's gonna make it
allowed for as should. I. I'm thinking I'm thinking I'll join them backup
together because it's gonna make it a little
bit hard for asic, we do it that way. So Control J, let us
join them all back home. Got to hide them either way
anyway, so that's good. So now I'll just hide these the floor because the
floor is actually done. Sometimes I'm making a little bit hard for myself
and I don't really want that, so let's make it a
little bit easier. Like so we'll do I think
roof actually next. So let's hide those off
away. Yeah, there we go. Let's do this fault that
is because this is false. And so you smart UV project 90, I think actually next
time I make this word, I'll just put it through
the way round we've seen is every piece of wood wants
to go that way round. So pack Islands. Let's have a quick look at it. Yeah. And there we go. All
right. That's looking good. I'm happy with that. Let's come to our roof. So I'm gonna grab
one room fed time. You smart UV project. Let's come to our
material. Planks. Can see probably going do
you want them my way round? Not sure. Yeah, I'll do this
other one as well. So you want UV project? Sign grew up them both and
then let's make them like so. I'm thinking probably better
off the other way round. Let's try it all. 19. Yeah, I'm thinking that's
gonna be much fat as long as you hey, just gonna call it, they
sold most of it anyway, we are going to see
them on the inside, so just make sure
you're happy with it. I think I'm happy with that. Like I was a little much
background in that way. For me personally, it's up
to you what you'd like. I think they're a
little bit too big, so let's make them a
little bit smaller. Like so. Yeah, nothing
that looks much better. Live up or I'm really
happy with that. Now let's hide those
out of the way. And then the next one, we should actually
get the whole of this sexual bond
finish included in the hay and probably
the ladder as well. All right, everyone.
So I hope you enjoyed that and I'll see
you in the next one. Thanks a lot.
19. Creating the Ladder & Fork Models: Welcome back everyone
to blend the three, the ultimate medieval seeing costs and this were like Dell. Alright, so now we're really, really motoring along with this. So let's come in and
we'll grab a thing. All of these, I want to pressure you smart, you reproject, spin them around as
always, UV and Pascal, and you should really
be getting into a nice flow now,
you click on it, just make sure they're okay, which they should be going
to check the next ones. I'm just going to grab them. Grab this one in hand
and approach you. A 90. And because I'm grabbing
it from onesies, just actually making them actually different
on the UV map. So it's really mixing
them up a bit. And this one, and this one, I'll let you read them
wrapped together so you want you reproject a UV. Cg-islands high the
amount of weight. Then we'll do the
last 30 on here. Like so Ninety because we would do one of them to be
round about the same size. It's always got to
take into account. So pack Islands, I'd mouth away. That's why we're not
doing too many in one go. So LLL ALL. And then wrap them first. So small UV projects, like 90 UV pick
islands would light, click Assign and they go, Don't tell me, I just
have a quick look at it. They look really, really
different, rarely radical. Now let's come to
what we've got left. So I'm going to hide
those other way. I'm going to do these now. So
LLL ALL, all the way down. I'm the new more UV project. Okay. There wasn't
pointing as well where L used to be able
to hold it downloaded, actually just go down them. I don't know what's
happened is that it doesn't seem to work
in Blender three. So if any of you guys have any
idea how to get that back, would be great if
you'll let me know. So I'm gonna come over here now, I'm actually going
to pressure you smart UV chambers making sure 90 UV pack islands. We also would like to assign
high them out of the way. And these ones, you smart UV UV pack islands. Assign an old page, double-tap the a and tab
and let's have a look. And there we go. Hopefully
it should be done. There we go. Doesn't quite look right
with other young softball. We can still have a
really good idea. Alright, so now let's
come in with our hey, so I'm gonna click New. I'm going to call this, hey, hey, what should we call it? Let's call a bomb. We'll just call it that
so we know what it is. It just so there's no confusion. Let us now come to shade him. Let's also unwrap this. I'm just gonna go round top. You. Smart UV project. Again, this is going to
be COVID in actual age. So just remember that
control shift T. Let's see if it'll actually go. I think I don't think the
hay Oh, we have there we go. Let's bring in Ohio. We can see that it's way, way too big hay doesn't
look like that. So let's go to UV Editing. Got them all s, bring them out. And there you go. You can see
it looks much, much bigger. We have got some
lines down here. You're not gonna see those
A's gonna cover it up anyway. The only thing we want
this voyage really just to see like we can see through any bits
just to make it look as though it's got a
lot of depth to the, hey, that's what we're
actually going for. So there we go. Now
let's come to in fact, I'm thinking I've got
displacement also a mouth swab. Give that so Control a, and then let's join
this to the bombs. So Control J, joining
us to the bottom, make sure the bond
actually moves. Let's quote, and we'll
call this bond like so. And then of course
we're going to right-click and we're
going to mark, as I said. Then I'm going to also control a whole transforms right-click. So origins, geometry,
space ball bringing my move up over there and there we go.
That's the bottom dome. Now let's come to the ladder. I'm going to top. And mom melts gateway with smart UV projects
on all of this. Like so let's call it two
materials down arrow, I'm gonna, I'm gonna come
in now and spin it round. So a 90 UV. Cg-islands top hilltop. There we go. Okay,
really happy with that lattice already
been marked as an asset. Let's pull this over here. Now let's make our actual folk, folk song relatively easy. So welcome to modelling. We're gonna put our
cursor in the center. So Shift S, because it's center. You can see it's no continents. So Shift S because
it's a world origin. There we go. Let's now bring in a cylinder. You can see when I bring
in the cylinder at the moment it's on 32. Don't really want
that. So I'm thinking instead of bringing
the Sunday yeah, I'll bring in a cube. We'll start with a
cube and I'll show you a different
way of doing this. So bringing a cube, so shift a mesh cube, come over to the
right-hand side and you just going to bring
into modify it. And you've got to bring
in a subdivision surface. You're gonna end up with
something like this. Doesn't look like much. Just press the dot on the number pad just
to zoom into it. Now let's press top,
make it smaller. And then I'm going to show you an easier way of how to
create something like this. So what I'm trying
to do at the moment, I'm going to bring it to him just to make sure
it's the right size as you can see here.
Welcome to face. Like grabbed the top
face and pull it up. I'm looking to base and
make sure that this not that high is about the
right size for a folk. At the moment, you can say
that the ward where he grew up seeing with these
ISAF taking off or no, not quite sure yet. I'm going to press control
law, bringing an edge loop, bringing it up to
the top of the warm red to do is I can see this
is probably way too high, so let's bring it down. So I went to come in, grab the top, we face legs.
So grabbing the top phase. And then you can press Control
plus on the number pad. Based on what that dose is, it actually increases
the selection of the next edge loop over. So Control Plus again, you can see it goes
all the way down. I'm going to show minus
also a minuses them off. Now I can do is I can pull this down to the height I want it. I can also now check the actual width of this and I can say it is a bit too thick. I'm also going to bring
in another edge loop, so control all left-click,
bring it down. And now I have a
really good idea of the actual thickness of it. And you can see
way, way too thick. Let's grab it all. Let's make it Senate. Let's press bring it up. Now you can see that dot is round about
the right thickness, albeit it's too hard. So I said let's shrink
it down a little bit. All right, Something like that
might be absolutely fine. Now let's come in and
make the bottom bit. So what I'm gonna do, I'm
gonna come in, grab the ball. And you'll notice
when I press a, it will get rid of this
indentation there. So if I press Enter, you'll
see plants it all out. That's exactly what
I want to make base actually into my actual falx. If I grab this side and
this side and press Enter, and then I press S and
X and pull them out. They won't pull out the moment. And the reason is we've now
got this on medium point. Now you can press S and X. You can see we can
pull them out. Now, is looking good? Yes, it is. Let's press Control
Law, left-click, right-click, control law,
left-click, right-click. And I can see just
how easy it was to make this actual fork. I'm gonna do now
is I really want to keep this kind of edge here. So I'm gonna do is
I'm gonna press Control Alt, left-click, right-click, control,
left-click, right-click. And then I went to pull
these out a little bit. So I'm gonna grab all of these. So Alt Shift and
click on all the way around Alt Shift click
and then we're just going to pull them out
just a little bit like so because I do want this
little bit of water on here. Alright, so now let's
create the fault-based. So what I'm gonna do is I'm
gonna come in, grab this one. And this one. I'm going to press
the eyeball and just to insert them like so. Then we press pull
them out like so. And I'm going to press E
to pull them out again. And now let's move them
across because of close to folk actually has actually
been a little bit like. So you can say, wow, that was really
easy to do, right? Yep. Alright, so now I'm really,
really happy with that. I'm going to smooth it
off. So Shade Smooth, bringing my auto smooth like so. There you go. One folk exactly the
right height and size. Now let's bring in
some materials. While do is I'll
actually come in and apply my subdivision,
so Control. And then I'm going
to grab it now, a new smart UV project. Now let us come in and
give it a material. Wood main lopes going the wrong
way again, as we can say. So let's come into UV Editing. 90. Uv, CG-islands. Don't zoom in top. All we need to do
now is replace. I think this one needs to
go the other way round. So I'm going to, I'm
going to Alt Shift, click OK shift click Control plus Alt Shift click
just to minus that off. The thing. While I'm
going to do in studies, I'm going to press all
90, spin it around. Now it looks a lot
bags set this bell peers you can see and I
think these are these parts. I'm just going to press B. Grew up them all, all 90. And there you go. Now you can see that looks at tone back. And now we've just got
the last best to do. So I want to commend out
Shift-click, Shift-click, hold, Shift click Control
plus all the way up. And then what we're gonna do
is bring in a new material. So plus nu, going
to call this iron, will have two types of iron, but just for this one, for now, come over to shading panel. Click on your friend's
full control shift C, Go back and you're
looking for I am. So this one here. The first one, shift, select the last
one. Click frames fold. We go zoom in. And let's have a look
what they looked like top assignment. Let's, Here we go. Well, they look
really, really nice. Now let's come back to modeling. Then we go, all right, And folk. Now I'm just wondering if
this workshop with a liar, what's I'm just going to
change that to light. Yeah, I'm not looks
actually bad. I'm happy with that. So Patrol or transforms. If we click on it, on
Charlie, all transforms, right-click, sorry
Jen, to geometry. And let's call this folk. Unless right-click and markers. I said, There we go. Alright, let's pull
this in some place. I'm going to put
it in my ladder. We've got a lambda,
we've got our folk, and we've got our
bond on now we've got Hayden record this
on the next lesson. Then I think what we're
going to work on, aids will work on the
actual poem, the voltage. All right everyone,
So hope you enjoyed that and I'll see
you on the next one. Thanks a lot, and
I hope you enjoy it and don't forget to
evaluate. I forgot about that. All right. See you.
20. Building the Water Pump Greybox: Welcome back everyone to blend the three the ultimate
medieval scene calls and this where we left off. Now let's create something
a little bit different. We made a lot of wooden
things so false. So let's create
something a little bit different on a very
simple animation. So what we're gonna do is
gonna create the actual pump. Again, I'm going to press one. I think I'm seeing
as I'm pressing one, I'm going to move everything
over justice way little bit. So I'm bringing my
reference it or not these things interfering
with it as well. There is actually unhide
this reference and show you. If you click on this,
you can actually come down to this point here. We can actually go
and change those. So if I come over this
little file here, we'll change it to home. There we go. That's how
easy it is to change out. I have a pressing need him
to be the size of this. I'm going to bring you OK. All right. Look. Yeah, that's about
the right size. So we can see now beg our actual contents of a
bringing this over here. Like so then I'm just
going to bring my mom, I'm upon poll, just to the top
of my actual ground plane. All right, so let's start
work on the actual pump. So I'm going to actually also, I think bring these over
it just so when a bring in new object is gonna come near enough in the sensory and just make it a little
bit easier for me. Okay, Let's bring in, first of all, we're
bringing cylinder. What we'll do is we'll
turn the number of inches down because we really don't want so many
votes as I mean, it's going to born
Pope or polygon count a fair day if
we're using 32 vertices, I'm going up here. So we'll keep those
down a little bit more upper and
something like 18. And the reason why
I'm printing on 18, I still want to keep them fairly low on the polygon count, but I still wanted
to look rounded. So in other words, if I
right-click now and Shade Smooth, come over to alter
smoothened prey on. You can see I've
still got a rounded, if I have thought on something
like ten, for instance, on the venosus,
you'll end up with a very blocky of parents. And being as this actual
particular build is focusing not on stylization
but on realism. We actually written
while not to have that rounded look of the piece, I'll
actually creates him. Alright, so let's
press one and let's make it a little bit smaller. And I think what we'll
do is we'll bring it down to something like this so we can say it goes up in our And then like that S and Z, bring it down, bring it out. And there we go.
Something like it doesn't need to be
exact as long as you're relatively close to
what we're actually building. So I'm gonna pull it
up just a tiny bit and then press the
tuple and come in, grab the top of it,
press one moment, do now he's gonna press
eight to extrude it. So E, pull it, pull it in. So we're only way it
came with extrusions, inserts, and scale basically. So now I'm gonna press
eight polytope, like so. Then my Wednesdays, I'm going
to actually use an insert. Want to press Alt to zoom
in and press I to insert, like so, I'm going
to press one again. And then a monument to do
is I'm going to extrude. So you can see it's
a little bit out. So the way to deal
with that is if you grabbed all of the sides, if you press S,
you'll have a problem where you'll start
scaling in there, as you can see, it's
going in there. So don't actually just press S, press Alt and S and pull it out. And you'll notice, now, if I press alternate, we haven't got that problem. That's a really great or good. Now press one. Let's bring you up to here. And then I'm going to press
bring you out like sewing. You'll notice we went
to first bring it out. We haven't got that
problem anyway, so we can just use S. Then let's press bringing it up. Then let's press I, bring it in. Like so. Let's press
one analysis scaleable. See where it probably
a tiny, tiny bit out. So I'm gonna do is I'm
gonna grab all of these. I'm going to press Alt and S, scale it out just a little bit. Grab the top now, one,
bring it up again. There's another way that we could actually do this as well. So what I'm gonna
do is I'm gonna bring straight up to the top. Like so I went to
then press Control. Left-click, put it right in
the center where he wants it. Then you're going to
press Control D is o, you're going to bevel it and
you're going to bevel it off to run about the right size. Then you're going to press T and then alternate and bring it out. And that's another
way of actually doing that same procedure. So many ways, some
ways you're gonna find a quicker than ways
that under him. So now let's press top, grab the top of this
again in face-like. Let's press one again. Let's press P to bring it out. And now let's bring you off. So I'm going to press E and I'm going all the way
up to here now. So then S, like so. And then finally E again, then S because we don't actually want this to
be flat on the value. You can see how build this. Again, bringing it in
and down, like so. All right, so there you go. That's the star of
our actual pump. Really, really easy, right? So now let's come in and pull this side
shoulder, tap on that. And before we
continue, I'm actually going to save this other way. So File Save. Okay, so let's now put the
actual handle on here. So we'll, we'll do actually the gripper here as you can see. So let's come to
the backend VFS. So if I press a time
coping with Face, Select, Grab this back is 75, press let's say control three. We can see that's
perfectly in land, so I can press Shift S because the selected tab shift a and
let's bring in another cube. And then what we want to
do is I'm just going to make base a little bit smaller, Something like that. I'm going to fit it into place and then maybe a
little bit wider. Because what I wanted
to do is I want this to actually hold on to my handle. I don't want it to
make it look basically thinking of that it looks like it's actually going
to hold something. I've just opened it a bit
further on the y-axis. Now let's put all handling
place undue the top of here, we have an idea of how actually long we need
to have a handle, and I think we need to have it. That's the most
important thing because you don't want
something that's so flimsy that it looks like
it's just going to snap off. I see this in a lot of
renders and things like that. Now things are just like little dinky salts
that are really, really long and they just
would snap quite easily. So let's solve that out. I'll come back to my opponent. I'm going to press Tab. I'm going to come in, grab
the top face on here. I'm going to press the I button. Insert bringing it in
and then I'm going to press E, extrude, bringing it down,
press the S put on them just to make it
a little bit thinner. And there we go, that
should be absolutely fine. All right, so now let's
put the underline. So what I'm going
to do while I've got this in the center of that, I'm going to press Shift S, cursor selected, and then
again bringing a cube, some shift a cube. And the reason I keep pressing tab and do
this in object mode, just I find it a lot
easier to work in object mode for New Paltz. And then I've joined
them all up and that's the easiest way that
I found to do that. Let's first of all, get
the right width of this. So I'm going to press S and Y. Then I'm gonna press one. I'm going to bring you up. I'm going to basically
shrink it on the z. I said like so bringing it down. And let's have a look at
that. I'm basically located that looks round about the
right thickness for me. So I'm quite happy
with the thickness. So if I press one now, I can actually call them, bring out to where
it needs to go. So if I grab this face
like so press one again. I'm not happy with the
thickness on the end. Nothing camps, so I'm
going to press E, pull it out on
this one, D again, pull it out and then S, shrink it in, like so. Now let's come around
to the back of it. So I'm going to press one. I'm going to pull
it out to here. I'm going to press E and then E, then E. Holy life. So I'm going to shrink
this just a little bit, so S, shrink it down, like so. And now I just basically
one of my handle on here, so I'm just going to press E. Then I'm just going to
pull it down like so. And I'm going to use this,
of course from a humble. But before I do that, I need to round these edges
off a little bit. And they also need to make
a little insert in there. It's just to make it
look a little bit different as you can
see, we've got it there. So it's kinda comes from here
to somewhere around here. So let's do that now.
So I'm just going to press Control Law, left leg. Let's put a roundabout here. So we've still got that
little handle on here. So you can say it's
going to probably start from the center of it. So I need to pull this
bar somewhere around here is gonna be the
actual arm that goes down. Basically what it
does is it causes a kind of suction
as a metal plate on the end and
when it goes down, it falses pressure and then
when it comes back hold, it basically pulls the water along with it a
bit like what you would use to unblock
a toilet base of the dots exactly
where it goes. Alright, so let's come in
and grab both of these, both of the sides. And then what I'll do is
I'll press I bring it in and then I'm just
going to use extruders. I'm gonna press E
followed by NSF, not move the mouse or
anything like that. And then I'm going to
press and pull it in. And if it's not
going in, of course, just make sure you
are on medium point. Alright, so let's
press top and number. Look it up. Okay, I think I'm
happy with that. The one thing that
I need to do now is I need to round off
these edges a bit. So I'm going to do that before
I make an actual handle. So I'm gonna press
Alt, Shift and click. And you can see that
we only go up to this. Now if you press Control click near the end the
way you wanted to do it. So let's say over
here, you'll see that grubs or in
all the way along. So that's another easy way
of grabbing something. If you shift click, move up to the end, control-click,
Shift-click. Control-click. You can see how quickly and easily than we can
grab these points. So Shift-click and
control plane. All right, now we've
got those points, Let's bevel them off. So we're going to press
Control Bay and just pull them out very slowly holding
the Shift bond. Now I want to be really
carefully because I definitely don't want to go over these
points as you can see. So I want it to still
be a decent match, an IPO price tags, you can say that's what
we've ended up with. A nice piece of rounded male that is usable as you can see. All right, so let's
come now to descend among going to do is
I'm going to bevel they send off so we can
make our handle. I'm thinking Yeah, Shut up, Babel it off on yeah, probably. So I'm going to
press Control and bevel this off. Like so. I'm probably as
well just going to turn this off one mole. So have a look what
that looks like. Yeah, nothing That's
looking much better. Alright, so now let's make them the law of the
arm. We're gonna do that. Well, I'm going to grab these two that are already grabbed. I want to press Alt
Shift and click. And then what I'm going
to do is I'm going to press Enter and then Alt and S and just pull that
out slowly. Like so. Have a look at that. I don't think I actually
pressed then sublevel. Is that coming out
of the way I want? I'm just going to press S and just pull it out
little bit more. I think I'm just going to
pull it by myself actually because I want it rounded
slightly on this end. So I'm just going to pull it
down and just do it by eye. Actually. Nothing That's
looking much better. Now you can see that
I've really got to pull this big bag
because if we press one, you can say it shoots
way over that. So let's do that now. So what we'll do is we'll
grab the inside of here. So Alt, Shift and click. In fact, congruent on the inside of here because I need to bring this back to this
point as you can see. So let's say I'm going
to grab all of this. So Control Plus delete faces, and let's fill this back in now. So hold shift and click. I'm going to fill this in with F. So just an F Control
plus Control plus, and now I should be
able to pull that back. Let's see if operate on normal kind of actually
pull it back on that. It's a better angle
as you can see. So probably going to do that. Then I'm just going to pull
it back and then pull it all just a slightly just
to get more of that shape. And now let's put
it back on Global, Press the top on, and let's have a look at
what that looks like. Alright, yeah, I think that looks pretty nice because he has to get his hand around
this to actually pump it. But it's not so big way he's gonna need two hands around it. So if you grab your mind, you can always check
up and press seven. Just bringing my
and just imagine his hands on the end of
this first dot zoom in. And you can see now
it can basically do this with one hand. And that's based on what we
want because we don't want this point to be Newt
or anything like that. Alright, so I'm happy with that. So what we'll do them
on the next lesson, we'll get this actual top-down, will actually get
this handle held onto something and this
actual ongoing in that. And then finally, we'll
actually look at actually creating the rake to
actually animate it. All right everyone,
so I hope you enjoyed that and I'll see
you in the next one. Thanks a lot.
21. Preparing the Water Pump for Rigging: Welcome back, everyone
was a blended three, the ultimate medieval sinkholes. And this is where we left off. Now let's come in and
actually create models. Won't do the pomp and authors. So what I'll do is, I've
got my cursor there. If you've not got yours,
I just grabbed out, put it in the center
pressure today and let's bring in a queue. Let's bring in a cube. Let's bring it down to
something like here. And then I'm going to do is I'm just going to bring you up. I'm going to just
create this pump. All know, it's going
to go down here. So you can see that
it needs to obviously be attached to something
on each of these signs. So while I've got
this air might as well bring in the
side points as well. So I'm going to actually
grab the handle again, grab this sexual facing. Press Shift S, cursor
selected tab again, shift egg, unless bringing
in now another cube. And we'll make this
smaller Nick Short, come back to nearly that
point when I pull it out. So I'm just going to
pull it that way. I'm just going to
pull it out to here. Wants a little bit of
leeway on that price top. Grab this face, and
then just pull that in. So, alright, I'm gonna press, so now I'm just going
to put this into place. You can see at the moment
it's a little bit out of, is that really in the center? I know that this
is in the center, so I really need to
move this actually, I'm going to grab it all
without pull it over. Like so now I'm just gonna work on how actual
thick I wanted to. I think the actual thickness of this is looking about right? So I'm going to grab the bottom. I'm going to pull that down. There it is. That's where it should
be swinging from. Actual long because I want this to actually come back, lift up. But this still to actually swing and let that do its work. Alright, so now let's round
off the edges of this. In Festival, I'm going
to press Control Alt, left-click, right-click just to put that right in the center. And then I'm going to
do is I'm gonna grab each one of these ends. I'm going to press
Control B and Bevel the moment we've actually
got on two segments, and I think two segments
works a lot actual bad. Now what I'm looking for
is to make sure that I'm happy with the thickness
again of this. And I think I just want to follow it out a little bit more. Thank you. It's looking
a little bit flimsy. Always be aware of that never
makes something too flimsy. Now I want to do is I want
to bring this point home. So I went to press
Control R again, left-click, bring it up. And then what we're gonna
do is I'm gonna come in and grab each of these. And I'm going to press S and
X and bring them in like so. And among went to do, I think actually I'll
leave it like that. I think actually that's
looking absolutely fine now. Now I want to do is you want
to put it on the other side. So to do that, I need space to put
this in the sense now we do know all cubes
in that sense. So if I grab my queue, press Shift S because the selected come back to my handle, then control lay
all transforms and then right-click and set
origin to 3D cursor. Now you can do is you can
come over at modifier, come down and then what we
can do is add in the mirror, put it on the y, take off
the eggs, and there we go. Now listen empathically place another and actually apply that. Yeah, I'm just gonna wait. Do this bit first
and then I should be able to apply
that in a minute. All right, so now, all we happy with
this at the moment, I think I am. I think this is just a little
bit too big at the moment. So I'm going to do is I want to make it a little bit smaller. So something like now. And then I'm going
to press S and wide. Just pull this out a little bit. Now once there is, I
want to make this a little bit rounded, so
I'm going to do that now. So I'm going to do is I'm
going to grab each one of these sides like so I'm
going to press Control. They beveled them off like so. Now you can see it's
nice and rounded. Now let's press control law
to left-click, right-click. And now we just want the handle that's going
to go down there. The first thing I'm going do is press Alt Shift and click. I'm going to press
Enter and then Alt and S and bring this out. Then I'm just going to
grab the bottom of here. So I'm gonna come
in from a palm, hide it with age,
come to the bottom. Now, press the top button
and then I'm just going to grab all of these like so. And I'm going to pull them down. So I'm going to look
actually are longer wanted. So probably, as you can see, probably down to
something like here. So I'm going to press
E, pull them down like that where no one's
actually going to see them and that should
be absolutely fine. All right, so I think I'm
happy with how that looks. The one thing I'm not happy with is just the amount won't this
rounded off a little bit, it might be a little
bit to square. So if you do want that, quite easy to do
that as we've done, just don't use two segments. It's so small, I
would just use warm, so I'm just going to
press Control P that will vary slightly like so. And then just turn this
down to one, like so. All right. There we go. Yeah, really happy with that. Now we want the actual desk
to come to the sides here, so we're just gonna
take that into account. So let's bring it out now. I'm going to bring these out. So one Wednesdays I'm just gonna see if
I can actually get away with pressing
S and Y. Let's see. So you can see they're
a little bit and bake and that's
probably not ideal. So yeah, do I want it like that? I'll do I want it to keep to the inside of movement
on the inside. I want it to have the
illusion that something is on the outside
actually moving this. So I think what
I'll do is instead of doing them, I
just put these back. So SY, then what we'll do is I'll press the I
button to insert. And then we'll press E and S and Y and pull them out like so. Then what we'll do
is I'll actually bevel off the end of it. So if I press Control
V now bevel of those items, like so. Now we can see we're
a little bit out for some reason.
I'm not sure why. I think it's in
the center of hey, I just think it's these parts
that are a little bit out. So let's say let's
fix these as well. Yeah, I will move these slightly over so I'm gonna apply my Amharic, so Control a. And now I'm going to
do is I'm going to press Control Alt transforms. Now I'll grab the
center of this. So if I grabbed, let's
say these ones here. So if I press Alt
Shift and click, hold shift and click Shift
S, cursor, selected, tap. Grab these, and then let's right-click
origins of geometry. Now let's press Shift S and
now we'll move them over. So I've got a shut-off
dot right in the center. And now we're gonna move out of there and I'll have
to lift them up. So selections because
to keep offset. And now you can say that
buying in the center. So now we can actually come in, lift them up, Live. So where do we want them? Probably want them actually. Don't want them around here. Yeah. Probably somewhere
right around here. Yeah, I think that
actually looks looks good. So they're actually
going to swing from man. Yeah, that looks
good. All right, one thing I want
to do then finally for this part is just
babbled ease off. Dns. You're gonna be using this.
Probably a lot of times you haven't needed and
I've seen or anything, you do actually want it to look good and realistic females
will put the wicking. Alright, so let's
grab these legs, press Control D and just
bevel those off very slightly like so. And
now that's located. Absolutely fine. Okay, So I'm really
happy with that. Now we just need the point now to actually hold
all these handles. So if I press hold, teach, bring back everything, and
now grab my black handle. And I think I could
probably get away with pressing control law
to left-click, right-click. And now let's drag these ohms. I will do it in the eye. You can say I want it clean
back here though first. So I'm going to
press Control Law. Left-click, put it to there. Grab each one of these
phases and then we can actually work and everyone's
who brought these up. So if I press E Now, we can see that we are caught in through there and
things like not, that's not something we were in. The one. We want this basically
to come on there. So the handle actually
moves from these. So let's pull them up
a little bit further. Let's bevel off them as well. So bevel off the tops of these just to make them a
little bit more rounded, a bit more realistic. Let's then press Control. They beveled them off. Like so unless round
them off a little bit more than just one like that. And now let's bring them out of it because you
can see that they're located probably too thick
on each side actually. So let's do the inside first. So I'm going to press S and Y, pull them out, like so. And now let's also
bring the main, Probably, probably on here. So let's bring them in
like now, both of those. So SMI bring them in. And then what I'll
do is I'll bring the bottom in a little bit more. So S and Y, let us see. Let's have a look
at that. All right. I think I'm happy
with how that looks. That's looking fairly,
fairly realistic. There's enough room as well
to actually have this. If we grab this, for instance, you can see it can calm
down so it rotates around and comes down
to actually hear. What I mean by that is if you grab the grease
pencil over here, you can see that this is
gonna rotate round to here and they are calm and lean against this all nearly to this. So you can just click on your grease pencil and
then you can left click. And if you wanted to
delete it, just press Control and you'll actually
delete off as well. So really easy to actually show people exactly
what you mean. Alright, so I'm happy with that. Now what we want is just a bolt in here or something like that. So what I'll do
is I'll actually, I think I'm gonna move this by thinking the
bolt will just be inlet. I'll just make a very easy bulb. So let's put it back on move. Let's come to this one. Let's probably grab, need
basically the center of the. So if I grab this
one and this one is gonna be near enough close, so shift as case it's a
selected and then Walters, I'll press Tab again, shift a and let's
bring in a UV sphere. Now, the UV spam
bringing in for this, I want it really, really low. I'm gonna put this
on object mode is awesome and see
what I'm doing. And because it's
got 32 segments, 16 rings, these
are the segments. These are the rings going down, and I really don't
want that many. So I'm gonna put this
on something like 12. I want to put this on eight. And I recommend every time you make bolts and
things like that, you always turn them
down really low because the continental crust
near lot of polygons. Now I'm going to do is
I'm gonna press tab. I'm going to grab this
and here press Delete. Remember we did last time. Faces press L, delete
vertices just like that. Then what you can do is now you can actually grab
the whole thing. So L, z, squeeze it in, and now let's spin it around. So let's spin it around. Let's try and get this in place. I'm going to press one. I'm going to bring it down. I'm going to press
estimate this smaller. I'm going to put it where
I'd lecture like it. So somewhere, somewhere around here, I think it's
absolutely fine. Wherever I put this, remember, that's where I'm going
to have my actual bone that's gonna go in there. I'm happy with how that looks. I just need now a bowl that
is going to go through here. I'm just going to pull
this out a little bit. First of all, I'm
going to do is I'm gonna grab this edge like so. And to pull it and then
the y here on the Y. So EY pulled over. And now finally I can pull
this over into place. Like so. All right, so I'm
happy with that. Now, obviously, I once put
it on the actual other side. So I went to do to do that. I'm just going to grab
this grab each one of these shift S because it's a selected grab this control
leg, ultrasounds, foams, right-click set origin to
3D cursor, add, modify it, bringing in a mirror,
put it on the y, turn off the X, and
presto, There we go. Alright, so we nearly finished
with this on the next one. What we're gonna
do is we just want to finish this up and then we're going to
start bringing the rigs and things like that. Obviously, I didn't the
textures and things. If you don't want to animate it. And then you can just
skip that call out. You don't really
need to animate it, but I highly recommend
it's only three bones. It's a very small animation. I highly recommend that you
actually take the time to learn it or be probably
ten minutes at the most, just so you understand that. And we're also going to animate the actual
windmill and things. I was really, really handy
if you know how to do. All right, everyone.
So I hope you enjoyed that and I'll see
you on the next one. Thanks a lot about it.
22. Blender Extras Pipes: Welcome back, everyone
has a blend of three, the ultimate medieval sinkholes and this where it left off. Now, let's think
now we've got this, we've got the handle in, we've got hold on something. What we need to do now is
actually bringing in all top. Let's bring it on top. So
what we'll do, first of all, I'm going to bring in a cylinder in the
center, of course. So let's make sure first of all, we can say this is in the
sense that if I press Shift S, customer selected shift a and let's bring gain,
that's not shift a. Shift, Hey, let's
bring in a cylinder. There we go. It comes in at state two and that's because I reload of my blender in,
extend this down a bit. So I want to put
it on something. I think 14 should be enough. It's going to again,
again, always check it. So Shade Smooth, also smooth. And you can say that is
kept its actual smoothness. Now I'm going to actually
show you what I mean by that. So shift a mash
cylinder, put it on. Let's bring in all
sorts of shapes, move, move, and there you go. You can see that I have
to turn itself really, really high to actually
get that roundness now. And because of that, if
I joined this to this, it will be set on 53 or something around that to
get the roundness of this. And that will basically round
off everything on here. It could even round off. You won't actually called
edges like these hard edges. You might actually want those
hard edges and you know, Gmail to do that because
this is set too high. Now of course you can use
shops and things like that, which we actually showed you. Well better I find
just to delete it, bringing a cylinder, cylinder, then just set it to
something full team, I would say 12 is the
minimum our go-to normally, right-click shapes,
move auto smooth on. And now let's spin this around. So all 90 S test1, and let's bring it to
where it needs to go. So it's going to top
out around the body. Like so, something like that. Now you can see I've
got my pipetter now rather than actually
creating the pipe from this, there's actually an easier
way you can do that. What I tend to do is I'll
come up to Edit Preferences. We're going to go to Add-ons and what we're going to
bring it into some extra, just bring these are actually
built-in within blender. So just make sure
that you've got them ticked on the very, very handy. There's a lot of extras
to do with curves, a lot of extras to do with
objects and things like that. And I find that a lot
of the time I don't use them for ages and then
also now need to use them, but allowed the tree sampling
and things like that. So they already built, so
just make use of them. So take them both
on, close that down. And then what should happen
is if I press Shift S now, because the Selected Shift a, and then what you'll
do is if you come down to where it says mesh, you will say that
you've got Walmart says pipe joints
and I'm going to bring in a pipe elbow and
this is how it comes in. Now, the thing is, if I spend this round, so if I press all zed 180, it will disappear that menu, and I don't really want
that one wins there is, I'm actually going to
delete it, shift a, bring in my pipe again. So I'm gonna come down to
where it says pipe elbow. And the first thing we're
gonna do is turn down the number of this is on here. This is the divisions. Clearly, we don't
really want not many. It's way, way too high. So let's put it on again, 14, something like that. And then what we can do
now we can bring down the radius of where we
want our actual top. We can also bring down
to where the lens starts and where
the lens finishes. And you can see now that
you can get a really, really nice angle of how your
tongue is going to look. You could bring this the
other way round if you want. So five prices, so
warm for instance, I can change the angle of this. I can put this on
90 degrees instead. If I put this on 90,
you'll see that it's perfectly bed now
in the right place. Sometimes I actually
do it that way. And then what I'll do now
is it makes it so easy. So if I press S Now, I'm bringing it down and then put this into the
place where I want it. So I'm going to press S. And now because I've brought
in and start from there, it just makes it a lot
easier to work with. So now I can actually come in, grab the bottom of here. So I select o shift
and click one. Hold it out. Like so. Let's pull it. They're going to into some place and then I'm
going to rotate it. So why rotates it like so. All right. Then what I would do is I
normally bevel this part off. So I'm Alt Shift and click press Control Bay, bevel it off. Now you can say that you've got a nice round top and
that's really actually easy to do it that way
rather than trying to do it yourself and make this bend and things like that. All right, so now we just
need an end on this. So press one again. I want to actually
extrude this out. So I'm going to grab
this end Alt Shift and click and press eight. Pull it out. You can see it
pulls out on here. Do I really won't? Probably not like that. So I'm gonna do this a
little bit different. I went to press
Control Z because it did press eight and
they don't actually warming some edges there and
I can't actually see them. Now on Wednesdays, I'm
going to stick with normal. And you can say it's
a little bit out, but I'm gonna pull it back into place to where I wanted
something like that. And then instead of
doing it that way, it's going to pull
this buckling global. I want to press control law. Left-click. Bring it down. Something like that. Then what I'm going to
do is I'm going to grab this edge Alt Shift and click. I'm going to press
Enter and then Alt and bring it
out. How I want it. Yeah, something like
that thickness, you can say as well
that we need to fix the inside of it
because of the moment, it looks as though we don't want to stay up
this top, but again, it's one of those things
you might as well fix it while you
hit actually here. So what I'm going to
do is I'm going to, instead of trying to extrude in and things that I'm just going to
add some thickness to it. It's just going to
make it easier if I press shapes, move
at the moment. Let's come in and put
in the auto smooth. And you can see already
looks really, really nice. We just wanted to fix
the inside of here. So all I'm gonna do to do that
is just grabbed this edge. I'm going to press
S, bringing it in. And then I'm just
going to press eight, pull it up to where I wanted to. So if I press, you can see that when I
pressed, it went to the side. I don't really want that. Now if you press a one, you can press the
email and you can drag it straight up like that, press it on the Z and that then we'll keep
it there and then we can move it across and that's
just a much easier way. And then of course I can
fill it with the F button. And now you can see that top
looks really, really nice. Alright, so now
let's join all of this up together and making sure that we've gotten
no modifiers on. Let's have a look. And it looks absolutely fine. So let's join it all up. All these little parts. Let's press G. Once we've dropped them all, you can say I've got
polymers in that. Let's see. There we go. One merit, we've got
one mirror on there, so let's just press Control
Z, join the rest of them, will shift select
this one, Control J, and then we'll grab this
one, apply the mirror. So control joining up to here, Control J and then G, move it over and there we go. Yeah, it works now. Now let's press Control
a or transforms. And I don't think that all transforms right-click
origins geometry. And now let's move it
off. So shapes move. And then let's just make
sure alternate moves on 30, which is okay, so now let's bring in some actual
textures and materials. What we'll do is we'll come
over to the right-hand side, will come to our materials in. The first material
bringing in is our ion. So bringing your
eye and let's pull this all materials so it can actually see
what we're doing. And of course it's
all messed up. So let's press Tab
to grab everything. You, Let's go into smart UV project click
Okay, and there you go. You can see it looks
fantastic already. Now what I wanted to do
is I want to actually create a note that ion, because I want to have some
variations in my hand. So I wanted to make this a little bit of
a different color. Let's come in and
click the plus new. And we're going to call
this iron in dogs. The one Wednesday is we're
going to click the top one. Click the down arrow
copy of material. Click the second one down
arrow and paste material. Now let's go to
our shading panel. Make sure you're
on the iron dog. Let's just pull these over. Just a simple technique
of using a gamma. So shift a, Let's do a search, bringing in a Gamma, drop that in here. And let's set the
gamma 2.31, like so. Now let me zoom press adult
bond to zoom into my pump. Let's put it on material and I'll just show you
what that looks like. Now. Let's grab, let's say, Well, grab the bottom. We'll make that a
different color. So I'm going to do is
I'm going to press, it'll shift and
click Control plus Control Plus come
up with tomorrow. I ended up click Assign,
and there you go. Now you can see how easy it
is to actually change that. Now bearing in mind, if you
do have some lines up there, they're going to
be very odd to see where the metal to start with, but you can move them around on your UV map just to
get into that place. You could also actually UV unwrap this properly if you
wanted to actually do that. Ok chip click Alt Shift, click Control plus, and then
I ended up click Assign. And now let's work our
way of thinking, right? We don't want my other class. I think I wanted to in the top, so I'm gonna grab the
whole of the top. I end up click Assign. I think I also want
it at the top of it. So I'm going to grab
the top Alt Shift click Control PostController plus
I ended up click Assign. I'm also going to
grab the handle. So the all of the unknown, I'm going to click, Assign, I think several. Nothing that's actually going to look really, really nice. Alright? You code out the handle to be something
completely up to you. I'm just thinking what I will not would it fit?
Let's have a look. We'll grab Alt Shift click, trying to go around here, look so Alt Shift,
Control plus Control plus and a moment to plus and
click the down arrow. And let's go to my word main
and then click the Sign. Does not fit there. Does it look right? Actually it doesn't
doesn't look right. I'm going to minus that off. And we'll just keep
the iron doctor thing. Alright, so where else DO woman? I wanted to hit on these bolts, go all the way through
and we go like so I wanted to on this
part here as well, I want this to be dark metal. So let's come down IN dog, click Assign, like so. All right, Finally the
last thing I want to do now is actually
grabbed everything. Make sure I'm in place. Let's right-click and we're
going to triangulate faces. The reason we're gonna do that
is because we had a lot of actual ankle bones with
the cylinders reuse. And then what you do
is you right-click tries to quads and
basics only then going to triangulate
these actual phases that we're guns and
things like that, then makes it easier than I am. Because we're actually
going to animate this just in case so we don't
have any problems. Alright, you can
see the bottom now, probably don't need
the bottom on here. You might do so I'm
gonna leave it. But normally I would say get rid of the bomb is not
a lot of polygons. So, alright, now let's say I press tab come up
with, and let's name it. So we'll name it Walter poem. Like so. You can see. Then what we're going to
do is I'm gonna come down with multiple and there
is a right-click. We're going to mark as asset. And there we go. All right, so on the next lesson, what we'll do is we'll
actually animate it and I'll make that lesson just
about the animation. It could be a couple of lessons
actually, not sure yet. We'll make it though just
about the animation. And then if you want to skip the next lesson that you can do, just go to the lesson after it. All right everyone,
I hope you enjoyed that and I'll see you in
the next one. Thanks a lot. Bye bye.
23. Weighting & Animating the Water Pump: Welcome back everyone
to blend the three, the ultimate medieval sin cos, and this is where I left out. Now let's do our animation. So we've got all of our materials on
everything like that. Let's come to modelling. And then one Wednesdays
I'm actually going to, I think I'll hide
this out of the way. I don't really need
this at the moment. I'm going to hide
this out the way. And I'll also had this other way just to give me a really,
really nice view. Now this pump is
bang in the centre. If yours isn't, just press
Shift S, cursor to weld, grab your punk press Control
H all transforms and then it should put it right
at the bottom and Nika press Shift S and
selections Kursk kickoff set, and that will then part of that. Now you can put the orientation
wherever you want to, of course, but I prefer mine. I think down near the bottom, where it's important that
you do actually reset all of your transforms before you actually start
animating anything. Don't ever forget that. Also well-endowed, a
little bit of a mess. All right, so the
first thing that we want to do is bring in a bone because we need a rig before we can actually animate something. If we press Shift
a and come down, you'll see that we've got
something that says armature. We've got a single bone. Now the first bone you bring in should always be
near the bottom. This is the root bone
all the way down bone, if you want to call it that
is the most important bone. It basically what attaches this actual objects or any other object to
the actual flow. So we really actually
need that end. If you don't have that in, you
can't get away without it. But most of the time when you send it through to
somewhere else, it normally ends up
messing up our rotates in over here or something like that and it
just doesn't work. So always make sure you've
got your roof bone, it won't now Wednesdays, I'm just going to rotate
this repo down round, so I'm going to press all y, rotates it around this way. And I'm gonna make it just a
tiny bit smaller, like so. Now, it's important that when
you bring in the next bone, you need to be in
edit mode so that we bring the bones together
rather than joining them all. So I'm going to press
top, I'm going to press a to grab this bone. And then you can
either press Shift D to duplicate or you can press Shift a and it'll automatically then bring in another bone. So here's our next bone. I'm going to press
Shift Spacebar then to bring in my move tool. And basically I want one bone to actually move this one bone from here and one bone in here to make this kind of
moved left and right, bringing the actual pump all the illusion that the
palm is actually being moved. So let's do that now. So
I'm going to bring this up. I'm going to rotate it around. So all x 19, So rotates it around
this way and then you can actually make it smaller
and put it into place. I want to make it smaller. You can also pull it away
this bit if you want to. It doesn't need to be buying in the center or
anything like that. I want this bone to be basically here while I went
to do is I'm gonna come in. I'm going to grab this bulb, the bulb the other side. So I'm going to press Shift S, then cursor to selected, and then going to press top, come back to my bones, grab this phone, just make
sure you've got this bone only Shift S and then selection
to cursor, keep offset. Now you can see that's
buying in the center. The point that we want in the center is this
bit realistically, so you can move it to the sides if you want
a better view of it, it will still them rotate
from this point here, and that's exactly what we want. We can also make it smaller
as well if you want to. Just so you have a bad view of what's actually
happening, we thought. Alright, so I'm happy with that now than I need
one more bone and it needs to be comment from
probably this point here. One Wednesdays, I'm going
to come to this point here. I'm gonna grab this ball here. Then you can see that it's
going all the way down. So that's really not gonna work. So I wouldn't do is
I'm just going to grab the outside here. The outside here, so we can see about two kind of squares here. Shift S, the selected tab. Go back to my bone. Tom again, shift D. Drag it over here, Shift
S because it's selected. Whoops, messed that up a
little bit. So let's go back. I might say grab both of those. Shift S gets the selected tab, grab them a bone, and then
Shift S and selection too. There we go. You can see it's buying in the center of that. Again now I can actually pull it out and you can
see that I didn't quite pull it out properly, so I need to pull it
out on this green just to make sure it
stays in the middle. I'm going to press
the ice ball and make it a little bit smaller. Now you can see hopefully, hopefully it's short, rotate from this
point, which is not. So I need to move it again. So let's press Shift S
and see if can move it. So cursor selections cursor. And there we go. Now you can see it's actually pointing to that and
that's exactly what one. It just will have moved
when I actually moved, this just makes sure that it's actually pointing through them. Now the next thing you want
to do is name all your bones. So if I call him to my
bottom bone for instance, we can come in and you can say that this
one is called bone. Comes to the next one, Bonollo. Bonollo won't, don't
really want those. So let's call this
one roof bone. So let's come to the
next bone and we'll call this we'll call
this the pump on. So welcome to this
one and call it home. I always end in bone because
then it's easy to find. So just make sure
you do that as well. Just get used to doing that. So compound bone. And then welcome to Walsh. We call this the palm, palm. This is the arm, so this will be the I'm just going to
call it the pump swings. So I'm gonna call it Just so
I understand what that is. I don't actually
know the name of that pumps wing bone like so. Alright, so now we're
pretty much ready to go. What do we do now? What we
do now is we press Tab. We make sure that we
are in object mode. We press control all transforms going to reset all of the transforms
of the bone. And then we've already reset the transforms of
the actual pump. Then what I'm going
to do is I'm going to grab my phone first, release the bones, shift, select the bones now,
press Control pay. And then you'll have a new menu where it says Set parents. Soon as you come down
you'll see you've got one with armature and you've
got one with empty groups, envelope weights and
automatic waves. The one that we want is with empty groups because we want
to actually wait there. So in other words,
we're going to be using weights to tell the bones how much actual
exertion it has over certain parts of this
match sounds complicated, but it's actually very simple. So we're going to
use empty groups. Now you'll find that
if I click on my pump, come over to the
right-hand side that we've actually got
a modifier added, which is the armature. So great. Now we need to do
is we need to tell blender or the bones which parts of the arbitrary
we want to move it. So if I come to my
bones again and I press Tab and I come to
this bone for instance first, so this is the arm bone. So basically I want this
to move all of this. You know, if I'm rotate this
or something like that, what I want to do
now is basically come over to my pump and I want to come over to this
little green triangle here. And you'll notice
now that we have vertex groups,
actually don't know. And this is because we
made it with empty groups. Now if you come over and you
put this on a white paint, you'll see that the
entire thing is blue, Even if I click on these. And the reason it's
blue is because we put it with empty group. So I'm just going
to show you now if we go back to object mode, and now if we come
to our pump on, which is this one here, we want this to influence
all of these songs. So how do we do that? If
we press tab and we come into Edge Select and we
grab the whole of this. And then what we do
is we've got pump on, we assign one, which is basically red because
it's a full weight. If we sign that. And now we press
Stop and then I've come back over to wait paint. You'll see now that
this is bright red. If I click on the others though, you'll see that it's
completely blue. That means that this bone now is assigned to this arm basis. This bone, if I
move, this will move this arm up and down or wherever I wanted to
actually move it. Now the next thing we
want to do is we want to assign this to this bone. So basically the same thing. So I'll go back to object mode, come back to my pump, press the tuple on,
come to my pump swing. And then one went
to do is I'm gonna grab this part in here, the bolts and will be selected
on the other side as well. And what I wanna
do now is actually assign the full
weight to this bone. So the pump swinging bone, click Assign now the root bone we don't need to
assign anything to. There is one thing though
that we do need to do. We need to make sure
that these bones, when this poem moves upwards, this bone actually
comes with it. How am I gonna do? I'm gonna go back to my bounds,
are going to press top. I'm going to grab
this bound first, then this bone
press Control Paik, and we're going to keep offset. Now you'll see a little
line goes to this form. Now let's see if this all works. So basically what I wanted
to do now is I want to come to pose mode. I want to click them up
ohms comb to pose mode. And now we can say that
they've gone Bloom. What does that mean exactly, it means now when I move this, let's press on why. You all see that
everything on here moves along with it
except this part here. So we clearly need to add
this to this bone as well. So good actual job
actually don't know, just so you can see
that site works. Alright, so now let's go back first and then it
comes to object mode. Come back to my palm, go to my palm, and then
I'm going to press top. I'm going to grab
this part here, so L, like so and I really,
yeah, let's have a look. Do actually want
to go down there? I don't think so. So let me just grab this part on its own. There we go. And then grab
this part on its own like so. And then what we're
gonna do is we're going to click Add sign. Now let's envelope to see
how these bones are looking. So I'm gonna click on my bones. I'm gonna call now to
normal bone Sarah, my palm gonna come
down to weight paint. And now we're going
to have a look. This arm bone, as you can
see is this one here so red. Then the pump swing bone is this one going all
the way down there. So that's exactly what a warm. Now let's come back
to object mode and go to all bones now
back to pose mode. And now when I move this, hopefully the whole
thing should move. So let's press R and y. There we go. Now this
should also move, so RY, and that is
exactly what we want. We want this to move
and misdemeanor. And it also basically move along with it so we can
actually animate this. You can see that I've gone way, way too far as well. It's gone through them. We don't really want that, so no problem. All we need to do
now is press Alt. You'll notice that
they actually pops it back to the original
state that it was in. And it's basically
based on when you press Control H reset
all the chunks forms. This is the state I
will put it back into, even if I scale it, even if I move it over here, I can also put those back
as well with Alt S to set the scale and Alt G to reset
where it's actually gone. Now let's say I do
the same for this, so altar and put it all back. And then what we'll do
actually on the next one is we'll actually start
animating this out. So I hope you enjoyed that
and I hope you learned a lot. I'm going to leave mine on hose mouth because I'm
gonna need that point. It actually animates it. All right, everyone, so I'll
see you on the next one. Thanks a lot.
24. The Water Pump Asset Completed: Welcome back everyone to blend the 3D ultimate
medieval sinkholes. And this is where we left out. Now what I want to do is I
want to actually animate this, to animate it based on
what you want to do is you want to be a layout, because layout actually gives you this timeline along here. I'm just going to
click on my layout. I'm gonna pull this
up a little bit. Just talk a little bit of room so I can see
what I'm doing. The simple animations
and things like that. You want to be on layout. And when we do more complex animations and things like that, there is an animation
button over here. Now, my wonder I don't want to put this on
material amount, want to do is I
just want to change the material slightly on here. I'm just going to
commend Tim upon. I'm gonna grab my palm, go into edit mode and
grab everything with a. And then I'm just gonna
come to my UV Editing and I'm just going to grab
all of these on this side. I'm going to press a press the S bar and scale
them up a little bit. I just wanted to move
them just to make it look a little bit
more realistic. It looks a little bit
small on the UVA mom, so that's looking
a lot better now. Okay, so now we can
go back to Layout, and now we can actually
start animating this at the star animation if we
put this onto pose mode, now, I want these to be basically where they all
now, because that's perfect. So you always want
it to be on one. And then what you want
to do is you want to press the eyeball and come down to where
it says rotation. So I want to basically have the rotation in this
place on frame one. So I'm gonna click rotation and then I'm gonna
come to this one here. And I'm also gonna
do the same thing. So I rotation. And now we're gonna do
is we're gonna go over it because this is
going to be 800 frames, is going to be quite a long the animation for the whole scene. Now you can put yours
down if you want. As long as you follow along
wondering the beginning, then you'll have a
great idea of what to do when you want
to crop this down. So let's come over
and first of all, put the frame ending
on a plunger. Now I wanted to do is I'll
come to this 1 first. I'm going to put this
on frame on a 100. So you can move it over
as well with this, or you can drag it
and pull it across. And then what I'm going
to do now is I'm going to rotate this around. So I'm going to rotate it so
it comes to just along here. So basically when
it dries off and why I'm rotate it round. So you can see that it comes to roundabout that basically
the handler going open down that moment there
is I'm gonna press I on rotation again and I'm
going to come to this one. I'm going to rotate
this round so I'll y, rotates it around just so it's pointing
straight down line. And then you're
going to press I and you're going to click rotation. Now hopefully you
now have it where it's going up and this
part is staying in place. That's exactly what we want. Now you can hide this other way, for instance, and you
can still check it out. So now you can see it's
actually working as intended. That looks actually really nice. Let's press Alt H that and
bring back all bones again. And then what I'm going
to do rather than trying to rotate this around again and not get it
in the right place, I wanted to come back home to
basically the bottom of it. So if I grab both
of these bones now, come over to my timeline
among Wednesdays, I'm gonna press B and I'm
going to drag and click. Now hopefully I
should have grabbed both of the states of
these bones at frame one. So now what I'm gonna
do is I'm gonna press Shift as I drag them off. As you can say, we get
an actual yellow bile and that means because
they all exactly the same. So now if I go past the 200, sorry, go pass the 100. I'm bringing it to 200. We shall now if I
press Space-bar, go back to the actual
position where we were, and that is exactly
what we wanted to do. So now all you need to do,
you need to call to the 100, be dragged because there is another point behind you because we've got
two bones here. Then you're going to press
Shift date and you're going to drag them over like so. Drag them over 300. Now, you can actually then go and grab all of these
and drag them all. But honestly, I find that
it actually messes it up. I don't know why I
tend to do is I just grabbed them and just do
it the old-fashioned way. Shift D, bring you up to 400, grab these ones B, and then Shift grabbing
onto where 509 just do it this way because I
realized that this for me, it makes it a lot more simple. Make sure they're nice, correct. And I don't have to go back and actually do anything again, shift day of 700. And then finally this last one, I'm just going to grab this
with B and then Shift, grab them up to 800. Now let's just make sure it works before we
do anything else. So what I'm going to do is
I'm just going to set this back to one base layer. Then I'm going to hide
these bones with h, and I'm going to
press the space bar. And now this should
move up and down. You just wanted to just go
quickly through the timeline. Venus. I'm going to
actually export this out to many different projects. And you just want to make
sure it's actually correct. So he's looking really,
really nice at the Bowman. The one thing you can see
is that when he starts out, it's really slow
and then it will probably join when
it gets to 800. So let's see if it also probably speed up a little bit or
slow down a little bit. And that's not
something we want. Don't forget as well. We also timing this with the water
that's going to come out here in the actual render. Let's see now, you can see that I really,
really slows down. Alright, so it's going to open
down, it's going perfect. So now all I wanted to do
is I want to try salts age, bring back those bones. Then what I want to
do is I want to come down to my timeline, press a and then what you're
gonna do is you're gonna right-click and you'll see where it says interpolation mode. What you basically want
to do is we want to come over and put this on linear. If you put this on
something like constant, I will prone constant and
show you where it goes. So you can promote
constant ping. This interpolation
mode actually makes the animation reacts in a
completely different way. Now for something like
a wheel or something, you don't want it to
start out really, really slow in the
beginning, then speed up and then slow down again. What you want is just
a constant speed. So when you press Right-click
interpolation mode, Linear is going to actually
give us that constant speed. So you'll notice
now when I start this straightaway
the same speed, it doesn't actually slow down. It just keeps going up that same nice speed and that's basically
what we're looking for. All right, So I'm really,
really happy with that. So let's put this back to here. And that base two then
is the animation. Now if I come in and put
this on object mode, double-tap the a, like so, and then press space bar,
you'll see it moves. And you'll also say that
if I move this now, you won't be able to
remove it altogether. But if I grab this and move it, it will move all together and that's
what we're looking for. So even if I put it over here, even if I spin it round now, you'll still say that it moves exactly the same
way as I intended, and that is the main point. Now the other thing
is if I press Alt are all j and put it right
back where we started. And now I actually
save out this file. So save the file analysis
load a pinata blend file, the new blank file,
and now if we call them two assets and hopefully if I come
to my farm assets, we should have a pump. And if I'm bringing my poem, bring it in and there you go. Yeah, actually works. It's actually got
the animation name. It's called the textures
and then everything. And that's exactly what a warm. So now when I bring
this into my scene, I'm going to put it over here, Let's say when it's
finished round, you go easy, resides
rarely, rarely cold. Alright, so I'm really,
really happy with that. Now I'm just going
to close this down. I'm going to now move this
it over somewhere else. So I went to grab this
press Shift Spacebar and let's move it
with my other assets. So I'm just going to
move it over here. So now you can see
that we've got a pump, we've got our ladders,
we've got our folk, so we need to look which what we're actually
going to work on next. So if I go back to modeling now, we go and open up our reference. So if I open up our
reference which is here, and let's make this a little bit bigger so you can
actually see what I'm doing. I'm just going to pull
this out, make it bigger. Alright, so you can see that
this is what we've got left. I'll think what we'll start
to do on the next lesson is I'm really reluctant to welcome the house because I know it's the holidays phone, but I think That's probably work on the actual
windmill first. All we cold work on the logs. If you notice, if I double-click this and I pull this over, you will say that we
actually have some logs in here and we have a
tree stump in it, I think actually will
leave this to last, will leave this to last. And what we'll do is we'll work on the actual windmill now. I mean, it's really fun
to make the women anyway, so let's do something,
something really fun. All right, everyone, so
I hope you enjoyed that. So on the next one we'll bring down this actual reference. Thanks a lot.
25. Scene Collections & Starting the Windmill: Welcome back everyone to blend the 3D ultimate medieval sinkholes and this
where we left off. Now let's put all cursor
back to the center. So Shift S to weld origin. Then let's bring in our
next actual reference. So I'm going to press Alt
H, hopefully, press top. I'll take, bring
everything back. Alright, so we've
got our collections here and I should really sort these out just so I can see what's actually going on. Let me just click on
our rendered view and we can see we've got
all sewn and everything. Got our M2 here. We've got all playing here. We've got awesome. I'm really, I don't really
want it like this. If this is gonna be kind
of a blend of firewall, we keep all of our
assets and everything. It really needs to be
sorted out in some way. Wildland do is I want to change the name of the collection. I'm gonna call it to assets. Like so. Then we went today is we're
gonna right-click this. I want to make a new collection. So new collection, and you'll
see it's called assets. I don't really want it to
be called that I'm going to call it lighting. Working, something like
that is wow, call it. Okay. And then what I'll do is
I'll drag this up, uh, both the assets and there we go. Now, I can do is I can actually click on any of these projects. They've gone armature. And that's basically if
I press Dalton zoom in, we can see that's the
armature to this, so we don't want to
mess with the empty. We can actually drag and drop
into lighting and where can we can also bring the
plane and awesome. So I'm going to click
the plane control, click the song, drag
and drop in lighting. I'm working and then
I can close up. I can close this one. And now you can see just
how clean and tidy or is. It also means now
that if I come over, you've got these, I see it. You might not have
this ion here. So if you come up to where
this little filter icon, and you can see that
we've got one that says disabled and renders. Just make sure that's ticked. Tom in mind may I don't know, then what you want to
do is you want to make sure that if you
take this aisle, you'll see it gets
rid of everything, the ground plane and everything
that's exactly weigh one. If we take off this one, it'll make sure that we've
got rid of everything, all of the assets and
things like that, this space and makes sure that we are disabled
in rendered. So this is really handy
if you want to disable, let's say, your ground
plane in the render. So you just want
to take an image of the ball or
something like that. And then it would just, even though it's here
in the viewport, it won't show up in the render, so that's really, really handy. So what we'll do
now is just turn off my lighting and working ado. I'm just going to
turn it off for now just to show you how
it actually works. I think also we should
bring in our guy. Let's bring in our
human reference. I'm also going to stick him
in lights and, and working. And then now you can see
that's exactly how it works. All right, let's put
that back on now. So for now though, we need to actually bring
in a new reference. So when it comes
to my reference, make sure we've
clicked on this and then we're just gonna
change the reference. So the moment we've got
All Walter pump reference, we need to change that. So
I'm gonna click on this. The one that I want is
a window reference. So I'm going to
double-click kit, and here is our windmill. Now, we're going to have to make this a lot bigger because
this windmills of fast, I said if I press one, just going to press S, then bring it up,
scale it right, OK. And you can see that
it's still not big enough. Let's scale it up a bit more. Let's bring them on. You can see there's a bit
of a giant at the moment. So let's scale him. Bring him down, scaling
a little bit more. Bring him down. Tiny,
tiny bit, bring him down. And there we go. That's about the right size. So now you can say just how high this actual
lab windmill is. All right, so we've got a very, very good idea from
this reference, how this is put together, can see how it's actually
pulled onto here, how this is actually built. And this is really important
because when you're dealing with things
like windmills or not, then not so simple actually,
it's pulled them together. I think the first thing
we'll do is we'll create the actual wooden parts that
actually go will appear, which are fairly, fairly simple. All right, So let's, let's
get started with a so I will, first of all, I'll bring it into roundabout the
sentence on here you can see this is on
the ground plane. And then what I'll do is
I'll bring in a cubed. So let's shift a mesh, bringing a cube and
let's make it small. And you will see that at
the moment it's gone into edit mode and just know
it's nice and object mode, It's because among random most Let's put it
on object mode, in fact will go on there,
well-preserved object mode. And now we can see
exactly what we're doing. All right, let's press one. Let's make it smaller, so S bring it down. Let's pull it into place. It's about the right size. So something something like
that looks about right. And then I'm gonna press tab, make sure my face like I'm
going to grab the top of this, then press one again. And I'm going to grab it
and drag it all the way up. And then all the way across
to something just on the way, this actual planus, so
something, something like that. Alright, so I think I'm
obviously happy with that. Now the one thing you can say is how these actually come in. And what you can do
to actually get that is come back to your reference
and spinning around. So all X minus 90, so our x minus nine
to spin it around. And let's bring this. Over and down, seven
to go over the top. And then if I bring this just
where my piece of wood is, so I'm just going to bring
it to where it starts. I know it's not perfect, but you can have a
good idea at night. You can see how far that
actually goes into, which means now you can
grab this piece of wood, grab the top of that,
and pull it over. And now you're going to have some idea of how it's going in. And you can see now that it's actually looking
quite realistic. This is important that
we have that because I want that to be based
around the center of here. Now, that's exactly
what I'm going false. So in other words,
now I want all of my pieces of wood
to come from here. So I'm gonna do that as well. Basically, I'm saying I
need this in the center. I'm gonna do is
I'm going to hide my reference out of the way. Now, the sense it
should be on here, so I'm gonna test is
basically bringing a mirror. So I'm gonna grab
my piece of work. I'm going to press Control
lay all transformed, right-click and set
origin to 3D cursor, which you already
should be commended. Add a modifier, we're
going to add in a mirror, mirror modifier. And you can see
that I've actually crossing over and that's
not what we want. So how do we fix that? Well, we come into edit
mode, the press L, and we pull them
out like a natural, put my reference back. So if I press Alt H, bring back my reference
spinning background. So all x 90, let's pull it back into place. Let's press walk. Let's lift it up. Pull it back into place. Now you can see that these first of all,
the not steep enough. Now we need them as steep because they're going
to quit coming. Okay. We based it on once we brought
them in this deep enough, it yes, They all steep enough. They just hated me on that. All right. Now the steep
enough they're under there, all we need to do now is move them across. So I'm going
to call them to them. Make sure I've grabbed them, press a and move them over. Like so now I'm just gonna work on probably
moving these over. I'm happy with Alba is I think I'm going
to move them over, so I'm gonna grab the bottoms, press one, move them over
a little bit, like so. Now I can see that we've
got this nice angle here. We've got a nice angle
here, and we use that. We got this angle by
using this one here. Alright, so now we need to
put it over the other side. Now, can we won't be able to do it with the mirror
as its satellite. That's because if
I put it on the y, you'll see that it's set like that and that's
not what we want. We can still use the America because if we pull these out, we can bring them so that the narrow enough in
the middle like so. Now the one thing
is that if I bring them together like this, you can see that if we
put some water on there, it's not really going to look realistic because they're
too close together. So what I'm going to do is I want to pull them out
a little bit like so. And then I'm going to pull
it out a little bit like so. Now I can say that if I put a flat piece of wood
like this on here, it's going to look much,
much better like that. This is quite hard to
actually get right. So don't worry if you takes a little bit of time
to get this right. Alright, so now I'm
happy with that. I'm going to actually
apply my merit. So I'm gonna come in,
control lay apply mirror. And now I can actually start
working on the top of here. So let's now start first of all with the planks
award on the top. So you can see this is
how the plants will go. I'm gonna do is I've got my cursor in the center.
I'm going to press Shift. I am going to bring in a
plane. Bringing the plane. I'm gonna pull it up an inch
place to where I wanted. Probably something like that. Maybe that's a
little bit too big, maybe let's bring it
a little bit smaller. So I'm going to press S bringing in just a little bit like so. All right, I think that's
looking really good. Now let's make these planks
of wood on top as well. So I'll do is I'll
press Shift a. This time I'll bring in just a cube and I'll show you the reason I'm
doing that as well. So I'm going to bring you press the S Bowen, make it thinner. So as I pull it over, press seven on the number pad. I'm gonna bring it over. I think something like that. S and X. Pull it out. Yeah, and I think my ward. So these ones are
gonna go this way and these ones are
going to go this way. Now again, let's check. So you can say that they just go in the other way round yet, we've got a little
bit of room here, so we just need
to make sure that we're making enough
room with this. We might need to make it bigger in the long-run
is all I'm saying. Alright, so now we'll do it. I'll press Shift D
to duplicate it, pull it over to this side, and now let's create this bit. So like we did with the bug, we're basically
going to come in, we're going to
press Control Law. Let's try three. Left-click, right-click,
Right-click. Boxing, analysis, control law. Left-click, right-click. And now let's split them off. So grab each one of these, so make sure you're on
individual origins, S and X, bring them in. Edge Select, grab this edge, random, pull it over. Just a tiny bit on these, and I wouldn't lift
them up either. So just a very tiny bit tab. There we go. Let's start with
something like that. Alright, so that brings us
to the end of this lesson. In the next lesson,
we'll carry on. Hopefully, we'll actually get this sexual or windmill into the place where
it needs to be. All right everyone,
so I hope you enjoyed that and I'll
see you in the next one. Thanks a lot. Bye bye.
26. The Right & Wrong Way to use Array: Welcome back. We're on to blend the three, the ultimate medieval sinkholes. And this is where I left off. Now let's fix these
and then we can actually create this fun. Alright, so what we're
gonna do is we're going to do what we did with the bond. I'm going to grab these
control AOL transforms right-click origins
geometry I didn't modify will bring in
a solidify first, we'll bring you
up the other way. This way, like so, make sure it's fairly chunky
because it's actually held in a fed bear weight
on the top of this. And then what you want
to do is just make sure even thicknesses on. I'm finally then let's
bevel it off as well. So add, modify it,
bringing it bevel. I'm going to put this
on naught point, naught one as we did before. And then one Wednesday is
going to come to the top, Control a, Control a, and then put those into place. All right, so now let's join both of these
together with Control J. Pull them down now into
place and now we should be able to pull all fun
actually on here. All right, so how do
we create the farm? They got to make sure
that you can see on this that the fans
turn this way. I might actually turn it around the other way and make these
little bits in it all, make this a little bit bigger and pull these out a little bit. I'm not so sure yet we're
going to create this, but we'll see once we got the fun actual size in place because we can see how thick
the finance from this. So we might be able
to do it from there. Let's have a look anyway. So what I'm gonna
do when actually hide my ground plane
at the moment. So press H to hide it and
I'll put my phone here. I'm also going to pull
this back a little bit. So I've got something
to work with and I want to keep this
really in the center. So I'm going to create my
fun with this actually here. The first thing we want to do
is I'm going to press Shift a and we're gonna come over
to where it says Match, bring in a plane, press seven, a moment series. I'm just going to
move this out or PE and I'm doing that
for an actual reason. Just move up along this y-axis, so it's looking a
little bit like mine. Now we need to make this
into the shape of a fun. Now, let's make it much, much wider on the Y. So let's bring you out, Let's make it smaller. Then SY, Something like that. One it really needs
to do is I need to see what size actual finance. So I think what I'm going to do, I'm going to once again
bring game my reference. I'm going to press all on X 90, then all 108 to just spin
it around the right way. I want to bring in my fund now, so I'm gonna pull this down. I don't want to make it smaller. I want to actually
put it into play. So where's my phone there it is. All right. So now I'm
going to bring it over seven squared at the top. There we go. Alright, so let's Hopefully that make this the right side. So I'm going to grab this now. I'm gonna press and bring it in. I'm going to put it like so. And then when we went to do
is I'm gonna grab the bump, pull it down without
a proportional and it's not gonna make it smaller. So S and X make it smoke, come to the top and then
snacks make it bigger. And then move it slightly over society grabbing all of it. So something like that. And you can see now I've
got the right size. Next thing I want to do because I'm actually going
to bend in it. I want to give this
some insurance. So I'm going to
press Control Law. And let's pour in
three edge loops, left-click and right-click, just to put them
back in the center. And then what I wanted
to do is I want to call them and grab each one of these. I just so just these two edges it full proportionality to non, but let's put it
on smooth instead. And among gonna do is I'm just
going to press Zoom round. Just wanted to pull these off, so pulled them up.
Bringing mouse in. You can just get a little
bit of a bend like so. And the thing
that's a little bit too much and went
to bend it again. We're going to press L Now, grab it all, pull it. And I just want a
slight bend as you can see, not too much. So I'm gonna zoom
in my mouse again. Again. Oh, there we go. Let nice gradual bend is basically what you
actually are looking for. So it actually looks like and you don't want it to show up. I mean, it's supposed
to Glad With the Wind, so that's why we're
actually making it lighter. Now I want to do is we actually want to rotate this around. So if I've grabbed
this here and I press all I'm y without
again proportional, it's a non anonymous
on why just rotate it slightly like it would be
we can rotate this most, don't worry at the moment if yours is not rotated correctly. All right, so now what we
need to do is you need to make sure that this fund is right
in the center of a before we do anything else,
let's come and do that now. So what I'm gonna do is
I'm gonna grab my phone, press Control a, I'm
gonna all transforms. And then going to right-click
set origin to geometry. And then I'm going
to press Shift S in such a world origin and then
Shift S selection to cursor. That's gonna put my thumb
right bang in the centre. Now I want to do is I want
to level this funnel, this actual reference to
basically the sensory. So I'm going to press seven. I'm going to hide
all of this out the way just so I can actually
see what I'm doing. Grabbed my reference, and
let's put my reference right and center of
where you want to go. Now if you can't see
anything, it's just because you just need to
drop this below. Drop this below that
line, the blue. You can see I'm making
it smaller than that. Don't really want to do that. So I wanted to do is I want to grab this and now
I'm just going to pull it. And there we go. Now you can say now I'm dropped below that. Nac can say exactly
where I want. I want this to be right in
the center of this center. I want in the central fear. So I'm going to pull it
up just a little bit. It doesn't need to be perfect,
just needs to be there. So you've got a good idea
of what you're doing. Now let's press
top, grab muffin, pull it up, and now you
can see that that's lying. No. And this is
where I wanted to come from, surround the center. I wanted to go around like so. Now the next thing
you need to do is you need to put your orientation of the actual fun down
to this point here. So if I press Tab and I come
in with my edge highlight, grab this edge and this edge. And then what I'll do
is I will shift S. Then what I'll do is I'll
Shift S because it's selected tab right-click set
origin to 3D cursor. So why did they actually set
the orientation that I said, the orientation
that I just to show you how not to do this. And now if the Mesozoic, what you need to do
to actually fix it. Now with that done, what we need to do is we
need to bring in a modifier and we're going
to bring in an array. And you'll see straight away, it goes over here. Now the thing is we need to look how many fans Paltz
we've gotten there. We'd go 12345678. So let's put this
on eight and you'll notice that it goes over there. And that's not what
we wanted to all. Now, let's come in and take
this relative offset off. And then what we want to
do is we want to pray on the Object Offset and which
object or we want to pray on. I want to pray on the
actual empty over here. So we've got mTOR one. Just make sure that you don't click on this, for instance, you'll reference
because that's also, I think class doesn't empty, which is, this is
classed as an EMT, shouldn't really be that. But anyway, let's come back
now and click on our empty. And there you go. You'll
see that that happens. And the reason that's
happening is because my orientation isn't
in the right place. If I come to my
phone now and I pull Shift S cursor to world origin, and then right-click set
origin to 3D cursor. Now you'll say they
all disappear, which is exactly what we want. Because now if we come
in and we grab all actual em empty seven
on the number pad. And what we're gonna do
is now rotate it around. So all zed rotates it around and you'll see that now we end
up with a beautiful fund. Now you can say that at the
moment I've rotated around, I'm 45 degrees and that's
what you want yours on. And then you will end up
with something like this. And you'll see that each one of these is actually been over. Now of course, the one thing
that we are missing on this is that they don't
actually have any thickness. And that's not really
any code because that's not really going
to look realistic. Let's come back once
again to all funds. Add modifier unless they started
bringing in, I solidify. And let's also bring
this out this way. Like so, let's shave them smooth so shapes in there so we can
see what we're looking at. And let's put on altars, move and there you go. Now, maybe these
funds are a little bit thick. I'm not
too sure. Yeah. I mean, they have to be quite
thick. Book this thick. I'm not so sure. So let's make
them a little bit thinner. So I'm just going to combine, bring down somebody phi just a little bit,
something like that. These things would be Hamad basically really, really thin. And the guy probably on the
phone would have made these. So something like that
I think looks really, really nice and that's
a really good start to our actual funds. What we'll do then on
the next lesson is will actually finish off
making the short job. This time, we'll get this round
paste in here and then we can actually flip it over and actually start working
on the mechanism. All right, everyone,
so I hope you enjoyed that and I'll see you on
the next one. Thanks a lot.
27. Creating the Windmill Turbine: Welcome back everyone to blend the 3D ultimate
medieval sinkholes. And this is where I left off. Now we've got
everything in a really remote as well as
start applying these. So I'm going to
apply my modifier. So control Les, Let's see
if I'm actually apply it. So I'm hovering over it. Apply unless apply
all solidify as well. Then what I'm going to do
now I'm going to come in. I don't need this empty anymore, so I'm just going to
delete out of the way. I'm going to as well Market
Mercosur, banging the center. I'm going to press Shift I, and this time I'm going
to come across to curve and I think I'll
bring in a circle. So I'm going to
bring in a circle. I'm going to press seven
and we're gonna make it a little bit thinner. Smallest, sorry. You can see that don't
quite fit there. It is fitting in line
with our actual font. It's just the references
a little bit out of my grandma reference
and just kind of move it over to the
side just a tiny bit. Does it fit a little bit better? A little bit, but it doesn't
really matter as I said. Alright, so go back
to actual circle because this when I
brought in was a curve. You'll notice that
you've actually got a curve option over here
on the right-hand side. And if you click this on, it's really easy to
create things like this. Working with kids, these
kind of circular pulse. So that's why I've done it. Now what I'm going to do
is I'm gonna come over to the right-hand side and we've
got a ton of options here. I have a Calm down to
where it says geometry. And then what we're going to do is I'm gonna come to where it says debt and I'm going
to turn this diethyl. You'll see straightaway
why it's actually so easy to use a sudden
your pillow a bit more. We've got a piece of
metal now that goes in there and fixed
really, really nicely. Now the thing is about curves, they can cost a lot on polygons. So as long as you
understand how to turn down the resolutions
and things like that, that path really great to you. So we can say that we
have a resolution here. And if we turn this down, you'll notice that it becomes
kind of jagged in a way. And the reason for that is
because we're turning down the resolutions that are
going around each of these. You can also then
come up and turn down the resolutions on this way as well to
a point where you can't even make eyes
as circular anymore. Let's turn this off
now to something. First of all, there
was turned down the resolution on
just on the depth. Then I'll turn down
the resolution on here just to get the
way that I wanted. So you can say that's
still looks like a kid. It looks like it's been
hammered actually into place. And I think I'm actually really happy with how that looks. All right, so one
chapter with it. Let's come up now, go to
where it says object, come down to where
it says Convert and now convert it to match. Basically you want
to click the button. You can convert meshes
two circles as well. But we want to come this one in this case to an
actual message. Just click that on.
The actual option will disappear now and your
curved and effort press tab, you can see now that is a
beautiful piece of match, exactly what we're looking for. All right, so now let's
join this with our fans. So press control J,
joining with it. And now let's calm and try and pour it in
some kind of place. So let's press Alt H,
bring everything back. Let's grab our reference. So I'm gonna pull all reference. I'm gonna spin it round. So all x 19, let's spin it around. Let's get into some
sort of place again. I'll reference gonna come
over here and lift it up. So that looks like run
by in the right place. Now let's grab our actual
font, which is here. Let's pull it. Let's
press all and X 90. And let's see if we need
to make this any bigger. Like sorry if I press one now, import it into place. You can see it's right
about in the right place. Now, let's just hide our reference all the way at
the moment because while, once there he's got a good
look at this and make sure that I'm actually
happy with our logs. You say sometimes when
you build these things, you might not like how small this is already
built-in again, should have say so I
think I'm just going to try and build it out. I'm going to make it
a little bit bigger, actually, Something like that. You've got to make sure
as well that it's not gonna catch on the bottom of it. So just be aware of them. All right then. So now I want to do is I
actually want to create the rest of this font attached
to these parts here. The one thing I can't say, it's probably that
these parts in here, the probably first of all, this is all going the wrong way round because this is
coming back this way, so it needs to be
placed in here. And second of all, these are probably a little
bit too thick, so let's come in and
fix those first. I want to come in
on each of these. I'm going to press S and Y and pull them away
from each other. Now can't do that because of
not one individual origins. First, SY, not
men. Medium point. There we go in SMI. Now we can pull them away. Alright, That's
better. Now let's spend both of these rounds. So I'm gonna grab both
of these and zed, and you'll see it's
spinning from that. Don't really want that, right, plague origin to geometry. And now spend 90. And there we go with the
spawn the right way round. Okay, So I'm just
making sure that the soul level now I want to do is I want
to build this out. So again, I want to
bring back my reference now and I'm going to spin it around. So I've
got some little caps. So you can see here, this is why I wanted
to look at so all z minus nine, minus nine. And let's bring this down. So I'm going to press three,
Bring it down into place. Like so. Like so and now have something roughly to
actually wear with. All right, so let's
build this bow first. One went to do is
I'm going to call them to the center up here. I'm going to press
Shift S cursor to selected shift next spring in. I think what will bring
in first is a cylinder. So let's bring in a cylinder. I'm going to put this
on 18 because it's very much out in the open. People are going to see it. So we might as well give it a few more edge loops rather than 14 to make it
a little bit more rounded. So I'm going to
put it on 19, like so I'm gonna spin it round. So all x 90, let's get it into place. So now I'm going to press S, bring it in to probably
something like that. I'm going to pull it
back just a little bit. And now I'm going to
do is I'm going to round off just this edge. So I'm gonna pull it
back a little bit more. And then I'm going to
come in, grab this face, press the e, and then press S. I'm rounding off life. So always work into my actual reference or I can say that's roughly what it is, doesn't have to be perfect. Then let's pull this back. Like so, let's press the
eyeball to bring it in. Like so. Let's then press the
e, bring you out. Let's press I again. Then let's press E and
bring it all the way out. So how far it's going to come. So if I press three now, I can say roughly, if I pull this out, so E, pull out, that's roughly
where it's going to come, but you can't see
my reference on there is a little bit out. Obviously, it needs to come
a lot further back than that because it needs to come
somewhere out here actually. Now we're going to do is I'm
gonna grab my actual fund, pull them out a little bit. I'm just getting
more into place. All right, so now let's
call them and actually also lift it up a little
bit because we can fix a little bit too low. Now let's make this
backpack first. So I'm gonna come
back to this tall. Then I'm going to press Control. Left-click. I can see that this paint really starts coming
out from roundabout here. So it's rounded by a where I can see that I'm gonna do is I'm gonna come
around to the park. I want to press S and Z, pull it like so. And I don't think
I need to bring it in on the x or
anything like that. I think s and z is
just going to go. Alright, so now I need
some parts in the middle. So let's do those pulse first. So I'm gonna press
Control Alt, left-click, right-click, press seven
square over the top. And I'm thinking,
I'm probably going to want them right in the center of here is
where it's going to come down and
actually fix on here. So a little trick once
you've put them in place, press Control Bay, and
that's then gonna make it so that you'd
call bevel in there. So something like that. Turn down the segments
and then it's just going to cut down the
amount of polygons you got. Now you can see you can
actually create this bit here. So what I'm gonna do now is it, I'm going to press Alt S and then just pull
it out this way. Like so. I'm really happy with that. Now let's bring in the
other edges that we got it. It's kind of a support to make sure that it
doesn't bend or anything. That's why they've got
those bands on there. So I'll do is I'll
press Control Alt, left-click, pull it
over, do the same. And this one Control Alt, left-click of it and then
Alt Shift and click. So we've got both of those
grabbed control bay miles, we'll do them together like so, and then enter alt
and S, pull them out. Not quite as big as this one, just a little bit, so
it looks like that. Now let's do this bit. Coming down here. I'm gonna do is I'm going
to come underneath. I think I'm going to
grab all four of these. So I'm gonna call
them from here, Control click to here. And then moments to do is
I'm gonna press eight, pull those down like so. All right, so that's
looking good. I just want to
flatten this out now. So I'm going to press S and
Z and just flattened it out. Like so. There we go. Now we just need the platform of where this is
going to actually go into to fix it to these planks of wood
and things like that. Then finally, we just
need to put the plants Award going down to here. That's quite an easy
job to do that anyway. Alright, so we rarely really
motion along with this. Now. The next one, hopefully, we should at least get them
modelling finished on this. All right everyone,
so I hope you enjoyed that and I'll
see you in the next one. Thanks a lot.
28. Finishing the Windmill Model: Welcome back, everyone
has a blend of three, the ultimate medieval sinkholes, and this is where I left off. Now let's think about
putting this on here. So what we're gonna do
is, I think first of all, I'll come over the top of it. I'll press Shift sb and
as I've got that graph, so because it's a selected, I'm going to bring
in a plane lands. So bring a plane, magma plane smaller,
one more plane. Basically it's a fit along here, probably halfway in-between
each one of these, I'm going to press S on y
and just pull it like so. Now I'm going to do is I'm
going to press control law. And I want to go
across my plane twice. So left-click, right-click
and you can see now, and I've actually
gotten that line going in there and that's
exactly what I wanted. All right, so now I want to
do is I want to make this. So it looks like it's actually going to hold
something in place. So I'm going to press
control law to left-click, right-click, and then
I'm going to drag these two each way over here. So what I mean is if
a person S and Y, I can pull them then like so. And now you can see
that all these even now I'm gonna do is I'm gonna
grab each one of these. I want to press
Delete and faces. And now finally what we can do is we can just
extrude this down. So I'm gonna grab
the whole thing, press eight, pull it down, and then I'm going to press out, pull it down into
place. Like so. You can say it's really actually starting to look
really, really nice. All right, so now I want to make these look
as though they're actually position on the air with bolts and things like that. So we're gonna do, is I'm
gonna come in, ground, each of this one, each of these edges. We're going to bevel them all just to round them
off a little bit. Like so, like so. And then press Control
be beveled above. And you might want to on here. So just check out
if you have to go with the two or if you want one thing now looks
that looks pretty cool. Now we won't Mau,
Mau peace on a, because this looks a bit
flimsy at the moment, is also looking at
tiny, tiny bit thick. So I want to make it a
little bit thick to thin it. I'm going to do is I'm
going to click on here, Control, Click,
shift, click Control. You can shift, click, Control, click, grab it, all. Just make it a
little bit like so. Now I'm going to grab it,
grab the bottom of that. Don't think so. What I'll
do is I'll just press Shift S cursor to select Shift. Bring in a cube, made my cube smallest, so S make it smaller and less
person that S there we go. A thing that looks yeah, that looks like it's going to actually hold that into place. All right, so we've
got that big now we need some actual LED bulbs. I think what we'll do is
I've got my cursor here. I'll press Shift a again, bringing in a UV sphere. And again, because I had
it set on this before, I'm going to use this to
actually the bolts again, like we did with the other
pulse that we've done. So Bolts 128, and that's
what I always use. And then I come in again, delete the the halfway point. So delete faces, come to
the barn, owl leaves. This is, you can say
it's very, very fast. Workloads actually
out, find MerkelMain, then squishy up a little bit, and then press S and let's
start getting these bolts in. I think. I'm gonna want some bolts in the wooden planks on this because it needs to
be fairly strong, so let's bring it over. So let's put that
in place and then below that quad big bolts and then go back through
those ship date. Put one this side,
grab them both. So we don't need to
worry about mirroring. We don't need to
get these perfect. In my opinion, you
might want to, but I'm just going to
move mine over here. And then we're going to
do is I'm gonna pull another couple of bolts
in each one of these. So I'm gonna grab this
one, press shift D, bring it over, make it smaller because we don't
want them the same size. These would be a
little bit thinner because it goes into
the steel there. So there's a bit
more holding them on rather than just the word. And then when we went today
is I'm gonna press your date, bring it over to this side, grab them both, then L, then bring it over here. Like so. All right, so finally I think I just
want an end on here. So I'm gonna grab
this shift S because it's a selected and then moments There's
going to press Shift a, bringing all the UV
sphere this time. Then I'm gonna put this
on a little bit higher. So 16, let's say something
like 12, something like that. And then all x 19. Again, I'm going to get
rid of the halfway point. So Alt, Shift and click delete. Faces, come to the
back out Delete. Now let's grab the
pot we've made. Let's press one to
go into front view. Let's press the S born. Shrink it down. This is where I wanted,
just on here, like so. And it might be a little bit too rounded this while there is, I'll just press S and Y and just squishy just a little bit. Now put in place. Tap double-tap on. Yeah, I'm fairly happy
with that. All right. We can see we've got
a lot of shade him. We've got some beveling to
do when things like that. But let's carry on. I want to do now is I want
to make sure that my award, We've got three layers
of world one or PA, round about one year and one
here, something like that. So let's get those in place. So first thing I'm going to do, I can say that when
I click on these, my orientation is
right in the center. I'll use, I'll press Shift
S cursor to select it. Then bring in a piece of wood. So Shift, bring in a cube. And I'm going to
bring you over S. Now let's bring it out
to where it needs to be. So I'm going to stretch
it out first, so S and Y, and let's pull it out
because then we've got really good idea
where it needs to be. I'm gonna pull it into place. Now, these pieces of wood, they wouldn't be actually
tilted did probably more than likely the straight like this, the wooden till and
probably go towards there. Now, when you do this, just make sure that you want
to hear how you want it. So you might want it tilting slightly so you can see
that at the moment, this is fairly flat. So they probably
would've made it flat, hammered it in, and not
really gone like this. They wouldn't have probably
bent it like that. It's whatever you want to do with yours that you think
looks more realistic. So I'm going to bend
it a little bit. And it's probably, as I say, not how they probably
would do when I press and bring it in
just so it's COVID inlet. Now let's make the next one
so they probably would get a little bit thicker
as they go up. So there's that taken
together account. So I'm probably going to
make this just a little bit thinner and then just pull it out just so it's
past those points. Now once you've done that,
let's make the next one. So Shift D, bringing it
down to the next place. You can see we've got
three on the head. You can put them
where I pulled them or you can just put
them in yourself. Press S on y, bring you out, make it
a little bit thicker. So you can see that on the end it needs
pulling this way a little bit. So I'm gonna pull it in this
way a little bit like so, making sure that it's
natural whatsoever and y like so now let's
do the final one. So shift date, bring it down. Asked him why bring
it out, pull it out. I'm gonna press one on the
number of pounds of three. Yeah, then I can say low that Rabbi in the right size anyway. So now I'm going to press
S, bringing this one out. Then let's put it into place. So you can see it's
fitting in both sides. Sli bring it in. There we go. Double-tap. Make sure you're happy with
it, which I think I am. Alright, so now I want
to do is I want to put these beams going round. So let's see if we can
actually get away. We've joined them all up. So Control J, join them all up. And that will do
is we need to set, you can either set the origin
to where your cursor is. All. There's another little
trick you can do if you press a little sideways being
next to the question, well, you will see current with
a menu like this that's a little sideways V next to the question mark
on your keyboard. And then what you want
to do is you want to put it onto 3D cursor. And you'll notice that the actual orientation
actually changes. Even though our intention is they actually goes
to the cursor. It means it's actually
now I can move these around based on that cursor. So this is really, really
handy thing to have. Now if you press Shift Enter
and then press all zed 90, it will actually
move them around to this perfectly
in line with this. Now unfortunately on this, you can say the award is
not actually perfect. We're not perfect going
this way as it is this way. So what we wanna do is you
want to press all said 90, spin them around again,
and now they will fit perfectly in place like so. Now all you need to do is
you need to grab them again, shifting and then all 90 and then pull
them out into place. So get these ones into
places where I'm saying I'm going to work from
the bottom 1 first. I can say the miles
out in the news, I'm gonna press S and X, pull
them into place like so. I'm gonna make sure that I'm
happy with this one in here, a little bit too close to here, so I'm just going to
pull it out a little bit like so and then went
to work my way up. So I'm going to press Tab now, grab this one with L. I want to press a little V
again to come back to the individual origins
so I can actually move this or pull it
into place like so, come up, grab this one with
out, pull it into place. Then when I went to this,
I'm gonna press top. I'm going to press a
little sideways V1, small 3D cursor Shift D. And then all zed 280, spin them around to the other
side, global south the eye. And it's as simple as that. Now let's press a little
sideways V wounds small, put it back on
individual origins, and now we're ready
on the next lessons, CMM level these off, install, bringing
some materials in. Then finally gal bones
and again and get this animated so you can see it's a fairly quick process now
I've gotten their stone. All right, everyone,
so I hope you enjoyed that and I'll
see you in the next one. Thanks. Bye bye.
29. Applying Materials to our Windmill: Welcome back everyone
to blend the three, the ultimate medieval sin cos
and this where it left off. So we've pretty much
got everything and don't unless the only
thing that we need to do now is smooth level and get some materials
on. So let's do that. First of all, I'm going to
do is I'm gonna come in. I want to actually click
on these balls because I don't actually want to
bevel the bolts off. Of course, I don't
want to give them more polygons or
anything lambda. So what I'm going to
do is I'm just going to select them with the elbow. I have noticed as well that my actual key strokes was clicked off and that's because I shut
down my computer. I forgot to put them back on some really sorry about that. There will be on from now on. So hopefully you should
have got through them. All right, so I'm basically
going to select all of these. I'm going to also
select this from one. And when I press P selection
and just separate them out, then I went to grab
everything else. So I'm gonna make sure I
have grabbed everything. All of these, all of these
going all the way round. I'm going to press Control
J and just grab everything and then press G just to
make sure to see, well, if not grabbed and you can
see I've not grabbed these, so I'm gonna grab them again, Control J of the mole G. And I can say that I've got
my bolts, this part left. Alright, so now let's say
right-click Shade Smooth. Let's come in then
and pollen auto smooth and it should
already come like now, which is really, really nice. Now let's calm and beveled.
Ease off a little bit. Now just make sure
they're happy with the thickness of these policies. If you're not, what you
can do where you can just come in and grab each one. I think I'm gonna
do this actually, I think they need been a
tiny little bit thicker. I'm doing is pressing Shift,
click Control, click shift, click Control, and just
going over them like that. And then I'm simply just going
to pull them out a little bit like so just to make them
a little tiny bit thicker. Alright, so now we can do
is we can press Control. Elt transforms, right-click
set origin to Geometry unless come in now and add in a
Bevel modifier. There you go. You can see it's already
looks a lot more realistic. Now in the old blender, It would've been on non. And you can see that
if it's unknown, you end up trying to bevel off the sides of the cylinder and that's not what
we wanted to there. So what we do is
we put an angle, so it should come up on an
angle on Blender three. But as I say on older versions, it won't come up on that. So just make sure
that you've got this angle set and
to say two degrees. Alright, so that's looking
really, really nice. I'm just gonna make
sure my reward is okay. And it looks to me
like on this one, and we know going actually
have to turn down the amount. And sometimes that happens, especially if you're dealing
with complex shapes. Sometimes it will just go
right from the officer. I want I'm gonna do now
is I'm happy with that. I'm going to press Control a, and then I'm going to
grab my actual bolts, right-click Shade Smooth, put it on autos, move like sewing. You'll see this Tolkien,
that smoothness, which is what we spoke about. Now let's join them to this. So Control J or Control a or transforms right-click
set origin to geometry. And I'm just doing that just
to make sure I'm happy with it being reset before I bring
in my actual materials. Let's now bring in the
actual wooden material. Let's do that first.
So first of all, I went to grab the whole thing. I'm going to press, I'm
actually not going to on rocket altogether actually I'm going to come in
with Edge Select. I'm going to grab, I think
I'll grab these for now. And then what I'll do is I'll click the down arrow
I'm putting this on would mean will also put this on material so you can see what we're doing. And you'll notice it pulls
the material over everything. That's not exactly what we want. Sometimes when that happens, what I tend to do is
make a new material. So I'll click plus new. I'll just call it. Great. Then I'll come down, turn the base color to a
little bit darker, and then grab the whole thing, click Assign, like so. And now actually I fairly, it's much easier to
actually work with. So now I can come to
the board waned main, Sorry, I can grab both of these. Press you come down to where
you say smart UV project, click Okay, and click Assign. And now just go and
turn these around. So I'm gonna go to my
UV editing because I've got a lot of weight to
work on with these. Press the adult bone. I'm gonna come in now and spend knees round. So let's zoom in. So 89 say pretty much the same thing we did with all of the
rest of the things. The one thing is about
this causes a site. We're not actually marking
seams or anything. We're working
entirely in Blender. So it makes it really,
really quick process. So let's command pack islands. And you can say because
of restyle blender, it's rotating it again. So just click that off and
there we go. All right. So I'm happy with
those legs come and do the other side now. So LL you and smart
UV project and eighth of 19 UV pack islands now because I don't
want these look exactly the same as this. I'm going to click Assign, and then I'm going to press
G from y and just pull them up a little
bit just so they look a little bit different. All right, So, so far, so good. Now let's hide these
other ways so we can say, Hey, we've done these unless
come in now and do these. You could get away with probably doing all
these together. They're not too big,
I don't think so. Let's see if we can use
smart UV project 90. Let's click Assign. And let's also make
sure the pack, because you can see that
overhanging a little bit. So UV and pack islands, Let's click Assign because
they didn't assign them. Let's go in and have
a quick look at that, Just making sure they
are happy with it. I think that looks
absolutely fine. Now let's calm and
hide those other way. Let's come and do the next
part, which will be these. Now these ones, I'm
going to rub them, but I'm gonna give them
a different material. So I'm going to press you
smart UV project, okay. 90, make sure they are packed. So pick islands,
close down arrow unless the ward light for
instance, click Assign. And you can see as
well because we've done all that work just how easy Israeli now to actually bring in the materials
and things like that. The other thing, of course, is that you really want to be
saving these materials out. It's something I didn't forget about when we talked
about what you want to do with the
ways you want to right-click and
you want to mark, as I said, now you've actually got that material.
Marx is an asset. It will appear then
in the blend file, which means you can drag
this material and just drop it onto any building
night you doing. I'm also going to come would
light right-click Mock. As I said, I'm not going to
obviously use the gray one. Alright, so let's say I'm, as we build this soap, I think it's most of the
materials we've used. I think we've got hey there, which we should also do. So I'm gonna come to my hay. Hey, bomb, right-click markers, I said, planks,
right-click markers, I said, and you can see that these are already marked
as I said anyway, that's pretty much all
the materials reviews. I think we've got a lot of
tie-in right-click markers. I said, alright, so
that was a fast job. Now let's come in and will probably bring
in another ion as well. So I'll come in and
actually do that now. So welcoming without bolts, I'll actually hide
those other way and don't forget hatred, hide. And then I'll come in
tomorrow volts now. Gavin, each one of
these bulbs, like so. And let's come around and press the double bond and get lost. Unless grandpa for these, these from, and then what I'll do is I'll click the down arrow and we're looking for I in dog. You can say I've not
got it as an asset, so I'm going to right-click
mark is an asset. And then what we're gonna do
is I'm going to click Sign. I'm also going to depression
and smart UV project. Now, they should have opened. Absolutely fine, just making sure that I'm happy with them. On ones like this
really big ones, you could go in. And instead of unwrapping
like I've just done, you can just face it
straight on, impress. You. Come down and project from view and
you'll see that happens. Press, bring it out with S. And now you'll see
it looks a tomboy. Because sometimes
on these things, what blended tend to do is
just actually break it up. And sometimes it just
doesn't need that. The bolster social that we haven't got to worry
about those anyway. All right, Let's press tab. Let's hide that one out of the way and let's come
to our other pulse. So I'm just going to hide
them out of the way. Always gains hobby, I have harden them out of
the way because then you can see exactly
what you got left. Like so so hide them if you want to say
how it's looking so far, just press the tab and
you'll bring it up anyway. So that's the way
that you can do that. Now let's come in and
we'll do these funds, will come in and do these parts. So I'm gonna grab
each one of these. So I'm going to press U
and smart UV project. I'm going to also put this on. We need the other ions, so I'm gonna press
Plus down arrow. I'm gonna bring in, IN this one here. I'm going to click Assign. And let's have a little
they looked like. And then we go Really nice. Let's hide those out of
the way. Scrub this ring. So with this, I'm probably probably just going to mark a seam and do it myself. So I'm going to grab this
here, right-click mock scene, come around the
back because that's where I really want to seem to be Alt Shift and click
going all the way around, Right-click, mock
scene, grab it out. You are on route and you'll see now that
it's on wrapped in that way it's a bit cleaner. And then I'm going to
do is I'm gonna throw an ion dark click Assign.
And there you go. I didn't want to
actually see a scene just on that point as
the central view of that carbon again,
hide out of the way. Now let's come to this part and see how
this part on ramp. So we're gonna grab
the whole thing. I'm going to click
you smart UV project. Click Okay, then one
way to do is I'm going to click Assign on the ion fish. So assign this like so you can see it looks
really, really nice. Let's put a rendered
view and just have a quick look of what
that looks like. Yeah, you can say
it looks really, really nice now we've
put it on that. Then what I'm going
to do now is some of these parts don't want, actually wanted to be this. I want them to be the dark ion. I'm going to do is
I'm gonna call him, let's say to this part here. So I'm gonna grab hold
shift and click shift, click OK, chip
cliff, Control Plus. Just keep going
with control plus until you get up to
these edges here. And then we'll just
click on the end-all, click Assign, press the Tab. A knight can say just makes it look really,
really different, makes it kind of looked
like something's actually holding it to get where the different types
of iron up to you, of course, if you
want to do that. And then what I'm going to
do now I'm going to come in to hide those. I want to grab these policy. I'm going to click, I'm going
to have this as normalized. So I'm gonna click you
smart UV project, okay? Click Assign, hide
it out of the way. Let's now come to these parts. You smart UV project. Okay, I am dog, click Assign. Hi down the way. And then finally the
two pieces of wood. You smart UV project. Okay, Let's Spend most
ramp because they all the woods so we know the wood
grain or be a different way. You may like islands. Unless put it on would
mean click, Assign, tab. Double-tap. There we go. Actually don't actually
windmill is actually done, didn't take longer all just walking around making sure
I'm happy with everything, which I think looks
really, really cool. All right, so on the next
lesson then what we'll do is we'll get the bones in and we'll actually
get this animates and then there'll be
another one down. Basically all we're
left with with the hardest structures
to actually build them will
just be the house. And to be honest, the windmill is probably harder
than the house anyway. So there is that
taken into account? So yeah, I'm really, really happy with how this
is turning out, alright, for one, so I hope you enjoyed that and I'll see
you in the next one. Thanks a lot. Bye.
30. Animating the Windmill: Welcome back everyone to blend the three the ultimate
medieval sinkholes. Now let's come in and to lay out because then we've
got our actual timeline. Let's put it on 0. And then what we
need to do is now, now actually the bone
structures in this, I'm actually going to hide
everything else away. So I'm gonna just going to
call them to my collection here high to allow the way because I really don't need it, is actually probably easier
than the actual poem. Whereas all points there it is. It's probably easier
because he's got less bombs and it's only
got two bones in this. And one of them is
the actual root bone. So with that said, let's first of all bringing our actual route bone
rather bond by shift day, come down with the exact
already before single bone. Let's twist this around. So all x 90 spending
around make it much, much bigger on this
because we do want to move this and be able to grab
it and things like that. Then what we're gonna do is
exactly what we did before. Press the top button, then we're going to press Shift a and bring
in another bone. Now you can see at the moment I have not no movement to alarm, so I'm just going to
click Shift Space bar bringing my move. You can also say that I
do have a problem in. This needs to be buying in here, so I'm gonna spin
it around first. So all x 19 goods
get it in place. And the moments there's
been a colon, right? So this center here, Personal take to bring
everything back. Click on here without shift
as curse, It's a selected. Now let's press top. Come back to our
bone, press the top, make sure you've got the
bone actually selected. And then you're going to
press Shift S selection to keep offset. I'm gonna make this
bone just a tad bigger, like so, just so I can
actually see what I'm doing. Alright, now before you
do anything else again, it's always a good idea. Click on your main
actual building or asset or whatever it is, press Control a or transforms. You can set the orientation to the actual structure
or down to the bottom. It doesn't really
matter. Then come to your bones and again,
control all transforms. Then when you want to
do is grab your bones, grab your Assets, Control P, and not that way round. So grubby, grubby
bones control pay, and then come down
to empty groups. Now, you will eventually learn
to use the older groups. But I wouldn't use them on
assets section is very red. I'll use anything apart
from empty groups. It's normally on characters
when you want to use, for instance, ultimately, weights on that
blender, do the work. But on something like this
you never wanted to do automatically because it's
just going to mess the obese, basically going to give weight to all of
this, some of this. So when this rotates is gonna rotate pulse of this
and things like that. So that's why I do about, alright, so now let's come in. We didn't forget to
name them this time, but we can come in
now and name them. So let's come in and we'll
call this root bone like so. And then I'll come in and
I'll call this fund bone, something like
that. There we go. Now the only one
that we need to give weight to is the
sexual fund bone. So I'm going to now
come back asset, come over it a little
green triangle. Let's come to the farm bone. Let's press Tab among
ranch do is I'm going to grab all of the parts that
needs to have some weight. You will see that
this part here, it doesn't need to
turn, it needs to be this part and this
part are not there. So if I grab all of this, you will say that grabs
all of that up to that, and that's not
something that one. So the best thing you can
do for something like that, It's just grab this. So Alt, Shift and click, grab at the other side, hold
Shift, click, right-click. And what are you gonna
do then is marketing. What that's going to
enable you to do now is come in with phase leg, press out L and now grab
all of those except this. Now you can basically
come in with your Edge Select again
and just go round and grab the rest of
it. There we go. Now we'll welcome to our
thumb bone. Click Assign. And now if you go
to waste paint, you'll see that I'll read
exactly the way you want today. And also naive or come
back to object mode, come to my actual bone, put it onto a post. Like so. You'll see when I
rotate this round on the why not the whole thing rotates around and
it actually looks like it's actually in there
rotating within that. We didn't have to
make any more mesh. So that's exactly what we want. Okay, So it just saves
a little bit of work. They work on this. Let's put this on
1 first of all. And then one way to do is
I only want to mess around with obviously rotation of this. I don't want to actually
mess around with a scalar. And if in law, not only do, first of all is do I didn't
last one, click on rotation. And then what you're gonna do is you're going to go to 50. I recommend 50 is a really good number
to rotate this around. So if I come to 50, now instead of just pro and 50, instead of rotating this, I'm putting in an
insert keyframe. What you can actually
do is you can do this automatically makes it so much easier and so much quicker. So where
are you going to use? You're just going
to click this and it says Auto key ring. And now I'm going to do
is I'm going to spin this around so I will
just press tall. Why 90? You'll notice it already
puts a keyframe. Now we can see we go this way. This way. Sorry you don't. If you come to 100 now, then you press all. Why 90? You'll see
already pulsating. Now why am I doing this? If it's going to be a circle, surely I can go from
0 to two hundred, three hundred and sixty degrees. No, it won't wait by
that it'll actually start spinning one way and then it'll spend
the other way. You can try that if you want. But I've found that the
easiest way is just to do it this way and do
really fast in this way. You can also grab
all these we've shipped and then mirror
them and things like that. That's also a way you can do it. But honestly, instead
of doing that, put it on auto key ring. Put it up to your
150, for instance. Press all why? 90, next one to 100 and just go like this and
you will find it really, really easy if you
do it this way. So that's what I'm recommending. So let's put it on there to 50. And then all why 90? And what I tend to do is
I tend to go into 300. Then why 90? And just give you a
quick test before I do anything just to make
sure it's spinning right. I'm not worried about foster
or anything like that. I was going because we know
that soon interpolation mode, I'm just making sure just
carries on going all the way around, all the way up to 358. And then I'm happy with that. Now let's put it on there. 350, let's spin it around. So all why? 9400? And honestly, by the
time you've messed around with the
mirrors and things, you probably could
have already done it. Now obviously, if you've got thousands of these today, yeah, you're gonna really
wanted to wear, probably use the
mirrors and things. But for just
something like this, over a 100 frames, I recommend just doing it like this and then it's not
gonna mess anything. All why 90? You can see roar
again near the end. Just our easy actually
is so 800 plus one. And then line 92. Now let's just make sure
they're going through. So I'm also going to come down Right-click
interpolation mode. Just make sure you press day and you've got all
these grabbed. Right-click interpolation
mode, put it on linear because the
space bar and let's say you wanted to do is just
basically go all the way through restart gonna 800. So that is looking really nice. Of course we can put this
on object mode as well. We don't actually need those on, and we can actually
have the bones on the way if you
really wanted to. Now before we end, now what want to do
is we can say that this is moving now you've
got to be very careful. When you move these.
They actually turn this off because you'll see not common put this
on pause mode again. I grew up this move
it, for instance. You can see that we've
actually put in one there. So I'm gonna put this back. I'm gonna put this
on object mode. I'm going to turn off
my auto key ring. Make sure you turn out
very, very important. Now I want to do is just
do the final thing. So if I open this, I'm going to call this windmill. Like so I'm going to right-click and I'm gonna
mark it as an asset. And when also called
geometry wind mill mixture. Like so, I'm also
going to come up to where he is my overall
mixture, this one here. So this is the water pump. So let's call it water
Pullman, mature, like so. And finally, now we can say that all windmill is
not in our assets. If I turn this off,
you can see it's still less so I don't
really want that. So I'm gonna grab the top. They are mature
shifts like the bomb, drag them in to my assets. Let's now close that up. Now hopefully if I move
this, so I have a grub this, move it over here
where once it like so, press the space
bar and it showed actually stay there like
that and actually go round. Alright, so let's give
it a try. Let's come in. And if by the way, you think disappears
or pay this, sometimes I've been
just pull that up and then it will come back. I don't know why that happens. It must be a bug or something. Let's come to file.
Let's save it. Unless open up
another blend file. So right-click blender. That's just check our assets, making sure they work. All right, so now we're
gonna go to Assets, we're gonna come to farm assets, and then we're going to
bring in a windmill. Let's drop it on there and let's make sure it
actually works. There. You can see
it's actually working. Let's move it though. So let's put it over here. Let's rotate it, making sure it still works.
As you can see. You can see also we can bring in our pump
at the same time, rotate it round all
z also still works. So you can see now, rarely really easy building
up these Paltz, rarely really easy
to bring them in. So I'm going to
close this down now. And on the next one, we're
actually going to start work on our actual main house. It's the largest building. Once we've got that
out of the way, we've got a few fences to build. We've got some worms, some leaves and
things like that. Well, that really, really easy. So now we're on the home
straight basically, I've actually
modelling the parcel. All right, everyone. So hope you enjoyed that and I'll
see you in the next one. Thanks a lot.
31. Starting the Main Farm House Greybox: Welcome back everyone to blend. And three, the ultimate medieval sinkholes and this
where we left off. Now let's go back to modeling. So we can actually work in
our viewport correctly. And then while wanna
do is I want to bring back my
reference and my flow. And what I wanna do
is I wanted to change this reference now for perhaps the kind of the most
complex part of the build, but only because it
has so many pulse. It's not because it's
more complex and actually creating these
animations or anything like that. Since it was quite
complex because of AI is actually built bulk. Anyway, let's come back to
now reference over here, and let's change it
out for its coal. Let's put it on there so we can actually see
what we're doing. Now, this one here,
the house reference. So if I double-click that, you can see this is
all house reference. When you start with
something like this, you need to make a
point of which side you actually want to work from
thinking about this reference. So the moment it's going
the wrong way round. So I need to spend
his reference round, zed 118 spinning
around, and that's bad. This is the way that
I actually want it. Alright, next thing we need
to do is what we did before. Let's get our little MAN. Whereas there is,
let's bring him over. Let's Spend them around as well. So we can actually say MLK, roundabout this woman, then
we can start from this side. I'll probably be easiest way. So all zed 90. And then I'll press three. Not three. Control three, is it? Yeah, Control
three. There we go. Let's bring this down now to make it the same
size as our guy. So I'm going to press
S, scale him up. Let's see if it's
the right size. Think ease. Just a tiny bit too small. So let's make them a
little bit bigger. Like so. Something like that tiny, tiny mall Bringing down. Let's have a look.
On the right side. Near enough pathology
the right sides. Alright, and I
didn't want to stick to these because it's really, really easy if you
do stick to these to get everything to
be the scale that I've got it when we come to actually render things out and start getting the ground and,
and things like that. Very, very easy then to see how things are
going to fit in place. Alright, so now I
want to do is we actually know that we've
got the scale correct. So let's bring in a plane. I think we'll just, we'll try and get
the scale Craig first before we start
building rounded. So what I'm gonna do is
I'll actually bring in a mesh, bringing a cube. I'm going to bring my cube out. So I'm going to bring
it out here, like so. I'm going to then
pull it into place. Press Control three to
the size I want to, so it's going to be
about this size here. I'm going to press top,
come to face legs, grab this edge of material, press one, note control three, Pull it back here. Then control three, Pull it
up to where it needs to go. So something like here. And then we're going
to do is I'm going to extrude from this pulse, so pull it all and that's where the realistically
needs to go. Now on need to do is I
need to calm and put it on here to get the
right actual width. While I'm going to do is I'm
going to a think, I'll try. Let's have a little easiest way. Probably spit my actual
reference rounds, so I'm gonna spend
my reference round. So all why 90? And let's bring the
reference up. Like so. And then I'm going to spin
them around. So all zed. And now I should've done
in the right place. So seven square over the
top and pull it this way. I'm gonna pull it this way, but there you go. Now you can see that we've got a rounded by in the right
place where it needs to be. Now I'm just going to pull
my cube actually have, so I'm gonna grab
this one and this 17 again pulling out like so. Then when we went today is I
want to grab this little one right-click and we're
going to manage that says at center and then
do the same on this one. So right-click management
says at sentencing a now, if I press Add wireframe seven, scroll to the top, you can see
it's narrow enough levels. So now we know that we've got
the scale just about right, which makes it
really, really easy now to actually create by. So let's press said,
go back into solid. And now we'll build around this. Let's reset all reference. Let's see When do we all
know that's not gonna work, so I'm gonna have to
rotate it around. So all why? 90? All eggs. 90. Let's see if
that's the route. Wait, no, it's not. So all
zed 198 and there we go. Alright, now I should be
able to work from now. I think I want to start
working first of all, from him while I'm
going to do is I'm just going to pull
this over here. I'm gonna press Control three. So let's put it a
little bit lower. Getting the right place. Something like that.
Let's start with that. Now let's come to our cube. And then while the
result per exit, control three on that. And let's bring in
some blocks now. So we can say about one
blog right up here, one up here, and then
going across the US. So I think we'll
bring the first one in across here. So
I'm going to press. A shift I bring in a cube. Then going to make it smaller. I'm going to base it around this one I've already created. So you can see that I'm
going to bring it down, make it a little bit
smaller, like so. Now let's bring
it out over here. And let's grab the face of it. Press Control three,
and I'm going to bring it out to the end
of here as well. So I wasn't poking out,
they end up there. Each of these now
might be with that, Let's say grab it unless
put it into place. Now let's think about
these and I'll see you. Again. They don't need to be perfect. You can see though that
I've made them this way so that all guy can
actually fit through here. Maybe it's better now if we're actually bring
this and just put it, refresh control three
rods, abacavir. And then I'm gonna
get a real good idea where it needs to
put these blanks, what it's just going to
speed up the process for us. I'm just gonna pray that I'm going to grab this
plank of wood. I know felt this in
the right place. Press Control a or transforms
right-click set origin to geometry top now Shift S
because it's a selected. And now when I bring
in another cube, so shift day bringing a cube, it's gonna come perfectly
where I needed. Now I'm gonna press
guards wireframe, and now I can actually start
building in the surround. So I'm gonna do is
I'm going to press S, Bring it down, the one to
bring it back as well. Just make sure you've probably
going to want to go into object mode because you want to make sure that these all back, rather than having to pull
them all back later on, when I press object, I'm going to just
pull it down to here. Like so just so I can
see that it's fitting back behind nice
slightly like so I'm gonna probably
download it like sir. All right, Now I'm
gonna press tab. Come to my face. It's always the holidays bit. Just start in this
hour, of course. Press Control three prices ED, going to wireframe now, unless bring it down, like so. So bring it down to the low. How they're coming down, press L unless put
this one into place. Like so now we're meant
to do is I'm gonna, I can see it needs to be a little bit then it's
a little bit too big. So I'm going to press S, make it a little bit
thinner, like so. And then what I'm going
to do is I'm gonna grab that self-control free again. I'm gonna pull it all
into place, like so. Then when we went to do is I'm gonna call them to the bottom of it and pull that
down a little bit. So Control three again, pull it down just a
little bit, like so. And now we can do is I can
grab the whole thing without pressure, bringing it over. Bring it over. Then
let's grab this one, shifting, bring it over. Then Shift D. We can see where quickly
creating this now, so it should bring
it over. Like so. Now I want to do is I want to grab this palette
I've already gotten, I think I can grab it. Whereas it go There it is. This one here. Press
Control three again. I'm going to press Shift key. I'm going to bring
it up and pull that into place, like so. All right, so we showed if we have Loaf now go into solid, say that we've already
got the beginnings of our actual house farmhouse. What I'm gonna do, I'm
going to also pull this back a little bit
because of the moment. If I'm not gonna pull it back in middle of them and
leave it like that. But you can see the
problem of boys that I need to pull
this out a little bit. So I'm gonna pull that
out like so and just make it look a little bit bad. And when it was, There we go. Alright, so now let's hide this reference just quickly
out of the way and won't do. He's now I'll put this
on the other side. So I'll come in. My house. I grew up the center of here Shift S because it's a selected
come back now to this. Wooden parts joined
them all together. So Control J joining
them or low, control lay ultrasounds forms, right-click origin to 3D
cursor, modifier, add, modify it unless mirror them over the other
side, like so. All right, so on the next lesson then we can really
start working. Then on the roof,
we can say that this might be out a little bit. We might need to pull
this all back in space. I think I'm actually
going to do that now. I went to grab them all
and I'm just going to pull them back just a little bit because I think they're
a little bit too far on anything that
looks a lot better. Now hake and then come down. I think I also need to
think about pouring this. Actually sits on top of those, so I wanted just
sand top of those so my hay can come down to here. And then probably
going to go over that. We might not even need
this part in all. At the very least, we should make it a
little bit thinner. So I said let's pull it down. It sits on top of that. Yes. Something like that. Just starts poking out to where the wall is, maybe a little bit more like this because they will
come down to EFN and over it. Okay, I'm happy with that. What we'll do that on
the next lesson is we'll just carry on
building this out. When we go out, we just then just pull the materials
on our course. All right, everyone, so
I hope you enjoyed that, say on the next one. Thanks.
32. Blocking out the Farm House: Welcome back everyone
to blend the three, the ultimate medieval
seeing costs. And this is where
I left the office. And now all I wanted
to do is I want to bow out the top of this
root flow of it. So what I'm gonna
do is I'm going to call them to my roof. I'm going to grab this one, and this one, I'm going
to separate them out. So y g, Just make sure
they're separated. Pay selection, top,
grab them again. And now there is a one to
bringing some edge loops. I'm going to press control law. Let's bring in H5. Left-click, right-click. And unless they're
the same on this one, so Control off, you can click five on the
number pad as well. And I'll do the same thing. Press Enter, right-click, and
then you've got them both. And then they'll just
wanted to bevel the sorry, bend knees in Lopez. I'm going to call them
to these ones here. I'm going to make sure my
proportional ends in his own, make sure it's on Smith. And then I'm just
going to press S and X bringing out and then
just bend them in. Just a little bit like so. I'm not showing them that way. I'm just going to hide
the house out of the way. I'm going to have a look now. Not very happy without actually
work. So let's try again. So S and X. Yeah, I think I've actually
gotten the wrong one. So let's have a look. Medium
point. Let's try that. That's an x. There we go. That's bend in which
bads, let's go back. Grab them, make sure the fly
again, come back to them, put them on median point, and then test an
x, bring that in. There we go. Now we can see we've
got a nice slope that now maybe grab this one and
this one do the same thing. Just a tiny bit. Yeah, that looks
much, much better. I'm very, very happy with that. All right. So now I wanted to do is I
can actually come now and probably get rid
of this ball here. So if I press Delete, I can get rid of that
and I'll just be left with this Then
while Wednesdays stays, want to call them to my roof. And I'm going to use these pods to actually create by roof. So I'm gonna come grab
this edge, this edge, I'm going to press
Shift D. Shift D, bringing it out without
proportional editing on. Sorry. All right, so now I want
to do is I want to create these into a piece of wood. I'm going to do is I'm
going to press eight. Pull it like so. There we go. Now let's grab the whole thing, pull it down and you
can see that it's got that flow now of
the actual roof. Now on today is I want to
pull it back the other way. So E, pull it back this way. Like so. Now let's
just get into place. So how far out do we
want to stoke out? I wanted to just a bit, so I'm gonna pull it back
just a little bit like so. And then one Wednesdays
I'm going to pull these pots bond. If I grab this, I'm going
to pull it with police. Pull it down, like so and then do I need to
pick this up a little bit? Probably. So I'm gonna grab
the whole thing. Figured up a little bit. There we go. Now the one thing I don't like and don't
like these end in flop. So I'm just going
to call those away. The way I'm going to
call those ways if oppress one, come to match, come to come to mash, come to bisect and just
cut those way at an angle. So something
something like that. Then while there is I'll just
clear the inner, like so. All right. I'm not happy with those. I think I am now, do I want to pull this out a little bit more so
I'm gonna press one again. Let's go on to normal. And let's pull it out.
Slightly. Like so. Yeah, I'm not dealing with that. All right, let's
fill that in with f. Then what we can do is we
still got cursor in the sense. So let's split this office. So Shift S, whoops,
sorry, selections, let's say control lay, all transforms right-click
origin to 3D cursor. I didn't know modify.
And let's bring in a mirror and let's put it
at the other side as well. So x and y. So that's both
sides. Trash control. Unless apply that. Let's now bring in another cube, so shift a cube,
make it smaller. I'm going to sit this
route on top of it. Like so let's make it longer. So S and Y pulling out. Like so. Yeah, that looks really good. And you can also,
if you really want to press Tab, press control law, bringing a few edge loops, grab the middle edge loops
or Alt shifting place, make sure you're on smooth
proportional, I did say, and then just
bringing Are you sick and bring it down
just a very slight, they're just start a little
tiny bit of character, make it look like
it's literally bowed. Just that tiny bit. Alright, so I think
I'm happy with that. Now let's come round. And what we build a noun
is the main structure. Because once you built
out the main structure, the rest of the building, printing a little bit
saying is really easy. This is actually how you would build a house in real life. I tend to stick to that because I find it
much, much easier. Alright, so I'm happy with this. I wonder is I'm going
to save my wig, so File and Save. And then we're going to
do is I'm gonna call them round now to this side, Let's say work on
this sphere here. We're going to have a window
in the back here as well. So I'm going to press Shift. Bringing a queue. Let's
bring the cube to the back, make it smaller.
Let's fresh one. Bringing it down to
where a warm set press S and X pulled out. I want out to about that, probably a little bit too
much less so as an ex, bring it in, slide, Let's pull it back
now and place. We don't need to worry
about this because we've got some planks of wood which are gonna be over here, but I do want to
pull it back just so the planks of wood
can say in here. So S and X, whole district
board non-leaky needs like so. All right. That should fail left perfectly. I'm looking at the gap here. That looks really, really nice. I'm really happy with that. Now let's bring in
another plank of wood. So we need to plants award. I'm in here. So what I'm gonna do is I'm
gonna grab this one here. I'm going to press L and then language there isn't
gonna press shift D as a bringing solve it without proportionally the denominators should bring the other one aim. And that's exactly what I'm
looking for like an India, I'm going to have an
actual window and then also pull these
back just a little bit. So the thing is placed
behind my like, so that looks really cool. Okay, so what I'm gonna do now is I'm gonna
press at the top. I'm going to press Shift a,
bringing in another cube, Bring it down here. Press the press warmth.
Let's bring it on. I wanted level with this, probably around the
same size or maybe, maybe a little bit
smaller actually. So S S X into place. Like so like so. Just making sure that sits
in there rarely nicely. All right, So I'm really,
really happy with. Now let's work on the
top part of this. One is a p squared across it. You can bring up your
reference again. Have you referenced
on the screen? Sometimes that's why
I'm actually doing it. It makes it much, much easier. I'm gonna do now is I'm going
to bring in a cube first. So bringing a cube, make it smaller,
roughly the right, maybe a little bit
smaller than this one. Pull it down, press one, Let's get in the right place. So something like maybe
a little bit smaller. So something like that. That's an x. Just fits in place. So it's hitting me,
I'm bring it out. So you can see it's a little bit smaller than this,
which is perfect. That's exactly what one because we don't want
she wanted to go now into this bear or
anything like that. And now we can simply grab
this Shift D and then all 90, shrink it down a tiny bit. And zed, zed, there we go. Pull it up. And you can see the
reason why is because the globals not on properly pull it into
place. There we go. And now finally, let's
make the other parts. So upon going, no pay
a pug grown up here. So I'm going to press Shift D. And then we're going to all, why spend it over, press the S born, bring it down and let's try
and fit this into place. I'm going to fit it into that. Just making sure they
stayed in place. Yeah. And I think I'm happy with that. Now I'll need to do is
I can just I think I should be able to grab
this, join it together. Not with, not with this one. Press Control J. And there we go. We've fallen mirror over there as well. So that's really cool. That's a really good
way of doing that. Double-tap the eye. There we go. Now on the next lesson then
what we'll do is we'll start working on the other side. We've pretty much
called the backside Donna thing that's
going to stay pretty much like not pop from obviously the chimney that
we're going to create. We're rarely, rarely mulch in
the long run, this one now. All right, everyone,
so I hope you enjoyed that and I'll see
you in the next one. Thanks a lot. Bye.
33. Establishing a Professional Workflow: Welcome back everyone
has a blend of three, the ultimate medieval
seeing costs. Now, this is where we need to mirror this
over the other side. So I'm going to grab, you can see that these up, all of these are really well. Now what I'm going to do is
I'm going to graph this one. I'll grab this and
I'll separate it. So P selection and now I'll do is I'll actually
apply this mirror. So control layer, I'll grab
this, this, this, this. And you can see that's Pahlavi. So I don't really
want to do that. I want to grab all
of those control J come to these parts. I'm going to grab this one. Selection around them again, control leg, apply those. Now I can grab this, this, this, so Control J. And there we go, got everything. Alright, so control
life all transforms. Right-click its origin to
3D cursor and modify it, bring in a mirror, put it on the y, the x. Hopefully, they should
be in the right place. Just double-tap the a
and I'm just going to envelope to make sure I'm
happy with where those are. I think they're a little bit
our let me just have a look. Yeah, I think they're
a tiny, tiny bow. And it's probably
because this is an dying in the center
of each of these, but no problem we
can move those. So I'm gonna do is I'm
going to press Control leg to apply that. And then I'm just going to move the part where I
need to move in. So for instance, this
one and this one, I'm just going to move, I want to move that one out there. So I'm happy with that. Or is it by maybe back I'm going to bring back a little bit
since those bad. Let's put it something,
something like that. And then while there is,
I'll pull these back. Just a little Todd microscope. We can mess around
with those as well. So that's no problem. On the final one,
I think I'm going to just pull this one back
a little bit as well. About sorry, I said that that is the basic structure of
our actual townhouse. So now let's think about getting the word actually into place. So what I'm gonna do
is I'm going to bring in a plane first because
I find working with planes a little bit easier
if you during this all why 90, spinning around. Let's bring it out. I'm gonna put it right
in the top of that. So bringing it back, so
it's gonna be in here. Like something like that. Bring it down. Then he was just
in there like so. Let's grab the bottom of it. I'm going to press
Control three, bring it down to the bottom. So we know at the moment, you can see that
this is not under the flow and I really need it on the floor so I can see
what marks you're doing. So I'm gonna grab it all. I want to then pull it down. These are actually on the floor and that's then
gonna make it much, much easier to work with because my plans wouldn't need to
realistically be in the flow. So I'm gonna come
back to my plane now. I'm going to grab
this side of it, pull it over to here, like so I'm going
to grab this side. Sometimes you can actually
grab it through or the meshes, you just won't be
able to see it. So I'm gonna grab that,
pull it over to this side. Alright, so that's the bit that will do is before I do any work on this,
I'll grab it again. I'll press shift D, all Zed,
Ninety, spinning around. And let's get this
bit in here as well. You can see that it's a
little bit high for this fit. We'll just bring it down festival that I'll
pull it into place. So something,
something like that. Maybe let's pull it down. Like so. Just pull it across. Like so. All right, There we go. So we've got both of
these parts it now, now let's give these some
edge loops to make it easy. So I'm going to do
is control three. I'm going to press
Tab and cosecant see-through where
we lose press said, put it in wireframe, and then we're gonna
press Control Alt left-click and just
drag it across. I'm just going to Control. Left-click, drag it across and just put it in-between
each of these beings. So Control Alt, left-click, left-click, drag it across, control off, bring it
down to the center. Now Guy, basically a polygon here on each of these and that's
exactly a while one. Then I'm going to make
my wood from these, and I'm going to make my
stone wall from this part. So now let's go around
to the other side. So I'm going to
press one. I'm going to do exactly the same thing. So Control Alt, left-click, control law, then
control off into place. All right, so that
looks really good. Now let's think about now split and these
old because we need to split these up to
make our planks award. The thing is though,
before we split them up, you might as well make
it easy on yourself. So I'm gonna do is I'm
going to press Control Law. Bring in some plants award. So many clients who
were doing something, maybe several looking
for it takes him away. Yeah, I think I'm
going to want a few planks of wood in here. And I'll see you can
say that I'm not happy with dot top plank
woods so much, so I'm going to lift them
up once you're in here, you can see also the top planks of wood or
actually it didn't. So don't worry too
much about it. Just make sure you're happy
with the size of the planet. So what, I'm going to
left-click, right-click. And you can say that
about seven in that. Let's try on the other side. So I'm going to
press control law. I'm going to press
seven. It's seven. I'm going to actually
press control law and press seven on the number pad and to right-click drop them in
place. And there we go. So you can say the not quiet the same height as the
don't worry about that. They don't really need to
be because we consult those out when we bring
them into place. Alright, so I'm happy with that. One thing I didn't forget to do. Sometimes do is I should have. Obviously, mama seems, makes
everything so much easier. So right-click mock seams. All right, now let's bring in some Angelou. I'm
going to press Control. I will do this 1 first. And you can see because
this has got a, basically a natural
loop in here, it's only going to
basically allow supplied slips knee,
which is fine. So control law, Let's pray. I think three on each
one should be fine. We don't want to go
totally overboard. So control law three, controller three, and just
work your way around. Remember, we're going to mirror this on the other side as well. So that's gonna make it
a little bit easier. So when I got to do this work
too much, this one here. Don't worry too much
about I just put two in that control law because that's where the dog is gonna be
on one of them anyway. So control are three. Control all three. All right, Now the one
thing I've done here, which I should have
thought about before, is I've put my edge loops, indiana really don't
want those in. So what I'm gonna do,
I'm just gonna fix up Alt Shift and click. And then Alt Shift click, I'm going to press Y G,
makes sure that split. And then what I'm going to
do now is I'm just going to get rid of these ones here. I really don't want them
in a little bit more work, but at least you'll learn how to actually do that
in case you did. I'm just shifts selecting
each of these and then we just going to press Delete. And you've got one that says dissolve edges and just
dissolve the edges. And what you'll find is
now you still got each of these sections because we've got an edge loop
obviously going in there. Alright, so we're
nearly ready now to create a wooden pulse. So let's actually come in now. And we showed where
you can say that we still can't split these off. I'm going to do now
is I need to pull basically mark down here and split these off
so we could do it. There is an easy way to do this. Instead of doing that,
what we can do is you can just shift select
this side control, select control, control,
control, control. Then you want to do every other ones I want to shift select. And you basically just
going to control select. And what we're doing
this fall is just to split them off from each other. So split these blocks
off from each other. We've only had to do too, and we only need to do one on
this side, cipher control, select an Aquafresh, Y and G. You'll see that
they're all split off. Right-click from there we go. That is what we wanted. Now we can come in and
we can go down each one of these like so and
split them all off. And then we can actually make some planks award from leaves. I'll grab not the top
one and the second one. I'll do the same
thing on this one. So, alright, so now
we can press Y G, split them off like so, drop the whole thing. And unfortunately, I
don't really want to do this with these because I'm only working on
my planks of wood. So now's the time to
come in and just split those off away from applying. So what I'm going
to press Escape selection, split those up. Grandma would again,
which is this one here, top, grabbed them all. And then let's press
essence ED with individual origins on so
S and Z. There you go. Now you should end up
with something like that. Alright, so what we'll do in the next lesson that needs will actually make these based on what we've done
with the bond. Exactly the same process. And then we can mirror them over the other side, do the topics. And then we pretty much got
the windows and doors to do. And you can tell when
the chimney ball, those those things aren't
that difficult anyway. All right, everyone,
so I hope you enjoyed that and I'll
see you in the next one. Thanks a lot. Bye bye.
34. Notching up the Modeling Difficulty: Welcome back everyone
to blend the three, the ultimate medieval sinkholes
and this were left out. Alright, so now let's go around and make these a
little bit different. So what we're gonna do
is I'm gonna come in, pull days on random, so
proportional editing. And let's come in
with Edge Select. And we're just going to do
exactly what we did before. So I'm gonna pull these down. I'm actually going to
try and do ff year. So you can see that
if I'm careful, I can get quite a few dome at the same time to make
them pretty uneven. So I'm just gonna go round. You can see if you careful. It's a very, very quick process. So let's come around
the side now. Just not too much, just very, very delicate. Sir. Alright, so now
let's pull some out. So I'm going to grab these. I'm gonna pull them
out very gently. Like so. I'm gonna
pull this one in. Again very gently. Shake it all about. So let's do this last one.
Alright, there we go. Now let's shake them smooth, fair, so shapes move, let's say for alternative, move on, Let's now
bring in a modifier. So we'll bring in a solidify. Let's make sure first of all, to going out the
right way because sometimes they got
different ways. So let's say yep, they're all gone now, hopefully. Yeah, the right way.
So that's exactly why one now I don't want
them too thick. So I'm just located to make sure I'm happy
with a thickness. I'm looking to
make sure as well, these ones here as you can see, that coming out a
little bit too much. So I think while dairies and grab with the try
and grab all those, control plus jump them all. Make sure you've not got
any grabbed over here. I think I've got one
grab their press G, take off proportional editing. You can see I've got
just thought one, grab this, so just go to it, press Shift L, and hopefully
then G should just be these. That's, that's pretty good. All right, Let's
pull these back a little bit because
there were just to fall forward for me. And I'm looking now
at the other side. So instead of trying to mess
around with the other side, well, I'm gonna do
is I'm just going to hide those other way. Press a and now I'm
just going to bring these ones are a little bit like so and now the thing much, much bad, press all tight,
bring everything back. And now I should be able
to make them a tiny, tiny bit thicker, like so. All right. I'm happy with that. Now, let's come in
and Bevel them off. I'm going to add modify bevel. And I'm not sure that actually resell
the trunk stones, they're going to reset them. So control lay, all transforms right-click origin to geometry. And now I'm gonna turn
this down to no point, no one. There we go. Finally then let's say I bring them closer
together again. So a, to grab everything, press one, and let's bring
them close together. So like so. Unless have a lower
diagonal line. There we go. That looks really, really nice. We can slightly
see-through here. We don't really want that, so we need to bring them a
little bit closer together. So S and said that
mall close together. And that looks much, much bad. Very realistic. And that's exactly
what we got in full. Alright, so the last
thing I want to do is probably want to get
rid of these ones on ADR, really one of those
half ones on that. These look absolutely fine. It's just these look a bit
a little bit of a mess. So what I'm gonna do is again, I'm just going to
grab all of these. I'll always check press G. You can say I'm going
to press Control plus just to grab
them all and press G. And then one Wednesdays I'm
going to lift them all. So I'm going to get
rid of these ones. So I'm gonna come
in and pressing L on each of these, and
then press Delete. And there we go. Alright, so now I don't
know why that one. I don't know why that happened. So let's have a look. Why did you go over that? And also show, let's
try and grow up. You want to actually have about why the oxygen there we
go. Because I deleted it. I don't really want
to delete that one. I grab this one, so I'm clicking on it,
click on this one, click on this one, delete. There we go. All right, so now let's
come in and apply all solidify, apply our Bevel. And then we want to do
is I want to mirror them over to the other side. I'm going to grab these
comptroller all transforms. I'm going to grab
these hip because I know my center point
will be a nice, I'm going to press Control a or transforms right-click
set origin to geometry, Shift S cursor selected. And then one minute to
do is I'm gonna calm these plants. So what now? I'm going to press
Control light. I'll transforms,
right-click the origin to 3D cursor, add, modify it. Let's bring in now a mirror. Mirror. It should be on several OK. Yeah, it shouldn't be on
the x and the y. Hopefully, sometimes when that
happens though, we will probably
have a problem with, you'll end up with
extra parts in there. So I've got to be really careful because if I apply this now, we'd probably got a
load or extra pulse because we're applying it on the X and Y and that's something
we have to be careful. I'm just going to try. I'm just gonna, I'm just
gonna be careful of this. I'm not actually
going to do that. Well, I'm gonna do instead is I'm going to
duplicate this myself. So Shift D and then all zed 118 and spinning
around like that. I'm going to do it that way. And then I think it's gonna
be much cleaner actually, so I'm gonna do it that way. Then I'm going to
join them all up. So Control J and I need to do the same
thing now with this. So exactly the same
control lay all transforms right-click
set origin to 3D cursor, and then shifting all zed
118, spinning around itself. And that's why you
should be left with. Ok, so now we need
to actually do the planks of wood
in this part here. So again, I'm going
to bring in a plane, so shift they bring the
plane, Let's spin it round. So all x 90, bring it out. Press one. Let's press S and
make it a little bit bigger just so
it fits in there. This next, pull it out. Like so. And now let's bring
the top of it. Someone press one again. Top, grew up the top. And that's pulled up to that. Alright, now I want
to do is I want to actually create my
plans towards plants. So we're going across
this way. Let's do those. So control law,
Let's bring a few when probably not many actually, I'll make them a little tiny bit thinner than the ones below it. So left-click, right-click. So I've got these
planks of wood here. And now I want to right-click and I'm going to mark my scene. Now. I want some plants weren't going up this way as well. So I'm going to press
Control Law, bring them out. Probably. Yeah, actually they
look quite nice. So left-click, right-click. These is what I'm looking
for, these going up here. So I've got to be careful though because I don't want to yeah, I love to mark some seams
done and then split them off. So I'll have to do the hallway, right place mock scene. You should end up with
the mess like this. Don't worry though, because
we've got to fix it. All right, so what
we need to do now realistically is we need
to call these away now. So I need to cut this
going all the way up here. So let's do that now. I'm gonna do that is I'm
going to press a wireframe. Want me to do is I'm going
to call this a wafers because I wanted to call exactly the same along
here on the longitude, we could mirror it
over the other side, in fact, won't give up. What we'll do is we'll
simply just couldn't from it and then put it for me and
we'll do it the easy way. Alright, so how do we do that? Well, let's come in
first and we'll press K. And that brings up
the knife tool, come to this corner and
then just basically comb, try and follow where the actual, you can see where these
into joining edges go. Try and click on
those if you can. It makes it a bit easier. So then you can press Shift
middle mouse and moving up. So again, I'm going to try and comb to where this is
interlocking here. And I'm going to
come down to here, come down to maybe
here, and finally, come down to the last one here, press the interval, and
hopefully you should end up with something like that. Now there is a problem. Normally I would mark
a seam on along here. I think we will do that. We'll right-click
and I'll Marcuse, and you can say I'm in face-like so I need to press Control a to market seen
Gaussian marked on that. Let's press one now. And then what I
wanted to do is now I want to cut those all the way. So I'm gonna come in, I want
to grab just this one here. And then when I went
to do is I'm going to press the seaborne. And now I'll bring
up a circle select, move your mouse a little bit out so you can select them all. And then I'm just
going to go in now and see if I can just cut
that way all the way up. Like so, making sure that I've not gone on this
bit as you can see, just following the old, just making sure I'm happy with it. And then I'm gonna come
now to the other side. You have to right-click,
take that off, and then you can press it
again once you've moved and do the same thing on this side, making sure pretty
clean like that. Press the yeah. I'll get the rest of
them first actually. So yeah, the rest of
them can say I miss one then looking down,
make sure it's clean. And then press Delete and faces should end up hopefully
with something like that. Now, we can see that all plants they need
to come up to here, let's say we need
the splits off. So again, I'm going to use
say, gonna come to here. Then when I went
to do is I'm gonna press Y G, split them off. And now I can do
is I can actually, well now they're all splits off. Now we can actually use
the ones that we need. So we really don't need these
two little points in here. We don't need those old,
so let's get rid of them. Delete faces. The
other thing is, I need splits off these
actual planks of wood now. Just go way, way too many. The edge loops
going up this way. But I think for now, I
think we'll keep them. I think it'll make it a
bit easier for us anyway. Now let's come in
and split these off. So I'm gonna come to the n1, come to the last one, and then know where my way up. So Shift-click, control-click should grab
it all the way across. Shift-click, Control,
Click, shift, click. Nope, that's the last one.
Actually, it stops here. So now if I press Y, G, split those up, and now we
should be able to split, these should all be split off. So if I come in now,
impressive way that select, you can see now
they're all split off. I press P selection tab. There we go. That's
split off from those. Let's now compressing
zed come into solid. Now let's split these
ones off as well. So if I come to these now, I'm going to have to probably go into wireframe again onset. I need them going on
basically these ones. So yeah, I'll go into wire-frame on small
under it that way. So Zed wireframe. Then we'll come flips
and split these up. So I'm gonna call
him, grab this one. We're going to shift
select Control, select, Shift select, Control,
select Shift Control. Why g? Now tap and they're also
slow, so Zed, solid. And now what we'll do on
the next lesson then is turn these into
plants award live. We've done these ones and then mirror it over
the other side. All right, everyone, I hope you enjoyed that fit
of a fiddly one. On the next one, you'll
really start coming together. You see on the next
one, Thanks a lot.
35. Working with Ambient Occlusion: Welcome, like everyone's
Blender 3D ultimate, many of our scene calls
and this where I left off. Alright, so now let's
do these phosphates. So we've got these, let's
split them all blind. We'd been doing
all the way along. So if I press one, press Tab, grew up these, now we should
be able to shrink them down. So I said about the mole, and that's exactly what
we're looking for. Now let's come in and
just move them around. Like so, just to make
them a little bit uneven. Alright, let's then
pull them out as well. All right, So there we go. Now let's come in and press
Control a or transforms. I'm going to right-click
and set them to the cursor because I'm gonna pull them over the other side anyway.
So right-click. So origin, 3D cursor, add, modify it and come
down to solidify. And let's bring them out. Bring them out this way. Like so. Then let's bevel
them off as well. So I'll quantify it. That will where are you? There you go. No point, no one. You can see they look
in a little bit. Misshapen are nice
because we add shapes, move and also, and move on. There we go. Now let's put these into place
where they're gonna go. Sorry if I press Tab S and Z. Without that, S and Z, pull them back together,
top double-tap. And there you go. You can see just how easy it
was to actually do those. All right, so now let's
do these top ones. So we're gonna come
to, I'll talk ones. I'm going to grab I
think I've actually gone bankrupt that I don't want
to knock, grab them all. And then S, Let's see, S and X bring them
closer together. And again, just the
same thing again, we're going to come in
to this one and move it over with most lended denom. So let's move it
over very slightly. Let's pull them out very
slightly when you pull them out. And now again, control
all transforms right-click cell
origin to 3D cursor, add modifier, bringing
in a solidified pulleys. Pulleys. We go pull them out. I'm trying to make
sure that they're round about the same
out as these ones. Which I think may all. Let's bring in a level. No point, no one. Alright. And I think they
look really nice. And that's again a, unfortunately it's no
snakes pull them together. People, it's healthy.
I have a little round. There we go. How easy was that? Alright, so now
let's apply those. So Control a, Control, a, Control a, Control a,
join them together. So Control J, Let's
say smooth them out. Associates move,
put an auto smooth. There we go. We should have already have the origins of these
to be a toxicosis. So now we shouldn't be able
to just come in and modify it and bring in a merit
rounds to the other side. Blank, so good. What's up? There we go. That's looking
really, really good. Now I think at this point, probably that Ralph bit bold, probably with built in this. So probably better off
bringing in some materials. The name carried
out with a belt. That's probably the
best thing to do. We've still got mirrors on here, which is good because we aren't granted in
Arizona there actually, I should have kept them
on religion sample. I didn't. Never mind. We can go in and do them
in little bits at a time. Alright, so welcome. Make sure raw
material and mobile during is I will come
to the bombs sphere. So I'm gonna grab all of these. So I'm going to press U and smart UV project and then we're going to
bring in our stone. So if a com to all material, which is this one, I went
to make new material stone. Let's go to our shading panel. Zoom out a little bit, click on My friends
bulk Control Shift T. And let's find our resources. So I enhance, I click
pulp calm then to stone, shift, select, Shift, select. Principled bringing them in is actually the wrong stones,
so we don't want that. So I'm just going to
press Control zed, It's not the right stone. Press Control Shift C. We can see it. If I go back. This one's called stone
and we don't actually, well nine we want the one
that says wool will shift, select shifts like and we've
also Stonewall occlusion. We've got an occlusion
here as well, so we might as well use that. It won't come in when we face
bringing in another way. We've got six textures
here, not five textures. So I'm gonna show you
actually how to use that. So bring them in principled and you'll end up with
something like that. The reason you end
up with it like the actually is because
it's trying to bring it in with the occlusion
as the actual base color. I have a minus itself. And then I open it again, come to mobile and bringing
this one, the color. Now you'll say it
looks back much. You just want to check
something if I unplug that. Yeah, there we go. That's
what I'm looking for. I'm just making sure
that the normal moms actually awake and let's
flip that back in. Now you can't see, we'd
have no problem in that. These are all going
the wrong way. What I'm gonna do is
I'm gonna call them to my UV Editing first. And then I'm going to
spin all of these rounds. So 890, let's spend them round. Let's also come
around and make sure I'm happy with the
size of the stones, which I think actually
they're a little bit too big. So if I make them a
little bit bigger, and the other thing
is just make sure that the stones underneath, they're actually not halfway. So in other words, it
just underneath it. It doesn't matter so much
about the stones on the bomb, although you can't fix
those by pressing S Y, just bringing them in
like that and then moving it up so you
can press G and Y, holding the Shift
and bring them up to make sure they're a
little bit more level. Now, as you can see,
where the soul is going to come up against
these stones anyway. Alright, so I'm happy with the way the stones
are the moment. Now all I need to do is
go into my shading panel and just change them a little
bit. So we'll do that now. Let's add on over to
our shading panel. Let's make sure we've
got our actual EV on. Now I'm looking at
what these look like. Alright, so they look a little bit light to me and they
are going to look a little bit lighter because we haven't actually gone occlusion now with a stone walls
and things like that, It's really a good idea to have an occlusion map included. So I'm just gonna
move this over, move my principled over, and I'm going to
grab my base color. I'm going to press
Shift day, bring it up. And you can actually come in
and change the name of this. So if you come over, press the N open now you can say it says
label, base color. Let's just change that to weigh. So AO, AO map either way
you know what it is now. Then we want to bring in is you want to bring in a mixed RGB. So Shift A Search makes
RGB drop-down there. And then we want
to multiply this. So click on where it says
mics come to multiply. And then what we're
going to do is basically multiply this over the
top of the colors. And now if I drag my
color into the top, dragged my color of my
A0 into the bottom. Let's set this to no, 0.792. Then finally, let's plug this
now into the equivalent. And you should end up with
a much, much darker wall. And this is really,
really now great control. Can you see how it's
actually doing that? You can see it's not
so much game rid of. You still got these
light pulse on the year. It's dark and in the end parts of them rather than
the whole thing. And that is exactly
what we want. Alright, so we're
happy with that. Let's put it back on no, 0.792. Then we want to do now
is we want to work on all wooden parts on the other
side, basically one window. We, instead of doing
that, I'm just going to grab this delete, grab this one, Shift D. Is that, so for that, whereas my actual sensor
hoping my sense is here. So Shift D and then zed 118, spin it around and
that's not done. Alright, that's an
easy way of doing it. Now let's do this one here. So we'll do these. We might as well do
these, just didn't chunk, so just the normal wood. So again, we'll do
though instead of adding that material
longer engineers, I'm just going to
click my down arrow, bringing my gray
click the down arrow. And we're going to
use the wood light, would light this one here. And then what I'm going
to do is I'm gonna go back now to me UV editing. I'll come to this 1 first and then I'm gonna make
sure I'm on edge select. And I'm going to
grab all of these. I'm going to do to it, Thomas, and I think that'll be enough. So grab two at a time. You smart UV project, okay, men 90 and then u,
v pi CG-islands. Just to make sure that
pack, click Assign. And there we go. Now
let's do the next one is, and hopefully it should come out a little bit
different demand. Now, you can see on these, I can see through them. Hoping might need
to move these over. As you can see, we'll have
loved ones who got these in, but they might need
moving overload it. I think they will do
that well with us. So S and why? On medium point this time I'm
Indian Point, press three. I don't know why that's
actually happened, but never mind S and Y. Move them over a little bit. Let's press Shift Spacebar, bringing our move tool, move them over into place. And then I'll just grab these
and I'll do the same thing. So I'm just gonna
move this over. Move more into position, and then pull them
out into place. All right. I look sick. Got again. I'll fix it because let's
just say it's gonna be going through probably to
a number of bills. So you smart UV
project like Okay. Hey, all 90 UV and pack islands. And let's just see
when I assign these, if they look different, so I don't want
them look the same. And you can say that
actually looked different except maybe this one here. So I'll do is I'll just
grab this one and Y, pull it down a little
debt, and there we go. All right, now let's come to the next one and do
exactly the same thing. I'm going to go round the corner and do the same thing on here. Impression you project, smart
UV project, click Okay. Spend the amount again. We could, instead
of doing all 90, we could do minus 19, spend on the other
way, and then u, v, and it spends them around. So the other thing
you can do is you can come up to where he says UV, Meredith, and just
mirror them on the x. And then that's
another way you can actually get away with. Mirror them around. Alright,
so they look really cool. Let's do the last one then. Like so. Unless fresh
you smart UV project. Okay. 90 UV part Carolyn's, then assign light would make
sure they look different. And there we go. Come on to file and save it out. All right, so on the next one
then we'll just carry on. I'm probably going to delete these and just spin them around, making it a little bit easy because we had those problems. Probably those problems were
caused by the way because we actually Meredith over so I'm actually just do
these on their own. I think I'll do it that
way, make it easy. All right, everyone,
so I hope you enjoyed that and I'll
see you in the next one. Thanks a lot tonight.
36. Creating the Chimney Greybox: Welcome back everyone
to blend the three, the ultimate medieval
seeing costs. And this is where we left off. Alright, so what
we're gonna do now is back on the road to
actually do in May. So I'm gonna grab these two. I think I am going to just
suck it up and leave them. Not actually just
duplicate them. So a 90 UV pick islands, assign the light would
like so There we go. Alright, Where can
our way along every so the reason we're
doing too, by the way, he's just so we make sure that the resolution of the board
is the same old way around. In other words, if we have these really big or really small, it has a real impact to
now the actual wood block. So you smart UV project, a 90 UVA package
islands unless assign. Okay. Is a look
in the same note, they're looking different,
so that's fine. Let's do these ones. We're going to come in. You smart UV project, a, 90 UV pack items are assigned. There we go. And now the last two of these
faults, you reject, okay? 90 UV, CG-islands sign. We go. Alright, really
happy with that. Now, let's come to
the other parts. So we'll do the actual roof. Now, what we'll do is we'll press Control H all transforms. Then we'll actually shades
move and then we'll plot are also moving on to get rid of those lump the
lines that we have there. And then what we'll
do is we'll bring in our plants would, so I'm going to come
to my material down arrow should be on the
planks. Planks of wood. Tab you smart UV project. Okay, Let's Spend
these around now. 90. Let's make them smaller. So S no larger. There we go. Alright, That's looking good. I mean, they're gonna
be hidden in any way. They're just there
to show rarely. Now let's come to
next pulse again. Just want to make sure that I've got no mirrors on or
anything like that. And now I'm coming into this, the main bulk of this you
can see here we have a, I'm just going to
press Control Z, joined that together, Control
J, hide out of the way. And now I'm going to
come to the rest of it. I went actually apply m, sorry, I apply this mirror and
then joining with this. So Control J and then press Alt H and then hide my reference on the
way you don't need that. Joined them now altogether. So Control J and then G, and then should be left
with something like this. All right, so now what
we can do is again, we can press Control
a or transforms right-click set
origin to geometry. Now let's quickly
start wave committee. So if I come to this top one, I want to unwrap this
separately because I wanted to give
you a lot of space. Actually come to my
little lab material, I'm gonna click down arrow, I'm gonna pray on gray. And then I'm going
to click Close down. And we're going to
have this on the wood, wood main, this one here. Alright, so we've got that. Now let's press you
smart UV project, okay, 90 UV and islands. There we go. Now we haven't we
need to assign it. There we go. All right,
that's looking nice. Now, let's hide this one on the way and then work
on the next one. So I'm going to grab all
of these, this, this, this, this, and this pressure
you smart UV project. Okay, let's see if these
unwrapped where I, we might need to split these up and I think it's
going to be the case. Yeah, they're not gonna
rock, correct. Live out. So I need slip these
also I want to do is Alt Shift and click,
right-click mock seams. And then I'm going to grab this one in face-like
L and then y, g, split them all. All right, now let's see if they actually
overlap properly. So I'm gonna come
in, I'll actually do the same thing
on there as well. Models, we'll do them
all at the same time. So right-click,
Maxime, face-like. Grab this one, L, Y, G. There we go. Let's come in now. Save these actually
all around bad. And while they did, so l, you smart UV project, okay, and there you go. 90 UV islands would mean
click Assign. We go. Beautiful. Alright, let's hide. That was out of the way.
Let's come around to the other side now and we'll do exactly the same thing on these. So L U Okay. Let's will leave those, we'll just pack them so Islands. Sign them either way. Now let's come to Let's do think we can probably
get away with Elise. Go grab that one needs
you can see by mistake. So I'm just going
to grab this one. You want UV project. Pretty much a rinse and repeat. It's all I'm going to do now. This particular Paul, I'm
going to split this though, probably into these and
then the two larger ones. Let's see if we
can get away with. So sine planning. Go away with actually
look absolutely fine. So let's come in and grab these. But what do you can't
see is the actual limb. The way we do this now? The workflow, just extremely fast and you can see
how easy it is to put these buildings
together, doing it this way. Using lenders, ultimately
wrapping based layers, what it is this
smart UV projects. It's always been
that I think it's been improved over
time, to be honest. Um, and as I say, I wouldn't use it all the time, but I would use a F always doing something like what
we're doing here. Because I think it's speed
up the process immensely. And as long as you
already know how to mock scenes and UV
unwrapped correctly, There's nothing wrong
with the avenue. A quick way of marking things down to the
final wouldn't know. Uv pike islands. There we go. Now we've just
got these pods to do now. So a thing and I got away
with doing all of this one, I think it can. Let's
see if we count. So you won't use
for your project. I just need to check
base to make sure I can get away with
all these thing. The problem is what
actually has happened in ase needs takeoff the same. So I'm going to clear all the
seams of that grumpy again, you Let's see if they actually
interacted with them. Yeah, Now you can see
it's much, much cleaner. Now what we're gonna do is
we're going to go down. I'm going to bring in the woods. Just typing board would
lie. There we go. You can see we all
need they will need spinning round, so a 90, spin them around UV, CG-islands tab
delta tough the AI. Let's put it all
material. So it can actually say, There you go. You can see really, really nice. You can see we've
missed two here. Let's come in and I think they've actually been they've
actually been in RREF. We just didn't assign
them. All right. Good job. We sold those. And then yeah, they've been
married anyway. All right. I think find double-tap
the eight now. We pretty much don't know
on the base of that. So that's actually
gone quiet false. Now we need to do is
we're actually need to work on the actual chimney. Now you just need to decide
that this is nicely, So you need it on this side, this is going to be
where the chimney, Let's say let's crack
on with our chimney. So what we'll do first of
all, we're bringing a cube. So shift day, bring any cube. Now fold this. You might very well want to use your
actual reference. So let's bring in our reference. If I press Alt H and
bringing them or reference, one just needs to do now is
I just need to align it all. I can say that I need
to spend this round, so put this on the other side. So all zed 180 spinning around and then just bring
this and what you're trying to do is
just line this up. I find bring this for instance, just to that press Control one, is it no, control 33. Is it three? I don't
know where I'm gone. There we go. Yes, I am. It's just very confusing with it being there, but
let's pull it down. Just aligning to
the bottom of that. And you can see now where he's actually going to call
it. It's gonna come here. Let's pull it out a little bit. And hopefully you can see now they lie no, narrow
enough Perfect. So we can get this
now where we want it. So let's bring it down here. Unless press S and wine, play out a little bit. Unless now look how far
that's actually out. You can see it's a myeloma and
we don't really want last, but let's deal with the height
first. That'll be easier. I'll come in, grab
the top of it, like so three and I'm
gonna pull it up. I'm going to press E
just to extrude it. I'm going to press
S and the only one coming in on the
wide because I wanted to keep the I don't actually want it bending in this part. I'll do I you might want
it to I'm not so sure. I think I want it
quite flat going up. Let's have a look where
actually it looks like we do bend it in. So if we do in this part in like so I was told to you if you want to live that
you might want to live that? I don't think I do personally. I think I'm gonna
keep it alive now. I might change my mind,
but we'll have a look. Okay, so let's press three. Press E. Let's press C again. There we go. Now let's do the final. So it's so Alt Shift and click. If I'm not gonna do that again, actually, I'm going to just
hide this out the way. I'm going to bring this in Fez
to where I want to is way, way too thick of the
moment as you can say. Let's grab this and bring it in. I think that's about
the right thickness. And I think if I brought
this and as you can see, I think it would
make it a little bit too thin and that's
what comes in me. I think the one
thing that we can do if we press Alt H and look
at our reference one small, so I'll take a look
at our reference. Yeah, that's how
far it's going in as you can see.
Sorry, it's going in. It's about that we could bring it in a little
bit more thing. I'm just going to
move my reference. I'll come back to my
chimney, press the top. Maybe just pull it a little
bit more, making it a little. Yeah, I think that
looks just a tone bend. I'm happy with that. Now let's come into the top. I'm going to press Alt
and tests and just pulled out probably a
little bit too much. So I'm just going to press
Control Z alternate, went out to shift just
to pull it out. Like so. Yeah, nothing that
looks much, much bad. Alright, now let's make
the actual chimney. So what I'm gonna do
is I'm going to press, I bring it in, then I'm just going to
illustrate it down. So e, bring it down. Like so. The final choice
where you could do, I guess, as you called, Alt Shift and click and
grab this. Pull it up. Yeah, nothing actually
makes it a low-pass, so I'm happy with that. All right, so in
the next lesson, what we'll do is we'll get
the rest of this bill done. We'll get these parts, don't, we'll get the the Boolean that's gonna go in here and just finished building this out. Of course, we've also
got the witness to pull in and we've got
the actual layer, the steps and things like that, that need doing bulk. We rarely, rarely get on
with this now and you can say it's really
coming together. All right, everyone, so I
hope you enjoyed that and I'll see you in the next
one. Thanks a lot online. Okay.
37. Working with Booleans: Welcome back everyone to blend a three the ultimate
medieval seem calls, and this is where we left off. Alright, so now let's first
of all make our Boolean. I think that's gonna make it
a little bit easier on us. So what we'll do is,
I'll, first of all, I've got my cursor, as you can see it
on my orientation. So if I press Shift
S testis selected, and I'm also going to go into modelling while I
actually create these, just gonna make easier
and I can see a bit more. I never presses three I
think is hide my reference. And I can see exactly
wondering, alright, let's press Shift and
we'll bring in a cylinder. Comes in 18. I think actually 18 should
be absolutely fine. All why 90 spinning around? Let's make it a little bit
smaller, Something like that. Basically what we want
to use this fall is to actually put all our logs
inside and things like that. We wanted to commend probably just below
this halfway point. So I'm gonna pull it
down a little base, so somewhere around here. And then what we wanna
do is we want to actually cut this
way a little bit. So what do I mean by that? I mean, let's get
rid of this side. And this side, let's
first delete faces, and let's now come to
the halfway points which is here, and delete faces. And then again L, delete versus now let's
call these parts. Let's press three just to make sure they are level
which they all, let's press bring
them straight down with Z just to make sure
they're on that z-axis. Let's press F to fill them in. And finally, now
let's fill these in. So grab this side, press the F4 on this side with all shift click
press the F4 on top. Now you should be able
to pull that into place. Now you want it to come. So it's not actually
going through the wall. Of course, you don't
want anything live out, but he wanted to be
long enough to make sure that you've got logs in
there that look realistic. So we might have to bring it up. You can see probably you can see there's a bit of what
that poking through, what don't want that
would poking through. So once it through, Joel's
talked to the board, probably something like that. I'm probably thinking
I need to pull this out just a little bit. So I'm gonna do that one
we're gonna do is I'm going to grab it from here. I'm going to press
Control T here. And I'm going to press
Control click to here. And I'm just going to
pull it out slightly like so I just want to make sure there's enough
room in there. So it looks realistic
with an orthologs and things stored in there
because it gets too thin, the lobes would be really, really dinky and we
don't really want that. So now let's come to this park. I'm going to press Control leg, all transforms, right-click
origins, geometry. And now we're gonna do is
you're going to actually bring in a Boolean modifier, Boolean, grab your cylinder. There we go. Now let's
apply that with control. Let's call him to a Boolean,
delete out of the way. And you should end up
with something like that. You can see it. What a sad about this plan curve would molar I'm going to
do is I'm gonna come in, I'm gonna grab, press Alt H actually grabbed
this plank award. I'm just going to
delete it because I really don't need
this one anyway. So delete that says, There we go.
Something like this. Alright, let's get
some materials on this straightaway so we can actually see what it looks
like and then we can put some wooden planks
and things like that. So what I'm gonna do to make
this a little bit easier, I'm actually going to grab this. I'm going to press Shift
H to hide everything else out of the way just so I can work on this a little bit. I'm just gonna make
easier as you can say. And then one we're going to
do is I'm gonna come in, grab all these going
all the way around, all of these going
all the way around. I'm gonna right-click
a magazine. I'm going to right-click,
Right-click mock scene. And when I then take
off the seams on here and here, so
right-click placing. And then I'm gonna also delete the Bulmer. Really
don't need that. Delete faces. Now I went to there,
I'm gonna see if this actually unwraps correctly.
Let's see if it does. We might need to actually
bring gain and other see, sometimes on things like this, you can actually get
away with unwrapping a with smart UV project. It just won't harm
wrapped correctly. So one wins. There's instead, I went to my seams out. So Alt Shift click,
right-click, moccasin, and then I'm gonna
come down, grab this, grab this, grab this
right-click boxing. And hopefully now that
should be an all to unwrap. Sometimes it is,
sometimes it's not. Now, probably not the
same in here as well. This one. And now I'll
try right-click boxing. Alright, so let's see if
that going on right now. So what I'm gonna do
is I'm gonna come in without L, L, and L. And I'm basically just
grabbing these from here. Now you can see I do
have a little bit of a problem in that
this is bending here. Now, I know this isn't the wall. Well, I hope it's in the wool, but still I want
to straighten now just a little bit before
we actually carry on. I'm gonna press one. I'm gonna pull this out just
straight up a little bit. I think it's in the wall, so I don't think I'll be a problem. Let's go back in and
grab all these now. Like so, let's press
U and just UV, unwrap it the normal way. And let's now go to UV
Editing. Let's zoom in. So first of all, a DLT zoom in and let's see, well these are actually
going to round like so what I'm gonna do is we
want to bring it down. I'm gonna put them gray. And then I'm going to
click the down arrow. I'm gonna put this on wool. We don't have any cobalt.
What's it called? Stone, is it because
we need to change up? Yes, it is. It's called stuff. So I need to change that. Let's assign it first, and then let's rename
that to instead of stone. I'm also, while I've got this, I'm going to right-click and
I'm going to mark as I said. Okay, so now I'm
gonna do is I'm just going to look around and make sure that they're
all going in the right way and you can see it not the null. We can see that these, all these ones rounded,
definitely not. So I'm gonna grab this, I'm
going to spin it around. So all 90 g, I'm just going to put it near enough level with the others. Just sorry, it's kind of
leveled off as you can see. The other thing about this is we haven't got bevel on yet. So I'm going to
bevel it all file. I'm going to bevel
it off on my own. Now the VM re-uptake, so I'm just going to Alt
Shift, click, Alt Shift, click, Alt Shift click, and now try bevel on it. So Control B. Let's see
what that looks like. And you say now that actually looks really rounded
and quite nice. We didn't really want
it straight too much. And it all fits together is while you
can really, really calm, see how the seams mall
there anything left eye, it's actually gone really well. All right, so now
let's call also right-click Shade Smooth
unless bring gay and smooth. And now we can actually
own wrap this fall here. So I'm gonna come in and
grab it with you on Ralph. Let's say, let's say Arial. Click Assign. There we go. Now we can say that,
that way, way too small. So let's press a, we bring
them out a little bit. Just try and measure them. Be round about the same size
as the one on the outside, like something like that. Now the other thing is
I want to press Alt H, bring back everything
else because you can see that these
breaks that rarely really too big in
comparison to be able to. So we need to make sure
that they're correct. So what I'm gonna do
is I'll just come in, grab the whole thing like so. And then walking there
is a compressive S Now. Bring them out and just make
them a little bit smaller, like so. All right. So then more in line, there
are a little bit bigger, but they probably would be
a little bit bigger because we're actually
building a chimney. So we've got to make sure that all right, Let's
come to this bike. Well, now, grub dot on the
route, and there we go. Let's click sign on the wall. Let's spin it
around. So all 180. So we go to the right weight. Let's press S. That looks
really, really good. The last bit now let's put in some stone while the result grab all of this going all the way
around with hold shift and click Control plus Control
plus Control plus. And it's going up to there,
which is fine by me. And then while I wanted
to do is I want to bring in a new material now, new and I'm actually going
to call this one stone. And that's why I changed the
name of the last one stone. Let's go to Shading. Let's zoom out a little bit. Control Shift and C. Let's
come to where it says, Well, we've got one
that says stone here. So let's bring that in. Select Shift, select principled. Zoom in on this because I've got everything
selected for some reason. So I'm just going to click
select delta zoom in, and there we go. Then one way to do
it, I'm just going to sign this as stone
when it comes to you. And I'm gonna small UV project like so because it is stone, you never going to see the
difference there anyway. Alright, double-tap the. There we go. Looks
really, really cool. Let's now think about
we need some blocks in here for where our logs are actually
going to be stored. So let's say Come in. I'm just some, just something
very simple actually. I've got my cursor
in there anyway. So I might as well
press Shift day, bringing in a cube, press the S BAD. Go back to modeling because
I'm not gonna actually, I didn't emphasize the moment on these because I wanted
to be doing the rest. I'm actually going to also
high vowel the white. And then we go and then compress three and put these into place. Now the logs hold is I wanted to be a little
bit smaller than this. And they're going to go in
the sun, the wool like so. I'm going to press S and X, hold them out, hold them
back into the wall. I'm gonna grab my mom, bring him around
because I've gone out in the air how big
the logs needs to be. So it can actually
say from this man studying whether these
are too thick or no, whether there needs to
be pulled bit lower. I think that looks about right. I actually now I'll do is
I'll press associate day. I'll bring you over
to the other side. Stick it in the wall, like so. And then I'm going to press
U to bring in a cube. And then S and Z, like so, and then S and Y. Let's stick it on top of it. We go, so it's level on
there and then pull it back. Now let's put a little one in. So Shift key,
bringing another one. Alright, that looks really good. Let's grab not all
my unless grab this, this wooden faces.
Press Control J. Let's press Control
a or transforms right-click region to geometry and modify it,
bevel null pointer. Let's apply that with control. Let's press tab,
grab everything. You smart UV unwrap. Let's bring in all Maine
would would spin them around. So a 90 UV pike
islands dot zoom in, top, double-tap the eye. There we go. All right, I'm really, really happy
with ABA is coming along. Now in the next lesson then
what we'll do is we'll build this kind of shelter
where he's going to actually coat the planks, award and things line up. All right, everyone. I hope you enjoyed that
and I'll see you in the next one. Thanks. Bye bye.
38. Planning out the House Shelter: Welcome back everyone
to blend the three, the ultimate medieval sinkholes
and this were left out. Now I just noticed
that I'm actually got some markings on
here as you can see. So I'm just going to
change those actually. So I wanted to come in and grab these and just have
a look why that is. So then it looks
like they're just probably just need moving up. So I'm just gonna grab them, shrink them down just
a little bit and then move them up somewhere
else and safe. That's got rid of them
which has knocked. So I'm just wondering
for several of Sica is not actually those as you can see if the
other one so I'm actually just going
to put those back and then I'm going to look at which ones they actually
it may be this one. Let's see if it's this
one. Yes, it's this one. You can see the reason
is because it's actually split this up into two parts. So let's just see if
it's that one as well. Yes, it is. All right. Let's come in and let's see if we can unwrap this one a little bit better
than where it is. I'm just going to press
you smart UV project. Click OK, and then a 90, spin them around UV
and pack islands. Let's turn off
rotate again because I've loaded up my lambda.
And there you go. You can see they're just a
tone band now sometimes that happens and you have to
go in and actually fix them the same for
these, as you can see. We're just gonna read them,
wrap these smart UV project. If you see anything like let's
just make sure you fix it. Because obviously we're
gonna make taken this through the scenes
and things like that. So you might as well fix
them when you see them. I'm just going to pack
items again on this one. And now that one should
be fixed as well. Alright, so now let's
create our actual shelter. I'm gonna do is first of all, I'm just going to
build it out the same way as to do everything. I'm going to put my guy here. Remember it's going to
have a tree stump here, is going to be of an axis, is gonna have some
logs down here. So it needs to be a
shelter where he actually caught ward base layer
is worse than I felt. So let's command
and first of all, I'll bring in a plane
as I always do, just to get the sizing
of our wants it. I think the size will be probably from here to
here, something like that. I'm going to press S. Why pull it out? And then what we want
to do is I'm gonna pull it all to the height, which is probably going to
be something like that. With this, you don't want
to actually too high, it would be fairly
low overhanging. Alright, so the next thing
we can do is press tab, come to the edge loop here
and just pull it down. Now I'm looking to
do is just pull it out to the size that
I actually wanted to. And it's probably going to
be something like that. It can imagine the range of benefit your wallets chopping up here doesn't have enough room
on the hair to chalkboard. I'm thinking that if he raised the Naxi probably would
have quite enough room. There. All the things
that you need to actually be looking at when you
thinking of doing this. All right, so now
we've got that we can actually start
building the house. So the first thing attempt to
do is we'll suppose so I'm going to actually grab the whole thing on
the impacts not well, I'll just grab this idea. Press Shift S, cursor
selected Tab Shift a, and let's bring in a cube. Let's make the cube smaller, and then I'll bring
it to this side here. I'm going to make
it a little bit. And then because it
doesn't have to actually be that thick on these because it's obviously
just hold it up there so it's something you will have put together on
his own actually. So you want to or
need any help to build like the top of the
house or anything like that. All right. So let's pull this up
to something like that. Then while I tend to do
is I'll do beside now. So Shift D, spin this around. So all why spinning around, bring it up to where
I actually once it and now I can actually
make this smaller ones. I've got this in place. I'm going to put these on top of that rather than
this on top of that. I think I will I think
I'll do it that way. What I mean is I'll
pull it down here. Spin it round to narrow enough the right angle, pull it down, then you can say it's
going to have to be pulled back into the wall as well like so I'm
just checking my angle out. Why? That looks about
right angle. Pull it up. It doesn't have to be
perfect, of course. Now the next thing we want
to do is I need to think, don't want this overhang in and this part not overhanging. So is this, it would probably bet this walls over
the top of this, it would just be stronger. So we have to think of that
when we actually do this, what I want to do is I'm going
to grab the whole thing, press the button, make it
smaller, then pull this. So it's actually
underneath like that. So you can see now that this, this has been supported by
this piece of wood here. And that's why I'm
saying it's probably gonna make it smaller. I'm going to actually
hide my bottom out, grab the ball me, and
then just pull this down just to make sure it's
in the actual floor. All right. So I'm
happy with that. So thought I think I am. Now let's do the next support. So I'm going to again grab this, I'm going
to press shift D. I'm gonna pull it back,
press the button, and then just spin it around. So all y. And let's just spin it around. And it might obviously need
to make this smaller as long as it goes into this here, this is where I'm
looking to put it in because that then is
a perfect support. You can either have it
in the top of there. That would be a support or economically in
kind of like this. That's also a good way to support things and what they
would have actually done. I think I'm going to
put mine into this. I think it's probably needs
to be a little bit wider. I'm not sure about
the thickness. I think the thickness
should be fine. So what I'm gonna do is press S and X is not coming out on that. I don't know why it's doing not necessarily assume
y, there we go. That's better. So something
like that thickness, I think it's gonna be fine. And now let's do let's
pull this down first. If we pull it down and it
can stop near the base, I'm gonna put this on my normal. You can see now that follows
that way now so I can pull it into place if Adobe's
properly like so. And there we go.
Let's dive in place. Alright, so now we've got this. We need a palette that
goes probably the bark, probably in the middle
and on the front as well. So let's put this over
the other side first. So we've got all of this join, Let's press Control
all transforms, and then right-click set origin to 3D cursor because we
know that's in the center. Come over Adam, modify it
unless bring in a mirror. Let's put it on the
y takeoff the x, and there we go, We really
cracking along with it. Alright, so now let's bring
in the other pieces of wood. So while I've got my
cursor in the center, shift a, bringing the cube. Let's make the cube
March smaller, and let's pull it back
to where it needs to go. So in this part here, like so and don't worry
because the plants Award are going to
hide the top of that. Just make sure you're happy
with the actual thickness. So I'm going to press S and Y, pull it out like so, and then just pull it
down just a little bit. I'm also going to save
our work as well. Don't forget to save
it out and then just make sure that the bottom
of it is in there. Like so I don't want it poking through or
anything like that. I'm actually thinking
I'm going to rotate text all in white. I'm just going to rotate it
a little bit like, alright, now I'm going to use the
same piece of what's on, which is press Shift and date. Let's say I'm still a normal
mechanic, pull it down. Now we count bytes,
it's a bit closer. So I'm gonna put this
piece in the middle. I'm gonna have this pace
a little bit smaller, but before I do that, I'm going to press
Shift D and bring it forward into the front hand. I'm going to have this
on the front lines, so that's really nice like that. Then I'll just
shrink this down and then pull it out, like so. All right, I think I'm up here. Now. One thing I need to
do is pull this out now. So I'm gonna come back
to this part here, grab the from and just pull
it out so it's overhanging. And then when I went to
do is I want to split yourself now. So Control. Left-click, right-click,
Right-click, and we'll mark a scene
and then control law. Let's make our plank
wooden planks of wood. Left-click, right-click. And there we go. Again,
moccasin, like so. And now we'll do Control. Three, left-click,
right-click, control law to left-click, right-click. Alright, I think I'm
happy with that. That's gonna look really nice. So these are the planks
of wood, of course. So now what we
need to do is just come across and
grab all of these. So if I press C and just go across all of the bottom ones, split those up with Y, G just to make sure display,
I always do that. And then one went to do and
I split each of these off. So I'm just gonna go LL
every other one might we've done all the way through the process of building
these and then press Y, G just to make sure. And then a. And now let's have a look at
how they're gonna look. Now you might want
these pieces of wood to overhanging a little
bit on this side, we can actually really
do that if you want to. But for now what I'm going to do is I'm going to press S and X and bring them
in, making sure, first of all, among
global and making sure that I'm on
individual origins. And I'll press S and Y, bring them in like so. Now let's come in and also we're going to have
to split them off this way as well as you can see, but you do want them to be only even so what I'm going
to do is I'm going to press S and X and just split them up very
gently, like so. And now let's make
them a bit uneven. So I'm going to call
them my proportional. I'd say I'm going to call them. I'm gonna press seven
square over the top, making this really hard for
me because I'm in the UV map. I could have been in modelling. I'm gonna just go into
modeling and make this autonomy easier because
I can see so much more. All right, so now I'm
gonna do is I'm just going to move these. As you can see, because I've
got my things so vague, actually worked out
really, really good. Alright, so that's
looking really cool. Now to lift them up, I'm
gonna make it a little bit smaller because
it's gonna be a thing. Not right. Then
I'm going to press Control said and then let them. All right. So I'm
pull this one down. This one. Because I want a
little bit more control. I don't want small line now, these will be just
probably all plants won't die align around
no, something like that. Alright, so now let's come in and take off
proportional editing. Fact, could we leave it? I'm just going to put
this on normal and I'm just going to
pull this five, pull this one back. Let's see. Actually I come, I'm going
to print them random. Let's see if I can get away
with just randomizing them. See if it works any better. Might actually, there we go. Actually, it does
look like it works. Donate either myself. All right. I'm happy
with them right now. What we need to do is actually give them some thickness
like we normally do. So let's say press Tab, press Control a, and
let's all transforms. And then right-click
the origin to geometry. Let's bring in modifier, so add, modify or bring in
festival, a solidify. Let's pull them up this way so they
wouldn't be too thick. The ISA would be
relatively thin. Again, he has created
these gonna hammer a load of nails in these
and things like that. So just bear that in mind. I'm modifying a bevel, no point O 11 naught
point, naught one. There we go. All right, I'm happy with that. Now the next thing we need to do is bring these obviously closer together and bringing close
together on here as well. So first of all, I'm
going to grab them. I went to press S and I'm
going to take off that first. So let's bring them
closer together. Like so why is why is the opinion with
the actual loads of lines on that is because you've got a normal and what it does is it tries and pulls them out individually
on the right axis. So that is another
handy tool to have. Now let's pull them
out on the x-axis. You can see here, because
I've got a normal again, if a process an x, it's actually following that actual line. That makes it really,
really easy then to pull them together like this. Now the one thing you just
got to be careful of this is that they don't overlap
or anything like that. You want some gaps in there. Basically, you can see how
nice that is actually located. Let's also as Shade Smooth
and let's say for on, autos move on, and then it's
gonna look even better. Now you need to make a decision. Do you want these overhanging over here or do you
want it like this? I think I want
mine over hanging. So I'm gonna do is I'm
gonna problem global. I'm going to put this on medium. And then when I pull
these out now, so I semi, I'm gonna pull them up from the center and I
want them slightly, slightly overhang itself,
something like that. Alright, there we go. Really, really easy to do. But now on the next lesson
we'll do the numbers obviously will
bring in materials, textures and things like
that will bevel these off. And then we'll get on with the tree stump and
the actual logs. All right, everyone. So I'll see you in the next one. Thanks.
39. Creating Realistic Tree Stumps: Welcome back everyone
to blend the three, the ultimate medieval seen close and this is
where I left off. Now let's come in and
do these parts first. So let's just first of all, make sure is that
Marist alanine essays. Let's press Control. Let's then join all of these up. So all of these press Control J, G, just to make sure you've
got everything which I have. Control a then all transforms right-click set
origin to geometry. And finally now let's come
in and bring in a Bevel. Let's put this on naught point, naught one. And there we go. Let's apply this. And let us come to these
planks now and apply the solidify and
apply the devil. Let's join it all up
now. So Control J. Finally, let's just make
sure we go ultra smooth on, smooth it off like so. And now we can name this. So
what we're gonna call this, we'll call this shelter. Wouldn't shell. In fact, we'll call it
shelter then wooden. Now why are always do that is I always called it
the name night A's and then followed by
what it's made out of. And I suggest you get in
the habit of doing that. And the reason is because
if you searching for, you don't want to be searching
for wooden gentlemen, you want to search
for shelter because it's more direct basically, you said for shelter and
then you'll have a list of shelters and then
wooden, metal, etc. Rather than if you
search for warden, you'll end up with tons of
things coming up broadening because there's a lot of things that are
made out of wood, so there is not to bear in mind. Now let's do the top
of the shelter face. So what I'm going to do
is I'm gonna come in, I'm going to grab, I could
probably get away with doing. All of these are quite small and they said, Well,
let's see if we can. Obviously we're going
to give them the type of wood I'm gonna do is
I'm just going to press U, it's right, UV project. Come over to my UV Editing. I'm going to zoom
in and I've loved, I think he needs to
spin them around. So all 90, let's make sure that packets or UV and pack islands. And then we'll come in with all materials and
bringing in the woods. So let's just make sure they're
all going the right way, which they now let's come
into the other parts. So I'm gonna grab, I'm going to grab all of this side and
then this one as well. I'm going to click Plus, and then I'm going
to click downwards arrow and click Ward. And I'm going to bring
in the word main, gonna click assign
you smart UV project, okay, and then spin them around. So a 90 and a new
v Pack islands. Now let's do the same
fold ones that are left. So L, l, L An owl. And then you and then small
UV project like okay, and then NK 90 and
UV and CG-islands. Now I just want to make
sure they're not the same because I need
to assign that. Let's just make sure
that look in different, which they all as you can save. So everything is looking
different unless double-tap. Now, I'm probably going to split these up
once I've built this. So I'm gonna move this over here somewhere
just so we've got, as I mean at the moment
it is a separate part. I mean, if a comb-over
now press adult bone, takes me down to
the wooden shell that and then all I
need to do is mark, as I said, and then we've actually got this
asset at the moment. Each can see that
we've got a lot cubes and things like that
because, you know, obviously, we can probably get away now we've joined
in this household. Let's join it all up. So I'm just going to go so many posts. So first of all, I just want to make sure that those parts, the role, they're all connected. So I'm gonna shift this one, shifts like the last one. Press Control J in natural pupil lines so you can see there that
we don't problem. I didn't check to see if
we've got mirrors on, so I'm going to quickly
go in and just check. So no modifier hide,
no modifier Hyde. There's the mirror
control way. This Hide. All right, There we go. So I'm sure there's nothing on it. Let's press Alt H,
bring everything back. Let's hide my floor now. Let's hide my reference. Don't need that right now. And let's come in
and grab the cube. Grab the last one,
press Control J, joining all of Shade
Smooth, alters, move on. And there we go.
We've got everything back to how we want to do. Alright, so now if I press G, it should be all of
that moving together, which is control
a alternate forms right-click salary
into geometry. Now we've got to
finish the house yet, so I'm gonna leave it as a cube. But of course when we've
actually finished it, then we will name it and
basically put it as an asset. Alright, so now we
need to work on is actually our logs
on our tree trunk. So let us say work on
our tree trunk first. I'm going to do is I'm just
going to press Shift day. Let's bring in a cylinder. Bringing a cylinder probably on something like a tree trunk. You can probably get away with
leaving this on faith too, because you are going
to need a fair few of vertices if you wanted to
look kind of realistic. So I'm going to
leave it on that. One we're going to do is
I'm just going to command, I'm going to press control law to left-click, right-click, like then what I'm going to do, I went to grab the whole thing. I went to make it smaller. So bringing it down
to the right size, all the natural tree trunk or something like that
looks absolutely fine. And then on Wednesdays, I'm just going to come into my face and let's put this on
random, make it smaller. You can see it's
already starting to kind of bring them in like that. And then I'm just going to
mess around with this now. So what I mean by that is. I'm just going to come in, grab something like this side and bring it in and do
the same on prompts, this one, bring it in, I'm gonna replace the top of it, so don't worry, we
just need to make it a little bit uneven line, so bring it bring it in, just don't go too
much so you end up with it too bent out of shape. You really don't want that. But obviously a tree is
gonna be pretty Ben. Just like this when
the textures are on, you really not gonna see this. Now what I want to do is I
want to bring out this thumb. So Alt, Shift and click. Let's come off and put
this on smoother than, and now we can actually
bring you out. So I'm just going to
bring it like that. There you go. Now you can see that stock tree. Look. Then finally now let us put
it on their random again. So click on random amount. Let's move this out. So if I pull this outline so you can see just how easy
that was to create this. And you'll see what
even better once we've got actual materials
and things like that. All right, so that's looking really good now if
I shade smooth, so shapes move, I'm
putting on an old system, if you will end up some lumps like that and you might
want to keep those. We'll see in a minute once we've got our actual material on, Let's as well, I think
we'll get rid of the bond. We never gonna, I don't think you'll be
turning this around. It's very simple
to create as well. So just in case I'll get rid of the bottom and the
top while there is. First of all, I'll bring the inline because you want the actual bulk
to come up to here. And then the actual would've
the tree to be here. What you want to do then is
of course press Control a and Mark seem so you've got
some control over it then. So in case you want to
actually select this, you need to right-click
and triangulate faces. And you can see now
we've not gone in, gone, and it's very easy. I'm just going to press L in
case you want to drop that. And that's the reason
we're doing that way, just speeds up that workflow and that's exactly what
we're looking for. Now this material is a weird
one as in it's altogether. So you'll see what I mean.
Let's go to material. Let's click plus a
mobile, call this as nu, and we'll call it a tree bulk. And then we'll go over to
our shown in panel now. And I'm going to
click on my French, but I want to depress dot again just to zoom
in to where I am, Control Shift and say, and let's bring in not stone, we want our tree box, so we've got one that
should say, where is it? Gross I am logs. There we go. This should be the one. I just want to save it. Yeah, this is the
one. So you can say, well, God, tree bark. And we've got the ends of our logs and this is what
we're looking for because we're going to use
this then to create a logs and of course
our tree book, we can also say that we've got an occlusion
in here as well. We might as well
actually use up. We have got one missing, which is the metallic, but we don't really need
a metallic anyway. So let's try and bring
them all in first, it'll probably only bring
foreign, which it has. As you can see, we now need
to make all actual world. Do we unwrap it first?
I don't think so. Let's actually
make the material. First of all I'm gonna
do is I'm just gonna pull this over, pull this over here, and I'm gonna grab this one. I'm going to press Shift date, bring it up again. Let's change this to o CC. Occlusion can put
collusion all that. Let's open this then. Bring in our log occlusion, which is this one here. And now let's multiply those
of light we've done before. We're going to bring
in a mixed RGB. Rgb, Let's put out there. Let's bring in our colon
output in the bottom, the base color,
put it in the top. And now let's plug this
into the actual base color. And now we're gonna do
is we're just going to put this on no, 0.617. Just let that load
offer a minute. Oh, we need a multiply. There we go. Now no
0.617. No 0.617. Gonna go darker. Let's pull that on
just to make sure. Nope, not yet. We've gone occlusion in. So let's have a look
at that. Yeah, you can say the occlusions work
and nice. So that's good. I'm just going to
pull that back. And then I'm also
gonna do is I'm also going to bring in a Gamma. So search Gamma. Let's drop this in the
base color, like so. And let's put this on 2.100400. And there you go
much, much darker. Now that might be too dark. It looks, it's
actually looking at a little bit shiny and I'm
not quite sure about, I'm gonna actually also gamma on my roughness because it
shouldn't be this shiny. It looks a bit like mod
rather than tree bark. So let's press Shift I, bring in another Gamma. You can use gamma is
basically underneath pots of these like so. Let's see if I can turn. Yeah, there you go. That's looking actually a
bit bad and I think it's probably a little bit too dark. That's looking a lot more
realistic now, as you can see, we've not got that
shine on their rarely anymore, it's
a little bit dull. And again, if you want to just
turn this down even more. And it's also probably
because we've not gotten metallic and
let's have a look at we don't want you
don't want that upper or I think
everything That's right. Let me have a look at
also seen as we're here. You can also be normal much
strand and bring the open, just make it look a lot
more realistic black bar. Alright, I'm really
happy with that. On the next lesson then what
we'll do is we'll actually unwrap this properly and that's probably going
to look a lot better. Then we'll actually start
work on the logs as well. All right, everyone,
so I hope you enjoyed that and I'll
see you in the next one. Thanks a lot.
40. Creating Logs with Curves: Welcome back everyone
to blend the three, the ultimate medieval sinkholes. And this way we left off. Now let's come back
to UV Editing. Let's actually unwrap
this correctly. So we can say at the moment this is really nice because normally blended in the UV editor normally brings in the last
kind of Mount be brought in. So that's not exactly
what I wanted. So I want to actually
change this over. You can see if I just
move this to the side, you can see it says
logs occlusion. We don't want that,
we want logs colors, so click the logs color, then you're going to have a much better idea of
what we're looking at. Now pick the biggest log
thorough reached the top of it. So I'm going to press
S to bring it over. Put that in place, then I'm going to check out. Let me press bring it
over, get it right. And the place where it needs
to be, something like not. Now I'm just going
to check out this because I'm sure that it's
not gonna be done properly. So this is how it looks. So you can see you've got
top of there on here. Let's see if it will look. You can see I've got
my ninth there, so I'm gonna make it a
little bit smaller. I'm going to press S and then bring it down land
into that place. And I'm going to grab this here, press G tab, and there you go. Now that looks really, really nice, as you can see, might be still a
little bit too dark. So we might as well
work on not just a little bit more before
we actually carry on, Let's go to shading. The other thing of
course you can do. And we've got our
render on here. Let's double-tap. It can actually see
what we're doing. You can actually
come in and also use the hue and
saturation on your color. That's something
else we could do. Let's say actually
do that first. So wherever not gamma rays, I'm going to press Shift a, I'm going to bring in
a U and saturation. I'm going to drop that in there. And then one way to do is
I'm going to bring down the, I think bringing up the volume. So just to make those, you know, those pieces of the world actually pop out
a little bit and now think we're getting
somewhere now we can actually bring down the, you are bringing up the you sprinkled to
you a little bit, that's making it look
a little bit back. Then let's have a look
at this, this gamma. Let's look at this camera now. Going to hold the
Shift button down just to get it to
where it wants it. All right, so now
let's look in a bit wet and it's looking,
really went on here. That's looking pretty realistic. I'm very happy with that. Now let's go back to mobile. And now of course we
need to rename this. So if a grub, it will
call it a tree stump, I'm will actually save
this out as another asset. So tree stump and then
right-click on Mark is asset. Now I can put my trees
don't in my assets. I can put my shelter
in my assets as well. So when I hide those
out of the way, let's have a look actually. Yeah, It did it didn't
hide everything, so I'm just making sure they're all hidden much. That's great. All right, so now let's
say I may call logs. How am I going to
actually make logs? What we're going to actually use curves is going to make it very, very easy to create lungs. All right, so what we want
to do is first of all, I'm going to put my
cursor over here. So I'm going to Shift
right-click just to put it there, just to get it. So mad, Shift a and I'm gonna come across to
where it says curve, and we're going to bring
in a pap so you can see, if you can't see
up at the top of your push up and you'll say, Well, we don't need
a curved pump. Let's put it round.
So all white. 90, that's the wrong way. Let us press all 096, so we've got more
going that way. Let's make them the right
size to start with. So I'm just going to press
S and something like that. Size. Looks looks about
right to be logs. Maybe that's even a
little bit too big. Let's make it a little bit
smaller, something like that. And if you press Tab now, you'll say that you've already got a few vertices to actually
work with it. That's great. So now I want to do is
I want to copy this. I'm going to press Shift
date over over what? I'm going to press shift D. We go shift date, grab all three of them. Shifting demands will make a load of them, and
then ship date. Let's make 12 of them. We can reuse them anyway. So something like that. Now, let's grab them all. Grab them all, join
them all together. Control J. Now we want
to do is bring them out. So again, let's come
down festival to depth. You can see you geometry
is already open here. Bring them all to make
them the size of logs. And you can say that
a fairly nice size. Now, if I press Tab and you
come to, let's say this one. So just make sure
I grab this one, make sure that you're
on. Again random. So put your proportional
editing on. Now if you press S, you'll see that we can actually
start making them random. Now the one thing is I wanted to make them individual origins. It's not gonna work.
I don't actually, let's press alt texts instead. There we go. Now it works. So old tests just
grab random ones. And then all tests showed
you how to make them badly. Random. I don't think that's
actually working too well. So what I'm gonna do is I'm
just going to go through, and I'm going to click ALT tests and just making
them a little bit smaller. But I'm
actually going to. You can see I've
got a little bit of variation in that
and that's why one, but I need more of it. So I'm going to do
now is first of all, going to look at
Turner resolution. Now happens if a term that
resolution now to one, because I don't want
too much resolution. I don't want these hundreds
and hundreds of polygons. There you go. You can see this is the one that I needs to none the most. You can say this is the thing that's making them all round. So if I put this on five-year, so now the more rounded, so I think that's
what I need to do. Now the thing is
I think I'll turn the resolution of two
to something like that. Then what we're going to
do now I'm going to apply this kind of fills
the ends of them, isn't one that says Fill ends. I'm just looking now. A full month take the third campuses can fill
the capsule using that, that will make it a little bit
easier rather than filling all these members talking rounded decide making
shoulder felt. Yes, they are. All right, so now let's go to object
and convert to match. Let's press tab.
And there we go. Brilliant. Alright, that's exactly
one of them. Is it? Well one though? Probably not. Probably not because
these cups now filled in, but we don't have any seams on them or
anything like that. So what I need to do is I
need to press Control Z, just go back, don't
fell in the caps. That will make it
much easier for me. Now let's come to Object and we'll go to Convert and mesh. Alright, now if I press Tab, now we've got more like base, and now we can fill these ends
in while I'm going to do, I'm going to come in
and I'm going to, first of all, I'll
mess around this. So let's say I grab
this piece if I come to my proportional editing and now oppress the S
button or something, let us say now you can see
we can actually get away. We're making them a lot more jagged unless exactly what one. So it's very, very soft soil. What you're doing, what you
want to just pull them in. I'll pull them
out, for instance, just to make them and
all the shift born as well a little bit on
the event like so. And that's going to
do the job perfectly. Alright. There we go. Now I'm
happy with those. Now we want the
ends of the maybe. Actually people normally
pull the ends out, but if you look at a log that
are actually pulled out, it's just a swelling where the water gets into
the ends of them. I think I'm actually
going to leave mine might not want wouldn't do though is I'm gonna come
around each of these ends. I'll do these ones first. Like so. Then what I'm going to do is I'm going
to right-click and magazine, and then I'm going
to press Alt F, and that's going to fail
all of those for me. So altough, they're really
easy way to fill those in. Now let's come to the next ones. Im route these
actually on my own. What I mean by that is Armand, my own seams on these,
it'll make it easier, I think so Alt F, so I'm gonna do is I'm going
to press Control seven, go around to the
underneath of them. I'm going to take off my
proportional editing. Grab this here,
press control here. I'm wondering is I'm
just making sure that my seams are actually going to be on the bottom where
no one can see them. And then I'm going to
unwrap them yourselves. Reason I'm doing
that is like I said, you need to know
basically how to unwrap things without
the blenders. Automatic UV unwrap, because it's always handy
for things like this. You can see that again when
you watch the video of how to unwrap things that we
unwrap them like apostle, so we don't want infinite loops. And then another words,
so right-click marketing, and you should end up
with something like this. Now if I drop them all now, in fact, what I'll do
first, I'll reset them. So all transforms right-click. So origins geometry. And then we'll do is
right-click Shade Smooth. Bringing my auto smooth
and nice should end up with something like this. You might not want these
lumps and things like that if you don't just turn
it up a little bit, should only be a tiny, tiny bit. There we go. It's not even a Faltys and
everything's smoothed off, so that's what you
probably won't. Alright, the last thing is
then that we can say that they're all the same size and
we don't really want that. It's not very realistic. Let's put on our
proportionality. And again, can we get away
with actually doing that? Probably not doing that. So let's say if we
can get away with putting this onto smooth, Let's try smooth.
Can we get away? Yeah, it's not as
smooth question. Let's go back. I'm putting
on smooth. There we go. And let's also put this
on connected only. Now if I grab one and
actually pulled up by y. So that's exactly what
one now you can see, I'm pulling them by making
them all of different sizes. Just by grabbing one part of it. Now go to these. And again, it's always the same thing. If you want to use
these on anything, you might as well
just take the timeout and make them look really, really nice because then you can reuse them over
and over again. That's another reason as well. While we've made so many of these were probably don't
want to need 12 of these, but we'll see we can
just bundle them all together and then we've
got logs and that dog. All right, so that's
not caught them. Now let's grab them all. Let's fresh you
let some rub them. And we showed if we
go to our UV mouth, have them olam wrapped
like this and you can see they're not
unwrapped correctly. Let us have a look
if I missed my ends. Yes, I have I forgot to actually market
seam on these ends. That's a bit of a
pain to be honest. How do we fix up? Probably just gonna have to In the hard way and sometimes, sometimes this can happen. On the next lesson, what I'll do is I'll come in and I'll mount my seams going all the
way around because I can't really get
rid of these now. It will be much, much
harder to do that. So I might as well
just soak it all. A mama saying, so I did figure out sorry
about that, everyone. All right. I'll see you on the
next one. Thanks. Bye. Bye.
41. Texturing Logs for Realism: Welcome back everyone
to blend the three, the ultimate medieval seeing call sign you can
probably hear outside, I've got a lot of rain actually coming down here in Cyprus. They actually faced the same
very well because we do want it to be rainy, windy scene, so
that's quite nice. Alright, so let's come in. I'm first of all, I'm going
to click on this edge. I'm gonna press the dot
born just to zoom in. And then one way to do
is I'm going to press Control click and just go all the way round and
fix those problems. I'm thinking I'm going
to Shift click it. Is there a quick way
I could do this? And I don't think
there is actually, so think I'm just going to
have to do all of these. Coming over. Shift
click, Control, click. At least we can
control-click though. I don't think that's
always been available. Speed things up because
you call him to Alt, Shift and click up vaginally
on these because obviously they've got a lot of triangles
and things like that. I don't want you to warm up
there, so it won't sit here. I'm gonna actually right-click
and democracy start again. Let's say comb and control-click or right-click on my team. I think we're nearly
halfway through, so it doesn't actually
take too long. We could have probably just
deleted the faces of the air. Maybe. I'm thinking if they would've been a quicker
way of actually doing this. I've been bought by the
time I figured it out. It maybe maybe I would
have already done this. That's the whole point of this. Let's go round. And whenever they announced, so right-click most
seeing how many people fall for nearly there. Okay. So how many
minutes did that took? About two minutes. So not
too long of a mistake. There are two
minutes long though. I mean, I've made the
mistakes after cows to fix or not save workout
and things like that to do things
all over again. So I follow not
the worst mistake of made in blend, I'm
showing you all the same. All right, so let's
get rid of that one. Right-click among
seen on the last two. And then finally
we can move on and actually UV unwrap these and get them looking
really, really nice. So among same and
then the last one. All right, now let's
say safely unwrap. So a U on the route,
and there we go. They'll grab beautifully.
It's really, really cold. Now let's put this on material. You can say, I can't see my, my, my thing at the moment. So let's put it on
there. There we go. Now we can see what they're
going to look like. Let's pull this a
little bit this way. And let's also bring
in all materials. So material will just
called a tree bark. And then we go, Let's
press top double-tap. Now you can get a real good idea what they're going
to look like now. I'm just gonna go in now
and just grab these parts. So one window is
gonna come in with L, grab all these Paltz. I'm going to basically
fit them into here. Sorry if we went to press
a, make them smaller G and just make sure that they all fit in here and
not actually on here. I'm just going to have
a low. And there you can see how well
they actually know. Now you can say, oh, we
need to do is get the ends. And then we can mess around with these lobes if we wanted to. Let's get the n.
So we'll press H, and now we'll grab
all of these ends. I'm going to go ahead and
grab them one at a time because I find that
it's much, much easier. Today. You can see that they're roughly around the same size, which is really good, can
actually grab more of these. I'm just going to look, if it's gonna be easier
doing it in that way. They're all really
good size, actually. Just shrink them down first before you actually
move them in. All right, so I'm actually
really happy with how they've turned out,
made it much easier. So L, G, G, and if you need to just shrink them down with x on the UV map, then trying to make them as
varied as you can as well. And again, it's the same
thing because you're probably going to use these.
A lot of scenes. Might as well take your
time and just make them look really, really nice. That's why I made a few
of these logs as well so that we can have
the opportunity to do. Again, if you need to use the
same one, we shouldn't do. But if you do, just
rotate it as something, just make it look a
little bit different. Say, try and use as
many as you can. Like here. I'm just
going to rotate it so all spinning
around. Thank You. Look a little bit different. This one is just over again. I'm just going to come in,
make it a little bit smaller. And of course I'll check
these before anyway, just to make sure
I'm happy with him. Let's make this one
much, much smaller. You can see as well that we've got a lot of variation in these, which is really, really cool. So I'm gonna do now is
just going to press B, grab those, GI, pull them up, grab these, the G, move them over here. Now can zoom in and
actually work on them. Now grab this one over
that and make it much, much smaller like so. Can't wait to see what these
actually turn outline. Let me again, I'm
pressing X over that. I don't want to be
doing that thing. They're going to come
out really, really nice. Some variation in the final one. I'm going to pull
this on, not one that I see I spawn bring you do. All right, let's have a look round leaves and there you go. You can say just how nice
These actually look. Now you can't see that
some of them might be like this one here. I've
actually done this one. Several of you can say this
one's not in the right place, so I don't know
why that happened. Well, let's put it in the
right place so it actually looks the same as this
one. You can say. Again, not in the right place. So I'm just going to
pull this one here. This one here. Again,
I'm going to press Tab. I'll teach and
grab this one now. Come out. And you
can see that this isn't actually own
wrapped correctly because of not versus CDNA. Good idea that we actually went around and check them all. Always good to do that out. You open around,
make it smaller. I'm going to put this in some place so S,
someone like that. So all this one this one here
I'm not very happy with. I'm just going to go in
and change this one. So a G or something like that. I'm much happier
with that primer on the other side
now checking them, they all look really
good on this side, so that is rarely, rarely good. Now, that looks really nice. So we are happy with those. Now what we need to do is
just come back to modeling, stack them all on top of each other and we will save them out. So what I'll do is I'll come in and I'll just move them making sure proportionality
and it's not on the next to each other. So let's grab three, press one, bring them over
to where they need to go. So you can see stacking them
on top of this, like so. And then I'm just going to
grab this one with edge legs. Make sure you're grabbing
them with legislators. You want to grab them all
same for this one. Like so. And then I'll grab the next one. Next one, next one. We want
again. Bring them over. Don't want to yeah, probably just gonna
get away with two. And I'm just going to
see how they fit in. Then. I'm probably going
to stack these a bit more. So I'm going to grab this one, put it here, grab this one. The reason for that is
because we're going to actually be saving
these out as an asset. So I'll warn them all
stuck together basically. Okay, like so. There we go. Alright, so now
we can say though they're going to
easily fit in there. We can have some over here
and things like that. So let's press Control
leg I'll transforms right-click set
origin to geometry. I'm not going to put these
in place at the moment. I'm now going to take this
and put it over here. We need an x as well, so
we mountains will do that. Now let's put those over there. I'm going to call those logs. We're also going to right-click
then and Mark as I said, and then drop that
asset into all assets. All right, that's
looking really nice. So what we're gonna do now, well, we'll do it
on the next lesson. We'll create our acts quickly and then
we'll probably stall. I think we'll start
printing out windows and then really
bringing this together. So we'll stop print on Windows. And then finally we've
got the door and we've got the little walkway
that walked down here, and then pretty much
the house has finish. All right, everyone,
so I hope you enjoyed that and I'll
see you in the next one. Thanks. Bye bye.
42. Planning out the Windows: Welcome back everyone
to blend a three, the ultimate medieval sinkholes and this where we left off. So now let's come to
our trees. Don't begin. Let's press Control. Old transforms, right-click,
origins, geometry. We did actually have a husband. I said, I think let's
press adult tree stumps. Actually, they're just
making sure because I didn't actually reset the transformer
or anything like that. So now I wanna do
is I want to press Shift S because it's selected. And let's just
make a quick acts. Nothing rarely a spectacular. And again, let's
bring in a cylinder. You're gonna put
this on a full team. You probably could
get away with 12. Well, let's make it
pretty decent act. So have a look at a reference for an export unfairly shoulder. Fairly simple, a
simple act space. There's gonna be a
small pulp the same. It just wants to be a kind of basic acts I want to do
is I'm going to press, I said pull it up like so
something around that size. He wants to be a handbag. You might want to do
a big avant-garde x, but I think for me, the quiet small these logs
which are over here. So maybe it's probably gonna
do it with the hand ax. I'm not sure, but maybe
it fits the C num. I'm lawful in a bit, but that's why I
wanted to control law. Three, left-click, right-click. Then I'm gonna come
down to this part here. Make sure proportional
editing zone, press the S born, bringing it in and just
pull it, pull it out. So something like that. Let's then grab this bit. Just bend it around a little bit and I'm going to pull that out. Like so and I think, yeah, nothing that looks up. So I found a little
tiny bend on that. All right, Now let's come in and think how big the
oxide wants to base. So first of all, I'm going
to grab the center of it. I'm going to press
Shift S because it's a selected shift a. Let's bring in a cube. Let's make the
cube much smaller. Let's take off proportions. And just for now,
so we're going to bring you in and I'm going to press S and X,
make it center. Then let's make it. Why does so S and Z? Where can I really kind
of weird angle here, but I think we can
get away with it. So something like that. Let's pull it out
a little bit more. The length that we
actually won't say. Let's press Control L Now, bringing a few edge loops. So three edge loops come
back to the front now, and then we'll pull it out
with proportional editing. Just to get that
kind of acts look, make sure you've got
connected on them. We don't want them to
stretch this out as well. Press three on the number
pad and then press S and Z and kind of pull
it out and you can see how easy it is to get the
actual shape, but we won't. Now normally on an axis only realistically the
end that is a sharp, the rest of it is quite blunt. Got lots think about if
you press Control B, you can probably
get away with that. I don't think so. You think so? And the reason is
I need to press control leg all transforms, so control AOL transforms,
right, thanks. Origins jump straight. Now let's try that again. So Control D, you can
see just how easy it is now to actually pulled
up by and get that shape. So I'm just going
to pull it out. And there we go. It's probably probably
not sharp enough yet. I'm thinking probably
need to bring in each of these as well. So I wonder is just going
to grab each of those x. Let us bring them in. Like so. And now
you can see it's starting to look
like an actual ax. Alright, so I'm happy with that. Let's bring in the top now. So I'm gonna press a, press, pull it in a little bit, and I'm thinking that looks quite nice now needs to take off proportional editing
needs press E again, bringing it out and just
round the top of it off. There we go. All right, now let's
spin it around finally to see where it's
actually going to look like. So all x 90 and then
all x on June 18th. So that's why it's
gonna look like. So you can say that probably needs to be a little
bit more bent. So let's see if we can
bring the proportion and it's an on press three
and then let's bring it up. Let's bring out a
little bit more. I'm just going to pull this
out a little bit more. So which way do we
want to do on two coming up like this,
it down like this. I think that looks
much, much better way. It's probably going
to be slanted anyway. With the amount of
work he's doing when he's probably going
to bend it slightly. So I think that looks
much, much bad. Now the last thing we want to do is I probably wanted to just pull this and now I'm
gonna come just going to pull this end out like so. And then I'm going
to take off course and I had the same
press the S button, just pull out very,
very slightly. And then a then E, one small. So just round off that. All right, I think
I'm up to without, Let's write platelets,
shapes, move, Let's bring in alters, move it. Again. Let's personal
Charlie, ultrasounds, foams, right-click
Set origins geometry. And I think on this, again, I'm going to probably malt my own seams because it's
just going to make it easier. So I'm gonna grab this end. This end. I'm going to press
Control a mock seams. I'm gonna right-click bend
and triangulate faces. And then finally, I'm just
going to come in now and grab the, the bottom of it. So if we comb from here, let's say go all the way
round then an a thing. If a follow-up round,
ding, ding, ding, ding, all the way round to here, like so, right-click marketing. Alright, now we need to mark them seems only actual oxide, which is not as
important actually. We just don't want
it to blend it to actually market seem like going across here or
something like that. So we want this to be pretty
much straightforward. So I'm just marking a
scene going all the way around to here,
right-click MCMC. Let's just hide this
part of the way for now. So h out of the
way, let's come in. We might as well delete that. We don't believe that face.
And then it's gonna be making a little bit easier
to actually unwrap this, okay, so I'm happy with that. I've just missed the same
there as you can see. So again, I'll come in. Right-click on mock Zoom. I'll teach, bring
everything back. Eight, grab everything, and then I'm just
going to press U. And this time on-ramp, we've unwrapped it
basically ourselves. So let's go to our
UV Editing now. We can see how that sexual
and I'm hoping that so let's press Dalton the numpad so we can
see what we're doing. And that will bring in
a couple of materials. So the first one we'll
bring in is obviously would bring in Maine would. Let's press tab. And you can
see that looks really nice, albeit you can see the resolution
on here is not correct. It's it's fall to it needs
to be more like this. It needs to be an ax wave, a lot of green in it. What do I mean by that? I'm going to grab it. I'm going to make it smaller. And now you can say that's
looking a lot more realistic. Even if there is a
little bit blurred, it still looks more realistic. Now let's come in and
click Plus down arrow. And then what we'll
do is we'll do, and I think probably dark IN, let's see what that looks like. So what I'll do is then I'll come in, I'll probably get away. We're just grabbing
all of this actually. And then assign, there
you go. One acts. Now let's see if we change the ion over to
the lighter line. So I am going to look bad. Probably, so, probably, so probably
looks better like that. The last thing I'm doing is
I just want to check this. I need to make this bigger. I think. Now it looks more
realistic as you can see because it
was a bit too small. Yeah, I think I'm
happy with that box. It looks like he's actually
creates them himself. Alright, so that's done. Let's come back to
where modeling. And then we'll grab our ACS. We'll call it acts like so
we'll make it into an asset, and then we go another asset. Now, now let's grab
our tree stone and let's put them over here because we'll bring
them in into the same. So I'm just going
to kind of placing things over just out of the way. And the reason I'm
doing that is because obviously we're going to
use them in the scene, but also you might want to
use them in your own scene. So I'm just moving everything
in kind of a way where it's just nice and in a nicely ordered that's
basically wondering, all right, so now
what we need to start on a's are actual Windows. Sorry if I press one
on the number pad, I'm going to put
a window in here, and probably a window
in this point here. So first of all, we need to actually create
all holes full or Windows. So let's get on with that. Now. If you look in a log
cabin in more than likely the windows
are actually square. They're not gonna be like when you normal
home where you've got rectangle windows are and you can let them
swallow wonders. I'm just going to
grab both of these. I'm going to press
Shift S because it is selected and then top and then Shift
a and we're just going to bring in a cube. Let's press one just so you
can see the size of this. And the window of
course, isn't going to be the whole of this. And it's also going to have a frame and that's
very important. The size of the window
is probably this big and the frame then it's gonna go round the
outside of that. So just take that into account. So I'm probably going to make
this a little bit smaller. My frame is gonna
come around there like so that's one base
you're looking at. So let's create that frame first because then
that will make it much easier for what
we're trying to do. So I'm going to bring this out by grabbing this ship date. Like so, press one. And then what you want
to do is you want to create this bigger. So if you press zed, go into wire-frame and hopefully you should be able
to see what you're doing. Press the S born,
and now you can say how big the actual
frame is going to be. So this is gonna be the window, and this is going
to be the frame. Now of course, the frame
needs to be a little bit past where it's
actually cool. So now I'm gonna press, I
bring it in and you can say it brought it in just a little bit past that, That's perfect. Now if I press delete faces, now we have 5%.
Go back to solid. Now we have a frame and we have all Boolean already to go. Now what we need to
do is we need to probably that are off creating
our window from this now, I will actually grab, I actually deleted it and I probably could have
just saved it. So I'm going to actually
fill it in again. And I'm going to press Y. And then I'm gonna
pull this out like so. And then base, I'm going
to create my window. So I want three windows in the top and three
in the bottom, so I want it pretty squared. So I'm gonna do about,
I'm going to press control law to left-click, right-click, control to
left-click, right-click. And then what I'm
going to do is I'm actually just going
to bevel these off. So if I press control V Now you can say that help
devil those off. And now I've got
little pockets for my windows and that's exactly
what I'm looking for. All right, everyone, so
I hope you enjoyed that. And then on the next
one, obviously, we will get this finished and
get all the windows and I'm sure we'll get all the
windows in at that point. All right, everyone, I'll
see you in the next one. Thanks.
43. Finishing the Windows & Glass: Welcome back everyone
to blend the three, the ultimate medieval seen costs and this is
where we left off. Now, you might want actually to have a frame
around the outside of it. And if you do want
that, just press one. And let's grab the whole
of this going round. So Alt, Shift and click
going all the way round. And then let's just press eight. Pull it out, and there you go. Now you can have a frame
as well going out. So I'm just looking
at this now and thinking that that should
go into the frame here, we'd probably have to make
it a little bit smaller. And now we just need to sync
these back a little bit. So I'm just going to
grab all of these, like so I'm going to press P and then just pull
them back live. So I'm gonna shift
pull back really, really nicely like that. Now, to put these in, this needs to go back
into this frame. This frame, in other words, it needs to be
three-dimensional. So if I grab this frame, you can say at the moment
it needs to be pulled back, it needs to be made
smaller as well. So let's get the
right size in first. So you can say the
moment we can't actually see that
frame going round, we need to actually
be able to see that. So what I'm going to do
is I'm going to probably grab the whole of the
inside, press one again, and I'm going to press S and
just pull that back a little bit just so we can see
that beautiful frame that we're trying to create. And then I'm going to press Alt, Shift and click and then S and pull this out a
little bit just to make it a little bit chunkier. And there we go. You can see it's really
starting to come together. Now let's split this frame. So I'm going to grab both
of these when I press Y to split them gene
as I always do, just to make sure the split, grab the other two
palates fresh one, make sure we're on individual origins know
cursor, individual origins, press the S barn and then
just make them smaller than won't go into those and
we're just going to extrude them back like so. And there you go. Now let's split all these off. So l, l, like pink
selection, split them off. Grab the actual frame control. All transforms, right-click the origins geometry
analysis, bevel these off. So I'm gonna call
little spinal level the mouth, naught point. Naught. Want to look at that? That looks absolutely fine. So now we can just
grab them all and bring them together
again. And there you go. You can see how easy it
is to create that frame. And basically this
Windows near enough don't control like join
them all together. Now, we can say we don't want
our actual Boolean joining, or I am going to join the
rest of them together. So control Jake and then
come to my boolean, split off now, selection
top, and there we go. All right, so I think we've
pretty much got that ready. The one thing is obviously we
do need to duplicate this. So should take, a mouse
will bring this over, because if I rotate
this now, so all dead. Minus 90, minus 90, I can actually move
it altogether, which is gonna make
it pretty easy. So if I press Control three, control three, there we go. Let's put now this in
the center of here. And do we want
this the same I'll do or want them lift it all. I'm gonna pull this back
in its place and envelope. That's where it's going to be. Um, I lift this one
up a little bit. I'm going to lift this
one up just a tad. Like so. All right, now let's join both of
these Booleans together. So Control J. Let's now and come
back to our house. And we will add, modify it and we're going to add in a Boolean. And it's going to
be this cube here. And you can see that's
what's happened. And the reason for that
is because we'd need on fast no exact. Now hopefully, hopefully
when I come in now, I should be able
to apply enough. So controller command delete my Booleans and we
shouldn't know with this. Very, very nice now. Okay, so now let's put this on material just so we can
actually see something. And the one thing we didn't
do is we didn't actually hit crayola materials first for first of all, let's
get them in place. So I'm going to press Control. Alt transforms right-click. So origins geometry. And now let's pull that back in place and just
have a quick look. Well, that actually looks like you can see it looks really, really nice and I
still have a same now. So Control a or transforms right-click origin to geometry. And these windows, you might
want to take one of them, I would recommend, and I have
it as an asset on its own. So we'll do that once we've
actually created them. So first of all, what I'm gonna do is I'm going to
make one window. So I went to make this one and then probably
put it over there. That's well, during while
there is our command, I'll press a you smart
UV project, okay? And know that everything
along Route fine, except these window panes on each ONE map
those differently. So what I'll do
is I'll come into each of these window
panes like so. I'll press one. And then what I'll do
instead is I'll press U and project from
view, like so. Alright, so now I'm going
to also split this off. So I'm going to press Control a, I'm going to mark a seem
to make sure they're all split off and hide
those out of the way. And I'm going to grab the rest
of my window, so a light. So now let's bring
in the material. So I'm gonna come in
remembering in the Woodford would like so and you can see they're all
going the wrong way round. So let's spend them all around. So let's go to our UV Editing. Let's say 19, spend
the more round, press the dot bonds and
circles zoom in an overload. And we can say that we're
still got problems in. These are going to
round the right way. Let's print omega 0 instead. So we can really see these are going around the right way. This one here, sorry, these
ones, absolutely, I'll note. So let's command and think, right, Let's spin these rounds. So the way I'm going to do it is I can say that these are
going in the right way. It's just these ones
going this way. So I'm going to grab this one, press control over this one, grab this one, press
control over this one. Grab this one. And
we can see that these ones are going in the
right way. So that's fine. I'm just going to come
in and grab all these. Now I'm going to start us
off 19th, spin them around. And then you can see now
they've been put in place. If you have any problems
with the world, go in the other way. Just check your grade on
here because you might be having a character that
goes right up to this. So you might want to check and
just make sure they're all going in the right way and I
think they pretty much off. Now the one thing is
that I would like all of these policy or at least to be a different actual shade of what I'm going to
actually do that now. So I'm going to grab all
these press Plus down arrow. Let's bring in the wood
light, so it would lie. Let's click Assign. We go, That's looking really nice. Now finally, let's
say press Alt H and come back then to
these parts here. And we're going to bring
in know the material, which is going to be
our glass material. Now you will find
now how to create actual glass or water. That is because waltzes as
some elements of transparency, for instance as IOLs and things that we are going to
discuss that a bit later on in the course
when we come to make the bucket and the actual
water for the poem. But this glass actually isn't
going to be see-through. It's going to be basically reflective. So let's
make that now. So I'll do is I'll
click the postpone new, we'll call it a glass. I'm going to touch you to
do that properly because I've got my cap stocks
on for some reason. So glass, like so. And now let's make a
new material so to or shading panel principle
Control Shift T. We go, Let's go back up one and we're looking for
glass switches here. I'm gonna bring this one is, as you can see as five, but one of them is specular. Let's make sure they use work. Let's bring all of
these in principled. Let's press the dot born. Let's assign these. So assign and we can see that dot is what they're
going to look like. Let's go around to
the other side. Doubletons. And there we go. I'm
gonna pro material. Yeah, that's exactly
what we're looking for. The only thing we
need to do now is actually unwrapped
and correctly. So we can see we've got
this at the moment. Let's just pull this over a little bit and what we're
looking for his boss, you can do a search
on here as well. So glass, glass and we want the base
color, this one here. Alright, so now what you're going to do is we're
going to press a, make these a little
bit bigger just so one of them fits in. What you want to do is you want to make sure you've got all of this dirt round hand
it fits in perfectly. Then what you can
do is income to the next one and
you can press G, you can actually hold it with x, so g x and then just move it across. Same
thing, this one. So L, G and X, and just move it into place. Let's now do this one. Again. I'll grab all
of these because it just makes it
easier to press G, put it into place, then grab this one, for instance, g, x. We just move them into the
place where I want them. Same with this one, g and x. Like so now let's do this one. We'll just move these
over just a tiny bit. So g, let's put them
over there actually. And then I can grab this
one, g and x, like so. And then this one g, x it like so. And there you go. Nice, beautiful windows don't
look in a bit Dead Sea, a bit weathered, and
things are outward. It's a rainy day. That's my excuse. That's
why they love them. All right, let's go
back to modelling now. What I'll do is I wanted
to put this window over here because you can't
see what this looks like, this one from this angle. So that should be fine. I'll do is I'll press
Shift D to duplicate it. I'll spin it around then.
So all xij minus 90, so I was at minus,
oops, that's wrong. So z minus 90, minus 90, there we go. So it should be in the center, this one should
be in the center. So Shift S, since it's selected, delete that grew up this one, Shift S and selections
Ghostkeeper upset. And there we go. Just make sure that it's
popping out enough or might need to go back
in a little bit like so. And then finally, while I'm
going to do is I'm going to press shift D, bringing it out. I'm going to press
all Zed, all the way, all z minus nine,
take spinning around, just making sure
that it's wrong way. So all zed 180, like so I'm going to call
this square window panes. And that then is because
you might note with a lot of windows when
you build in things. And you want to distinguish
between which one is which. Let's pull this
then as a market, as I said, let's pull
this in our assets. Now this window is basically
that in case you want to use it in any of your other
scenes and things like that. Alright, so that's
done now we can join these windows all to our house, hopefully sludge press Control
J, joining them all off. Make sure shaking smooth is on. Make sure that your
alters movie zone, which is alright, so now you can see it's really,
really coming together. The only thing really
we have to do is the actual door here and we have just this little walkway
that we're going to create. All right, everyone. So I
hope you enjoyed it so far. I hope you learned a lot
and you can really see what the possibilities are
with this blender. Three, I say manager. Okay, I'll see you
in the next one. Thanks a lot. Bye bye.
44. Planning out the Staircase: Welcome back everyone
to blend the three, the ultimate medieval sinkholes. And that's where we
left off. Now let's say think about all
actual dollars. So I went to do is
I'm going to call him into my building. I'm gonna come to face legs
on the grab this face. Well, I wonder there
is a just want to pull it out just a little bit, just so it actually comes
past or up to these. So I'm going to play
out a little bit more. And then webinars, I'm just
going to grab the top of it and pull it
down a little bit. Just saved enough we
can get away with that. I don't want it
sticking through. Definitely don't want
it poking through here. Anything like that. You can say is a little
bit closer to do is just grab these and we're going to do this on
the other side because obviously we haven't got
a door on your side, so something like that. Then I'll make my actual hey, go through here anyway. Alright, so now we've got that. Let's come to this part here. Press Shift S and
cursor to select it. And then what I'll do
is now press the top. I'll press Shift K and I'll
bring in a cube, like so. And then we'll start making
the top of all adults. Now it's always important
when we've pulled this Cuban. So if I press Control three, that we bring in or
human reference, and we just make
sure that this door is going to be adequate. In other words, the right size, I'm going to press
S and pull it out. And let's fit into place. Then you can say we want to leave a little
bit of a gap on the hair. Now let's bring
in our reference. So I'm gonna grab my little guy. Polymath, press Control three. We can see that he has got
plenty of headroom on there. We can see how big the
door's going to be. The dose is gonna be a fairly
big size in comparison. I think I'm happy
with the size of this because if you notice where the cabins and things they do are fairly chunky
doors Actually. I think I'll be happy with that. Alright, so now let's say bring
out the actual worldwide. So to do that, I'm
going to press all Zed. Then basically look in the
Boudin ever half-life, what ways that were
massive benefit, it will be quite thin or PE, because it would be a
complete waste of resources. If not, the same thing I tend to do is I've
got my money here. I'll press Shift S,
cursor selected, and I'm going to
bring in a plane, so shift a, bringing the plane. And then while we went
to do is I'm just going to build this out. I'm gonna work out festival where it's gonna come out too. I know my plants award, uh, probably going to come
up to this point here. I'm going to pull it
back a little bit. Gonna have some supports
and things like that. So I'm gonna pull it out because my planks of wood
wouldn't probably be into the wall on these top blanks there
wouldn't be lifelong. And then I went to do is
I'm gonna grab this now, this end and pull it by
something like that. And that sound
basically going to build out the first part of it. That won't Wednesdays, I'm
going to pull this back here. I'm gonna say that
this is the top and this is the hallway that's
going to come from here. Then I'm going to work on
the actual actual steps now. Lynch news, I want
to use this part. I'm gonna press shift D. I'm gonna pull this out. I want to pull it down
to probably here, like so, then I'm going to
press E on y and pull it out. Now, I always say, obviously are MAN needs
to be stored on here, but you can't stand on here yet because we
haven't made it in towards this wants to be a
little bit of a step here. That's normally
what would happen. Now if you bring him over and
you put him on this step, you need to make sure that each would fit on the
whole of the step. You won't have, for instance, two steps to be so small days just be able to pull the
front of the South Beach on. It needs to be able to plan his whole fee on
the steps like so. That is basically the size
of the step that you need. Now once you're happy with that, come back two steps, split off from the rest of it. So l, selection, tab it again, Control a or transforms right-click set
origin to geometry. And now let's put
this step into play. So this step here would
probably be fit in, into the wall some way, like so. You can say actually this
one goes on the needs. So that's quite how many pearls. Now let's pull it out. So L E, pull it down, so extruded and make the
steps relatively thick. There would be relatively
thick because they're old in his weight and he was probably carrying things up
and down there. So you would have to have them
relatively thick in size. Now we need to do is again, come over to Add Modifier, bringing array, put this on 0. Now let's bring
out the next one. So I'm going to bring
out the next one. There is attempt to bring it out so it just fits the end of here. So I'll put it to one. Not one. Sorry.
Yeah. There we go. And then I'll drop
it down again. How far do we drop it down? It's again talking about the
same thing too is cough. So if you look for bringing
them down, bring them down. The bottom lobe is coffee is normally where the
step would go. So you can see that that's
the bottom of his car. And now I need to
come back to my step. Let's increase. This and you can
see we're probably going to need one more light. So the other thing is
if you really want to, you can get away. If you don't actually like
how far this comes out, you can probably get away
with making it less. I'm just going to bring him
down to the ground plane. So I'm going to press three, put him on the ground plane,
crashed on child three. And now I can say this is
about, is about right. Actually, if you really want to make these a little
bit thinner, you can. What we'll do is we'll pull
them back a little bit. So l pull it back a
little bit, like so. And then we'll grab just
a space here and you can bring them
back a fair amount by making it a tiny,
tiny bit smaller. So you can see that just
making that tiny bit smaller and then just grab the amount and just make
sure that you speak, still plan on the
money if they do, and you will be able
to get away with it. So you can see it's
still plan on there. That's perfect. That's exactly what we want. Alright, so the next thing
we want is this too thick, I'm sorry, width wise. So let's pray, mom,
this one here. I'm just gonna check
like so sorry, his hands lab, but he's obviously not gonna have
his hands outstretched. So I'd say that this is
probably a little bit too big. So I'm going to do is I'm
going to grab this unless, and then I'm going to come in, grab this edge and grab this one and this one and
just pull them back. Just a little bit, like
making a little bit thin it. Alright, I think that's
the bulk in about writing. Now let's check. What we'll do is we'll create the support. So I'm going to come
in, grab this tier. I'm going to press Shift S
Kostas selected tap shift. Let's bring in a cube,
the cube smaller. And you can say now working with mucosa should be
second nature to you. Now again, why I tend
to do is I'll bring him up and look for him. Sorry for spending round. So all zed. You want to basically
to be able to lean on the top
of your platform. So what I mean by that is if a command press S
and Z, pull it out. You can see now he would
put his hand on hand. Let's make this
down to the floor. I'm just going to grab
this control three, pull it down past the
ground plane which is here. Look at the thickness, is that going to be holding things up? I think I think it will be. Now let's grab this and press
Control three and shifting. And let's move it
to the top Paul. This space award here. So we need to pull
it out little bit, something like that is
absolutely perfect. Alright, so now you can see that these are probably a
little bit too high. So let's bring in each
one down, like so. And then let's bring a
piece of wood into here. So Shift S, because it's a
selected shift to a cube. Estimate it small f seven
to go over the top and then S and X make it thinner because these are
planks of wood not posts. I'm bringing it down. Sy we go now you can see that he would put his hands on it and lean over. And that is exactly what I want. So now I'm gonna do is
shift take, bring it down. Like so, you don't
fall through that. And then finally, we need a
support in post along kids. So bringing it down to here. And what you want with
this supporting postdates actually to be a
little bit thicker. So it's just a tiny bit. So S and X pull it out a little bit so
it's a little bit chunkier. And then essence
ed and make it a little bit thinner
than this one. And that makes it actually
looks fairly realistic than wanted to do is I'm
just going to pull it down a little bit, like so. All right, so I'm
happy with that. And now we need to get this
supporting post over here. We'll come, we'll grab
this one without Shift D. Because it's fairly small. This we don't actually want too much too many supports in it. Again, well, I tend to do
is I try and get this to be the same height so
you can see it. It's, it's probably still
a little bit too high. It should be where
waste is these posts, maybe down a little bit more. I'm gonna pull this down
just a little bit. Like so. And then what I'll do is I'll
put this guy on the bottom one and then pull
this post down. Control three again to
where it needs to be, which is roundabout.
Roundabout, right? Alright, so now
let's see if we can actually get this part. So I'm gonna come to this pop. I'm going to press L, ship date. Pull it to grab
the bottom of it. Press Control three again, and then just pull it out, pull it into place. And then just so
it's kind of the same going all the
way up where it actually suppose
those steps like so. Realistically this should
be more in the middle. I'm going to grab
the whole thing, going to pull it up like so. And you can see already looks, looks at home that I'm gonna do is I'm actually
going to put it, put it there, and then I'm just going to grab
the top of it. Press Control three again. And then I'm just going to
pull the top of it, like so. Now you can see it
looks a tone back all these steps poking out
a little bit too much. So I need to pull them in
and I'm gonna come in, grab that because we're
still got the array on. There we go. And what you would
have these probably some bolts going
down each of these I think we're a lot the
bolts and actually just seen as will make you look a
little bit more realistic. Now we've done that, let's put the actual top of the song. So all I'm gonna do is
I'm going to grab this again, went to press out. I'm going to press
Control Shift D. And let's see how this
poached actually fits in. So you can say it needs to be just a tiny bit higher because it needs
to be about there. So let's bring it in just a
little bit higher than that. You can see just how
easy that was to actually get this into place. These basically are
going to be supported with the ball and
with this post, you might want to
pull up some extra support and things like that. Well, think for me,
I'm pretty happy with how this is turning out. Alright, so I'm gonna
go all press tab File and save this out, and I'll see you on
the next one. Thanks.
45. Finishing the Staircase Asset: Welcome back everyone
to blend the three the ultimate many
evils scene calls. And this is where we left off. Alright, so let's now carry
on working our way round. So what we'll do is we'll
grab both of these, will grab all three of these, Shift D and then all 90. Let's spin them around. Let's pull them then
into the center of that, and that's then put
them into all poach. Now I'm thinking it might be better on this
to pull them this way, so they're actually
against that like so. And then pull this post
little bit over here. So I'm going to do,
I'm going to pull my post a little bit
over that like so. And I think that looks
much, much better. Alright, So now let's
level these up. So we'll grab these
posts told him into place and then grab
all plank thing. That plane is actually
separates a days. Then you need to
work out which way these planets are,
what are going to go. The obvious way is
this way for me. I don't think there's any real anything really all
going about that. I think it's just going
to look a lot like that. One thing is you might want just one post at the
top of the year. So I think I'll do
that just for realism. So L shift D, grab this over here and
just put it on the Neith. So once we underneath something live out and then
essence edge just make it a little bit like that and it's
going to fit into there. So I think probably pull it this way as well
just so it fits in. Alright, now let's do the plane. And then we'll have
a good idea of what this is gonna look like. So we'll press control law. Let's have a look. How many planks on
something five, something like that.
Right-click moccasin. Let's bring in this way. So three left-click. Now what we'll do is we'll
just split them off. So l p, not p, sorry, y, g split them up loud, but that'll be easy at a, and let's put it on individual
origins and then S, Y bringing the main, put it onto random, so random takeoff
connection only. And you can see now again
how quick this actually is. So let's bring these
back a little bit. And then let's bring
them forth as well. Make them a bit. They don't even. Alright, so now let's press Control
a or transforms. Right-click the
origins geometry, add in a solidify. And let's bring it
down probably to here. So let's pull it down this way. Holding the Shift born
again, something like that. Yeah, I think they're
going to require chunky. I think they're looking
absolutely fine. So I'm very happy with those. Alright, next of all, I wanted to do now
is bring in a bevel. So at modifying bevel and we'll pull out nope, 0.1 length. So maybe, maybe it's, let's put it on my object mode so it
can have a little low. I think that's still
a bit too much. So what I'm gonna do is we
want to put a naught point, naught, naught five instead. Yeah, nothing that looks
at home buyer like that. Alright, now I'm going
to do is I'm gonna grab them all x and y. Let's take off this. We don't run them on S and Y. Let's pull them back together, like so. And there we go. That's looking really nice. Finally, let's put in
those bolts that we talked about and then we'll get
these parts finished off. I'm going to press Shift
S goes to selected shift, a lead Spring in a UV sphere. Let's put it on
something like 128, like we discussed before,
and find the van. Let's delete the halfway point. So here, delete faces, got at the bottom
of it, L, delete. It says L, grab the whole thing, S and Z, squishy head
and then spin it around. So all why 9088? Spin it round and then Control three and let's pull
them where we want them. So they're gonna
be going in here, into here, like so there's
gonna be a bit small, not the best to junkie. They want to be fit
in into the step. So like so. All right, can we get away
with a Rayleigh's? I wonder if make
it easier for me, control a Ultron song, dry flakes origins,
geometry, that modifier. Let's see if we can
get an array 0. Let's move it out on the y. Then on the z. Let's say I can get away
with doing it like that. Alright, You can
say they've gone a little bit aurorae
on here unless just because I need to bring
the zed Olga thing down. We go and let's bring them back. Not that way. A little bit. The other way. There we go, in the center,
that was made easy. So let's press Control lay and actually have
those in place. Let's pull them back
into place now. There are actually
sticking out of the wood like so
right-click, Shade Smooth. Let's put officers move
on because it shouldn't affect them and we join them
all up to the rest of them. All right, So now
just the actual, these plants award, we might
as well apply our array. So control lay the one thing we haven't
gotten these plants. So what is the cost of devils? So we might as well
do that as well. Let's surface will press
control light all transforms plague origin to geometry
and modify a pebble. Unless they can get away
with no point, no one. Maybe, maybe not still a
little bit too much a fail. So no point. Normal five, yeah, now it's
looking back control. Now let's do these parks. So Control a, or
transforms, right? It takes origins geometry. I'd modify it. Bevel, don't 0.01? I'm probably on these
actually it's actually worked probably naught
point naught five is probably a
little bit too low, so I think I'm going
to be happy with that. So Control a,
Control, Control a, and we just joining
everything OK, now they can show
everything's together. And now just shift select it, Control J, join it all up. Control layer transforms,
right-click origins geometry. And then we go, we can call
this actually a walkway. Before we join it all up, I will create this separately
and then you've got that as well because that's a nice
assets to actually help. What we'll do now is we'll
actually put this on material. And I'm going to unwrap
it a little bit of time. First of all, we'll
come in and adding or grave gray like so. Then plus down arrow. And we'll use two
materials again. So what this would mean, and then plus down arrow would on the world lights
will also use a word like just for these
plants are what again, anything that's really weathered
and gets replaced a lot, which would be these
steps probably gonna be probably
a different color and it just adds a
lot to the scene. You can see here I've
got a piece of wood, but I'm not gonna worry
about that right now. Okay. So let's unwrap along ramp these all of these
parts, all those joints. That's the question. All
those joined know the not. So let's join them all together. Control J. There we go. Now let's go back. And I've got all of these. I don't want these graphs, I'll just have to go and
Grieg around them, ALL. Like so. And then new smart UV project, okay, and let's give
them the word main. And let's spin them
around as always. 90 UV pack islands dot zoom in. And then we go. All right, Let's hide those out of the way. Let's come now to these ones. We'll do the exactly
the same thing. So LL, and now you
smart UV project a UV and pick islands. Sign by the amount of white. Kind of get away with
doing all of these steps, maybe let's have a look. So you smart UV project, okay, would like to assign spin
them around 90 pack islands. Alright, let's hide
those out of the way. We've got one piece
of wood here, so I will have to make this
smaller, just so weird. So use what you reproject. Sine 90, let's make it smaller, G, put it into place, hide that one out of the way. And then let's do our bowl. So we're gonna need
models will change our gray and put it onto I in. I think it would be the end-all, to be honest. So we'll use that. I'd say actually
these things now, like so, I'll just round. That actually should
work a lot of that and then assign.
And there we go. There you go. Let's go back to modeling. Let's make sure it's all
one piece, which is, let's double-tap the egg now, I'm a level of just see
what it looks like quickly. Yeah, there you go. Looks really, really nice and
it looks very supportive. Let's say you can see
I've fits really well. Alright, so what we'll do now is just put this
back on material. I'll come in and grab this. I'm just going to press Shift D. I'm gonna move this
over here then. Like so you've got what
way you go waterway here. Just going to minus off the y because we're going to join
this up with the house. Whereas this we need something called worldwide because it's going to actually be an asset. So right-click Mock, as I said, in that same file, Save. Now what we need to do
on the next lesson is we'll actually create
the door here. Probably delete all of
these planks actually, rather than use a Boolean. Create the doll, the handle, and then pretty much
the house has finished. I'm ready to move on
to the next poll. All right everyone, so
I hope you enjoyed it. I'll see you in the
next one. Thanks a lot. Bye bye.
46. Creating Realistic Doors: Welcome back everyone
to blend the three, the ultimate medieval
seen course. And that's where we left
off. Now, what we need to do is of course,
create the Dole. If I come in and grab
this EL press Shift S, Krista selected shift a, unless bring in a plane,
let's spin it around. So all why 90? Before actually, I carry on. Let's just check to see if we've got a face orientation
issues which we have, so we need to fix those. Let's come into this first
and we'll just grab it, hold, Shift N spend
them all around. Let's come in then to our house, scrubbing all Shift N, spin everything round, just
make sure it's all right. There we go as quick
and easy to fix them. You can see here this, if
I start off with this, this way, it's going to
be the wrong way round. So all why 180 spinning round and now we've
got that in the right way? Or is it said when
you bring your plane, if you turn the ground, you'll leave Robbie right or wrong and just spinning around. Just search, right.
Alright, now let's set off. So let's come to
face orientation. Let's put this in place and
to where it needs to be, where I need this is first
of all, press Control three, I need it to comb to the edge
of this so you can see to the edge of here and
to the top of the ear. So I do want a little
bit of a gap on here, bearing in mind that I'm going to make them a
little bit uneven as well. And then of course I
need it back to here. So if I pull this back, you can see that it needs
to come down a bit. So you can see if
I pull this blank, look where my dog
is gonna go in. You can say we don't want
this big gap down the bone. So it has grabbed the bomb, pull it down a little bit. Alright, Finally then
that should be, yeah, that should be enough
of a gap that Let's grab this and pull
this over this way. Like so we can go rarely full ball on this doll, give you
a hinges and things. I think what we'll do
is we'll just create a simple door for this same. You'll have the basis
then for simple dough and you can actually create
more if you want to. Now let's pull this Dole back to where we
actually want it. So if I pull it by, I'm probably going to want
the world to come to here. You can see that little
they have alleged that. And now I can actually
go into my actual house, grab this one here. So L delete vertices and then come around to the
back of it and Command L, L, L, L one. So delete that says, alright, there we go. That's the stall of all don't. Now let's convert
them to our plane. Let's press top, Let's
press Control Law. Let's bring in yeah,
Probably this many. Left-click. How many
is that right-click? Five. I brought in, you might
want to bring in some mult. I'm going to right-click on moccasins as we always
do control law. Then let's bring in full edge
loop, something like that. Let's come in and split them up. Lll G, pull them back, a show run individual origins
and pull them together. Like so. Run them proportional, I'd say, unless hold them very
gently on the dole, we don't need them
crazy or anything. Like I didn't see that
one went a bit crazy. We don't want to lie
that just a little bit. And then let's pull them back. Like so something like that I think is gonna be
absolutely fine. All right, so now let's set first control
labeled transforms. Let's right-click the
origins geometry. Let's right-click
to shade smooth. And let's then put
on also smear. Now we call it instead of using the solidified,
just extrude them. Bike can also do it
that way if you just grab them all a pulley. That's also a really
easy way to do that. Yeah, I think I'll just do that thing
because it is adult. Let's probably by without approach lead to non just a
little bit further. Like so. Now I've got my dog and
know where it's gonna go I wanted to do now is
just pull it out into place. Like so, because I didn't
want to fall back on this dough just in case you want to use it
for something else. So I'll show you
quickly how to do that. What I'm gonna do now is I'm
going to grab the top of it. Let me grab it like
so pulled by Mark proportional to known
bringing it down. Just make a little
they don't even, maybe that's a
little bit too much. And then I'll also do
the same on the bottom. Like so. All right, I'm happy with that doll
that looks fantastic. Now let's just bring
them back together and bringing in bevel modifier, bringing a bevel, 0.01. Let's see if that works. Again, probably a little
bit too high on the null 0.05 knots located in a much back and then
tap a grabbed them all, make sure you proportionately
turns off and then S Y and just bring them
closer together. You didn't want to
probably a little bit more of a gap and you don't actually, I mean, they wouldn't be a solid as this for
instance, because. The beam replaced the law, the warp and things are
being opened all the time. So realistically, you probably want a little bit closer than, than what you wouldn't
be able to pause. So you can say a little
bit of a gap down there. All right, let's press Shift
S because it's selected. Let's then bring gain ICU cubed. Let's press S. I'm going
to pull this then to the, I won't say obviously
much smaller than that. And I'm going to
pull it up like so, I'm going to press tests and
x. Let us make it thinner. Then express SRY pulling
out. And let's have a look. How thick that actually
it's going to go right on the buyer in the backpack. You can say it's a little bit flimsy if we
bring out money, You can see how big is it
needs to be thicker than that. I'm going to press S and Z like so then I'm going to bring
it down. So Shift D. Then when we went to
eat up a bit that goes across here and now
that is how it would, it wouldn't be three
plants normally. It's a bit that
comes across here because that makes it
actually much stronger. So should bring it
up spinning around. So all x spending around. And let us get this part
in its place first, let's put it onto solid mode so I can actually
see what I'm doing. So something like that. Let's bring it in, Let's make
it a little bit thinner. Like so. And let's grab the bottom, pull it down out. Like so. That looks, that looks absolutely
fine my thought. All right, so let's say
join these together. Control J. Now let's finally
cocaine. I'll bolts. So we'll again, we'll
do the same thing. I could actually steal
a bowl operator. It's probably going to
be easier to do it now. I'm just going to steal
one shift, bring it out. It's going to save us
a little bit where selection, grab a control. All transforms right-click
average into geometry. Control three. And let's just bring you
OK and put it into place. Wants to be up close where
this actual plant kids, so it needs to go
little bit higher. Like so what I tend to
do if I'm doing this, I'll come to the other side. I'm just going to permit I'm just going to press
shift D Then. I'm just going to do it. I think let's have a look. Every probably don't want
them so level or anything. So I wanted to make them
a little bit different. So I'm gonna put it like that. And then I'll put
this one, hope. Pull this one up a
little bit so they're a bit on the even
as you can see. And then what I'll do
is I'll bring this one down like so and then shifty put it on here. And then maybe this one. Like so you can see again
they're a little bit uneven, maybe a bit this way. And then shift D shift the shift take
something like nothing. I think that's going to
look absolutely fine. Now let's grab them all and
join them all together. Control J, joining
them all together. Then let's pull them out. Sorry if we pull them
out now into place. Alright, look at
absolutely fine. That looks pretty realistic. Let's double-tap
the height and that will bring in is not the cube. So shift day, bringing a
cube, press the S bar. And this is going to of
course be the handle. Now for the handle, you better off just
grabbing your mom. I'm bringing them up
to the same level. So Control three, bring him up to the level of your
door which is here. And then you can
say that the handle is probably going to want to be about here that solve
high, Let's squish it. And so why bring it in like so. And now let's bring
in the other way. So I sin x, bring it in. We're just going to make a
very simple handle here. We don't need anything too big. The other thing is just make sure that his hand is gonna fit. You can say that it needs to be probably a little bit big. Now let's command and
bevel these edges. I'm just going to grab this one, this one, and this one here. I'm going to press
Control J and you can see that the pebbled off. Okay, but that's probably
not probably right. Let me get my words out. So the reason for
that is control AOL transforms right-click
origins geometry, Control B, like
so, teddy a, warm. There we go. Now
let's bring it in. So we've grabbed this
phase, press the eyeball. So press the keyboard just to go in now extruder.
And there we go. They've got makings of all dog
just going to save it out. And then what we'll do
on the next lesson, we'll get this
doll finished off. We'll make it into
its own asset, and then we can move on
with the next step, width. The next thing is, I'm not sure what
that's going to be yet. Probably going to be the hail, something like that,
but not in fact, we'll actually
create the fences, I think next that'll
be the easiest thing that we can take those
straits in as well. All right, everyone, so I
hope you enjoyed it and I'll see you in the next
one. Thanks a lot. Bye bye.
47. Handles with Curves: Welcome back everyone
to blend the three, the ultimate medieval sinkholes
and this were left out. Now let's make a quick handle. So how are we gonna do that? Well, I'm going to
do is I'm going to press Shift a and when
to bring games a plane, a claim that seems a bit strange and we're gonna
make out loud plane. Now you can see that it
went in the wrong place. I'm just going to go back. I'm gonna do is I'm
gonna press Shift. I have some bringing
my plane into here, so it's a selected top again
shift they bring in a plane, let's bring in a plane
that's spinning around. So all x nine take, and then what I'm going to do
is I'm going to take this. So I went to grab
just this edge. So grab this edge, Shift D, move it over, delete
the rest of it, Delete. Now how are we going
to use this to make a handle your OS. So let's make it smaller photo. Let's bring it into place. So it's something,
something like that. Let's add a few
more edge loops in. So I'm going to press the top. I'm going to come and make
sure I've got I select it right-click and sub-divide,
right-click sub-divide. Now I'm going to do is I'm
going to grab the top of this. I'm gonna make sure about
proportional editing. Bolt onto smear. We don't want any
randomness in this. And then when I went to
there and we're going to bring my mouse all the way and
just bring it in. Like so. Then I'm going to
do the same on this one, bring it in like so it doesn't look like
much at the moment. I'm going to give it
another edge loop, another subdivision here. So I'm grabbing this, that and this
right-click sub-divide and then bring it up slightly. I can't do that
because I need to just grab the middle
of it. There we go. That's better. All right, Now what we wanna do
is I want to turn this into a coup object, convert rights on the side, and let's bring out the debt. And you can see how
easy it is to create a handle with this technique. So let's say, bring it
down a little bit more, a little bit to say something,
something like that. Let's come in now and grab this. And what we'll do is
we'll press E and X and pull it out
into the actual DLT. This one-on-one to
them this way anyway, so I'm just going to grab
this Shift Spacebar, just bringing my move tool. I'm just gonna put
that into place. Alright, and you
can say that real, real easy way of creates an adult handle
spring. They said. You can also make this
a bit fire if you want so old tests and bringing it out to make it a
little bit fatter. Little bit more like a
door handle. All right. I think I'm already
happy with how that looks as
simple doll handle. Maybe this bits a
little bit to five. So I'm just going to bring
you back a little bit. I'm going to bring out this
bed as well. Like that. Yeah. Okay. Alright. Let's not worry
too much about that woman there now I'm just going to
turn down the resolutions. And I'm also going to turn down the resolution of this just
to be a little bit less. So it's not too many
polygons like so. And then you just go to Object, Convert and converts mesh. Great piece of mesh. Now let's right-click
Shade Smooth. Let's put it on officers
Smith to see what we get. We're gonna have to turn
this off below their thing, so something like that. It's gonna look absolutely fine. Probably mesa, we're going
to be joined in a soap with the actual
the actual house. So I'm hoping I might have to
move this off and I'm open. We should be able to
it should be okay. Actually, if we can just
move it up, Let's see. My absolute whereas subdivided, that's the problem with, then you will actually get us moving. So if you come over and add a modifier and we just
bring in a subdivision, you'll end up with something
like this, press Control. A. Now if you go back
to your smooth and put this on Thursday, you'll see that it's
actually smoothed off. Rarely, rarely
nicely, problem is you've got a few more
polygons in there. Well, I mean it should be okay, Let's come in now and
actually create all n. So e, ALT and AST takeoff proportional
and it's saying so alternates just bring
them out a little bit, just to make it look a
little bit more realistic. And we'll also do the
same with the bottom. So E S bringing out a little bit you can see
probably doesn't fit into well. Let's think, let's
bring it out probably a little bit wrong way. Let's bring it out like that. There we go. Come rotate it, round everything. Rotates it. Pull it back. Camera. Yeah. I'm happy with yeah, that looks like a nice don't
join all of this together. Now let's make sure we've got
no bevels on which we have. So control a bevel these
off amount as well. So I'd modify it, the devil. We didn't actually reset
the transform online. You can see that's why it's
messed up a little bit. So control a all transforms
right-click origins geometry, naught point, naught one. Let's try that. No, no, 0.5. There we go. Control a and then just
make sure the other parts, so this is fine, this is fine. The bolts of fine. Alright, so let's say join all of this up
together, like so. Press control J, joining, shapes, move, Altos, move on. And you'll see now
the actual handle is smoothed off and that's exactly
what we're looking for. Now. The dog is
pretty much don't we just need in materials? So let's bring those in first. We can say the moment
we've got iron name, we don't really well not so what we'll do is all
of these are on route. They just didn't same place. So let's do the bolts first. So I'm just going to
grab all of my bolts. I'm going to actually press Tab to move my guy
out of the way. It's getting in the
way a little bit. There we go. I want to do
you can say as well though, this one's a little bit out.
I'll actually unwrap them. First thing is I've
grabbed them all, so I'll go to UV Editing. You can see they're
all in the same place. All you need to do
is putc islands, just going to pack
them all out there. Looks exactly where you want. Press dot and let's
go back to it. Let's grab this bold. Move it to the side slightly. Okay, they're all
different now I can hide. I shouldn't I shouldn't
have done that. Yeah. Okay. Well,
we'll do it that way. I'll just grab them all again now and hide them
out of the way. Just getting in the
way little bit. Grab this one. Again, a little bit
of a head of myself. So the other way, now this Sunday, I'm going
to give it another material. So I went to grab it all. You smart UV project. Let's see how we own route. As I say, normally with metal, you don't really need
to worry about it. So I'm going to click
Close Down Arrow and we've already got IN dog. Let's try the other ion. So this one here,
Let's click Assign. Unless put in several
away, it looks like. Now let's put our bottom first before we do
anything with this. So I'm going to come in and
select just to grab all of these small UV project, would light, click,
Assign, spin them around. So a 90 considerable
proportion to non, don't want to spend
them around with that. So I'll 90 UV pack islands. There we go. This is the thing I'm
looking at this handle here. I don't think I'm very happy
with this being laid out, so I'm going to
assign it like that. Now it looks bad. And the
reason it looks bad by the way, is because this bit here, it wouldn't have a lot of people touching and things like that. Whereas the handle it
would be constantly torch, constantly smoothed off, and probably a lot shinier
than the dolt mouth. Now let's come around
the black and we might as well also on roundly. So you smart UV
project on Route 99, u, v, and pack islands. And let's give it the wood. I think I'll give you
the word main, like so. Yeah, that looks not logged. Perfect. All right, so let's
go back to modeling. And we'll call it. Let's call it. We're gonna
make a duplicate of it. So I'll do that first. First of all, I'll do
Control a or transforms, clicks the origin to geometry. And then I'm going
to press Shift date. And I'm going to call this
wooden Fondo, like so. And you can name yours
again wherever you want to. I'm going to right-click
that markets. I said, and then I'm going
to bring this out over here. I'm gonna spin it around. So all Zach, I'm
just going to put it into a nice place again because
you've got collections. You really can make a load of collections and pulp
things and everything. Is that what we
haven't been doing? This for instance,
on the window, I don't think if I come to my materials, Let's have a look. We've got glass. You can see that we've
known this as an asset. So Mark as I said, Mark as I said, not small that small, gray, we don't need milk. And as I said, and also the logs window for
the logs over here. Tree bulk, right-click monkeys, I said, All right,
so then you've always got those
materials as well. And that's the that's
the whole point of this. Let's say poke this
door into place. I'm going to press dot, zoom in. Let's put it into
place, roundabout that. Let's grab this then. What we'll do with it is
Control a or transforms. I'm going to then join
this two modules. So Control J Willard inherit a material and
then while one is through his grabbed this you smart UV project
quickly go to my UV, spin it round so
90 UV pack islands make it a lot smaller because
it's a little bit too big and then give
it the wood main. So click Assign again. Now let's go back now. Tap, double-tap. And there we go. Alright, that's pretty
much the house finished. What I want to do now is
joining us altogether. So let's join it all up. Gonna press G, make
sure I've got it all. Control J, joining altogether. Right-click, Shade Smooth. Make sure my outsource
moving zone, which is Control
a or transforms. I'm right-click and set
origin to geometry. And then we can call
this farm house. And then we're going to
right-click Mach is asset, dropped that in our assets. And then let's finally
move this over to here. Wow, we can see how much
we've actually done now and we're pretty
much motoring along. Now, what we want to bring
in now is another reference. If I press Alt H column to my actual reference and let's change it out
for another one. So let's come down
and we'll change it. If I open up, Let's change it. I want to actually
have the top view. So this one here,
because I want to create next is the
actual fences. I think it's
important to create. I'm just going to make it easier than to just
bring them in. So we'll bring this one in. And you can see now, although
we can't see perfectly, if I press Alt to zoom in, we can see roughly
how the fences, all the very simple fences. So we can just create
those really easily. We can create a pumpkin
patch of fence as well. They were things like the
hay that makes these up. We're going to create those, the grass and maybe the leaves, maybe the pumpkins as well. So you can say this is actually
really not a lot left to actually create as far
as modelling goes. All right, everyone, I hope you enjoyed that and I'll
see you in the next one. Thanks a lot.
48. Creating the Large Fence: Welcome back everyone
to blend the three, the ultimate medieval sinkholes. And I really believe this is the ultimate course to
learn. Blend the three. I think it's coming
along very well. Now let's move this over
here and spend this round. So I'll wide 91 Wednesdays. I'm just going to pull it down. And what I wanna do is I just
want to level the soap to the same size as
this farm house. And the reason I'm
doing that then, because I love a good idea
how big this actual offenses. So I'm going to
spin this around. So all 90, let's spin around. You can see it's the
wrong way around. So all is it a 180? Spin it around the other way just to make it a
little bit easier. And then what we're gonna
do is I'm gonna pull it out and then make it much, much bigger to the size of
my actual fall mouse here, we don't need to be exact. You can see it's a
little bit too big. They're just gonna pour
it into place now. And hopefully that's going to be roundabout the right side. So something like that, which means then, now
call the right size. If I pull this out, I can see, for instance, my actual fences this size, which means as well that I
can bring my little guy out. I'm putting into place
and I already have an understanding of how
big this actually is like. So I'm just going
to pull him up. Now we'll work from this. So I want to press Shift
S cursor to select it. Then we're going to do is
I'm gonna bring in a cube. So shift a, bringing in a cube. Let's press S. Like So what we wanna
do is make this about the right size of a post. So I'm just going to
pull it into place, something something like that. Then what I'm going to do now
is I'm gonna pull this up to the height I should
be. So let's grab it. Plato. It's gonna be a fence. Fence, probably
something like this. Then what they would have is two planks on them
maybe going across. So if I in other words, what I'm saying is
just first of all, make sure you're
happy with the size. They're not going to
be used these things, especially on the pumpkin patch, they're going to be
quite small, but they're going to be replacing the
fence is pretty often. So they wanted they
would have dug a hole out how to post in, and that's the way
it would work. So you won't have these really, really thick or
anything like that. Let's press seven Let's
press Shift date. I'm bringing the post
over to the other side. So now we have a good idea of how long our actual
post days and now we'd probably need
I'm not going to work. Let's grab the whole
post ship date. Pull it over to where the
post is, which is here. Now we bracelet going to
bring in some plants towards so Shift S because
the selected shift, Let's bring in a
cube, Let's press. So pull it out where
once it first. So I'm going to pull
it out to halfway, just before halfway
because I'm gonna use this to make more
posts as you'll soon. So x, y, sorry Sx,
make it thinner. Like so, and then pull it
up to where you want it. I'm thinking not probably
something like that. Would it be a little
bit higher than that? I'm just looking rounds. I think actually
that'll be fine. That will be fine for this. Now the thing is will the will the piece of would-be on
the inside or the outside? I think they're gonna
be on this side. Um, I'm just thinking. I think actually probably, yeah, I'm going to put them on the outside like
we've drawn on here. So let's say it's up to you which way you
want to put yours. Let's pull this out. So I'm gonna pull
this out over here, like so, I'm going to also
give you a few edge loop. So maybe three,
something like that. I don't want to give any
edge loops on these things. You can make them
bend and things. But the client thick these posts and not actually gonna
be warp to anything, whereas the planks of wood, they possibly would be. Now what I need to make sure I'm happy with the thickness
of these plants. Maybe they're a
little bit too thick, so bring them in just
a slight bit light. So Shift D, bring this
one down. There we go. All right, So I'll think I'm
gonna be happy with those. Now what I wanna do is I want to basically grab this post, want to press P, selection, grab it again, control
lay, all transforms. Right-click set
origin to geometry. If I press seven, I should
be able to press shift D, bringing it over,
spinning around. So all that, minus 90
minus, Let's do that again. I was at minus 90, spin it around and let's see if it actually comes into play. So it should say roughly
into place like so. And that is basically how these would be I'm gonna do is
I'm going to press seven. I'm going to make
another one, shifting. Pull it over. And you can say they should roughly into place
like we've got here. They don't want to pick
perfectly or anything like that. You didn't want a
little bit of a gap and then we're gonna
do the same thing. So shift day, bringing it
over, hit it ends place. And now I want to go
back over this way. And you can see
it's really, really fit in the scene
actually really well. So what I'm gonna do is I'm
gonna grab all of these. I'm going to press Control J, then going to press
Control a or transforms right-click origins
geometry and then shifting. When you use that to make this a little bit easier for myself. So all z minus 90 again,
I was at minus 90. It's been around. Let's bring this into place, which is halfway along. You might want to put it in
a full way on this side, look at that one, that
one is about halfway. So we needed that
because they need to level up a little bit. Alright, so how many
more do we need? Let's press shift D again, and let's bring you over. We can say we got, we've got caffeine there. But this one is going to end
rounded bottom this one. So I can actually
come in with top. Grab it. Move around. Our delete. Let's says a non-one going
to do is I'm going to grab, you can say 123 posts. So if we got 12, we haven't got quite
got three here. What I could do is
join these together, so Control J and then
just grab this one, this one, this one. And then shift. Move it over. P. Selection, tab, control
leg, all transforms. Right-click its
origins geometry, spinning around all z minus 90. I keep making that same mistake. Unless pull this
into place, like so. Next short,
hopefully, all level. Alright, so that's
looking pretty cool. And now we just need a looks like we've got an older one there which had
been put in place. I don't know why it won't
let us do that now. So I'm gonna grab this one
and this I'm going to press Control J top shift,
bring it over. Like so. Then I need it go in
the other way now. So I'm going to probably
just grabbed Yelp. I think I'll grab this one, all of this actually, I'll
make it easier, so shifty. So let's put it in place
and then finally grab these two LL and shift
to put it in place. Like so. All right, so that's
looking cool. Now let's join it altogether. So Control J and then G, just to make sure
you've got it all, put it back in place. And now we're gonna
do is I'm gonna go in and bend these a little bit. So I'm gonna come
in, put it onto, I think I'll prime
connection only on these because I don't really
want to bend this yet. So what I'm gonna do is
I'm just going to press G. And I can just put it back now and just
move it just a slight bit. So you can see
just a slight bit. Just go round, move
your posts because it is just a slight amount of movement just to
make them uneven. And it just makes a
real big difference. Because there's no way
these posts would be in the ground pathetically
north to the bins stored, especially through a winter
or something like that. This would have been used, probably repaired
on a yearly basis, but not not actually replaced. So they would've
replace these posts, maybe the planks of wood. So we'll do those after. Think this is the
last one actually. Alright, now let's
do these ones. So again, I'm impressed all
on y and spin this around. I can lift this one
up for instance. Then l, like so and just make them again
a little bit on even. Alright, let's do
the same with these now and just work
your way around. You could even go round, whoops, that's
going to be crazy. So just a little bit uneven. Then we'll go around
and just bend them. Oops, not that way. Bend them a little bit. So I'm gonna grab this one and then this one will
pull down a little bit. This one will bend a little bit. So all x. And I'll also pull
this one down. I'll hold the shift bar
and if you need to, and then this one here, so x. Alright, so now what you could do
is come to your Edge, Select, grab an edge like so. Just spend a couple of them. Not too much, we don't need them too much, just a little bit. Like so. Just make them look
kind of organic, realistic, not
live, they've just fail NAPLAN today
in a 3D software. All right, So think
this is the last one. Okay, Let's have a look at
that. And there you go. You can see it looks
really realistic. Alright, so what we'll do
that on the next lesson, we will actually come in,
give these materials. There's just one material,
so that's quite easy. Well beveled them off
library, don't be fall. And then we'll start work on this pumpkin patch and
get that out of the way. And then we can
actually probably start work on the grass, hay and things like this because pretty much everything
is built by them. All right, everyone,
so I hope you enjoyed that and I'll
see you in the next one. Thanks a lot.
49. Pumpkin Patch Fence Greybox: Welcome back everyone. It's been 23, the ultimate
medieval sinkholes, and this is where I left off. Now let's come in and
grab all of these. I don't actually
want to unwrap them all at the same time
because it will probably make the resolution
just way too small. What I want to do though
is Babel them off. So Control a or transforms right-click set
origin to geometry. And then we'll come in and
add modifier and bring in a Bevel and put it on
don't point no one. Let's say if that
looks absolutely fine. Is it too much? Let's try naught
point, naught 5.5. Yeah, Probably
that's gonna be bad. So I'm just going to
apply this control. And then what I'm
gonna do is I'm just going to wear my way across now. So I'm going to give
these the same material. And I think what I'll do is
I'll do this chunk at a time. I think that should be fine. And then we'll do is
press you smart UV. Then welders come to my
UV Editing will bring in the gray material, so gray. And then we'll
press Plus down and would would mean press
adult bone, zoom in. Let's assign that these ones
and that spin them around. So AR 90 spin them around. I did use a proportional it is, and let's turn that
off and do it again. So our 90, let's UV islands. All right, Let's come in. Let's put it on materials so you can see what we're doing. Now let's go into the next one. I want to grab these, probably going to grab
all of those actually, you smart UV project, assign a 90 UV and pack Ireland. So you can see
pretty much all of this is just rinse
and repeat now. It's just your imagination. What you wanted to create. At least up until this point, we've nearly finished
the modelling. You've learned all the
basics of modeling pretty much in creating these. Now we're gonna move on. Once we've made
pumpkins and things are just a few simple things to during things like
political systems. So you smart UV, project 90. I'm trying to give you an all-round skillsets or where to create a scene or anything pretty much that
you want to create. So you smart UV project, okay, assign a 90 UV CG-islands. Same again with these last ones. Are you smart your
group project? Okay. 90 UV and whereas it back islands
and hit the assigned bone. All right, let's go
back to modeling. This is what we should be left
with, something like that. Looking very nice. Let's hide this other way. Let's hide our floor
out of the way. There we go. Now let's press
one. We've got front view. Let's pull them down
to the floor view. Let's bring our guide. I'm just making sure that everything is right and I'm happy
with the high of them. It should be able to pull
his hands on them live. That's basically a
good size fence. If I had cows and things online, probably going to be a
bit higher for something like corn or
something like that. This is going to be
absolutely perfect. So now we're going
to do is and again, resettlement transforms. Then I'm going to
call lodge fence. I'm now call it vegetables. Just so we know the difference in case
you wanted to create another fence for
your farm animals or right-click and Mark, as I said, unless drop
that in to the assets, unless then pulled up over that. Alright, so now if I press
Alt H, bring everything back. We know already we've
got the right size in. Now I want to do is
grab our little guy. Like so we want to
create a pumpkin packed. So I'm just going to
pull him over here. And the pumpkin patch is
a little bit different. So we're just making a
variation on the fence and just making sure he's actually stored on that. There we go. Stood on there, so we have
a good idea of the height. Okay, so let's go over
the top with seven unless bringing
offers and parts, I'm going to press
Shift S selected. Let's bring in now a cylinder. And I want to make sure that
this one is pretty low on the resolutions
because I am going to use this a lot of times. So let's put it onto pretty
much the bare minimum, which is going to be 12 and you might still get that roundness. So that's what I'm actually
going to look for. I'm going to press
S and then I'm going to bring it in
to where I want it. So something something
like that Saul size, it's probably going to
do and then we're gonna stick it in the flow like so. Then I'm going to pull it
up to the high amount once it probably again
around the same height. Is what we did with the others. You can see that it's probably isn't going to be a little
bit too thick, I think so. So I want to make it
a little bit smaller. Essence zed, pull it up
so it goes in the flow. Yeah, that looks roundabout, the right Hi,
something like this. Now with things like this, you're going to
have some bending. And because these are basically
logs, are they using? So we might as well
create this 1 first, I'm going to press Control
Alt, left-click, right-click. And among Wednesdays, I'm
going to just grab this, put it onto random, and then I'm going to press
G and just move it out just a little bit just
to make it a little bit Don't even like so. All right, so that's
the first one done. Now we also need to bevel
off the top of this. So I'm gonna grab the top. I'm going to press
Control Bay Beverly. Often you can say, no, very good to bevel. The moment actually there is, that actually looks pretty good. I'm going to leave that,
I'm going to come to the bottom and we leave
the faces on here. I'm gonna come back
to the top then. And then what I'm going to do
is I'm just going to again, Mama Saint control a Maxine. And then I'm going to right-click
and triangulate faces. And that's gonna be made
pretty easy for us. Let's shapes move now. So shapes move. Let's bring in also smooth and see
him get away with it. Can't quite get away with
that as you can see. So we need to bring
Europa ultra smooth. 36, something like that. Yeah, that's located
in a quite nice, one thing is a thing. So have a look, have with devil that a little bit too
much as you can see, we've got a spike
going up there. Don't really want
that. So to fix that, I'll do is I'll just
take off proportional. I'd say essence ed. And just flatten that out again. So S zed and flatten
out and there you go, it looks much, much better now. You will get some hard edge and obviously it wouldn't
all be smoothed off. Now let's say I put the
rest of these posts sense. So if I press Shift
and come across, then I think how many
we got here actually, I think this is where is this? This is the actual opening. So I want to say is the one probably one here,
probably one here. So I'm going to press Shift,
bring it over to here, and you can see they
didn't actually duplicate. So let's go like so they can
be a bit uneven as well. These shift D over here. Now, this is the next one, so let's call this way. Now we're gonna
put them so I can see warnings here, roughly. Like so. And the
other one is here. And then shift day,
another one here. All right, so now let's do the other side so you
can see one here, one here. So we should, whereas this
one probably around here, around here, then
one here I can see. So it should be then shifting. And whereas this one
probably around yet. Then tomorrow. I'm going to pull the one on
the end actually. So around here, and then this one somewhere in the middle
here, something like that. Alright, so we've
all posts help. Now let's make them a day uneven will join
them all up as well. So I might as well, I'll just have my
reference out F and now, and then I'll also hide
my floor and then I can simply move my mom back
and just grab one of them, press B to grab the
mole, press Control J. And now I can grab them all. And then what I'm gonna do is
I'm just going to command, I'll start with this post and I'll just make them
a little bit uneven. So Paulson and just move it
out very, very tiny bit. Say I'm just moving out just to make them a little
bit different. So now we're doing now is we
just move in the ward round. This is not actually
moving the posts. We're gonna do that
in just 1 second. You can see how quick this isn't just moved a little
bit too much there. Like so. Now I'm just gonna
pray onto, whereas it smooth. Now I can grab, just move this whichever way I want to do it just to make
them a little bit uneven. So I'm just gonna move that one. Alright, so something like that. Now let's come to the, The next poll, which
is going to be just planks of wood
going across here. Well, we need to
establish now as well is I think I've
gone too far with this. I think I need a gap in
here some way you can say, I think it's actually
here. I'm not sure. Let's have a look.
Let's press Alt H at top first Alt H,
bring everything back. The gap, this is the wall rate, so this is where he's
going to walk in. I'm just gonna put them
on and he is just sorry, I understand where that is. So I'll zed nine to
eight areas, the Pachet. Now, let's bring in
a piece of wood. We've already got
our cursor here, so let's say use that. So what we'll do is
shift I bring in a cube. We will have these
pretty straight. I'm going to pull, I think I'll put three in
there, something like that. I'll keep going a little bit. For onto here. Yeah, something like that. Maybe a little bit
of thinness still. Put it back into
here and then tab. Grab it. Not what I wanted. Let's pull it over the halfway point and then we'll have
three of those. So if I press, which way is it Control
three there we go. Pull it down and then
shift D, pull it down. Like so. All right. So I think I'm gonna
be happy with those. So whenever we're going
to do is ship date, bring it over to the next law. Can see that a little bit
longer than these ones. So I'm just going to grab these. Wanted the money even anyway. So it's just a little
bit more work. These and drag it over to the halfway point and then put those back in its
place, like so. And now I'm going to
grab all of these. I'm going to press Shift,
bring them out of zed 90. And let's just pull
those into place. Like so we'll just
do these ones. And then on the next lesson, we showed be able to get
most of this finished off. Let's pull them out. Like so. I'm just gonna save, I'm awake and then we'll see you
on the next lesson. So hopefully we should get
this finished on that one. All right, everyone, so
I hope you enjoyed that and I'll see you in the
next one. Thanks a lot.
50. Fine Line Between Realism & Polygons: Welcome back everyone to blend the three the ultimate
medieval scene calls and this where I left off. Now let's keep
working our way over. So I'm just going to grab this. I'm going to press Shift de novo pathway between reflects. You can say we are
going to bend them over these actually my face, I'll just press shift D again. They also might fit, so these ones
definitely are not. So we'll just pull
those back like so. And then we'll grab these
and go around the other way. So we should update
all zed 90 thing with these ones that needs to
be pulled out a little bit. We don't want them in the posts. And these can also
come out a little bit. You can say this one's, we'll do we'll solve that in a minute. So then bring them over the entrance. So Shift D again, making sure I'm
happy with that one. All right. Now let's say
carry them around so we'll just grab these shift day, bring it out and
then pull it over. This one. Can see it's a little
bit about that. Let's put it into place
and let's pull these out and then I'll make sure
that they're in place. So pathway. Are they touching it? No. They're just floating in
there so we don't want that. All right. Shifting is bringing them out. You can see this one
is much, much shorter, so I went to the ends and
then after we've done this, we're just going
to move them out. But you can see here that these need moving our little
bell and this one. So I'm actually going to
move all of those out, seen as the only to move now
and then I'll grab this one. I actually move them. Not like that. I'll press your date and
then move them over. Like Miss I'm just going to spin those just round just
so they fit in place. You go now the same place, which back then what I'll do is I'll grab each one of these, just pulled them over and
then pull them out line. So, alright, so now I'm going to do is I'm
just going to come in and just moved some of these. So I'll why just spin
them around just so they're not even there,
even at the moment. And I don't really like that. So I'm just going to go round, just spending a little bit
of extra time, just move in. Everything out. Like so. Same with these spin, this form rounds. So our x, I'll leave
the other one bit flat. Let us move. I'll
just do the movement. It's actually first in mind, be quicker to do it that way. Then rotate them. And maybe that's a
quick way of doing actually grew up this
one for instance, and now go in and rotate them. So scrub this one, x, no x, y. We go. This one came a bit
too close to it. Sometimes that happens,
so you need to be quite far away when you are on a rotating, something like that. There we go. Alright,
let's say this one. They close again by actually
be able to get away with it. Alright, so the last
poll of these ones, making them all uneven, It's not landing, drove it all as you can see, I just bend. It does get a bit tedious
after a while during this, I completely understand that. In the long run, it doesn't
it doesn't take that long. So we should be, should be happy
with the results. So once you've finished it, so this is the
last one for this. So our x, there we go. All right, Now we need
some little posts. So I'm going to
bring those in now. I'm going to press the top. I'm going to press Shift a. I'm bringing in a cylinder. I'm going to use the 12 again, same as I did before. I'm going to just
put this into here. Like so make it smaller, bring it in place. They're going to go on
the inside of these. So just make sure
you put it into the floor flows here.
Let's bring them back. And let's bring the top of
it into place as polio, you want them just
sticking over the top. I can say that
these are probably still a little bit too thick, so S, S, and Z. So now it's looking much back
then that scam into play. So something like that.
Put it over here. And again, we don't want to be using too many
polygons on here. So control law, probably
something like, I would say. Alright, so now
you've got these. What we can do is we can grab them all and
we're just going to duplicate them across. Like so. Like so and just work
how many actually won't probably get away
with Forum, this one. I'm going to grab mole now. Like so I'm gonna
bring them all over. Shift D. Yeah, probably get away
with foreign that once you've probably a fifth
one on this ramp, this one shift,
they bring it over. All right. So now let's grab
let's grab four of them. I think we're all in the
fall for the next one. So Shift D and
rotate them around. So all z 19 you can say that rotates and individually don't really want that went
on to a medium points. So all zed 97, let's
go over the top. Like so. Yeah, that looks fine. Let's do the next one shift day. Probably need another one in not just making sure that
fed them in place fine. Yes, I have. So let's just
grab one of them. Now. Let's grab all of them. Bring them over. Let me go
and now let's bring them out. So shift they spend them round. So all 97, let's
go over the top. Fit them in place. Like so. So shift probably easier to actually do any other
way I'm doing it now. Then Shift D 90, spin them around place, so then you get stable. We've got to do
next is just make them a lot of variations. Alright, So there
we go. That's that. Now let's come in and
make these variations. So what I'm gonna do is
I'm gonna come and grab, let's say this one. I want him connected
only off and I want him to be on random
and I want to save, I can actually pull these
in without making them. You can see there
that they're not really working too well. Randomized polynomial,
I laughed, so let's see if I
can put it onto. I'm almost wondering
if there's any. What about sharp does
actually wearing? Let's see what that section
working quite well. So we'll use the sharp instead. We'll pick some alta,
pulsar them down. Like so. Hopefully
I've got that one. There we go. Looking to
make sure they're uneven. Looking slightly uneven
there, so that's good. So let's do the
sharp on this one. The morning you've noticed. These will look, Let's say
try once we've done this, C Sharp will actually wig signs. Yeah, actually that will not actually looks like
it's going to work. Yeah, I think I'm gonna be
happy with this now this is during its bow
in the Mao know, making them too
destructive like you would have with the randomized, because it randomizes
all the polygons. Realistically, we just want to randomize the edges
more than that. I think this is going to be much better than the way
probably did this in the when I actually created
this farm folder costs. So yeah, I think that
it's gonna look like so. All right. Let's
have a look at that. And I think That's looking, that's actually
looking really nice. I'm really, really
happy with that. Then what we'll do then
on the next lesson, we'll actually give
these materials and then that's
another job down. Then I think we're pretty
much onto foliage, pretty much foliage in, Hey, hope you're looking
forward to that, and I'll see you in
the next one. Thanks. Bye bye.
51. Finishing Modeling the Base Structures: Welcome back everyone to
blend the three the ultimate medieval scene calls and
this where we left off. Now let's come in and
give this some material. So is it all joined together? First of all, note the
null joined together. So I'll do this first of all, there is control or transformed, right-click set
origin to geometry. And let's bring in a material. What I'm going to use this,
I think I'll use the bulk. And what changes slightly, so I've got my tree bark
here and what I'll do is I'll just, I'll
make a new one. New. I'll call this fence ball. Like so. Then what I'll
do is I'll copy this now. So copy material
and paste material and then minus a half and then find the one I want to do
is I want to unwrap these. So I'm gonna grab them all with a person you born on smart
UV project, like so. All right, so now let's make
them a little bit bigger. They look okay. I'm not so sure they look okay. I think I need to make
them a little bit. It will look at a UV map. We can see probably too many of them at the same
time, I'm gonna press adult. What I'm gonna do
instead of doing it. I want to grab a few of them, like so I'm gonna grab, let's say this many press Control plus just
to grab them all. And then you smart UV project. Okay. Then let's have a
look at those ones now. Yeah, they look in I think
a much much past them on Wednesdays when I
hide those are the white and then come
to the next law. Grab them, control, close just to make sure
you've got them all. You want, you reproject them either way unless grab
another load of them. So something like this control plus hi the Monterey
and finally, these scrub them control ports just to
make sure you've got them all. You can say I didn't
have them all that. So you and that's because
I grabbed them were not in wireframe or
anything like that, so it didn't grab
the back of them. So smart UV project. Okay, Let's bring
everything back. I'll take a now, let's go in. We'll put it onto our
render view double-tap. Now let's go in and actually just make sure we've
got these rights. You can see we've got some
logs ear and things like that. That's not what we want. The rest of them,
as you can see, the mind look okay,
I think I wanted to make them a little bit brighter. A lot of time when they made
these sticks and things, they all like more
like branches, so they're a bit, a bit cleaner. Not quite this color. So let's
go to the shading panel. I'm going to do is I'm
gonna come in on a think. How many of these have gone up? Five. I'll do is I'll zoom in now I'm in the shade and icon sets. Let's grab this,
press the elbow and zoom to come to the first one. And let's, first of all, I'm just going to
delete this one now the way I don't need that, then I'm gonna come in and
I'm going to delete all of these other way just so I can make a fresh kind of star. Now we know that this one, if I pull this up
just so you can see wondering this one
is the roughness. So let's plug that back
into the roughness. Let's plug our color back
into the base color. And that's then I've
looked at, there you go. You can see the much,
much lighter now. Alright, so now let's
bring in a Gamma. So shift a brain gain and
gamma, drop nine there. Let's then bring in
a UN saturation. So search hue and saturation
unless drop nine mat. All right, my gamma, I'm
going to call on 1.5. So let's put it home. 1.5, like so the moments
do is with my saturation, I want to turn this
down to no 0.6. I'm going to turn the volume
down to 9.8, like so. Everything else, I'm
going to leave the same now let's zoom out here. Just looking for on no
resolution actually. And just make sure if
I'm happy with this, I think I'm actually happy
with those and you can see a lot of them
even though they have the logs and things on there because of
how the you can see here, this one here for
instance, I think, Yeah, Well I have to solve these other all they look at their mess. I'm not dealing with the
actual color of them now. I might want to make them
a little bit more red. I think I'll do is I'll come into the UV editor,
installed the malware. So I'm going to need
to put this on my logs so I can see exactly the
ones I'm looking at. Logs, call it. Now
we can see those, any that are in here. I can just grab them
all, as you can say, and just move out these
ones here so you can see these are all
in the wrong place. Let's just grab them to crash G without fortunately Denon, whereas press G and just
move them out of the way by. So now we're going
to logs in there. That's the first part. Now let's come to the next part. So we're gonna grab all of these one's a little bit of
a time, I think so. Well, there's I'll grab
grab four of them. I'll press U smart UV project. And then one we're
going to do is again, I'm going to bring
in a new material. I love it on the wood, just the main would like. So let's zoom into these
ones and I've loaded. You can see the guy
in the wrong way round someone press all 90 UV and pack
islands and I'm just making sure that they
look code you can see probably need bringing in the probably a little bit too large. So I've been bringing
them in now you can see look a lot more correct, a lot more realistic. Now I'm happy with those. Let's now command and do. We did Forum these ones. So if we can get away with
for again, small UV project, a 90 S, bringing them
in. And there we go. Now let's do the next fall. So these ones here, so L, Let's do three actually as soon
as we've got three left. So smart UV project a, 90 S, bring them in and
let us do these ones here. So out you smart, you reproject 90 S, bringing in like sir. Alright, so now let's
do the back ones now. Again, probably grabbed, I'm
gonna press B again to grab these ones from
press control plus you smart UV project, okay. 90, make them smaller
and less envelope a day load like I didn't
actually give them materials. So let's come in with wood. They look really, really
nice as you can see. All right. So let's work our way along. So I needed we grab we grabbed around six of them, so
we'll do the same thing. I'll just press Control
plus to grab them all. And then smart UV project and
then spend them all around. So all make them
smaller, like so. And then just let us
do the same thing. So now we want these, these ones, Control Plus you. Just rinse and repeat. Then we should have these. Pretty much don't
think I can grab 123, so we can grab all
of these actually on this last one and won't
get away with that anyway. Miss two over there. And then you want you reproject
90, bring them in. All right, Now let's
join it altogether. So join everything together
with Control J, J, like so. And now let's go
back to modelling. I'm just going to make sure
I'm happy with all these. I'm just going to double-tap. And I hate that whites
it's coming from if I comb and turn
off my transparent, you'll see now,
it's got rid of it. The rendered mode lobe.
It's got rid of it. It looks much, much always. Still that anyway,
we'll sort that out in the actual lighting. It's probably because
it's EV cycles just going to quickly grow on cycles and just
have a little bit. Yeah, it's just the lighting
coming from the backwards. You can say, well
sold out, no problem. Let's put it back on eBay. Alright, so that's, I
change them over anyway, but we're not going to
deal with that right now. Alright, so that is nice.
I'm happy with that. I'm happy with my sticks
on day one to make them a little bit more red
or something like that. I will show you actually
how you do that. So if you come in at shaded
and we go to our fence bulk, I know you want to do just got a nice place where
you can actually see, where you actually
looking at, double-tap the ice or not what light
yellow going round and then come to you and you
have finally continue you just a little bit
more red like that. You can also use a color
ramp to do this sunblock. Don't want it that red.
Probably something like that. Just a little bit of redness
on that a little bit more. I'm just going to
turn you away and look at the colors of goal. You can say, I'm gonna put this on one and show
you the naught 0.5. I think it was. Yeah, it was. Unless you bring in a U. So if I'm bringing
in a search color, drop that in to my u. And you'll see at the
moment it's like that. Let's turn this off. You can see that
now I can give this a slight red hue.
Same for this one. Come to this. There we go. You can see, you can give
it a slight brown you now and that's why we're
looking for All right. So I'm not kind of not
feeling there with this one. So I think I'm going to do is
I'm actually just going to delete the other way and
just keep them as that. I'm just going to
keep them as the way I have showed you
how to do that now. So if you want to change those, that's perfectly up to you. All right, Let's press top, Let's grab it out. Let's press Control
a or transforms. Right-click the
origins geometry and we'll call this fence small. I'll get rid of my caps lock. So Defense. Small. Vegetable. Like sir. Alright, now we can
drag this and put it over next to the fence, like so. And then we just need
to change it into a assets and let's
drop it in RSS. Alright, so there we go. That's the actual fence done where they've
been over there. I'm just going to put it
back over here and move my flow a little bit over so can actually see
what I'm doing. Also want to pull
that into place. I want to bring in is gonna
be in the right place. Just sticks out a flaw
like so. All that fancy. All right, a couple
of times. Now what we need to do is
on the next one, it will bring in
another reference. I think we'll just create
all just a basic pumpkin. And the other reason
we creatinine is just so you've got
something to bring in. We're gonna do a lot with
it actually in the scene. I'm, I'm just looking now what
else we need to we need to create our grass or branches and obey and things like that. So I think pretty much now it's pretty simple modelling
with these things. All right everyone,
so I hope you enjoyed that and I'll see
you on the next one. Thanks a lot.
52. New Pastures Starting the Scene: Welcome back everyone
to blend the three, the ultimate medieval same course and this is
where we left it off. Now, actually, instead of modelling more things like the grass and things like that, I think I want to make a star
actually creating the scene because opening like
to lots of Blender, it doesn't really cost a lot
actually on your system, so you should be
able to do that. And even if you call on,
just save out this file. And then we'll open
up another farm where you can just
swap between them. If you need to do
that, if you call it lowest spec system or
something like that. Alright, so what we're
gonna do is first of all, I'm going to actually
mark this as an asset. I'm actually ImageJ the 70. And the reason we're
gonna do that then, because I've actually
scaled it to the right size and I'm hoping it will come
in and lighten up. So let's see if that works. First of all, I'm
going to right-click come down markers asset. And then what I'm going
to do now, I'm just going to save my file. So save, and then I'm going
to open a new blend file. So I'm going to right-click
file. Let's open it. Let it load. And this is of course is the scene that
we agreed to width. All right, so now let's
go over to where it says layout, sorry, assets. We need to bring into myself, so I'm just gonna pray
onto my phone assets. And there we are.
We've got our MTN. Now I'm hoping that this comes
through at the right size. You can also say that
all those materials that were curated are also in the ad. So that's really great. I'm going to do is I'm going to try and bring in this empty. Let's see if it comes
in. So I'm going to bring it in and there we are. It should come in the right size and that's perfect. That's
exactly what I want. Now when I bring my my fall myosin or
something like that, it should come in the
right size and I can start placing this down
and find the done. I can start cutting out
this piece of lung. So that's why I'm going
to do I'm going to press seven and I'm not
going to do that. I'm going to make sure
that my head reference is right where it should be, which is at the moment. And then one way to
theirs, I'm going to press Shift Spacebar,
bringing my move tool. I'm just going to pull
it a little bit down, like so that one went today is I'm going to
bring in a plane now. So I went to press Shift X, just make sure your cursor is in the world origin,
which it should be. And then Shift a and
we're going to bring game whereas shift day, sorry, bringing in a plane. All right. I'll get
with it. Don't worry. Then what we'll do
is we'll press S, bringing IT scalar out
to the place where it once it like so
something like that. Then what I'm going to
do now is I'm going to actually sub-divide
this a lot of times. First of all, to help me out and went to add and modify it, come down to where it
says subdivision surface. You can keep a simple and you just need to scale
it out a little bit. And it should actually
make it better. If we do put up five, bring down all the way up. I think it's six that it
goes up to press Control. And then you'll see that
if I press Tab now, we've got it kind of like this. And it does make it
a little bit easier when you're trying to pull
it out and things like that. I'm going to do now is
I'm going to press S and just bring it out a
little bit like so, I don't want to be
caught in this away. Alright, so now we've
got that we do, we need to probably still divide it another
couple of times. Let's have a look how many subdivisions
we've actually got. We've got 8,192 at the moment. If you see down here
That's the amount of polygons are triangles. So what we can do is we can
actually come in now up everything Right-click
and sub-divide them. Let's see what that was. Pulls up 32 thousand. So that should be absolutely
fine to actually work with. We're going to do a little bit. So we're gonna add a displacement map in just a tiny bit just
to make it uneven. And we're also going to sculpt and we're going to call two out. So they're the things
we're going to do. One went to do now
is I'm first of all probably going to coach
you out based on it here. So if I press seven price
Zed going to wireframe, and you can see this is where
I want to cut it out again. So I've got plenty to
actually call out. I'm going to actually make
it a little bit smaller. So it gives me more actual
polygons the way we are. So I'm gonna pull it
up, make it smaller, and then just save
that it's actually fits in so I can
pull it up a little bit more as you can
see, make it smaller. Now you can save both fair
amount of polygons away with, I'm going to work along this
route around here, like so. All right, so let's,
let's do that now. You want to be cutting
out a little bit further than your actual graph. So for instance, you
want to becoming out here because we're
gonna be adding in another material and we're going to make the actually
transparent. So why do we do that? Because then it gives
the illusion where the actual ground ends and
that's exactly why we go now, let's actually do that now. So I'm gonna come
in with my knife. So now I've told I'm gonna go to morphine so I can
actually see what I'm doing seven Zed wireframe. You could also, if you
can't see very well, you can actually
calm to your actual empty all your image and you can actually
shouldn't be able to. Let's have a look. Can we
turn this down, the opacity? So I can actually turn
that down a little bit. So you might want
to just turn that down a little bit just
to get that with you. All right, let's come
back to this now. What I'm gonna do is I'm
going to stop continent away basically where my grasses, That's exactly what you
want to consider away. So I'm going to press
Tab and then one which doesn't want to come in and
kind of actually double-tap. And then press K, should be able to coach it
around here like so. Let's hope that went well. Be able to mark my
seams, I'm hoping so. I will actually have
a selection icon. So I'm just gonna call around past these pieces of
grass as you can see. Like just do this roughly, doesn't need to be
absolutely perfectly. You can see here it's a
little bit tie on this bit. Going in and out. I'm just making it
kind of interest in as well as the main point of this. Like it needs to look organic. Go back to that, press the
Enter button, and there we go. Now you can see
that it's actually selected all of my line. And maybe that's because
I had a vertices instead. And now it can do is
I can right-click and I can mark my same. So whereas it MLK, same, a confession, control,
amoxicillin, hopefully marketing. There we go. That's
really good because that means that I can actually
get rid of all of this back. But hopefully, if I come
in now to Face Select, grab all of these with LLC
actually goes through that. So I just need to work out now where all the missing
links is it on this bit that adjoined a lasso,
double-tap the envelope. So I'm just going to zoom in just to make sure that
actually touching Could, you can see they look like
they're actually touching. So we must have a place
which just missing. And it's probably actually
going to be hearing this command
right-click and mixing. And let's try it again. Let's
see if we go to this time. Nope, still on pace. So to put up the a and
we're gonna move around. Here's another one,
as you can say. I'm right-click amoxicillin. I'm just going to go round because I think
a little bit more so right-click among scene
and just fix those then. See one here. Rather than keep doing this. So shift click,
right-click and mop. Same. Just look in and see
if I missed any mall. And it'll take a
little bit of time, but we might as well do it
because it is going to make it easier for us to actually
grab the next part of this. So right-click mock scene. Go around probably with the presidency and go
around it. Not way. That might be a little bit to
another way of doing April. I did it this way initially, so I'm going to carry
on doing it this way. Okay. I think I've got them all. Let's hopefully grab it. No, we still got all
mixed in. So let's see. Where is this this
last one thing. Come back around to the store. So let me just have a look
where he's going to be missing and it's
a shame that you can't like grubbing,
going all the way. I'm going to actually
try wherever you can say I'm going round here. I don't really want to
regard around there, so I'm just going
to sit around here. I'm gonna mark this seems again. And then I'm going to do you can see here that it didn't
actually go through that. I'm going to do instead, we're gonna, I'm
gonna grow a piece. I'm going to press
Control click and just keep pressing Control
click to go round. It's another way of doing
it where you should actually be able to find
wherever the same zone. Because it will actually
try and cope through layer you can see they're actually
trying to cope through that. Let's go round now and do this. I know it's a bit of a pain, but we better off trying
to get rid of this outside in this way because
it's nice and flat. If you do, just try
and delete off, let's say your
faces, for instance, you still going to end up with issues because it's
gonna be very, very jagged. That's the problem. Now I know is impressing
control-click. It's actually finding a way through so it can't really miss out any of the edges. That's exactly why
I'm doing this. Now you could take much,
much larger chunks. You can see here
there's an issue there, but we'll sort that out as well. Hopefully, they should fix it. It's probably better
off that we do have some problems
with this so that you can see the
problems that we have. There is another way that
you could actually do it. You could probably
instead of having all of these
divisions right now, you could have
probably caught it. And then under the new
subdivisions or reach, apologize, they may be. So we can see here we
have an a problem here. So I'm just going to go back
and click on all these. I'm going to press
C middle mouse, and then I'm gonna try
and do this part again. You can see I've
got a problem that is actually trying to
select the whole thing, which is kind of weird. So we don't really want that. I'm going to select
these going all the way. So it could be a
problem with this. This might be where
the issue is on here. Hopefully we should find it far. Do we go down? Just to note that for now, I'm just going to
press doctors or can zoom out and zoom in
a little bit easier. It's just gonna be at hardware. Hopefully we should be
able to get to the end. Now, I'm hoping this
fixes the issue. Alright, so now I'm just going
to keep that bit as well, Right-click maxing like so let's come in now
and try and grab it. So L, and you can see now it's actually a weird
so l are not one. And now we should be able to L or miss one, delete
everything off. L delete faces and you
should end up with, I've got one face here a thing. So delete and faces. And one way to do
now just to make sure that this a split off. I'm just going to grab
everything like so. And I'm going to then press P. In fact, I won't
do it that way. What I'll do is
I'll press Shift, Shift Spacebar,
bringing my move tool, pull it open minute, and
then grab all of this. Like so. So I went to
basically split it off. So pay selections with the top, hide this other way, grab this one, hide
out of the way, grab this one top, and then delete vertices. And that's just going
to make sure that I've actually got
nothing left over. Then you can see this still, this little spot here. You can actually delete that. You can see it's a plane here. Delete that out of the
way, then press Alt H and you'll end up with everything back
that you need it. All right. So that was a
bit of messing around, but we got there in the end. So that's the main thing. If I press Add now bring
back my solid view. You can say if I press Control, Alt transforms right-click
set origin to geometry, and let's pull that
back in place. All right, So there we go. We've got our grass started, so lots of The main thing.
All right, everyone. So I hope you enjoyed
that one bit fiddly, but we got there in the
end, you might have gone. Okay, man had a few
problems but we fixed it. All right. Thanks
a lot. Bye bye.
53. Problems with Creating the Land: Welcome back everyone
to blend the three, the ultimate medieval sinkholes. And this is where we left it up. Now I want to do is we want to actually give this some kind of depth at the moment is very, very flat and we don't want that. So what are
we going to do? Just a simple trick
where you can bring in a displacement. So it will come to our modifier, come down to where
it says displays, a mobile do that is go over to our textures and went to come over and just click the
Down, sorry, click New. And then I'm going to
click the down arrow on where it says MHC or movie. I just put in clouds and you'll end up with
something like this. Make sure your lens is
actually smoothed off and you'll say it looks a
little bit like this. Now of course we don't want it and kind of jagged like this. We want this to be a
bit bigger so you can change the scale to
make them bigger. Like so this is kind
of how you want it. So bring you right out
and just change it lies. I'm just going to give a lot of kind of noise to detect texture. The other thing is we don't
want it this much either. So I'm gonna do now is
just going to go back to my modifier and
I went to turn down the strength a fair amount just so we've got something we just want something
to work with. I'm going to pull it up.
And there you can see that's what we've got
to stop to work with. A little bit of noise that
I'm just going to save. It can actually varied it
out a little bit more. So I'm just going
to go by turned down the debt for instance, like Yeah, and I think I'm
actually happy with them. So look at this, which I
don't really need them. Yeah, I think I need to
turn down the depth. I think he was happy with it. Alright, that looks
a bit bad for me. And then I think what
I'll do is I'll turn down my strength to
something like that. Very, very slim
because we're going to go with, and we're going to use. Now think I'll turn
it up one more. I think we can get some
variation like that. And then what we'll
do is we'll go in and use the sculptors. Well, don't forget
the result as well. All right, so now I
want to do is you basically want to
make a note the same. Now, I'm going to just
hide this out of the way. So highly out of the way. And then what I'm going
to do now is going to come in and press seven. Like so. Then I'm
going to press tuple. And what I want to
do is I want to make another caught now, but I wanted to make
another call relatively close to this one here. The reason we do that
is we want to give this another material and want the grass to kind
of come up to here. And then this bit
here to be Transform. And then it's going
to give the illusion like The grass is ending. You're not going to
end up with a kind of fold-over where the end of the actual end of the rocks
are and things like that. So first of all, what we want to do is you
want to grab all seen. So Alt Shift and click, just keep going
all the way along. We should have a way that we
can actually grab all this. I'm going to press Control
click and just go run. It is relatively easy to grab
now because you just going round the whole side apart
from this look obviously. So let's not do as fall, but we're just going
to click round. We could have actually save
this as a vertex group. You can actually
do that as well. So then you can just select it. I also think we might
be able to select it, select bij all by trade. We can, you can select similar lot by
seeing, there we go. That made it a much easier. Now we should be able
to do is if we put proportional editing on a short, well, to pull this down, if I pull this out, which you'll see now I can pull it down slightly like soap. So we wanted to drop a
little bit towards the end, just make sure it's not so much. Make sure you can see now it's just dropping
towards the end. And that's exactly what we want. One, that little bit of depth where the grass
kind of comes down. Now I wanted to do is
now called this, uh, basically one to command
a mark, a node the same. And I'm going to use
probably my knife again. So I'm gonna come in, I'm
gonna press seven K button. Let's put it onto vertex.
Let's press K now. And hopefully I
should be able to cut away rarely close to the ones
that we've already called. Like so I'm just
gonna move my mouse. This is basically
so that I can bring in another material and
make it transparent. So my grasp, I'll go right up to this edge that
I'm mocking now. Then the other edge down there, we'll actually
dissipate it like so. And it just gives
us also a reference to mark our gracile to we don't really want to go over this
one where we're actually pulling our grass into the same. Don't worry as well. We're actually going to triangulate these so
we don't run into with a load of angles
or anything like that. Just looks a little bit messy, but he's actually it
will be a working mesh. I'm just hoping that
I've not got to go around again like I did before. Maldi seems again. Let's call him in on
this one, like so. Let's zoom in and make sure
that I marked it right there. Press the pen tool
and then I'm going to right-click and Control
E, sorry, on democracy. All right, we can see
we've got pieces missing again. I hate when that happens. What I'm gonna do it that
way is because I learned I'm going to press not there, I'm going to press
Control plus going round. Make sure I've got
them all because it's very important for bringing in the material that
I actually do this. So I'm just going to spend the
time going round it again. This is just preparation. And if we gonna get a really
nice render of Lambda, we need to prepare it. Well, I do think that this still is probably the
fastest way of doing this. I'm just going to go
in and control select. You can say where we've
got parts missing. So you can see a dumb I was actually
going over, I'm sure. Let's click on this. Here we go. Keep following it
all the way through. You can see we've got
some edges on here. I'm not sure why they're
they're both talking, go round then get rid of those. Anyway. I'm actually not
sure how they've actually appeared that I don't know
what that's a bulk will not only round one edge. So maybe I actually selected the mind mistake and
I'm on the same, maybe won't go round. Just select them because I don't think there's
too many of them. Then hopefully we can start
bringing in all buildings. Finally, then we
can start sculpting random effect because the
edge of buildings you, you get where the soils kinda lift adult at
the edge of them. You get that. You are obviously going to
have the sole LinkedIn, for instance, where you farmers, we're plants and things
that are growing out. The pumpkin patch is gonna be the soul is gonna be
turned over a little bit. So we need to do that as well, just to make it look realistic thing we're nearly at the end. There we go. Let's
right-click and mixing knife. Grab this one. I should be able
to grab eight down to that loss gain now. And you can say that that's perfect, it's just these parts. So let's come in now and just grab these parts going round, grew up and get rid of
them will just clear the seams on the
message said there wasn't many of them,
so that's good. Still don't know
where they came from, but either way, they're
gonna be gonna be fixed. So we'll look, is there anymore on there
were just talking about I don't know why that
is anyway, I'll right-click. Unclear. It seems analysis
if we can grab this, Let's see if there's anymore. So l goes all the way around. Alright, so that's, that
now is settled then. The material that
we're going to bring in now you want to
do is you want to bring in your actual buildings. We want to start
bringing those in. We're going to base it basically on the actual reference
that we've got. So if I press saltation now, bring back my reference. And among Wednesdays I'm
going to go to the top. I'm going to press zed,
I'm going to wireframe. I'm actually I showed rarely. In fact, do I need to
go into wireframe. I should have put this
just down on the bottom. Probably actually going
to do it that way. It'll be easier because yeah, Can I see it properly? That's the problem. I've gotten. Double-tap the a. I'm going to actually bring out the constants a little bit more. I might be able to
do it like this. It's up to you really how you
do I'm gonna pull this up. I need the halfway
point actually. So I'm gonna pull it up, pull
it all. I don't think so. I'm gonna pull
this down instead. Actually. I just really, really flat on top of that. Once it really flat on
the actual ground plane. So you can see this is
below the ground plane, so I'm going to grab them
both and pull them up. There you go. That's about right. Alright,
there we go with that. Say, that sets up now for what I want if I
double-tap da, now, what I'm gonna do now
is I'm gonna go over to the assets and set myself up just so I
can bring these in. And I'm hoping whenever
I want and I'll say exactly if it's going to
work, doing it this way. All right, everyone,
so let's see if that works on
the next lesson. I hope you enjoyed it, and
I'll see you in the next one. Thanks a lot. Bye bye.
54. Populating the Scene with Asset Manager: Welcome back everyone
is a blend of three, the ultimate medieval sinkholes, and this is where I left out. Now let's zoom in
and let's bring in our farm house,
which is this one here. So I'm just going to drag
it in and hopefully, hopefully it should work. So let's pull it out and
it fits into that place. Pretty nice. Let's press that go into solid and let's see if
it's just gone in flat. So double-tap the a. There we go. Actually, that looks like it's
worked pretty well. I'm just going to pull this down and see how far we've got. Yeah, I think that's
where it created well, and you can see I've
left my M displacement on as well because
I might need to reduce it once I've
gotten my material on and things that are going to have
a much, much better idea. We can say actually, it's done a lot
of the work here, forests for instance,
this is very uneven. I think just turn it down one. Yeah, and I think that
looks a little bit, but I'm just making sure
my house is still fit in. And I think this is looking
really, really good. Alright, so now if I
go over the top again, I'm just going to press a zed, go back into wire-frame, and I'm gonna log to
where the next thing is. We can say we've got
what ways on here. So we can see we've
got warm walkway here. So let's find out what way, whereas our walkway
did we actually save that out areas as what way? Let's bring that in. I'm
gonna spin it round. So all I said, I'm
gonna put it into place once I've called these basically in the right place and I can go round
and move them. Now I'm going to press
Shift date and I'm going to bring the wall way round here. And let's bring it over
to where I want it to be. So somewhere somewhere like here you can see my house is probably a little bit out here. It's probably a
little bit closer. So let's grab my house. So I'm just bringing
it over a little bit. Let's see if it's time. Say
my house on this image. Probably gonna move
it over like so. Now let's bring in the windmill. So let's bring the windmill in. Let's turn it over the
front of the window, as we can see here. If we spin this around now, so I'll spin it around like so you can see it's a little
bit bigger, maybe the mine. I'm not actually sure
if it is or not, but I'm gonna leave it for now. Again, I'm going to check it out once I've got everything. Let's bring in the
ball men now so the bond, spin them around. You can say this is the bomb
where the haze over here, so we can display all
is at 90. Bring it in. You can see how easy it is actually to bring all these in. All right, Let's bring in the, this is the small
vegetable patch, so let's bring, bring missing. What I'm going to
do, you can see that this is going the
wrong way around. This should be over
the other side. And if I spend this round, you're going to
have the ovaries. So that's not
really what I want. So I want to do
instead is I want to mirror it on, let's say the x. Now it's not there. Well, yeah, you can do on the x-axis because now you can
just spin it around. So all 90 and then all the 90 and there
we go responding run, they're facing the right way. So that's a very easy
way of doing that. Now let's bring in
our main fence. So this is the large fences. So let's bring this in. And then you go,
you can say, Oh, he says that was just the
Plunkett in place, like so. Then I'm going to check now
to see how far that goes. Now the other thing
is I'm going to bring in and I've got these in. I'm going to bring my human in. I'm gonna put him there as well. Just so I've got a reference to actually where we
were just looking at. I've got my plot I
wanted to bring in, I'm a pump is a bit hidden, is actually round here. I'm going to bring in
my poems and put it in something like that. I'm not sure if I need
to turn that yet. I've also got my stone. Let's bring in,
I'll stop here for now and then move it so
trees don't bring that in. Whilst we've got, we've got
our logs will bring those in. We've got our acts. So I'll actually want to
pull up near my tree stump. So I've got my folk, folk and we're gonna
pull up just over here for now. What else have I got? I've got my shelter. I think my shelters
actually don't, so that should be fine. I've got my ladder,
so I'm just going to put my ladder over here. Now I'm going to go in and
actually fix all these. Alright, so let's say,
let's go into a solid. Let's now get all
of these in place. You can see my axis
just, just below that. And there we go. There's the x. Let's put the tree
stone over here. You can say I'm going to
have to lift this soap. So I'm just going to press
the dot born just to zoom in and I'm gonna pick them
up and put them into place. Might have to actually
make those smallest amount be a little bit big. Let's bring our guy in, is actually sunk
in a little bit. Let's have a look if
everything's some kind, I'm just going to hide
this out the way. There we go and see how far things are actually
some kids off thing. I'm gonna bring this
down a little bit like so and then bring my house down. Do I need to bring
this down just a tad? Like so. Now let's bring all
man round here. And look at the
size of the Acts. I'm going to bring them in. I'm gonna pull them all. Just checking them. I'm going to make the tree
stump just a tiny bit smaller. Also. Just pulled that in place. I'm going to press
three. I think it is. Yes, it is. And now we can get that in place and then I'm going to
rotate it on the XOR, x your site is plunked
in that kind of thing. I'm also gonna, I'm gonna
rotate it around because nothing ever should be
perfectly straight. So always bad, It's
turned into an angle. All right, so now
we've got our logs. Let's put those in place, so all zed, bring them in. You can say that we've
got a lot of room here. Again, make them smaller,
it's not gonna fit. So like so let's pull
them back into place. Not looks, I don't want a
mind game too far over. So something like not as
plumped them on the thing. Yeah, something like that. And then what we'll
do is I'll grab a couple of these
with Edge Select. And then what I'll do is
I'll bring these out. So ship date, should space-bar
move, bring them out. Say I don't want
proportional editing on. And let's put these over here. So I'm going to make it just put them over here
like he's actually working on some of them. Zed. Then I'll grab one of them. So zed, like so I'm bringing
this one out. Like so. All right, double-tap the ion. Let's have a look at that. Okay, I think I'm
happy with that. Now let's have a look at this. When melt sampling is I'm
just going to move my guy that actually I think the windmill looking from here and it looks really
nice size actually. I think I'm actually
happy with that windmill. Now looking in my
fence over here. And actually I'm really
happy with how that fits. It fits right? Or close rate is probably
better than my old one. The pumpkin patch
is looking really nice where the actually
is because then they've got this
walkway through here. And we can work
with that as well. So let's now look at the pump. The pump just needs
going a little bit. Probably actually narrow it to the fence would be
more realistic and see that as a brother and I
need to move it altogether. So I'm just going to
grab this and pull it up and then just
move it altogether. Like so. Yeah, thanks.
Something like that. I'm going to go to bucket as
well that I need to post, so maybe a little
bit over there. All right. So now I'm going to
bring my ladder. I bring my ladder, press
all 90 and then all x, sorry, y, and then just bend over it very slightly like so. And let's get that in place. So do I need to lift
this up? Not really. I can lift it up
probably a tiny bit. I'm actually happy with that. Let's look. They'll just a tiny bit line. And then let's bring off,
put it against here. Then x and just to pick
slightly leaning up against it, lets the moment of truth, Let's come into modeling. Let's say press tab. Let's make sure it
written material mode. Let's wait for the materials
too old, too low HDL. You showed end up with
something like that, looking rarely really nice. Now let's save the animations works or even news
press Space-bar. What we're looking for
here is just to make sure nothing jumped
somewhere else. That's exactly what
we're looking for. All right. I think I'm really,
really happy with that. Now what we want to do is now
we know everything works. Let's have low reframe a
hundred and two hundred. You might as well let this run through and see if it actually were only
going to frame 200. There we go. That's
one of the problems. So let's come to the layout. Actually put this to
end on frame 800. That's why it's flaking. So you just want to
make sure that these go through all of the way. So basically your palms doesn't it doesn't miss fire
or anything like that. I'm just looking at
this point, making sure I'm watching
it go up and down. That's absolutely fine. And now the, the actual
windmill is going round. And that looks
absolutely fine as well. Alright, so let's
press space bar. Let's put this back to 0. And now what we need
to do realistically is just check all lighting. I think what we'll do
is on the next lesson, we'll do that on
the next lesson, we'll start bringing the
materials into this part. You can see here that I've got some Robert jagged
pieces that I showed. If I click on here, probably get rid of or
move them out at least. So I might as well come in
and just any jagged pieces, just try and stretch
them out a little bit. It doesn't matter about
a little bit stretch and actually you won't
notice anyway, so I'm just going to smooth
this out a little bit. You can say there is
another technique you can use as well to
actually smooth this out a little bit,
which I'll show you. I'm just going to smooth
them out a little bit. Before I do that, I'm just going to
come around any of a jagged pieces that I can say. I think that's actually
all this, this one here. It really bring that in, just a smooth those out. Then what you can do is you can actually come in with da select. So I'm just going to
select one of them. I want to come to select and
we'll do what we did before. So select similar by seams. And then what you can
do is you can come to where it says vertex, smooth vertices, and you'll see that it actually starts
to smooth them out. And now if I come over
here and turn this up, it all down like so you
can say it really starts to try and smooth those out and you can turn
up the number as well. Think that smoother out. M a no. No phone. No. Okay. So you can say I've
missed a piece over here, so I'm going to do some
just going to come in, I'm going to press G and just smooth it out just
a little bit, like so. And then I'm just
going to look round, may can show them how paid. Think I still need to smooth
this out a little bit. I'm just going to press
G, bringing it out. Just to smooth it
out a little bit. There we go. That's smoothed out much punch back, like so. And then finally the
last thing I'm going to do is I'm going to
grab it all now. I'm going to press, I'm going to right-click and I'm
going to, where is it? Triangulate faces. And I'm going to
right-click again. I'm gonna put tries to quads. And what that's done
is it's triangulated everything and just
making sure that there's actually no guns
or anything like that. All right, everyone. So what we'll do then on the
next one is we'll actually start to bring in some
materials on this land, get that already done, settled for the grass
and things like that. We're actually going to
be 0.3 textures on this. Normally you can only put
two textures on something, but I found a way
to put three on. You just have to be
very careful with that. So let's just say
it's a bit of a high. All right, everyone, so
I hope you enjoyed that and I'll see you in the
next one. Thanks a lot. Bye bye.
55. Working with Multiple Texture Maps: Welcome back everyone
to blend the three, the ultimate medieval sinkholes. Now let's do something a
little bit complex and let's make the material
for all actual ground. So I'm gonna do is I'm gonna
grab my actual ground plane. I want to actually just
turn this off for a minute. If you turn this off, it'll
get rid of the gray map. Sorry that gray items
at the package you can see we've got all of our Viewport here with the x
and y and things like that. It just takes it off and it just makes it a bit easier
to actually see what we're doing
because we haven't brought lightning yet, we
want to bring a light. And then once we've actually settled
descriptor ground plane, so now let's come in and
come to our materials. Click New. I'm going to
call this ground, ground. Like so. I'm going to straight away just right-click on our
market as an asset anyway, just so you've got
it, then what we'll do is we'll come over
to our shading panel. And as I say, this is a
fairly complex material. So just try and pay attention
is what I'm trying to say. Alright, so what we're gonna do is we're
going to first of all bring the material
output way, way over here. What we're gonna do is
gonna hold Control, left-click where
it actually goes in and just get rid of it. Then what you're gonna do
is you're going to grab the principled control shift T. And what we're gonna
do is we're going to bring in references, are references,
sorry, all textures. So whereas alt text to say they are bringing your textures
and the first one you want to bring in is
called a grass on rock. So let's find grass
rock here it is. So aggressive rock,
you should end up with five different textures. So you can see we've got
an AO there as well, so we need to bring nine. I'm going to Shift
click all of them. I know they won't all
come in and we should end up with something like
this at the moment. I'm just going to
pull this down, like so I'm going to do is
I'm going to grab this one. I'm going to press Shift date, bring it up again. What we normally do
is we open up this. We're just gonna
call it like so, just so we know what it is. And then I'm going to change
this out then for the AO. So I'm going to click
my A0 is this one here, it says eo, double-click
it, and there we go. Now let's bring in
the mix RGB again, like we've done
many times before. So this part of it you should
be familiar with by now. Let's put it on multiplying. Whereas my multiplying, whereas my multiplied.
There it is. Okay, let's plug this
one into the bottom, this one into the top then unless also on this
one bringing a Gamma, just copy what I'm
doing for now. And I did set my note
based on the lion, so just bring him what I'm bringing in and
then you can play around with these if you want
to shift a search Gamma. And of course, this is how
dark this actually is. We might go in and
change these as well. Let's just set this to 1.1. Let's plug in the color. And finally, let's plug in the color to the
actual principle. All right, So that's one said. You won't say anything at
the moment and that's fine. And the reason is
obviously we've not got anything else sets on. Now what we're going to do is
we're gonna grab principle. I'm going to press Shift
date and drag that down. So this will be the
second actual one. And this one is going
to be all mode. Again, I'm going to
press Control Shift and I'm going to go to mode now. So we've got where is it mod? Let's find our mode. Again, I'm going to grab the first one is
grab the last one. This time we've got six m, so we need to get all those in. So click the principled,
and there we go. We've got five of them in. Let's move these
out a little bit. Like so. And then what I'm going
to do is I'm going to make another one now for the AO. So I'm going to grab
this. It's a shame that blend that doesn't
let you bring in occlusion is like right
off the bat with the principled I wish you did
where it doesn't shift, drag it, OK, change this to a o. Then let's make a
multiplying to mix RGB. Jump in, and let's plug
this into the bottom, this into the top. And I'm going to actually
change this slightly. So I'm going to put
on nought 0.7 volts. Then what I'm going
to do is I'm going to plug this in now
to my base color. I'm also going to then
come up and change the FAQ on the multiplying
this and put it on 0.908, something like that.
Alright, still nothing. That's exactly what I wanted. Now I went today is
I'm going to bring in my grass ground. So I'm going to do
is I'm gonna grab my principled ship
date and then I'm going to zoom in like so. And I'm going to press
Control Shift and say, let's find grass
ground is called. I think it's near the bottom. So below ground, fallen
leaves, It's not that. Whereas grass ground here it is. All right, so let's
bring all of these in. We can see on this by the way, that we've got normal
GL and a normal dx. Uh, don't need the dx, so I'm just going to delete mine when it comes
to you and yours, obviously you open up that and so it's normally with blended, the normal map is
normally a normal GI. Alright, so what I'm gonna do
is I'm going to grab all of these principles,
bring them all in. Then I think on this one, I need another
ambient occlusion. So let's let's move this over here because we've got a little bit more
work to do on this. I'm gonna put my
displacement here. The displacement, by the way, we'd never really need it. You can set it up so that using a displacement
like on the ground based on the actual material, you can actually do that. Well being, as we've
called displacement, just blight based on a
simple noise cloud texture. The other thing of
course, is I did forget to do is I really need to plug my vector into
my ambient occlusion. Not something I did forget. It's not actually going to work. Alright, there we go.
Let's plug this one and you can see it's trying to
plug it in just thousand yet. So what I'm going
to do is I'm gonna pressure, bring that open. I'm going to change
it then to A0. So then what we're
going to do is I'm going to grab this,
pulled the n, like so I'm wondering actually if I plug it straight
in from here, Let's see if I can yeah, that's how it should
be plugging in. That was much, much
bad like that. Once you clean it like
that, there we go. All right. Let's come back then. Bring them down a little
bit. I don't know why. I'm gonna pull up their
mess, the whole pumps it. Let's press Control,
zed and safe. I can actually move them. How
do you move these things? Is that gonna move it?
I'm holding my Shift. I'm holding my there we go. There we go. That's exactly what I wanted
to just put those back. All right, Now let's bring
it in, multiply again. So I'm going to
press Shift a and makes RGB bring that in, let's say plug the
same to the bottom. So the bottom again, this into the top. And we're also going
to bring in a gamma. First of all, I'm going to, I'm going to actually set
this to 0 for now. I'm going to then bring it in. Let's try a Gamma. Just to give us more
control if we need it. I'm going to plug
this in on that. And then I'm going to bring in a UN saturation
just pulled over. So shift. All of the ones that we've
actually used before. So that's great. You and saturation I'm going to do is I'm going to
actually zoom in to this. I'm just going to change
the saturation to 1 for the value to null 0.850. And then we're going to
do is I'm going to plug this color into the
color of my u and saturation and drop
the color into the base color of my principles. Finally, I want to also change
the roughness on this one. So I'm going to press Shift
eight, bringing them up. The gametes are
really, really easy way of changing your
roughness down. So just drop that in way
your roughness says, I'm going to put
this on no, 0.1. Now we need to find a way
of plug-in all of these in. So that's the, that's
the main thing. So let's come to this 1 first. So the way we're going to
actually paint on here is to use vertex colors and vertex. We're going to separate
them out. So all GB. And they said We're gonna have a red and we're going
to have a green. And that is always going
to distinguish in which actual texture goes when
it's the only real way of actually pull in
different textures on an actual plane or
something like that. So first of all, I'm
going to bring in, and I'm going to press
Shift a and bring in a vertex color, which is this one here. And I'm going to drop
this right here. I'm going to
duplicate this then. So Shift D and then
one Wednesdays I'm going to separate the RGB. So I'm just going to
put these together. I'm going to press
Shift a and we'll pull STP and you allow separate, make sure its theology
B1, let you pick him. They see it. I'm going to duplicate that
again. So shift day. And then what we're going to
do is I'm going to plug in the color from this one to here, and the color from
this one to here. Alright, so now we
need a mix shader. So let's press Shift
day bringing in a mix shader, like so. And then what we're going to
do is we're going to plug in the FAQ from this one here, this separate RGB, we basically
want to plot the reading then the fact of this mix shader like so I'm just going to
pull that up there then. Based on what that's done then
is any the upload Damian, Then it's going to
use the red channel to basically put
those onto our plane. That is exactly how
it's going to work. What we'll do then
is we'll carry on with this on the next lesson. And hopefully we should get this finished off and
we actually should get this, paint it open. All right, so I hope
you followed along and it's a bit hard
to actually zoom in and show you exactly
when a zoom out you can see how big this actually is. I'll try my best to
make sure that you be able to see exactly
what I'm doing. All right, everyone,
so I hope you enjoyed that and I'll see
you in the next one. Thanks a lot. Bye bye.
56. Vertex Painting with Multiple Textures: Welcome back everyone
is a blend of three, the ultimate medieval sinkholes and this where we left off. Now let's come in and
duplicate this one out. So if I bring my mixture, you just press
Shift a and that's duplicated over here somewhere. And then what we'll do is
we'll use the green this time. So this green one,
and we'll plug that into the fact of
this mix shader. Now let's start plugging
in actual part. So again, we don't really
need the displacement. So I'm going to unplug this displacement is just making it look a little bit on tidy. Then what we'll do is we'll grab the principles of this one. And I'm going to plug it into the top one up here
of my mix shader. So you can see that's
plugged in their life. So I'm going to grab the next
one down, this one here, which is my mode,
and plug that into the bottom mix shader. This mix shader, I'm going to plug into the top of this one. And finally then my
other principle, which is way over here, I'm going to try and
grab it and plug it into the bottom of this
mix shader, like so. Now nothing happens
and that's because nothing at the moment
is the moment of truth. Let's plug them in life. So something should happen. We haven't got unwrapped
or anything like that. So we do need to do that. So let's let it low dope is
going to think about it. And hey presto, we've
actually got something working so we might not
even need to wrap this. Actually. I'm just looking at the you can say I've got my rocks and things like that. I'm just going to
actually press top and press U and unwrap. Should unwrap. Absolutely fine. So let's have a look. Going to take a little bit
of time obviously, because it's got a lot
of materials on here. There we go. Alright,
unwraps. Absolutely fine. And that is actually
looking really nice. So let's now go to
modeling again. One problem though, before we actually start painting
on it is that we haven't changed the size of
the map space layover moment, they're all at one and
that might not be ideal. So as I said, you just make
sure that you unwrap it. So make sure your Zoom wraps. And then I will show you
exactly how this works. And then we'll go in and
quickly change the map Soviet, and then we can actually stop
painting not incorrectly. So I'm going to press Tab, so main object mode, I'm going to come over then
to the left-hand side, make sure we're in
vertex paint them. And it will go to
this kind of grass. And you can see the grass
based on the man is really, really chunky and that's
what I'm talking about. They have a thing is just make sure you save your file out. Save it out as something
different of course, because when you
vertex painting it, Coke crash, I guess
something like that. Alright, so let's
show you what I mean. So at the moment, AML white, as you can see here, we are
on draw as you can see. And if you click on this
bond here, we can see, we can add, we can subtract, so it should be on the ad. And then what you can
do is you can put this on the y and you can say, oh, it's just doing
the same thing. Now let's command and
put this on black. So I went to put this
on Black and you'll say the ADH is not working, Let's put it on drill. So you can actually draw
on that with black. And there we go. It should be subtract or safe
subtract weeks. Now, subtract
doesn't work either, so it's basically only draw and it's based
on the college. So there we go. So you can see we
can paint this on. And now that the
moments of truth, Let's come in, put this on
white and put it on red. And now you should be
able to draw ROM mode. Exactly what we wanted. This is how it works. So I'm just going to draw some
mode on here for instance. Like so because this is where obviously I want
my mark to be on. And then what I wanted to
do is I want to actually, well the first thing is I wanted this grass not to be graphs. I wanted it to be rock and
then put my grass around here. And the other thing is I don't
want these to be really, really big, like
they are on here. How do we solve that out?
Let's go first of all, back to our shading panel. Let's then zoom in
to this one here. And over here, you can see
that it's based on the UV map. So we've unwrapped it and then we've got a
scale over here. If I put this on 333,
and there you go. You can see we've actually
changed the scale now. So again, you can command, I will look at what scale you're actually happy with and
then change the scale. Now let's come to
the actual next one. So what I'm going to do is
I'm going to come to my mode. You can see my modest
way, way too big. Again. Just remember where
I put them on, might not be what
you want them on, so make sure you change
them accordingly. So 888, and you can see that
that probably is too small. So I'm just actually
going to change this, but I'm going to try 55 to five. Now that's probably going to be much, much better like that. Alright, so this ground, I'm actually going to make sure I've got it on at the moment. So I'm going to change
mine to let's try 22. I'm just looking at the size of the rocks now on
comparison with this. So this is a fairly,
fairly size. The rock mine come in and change that as I've
actually built this out. Alright, and the last
one, let's have a look. It's the grass. I'm
just going to move down and don't worry
about the collegiate Eva. Let's put this on
full, full and full. And there we go. Something
like that, right? So what I tend to do
now is I'm going to, I've got my grass
actually set out several of the size
of the graphs now, looking much, much better and the grass is
going to be hidden. So don't worry too
much about that. So I went to do is I'm gonna
go back to modeling now. I'm going to press Tab and
I'm going to basically paint this all in this color for now. So let's come in to vertex pain. This one I think walls black. Black. All right, so I'm just going
to make my brush bigger with the little brackets next to the class and just
paint the whole thing. This color to start with, because I find it much
easier on the eye. Like so. And then what I'm going to do is instead of going round and putting this
really high on the strength, I tend to then go in and lower
the strength right down. And then I'll call
him and put it on. I think it's why
is my actual mode. I'm going to zoom in. Now that's the grass as you can see. So what we'll do is I'm
gonna problem the red. Let's try to read. Yeah, there we go.
There's my morning. You can say now I'm
just going to click on here and just
gently go over it. Live so you can see how
easy that is to do. If you've got a pod, a graphics tablet or
something like that, it's probably going
to make it a little bit easier to actually do this. You can also tell you
the strength of if you wanted to be a little bit
quicker, I'm gonna leave, I'm gonna leave my life
is because I don't want it too muddy or
anything like that. Now what you really want to do is you want to make this to your heart's content and make
it exactly as you want it. The more obviously
I click on it, the more more directly
going to get in there. You want to basically
overstepping the boundary a
little bit like so. So somewhere down
here going now, you can see how easy
you can make it log fairly realistic like this. Also where this is going to be a fair bit
of more ground that, and also onto the pumpkin patch, there'll be a fair bit of mode, maybe not as much
modest whatsover here. I bought a fair bit on here. So I'm just going to move
this up a little bit like so you're going to have a mode probably going
on your walkway. So anyway where he walks, it's probably going to be a bit muddy in codomain and
make that a little bit more like Nemo I'm going to do is I'm
just going to have a look round and anywhere else. So one mod probe, so probably
walk in through here. This is probably
gonna be a bit mode, probably through here as well. Probably on the hair where the rain probably hangs off
the ethics rain and a little bit around here, like so. And then maybe just a
little bit over here. Coming out here, got
a little polar legs, you can say, all right, that's looking really nice. Now, let's bring in all the
one I think it's on black. Let's see. No, that's not it. So let's put it onto a white Let's try
lot. Yeah, there too. So there's our green
grass as you can see now, the green grass if you
want around the edges. So you want a little bit
because we're going to have some green grass
flows down here. So wherever he's not Wall came wants to be a
little bit greener. And you also probably want a little bit of green,
open-air the house. And the reason for that is I'm just green in
this as you can see. The reason for that
is because round the edges of this and what I'm gonna do is I'll
show you what I mean. I'm gonna green around here. And then one went to do
is I'm just going to tell my brackets down and
then just put it so they agreed because you'll end up with grass
growing round these policy it. So that's why I'm doing that. And then I'll come back to here. You don't want it too much because it is a
little bit by this, we come to end it down,
but rather than not just green out a little bit. And as I said, it's
gonna be COVID wave, graph, some foliage
and things like that. Which we're going to look at. Probability after we do,
we'll probably do the hay. And next I'll have a
look actually before. I don't forget some
of this as well. We're going to make
another material. Blankness, Paul out. Let's make it smaller
and let's call them to the sign of the house. A bit of green here. Green in here, maybe like a
little bit of green in here. Then going round here. And maybe these policy, you're gonna get some growth of grass and things that's
normally what happens. So I think I'm happy with that. Just want small
pieces then on here, I'm going to make up
a little bit bigger. Probably a bit more
modeling the dire actually. Just get it right. So
basically what you want, alright, something like this. Just looking now
for going off mode, going down there, I think I want a little bit more
and more down here. I think the mode, local
laws that black, I think. Actually, no, that's
not the model, so we'll put it on the most
beyond the red lunch trauma, red. On the red. Let's make some more
Walter down here. Get rid of this rock so
much. And there we go. Meet announcer. Here we go. Looks really radical. Now let's come in. What we'll do on
the next lesson is, well, think about all sculpting. We'll bring in some sculpting. And then finally we consult on our lighting and then we can start moving onto the political systems
and things like that. All right, everyone. So
I hope you enjoyed that. It's really coming
along now and I'll see you in the next one.
Thanks a lot. Bye bye.
57. Sculpting Within Blender: Welcome back everyone
to blend the three, the ultimate medieval sinkholes. And this is where
we left off now, before we carry on, Let's do
a little bit of tidying up. We've got a lot of them
policy that needs to be tidied up so we actually understand where we're
actually coming from. So first of all, long-run
today is I'm going to grab this scene collection. I'm going to right-click
and I'm going to click, can actually rename this. I'm just wondering why a
Comp rename that so weird, but I'll actually right-click, click a new collection. Yeah, and this one
I actually rename. These are called this
Let's call it buildings. Like so. And then what
I'm going to do is I'm just gonna go
down uncontrolled. Click all of these buildings and you can see them
highlighted there anyway, I'm even going to put melodic large fencing
several of my logs. I'm not sure what this planet, so I'll look at the
after my Waltz upon my windmill and my
wooden walkways. And then we're going to do
is I'm going to drag them and drop them into my buildings. Close that. And this is what
you should be left with now. All right, so now let's see, we've got references, so
we'll use another one. So I'm gonna right-click and
click new, open that up. Buildings one. There we go. We don't want that in
there, so we'll call it out references and that's
moved that all. Try and grab it
and put it there. And then what we'll do is
we'll just close it up a second and we'll bring
in our reference. So here's our reference, and it's our empty
or human reference unless drop those
in our references. Let's close out. The reason we're doing all this is because we
are going to have many things in here,
many particle systems. We're gonna have wind in here, smoke, things like that. So it's really important
at this stage that we actually clean it all up ready for bringing
those pulsing. Okay, Before we get
overloaded with Paul, let's have a look at our plane. So what is our plane
exactly? Let's have a look. Let's say this plane is
going to be our ground. It's just that you can't
see it at the moment because we're still
on vertex paint. So let's put this
on object mode, what we'll call this ground. I'm actually going to make a
separate one for our ground. So we've got a water pump here. Let's make sure it still works. So multiple them on a windmill. And when I grow up both of
those and put them into, I think they're actually in
the other end built-ins. I don't think they are actually, I'm gonna drop
them in buildings. We're gonna make sure
that they still work. Just to make sure
that the animations went along with them,
which they have. That's great. Then we've got our ground plane. I'm actually going to make a new one collection
for a ground plan. The reason during
that, of course, is because I wanted to be able
to put it in somewhere and turn it off and on
when and when it needs to new collection. Let's call it ground, like so. And then let's grab our
ground and drop it in there. All right, let's close
all those up. Now. Let's make sure this week, so my references hidden, let's hide all those. My buildings, they then
my ground plane hidden. Okay, So, so far so good. Now let's do a little
bit of sculpting. I'm going to do is I'm
going to first of all, just put it on object mode just so you can see what I'm doing. And then we're gonna come
over to where it says object node and put
this on scoped. Now I pretty much, you'll
see that if a drawdown here, I can draw a line in that. You can also say, at the moment, I've got it on strength of one. If depressor control and draw, you'll see that it indents it. Basically what we
want to do is we want to start with all farms. So we want to make
this a little bit uneven to where the actual
plants are going to grow. So I'm probably
thinking I need 1234, maybe five lines on here. So what I'll do is I'll
press seven square over the top and then one
went to do is I'm just going to Gabby like
this, something like that. Then I'm probably going to
turn it down a little bit. Actually, I'm just go back a minute and just do that again. Let's just get rid of that seven and then let's
just try it again. Like so just a line of where my actual land plants
are going to grow. You can see I've left a gap
there and then I'll come to this one like so, and then the next one, like so. And then finally this
one. There we go. All right, you can say that
I said brought those up and added a little bit of realism that now let's put
it back on material. And you can see now it's really starting to stand
up a little bit. Now what you want
to do is you want to call them now round to these posts and you want
to raise it a little bit, especially around these, because that wouldn't
be more realistic. You can click an old
as well and you can see it's really worth
taking the time. Just erase these things
off a little bit and certain corners
and things like that. Maybe underneath it, raising probably sweeping under there and things like that. So let's just raise it up. You'll always get modern things on that coming into the corners. Raise this bit line. So just wait your way around
again for the realism. You just want to be putting this extra kind of be aware Kim. Just to make it a little
bit more realistic. I'm PLC learned and actually
how to actually do this. Alright, so I'm happy with that. Let's just go around now
and raise these bits. So wherever there is a kind of mountain or say you might
want to come in and just raised a
little bit like so, just to make it a little bit on, even as you can say, rarely, rarely adds to it. We're going to have
some trees here, but it's rarely go to make
the ground a little bit uneven than what we had it just especially because we're working
with the ground now, we're not just based on just a noise texture or
something like that. I'm just going to raise
this phrase opiate. And then I'm just going to
make it a bit smaller and just pull it up In these points here. So it looks as though this is actually not just placed on the ground that
among engineers, I'm just going to bring it
around a little bit over here. Raises soap way my
pumpkins are going to be. And then let's come in now and raise the volume
up a little bit. I don't really want
to raise dope. Watch round, laugh like this. I think pretty much
part from this fair. I'll raise this up a little bit. Just taken so many places. Alright, I think we've pretty
much done with the ground. Now it's time to
actually think about, actually liked to have seen. What we're gonna do is
we're going to actually come in and light our scene. So first of all, we'll put it onto our EV. Even though we're not
going to use an EV, we are going to use
in cycles from now. What will do that
names will come over to the right-hand side. I'm on Wednesdays,
I'm going to mess around with a few
of these options. I guess first of
all, the thing is I really shouldn't
be actually bringing in my liked him first and then I'll be able to say
exactly what it looks like, a mess around with these.
So let's do it that way. Instead, I'm gonna do is
I'm going to call them to my weld, this one here. And I'm going to then come to my assets among them to do
and I'm a world's gone off, so I just need to pull that arm. I'm going to actually
drop in my HDRI setup. So this one here,
you can bring any of these and if you want and
you can try them out. So let's put it onto EV, and let's just drag
and drop one aim. And you'll say there is the
first one that we brought in. And let's see what
this actually looks like on cycles once
it brought in. So what do I mean by that? Well, first of all, I'm gonna go over to my shadings panel. I want to make sure that this is on wheeled instead of object. Now if I zoom out, I showed where is
it There it is. This is my world now and this is where it
should look like. Let's put it onto our
render it among registers. I'm gonna take away the HDRI. I'm going to pull the
gradient on instead. And this is our gradient and
this is what we made before. If you remember, now it's the wrong way
round at the moment, this should be light and
this should be dark. If I just take this down to the lighter one and then
come back to this one. And I'll make this
the dark long, that looks then much more realistic the more
it did before. Alright, so now let's say
come in a couple of top. Let's pull this
down a little bit. Let's also bring in a song. So shift day, let's bring in, whereas my lines bring in a song and Shift Spacebar so we
can actually move it. Let's bring it up and
let's rotate to so all y rotates and we've
got a few shadows there, as you can say, not too
deep or anything like that. I'm also going to
rotate on the zed. Zed, Let's say probably, yes, probably print that way. So we've got that
nice edge Ginkgo and that probably
something like that. It's a little bit
low at the moment, this song, but we
should be fine. Let's just pull it
out of the way so it's not gonna get in
the way of anything. Alright, I'm really
happy with that. Let's come in now
and have a look at what it's gonna look
like on cycles. And it will be much, much slower when you do this. Basically you just
want to get this set. And then probably
for nevi just to get a good idea if
your computer is a little bit slow or
something like that. So I'm gonna do is
I'm gonna come out with set this two cycles. There you go. You
can just say how nice that actually looks. Now the thing is, I think it's, the song is probably not quite bright enough
at the moment. If a comb-over,
here's my song here. If I click on my son, I can come in and turn this off. Let's try three,
something like that. And you'd say really
brightens out now, I'm rarely, rarely
makes it's done now. Don't worry when you go to
grass and everything online, but you can change
the color of this. You can also probably come
in and just change the song. Just debate a little
bit more yellow just to give it a little bit more
ambiance and things like that. All right, So what
we'll do then on the next lesson is we'll go through and set
all of the cycles, options and things like
that and get it ready then to be rendered if we
need to render it out. All right, everyone,
so I hope you enjoyed that and I'll
see you in the next one. Thanks a lot of AI.
58. Rendering with Blender Cycles: Welcome back to Blender three, the ultimate medieval sinkholes. And this is where I left off. Now let me put it. Let's go to modeling
because I don't really need to mess
around without a moment. You can see this is how it's
going to look right now. Now what I want to do is we just want to go
through some oxygens. The first thing is that if
you've got it on cycles, you really want to be putting
this on experimental. And you also want to be
framing on your GPU. If it's on cycles, try and use your GPU if he can. Now normally needs
to be a cute GPU. So the result content with, so I'm just going to
put mine on GPU and you can see how quickly
that loads up now, much, much quicker than you CPU. I'm also just going to turn off my viewport and
things like that. Now what you want to do is you
want to come over to edit. You want to go into Preferences. And then what you
wanted to do is you want to call them to, I think let me just find
which one is system. You can see here that I've
got mine on optics x. We've got HIP know compatible. See, you emphasize requires
a don't even know. This is an AMD GPU. So apparently the
optics is for Nvidia and the hip is the and
what did they say? Well, look, there we go. Amd, Nvidia algae false and AMD. There you go. The CUDA is
basically like the old cycles. You could speed it up like that. And I think Miss optics x is four cycles x, if
it's not weird, came like mine wasn't
working just to make sure that my actual
drivers were up to date. And as soon as they're updated those than it actually worked. And I will tell you
that using cycles x, which is what I'm
using right now. So you can't actually click
on a, as you can see, it just says cycles,
but it is cycles x. It is much, much quicker than the old cycles like
by a country mile. So I can get this to work. Great. And if not, well, unfortunately, you'll just have to take longer to render out. You will have to
wear swap between a probably EV as well because that's gonna
make it a bit quicker. Alright, so once you've
got these both take Tom, close that down, and then what we can do
now we can come down and actually upon a few
of these oxygens. So I can actually make sure that your noise is actually
denoising this one here. You can see this isn't render. Listen viewport. If
I click that on, you can see actually the
noises they hold out for us. So that's really
good. Points are opened his next the light paths and you'll see down here that we have one that
says transparent. Now basically this
needs set into 28. And the reason for that is
we are going to be bringing entries and we're
going to be bringing in a lot of foliage
and things like that. If you don't have
this setup to 20, you'll end up with
really, really dark patches within new
trees and things. But it's amazing
just to figure out, I used to build things
and end up with a load of darkness inside the
actual trees and things. And I never knew where it was. Anyway, recently I
didn't find out this is the reason turn result and it's going to look
much, much better. Now the really good thing about Blender three is that most of these settings now are actually sets up
really, really well. In other words, straight
out of the box, you actually get
really good results. And that's something
really improved before you had to go in
and set everything up. Now one thing you
will want to pay attention to is This is the viewport samples and
this is the render samples, as you can see here. The lower uterine
down the samples. So they say the low return
is down and the worst it's going into lobe
both the quicker it's actually going to load up
when you turn it around. So if you do have a slow system, just turn these maximum
samples down a bit, the render samples, I'm
gonna turn this down to 500. You never going to want
to unfold 1096 anyway, unless you're doing a
final final render visa, That's a very high
simpler amount, and we have got noise
dynodes on as well. Alright, so the last thing
you really want to check, a thing that's on the
performance, yes, it is. Eighth. You are using a graphics
card to render out, like I've told you
about the GPU. You want this on the tile size of 2 thousand and faulty item. You want to play around
with this as well. But if you're using a CPU, I would say that you
need smaller tiles. So in other words, 64
or something like that. So CPU smaller tiles, GPU, larger tiles, that's
the way I have found it. Not everyone agrees with that, but that's what I
have found that rarely actually speeds up
the rendering process. So just bear that
in mind as well. The next thing you want to do is you want to come
down to where it says color management
and open that up. And what I like to do
is I like to change the lock and click on this and put it on very
high contrast. And you'll see that it really
brings out those colors. And that is something that I actually personally really like, especially with the
same line that you might want to say a
lot more washed out. But I find that if
I set it like this, I can then go in to Photoshop
or something like that. Basically saturated out. If I made this look I
actually really liked. That's the look I'm going for. All right then, so that's pretty much all of that
actually sets up the one thing you might
want to mess around with is where it says, use
spatial splits. I always take that on. I also always take
on persistent data. And the reason I do that
is because I find if I'm doing an animation, so I'm going to round
this or something that. Assistant data staying around actually speeds up
my reading the time. So that's why I keep an eye
on especially when you've got smoke and everything
else going off in the scene, you probably going to want
that on. I would turn that on. Alright, so that's pretty
much everything for that. Now what we need to do is
think about Christian or grass to get our process in our scene and
things like that. We're going to probably
want three types of grass, so let's actually start
cracking on with that. Well, do now is I'll put
it on just two material. I'll bring back my
view poll unless actually also make
a new collection. So I'm gonna make a
right-click new collection. And we'll call this Lightroom
when we'll call it light. Wind, like so. And then I'll put
my sewn into here. Alright, so let's make
a start on our graph. So if we come to our reference, we can actually bring
that around now, like so and then spin it over. So all why 90 message
alphabet are X9, all z? There we go. We've got
something that way you can use if I press warm now,
yeah, that's the right way. Let's press all zed
180, spin it round. Then what I can do is I can come over now and change this out. What I want to bring in
is obviously the foliage. This is not the multiple
reference, it's this one. So let's bring in
it is all grass. This is our grass
basically reference. And you can see I actually created a full types
of grass and bold. I wouldn't actually go as far as I think he only needs three, basically just make
them smaller in size. So we've got 123. So
what we're trying to do, so I wasn't gonna do that. I'm basically going to come in. I'll put my cursor here. Let's start over here. We could use the center and just
hide those out of the way. But I'm just going
to pray over F and now I'm going to
press Shift day. I'm gonna bring in a plane. I'm going to spend
this plain round, so x 90, let's spin it
around lens press one. And let's make this then into the shape of an actual leaf. So all I'm gonna do is
I'm gonna press tab. I'm going to shrink it in. So S and X taken off proportion, I'd say like just a
very, very simple leaf. So I'm gonna grab
the top up here, which is baseball bringing
my move. And there we go. No. Face Select bringing OK, OK. So now Let's bring in a few
edge loops, so control off. You don't want too many
because remember that these edge loops are basically
to be used for your grass. If you have hundreds
of thousands of those, then it's gonna be
a lot of polygons. So S and X, Let's bring it in with proportional editing on. Let me bring that up a
little bit, like so. And let's bring in
this edge, S and X. Bring it in like so. And let's bring this
out a little bit. I'm just trying to
get that nice flow. I'm gonna take this off
for a minute and just bring it out the
old fashion way. Like so basically what
I'm looking for is just to get a nice kind of leaf control law or
grass blade like so. Then what I'm going
to do is I'm going to now then they solve. It. Needs to be a little bit longer. So S and Z those play out. Not like that Actually. Yeah, I'm pulling out from that. So let's press tap S and Z. Let's pull it out a little bit. All right, that's
looking at quite nice. Now let's bend this in
a little bit. Like so. Maybe not too much and maybe
with proportional editing on bringing in life. So there we go. All right, now let's bend
this around a little bit. So all x, Let's bend it around. Now we can start shaping this one went to do
is I'm gonna come in, grab this form and then
just press the G bone. Hopefully pulled on the GE
board and just bend it. Don't worry about getting in the right place the moment all you want to concentrate
on, it's just getting it. So it looks like a
nice piece of grass. Also don't bend them
to fall as well. There's a reason for
that is I don't want to bend it too far over because you're going
to have loads of these. So just take that into account. Now what I wanted
to do is I want to come to the bottom of here. I don't want to actually pop in. If I press Shift S closer to selected and then press Shift M, I'm going to bring game is
I'll just bring in a cylinder, make it smaller without
proportional to num. I'm going to use
that just as my kind of grounding wire
can ground them all. So I'm gonna press S and Z, make it a little bit bigger. And this is where my grass is basically when they
come out from, we're gonna separate it off
with pay and selection. And there we go. Now
this separates it. And now what you can do
is you can basically make another piece of
grass, so ship date, and then all zed, spin it around and then we
can put them into play. So another way is by
then put this into here. I can actually see where I actually wanted
to work this from. All right, then I'm
gonna make this smaller. And then don't worry, I'm
gonna actually mess around with scales and
things like that. Once I've got a few of
these grass blades, it we're just working on our
best blades at the moment. All right, so now let's
make a few more of these. So while do so shifting and
then r and z, and then G. Let's pull it in its place. Let's make it a
little bit smaller. Let's grab this one then
and Shift D and then z. And you can see how
easy it is actually to create these graphs played, so something like that. And now we want some
inside ones as well. I went to grab this one. So Shift D and zed spending around like so let's
put this on the inside. And z, I'm just bulk and overload that basis what I'm trying to do,
something like that. And then Shift D, Z, spin this one round. Like so. Let's pull it down a little bit. Then maybe, maybe one
in this way as well. So I'll make this one a
little bit smaller as well, and then I'll put
it back in like so, and then Shift a
and then All and z. So let's pull that down and let's now mess around
moving these around a little bit because I
clearly not in the right way. So first of all, we'll just
join them all together. Control J, and then
right-click Shade Smooth. On the next lesson. Then we'll mess around
with these and we'll get these three lots of
grass actually done. The del tag along
the very easy to do. If you follow along, you'll
find it really, really easy. All right, everyone,
so I hope you enjoyed that and I'll
see you in the next one. Thanks a lot.
59. Creating the Grass & Plants: Welcome back. It runs blend the three, the ultimate medieval
seeing costs. And this is where I left off. Now let's come in and actually
mess around with eight. So I'm going to do
is I'm gonna bring my proportional editing on. I want to grab it here. I'm hoping I'm moving. It also needs port
connected only on. And now I can
actually mess around with the SOC and grab it and just bend them around into whichever kind
of style you want. You just want to make
them all different. So I'm gonna grab
them the main life, so just mess around and just make them
all look different. So I'm going to
bring some more in. I'm just going to rotate that
one round as well, like so. And then G, bring this out. G is move it to the side. Like so. And I'm also thinking Shut up,
bringing some Morin, maybe let's press Shift Z, spin it round. Defend
it to the side. Maybe let's make it smaller. Alright, Something like that. Now you might want year-old's
going straight up into the air to make them
more grass like it's completely up to the
straight to you do them. Obviously, the more
different is going to do. I'm also a thing going to
put one in the center, so I'm just going to grab one. I'm just going to take
that off a minute. I'm just going to press shift D, Then I'm gonna
rotate this around. So all why put it
right in the center? Then an x, maybe, something like that,
make it smaller. Then G. I'm just going to move it out. I think so. Yes, some
points in that way, I think it's going to look
bad when I grab this one, then I'm bringing this one out. Now. We go and that's rarely
both Dale Fellow. Alright, let's press Control
J and joining it altogether. I think. Yeah, I think I'm
happy with those. I'm just saying this one here needs just moving
out a little bit. I don't think I'm
not through with it touching now so much. Yeah, I think I'm
happy with those for my main actual graphs and we can move these
on the fly as well. So don't worry about that. Once you've actually
got the main, you can actually change them
to your heart's content. Now what I'll do now is I'm
going to bring in a material. So I went to Festival press
Control a or transforms. Then going to set my actual orientation
down to the bottom. So I'm just going to grab this. I'm going to press
Control a or transforms right-click origin to geometry. And then I went to
press Shift S because it just selected grab my grass. And then what I
wanted to do is I want to set it down to here. So right-click set origin to 3D cursor now can
drop those down. Basically all my grass
to come out from here and then I can
re-send my graphs now. So right-click set
origin to 3D cursor. That means then, why not
bringing this grassy onto my ground plane? It's going to actually stick
out the floor from here. They say where this
actual point is. We can mess around
with that as well. Now let's come in and actually
gave these materials. So I'm gonna click new
grass clades. Like so. Let's come over to our
shading panel and then moments do is I'm gonna
put this onto object mode. I'm going to go to my grass, so adults go to my grasslands. And then what we're going to
do is I'm going to come in, grab my principled press Control Shift and the
T. And I'm going to find my grass blade so
textures scroll down, should have worn that says
whereas it grass blades. There it is, grass blades. And there we go. All right. So just these five
I don't need that. That's just another color. Bring them in like so. And that's why you
should end up with something like this. Let's alter these a little bit because I'm not happy
with the color. And again, we can go in
and alter the college who assaults content,
double-tap the a. You can say this
is how they look. And so what I'm gonna
do is I'm gonna come in and I'm going to also bring
in my ambient occlusion. So I'm gonna grab
this one ship date exactly the same as
we've done before. Let's put this on a oh, let's then bring this in
with the Open button. And there we go on. Our occlusion is here, let's say also plug this in, just making sure to
plug this in properly. Like that to the vector. Let's press Shift day
and bring in a mix RGB. What I want to do actually
after this is just make sure with the occlusions on my actual materials that
I've actually done them properly because
I'm not actually sure if they're
all done properly. Now let's plug this
in the bottom. Plug this in the top. Let's put this on multiplying, as we've done many times before. Let's set the fight
on this one too. No point. Full, full two. Let's bring in a Gamma just
in case you want to mess around with the
darkness of these. So we'll bring in
a Gamma just to give us something to
play around with. And we'll also then bring in
a UN saturation. So review. In saturation, bring that in, move my principled over here. And then what I'm going
to do is I'm gonna plug the color obviously
into the colon. You plug the base color
than n and we should have, Nope, it's something might not. Now let's change the, you to know 0.6. There we go. Much, much greener. Let's put the saturation
down to no 0.7. And let's yeah, I think
that's everything. I think that's actually going
to look pretty nice now you might want a little
bit greener as I've said, but I think I'm happy
with mine like this. Alright, so I'm
going to pull that down now and make them
much, much smaller. Double-tap. I didn't have a
little dialogue like, I think I'm actually happy
with how that looks. I'm going to now
come over and I'm going to call this grass. You can see at the moment
plane, one plane to, I'll call this cylinder
shutter college orient. I'll call it orientation. And I'll pull foliage
and the stock. So foliage and it's just there
just to help me and went for a space in there to children
where that needs to go. And this is called Launch dress. Like so. Alright, so now
I'm going to make an oval. I'm just going to close
the old clothes and my reference close
with my ground. I'm going to make
a new collection. Some little vesicle,
there it is. And I'm going to
call this foliage because we're gonna have a
theft few parts of foliage. Let's open up this
and then we'll grab both of these and just drag them into our foliage
and then we can close everything off
except that it also means that because I've
got them now here, I can actually move these
around and things like that. So it can actually hide my large graphs while I
create another one. So I've got my cursor it, Let's bring in then
another plane. I'm going to spin around. So all x. Let's spin it around with S. The moments do is I'm
going to bring this up, bring it in so S and X, and then pull it
up a little bit. Now you will notice that grass Shift Space bringing Move tool. I can say that because of naive model, it makes
it a little bit older. So let's go to modelling
are working there instead, a grass that is the
small aggressive, he's normally a
little bit thicker, so we're going to look at that, making it a little bit thicker. So I'm going to
pull this up now, like so let's get it into
place without pull it down. So this is roughly
where I want it to be. Let's pull it up a little bit. Let's do an instrumental loop. So false, something like that. Grab on this one. Let's put on proportional. I did send. So I'm gonna grab both of these actually and bring
it in, pull it out. Like so, let's then make
the end of it very thin. Like so unless naturally
we've done in the center, pull it out, bring
that in like so, and then that's rotated x. So let's pull out, live out, and then let's
spend it down. Again. It doesn't really matter how you all's actually look how
close they are to mine. Just, just make them as
random as possible rarely. So I'm gonna do
is I'm just going to rotate this round now. Thanks. Like so, and I'm going
to bring it down with j, something like that. And you can say it's
much, much thicker, maybe a little bit too
thick on the ball, needs to bring my nothing. So S and x, like so
something like that. I'm happy with that. Now we're gonna do is just shakes me. I'm going to press
shift D, bring it over. Bring it up. Basically the same as we've
done with the others. Well, this one is just gonna
be a little bit thinner. Of course, I'm gonna grab
both of them shift date. You can also do it by
this because you're all gonna go round and mess
around with them anyway. J, pull them into
place, like so, and then shifting,
then all Z, j. Then make these a
little bit smaller, maybe something like that. Let's join them
all together now. So I'll Control J. Now let us come in and
mess around with them. So we've got proportionate
to non connection only. Now we should be able to
play around with them. Like so. Let's spend
this one round. So on G, like so. And now we just
want to make sure that they just altogether basically can say
that that one's probably a little bit
farther out, like so. And I can say that really quiet thin. I'm happy with that. Now I want to do is
I'm going to press Control a or transforms. I want to basically set
this to the center. So the first thing
we're gonna do is set origin to geometry. And I'm going to press
Shift S selection cursor. And then I'm going to pull
them off to where I want them I want them sticking out the
ground probably from here. So while there is then
set origin to 3D cursor. All right, so that should
be at the bottom of that. Now let's say actually
bringing in all actual whereas our grass, grass blades there it is. Bring that in. Let's see what they looked like. Double-tap the a. There we go. Alright, so let's bring back, we'll call this small grass. Like so, bring back our
large graphs and you can see then what the
difference in the sizes. And we've got small grass, we've got Lodge Grass, and we're gonna make
this one a little bit smaller like this. And I think also want to do
anything else with that. I don't think actually do it. The Mona thing, I'm
going to give them a test before I
do anything else. Then we can Probably probably make a median grass and we'll do that
on the next one. I'll do on the next one is
we'll make a medium grass. And then finally
we'll start to get these onto our actual plane. All right, everyone,
so I hope you enjoyed that and I'll
see you in the next one. Thanks a lot. Bye.
60. Blenders Particle System Setup: Welcome back everyone
to blend the three, the ultimate medieval sinkholes and this
where we left off. Now think what I'm going
to do is I'm gonna pull a very small piece
of grass over here. So I'm actually small and thin, maybe something like that. You can pull some plants on the air and things
like that as well. But I think what I'll do is
I'll just make one mole. So I know it's a bit tedious, but once you've made them again, you can save them out and
then they actually don't. So I'm just going
to pull this up. I'm going to do exactly
what I did before pulses. It's actually a good practice
to actually do this. Let's turn yourself. Let's
make this one very small. So Control, left-click,
right-click, control law. Like so. And let's
grab the bond. Let's put proportional
editing S on x, bring it in, and let's
bring this one in. S and X, bring it in, like so. And then a bit more on this one. So I see an x like so
something like that. Now let's rotate it around. So I'm going to grab
the whole thing and all x rotates it around. And now I'm just going
to actually bend it. So I'm going to
grab this center, going all the way, Alt, Shift and click, and then G, bring it in, it like so. And then I'm going to come to the top now and just rotate it. Rotate it round, like so, and then just manipulate it
into place where I wanted. So at the top I
want to rotate it. There's just playing
around with it. As you can see here. There's no great science
to it or anything. Let's say straighten it
upto something like that. And I'm looking now just to
make sure happy with it. So I'm just going to straighten
this up a little bit. Alright, Let's say Shade Smooth, and that's now bringing
in another one. So I'm gonna grab
it shift day, Zed. Make it a little bit smaller. Right-click set origin
to geometry just to make it easier to do
this part like so, let's put them right
in the center. Let's put an object
mode as well so we can actually see
what we're doing. Let's grab both of these
and then shift a zed, spend them round,
poke them in place. And then let's grab this
one and should date. Hold on when in place there. And then let's grab all three
of these and then Shift D and then spin them around. So let's spend them
around a little bit more. So all zed, alright,
something like that. They look in a bit smaller. Let's get one in
the middle as well. So Shift D and then all on, why? Spin it around? Gee,
this one in the middle. Yeah, something like that. Now let's manipulate all day. So what we'll do is we'll
join them all together. So Control J. Then we'll just grab this one for instance and just start
manipulating them all. I'm going to pull them. They're not very happy with
them being so far out, so I just pulled them in
a little bit. Like so. Let's move this one to the side. Alright, someone saying
something like this. And I think I'm gonna come in and grab the bottoms of them, takeoff their connection only, press the S bone and just
shrink them down a little bit. Alright, let's put
it back on material. Let's say bring in grass blades. There we go. And then
while doing this again, I'm going to I think stick
them in the groundwater. You can see probably
a little bit small on this one to be here. Let's press one. Yeah, it's probably going to be just
want to be a little bit down. I'm just going to hide my
cylinder out of the way. I'm going to come to the bottom. Something maybe around
the bottom one. So something around here. So I'm gonna go up, as you can see here, Shift S because it's a selected. And then I'm gonna grab
the whole thing salary in 3D cursor. In fact, I'll do all transforms
and then set origin to 3D cursor just to make sure
we don't have any problems. Now I'm gonna do is I'm going
to call it too tiny grass. You can call it a grass, shrubs. By either way, we can see we've got our
foliage in here now. All right, so now
we need to actually bring the foliage
onto our other pulse. So what I'm gonna do
is I'm going to come out and calm again to my actual plane where
a guy over at the non, remember, we have
got a mark on here. If I press tab, you
can see that here. We should have let us come
in and unblock actually. Yeah, because we
actually have to go in. And actually Monica seems again because if I grab
the whole thing now it's gonna make it a
little bit harder to do, but I don't really want
to do that right now, but I'm gonna come in and I
forgot actually about that. So we'll solve that out anyway. But you can see roughly
where we need to take our plants do and that's
important, actually borrow. So. We'll do that in a minute. Now. Then let's come in and
think about bringing in all graphs and how
are we gonna do about the first thing
you want to do? You want to bring in
a political system. Political system is based over here on the
right-hand side. So just click this on, click New, and you'll end up with all of these all over here. And of course that's
not something you want you want to
based on the grass. Another way it's, it's
trying to distribute randomly some
particles over here. So how do we do the next pulse? So let's put it on here, and we'll end up with
something like this. Let's put the hair on 300. Because we don't actually want tons and tons and tons of them. Let's say leave
these as they all. Let's come down and
look at the source now. So I've gram faces jetted, all of these things
should actually be on. The next one we want to
go down to is the Render. This is the most important one. And what you want to
put this on path, you want to change to object and you'll notice
they disappear. And then what you want to do
is you want to we want to keep the show a
mix around because he admits it is basically
the ground plane, so we definitely want that on. What we want to do is
then changed the object. So the object we want today
onto our lounge graph. So let's move over
here a little bit and you can see are
large grasses here. So let's grab this and you
can put it over here as well. This might be easier for you. So if we go back, you
can say that I can click on large graphs. Now you'll see we've actually
got something happening. Double-tap the eight. You can actually get
away with double-talk. And you can see it. We can just see them. Now if we turn this, scale up their large graphs. Now the problem is
always the same is that the randomness. So let's see if can
just change this round. Just sometimes it never
goes away. You wanted to. You can see here that this
now will have to be rotated. We I don't know why that is, but I always have to come
in and you have to rotate. So if I rotate it
round now you'll say, I'm gonna express all why 99, you'll see it's
actually working. I don't know why that is. I don't know why it does that, but that's the way it is. Now the thing is,
you'll also see that the role looking
pretty much the same. So I'm gonna do is I'm going to come down to where it says scale randomness and
just turn that around. And now we're gonna do
is I'm just going to scroll down a
little bit further. What I'm going to do
is I'm gonna come to where it says, children. What I wanna do is obviously I've not got many
here at the moment. So I want to put this
on intercalated. And you'll see at the
moment that we have a display mount and
a render amounts. So just remember that
the amount you see here is gonna be far more when we actually
render that out. How many months It's
really hard to see. So if you put this on a 100, you will be able to see
exactly how many you can say. It's way, way too
many of the moments. So the render amount
is way too high, but we're not gonna
worry about that yet because the thing is, we're not gonna put
these like bases is going to be a bit
different from this. Now the one thing is I'm
just going to put this on ten to the moment just
so I can see wondering. What I wanted to do is I want
to wear come down to where it says, whereas it roughness. So you've got clumping
and you've got roughness. You can see that if I come
down to where my roughness is, if I go in, I can actually change these
around as you can see, it can give even more
randomness to them like so. And that's exactly
what I wanted to do. Randomness, let's turn the OB can say sum again, turn around. Some are not as even more
randomness to our actual same. Now then we are not happy with this
because of the mountain. We've got these pieces of grass everywhere and I don't
really want them everywhere. I actually wanted to place where these pieces of grass
are going to go. So if I come down, I'm also going to look at
whereas it vertex groups, you have got one that
says vertex groups. And this is based on
what we're going to use. So how are we going
to actually do that? So what I'm going to
do is first of all, I'm going to come over and
click on this triangle. So I'm gonna click on here, click on my triangle, click Plus, and I'm gonna
call this large graphs. Then what I'm going to do
is I'm gonna come back now to my political system. And I'm also going
to change the name of this to large graphs. I'm also going to change
in here to large grass just to make sure we're
not gonna get confused. Then what I'm going
to do is I'm gonna come down to where it says, children, display them out. I'm gonna put this
on 100, like so. I'm going to
double-tap the a then. And now I'm going to
come down to where it says density on large graphs, length Lodge Grass,
clone Lodge Grass, and King Lodge Grass, and just pull all far
those on large graphs. So why do we do that basically? Well now you can see that we've
got it looking like this. We've got grass
going everywhere. That's not exactly what we want. So if I am come in and
change first of all, the children, whereas my
children gone there it is. And upload this on ten and then upload this
on ten as well. And then I'll come
over to wait paint. If you come up with white paint, you'll say at the
moment nothing happens. But as soon as I click
on here, you'll say, Oh, we've got a load of grass and this is where one
of the grass to grow. So what I tend to do nowadays, I will make a load of grass, so I'm just pressing
on just make sure you stretch one on 100 or
something like that. So bringing it down, this
is where I won't grass. This is then when I'm going to just take this off
onto an object mode, and I'm basically going to check out what my grass
is looking like. So I'm gonna problem
rendered mode. And then I'm looking for
my grass and you can say, this is way, way too
thick at the moment. They don't want it that thick. So I'm going to again
go over to, sorry, a white paint and then
I'm going to turn my brush down and just
going to have a look now, if a turning down, how much grass, so we're
gonna put on there. You can say the mall put
the weight on the thicket. The grass is going to be on the taller the grass is going to be. That's why we're looking for. All right, so now let's
come back to object mode. And now let's think this down a little bit because clearly
it's way too much. So what we're gonna
do is gonna come over to where it says number. And let's put this on 200 or something like that
and send it down. Let's try 50 maybe. And maybe that's too little. So let's try one hundred. One hundred looks about right? So you can see now how
easy it is to actually bring in the grass and
create realistic graphs. And also this grass
is actually say, Oh, ready to actually move in the
wind and things like that. All right, for once
on the next lesson then what I'll do is I'll
show you how to bring in the next grass and I'll
show you actually how to paint that on and really bring you up to the edges and
things like that. All right, everyone,
so I hope you enjoyed that and I'll see
you in the next one. Thanks. Bye bye.
61. The Weight Painting System Explained: Welcome back everyone
to blend the three, the ultimate medieval
seeing calls. And this is where we left off. Now what I want to do is
I want to actually create a nada grass political system to go with this one where we're going to have
smaller graph. So how are we gonna do that? Well, you'll come over to
your political system. You'll see we have
a large grasses. What you want to do is you
want to click down and click Duplicate
political system. And now you'll love
this one here, but you'll see that it's
still called large graphs, so we need to change
the name of this. What I'm gonna do is I'm just
going to click the Plus. And I'm then going to
call this small gross. And if you don't do that well, I'll often is when you
change the large graphs, you'll end up with
this changing as well. So let's change this
to small graphs. You'll notice that I've
got double one on here. Don't worry about
this because I've already created one before. Alright, Now you will see that way I've got everything
on near that we need. I'm just wondering what the
Advanced actually brings up. Show him it's pretty much
the same stuff actually. Now what I'm going to do is I'm gonna come down first of all and check off my
large grass among my students going
to use my pipette to click on my small graphs. We could click on
all tiny glass bulb, click on the small
graphs for now. And now I want to
do is I wanted to take all of these obviously, you can see here it
says large grass. I want to create another one. So plus small graphs. Again, you can see that
small graphs appears. You can also say that I
need to turn it around. So small grass like so let's
come in and turn round all. Whereas it, this
is a small grass. Let's bring it over here
and let's spin it around. So I went to spin off by 96, spin it around and there we go. A little small grass on that. Now let's bring our
small graphs into play. So we've got our
vertex system set up. So now we need to go back
now to our political system. And I'm gonna come down
to where it says density, click it on and small grass. Grass, small grass
and small grass. I just tend to do
those fall because now the others don't really
make any difference. So let's come in
and come to, wait. Now let's bring in
some small graphs. So let's see how this works. I'm gonna put my small
graphs around the edge of my filled-in because that I know is where it's going to be. I'm also then going to check because I always
come in and check, double-tap the eye
and just have a look. Well, that small grass looks
like and there you go. You can see that is out,
the small graphs work. So you can see we've got large
graphs and a small grass. And then we can put this
small graphs around the edges of the buildings
and things like that. All right, so now I'm
gonna basically go in and do my large grass on here. Sorry, we just swapped
between them now. So put large grass on, I'm gonna put a weight paint on and then I'm just
going to come in. And if I hold this down, I'm going to actually make the strength a
little bit higher. So I'm not gonna click
so many times like so. Bring him a large
graphs over here. Don't forget you
can actually minus itself among Chinese,
there is as well. I wanted to bring
you up to the edges. So it comes over the
edges like so when you read it and just press
object mode and just have a look and make sure that
you actually happy with it. Alright, so let's go
in now and it's gonna take a little bit
of time to do this. I'm just going to bring them in and then we can mess around. As you can see, I'm just
going to bring them up to the edges like so. I'm also then going to click on my small grass bringing
up not to fill these out a little bit to make it
look pretty realistic. Like sir. All right. Now let's say I'll come in with a small brush first
and do that one. So I'll turn off
my strength mole. Underneath here. You're going to get actually that we're going to do some pumpkin
patches, right? I'm just going to put
a little bit gross and then go around here. You can see how quickly it
is to actually do this. Sir. All right, I'm
happy with that now let's go to our
large grass again. I'm going to turn this off
actually and put this on here. Then I'm going to break
this a bit bigger. Bring them on large graphs. Hope to the edges. Here. Background here. Alright, let's have a look. Well that looks like so
I'm gonna go I'm fact I'll I'll actually bring
in some more small grass. So bringing some more
just small graphs around these parts just to
fill it out a little bit. All right, Let's have a
little that looks like. So back to object
mode. There we go. And you can say at the moment that it's nowhere near
as they can often, sometimes this happens
when you do it actually looks thicker
than water walls. So what I tend to do
then is just go back to my particle system
and put this on 300. And there you go, you see it
really, really fills it out. Pull the large graphs on 300, likes, double-talk the area and just have a look and make sure they actually
helped me with. And you can see it really
starts to wear filled out. If you want even more, you just basically
concern there. So all you can go down to
your children as well. Don't forget, this will
actually multiply it basically. So multiply up so 20. There you go. That looks a
lot better as you can sue. Alright, I'm really
happy with that. Now one thing I'm not
being about is I really need to fix this now so that it ends up in the way I want it because at the moment is quite a hard edge
and I don't want, I want it to actually
disappear off of that. And the grass Delta B here. So let's say work on that next. So what I'll do is
I'll come to this and there is a really good
thing that you can do. You can actually come in
geo-political system, scroll up and you'll
see these two little TV's. Just turn them off. And then that will actually
make it much easier to actually run blender as well. So there is that. Now let's put this onto
a material mode instead. And then I'm just gonna
go in and see if I can actually mark the seams
out where I helped them. So you can see I do have
a problem with my scene, not these for some
reason on well, it messed up because
I actually read it. So what I'm gonna do,
I'm gonna press K, I'm gonna grab this
one and this one, I'm just going to go in and
fix the so I'm gonna come in, gear up this one and I'm right-click mark soon and
I'm just gonna go round now. And probably, I'm
thinking probably easier if I just go in with the nocturnal
and just fixing, going round like this, instead of trying to
maybe it is easy. It's a bit hard to say really, I'm just gonna try, I'm gonna try going round
like this, I think. Then I'll have to go around
it just once more just to get this right because you can
say it's fairly jagged. I'm not really happy
with it being so jagged. So I'm just going to go round, fix them and don't worry about
the the way of this mesh. We could we could go in and clean that up if we
wanted to as well. You can see here, I went kind of light and it's kind
of a bit of a mess there. So I'm going to press the Enter button,
right-click and moccasin. And then one Wednesdays
I'm going to, I think I'll join these two up. So I'm going to join
these two world with J. And then I'm going to
right-click controlling. Sorry, I'm focusing. That one went today is
I'm just going to get rid of the seams because
they're a bit of a mess. So right-click, I'm placing
basically this bay here. What we're trying to do
is we're just trying to basically fix all seems and things like that and just
make it nice and clean. So mom scene, you can see it probably got one in
there. I'm gonna miss. So right-click moccasin. Alright, I'm thinking that is
this the best way to do it? Probably it's going to be
got a lot of work to go. I think, I think also that the split there
soaps or right-click mock scene and then
come around to here, can probably see
where I'm up to. So if you look over here, right-click on mock CMA. Now let's see if we
can actually split this so you can see that I can grab it all the
way down to here. You can see that grabs
the whole thing. So I know I do have a problem
and I can see where it is. I'm gonna come in double-tap among assuming
that some arcsine, Let's save thoughts it,
when grandma it again, It's still grabbing it and say
that this space in graphs, or where is it OK to? Oh, I don't think
I've actually yeah, it's probably because
of not mom to see more peer of a Let's come in. We'll move on here. Right-click democracy, press
the dot born, zoom in. And now let's see if that works. It's a pain. Now it is a pain,
but we'll get that. Alright, well fixed
on the next lesson. We'll make the
priority to fix that. We can really see how
it's really coming on. Sorry, it's just more exciting stuff basically to get through. All right, everyone. So
I hope you enjoyed that and I'll see you in the
next one. Thanks a lot.
62. Dealing with Transparent Materials: Welcome back everyone
to blend the three, the alternate medieval
seeing costs. And this is where we left off on this pain that we're
trying to get down here. I'm just going to Control Click going all the way along here. All the way along. You can see it goes
through that door really well now I think I'll
bring it to here first. Just controlling click
in and trying to find That's a sin
mt. There it is. So I'm just going to go
all the way along like so all the way up to that scene, I'm going
to right-click. And in boxing, now
I'm going to say if from here I'm
golden. So let's see. So yes. Alright, let's go
in and do the rest. I'll deal with control-click
soon as that seems to be what blender
like stirring. You can see though I
can't actually do that on the hand because it's gonna
be very jagged again. So I'm gonna go in
and first of all, I'm going to take
off everything. So double-tap the
come to hear them. Let's join it to here. Press enter, bomb,
right-click, and moccasin. Now let's, we can probably get away with this part going up
to that, so we'll do that. So come back from this
one control-click. And I know it's a
pain to do this, but it is going to look
good when it's done. So like so like so like so I think I can follow
this pretty much, maybe all the way round. So I'm going to control click. I'm just looking at Jagged. That is, I think that's
actually going to be okay. I'm gonna go all the way
around this one here. Probably not. So
let's come to here, right-click mock scene,
give it a quick test. And there we go. That's good as well. Now let's
come in, double-tap the k. We can see we've
already got WIC, a good workflow go in here. So I'm gonna come to
here, maybe to here, like so here to here it. And then I'm going
to press Enter. And you can see, I don't
know why I didn't do that, that Tombow, apparently,
we have to go in now. Grab it with Control. Click, right-click. Frankly, democracy,
alright, Let's say joined this off on here, making sure it actually works. So right-click mock scene. That's Command face like L. And there we go. All right, we are really getting somewhere. Let's say, let's
double-tap the eye. Let's put it onto this and let's see if it actually works with the knife
doing it that way. There you go. It might
just be that control. Marx image just seems to work on their virtue select,
I'm going to call them. And grandma seems now. So again, I'm gonna start
from here, column troll, click all the way to here, all the way to here. And can I get around
this note bound when a market seems so I know I'm going to
come from here. Right-click mock same. You can see I'm breaking this down just to get it to work. So L Now on Wednesdays again, I'm gonna comb, double-tap
the a, you're gonna press K. Going to make a knife
project following this all the way over to here. Like so. Like so. Maybe two. Maybe to here. Let's press Enter, right-click, no, control a moccasin. Now let's say democracy
him on this one. From here, we'll do it. So
right-click mock scene. Let's see if we have
to do we have to do this one against it
is a pain to do this, but the heavy hole,
that's the way it is. So let's press Control. I can see probably
why is messed up. Thing is with the
Knoxville doesn't always, as you've seen, make mesh. I'm just going to bring it back. So here, it doesn't
take too long actually, mark scheme and let's see
now worked. Yes, awesome. And we can see now that we're
actually getting this done. So let's come and
we'll start from, I'll start from here. And then Control. Click. Again. We weren't mailed. See these
seams or anything like that. So that's one good thing
that we can see as well, that we've got
lucky on this one. Maybe you have as well. I can actually come through and you're
gonna be thinking like, what is all this work for? Is it really worth it? Well, you'll see
it does actually make it look a lot, lot. They're just going to zoom out a little bit
and envelope whale, I was going to so
think I'm going to put it to I don't want you to want to go in there once
it coming up to here. And you can see them still. Probably gonna bring it to
here, right-click mock scene. Then we're gonna press
K, put it onto that, double-tap the press the k, and then bring it to here. Then I'll have to
retract macro myself. You can see that we've
doesn't exist on this part. And then back to myself. Alright, so let's control, Let's moke the same. Now let's come back. So from here. So k sorry, I control-click. And then going
around this corner, what it was is I think
it's because I actually basically triangulated it and then turn the
triangle inequality to make you a nonane gone
and asked what master. Now let's save to
actually design. So L, There we go. Let's see if I can
grab all of this. I think we've got one
wrongly. Yes, we have. So let's come in. Let's see if we can
fix this one as well. So control-click all the way, hopefully this part going in. So right-click
mom, say lead sit, Let's say please, please work. There we go. And that one also it's gonna work is
that we're going to work. Yes, it is. All right. Let's say if hopefully
this is gonna work. So there we go. Finally, alright, so
let's go to our material. What we're gonna do is
we're just going to call this ground transparency
in C, like so. All right, Finally,
let's apply that. So you'll see it
goes white column rarely see anything
at the moment. Let's go now to our shading
panel and let's zoom out and you'll see
unimpressed dot to zoom in. First of all, see what
I'm actually looking at, doublets out the a and let's
now come to the principled, which I'm not going
to get rid of. So I went to my principal and it's gonna move this
over and create a simple material
with a transparent. How do we do that? Well, we press Shift a and
we go to Search and we just bring in
transparent the SDF, which is this one here,
not the translucent. Make sure it's the
transpiring mix shader then. So Shift A Search mix shader, join them both together and you just going
to turn it down. And then it gives you flexibility actually
into how much you want. So if I turn this download 0, put this onto surface.
There you go. And you'll say if
I turn that bowl, you'll say it comes
back or disappears. Now the great thing about this is why I've
actually done this. You can see I've got a
little PDC IT might want to fix. I'll think a wheel. I'm going to go into this piece, grab this one, and click
Assign. And there we go. Let's parse top, double top. And then I'm just
gonna look around, say wondering why
I've done this. And you'll see now that
if I go to modeling, press top, put it onto render, bring back my leaves
now for coming to our leaves or the double Tommy, I can say why I've done not because they start to
actually hangover. Now you can't see that some of them look like they're floating, but we can actually fix these. We've actually going in now
I'm coaching them away, which we'll do in a second. But you can see it
just looks so much better than being on the edge, right on the edge and just
trying to hang of it, this actually looks
much, much better. If we turn this off, we can see how much better
that actually looks. And that's the reason
I've done this. Okay, so I think I'm happy
with how that looks. Now you can say that we've got all of that
transparency done. Now what we'll do then
on the next one is, well, just tidy everything up. You can see here probably
got a few pieces of grass that probably needs just sticking up a little bit. In the meantime. I hope you enjoyed that
and I'll see you on the next one. Thanks a lot. Bye bye.
63. Creating the Straw base Mesh: Welcome back everyone
to blend a three, the ultimate medieval sinkholes. And this is where we left off. Now, few things
before we carry on. First of all, the grass, we haven't got enough of them. Second of all, notice that
this is looking a bit pink. And third of all,
I'd like to try a, another HDRI just to see
where it actually looks like. With that, let's come over to our political system and
we want the small graphs. And if I put this up, Let's try just putting us on
the 1000 just to make sure That's gonna pour it office that way the a's I'm just
looking over here. I'm gonna pull
this to 300 again. And yeah, it is to do with that. So it's probably just not
enough way actually in here. So I'll try that first
before doing anything else. So I'll do is I'll grab this, I'll put it onto a weight pain. And then what I'm going
to do is I'm going to print onto material mode. I'm also then going to make
sure that I'm actually sat on my large grass and
maximum weight paint. On white paint. Yes, Wait, painless, pretty
on object mode. There we go. Now can say, can actually pull some more of these on here. I do think though, that I'm
actually going to need most. I'm just gonna put it
back on object mode, put it back onto material. And I think I'm just
going to need a few more of those anyway. So I want to do is I'm gonna
come to my political system. I'm going to come
to my children. And I'm gonna put this on 50 or something like,
yeah, there we go. That's located. That's
looking a lot better. Maybe it is still
a bit too many. Maybe I need to go down
with my political system and I pull down 50 and then
pull the random mountain 50. Yeah, that's probably
actually let's put it onto rendered view
and have a look. Yeah, actually that
looks so tombstones bad. All right, I'm happy with that. All right, so let's solve
the next problem out. Next problem is my logs
it onto material mode. You can say all material mode,
they're absolutely fine. It's just on my rendered
mode for some reason, they're coming out pretty red. I'm not happy with
that. Let's command to my shading panel
and fix those. You might not have this problem. The other thing of course,
I can see here is that my occlusion isn't actually
approved in each block. It's not a very good
thing. Let's plug it in. Like so. This won't be because of this, the
multiplying guessing. Let's turn that down. Now. Let's look in March, much cleaner, more yellow, exactly what I'm looking for. And let's have a look at the easy to do with the saturation. Let's turn the saturation
down a little bit. There we go. That's looking
much, much more realistic. Alright, now finally,
let's come in and put this onto our weld. And then we're going
to do is I'm going to look at changing out my cloudy field
just to see what he's going to lie before I
carry on and see if I've got an HDMI that I like that. So I'm gonna click this bond. It'll take me to my HDRI. Gonna pig Stonewall, God
racists pick that 1 first, maybe a little bit. Let's try The Hobbit. Let's try the Sahni mindset that want to think
that one's making a local little bit back. Yeah, I think I'm happy with how that looks. Let's try the elbow. Cloudy. Yes. I think I'm gonna go
with the Sunny Park. I just think it makes it stand out just a little bit better. Alright, So I'm happy with that. Now what we want to do
is one to actually look at creating our actual, hey, so how do we do that? Well, first of all,
we're gonna do a little bit lighter grasp. The thing is that
with the grass, I'm going to go back
to modelling First. I'm going to put
this onto whereas it Material view and
among meant to do with my grass is I'm
going to grab them. So it should be all of
these golf foliage in here. I'm gonna grab all of these. I could always can grab
the orientation as well. A moment injuries. I'm just going to pull them all together. So I'm gonna move
this over to here, move this over to here, pull it back home
this or connect, you see what I'm doing them
really can't see anything. And then on
Wednesdays, we've got the very small ones as
well, which we didn't use. So let's grab all
of these together. Presby, a moment there is, I'm gonna move them down and just stick them
underneath the world. And the reason for
that is because if I actually hide these, it will hide the
political system is WiFi commands install. I didn't them. Oh, actually, unless it
doesn't hide them, several. Got away with it. Okay.
Well, that's good. I'm going to actually stick
them onto their board. Last time I did this when
I tried to hide them. They actually hit my
political system. So anyway, that's great. So I can't hide them. I'm just going to
put them under that. I'm gonna hide them
to study in the group so we know where they all. I'm just going to close the hole and then I'm just going
to put this on material. All right, so now let's start
work on our actual hey, and if you open your, Hey, we all, this is all hate
I actually created. You can see if I zoom in, this is what it
actually looks like. Very, very easy to create. So let's go with that now. So first of all, we'll
put our care set. Whereas now again, greater shift right-click
and put it around that. And let's first of all
bringing in cylinder. Let's first of all
bringing in a cylinder. So shift a mesh and we'll
bring in silhouette. Let's put the vertices on 14. That should be absolutely ideal. And that's finally, let's press S and zed and pull it all. We will need relatively
thin but relatively long obviously to
look like pieces of straw just going to press doll. I'm bringing it up. So I said something
maybe a little bit sena. I said something like that. I think looks pretty
strong light. Now let's press tab. Let's press Control on
bringing some edge loops. So I'm gonna bring in
probably left-click, right-click company
is not six edge loops I've brought into mine. And then what I'm going
to do is I'm just going to duplicate this. So I went to do
clave is full-time, so Shift D over. Fortunately, it's
not moving over. Shift D. Shift D and
move it over like so. Alright, so they're looking, God started now, let's command. I'm, what you want to
do is you want to put another edge loop, control law. Maybe two extra edge loops,
left-click, right-click. And then what you're
gonna do is you're gonna come in quick Face Select, and we're just going
to pull these out. So where's it gone? It's this one here, hold, shift and click and then width. Fortunately it's not
pull those out like so. And you want to make these I don't know
the names of them, but they actually held Walter or something like that. And
that's why there's that. And then you come
to the next one and we're just gonna
do the same thing. So welcome to this one. Control Alt, left-click,
right-click, face, select Alt Shift and
click S, bring them out. Then the next one, we'll call
them probably to this one. So Control Alt, left-click,
right-click, Face, select Alt Shift and
click, pull them out. And then finally this one
I'll do at the bottom. So control law to left-click, right-click, shift and click. Hold them out. Now let's come to
the top of here. If I grab over here again, proportional editing on
just going to use the G, I'm gonna pull it out
low, Pretty fall. And I don't want the others
to be affected by it. So I'm gonna make sure that
connection only is on G. I'm just going to
bend these just a little bit to give a little
bit of realism to them. So first of all, I'm
just going to bend in this way and then I'm going to call them and bend
them the other way. Don't want them straight, basically, it's what I'm saying. So something like this. And then if you go
around this way, you'll notice the very straight
on to again scrub them. Come to the next one,
then the amount. Like so and just make
them not straight. All right. Something like that. I was looking pretty nice. Now let's actually give
these some colors. We can change it in a bit, so it doesn't really
matter too much. The colors you give them. All we're gonna do
is we're going to go to where plus, plus. We're gonna go into
the materials. Click New, I want to
call this straw one. And then all of
it not like that. I'm going to take
my cups off straw. Like so and then let's give them a brownie type color,
something like that. Let's also turn the
roughness down. We don't want that shine
in or anything like that. Let's also shapes move. And now we want to do
is you want to copy this woman who's going to
press plus, plus, plus. And then when I click this one, I'm going to click Copy material and then hopefully
paste material. We don't have to click New
and then paste material. Like New. Paste material.
Thanks materials. So call this stroke. Stroke three. Straw full. Sir. Alright, so
now with this one, Let's just change the color
to be a little bit darker. Let's change this one to be
maybe a little bit lighter. And this one,
again, like I said, we will change the
colors on these, so don't worry too much. And now we'll do is we'll go in, grab this one so I
can't show the blend, the crash layer so
that words are well, so I'm going to just come
in and copy material, new pace material and
we'll do this again. So, oops, new pays material
and new and paste material. Now let's come to this one. We'll make it a
little bit darker. This one will make it
a little bit lighter. Again, like I said,
we're going to actually change these FM amount, so don't worry too much. Now let's come in and
we've got the first one. So let's shade smooth. Let's also make sure that
I pulled the roughness. You have solved
the roughness out. So that's one good thing. All right, so let's come in,
grab the whole of this one, and click on this
and click Assign, come to the next one, grab the whole of this
one click Assign. Next one grabbed all of
this one click Assign. Now we've got full, basically straw
pieces that we can use to create our actual straw. And we'll probably do the bond first and see how that goes. All right, everyone. So I hope you enjoyed
that and I'll see you on the next one.
Thanks a lot. Bye bye.
64. Particle Systems Based on Collections: Welcome back everyone
to blend the three, the ultimate medieval
seeing costs and a really is
turning into that. So let's see what
we can do next. So let's come to strolls. I'm what we need to do is
we need to split these up on that slight grab
the first row, l, p. Next one I'll take lp and
Al and paint selection. Grab them now control
lay all transforms, right-click set origin to geometry and just go down them and do
exactly the same thing. Clicks origins geometry. You should always
do this anyway if you're using Nepal ecosystem, the origins geometry
exactly same as we debit the grass or it's just
not gonna work properly. All right, so now we've
got all of Australia. Now, let's call him
and I'll see if I can use this piece of board
for what I wanted to do. So I'm going to do I need
to split this up first. I'm probably going to say yes, I'm going to have to split
these individually, each one. So I'm gonna come in and
I'm gonna grab this one. And I'm going to
press P selection. I'm going to grab
this one selection. Now the other thing is that my stroke at the
moment is foliage. And you can see here if
I combine cylinder LL1, I'm gonna call it strong one once you've done the
preparation than it's easy. So straw to I'm going to do this because it's gonna
make a little bit easier in the long
run to do this. Straw. Three, I'm going to show
you another tag me lie. We used for the graphs where we add two separate
political systems. Instead of doing now what
I'm going to show you is I can use the same
political system, but based on a collection
instead, straw, fault. All right, So now
we're gonna do is I'm going to right-click New. And then you can
see the foliage. I'm going to pull
it out to here. And I'm going to call
this stroke like so. Then I'm going to
grab my full strolls, bring them up and drop
them into strong. Now we've got an actual
collection called stroke. Alright, so now
let's call our roof. Then what we're gonna do
is we're going to come to our political system. You're going to click the plus. And I'm going to click this to little interlocking Fauzia. I always do this just to
make sure I have gotten new political system and I'm not going to change this
particle system or anything like that. So just always make
sure you do that. Click it. Let's call it straw. I'm gonna call it straw one. Because sometimes
when we put them on different houses
and things like that, the straw will go a different
way in a bit weird. So we just want to make
sure it's going to work. Then I'll call this
draw one as well, just so we don't get confused. Now let us come in and actually mess around with a few of these. So first of all, we could
put this on 6 thousand. We'd probably going to
turn this down a lot lower as we go on. I'm also going to put this
onto hat and you will end up with something
crazy like this. Alright, let's come
to hair length and we'll put this unknown 0.7. Again, we might change
this as we go on. I want to put this on to the last segments
actually means it's kind of like putting edge loops into it and
we need less of them. So that's why I've pulled
out on the next one. I'm gonna come down
now and change this from rendered us to collection. And when it then
pop the collection, here is the incidence
collection when a pro and straw and
straightaway now, you'll end up with
something like this if I double
tap the egg now, you can say that this is
what we've ended up with. You can say it's not looking
too good at the moment. So why is it not look into
how well the reason is obviously because the color
and the guy in the wrong way, probably not big enough, even maybe a little bit too thin. So let's fix all these things. First of all, what I'm going
to do is I'm just going to grab all of my styles. So I'm just going to
move them over it, just sort of the color and
see what I'm actually doing. Something like that. Let's
come to the first one. We'll go it and I'm just going to make
the column which lights? Let's see what I'm
going to want to bring into the white like. So we can also do that
with the next one. I can actually go
up here like this. So bringing them in,
which whites darker. Now we can actually say
what we're actually doing because they're a bit
too crazy to work with. Actually. Let's bring this
one to the white like so. Now I should be
able to make them darker once I've actually
turn them around. So let's go back to
our political system. Click on it, double-tap the I, and now we can call them
and actually work on these. Let's come down first of
all to where's it all? Actual rotation. So it shouldn't be
under Advanced. Let's click Advanced, and
then we'll get a rotation. Let's open that up and let's
pull the face first of all, the phase short, turn them
around the right way. So now the face
in the right way, Let's put a random nice
helped a little bit and pull the random phase up a little bit so we don't
want it too much. But now you can say we're
actually starting to get somewhere all the correct. Yeah. Obviously because
they're not fit in the place and
they're way, way. There's no enough for them. They are too small, so let's come down and
send the scale up. There we go. Now
we rarely again. And let's also turn
off the random phase. Maybe or something like that. Now you can see we're
actually getting somewhere now let's come back. I think it's this one, which one of them has actually going to the rotation of them
instead of them land. This one I'm gonna
do is I'm going to put this where it says rotation on normal tangent. Now let's try and
straighten the moment. So let's get them straight. There we go. That's exactly what
I'm looking for. I'm looking to poke
out a little more. Now you will see the
scale of these is really, really thin at the moment. So we really need to say now, I'm just going to come down scale and I'm going to
turn those off like so. And now you can see we really
starting to get somewhere. And now it's starting
to look a lot more realistic now on it. So just make sure I'm happy with our fall destroys sticking up and
things like that. We've got a lot of
randomness on there, as you can see, that also
the colors that way, way out to the moment. So I'm gonna come to my colors and I'm gonna change
those to be much, much darker and fit much better. So first of all, when
a Dalton them all. And then I'm going to go in and make them probably
a bit more brown. So I think this one's a
bit too dark like so. And then this one, the
big darker like so. All right, now let's make them a little bit more brown now. So welcome to this 1 first. Let's bring it in. Slightly browner,
same as this one. Finally, the last one. So let us have a look
at what they look like. Evades to Brown. Do we think? Not so sure. The thing is I think I
think that big enough. I just think I
need more of them. I also think that
needs to probably be a little bit more on the
on the yellow side. Yeah, actually, I
think that looks bad. This one of the
things is putting out a little bit random
mess around with you with the college trying
to trying to get them. Correct. So what you
actually want, there we go. That's actually starting
to come somewhere. Now let's have a
look from back here. If I double tap the eye now, I'm much happier with those. Now let's come in and see if we need to make them any thicker. So I'm just going to
call them back to my political system that will top the egg so I can
see where I'm looking. Put it on rendered view because
I won't give me a March, March bad view.
And there you go. Now with the lights
on and everything like you can say exactly
what it's gonna look like. Let's just zoom out a little
bit and just make sure my pay just going to
lay low dope load. They solve. Yeah, I'm really,
really happy with that. And you can see that
we're going to have to cut a lot of their way. But I think I'm happy
with the colors. I think I'm happy where
it comes down to. Definitely happy
with the thickness. So just make sure
you have yours, make sure you come to
this angle as well. And what you're looking
for, you just making sure that the null old
flat there is a lot of the volume there and
things like that In column C through
this so much. If you want to put a little bit more thickness
own, you're welcome to this, but I don't think I'll just come down to where
he says children, if we use in slope and you'll
see that that happens. And I don't think you
really won't not. Let's put it on simple. Yeah, I don't think the
children's gonna work here. So what we tend to do instead is I would even
make these bigger. I'll just turn this
up a slight amount. You don't really
want it too high as my point,
something like that. Maybe 8 thousand, I think. Maybe that's even too high. So let's try 7 thousand instead. 7 thousand I think he's going to do can still see under that. Alright, I'm really happy with
how that looks if we want. So what we'll do
then on the next one is we'll get this hay on the older parts of the house, for instance, the
rest of the bond. We might have to spend
these ramble we can, we know already how to actually copy them
and things like that. So we rarely really
motoring along now. Think after that, then we're
probably going to be at the point where it can
actually start tackling. Oh yeah, we've got this high ear as well where we can actually start tackling the geo
nodes and things like that. All right, everyone,
so I hope you enjoy it and I'll see you in
the next one. Thanks a lot. Bye bye.
65. Fixing Problems with Particle Systems: Welcome everyone to
blend the three, the ultimate medieval sinkholes. And here's our hey, I think I want to
do while I've got this all my render viewers, I just want to actually change
these colors a little bit. I'm still not happy with them. I can see this
one's got a kind of blue in there and I'm
really not happy with that. So I'm just going to put this
on come to my materials. I don't know why this
one looks a bit blue, but I'm gonna change it, make it a little
bit more yellow. I think so Let's try and bring it bring you out of bed and
then slowly drop it down. Tell him happy with the color. Still not happy with that color. I think I'm happy with that. Bring it down a little bit. Yeah, I'm not said they bad. Now let's come to our next one. We'll do the next one here. First of all, get
this color warmer fluid, something like that. And then I'll bring
it down like so. And then we'll come to the next one that
we don't miss one. I'm actually show
some current why. Bring it down like that. And then next calm, I think
there's only this one left. I actually pulled this one. Why? We've got one more thing. Let's bring it down. So it's this one here. I don't know why we
didn't actually this one I think is this one on line. There we go. Like so. Now we say the, I think that these are probably a little bit to the right, call it They just a little bit too light
now his wife fail, so we need to just darken
them up a little bit. So now we've got them on
the right color walk and do is I can just come down and very gently just darken them
all down just a little bit. Like so. And then I can go back if I need
to darken them again. Now that I think he's a March March back
called a borrower head. Slightly green. Slightly yellow,
slightly brown. Yeah. And I think I'm much
happier with that color. All right. So that's
the color dome. Now let's come to the other
side among going to do is put this on the other side, so it will come to
our other side, comb to our political system. Click the plus
button and then all you need to do is
click the down bond. What you're looking for is
the strong and double-tap the unluckily for roles they've actually worked out
on that side as well. Now you can say downloads
really, really cold. Now let's come to this room. I highly doubt that this will work on this
room for as well. So why Wednesdays when
it comes to my roof, I'm going to grab
this part of it. I want to press paid selection. You can see it's
split them both off. Now I don't really want not. What I wanted to
do is grab this, grab the top of it, grabs the bottom of it. I think that's the bottom of it. That's pretty buck
on their minute. So can see what I'm doing. Material and I'm going
to split this off. So selection splits off, now should end up with
this one and this one. Alright, so let's see if
it goes the right way. I don't think it well, but we'll say I'm
gonna come over, click the Plus, click the
down arrow, put it on straw. And what do you know? It has actually gone. Right except I think because
I didn't reset this, Let's say I'm going to resave control AOL transforms right-click
origins, geometry. And that's not really
done anything. Set now note no words. What we're doing is I'm actually going to copy this instead so I don't want to mess around
with the ones too much. So I'm going to do is
I'm gonna, I'm gonna pull up is this one, this one should be this and some slope straw
one. There we go. I'm gonna put this, this one is strong, one as you can say. And this one is a
political system. So I'm basically going
to minus that off. I'm gonna come back to
this one store one. I'm going to click Duplicate, and then I'm going
to come to this one. And we'd call this
a stroke, like so. And I'm going to dissolve. And we showed belief
with that now. So if I've turned myself, it should just
turn off that one. That's exactly what
I'm looking for. Double-tap, Let's put onto random mode and see
what it looks like. Now you will see that we do
have a few problems here. First off, it's not actually
overhanging properly. Second off, I would
say that the the panels underneath here that are a little bit too
light to be honest. And thirdly, if I turn the hair, you'll see that this one, I'm actually grows as well
and I really don't want that. So let's go down these and actually fix the
problems that we've got. First of all, let's
fix the fact that this particle system seems
to be attached to this one. So I'm going to do is I'm going to click the Plus bone and basically how there
like this and now hopefully at that
time and so there you go. It doesn't actually
held to that one and that's exactly what
I'm looking for. You can also say, as I tend to soap actually
made it look better. So I'm going to pull
this up slightly to nought 0.8 and that's going
to make it look a bit there. And then what I'm
going to do now is. I'm gonna press top. I'm going to do
is I'm gonna pull out this part of the room just very gradually
till we get to here, press the Tab button and
you'll see straightaway, double-tap the dots then
located tombstones bad. Now you can't see on this edge, this is poking through here and we really don't want that. So I'm going to do now and
when it's come to my house, grab this without not
attached to anything. I'm just pulling down,
dropping below that, double-tap the eye and then just make sure that it's
actually in place. So if I press Tab now, double-tap the height, that's why it's
going to slow light. You can see it looks much fat. Secondly, now let's salts out the actual planks of wood so you can see we've
got a plank, see it. Let's hide our mixer out of the way as well so we can
actually see what we're doing. Here's our planks. Let's
come to our planks. Let's go to Shading. Wouldn't just going to zoom in. I'm going to put it onto render. I'm going to put this
onto object mode. And then I'm just
going to darken these out a little bit by zooming. Now, I'm basically
bringing in a gamma, sorry if I press Shift A Search, bringing a gamma drop in place, and then if we turn
this down, no, hope we shall be able to
darken the outlet like so. Now let's see what that
actually looks like. So if we bring back all political system,
double-tap the eye. You can see that that
looks a ton better now, it really, really
fits in March back. It will also find a bond as
well because obviously we've got our bond also the same. Alright, so I'm really,
really happy with that. Now. I'm happy wave, I'm looking at the
length of the straw. Am I happy with the
length of the straw, I think and I am. Do I need more straw on this
or it's not looking fine? I think actually,
it's looking fine. I can cut this
along here anyway, so that's absolutely fine. Yeah, I think I'm
happy with that. The one thing again that I think are not happy
with is just the color. I think I need to make it
a little bit different. I think it's still a
little bit too light. So I'm going to actually again, come to my strolls and just darken them up
just a little bit more. Like so come to this one. I think I'm happy with the
colors just a little bit. To lifestyle. Some will come out now. Yeah, and I think that's looking back now let's look
into small, realistic. I think they're a
little bit too yellow. I can play with around
with that all day long. So that's one of the
other problems you have. Let's say, come back to
where I'm modelling. Unless now come around and
have a look at this size, will also just put it
on material for now. Fixed this other side as well. So lay all low doped,
lots of low HDL. Again, if you want to
take the grass off because you don't really
need that on right now. So I'm just going to
come to my grass, come to send these
two boxes off. I'm going to save
it out as well. And now you'll
probably find it's working much, much faster. All right, so now let's
come to this one. Straw to 01 can actually call
this destroy two instead. Yes, I can. That's good. Let's come to this one then. Again, what we'll do is
we'll grab this like so. And I'm gonna pull it
all the way to here. And I'm also then going
to come to my house, grab just this Paul and
I'm just going to pull it down underneath the roof, like so. All right. Top double top. There we go. You can see that they
have would just say, now let's come back to this
political system downwards, down arrow, stroke to show me that one,
double-tap the eye. And there you go. Look how easy it is and how
good that looks. Now let's come to this one. We probably going to need another political
system in here. Let's say I'm going to grab
this L selection tab control, all transforms right-click,
sorry, June geometry. Please wait, let's
see if we can. So plus down, Let's try
straw too fast, maybe. Double top. Actually, that looks
really, really cool. Except the behind you're
obviously it's fall too yellow. So I'm going to have to
really bringing that down. I'm also going to look to see if a straw will download that. Let's find the straw one. Where is it? Straw?
What's this one called? Let's have a look at
what this one's called. Now, this is called
stroke to 01. So let's come to this one. We'll try. They see it. Don't company. I think actually that's probably going to
look a little bit. Let's finally come then. Let's come to the
material hay barn. Let's come to where
is it shaded? Like so let's press
zoom in, double-tap. Now let's, this is the
rendered view of course. So now we just need to
clean this overloaded. So this should be, hey, texture. So all I need to do again
is I just need to bring into gamma gamma job. I think also with this
that's high enough. It's just a fact I also
need a saturation. So such Hue Saturation
drop by and I'm just going to turn this down
a little bit like so. And I can say that's
fit in pregnancy. Just stick that setting
this up a little bit Mall, going to double-tap the a. So we're just going to zoom
out now let it load up. Yeah, and I think that
looks pretty good, but still not be with the cholera thing or maybe it's because I've
not been aggressive. I think that needs to
work on this color. I think I'm gonna do is before the next lesson,
I'm going to go away, work on the color of my my
hay and then I'll come back. Obviously, the color is
a personal preference, so I might as well do
that on my own time. All right, everyone, so be enjoyed that and I'll
see you in the next one. Thanks. Bye bye.
66. Creating Trees with Sapling Generator: Welcome back everyone
to blend the three, the ultimate medieval
seeing costs. And this is where I left it off. And if we now put
this onto render, I went away and actually
worked on my halo band. I'm much more choppier
with these colors. So what I'm gonna say is if you want to pause this and get
the same colors as me, I'm gonna click on each one
of these now, just pause it, write down the hex number, which is this one here, and then you'll
have those as well. So this is my first one. This is my second one. This is my third one. This is my fault. All right. The other thing
that you might want to do, I'm just going to put
my grass on just to see what it actually looks like
when a mess around with it. So I'm just going to
turn both of these on. I'm going to
double-tap the a. I'm just gonna zoom out slightly like so I can see
what this looks like. And the other thing
you can do with your actual line is income
over the actual cycles. And scroll down to where you
add your color management. And the one thing
you can actually do is turn up the Gamma. So if I put this on
something like 1.3.31.3, you'll see actually
really brightens the old. Now that might be a
little bit too bright. We're still got shadows
and things like that. But if you really want to
Brian, there'll be a candidate. You can also mess around
with the exposure and make it a day seen. A nice thing or
something like that. I'm actually going
to mess around with any of those at the moment. I'm probably just going to
reduce this a little tiny bit. So let's try 1.2, like that. Yeah, and I think
I'm happy with that. So the next thing then
that we need to really work on is moving these
stalls out the way. And then where can actually
on all I'm just wondering if I can actually hide the
store out of the way as well. So I'm just going to hide those. I'm hoping I still renders with the other way because I've
noticed a lot of time if you hide them out of the way
and you come to where render this out, they
actually disappear. So I'm hoping that
doesn't happen. Again, while I'm
going to do with my story's going to grab them all. And I'm gonna put
them underneath myelin just in
case that happens, then we're not going to be able to see them just hopefully no big stalls are sticking
out the the land or anything. All right, So now we're
gonna do is we're actually going to work on
creating our trees. What I'm gonna do first of all, it's going to pop this on material instead
of my render view. And I'm going to leave my
grass just that for now. So let me just load up. Sometimes it will take
a little bit longer. Let's actually go
back to modeling is just going to make
it so much easier. So I'm gonna go back
to my model ID and you will start notes and things
will slow down a bit. As I say, you just got
to turn these things off if you compute a
concave or with it. Now what I'm gonna do
is I'm going to put my first tree roundabout
here, somewhere like that. Then what I'm going to do now, It just want to make
sure if you go to Edit Preferences and
you go to Add-ons, just press in SAP
and you'll have one called sapling
tree generates it. Just make sure that's ticked
on and then close this down. Then what are you going
to do is press Shift a and you're going
to press stop first. Then you're going to press Shift a and you're going to come to where it says curve,
it's actually occurred. If you go up, you'll
see one that says, suckling tree generates
it, bring that in. The thing is about it. It will always, always
place it in the center. I've tried this every time to place it where the cursor
is, where he'd never dose. Now, the first thing
you want to do, we just want to create
some very simple tree. So what I'm gonna do
is load a preset and I'm gonna bring in a
wide ***** like this. Now remember, if I touch
this or do anything with it, it's going to
actually mess around with It's going to basically take away this and
I can't bring it back down, so I don't really want that. The one thing you do
want to do is just change the actual seed. Now you can see I've changed my seat and I've got
something like this. Now you are welcome to go down, mess around with these
to your heart's content. You can also change
all of these things. So if I click on a
different one of these, I can change the branches, what the actual root looks like as you can see
the route down here. I'll just show you one
of them, for instance, by bringing the soap,
you'll see I can change out the root looks
and things like that. Again now press Control, zed, I've took it off
and I have to go back. I'm bringing in a nice exactly
what I'm talking about. So if I press Shift, daycare, sapling generate, it
brings in the same one. Let's put it back
on to geometry, and let's bring the preset. I'm alive. White birch. And I'll change
the seat than one. And there is that's the
one that I hadn't before. I think I think I'm
happy with that. I'm not gonna mess
around with it anymore. I'm just simply then I
can say if I click on it, they are invitations here. Natural press Shift as bringing selections
cursor keep offset, and there it is, and just put it in the right way they wanted. So you can view it from here and say exactly what
it's gonna look like. So I'm just going
to spin this round. Just very slightly, like so. All right, now let's
bring in the next tree. So again, shift day that's
bringing in a sapling. And we'll put this on
again, a wide *****. And let's put the random seed. Let's try to find him one. Like probably something you can make this smaller as well. Maybe something minus envelope. Let's keep going. Looks a
little bit similar to this one, so I don't really want that. I want to want something that looks a little bit different. Business pollutant below. Yeah, something like that one. That one looks a bit different. All right. I'm going to grab
it and then I'm going to move it over, put it. I don't really want
them level or anything. I wanted to maybe out or maybe in which way do
I want it maybe out, I don't have a look
in this process, shrink it down a little bit. And now the log very
different from each other. Alright, so that's the
beginning part of it. Now we have to actually change these Internet.
So how do we do that? Well, the first thing
we do is we come over object just the same as you did a curve and then
convert to meshed like so. And if you press Tab, you'll say this is how many polygons is not really going to worry about that too
much at the moment. I'm gonna do then is
come to this one here. I'm gonna do the
same thing again. So Object Convert to mash. And there we go. Double-tap the eye and this is what you showed and don't wait. So now it costs, we need
to give this a material. So if I click on
this first tree, I'm going to click New, come over, and we'll
call this tree. I'm going to give it.
You can see we've already gotten off a tree
bark around the other side, so I'll call it tree bulk main or something like that just so you can actually
save it out again. So right-click, Right-click,
Mock as I said, and then we'll go to
whereas shading zoom out. I'm actually going to grab
this and get rid of this. I don't really need
that on there. So all I did was left-click, left-click, drag over
that too by little arrow. It can actually get rid of that. So that's actually a bit
easier now to work with. And then what we'll
do is we'll come to our principled control shift T. I'm gonna go then
to my tree bark. Click all of these
clips principled, bring them all in and you should end up with
something like that. Now of course, as
you can see here, this is a little bit dark red. It looks more like a red board. Then it's not really
going to fail seeing. So I wouldn't do is
I'm going to bring in a UN saturation and
just turn that down. Oops, not shader,
hue and saturation. Let's bring it in again. Hue and Saturation.
Drop that in. And then that's what
the saturation, 0.7. There you go. You can
see it looks tones back. Now, let's come to all
the one and you'll notice as well that
we didn't even have to tell them anything. And it still looks
really, really realistic. So that's really cool. Now let's come back
to this tree bark, which is this one here.
Double-tap the eye. There we go. You can see it's really
coming together. They'll come together,
even bear once we've got the actual
leaves and branches in. And that's a fairly
complex thing. And then we're going
to store that. Now. What we're gonna do first
is we're going to go back to modeling
one small and then we're going to come up
to Edit Preferences. I'm what I want to
bring gaze in A's. Images is playing. So images. And you'll have one
called images as planes, make sure this is ticked
on and then we can bring in a image as applying
exactly what he says. Now if I press Shift,
come down to where it says at each price top first
because I'm in edit mode. So now shift, I am bringing him where he says
and images as planes, this one here and one way of
looking for now is the leaf. So if a callback, so tree
ball, click the up arrow, you'll see one that says leaves this one here, double-click it. And there we go.
Let's finish round. So all x in 90, I'm just going to
bring it out just so you can see exactly where it is. Press the S born and
there you go, Five, Press one now and zoom in. You can see this is actual leaves of
our tree that I'm actually going to put
on our actual tree. Now you want to do is you
actually want to go to your shading panel
and you can see that this one here
is called leaves. And then what I want
to do is I'm just going to pull this
up a little bit. I'm going to press the
double bond just to zoom in, press one so I can
see why I'm doing. What I'm gonna do then
is I'm just going to pull this leaves over here. And you can see as well now the alpha is already plugged in to the Alpha phase
because that side is brought in as an actual alpha. Now I want to do is
just want to pull the immaterial output over here. What we're gonna do
is first of all, I'll bring in a collar around and I'm going
to use a color on basically to get rid of anything that basically
I don't want, I want to basically make this
an Alpha Boule to keep the green and the branches
and things like that. So I'm going to press Shift, I going to bring in a color ramp and just
pull down there. And then I'm going to plug in the color to the actual
FARC of the color ramp. Now base I need this to be
mixed with the principled. So of course have
some control over it. So basically I want
to press Shift J. I don't want to bring
in a mixed shaded. I'm going to drop that
right in there, like so. Then one Wednesdays I'm just
going to unplug this with control and then
plug into the bomb, and then plug the color from
the Colorado into this one. And then finally, not the
mess the whole sorry, the color into the fight. Of course. And then what I'm going
to do is I'm going to then bring in a transparency. So shift a search transfer and
this one transplant BSD f, and plug this into
the top of that. Now you won't see anything
happen quite yet apart from we end up with a bit
of a thing difference here. And what I'm gonna do now
is if I turn this down a little bit like so thing I've got these are
all way around actually. Let's plug them in
the right way round. Yes, there we go. Now we can say that way. You can say, well up in that, I'm just going to turn
these down to get rid of all of those y bits
going behind them. So probably, probably down, just pass the RGB. As you can see, if we
turn these more down, it starts to get
rid of the leaves and we don't really want that. So something, something just before
those y-axis starts take over something like
that should be a null. Now bearing in mind
there's gonna be a lot of these gonna be in the trees
and things like that. You're not going to really
see them as they are here. So just bear that in mind. All right, so now we need to
do is we need to actually create all branches are going to come up on trees and
have these kind of leaves on them all do
now on the next lesson, names will actually create our actual branches
and then we'll pull these actual
leaves onto that. All right, everyone,
so I hope you enjoyed that and I'll see
you on the next one. Thanks a lot.
67. Tree Branches Created the Easy Way: Welcome back everyone
to blend the three, the ultimate many evil sin cos, and this is where we left out. Now let's come back to modeling, let's say a press Tab. And then when I went
there is I'm going to create a actual branch now. So how do we do that? Well, let's come in
and probably put out branch somewhere over yet to start just to get
the right size of it. So I'm going to press Shift S because it's a selected
and then shift a. When I bring in a cube, I'm going to press S, and then that's just going to
give me the right scale. So if I press one
now, bring it up. Like so, like so I won't say something
probably around that scale. And then also as well, what I'm going to
do is I'm going to just come over to my
modifies tab Add Modifier. Let's bring in a
subdivision surface and you'll end up with
something like this. Just make sure you're
happy with the size. I'm probably get
away with making a little tiny bit bigger. I'm I going to do is just turn
that off and you're gonna create an actual branch
bearing in mind. Probably branch needs to be a little bit shorter
than this may be. How do we create a branch? Well, we just come in and we
pull it out, we extrude it. We move it over. We just create a basic
brands, something like this. I'm going to press control law, left-click control Bay, just
give a quick bezel like so. And then I can actually
create another brand is probably coming
out of here, like so. And then E again. And let's move it up. Something like this. Maybe more Cray, a
couple of extra on here. So Control, left-click,
right-click, control Bei, pulled it out and then let's pull
it out from here. So let's pull it over here. So I'm just using the G bolt and then just to pull
it out like so. I'm thinking also I'll need
another branch on here. So Control Alt, left-click, right-click on Joel, be like so. And then grab this face here. And then like so and
then G, Let's move it. And then let's rotate
this round actually. So I'll rotate it round
and then E again, like so. And you can see now
we're starting to get the makings
of a nice branch. Now let's put all TV back on and you should end up
with something like this. You will see a few
problems with it. And the reason is
because we have, it's basically converts today, but without doing any of
the kind of hardware, let's press Control Law. Left-click, right-click. And you say as you're
bringing that down, we can actually make a
nice start to a brunch. Let's press Control Law and this one then I'm bringing the open, don't bring you up to fall. You still want them
rounded on the edges. You are going to make
them smaller and they will be slightly points. You will maybe not not pointing. Control law, left-click,
like so, control law. I'm bringing it up a
little bit like so. And then Control, left-click. And then to get rid of
these bits as well, control law, and then
just bring it by like so. Do we want one there as well? I think self-control are
bringing it back. There you go. You can see how easy it
is to create that branch. I think on this branch I'd say I'm actually happy with it. Finally, they need to do
is I just need to go in, grab each of these ends. And I'm just going to press
Alt and just to make them a little bit thinner with
proportional editing. In fact, Christ, all
tests now you can say, I can bring them. Not like not let me
to bring it Ryan. Let's bring them in.
Probably not that much. Probably take portion let us denote let's have
a go with that. I'll test. I need to go or one, so Control plus proportional
editing analysis, try. There you go. That's better. That's exactly why
one night and say they got much thinner as
they go down to the end. A lot more realistic. Before I finish
this, I think I need just one more branch
just to give a little bit more
something left-click, right-click Control
D. Let's pull it out and let's pull this up here. And then I'm just going to
move them around a little bit more like a full
disappeared II again and then just press the G bendy
over, something like that. I'm just wondering whether whether I wanted
bending over so much. I think I'll take
proportional as it's enough. Then just bend it over. Can actually get away
with eyes a problem. Probably going to have
to rotate it around from here and then bring it over g. That's looking
a lot better life though. Now let's press Control law, bringing another
edge loop like so. And let's press
Control R on this one, bringing it a
little bit to fall. Do we think? Probably so let's
rotate it around y. Let's grab the end
of it, like so. And let's just bring it down like so and just
pull it over that way. Let's grab the whole thing then. We'll just move them
around a little bit now just making them later on even, and also making this a
little bit uneven as well. And maybe for one more
edge loops in here. And then G just
pulled off as well. Just to make it
organic as possible. Alright, right-click Shade
Smooth. And there we go. Now, last should be,
that should be fine. I think we should be
able to go with them. Now we want to do
before you carry on it, you can see where
I've started this I1, my orientation, all of these leaves to be where
this starts as well. So I'm going to do is I'm
going to right-click. No, not I'm going
to actually come to this one Shift S case,
it's a selected. So that puts up that
grabbed my leaves, right-click and say
origin to 3D cursor. And of course, the
reason I've done that A's because I want my leaves, this branch to actually
come out from this point. I want to be able to control, in other words, all
my political system. I wanted this to be where
the orientation is. So this is where it comes out. That's the reason of DLNA. Alright, so the next thing
I wanted to do them, he's grabbed my branch again and I can actually apply this now. So control a, I can then come down and actually bring
game my tree bark, sorry for putting
Tree bulk main. There we go. And you
can say that it's not very well on this one. So I'm gonna do is I'm
just going to press U, you small UV project. Click OK. And there we go. Much, much fat buried in
mind that you never been able to see actually what this looks like
once he said in that, because you can't
see that closeness, the COVID leaves and
things like that. So that's great. Now let's grab this and pull it back
a little bit like so, just to recall tree
branches available. Alright, so now
what we need to do is just come up with 12. It's X group. Let's bring in a new vertex and we'll
call these leaves. I'm going to use our
weight paint again. So what we're gonna do is
you're going to come over to Object Mode white paint, and you'll see it's
all blue of course. So let's come in and just give it some heat
on these parts, just on the ends because that's where it once our
leaves to come from. So I'm going to go underneath as well and do the same thing. Like so like so like
so just on the ends, like that should be
absolutely fine. Let's come back and put this
onto object mode again. Now we've got that
and now we can come in and bring in a
political system. Again, I'm going to click Plus, I'm going to click my
level two icons here. I don't call these
leaves like so. And I'm gonna pray on hat and we'll end up with
a mess like this. Obviously it's based as well on the colors of the
actual tree bulk. And that's why it
goes. It's, it, it's a good way to
actually create a particle grass as well
because you can base it, for instance, on the
modern things like that. So there is not
taken into account. Actually before I carry on, I'm actually going to
change this to wear tree branches, notes, leaves, and the reason for
those it calls, I'm going to have leaves coming off my trees and it's
going to get a bit confused. And so I really want this as
a tree, branches and leaves. Let's click Advanced on. Let's also just come round. I'm just coming to these leaves. I'm just finding out
what this is called. So this is actually cold leaves. It should be the
only one night east called leaves hopefully. So let's go back now to
our political system now, got that thought while
we were in series, I'm actually going to put this
to treat branches instead because the leaves are obviously
going to be on the tree. So I don't want to be confused with leaves
and tree branches. Let's send that confusion by
colon that tree branches. Let's also call
this an unbalanced. Now let's scroll down to
where it says density. And let's put this on leaves. So it should just come
now at the end of our branches you can see that I've got none
poking out there, so that's a good stock. Now what you want to
do is you want to see where it says path. I'm just going to go
the same as we did with the graphs and
things like that. It's where are you going to
do is put this on objects. And then with the eyedropper, you're going to select
your actual leaves and you will end up with something like this if I double-tap the a now, you can see already these are
starting to come together. Revenues, albeit we've got way, way too many in them. Now it's just a case of messing around with
all these options and getting the actual branches look in the way they want them. So the first thing
you should do is really took me under number
to something more manageable. Maybe 20, we might have to go a little bit more than that. But what you can see
straightaway because I moved the orientation
of this branch. You can see now all
of these branches, all stoke cow in
the correct way. So you can see they
all come from here. Now the other thing you
can see is that the, probably a little bit
too small at the moment. So maybe that's something
they make them look on. Next thing, let's come and
give me just a few more. Let's try to pick something like that That's
looking a bit bad. Let's come down to
where it says scale. So we're going to
come to where is it, where the render is. So here's our scale. Let's put a scale, run
a soap a little bit. Let's turn the scale
up to nought 0.11, something like that because
they are going to be too big. So I'll save because we're going to now mess around
with the rotation, then we won't see a lot more. Let's come into where
it's a rotation. Let's click that. Let's
turn the orientation axes. Let's try on normal. Let's then turn the
randomized think is this one. Let's turn it around. Like so. And then you go, you can say it's already starting to really, really low, like actual leaves. Now I can also turn off
the random phase of it. And then we go
really, really nice. Now recommend
before you carry on just to put it onto
rendered view, just so you can have a quick
look and see what it looks like and you can see
what I'm talking about. So in the center of beer, we do have dark spots. And the reason for
that is probably because we've got a few
too many leaves in here. Now you can't get rid
of that by coming over to your Cycles
render options. And why you want
to do is turn off this transparency,
something like that. And you'll see now
that gets rid of it. You can turn down the amount
of Leaves you've got. Probably going to send
this down to well, 25, something like that. That's still absolutely fine. And I'm just looking now,
whether I'm actually happy without the leaves are
actually sticking out here. Let's see if I can
drop this down. Because obviously, the
less we can use on this, the barrier will be,
you can see there's a lot of leaves on here already. So let's come back to this. Let's put it on
something like a 30. And let's say I
double-tap the a now, while that's going
to look like and I think we can probably
get away with 30. That actually looks really nice. Now the more we'll do then on the next lesson needs will
actually convert this into an actual branch and then we'll get these
actually on our trees. All right, everyone. So I hope you enjoyed that and I hope you're looking forward
to the next lesson. I'll see you in the
next one. Thanks a lot.
68. Weight Painting the Trees: Welcome back everyone
to blend the three, the ultimate medieval seeing calls and this
where we left off. Now let's put this back on material so we can actually
see what we're doing. Let it load up. Eventually. Well, There we go. Alright, so this is what
we've called the moment. Let's just move this over here. Like so I want to attend to
do before I do anything, I will actually press
shift D and just duplicate that because I wanted to have a
duplication of it. Because when I apply this, basically before I put my tray, I want to make sure
it's right and I want to be able to alter
it if a candidate, I've got this now come over
TLS Spanner and you'll have one that says Make
instance real. Then we want to do
is you want to come over to your political system. Now, what are you
gonna do with these just minus that off, then you're going to
grab yellow branch, for instance, join, it's
OK to all of these now. So we're basically going
to join them altogether. So they grabbed them all, joining them all together, like so, press Control J. And there we go. And you will end up with
some changes of course, because what he's
trying to do is just tried to double them
all with this one. So I forgot about that. Actually happened in,
well, never mind. And this is what's actually
happened to the leaf as well, because we've joined
them all together and issues that
political system. I'm going to shrink
this one down and just make it a
little bit smaller. And this suddenly the
world and I actually, you can say I've
gotten leaves here. This is the one, this
is the other leaves. So I'm basically, I think
probably delete that off. So a bit of a mistake
by me that here we go. This is the one
we're going to use. So I'm going to actually
call this instead, so I actually know
what I'm doing. Treaty leaves. All right, Now let's
sit home to our tree. Then what I'm gonna do is
I'm going to press Shift H, hi, different l sound the way. Press one on the
number pad. Like so. Now there's an easier
way to do this. We're going to actually come in branches and we're gonna
use white paint again, but I'm gonna show
you an easier way to actually do these branches. And the way you're going
to do is you're gonna come over it to white paint. And then if you try
and draw on these now, it's gonna be very hard
because it's not going to go through the back of them
and everything like that. I'm going to get exactly
what you wanted. There is another easy
way of doing this. If you go to object
mode, price Zed, going to wireframe, double-tap. And then what you're gonna do
is you're going to press C. And instead of using the
weight pain in that way, what are we going to do is
you're going to actually grab these in object
mode on a second. There we go. In object mode, we're in. Now we should be able to
click on them like so, just with a left-click, we're actually going through
all of these branches. So now you can just grab
them all like this, going all the way
around. Like so. Press right-click three
on the number pad, come back to it now and go over the ones on the other side. And basically doing it this way, you pretty much should
get them all, alright, like knock something like
that looks absolutely fine. Now what we can do
is we'd come and assign this all of that weight. So now if I press tab, come to my weight pain, you'll see for some material. Now all of that now he's
done for his really, really easily and that's exactly
what we looked involved. Now what we can
do is we can come over and do our next tree. So I'm going to press
these old tapes, bring everything
back in object mode. In object mode, alt cage,
bring everything back. Come to my next tree,
which is this one here. Shift H to hide everything else all the way
to double-tap the, let's say the aid to wireframe. Let's press one
on the number pad and let's come over again. I'm given a vertex
group called branches. Branches small alcohol
there is just so I've got differentiation
between the other tree. And then what I'll
do is I'll press C. Hopefully for
you on object mode, press the tuple and we
go round them like so. Let's press three, goes
to the other side, like this, like so. And then I'm going
to click Assign. Let's put it onto a white
paint and I've low, double-tap the top,
and there we go. Now you can see that
one stone as well. All right, let's go
back to object mode. Let's press Alt H,
bring everything back unless comb to our
first big trick. And you know what
we're gonna do, we're gonna click on our tree
now I'm going to come out of it and we're gonna give
it a particle system. So plus, let's give it a new one and we call a tree
branches large. I want to keep it
as that we might need another one for
the smaller one. So tree branches lodge. Like so. Now before we move on, Let's come to our branch. I'm what I want to
do is I want to call them to up my answer. If I press Tab, I want my actual orientation to be right there in
the back of it. So I'm going to
press Alt Shift and click Shift S because it's selected tab right-click
salaries and geometry, I'm actually also going
to reset the orientation. So eat reset all transformed. Right-click salary
Jin to 3D cursor. There we go. Then hopefully should make sure that they do pop out of that. So I'm gonna do now is I'm
going to come to my tray, pop material mode on the moment there
isn't gonna pull up this onto hair like so. Of course I don't want it
coming out on the hat. And when I put this
on a 100 for now, I want to increase
it a little wild. And then one Wednesdays I'm
coming now where it says Pop, put this on object. Let's now go down to
the instance object, which is going to be
this French here. So bring it in. You should end up with
something like this. You can say that at the moment, the way to where small board they all sticking out of there. So let's come in and
turn the scale like so. You can also see that
completely in the wrong place. So let's come down to where
it says dense and say, put it on branches. Let's double-tap. And now we should be
able to work on them. We're also going to put
this onto random view. And now we should
have a good view. While this is actually
going to look like, Let's also add command and certain scale randomness
soap like so, basically a bit like
we've done before. Let's pull object
randomness on line. So let's call them
and turn off this to 300 or something like
that. And there you go. As easy as though you can
say wherever we pulled out, exactly where we've got all
weight on our actual tree. That looks really, really
nice as you can see, and it's really,
really easy to do. So you can see now all
of these branches is sticking out and looking
really, really realistic. Again, it really easy
to do, All right, so I'm really happy without the one thing you
might want to do is just you might want to
change the color of days, but I think I'm pretty
happy with them. So now I'm gonna do is I'm
going to call them tomorrow. The tree think we've
got tree branches, LacI it Let's see if we can actually do it just
with this one as well. So I'm gonna grow up this. I'm gonna come here. I want to bring down
my tree branches. So whereas tree
branches large as this one here among in series, I'm actually going
to duplicate this. You can see here
that the godmother, let's see if we can
actually get away with doing a tree
branches small, double-tap the egg cell below. Actually a mine on needs
to actually do anything. That looks really good. And it was really,
really easy to do. Alright, that's actually
worked out bad on my original. The one thing I would
say is on this one, I might go in and just paint
a few more branches in here. So can a bit empty, maybe down to this
bit here, I think. So. Yeah, I'll do that.
I'll go to my tree. I'm going to come
over to my branches small and then going to
think of all the result, I'll hide everything else. So Shift H height of rent
analysis and then I can come to this zed wireframe. Let's just make sure we're on weight pain double.com
where the sand is. Another moment. So let
us go to object mode. Scan a bit funky at the moment. So let's hide political system. And now we mine now to
see on our white paint. There we go. Alright, let's put
it onto wireframe. And then again, can
actually paint on this slide, this bolt. I don't want you wanted
to do that through. I wanted to go to object mode. That looks something a wireframe can actually do
onto object mode. And see, in fact, let's come back to here. Brian itches. Not actually, let me
do it for some reason. Let's problem. Sometimes is a bit with
this and I don't know why because I'm not clicked
on it. There we go. Now we can do it on
zed wireframe top. Now it should be able to do it. So if I press C Now, let's see. Yes, there we go. And that's why I mean,
I just want to fill these out just a little bit down to probably down to
there, something like that. Click Assign, right-click,
click Assign. Now let's bring everything
back to work or material mode, I'll take to bring everything
by double-tap the eye. Let's also put the
this background. Let's put it onto rendered view. There we go. That
looks a tone back. And don't worry as well, we can actually prove these trees. So that's the best part of this. And also these trees will also
move in the wind as well, which we're actually
going to probably do on the next lesson, I think so, yeah, we'll do
that in the next lesson. You can see we've pretty much, we've got the geo notes today with the actual
lead plant screen. We've got the
pumpkin and to grow, we've got the wind and
the turbulence to go, and we've got the smoke and
the Walter system to go. So not a lot actually
left now we're rarely, rarely along with this. Let's put this onto material. Let's save it out. Okay, everyone, I hope you
really enjoyed that one. I hope you've learned the law, really, really coming along now. And they were looking
at Brown from Baghdad. I didn't realize I blend or
either LOD system anyway. So that's looking
really, really nice. One thing is before we go, I think let me just put
this on Render again. I just want to see
if they said, Yeah, this stone, it's looking
way, way too bright. I'm going to actually
fix that before I do the next pulse. So where is my stone? Here it is. Let's calm and put
this on material. Let's go to shading, just looking way to
Brian and comparisons, everything else it doesn't doesn't quite sit
right, does it? What we'll do is
we'll just bring into gamma and you should
be well aware now I'd say we change these things
and make them look, right. Let's drop that in there. Let's turn this up to I think that's the
way we need to go. Yes, it is 1.5. Let's try that. Let's zoom in to this. So I'm just going to grab it. Zoom in and turn these down. Just a little bit, put down
render. So have a look now. Yet still to Brian, let's put it open. There we go. Should be matching
this stone realistic, late and not logs. Tones back. Alright, rarely realistic. Now let's put it
back on material. Let's go back to modelling. Unless press Tab, double-tap on, Let's actually save that out. So save that out, and I'll see you on the next one.
The problem, thanks a lot. Bye bye.
69. Creating the Geometry Node Leaf: Welcome back everyone
to blend the three, the ultimate medieval sinkholes and this is where
we left it off. Now what we're gonna
do in a minute, we're going to make our
leaves for our actual plants. And then we're going to use something called Geometry notes. And it's a very exciting
new thing to blend a three. It's basically where we
can create meshes and animations using
only a note system. So very, very
interested in lots. Look forward to that. The first thing is
I always do this. I just go back and actually fix any problems
with my collection. So you can see we have a
lot of things that aren't really named or put
in the right place. So first of all, what I'm going to do
is I'm actually going to grab my leaf, as
you can see here. I'm going to actually
find it on here and see if I can just hide
that out the way. I shouldn't be able to hide it. It's when we come
to render where you probably have a problem. We have a branch here. And because I'm actually
happy without my leaves off, I'm basically just going
to delete that out of the way that I'm going
to come to my leaves. Again, I'm always putting
things on my actual match, sorry, my actual land. And the reason I do that is because if in case I
can't actually hide them, I just want them
under there so no one's going to see them and
they're out of the way. That's basically
why I'm doing that. Alright, so I don't know that
now what I'm looking to do, There's another way you
can do it is where you can put it right over
here somewhere. I'm basically use clicking
just to get rid of that. That's another way you
can actually do it. Now the next thing we want to
do is I've got trees here. They obviously won't
bring in foliage. So you can see we've
got these tree leaves and they wanted
to be in foliage. I'm going to pull
that off and just drop if I come into
my foliage like so. Then I'm going to just make sure that my leaves
are still there, which they both are
as you can see. Now let's come down to
Trey and we'll call this large tree, like so. And then I'll come obviously the other ones and I'll
call this small tree and just then I know what these are. I can pull those nice and
cleanly away in my hierarchy. So let's close those up. Now you can see everything
is nice and clean. Now you will notice we do have a fair few amount of tries here. And the thing is, it is
going to add up to Alex, we have a lot of particles, we have got a lot of leaves
and things like that. So the scene is gonna
add up to a fair amount. And this is why I
keep saying that if you if your machine
is slowing down, just come to your leaves
or anything like that, come on which way your
political system is. And just turn both
of these TVs off. It will speed the open-end and same as for the
leaves, same for the hair. You don't really need the moment you know what they're
gonna look like. So it's only when we come to actually render them
out while I went to do is I'm just going to come to my political systems
and just turn them off. It's not so difficult
as well to add a mom because we've got them
in all buildings anyway, so we should be able to
find them fairly easily. Alright, so that's always, let's actually turn the
leaves off as well. And then you all should
be speeded up as minus. Now the next thing
I want to do is if we come over to our reference, I don't actually think
we've got a reference on. It's a simple actual leaf is gonna be a little
bit like this. Let me just have a look
to see if a Goldmann, I think I'm gonna
come to my reference, go down to change
the which one it is, and let's put it on here so I can actually see
which one it is. It's actually this one
here, as you can see, GO node reference, double-click
it, and there we go. Now you can actually get just a good idea of what actually it's supposed
to look like. You can see though, because it's a black
black black background. We've got some parts missing, but don't worry about that
because we just want that this actual leaf
idea to be created. And I'm gonna put
my cursor here. I'm just going to try and create a leaflet up just very simply. So all I'm gonna do
is bring in a plane. Plane. I'm going to
set to this right? Anyway, I'm going
to go over the top, then I'm going to
press S and wireless, try some wine, pull it out
like an S on x and pull it in. Tap control law, bringing
a few edge loops. So left-click, right-click
a main edge loop down the middle,
left-click, right-click. And now let's bring these back. So we've got a nice, basically a pointy bit on it. All we can bring them
in, Let's have a look. So S and access bringing them in to something like that do are rarely wanted
pointed at the end. That's the thing I
need to ask myself. And I'm going to come
in and just bend this straight down the center. So let's pull it down like
so, something like that. And then let's go back
to our reference. Just have a quick look. You can see it comes out
and then it goes in. We can see it is actually
pointed on the end. So let's try and replicate that. I'm going to call
them to this end. I want to press S x and
bring it in like so. And then I'm gonna
call to visit now. And then an x,
bring this one in. Probably something like that. Alright, so now let's
give it that nice fence. I'm going to grab
the middle of it. I'm going to pull it all lines so you can see how
easy that was. I think actually we're
nearly there with this. I'm thinking that
probably needs to just pull this
down a little bit. So just zoom in, pull it down. If I'm not gonna
do that actually, I'll just take off
proportional I did send I'll come and grab it here and here, and then I'll just
pull them down. So now I'm just thinking, do I actually want a
pointy bit on here? I'm happy with it light up. I'm actually happy
with it live up. Last of all, I want
to shade smooth and I'm just going to
look from this end. So let's try joining me. I hope to see where it
actually looks like. So what you should do is just grab the first two on
either side of it, then shift select the middle
one, and then right-click, come down to merge vertices
and merge and center it. Let's have a look at
that looks like so tap, double-tap the egg. Actually, I think
that's probably going to look like that. Alright, so the last thing
that I wanted to do, Let's go back and I
just have a look at all the beginnings
of actual leaves. Can we say any of those? We can say that the quiet thing, maybe the one's a
little bit more thin. Basically, let us come back. This is the beginning, so
let's pull these into things. I'm gonna, I'm gonna grab
all these process than x. Just pull them in and then I'm going to grab just
both of these, press adult bone so it can
orientate around them. I'm just going to
pull them down like so and then in a
little bit more. All right, so then now should
stick out a lot longer. Alright, I'm really,
really happy with that. Okay, so now let's go in and actually create
these as notes. Probably need to give
these immaterial fest. To do that, I'm
basically going to come in and give it a material so new and I'll call it
something like crop leaf. Like so. And I don't
think we need to bring in any kind of image
or anything like that. I think what we can do
is we can just go to Shading and I'll show you a different way of
actually doing it. So first of all, if
you come to your principled and you
press Control T, you'll end up with something like this where it's brought in an image texture and basically this texture
mapping and things like that. That's exactly what we want. Well, I'm gonna do is
I'm going to grab all of these and just pull
them over to this side. And then I'm just going to
come into my image textured, press Delete, and
just get rid of that. And then I'm going to plug
it into the normal from the UV because I
don't really want it based on the UV anyway. And then find out what I'm going to do is I'm going to call them and bring in another note. And this is gonna be a basically
a simple noise texture. Noise texture plugged
that in the vector. I'm plugging into the vector
of the noise texture. And then finally, what you
can do is you can plug the actual color of this noise texture into the
normal of the principal. Now what you can do is
you can actually change the color of the base. Let's first of all
go to our leaf, whereas only fair it is. Let's come here. And this is why it looks
like at the moment you can say we've started to
get some noise on that, Let's change the colony annual, say exactly what
I'm talking about. So let's make it a
nice deep color, okay, and you should end up
with something like this. Now first of all, what I'm
going to do is I'm gonna come down to my rotation and turn around 280,
something like that. And then I'm going to scale
this, scale up the detail. Just scale it up a little bit. And let's put the
roughness also. You can see now that
it started to turn in to something
that resembles a, nicely with a lot of textures and things
like that on there. And that's all you
really need because these leaves are actually
going to be growing over here. So something like that
should be absolutely fine. You might want to go
in, as you can see, we've got a lot of them kind of a squared
blocking us on hand. And it's just because it's
playing and it's really got nothing to really work
with. What you can do. You can just come
in and bring in a subdivision surface and you see that it's
going to really, really bring it
out a little bit. I like the hard edge
genius of this on the, on these leaves and things. I think from a random
point of view, unless you really close, you're really not
going to see that. So if you're looking from here
and they are quite small, it just looks huge here. You can see that you can't
really say anything. It just looks that
blocking this look is basically how the crops
are going to look. They don't actually look
too rounded when it comes to this certain type of crop, which is basically
going to be corn crops. So that's why I'm
basically going for, now. One thing is when
I've done this, you might want to make it
possibly a little bit darker. So I bring this down a
little bit or a pillow bit. You can also, if you want to mess around with
this even more, you can go and plug in a colorRamp pulse,
something like that. So just bear that in mind. You should have an
idea now about to do so now we've got our leaf. I'm very happy with that. So now let's actually create
all actual geometry notes. I'm just going to pull this
over to the left-hand side and then I'm gonna come up
to where it says geometry. Now, I'm going to then press adult bonds just to
zoom in to where I want the geometry
road to appear. We're just going to be
obviously where my cursor is. Now the thing is, this is setup. How itself basically ball. I don't really use this for me. I'm just going to pull this
over to the side and just get rid of that just
so I've got more of a better view
of what I'm doing. Next dollar 1's do is
we want to place new. You'll end up with
a Geometry Group important, a group impulse. And you can come in and name
it and we'll just call it, let's call it corn across one. The reason I'm calling it cone crop one is because I'm
going to have a fair few of these because
basically I'm going to change the seed so that
they look different. Because if you look on our farm, we're gonna have affect
your crops on that. Alright, so that's that bit. So phone to call the lesson. In the next lesson,
what we'll do is we'll actually crack on
and actually start making actual cone crop
using the geometry notes. All right, everyone, so
I hope you enjoyed that a little bit of a
boring one ball went to solve those things out. So I'll see you in the next one. Thanks a lot.
70. Introduction to Blenders Geometry Nodes: Welcome back everyone
to blend the three, the ultimate medieval
seeing costs. And the first thing we
wanna do is actually save this out because I did
actually I forget. One thing I did forget
is the bringing my cue to actually put
this geometry note again, I didn't forget that I'm
going to do is where my actual cursors, I'm
just going to press Shift. I bring in a queue and
you'll notice that my geometry now disappears and among registers is just going
to click this down arrow. I'm putting on crop bond. And hopefully, Let's
see if it actually goes on crop one prime carbon, I'm going to have to pick new. Now let us see in
front of crop one. Yeah, there we go. We've
got a juncture know now, based on our actual key, we actually need some mesh
to actually start this off. All right, so the first
thing I want to bring in is create the actual stem. How am I gonna do
that is bringing in a quad and I'll tell you why isn't a minute when
I see where it's cold. So it's called a quad and
it's called quadratic Bezier. Let's just drop this in here. And you will notice at
the moment window wave, this impulse which is red. Obviously that doesn't fit. Anything that's red,
clay soil doesn't fit. So if you pull that away,
you'll see straightaway, but you started to get the actual makings of
some kind of stem. Alright, so let's come in
and change a few of these. So I want all of
these are zeros, so you wanted to 0 and you can
actually tap down as well. So all three of
these on 0, then 00, and then to actually doing that, you can see in real-time
it's actually changing. And then one and then 0. And then finally the last one. As I say, I've messed around a lot with these to
create these things. So I kind of put them
in the right place. I'm also going to do is
press Shift Spacebar, click my Move Tool. And what I wanted to
do now is just move this down to the
actual ground plane. So you can say this is
where my ground plane is, just going to move it
down, right to that. And then I'll have
a good idea how this is actually going
to stick out the salt. We can move them as well
on things like not. All right then so
I'm happy with that. Can I just actually
take that off? Yeah, I can still work with
it and then click on it. I think I'll be happy with
my movement told that. Alright enough, messing
around with that. Let's move on to the next part. I think actually as well, before we start, I think it's probably going
to be easier. You can bend it like
a stem would do. Brow. Think for us, we'll use a noise to actually
bend it in the end. I think where we've got a one on here will actually
also set this to 0, and then that will put
it pretty straight. So it should look
something like this. Now what I want to do is
I want to actually change this into an actual match. The way to do that is
basically curved mesh because this is a
curve in the moment. If you press Shift eg Search, put in curve and you'll see one that says
whereas it curve, looking, duck curve to match, just go scroll down
a little minute. It's not so everyone see if
I can actually scroll down. So I'm gonna promotions
that we say we find it not white curve
to measure it is, Let's drop that one
in and then the moment nothing happens
and the reason why nothing's happening
yet we've told a blender that we want to
turn this into a mesh, but we've not based on anything, so we need to base
it on something. I wanted to bring
in another node. And this time I'm going
to bring in curve circle. What this will do
is basically tell blender how sick we want to. Really, that's where
he's basically doing. So curved circle right down the bottom and bring
this in the moment, you'll say, well, it still
looks like a bit of a steak. And that's just because we
need to plug in this curve to the actual profile code and you'll end up with
something like this. Now two problems with this. First of all, the resolution
is way, way too high. It's a bit like
bringing in a cylinder. Again, it's set so I don't know where it
is in Blender and 32, but they're fairly
seemed to like it saying with the cylinder. So let's turn this down to 12, which realistically
is the bare minimum between 1012 is a Batman
when you can get away wave, as we spoke about before, we've making a cylinder and making it low actually round
when we shaded it smooth. Then what we're gonna
do, what you can see the radius is way, way out. I mean, this is gonna be like
a tree trunk or something. We're going to turn this down to naught point, naught two. And there we go. Now we're
starting to get somewhere, albeit it's just a
stick of a moment. Now what we're going
to do to actually bend this and
things like that is new is use a actual
noise texture. But the thing is before
you can use noise texture, you need to bring
in another node to actually plug it into. I'm basically going to plug this group output just a
little bit over here. So I've got a little bit
more room to work with. So the first thing we want
to do is use a set position, its tell blender, Hey, this is where there's
noise texture is actually going to put it. So what does that mean base,
I'll show you what it means. It means if I go to Search
and I looked for one called Set position
will say every case. If I plug this in here, you'll see nothing happens bolt. If I start messing
around with these, you'll say that actually moves the position to
basically an offset. Now I don't want to use r as this set position to
offset this in any way, what I want to use
is a noise texture. So I'm going to do is I'm
going to press Shift, I search, putting noise. You'll see when you've
got noise texture. And I'm just gonna
put this in here. And then what I'm going to
do is use the colon value and pull plug that into
the offset on here. And you'll end up with
something like this, maybe pretty funky right bulb. We're actually
getting somewhere. We just obviously need to bring down the noise
and things like that. But you can always stand
basically how this works now. Now of course the noise texture
is not set up correctly. What we need to do is
we need to go in and just alter a few
of these values. Now recommend just
printing the values IPO. And then a bit
later on when we've completed the actual
geometry node, you can go in and mess around
with these and say how you might give them
an actual best way that you like the
look of a lot more. So let's come in. First of all, change this to 4D. Let's come in and change
the w value to 29. Let's change the scale to 1.3. And I think actually thought everything now we
need to change. Now, there is another
problem in-lab. If I move these over here. We all sat in the position
right after the curve to mesh. And it shouldn't
actually be after it. It should be before it. Because at the moment
as you can see, we're displacing it over here and we don't
really won't know we wanted to displace it
from this point here, which is the curve to match. What we need to do
is if you old old, you can actually pick the
soul and then drop that down. They fold the curve dimension. Then we can call I'm
plop, They said. Now the problem is you can still see that even though
don't all that, it's still not in
the correct place. So I need to actually fix up. The way I'm going to do that
is I'm going to bring in a vector math node
and then we'll reset with our impulse basically
back to here because we won't see it set back to here because we don't
want to move in, in a weird way when the
orientation is based here. So if I then comments, bringing another node and I
bring in a vector math node, and I'm going to drop this
right over here, like so. Now if we put this
on subtract like so, now if we bring this to, let's say null 0.6, you'll say that we stop moving it in a
different direction. I'm just gonna point a
few numbers in here. Yours might not be the same, so just move it and hold the Shift button just
to move it down slow. Let me see them get
your first 665. These are the numbers
that are putting on my own and these seem to work. So let's try no 0.6 and you can see pretty much that
they're exactly the same. You also probably going
to work out this way. Alright, so now we're back to this position. Always great. Again, the moment you will
say that when I move this, it moves all over the place and moves
straight out of the way. And that's definitely not
something that I want. You'll also notice
that this one over here is the well-known 100 volt. So I definitely don't want that. I'm just gonna get rid of it
and come back to this one. So that was the crop
that we actually made, but we based it on here. Now the problem is I'm
gonna put this on 29 again and you'll say drops
right back into that. That's not actually
something we want. We want this thing to move
from the orientation. We don't want it
bouncing around all over the place or
anything like that. So how do we fix up? Well, what I'm going
to do is I'm going to basically pull my noise
texture over here, over there so we can still say, I'm gonna move my
subtracts over here. I'm going to bring in
another vector math. So Shift, bring
in a vector math. Pulled that in. The moment it's on Adam, what I want to put
this on is multiply. So let's just put this on multiply and you'll see
it goes straight again. The reason for that is because
we need a curve parameter plugged in to get it set
back to this noise texture. So if I press now shift
a cone to search and bring in a curve parameter, which is this one here. Drop this in just below your
noise texture, plug this in. And now you'll say it comes from that point that now if I
turn this up and down, you'll see it wiggles right
from our orientation. And that is exactly
what I wanted. The curve parameter
basically just tells Blender to stop from here and
not move from this point. All right, So we pretty
much salted or not. So what I will do that on the next lesson is
we'll carry on. I think actually I'm just
going to grab all of these, so I'm just going to
Shift, select them, shifts like base and move them
just a little bit over it. So I've got a little
bit more to wait. And I'm also going to come and just get rid of
this group import. We will need it later on, but
we don't need it right now. I'm just going to delete
it out of the way. Alright, so you should end
up with something like that. I know he's gonna
be a bit hard to see because of the
fact that it's, it's quite a lot of
notes in the end. I'm hoping I'll be able
to zoom in quite often. You'll be able to see exactly
how it's mine is low, just in case you've
missed anything. All right, everyone.
So I hope you enjoyed that and I'll see
you in the next one. Thanks a lot. Bye.
71. Working with Geometry Nodes: Welcome back, everyone
is blend the three, the ultimate many
evils seeing calls, and this is where we left off. Now what I wanted to do is
I want to basically make this thinner at the top on it thick and the bump and
thinner at the top. So how do we achieve that? First of all, I'm going to move my curve to match
your style over here. And then I'm going to
do is I'm going to set the curve radiators because that's honestly what
we wanted to do. So shift a set curve there, we upset the curve radius. Want to probably say,
nothing will happen because we haven't
actually told blender how to actually do this. In other words, we broke
the end and it's like, okay, what do you want
me to do with this? What we need to bring in
is a curve parameter. It's actually tell blender
where to actually do this, like we've done with the
curve parameter over here. And we tell blender to set this to the actual orientation. So let's bring in
a curve parameter, so search curve parameter. And let's just put
this above here. And now if I actually
plotted this kind of parameter into the
radius at the bottom, you'll see that
we get something, we've actually got
its center vote. It's the wrong way round, so we need to
change this around. Let me just pull this
up and hold this over here so we can say
a little bit easier. We need to invert too,
of course, in some way, but we don't actually
have an invert within the geometry nodes. So we need to do it another way. The way that we're gonna do
instead is we're actually going to use a map range. Now if I press Shift a and
then bringing in a map, you'll see one that says map
range and just plug that in. Now I'm at range is
basically give him Glenda. It's a bit like working with shape keys and
things like that. If you've ever worked
with those all vectors where you're given a range from 0 to one or 0.5 to
one for blended within, you could have a color from red to green and
everything in-between. And then you sit in
it, how far it can go to the red and how far
it can go to the green. And that's based on
what you're doing. Now all we need to do is on
this map range to change this round is called
the minimum to one, then the maximum to 0. And you basically just
swapping them around. If you ever need to
invert something, just use a map range
and you can actually get exactly what you
want very, very easily. It's just like an inversion. It's not supposed to
be really useful that, but it actually can
be used for that. Basically, the moment
you'll see that the tip of my actual stalk is a
little bit too thin. So I tend to do is I'll
just come in and turn off my minimum just a little bit
to 1.4, something like that. It just can say out a
little bit because I don't want it so thin that
we can't actually see it. Alright? The other
thing, of course, is you can double-tap the egg
and you can actually where can it without the yellow
kind of border around them? Sometimes I find this a little bit easier to
actually work with it. Now what we need to do is
we actually need to create the growing animation because we basically want this
to grow up from here, growing up all the
way up black dot. So what we need to
do first of all, is bringing in a trim curve. So what I'm going to do is
I'm going to press Shift, search, trim, curve. Just drop this in-between
the set position on if I zoom out the
quadratic Bezier. And what this is
actually going to do is it's actually going
to trim the curves. So if we pull this down, actually called sit down, and it's a really easy way to actually get things to grow. It, trims it down by say, so this is the end. If we trim it, it
just goes all the way down to the bottom
when it's set to 0. And that's how that
actually works. Now we want to do is we
actually want to bring all leaf into onto basically all plump. On Wednesdays, I'm first of
all going to find my leaf. So I'm going to
leave is over here. Let's name it. We can say it's cold
this in a moment, I'm just going to
call it a leaf. Hopefully I've not gone
another one called Lee, and the moments do
now I'm going to come back too much dark where
the geometry nowadays, and I'm basically going to
drop my leaf into here. So if I come in Grandma leaf and you can see
it's a bit fiddly. I know it clicks off if you grab them, this geometry know, grubby leaf and
you should be able to pull that into
place and drop it in. And there you go, you'll end
up with objects in focus. You can actually press Shift a, bringing in object
info and bring it in this way and then click on nearly all you can do it the way that I've
just showed you. Now we've got polyfit not
connected to anything, not gonna say anything. Let's say now if we can get this into the place where we want it, now I need to do is we need
to create a instance so that we can plug
basically all leaf into. It's basically like a shader
or a mixture it away, you plug in two different
items together. So what we're gonna do is
just move the geometry, sorry, the group
output node over here. And then one way to do is
we're going to bring in an instance, two points. So if I put it in instance and you want the one
that says instance, not instances,
instance two points, and then just drop that and
then I'll actually disappear. It's not meant to do is
I'm just going to drag my leaf over and down here. And then I went to do
is I'm going to plug my geometry into the instances
and watch it happen is. Your actual stem should come
back and then he leaves, should be attached to it. Let's save that actually works. There we go. You can see that
that's not exactly what 1. First of all, it's way too big. Second of all, I
just need to reset my actual orientation to be right back here because I had to actually in Palmer leaf because
I messed up a little bit. So I'm just going to come in and actually grabbed my leaf. Like so Shift S cursor. Where is it cursor to selected? And then I went to do is
press the top right-click set origin to 3D cursor. And you will notice
now that this has changed very, very slightly. So now let's come back to this and except
it's a bit of a mess, but we're going to
actually solve that out. So why is that happening? The reason why this
is happening is because this shouldn't
be passed here. It's basically calling
out the actual stem. So I need to actually
change that. So what I'm going to
do is I'm actually going to grab it with Alt. I'm going to drag
it then over here, I'm going to bring the
object over here as well. I'm going to plug the geometry
into the actual instance. And then I'm going to do
instead is I'm going to drag the set radius and plug
that into the points. And now you'll say that
we've got our stem bark, but we haven't actually
gone and leaves. Now at the moment you'll
see that we've got no leaves, but we've
got a standby. The reason we've
got no leaves is because this is
plugged into a table. This isn't plugged into anyway, so we basically
have no instance. What we need to do is
we need to someway of joining these pieces of
geometry two together. They're actually
connected really. It's just not
showing it. What we need to do is we
need to bring in another node called
joint geometry, like drop this in here, and then you can
basically plug in your instance into
the joint geometry. And hey presto, now you've got
your leaves and he showed, although we can't
see it very well, have your actual this
stem in that as well. Of course, they're way,
way too big still, and they're all points
in the same way. I'm not really happy with
that. I just wasn't there to actually make this
smaller, does it? Actually? It doesn't actually. I'm just going to
press Control leg old transforms and then
set origin to 3D cursor. Yeah, and there we go. It's
made it actually much, much better, actually
much more usable. If not, it's just
not brought in. I didn't reset all
of the transform, so just make sure you reset all of the
chunks foams on yours. And make sure that also you put the orientation right to
the bottom of the stem. And then he's gonna make
it so that it goes up, as you can say to
my actual in here, you probably are public gateway with actually
making this smaller pressing Control leg all transforms right-click
origin to 3D cursor. And I think he made him a little bit smaller
than not that much. So we'll leave it at that. Welcome back to it, and we'll
make them smaller within the geometry notice
just wondered if that actually worked by
that, apparently not. So now let's again, just
tidy this up a bit. So I'm just going to pull
this a little bit this way. I'm gonna pull my instance
two points this way, just so I can see where
these actual lines or dy is the most
important thing for me. I'm also going to just put this, it around here and
move this over a little bit and then I can
see exactly what I'm doing. Now the next thing
I need to do is I need to have some control over how many leaves are
actually on my actual stem. So how do we do that? I need to bring in
a resample curve, shift a and comb and
search resample, and then drop this in
here and you notice straightaway that should
be ten along here. If I turn the soap, we get mall, turn it
down, We get less. So now we've got control
of Romney leaves. We actually haven't yet though, what we started called control. All the randomness. When got control of
the rotation, went, got control of basically
how big and small they are. So we've got lots of work
still to go on this. And we also need control
of Aldus actually grows out because it's okay at the moment you grow in with, whereas it without
know that over here with our radius and with just looking where a girl face with our growth over here, which is on the trim curve. Well, we haven't actually gonna control of the
leaves as you saw, they just disappear basically. So lots to do. We'll actually showed, make a lot more progress
on the next lesson. All right everyone,
so I hope you enjoyed that and I'll
see you in the next one. Thanks a lot. Bye bye.
72. Complexities of Geometry Nodes: Welcome back everyone
to blend the three, the ultimate medieval sin cos, and this is where we left off. Now let's give it a good number. So let's give it
something like 24. It's gonna look a little
bit funky at the moment, obviously because
we've not rotated and obviously because of
the size of the leaves. The other thing of
course, is when you're working with all these
nodes, you really, really wanted to be
able to frame things, a name them so you know
exactly where you need to go. If you want to
change, for instance, normal leaves and
things like that. I'm gonna do is I'm gonna call
to where it says resample. This is how many
leaves around here. And then what I'm
going to do is I'm gonna come over here. You can press the Enter
button or you can just open it with that little
arrow that, and again, we come to note wrangler, which has one part of it
that says frame selected, which is really handy. Now I can actually come
and change the color. Let's put it on red or
something like that. And let's name the label and
we'll call it said number. Leaves, something like
that. And there you go. Now you've got a
frame around it. You can actually see
that really clearly. We want to change the leaves. I can go straight to that. You can actually frame
as well a lot of them. So I can actually grab, let's say all four of these
come to my Node Wrangler, come down frame
selected and it will frame the whole things and
then you can label them. Really, really handy
thing to know on a really good thing to actually use in your actual node cell. Now what we need to do is we
need to rotate these leaves based on the rotation of all actual stem. So
how do we do that? Well, let's bring
in a, another node. So I'm gonna come over here, Shift a and we're going
to bring in an Align, Align to vector. Let's plug this into over here. Sorry, let's put
it over here and let's grab then the rotation. I'm going to plug the
rotation into the bullet. And I'm basically going to
plug then the rotation coming out into the rotation of
my instance, two points. Then you'll say that now
these actually changed. So I've pulled this download, but you probably going
to say a bit bad that they actually move in the rotation of all actual stem, of all actual plant. Now at the moment
you'll see that that line doped sideways. We don't really want not, so just check yours
out a leave a beat. The Z or the y or the
might be actually correct. And you can say a mine,
it's actually the Z lines them up in the right
way that I'll want them. I've told my leaves a little bit so they're a little bit tilted. But don't worry about that because we're gonna
mess around with the rotations and things.
In a few moments. Now the moment you
will see as well that they are stacked top perfectly, That's not realistic, so we
need to actually fixed up. So what I'm going to
do is I'm going to command press Shift a and I'm looking for a curve,
tangent, curve. Let's have a look. Where is it? Putting a tangent. There we go. Okay, If tangent
and bring that in. And among engineers,
I'm just going to probe the tangent into the vector. And you'll see now that gives a lot more randomness
to our actual leaves. Now you will see,
although they've actually bended now
a little bit of the random kind of bend now you will stay that there's still kind of stuck
with each other. So we need to give them some
random value of where to actually appear on
our actual leap. How are we gonna do that is
I'm going to press Shift a search and I'm going
to bring in a random, random value and bring that in. Now at the moment,
the random value is on the flow and we
don't want to own that. What we want to on is a boolean and then you'll notice
that this changes color. So you can see if there's
a flow, it's gray. And if I try and plug this
into my instance, two points, which is basically
what these all, nothing will happen because
this is not correct. So I need to put on a Boolean. Now I can actually plug
this in to my selection. And if I turn up the
probability increases, the probability of actually
where these are going to appear along these
points of my stamp. Now, the points of
the stem are actually based on the area
where it says points, which I don't want to answer. I'm not actually going
to mess around that. But just in case you do that is are you
actually change that? Now at the moment, the size of the leaves is bugging
me a little bit. So what I'm going to do
is I'm actually going to come in and just change
the size of this down. So how do you do that? Well, if this one I'm just
going to move it over, you can have an idea that you can't actually change
these on the fly. So for instance, if I come
in and grab this question, you'll see that we can actually
change this on the fly. So how do we change the size? Well, we simply grab
all of it in edit mode, press the S bond,
shrink them down. And among went to
do now is just move the orientation because
you can see they're out there because
the orientation is here in with my veggies, like select one that shift S
because it's selected tap. Now right-click set
origin to 3D cursor. And now you'll see
that they've gone by. Now you can say, it's much, much easier to actually see what these look like when it
bring the account is. It's even easier to actually
see where they are. Now of course, the
problem we still got is that they're not rotating
in the correct way, the role just don't
want side of it. So let's go in and
actually fix that. I'm going to, first of all, they'll put the probability
on nought, 0.858. Animals are going to, you can actually turn the
CDO a different seed, like three or
something like that, just to distribute them. The unevenly. Now this is actually
important because this value here
is something that you might want to do as a
quick way to actually change the actual plants
and now they look so I'm actually going to
come in and frame this, and I'm going to call
this random seats. I want to come up to node. I want to change the color. I'm gonna put it on yellow
or something like that. Then let's change the
name to run them. Randomize leaves an SSI. This is very important
because when we come to make more
of these plants, this then we'll distribute
them more unevenly by just turn in the actual seed or it's one way you
can actually do it. There are other ways, of course, but this is one of
the easiest way. So I recommend doing this. Now let's close the
salt with the unborn. And what I need now is
to actually rotate them. So I'm going to call them to wear my instance
two points off. I'm probably going to
pull this actually over here just so I can see
a little bit easier. And then what I'm going
to do is I'm going to bring in a rotate instances. So if I press Shift day rotate instances and drop
this just after my incidence, the points obviously
nothing's gonna happen because nothing's
broken into yet. So the way that I'm going to
rotate them is first of all, I'm going to bring in a index. So shift a search index,
light drop-down here. And now if I plug this
into my rotation, you'll see that it actually
rotate them around. And hey, we're getting
somewhere, right? But it's rotating them
all kinds of crazy ways. And we actually want
to set this only rotate around the
z-axis, for instance. To fix, all I'm going to do is press Shift eight
search combined, and you're looking for XYZ. I'm going to plug that
into there then and then just take it out and
plug it into the zed, unplug it off the why,
and there you go. Nice. Just rotate them
around the z axis. Really, really easy way
to actually do that. Now we're still
about some problems in, well, first of all, the plants, they're all
the same size going all the way up and that's not
very realistic or Alt. The other thing is I would
say that there's still probably a little bit
too big at the moment. So we need to really fix that without actually
having to go in and fix it with our
actual link. Also. Still when it grows, if we move over to
the trim curve, you'll see that kind of weird. I mean, if any plant
grows like this, then let me know, but
I don't think so. So we need to actually
fix that as well. Let's actually stop
fixing that now. Now I'm going to
come in and just show you actually what I've got. So fall a little
bit hard to see, but you should be
able to get an idea if you've missed
anything of everything I've gotten just going to zoom out a little bit just so you can see everything just to
make sure yours is the same. I'm going to actually
pull this up here so I can actually show you. There you go. You shouldn't be
able to make out just everything that
I've got in here. And just make sure
it's the same just before you move on
to the next bit. Alright, let's pull that down and let's make a
start on the next bit. Now you can see
there's still bending. A little bit weird, so let's
go in and quickly fix that. So all I'm gonna do
is I'm just going to move my index over here. I'm going to bring in a,
another math, math node. Whoops, not that one. Let's press your day
again and try that again. So math node drop
that in a moment. I'm gonna put this
onto multiply. I'm going to set this on the magic ratio number,
which is 2.412. There you go. Now you can say that located
a lot more realistic bend in as we go open, just spending more
realistic and you can really see we're actually
getting somewhere now. Alright, so let's sort out
the sizing because we don't obviously want them the
same size all the way up. So what I'm going to do
is I'm just going to bring in a curve parameters. So shift a curve parameter
much brain space again. There we go. Kind of parameter
dropped by in here. And then let's just drop
this into the scale. And now you'll see that they get bigger and smaller as
they actually go home. But of course, one of
the problems we have is we don't actually have any control over
this in a moment. I mean, this is just plugged in, so there's no control over that. So we actually need something
to actually control that. So what we're gonna
do on the next lesson is we should be able to see what actually probably just about
getting this finished. It should actually be animated and growing and
things like that. All right, everyone. I hope you enjoyed that and I'll
see you in the next one. I did say that this will
be quite a long process, but I'm trying to
explain things the best way it cancel
that if you go away, you actually have
some understanding of how to actually grow your own plants or
create your own plans and other things actually
with the geometry notes. All right, everyone,
so I'll see you on the next one. Thanks, Laura.
73. Finishing the Crop Geometry Node: Welcome back everyone
to blend the three, the ultimate many evil seeing calls and this
where I left off, now, we have a fixed. Some things, they do
get smaller as they go, but they're very, very
linear at the moment. I mean, they just get tinier and tinier and larger
and larger as they go up. And that's not really realistic. So let's actually fix up. What first I'm going
to do is I'm going to pull this code
parameter out here. And the first thing
we're going to bring in is a math node. So a node and drop
that in there. What you can actually do
then is change where it says Add to pow it a name. We'll say there are
a lot more evenly distributed and they look
a lot more realistic. And that's exactly
what I'm looking for. I think while I'm also
going to do is I'm going to number of leaves. I'm just going to turn the old Just a couple more
just to make it look a little bit
more realistic. And they also show you exactly what happens when we come to animate that as well. Now, just so I don't
get ahead of myself, if you actually come back
to your power as well, it will show you that you can actually change the way this works now so you can make them smaller and bigger
and things like that. Alright, so I'm going to
hold the Shift button down and won't my
smallest slave to be something around
that size and the thing that looks
absolutely fine. Now I'm still not
happy with the size of these leaves and I
don't really want to go in as I say an
alternate on here. So I'm going to do
is I'm gonna bring in another math nodes. So I'm going to press your
math, bringing a math node, drop it in here and
the moment it is, I'm gonna change
this to multiply and now have a lot more control
over the size of my leaves. So you can say I can change the size of the top
leaf for instance. And then I can
come in and change the size overall as they get
down towards the bottom. It just means you have
a lot more control over the size of the leaves. And I think that's
much, much bad to be. That way you can see
now it looks a lot more realistic than
what we did before. And the reason we put
out there is because we don't want to change
it on the XYZ. We just want to
change them overall. So let's just move these into a little bit
better place now. Now we need to do, we need
to animate the leaves and the actual stem,
both together. So what I'm going
to do is I'm gonna come back to where
my set position is. A momentary is I'm going
to move these around. So I'm going to
grab this with Alt. I'm going to put it
this side instead, and I'm going to move those up. And then when I plug my
multiply back into my offset, like so, now if I
pull my trim down, you'll see that the
grow in a much, much more realistic way, albeit the not quite right yet, but it's just better if
we swap those around. Now let's bring
that group impulse back that we had
before we deleted it. And you'll notice over
here we have a output. We don't actually
have anything here. Both if we bring in
a group impulse, clog, this impulse into our trim curve where
we've got our end of the moment from this gray. Here, you'll notice now
you have an actual end appear and you'll know
is gonna pull this down. I have control of the animation. That then is where we can actually insert our keyframes
and things like that. And that's exactly
what we won't control. Be able to make this grow over
a certain amount of time. If we didn't put the same, we would only grow over 200
frames and you won't have any control over it is basically why we're
actually doing this. Now at the moment,
you'll see that when this goes down to nearly 0, the leaves look like this and
this is just not realistic. We need to actually
control the scale of these leaves as this
grows up and down. So the way that you
can do that is if you come over again to your scale, which is these over here, and we bring in
another math notebook. You put it in front
of this power. So every brush Shift
a search Math, drop that in here, like so you'll end
up with often. And of course that's
not what we want. Now if we set this to multiply, like so what we're actually
going to multiply it by? Well, we're gonna multiply it
by the value from this end. So if I bring this and drop
this into my value your life, so now I may actually
bring that down. You'll see that they get
smaller and they get bigger as all actual plan starts to grow unless it's exactly
what we actually want. Now, the final
thing really that I wanted to do that
is as this grows, I want to leave space like
pointing up to the sky. And then as it finishes growing, we want the leaves to drop
and kind of drooped down light in real life.
How to do that? Again, we're going to
use this group impulse. What I'm gonna do is I'm going
to look for my rotation, which is over here. And if I plug this into
my rotation of my XYZ, you'll see now that they're
actually point to note, let's actually see
if an x plug it into the x all the way I want
them actually probably. Yeah, it says the x value, so it's the x-value of mine and that's actually points in them. Openness guy, like so and
that's basically what I want, but I don't want it to grow like where they're just
pointing straight. Oh, I actually want
them to be able to grow pointing up and then come down as the actual
animation finishes. So you can see it looks really realistic as they're growing up. Well then we leave
them to point. Now, what I'm going to
go to quickly fix that, I'm going to bring
in a membrane. So Shift A Search MAP range and just drop that
in-between then your output, sorry, input and where your x's. Alright, so now we're going
to have some control. I'm just going to move
this down as well, just so we can see
what we're doing. We're going to have some
control then of how the leaves are
distributed at well, which way they're
actually rotated as the animation takes place. Now what we're going to do is
I'm going to zoom into my, my range and we need to actually
bring in some keyframes. So we're gonna do
is I'm going to put this narrow enough down to 0 so we can actually
see what Olly's, I'm gonna press dot
just to zoom in. And then what you want
to do is you want to put your minimum so the leaves
are actually pointing up. And then what you can do
is you can hover over it and press the eyeball. And then where you can use, you can bring this
up and you'll see, as I bring the soap leaves
will stop points to note. And as we get up to the top
now we can actually bring this down and point the
leaves the other way. So this doll flopping over, lightened it would in real life. So there you go. Now if I call Anna Perez, I not gonna go through the cycle and
bring this back down. You will see as
they start to grow. So if we zoom in,
they start to grow. The leaves are pointing to node. Point to note as
we get to the top. Now those stopped to
hangover and droop down. And that is exactly
what we're looking for because that is basically
like real life. I also think what I'm
going to do is I'm going to go to the
halfway point. So something like that. Just make sure I'm happy
with my leaves off. So you can see here
that there's still, there are only points to
not really like that. I'm going to point them
all a little bit more. So if I move the line,
press the I button. Now you'll say that as
I come up, they go, Oh, points, like so. Then as we get near the top, you'll see they actually stop. Point down. So I need to
point them down again. This one, I'm going
to bring it up. Press the eyeball, and now
let's give that a try. So we should have
them point to OK. And as we come up to the top, and then they start
to point down, as you can see in the
droop down, like so. All right, so just make sure
you're happy with that. Before you carry on. Just make sure you're
happy with the animation. Just going to turn that off and just look at my animation. There you go. Now you can say it looks
pretty realistic light, so I'm pretty happy with that. Now, let's actually
have a look and make sure I just want to press
just want to come through. But again, I think I'm
happy with them. All right. Then I'm happy with
that. So let's move on to the next pit, which we obviously need to do. I'll stamp. Now you've got nicely everything
you need in there. Just make sure that
you're happy with the number of leaves so you can turn them off if you wish to. Like so in Coahuila, think that looks a little
bit more realistic light. And then where you're
going to do is you don't need to randomize
these leaves at all, but you can't say
if I click on this, they will be randomized. And that is exactly
what I'm looking for. Who went actually come around and actually
make a few of these. So that's why we've
actually done not so basically we've
nearly finished now, all we need to do is basically bringing in a actual material. I'm just going to
pull this over, pull this over,
pull this over it. So what we're gonna do is
bring in a sense material. But before I do that, I just
wanted to check my leaves. You can see here, they've not really got, I don't know why, but
they actually go, they have the gold leaf here, so let's actually go
and I'm looking here. So I'm gonna do is
I'm just gonna go to my shading panel and just make
sure I'm happy with that. Yeah. And that's the that's the thing I thought
that was the case. What I'm gonna do now
is I'm actually going to wait for it to
load up and then I'm going to just
create my leaf stem. Again. The reason is because
I actually messed open a deleted my leaf and then I had to bring this one back in. So I'm going to do is I'm
going to press Control C, bringing my mapping
and my texture. If you remember how we did this, we just basically deleted
the image texture shift. They bring in a noise
texture like dropping that, bring in the vector then, and then bring in the color
we wanted to on the normal. And then bring in
the color and plug that into the normal, like so. And then we get some
sort of texture. Alright, so now I'm going
to do is I'm gonna go back to my stem now. The geometry now,
which is this hit. And then what we're going
to do is going to bring in another node and we're
going to set the material. I'm going to do is I'm
going to press Shift a set, say Arial, drop that in place. And then what I'm going
to do is I'm going to look now full, not material that I had on
this leaf, which is leaf. All right, so now let's
go back to geometry node. We're going to look for a leaf. So this one here. Now let's zoom in and have a look at what
that looks like. Alright, I think I need to
come in and first of all, mess around with a few
of these because I can see it's not
quite looking right? So if I go back to my shading
polynomial and we can say this is what it's actually looking like in
the material mode. So I'm just looking yeah, the geometry ODs on the object, That's why I'm not
getting anything. So now if I click on this or
I click on my render view, let's say render out. And this is why it's
actually going to look like you can see that their logo pretty
dark at the moment, but that's because I've got no grass in or anything like that. But I can see a definitely want them a little bit darker
than what these are. You can see I've
got some nice lines going up then now as well. So I'm actually going to
come in back to my shading, put it onto rendered
view and turn this up just a little bit.
So let's have a look. Where is it? On the material, which
is this leaf over here. They confuse an unknown. There we go. All right, so now let's put this a little
bit dark and what it is. So a little bit darker. And that's also go in. The roughness is up to null 0.8. That should be fine. And you can see now that this is what it's going to look like. So I'm just going to
go in and just making sure my stem and my leaves. I'm happy with my leaves. I'm just looking at the stem. I'm actually happy
with that kind of turn off this a little bit. Like so. Just bring
it up a little bit. I'm not happy with them looking like I don't actually think so. I wanted to send
them down again. Yeah, that's looking
much better. Alright, I'm really, really
happy with how those look. Now, if you can look at here, let's just try to
unfold to you as well. It brings out that
stem a little bit. That's what I'm looking
for. So I've got it on full day and I've got them looking like now so you can copy exactly what I've got here. These are my settings. The color of my leaves is this, whoops, don't want to do, but let's press Control
Z to go back to worry. And let's come in. And if you click on the
color to-to to F1 date. Alright, so let's go
back to modeling. Let's put this then
onto rendered view. And let's have a look at
what that's looking like. There we go. So what we'll
do then on the next lesson, we will come in and put
these actually in our farm, just going to press
the top double-tap, hold these in our farm, make them a few random ones. And we also need
to actually create the animation over all 800 frames that
we're working towards. All right everyone, so I
hope you enjoyed that one. They'd have a long
one, but we finally got that and I'll see
you in the next one. Thanks a lot. Bye.
74. Laying out & Animating our Crops: Welcome back and runs blend the 3D ultimate
medieval sin cos, and this is where I left off. Now what I want to do is
I basically wanted to go, and now if you click on this, go back to my geometry nodes. And then what I want to
do is I want to set this on a timeline so
I can come in on, for instance, come
down to this corner, drag this over like so. And then what I can do
is now I can set base onto my Thomas I have here. You can see that you
go one timeline. Now you can do is just zoom out a little bit
and we're going to set this to frame one. So you can see here, can
set this the frame one. Then what we're going
to do now and when it's come to my output. Whereas the majority
nose area is, you can say this is a one. Let's put it on 0,
and let's press I, and you'll end up with some
actual key frames insert, then let's come to 800. To 800 if you need to
put this on one all the way up and then press I like so now let's
give it a quick try. So we're going to
press space bar, double-tap the ISO can see, well, I'm very well, take a bit of time,
but you'll see now it's actually going
to grow over time. And there we go. You can see
I'm stuck drooping down. Now you go to Geometry notes. Now the one thing is that if I press Control Z and
just go back a minute. So I just wanted to grow
back to where it was. Now you can see that
we grow up to here. So this is an 800, but I'm not quite happy
with them finishing on 800. I want to finish them a
little bit earlier so that we get to actually
see them grown. They don't just fully grow and then it's the end
kind of things. So we want to really
pull these back. So what I'm gonna do is I'm
just going to click on this. I'm going to press G and
I'm going to pull them by just two somewhere
around there. So we've got a few frames to actually save them fully grown. And now we can see that they just kind of often in the
window, something like that. That's exactly what one. Alright, so now what we can actually do now is
come back to modeling. Press tap, double-tap. Just pulling this over now, I'm just making
sure I'm on cycles. Okay, Let's pull this over and
let's put this into place. I'm thinking my song is probably a little bit too
bright in the moment, but I'm just going to
put these into play. So I'm going to put it onto
material mode again so I can actually see
what I'm doing. And also we've not
got the grass and the hay and all that
sort of stuff in that. So we need to check the albums. We've done this, so
I'm just letting it to load up coal mines place now. So let's put it over. I'm actually going to throw
an object mode discord server can see where these off. I'm going to put this in here. Then basically what I
want to do is I want to press Shift to drag it over and then Shift
key and drag it over, and then Shift and drag it over. And now I will show you how
you actually randomize these. So if we now come to
our Geometry notes, we press Alt to
zoom into this one. And then what we do is
we actually copy this. So what I'm going to
do is I'm gonna press, click on one of them,
press it to be. And then press sake, and then click New. And you'll see that we've actually gotten a new
one in place anyway. So I can call this cone crop. I'll call it so because
this is the NMOS like so. And now I can go in to where
that randomized Lee's walls. Put it up on. There you go. It doesn't
actually change the old days. Now, when coming to the others, I can click this one and
go to the end on three. In this doesn't really
actually costs blender a lot. Let's put it on five minus
column to the next one. And we'll call this too. We'll give this a quick
try before we finish. I'll put this on, let's say
six or something like that. And now you can say that
looking very different. So now at the top, I put this back. Let's see now how
these actually grow. Of course, if you really want to go in and
you can actually see how these are
actually growing. So they grow at different
speeds and things like that. But what you will see is now when they've
actually fully grown, they're actually all
looking very different. You can already see
that look different. You can also come in and rotate them around so you can see now the grade all different and that's exactly
what we wanted. You can also change, of course, if you wanted to, the
number of leaves in them. So let's say we
come to this one. The geometry around
is already set up, so let's change the
number of leaves in them, something like that makes
them a little bit more. And now I tend to do is I'm only going to do this
with a few of them. I'll tend to do is I'll calm
and drag these with shift D, shift D, drag them. Then I'm going to
spend them round. So all zed, spend them around, so all 380 the other
way now like that. So this is basically
the opposite of that and then will attend to
those I'll shift date, come to the next ones.
Put those in that. And I want to basically make these a little
bit different as well. So you could go in
and come to this one, for instance, and let's go
and give it another one. So we'll call this crop, I think we're on five, so we'll call it
five and I'll come to the seed and I'll
put this on seven. And then I'll come to this one
and I'll call it crop six. Let's put this on eight. We're on crops 567, so seven, and let's put this on nine or ten doesn't
really matter. We've got, we've got
thousands of seeds. I think we're on crop nine. Yeah, something like that. And let's go buy put it on
one or something like so. All right, so now
what I'll do is I will grab all of these. And I'm going to
press Shift key. And I'm going to pull them
here and then press all 9019, spin them around and
let's put them in place. I'm going to press seven, pull them in place like so. Now I need to just
mix these up a little bit so you
can see I'm just going to pull them out, hold them into a
different place just to randomize them a debt like so. Make them a little
bit different. Just before we do
the the last one. Let's come to these now. Exactly the same
thing. I'm looking where my actual lines are. I think they're a
little bit actually, I'm going to pull
them into place. Move this one around, just make them a
little bit different. Now I went to those, I'm
just going to grab this one. So shift the focus
into the center. Let's grab this one Shift D. Put this down here
somewhere like that. And then shift they always, those tiny variations not do make all the difference.
So should think. You can say move that
one in a weird way. So let's pull it and
put it over here. Alright, now let's go
back to modelling. Let's press tap,
double-tap the egg. Unless give this
a test I'm going to put on layout
actually so I can see like so what I'm also
going to do is I'm going to basically put
my older pulse on. So I'm coming to
here, turn the TV on. Same for the, hey, this is just the final test. Now we've got these to see
them all grow together. To say exactly where
it looks like. Now of course, on
their rendered view, it's gonna be a bit
hard to see that, but I'm gonna give it a try. So double-tap, put it on
rendered view run lab. Now, this is where it's going to look like in
the final renders, you can say very realistic. Let's put it on
0. Let's put this on material now and see how
they grow. So here we go. Let's press space bar. You should be able to see the
little tiny shoots coming up and you go,
you can see some. There we go. We can see them growing away. Don't forget you're
going to see this in real time when you've
rendered it out. There, we go nearly
finished growing now. Rarely, rarely happy
without going. Got our windmill going. There we go. I think
what we'll do now on the next lesson
is we'll actually start working on all water pump. And then I think will work just to give
it some variation. I think they're more orders.
We'll work on our pumpkins. And then finally we've just
got the wind and the smoke, which is quite easy actually to, to create those things.
All right, everyone. So I hope you enjoyed that. I hope you really happy with
what you've achieved so far, and I'll see you on the
next one. Thanks. Bye-bye.
75. Working with Liquid Simulations: Welcome back everyone
to blend a three, the ultimate medieval sinkholes. And this is where we left off. Now, let's first of all
put this on material. Let's come in then to now I
probably can work like this. I'm not sure if you come
with all these grass and everything that if he can't
just turn your grass off, I think I'll probably
will turn just my grass off because I can see a
lot easier than this pump. What I'm going to do is I'm actually going to grab my phone. I'm going to press Shift
S cursor to select it. And of course that's
gonna put it right where the orientation
is off the palm. And then we're going
to do is I'm going to press Shift a and we're
going to bring in a cube. I'm gonna make an acute March much bigger,
something like that. I definitely wanted
to hang underneath here because this is going
to be the actual domain. The domain is basically something where the water
can only exist within. You don't want it too big and you don't want it too small, you want it to cover
the entire thing. If I zoom in and now
you'll see as we move up, that is my pump. In the entire domain
exactly what we want. Now the Walter welcome through and it will
go through the floor. So we need something
to catch it as well. So that's where you have
an outflow and an inflow. And basically your inflow is your actual kind of
water coming out. And your outflow is
basically where it will drain out of.
There is not too. Just remember, first of all, I'm going to bring
this and I'm going to turn this into a domain. One went to there is, I'm
first of all going to make my domain fabric smaller. Like so, because my water
is going to come down here, I'm also going to press
Shift Spacebar move and just move it out.
Impressive essence. It covers the entire
top, like so. And also so it's got a
fair amount of distance then to actually drop down. Now it is quite odd to actually work with domains with liquids. It's much easier to smoke
because you can actually see through this in the
beginning, you won't melt. S3 basically is what
I'm trying to say. Alright, so now
let's come over to our actual panel where
we make simulations. And what we're going to
put this on is fluid. And I want the
time to be domain. Now, what the domain
will actually do is you can save
to come down here. This is where we bake out
our actual animation, that space where
we're looking for. So first of all, let's
come over though and put this onto liquid like so. Let's set you notice, as soon as it changed
from gas to liquid, it's actually changed now. And then let's set
the resolutions 228. And the reason I'm doing that is because the higher
the resolution, the better the water is
actually going to log. There is a problem when
you do it to 64228. It's sometimes
changes the way the actual sometimes changes the way the simulation actually goes. I'm actually going to thinking about going to put this on 64. And the reason I'm
gonna do that is just for the people that have got lower end computers
and things like that. Because it does take much, much longer to actually
take things out. Moments do is I'm going to come down now and I'm
not really going to mess around with any of these things except
where it says, in this simulation method, I'm just going to
pull out on epic. Just make sure that your
liquid is obviously take to on and then come down and
make sure it says mesh. Now this is actually important. For some reason. If we don't actually
take this on, it's not actually
going to work again, I don't know why that is, but when I've tried this before, not take this on,
actually doesn't work. Now the other thing
that you want to do is you want to set in frame 200. You also want to change
this time to replay. What replay means is
that Blender will just replay it on the
timeline in real-time. We don't actually
want to do that. We actually want
to take this out because it's first of all, when she's back down, It's much quicker to see what the
simulation looks like. And second of all, if
you have this on replay, it never plays the same way. The simulation never
plays the same way as if you actually bake out. So we're gonna put it on all. Now you'll say we have an option of coal and that's
exactly what we want. Now what I'm going to do
over the right-hand side, I'm actually going to
close this, so close this. So I'm basically just
going to close these old unlock then for this year and I'm
actually going to call it a water domain. So if I come down, I should have it
here, this one here, I'm going to call it
Walter domain, like so. And I'm also going to
then check out these, these are all cubes and these
are all crops, of course. So I'm going to do, I'm going
to come to the first one. Press dot is off those crops, so I'm gonna call it
to crop, like so. And now if I copy this, so if I press control C, come to the next one, Control V, you'll see that
CMS is crop, our one. That's exactly what a one. So I'm just going to basically
call them all crops. Just go in and change
the names of them. Should have really
changed it before. We'll actually creates
an aldose bulk. Hey, whoa, not to worry, sometimes we make
those mistakes. So Control V, Control
V, Control V. It's a shame that we've got so many crops, but you can see. How easy it is to change these. Then I'm basically going
to pop these probably not into foliage or public
taught them in their own one just so we've got them split
off and the rest of them. I'm not also not
sure whether you can actually have these. And I say phi right-click
and Mark as I said, I'm not sure if that actually works with
the geometry note. So that's something that you
might want to check out. Alright, so now
I've got foliage. I'm going to create a new and it will come in
with the following one. So there we go. I'm going to pull that over that I'm going to call these crops. I always like to
keep things tidy. Pull that off, and
then I'm gonna grab my first crop, my last crop, and my leaf, and then drop
those into my crops like so. And I always, always just make sure that
actually working now. So come to a timeline just
to make sure the work. Sometimes when you move
things into a new collection, if you've done something
like we did with straw away based on a
collection, they stop working. So I always just check
just to make sure. Alright, so here's
our Walter domain. I'm actually going to
hide the other way now. And then what we're gonna do now is I'm actually going to focus on creating my actual Walter, which is based on
the simulation. So I'm going to
series, I want to press Alt Shift and click. I'm gonna come in Alt
Shift and click on that shift S because
it's a selected tab. And then what I'm going to
do is now I'm going to press Shift and bringing
in a UV sphere. And this is what
we're going to use for our actual Walter. Let's make it pretty small. It needs to actually
fit into that tap. So really, really small line. Let's press dot and make sure I'm actually
happy with that. Probably, it's probably
a little bit too high. So I'm gonna do is I'm just
gonna go back to my top. And I'm going to come
into the end of it, Alt Shift and click Shift
S, because two selected, grab my UV sphere, Shift S, selection to cursor, and then it's going
to pop out of there. Now I'm not sure
if it needs to be a little bit and
back a little bit, something like mine waste fund. You just got to be careful
because the simulation, what it tends to do is it
tends to bubble up around a and this is why I'm making it actually smaller
than the top. So I'm gonna make a
little bit smaller again, like so, and hopefully we
should be fine with them. Now let's come in and
bring fluid simulation in. This obviously wants to be a flow and obviously
wants to be a liquid. The geometry wants
to be a inflow. So this is why we
are speaking about, so this is where the
water flows out. We're going to make another one, whereas actually
going to flow out off the first one we
want is an inflow. This part is another important
part where we've got this, where it says flow source. You will say it's on a
mesh and you need to set this subsurface emission
onto naught point a. If you don't do that, basically nothing all
up and you won't be able to see any
Walter simulation. Again, I don't know why that is. We just have to make
sure that this is self. I watch a lot of people sharing tutorials and things and they never actually show
you this part. Then you'll come in,
you'll think, well, why is my simulation
or where can I most of the time it's
down to this part here. Now we're going to
do is we're going to create another one of these. So I'm going to
actually bring back the one Walter domain. Actually I'm going to hide
my wall domain and just make sure that this, whereas it should be in my
crops for the looks of it, I'm going to actually pull
that down and hopefully drop it right in there and
then close off that. Like so now I've got my smear. I'm going to call
this water flow. Like so. Then what we do now I'm going to
create another one. So I'm gonna show my domain. I'm going to then
press shift out. I'm going to bring
in a UV sphere. I'm going to bring this down and we definitely want this to be underneath like so
something like that. I don't want it to
be it doesn't work correctly if it's right
where the water drops. So what you tend to have to
do is you tend to have to move it like here, somewhere like that
in the corner. That's why typically
attempt today. And basically what
this is going to do is the water is
going to drop down, down, down into
the bump map here. And then this is actually going to empty out. It's
basically like a plug. So what I want to do now
is put this on fluid. I want to put this onto flow. I want to make sure that
the the smoke is going to be liquid and then the geometry
is going to be inflow. So basically the Walter
is going to influence it. Put this on null point a again, then we should be good to go. Now I'm going to
do is I'm going to just come over to
my domain again. What I want to do now
is come down and you want to bake cow vehicle. So if I click Bay coal, you'll see that it's
actually something is happening and short, yeah, I can actually move
while I'm waiting for that. Let's wait for it to bake
out is over 800 frames. You might want to
reduce the frames. Why you just give this a test just to get the hang of things, because it is quite complex to get these
things to work correctly. So let's just wait for it to
where Baker over 800 frames. I'll speed this process up now and show you what
I've gotten, man. Okay, and this is what
we're actually left with. Sorry if now if I come
to my actual outflow, as you can see here, I've
pulled this back to 0. It will disappear as soon as
the star and there you go. You can see the
trick club water. Now hopefully what I'm trying
to bind column is this actually know overflowing is actually overflowing
because that for some reason is not outflowing. So hey, go is it
going to outflow? I think I'm actually going
to lift that up because we definitely don't want this
coming through the flow. I want to do is I'm going
to actually come in, grab my inflow. Is it is it outflow? I think it should be an outflow. I think that's the
reason I'm gonna put this into place somewhere
like that instead. And let's now see if
that's actually works. So what I'm gonna do
now is I'm going to call and read, bake it out. I'll do that on the next lesson. So I'll read, bake
this out and I'll show you where it looks
like on the next lesson. All right everyone,
so I hope you enjoyed that and I'll see you on
the next one. Thanks a lot.
76. Creating a Water Shader with Nodes: Welcome back In ones
blend or three, the ultimate medieval
seeing course, and this is where
we left it off. Now, I did read bake it out, so we should be able
to see if I press Space-bar now that it's actually working perfectly and it's actually flowing into
basically our plot. And you can drip in like that. Now what we want to do
actually fall this is we want it to work so that
when they Sando comes down, the Walter actually flows
when they reach the bottom, then it starts
pumping it by count. That's exactly what
I wanted to do. What I'm going to use now. I'm gonna calm it on 0. I'm going to zoom
in a little bit. And then what I want to
do is I want to call back to see it in press dots so
I can zoom in and zoom out. And then what I want
to do is I want to use this flow and to actually create the illusion of it flowing, unknown flowing. So what I'm gonna do
is I'm gonna put this onto a wall once,
something like that. And then going to come to
where it says flow and click this orange marker here. That moment is I'm
gonna come to 100. And I'm going to click
this orange marker here. Click this off, then 200, and we're just going to
work our way up every 100, clicking it on and off. So you can say 300. And if you need to
move it up like this, and just do the opposite. So let's go to 400. The reason we're doing
this is because as I said, we want the simulation
to flow on and off. Alright, so 600, just
make sure you don't miss any out. Like so. And then 700 and we should hopefully get to
the store again. It should work perfectly
because it should be on, which is like so. All right, so then we
need to do is you need to come back to your domain. So if I put this,
for instance, on 0, we'll see if we can
click on our domain now, come down to where it says
free all, so click free. All the moments do
is I'm going to bake it all out again so
they could all out again. And you'll see that it's slow it at the start because
water is flowing. As we get further
speed is obvious. You can see that
and then I'll slow down again as you can say, because what it's actually
doing is it's flowing walled set on fire and water. And that's basically
what we wanted. Now we're just going to let
this bake out to 800 frames. We're gonna make sure it's okay. And then what we're gonna
do is you want a free old? And then we're going to turn up the resolution on the wall to just to make it look
a little bit bad. Because once you've picked
out the actual, you know, the animation of the Walter
isn't not intensive, It's just the actual bacon
in the simulation process. That is, alright, you can
see we're already at 800. Now let's give this a try. So if I press Space, There we go, two stops flowing. Should stop at 100, which it does as
this comes up again, and then it should start again. There you go, starts flowing
as this comes down again. And you can see it's working
exactly like upon dots. Now let's put this back again. And then what we're gonna
do is we're gonna free old and this is gonna
take a bit longer. So I'm going to do is I'm
going to speed this process. Just put it on a 128. And then what are you going
to do is come down again, Baikal and I will
speed this process. So as you can see, is much, much slower now. I'm going to speed it up and I'll see you on the other side. There we go. Let's
give it a try. Let me press the space
bar now and you can see that water is looking
really, really nice. It's coming out at the
top really nicely. And of course, it's disappearing in the bond
down. I'll plug all. And that's the
main thing, right? And you can actually see
it disappearing down that this also gives you the skills to actually
go away and create things like multiples
or things like that. Many, many things you can actually do with
these skills now, alright, So the one thing
we haven't done, of course, is if I put this on material
letting all low note, you will see that obviously we've gotten our
material on here, so we need to bring in
an actual Walter shade. It I'm gonna do is
I'm going to show you a nice watersheds. Watersheds, this you can make really complex,
are really simple. I'm going to show you a
fairly simple and shade it. That looks really, really great. And also you can
actually save it out in your assets so that you can use it in any other scenes
that you want to create. Just create a new one,
call it Walter shade it. I've already got
one called water. So this one here, Walter and I've
already saved out. So I've right-clicked
mobs as I said. And now I'm gonna
do is I'm gonna go over to my shading panel. I want to press
adult to zoom in. I'm going to pull my material
along so I can see what I'm doing as I'm actually
working on it. That one went today is I'm
just going to zoom out. I'm going to delete my principal,
not gonna need thought. And then what we're going
to do now is I'm going to bring in a glass BFS DFS, so glass BSD F, bring that in. Now the color of
the glass be SDF. I'm going to put it in
this color so you can do the same because
I've found that says rarely really nice colors. What I'm gonna do is
I'm going to zoom in opening all content,
a hex control. They just pull that in, press Enter button, and then you'll have the
same color as I am. Let's put the I O
wall, the aisle wall. A motor is basically refraction. It's basically if you think
of a straw going into the world set how
refractive it actually is, is how far it pushes up
straw over to the left. And different things can
actually affect that. So you could have something
like saltwater is very, very different actually
from freshwater. The reason just to
take into account, so put this 1.330,
something like that. Now let's bring in a
transpire in BSD F. So shift a transpiring. Bsd F, not the translucent
or transparent one, and the column just going
to steal my color again. So I'm gonna go over
and grab this one. So Control C. And then
I'm gonna come over here, control V. And there it is, FF B12, CB just pulled out. And then what we're gonna do now is bring into mix shader. So shift day makes
shaded dropped out. And among Wednesdays
I'm going to plug in my BFS DFS shaded. So he is plug this
one into here, and then I'm going to plug this into the surface of
my material output. And then we go, we've
got something happening, not quite finished yet, but you'll see as we do the rest of it that
we will finish. The other thing is we need
an absorption at the moment. It's a bit like a
mirror and we don't really want that.
So let's come in. And then what we'll do
is we'll press Shift a search volume, absorption. So volume, this one
here, absorption, bring that in and
the color again, I'm going to steal
from mild aside. So hex Control C. I'm going to zoom in a little
bit so you can see it. Control they 7598,
just like that, press Enter and it's
this nice blue color. Put it on three. And then what we've
done to do is bring in a subsurface scattering. So shift day surface scattering
dropped out below it. And again, I'm going
to grab the color. Then put in the color on here. Again, B6, D. And I think that's a no,
I don't think it's 0. Try either 17,
something like that. Then again, you can actually change yours as we
as you move on. The Iowa, I'm going
to keep as 1400, and now I'm going to bring
in another mix shader. So I'm gonna grab this one, shift, bring it down, plug my volume into the top, plugged my subsurface
scattering is Bob. And then one we're going
to do now is I'm going to plug them all into my volume. So shader plug them into my volume and you should end
up with something like that. Now if the moment of truth lets put it onto rendered view, and it should look
something like that. Rarely, rarely double-tap
the beautiful waltz. And as you can see, you can see it looks slightly brownish, which is what I actually wanted. And you can change
the color really easily on the glass
and the transparency. That's the color that I
actually wanted mine. Now when this flows, if I go to mobile and
now press adult bones, zoom in, put this
on rendered view. Press top, double-tap. Now let's press the space bar, even my belt, see something,
Let's have a look. We can see something happened. It's very hard to say though, because obviously it's gonna
be pretty grainy while it tries and goes
through the frame. Really, really low. Frame rate can't
really say a lot, but we will do in the end, I'll show you how to render
this out and all that stuff. Okay, so that's the
actual Walter done. So what we'll do on
the next lesson, we'll create the bucket, will create the rising old pulp, the actual them Walters. It rises up and drops back down. All right, everyone, so I'll
see you in the next one. Thanks a lot. Bye bye.
77. Creating the Water Bucker: Welcome back everyone
to blend the three, the ultimate medieval
seeing costs. And this is where we left off. Now, once do we follow
finishing is I want to make sure that all of this
is in the right place. And I can say, I've
got a domain here. I can see though my outward, this one here is in
microbes for some reason. So if I scroll down,
should have two. Let's bring those out and try and put them on
the bottom, like so. Let's just make
sure to put it onto object mode so I can
actually see what I'm doing. Come back into layout. Always check base a, you-all to something
like I've said, just make sure it's
still working. The reason, by the way, why
he demoed domain is visible. This is because
it's on 0 and it's not started on the simulation, but we never actually
render it from frame 0. We always render it from frame
one. So that's important. The other thing is you can say installed it's polar
in from this one. So it's all sets or basically an 800 frames
to actually keep going. Sorry, it's like a
repeating process. And you can't even
see the difference. Just that to take into account. Now on Wednesdays, I'm going
to just pray on object mode, and I'm going to put these
in a Walter simulation. So I went to right-click New Collection and we can see
our new collection is here. We'll call this
Walter simulation. Like so. And then what
I'll do is I'll grab these three and I'll drop them
into my water simulation. And again, as I always do, just press space bar, just make sure it turns
off and things like that. It make sure it's working
correctly basically. And there we go, it's
working correctly. So now we can actually come out File Save and then I'll
just pray on here, something like that I just
saw, can see what I'm doing. Alright, I'm going to actually hide my bones or the moment on here because I'm going
to actually bring a bucket into this
long Wednesdays. I'm gonna practice your mesh
bringing in a cylinder. Now it's important in your book it that the number of edges, basically how many pieces of wood you want on your bucket. For instance, if I put
this on faulting, like so, this is from a book
is gonna look, each one of these is going to represent a plank
of wood basically, let's make it smaller. Let's pull it down
to how big do we want our bouquet? Let's grab. We still got our guy and I
think he is. Yes, there is. Let's bring him over
and just make sure the bucket is not
ridiculously big. Let's pull him over here. As you can see, this book is
probably, probably grumble. Keep pressing adult bone
a little bit too big. So I'm going to press S, scale
it down a little bit and may not look much more
easier to actually handle. I'm going to pull it down. Then I'm just going to work on getting to be the
right shape I want. So I'm gonna grab the top of it, press the Shift Spacebar, move. I think I'll just bring it
up a little bit, like so. I'm happy with that. Now let's
bring in two edge loops. So left-click,
right-click, Right-click, and then Control V. Actually don't want
to be in control. Yeah, I think I'll show you a different way of doing this. So I'm just going to
bring those back in, not doing anything to them. I know what I'm gonna do is I'm going to press Shift Date, press the S bone, pull
them out like so. Then I'm gonna come
to each one of these. I don't need them. I'm gonna press Delete and dissolve edges just
to get rid of those. And then I'm going to split off. So l, p selection tab
grandma bouquet again, and then moment to top again. I'm just going to
grab the bottom. I'm going to press Y and
then just pull it up. And then I'm going to grab
the bottom of the bucket, press Y and pull it down. Now I want to actually make
the top a bit smaller, like so because I'm going to
use for the actual waltzes, so I'm going to just hide
the other way at the moment. Now the bottom, I've
already created the bond because if you have a bucket and you
want to not do this with it and not have water in, you want to create a
realistic book in any way. So that's why I've
actually done this. So now we've got this. Let's press tab. Let's grab both of
these because we've got them everything
we need right now. We don't need anything else. Let's press Shift H to hide everything else
out of the way and we'll come into it now
and hide this part again, so hide it out of the way. I've got the bottom
of it. Let's press rotate just make sure. The bottom of HCl,
this is the top, so this is the waterfall. This is the bottom. Unless press seven squared on the top
and then one went stairs. I'm gonna come in
with better just like select these two verts, press J and just bring in
edge like so J men object. Then what we're gonna do
is we're going to come in, grab each one of these
right-click and democracy. Then I'm gonna come
in, grab each one, each of the y and
J, split them all. And then you can save it. You can say I've grabbed
the whole thing, don't really want
to do that, so I'm gonna just draw them up. Okay, I'll pay selection
split to come back. There we go. Now I've
got this now compressed K over the top with seven on. Why put it onto
individual origins. Sli, bring them in. Now we're gonna do is
we're just going to press E to bring them all up. So and of course, this is
the bottom of the bucket. I'm not going to mess around with creating a bit wobbly
or anything like that. I don't really
want to do that in this book is a very
small objects, so we don't really
need to do that. I'm just showing you how
to create a simple bucket. Let's press Tab then. Let us actually
split off our Walter because that's going to mess around with it a little base. So I'm gonna grab
this pay selection splits back to the
bottom of my pocket tab. And then one way to do is I'm
going to press Control leg, all transforms right-click
origins geometry. And now let's bring
in a bevel command. Bringing a bevel. No point, no one, let's save that semi god. Point. No, no, no, no point. No point. Normal five. Now to high style. So no point. Don't know what I'm just saying. If it's asexual beveled
off, That's perfect. Just couldn't see it from that. All right. Let's press Stop and now let's
press a sorry, not per se. You want to come and
grabbed the top pots now. And then what you
want to do is bring them close together so as to why bring them
closer together? Like so, press the top von, like so now the reason
I've done that, I want to bring these
costs together. So it looks like there's
an actual gap in there. So now what I'm gonna
do is I'm gonna grab the bottom of them and
make them actually taught. So S and Y bring them in, make them touch it like so. And there you go. You've
gotten the illusion of a bottom of a bucket and you still can't
see through because obviously you don't want
holes in your book here. This is going to be
water pouring out of n, But now let's grab the top of
it and let's pull it down. When we have a bookie,
we tend to see the bucket where the board
start roundabout here. Now let's come to
the other part. I'll walk can do with this pot is probably just come in and right-click and control
a market scene. And then let's come into
every other warm zone. I'm just going to grab every
other warmth like this. Hopefully this should be able to grab it real the one account, so wij split them up. There we go. Now you've
got two options here. You can make them
smaller like this. So you can just say S, make
them smaller like that. It's probably the
easiest way to do that. Then let's press top
control, all transforms. Let's then right-click
the origins geometry and let's bring in a solidify. I'll do that on this one. I'm going to pop them
out to thickness that one of them someone I
will check them out. So they're actually
touching again. And that's basically
how I want them. We can see we do have a
problem with the bottom of it. We need to bring it in. So let's fix that quickly. Bring it in. And you can say,
because we did this altogether, it's made it really, really easy to actually do that because it fits
perfectly on that. That's exactly what we're
looking for. All right. So I'm happy with
other bucket logs. Now let's come in and
we'll come back to this. And I'll actually apply that
because I'm happy with it. Then what I'm going to
do is I'm gonna come now to the top of here, make sure among normal. And then I can pull these
or pull them down just very gently just to make them
a little bit on the even. Like so. Why no R and X? Yeah, there we go. Uneven. Just work your way
around your bucket. And as I say with
all these things, if you're going to
use it a few times, might as well put the FN
just to make it a little bit on even like so. All right, There you go. You can see we're actually
getting somewhere. Now the last thing I want to
do is I want a bevel it off, but I wanted to bring these
as well into each other. So how do I do that? I basically got to come in
and grab each of the outside. And you'll know from doing this, what we did earlier on one of the models is we brought
them in based on normals. So as long as you call
this abnormal and you've got this on individual origins. Now if you press S and
let's try S and X, you can see now we can pull
these out pretty close together based on each of the
x value of each of these. And now we've brought
them out closer together. They look Tom's bad. Alright, so I'm happy with that. Now I want to do
is bevel this off. So I'm going to press Control.
Alt transforms, right? Clicks, origins, Geometry,
modify, bringing a bevel. Let's pull this one. Let's try that. And
they always do is I don't know one, Let's try not. There we go. That
looks absolutely fine. Let's press Control a. And now there's a point
where you need to say, at least close enough together. I think they all
personally, you might not. Now finally, what we need to do is you need to
come to these parts. Let's go to Object,
Convert to curve. And then let's come down
to where our geometry is, bringing out the depth. Like so let's make them smaller. Pulled them into place. Yeah, I think they actually
load really good like that. Can I actually bring
down the just this, let's print on, let's try
three, something like that. I don't really want
I could bring up this and it would
round them off mobile. I don't really want
to actually do that. I wanted to leave
them like that. The one thing I do want to do is probably stretched
them out a little bit so you can extrude them a
little bit to make them just that little bit
wider. Don't go too much. Also look a bit funky. They won't twist correct
layers while I'm trying to say
something like that, Let's move them off as well. I can't smooth them
off actually, yes. So I think I'm happy with them. Do I need the fault? Kind of get away with just the back and starting
to look is at the back. All the other warmness see, just from seeking Gateway, we're just doing the front and then bring them in
if you want to. I think now I'm
gonna leave them on for a moment and do then is just convert the object. Let's come down on
convert to match. Let's say right-click shapes. Move on. There we go. Alright, and if you want the smooth command, add modifier, subdivision surface,
an annual GMB, much, much smoother like that. Alright, I'm gonna
just sub-divide press Tab like so double-tap
to the eye. And there we go. Book, it's narrow enough,
they're finished. We'll bring in the textures, pull these out a little bit, and then we'll work on this actual Walter going up and down. All right, everyone,
so I hope you enjoyed that and I'll
see you in the next one. Thanks a lot. Bye bye.
78. Animating with Shape Keys: Welcome back everyone
to blend the three, the ultimate many
evil seeing costs. And this is where we left off. Now let's come in and
bring in a displacement. First of all though,
let's put it down to where we need to put it. I'm going to bring in
a subdivision surface. Where are you?
Subdivision surface. Let's turn that up
a few times, maybe. Let's tell you up to six press Control a and just have
a look how many that is. That's probably
going to be enough. So then what I'll do
is I'll pull it down, press the S bar and pull
it out a little bit, just making sure it
goes in the actual rib. I don't know the modify it. And let's bring in and
displacement modifier. Let's also press Control a or transforms plate Sahel
region geometry, just to make sure everything's
fine before we stop. Now let's come over
to little checkers. If I click down on the,
I should have a texture already and I'm not
happy with that one. So while there is alt click, new texture or long, Let's put it still on clouds. But let us actually mess
around with this nowadays. So crazy, like so let's
bring it out a little bit. Maybe like that,
something like that. And then let's call him back
to displacement and send down the actual strength of it. And now you can see that
is actually located. A little bit nice. Now, one thing I
do want to look at is my M shape CLI, keys. If I come over to my Shape Keys, click the plus and
click the Plus again. What we're trying to do
with the shape cases, we're trying to bring it
up and bring it down. It basically as the water flows, opened down with the shape keys. You can say the moment
this is on one, if I move this value,
nothing really happens. So what I want to do
is I want to press top one cell one
basically put it on what? I want to press top. I want to grab it and I want
to pray down into the bone. So I want to make it smaller. Then I want to press Tab again. You'll see this as I always say, it's a little bit low in there, so let's pull it
up a little bit. So let's press the top. I just don't want any of those. Actually, they are okay there. Okay. Like not
actually going through a little bit like that
and nails degrees. If I press tab and bring
this down to the bottom, you'll see as it comes up, they actually starts to
flow a new as Walter dose. That's exactly what we want. Let's shapes moving,
make sure that sum. So now we've got the ability
to make this flow open down, open down, up and down as the actual Walter flows into it. So what do I mean by that? Let's put this onto one. Let's press Alt H and
bring everything back. And as you'll see now
that at the moment, this pump on frame one isn't
really doing anything. But as we move up to frame 100, you'll see that this starts at, should start to fill up. So if I put this back on, I set this down to 0
now using my shaky, so print all the way down
in, press the button. And then what I'll
do is I'll come up probably frame,
let's say frame. Frame a 110,
something like that. And then put this down
to 0, press the button. Now you'll say that's
a press Space. Days starts to move and
fellow like Walter would do. Brilliant right now
I'll need to do is I need to empty this out
and let it refill. So now I'll go to,
let's say two, let's say, Let's say 199,
something like that. And let's put this then we're going to fill in up and
then going back down. So let's have it
coming up all the way. Like so. Now let's
give that a try. Combs and ensured get to that. Then empties. Then we want it to
refill that cope. So I'm going to click just
this part now because I don't want to see all of those and then pull
this off for a minute. So I'll pull this open
minute throughout this now. Then what I'm going to do,
hopefully it shouldn't now, I'm trying I'm hoping that she'll be able
to grab these and bring them over it
and hopefully put it here and just carry on going
all the way up to that. And so we will see, so if I press shift D, I'm going to bring these
over and then going to pull this just after this
one here, like so. Now let's see if that's
actually working. Let me show it filled all the way open and start emptying. And then go back down. And now we should start
filling up again. So let's say we go, we should go back down again. There we go. So false. I'll go shifty, bring them over. Into the front of it. Like so. Then we've got 609. Let's bring you up to
the Challenger bottom. Now let's press space-bar. Watch it go down. Six weeks now. Let me go down, it goes again. The good thing is because we've
got that displacement on. It really gives the illusion of the water actually move
in, which is even bad. You'll never notice that there's the same displacement every
time or anything like that. Now let's see if it goes down to 0 and let's see if
then it restores. Now, the other thing that
I'm happy about with this, normally we will
grab everything, Right-click interpolation
and put it onto linear. But I actually
don't want to say I want it on the Bezier one on this because it's
slowing down and speed. No, we don't want the same pace, so that's really good. Glenda actually
does that for you. In other words, when you first
start putting some nope, it starts off slow
and then it speeds up as it comes up to the top. That's exactly what
we want, right? I'm really happy with that. The animation is done. Now I need to attach this to my bucket so if I can
grab my book it now, press Control P, set
parent to object. And hopefully now
if I grab and this, and this, I'll try and grow them both those press Control J, I'm hoping not the
animations will still work. Everything moves with a bucket. I'm going to grab
the bottom of it. Well, I'm going to hide my
lungs well, grab the bottom. I wouldn't join
that then to this. So Control J. Now let's just save that water
comes up and yes, it does, still working. Absolutely fine. Alright, so
the last thing we need to do is we need to add
some materials in it. Luckily for us, we've got all
the materials already done. I'll come to this part first. And then what I'll
do is I'll come to my materials and we're going
to bring in the Walter. Walter, and there we go. And then let's bring
in the, it would now. So I'm gonna click
the down arrow. What do we want it with light? Let's try with lie.
I think that's going to look absolutely fine. What I'm gonna do
now is I'm gonna grab them all and went to press you smart
UV project click. Okay, and let's then
go to UV editing. I can see everything
is on ramp like this. Let's first adult
just so we're int into where we need to
be and then what we're going to press a 90 spin
everything round UV and Pike islands,
takeoff, rotation. Let's put it onto whereas it was my here it is all
the way over here. Pull it back, pull this bar. And if you ever
want to get rid of this, just press the T ball. Now get rid of that. And now let's have a look
at what that looks like. I don't want this black shadows there not to consume with it. Let's come in and put these
on a different material now. So we'll put these onto file. Click the down arrow IN. Probably dark
high-end, I am dog, click Assign, press the
top bone. And there we go. There is our bucket just
making sure the bottom of his OK. Now I'm gonna go
back to where modelling now. Press Alt H, bring
everything back, double-tap, and I'm gonna
put it on the render view. Then what I'm going to
do now is I'm just going to press space bar. Let me just say that, um, load up so we can
see how many frames around. There we go. There's our actual Walter,
I'm gonna lay low dope now. This is where it'll
actually look like when it's
actually rendered out. And you can see the
water sloshing around there and then it will
let me to back out. All right, everyone,
so you can see that this is really coming
together, really nice. And we can still see
those black balls that I don't actually
know why that depth, that quite weird that maybe
it's probably because it's actually in the domain
or something like that. So the domain might be
actually affecting it, but he won't affect
it in the render. So that's the good thing.
All right, Finally, I'm going to save that out, save thou like so. Let's just have a quick
look around and think. The last few things
we've got to do is the smoke simulation and we've got our pumpkins
to actually do it. I'll think what we'll do
first is we'll actually make a star on actual pumpkins. Then put all kind of the
pumpkin leaves around those, so we'll do the pumpkin next. All right, everyone,
so I hope you enjoyed that and I'll
see you in the next one. Thanks a lot. Bye bye.
79. Shrinkwrapping Pumpkins: Welcome back everyone
to blend the three, the ultimate medieval sinkholes. And this is where we
left off. Now, let's make a start on our pumpkin. So I'm gonna do is I'm going
to grab my little guy here. I'm going to move
him just over here, so a bit out of the way. I'm going to put him
merit to that line there. I'm also going to grab my leaf and I'm going to do
what I normally do. Put it out of the way here. I'm gonna get rid
of my reference and I don't need this anymore. And you can still keep me referenced the look
of the pumpkins, but I don't actually need mine. So I went to leave
out of the way. I'm going to come back to my
guy now, press adult bone. I'm going to press the Shift a, and let's bring in a UV sphere and when to actually leave this, you can see I brought the
ANOVA, don't really want to do, but let's press Control Z
to get rid of that shift, to select it, and now
bring in my Erase phase. So a mesh UV sphere, I want to leave it
on 72 actually, because I'm going to use this as the base my pumpkins and need a few actual polygons to
actually do something with this. How big do I realistically
one of these pumpkins, I want them fair psi. So something, something like this big clarifies
pair size pumpkin. And then want me to
do is just gonna move this over to the side. And I'm going to press one. And I'm going to actually
pull it out on the z-axis. So S and Z pull it out. Something like not. And
probably I'll fly and off, maybe flying off
the tops of these. So I'm gonna come in,
grab the top with C, and then grab the bottom. We have C as well like
so just making sure I'm grabbing off
announce on their bring Propulsion Lab denom, press one and then S and Z and just flatten them
off a little bit. Because if you notice a
pumpkin when it's growing, it looks more like this shape. I'm like a capsule rather than something that's very
kind of spiky events. It doesn't actually look
like that. Shapes move. And now I'm going to do is
I'm gonna press shift, Hey, mesh, bringing a
node, a UV sphere. Let's make it smaller
so it's round-about roughly near enough to the
right side that we want today. So something round
about that size. I'm going to pull
this over here. Then the moments do is I'm gonna make the little
grooves of my pumpkin. I went to press Alt
Shift and click, I'm going to miss three
hours and then Alt Shift click and hopefully mystery out. Hold Shift click. You can see straightaway
though is this quadrant here, then you know it's gonna be
the same all the way around. In other words, it's gonna work is what I'm trying to say. So hold shift and click and then Alt Shift and
click of a mystery out. You can see a little
bit wrong missing two. I'm just checking with all this, right. Let's have a look. I don't think Yes, I've got this
wrong. There we go. This is the center, which
means misinterpreted. He is he is not here, Mr. out. And then we can do
the same over here. So 123123123. And then want to three,
and there we go. Now let's see if we
can pull these in. Don't want proportionalities
an answer. I'm gonna pull these in to get the shape of my
actual point, Kim. And there we go.
One of the thing, pumpkins don't really
lie this on top. I need to flatten this
out a little bit. I'm gonna do is
I'm gonna come in, grab the top of it and a short, they are able to
flatten this out. So let's see if it comes. So I'm going to press S and Z, flatten that out and then
pull that down like so. And then smooth it
off, Shade Smooth. And I think it's
gonna look like that. And then I just need
to bring it in. And then space and
bring it in, like so. And let's put it on object
mode so I can actually see, and there you go,
That looks much, much more like an
actual pumpkin. Now I just need to do
the Baldwin as well. I'll do the same thing again. I'm going to grab
this one, press Save. Then when the press S and Z, plan it out and then pull
it in and then pull it in. Like so. And there we go. Alright, they look
really, really nice. Now how do we get this to
grow in the correct way? Because as I say, pumpkins, not only the grow like this, and then they grow outwards, and then they end up with
these kind of bands in there. I'm just wondering
whether these bands, I'm happy with them. Yeah, I think that actually,
I think when they've got the actual material and they're
gonna look really nice. So basically we have to use something called an
actual shrink route. What we want to do
is we actually want to use a shrink map because then we can do a little bit like what we did
with the bucket, where we actually used a
technique using Shape Keys. And that's what we're
going to do with the actual pumpkins on Wednesdays on the
comb to this one, I'm going to press Control a
or transformed dry plague. So origin to geometry. Then I'm going to press Shift
S because it's selected, come to my main pumpkin
Control a or transforms, right-click, sorry, to geometry. Then I'm going to move this
pumpkin over to this one. So Shift S, Shift S sections go say keep offset and you shouldn't know with
something like this. Now it's up to you
if you want to make your pumpkin a little
bit bigger thing to do, I'm thinking I'm gonna make it. Nearly enough the
same size as this. Now I'm actually going again, so something like that. The other thing is if you're
doing this now you want to make sure that your
final pumpkin, He's roundabout the
size you want it. So I'm thinking this is
probably a little bit too big, so I'm gonna bring
them down, like so. Now I'm gonna grab
my main pumpkin, come over to the right-hand
side so your modifiers modify it and you're going
to bring in a shrink brown. Now what's the
target going to be? It's going to be this one here. So I'm gonna click target, come to this other
one. Click it. And now if I actually apply this shape key, click
this little down. Now, plie shake key goes
back to how we walls. Wow, Well let's just happen. Well, we can get rid of
this one to start with. So let's press Delete unless
now come over to this one, come to our shared keys and we have a shrink wrap
and if it send me, wow, it goes back to that. Alright, so that's
exactly what we want now we do need to work a
little bit more on these. We need to make five of
these or six of these. Many you want basically
in your garden. And we need to make them
a little bit different. So I wanted to do is base, I wanted to use now this shrink
wrap to make another one. So I'm going to do is
I'm going to press the Plus bond and I'm
going to call it a mid, a shape, something like that. I'm shape like so. Then one way to do now
is I'm going to come and put this back to one line. So come to my mid shape
then what I can do is, as you can see, pull this out. So I'm gonna do is I'm going
to grab the bottom of it. Partial edit denom, pull it out like so,
something like that. Press the Tab on.
Now if you come to the image shape can actually
pull it out like so. This is actually our
pumpkin is actually grow. Normally. They actually very
bold as the grow like no like that, like this. And let's pull that
back again. Like this. So this is kind
of the mid-level, but on the beginning
level of pulled this out, they actually grow like this. This is exactly what
we're doing here. Now the other thing is, I don't particularly want these
actual groups in there. So I'm going to command to
where these grooves on, just pull them out a little bit. The duo of them slightly at the top, not all the way over. So I'm thinking I'm thinking
to shudder really do that. I should have just made the
top of it a little bit small. I think I'll do that instead. I'm going to Command
Alt, Shift and click, and just make it a
little bit smaller. It's pulled out and then
a little bit smaller, pull it out like so, and then
pull this bit in as well. Like so, Alt Shift and click S. Happy with that, I think am. So that'll be how it is. Because basically a pumpkin, if you ever go and look at a faster video of
our pumpkin grows, it actually grows from a flower, grows from a flower
that drops off. So it's like this. And then it gets,
it said goes like Mr. bulbous and then
you can go like this. Then finally we go like this, and this is the
growth of a pumpkin. So that's basically
what we've got here. Now we can come in and change the actual
base of this pumpkin. So in other words, if I grab this and let's say
I want to move it so I'm going to press G it
out yet, press the top bar. Now you'll see this
is how the pumpkin finishes and we can still
alter it in this way. That's really good
for us because it means if I go back now
and just pulled up by, if I now make another pumpkin. So I'm gonna come in and
make a few of these. Let's say how many D15,
something like that. The good thing about phone
Kinsey's in this time, fed a lot of people. You can make a lot of things
often, very, very versatile. So let's come to
this pumpkin first. Do is I'll make it a
little bit smaller. Then I'll call them grab
the top and then we're just going to it all like so what I'm trying to do here is just make the pumpkins
a little bit uneven. Like so because I don't want them even hold
that stop Pinchot. Now let's come to the next one. I'm gonna grab both of these. I'm going to make this
one a bit fatter, so I'm going to press S and Y and you can see I still got my normal arm, so I'm
gonna turn that off. I want to put it on medium
point and I'm going to press S and just pull this
one out a little bit. Maybe on here as well. Make it a little bit
fatter on the edges. Yes, something like that. Make it a little bit smaller. Now let's come to this
one and we'll pull this, will make this a
little bit bulbous, maybe something like that. Let's pull it out on this side. Like so you just basically
what you're doing is you're just making them look very different from each other. Let's make the top of
this pumpkin is who can come in all different
shapes and sizes. That's another good
thing for us. All right. Something like that.
And then finally, I think this point cane, probably the bit semester, Let's go the other way round. So hold shift and click. Let's press the spawn, bring it in and make it
something more akin Latin. And you can see they all
look really different now. And that's exactly what
we're looking for. All right, so that
the pumpkin is done. We've got the shape keystone,
everything like that. Now we can actually
stop putting them into the garden and actually
start animating them out. We also need to make
sure that not only are we doing the growth
animation of them, we also need to make sure that
they change color as well, because pumpkins and not orange, all the way through
each slide, the style, our same color and the change
color as they go through. All right, everyone,
so I hope you enjoyed that and I'll see you in
the next one. Thanks a lot.
80. Pumpkin Growth Animation: Welcome back, everyone
is blend the three, the ultimate medieval
seeing costs. And this is where we
left off. Now let's get out pumpkins into place. We know that roughly
the right size, you might want to make these absolutely humongous. I think. I might make them. I don't want to make
them new movies. I think I'm happy with this
size actually so well, there is bring them over now. Where are they going to be or roughly where they're
going to be and put them into place.
You want them to. Scott talked about they don't
grow in perfect harmony. Like like your crops
or anything like that. So I'm just going to put them where I think I want them first. So let's just grab this one, g, g, g, and maybe this one over
here, something like that. Now let's spin them
around because of course they're not gonna
grow like this even. So I'm just going to
spend this one round. I'm gonna also spin the swamp
round, something like that. Press G, just bringing it up
and both press all and Zed, Just turn it round and I'm
going to find them out. So don't worry, I think
on this one actually probably to grow similar
to where it is now. So let's put it
in. Yes, something like that actually
might be fine. And then this one, I'm
gonna spend round and then all all x, something like that. Let's put it into the
ground a little bit more. And then this one, Let's make it a
little bit bigger. I think this one press, press and bring you out. And this one's going to be
a fair size one and then r and y spin it around like so. All right, so that's
looking pretty good. Now what we need to
do is we need to make sure that the base of the
pumpkins now is flat. In other words, we don't
want these round based sticking on the floor of
the needs to be pushed off. So welcome to this 1 first. And then what we'll do
is welcome to the base. And you can see that this one is quite far into the ground. Do we really wanted that
far into the ground? The biggest pumpkin are, the more it will be pulled down, squished into the floor. That's where you
need to remember. I'm gonna do is I'm gonna
come now, grab this one. I'm going to press G.
I'm going to bring this out and just push it all. He's actually stoke
on the ground. And then one way to do is I'm
going to pull it down now. So I'm making it
look as though it's actually on the ground, not actually stuck
in the ground. That's what we need to do. Let's come to our next pumpkin now and do exactly
the same thing. So g, hello, old settlements of looking
at that and then we go, that one looks
really, really nice. I don't want something that
let us come to the next one. Again, we're going for realism. That's what we're look involved. Let's grab this one
plus G, bring it in. It looks like his south on
the ground and not one dose. And then this one,
this one might actually be okay,
Let's bring it out. We'll bring this one out
a little bit actually. So what I'm gonna do is I'm
going to bring it unfold. One's got a low weight to it, let's say like so. Like so, like so. And then I'll grab
the whole thing, g, pull it out a little bit. Just try and get it. Sorry, section the flow. Now one looks really cool like this one I think
is narrow enough. Fine. Whoops, let's grab this one. G rabbit here. Microscope. All right,
So those parts done. Now of course we need
to make them grow. So let's go over to our layout. Let's press dark because we
add our pumpkin or thoughts I did mine do whenever let everything low
dope. So let's press. Yes, there we go.
There's our pumpkin. Let's put it onto object mode so we can see what we're doing. Now on 0 of course,
while on wall. Now we'll do is we'll actually
call them Where don't want this on this pumpkin
to finish growing. I'm gonna put this one
on 650 or around about that because I don't
want I don't want them all finishing at the
same time as well. So 649 press the eyeball and
location rotation scale. Let's come to the next one
and we'll put this one. This one, this
one's a bit bigger, so we'll print end in about 690. So I rotation, rotation scale. This one's a bit smaller, so operate round 600 miles. Maybe I location rotation scale, this one a little bit less, eye location rotation scale. And this one then is a big one. So we'll pray it to 700
false, something like that. Location rotation scale. Now let's go back to
frame one will come to this 1 first and we press tests followed by 0
on the number pad, and then press i
location rotation scale. We're just gonna do that
then with the rest of them. 0, location, rotation scale. And you know exactly what
we're doing here now I think we're making them grow. The last 10 location
rotation scale. And now as we bring this
POC chins stop to grow, not in the way that we want. So we definitely don't
want them like this. So at frame. Let's say 200. We definitely don't want to grow in like this. So what I wanted to do
is I want to come now to my Shape Keys and
the basic one to, I think it's the main
shape of the envelope. We want some green like this last sequence and
this one down as well. Yes, something like that. So that is basically
how we want them growing up to frame 200. I'm going to press I
and go to this shape key press I like so now let's do the
same with the others. So welcome to this one. And we'll just pull
them into one. I'm going to press
went to a party on to 20 on this one just to make
it a little bit different. I don't want them
grind the same way. And then this one, I like, so do the same with this one. And also you've got to
make sure you can see him float and you
definitely don't want that. So we're going to solve
that out as well. That's always something that
you just need to check. So let's pull them out. It may be to 09.
Come to this one. This one. Let's
come to the others. I'll put this onto 21, like so. And I think we've
got one more left, so we'll put this on 196 because I'm from one
different ones as well. Does mean not the short grow at different rates
to the final Paul. Now if I come in and
I press space bar, then they go, don't forget, we need to pull them
down because there will be floats and
let's double-tap. And you can see the
stall out like this. Little bulbous flowers that they'll then as they
continue to grow now you can see that they're not
gonna be the final shape key because all we've done
is set the size of them, so they're only going
to go to the size. You just got to consider
that. Like soap. So the green line
not at the moment. So now we need to do is just
the final sizes of them. If we com thing, we had one of 700,
something like that. So I'm going to go to 700
and I'm gonna grab this one. And I'm going to put these back. I think there needs to
be Let's have a look. Yes, something like that. So I'm going to
then hover over it, press I and I, come
back to this one, then you can see
this one's at 600. So I'm going to pour it
public somewhere like that. Grab this 00 and then I
and I come to this one. This one's here, so I'm
going to print back. I'm wondering, Oh,
I can actually do it that way.
That's makes it easy. So i and I come to
this one like so. And then finally, this one. I like. So now we just need
to fix the floating. Let's come to here. And based on what I
wanted to do is I want to bring them all down
to the ground. So let's bring this
one down first. I'm gonna make sure
that as it comes down, it's going to be
plumped into the soil. Like so I'm going to press, I am going to pray on location. I'm going to grab this one
then put it into the soil. Location. Same for this one. So I location. Finally this one, Let's
put it in the ground. And you can also have them rotate them around
as well if you really want to go to town and went to put this one
a little bit more. I'm actually going to rotate
this one round as well, so I'll y and let's rotate it around so it actually
moves as it gets over. So location. Now
let's put it on 0. Let's say how these grow. We had to go. I don't want to say
any floating as well. I'm looking forward to making sure you can save that as well. This one is still floating, still floating around
on the ground. It's only until their
way they start off. All want to do is I, I'm
gonna get down to now. I rarely, rarely small point
and just make sure that the role in the ground because I really don't want him floating. So what I'm gonna
do now is grab. And in fact I'm going to
come out and grab them all. So I'm hoping let me
just go back and make sure we're gonna
press seven square over the top because while
I'm worried about yeah, They all coming from the
right place, so that's good. So I'm just going to
put them now really, really small and bring
them down to the ground, down into the
ground so that just poking out there
as you can see and then press i location. Now doubled somebody
I trust spacebar. I'm hoping nothing
is going to be floating out on them. I'm
just going to move in. There comes one. He's
not floating now. Let us see them go
all the way now. As you can see, it's still got
that bulbous part of them. It might be a
little bit too far. I'm there actually
now you can see the game really, really far. Like so. We can see now all we've got to do now is
probably get rid of that bulb, which is probably they're
a little bit too long. If I bring them back, let's say Let's say two here. Yeah, we don't want them all
changing at the same time. So if we grab this one, we just come in now and just
change it a little bit. So if I come in now, think it's no,
it's not that one. Let's change this. There it is. This is the
one that we want to change. So it's gonna be this. So I'm gonna press around
250, we're gonna make it. So let's put this
one around 300. Then we know it's this one.
Now we're going to press, I am going to grab this one now. 200. Press I, and then we're
going to come to this one now around this,
I'm gonna press I. And then finally this one. When the round, let's say 300
on that one, bring it down, press I, and now let's
give me one last try and let's see what
they actually looked like. Double-tap the Hs
so we can save. There we go. You can see
the quiet boldness again. As we start to come
to that 200 mile, you can see the milestone to
find NEP in different times. Now the granulate like pumpkins, the garden like there's
like a narrow kind of a. Now as we get older, you should be able to
see the nice groups and the nice indentation calm as though they're being
blown up like a balloon. There you go. There you go. Realistic, great pumpkins. Now what we need to do on
the next lesson, next, we need to bring in
their actual textures and materials for them to
make them look realistic. And then finally after that, we're going to add in some
leaves as well because pumpkin leaves are
actually a little bit different leaves around it, so we might as well do that. And then finally we've just got that smoke simulation to do. All right everyone, So we're getting that not long left now. And I hope you really
enjoyed it so far, and I hope you're going to carry on enjoying the rest of it. Thanks. Bye.
81. Animating Pumpkin Textures: Welcome back everyone
is a blend of three, the ultimate medieval sin cos
and this where I left off. Now let's come to our pumpkins. And let's come to the
first one and we'll put it onto material milk. And then we'll see exactly
what it's gonna look like. And then we're gonna
bring in material. I'm going to come in
now with my material. So I'm going to come in. I'm just wondering
where all these pumpkins all I think
they're all here. Yeah, they only are all. Let's have a little while I
managed to get phenomena. That's not Sphere, don't really, that's the water simulation. Just wondering,
yeah, They alone. All right, so we've got severe
phase six. There we go. Let's put those down. Let's put them down here, hopefully. Yeah, there we go. Now we can close that. And now I can make a new one for my sin collection just so it's all nice and
tidy as we know. Alright, let's call
this pumpkins. Like so. Let's do that correctly. So let's ground,
Let's rename them. So I'm gonna call it pumpkin. I'm also going to
just copy and paste, so Control C and then I'm
going to press space one. Then I'll do the same on here. So Control V, Control V, control V, It doesn't map out the L1 as long
as they know what. A pumpkin, alright,
something like that. Grab them all, drop
them in place, close. Oh, alright, so let's come to the first pumpkin
and more calm. So I'll materials, you
can see, that's not it. There we go. First of all, new, let's call it pumpkin. Like so. And then what
we're going to do now is let's put this on one. Obviously we can't see
the color, in fact, well, on 800 because then we'll see the final cola and that'll
make it easier for us. So I wanted to do
now is I wanted to go to my shading panel. I'm going to grab
my principled press the double bond to zoom
over to my pumpkin. The moment is I'm going to
press Control Shift and tik. My principal Control Shift T. And then I'm going to
go to my references, click up and come
to my textures, looking for one that says pumpkin, which is this one here. You can see regard
leaves here and the rest of it is pumpkins. So let's grab the
mole, bring them in. And there we go,
beautiful pumpkin. Know what we want though? What we want to do
is we want to pull this over, pull this over. And then what I
want to do is now I want to bring in a Gamma, a hue and saturation and
another you in saturation. That's how we're
gonna do this one. So Shift, bring in
a Gamma, like so. And let's then bring in
a hue and saturation. Unsaturation unless bring
in another UN saturation. Like so and drop by in that. Now let's zoom in a little
bit and moments do it. So we're 800 long. Windsor is I'm going
to put the value of this on null 0.7. Turn that down a
little bit so you can say one word to do is I'm
gonna put the FAQ on. This is a fairly
consistent, as you can see. Now, the other thing
is, I'm not actually happy about my
shininess on this. So what I'm gonna
do is I'm gonna come over to my roughness. I'm actually kinda
grew up by you in saturation public
counters shift D, drop it in place like
so unless put this on no 0.6. There we go. Turn down that roughness
way, way too shiny. Now let's come to the hue and saturation of the final lobe, basically of the pumpkin, I'm gonna do is I'm gonna
put this on note 0.950. Then I'm going to have a look at this while it is on random view. So that's what he's
going to look like. Just make sure they actually
happy without the logs. Now don't forget, we've got
our song that's probably, probably a little bit too
bright at the moment. So let's command where. Whereas awesome, Let's
find, let's close that. Close a bold simulation. Close the PowerPoint chins
and light the sun here. Let's just turn it down to
something like two instead. Let's just turn that to 0 and
see what that looks like. So we're lend the HDRI, do the whole of the
work and it's probably a little bit to where it's
probably enough right. To know. So let's put 1.5. And so that looks like, yeah, probably 1.5 is going
to be much bad. Now I'm doing is I'm just
coming around to my pumpkins, just making sure that
they look a lot. You can see the color rarely, rarely looks realistic now, I'm really happy with
the actual color of them right now while I wanted to
do is I want to come on. And put the color down
onto white is going to be closer to when the
actual pumpkin growing. Of course, I wouldn't
do just for this now. I'm just going to pull this out just a little bit like so. And then what I'm going
to do is I'm going to click this down our problem, a dope sheet and know
but don't shoot. Sorry. My whereas it my timeline. There we go. Timeline Dope
Sheet, something completely. Well, it's not different.
Boids, something that's a bit more technical. So let's now bring it down. We can see them grow in
and things like that. Let's put it on 0. And then what I'm going
to do on one sorry, a moment to do now
and went to mess around with his
urine saturations. What I'm going to do
is I'm going to put the EU on no, 0.7. I'm hoping actually did I
change that? Let me just think. I need to go back
to wait on good. Actually, that's
quite silly of me. And find out 800 and
I'll come to yes. 6 six hundred six hundred well ago and then one
way to there I forgot. I'll just press I just do
actually keep those in place. Now, let's calm to frame one. Unless change these
now a little bit. So frame one, frame 0, it
doesn't really matter. It will put the, you know, 0.7 did no 0.7. We'll put the saturation 0.650, and we'll put the value 23. And we'll leave the FAQ. What TAs, and then
we're gonna do is I'm gonna press I and I. And hopefully now
as I press Play, I'm going to probably put it on just the material
just so I can see. Unless press Play, I'm
going to double-tap the a. And hopefully as this grows, it should be a nice drink. Colors while they
are at any should go to a nice yellow
color as it goes. There it goes. It's grow in. Yes, that is exactly
what I'm looking for. So now it's that
nice yellow color without actually having
to do anything else. And as it carries
on growing now, it should become a
nice orange color that is actually realistic
to what pumpkins grow like. The color they go me. As we go up to here, you
can say it goes that nice, beautiful orange color. Yes, that's exactly
what I'm looking for. All right. So now we need to
do, we need to come to our next pumpkin. Then all I need to do,
click the down arrow. I'm putting PQ
pumpkin, next one. Pumpkin next one. Then the final one. Like sir. Alright,
now I'm going to take this off rate
because I don't really want this in
my shading panel. So I'm gonna do is we're
just gonna pull it over to the right-hand
side, simple as that. Let's go back then to lay
out double-tap, like so. Alright, so now we've done that, let's actually save it out. And then what we're gonna
do now is we're going to actually create all
pumpkin leaves. So first of all
though, let's come to political system and let's just turn on
our grass double-tap. Just so we can see what
we've got to where we are. Let's have a look
from rendered view just to say how much
grass is round. You can see it's a little
bit of grass round yet. And we're gonna basically, we've got a little bit
of grass and ears. You can say, well, we need
some pumpkin leaves just to really fill this out and
make it look realistic, looking a little bit
borrowing at the moment. So now what we're gonna
do is we're gonna impulse these leaves again a little bit as we did with
all the leaves. Let's put it on object mode so we can see actually
what we're doing. We've got our cursor over it. I actually need to
parameter mode because then I'll be able to see
wondering shift day unless bringing in a empty know an image, sorry, images, planes. And then let's go and find
that pumpkin which is here. And this is the one
you want to bring in your pumpkin leaf. And hopefully, yes, there we go. All y, sorry, x 90, spin it round and I'm hoping
it's a go-to resolution. Sorry. Yeah, there we go. That's exactly why one I want to be able to
see through it. That's exactly what I want. All right, so I need to
actually alter though. This obviously, as you can see, way, way too bright,
doesn't look realistic. So we'll do the actually
on the next lesson, we'll start working on these pumpkin leaves and get those in. And then finally, we've just got the smoke went out
of the chimney. All right, everyone, so
hope you enjoyed that and I'll see you in the next
one. Thanks a lot. Bye bye.
82. Creating the Pumpkin Leaves: Welcome back and runs
blend the three, the ultimate medieval sinkholes and this is where we left off. Now what I'm going to
do is I'm going to get my leaf and I'm going to actually go into
my shading panel. This is what we showed
up at the moment. So let's split this
over here somewhere. Press the dot bond to
zoom into my leaf. Probably. I'm going to just pull it over just for now because
I want it to be really near my grass or
can actually get a good idea, press adult bone of what is
actually going to look like. So let's first of all, we can say that all base is
first of all, very green. And also we've got some white
patches around it as well, and we don't want those either. So let's first of all,
bringing a gamma, so shift they search
gamma, drop that in there. Let's put the gamma
on three-point to darken it Raphael pillow. Then you can see already that's
making a huge difference. Let's then move them. It's arrow output
over here somewhere. Let's bring in a calorimeter, so shift a color, drop that in that, let's
say bring in a mix shader. So shift a mix. This is just a very,
very simple shader. Going to drop that in there. Then I'm going to bring
in a transparent shift, a transpiring be SDF
dropped ions and he hit. And then finally what
I'm going to do is I'm going to where you can see now they're
already starting to look like it's just
not quite yet. So let's plug the color into
the FAQ of the mix shader. We know what we
use in this fall, we use needs to get
rid of those y as we bring this down
as we can see, and then we can bring
this warm, this one. I'll make it pop. And then we can also come
in and turn this down. Now, cloud that's not
actually working. Nothing wrong way round. There we go. There we go. That's exactly right one. Let's put this back on white or a little bit gray
just to make them comb? Yes. Something like
that. I think. Let's have a look.
Let's turn this down. All right. Now I'm looking now for
the color of these. Ama. Happy with that.
I don't think so. I think I'm still
not good with this, so I'm gonna bring in a huge
search, hue and saturation. Let's drop the end, Let's
turn the down. Like so. Maybe not boundless
tend the value. Yeah, now we're actually
getting somewhere now it's really starting
to come together. All right, I think
I'm happy with that. I'm not doing this
white line is not wireline going to be around
them. That's the thing. If you zoom in, let's
put it onto yeah, that's that's looking
a lot more realistic. The one thing is I think, I think it still needs bringing down the saturation just a ton. Like Bob. Now we rarely really fits. Okay, so we've got to leaves. Let's put it onto
a material again. Let's move all leaf while we're gone to modeling as well
because I'll make it easier, don't like so let's move all leaf over here without
proportionately to none. Then the last thing we
want to do before I continue putting
on some material, and what I wanna do is I
actually want to, first of all, press control law and
bringing a few edge loops and then control law and a
few edge loops this way. Then I'm probably going
to just put your owl basically because I'm not okay with it being a
whole one of those. So I'm gonna come in
with my knife tool. This is another
technique you can use to actually make
your leaves and foliage look a lot
that I just caught them owl will add onto the amount of polygons you
golf ball does make them look a lot that something like that. Press Enter. And now
let's come in and get rid of all of these pumps. And then delete faces, you should quit that. And now we're gonna do is
just bend these a little bit. So I'm gonna come in, grab them, press the G born, just bend them out,
making them look a little bit more realistic. Like so. Especially because
these leaves normally bend up and around
like I'm doing here. They wouldn't
normally be so flat. All right, I'm happy with that. Now the next thing I want
to do is I want to actually set My where this comes out. So I'm gonna grab this one here, press the G bomb
without Portland. And I want this to be
where my orientation set. So cursive select it, press the Tab Bar,
right-click, Shade Smooth, and then right-click set origin to actually reset control
leg or transform. There we go. Salary 3D cosine. That is exactly one-to-one. Now you can say, that's
looking really, really nice. Alright, so we've got that bit. Now, what do we
need to do with it? Well, we need to make a basically a tangled vinyl,
something like that. All I'm going to do is
I'm going to bring in a cave and we're going
to bring gain I Path. And let's use that actually, I'm gonna make it smaller, like so pulling out this way. Now let's come in and
actually rename this as well. So let's find its
called pumpkin leaves. So that's actually fine. I've actually renamed it.
Let's bring this out. So I'm gonna come in to my
geometry and bringing out the depth of this, like so. And then I'm going
to come in now and move this around with j, just to bend it around a little bit and make it
a little bit different. I'm also going to go in
and press and subdivided. And now you'll see
that we've got a lot more variation on it. We can also come in
and press Alt S, just thin it out
towards the end. So like this. And we can also
use proportional editing. I'm really thin out
towards the ends. Like so. Because it's a little bit
too thick of the moment. So something like that, I think looks much, much back. Can we probably enough value? Dark, windy,
something like that. I think it's absolutely fine. Let's also pick it up
as well in places. The different un
unless straighten it all out little bit just
so it's not too much. All right. Yeah, that looks nice. Now what we can do
is we can just turn down these because we
don't really need them. We want them and the
more jagged actually, so I'm really going
to turn that down. I'm also going to turn
down the resolution, probably one,
something like that, because I find it
makes them look actually a little bit bad. And then finally what
I'm going to do is I'm gonna come over to object, Convince, and Convert to match. You shouldn't innovate
something like this. Now, the next thing you want to do is you want to bring in, basically could probably
get away with this on here, but make it slightly different. So what I'm gonna do is come
over to my materials panel. Click the down arrow, unless put it on, I
think it's called crop. So let's have a
look. There we go. Crop leaves. This is how this one looks. I'm going to click
the postponed new. I'm gonna call it
a pumpkin stem. Like so. And then when I click on this one, coffee material, paste material to the
next one, like so, minus this one now,
and then let's make them more akin to this color. So you can say the
moment these are a little bit, Let's
have a look in. You can see they're a
little bit to wear dog. So let's go back to shade in two likes or they
just wait to live. So let's go to shaded. Let's put it onto render view, and let's zoom in
and zoom out here. And one window is, first of all, I'm going to just save
and can actually grabbed a notepad and put it on a
dark part of it, like so. And let's have a
little that looks like I feel that that's
still not dark enough. So I'm gonna come in and
just make it darker. Double-tap the eight. I'm going to also make it a little bit of
a different green. There we go. Now that's
located much, much better. I'm also going to make
sure if I grab it, I'm going to shade smooth, like so. All right,
but what's happening? There we go, That's
looking much, much bad. Alright, so back to maudlin. Then what we're gonna do
now is press the top bone. Let it load up, press the top
one pulsus biochar material because we're not going to need it on render at this point. And then what we're gonna
do on the next lesson is we're gonna do pretty much the same thing
we did before. We're going to use a
particle system to place these leaves are long,
the sexual stem. Alright everyone, I
hope you enjoyed that. Nearly there now, we should
get the pumpkin patch, finish them by the, by the end of the next lesson. So, all right everyone, I'll see you in the
next one. Thanks a lot.
83. Populating our Pumpkin Patch: Welcome back and run
to blend the three, the ultimate medieval
seeing costs. And this is where we left off. So now let's come to our stem, our pumpkin stems
called nibs pop. So let's call it
a pumpkin stems. Leaves. Like so. Then what
we'll do is epistatic. These all in Pumpkins. Yes, they also won't be fine. So the pumpkin stem and leaves, Let's come over now and
give it a particle system. So plus, click the little arrow, and then we'll call this
pumpkin stem leaves. Like so. There we go. Now let's command and
put this on hair. We want to put advanced on, we wanted to put this
on something like 20. For now, we want to come
down and where is path? We want this on object. And the object we
wanted is this. Here. There we go.
Something like that. Absolutely fine by you from the non-growing in the
correct place. So what we need to do
is I need to change. Look if it's just
looking at it's done. Which is the one that
I need to change. It's definitely one of these. I'm going to first of all
change the scale like so. Then I can see that there's
still not growing from the place that I
really want them to be should really be growing from the air into the actual stem. So let's have a look and change where they're
growing from, emitted from Dr. volume
and there we go, That's actually getting
the volume and now I need to rotate them around. So let's have the rotation, randomized rotation
that's not working yet. There we go. Now let's
bring the phase. Ok. There we go. But they actually
grow in the wrong way round at the moment
I feel like it should be further or PMA
be telling you the way. I mean, so let's put them
the other way round way, this way. Like so. Yeah, there we go. Now let's come in
and give a few more. Like so. There we go. That's looking much, much bad. Alright, so I'm happy with that. Let's make sure we don't
need to randomize them had been mol so political
face, something like that. And then I'm basically
just playing around with them in the moment. I need to randomize this scale, as you can see, bring up the
randomness holding shift. So yeah, I think that's
looking pretty good. I'm just going to put it
onto where rendered view. Just to see what they look like. Think that's looking
really nice. Now, I'm going to actually change this now
because I think I'm, I don't think I need to
mess with us anymore. Now. All I need to do
is I need to come over and make instance real. And then I need to just
go to this stem now, grab it, press the Aldon minus
off the political system. So minus it off. Hopefully. Then we should end up with that. Now we should be able to
join all of these together. So be grab it all control J
joining altogether like so. This is turned into that, which is absolutely fine. I'm going to put this
will make it smaller. It's not really going
to do anything. I want to put this underneath. They're like to do
with everything else. I'm going to put
this and call it the pumpkin leaves a template. I'll call it template. Like so. Alright, so now I need to do is I need to bring this. I'm just going to
use this over here. I'm gonna put this underneath
as well. Don't worry. What we're gonna do now is
we're gonna call back to, I'm just going to lift
it off a little bit back to our actual grass. The one thing I didn't
forget as the orientation, it should be actually here. That's absolutely fine
because we want this to be relatively flat
to the ground. I might need to move
it down a little bit more because it depends on what's going to
go around here. So let's just save this, come back to our ground then. And then what we're
gonna do is we're going to click Plus Nicole, they said pumpkin
leaves, like so. And then I'm also going to
click Close on here and call this pumpkin leaves, like so. And then I'm going to come down and bringing
my pumpkin leaves. I love it on a 1000 and I'll
come down to where it says, Which one is an axon
hair. We want it. Where is it? 1.50? No object on the object we want it on is this thing
here. I can reach it. So let's double-tap the
a. We don't need them. So let's object is this one here and there
we go. Starts off. Pumpkin leaves. So as
a site we might need to move these around because they don't look
right on the moment. They also the size. So let's change the
scale up like so. Let's change the randomness
of the scale up. Like so. And now let's
rotate this random minute. So if I grab it with can I
rotate it around my mouse? Yeah. Yukon, you
have to rotate it around the other way, so
I'm gonna grab it all. Grab this one, this one top. And I went to just pull
these out illuminate. And as you see as
a pull those out, it's doing that. I
don't really want that. So I'm gonna press tab, pulled them out so I can
see what I'm doing now press tab and now we
should be able to rotate them. So all y, Let's have a low cow. We rotate this round
the right way so you can see the rotates
around that way. Let's pull them up. Let's press
Tab now. And there we go. That's exactly what
we're looking for. Okay, so that's
looking much better. Let's call it rendered on
before we do anything, Just making sure
they're exactly the way we want them. There we go. That's exactly what
we're looking for. Now that we need
the rotation to be the other way as well. So
that's the only thing. So if I come back to
Milan, double-tap, and now we'll come down
to where advanced this. And that will give us
hopefully rotation. And now we can
turn off the face. There we go. And now let's pull a randomness phase in that. There we go. And
then this one random as well. And there we go. Now you can see that
looks much, much fat. Now I'm just looking at just
to make sure I'm happy. I think they're floating a little bit too high
above the ground. So again, I'm gonna
come to here. I'm gonna press tab. I'm going to just grab all of these now. So I want to grab all
of these hopefully. Yeah, convex you grab all those. So I'm gonna grab everything. I'm going to pull
them, I think this way into the ground
or the mall top. Now there should be onto
the ground a bit more. All right, I'm happy with that. That said it looks as though now that the tangling around. Now the final thing that we
need to do is we need to come once mall to mall ground. We need to come to
here and we need to say another one, pumpkin leaves. So we'll call it pumpkin leaves. Like so. Then what we'll do now is we'll come back
to our political system, come down to where
our densities, unless Bramson can leave. Pumpkin leaves, pumpkin leaves. Pumpkin leaves. Now, we can go to, if we double-tap the egg, we can go over it too. I'll wait painting. And we should be on pumpkin
leaves us have a look. We're also on rendered mode, which doesn't help.
So pumpkin leaves. And hopefully, I'm hoping now
if I come in, There we go. Not quite a strength I don't want is so high, I
wanted very low. Actually. Let's bring in a few pumpkin leaves and once
and for all of these in, I can increase the strength up. I just want to see
what they look like. So something like that. Alright, so let's then
put it onto object mode. Now global dialogue
like and you can see they're not
quite come in there. We wanted them
because the strength, I need to put it on
a 100 straight off, I think just so I can say RNA to reduce them down and
change the scale now. So I'll actually try
doing that face. I'll come back to my ground. Back to the particle system. Let's put it on 20,
something like that. And now let's really bring
these open on the size. So the size is whereas
the size gone. You can also bring up
on the size on this, but I don't really yeah, actually, I could bring you
up on the size on that. So let's double-tap the eye
and I will look at that. Yeah, not actually might be a bad way to do it
rather than the other. I'm still going to mess
around with the size though. Scale there we are.
Bring it up like so. I'm bringing that
one down just a tad, like so there we go. Is that too big? Now, when I print my
render view of what small, just to have a good
look at what it looks like. There we go. That's that's a tone that
apart from the size, may be a little bit too big. So let's pull it down. Just a time, timelike. So, alright, that's cold. Now let's put it
back on material. And finally we now we can come in with white paint
and then we're going to just paint a few
more of these. Like so. And I'm hoping when
I've done this now it's going to
look absolutely. I'm just going round leaves and states I'm messing
up a little bit. I don't know why
that's happening, but hopefully they're
not gonna come like Amanda can mess with the
size halfway in between. In the end it's
going to look fine. Hopefully. We'll get that. I'm just going around
these ones as you can see. Not just fill out this
a little bit like so. All right, let's put
it on object mode. They've got like that, that's
not exactly what we wanted. So now I need to wear they'll deny a little bit
more and then pull them down. So let's pull them
out, load them all. So unless bring the scale of them right back down,
something like that. Unless I have a little that
looks like I'm rendered mode. Let's zoom out a little bit. Happy with those. Let's
bring in a few more. Let's try 100. Yeah, that's probably too many. Let's try 70. There you go. That looks
absolutely a really, really great, I'm really, really happy with how those out. All right, let's put it
back onto object mode. Let's now File and Save. And then what we'll do on
the next lesson is we'll bring in our smoke
and I'll turbulence. And finally then a non-smoker,
our wind turbulence. And finally then we can
actually crack home with the actual
smoke simulation. I'm not gonna say it's
the hardest simulation is how the simulation, because it's called the
biggest chance of messing up. It's more than the
water simulation, but apart from that,
it's not that hard. Anyway, let's bring this down now because I can pull
this out of the way. So I'm just gonna put
this onto that. Like so. All right, everyone, so
I hope you enjoyed it. We're not far off now. Probably five-sixths lessons, something like that maybe, and then we should be finished. All right, everyone, I
hope you enjoyed that and I'll see you in the next
one. Thanks a lot. Bye bye.
84. Creating Wind & Turbulence: Welcome back and run to blend the three the ultimate
medieval sinkholes. And this way we left off. Now the scene wouldn't be complete without a
little bit of wind. So let's bring that in. It's a very easy process. And then finally, we'll
move on to the smoke. The other thing we need to do is a little bit of tightening. You can see we've got
a little bit of Coke going through their neural. Let me get my words
out. Always best to actually doing that
right near the end. Because once you
actually call this away and you're unfortunately unable to change your hay and things like that.
Same with the leaves. You're always
better off looking. If there's any leaves
like this one here, you can stick out. It looks kind of a bit funky. Maybe this one here, I'm just cleaning the actual
place up a little bit. Also make sure that
when should finish that everything's in
place, that it should be. You can see here, I've got pumpkins and if I open
the open the envelope, I'm just making sure that
everything's in there. I've got everything is basically in the place where it
should be because then it's really easy for any comeback to the scene
if you want to take something out of it
or if you want to put something as an asset
and things like that. So always, always try and
keep it at tidy scene. Let's first of all,
bringing in wind. The way we're gonna
do that is we've got cursor over here the
moment I'm just going to press Shift S and just
put my shift right-click, sorry, put my cursor there. Then when we went to do is
I'm going to press Shift a and come over down to
where it says false field. And under here,
you'll find a wind, bring you in, then
let's spin it round. So all wide, 90, and it doesn't
really matter which way the wind ACE so much. It's all about how
it's actually placed. So in other words, I
don't want to know when to just go
straight across here. I want it to probably
come in the direction, something like that that also interacts with
your actual smoke. So there is not to bear in mind. Alright, so now we've got, when I went to pull it
out a little bit, just so I can actually say it. One way to do is I'm
gonna come over to the right-hand side
and you'll see you've got this wind icon here. That's not the one-on-one.
I want this one here, which is our wind. And you can see we've got
strength and we've got flow. I want to turn my strength
up to something like five. So I'm gonna turn
it up quite high. And you can see there now, let's actually had some
interaction on here. What if I press space bar, you'll see nothing
actually happens. Nothing's actually move in. And the reason for that is
because all it's done is it's put the grass basically
facing against the wind. If I turn this down to
something like one, you'll say actually
goes back and there's not a lot of
actual strengthening. Let's turn it up, something like to just have it a
little bit of a wind. And what you need
to do to actually make this when work is, you need to bring in
something called turbulence. So the way we're
bringing turbulence exactly the same
way as the wind. We press Shift a and
then what we do is we come to where our
false field is. And you'll see one
every come down that says turbulence.
Let's bring that in. And it will come in a bit
like an actual entity, albeit when I move this
over, move this with the j. You can see now that my
actual grass starts to move. Now basing on how I you've
actually got your wind SAT, is the amount of turbulence. So you're going to
get now bearing in mind that went to move this. You can see, hey, if you look very closely, you'll see that the
actual he moves. You'll see that
show graphs moves. And you'll see the actual
leaves move as well. So everything moves. And that's really great.
That's exactly what I wanted. All right, so what
I want to do is you want to call
them and turn you window probabilities about 2.5 just to give it a little
bit of an extra strength. And then what we're gonna
do with this turbulences, we can either have
the wind blowing this way and then going back and
making a lot of turbulence, all you can simply move it
just straight across the same I'm going to do is I'm
going to try putting it here. You can also see the
strength of all turbulence. And what that is, what
that basically means is, you can see here as well,
there's a noise amount. You can put this noise amount up slightly to something
like null 0.1. What that does is
it basically turns the turbulence on and off on
and off really, really fast. It's the same as what
was strength those it's how much actual wind
goals that will be. This is what the turbulence
is actually doing. So now if I move a little bit, you can say there's a lot of
interaction in our graphs. Now, I would suggest that you don't actually put too
much turbulence in there. You only want it very, very slightly, in my opinion. Now the other thing is, you can also come
to say your grass, go over to your
political systems and write down near the bottom. You will see that on the
field weights you've actually got a way of controlling
how strong the turbulences, how strong the actual windows
and things like that. So you've got a lot of
control down here as well to actually
make it stronger on, let's say the grass
less strong on the hay, mole strength on the leaves
and things like that. All right, so let's go back to our turbulence now on how to
actually get this to work. Let's come over to layout. What we'll do is we'll
put it onto one. So let's put it on one. Let's zoom in into our
actual turbulence. And what you want to do is you want to basically
move you to, uh, billions from here over to here, and then maybe over to here. I'm gonna press location
rotation scale. And then when we went
through now is I'm gonna move it over to here. And you'll notice when I moved out with if
I move this now, it's going to pop straight back. And that's because we've
actually inserted our key frame. Let's think we're going
to want to take probably, let's say around 300. So we'll move it 300. I'll move it over here. Like so. And you can say,
let's say how fast, so location, rotation and scale. Let's put it back.
We're on object mode, soprano GMO, because then you're able to see
it very easily. Now as you move it, that
everything starts to move. So he leaves moving
and things like that. Now what you've got to think is that too strong?
I think it is. I think it's way, way
too much turbulence. So what I'm going to do
is I'm going to grab this and I'm gonna
put it up to 800. And then one which doesn't
want to come back. And I'm going to
press play again. Now you'll see it's
much, much more gentle. Gentle enough for you. Again with leaves and
comment attendee, turbulence down
all the wind down? Or is that okay? Period. I actually think that this is really, really nice. Just going from there to there. It gives us a really, really nice goals of when they can see the grasses
moving in different ways, but mainly going in the
direction that we want. That's basically what we want. And you can see as
well how easy it actually as to where
to bring that in. Alright, so what we need to do now is you
need to open this. We need to call
them to turbulence and our wind more
I'm going to think, I'm going to put them into, is this one here that I
created lights and wind. So let's grab them both. Let's pull them up, put them into Lightroom when
let's close that off. And now we can put this back and we should have a punk going. We should have the
wall to go in. We should have the
windmill going. We should have all our leaves and things like that move in. And it's going to look
rarely radical when we actually call them to
actually render this out. All right everyone,
so that's that Paul. Now what we want
to do now is make our actual smoke is basically the last
thing we need to do. And the thing is
that for the smoke, it's basically near enough, the same as creating
our actual water. What I'm going to
do is I'm going to come to my chimney first. I'm going to clean a little bit and then
press Alt Shift and click, I'm going to press Shift
S cursor to select it. And then what we're going
to do now is I'm going to actually fix these
bits before I actually carry out whenever in my
domain and a brighten my actual smoke and I
can actually fix those. Let's come in. Do
the leaves there, so welcome to our leaves. And all you need to do is
you need to just look round. So put it on material and
have a look around at which bits are funky. You can say if we zoom in
a little bit, in fact, we'll put it on Render
view and I'm just going to give us a much
better view, isn't it? Let's double tap the aim minute, and let's have a look round. So I can say, not too happy with this part
here is you can say, I'm looking at this tree now, just making all the
alterations that I wanted to. I think actually with this tray, I'm really happy to
actually with our 1 eighth. It's this one here where
I just want to take maybe this top civil look
at this top up here. Actually. Does it look right? Actually looks kind
of kind of gold. I'm just looking around. And now this fall
though I picked tau. I actually think
the trees for me, it's turned out actually right. Well, I will tell
you what you can do in case you do want
to actually alter it, is you just select the tree. We go then two over here I'm gonna pray
on object mode again. Object mode. There we go. And then one went ahead and
put it on particle edit. And now you'll see that
we've got all these lines. All you need to do now is
come to you, It's scissors. And you can just call
them away a little bit. And what that'll do
is it'll Coke down the branches for you, making them not so long. You just need to go to your trade and just call them down where you're
not happy with them, just trim it off basically. And now what happens if I put
this back on object mode? You can say that it's actually
trimmed, all those done. You can say, for instance, like this one here, not very, I don't know if that's
part of the tree. If you want to have looked at that or you need to
do is just turn this off and now you can see the
actual branches of the tree. So we don't want to
call that white. Well, you Cocoa right
away if you wanted to, but I'm not going to I'm
happy with the trees. I'm going to hide those up way high, the tray out of the way. And then I'm going to
come to my head and you can say it's split
into two different parts. So that makes it a
little bit harder. And then what I'm
going to do now, again, I'm going to
come to political edit. I'm going to come across
and cut these down like so. And the moment I'm gonna
pray on an object mode, double-tap the Uygur
and just have a look if you're gonna get
some sticking out, It's just we want to limit. It also makes sure
that the sides, if you happy with the signs, I think I'll do I'll go in and actually fix
the whole thing. Now the thing is mixed quite a bit tedious
actually to do this. So what I'll do is I'll do
that on the next lesson and then I'll carry on
creating my smoke. All right everyone,
so I hope you enjoyed that and I'll
see you in the next one. Thanks a lot. Bye bye.
85. The Particle Edit Comb: Welcome back In Romans
blend the three, the ultimate medieval seeing
costs and this way we elect l. Now let's come
in and fix this one. Then we'll do this 1 first. I'm going to press one,
It's going to front view. I'm going to just
call away the sides as well to women's
political edit. I'm going to make sure
that these go away. So go down, go down, like so, and then go across. And I'm just going
to call them a little bit more and find that as well that if
he caught like I'm doing here, It's much bad. It's a little bit more organic. Now let's put on object mode. Let's double-tap.
And there we go. You can see we've caught
some of these down. Now let's go over
to the other side. So I'm going to press
Control one to go around the back to exactly
the same thing. So object, political edit, command called these down. Like so. Let me just come to here. Like so, let's put
on object mode. And there we go. Don't make sure that you're happy with it, which I believe I am
much happier with that. Now I'm going to press three and then I'll do this 1 first. So let's command, I'm called
this political system. Edit. Sorry, again, I'm just
gonna go round my chimney. I'm just winging it a
little bit like so, and I'm just gonna call them so something like
that. Object mode. Let's press three on the
number pad, all control three. Let's go around the other side, grab the other one, and then
I'll show you what it means. So you can see on the end, you can do all of these options
the moment you can stop. In particular, did
they disappear? And then you end up
with disconnect, disconnect, all deleted it. And what you need to do
is you need to disconnect the hat and then rejoin the head and you will be
able to keep these edits. That's the thing. If you don't do that, you'll do these ideas. And the only way you can
actually alter this then is by actually
deleting the Edit. Alright, let's go
to object mode. Double-tap the eye. Let me show the left with
something like that. I'm pretty happy with other A's. Now let's bring put it
onto a rendered view. I just wanted a quick
lobe just to make sure I'm happy before I sign off on it. Happy with that one. Happy with this one
now where it goes up to happy with the color, happy with pretty much
everything on there now. Yeah, I'm I'm happy
with that brush and I'm just wondering where
my human stove, I mean, that I'm
actually have a look. I just don't want
him there it is. Let's have a look where it is. Let's press Dell and zooming. Okay is over here, Let's delete him. We don't need them anymore. There you go. You've gone. All right. Now let's call him
back to object mode. Unless call now to actual smoke. I'm going to do is I'm gonna
go probably back to model. And actually I'll
make it easier. If a colon now to name our
chimney, grab my house, press adult just
so I can orientate myself around that and
then won't want to do is I'm going to press
Shift a and we're gonna bring gain a UV Sphere. Exactly the same
area is what we did with Walter
simulation over that. And then I'm going to
press S and bring it in. I want to press one. So
I've just got an idea of the actual scale of this, and I always make it
probably round this side. It's very hard to
say what size you actually need it without actually running the
smoke simulation. So I'm gonna make it
a little bit smaller. I would always err on
the side of smaller rather than larger
is what I would do. I'm bearing in mind the
February pull this down, the more chance there is the smoke is going to
interact with this. Now you can use a collider on this actual house
for the smoke, it does cost more, lot more on the actual
simulation because every single smoke
particle will be actually banging up
against this chimney. So in other words, I'm saying is we could stop the
smoke particle, the smoke simulation all
the way down in an average, just banging around and
come all the way up. Now, that is going
to cost a lot more. So that's the reason why I
don't really want to do that. Alright, so what
I'm gonna do now, I'm going to come across
the right-hand side. I'm gonna go across to
where it says fluid, even though it's not fluid, I want to type on here flow. And then one Wednesdays
I'm going to call them and you can see it's
already on smoke, just needed on an inflow. And then what I need to do now
is think leave everything. I'm just looking at my own. I think they said let
me just have a look at my own actually wildcard. Everything else should
pretty much stayed the same. All right, so now let's
create our domain. So I'm going to press shift a, shift a cube plane. I'm shifting mesh cube. And there we go. Let's
just print them Wireframe just for a second so I can
actually see the size of this. I'm also just going to hide the other way so I can actually
see where my chimney is. And then I'm gonna
grab my domain again. I'm going to press S, bringing out to probably
something like here. Then what I'm going to
do is I'm just going to move it slightly over to the side and then bring you like so
the thing is I want much smoke because
I know my wind and turbulence is gonna
push it this way. So that's what I'm
trying to actually have. The other thing is before
maintenance a domain, I need to really call it out. So if I press S and X, pull it out like so. Now what I tend to
do, and if DLNA is I'll press Control light, all transforms, and then right-click set
origin to geometry. Now let's create this
actually into a domain. So I'm going to do again
is come over to fluid. I'm going to put this
on domain like so. Now let's first of
all pop this on gas. Let's put this on 64. I don't think we'll
need to go to a 128. You can do that again. All you've got to
do is bake it out and you'll get just much, much better smoke if
you actually do that. So just bear that in mind. All right, so every
thousand just going down now the
options and look in, I want the domain
to be on adaptive. They actually really helps
when the smoked guide, if the domain is getting bigger, that's where it actually does. It also seems to speed up the actual process and
make the smoke look bad. I don't know how that works. That's the way it works. What I'm going to do
though, is I'm going to actually increase
the margin of error. So if I increase this,
it's called margin. And what it means is
this moves out further. If you don't increase this, the smoke really, really bumps up to it and we
really don't want that. So we wanted to
move a lot further away and give a
lot bigger margin. Not sure what this is based in. It could be based in pixels
are not really sure, but you might need
to increase this to get it to move
away even further. Let's move down
then the 12 things you do need tectonic is
dissolved and noise. Let's open up, dissolve. Now the thing is
about dissolves. If you hover over it, you will see it terms out
quickly in the smoke dissolves. And that's basically
where it does. A higher number determines how much more faster the
smoke actually dissolving. And the reason you want
that is because you don't want this to just
fill up with smoke. You wanted to actually come and taper off and slowly dissolve. And that's what we're
basically looking for. Alright, so let's
open up our noise. And the noise again is, how much is noise
within the smoker? In other words, is it puffing
out or something like that, that you would get on a kind
of stylized chimney ARM, something like a train
or something like that. You might want it like that. And this is the
timescale you can see of how many hours puffing out and
the actual strength of it. If you want to do something like that, turn that on for us. We just turn it on just to give a slight recall in
our actual smoke. And now it wants to
do is want to come down and we want to set this, of course to a 100, like so then what
we're gonna do, we're gonna change this
again from replay to fall. And then I'm gonna come
down and I'm going to leave everything the same. I'm just going to
bake all that again. It's gonna take a
little bit of time. And I think that
smoke simulation is take a lot longer than, than the voltage simulations. I don't know why that
is but the same. So just bear that in mind. If you if you put me on 928
or something like that. Alright, so I'm going to
speed up this process now and on the back
when it's done. Welcome back, and it's
actually finished. So let's give it a try. So what we'll do is we'll
come to our layout. And I'm hoping it's set to 0 because there wasn't
anything happening. And if the press
the spacebar now let's have a look at how all
smokers actually working. You can say at the moment isn't actually rising
as much as I wanted to. The one thing you'll
find with a smoke is it doesn't matter. If you try and
copy the same kind of things you've actually got, they'll always end-all very
different from each other. It all depends on you when you turbulence and everything else, that is where it's
all dependent on. What I'm going to
do now is I'm going to come back on the next lesson. We're gonna mess
around with a few of these options and
I'll tell you what they do and try and actually
get this going correctly. All right, everyone,
so I hope you enjoyed that and we'll get it looking. Really, really great smoke and I'll see you in the
next one. Thanks a lot.
86. Smoke Simulation Creating Smoke Shader: Welcome back and runs blend the three the ultimate
medieval seeing calls. Now I've come back and if
you actually press Play, you'll see here that
nothing's actually happening. The reason is for that
because I actually went to I actually messed around
with a few of the options, seeing if I could get
the smoked a lot right. If you have to do that, the
problem is you've paid out. In other words, this
has been saved to an actual cash the moment you
save it out and reload it. Not cash doesn't work anymore. So basically what you need
to do is you need to go in free and then you
need to rebate out. Now we'll show you what will
actually do is we will come in and we'll just for now
put this on 32 or even 16. Let's just put it on 16th now. And then what we're
gonna do is we want to reduce that right now, that if I take the salary
should look a lot better. Now the other thing is I want to also come to the dissolve. I want to put this on something like 25 or something like that. And what this is gonna do
then it's going to make the smoke linger around
for much longer. I'm also going to click off
this slow because what that does is it means that
in the beginning, the smoke will disappear much, much faster and linger around much longer
in the long run. I'm also going to do that. That will then do is I'm
gonna breed bake out. You can see this is like
the racist now, really, really fast because
obviously we're juiced the actual in detail of all
actual smoke down to 16. Let this finish out. Let's see what it looks like if it's going a little bit
better than where it walls. And then what we'll
do is we'll go in and actually give this a material. The reason we want to
give it a materials, because at the moment if you
try and render the sound, or you're gonna see
here is a white bowl. And that's not what
we wanted to say. We need to actually fixed up. There we go. It's
actually finished. So let's see what
this looks like. Now you can see as we play it, it lingers a lot, lot
round as you can say, and it's looking
Much, much better. The smoke, the problem is that you can see we do
have a few problems. First of all, I can't see how far this smoke has
actually going. The reason for that is because I've not actually
gotten material. Let's solve that out first. And then we can actually say,
if I come to render view, all I'm gonna say is a bowl. That's not what I want. Let's
come to our material view. Let's then go into our shading. Let this load shading. There we go, unless they
income to our domain. Let's give it a new material
and we'll call it smoke. Like so. And then what I'm
going to do now, I'm going to come in and
delete my principled not going to need though,
let's come over them. We should be pretty good with
nodes now at this point. So let's hover over it, shift a and we're going to bring one and that's
called an attribute. And basically this is going to tell blender that
they attribute of this smoke is gonna
be determined by the density of the smoke.
That's exactly what I'm doing. So I'm going to do, I'm going
to call them to the name. I'm going to write in density, like so and it
doesn't have to be capitalized or
anything like that. All right, now next
I wanted to do is bring in a multiply. So let's do a search. Like so. And let's pull the plug, the fact of the mouth, sorry, of the attribute
into the bottom of the map. And let's pop this value on 50. Again, we things like this, just create them as I'm doing. And then again, you can
go into the end and actually mess around with
them to your heart's content. Alright, now let's
say grab this map, press shift D, and let's just duplicate it among and do it. And they're gonna get
the volume of this and plug it into
the top of here, turning the value
of this down 2.3. All right, Now for
the Maggi bit, how do we tell blended
about the density? What we need to
bring in is an RGB. We're going to
press Shift a RGB. Like sewing, you'll end up
with something like this. Why do you want to do then
is just turn it down so we can end up with a smoke
darker or lighter. So I'm gonna start with
it's something like this. This will basically
determine how dark the Smokies
where it's thick, it an outlier is where
it's actually likes it. So this is the actual pathway
can mess around with. You can actually put a frame around it or something like
that if you wanted to. All right, so now
we need the volumes cancel and a volume
absorption because they are what's going
to determine how the lie actually
passes through Osmo. What we'll do is shift a volume, a volume, sketch it, and then also shift a. And we want a search
volume absorption. And this volume absorption
is how you would actually do fog as well if you want to foggy scene or
something like that. Now let's grab the
value of this, multiply and plug it into
the density of this. And then what we're going to
do is unplug the color in. So you can see now is based
on the density and the color, and that's the volume scattered. That's exactly what
I was working. And now we're going to do is
we're gonna plug this value into the actual density
of volume absorption. And again, it's based on
color that we've picked. Now we need to join
these two together. So let's press Shift a. And we're going to add shaded because we don't want
to mix the shaders, we just wanted to add
them both together. So let's command. Now both the shaders
together and finally then we need to give it
a mixed shaded. I'm not sure actually wipe
all this mix shader on. Maybe I don't need
you looking at this, but I'm like, oh yes, I
don't know why it is. It's basically a
mix shader in here because I basically did
the fire and the ball, and that's why I've
got a mix shader. I don't actually think
I need that mixture. This one we're going to do
is I'm just going to plug this straight into
my volume. Now. Let's actually say,
well that looks like so you can say nothing
at the moment. Let's come now to, There you go. Now you can see exactly what
that's going to look like. There you go. That is exactly
what is going to look like. You can see it looks
a lot more realistic. Now let's come in and what
we'll do is we'll go back to our layout and we'll put
this on Render View. And then one way to do is
I'm going to actually put this at 650 or
something like that. What I want to
actually do is I'm just saying how far
it's going over. I'm seeing our profit is. Remember that this
is being done on 16. So it's very, very low. If I put this at
us point on one. Yeah, That's what
exactly I'm looking at. How is it basically
starts and out seeing the actual limiter
in that? No, it's not. Then what I want to do is
I want to pull it over here and see how far it's gone. You can say it's not
going very far at all, so we need to do something
about them online to do now is I'm gonna come down
and went to free all. And what I'm going
to do is now looking at the buoyancy density. And he, These are the two
things I'm actually looking at. If you look up, hover
over the boys density, it says buoyant false
based on smoke density, higher value results in
faster rising smoke. So let's try plotting
that on three. The moments do is
I'm going to bake it out again because
we've got this on 16. It's really handy now
that we can bake it out. Really, really fast. Albee is still over 800 frames. We could reduce the
amount of frames. I think I'll do that next just to actually see what
the smoke is gonna look like in the beginning
and then bake it out. So that's what we're
really trying to do. So let us finish baking out. It's still pretty
faster than the moment. Yours might be a bit slower just depending on what machine
is actually running. I'm hoping now the smoke comes up to here and it's
actually going out. It's a shame that we can't
do this in real time, but he never works out the same. So you can see here, this
is what it's actually done. So below, you can see not
a lot happening there. Let's mess around then. I'm going to do now
is I'm just gonna change a few of these options. So first of all, let's
put the timescale onto. This is going to make
the smoke actually come out a lot faster
than what we had it. I'm actually gonna put
this on material just so I can see what I'm
doing at the moment today is I'm going
to scroll down a little bit because I have
just been playing about with it actually off record and swelling to do
is I'm gonna put the buoyancy density
to the heat to two. And what we're gonna
do is I'm gonna make the smoke men disappear. A five on. I'm also going to turn on, so five and also turn on slow. And then we're going to do
is I'm going to put this to 300 and just to actually
make it simulate plaster. And then I'm just
going to bake all and let's see what
that looks like. Let's say what this
looks like at 300. And then if it's okay, we
can send you up to 800. And then finally,
if that's okay, then we can actually turn
off the actual resolutions. We're going to go
in those stages just to make sure smokes, okay. It's very, very hard things to work with smoke, to be honest. All right, so let's
turn this up. Let's have a look at our render. And you can see that now
by bringing this back, That's looking a lot
better actually, that's exactly what
I'm looking for. Another wanted to link around, you'll see it goes
let the optic, what I'm gonna do now is just
turn this up to 800. Free. I'm gonna read, bake
them once that's free. Free, all, come on. There we go. Bacon. Let's see what happens at 800. It might not disappear
fast enough and actually come up to
the edge of my domain. That's not something
I really want. So I need to just make
sure that this is gonna be okay before I
actually continue. And you can see though, because we tend to
down to 16 though, it really doesn't
take a long time, so that's really great. Now I'm thinking whether
when I've done this, whether I told him to 64120 K, because once you've actually
baked out already begun. So the actual render times don't really add
up to that much. Nearly done. Alright, so let's see
what this looks like. And there we go. Let's bring it all the way up. You can see it's coming
out and disappear. And I wonder if I'm putting on this is just gonna
be black I think. And then press Space. I love a good idea where
it's gonna look like. So you can say it looks
like it's blowing in, the wind is disappearing. And I think actually
I'm happy with that. All right, let's
put it onto here. I'm going to have to look it up. Press Spacebar. Very hard to see actually when you've not rendered out what
it's gonna look like. Now let me show you the
next bit then before we actually, in fact, no, I won't while do is while
I'm off off recording, I will go and you did
the same as well. So let's frail. Well, I'm going to do is
I'm going to let it free. Then free. All. Come on. There we go. Now won't went to do is I'm
going to put mine on 128. I recommend you
try 64 with yours. And I'm gonna actually bake
all this out while I'm off. And then what we'll do
is walk on back and I'll show you exactly how that works. All right, everyone.
So I hope you enjoyed that and I'll see
you in the next one. Thanks a lot.
87. Our First Scene Render: Welcome back everyone
to blend the three, the ultimate medieval
seeing calls. And this is how
my Render button. Now, now the thing
is about this, if you come over here, I'll just show you
I actually spoke to 64 because I started
running around 1288. Literally would've talked two hours or something like that. And I just weren't prepared
to actually do that. A couple of things I actually changed our mind is I'll put the timescale to just make sure you wanted
to put that on there. The buoyancy and heat to
chew on each of those, uh, certainly dissolve to
five and put it on slow. Nothing else really a
changed apart from, I opt the wind to five, and they also hoped the
turbulence to five. And then I just baked
out at 60 volt. Now there are a couple of other things that you need to know. First of all, if I
put this on near 0, you will be able to see
probably just didn't. There are actual emitter. And that's not something
we want to say. I'm Festival going to go in and I'm just going to
call the submitter. Among vegetarians,
I'm actually going to hide that if I
hide my domain, like so, I should
be able to then see my mitzvah in today's want
to come over to my shaders. I'm going to zoom in
with a double bond, and I'm just going
to simply give it a real simple actual shader. So all I'm going to do
is I'm just going to hopefully bringing a surface. So shift a search
and let's bring in a trunk spring, BSD F. And let's plug that into our actual surface
and now disappears. So that's all you need to do. You can actually get rid of the, the, the principals as well. Alright, so now we've done that. Let's bring back
our actual domain. So bringing by EDB domain. And there you go. Now
you'll see the smoke that they had and now the way, and that's exactly what we want. Now the other thing
you can do is if we go to layout and let's just pull this smoker,
something like 550. That's really in the flow. What you can actually
do now as you can come to your shaded, Let's say double-tap there just so we don't see all MIT to that. Now what you can do is
if we come over and click on our domain,
double-tap the right now. Now if you want your
smoke basically thicker, all lighter, you come over
to where this multiplies. And if you put this on
wall, for instance, you'll end up with they're wispy smoke, something like that. And if you put it online,
150 or something, you'll end up with much,
much thicker smoke. Let's also mess around with
the actual value of this. If I turn the salt is
going to become much, much darker, a lighter. You can see we've got control over the
darkness of all smoke. And also if we turn this off, you'll see it becomes much, much thicker, turn into soap. And then you can actually
turn this down and bring you back down to the color
you want to look in. I think that actually
fits the same. Much, much better. It's much, much darker underneath as
you can see as it comes out. A mind just let us have a look, turn that down just a little
bit. Something like that. I think I'm much happier with. Alright, so that's me and
I'm happy with my smoke. I'm just going to go back to a layout among gonna do is I'm just going to play
it through one small, I'm just going to come in and just play it through
very, very quickly. And it's a shame
that we can't really see this in real-time because I don't think it actually
works on eBay. I don't think it's
set up for eBay. We mine belt see something. Let's see if we can
actually see something. So if I press plague, yeah, Again, unfortunately is smoke simulation and not
very good in real time. And that is one of the
major drawbacks of them. I think I'm happy with how this is done at Walmart you're
looking for is over the top, how far is it actually leave in a way from my actual building? Is it thick and often
things like that, and I think I'm happy with them. All right, so that
then leaves us back to coming back to our modeling
precedent top tabletop, unless spray onto mix Ariel. And let's just take stock of everything that
we've got right now. What you want to do is you
basically wanted to go in and making sure that
you're happy with everything in the scene
before we carry on. And we're also making sure that we can't see
any of these parts. You can see here that I've
got everything upon the here. And now what I'm
going to do is I'm going to grab all of my pulse. I'm also going to make sure
that I have actually pulled a and this is basically
the tide and upstage. So where is this? I think it's in the pumpkin. Yeah, there is. It's in there. We don't really want that. So I'm going to do is
I'm going to right-click and click New. And then we're gonna pull
that out and put it in there. I'm going to call it
smoke simulation. Then what I'm going to do
now and which grandma cube, which should be this one here. I'm going to drop that
in my smoke simulation and come down prevalence via pulled all the way and also dropped out in
the smoke simulation. And now I can close the pumpkin. Intima cube and I'll
call it smoke domain. Then I'll come to my sphere
and I'll call it smoke. Mix it. Like so. Now I can
close all that up and I know that is all
really, really tidy. Now everything's
working well wherever reference here that hasn't
gotten into an animal. So we can just delete
that out of the way. Everything else should
have something in it. Alright, so the last
thing I want to do then is if a press one, I wanted to grab all of these and basically bring them
all close together. So I'm just going
to bring them down, pull them all in line
with each other, like so. I'm going to leave
this obviously that's part of my Walter. And then I went to
grab these now. Drag them right over
here, right over here. Like so because I wanted to
take a render of this bar, really don't want
these actually in the same way that we do that is I'm going to
show you in a minute. So now we're gonna do
is I'm going to put this back on object mode. And then what I'm going to
do is I'm going to bring in a camera and just show you
how to do a quick render. Sorry I've repressed. So shift. Let's bring in a camera like so. And you can see our camera
appears that now if, let's say I want it to
be viewed round here, rather than trying to
move this camera out. If I just press control alt and 0 not then he's gonna put the camera in the
view that I wanted. Now I'm just going to zoom in. I want to press the N. I'm gonna come down to
where it says View. And then one went to do is just click this camera to view. And now I can just actually
move and actually place my camera where I wanted
to take a screenshot. Now you can also press Control and Shift and
the middle mouse button. And then you can zoom in a lot, lot slower like so. I think I'm going to take
a view of something. So have a look. Something like let's get the actual windmill
into a nice place. Something like this, a thing
we can just see the smoke. I'll bend the upper little
bit, something like that. And now you need to do is decide where you actually
want the smoke to be. I think something like 400 should do it,
something like that. And then I'll go
back to my camera, back to modelling
will take you back to the camera and then just
take off the camera to view. Now you can actually
move freely around. Now you will say
that we probably, if I go back to the camera, I can probably going to
make out these in hand. And this is not
something I want. If I come to my camera, you'll see that we have
Eclipse stop and Eclipse. And now if I put
this clip hand on 0, you'll say everything
dissipates. And the reason for that is
because it's clipping it at 0. In other words, it's limited the amount of view that
the camera to command. So if I turn this off,
you'll see acetone. You hope everything
comes back into shop except these over here. So I basically want
those out of shots. So you can see at the
moment, 149 meters, Let's bring it back till
all of them disappear. Let's put it on a 100 meters. That should be fine actually. And now we should be
able to take a render of this without anything
else in the shot. Now the one thing
is I do want to move it back a little
bit because I don't like when we take a shot and you've got half the
trees missing out of it, something like that.
I'll tend to do. You've just moved my camera bulb to get everything in the shell. So I'm going to press
Control Shift and just assume they can slightly level efforts note
to get a really, really beautiful shop
or something like that. Then what I'll do is I'll
click this camera to you off. I want to just click
it on just to see what my extra shot is gonna
look like and rendered view. And there you go,
you can see that is exactly where it's
going to look like. You can say
everything's growing. The pumpkins are in the
background and all of that stuff. Now we've done that. I recommend always
put an EVA onto object mode or even
onto wireframe. I recommend also then climb over eruptions where
it says cycles. And you'll say at the
moment, we have some plan. You can see in render
samples it's at 500. Viewport samples is 1024, which it should be much
lower than this anyway, because every time you click this random body's
trying to sum play out. So 1024, the higher that says, the longer it's going to take, I'm just going to do a
quick render at 500. Yours might take a
fair amount of time. I've got a very
fast machine here. So I'll just put this down
something like 20 If you want an idea once you've
actually finished, because we've actually
got all the noise on, it will actually
denoise it in the end. Let's now go and
render this out. So Render Image. And you'll say it takes a
while before it starts. And now the SEM plan, as you can see here, starts going up. And you can see my
machine is pretty fast. Hopefully you all machine
won't be too slow. You can see smoke over here. You can see our
pumpkins just here. You can see a bit of, Hey, here, you can see that
we've probably missed some hay actually
sticking through here. So we're probably just
need to solve out because it doesn't look
very good like that. So let's solve that out. And the thing is what you're actually trying
to achieve areas, you just trying to get a view of how it's
actually go into log. And that's the main thing
you're trying to do. I can see that
probably my leaves, it probably needs to
come a bit darker. I'm probably gonna go and,
and actually do that. You might want to
make the ground also a little bit
darker on these, you can see probably
the gamma and this is basically the
final checks before we actually render
it out completely. So you can see it finishes now. And there we go. That's what
we're actually left with. And we can actually
zoom in now and say that it's a
pretty nice render. We've got no fireflies as
those little particles ready Finland on them is because it basically
Dean noise down. All right, so one
thing I'm not forget about is this chimney. I can see these are
pretty sharp basically, the whole of the image
looks really good. We've got to get rid of
these doctrinal please, and leaves and maybe
darken the ground here. So these are all things that
we're going to work on in the next lesson just to
get this looking right. All right everyone, so I hope you enjoyed that and I'll
see you in the next one. Thanks a lot.
88. Refining the Scene: Welcome back in Rawlins
blend the three, the ultimate medieval sinkholes and this is where
we left it off. So like I said, I didn't
want to leave you just with our showing you how to actually fix all
of these things. So while I'm going to do is
I'm gonna put it on material. I'm gonna make sure that
my camera to view is off. And then want to do
is I wanted to come into this part first. I'm not very happy with with how sharp this actual
chimney chalk look. So let's see if I can actually dissolve a little bit
more safe and grab it. Will it grab the whole chimney? Yes, it will. So what I'm going to do
is I'm just going to grab all of these and it's not a time at this time to
actually worry too much. Let me just load
up too much about how many polygons
and things like that because these are clean now down to the final render. So let's actually zoom
out minute and let us come in and go round, grabbing all of these and turn anything off if it's slowing
your machine down too much. Like so. And then moment, I'm going to press
Control J and just those are beveled those off a
little bit more lax low, just around them
off a little bit. I can also save the
tops off here as well, is weight too sharp. So I'm gonna grab each of those. Actually, I think what it is, it wasn't the roundness of that. I think it's the tops of them. Let me just have a look and
take those off. There we go. Let's scrub the tops of them. Like so. Press Control D. I'm just going to
leveled off like so. And then one winner
is I'm just going to pull the segments on to nothing that's going to look much, much
better like that. All right, so now let's
come to our actual ground. So our ground plane, and we need to go to our
actual shading panel. And we need to make sure we
are happy with the color. So the moment we can see, we need to be on ground lines. So I went to double-tap the a. We're already on our render
view, so that's good. While one series I want to
commend, darken these up. You can say the moment, this is a really easy
way to see this. So this is the area
of grass and wrong. This is this wherever certainly. So you'll see it goes really, really dark like that. Now you might wonder,
feels like that. I don't think I want
mine quite line up. So one way to do is I'm going
to Let's try that again. Bowman much, much
gentler with it. So I'm just going to turn it up, make it a little
bit darker and you can see it's really
starting to come now. And let's go not to the mortar. Think on mode should
be absolutely fine. So let's go to the next one. And I'm hoping that
this Gamma here, we'll turn this one
or this one here, as you can see, let's see if
we start turning this all. Can we make this darker as well? Something like that I think
looks much, much better. Still might be a
little bit too dark. I'm going to just let
me turn it down by one. Yeah, that's a big greener. And then I'll come
to the other one. And let's just make sure
we'll turn this one down. Something like that. Now let's calm to these leaves while we're
in our shading panel. So I'm just going to come
around to these leaves, just make them a little bit
more green as we can say, these are the actual leaves. Let's find my pumpkin leaves. So I need to do is I need to
call them under my pumpkin. So let's have a look. Pumpkins here. We want pumpkin leaves. There we go. So this should be
the pumpkin leaves. Let's let us actually
have a look. I'm wondering if this
is our pumpkin leaves. There's a pumpkin leaves. So let's try and turn off this to around ten and save the heck. Yes, that's the one. So let's press Control Z and go back. And then we're going to
do is I'm just going to turn the top one and maybe try to turn
the saturation down. Just a little bit, something
like that just to make them fit a little bit better
in and I think they do. And now let's come to our
hey here because we can say, I can actually go
into material Modi or an actually see
this. So that's fine. I'll come to my height. I'm going to press
dark, just do see you. I can go into the right place. And then while we're
in today, I can still do this in the
shading panel anyway, I'll come to my
political system. There is a problem
with the, hey, I need to come
down and cultural, hopefully I shouldn't
be on call and said, No, I'm on move. Let's whereas my political
Connect click on this thing. I'm press T and bring that out. Come down to coat and then
just cut these down like so. Just make sure that you're
not coin actually in there. I'm just going to
come down now to the side, caught them all away. Like so I'm also going to do it this side
of course as well because of the moment will
belt see all of those, Let's just cut them down. You can say recall few more
years, let's call them away. Just make sure you've
not got any way. You can say I've
called a Theo way down there but you won't
be able to see them. All right, Something like that. Now let's put this
back on object mode. And finally then we'll
go back to modeling. One way to do is I'm going
to press top double-tap. And now we're going to
give that a render again, again, put it onto object
mode before you render out, come over now say
the word count, so File and Save
and then render, and let's render image. Let's see what that
actually looks like. Again, you can put
yours down pretty low. I'm going to have mine on 500. And now you can say, Yes, I'm happy with that. It's really, this ground is
much better as you can see. It's looking at tons, but
we can't see that hey, through the actual chimney, as you can see, is looking
much, much softer now. It's less hard and the actual greenery over here fits the same
much, much better. You can say that all graphs
and things like that, or hanging over the side
exactly as you want them. We don't want to also say it's a little
bit of soil on here, but I'm still happy
with how that looks. All right. I don't even need
to let this finish out. I'm very, very happy with that. Now what I tend to
do is I will come to my layout and I will do
it from here basically. So I'll put it onto a 100. And when I go back to
my camera view now, what I'm going to do is
I'm going to press N to open up that panel view. And let's come around
to the other side. So it's N to take an image of all the sides just to make
sure I'm happy with them. So I'm going to
zoom out like so. And I'm gonna go to
Render, Render Image. Let it render out, and let's
see what this looks like. I'm also looking at this
point at the actual lighting. I'm looking to see if
there is no flying ear. Can we make out the acts and things like that?
And yes, we can. I'm looking around here to make sure that I'm happy with it. Probably there would
be less grass around it because you won't probably
be walking through here. You might want to take
that into account. I'm not actually going
to delete our Anything. I'm really happy with
this as two now, remember is while
we can't actually see the wind or anything, because we're not
rendering out as a video. And I'm happy with
just being able to see this word only here. I'm very happy with that. The trees that are
looking very good, there is not any bits that
really needs to go away. Finally, then let's
come around to the last view like
this before we do just all just RM closer views. This is why I always go through. So let's go to
Render, Render Image. Let it low dope. You can say
this is a bit dark view. Do you want it so dark
at the back or a happy, I think I might be a thing this looks actually very natural. Again, I'm very happy with this. I don't need to do anything. I want to close it down
and you can see how quickly you can work through
when she started doing this. Now I'm going to do a bit of
a top view to have a low. I'm also going to move
this up to probably 650. So we've got most of
this stuff grown. And then I'm gonna go to Render, Render envelope, making sure
I'm happy with the colors, making sure I'm happy
with the walkway and all of the Walter. And I think actually this nu is really, really nice actually. So I'm thinking in my head, when I come to actually render this out,
the actual video, I'm probably going to do it
a bit higher than one behind it rather than lower because
we wanted to a view of it. Alright, so I'm happy with that. Now we've pretty much
done all the views of it. So now I'm going to do is I'm
just going to come in and take an image of
the pumpkin patch. So again, Render, Render Image. I'm just making sure
that I'm happy with it. There we go. Again, unless I know that there's some
leaves thick interior, so you might want
to go in and just delete those leaves
out of the way. But you can see the rest of it. It looks really, really
organic and that's the point. And we actually looking for, with this Walter there
and things like that. Alright, so I'm gonna
actually close that. Then I'm going to
look one more view. And it's probably in fact we'll just do a couple more signals. We've got time. So I'm
just going to come in and zoom in on the growing plants. So again, Render, Render Image. And then finally we'll look at the bottom and see
what that looks like. This is a grind plants
I want to look at, I want to make sure
that they are looking very different from each other, which they all, I'm
looking at where the grasses growing up to
there and things like that. I'm really, really
happy with that I look great in any sort of
game or an event. So now finally, let's come up. You can also grab the bond like for instance
for US adult bone, and that will then
get the camera, they won't looking forward, the bond is just to get
a nice image to see if I can actually see
any of the inside. You might want to go in like yours over there is my point. So I'm gonna take
an image like that. It might not be very well lit. And in a sense, we've
got the song round by AF showed you how to move your HDRI round and things like that. So I'm gonna put it here. I'm just gonna give
it a quick render. And let's see what
that looks like. And as I've said, it's
a bit dark in there. You might want to go and
lighten that up a little bit. I think I think I'm really
happy with that on the water. Looks great. All right, so now
let's close that down. What we'll do on
the last lesson, which should be the final one before closing this
course is we'll actually come in and I'll show you how to sell a camera where
it actually goes around the scene and takes
a real nice they're doing 60 degree video of
your actual scene. All right, everyone,
so I hope you enjoyed that and I'll see you in
the next one. Thanks a lot.
89. Setting up a Turntable Camera: Welcome back everyone
to blend the three, the ultimate medieval sin cos, and we nearly that, we're nearly finished the ultimate
medieval seeing costs. So what I'm gonna do now
is I'm just going to zoom my camera out to
something like here. I'm going to turn off
my camera to view. And among range
there is basically the center of my scene. I'm now going to move my
scene or anything like that. I'm going to do is I'm going
to try and find the center, which is probably
going to be well, if I go over the top, I
can see it's probably around this posted
somewhere around there. So I'm just going to grab this pose press Shift
as cosets are selected. And then one way to
do now I'm going to bring in a circle. So shift a curve, you definitely want
it to be a curve. Bring in a circle, make the circle bigger, and I'll show you why you
want to make this occur. So I'm gonna bring this
out and you can see pretty much that it's leveled. You can see it's
pretty level this way, this way and this
way. So that's great. Come over to your curve. Then if you scroll down, you've got one that
says path animation. The number of friends want
to set this to is 800. And you'll say, Hey,
but while we're doing this fall, I'm gonna show you. So now we're gonna do is you're going to
grab your camera. So I'm just going to take
that off so I can say, well, I'm doing close. The old grabbed my camera. There we go. And I'm gonna put my camera to a part of my curve. I'm going to do is I'm
going to grab my camera, Grumbacher, which shifts
select, press Control pay. And you're going to follow path. And then you'll see a
camera comes to here. So now you want to come in. You want to grab this point
Shift S because it's just selected top grubby
comma Shift S, selection to cursor, keep offset and that's going
to pop the camera right. Now. We don't have a problem. If we don't talk camera,
we're looking at Nelson, and that's not what
we actually want. We actually want to
look at the center of our actual scene. Again, I'm gonna press seven. You find yours kind
of center point. And I'm going to use this post again when I click on my post, Shift S is selected, and then I'm going
to press Shift. I am going to bring in an actual empty plain
axis and bring it in. And what we're going
to do with that, We're gonna point
our camera eyes. So let's come to our camera. We're gonna go to all
constraints panel, which is this object constraint. And we want to track two if you come down
and click track. So then what you want to
do is you want to click where the target is and
just type in empty. We should only have one. So this empty and you'll
notice straightaway then our camera actually points
straight at all empty. Now if we put this
back to again, we press Spacebar, go up, cameras actually
move him around. And what it will do is it will
move over the 800 frames. And at frame 800, it will actually
pay it back here. So if I put this there and I press 0 now to go
into my camera view, you'll say, Hey, this is
not a very good view. Yep. And the reason is because
we need to move up or circle and we've
got our empty move. So if I bring my circle OK, now we can actually move our camera and that's
exactly what we want. But the thing is, it's not view correctly or
not far enough out. So all you need to do is make
a circle bigger. Like so. And then again, polio, OK. Like so. And you've also got the EMT to also pull it up to
where you want to. So something like
that for instance. Then what you want to do is
you want to press space bar will actually put it
into wireframe mode. Press baseball. Night can say this
is actually always going to go around
your actual scene. Now what you're trying to
do when you do this is you looking for any
pulse of the same, that a disappearing out
past the actual frame. So you can see it nearly disappeared out of the
frame, but not quite. You can see we'd never enough that we just need
to pull it out, probably just a little bit. So I'm gonna grab
my circle again, press the S bar. Like so. There we go, below. And everything is pretty much in frame that I want to do is I'm just going to take
a quick image. So something like that just to see it fall of my trees and I'll just
print them random view. Now. There you go. That's the deal
you're going to get. Now I'm gonna print it 300. This is a view I'm gonna get. I'm trying to make sure that
everything is in the same. I'm happy with the
actual heights of it. I think I'm really happy. I think if I grabbed my empty again and pull it
down a bit or ROCC, I'm not gonna be any
happier with that, is that I'm going to
grab my circle as well and pull that up a bit just to tilt my camera pillow. And then grab my empty again, my camera down a little bit. And now again, I'm
just going to go through making sure that
all actually fits in. So let's presume
wireframe on small, print another star and
just spin it around. And what I'm looking for,
it's just I don't want anything poking out of those. You can see, hey, look, it's
very, very close to that. So if we pick up our him
to just a little bit, now we can test it again. Again, you can see it's
a little bit here, so let's pull it out
just a tiny bit. So just a tiny bit. So I'm just going to go round. And now if they were
actually perfect, I'm now thinking, right, Is this where I
want to start it? You need to go to frame one. And you just need to save. That's where you want
to start. If you don't, you just rotate
your circle around. Z, rotates it wherever
you wanted to start it. Because the camera's going
to move with it anyway. Like so as you can see, if I want to stop from halo
and it'll now stop from here. It's just wherever
you want to put it. Now. I want, I think mine to stop from probably here I think is
a really, really nice view. Something from that it should
go all the way round now. Back to the stall which it does. All right, so let's put
it on frame one. Like so. And then what I should
do now is press I almost circle basically
location and rotation. And then while I'm going
to do now is I'm going to basically spin it
around by 90 degrees. I'm going to come to
wherever 800, remember. So two hundred, four hundred and six
hundred eight hundred. So let's go to 101. And you can see the animation
is already going away. But what I like to do is alive press location or rotation. And then let's come to 400. And then I location
and rotation, 600, location rotation, and finally 800,
location and rotation. And then what I'm
gonna do is grab the mole interpolation mode. I'm going to put it onto linear like so it
shouldn't do that already, but just in case it doesn't. And now let us go around. There you go. That's why we've done over a 100 frames
while you've got to remember is because if
it's gonna be pretty blue, if you do it unless frame, so you could do it
over 200 frames. But you're gonna end up with
a pretty blurred because it's going to be moving
too fast is the problem. There's a very fine line
between doing it over, let's say 1500 frames, which is probably
a waste of time. I know over 800 frames, which is probably
going to look good. And then you can
probably speed you open. Then it's going to
take a fair amount of time to actually render out. Now let's set pulls out unless go through this option here. At the moment, I've
got mindset on there, 500 samples, 500 samples. If I render this out, this is where you need
to really work out. So Render Image. You can say that if I
render this out and I let this actually play out, it should come up at 4547
seconds, something like that. Let's see if it adults. Sometimes a bit
slower depends what seniors scene we can
see where it frame 159. Now bearing in mind
because we've set some options in the blend of cycles that splits and
for rebuilding the scene, it will actually
speed up overtime. The only by probably
about five seconds is not a lot of
difference in it, but those five seconds
over each frame do make a fair bit
of difference. Now you can see, fold me that even 500 frames a
little bit too high, it's going to take way too long. It's going to be the literally probably 1216
hours of his point. And that's not something
I really want. So what I'm gonna do is I'm
going to close it down. I'm gonna see if I
can get a good image. 200 frames. Let's
try 200 frames. Challenges, samples,
sorry, come again and render out and see how
long this text so 200, let's say how long it takes, as long as it's
between 3040 seconds. That's what I'm looking
for because I know. Then getting down to that,
at the end of the day, I'm going to have a
pretty decent render. I'm just going to let this
render out just to 100. I've got a lot of other things run and things
like that as well. Sorry, it's probably
going to be much, much quicker when I've
closed those things down, which I always do before. Alright, so 200 frames. Let's finish, talk
roughly 30 seconds. Now I need to zoom
in and make sure I'm not saying all kinda see the details of these
things because that's what we basically
trying to wake through. Does the actual smoke real
good From with 200 frames? I think that 200 frames for me is pretty good and I'm
very happy with it. Now I can do is I
can close that down. Save out again. So file save. And let's now come over
to the right-hand side. What are you going to do
is you're going to come down to where now this one here, this one here is
basically where you actually send it out. I'm going to send
my now Festival, 1920 by 1080, pretty much where you can
load that on YouTube. And it's easy to bring that into a blender to actually
create the video. If you change this and
you make it a square, much more charter to deal with. So just bear that in mind. Next of all, frame rate, at the moment we've
got it at 24 frames per second if you turn it. So obviously you're going
to have more friends, but it's gonna take a ton
longer to actually do that. So let us say a prayer on 60. It's gonna make a huge
difference in how long it actually takes to
actually render that out. So I don't really want
to actually change that. I'm going to actually put it
on 23.99, wasn't on 2424. I'm gonna leave it
on that anyway. Let's go into the
temporary change this and what you want to
do is make a new file. Now, what I'm going to do is I want to make a new desktop file. I'll call it new
and I'll call it course render,
something like that. Double-tap it and
I'll call it farm, medieval farm render. Except, and now basically every single frame
is going to be called many evil farm render O1, O2, something like that. Now what you want to
do is you only need the RGB if you're gonna
give this a background. If you know, gonna give
this a background, turning off to RGB, it will speed up the process. Next you want to
call it a depth. I'm not going to put this on 168 takes a lot longer if you're
going to pull that arm. And finally, the
compression of the image. If you put the soap, It's also going to take a ton longer. It's really up to you how good quality you want the image. And I doubt many people
are gonna see it. A difference between 816 frames. That's basically everything. They only other thing that
you really want to make sure is that you've
got it set on PNG. You do not want to
render out as a video. And the reason for that
is because if it crashes, you'll stove, you can't
do anything about it. You're going to be trying
to render out again, as there is a high probability
of this actually crushing. So just make sure you don't
because you might come back tomorrow morning
or something and it's crashed on frame 20. Then then you've gotta
go into all again. Now I can come back
tomorrow Monday just crashed on frame
20 and it's a PNG. You can just start from training 21 and I'm rendering out. So just remember to
take that into account. You've got also
makes sure that it's going from focusing for a
moment to frame a Andhra. I've gone out before I set
this at frame foreign didn't have come back and it's like
I missed out off of it. So just make sure everything is correct before you
hit not random bone. And now I'm going to do is
I'm going to end it here, leave the leave this recording because
what I'm going to do then is actually speedy open. You'll see it actually
rendering out in real-time. All right, everyone,
so I'll be back after this and then we'll
conclude the course. The next lesson. All right everyone. I hope you enjoyed that and I'll see you in the next
one. Thanks a lot.
90. Outro & Critiquing our Own Work: Welcome back everyone.
And that brings us to the end of my blended three, the ultimate medieval
seeing calls. And it's been some journey. We had gone through
most of the blend three systems you're going to need for future dioramas and renders. But in the end, the
most important thing is to really create
your own work. And that means to look
at both the pros and the cons of your 3D model
or rendered images. We hold that said,
let's take a look at my own final render and go through my own process of analyzing and
critiquing my own work. First of all, the
starting point on the render may have
looked a little bit. It was looking straight
through the wooden walls. Bright colors and theme of the scene really go together well and create that look off. And then he evil, windy and drop scene. I was actually going full. I think if you went
for a more vibrant, bright mood, it may not
fit the scene so well. I think the wind in the grass
could be a little stronger, but I also think is spot on for the things like the
trees and the actual head. As we move around the scene. One of the things I'm
really not happy with is the way that
actual smoke to it. Now, next time actually
create the smoke simulation. I'll be sure to drop the
actual simulation further down so it fits in the
chimney much, much better. The other thing about
the smoke cases moving a little bit
too fast as well. Of course, I'm hoping
as well in the future, the blender simulations
actually work much, much bad in real-time, given us the ability then to see it actually in real-time. It actually Walter simulation,
I'm really happy with it. I'm not coming out
really, really well. I also always try and
make an effort to look at what I'm actually happy
with the most in the scene. And I think for this scene, the thing I'm most happy with is the actual plant animations. And it just shows how versatile
actually blend to convey. Whether it's actual animations, whether it's shape keys
and things like that, or whether it's
actually working with a new system of geometry now. So it really shows just how
powerful blend the A's and how powerful the new geometry
nodes to blend them. Nice and pull when you actually
analyzing your own work, you're always looking full data. I actually intend this. Did I set out to actually
create it in the way the ID. This can tell you a lot about
how much you need to learn all what actually pulse of 3D modeling or rendering you
need to actually improve. And that then will
really help speed up the process of
how quickly you learn and just how professional of an alte
should actually be calm so that everyone brings
these costs to a close. If you like what we
did in this course, then please write
a review to let others know why they
should actually take you. I think there's something in the course that you didn't like. Oh, you didn't like
the whole cost. And then again,
please write a review telling us what we
could actually do bad, actually improve, that everyone really does bring this
course to an end. So with all that said, Happy Meal than everyone, and I'll see you
on the next one.
 3D Tudor, Bestselling Blender Author & 3D Educator