Transcripts
1. Tombow Marker Tips, Tricks & Techniques Intro: Welcome to the
Tombow marker tips, tricks and techniques
for beginners class. In this class we're
gonna be talking about Tombow markers. There are pros and cons, the appropriate inks
to use with them some basic coloring techniques, which in all honesty is not my favorite way to use
them or the markers. But because of their
diabetes properties, there's some super fun techniques that you
can do with them. And this is a composition
of all of my favorites. This class comes
with a supply list that has broken down between the different techniques
that are taught and the supplies that are
used with each one. There are also links to
each one of those supplies where you can source
them to save you time. I hope you play and create the techniques
while I'm teaching them and have fun watching
how the inks flow and move. You can feel free to use the exact same
colors as I'm using, as they're listed on the supply
list or choose your own. Have fun, be creative. I haven't tested
and compared them, but these techniques
won't likely work with other dye based markers
as well. Let's go play.
2. Tombow Marker Info Tips & Storage: Before we get started
with our techniques, Let's start talking
about the markers. So Tombow markers are a dye
based ink or water-based. They have a fine tip on one end. They have a brush tip
on the other end. These markers are closest to the markers that we
grew up with as kids. When you're starting, say to do card making and
stuff like that and you want to color in images. These are a great one
to start with simply because you don't have
to learn how to color. However, having said that, they're not my favorite
way of coloring for cards simply because you have to color
fairly quickly. Because of the water-based
nature of the markers, they start to tear up until
the paper quite quickly. I'm not sure if actually you
can see it on the camera. That might have been a
bit too dark to color. You might not be able
to see it at all, but you have to, when you're coloring images, you have to color
fairly quickly. So all of those darker bits in here are a little bit to the
paper that have come off. While I'm coloring. They're great to start because you don't have
to learn how to color, but you do have to color
fairly quickly unless you want the paper torn up when
you're making your cards. The one thing to know is
when closing the cap, especially this side
on your marker, make sure you hear that click. I worked in a scrapbooking
store for 12 years. And the only reason any of these ever dry it on
the shelf when they were new was because someone had
taken the lid off of them and not completely close them. So that's something
to be I'm sorry. That's something
to make sure that you're doing when
you're closing them, make sure that you hear
that little click. While they're not my
favorite way of coloring, I am going to show you how
to color in the first video. There's some fantastic
that you can do with them. And there are a lot of fun to
play with in that respect. So the inks that we're going to be using
throughout this class, I'm going to be using
momentum ink when I want to stamp an image
and just color it, but not use any moisture. Anytime I'm gonna be
using moisture or water and I'm stamping before
I'm using the markers, I'm going to use this
stays on it because it's a permanent ink is not
gonna go anywhere. And then when I want
to do some embossing, I'm going to use my
bursa marketing. Some of them you'll
see me doing, some of them you
won't see me doing. There's a couple other paths
that I'm gonna be using just four things afterwards, but I'll tell you
when I'm using them and there's no
other reason for a, It's not something that
I'm gonna be using regularly throughout the class. All right, so
without further ado, 1 second before I forget, when you're storing
these markers, they should be stored
laying down. That way. You've got the ink going both ways to the fine
tip and the brush tip. If you start storing
them sticking up, often people will have issues
with one end going dry. So when you're storing
them, I have mine. Of course, I have the band completely filled
with other stuff, but I have mine
sitting in a bin, other markers and stuff like that and they always
get stored flat. Just keep in mind, there
is a storage case that you can buy that the markers
all fit into little slots. And I would take that case
and I would store a flat as well without further ado. Let's go to the next video
on our first technique.
3. Colouring with Tombow Markers: First technique that we're
going to be doing is just simple coloring
with your markers. I'm going to use my
Momento ink pad. It is a dye ink pad, but it's water resistant. So it's a good ink pad to use
when you're just coloring, you could use this
stays on pad if you want because it's not
going to move at all. But if you're just starting out once somebody that's easier to clean off of your stamps, the momentum is a
great one to go with. I'm holding my stamp in the center so it doesn't
shift and I'm just personally pressing her
own lung the outsides just to make sure that I've
got a good impression. So typically before I color, I'll let this sit for
about five minutes just to make sure that
it's good and dry. And I happen to already have
one on the other side here. When I am coloring here, I'm going to start, I'm gonna do my rows here. I'm going to start from
the lightest color. Like I said in the
introduction video, I'm coloring fairly quickly
because I want to give that paper as little chance
to pill as possible. You can just color flat, just one color if you want. But it's fun to add little
bits of extra color, especially when
you're doing flowers. Often flowers have different
hues of each color. It's fun to add little
pops of another color, just makes it a little
bit more interesting. But you definitely
don't have to if you're more comfortable
starting out and not darker one here. If you're more comfortable
starting out and just using one color for each thing, you can absolutely do that. The other thing that you can do is there is a colorless blender, which is a marker
with clear ink in it. So you can take your
marker and you can scribble it on some plastic, and then use that
colorless blender to blend your color
in a little bit. When it's blending it in, it's going to start dark and
then it's gonna go light. Once again, you still want
to make sure that you're I'm coloring quickly so you don't start tearing
up that paper, but that is an option to use. So you can tell, well
now it's got pink on it, but I actually don't
typically do that very often. So my markers in pristine
condition there. So I'm going to color
in my little buds here. I typically go and color
the entire part that I want with that particular color and then move on
to the next color. I'm just going to flick
in some dark where the bud hits the greenery there. And it's all personal
preference with color. I'm doing flowers. I typically do more
pinks and purples. Yellow is actually my
least favorite color, so I don't really
use it too often, but I figured I should use
it for this one because I thought it needed a little
bit of extra color to it. Yellow on that flower there. And I'm just going to flick in. This is like a dusty rose color. By flicking and all
I'm doing is pressing the marker at the bottom
and then flicking it up so that it's not just one straight stroke like
this, it's more like that. Let's get to some of the greens. I'm going to start with
my lighter green and I typically start with
a lighter color. And then I will add my accidents
with the darker color. All of that. These leaves are fairly small. You probably don't even need the extra little
accent of the dark. I'll put the direct rate where
the leaf meets the stem. But I do think it makes it look a little bit more realistic when you have a little
bit of a shadow there. So I'm going to add
the shadow rate again where the
leaf meets the stem that ended up being more of
a square than I intended. Also putting a little
bit of a shadow beneath that little flap
of the leaf there. This particular stamp is fairly, a fairly loose drawing. You'll notice there's a leaf that goes right in
front of a pedal. I think that's supposed
to be a pedal there. When it's a fairly
loose drawing, I'm usually fairly quick and don't really do
a lot of detail. Coloring when I'm doing it. I noticed I missed a
couple of leaves there. I think that's supposed
to be a petal as well. I did it on the first one. Let's go back and add some
of that light pink there. Typically what I would do
others by Malory there, typically what I would do is I would add it to or
glue it to the mat, which I can do right now. Then I would glue it to
the front of the card. And then my last step, because it takes a little
while for it to dry. My last step is to
add some stickers. So stakeholder a little
bit of a glitter glue, but it has a really fine
point to it so you can get some nice detail to it. So I'll add some
stakeholders to the image. And then I set it aside to dry. And if I'm still Crafting, I make sure to set it aside
where I can't reach so that I don't accidentally
put my next piece over top of it to dry. I've done that before. That's the voice of
experience talking there. The other thing to
know about stickers, you can cover an
entire area with it. But because these
markers or diabetes, I'm gonna stick this aside to dry because he's
markers or diabase. When you add stick holes or glossy accents
with some colors, it completely changes the color. So get to know your
markers a little bit if you're concerned
about the color changing tested on a
scrap piece of paper, I use this one
because I know that this one changes drastically. There's a huge
difference between the actual color of the marker and what it changes to when
I put glossy accents on it. It's not so bad with
the stickers on it. But just be aware
that it does that. The other thing too, because
it's a diabase marker. If I were to put
this sticklers or the glossy accents over
two different colors, they would start
to run together. So another thing
to be careful of, the one thing that
I haven't done, and I will show you,
but I'm going to avoid the areas that
I've put stickers on. I like to take a really,
really pale gray. This one is N95, and I'll put
all the marker colors that I'm using on the
supply list for you. So you know exactly
what colors I've used. I just outline the image
and it's something that if you didn't know it
was there most of the time, most people won't notice, but it tends to put a
tiny bit of a shadow behind it and it makes the
image pop a little bit more. You'll notice on this
one where I put it, you kind of got area kind
of pops just a touch more. And it's one of those things
you don't really know why it's doing that until you realize that it's just outlined with a little bit
of a light gray color. Just something to keep in mind. You don't necessarily
have to do that. But it's something that
I liked doing and I find it makes my images pop
a little bit more. I'll see you in the
next video and I'll show you in another technique.
4. Direct to Stamp Technique: Another fun technique to do is something called
direct to stamp. And really it's quite
straightforward when you list. When you think about what
the technique is called, You're gonna take your marker
and you're kind of color it directly on your stamp. Now you do want to
be careful when you are doing this technique. You don't want to be aggressive with your markers because you can start to break
down your markers. The tips of them. They last really
nicely as long as you're taking care of them
and being careful with them. If you're aggressive
with this technique because there is some rough edge touches on the stamp where
you've got the detail. You can start to
wreck your markers. I did a class once and
some of the ladies were not very careful
with this technique and they ended up some
of the markers were completely broken up by
the end of the class. And what I mean by
that is, let me find. When you first get the markers, they're nice and
pointed like this. Once they've broken down. Oh, this one's not too bad. Actually, I thought this
one was the worst one. Once they broken down,
they get really feathery. You don't have a point
at the end of it. Basically you have
the market starts to dry out and if you
want to get a nice point, nice pointed tip, the
only option is to use the pointed side or the
fine tip of your marker. So you want to be
careful these markers, you can't rethink them and you can't replace
the tips of them. Once they dry out, you do have to throw them
away and replace them. It's always nice to make our tools last as
long as possible. I'm going to add a little
bit of the dark green. In certain areas. Some stamps are easier to
see the detail than others. And this particular
technique works better on stamps that are a
little bit more solid. Then it open. You'll notice this flower
is completely solid, whereas this one was
just an outline. So you definitely want to choose stamps that have more
solid nest to them. Next thing you're gonna do, because this ink has dried
while we've been coloring, is you're going to have on it, which means blowing
on it with hot air, just like you would if you
were to clean some glasses, you're going to have
on it that's going to moisten the ink and then you're going to
stamp with it so you have to be careful with it. So let's go. And I do it a couple
of times just because the image is fairly big. Once again, I'm holding
steady with one hand and I'm using my other hand
to press down. There we go. We've got a nice
beautiful image of that stamp from there. Because this takes literally
no time to dry from there. I would almost right away going glue it to my mat and then glue it to the
front of the card. I'm not gonna do that for every card with this
class because they're all done exactly the same
way as the first card. But there you go. Now, I'm going to show you
that exact same method, just a little bit
different way to give a full watercolor
look with his stamp. See you in the next video.
5. Faux Watercolour Technique: This for watercolor is fairly similar to the last technique, which was the director's
stamp technique. In the sense that you color all your images with your
markers rate on the stamp. I typically go from light
to dark when I'm coloring. That way, if I happen to hit a light color with my
dark morph or when I'm coloring it with a dark marker, tend not to get too much
contamination on my markers. They're fairly resilient. So I've had happened to get
a dark bit on my markers. Typically, all that means is when I go to color
it next time I have a spot of dark before
I get my true color. But it's always nice to
know how to avoid that. The other thing that I'm doing differently with this card, as well as read moistening
the ink differently. So last time I checked on it, this time I'm going
to take up Mr. And I'm gonna missed it with water. The other thing I'm
doing is last time I was working just a
regular card stock. This time I'm working
on watercolor paper. You could also use
mixed media paper, just something that
doesn't mind the moisture. Regular card stock does
not do well with moisture. So it reacts the kind of bubbles and stuff like that so it doesn't react
nicely with it. So you'll want to
make sure that you have a card stock that can handle the moisture. Like last time, my ink
has pretty much dried while talking and while
this is a fairly big stamp. So by the time I'm done
coloring it, the incus dry, I'm gonna take my
misting bottle and I'm going to miss it just
a couple of times just till I can see that
my whole stamp is moist. You can see the shine
from the light. You don't want to completely wet it because if you
completely wet it, you're gonna lose some details. So you can see I've got some
really good detail here, but I've lost a little
bit of it over here. And sometimes
that's okay because that's part of the look, but sometimes you don't want it. I didn't wouldn't want to lose all of the detail
for by holes down. Let's go. I'm going
to miss it a couple of times and then I'm going
to stamp it right away. That was actually three
times because I could see an area that the
water didn't hit. Once again, I'm
holding steady with one hand and I'm just
going to press around with my other hand and
make sure that I get good pressure all
the way around here. Then I'm going to
lift my stamp up. Now. I could've had a little bit
more water on the stamp here. I cannot really go
back and redo it. So I'm just gonna
leave it as is, if it bothers me and I
really wish that I had some more watercolor look detail. I can take a
watercolor brush and I can go in with that brush. And I can spread the anchor
around a little bit. You don't have to if
you don't want to, but you certainly
can just to get that a little bit more
of a watercolor, look, if that's what you're going for and if you wanted to have it a little bit more blended out, now one thing to do, and I'll show you this more when I'm doing the watercolor, I've got green on my ink, on my brush now, I'm going to just squeeze it out and then Mike brush
is completely clean so I can go back in now with a it and I can blend out
the pink a little bit more. For this one, I would wait
until this is completely dry. And then I would
go and mount it on the mat for my card and then
onto the front of the card. I don't want to start doing
any gluing while that is wet because then I have a chance of putting my finger in
something and smudging it. So I'm going to leave that
till it's completely dry. And then I'm going to
glue it onto my card. I'll see you in the next
video where we're going to do some actual watercolor
and move Tombow markers.
6. Watercolouring with Tombow Markers: Now we get to watercolor
with Tombow markers. And this is a great way
if you already have Tombow markers and are using
them for other techniques, this is a great way to
see if water coloring is your cup of tea
or if it's not, I'm going to use stays on ink. It is a permanent ink. So when I use the water
with the water coloring, it is not going to go anywhere. I actually just
touched my stamp, so it might affect
that, but it's okay. Again, holding the center
to keep everything steady and then pressing
around the outside. There we go. Now, I typically again, wait five minutes or so for
this to completely dry. It does dry quite quick, so it's probably dry
within a minute or so. But I have one here
that I stamped earlier and is
definitely good and dry. The one thing to
keep in mind when water coloring with tomos is you want to make
sure that you, or using bright colors. This is the color
of this marker. If I color directly
to the paper, if I scribbled onto plastic, which is how we watercolor
with taboos and pick up that ink, is
significantly lighter. Even the darkest part of that color is lighter
than its original shade. You want to make sure that you're choosing brighter colors. Because for instance, this
really light gray here. When I go to color on
paper, it is that color. When I go to paint it, it is really,
really, really pale. The other thing that you can
do if you want is you can emboss your image and then stamp the colored
the embossed image. I did this just to show you what the difference looks
like between the two. This one is stamped in
a boss and this one is just stamped with stays
on in their watercolor. If you have an image
where you want to keep everything precise
within the lines, you want to make sure the
shading stays within the lines. The embossed version
is the way to go. However, again, this particular stamp is
a very fluid and loose, so we don't need to
worry too much in my opinion about keeping
everything pristine. First thing I'm going
to do is I'm going to use my light pink. I scribbled onto
a non porous mat. It's not going to absorb
my ink and it's just gonna be a palette
for me to pick it up. And then watercolor. This paper that I'm working
on is watercolor paper. You could use mixed media paper. Again, you want to
make sure that you're using a paper that can handle the moisture isn't
going to warp them. Bubble with that. I'm just going to quickly do my lightest pink on all the
colors that I'm using it on. And then I'm going to
do my darker pink. And you can see
every single time I go to scribble it on my mat, I'm going in a different area. I'm not gonna
scribble over top of where I've got beads of water because that is going to just dilute my ink even more. I've got a paper
towel here to tap my brush on between
colors to clean it. Not super necessary with the
pink just because I wouldn't contaminate anything if I
put the color in there. But if you're changing colors, like when I go to green
or when I go to yellow, you definitely want
to make sure to change and clean
your brush between. The other thing
to keep a note of is when you're working
with watercolor paper, typically it has a bit
of a texture to it. But the mixed media paper, at least the ones
that I have gotten, don't have that texture. So if you're wanting to
work on a smoother paper, you would either choose a
watercolor paper that doesn't have the texture or
mixed media paper. For this, it doesn't really
make too much difference. My stamped image didn't
really get affected by it. But sometimes you'll notice it was some of the cards later on when I go to stamp an image, the image is a little
bit more solid. So you notice that texture
a little bit more. All right, So that pink is done. I'm using my paper towel
to just clean my Madoff so that I know that I
don't have bits of ink. And the way I typically am coloring with the
side of my marker, when I'm coloring the color, putting the color on the mat, it's just going to
give more color or lay more color onto
the mat for me to use. Which means I'm going
to have to scoot on there a little bit less. I'm just tapping this light pink for this dusty rose
color on here. I don't necessarily
want brushstrokes, but I just wanted
a little bit of a touch of pink in there. If I wanted, I could use
one of the pinks that are in my roses, but I'm trying to keep them
a little bit different. Let's go with the lightest
green first for the leaves. Like I said, this
is a great way to check and see if you
like water coloring. Not every single technique
is for everyone. Some people prefer some things
and others prefer others. There's no right or wrong. But if you have the
Tombow markers and are using them with
different techniques, great way to just test and see. Water coloring is
your cup of tea. I like this brush that I have. I liked having the water in the handle and being able
to just touch it onto paper towel if
it's too wet or to squeeze it onto paper towel
if I want to change my color. Because I tend to be a
little bit of a klutz. Having an open bottle
of water on my desk, chances are at NACA. A great way to keep
things neat and tidy, as well as the fact that it
makes it quite portable. Very easy to take a
little piece of plastic. Take your markers, take
little water brush and some paper towel as well
as your stamped image, and then take it somewhere in
paint. Take it on vacation. If you happen to be
traveling somewhere and wants a little bit of a creative outlet
while you're there. It doesn't require a
whole lot of supplies. I'm just touching some of
these up again because I noticed the dark part isn't
really very dark on here. By just tapping it on, it tends to get little
tiny bit darker. I missed. That row leaves, they're
completely There we go. Then just like my
colored version, I like to put light
gray behind my images. For me. It makes it
stand out a little bit. It doesn't necessarily
have to be like rate could be light blue, it could be whatever
color you want. It's one of those things
you don't see a whole lot. But I think it just makes it
pop out a little bit more. You could choose a little
bit darker gray or a darker color if you wanted
to be able to see it more. Do you have to
rethink the palette a little bit more often
with this though. Because it does, because it's
such a light colored gray, it does tend to something
sick and in there, it does tend to get too light if I don't
recolor my palate. Often enough. You'll see that while I do this, I'm working from the image
and then I work my way out. So I'll start at
the image and then I squiggle my outweigh out, mainly because the color gets lighter as I squiggle out and I want the darkest part
underneath the image there. All right, I'm not
going to finish this one because you can see where what I'm doing, this one here is completely
done and it's very, very subtle, like I said, if you wanted it to
be more in your face, you could choose a color
that's a little bit darker. There's so many
different grades. I think there's like eight
different color gray, so you could choose one
that's a little bit darker. Then for this one, I chose to just choose a pale
yellow instead of the pink. Neither is right or wrong. I just wanted you to see
what the difference was. It just changes what your
focal point of your card is. I'll see you in the next video.
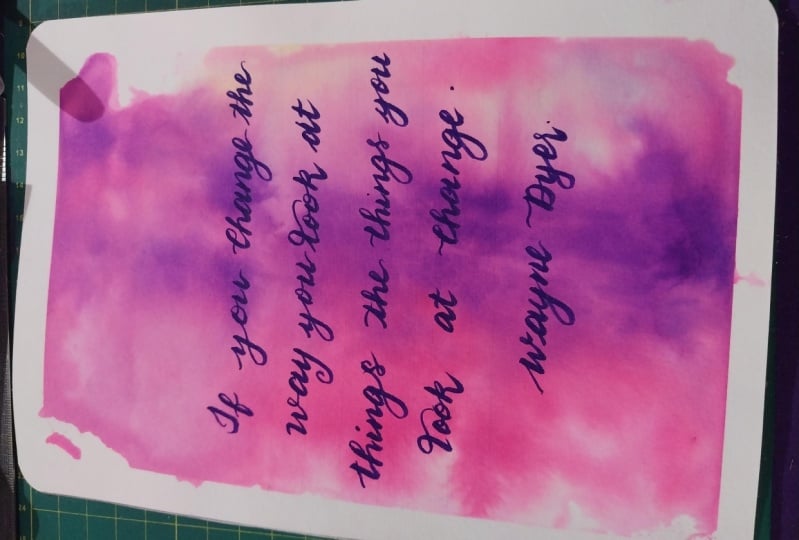
7. Hand Lettering with Tombow Markers: All right. Hand lettering with Tombow is in
full disclosure. This is gonna be a
very short video because this is not my forte. This is something that takes some practice on
your supply list. I have a link to a
blog post from someone else that has a bunch of
different great resources. But I just wanted you to
know that if hand lettering, lettering was your thing, if you wanted to learn how to do it. These are a popular choice for people wanting to
do hand lettering because you can get
really fine lines. You can also get
really thick lines. It takes a bunch of practice. And quite frankly, I haven't
done the practice for it. So I don't do hand lettering. I love watching it. I could watch hand-lettering
videos for hours. But we all have strengths
and weaknesses. This is not my strength. American crafts came up with
these great stamps here. And the intention to
them was you could stamp them and then put a piece of tissue
paper or tracing paper on top and you can practice
your lettering. Full disclosure. I stamp the images like that, so it looks like it
was hand lettered. But it is not It's not my
thing. It's not my thing. This was my attempt earlier. It's not my thing. But I just wanted you to know. I just wanted to touch
upon it that these are great tools for doing that. They're inexpensive
tools for doing that. If it's something that
you're wanting to do and try checkout the link that
I have on the supply list. And it'll show you a bunch of resources that will point you in the right
direction for that.
8. Tombow Marker Background Technique: Some of the fun things
that you can do at the Tombow markers are
different backgrounds. So I'll show you how
this one was done. Super simple. Anyone can do it. I grabbed the wrong
buffer there. All I'm gonna do
is I'm going to do this on my little mat here. You could do it on
an acrylic block, piece of plastic,
piece of Saran Wrap. If you did it on a piece
of plastic or Saran Wrap, chances are you're going to have a little bit more control because you can flip
your piece over and you can press your ink down to make sure that
it's completely covering what you
want it to cover, as well as C. And push the ink maybe
where you're wanting it to go a little bit more
while doing it this way. I don't have that luxury. It's gonna be what
it's going to be. But I just wanted you to
see the possibilities. And in a future one, I'm gonna do the ink width on an acrylic block, so
you'll see that version. So I've scribbled
onto my plastic, onto my non-stick surface. I'm going to mix it with water. I want to make sure
that I have a decent amount of water on there. I'm taking my piece of watercolor paper or
mixed media paper, whichever one you want to use. And we're going to lay it down. And I like to push my finger on it to make sure it's got good contact and then
I'm lifting it up. Then I'm going to let
it dry completely. So obviously, this one looks slightly different
than this one. I used exactly the same colors. The control that you have is over the colors you're using. You don't have control over
exactly where the ink goes. You'll have a little bit
more control. Like I said, if you use a piece of
plastic, then you can flip it over and see it
a little bit better. But now we have to
wait for this to dry. I am going to use my heat gun to dry it
a little bit faster. This is a heat tool that is a little bit
more gentle heat and it's meant for drying glue is drying inks,
stuff like that. So I'm going to use this
and then we will stamp it. I have to make sure this is completely dry
before stamping it. Otherwise, the moisture on my paper is going
to affect my ink. And it's really going to
depend how much water you had on your surface as to how
long it takes to dry? Most of it's dry. There's a wet spot here
in a wet spot rate there. I can also lift my paper
up and dry it as well. If by chance you have a blob of water and you don't
like what's happening. You could always take some paper towel and
lift the ink up. But one of the
things I like about this particular technique is, like I said, you
have some control. The rest is just seeing
what happens and enjoying the creativity of it. There is still a little
bit of wetness here, but I'm gonna be stamping
in this section anyways. So I'm not worried about
that ink affecting it. So I've got my stays on here. I could do this with
the momenta as well. But you definitely
want to make sure that everything is completely dry if you're using it with the momentum because it
will start to run it. Not. And I'm going to
stamp this as much or as little as I want. I'm, I'm stamping with the same stamp over
and over again. You could choose the same one, you can choose different ones. Your choice. Once this is completely dry
because there is a spot that's still wet, all I'm gonna do is glue this to my black mat and then glue it to my front
of the front of my card. Super simple technique
doesn't take very long. The thing that takes
the longest is waiting for your ink to dry. So I'll see you in the next video and I'm
going to teach you some embossing and the
emboss resist technique.
9. Emboss Resist Technique: All right, so the
very first step for our embossed
resist technique, as we need to emboss our image. This one, it happens
to be a quote, you could do an image. Definitely, I would
choose something that's a little bit thicker, a little bit heavier, a
little bit more solid. I wouldn't necessarily choose just an outline stamp
simply because you want to make sure
that you're able to see what the embossing
is resisting. I've got my versa
marketing, my clear ink. Clearly that standard, even
though I just checked it was not it as clean as
it could have been. So this is supposed to be clear, but we're
gonna go with it. I'm going to put my
clear powder on it. I have my clear embossing
powder in a container because I tend to use it the most out
of all my embossing powder. This way I don't need
a scrap piece of paper underneath it
because I can put the excess right back
in the container. Going to use my heat gun and I'm going to melt the powder. This heat is different from
the one I use to dry this one emits heat more direct. So it's just gonna be a bit quicker when
I'm doing embossing. You'll see the powder
right now is a mat, but it's going to change
shiny as it melts. All right, so as soon as you tilt it in the
light and you can see that the embossing
powder is all shiny. That means it has
completely melted. I'm going to put
my heat gun away, move my embossing powder
so it's not my way. So I've got the colors of my markers that I'm
going to be using. Like I said, this is
supposed to be clear ink, but because of Apparently
I didn't clean my stamp well enough is actually a slightly
purple, but that's okay. I actually haven't mixed media
paper underneath this one because I wanted you to see
just a different look up a smoother paper or mixed media paper
that I have right now is to stress heavy stock
mixed media paper. You can see that I
am not very careful with coloring with
my markers here. I'm just trying to
get the color down. Once we have the color down, you're going to use our
spray bottle and we're going to spray it and it's going to start the
water's gonna start moving the color on the surface. This is again, one of
those things that you have control over where you
lay the color now. But you don't necessarily
have control over where it starts to move when you
hit it with the water. So make sure that there's
nothing in the way that I want wet and then I'm
going to miss it. I just want to make sure that everything is completely
covered in water. Typically, if there's an
area that's not very wet, you're going to notice it. I just have it on
my mixed media mat right now what I'm
gonna do is I'm going to move it so that it's
on some paper towel. So the paper towel will absorb anything that comes off of it. And then I'm going
to let it dry. If I want to speed
the drying up, I'm going to use my heat gun
and I can speed it up a bit. You'll notice that there's
water with some of the ink. Beat it up on top of my top of my stamped and
embossed image there. That's totally fine. It's not going to stick to the embossing because
the embossing is like a plastic so it
will resist the water. Once everything else
is completely dry. I can use the paper towel and I can dab any water droplets
that are still there. Everything's dry except
for these two sides here. Even when you're
using card stock, that's meant for water, it tends to still curl. But it kind of helps
the ink flow words wanting to flow,
which is kinda fun. All right, So everything is pretty much dry other
than a few beads of ink on top of my embossing. Let's clean that off completely. Make sure I'm using a clean part of my paper towel and I'm just going to dab it on top of the embossing to remove it from the top and look how different
they turned out exactly the same
colors and I used them in exactly the same order, but they changed or they turned to a
completely different. So all I would do now
is I would glue it to my mat and then glue it
to the front of my card. But it's a fun thing to play
with because like I said, you have control over the colors you're using
and where you put them. The rest of it, it's
up to the water and creative fates for where
it actually ends up going. But such a fun
technique to play with. And I would look
really, really cool. I think if you use the
flower silhouettes as well. The only thing I didn't I
didn't use any because mine are really tiny and I
wanted some big ones. But such a fun
technique to play with. And see what happens. We'll
see you in the next one.
10. Drippy Background Technique: This next one here is a bit of the same technique
as the previous one, but just with a little
bit of twist or two. I've got my watercolor
paper here. I'm gonna do this one
on an acrylic block. This is an alert,
alert acrylic block. Then I'm using the same
colors, same as before. I'm scribbling each of the
colors on the acrylic block. I typically will do
that on the side of the marker so that
I've got a wider edge. If I do it with the
top of the marker, I'm gonna get a lot less ink. I'm trying to get more
ink so that I end up having stronger color, which is relative because like I said before, by adding water, the colors later anyways, so I'm going to
miss it with water. Then I'm going to put the paper side down
that I want to see. And I'm going to flip
this over a little bit so I can see exactly
where it's going. And then I can push
the ink a little bit. I can there we go. Works better if I've got it
lifted up a little bit here, and then I'm going
to lift this off. I'm going to use my
heat gun to draw it, just clear off the block there. I want to make sure that
it's completely dry. Before I stamp my image on. Grabbed the wrong heat gun, I could I could draw it
with the other one as well, but it's just a little
bit more aggressive. But see, while I draw this, Let's change the stamp
on my block here. I did use watercolor
paper for this one. My sample has obviously
more color to it. I think I'm gonna do
just because why not? I'm gonna go and do it the
same thing on the other side. Just to get a little
bit more ink there, a little bit more
of a background. Quite frankly, because I think
it will look kind of cool. Very good. Same process. Let's mix it with water. Then I'm going to put
my paper over it here. Let's flip it over. Move the ground a little
bit. There we go. Now let's take it
off and dry that. Just a little bit more
of a colored surface to work on when I add my stamped image. As you can tell you only again, you only have so much
control over it, but it's kind of fun
to see what happens. If you're into art
journaling or mixed media. This could be a
really fun background to do in your journal. It's just a fun way to play with the inks and
see what they do. Have some loose creativity. Obviously, you only
have so much control. Now let's wipe this off again and then
set it to the side. So I've got more room here. Alright, so I've got my
ink or my stamp here. I am going to stamp it with
this distress oxide ink. This is a dye pigment
blend and it's just a little bit more opaque. Then just using a just move up, sorry, just using a
distress ink pad. The other thing is when I go to stamp
it because I used watercolor paper
and because I have, because watercolor paper
has texture to it, you're going to see some of
the areas weren't super well. You don't get a really
clear impression. So by taking the marker
and coloring it in, we're going to get
a clearer image. I'm going to use the brush
side with the heart. Then the fine tip works. Well with words. I only did it with the words that were a little
bit thicker because those were the ones that I
found were more noticeable. That area is worth missed. When you're choosing your paper, whether you're choosing
mixed media or watercolor, you might want to
keep this in mind. If you have a stamp that you're wanting to stamp on there. You may want to choose the
mixed media paper that's smooth because you're going to have a better
stamped impression. I'm going to leave
that as it is, finish it off later. To finish my card, I would glue this
onto the front and then glucose onto the
front of the card. Once again, just a pretty fun, flowy watercolor background, will see
you in the next video.
11. Coffee Filter Technique: All right, so another
fun surface to use your TA biomarkers are
on our coffee filters. Super inexpensive. Most of us have them because we, most of us drink coffee. Basically. All we're gonna do is color whatever
image you want. This is how I did
the sample here. I created kind of
a tie-dye pattern. I'm going to show
only do it on half the half this because I want to see what
happens if I just do circles just for fun. So you can do whatever
pattern you want. You're going to cover
your whole coffee filter with your ink. Hardest part about this
one is letting it dry. What color should I use an x? Let's do purple one. Waiting for it to dry.
Let's go with this. I'm gonna think I've only
done it on the inside. You would typically
do the entire thing because once you've got it
wet and you let it dry, you're going to glue it to the front of your car
and you want to have a little bit of surface
that you can choose. Which part you're going to put on your front of cards here. So let's move the
markers out of the way. I'm going to put it on
here so that I don't have to move it after I wet it. And all you're gonna
do is take your water, you're going to
completely wet it. I typically saturate. It makes sure it's
completely totally wet because the more you wet it, the more of the
ink starts to run, which is what gives you a
really funky patterns to it. There we go. Now I don't want to move this. I want to let it dry on its own because I want the ink to completely
flow and move. I'm going to use
this piece here. This piece is one that I
was playing around with. Where does my, my paper there? This one here, I
accordion folded it. I square both the ink on my surface here and then wet it and then just
dipped some of the edges. I ended up getting
a fun little bit of a plaid look to it. So I'm going to glue that
to the front of my card. We're gonna make this
card a little bit different from the sample. I'm using some
collage medium glue, which may or may not
cooperate with me here. This glue is also, you
can also buy it in a tub, which for this particular
purpose is better to buy it on the top because
you can use more. What I'm gonna do is I'm gonna
spread it with my finger. Then I'm going to glue the
paper. The card stock there. Now there's 23 ways that you
can trim the edges here. You can trim them
with the scissors, which is what I ended
up doing for my sample. Or you can put some glue on the other side and
you can wrap it over if you didn't want
to have a cut edge, although you don't
really see the cut edge. The other option is to
take your water brush. Where did I put it? To? Very lightly. Put a line of water. By doing that, you end
up with a little bit, little bit more of an
organic torn look to it, which is kind of fun. Neither one is right or wrong. You can do this
with certain papers as well, this
particular technique. But you want to have
papers that are thinner, which is why this coffee
filter works perfectly for it. And typically when you're
doing this technique with a coffee filter or
rice paper or whatnot, the RIP will follow
wherever you wet. That's what's nice about wedding and having
that control there. This part, it didn't glue down quite enough, but that's okay. My mat might not be my mat is too small for this
particular one with a tear. I can either make a bigger Matt, make a bigger card or
I can cut it down. Typically what I
would do knowing that it tears a little bit
bigger is I would make my piece of
card stock here a little bit smaller so that I had room around the edges for
that place to go there. So you can see the mat and see the mat but also
have the torn edge. Then to stamp on top of here, I like to use my stays on pad. I'm actually going to do it this way because this part is just a little bit not glued down and I don't
want that filter to decrease stamps quite easily. From there I would go and
put my card together, glue it together all
exactly the same way. Like I said, if we're
gonna do the torn edge, I wouldn't have my piece
that I'm gluing it to a little bit smaller so that I
can see my mat around there. But just a fun way to use
coffee filters and have fun with this when
they'll be cute to do as say an Easter card or going cut these out as Easter eggs or whatnot,
they just look so fun. Or as a tie dye. Just like that. I'll see you in the next video.
12. Galaxy Background Technique: All right, so these
last two techniques are my absolute favorite. So the first step, the
last two is this one here, which is a galaxy background. Super fun. So I've got the
colors that I'm using here. You can actually
buy a set of Tombow that is called galaxy that
has all perfect colors to do. A galaxy painting.
Background with. I'm trying to color these in the same spot that I
colored them for here. It doesn't have to
be exact same as the other backgrounds that we've used, we've used water with, there's a certain amount of
control you have and the rest is paper doing what
it's gonna do. I typically will do the
brighter colors in the center. Then the darker colors
around the outside. Black one here is fairly dry. So just an FYI. The markers do not last forever, they last quite a long time, but they do eventually
run out of ink. There is a limited
amount of ink in them, they will eventually dry out. But what I'm gonna do after
I have added the water, let it dry, I'm going
to use an ink pad. Where did it go? Ink pad and a jumbled robber
to darken the outside. Because I think part
of the fun about the galaxy background is
that dark outside part. So it kinda looks
like you're looking at part of the galaxy. So make sure everything's
out of the way. We're going to add water. Once again, you want
to make sure you add a sufficient amount
of water so that the ink can start
to flow and move. And then I'm going to use
my heat tool to dry it. I'm going to pause the video
and I will be back when it is all dry and then
we'll come right So we're completely dry. And you'll notice my
colors are a little bit lighter than my sample. If I wanted, I could go
in and add some more. This one just happened
to be a little bit more faded then my original one. But I'm going to leave
it as is for right now. First thing I'm
going to do is take my black ink pad and my jumbled Robert and I'm using this on actually I'm gonna
use it on my glass. Here. I can see that my back of my card star has a little
bit of moisture on it. If I started on my glass
and work my way in, just darkening the edges
around my card stock here. You could do this also
with an oxide pad. This thing with an
oxide pad though, is because it's a
little bit more opaque. I want to be able to
control how much of this goes dark and how much
of it you see through. So I like I feel like I have
a little bit more control by just using my regular
black pad here. I could also use the
Momento pad for this simply because it
is a diabetes pad. It would work the same
way for what we're doing. If I want, I can add some darker areas
on the inside here. Make it a little bit
more mysterious. Just keep going until you have
it as dark as you want it. Where's my there we go. I'm going to leave it
like that for right now. I'm going to dry anything
underneath there that's wet. And then I have some posca pens, which are paint pens. I have them in two
different sizes. And all I'm doing with
them is adding stars. Now the one thing
to keep in mind when you're adding
stores to something. Don't do them an even spacing makes sure that
there's some that are clustered close together, some that are farther apart. You go look at the night sky. You're not gonna see an even
pattern with the stars. You don't want to do
that with this here. If by chance you like it, you can do the little
clusters like this, which are like little. Here. I'll do it on the
back of this here. There's just little this is a big version of it obviously,
but that's all it is. I did them and I ended
up not liking them. So I'm not gonna do
that on this piece. Here. You go, add as much or
as few stars as you like. And then we're
going to stamp and emboss the imagine on
the front of this here. So I'm gonna take a
scrap piece of paper. You have to make sure that
everything is totally dry, otherwise, it is going to the embossing powder
is going to stick. Hopefully my black is dry
enough. It might not be. We're going to find
out in a second. It wasn't quite dry enough
because you can see the flecks of ink that are reflexive
embossing powder that are sticking to
the background there. In order to fix that,
all I'm doing is taking a soft brush
and I'm dressed, just brushing powder off. For this particular project. I don't mind having a few there because it kind of
looks like the stars. But that was for too many
in that little area. Once I've got all the excess powder off, I'm
going to emboss it. There we go. Then it's as simple as gluing this to the mat and then gluing this
to the front of the card. Obviously I did the layout a
little bit different here. All of my samples are
done in this layout. Nothing to say that you can't
do it horizontally as well. Sometimes I personally, I liked the way it
streaked across here, so that's why I wanted
to do it this way. For this particular one, some cards lend themselves
well to vertical cars and some lend themselves to horizontal cards.
But it's not pretty. And I know there are
some star stamps or galaxy stamps or there's some stencils and stuff
like that that you can find if you wanted to use
them for that as well. I just don't happen to have any. So using the markers to create the stars
works just as well. You can go in and look at
certain constellations if you want and
include them in there. That would be sorry, that would be super fun. But I just thought that was
the cutest little technique. I love it. We'll see
you in the next one. The last one, I have to
say it's my favorite.
13. Northern Lights Background Technique: Alright, so this one is the last one here,
northern lights. I've had a bit of an obsession within northern light slightly. When I was doing the sample
for the Galaxy, 01:00 AM, I congratulate you could
do this and it would be really, really cool. And it worked out. I
loved how it worked out, so I thought I'd
share it with you. Exactly the same technique with scribbling onto
the card stock, but I am just doing it at a little bit
different formation. Once again, you have control over where
you lay these colors down when they blend and
move when you add the water. It's just going to do
what it's gonna do. This is a green color. I wasn't expecting
to get so much of a yellow tone in
there, but I love it. That's part of the fun
is seeing what happens. So I want to get a little bit more blue behind the trees of the lighter blue
there so that I can see the silhouette of the trees. Then the Navy at the sky. I didn't do this in this sample, but you could take
the same posca pens and add stars to the sky
on this one as well. It would be really, really cool as well. I want to make sure to
get a decent amount of the dark ink because I want to make sure to see the
darkness of that sky there. And then just for fun, let's out of it a green right here behind where
the trees are gonna go. Alright, so let's missed it. Once again. The ink is going to do
with the ink is gonna do. I'm gonna use my
heat tool to dry it. But it's not the
coolest the way the ink starts to flow and
move and love it. Once again like
before, if you get, say you don't like that line that's appearing
at the top there. You can use your paper
towel and you can just dab it to get it off there. The bottom here, we're going to stamp some trees over there. You're not going to see
what happens over here. Alright, so the top
is pretty much dry. Like I said, you're not
gonna see what happens here because we're gonna
be stamping some trees. So I'm just going
to dab that off. I am going to clean
my table off here. I am going to use my
black stays on pad with this tree stamp here. Any tree sample work, you could even use a
stencil if you wanted. I am using watercolor paper, so you'll notice that it doesn't give me
completely solid image. You can see through those trees. I didn't fix it for my sample because I wanted to make
sure to mention it. But what you can do,
where did my black go? What you can do is you can
take your black marker. You can fill it in a little bit, or you can use mixed
media paper so that it is smoother and you get a
better I'm stamped image. That's still a little bit wet
so it's not taking the ink or you can go ahead for
this bottom part here. I can go ahead and I can take
my black ink pad and foam. I can fill that in right there. I would definitely
use the marker for the parts of the trees
if there were some parts that were not as solid
as you want them to be, because you'll have a
little bit more control. You won't have any
control if you're using the dot, the jumbled robber. As well as the fact that I love seeing the pokes of light
through the trees there. So you definitely want
to be able to control exactly what part
should fill in there. Let's put a lid on there. And I've got a different, just a slightly
different shade from my sample here, but that's okay. All I would do with this
is put a math on it, put it on the front of the card. You could stamp as
antiemetic if you wanted to, but I actually don't
think it needs it. I like it exactly the way it is. Just like that. Love what those inks do.
14. Tombow Marker Tips, Tricks & Techniques Thank You: Thank you so much for joining
me for the Tombow tips, tricks and techniques
class for beginners. I hope you had fun. I learned a lot and enjoy playing along with the
techniques, along with me. Just curious where some of my favorites to your
favorites as well. Let me know. I hope to see you in
a class coming up soon and don't forget
all the suppliers I used are on the supply list that is included with this
class. Have a great day.
 Artsy. Island Girl, Teacher