Transcripts
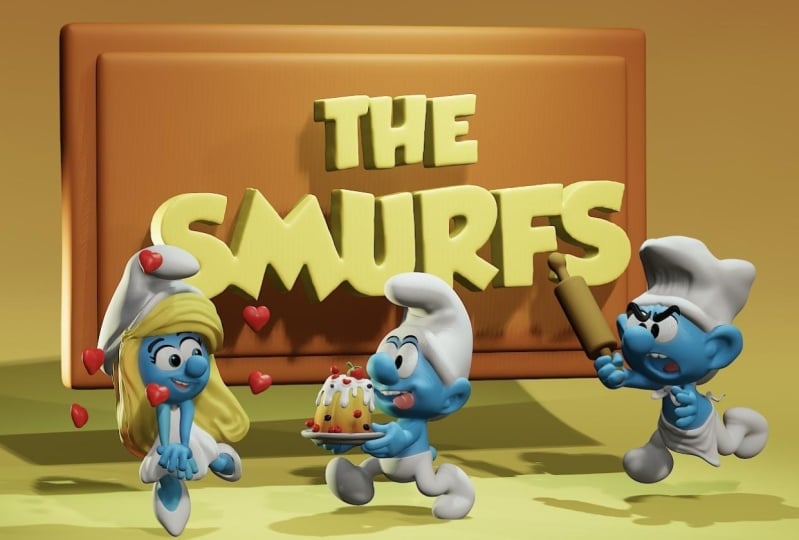
1. The Smurfs! Intro: There's a Smurf. Do
Smurfs have tails? Welcome to another
Nomad Sculpt tutorial here on Skillshare. My name is Dave Reed, and today I'm bringing a bit of nostalgia with some really cool
cutting-edge 3D Sculpting. We're going to use Nomad Sculpt. That's a 3D Sculpting
Application on iPad, iPad Pros, or Android tablets. I've been drawing and
sketching for about 35 years. I've illustrated some
amazing children's books. I've also created
illustrations for major institutions like the Museum of Natural
History in New York City. If you're just getting into 3D, this class might be
a little advanced. So I would suggest one
of my beginner classes. But if you've been
working with 3D for awhile and you're ready to
take it to the next level, then I would suggest
taking this class. So once we ever character
is pretty much blocked out, then we can start
modeling and Sculpting so that they look a little
bit more like Smurfs. And after that, we'll make
any adjustments we need to. And then we'll start at voxel, remeshing the shapes take. So once we have our
Smurfs blocked out, put together, voxel remeshing, then we can start lighting. Once we have our Scene lit, we'll do some simple Coloring. If you want to make
different colors, Smurfs, of course,
it's up to you. You can have some Fun
with this project. After this class, you'll have the patients and
the confidence and just a formula to be
able to pretty much 3D Sculpt any character
that you want to make. So with that said, I look
forward to seeing you in class. Once again, I'm drug-free, Dave. Keep drawing, keep Sculpting, and I'll see you
all on Skillshare
2. Class Project: Welcome to the class projects. So there's a few parts
to this class project. The first thing is
the main Smurf. You don't have to do
the Trio of Smurfs. If you don't want
to, you can jump to, I think it's video 32, 33, but it's the video called
lighting and Coloring. But if you're ready
for that challenge, which I hope most of you are, you can do the Trio of Smurfs. That's very complicated
and complex. It's actually a lot easier to Sculpt something once
you've already sculpted it. So it's not going to take
as long as the first Smurf. Because in that Smurf,
we're going along, we're figuring out the best
way to get everything done. But then once we
figure that out, we can just use those
for the other three. For example, will make one body and we'll use
it for all 31 leg. And then we'll copy
and paste that for the other ones and just
tweak as we need to. So there's a lot of
really interesting things that you learn. And I hope you're up for that challenge in
the next video. Also, there are a few tools that I'll be using
throughout the tutorial. So make sure to just
follow those so you have the tools
like a rounded edge, smooth color and
things like that. If I don't mention it
in the next video, then I'll mentioned
it before. I use it. Also makes sure that
you download all of the files from Projects
and Resources. I have the reference images, including the reference image
for the word the Smurfs. And also I have some
sample images that I made and also I have mine
Nomad Sculpt Project. So if you ever run into any issues or if
you want to see how I have something put
together or if you just want to see my file, then at least you have
that that you can look at. Just make sure that you
save yours before you open up mine or before you close it or anything like that. And with that, I think
we should jump into the next video where we
can finally get started.
3. Getting Started: Alright, so here's
the scene that we're going to make this as a 2D. I think this is probably
the original sperm Smurfs. So we're going to make
this a Nomad Sculpt. I'm just going to
crop it in Procreate. And then we're going
to start with bringing our reference images
into Nomad Sculpt. So there's a few
things that we want to do before we get
into our Sculpting. So first, I want to change my, the material of our mesh. So this is just a sphere mesh. But I want to change the
material to a mat cap. We'll make it easier to Sculpt. So we want to go up here to the sun and we want to
change it from LET PBR, which is just LET PBR is
just regular material, meaning like right now
it's like white and shiny. That's your, that's the
material that this is, but we're going to
change it to mat cap. It ignores all that. It ignores the lighting and it makes it easier
to Sculpt with. The next thing is we
want to make sure that we're Sculpting an
orthographic view. So we go here and we make sure
that we have orthographic that just makes sure that keeps from perspective
distortion. And when you're, when
you're Sculpting, you don't really
want things looking bigger and smaller depending
on where they are. You just kinda, you want
to Sculpt as cleanly, as cleanly as possible. And then you turn
perspective off. Then you turn perspective
on afterwards. And it's gonna be in
the proper perspective. So now I'm going to
quickly walk you through two tools that
are used very often, rounded edge and smoothie pool, but you can call it
just smooth color. So we'll just call
this smooth for now. So round edge, smooth color and I'll show you
what they both do. So you don't have to do
this. I'm going to switch back to let PBR just so I can show you an example
of what we're doing here. So if I add a box
and I validate it, now, if I want to
round out these edges, I can use round edge and I
can start in the middle. I can drag it out. You notice, when will this
go away? Just pinned. And you notice that all
the edges are round. So I'm gonna do that again.
I'll turn on the wireframe. So I'm gonna start in the
middle and then I'm just going to go like this. You see now it becomes rounded. So you can do this more or less. But I wind up doing this
a lot as we go along. So I'm gonna show you how to
make this rounded edge tool. So really quickly. Basically you want to
take your smooth tool, tap on it, and then hit Clone. And then you can name it. Will
name it round, round edge. Okay, so then it
shows up here and this will be your active Tool. So once you have that, you want to go into
your Tool Settings, you have some settings here that we're just going to leave. And then we go to this
little pencil thingy. And then we go down. We have dot log radius lock intensity. So we want to lock radius. I think that's all
for this menu. Then you have alpha,
this should be fine. Then you have falloff. So for fall off, we just want to
make it straight. So we're going to
tap here straight. Whoops, go to
preset. Here we go. So we want to leave it here. Filter. All this should
be is just default. And then we have
pressure and you want to uncheck, Use Global Settings. And then you wanna go
down to these two preset. You want to tap them both
and just do straight. And tap this one and
do straight. Like so. Once you have that, you can go to your Tool and
you can tap it. And you can hit
Save, confirm Save. And now you have your
round edge tool. It will stay there as you
come and go out of nomad. So you want to start in the
middle and just drag out. You will see that it will get, the edges will come smoother. So of course, just
so you're aware, as we go along, we're going to voxel
remeshing. If you've ops. So remeshing this high, then it's not going to
smooth out to too much. But if you, and
this is a shortcut, this is a voxel
remeshing shortcut. This is the same as
going up here for voxel. And see where is it voxel
and then remeshing. So this is the same
as just a shortcut. Whoops, I keep hitting
voxel remeshing. But if you want to make
it even rounder than you want to, voxel remeshing lower. So this is going to,
this is going to remove geometry from
inside your square. So let's say we did 40. And then we can do it and it'll start smoothing out a lot. That's a general rule of thumb. If you voxel remeshing high, then that's great for more detail because it's
not gonna be as valuable. But if you voxel remeshing low, then it's gonna be
software and you can do that as much as you need. You just want to pay
attention because once you have a lot of detail, you don't want to
voxel remeshing alone. Okay, So speaking of
voxel 3D mesh low, we also have smoothie poof. So we're gonna do
the same thing. Take your smooth tool, tap on it, tap clone. And we'll kept, we'll
call it smooth color. Okay, So now we have
smooth color here. So this is the active Tool. We're just going to bring the
intensity all the way down. Don't know what happened.
So smooth color were being the intensity all the way down the radius doesn't
really matter too much. Then we can go here, save. And yes, so now we have
round edge and smooth color. And I'll show you what
smooth color does. We'll just take Select Mask and let's just color this
two different colors. So we'll go with a glossy. And then we'll take our
mask and we'll invert it. And then we'll color
maybe matt middle. Okay, so we have our, we have this painted,
let me clear my mask. So now we have these two colors and we want to smooth them. So we're going to
use Smooth Color and doesn't affect the topology of the, of the sphere at all. Actually two nice
colors that I did. Again, this works better when you're voxel remeshing lower. If you voxel remeshing
high after this, then it won't smooth as well. So this is nothing that
you kinda have to pay attention to as we go along, but very useful and makes
for a very pretty blend. So another thing that
we might do as we're going along is
called decimating. So decimating again removes geometry from whatever
shape that you decimate. And it's really good for
bringing down your file size. So I'm gonna do this often. And usually when I decimate, I use round edge
on whatever it is. And I'll go over it a couple of times with
round edge if I need to. Or you can do it
without but decimate, you will want to just come here. And we go to Misc, and then we get
our miscellaneous. And then we go to
decimate right here. So when you decimate
right now, this side, this sample box is ten K. So
then we go to miss decimate. Now it's 5,000 and
now it's 2000. And you can start
to see a little bit of this sort of thing
happens if I hit Undo. You see how it changes
a hit Undo again, you see it's the smoothest. So that's just something that we're going to have
to do and you have to weigh out the integrity of
your shape with the size. But I liked this box, so
I'm gonna keep it for now. I might decimate it later, but for now I'm
just going to hide it because we don't need it. And let's add a sphere. Okay? Okay, so now we have all the
business out of the way. Now we can get to the Fun stuff. I'm just gonna hide
this and add a sphere, even though I said that a sphere in the last video,
but that's okay. So let's bring in our
Smurf reference images. And if you don't have these, make sure you download them from the Projects and Resources. Tab on Skillshare. And I have everything
will be available there. All of the images
that I use here. So we want to go to this little picture icon and then we want to
use reference image. Then we tap on the
Image, import photos. So wherever you saved them and that's where you want
to bring them in. We can actually bring them
both in and just hit Add, and then they show up in our
reference image library. So we want to use
this one first. We want to hit Transform. Then we can place it
kinda out of the way. So you can just use
it as a reference. So I think that's pretty good. Okay, So we have our
reference image, Image, we're rocking
and rolling. So the next thing, I don't know why,
I don't know why. So then the next thing that
I'd like to do is make some sort of ground or
some sort of floor. So this, this way it just
gives me a base and I can get rid of this grid because I don't really like the grid too much. I think it's a
little distracting. So I'm gonna go into
the Scene menu. That's where we add all
our, all of our shapes. I'm going to add a
cylinder. For now. I'm just going to
shrink the cylinder and I'm going to
use that red line, which is our horizon line. I'm going to use
that. I'm probably make this a little bit bigger. So I'm gonna hit gizmo. Make this bigger,
maybe like that. And just make it smaller. So just something like
that. I think it's good. I'm going hit gizmo again. And I want to make this a
little, a little rounded. I'm just going to tap
these three little dots. And with this to two. Then I'm gonna hit validate. But we're going to
jump to the next video where we're going to continue to Blockout are Character just using regular primitive shapes. We're just going to
get a basic overall. Just build all of these parts. Nothing too crazy for now. We just want to get
these basic shapes in place so that we can
make our little Smurf
4. Character Blockout: I a pause to sneeze, but I was successful. Okay, so now we have this cylinder which we're
going to call the floor. So we just go back into our
scene, three dots here. And FSLR works for me. Then we have our sphere,
which I'm going to use the gizmo again to
me, just move up. And I'm gonna get
rid of this grid. So I'm going to tap Create here. I see some, oh, okay. I thought my there might've
been newer options because this application
updates all the time. Alright, so we have the floor, we have our sphere, and we have our reference image. I think. I think, I think we're good
to start Sculpting. So the first thing is
obviously this is to the side. So we want to make
all these shapes and then just put them together. That's the easiest
way to make things. Just break this down into individual shapes,
individual pieces. So whatever, however
complex something looks, it can always be broken
down to very simple shapes. And eventually you'll just
start to see it as shapes. So first I'm gonna move this
sphere up and let me turn it back to mat cap. I want to, I think I want
to start with the body. I like to start with the body. It's kinda like a
good, good base. So their body is sort
of like a teardrop. It's just like a teardrop shape. So we're persevere and I'm
just going to validate it. And we just want to make
this teardrop shape. The way that I usually make
that is we use the symmetry. So if we go to symmetry here, I'm going to scroll
down to show line. And I actually usually keep, keep this on all the time. So we do show line. We can see that our
extra symmetry is selected here and you can
see the red line here. So that's our X assymetry. That's why you see that red line going around
the whole thing. If I tap on this, you
also see a red line. So we go back to symmetry. And we can also do the blue, the blue Z axis. So as you can see
down here now there's like a red line
and a blue lines. So we want that for the sphere. So we want to go here
as well and just tap the blue. So now we have both. So what we can do is drag up and it will drag this up
until we get a tear shape. I like to use move for that. You can see everything
is selected, but of course, that's not
going to move symmetrically. And unless you have symmetry
selected here as well. So we tap the symmetry, make sure you're on
the right shape. And then we can
just drag this up. I'm going to tap front so I know what I'm looking at
the exact front. Use Move tool My moves, the size is for the pixel size, it's about 02:40 or so. And then I'm just gonna
drag this up like this. And maybe just kinda make
it a little bit more. Smurf II, Smurfs,
like maybe pushed the bottom-up a little
bit, something like that. So I think that works. I think that's pretty good.
And turn it to its left side. You basically just
want to look at the reference and just, just make like a nice
little teardrop. Anything like that I
think should work. Look at it from lots
of different angles. Just make sure it's
make sure it's good. And obviously he's turned, but I don't want to. Usually when I start
to sculpt the shapes, it doesn't really matter
which way they are. I just want to get the life
of the shape and then we can, and then we can plug
it in afterwards. The arms are pretty much they look like
straight cylinders. And then we have
this arm shape here, which I think will
be around cylinder. And then we'll just use some
spheres for the fingers. Maybe some pill shapes for the is very pills
shaped fingers. So, you know, systematically
we'll just work through it. So next, let's change the
name of this two body. Okay, so we have Fluor body. So let's add another
cylinder here. And I'm going to tap Gizmo
so I can move this around. So I'm gonna move this
up and just shrink it. And maybe I'll
just move it over. So I'm going to shrink it. And judging using
the body as a guide, like I want to make the arm essentially the size
that it looks like. So maybe around this size. And is arm isn't too
long but it looks like it could be about the
same length as the body. Will stretch the arm out
to maybe around there. So that should work.
I'm going to rename this arm because this
arm he has is straight. So let's make a
sphere for the head. It looks like a sphere. It might be like a
little bit of a there might be sounded
like a little bit oblong or something like that, but definitely
closest to a sphere. So that's the shape
that will add Sphere here, like gizmo and
bring it all the way up. And let's see, the head
is bigger than the body. So we want to make the
head bigger than the body. Okay, so something like this. I think that I think that works. So okay. So he has this little
his little bottom here and he has this
leg coming off. So I think the easiest thing to do for this would be the tube Tool and then another
sphere for the Paris feet. And if we want, we can
actually turn him and sort of sort of put him in that
general position using a, using the arm. And let's add. Actually they don't
have to do that. So let's just use tube. So we just go to tube here
and we don't need snap. And I think we'll use,
let's use curves. Curve is much better now
because it doesn't rely on, like it uses less nodes. Before, before one point, ETU was, it was tough to use. The legs sort of
originates around here. It comes down, then
it curves back. So let's just do that shape. So we're just going
to follow the, we're just going to
follow the reference. So something like that, that looks pretty good. Actually. I'm gonna get
rid of one of these nodes. Maybe even get rid
of two of them. Okay, that looks alright. You can use the gizmo to
twist it if you want. You can adjust the
general position. Like if he's gonna be this way. You can sort of you
can adjust the leg. I'm gonna leave it outside
the body just so you can see everything
that I'm doing. I'm going to tap gizmo again, that's going to bring
up the tube options. So let's go ahead and make
this a little bit thicker. So probably the same
thickness as the Arms. Think something like
that. I think that works. The knee might be a
little bit bigger, but ultimately, I think
it looks pretty good. So I'm just going to just sort
of adjusted a little bit. This is the front.
Turn it a little bit. Let's move it into his body. So let's use the gizmo. Tap the gizmo up there. And I want to move this into
the body because that's the only way that I'm gonna get a proper placement for it. Another little trick
that we can do is we can actually angle it. So here's the front. So he's kinda facing this way. So I want to angle this and
let's just save this view. So we go up to this little
camera view and just hit one. So we'll just save it as one. That way we have this
view so we can kinda go back and reference
it if we need. And this will kinda show us
a lot of what we need to do. So let's take the arm and
let's move it into the body. And it can rotate it. And we can just put it in a
general position like this. Now obviously the body, we're going to have
to bend the body, but I don't wanna do
that yet because we can use this body for
the other three. We can actually use a lot of these shapes for
the other three, they're all pretty similar. So I probably will copy this or duplicated before we mess
with the body too much. Okay. I think it's
looking pretty good. So I'm going to go
back to my view. And I'm just going to adjust
the leg a little bit. It's going to spin it. It looks like the shoulder would be here and the leg is
like right there. So this is perfect.
The shoulders here, the leg comes down. And I think that's
looking pretty good. So let's add another sphere
that we can use for the foot. And we can also label
some of these two. So let's take this name. This will be leg
sname this leg B. Let's take this sphere and
name it head, arm, your body. We want to make sure that we
continue to label things. So let's add another sphere. And we'll use the gizmo to just kinda move it into
place, shrink it a bit Okay, So that looks pretty good. So I'm going to stretch
it a bit smaller. Alright, so I'm
going to validate this sphere and we can use move to just kinda manipulate
it to get this shape. So I'm going to
turn symmetry on. I'm seeming to undo, undo the move, go
back to the sphere, validated, and then
turn symmetry on. You want to make sure
you have symmetry on. Because right now we
just want to bend it. Okay, so something like that
I think is pretty good. Because we can always adjust and make this little front part. We can always bend
it a little bit more or we can do this. This might be a little
bit easier option. We'll take this,
Let's rename it foot. And then we can clone it. Take your Gizmo, and you
can actually just bend it, bring it down, make it
a little bit smaller. There we go. So that's
kind of like the Ben that we're looking for,
something like that. You can kinda twist
it a little bit, just make it as you would need. So I think that's pretty good. So now we can just
go ahead and just trim this back part off. So we just use the shape
to make another shape. Makes sure you're on the
one that you want to trim. Guess I'm using this square
and we just trim that. So and we'll be able to smooth
that out as we go forward. Okay. I think the
bottom of the foot might be a little bit more flat. So I'm just going to push, I'm going to push
on this a little bit and just make this
a little bit more flat. You can even adjust this
one too as you need. But I think that looks
pretty, pretty good. Can also kinda smooth them
together a little bit, even though they're
not connected yet. Let me turn off symmetry and just kinda smooth
this out a little bit, just so it's a
little bit closer. So that'll just help us
when we do voxel remeshing. It'll just make it easier
to smooth the two together. Okay, cool. Okay, so let's take our leg
here. So this is like B. Let's clone it. And let's call this
one leg a. Leg a. We'll take our gizmo
and we'll just move it over and see how this leg is up. So we'll just rotate
it with this red ring. We'll just rotate that up. If we go to our view, we can have a better look at what this looks
like on that side. And obviously we have to adjust. There's a few things
that we need to adjust, but we're we're in
the right ballpark. It just seems like the legs might be a little bit too big, so we just have to adjust
some things like that. These 2 ft, I'm going
to take both of them. Let's Nestle one
under the other. So just long press
and bring it up. And it will, they will Nestle. So then we can just select
both of them, clone them. And we can bring it over here. So let me can move
it, rotate it. Again, this is very loose.
Let's go to our view. So we can kinda see what we see rotated a little bit more. You can see the whole
bottom of his foot. So these are the things
that we're looking at rotated this way. We can see the whole
bottom of his foot. So we might not even
need this little piece. So if I hide that and we'll take a look and see
what it looks like. It's still up and we can
see the bottom of it. So it'll probably be
something like this. And then we'll just we'll
adjust this leg as we go on. We have to make it smaller
and things like that. So we can do that in time, but we just want to generally
put these things where they're gonna go and then
we can clean them up later. So let's also take this arm. So we'll name this one arm B. And then we can do
the same thing. We can clone it and
make this arm a. Then you can just bring it over. Let's go to our view because it looks like his arms
are doing the same thing. So let's make them
there for now. Let's go to work view again. Okay, So this one is a bit. So we'll probably have
to adjust both of these Arms to make them to
put them in the right spot. But that's okay. I'm gonna
adjust this a little bit more. I'll just this one as well. Okay, something like that. So in the next video,
we're just going to make some adjustments and fine tuning our character as well as duplicate the body because
we can use those later on. So that's what we'll be
coming up in the next video.
5. Fine Tuning & Adjustments: So let's go ahead and
copy this body part. That way we don't
have to do it again. It'll save us a little
bit of time later. So this will be body a. So I'm going to clone this. I'm just going to
move it down here. And we'll make this body
be that way if we need it, we can just come back
and it's their body. A. Let's go back to our view, our little side view,
they're running view. So first things I can
see that the body, his back is arched. I want to take move.
But obviously, remember we have all
these symmetries and we can't use all these
symmetries right now. I think we just want
the red symmetry. So let's go to Symmetry
and turn off the Z. So now we only have the red. So when we push, it's
only going to push. It's gonna be equal on
the back, left and right. Otherwise, when we
push is going to like push on the
other side as well, we just want the
left and right side to push equally like that. So let's make the move
tool a little bit bigger. Just gives for a
nicer, a wide area. We'll make this
smooth. We'll make the move just a little
bit more gradual. Which is a little bit
different than drag. Drag is like a little
bit more tight. For this little section. Move tends to be more smooth because there's a
wider area that it's moving. So we just want to, lets go back to the view. We want to line up the
back with the leg area. So I'm going to move this all in a bit and just try to give him a little bit of
like an arch in his back. I'm probably just make
the body a little bit smaller while I'm doing it as well because
it's a little big. Okay. I think that
looks pretty good. I don't think he needs
more of an arch than that. I think that looks pretty good. Make this a little
bit smaller up here because they don't have
big bellies or anything. They're pretty they're pretty
small in the mid section. Okay. So the legs are
obviously a bit too big. So with this leg,
I'm going to use the gizmo and just make it much smaller. Bring it down. So there's like,
there's like a cut which we can do using split. Later on. We can split this. So here's the separation with
the blue from the white. So we just want to
match the leg size. I think something like that. It's a pretty small little leg. And now when I turn this way, I kinda have to just go with go with the body and
go with the instincts. It looks, it looks right here. But if we turn it this way,
like it's a little bit, It's not really matching
up with the body. So you need to just rotate
it and line it up with the body and just make it
look as natural as possible. In a little bit more. I don't think there's that
I don't think there's that much like hip or anything. I think it's right into
the body pretty much. So that's what I want to do. So that looks okay. And now we'll just use the, take the foot and follow suit. So we'll take the feet. And there are a little bit
big. So maybe I might make it a little bit smaller
and move it over. And then just use all of these other cues
like the leg and things like that to just make it look good
and believable. Okay, I'm going to move it up a little bit because you can see that there's a little bit coming up after his leg and the leg is
actually quite short. So I'm gonna go I'm going to tap on the leg and
then tap on tube, brings back the tube options so you can kind of shorten up the leg because the leg
really isn't that long. There's not that much space. It actually, I might
bring it up a little bit. It's really bent. So maybe even
something like that. The good thing about
the groups, I can tap, since this is nestled here, I can just tap on this one. You see here, this group. If you ever needed to move
something like if you tap on this and you're like, why is the other
one moving as well? It's because of this group. If you needed to move just one, you can have vertex
and it'll just move the one that you are on. But we'll just do group because we want to move
both parts of the foot. Okay. So this is
looking pretty great. I think I'm pretty happy
with the location. I don't mind that it's like
uptight close to his body. That's how the references. So I think that
looks pretty good. The other thing is just a
little blue section here. Do Smurfs have tails?
Actually don't know Oh, they do have a little tails. I don't think I if anyone
ever asked me that, I don't think I would have ever guessed that they
actually have tails. Alright, so I'm
going to take move. I can see that this
is real thick here. So I'm just going to the other one there as
well. It's the best. I think I'll just
edit both of them. So this one, I'm
just going to move, make it a little bit
smaller and I'll take this and just move that as well. Make it all a
little bit smaller. Maybe make it a little thinner. You can also take smooth
and just kinda smooth away. Choosy. A nice way to
kinda reduce mass. But keep it fairly
clean until we, until we remeshing it together. Okay. So let's go back to our view. And I'm always going to, there's always so much
details that I so many details that I'm
trying to do it once. One little thing that
I'm noticing is I kinda wanna kinda want to
turn the leg back a little bit more
because his knee is almost pointing straight down
and minus a little forward. And this is very nitpicky. But one thing we can
do is take this leg, leg B. I'm going to bring
it up over the foot. And then I'm going to
nestle the foot with leg B. So now I can just take leg be. Remember what we
were saying before. I can use the gizmo and group and it will
move everything. I hope it moves everything back. So that's pretty much
all I wanted to do. Okay. So now we have this leg. And I mean, part of me wants to just duplicate this again, but It's not that
difficult to just adjust this and make it smaller and kinda match
it up with the other ones. So I think that's what I'll do. Want to bring it into the body. Then just kinda take a
look at the reference. I need to make it smaller again. So you just tap on
tube and then you can adjust the tube sections. So maybe something like this is not that much coming off there. Maybe we'll take the whole thing and smooth forward a bit. And always go back to your view and just check it
out with your view so you can kinda see
what it's looking like. We'll take this foot and then sort of adjusted
his little cream puff feet. They have such funny feet. Okay, it's not so bad. Let's take a look
at the view again. See what we're missing. It actually looks
pretty accurate. Maybe just a little
bit forward and this foot is facing
up a little bit more. I want to put a bit
of a bend in it too. So I'm going to use Move tool. Notice I have the
symmetry still on this. So I'm gonna make the move tool little bit bigger,
maybe around 300. So when I pushed down, you can actually
pull here or you can push down from the top or both. We do both. Make it a
little bit smaller. Just try to get some
of that roundness and the bottom little details like that that I tried
to really stick to. And I think they I think they little details like
that make a big difference. I think that looks pretty good. The only thing that
I'm struggling with now if I go to my view, the leg is fine. But there is a little bit of
a difference in the space. I think I need to bring
my foot up a bit more. I think that's the best way
to handle that situation. Then we can take this leg, we can go back to
tube and then we can just adjust this leg
to go into the foot. I think that works. Then we can adjust this to go
into the the body. I think that works. I cannot believe they have little tails. Let's go ahead and add. I'd say we'd label
all this stuff. We want to make sure we
have everything labeled. Arm a RMB. Oh yeah. Everything is labeled nicely. So this is the other foot. Let's take leg a and move it up. And that's Nestle the feet. Okay, I don't need
this little piece, so I'm going to delete it. And I'm going to call this foot a because this goes with leg a. So those are nestled. Now
let's go ahead and save. All right. Let's add a little. Actually, we can just copy this. So we'll take the
head, clone it. We can go ahead and validate it. And let's just tap
on the three dots and let's just name a tail. So we'll use our gizmo
and then just bring it back to his tail end. It looks like it's just
this little sphere. It looks like it's quiet low. So maybe something like that. Let's go to our view.
Can't really see it there. But it looks like that
looks like the right spot. I have to slide it over just
a bit so we can see it. I think that works. Still
looks like it's in the middle. And we can still
see it in our view. So that'd be a good
little breaking up of the white with a
little blue tail there. Let's position his little head. And then we can make the
hat and things like that. So let's bring the head
Down a little bit. And it looks like it
might be a little big. The body actually looks. The body's Tool looks
a little big to me. So I think I need to make I just want to
shrink it a little bit. So we'll just use the gizmo and the orange ring and just
kinda shrink it a little bit. That feels a little bit better. I think that feels a
little bit better. So I might have to
since I did that, I might have to bring this leg in a bit more because I don't
want that much space here. I'm always looking at
this negative space to, to make sure it
vaguely matches up. Because this negative
space is very important. See how far down the arm is. His wrist is like
all the way up here. So that's why I'm
we're going to have to make the Arms smaller. This is still
looking pretty good, but I think I can
bring this leg up a bit and maybe even the
tail up a little bit. Just a smudge. Okay, so let's get these arms a little
bit better as well. So we're going to just shrink them and put them into the
body a little bit better. So that it looks a little bit, definitely little bit better. So now we can make
the head a little bit smaller and just bring it down. You can see there's no point. It's kind of his head is round
it on the top of the neck. So I think that would be good. And we look in the front view, we can see our arms
are looking crazy. So I'm gonna bring them
in closer to the body. Maybe even make them
a little bit smaller. They should be about the
same width as the legs. So there's still a little thick or a little smaller
than the legs maybe. Okay. Bring us anymore. Okay, That feels a bit
better. Let's go to our view. It's important to
go to the view. So we have a good foundation for where we're
putting everything in, how we're doing everything. Okay, so let's make
this little Plate. Because we can use the Plate as an anchor also for the arms. Because they can be
a little bit tricky to get the arms right
in the length, right? But if we put, if
we put the plate using our view that we pretty much like
if we put the plate, then we can anchor the arms
and we can adjust things. Because obviously the
main draw is gonna be not only the Smurf
but his little Plate. So in the next video, we'll use the lathe Tool to
create the Plate. So then we can continue
with the arms and filling up the plate and continue blocking the rest
of our character
6. Lathe Tool Plate & More Blocking: Okay, so let's make this Plate. So let's use the lathe Tool. Let's find it. So
here's the lathe Tool. We can just use path. You'll see this orange line or this line will come
up in the middle. What we wanna do is
I'll just show you. So we're going to
start at the line. We're going to come
out like this. Actually might be
easier to use curves. Let's use curves, the curve, the new and improved curve. So I'm going to start from
the line and then come out. And then we're going
to come up like this and then make like
the lip of the plate. What's important is you come
down and over like that. Now, I didn't do it
a very good job, but we can fix the nodes. And as you see,
it's still pretty much looks like a Plate. So that'll be your platelets. Go ahead and label
it now. Plate. And so if we want to make
this a little bit rounder, you can just adjust your plate. Looks like his Plate
is kinda round. Can't really see the whole
thing. But that's okay. Let's make it a little deeper. Maybe let's make
this a little bit. We go. That looks pretty good. Two, not too crazy,
just just a Plate. If I look at it on
the right side. Well, it's not it's not
straight, but that's okay. I think that will
work as a Plate. I think I'm happy with
that. So before I validate, I just want to move it generally to the right area and actually
might be a good idea. Let's see if we can use the
gizmo to do move origin. If I hit right, no, it's the Plate is
still not straight. I want to straighten it out.
Let's bring back the grid. And as long as
we're on the plate, we can use the gizmo. Where's the gizmo? Let's
do pivot, center, pivot. And I'm just going to rotate it until it's pretty
much straight. That's like a teeter
totter or something. It's not the easiest
thing to do. Unfortunately,
like it should be. But maybe from further away, maybe that'll make it easier. Okay, so that's straight
enough. I think that works. So now I'm going
to move it up and move it to the general position. Big Plate. So we'll shrink it. Something like this. Move
it out a little bit more. Let's see how far away
it is from the body. So let's go to our view. And then we'll just there. It's tilted a bit. But I think that's
okay. I think we just want the general
area for now, right in the middle,
in-between both hands, we go back to our view. We'll see how much space it
is from the rim to his face. If I'm looking at the view, it's actually quite a bit off. Just as a few things
that are off. First, we need to make
the cut in the body. So that will tell us
where things are. But right now if
the cut is here, the Arms are very high. So there's that too. So I think I need to
I think I need to take the arms and
bring them down lower. So you might have different issues because when you do this, it's gonna be very
different than mine. Obviously. I'm trying to show
you everything that I do. But I think most more
important is just the reasons why I'm doing
everything right now. I'm going to maybe I'll use move and I'm just going to try to make the
body a bit smaller. So maybe something like that. When I look at my view. Okay, that's still not too bad. I'm going to move the head down. Okay. There might
be a bit better. The head is right
at the shoulder and that's a little bit
better of a position. And the plate is tilted, but I don't know if I
want to tilt it now. I think I want to
build this on top of the plate and then
till everything. But what I basically did
is another see this, this negative space in-between
the Plate and the mouth. So that's why I wanted to bring the head down
and make the body smaller because the head
would be closer to the plate. Okay, so let's make some
big moves because I feel like sometimes it's easy to sort of like nitpick
and go really slow. I'm gonna make this smaller. But yeah, I need to start moving things along
a little bit. Okay, so let's get to the head. Now. What shape is this head? It's just like an oval or it's kinda just like a
circle, it looks like. But to me it looks more like. Let's, let's take
the symmetry and let's turn on or we didn't
invalidate. Let's validate. So I'm going to turn
on the Z as well. Then I'm use move. So now we
have the red and the blue. I feel like the shape is more
straighter on the bottom. Want to make sure
I have symmetry on and we're using move. And I just want to make the bottom a little
bit straighter. Not that much, maybe
something like that. And then I want
to make the top a little bit straighter as well. I feel like the head would
be that sort of shape. And maybe I'll bring bring the back end
a little bit more. Okay, so something like that. I want to turn off the blue now. Now we're just
dealing with the red. And also I want to make the
body's smaller up here. So if I'm looking at the
front and this is the body, I'm going to use move and
I'm going to lets solo it. And I'm just gonna make
it thinner up top. You're going to just make
the whole thing thinner. Me move ahead a little bit. Now. Little bit higher. Okay. Has it look It
looks pretty good. Okay. So for the head, There's this nose, which
lets just add a sphere. We're going to just block
this out little by little. So let's add, Here's the
head. Everything is labeled. Lets add a sphere and
let's just label it knows. So now what use are gizmo
and we'll bring it up. I'm just put it in the
general the general area. We'll make it smaller. So
maybe something like that. So also for the head, I feel like the
head would be flat. See the eyes look like they're
kinda wanna flatter plane. So I'm gonna go to the
head, go-to flatten. I wanted to flatten. Can probably do move
first and then flattened. I just want to flatten the
front part of the head a bit. Maybe something like this. Might not even have
to really flatten it. I think it looks
pretty good like that. So that's essentially
what I wanted to do. I just wanted to flatten
flatten ahead a little bit in the front and then
we'll take the nose. And then again, just generally
put it where it should go, maybe something like this. So it needs to be some
room for the Mouth. I think that looks pretty good. Now the nose does look like it's kind of straight going up. But I think we can do
all of that with move. So let's take the
nose and validate it. I think we can use
move lets save. Remember to save
every now and again, I don't have autosave on. I'm going to turn symmetry on because we just want everything to do to be
the same on both sides. So let's just kinda Sculpt this nose so it's kinda
straighter on top. So I'm going to pull this back. We can make it a
little bit smaller. I'm going to pull this back. And then this part, I'm
just going to lift up. This bottom part
is nice and round. So I'm going to push
this down again. Just so we get that
nice round nose and push it down even more. I'm not trying to match. Obviously his face is
turned a little bit, so I'm just assuming what the profile is
going to look like. And I think it would look
something like this. It's very bulbous. We wanna make sure that this
part is nice and round. But then it comes up. Okay, so something like this. I think it seems pretty good. I think that works. The size
we can deal with later. The eyes look pretty simple, but let's make the ears. So for the ears, you can see there's
actually look like, they look more like spheres. But I think I'm just going to use cylinders and then we can
smooth the cylinders out. So let's go. We have the
nose, let's add cylinder. Then we'll use the gizmo
and we'll bring it up. And we can just bring it to this side that we're looking at because we can't
see the other one. We'll Mirror this eventually and it will just be the
same on both sides. So we'll shrink it will just
make it a general ear size. And I'm going to
use snap and 90. That way, I can just
take a look at it. Exactly 90 degrees. Before we kinda
mess with too much. I'm going to bring
it out and maybe make it a little bit thicker. Like so. Maybe even a little bit more thicker,
little bit more thick. So I think that
looks pretty good. And I'm going to stretch it
and I'm just going to sort of It's pretty big. They have pretty big ears. So I think this is the general area that
the ear is going to be. And then the Mouth
would be here, maybe a little bit more
forward, something like that. So I think that
looks pretty good. Actually. I'm not going
to mirror it yet. And we're gonna, we're gonna do the details for this ear
and then we'll Mirror. And it will just go
on the other side. So let's validate this, but we want it to be rounded. So we're also going
to do a round edge, the one that we made. So we'll do round
edge, we'll start in the middle and
we'll just round it out by pulling down
a bunch of times. And that's perfect. I might even make it
a little bit thicker. Maybe something
like that. Now you can see these little
pieces of the ear. And let's use move first because we want to
just kinda stretch it. I don't think we need symmetry here because we're
just going to, we're not going to do
anything symmetrical anymore. So we're just going to move it. So it's like bigger on this side and smaller
on the bottom. Just like it looks
in the picture. So we're just going to
stretch this side out. Let's make it a little
bit bigger just for the movements are smoother. So we'll make it
bigger on this side. And then just kinda bring this, this part, this part together. Round on this side and
then smaller on this side. Okay, pretty simple.
It looks good. So now we have to make these, these lines in there. So the way we'll do that
is let's use layer. We can use the layer Tool sub. And that will create
something like this. You can control the depth with
this part, the intensity. So if you want to bring
that down a little bit, and essentially
we're just going to make a kind of a hole in there. But we're going to make it sort of on the bottom side
of this cylinder. So I'm just going to start here. It's a little big
still, so we'll make turn the radius down. And actually something that'll make it a little bit easier. Let's save. And
let's refresh this. So let's do a voxel remeshing. Voxel Remeshing here
right now it's at 01:09. You can bring it up to
150. Should be fine. Just so you know,
I'm going to use this shortcut on the bottom. You can put that shortcut. Where is it that you can put
this shortcut down here? It's the same exact
thing that I just did, but you might see me
swipe up and then just set my resolution and then do re-emission. It's
the same thing. But I will I'll probably be
using this as we go forward. Okay, so we Remeshing
that you can do round edge again to
kinda smooth it out. Okay, smooth all that out. And now I'm going to take layer and we're just going to carve out,
see the difference. It's a very big difference. And we want to carve out a
shape pretty much like that. Maybe even less, maybe even
just more towards the bottom. So something like that. Here's another way
to do it. If that's at that is difficult. You can use the mask. And then you can make
a little bit smaller. You can use the mask, you
can make your shape here. Then you can take
unmask if you want to just clean it up and make
it exactly how you want it. I think something
like that is good. Then you just go to
the mass settings, invert gizmo and then
you can bring that, you can bring that in like this. So that's just another
easy way to do that. So you can use layer,
which is more of like a wild, wild west style. Or you can just use the
mask that we can clean it up and you can
do it like this. So let's get rid of this mask. So we'll go to the
mass settings and to clear. It looks good. You can do rounded edge. But actually, excuse me. You can just do
regular smooth two. Was I just using smooth? I might have just
been using smooth. You can do regular smooth
and just smooth it out and just make it
look a bit more organic. Like so. Then for this little, that little nub in there, you can add a sphere
and stretch it. Or we might be able to get
away with doing inflate. Actually have a better idea. Let's take the gizmo and So now let's just turn this. Let's take it off snap. So
now we can position it. So it's sort of like
coming out of his head. And now we just need to
go to where our scene. We just need to kinda keep an eye on where this is in accordance to the
bottom of his head. So the bottom of
his head is round, it goes right into the ER. So that means that this
year is pretty low. So I'm going to tilt it and then I'm going to tilt it with the red ring because we're seeing a good amount
of it from the front. So I'm going to tilt it like
that. It looks pretty good. It's about the same
size as the nose, which means that mine is
a little bit too big, so I'm just gonna make
it a little bit smaller. Doesn't have to be exact. It just has to be exact
enough for someone's like, why is the ears so much
bigger than the nose? When on the reference clearly
thereabout the same size. So you always have to be paying attention to that sort of thing. Okay, so let's see how
much of it is showing. I think that looks pretty good. It looks good. So
now we can go ahead and we'll go to the scene. So this will be the ear. We can just call them gears. And then we can go to
add and then Mirror. And now we have one on
the other side as well. Okay, So that looks pretty good. I'm going to use I'm going
to valid or actually no, I'm just going to tap on
this ear and then tap move. And I'm just gonna
move this a little bit more into the face. Still looking good. It's
still a little high. So I'm gonna bring it
lower, a little bit lower. I think that looks pretty good. And then I'm going
to use inflate. And I'm gonna do
this on the head. I have symmetry on, so it's
gonna do it on the same, on the other side as well. And I'm going to use inflate. I'm just going to inflate
that little round piece. So I do inflate like that. It looks quite big. But the thing is if you
smooth it, you lose a lot. So let's, before we do that, let's go ahead and voxel
remeshing the head. I'd like 150, I'm
going to save first. I tried to save
before I do voxel remeshing because it's
always prone to crashing. Then we'll do a voxel remeshing
around 150 on the head. So that should allow
us to be able to inflate with a little
more accuracy. So it should be a
little cleaner. Let's maybe something like that. Can actually do it on an angle. Then you can smooth
it down and it will probably just make
exactly what we want. So it just makes that
little, that little nub. So that's pretty good.
That was pretty good ears. We'll continue working on this. And the next video.
7. Even More Blocking: Let's make the hat on top. So it looks like it's
sort of like a Santa hat. But this might be a bit of
a I think I wanted to use a trying to figure out the
best shape of this hat. Okay, So it's sort
of looks like it's, it might be kinda squarish, but we can do that after. I think we'll use
a sphere and we'll make the initial shape of
the top part of the hat. We might use something else
for the brim, so to speak. But let's start with a sphere. I think that'll be the
easiest way to do it. So we'll add a sphere. We use our gizmo
and bring it up. Alright, so we have
our default symmetry. So let's go ahead and validate
this and let's use move. And maybe we'll actually
do the Z symmetry as well. Now we just have to make
another teardrop type shape. So we're just going
to stretch this up. Make sure you have symmetry on. So we'll stretch that up and
then we'll make the bottom a little bit bigger like this. We have to do it on both sides. Like this. Keep going
back-and-forth. Think something like
this is what we need. There we go. So we
have like a soft, soft kinda looking cone. I think that's what we need. Okay, so now with this, Let's turn off the Z. So we go to Symmetry and
turn the Z axis off. That way we can just
push it to sort of get this floppy shape. So I'm gonna hit right
and symmetry zone and we're just going to push, pull, push and pull. Something like that. I think
that's, that's pretty good. So now let's add, this is gonna be HAT. So let's just name this hat. Let's add another sphere
because we can do the same thing that
we did with the foot. Now, we'll just add
another sphere like this will make it this
kind of shape here. Stretch it out a bit. We'll use this blue
little sphere on the, on the gizmo, stretch it out. So we'll kinda put
this in place. Let me make it a
little bit bigger. Something like that
looks pretty good. So now let's just
match the shape. Again. We're just going to
pretend that we're looking at this as a profile. Even know right now it's
like a three-quarter pose, but we're just gonna
pretend it's a profile. So I'm just going
to move this hat, make it a little
more rounded here, push this side down. And then just use this and make it work a little bit with
this part of the hat. I'm going to validate
this little 12. Then I'm going to use
move and just make it a little more
round on the front. This is a little sharp. If I can explain that right. Like they're really
tiny details. But I just want to make this a little bit route more round up. But I made a mistake. I
wasn't using symmetry. So I'm going to
make sure I press, go back and use symmetry. So that's exactly what I mean. Now it's just a bit more round, really tiny details, but I am
very, very detail-oriented. Think that looks pretty good. The only difference is
this is a little bit more. Here we go. Little bit more like that. I'll use move and then
just kinda make it seem a little bit seamless. Split this up to okay, I think that looks like a
pretty good, pretty good hat. The width. I might want to just adjust
the width a little bit. Maybe just adjust that up top. But ultimately I think
that looks pretty good. That looks pretty solid. So the only other thing that
I'm wondering is this brim, That's the only thing
that's a bit funny to me. I think we can use
a tourists had top. You have the sphere. Let's do Top tip. You can name it whatever
we had Top Hat, top tip is just so we
know we know what it is. We can add a tourist. I think a tourists might work. We'll bring it up to the spot. Now I want to make it thicker. So let's tap the gizmo. Excuse me. We can bring up
our other options here. So now actually
when you tap gizmo, that options already show up. So I think it's the
green one here. The green one makes it thicker. Think that's what we want
and I want to use the gizmo now to just stretch
it like this. Stretch it a little bit more. Make the whole thing smaller. Maybe. Sometimes I
have to go back and forth because I want it to
be I want it to be thin. Let's see. There we go, make it bigger and then
stretch it a little bit more. So I'm thinking
something like this. Let's see if I bring
it to this hat, maybe a little bit bigger,
then bring it straight up. That feels right to me. That feel right to you. I feel like feel like that
kind of works. So let's Nestle. So let's
take the hat top tip. The hat top will
nestle it there. And then we have the tourists. Let's rename e1 hat brim. So that's the brim. So now we can nestle
this as well. So now we can bring
this to his head. Bring it down. We need
to make it smaller. So it goes down behind the ears. So I'm gonna bring it
down to behind the ears. I'll just hit right. And now
we can just position it. We can try to just position it where it seems like it would go. Maybe back a little bit more. Whoops. I don't want to turn it. I want to just move it up
and down and left and right. Okay, So the first problem
that I'm seeing is okay, So if his poses like this, the hat has to be further back. Hand has to be sort
of like this even. But the only thing about that, that actually looks okay. Hey, that's actually not bad. But there needs to be
more room for his eyes. And also so there needs to
be more room for the eyes. And the other tricky part
is if it's like this, but in the cartoon is
hat is way up there. So now the head is, this looks like the perfect
place for the eyes. But the head is round and it would have to
curve a bit more. I think this part of the
hat needs to be bigger. These two. Okay, so it's going
to move the hat and the brim hat and the tip. So I'm going to
take the brim off just so they're not
connected anymore. So now we need to, we have a good
place for the hat. But let's make this part
a little bit bigger. Move it up a little bit more. I'm going to take this
little brim piece, just the little brand P. I'm going to
disconnect them all. So just a little brim piece. I want to put this
where I want it to be. So let's, I'm gonna
look at my view and kinda just want to put it
where I think it should be. The view is actually
more like this. Hello, I'm looking
at the view is actually more around here. So what I'm going to do is
I'm going to update this. So I went to the camera and
you hit this little update, button, it up late,
updates your view. Because I think this is
a little more accurate. So this part actually
goes over his nose. So that's pretty important. The nose would actually be the nose is right over
the middle part of the body. But he's also kinda
lean back a little bit. So that's where some of this, some of this stuff
can get a little Tricky. So let's take the head, Let's Nestle some
of these things to make it a little
easier for us. So we have the nose, the head, Let's Nestle the head, the nose, and the Mirror of the ears will Nestle
all those together. Let's go back to the view. I'm going to push it, push
it back a little bit. Okay, so now the nose is
still a little bit high. We can probably just move
the whole thing back. You probably don't have
to do all of this. But again, I'm like a little bit a
little bit crazy with it. I just want to move it
back a little bit more. I'm going to take this back part and just kind of angle it a little bit better view. Okay. So now at least the
nose is a little bit closer over the
center of his body, still out a little
bit, a little further. But I think that's I
think that's okay. It's now I'm going
to take these pieces and put them where
they should be going. So I'm going to move
it up and back. This whole part. I'm just
going to move up for now. I'm gonna put,
oops, I'm going to position it in the head
a little bit better. Something like that, but we can actually tilted
forward a little bit. So that will actually help us. So let's look at our view again. It's pretty good. It's, it's,
it's a little bit better. Okay, so I'm going to take
this and now I'm just going to use move. Kinda make it very curvy. I'm going to take this
and make it smaller. It looks a little
bit, a little big. I'll just use move again and
I'm just going to marry, marry these two together again. But, but the main
thing is I just want, I just want a nice, a nice curve here. That's all I really
want is a nice, a nice curve here. Let's take a look our view. Okay, that's pretty good. Not too bad. So we have
this, we have this. What I think we can do is take
the hat tip and the head. And I'm just going to
make it a little bit smaller and I'm going
to tilt it forward. I think that's gonna help. Let's take a look
at our view again. I think that's pretty good. It's a little far back, but I think I think
we can sort of figure that out at another time. So now let's just, I'm gonna
take this part and just make sure that I marry it
back up to the head. You can even take the tourists. I'm pretty happy with it, so
I'm going to validate it. And I'm also just
going to move it. I'm going to turn symmetry
on and we can kinda move it around and just make it. So it's a little bit better. Kinda formed fitted a
little bit to his head. Okay. I think that's good. I'm going to move
this up further. Let's take a look at the view. And actually there's a,
there's a lot of space here. So I'm kinda struggling
with that too. This is like this is the
important stuff that really make or break
your projects. Like I know I'm spending
a lot of time on it, but this kind of
stuff is important. And it's important
to figure out why certain things look
the way they do. So that's why I tried to keep all this stuff in and
I tried to take the time to really show you why I'm doing and making
certain decisions. So one thing that, Okay, so this is here and this is actually close to
the jelly thing. So this is a good spot for this. But you can see that you have to really match it up with the head and everything else. So let's see if the little
jelly thing is about there. It kinda Touches his
nose a little bit, but we can actually bring
the nose up a little bit. We can tilt it back. So we can so I think that works. We bring the nose up a
little bit, we tilt it back. Now we can give a little
bit more space up here. Maybe put it forward and
move it back a little bit. I think something
like that is okay. So now we just need to do the same thing that
we've been doing. And just sort of Mary this to
the front part of the hat. We can take this and
also just bend it. Since it's all the same thing, we're going to remeshing
it altogether. It looks like a
symmetry issue here. I don't know when a seems like something is off,
you know what happens? Something probably got turned at some point in time.
And that happens. Unfortunately, it's
really hard to keep the symmetry sometimes because things just like get messed up when you're in
the thick of it. Okay? It looks
like a good curve. That looks like a good curve will bring it down
a little bit here. And I want to bring
this tourists out. I don't mind actually making this a little bit more square. And then spreading the head
up the hat out a little bit. So it's a shame that
the symmetry got kinda messed up.
But that's okay. Alright, so another thing that I might wanna do is
stretch out the head, but I probably don't
need to do that. Oh, that's okay. I
actually like it. I like the head stretched
out a little bit. Alright, I think that
looks pretty good. So do we have enough room
for the eyes? I think we do. But another cool thing is we can just adjust the hat
as much as we need. And then we can
take this inserted, just move it up a little bit. Okay. So I think there should
be enough room for the eyes because they actually go down to towards the nose. So I think that should
be good and we can add, we can actually
make the skin and go over the head a little bit. Okay. So yeah, that was
pretty tricky part. I didn't expect that
to be so tricky, but it was just kinda tricky. And I'm just going to
continue to adjust this. And like I always do, I'm gonna try not to it out. I'm just going to show
you my my Adjustments. Because again, that's one of
the more important things that I do and I spent a lot of time on and
it's the Adjustments. Oh, it's this thing that moved. Somehow I moved it
from the center point like that. Never fails. How this feels a little bit too. There we go. Very round
with a very, very round. So you want it to
be more round down here. I think that's good. Key the ears, Let's
make sure let's see the ear positions. The ear positions
are pretty good. They might go a
little bit lower. Which in turn, I do have to move this little
thing that we made, but I think we can
just use the Move tool and it should move enough. Yeah, that's fine. Okay. Alright, good. Alright. That was
rough. That was rough, but we are we we're we're
rocking and rolling. So when we come back, we'll
I think we'll do the eyes, the mouth, and then
we'll do the hands, and then the rest of them. But it's tough. Take
your time with it, take as much time as you need. Just try to get it as
close as you can do this. And just keep in mind
the negative space and things like that.
8. Blocking Eyes & Brows: Let's do some simple Eyes. Can use two cylinders
or spheres. I think we can do the
eyes very simply. Open them right in the middle. Hopefully the nose
won't be too big, but we'll just have
to make it work. Smurf is a Smurf. So let's I'm just going to tab here that way when the when I make the eyes there
right in the middle, I don't know why I felt the
need to explain that too. So let's add sphere. And we can name this. So we'll use our gizmo
and put it in position. To be careful you don't
move other meshes. So it will shrink it and we can just make one and
then we can just mirror it. For now. We'll move it over. And I'm going to
shrink it like this. And actually before we
do that, Let's undo, Let's go ahead and
so we have Eyes. Let's go ahead and clone
net and name this one. Pupils are P1. P1 for Pupils. We can hide it for now and
just go back to the eyes. Alright, so I'm going to, again, I'm going to just shrink it this way because you can see
the eyes look very flat. They don't look like
they bulge out too much. So I want to make sure that
their eyes are very flat. We look at the front
and we want to make it something like that
should be pretty close. I'm here right again,
I'm going to bring it to the skin and then
I'm going to bend it just so it's right on
the surface of the skin. And if you're, gizmo
is not facing, is not aligned with
the actual sphere. See how I move it in the
gizmo moves along with it. You might have a line on, see if you do a line is just going to stay to the project. Left, right, up,
down, back, front. So it makes sure
you turn that off. And now it is the gizmo is based off of your shape,
which is what you want. So you can move this right
down to the surface like that. And I think that's pretty good. Might be a little small. Okay. So if we like that, Let's go ahead and hit
Mirror and then see. Okay, so the eyes are touching. So that means we need to make it bigger and move them
closer together. Okay. It's not bad if they feel they feel like
they should be wider. I think I want them bigger
and wider. I believe. Yeah, I liked that better. I'm going to move them a
little bit further apart. And I might even tilt
them towards each other. That might give them a little
too much of a expression. I think I like that. I'm gonna, I'm gonna see
if I can move them in closer to this In
more in the head. And let's see how that
looks a bit hard to gauge without anything
else around it. But for now I think
this is pretty good. Bend them out a little bit
so that they're equal. Yeah. The top was looking
a little little pointy, so I just wanted to okay. I kinda like that. I need to
move them close together. They are touching. And it might we might have to
bend them outwards to okay. I think that's pretty good.
I think that might be good. We just have to
gauge the size of the nose and the face
and all that stuff. I think the nose might lets point the lets expand
the nose a little bit. I think we might want to
expand it a little tiny bit. Forward. Well, we can just
move it forward and up. But I'm gonna go to
pivot and I'm going to turn this that way. That way I constructed a
stretch it out a little bit. Like that feels
right to me. Also You can't really see it, but the face might actually
come out a little bit more. I'm going to use
move on the face, make sure I have symmetry on. Because since we can't
see the profile, we don't actually know
how far up this goes, but it goes up quite a bit. Which means that we can probably bring this up a little bit. I think that helps a lot. Bringing this
bringing this bit up. Yeah, I think that I think
that helps because we still had to figure out the
mouth and stuff like that. So now that we've done that, let's adjust the eyes to the
new position of the nose. And another thing that we can
do before we even do that, Let's Move, make the move
tool quite a bit bigger, so it's nice and smooth. We can also flatten
this up a little bit, something like that. So let's now adjust these eyes. So we just have to bring them
out a little bit more and just adjust them because we adjusted the surface
of our face. So it's moving a little
closer together. Maybe make them a little bigger. And I just like, I think I just want the eyes to be bigger. But that's where your
personal touch comes in. And sometimes there's
things that may not match, but I think they
might look better. So that's just what I'll do. Okay. I think that looks, I think that looks pretty good. The nose. This is a
little, this is very, very, you know, I am by now. I feel that the nose is a
little too narrow here, like pointy, and I want it
to be bulbous on both sides. So I'm going to spread it out on the top a little bit
bigger. See what it mean? I'm just like making it
a little bit more wide. Yeah. I think that's I
think that's better. Because sometimes
when you stretch out a sphere it just gets
a little bit pointy. Kinda like how this is a
little bit pointing to. And evenness. I might
want to spread out the front a little bit
so it's not so sharp. In a sense, for lack
of a better term. Spread this out, try to make that straight, that transition. Okay. Good. I think that
I think that works. I don't think I need to
Eyes to be any bigger. I think they look okay. But maybe a little longer. Even. I don't know. I think they're, they're okay. But it's hard for me not to
experiment. As you know. As you can see, I'm always
experimenting. I like it. So now that we have that,
let's go ahead and save, make sure we save our progress
so they don't get a crash. It looks pretty good. Head shape looks good, the ears look good. Another thing that
I wanted to do with the hat was used flatten. This is on the
brim specifically. I wanted to flatten out part of the brim because it just
feels flat to me there. So what I wanna do is flatten it out with a flattened Tool. Notice how I'm
leaving a little bit. I'm not really
flattening and out. Like I'm leaving a
little bit here. So there's sort of like a lip because I want to
flatten that out to essentially I just want this middle
part to be flat. There we go. It's kinda minor,
but I don't know. It's just something that
just feels right to me. I'm gonna do it
on the sides too. I'm just going to
flatten them out. And on the back. Just flatten it out. And
then I'm just going to use smooth and just kinda smooth at all. And actually
you know what? The smooth is gonna be very
accidentally went too far. I think it just smooth
gently is okay, I don't think we need
to voxel remeshing yet. I think we can just
smooth it very gently, but the mesh is going
to be very soft. So just don't smooth
that hard or it will, it will work the shape. So I'm just very gently. Now we'll use move and
just bring it out. It seems like it's a
little close here. See how close that is? I don't really like
that, so I'm going to bring it out a little bit more. Just kinda pull it out. And
especially by the sides. Mean something else
is like not perfect. I wonder if I need to align, see if they can
straighten this out. Okay, Now it looks straight. What about this? We'll just move it
over a little bit. That looks straight
street ish K. So I'm gonna go
back here and this is what I was just
trying to do before I got sidetracked by
this stupid symmetry. It's like symmetry loves to
dislike not be symmetrical. Would be cool if there was
an option on like a mesh. And you can just do
lock symmetry so that you couldn't sculpt
on it or move it. Like it wouldn't let you do it. Like if you know, there should just
be locked symmetry. I think that'll be super useful. Okay, good. This
is looking good. Now. There's little hairs
like little eyebrows. So which means that
there's little, there's like the skin
kinda goes over it. So we might be able
to use inflate, either that or we'll
add cylinders over it. Let's try inflate on the
face with symmetry intact. Let's just see how that looks. If we do a couple of rounds. Now that makes him look
a little bit angry, even if we smooth it out, I think that makes
them look angry. So I think the best move
is to use cylinders. So we're going to add
cylinder. Bring it up. She's snap for now and
just snap it forward. You can turn snap
off. We'll shrink it. And we're going to
use this to make the kind of like the eye
socket sort of thing. So now we'll bring it down. And forward. We'll move it over and then we'll
just kinda shrink it. Maybe shrink it this way. Hopefully it's starting
to make sense. Shrink it that way. We can go ahead and hit Mirror. So now we have both of them. So now the only thing
we have to think about is how much of an
angle do we want? So we can take it off of a line because we can move them forward and then we can tilt
them back a little bit. Something like this.
But if we do this, we just have to adjust the hat. But I think I might like that. Let's take a look a
little further out. I wanted to be a
little bit more round. I'm going to separate
them a little bit more and maybe even
stretch them out here. Okay. I kinda like that. So I you know what,
I'm going to validate them because otherwise I'll just second-guessed myself
forever. We're on this one. I'm gonna, I'm not
going to use symmetry. I think I'm just going to
adjust this, willy nilly. And we're just
gonna make it work, so I'm gonna pull
it up. It's okay. They both of them are
going I just didn't wanna do both sides on one. Because that's what the
symmetry, symmetry would do. This isn't a mirror right here. So anything I do to this one is going to happen to this one. I just don't want
the two symmetrical sides to be affected. I want to just work
this thing as a whole. So I'm going to open this
up a little bit here. And I wish looks pretty
good, to be honest. Maybe just open this up. Yeah. Whoops. I think
that works pretty well. Actually, I think that's good. Yeah, I like that.
I think that works. So now it's just the hat. And for the hat I think
we'll just use move and we just need to kinda make a little room for these,
these little things. So we'll just kinda puff
this up a little bit. And I think that will I
think that will work. I think that's all
we need. Really. Just a little bit of
puffing up. Okay, good. Here's another little detail. We can flatten the
underside of the brim. One thing I really
like is making planes and concentrating
on planes. So by flattening this underside, just creating a nice plane, see how the light hits
it differently and gives that nice dark shadow there. Even though this is a mat cap, you can still see when you
move things a certain way, you just see enough light and reaction to it to know that
you've made a difference. If you want to go to step
further, you can do pinch. And you can bring it up a
little bit more. Symmetry zone. You can pinch the brim. So you can pinch the brim
and it kinda gives you a little bit more
separation on that plane. Little bit more of a crease. Going to be careful sometimes
it does things like that. Okay. But I think that's
pretty good. Okay. So I think that's good. I think we'll come back and
we'll do a little bit more. We'll do the Pupils and we'll do the Mouth in the next video. Make sure you save
9. Blocking Pupils & Mouth : Video number nine.
So we're going to block the Pupils
and the mouth, but I just don't like
the eyes together. So even though this is
traditionally how they are, I think I'm going
to separate them. I think I just liked them. I just think it makes a cuter with the eyes a
little bit more separate. I'm going to separate
the Brows as well. Maybe even tilt
them a little bit. I don't know. I just
think it's cuter. So I'm just making that
executive decision. And you can choose whether
you wanna do that or not. It's completely up to you. That's the best part
about this whole process. Alright, so the mouth. So this should be Fun. So how do we want
to do the Mouth? I think I want to give teeth to, you know, I give my
characters teeth. You know, I can't help it. I'm thinking for the Mouth, I might might be able to trim. Let's try it. You know what, let's just go for it. And I apologize for not
having clear, concise things. But with my work, there's always an
Art to everything. And I think it's very important. This stuff isn't mechanical. Sometimes you have to make choices and sometimes
they have to be wrong. And then you say, okay, we're just going to
try something else. So let's use the trim tool just in case you want to see
some of my trim settings. These are my trim settings. Stroke. I'm not sure. I think
all these are default. I'm not 100% sure, but I think that's all default. I'm going to sneeze. I'm
going to try to hold it. So he's smiling. So we're going to have
to make some cheeks and the mouth is open,
but it's hard. The way that the drawing is, it doesn't really it doesn't really allow for
the proper Mouth shape. This is one of those things
where it's kinda weird when you're trying to like 2D. And 3D isn't like
one-to-one conversion. So we kinda just have to
make it make do on our own. So what I'm thinking
is we'll use trim with lasso and let's
see how this looks. So I'm gonna just make a
little Mouth like this. Just trim that. And it's not going
to trim because I'm never on the right mesh. Kinda used to that by now. So let's try and
trim this again. Actually not bad, little, a little wide, but I think it actually could possibly work. I think it looks kinda
cute. If I'm honest. I think that could
possibly work. Okay, so let's use clay. And let's see if we want
to make some cheeks here. There would be
about around here. Smooth all of this out,
including the mouth. And I think the Mouth
is a little too big. Let's use drag and bring this. Because when he,
if he's smiling, you really have to bring up the ends of the
ends of that Mouth. It actually is kinda cute. So a lot of what I
kind of go off of is literally just
how cute it is. But I think the Mouth
is a little too big in this situation, so I'm going to have to
undo just a little too big. So there's a few other
things that we can do. One we can take crease and we can start a
sketch up a Mouth. We're using symmetry. And so I'm just going to
draw a Mouth in there. Kinda like that. So
that would actually be a really good Mouth. I think. I'm going to use,
I'm going to use Mask. Make sure you not on unmask. And maybe we can just remove the part of the
mouth that we want open. So maybe something like that. And we'll go here
and we'll invert it. We use our gizmo and
we can push back. Maybe like maybe shrink
it or maybe expand it. Now usually expand. The only thing it makes
that much difference. It's gonna be like pretty
black back there anyway. So I think that's fine. Bring it back a
little further if you want. I guess
it doesn't matter. Okay. So we have that. I
think that looks okay. I'm gonna go ahead
and clear this mask. So I'm gonna go back to mask, back to mask options
and just clear it. I think that works. I think that looks pretty cute. I don't think the Mouth needs
to be smaller than that. I feel like that's a pretty good I think that's pretty
good for the mouth. So I'm gonna box
3D mesh the head. So it'll hold this shape
a little bit better. So I'm gonna save and I'm going
to voxel remeshing ahead. 160 should be fine. So now we're going
to go to smooth. I'm still going to smooth kinda gingerly because I don't wanna
lose the shape too much. And we're not voxel, voxel remeshing that high. So okay, I think that's pretty good. It's not bad. The only thing that I'm
sort of thinking about now is if I should have if I should
have made the line. And then when I did the mask
like not make it end-to-end, but should have started the
mask inwards a little bit. Let's see if I can
use drag and drag. Drag this up. This is obviously
going to go back. It's a little bit, It's
a little bit funny. I don't like the way that
this Mouth looks like this. I think I'm gonna have
to try something again. I'm going to go
back to the mask. And I'm going to go back to mask and then
I'm gonna do unmask. So let's try not bringing
it all the way to the end. That makes sense. So maybe something like this. This way we have a
little bit room to make that crease for this smile. So I'm not sure, Let's see how this will work. So let's invert it. Gizmo will move this
back like we did. And then we're gonna
go ahead and clear the mask and see what we have. Okay, That's not bad and good
and voxel remeshing again, I'm gonna do a little
bit higher this time. I'm going to do it at 200. Alright, so I do want
to add some cheeks. So many use clay. And I want to add
some cheeks here. He's smiling. I definitely
want cheeks. Smooth them out. Nice. And smooth. Just small little
cheeks. I like that. So now the other
thing is see how the Mouth is a bit wrong because of the
way that it's trimmed. It actually this part needs
to come out a little bit. So I'm going to use,
Let's use move. And let's try to
drag this part out. I want to flatten it
because I don't like that. It's a sharp edge. So let's just flatten that edge. I think that's a lot better. I still think that we
can bring it out more. So I'm going to use move and
just bring this out more. This is another important thing that I've learned when I'm making characters like
this is really hard to do. Mouths and make Mouths
look good and natural. Because there's just a
lot of nuances to them. I really want here, there we go. See, that's what I'm
kinda going for. I want this to be
an angle like this. I don't want that to
be because that's because I don't know. It's kinda hard to explain. But hopefully it makes sense
that when you see it now, it looks more like a
Mouth than it did before. See you go back. You
don't want that. You don't want the Mouth part. You don't want this part
over the bottom lip. That's not good. So
that's why I like pull the chin out and push
them Mouth back. And for any character
that you do that has like any sort
of Mouth like this, There's always going
to look better. Another thing is this lip
going down like that, like this should
actually be coming up. So I'm going to
take move and try to pull this part up and out. Which is a little difficult, but there's a few ways to do it. So we're going to try
to pull this part out. It looks pretty good actually. You can pull it out a
little bit more. Okay. It looks pretty good. So let's go ahead and try to smooth. It was when to keep smoothing, keep everything nice and
smooth as much as you can. Apologize for the sniffles.
I don't know what it is. The last two nights like
before BED, get sniffles. It could be the
fan on behind me. But I don't know. Anyway. Anytime you have
things like this, sometimes it's nice to
add to make it flat. So I'm going to start serve
on the bottom, on the inside. And then I'm gonna kinda
curve out a little bit. So watch me do it
and then try it. So you see how I
kinda curve out, but I don't make it
flat all the way. See how I like how this is just a straight
and like a crease. And this part
flattens so I start underneath and I
flattened like that. It'd be nice to do
with the bottom. I don't really like this. I'm not really sure how to. Let's protect the
top of the mouth. Lets you select Mask and lasso. Let's just protect
the top of the mouth. Actually a symmetry
zone so you can just do one side and it's fine. So I'm going to take drag. I'm just gonna move down. The only thing I
don't like is see this little this
little protrusion. I just don't like that, so I'm
just going to push it down a little bit. It
didn't really work. Let's try flattening and flattening works a
little bit better. Just want to flatten
that out a little bit. And you can actually
do the same thing, can actually flattened.
It's not bad. Alright, let's get rid of
this mask and just make sure that everything is
still hunky-dory. You got some little
weird parts in there. So we can smooth inside
the mouth as well. Symmetries on both sides
to be being smooth. Smooth, a little
crease in there. Just want to smooth
all this out. Get rid of some of those
little dimples in there. Even though you're not really
going to see in there, it's just nice to keep
everything nice and smooth. Like a smooth mesh. Okay, so now let's take a
look at what we've done. I think it's cute. I
think it looks great. I loved that. Okay. And we can sort of we can use drag and then enhance
these, these cheeks. Let's use crease first. So we use crease
to enhance first. So that's sort of resembles
like the upper lip, like kinda going
over the bottom one. I'm still going to
smooth out a little bit, but I'm going to be very gentle. Okay, That looks great. And then drag and then drag up where you put
the little dimple. Now we can drag this point up. And that makes
them even happier. So you just want to do that
in that little dimple. So that gives you those nice
little take cheek dimples. I think that's great. Okay.
You can pinch if you want. You can pinch. I don't I don't
remember if we've already pinched this, but
you can pinch it. Do the same thing down
here if you want, if you want to pinch
that plane a little bit better, you can do that. But if you want. And the bottom part of the
mouth looks a little wide. So might just take
flattened and just try to flatten this out a
bit around the mouth. So I'm just kinda flattening around the mouth a little bit. Just I just wanted to get rid of a little bit of this Psych. There we go. That looks
pretty, it looks better to me. Now I'm just going to smooth it. Smooth everything out. Keep everything nice and smooth. Smooth, smooth out
those cheeks a bit. Okay, that looks good. You can also adjust the mouth
a little bit if you want. Like if this is too wide, you can use move
and you can make it a little more narrow. If you want a little bit
more of a narrow mouth, you can do like that. Okay. Alright, so I
think this looks good. Oh, we didn't do Pupils. Let's just do the
Pupils real quick. Since I already
labeled the video. So P1, lets bring back P1. Pupils are looking
huge right now. So we use our gizmo
will shrink it. And it looks good. So we'll do something like this. Now we just see you
just need to flatten it up the same way we
did with the eyes. So just flatten them out and
then push them into the eye. It looks like he has
more elongated Pupils, just like the eyes. So we're just going to
elongate them a little bit. I think that looks good. Maybe he's looking
mic more down. So something like this. Of course you can put the
Pupils wherever you want, go ahead and mirror it. Then you have your
two Pupils are, but they need to be
closer together. So I'm actually going to
move them closer together. Maybe even tilt them
outwards a little bit. I think that's a lot better
even though the nose is big, we might need to make
thin the nose out. But I think that
looks really cute. Let's take checkout our view. I think that looks
great. I think that looks good. Okay, Cool. So next, I'm going
to experiment with some teeth. We can
add the Tongue. If we have time, we'll
start with the Hands
10. Teeth & Tongue: Alright, I'm excited to see with this little guy
would look like with teeth. But first, I just
want to squeeze the nose together a
little bit just so you can see the eyes a
little bit better if there's like looking from
a front view or whatever. I think it just looks
better with the nose a little bit thinner. I think that works. Alright. And actually maybe I'll even bring it up a
little bit at the base. Maybe it'll bring it in a
little more here. Yeah. Maybe I'll even squeeze it
together bit more at the base. Yeah. I don't know why I'm
making those weird sounds. Okay. So I really like it. I wanted to give
them some teeth. I know that I'm gonna I'm gonna get a lot of
backlash for these teeth. But I love, I love putting
teeth where they don't belong. I love putting teeth on characters that
they don't belong. So we're just adding a sphere. I'm just gonna make them out
of spheres using Mirror. So we just shrink. I'll move it up so you
can see what I'm doing. So we'll just kinda shrink and then go something like this. That's it. And that's
pretty much your tooth. You can kinda square
root off a little bit with the flattened
Tool if you want, but you don't have to
do that right away. Can do that, whatever. Oh, and you can also do like, you can also use
something like this. Let's say we want to
use this for a tooth. I'm going to move
it out of the head. So here's our sphere. Let's say we wanna
do front teeth. You can do something like this. So we're going to validate this sphere that's right
in the middle. And what we can do is go to the, can use our gizmo
symmetry vertex. So we move to a vertex. And you can spread
this out like this. Like so. Turn off symmetry
can put this back to auto. It's fine. But we want the, we want to put this back
in the center that Gizmo. So I'm just going to do
pivot, center pivot. So now we'll just use move. We want to add a little
bit of a bend in this if it's in the front. So I'm just going to stretch it. Let's solo it. And let's push it.
It might get weird. Didn't get too weird, but
I got a little weird. So I'm gonna quite insane. And then I'm going to voxel
remeshing this little thingy. Maybe like 150 is fine. So we'll 3D mesh
this little thing. So now when we push it, it
should just push normally. So that's what we
want. We just want that little curve in there. You can pull a little
bit from the front two. So when we un-solo and
it's there'll be more like teeth who does have
to move it back in place. And also angle it a little
bit better to pivot, pivot. So you're going to make
it a little bit thicker, maybe a little less thick. And you can take move and maybe you want to adjust
the shape of these. Again. Symmetry. You can
do something like that. Okay, so that's the front teeth. Let's go ahead and add
another sphere and call this T fees. So now we just have
another spirit. You can do the same
thing, but just add the little ones on the side. Same thing, shrink, then
squash it together. This is my favorite kind of teeth like you don't really have to do anything too
crazy with teeth. Go ahead and hit Mirror. And then it gives more again. You can make the two
little separate teeth on both sides and then
back a little bit. Something like that.
I mean, I'm sorry. I don't know who doesn't
think that that's a good idea to give them little teeth. I
think that's great. I love it. There, little small. So it's unchecked that
this year There we go. There little small
so I might just make them a little bigger
weight. Why is it moving? So weirdly, let's
do pivot, center. Pivot. That didn't work. That's the center. This is
not the center. Oh, no. Why? I know why. It's because of
this. So I'm going to go ahead and validate this. Now when we do both of
those and make them bigger, they should be even. Okay. Yeah, that's even. I like that and move
it back a little bit. I like that size. Good. I'm keeping it. I don't care what they say. You have to be brave
and doing this stuff. Because people will love to
like tear down your ideas. But you just have
to do them if you really want to do it,
you have to do it. Unless someone can have
a good compelling reason why it should be done
a different way. Even then you can do it. You can do it whatever way
that you want. But listen, because sometimes people might have a better idea. You have to stay open to
people having a better idea. Alright, so now
let's do the Tongue. I must time we have left, okay, really? It's only 6 min. It's not bad for the tongue. Lolling out of his mouth. Tube Tool. I guess to Tool. The tube will do
curve, maybe snap. So I'm going to
start in here and I'm just going to do
something like that. We don't need snap
anymore because now we already, it's already done. So now I'm just gonna move these nodes until it looks like it's just going to move the nodes until they're
on the surface of the Mouth. What happens is even though
I turn snap off here, it remains on up here. So that's why I
was getting those. That's why it was
messing up like that. So you need to turn
snap off there. I always forget that these have wished would
just be synonymous. Like everything else. You should turn one off. This should also go off, but maybe in an update. Okay, so let's bring
this out a little bit. I don't think it needs
to be that long, so I'm going to bring
those two together to get rid of that node. Bring this out a little bit. Spline. So it's nice and
curvy. I love saying that. Okay, that's pretty good. I think maybe this can be
done a little bit lower. Okay, so hopefully this
will work, we'll see. So we need to make it wide. Let's try with a profile. So let's try to flatten it with this so we can make it flat. So now I want to, oops, oh yeah, that
actually that's good. If you tap on these
little nodes. I feel like I did this
whole thing way too fast. So I'm gonna do it
again and slower. This is the profile. The profile is kinda like the
cross-section of the tube. So like if you wanted to
make the tube into a ribbon, you could use the profile. So when you tap the profile, it turns into a box like this, which represents the tube. The tube is now a box. When you tap these nodes, it makes one part Round C. So this is how you know, when you're looking at this, this is the cross-section
of the tube. It's just turned. That's
where twist comes into it. So if you were doing this, if you're making
like a candy thing that had a flat
bottom and round. I don't know what
candy that would be like a Tweaks or something. International students are
gonna be like what's a Tweaks? Maybe Tweaks is well-known
all over the world. But you can twist
it if you want. So this is where
twist comes into it. You tap twist and then you
can twist it like if you wanted that to be on
the outside like that. So that's in a nutshell,
that's the profile. So instead of this, and this is actually
good because it will be round on one side. But see if we can, there we go. So we can make it a
little bit more to10. So I'm just literally trying
to make it like a Tongue. Bringing these nodes
in. Kinda like that. But I want to flatten
it up more to, I just wanted to be more flat. So I'm bringing these nodes
up. And that's kinda good. It's still a bit small, but that's pretty good. Alright, so now I hope that
we can, let's twist it. So that's better So it would be nice if
I could use the gizmo now to stretch it. But the gizmo is a bit
weird as it stands. So let's use pivot. Let's try to pivot this in
a way that will help us. See we can as good, we can move the pivot. So let's try to put it in a
direction that will help us. So if we want to
stretch it this way, then we just put it so
that's like up and down. So that looks pretty good. I think that looks
pretty much perfect. So I'm gonna hit pivot again. Now this is our pivot. Let's see if it stretches
the way that we want it to. It does. Okay. I think that's pretty good. I think that's pretty good.
So the only problem I have now is the end of this. It would be nice
if that was round, but we'll probably just have to make it round manually,
but that's okay. So now this is
looking pretty good. Tongue is not too big. So I think this is fine. I kinda wanted, wanted it
to be closer to his cheek. So we might have to
add another node there so that we can bend
this a little bit more. Uncheck. Oh, now it twists back, doesn't it? So we have to undo. It looks like we have
to leave, twist on. Otherwise it goes
back to normal. Which is a bit weird. You would think that it would just
hold the twist position, but maybe in an update. Let's twist it a little bit. Like that was time
that we have 12 min. So that's looking pretty good. Let's bring this in
a little bit more. Okay. I think that's good. Okay. I didn't want to
test something out. I don't think this will work, but sometimes if you
bring this down to four, you put this up to two, it'll rounded out, but not
really in this scenario. Okay. Had to check. Alright, so I think
that's pretty good. I think that's the best that
we're gonna do for a Tongue. So let's go ahead
and validate it and see if we can really
turn it into a Tongue. Now, I'm going to
voxel remeshing. It. Should be good. See how it hardened it up. And we really needed that. So I'm gonna take flattened
and I'm just going to flatten up these sides to
sort of make it round. Can solo it. Just
flatten these up. Just be careful you
don't accidentally hit the wrong part
of the tongue. Flatten out these edges. The tube tools, so much, so much better now, It's really
great that we have this. I wish I had this
one I was doing the tangent Ninja Turtles. I did all of them
back when I had COVID felt like garbage, but I got all, had a lot of progress
with Nomad Sculpt. But the ribbons, their masks and stuff where they
called them anyway, the little things that
come off their masks. This would have been
saved me so much time. So let's un-solo this. So now we can kinda
see what we're doing. So we need to use move and we need to move
this out of the cheek. So we'll kinda move it, make it a little bit bigger. Move this down,
maybe move this up. A lot of that same push and pull that I always do
with the Move tool. Okay, That looks good. It looks like inside the mouth, the tongue really isn't
where it needs to be. So I'm just going
to use move again. Just move it to where
it needs to be. And I'm adjusting the size. Like for example with here, I can make it a
little bit smaller because I just want
this to come up. I don't want to move to much more of the rest of the tongue. Just that little section. When I want to move more
of the whole Tongue, That's when I that's when
I make move a lot bigger. So I want to, the tongue
actually would be, now that I'm thinking about it, the Tongue would
be flat in here. So this part would come out, this part would come down. So he does that make sense? So the tongue would be
flat inside the mouth, even though it'd be coming
out in turning sideways. So the only thing
that's important now, as I just want to finesse
this so that a little bit bigger so that the tongue looks like it's touching the side of the
mouth inside here. Which is a little tricky. But I think that
looks pretty good. I'm gonna hit Solo. And I'm just going to
bring this part back some, I'm going to bring this
part down a little bit. This is only because
I just kinda wanted to look like it's going
like an actual Tongue. But I think that
looks pretty good. It's a little small. So
I might just run that. I might, I will just kinda spread it out a little
bit along the way. Just make it a
little bit thicker. Make this smaller just to
kinda make this a little bit more round at the end. But I think that's good. I'm going to save
because I don't want to ever do that again. At least with this, you want
to make sure it's saved. Now, we can smooth this out. Hopefully it will just have
a nice smooth looking tone K. That looks good. So now I'm gonna do solo. So we can do this little line. The little Tongue line
shouldn't be too difficult, doesn't come all
the way to the end. So it comes about here. So we'll just make
a nice little path. Just like a dog,
something like that. And then I'm just gonna go
ahead and smooth it out. Kinda keep it looking
nice and natural. Not too intense. Love it. I love it, I love it,
I love it. Very happy. Alright, so let's make
sure that we save. I think we just saved, can
ever save enough. Okay, great. So when we come back
the next video, we will do a Hands. I think we've gotta
get to the hands. The hands and then in Dessert
will be, will be good
11. Pudgy Hands: Let's make some hands. So make sure you heavy
Character saved. And I think we're going to
use cylinders for the poems. And then we're going
to use spheres to make the little sausage fingers. And then we'll do the
thumb from there. So let's add, we'll
do it on the top. So I'm going to add a cylinder. And I will just move it up over top so we can see it easily. Use front. Okay, So actually,
no, this is fine. Let's use snap and
then snap it forward. We can just shrink it. That's a good general size. So that's pretty
good. So now let's just go to the front again. So this would be the palm and we'll be able to do
with thumb over here. I'm going to rename this poem. Okay, so next, let's add sphere. So we use your Gizmo
and bring it up. Scale it down generally to let the width of the
hand I think is fine. So maybe something like
this. That's fine. Okay, so what we
need to do is we need to stretch this sphere out. We want to stretch
it out up and down. So first let's go
ahead and validate it. And I'm gonna actually
going to clone it. And this is gonna be
the start of the thumb. So I'm going to call
this one a thumb sphere. This is the clone. The thumb sphere is gonna go probably around here,
maybe a little bit bigger. So I'm just going
to leave that there for now and go back
to this sphere. This is gonna be a finger. So let's rename this finger K. So now what we need to do is the same
thing that we did before. We're gonna do symmetry. Grant put this to vertex. But we don't want to
stretch it out this way. We could stretch it out
that way and turn it. But you got to, it's better to get
better at the symmetry. So it makes more sense. So we're just going
to change this to the green symmetry. I think. We'll go here and
I'm pretty sure we turn that off.
It's the green. Okay, then we have the
green line, like so. So now we have symmetry and vertex will be able
to stretch these out. They're actually really
might be too big. Some sausage. So let's shrink it up. So the width is about
where the hand is. So here's something like that,
I think looks pretty good. That looks nice.
Alright, So tube Tool probably would've been nice to. So we have this finger. Let's test it out
with the tube Tool. Actually. Let's go tube Tool. We'll do path and we'll just
make two of them like this. Hit radius and we'll make it, well, we won't hit radius. And we'll just, we'll use this orange node to
make it thicker. So we'll kinda
match, match this. We'll make it thicker. Like so. And let's try this little
round to make the rounds. So let's go here. But this to four and
then change this to two. That usually makes it round, but it's so small. Let's use the gizmo.
I can find it. Let's use the gizmo and actually we should be able to make it
wider with this orange. I keep forgetting about this. But it's still not straight. So there's still some issues we can straighten it out like that. That's okay. So let's see how it is. The main reason why
I wanted to use this is because we
can put a bend in it, though it looks like it's not
really bending that. Well. Let's see if we add another post subdivision
that helps at all. No, it doesn't. What if we
do spline spine helps less? It's not bad, but it's you
can see that it's not, it's a little bit
hard to maneuver. It doesn't really work the way
that would make it easier. So unfortunately, we're
just going to leave it. But it's good to try out
different in different methods, but I think I'm going to
stick to stick to this one. Okay, so let's start with this. Let's make it more of a poem. He looks like it is
more rectangular palms, but they still, everything
should be round. Ground is like cute. So we're going to keep it round. So we're going to hit front.
And this is pretty good. We're going to validate
it and just use move. We'll turn symmetry on. But we actually want
to do both sides. So let's also do the
just the right one. Yes, we wanna do the green as well because we want to move the front and the back parts as well as the left
and the right. So essentially we're just gonna kinda make it more square. Just like that. Keep it simple.
I think that looks great. So now we'll just
use our round edge. And let's just round this out. A couple of times.
Nice and smooth, nice and square root and round.
I think that looks great. Alright, so he's gonna
be holding a plate. So this is gonna be the
open part of the poem, and there's gonna be
a few fingers here. So if this one is he
has three fingers. So there's one here. And then the other two. So let's just hit Clone
and move this one over. Let's make sure we
take it off symmetry. We can go back to just auto. So we have two. Let's
hit Clone again. Those are our three fingers. Pretty much. It might have to make the palm
a little bit wider. So maybe something like this. We need to do the thumb as well. So the thumb can
be a bit tricky. But I just like to
think of it as like a little like chicken leg. That's honestly how
I think about it. I'm going to clone
the thumb sphere. And I'm just going
to name this thumb. I'm going to shrink
it, stretch it out. Okay, So we're gonna put
it pretty much over here. So it's a little bit
tough to see to kinda just make the him holding the plate in
this sort of angle. It's a little tough.
But I think that we I think as long as we
make the bulk of the hand and then move
it down to the plate. I think that'll make
it a lot easier. So all of the thumb is, is this basic area down here. I'm going to actually
stretch this. I'm just going to use move. We don't need symmetry.
I just wanted to stretch this out a
little bit with the hand. This will be on the palm side. This is this round
piece on our thumbs. And actually put on a need
to go this serious with it, but I can't help it. I guess. I think
that's pretty good. I'm gonna put a bend in
this part of the thumb. And do we wanna do
symmetry? Probably not. Let's just push this
up. We push that up. I think that looks pretty
good. It looks pretty good. Let's put it a little
further away from the hand. And I'm gonna spin
it a little bit. Let's take it off snap and
just spin it a little bit. Something like that. I think is pretty
good. So let's see. We can just drag down from here. We might be able to just
drag the thumb or move. Maybe we'll try move. It's not bad. Okay. This is just an arch. It looks like maybe we'll
make it a little bit thicker. I think that works. I
think that looks great. Actually you can tell when
I'm like surprised myself. Alright, so the fingers actually really liked this
hand. I'm gonna save. Okay, So this is a great hand. But we need, we
need two of them. And maybe we should,
maybe we should bring this one
Down and place it. And then we can just Mirror. So let's just kind
of maneuver this. Actually I'm going to save one just in case I can remember
how the other hand slope, but I'm going to save
what we have here. So I'm going to take the
palm, fingers, thumbs All of this. And I'm going to
connect them all. Sometimes I just kinda save because I might want
to use it later. I can't remember the
rest of their thumbs. Are there. Hands are in the same position. So I'm just going to clone. And then I'm just gonna hide
this and just hide it away. I need it later
with body be even. I know I'm not going to
use that again. Okay. Anyway, so back to the fingers. Going to move. Okay. So as you can see,
they're all his hands are like little curved. Fingers are a little curved. So we're going to
take it off symmetry. And this one. Let's see if we can move it. Let's switch the
symmetry to the back, to the X. I don't see it. Maybe the boat now I see them. Still don't see the X.
What are we doing here? Okay, Well anyway, let's
see if we can move this. So let's just turn
the symmetry off. And let's use move. Pretty big. And let's see what
happens if we bend knees. Okay, so bending funny, which means we have to
voxel remeshing them. I'm just gonna do about
01:50 and I'm gonna do each one at 01:50. Okay. So we don't need that much of a
bend in the first one. That looks pretty good and then we're just
going to bend it. Let's put the pivot
on the other side. So we just move the pivot down. Again. The pivot is here. The pivot is the
center of the gizmo. So you can just tap on the pivot and then you can
move it wherever you want. You can change the gizmo around. But when you move the pivot, which is what we just did, then when we turn it, it's
going to turn on that pivot. So that's what I that's
what I just did. I hit Undo. That's fine. Okay. So this one is gonna be just maybe
a little bit more, turned a little bit more. I'm gonna put it into the hand a little bit more
and bring it down. So maybe something like this. And this one is who might
be able to use them all. Which has been, the more,
I'll do it the hard way. So symmetry is off. So let's bend. This guy. Still looks kind of funny. Okay, so now let's just gizmo
it to the proper place. Let's move the pivot down here. So we'll move it back into
the hand, will rotate it. So it's a little more. I think that's pretty good. I think that's good. We have the pinky move pivot
symmetries off. Now we'll just do
the same thing. Put a bend in it, make it a little smaller
since it's the pinky. Move, the pivot, save, some of that is randomly saved whenever I get that feeling. Term we can. Okay, So
now we'll just this one. So all the fingers are touching. Rotate this a little bit
of this with finger down, a little messed up, but
I think it'll be fine. So this one is turned the most. Okay. Yeah. I think that looks
good. The only thing that I think I
might've did a little bit wrong as see how the, on the thumb, actually
the arm goes here. This would actually become this. This actually might be perfect. Not perfect, but you know me Let's take this sphere and just move it out a
little bit more. So there's a little bit more of a comes out and
then go straight. Let's move this
finger little bit. Just to a nice push and pull. Okay, I think
that's pretty good. So we'll have to kinda
like fix it up as we go, but I think that's pretty good. And let's name this one
right palm or less. Name it. Our poem. What I'm gonna do
is take this and bring it down and position it, fixed the fingers and
then to the Mirror. That's the smarter thing
because if there's something that I need to change or
if I need to do it again, worst-case scenario,
then it's not worth spending the time to do what
I was just going to do. Now I can re-size it,
re-size everything. It would be straight off of these arms so we
can position it. The arm always goes closer to the this is always straighter. This always has that
curve that comes out. So that's why I'm, instead of positioning
in the middle, I'm going to put his
position at more this way. So this is more straight. So that looks pretty
good. Actually. I'm going to open it
up and then they look like they're a little
bit too big still. So we'll make it a
little bit smaller. Now we get to see, okay, So this is kinda close
to where the arms are. But we want to use that anchor. We want to use
where the Plate is. But now that I'm
looking, the Plate is actually a little
bit too far away. It seems like Let's
look at our view. And the Plate. The middle of the plate is right over the
middle of the foot. So I'm going to let's
validate this Plate. And then let's move it more in. Go back to our view. Okay, so now it's about
more in the middle. This part is closer to his
chin. That looks good. So now I think the
only thing that we have to do is take the arm, the arms look pretty good. I think the size of
them is pretty good. But we can just twist
them so they can fit. So it looks like
they're coming from his body to the
sides of the plate. Wait, where's the body? I got real nervous for a second. So in the next video, we're just going to
continue working on these. Hands. Are going to get this
right. Don't forget to save
12. Hands & Arms: Alright, part 12, we're going to continue with these hands. So what this shows us is it's not
really going to work if his hands are going straight, like we did in the last video. So we just opened these up. Now, if we just tap the hand, it might move the whole group. Nope. Nope. Touch the poem. It should
move the whole group. We want to open this up. Okay, It's starting
to look better. Starting to look better. I think maybe we'll tilted down, get that thumb into place, or maybe even just leave it. We like where the Plate is. The thumb looks a bit along. Thumb does look a bit long. And the fingers aren't quite
as bent as I would've liked. But they still look OK. Ok, OK. You know what else? I might just do
the whole arm and then write, not
going to do that. Okay, So let's see what this,
Let's see what this needs. I think we need
to twist it more. So we've More like
he's holding it. You really have to like just think about how you would
be holding a plate. Like we hold the plate
like most of the weight is here on the
inside of our hands. So I think I want to do that. I think that's
seems a bit better. Thumb we can probably bring down and we can put it a
little bit more on the plate, so I'm going to rotate it. I still wanted
this to be smooth. That's why I bent it
up. It was like this. I still want that to be smooth. Even if I bring this down, I might just like, still try
to make that kind of smooth. That just makes sense to me. I'm going to freestyle
it and go with that little sphere in the
middle and just move that down. So then we have that
contact with the Plate. I'm always going to
continue to turn it every which way just to
make sure that it looks good because
it's a bit hard to you just want to be able to do you
wanna look at it from all different angles. That's the only way that
you're gonna be able to tell if it looks good. So now these fingers, so this this finger
is not nearly enough. So I'm just going
to bend it again. I'm just going to bend it more. So I'm going to
push I'm going to pull to bend it a little more. And I want to position it now. I want to cosy it
up to the plate. And I want to put it a
little bit more underneath. And I want to bend it
a little bit more. Now I have to move this
up and I want to put it a little bit more into
the into the hand. There we go. See that it looks like I want it to be
touching the plate. I want you want contact. You definitely want
contact or else it's not really going to look logit. So now all these fingers, I'm just gonna kinda
do the same thing. I'm going to push
them a little bit more in this one
maybe I'll bring down and I want to
twist it a little bit. But I want contact with the Plate on all of
these fingers now, but I just need to
separate them more. Not even separate
them, but I just need to bend them
a little bit more. It's okay if they're not
completely separated. I think it makes it
look a little bit more real actually when they're
not completely separated. So this looks pretty good. So another thing that I
kinda wanna do is, sorry, I know I insistently, insistently move
the canvas around, but I just like need to
see it at all angles. So that's what I'm
doing when I do that. I know it probably
seems a bit erratic, but I just need to see
it from every angle. That also gives me ideas of things that I might
want to change. So that's another
reason why I do that. So I'm going to take
move and I'm just going to round out this
poem a little bit. Because I like the position
that the arm is in, even though I can move the
arm a little bit more, me make this a
little bit smaller. I'm just going to
draw this out a bit just so the whole hand, let me take it off symmetry
because it's making the other side wide as well. We just want to pull in. Let me think we need 3D. We don't need symmetry at all. But I'm going to turn
this off just because I like to just have
the default exon. Even though I'm not going
to use it right now. Let's make it a
little bit bigger. I just want to round
out this hand. Whoops. Maybe push it a little bit. Maybe pull it a
little bit down here. So that's gonna give the hand
a little more roundness. Just in the poem. See how like our
palms is around. They're not super flat. So we're just going to
add some roundness. I think that looks great. I think that looks fantastic. I still think the thumb
is a little long. So I'm going to want to have to move the pivot so that we can just squeeze it. Maybe align. I think a
line we're actually works. Sometimes the line happens to
be in the right direction. So now I'm just gonna
make it a little more stubby and push it
a little forward. Now that I've done that, I just have to make
sure that it's still I think I can tilt
it a little bit more. I can move it like that. I need to put it
more on the plate. No, I think that's
actually pretty good. It seems believable. It's touching the plate
enough. I'm good with it. Fingers look good. I can probably just move
them a little bit more. Okay. This looks good. Little sausage fingers. And we can actually, we can
actually bring the palm a little bit over a
little bit more. Since the fingers
are kinda turned. Maybe we'll pull this
bottom part out a bit. So that's pretty
good with the arm. It's pretty straight.
And I'm happy with that. I don't think I need to
mess with that anymore. I think it looks good.
So the arm though, I want to go back to the tube Tool because it looks like we can still mess with it. Right. Let's see. Oh, is this a
sealant? What is this? Is this It's not validated
or it's a cylinder. That's what it is.
Okay, it's a cylinder, so let's validate it. And then let's just tilt it. So we're going to
tilt it a little bit more into the body. Just jumped off my lap. So we're just going
to tilt it in, slide it in a little bit. Maybe up, tilted a little bit
more, something like that. Then I'm just going to use Move, move to a pretty
big and then just kinda drag it into the body. I think that's fine. I don't think the Arms gets
smaller at the shoulders. That might've been
something that could have possibly been useful. I don't want to see what
it wouldn't look like now, if I did that with the arms. I guess that's how I guess
that's how we learn. So let me I'll tell
you what let's save. Now let's go back
and take a look. Because if I don't
like it, I can easily. So now I've undid undoes. Now I can hit radius
and maybe we want to make this side a
little bit wider. In this side a
little bit smaller. I think I liked that better. I know it's I get excited. I don't even know what these do. Can I still move them around? No. I think I like that
a little bit better. There's just something about
that that feels right to me. Okay. So what did I say? Okay, so what we'll do the same thing would
just validate it. And maybe we want to even, lets take it off of a line. And maybe I just wanted to
do a little bit of that too. It really have to be that doesn't really
have to be thick that way. I think that's better. Works
better with the Hands. Honestly, I'm just going
to use move at a pretty big so it's nice and smooth and just push it into the body. Same thing with here. You
can just push the bottom and just kinda even it
up with the hands. Like so. I think that's good. So part of me wants to just there all the same color
as well. It's good to know. This thumb is a
little bit crazy. So we just need to,
or even the hand, we just need to smooth this up together a little bit better We will take the roundness
of the thumb and just kinda usually to marry this together
a little better. Before I do my voxel remeshing, the shapes, you're looking good, It's looking nice and smooth. I'm going to save because
I like this better. There we go. I think it
looks I think it looks good. Okay. So this hand I love. I think we can just take
this arm and just make, if we can make another one
that would be perfect. But we probably have to
voxel remeshing it first. So I think I'm just going
to take this whole arm and the hands and everything and voxel remeshing it together. But do I want to? The only downside to that is like we're gonna lose
a little bit of this. Great. The top,
not the topology. These creases in the fingers. That's the only thing I wish that I wish that we
can mask off part of it and just voxel remeshing
the part that goes into the, I wish we could do that,
but it's not possible. So I think the best thing
to do is voxel 3D mesh. Little by little. I'll show
you what I mean by that. If we take the thumb. So if we take the thumb sphere, the thumb, what else? Can take the pinky? We can take this
finger and the poem. So everything except
the middle finger in the arm as well. And the arm, actually,
I'm going to save. We have all of
those things still picked out. I'm going to save. And then I'm going to
voxel remeshing this together at around 200. So we voxel remeshing all
of that together at 200. And then we can smooth, you can smooth this out. I'm going to do it
gently because you can see that it's still
a bit malleable. You can solo it now. You can smooth all of this out. Make it look nice in
cartoony. I loved that. There's a, I love a good smoothing that I don't
know what they even means. Okay, So that looks
great. Perfect. That looks so good. So now
I'm going to un-solo it. So now we have this other finger here which we could leave. But I think we need to
voxel remeshing it as well. Unfortunately. But I think what I wanna do is marry it up to this
a little bit better. Because I don't want to have
to smooth it out too much. So I'm gonna bring
this back and just try to marry this together
as much as I can. Okay? That actually looks pretty good. I'm not even have to,
but let's try it. So now we'll take we have the finger and then we
have where's the arm? Okay. Rma, I'm
going to bring up. So then we have the finger. So let's save. We can take these tube and
voxel remeshing together. I'm gonna do it around 300. I wanted to be fairly high. So we'll do it around 300. Still looks really good. I just want to smooth out this section where the finger
goes into, but that's it. I don't want to really
smooth anything else. So when we voxel remeshing
the arms to the body, will do it over 300
13. Arm Mirror: Arms at one K. Still looks okay. Okay. So it's looking
good. I'm happy with it. So now arm a. Lets see what happens
if we add it to a mirror. Here's the front. If we add to a Mirror, maybe it will go where we
want it to go. So good. Ever seen arm a add Mirror? Alright, look at that. Think that looks
good. Now we'll take, so now let's validate this. And uninsurance. Yes. So now we have
the arm here with two. So we have arm a and arm a. We can delete this because
these are two separate pieces. So one of them can be which
one is this? Let's see. Okay. So that's right arm. That's right arm. This
one is the left arm. Okay. So that's the left arm. So now we can just
deal with left arm. We can get rid of this. We can get rid of R&B. Now we can just play with this arm. So we'll just turn it a little bit and bring it
right to our Plate. Will married up to her plate. We have to make sure that it's the right spot on the body. But it's only a matter
of lets move the pivot. Pivot a little bit more here. Right there I think
maybe like at the wrist. Let's see if that helps
us out a little bit. That might make it a little
easy for us to work this out. Okay, It's looking good. We'll move it into the plate. Maybe we'll move it
forward a little bit. Okay, Let's take a
look at our view. It looks good. That looks
really good, really good. Let's take look at
the view again. Also were an orthographic. Let's take a look in
perspective. It looks good. We can probably move this arm out a little bit
more as you can see, it's poking through the back. So that does make sense. So I'm going to go
back to orthographic. But it does make sense that we move this arm
up a little bit. So let's see what happens
if hit a line still. Ooh, yeah, it's a
little bit better. Easier to move it straight out. So I'm gonna move it
straight this way. Maybe around there. Let's take a look
at our view again. Okay, that's a little better. It makes sense. Kinda want to put this arm
back a little bit. Although Let's move the
pivot on this, on this arm. Even though it's it's
kinda perfect where it is, but I think I'm just going to
slide it back a little bit. Still looks pretty good. Everything's still
looks pretty good. Let's take a look at our view. Okay, that's good. That looks that looks good. It looks natural. Like it. As far as
the end of the arm, it can probably just smooth
that out a little bit. Perfect. So that OK, That'll flow greatly
nicely with the body. Okay, so now we're at a point where so this is still a tube. And we can, Let's validate
these tubes down here. Actually, before we do that, Let's see what happens
if we, I just hit Undo. Let's see what happens if
we do post subdivision. Just make them a
little more round. I think one is probably good. I think one is probably good. Now validate. So
same thing here. I'm just going to
change the three dots post subdivision up to one. So all that's doing
is just giving a little bit more
geometry to the legs. You can validate who
actually didn't, actually didn't
look as this one. Does this look okay? It looks
okay. It looks good enough. Okay. So the only thing
is I want to bring these A little bit more into the body. Let's not a problem. So we'll just kinda pushed them into the body a little bit more. So the legs. It looks good. In a little bit more. Okay. That looks good to me.
So now we can go ahead and I think we can voxel
remeshing these legs. Leg B, foot. So all of this I think is great. I'm gonna do a quick save. And then I'm going to voxel
3D mesh this stuff together. So let's do voxel. Let's remeshing it
together, like 200. Okay. Then we're just going to
smooth. It. Just knew that all these wrinkles and referrals and all
that other stuff. I usually voxel
remeshing at 200. It's like a good median between being strong
enough to hold the shape, but still soft
enough to continue to have a smooth to smooth
it out, smooth, smoothly. That makes sense. I did kinda wanna add, I might be able to add it here. Let's see if I can
do it in Fleet as the only thing that I
was thinking about. Adding on inflate down there. Let's see what happens
when I smooth it out. Oh yeah, it actually looks
pretty good like that. And actually kinda works. Just like a little inflate. And then I'll take crease and I'll try to
get underneath it. Let's see how this works. So just get a little bit underneath it and
then smooth it out. And kinda makes it look
like this little fold here. I love making those. The only problem is
sometimes when you voxel remeshing them together, it gets really soft. But luckily you can
do it after the fact. Excuse me, like I'm doing now. There's one on the
back to so we can try to get that one be
a little bit easier. Sorry, this thing is moving
around like crazy on me. Looks pretty good.
Can double up, make it a little bit thicker. Because when you smooth it, obviously you're going
to lose a lot of that. But it's okay because it keeps it looking a
little bit more natural. You don't want it to be to see if we can do a double there. Let's see what looks like
when we smooth. That's good. You would just want it
to look like a wrinkle. Keep it simple. I think
that looks great. Okay. So I think that looks good. I think we can do this side now. We can try to do let's
try to do the writ the wrinkle with inflate. Let's try to do it
and see what it looks like. If we do it. First of symmetry is still on. Let's do them in the bottom to just kinda see what happens. Actually, I don't
know. Let's try it. So voxel 3D mesh around 200. Smooth. It looks okay. This one is a little
muddy though. I think we need to just
not do it for this one. For the front, at least.
It's a little muddy. So we'll just voxel
remeshing as is. Looks create and
probably could have just voxel reduced it to the body. But I think that
looks wonderful. Maybe we'll add one to the back. Let's make it a little smaller. Sure, it's nice and smooth. Maybe add a little crease
on the bottom and top. Just smooth again. Just to kinda keep it natural. Nice. I love little
details like that. They really, they really
make a difference. So I'm going to solo this. Oops. I meant this leg
because this is bugging me. See that like not there. Don't like that. So what I'm gonna do is just
flatten really big. I'm going to flatten this out. Check the profile,
check everything. So flattened out, flattened out. I know. Flatten it out and then I'm just
going to smooth it. Okay. Yeah, I think that looks okay. It might take mood and
just a little bit of a wanted to be ramped
perfectly round. Okay. Good. Better.
Alright. So I think that's pretty good. I know I paused it,
so I think this is long enough for this part. I think next weekend. I think we can voxel
remeshing them together like we
have to do the ears, the body, things like that. And after that we can get onto this little Jell-O cake thing. Alright, don't forget to save
14. Voxel remeshing & Joining: Alright, so there's a
few things that we can voxel remeshing together now. But I think I want
to wait before I do the head to the body. Let's take the body and then
let's split that first. So let's use split. And let's take maybe
we can use ellipse. Maybe we can use ellipse. So let's try to make an ellipse. Okay, that's not going to work. Let's see The best way to
do do it with ellipse. So something like that. Be nice if we could.
Oh, there we go. So we just do it a little
bit in the middle. It's still a little bit. I'm going to turn him
a little bit this way. I'm using the lips with split. I don't have circle.
Should use centered. This is good. I'm just as I'm
trying to make the ellipse, but I don't want it to
be so close to that leg. That's the only thing
that's bugging me. So I'm going to turn
him a little bit more. Still close to that leg. Maybe I need to
turn the other way. No. Okay. That's a little better. That
might actually be good. I just didn't wanna do like
a straight line across, like that's kinda boring.
I think this works. So now both sides, I'm going to save this
because I like it. But both sides, I just
want to voxel remeshing. I'm going to box
Remeshing like 200. And then this bottom piece, I think we can voxel
remeshing with the legs. So let's find the Lewis. So we have this leg, leg a, leg B, and the body split. Where's the body split? Oh, by the a. Okay. So we want a box 3D mesh
all these together. I think I'm gonna
do it at like 300. Okay? So now this is
altogether at 300. I'm going to take smooth
and just smooth out. Let me turn symmetry off. I'm just going to
smooth out these legs. I want to be a little bit
gentle because I don't want to ruin top crease where
it goes into the body. I want to be very
gentle with that. Maybe just to round edge. 123, maybe that's it. Still see these pretty well. You have to be careful
though because rounded edge we'll get rid of some
of these details. But I think that's fine. So I'm going to
take the top now, which is 138 K.
That's quite big. But I'm just going to do
rounded edge on that as well. I think that's fine. Okay, So we have
that break there. So now we can go back and take everything else and
voxel remeshing it. So I'm gonna go ahead and save. I just want to make sure
that everything is equal. Otherwise, when we
Remeshing all of it, some things are going
to be a little bit, there'll be less
pixelated looking. This definitely. So I'm going to just go to
multireligious and subdivide. Subdivide again. And I'm going to
use rounded edge. Okay, so that's for that
Mirror. Use round edge. And again, I think everything
else is pretty high. This is not. So let's multi-rate and sub-divide
the nose as well. Okay, so that's good. So I'm gonna save and I'm
actually going to save as new. So Smurfed Project one. That way if I need to
go back or if you need anything from here before
I voxel remeshing, we have it saved, so I
always like to do that. Now we have the head, the nose, these mirrors, and the
arms, and the body. So now let's voxel
remeshing that at 03:50. I think I did it through 50. Want to keep all
that nice detail. The degree mesh. Okay, there we go through 50, looking good. So now we can go
ahead and smooth all of these contact points. Symmetry. It looks like it's actually
still intact for some of it. But for the bottom are not
really going to use it. And it doesn't really
matter if we use it now because it's, it's
kinda together. And there's gonna
be no extra detail because it's all just blue. But we definitely want to get
these ears looking right. So we just want to smooth out. Smooth these sections out. Yeah, that looks good. Actually And we can smooth
out the neck part where the head goes
into the neck. It looks good. I'm going
to take it off symmetry. And I would just kinda do these arms and get rid of those like
pinched sections. I wish I could kinda get rid of the more of these
pinch sections, but it's kinda hard
to get rid of that. I find that very, very
difficult to get rid of. Unfortunately, it's just
sometimes when you merge, they just kinda like show up and there's just
nothing you can do. Sometimes you can pinch
it out. Sounds weird. Pinch works. But I don't
think it'll work on here, especially the fact that they're clean and
how they're spaced. I think that's more of
what I'm concerned with. Because if you do pinch, sometimes you can you'll
start to move that line. It's actually not too bad. Let's see if maybe it'll work. It looks like it is kinda
cleaning it up a bit. Just making that lip
a little bit smaller. So maybe maybe it's
a little bit better. I know when I used to
do this, I had issues, but I'm glad that I kinda tried it out because
it looks like it might be making it better. So let's see if we can do
it on the bottom as well. I think it looks pretty good and the spacing is
still pretty even. But I don't like
those pinch marks, so I think that's pretty good.
I think it's pretty tight. It might just be it might
be a little bit MCM, everything kinda moved up a
little bit, it looks like. But I think that's an easy fix. I think we can take
this and the tail. Whereas the tail, I think
we can take this in the tail and just move
them up slightly. I think we're good.
It looks great. Let's save four, we lose it. Alright, let's take the hat, hat, hat tip and it's voxel
remeshing them together. Think 200 is fine for this. That real ugly. Smooth that out. Still a bit lumpy.
Unfortunately. It's a bit lumpy and I
don't really want it to be. So I might have to voxel
remeshing it lower. So I'll go down to about 100. And hopefully this
will smooth it out. If you run an issue and things aren't as smooth
as they should be, just voxel remeshing lower. Okay, That's much better. I think that's I
think that's good. Much better. I want
it to be perfect. So I'm just going to raise
this up a little bit. I want to make this
curve as perfect as I can get it with the naked eye. This kinda comes up
a little too much. I know my intention to detail is sometimes it's little,
a little bit bananas. Also. I want it, I'm gonna do use inflate. And I wanna, I wanna do
a little thing here. I might have to
change my inflate. I feel like it's a little bit I feel like the shape that
it makes is a little funny. It's a little sharp. So I want to go here. Alpha or maybe it's a falloff. Fall off. I think I wanna do one of these. I think I'd rather it
be sort of like this. Let's see if this helps.
I think that helps. I think that's a
little bit better. It could even be a
little bit more wide. So let's see how this looks. I think that's a little bit
more of what I'm looking for. I wished the top was
a bit more flat, but I don't think I have time to play with
that right now. I just wanted that little lump Which I think I achieved. See what happens if I
put the intensity up. Okay, I guess that's
to be expected. But maybe this will make,
make it a little bit more. I liked that, I liked
that difference. I liked that little lump there. I like it. I'm going to
use crease to enhance it. Just smooth it out and
keep it nice and natural. Nice. Again, I love
those little details. Okay, So I don't think we
need to connect the brim, so I'm just going to the
hat top and hat brim. I think I'm just going to join
and this will be the hat. Okay? So next, I just want
to make the eye Brows. So here's little black eyebrows.
So that's pretty simple. We'll just do the tube Tool. And actually I want to
practice making them flat. So we're just gonna do curve. We'll do snap because we
wanted to stay on the surface. Okay, So there will be, can just do this on
her own monopoly, need to follow the I think
something like that is great. So it's spline. And I'll do it the way that I normally
do it with eyelashes. So I'm gonna make this side
bigger, this side smaller. And maybe I will do
my little thing. I'm gonna take it
off of snap here. I don't know if I want
to do my little thingies that I always do
what my characters. I think that's four
eyelashes though. That might be for eyelashes. Write. Undo that. I think that's for eyelashes. I think I want to do
this more traditionally. So I'm gonna make this smaller. Make this a little smaller, this a little smaller, but this bigger, bigger. Let's get rid of a couple of these nodes by just
bringing them together. The smaller,
something like that, I think is perfect. I want to try with the profile. Yeah, that's exactly
what I wanted. Actually. That is exactly what I was hoping for,
something like this. So now I'm just going to
tweak these a little bit. So it looks a little
bit more natural sizes. But I think that's
actually pretty good. Let's hit Mirror and hopefully it will be
on the other side. And look, see if we
hit front and it's pretty pretty much perfect
and the other side as well. So I think I'm
gonna go ahead and validate how big are these. These are still pretty small. So let's see what happens
if we do rounded edge. We probably have to
voxel remeshing. There might be a little to no ink rounded edge. I think it It's perfect. So I've never really done
the My eyebrows like that. Actually let's do eyelashes to, I always do that with my
characters. So, you know what? Let's not stop here. Of course you don't have to
do this if you don't want to, but you know me, I'm going to make my
eyelashes like this. Boom, turn snap off, spline, make them
nice and curvy. And maybe I'll break this
one off a little bit. And it radius and
make this bigger. Maybe I'll tap
another one there. Tab radius again, and then
I can make this smaller, smaller, smaller. See what that looks like
because I might look crazy. It might be too much
for these guys. Let's see how that looks. It looks okay. I can make
this smaller and excuse me. Just bring this into the
I 0 oh, snap is off. Let's see if you can
bring that into the I bring this all of these
back into the eye a bit. There we go. Just so we have
like really subtle lashes that actually
looks great. Looks great, the
Mirror looks great. So I'm gonna go
ahead and validate it and make sure that
you label everything. So these are these
are the Brows, these are the lashes. And we need them separate. So I'm going to take the lashes out and then
add their own Mirror. Now we have these and
obviously we have the name, we have to label them again. So I'm going to
validate join children. So these are the lashes. Then we have the Brows. So we're going to
validate Joining Children and then rename this Brows. Okay? So this is the body a. This is gonna be the head. The lower part is
gonna be body B. And the hat should
be above body a. The brow can be under body a. The lashes can be
under the brow. The teeth as well can go up
because they're on the face. So here the plate, so
these are the eyes. Lets bring those up to I don't want to
really connect them. So I bring them up there. These are, or these
are the Pupils. So bring those up to
and I want to name these mirrors Pupils and
named this Mirror Eyes. Okay, Good. Oh, the tail to
the tail should be connected to body a. I
think we'll just joined. I think we'll just join the tail because it's
gonna be the same color. Oh, the nose, did
I forget the nose? I think I forgot to
smooth the nose. You want to be really
delicate here. Actually we can
turn on symmetry. I want to be really delicate here because
I don't want to, I don't want to mess
with the mouth at all. The Mouth looks good. I want to keep it that way, but I do want to
smooth off where the face goes into the nose. Okay. Alright, so let's save. Okay. So I think I think that's good. I'm just take another look
at my all this stuff. Everything looks
together. It looks good. Brows where the teeth are
connected to the Brows. Tie. Probably just joined the teeth together. Just call them teeth. Tethys. Body B. We'll put body be up
by Baiae as fine. Tvs Plate. Okay, good. Good, good, good. We'll save. Alright, so next we will come
back and do the dessert. I'm pretty sure that we don't
have anything to do here. We'll just come back into the dessert and maybe
these little details too, but we'll concentrate
on this Dessert
15. Dessert Time: Let's make this just
jello or cake, bunt cake. I don't know what that
will kind of cake that is upside-down cake. I don't know, but that's
where we're going to make. So let's use sphere. And we'll bring this fear
up so we can see it. Okay, so we need to make
these little sections. So we need to kinda make
like wedges in a sense. So I'm going to spread this. I'm going to go like that there. And then I think I just want to validate this so I can actually work on it. So next, I want to use move, and I'm going to turn on
symmetry. Here's the front. So I'm going to
turn on symmetry. And I'm going to push
the bottom part up. You know what let's do? Let's
turn on the z-axis as well. So let's push the
bottom part up. Some kind of just thinking
about this as a wedge. And see the bottom
is gonna be flatter. So maybe something like this. Okay, the top is maybe
something like that. Go to the front side
and just kinda squeeze it a little bit
together like this. So this feels like each
individual section, it feels like they would
look kinda like this. Sort of like that.
Okay. So another thing is that it looks like
they would be flat. So I'm going to turn
off the z-axis. So now we just have
this red symmetry is still on and with flatten, I'm just going to flatten
out flatten this out a bit because it feels like that would be flat and then I'm just
going to smooth it. And hopefully this was like
This is a good section. I think I think that's
a good section. I'm getting some of these
lumps and I don't want that. So I'm going to voxel remeshing. Maybe it like 100 or so. So remeshing it and
smooth out those lumps. Okay? So now I'm this, I'm going to call this cake. I think it is kick.
I thought it was Jell-O at first, but
I think it is cake. I kinda want it to
be jello though. So this piece, we need
to add a radio repeater. So we'll do add radio. See, we have kind of
it's there already. So radio repeater, I'm gonna go here and I'm going to
name this radio cake. So then we go to
the actual cake. Turn on our gizmo. And we're still
remember which one that we're actually I don't remember which one the main one
is, but that's okay. So we want to separate them. Maybe tilt them
forward a little bit. We need more. So
let's go back to the actual repeater,
the red one. And we'll make a
little bit more. So maybe something like that. That feels about right. Right. I think that
feels about right. I'm going to tap on one of them and I'll probably just use move and just push it forward. Make it big. So it's like
nice smooth movements. You actually can't see the top. So I think that's
perfectly fine. I think that's good. Excuse me. So now we still wouldn't put the icing and
stuff on top. Don't way. But this is pretty good.
I'm gonna save it actually, I might just validate this. I'd like it so much that I think we're just
going to validate this. Join children. So now it's one piece to 158 K, but we can choose, we can adjust that later on. So now we have it altogether. We can add this like
icing stuff on top. So that's gonna be,
that's gonna be Fun. So for that we'll take the mask. And we want to just mask off. So we want to just
make nice loops. I'm in a little closer so
they're a little more clear. So I'm just going to
make nice icing Loops. Hook. It turns symmetry off. And just make some nice icing. Make sure we fill
in the whole top. It looks pretty good.
It's a bit doesn't look like it's far down enough. Some of these are
pretty far down. Maybe we'll just kinda I tend
to make them not even too. I think I want them to be even. So you can take unmask
and then you can sort of adjust them as
you as you wish. And I want to make
everything nice and round. Yeah, I do tend to do that. I notice I tend to I tend to make when you make like icing
or anything like droplets, like I tend to make them on an angle and I feel like
it should be better. I feel like they
should be straight down because that's
how gravity works. But it's good when you know the things that
you tend to do. So even if you do them, It's good to know. It's good to just
be aware of them. Because if you don't know, then you're liable to not
go back and change them. This looks better with them being straight, straight down. You want to make sure
around all of these out. Okay. I think that
it looks good. That looks good. Although
there's still a bit high. Let's join these two. Just kinda bring them
all down a little bit lower. I think. Way too much time on
this. Okay, good. So now that we have this a
little more here as well. So now we have that. So what we can do is we can use the mask tools shell here. I'll probably have
to adjust this, but you can go down
and do extract. So let me hit extract. It's actually not bad. That's actually a
decent thickness. Might actually be workable. I think that's actually good. I just used the default
settings. Here. What this does is it
adds that on top, see, so it adds that on top. So let's go ahead and go
to the part underneath. And we can turn off the mask, see the black underneath. So go to the mask and
we'll clear that. So now we have this on top. Let's make sure that
we label everything. So this is the icing. So we have the cake
me of the icing. And it looks great. It's actually quite
detailed to them. I'm a bit surprised actually. I think we can just smooth it Ooh, wait a minute. It feels like it's all separate. That didn't smooth
together like it was. Okay. Let me so we
have the icing, Let's voxel remeshing
the icing, like 150. Now it's together. Okay? So now I'm
going to smooth it. Now I'll smooth it and just
make it nice round icing. It looks great. Okay. Okay, so now it's smooth. It looks like proper
icing on top of our cake. But of course, there's still
areas that we can add to it. So we probably couldn't
have to push it all into. But we'll do that in a second. First, let's go ahead and add. I'm using I'm just using clay. I think I'm just going to
add some round pieces to it. It might even add some
round pieces to the icing. Because the icing is
a little bit higher. So I'm just adding
these round pieces and then I'll just smooth them out. Just to give it
that thick icing. I think that looks okay. Let's take a look
and it looks okay. This little thing looks
a little bit weird. So I'll just smooth
that down a little bit. A little too aggressive with it. But I think that looks good. Although I kinda want
pardon me, doesn't like it. I don't mind it
smooth like this. But I think pardon me, just wants to use Move
and bring up the middle. Perhaps. Maybe just smooth
it out a little bit more. And I'm going to use move. Yeah, I like to
just more simple. I do like that better. So I'm gonna move these
sections back into CA, you can see the underside. You don't want to
see the underside. So I'm just going to
squeeze, squeeze these back. It's always gonna be
better if it makes contact with the cake. So all of these, excuse me, all of these, I lose
my voice after 2AM. Actually, it's 03:12
A.M. right now. Okay. All these little okay. I think that's good.
Okay, that's good. I'm gonna save. It looks great. Alright, so now there's little, there's a bunch of little
berries, mushrooms, which side? I want to be the front. But it's moved out pretty good. I think I'm okay with that. Is makes sure all
of these sections are here, they're all look good. So now we just have to
choose which part is gonna be kinda front-facing. So let's spin it I think I like this side. I think I like that. Excuse me. So if our view is
pretty much here, then I think I like this
as this is the front. Okay, let me make sure I
move this little piece in a little bit more. Okay. So now there's
lots of little Fruits, but I think we can add those. After the fact. I think we
should go ahead and take the icing and the cake
and move it into place. Let's do pivot, center, pivot. We'll move it down. Shrink it. Nobody said
to find the Plate. It looks pretty good. Let's make it a
little bit smaller. Maybe we'll stretch
it a little bit. Think it looks pretty good. It is a little a little bent. It's a little curved. But I might not have
to add the curve. I think it's fine
without the curve. I think it's fine without
the curve. But the curve. Anymore, I think I might
want to add the curve. Let's take the cake first. And they joined. They are, okay, so we need to voxel
remeshing the cake as well. So I'm going to remeshing, I'm going voxel
remeshing it like 300. Okay. I'm gonna do round edge
once, twice, three times. Okay, so that's pretty good. I might add some details
to the cake later. So I'm gonna leave this high. Right now. I'm going to take move. And I'm just going to, I'm
just going to push it. Push it, pull up a
little bit on the top. Okay, so now it has
a little bit of a bend in it. Pull this side. I'm going to move it back over. I need to disconnect them. So I'll take the cake, I'll move it back over to the middle of the plate. Size. Looks good. So now we just have
to take the icing and make that work as well. I mean, still looks pretty good, but obviously we have
to make a few changes. So I'm going to push this side, I'm going to pull this side up. And I'm just going to pull
out these little pieces now. Because now that this
part on this side or just inside the cake,
a little too much. So we're doing the opposite
of what we did before. Then on this side, we'll probably
just have to push. I think it looks pretty good.
I think that looks good. It's got a little
bit of a bend in it. It's always something lets
pull this out a little bit. Let's make this a
little bit smaller. I just want this little
section to come out a bit. Okay? Okay, cool. Cool. I like it better with
the curve. So let's save. So now there's just a bunch of berries and things like that. These might be raspberries. These are just like
around a little berries at it, actually like mushrooms. But we will do the
Dessert fruit. After this quick break. Don't forget to save
16. Little Fruits: Alright, let's tress in
some little berries. So there's a strawberry on top. There's a bunch of
little round berries. He's actually looks
like mushrooms. But I think they can
just be barriers. I think it's fine. So we
might not need this many, but we'll see where it takes us. So let's go ahead and
just add some spheres. I guess we'll make
the strawberry first. Let's go ahead and Let's go ahead and validate
this sphere. And let's call this,
let's clone it. And we'll call the
first one strawberry. And we'll call the
other one Barry. Okay, so we can
go to strawberry, let's hide regular Barry. So strawberry, I guess we can just make
the strawberry shape. So let's do symmetry. We'll do z-axis. And then we'll do move. We'll just make a
strawberry shape. Whoops, I was using colors, not going to lie
while I was gone, I was playing around with just playing
around with the Smurf. Make sure we turn symmetry on. K will stretch that down. Make sure it looks good on all the angles will
push the top-down. I mean, I think that's pretty
good for a strawberry. I don't think it needs
to be that intense. So what's the best way to get
these little marks on it? Let's see, we could potentially
use the stamp tool. And we go to this
little thing here. Let's go to alpha. It looks like it's
going to be a square. If I just do it
now, it's a square. So if we change this, if we do the scaling
and bring it up. So now it's see
that round circle. So it should be a circle now. Okay, so that's good. Let's go ahead and
let's sub-divide it. So we'll go here, multi
raise, subdivided. Once we're using the
stamp, Let's use sub. Lets make it small and I
just want to see if we can. That's not bad. Actually. See if we raise the intensity if it
goes a little bit deeper. Okay, so I don't
know if this is the best and maybe we can
change the falloff to something a little
more strawberry like. Let's try that. That might actually work. We still have symmetry on, but maybe that's okay. I guess if you want your strawberry things
to not be symmetrical, maybe just don't put them
too close to the line. Maybe that's okay. That
looks pretty good. We can turn symmetry
off and then just do separate ones as well. You want to break up that being a little too symmetrical. You can do something like that. I think that's pretty
good for a strawberry. I'm trying to get too crazy and make them a little
deeper if you want. And now the reason why I
make them a little deeper, as you can see that
it just gives them a little more depth for
the for the light to hit. It's gonna be pretty
small. But you know me, I go all out. We're going to spend this
much time here, then. I'm going to spare no expense. That's probably the
best strawberry. I think I've done. A
quick period of time. Okay, so now we can do this
other little stem. Let's see. Let's do. So strawberry, let's do a little tube. We'll just do a little curve. Like so. I quickly
don't need snap but So we can do a little
curve like that. I'll do spline and I'll do radius and make this
a little bigger. Actually, I'll do it twice. This way. We have all three. The little radio things
are Radius things. We'll do something like that. Maybe. I think that looks good. Make sure it's written
pretty much in the center. Let's see, we can
make this round. Again. This is division four. Then put this to two. We can make this a
little bit bigger. I mean, it's not bad. But still it's just not not where I wanted,
what I want it to be. That's fine. So let's validate this. Let's do round edge. And we'll just rounded
off a couple of times. And that's more what I wanted. Anyway. We have these
little triangles, which I think maybe
that's accurate as to what strawberry
leaves look like. I guess we can
take a quick look. Strawberry stems. Here they are triangular. Okay. So we'll go ahead
and do this is the tube. Let's add a cylinder. We use gizmo and bring it all the way up to our working space. We'll make it small, flatten it. And now let's look at
the front top view. Alright, maybe we'll even, okay, So we have
this cylinder here. Let's go ahead and validate it. And now let's use
the Y symmetry. Okay, that's what we want. The ink, we already have the read write and we have the red. So that's what we want. So let's just turn
this into a triangle. Let's turn symmetry on. Then we'll just
kind of shape this into a nice little
pointed leaf. Leaf. So maybe something like this. Thanks, good. I don't
think they really need to be that straight. I think that's good.
So once we have that, we could round edge
it a little bit. Then we could take move. Let's go ahead and turn. Let's turn that off. But let's turn symmetry
off altogether. Actually, no, let's leave it on. We can leave the
red exon excuse me. So again, just was
not confusing. We'll use the Move tool and on this shape will actually
just keep the red X. The only thing I'm
going to do with move is just make a
little bend in it. I'm gonna make move kinda big. That way. The bend is fairly even in soft and it
looks, it looks natural. So something like that
I think is all we need. Now. I'm going to move
it using the blue. So I just kinda moved
it off to the side. So now we can add a repeater. So we'll go here.
What I just do, I think I deleted
it by accident. We go back into our scene. We have our cylinder
and let's add radio. So then it gives us that we
can add a couple of more. And I think that's I think
that's probably good. So we have to go down
to the actual cylinder. And we can still adjust
this if we want. So we can move this, we can move them around, we
can move them all inside. We can shrink them. If we want them to
be a little cuter. Lets bring it down
to the strawberry and kinda shrink it into place. Let's make it a little thicker. And I'm going to
stretch it out a bit more because the wrong oh, yeah. So I want to move
it with this one. I'll it's a little small.
Made it a little small. I did make it a little
small. Let's undo. And so maybe I'll just make it a
little bit thicker and a little bit longer. So this way when I shrink it and move them
all back together, Let's move them down. Okay, it's not too bad. Remember, we're kinda
working on this one. Base. Little thingy. Okay, I
think that's pretty good. I think that's all we need. Now I'm just going to use move. I'm going to turn symmetry off. Actually, we can leave it on. We can leave it on, excuse me Because we're just
gonna be working with this one leaf that
has the red line. So we'll just leave
it on that way. We can just pull the bottom
and we can just adjust it. Like so. Then I'll just use the gizmo and bring it down
into the strawberry. And then we can slightly adjust this and just put
it right in the middle. But I think that's pretty good. Okay. So I'm pretty
happy with that. So I'm gonna go ahead
and this is our radio. This is the, this is
the strawberry leaf. I'm going to validate
it, Joining Children. And I'm going to rename it. Straw. The leaf, his, excuse me. I'm a little little tiny cold. That's not really cold. I think it's like allergies. I clean my whole backyard today. So it's a little
bit of a struggle, but we're going to
work through it. But all the the same excuse me. You know what might go back
and make them thicker. I feel like they're
not thick enough. I'm just going to use move
again and I just want them to be a little
bit thicker. I think. I'm still working on this one. Yeah. I think I wanted it a little
bit more thick like that. Okay. I think I
liked that better. So I'm just gonna do
the same thing again. So select this, make sure
you select this radial last. That way you'll get
this menu and you can validate join children. These are the leaf fees. Let's go ahead and save. Now. I'm going to
voxel remeshing them altogether at 01:50. And then I'm going
to take round edge and just do a round
edge on them. I think that's perfectly fine. So now I'll take the,
this is the tube. So let's name this
strawberry stem. Okay, So both of these can
move down a little bit. I think that's I
think that's great. Okay, So we have strawberry, strawberry stem and leaf is, I'm just going to nestle
all of these together. That way we can move them all together where they need to be. So we'll move it down over, make it really small groups. And let's check out our view. And we can, whoops. Now we can kind of adjust
it and just kinda look at the I think I kinda
want it like this. Okay. I kinda like that. I
think that's pretty good. It would also be nice. This is a little
bit extra we can do inflate on this icing. Might be nice to kinda
give them a little home. Kinda give the
strawberry a little bit of like he's stuck in
that icing kind of thing. And then just smooth it out. Just that little bit
of like love to, to really make, to really
like meld them together. So that was, I think that was the more difficult part,
the little strawberry. So let's go ahead
and save again. So now we'll just
add some spheres. And I don't think
these are mushrooms. I think we'll just
make them varies, but we can make them
different, different types of barriers if we
want different colors. We already have the other here, we have our berry here. So we'll just go ahead
and bring it down. We'll make it smaller. Maybe we'll make this base one. I don't want that
to be a Raspberry, but maybe a little tools. I'll actually, you might
not be that much work. Now that I'm thinking about it. That might be very easy. Let's see. Let's see if we can do the same
thing we did before. So first let's make
the indent on the top. We can squash this a little bit. So we'll square.
Actually. It will squash it a little bit. Then I think I'll use what, what did I use before you move? And symmetry? I'm going to turn on XN, X0. So let's see if we can make this indentation in the middle. Got turn on symmetry You make it a little smaller,
right in the middle. Now maybe we can
use that stamp tool again and just make it
a little bit bigger. We might be able to
make that nice indent. I don't know why I
said it like that. Remember, we can always
go into here and change this fall off. We can change the falloff
to something like this now. And also with this
turns symmetry off, we don't need symmetry for this. So yeah, that's a
better like fall off. And maybe I'll do a
couple I write in the middle to kinda
give it that depth. Okay, so now we can not do sub. And then we can see how it
looks like if I wanted this to be whatever kind of berry. Or we could always do symmetry. That might make our
life a little easier. Can turn symmetry off. If you want to do
one in the middle. Whoops, then you can
turn it back on. And we can kinda
just let them rip. Let's do a couple more down here and then we'll
turn symmetry off and do a couple just
to fill in those spots. We'll do a couple
up here as well. That's a good Berry, right? Am I crazy? I think
that's a good Barry. So stamp tool, stamp tool is
the MVP of this this class. So now we have a
little raspberry that we can use a few
times if we want, we can make some other fruit like little cherries
or something. But this will be good. We can
make this one in the air. Just like in the image that's
making it a little closer. Maybe a little smaller. So there's one in the air. And we can clone
it. Did that work? You can just hit Clone. And
we can move a few of these down to the lips, to the plate. You can make them
a little smaller. Again, I don't mind. I
don't mind contacts. I don't mind them
kind of going into the into the thing a little bit. Clone it again. Maybe is
another one over here. Make this one a
little bit smaller. Maybe. Okay. So maybe
something like that. And what do we think these other ones are
so confused at those? Let's clone this.
Let's make one inside. Let's do one raspberry
inside the icing. I mean, inside. Rotate it. So you
can just, you know, you don't have to do them in
exacts spots in but again, I'm just following the
reference, so feel free. You're sure project. Again, I know I'm gonna do my
inflate and just kinda make some really make this thing
look like it's in there. Give it some love. And then maybe just one more of these on the plate and then
it can be some other berries. So we'll take this one, go
to the gizmo and clone. And I'm gonna do a line. It's just because it's easier
to just move it in space. Okay, so we'll do one Down here. Maybe we'll do one more. A little bit smaller. Just a little bit closer. There we go. That
looks pretty good. Okay, So we'll come back, we'll do a few other
little cherries. And then I think will be, I think our base will
be pretty much done
17. One Down: Let's just add the
rest of these little Fruits in and then I think we can try to
tackle those other three. I think there's gonna
be much easier now that we have this guy all done. So let's see, let's go
back up to the fruit. So we have the berry here. I'm going to change
this one into rasp. I think I forgot the B. That's okay. You
know what it is? I'm going to take
all these barriers. I'm just going to connect them just so they don't get lost. So we have the berries,
you have the strawberries. Let's do a quick save. And now I'm just going to
add some regular barriers. We can just use a sphere. And I'm not gonna get
too crazy with it. I'm always worried them an excellent you hit
something else. I'm just going to turn this, I'm going to validate this. And then I'm just going to turn this symmetry on
like we always do. And I just want to
use move, excuse me, with symmetry on and
I just wanted to, I just want to make it
a little bit more of a cute cute around shape. Maybe just like I mean, it's, yeah, it's more, a little more organic than just the regular sphere.
I think that's fine. I think that's good.
Again, you can use stamp with yes, with sub. If you want to go ahead and add that little bit at the top, outlets turn symmetry off. You want to add
that little bit at the top, something like that. And you can always
just smooth it out to little more berry like. Now we can take this and
just shrink, shrink CPU. And we can add, you can
add one to the icing. Because excuse me,
in the reference there is one of the icing. Think that might be nice. We'll make it a little bit
smaller than the other one. I want to move it
up a little bit. Me that's a decent spot. I'm gonna go ahead
and do my inflate, whoops, on the icing. And then smooth little
bit, I love it. So I'm gonna take
this one Gizmo clone. Why I started talking all funny, sometimes make myself
laugh at myself. Another one in here. Excuse me. I took a drink before and it
went down the wrong pipe. Snow I feel have choked. So we'll put another
one in here. We'll go ahead and
do our inflate. So we'll put another one
in there, maybe one more. So let's do a nice little clone. Not that. Keep the smooth tap on the very and
then hit the clone. Maybe they make this one
a little bit bigger. And we'll bring this right in the icing maybe right there. Make it a little
smaller. Make it facing a different direction. And maybe we'll
bring it a little bit lower just so it's
a little bit different. And then we'll do My inflate. It's a little too much. And we'll go ahead and smooth. Okay, so now we'll just add a
few of these at the bottom. So I'm going to go
to gizmo and clone. It just makes sure
you tap the barry. We can add a little few of
these in the bottom as well. Maybe we'll kinda Nestle
it in there a little bit. You can take drag
and if you want to or move really small, you can kinda make it so it's
like squeezed on the plate. Again, I don't mind
a little contacts. I think that always makes
things look pretty good. I'm gonna take this
one again because we adjusted the other
one and just cloned, just add a couple of more Make them a little smaller. So and of course,
with the colors, we can make these
like blueberries are pretty much
whatever we want. So I'm going to clone
this again and just add another one here. Maybe one more over here next to our little raspberries to give that little
difference of color. And whatever we decide to make these good safe. Okay, So I think he's
looking pretty good. So if we look at
the image again, I don't know where
the whole image is, but it's just a general
regular back drop. Not too much going on. So I think we'll just add
a plane or two planes. So we'll go to our Scene
and we'll add clean gizmo, and we'll just make it
bigger. Let's go to front. Now we have our plane and I think we can just
leave it where it is. Let's turn on grid. It's actually perfect. So we'll just leave
that where it is, turn the grid backoff. And let's go to
our view. Or view is or actually seeing
the bottom of the plane. Interesting. So it can be kinda like this is a
little bit better. Let's save this as V2. So let's add view
and rename this to. Let's take the plane
and let's turn it. So we'll do snap, maybe 45. So we'll just turn
it. 45. Oh, it must be in the raspberry thing. Lets bring the plane out. We're bringing the plane out and we'll name this one FSLR. Let's clone it. Actually, we can go ahead and validate these. I'll take this one and
I'll validate it as well. And let's take it off of a line. And we don't need snap anymore. Actually, we can do snap 90, just type in 90. So now we'll move
it up back here. And then we'll snap at 90. Doesn't really matter. We can
move it up like this. Okay. Like that. So now he's has
like a little backdrop. So we'll take the floor. Let's name this the back wall. We can go ahead and connect
and Nestle those together. So now we just have a
little, a little backdrop. You can also use your Gizmo if you want
to stretch it out, make it wider or
something like that. Let's take a look in perspective.
This is looking good. Now at least you have sort of backdrop that we can work with a
little bit later. If you don't want to
do the other Smurfs, then you can skip
ahead to painting. When I, when I light and
paint all of the characters. So that way you
don't have to do, if you don't wanna do
with the other Smurfs than you don't have to. Okay, I'm gonna go ahead
and hide this for now.
18. The Trio: Okay, so great job with
this little Smurf. I'm going to try to
move a little bit faster and we're just going to move through these other Smurfs. But we have a basis for
everything that we did. So the other ones
will be much easier. And it's, that's, that's one of the really cool things about Sculpting is once you
make something like, we've figured all
this stuff out. So when you're doing
the other ones, we're not going to have to
do so much of that figuring out because we have
all of our answers. Okay, so I love it. Save, It's looking good. Lots of berries. Here's the other barriers. So let's just do a little
bit of housekeeping. That's okay. You know what, all these
berries are just berries. So we'll just keep them. We'll just keep them there. But I'm gonna hide
all of this stuff. I'm going to hide everything.
Maybe not the floor. We'll keep the floor and lets
bring in the other image. So let's go here. We'll take away, we'll
tap on that one, and then we'll
bring this one in. You can hit Transform and you can make it
a little bit bigger. So maybe something like that. Then tap again on the screen
to go back to Sculpting. Okay, So it looks like all the legs are kind of indifferent,
different positions. So we'll just start with
the bottom one for now. We'll start with the body. And I promise you, it'll be a lot easier now
that we did that first one. So we'll go to a Scene. Start at the top and we'll
just add sphere. Bring this. I'm going to bring
the sample box down. I don't know what I'm
gonna do with it or if I'm going to ever
do anything with it. But I don't know. Sometimes you just save stuff. Actually, we already
have a body. We already have a
body Down here. Forgot about that.
Lets bring this up. Okay, we already have a body. They're all pretty
much the same. They're all pretty
much the same shape. So that's good. That's going to help us. I'm going to turn it this way. It was high, this
sphere for now. Okay, So what we can do, they're all sort
of bent, straight. So let's go ahead and take off. Well, let's go to the
symmetry and make sure that we undo the Z, we
only want the X. So using symmetry, you can
see it's down the middle. We're looking at it
on the left side and see how it's
they're all straight. All their backs are straight. So that's what we're
going to do to this. Going to use move. And we're gonna make this part
straight, just like that. And we can make it
a little bit more straight or bended a
little more as we go. We're doing the back one, so I probably will or the bottom one. So i'll I'll bend it
a little bit more. But I think that's pretty
good. I think that's perfect. Maybe it'll make them
a little thinner. Okay. I think that's perfect. Okay. So we have the
body for this one. The legs will be
somewhere under here. But I'm gonna go
ahead and clone this. And this one would
be body bottom. This one will be body mid. And then we'll clone
that. And this one could be body top. Okay, So we have bottom. So that's this body. But me have put them in order. So then we have body mid, still looking at it
on the left side. We'll use our gizmo and move
it up and back a little bit. So it looks like it's
sort of around here. Now the kind of big to take them all and just
shrink them a little bit. Okay. Lips. Make sure that we
do body bottom. I'm going to move that
down a little bit. And his feet are
actually touching. So I think that's a
good distance away. The mid is up in a
little bit behind. So that's right here. So
this one should be body top. So this one is up here. And it's bent forward
a little bit. Let's take it off snap and just rotate it
forward a little bit. So obviously we're going to
have to adjust these and make it, make it look better. But essentially, this
goes up straight. This body is a little bit behind Maybe not that much. We'll move it over like this. And then this one is it looks like it's right on
his heel so as he'll be here. So I think that's
actually perfect. And then we'll
just adjust it as, as we go. Something like that. Okay. And again, we're
looking at the left side. This is the this
would be the front. So we're looking
at the left side. Okay, so let's add some, some spheres for the head. I'm gonna name this head. We'll use our gizmo
and we'll just bring it up to the head area, which is about here. Maybe a little bit down
a little bit more. So maybe something like that. Maybe move it up a
little bit. Okay. And I want to, this one
is with the bottom, so I'm going to nestle
it at the bottom. And I'm going to use
gizmo and validate. So I think it's
probably better to just do one head and then
use it for all of them. So let's work on the
head, on the front. We'll do the same thing
that we did before. So we'll use symmetry. We can enable the symmetry here. We'll do X and Z to X for now. We use move, turn on symmetry. So we just need to make the head kinda like we made
the other ones. So I think they're just like
a little bit more round on the bottom and they're
a little bit oblong. So I think something like
that is pretty cute. So now I'm going to
turn to the left side and just kinda make
the back of the head. So I think it's
something like this. Can you can't really see
the back of their heads. But I think something
like that will work. Okay, so now we can add another sphere and
this will be the nose. So we'll just bring
it up, shrink it. So we'll just work that in. Let's label this nose. Let's clone. And I'm
going to bring this, let's label this Eyes. I'm actually going to
bring it out. So I'm going to label this Eyes bottom. Even though I don't
remember the accident, I think it matters. But the reason why I
wanted to do that is because obviously we're going to use the Mirror for the eyes. So we can go ahead and just separate them and just kinda put them in
a general position. We'll just elongate
them a little bit. Eyes are pretty much
gonna go like this. He looks kinda like Elmo now. Okay, so that's the Eyes we can actually
connected. It's fine. Okay, so let's go ahead
and hide the eyes for now. And let's go ahead
and shape that knows. So let's look at the left side. We use move symmetries on. And let's go ahead
and shape this nose. Okay? Let's validate it. Symmetry on. And just
like the other nodes, make the move tool
a bit smaller, we'll just kinda stretch
it up a little bit. Something like that. That looks pretty good. I
can bring the middle end. Remember we had to do
this on the other one. So I'm just gonna do it now and just kinda thin
it up in the middle. Something like that I
think looks pretty good. And also we flattened out the front of the
face. Remember that? So let's go to the head. Who actually we moved. We just use the Move tool. So symmetries on,
we're just using move. I'm going to tap the
left so that we can just remember we
straighten this out. So I'm just going to hit
move a little bit here. Flatten out that face. I bring the bottom
out a little bit. Perfect. So something like that. Which is pretty much
what we did before. Nose looks a little big Shrink that, bring it
in a little bit more. All right, great. All the hats
look pretty much the same, so I think we might be able
to just steal the other hat. So let's just go
ahead and do that. Now let's get a quick save. And let's find the hat. So we'll clone it,
will bring it up, connected in there
and we'll unhide it. Oh, that's so funny that it's sort of in this the right spot. Kind of It's a bit strange. Little odd, actually. But yeah, I guess
we did them we did the regular Smurf,
sort of the same way. So it kinda makes sense. I might want to redo this. I'm going to have to amend and have to redo the head at all. But he has a little bit of
a different expression. So there is that we might
have to redo this tourists. I'm gonna hide these bodies. Both of these for now. You can just concentrate
on this one. Okay, so we might
be able to take the hat and let's
go to the scene. Let's see if we can separate. Now. We can separate
these two sides. I think I'm going to get rid of this and just add
a new tourists. I think that's how we did that. So we'll add a new
tourists, will bring it up. Gizmo so that we can
bring back the options. And then we can just
use this green. Then Gizmo to just stretch it. I think that's how
we did it. Now. We just want to place it. Shrink it a little bit. Okay. Yes, So pretty
much like that. I want to try to place it with the hat instead of the head. Because the head we can move
the character, we can move. I guess we can move that too, but okay, so that's good. I'm going to take the hat and just get it out of there
so we can move this. I just want to move
all this stuff. So it's like equal with him. Actually. I don't really think I need to. I think I'm going to keep
the hat where it is. Mu we should move there. Instead. Maybe that's the easier option. Meet the head a little bit more. I wanted to come out
a little bit more. So this tourists I think needs
to be a little bit bigger. I think that's okay. I
think that looks good. I'm going to validate
the tourists. And remember we flattened it. I want to flatten the front. We can actually
turn symmetry own. We'll flatten the
front. Flattened sides will flatten the back. Let me get those
nice planes again, underneath and on the sides. Okay? So now I'm just
going to smooth this out, but it's a little soft. So let's, let's go here and multirate and
sub-divide it once. So it shouldn't be so soft
now here That's better. Hold that shape. Okay, That looks
good. Happy with it. So let's ask some cylinders
to make for the for the ears. Must time we got okay. A
couple more minutes left? So we'll add cylinder. We use our gizmo to bring it up. Let's look at we'll
do it on this side. So we'll do snap 90. We'll use this arrow
to bring it over. Let's just position it so we can kinda get an idea
of how big we want it. Have kinda be gears. A little bit more,
little bit more. So maybe something like
that I think is good. The ears are down pretty low. Something like that. Good. So now we'll just take we can
I guess we can mirror it, it actually, we'll just
hit Mirror Validate. So now we'll take the two. We want the Y yet we'll
just do the Y-axis. We don't need the X, just the Y. Then we can use move symmetry. And now we're
just going to shape it. Remember we made that
sort of shaped like this. So we're just going
to shape this ear to make it a little more eerie. Okay, I think
that's pretty good. Now we'll take our mask
again and we will hook. It's a little ugly-looking. So let's just voxel
remeshing this like 150. Actually, that made
it look worse. Let's subdivide it. Okay, that's better. So we subdivided
it and now we'll make let's make
it a little more. I don't want to get too
close to the edges, the edge down here. But I think that's perfect. So now we'll just do, we'll go to our mass
settings into invert, and then we'll do it gizmo. And now we can move
that piece in. Oh no. Let's turn off. The symmetry is too long. I don't really want
the symmetry on. Lets see if our
gizmo, it was doing a weird, oh, let's invert. Mask. Invert. I'll do the gizmo. Okay, so the symmetry
was on that Dessert. That was a little
weird. Okay, so that we did that,
That's perfect. Now we'll go back to our
mask and we'll clear it. So now we'll take
our gizmo and we'll just maneuver these a
little bit into the face. We can get it off, snap, can rotate them out, bring them down a little bit. See they're very, very low. Maybe we maybe we even rotate
them this way a little bit. Oh God, look at that. Whoops. That's okay. But I think that's, I think that's pretty good.
I think that's not bad. Maybe rotate them out
a little bit more. But I think that's pretty good. So now let's take round edge. Yeah, I think that's okay. Let's tap on the face now. And let's use inflate and we'll make those
little inner thingies. But notice the direction I'm
doing them. I'm doing it. So I'm doing one on the surface and then
I'm doing one sort of behind it but like close
to the close to his face. So something like
that. Because when you smooth it, you're
gonna lose a lot. I think I lost too much. Let's do Clay. Let's
do inflate again. We'll do something like that. So let's sub-divide it. So we'll go here, sub-divide. So now we shouldn't
lose so much. Okay, perfect. I'm
going to take move on the year and
just move them into the face a little bit more. The I'll move the whole things and a little bit,
something like that. Okay, I think that's good. So let's take some
cylinders and do those pieces for the eyes. But let's name these so
we've got to make sure we keep everything set. So this is the ear Mirror. Actually, we can go
ahead and validate this. So let's validate it.
Joining Children. This is gonna be ears. Okay. Here's nose.
Those are the, these are the eyes
that we didn't do yet. So we'll go ahead and
add those cylinders. Okay, so when we come back, we will go ahead and
position these cylinders, will turn it and position them for the eye sockets like we did. But rocking and
rolling. We're gonna get through this really quickly. It is much easier because
we know all the tricks. All right, See you next video.
19. Quick Blocks: Okay, let's jump
right back into it. So we're going to use
snap, snap this forward. Like so. Can shrink it
a bit, shrink it a bit. And they all pretty much have
the same kind of things. We'll just have to edit his
eyebrow a little differently. But that's okay. Let's
stretch it and then lets you can kinda put it
in position a little bit. Let's take it off of snap. I'll move this one over. You can go ahead and Mirror. Go back to the gizmo. And I think I had had
them a little further apart because I wanted to
Eyes little further apart. I just think it looked better. So even something like this. Bring it down a little bit more, maybe angle it
back a little bit. I think that looks pretty good. So let's make sure that
we just label this. Can this be eye sockets? And then we will, I think we didn't we
have the eyes, the eyes. So let's go to the eyes and just fit them in so
we'll make them flat. Probably should have.
Actually, before we do that. Okay, So we have that. Let's go ahead and before we do that, let's go, let's clone
the whole thing. So we're going to
clone both of these. And let's rename this I whites, because that'll be the
whites of the eyes. Let's rename this
one P. For Pupils. We can hide those now. So
we'll just back to go. We'll go back to Eyes weight. We'll tap on that. We can go ahead and validate it. Now. Now we can just work on these Eyes, will
flatten them out. Further away, maybe
a little smaller. Ahead and click. They can go down a
little bit more. Maybe a little bit bigger. I think something like Who thinks something
like that works? There might be a little big it could be a little
little too big. Sink come back in
there a little bit. And we just have
to make sure make sure you rotate
them so that there aren't there nicely
on the surface. Kind of evenly all around. So I think that
looks pretty good. So now we can take this, let's go ahead and validate these. And we can just take move and just adjust
them a little bit. I just want to pull There we go. Pull it out some. Okay.
I think that's good. So now we'll take P1, we can unhide those. We'll go to the go to this. We can validate. And let's just use our gizmo to
make them smaller. That orange ring. And we'll flatten
them a little bit, bring them down and we'll
do something like this. We'll put them a little closer. I think that's good
for now because we can always change change them up
a bit later if we need to. Okay, so let's take
a look at this. The head. So the Mouths, we're all a little
bit different. So I think it's safe to, I think it's safe to do
the ears to voxel 3D mesh, the eyebrows and the ears. And maybe even a nose. Yeah, Let's I think I made the
ears a little bit too big. I think the ears are
a little bit too big. So I'm gonna go to oh, that's right, we validated
the ears. That's okay. So here's another little
trick that we can do. I want to make the ears
a little bit smaller. So I'm going to take
trim with rectangle, which can cut one off. Then we're going to take this
ear pivot, center pivot. And we will make it
actually doesn't look doesn't look that
small from this side. It's only from the, you know, why it doesn't really look
that small from this side? If he's looking like
this, it's actually fine. Crisis averted. Okay, good. So I'm gonna take, you know what, you
know what we'll do. We'll take the head, the ears, and the nose, eye sockets. Let's validate the eye sockets. Validate the eye whites. And we'll validate P1. Actually, we won't validate P1 because we'll have to
move those around. So let's take a, all of these. The head, the ears, the nose, the eye
socket, the eye whites, and not the highlights,
the sockets. So let's join those
for the head, ears, nose, and eye sockets. So we'll just join those. And let's label it ahead. Okay, So now we
have the I whites, I'm going to connect ahead. And P 11, I guess. Okay, So the good part about
this is this is perfect. So now we can clone this and we can bring this
up to body Mid. So now we have all of that done. So I'm gonna hide that. I'm going to take this
again and clone it. And I'm going to bring it
all the way up to body top. Okay, so now that's done. So now they both have
the head and we can get to those when
we get to those and tweak them from there. Okay. So now let's go ahead and make his legs and
his eyes are up, so now he's separate
from the other ones. So we can we make sure that we're on the
right Eyes there we go. Eyes bottom. So his eyes
are actually looking up. Something like this. His eyes are looking up. And let's give him some legs and we're gonna
do the same exact thing. We're just going to use the tube Tool and can probably use path. We'll just do 123. So we'll do 123. So this is mirrored. Take it off Mirror. Oh,
he must be in a mirror. I must have excellent. Put it
in Amir. Let's take it out. Oh, the hat to almost
forgot about that. Yeah, So we have the hat to, we'll, we'll clone that later. So let's just
continue on the tube. Let's make this leg. Okay, so now these
legs are very similar. They're actually
pretty much the same. So what remember
that we can clone this and we can actually
do it all three times. So we can do one leg and
just use it all three times. So this first leg is
pretty much like this. It's a little make
it a little thicker. So maybe around their
bodies a little. Look in comparison. I'm not actually it looks okay. I'm going to raise
it up a little bit. I'm gonna make his
belly little bit. Just take out a little bit more. I'm going to take
his leg and oops. Take it off of snap so we
can go inside the body. And now I just wanted to look natural so we have to
kinda just adjust it. So it looks like he's walking or stepping a little bit more. Maybe bring it a little
bit more towards the back. I'm gonna, I'm gonna do a line so that I can just
move it straight back. Okay, Good. Okay, so now we can use, Let's add a sphere. And this will be foot. So these are gizmo and we'll just move it over
to the general foot area. And then we'll just
mold our foot, squeeze it that way. So now we have to make it
this sort of funny shape, that is foot is,
I think we can go ahead and validate it
and just use move. And we just want to
have this sort of Almost like a hot dog bun. Not sure how it's to
really explain it. We can turn symmetry on. And we'll just concentrate
on making the shape. So it's sort of like goes up. There's a bend in the middle. And then each side is around
the front and the back. And it looks like sort of running out of space
there unfortunately. So I'm going to
take all of this, take everything in the sphere, and just move it
up a little bit. Okay? Okay, It's getting there.
We're just going to continue to work it until it's all. It's nice and round glory. I think that looks pretty good. I think that looks pretty good. I'm going to position it
up a little bit forward. I think that's good. I think that works.
We can take the leg, go back to tube and we can
just adjust it if we need to, maybe move it back a little bit. But ultimately I think this
works out really well. We're bring this in
a little bit more. So it goes right into
his body. Like that. I think that's good. This
leg is looking pretty good. So we have the leg and the foot. I'm going to nestle those. And this one is leg bottom. Let's make sure we save. This is like bottom. And let's go ahead and clonus and bring
it up to body mid. And we can clone it again. Oh, let's go into body made
and rename it. Leg mid. That would be don't
get confused. So we'll take leg bottom, we'll clone it and let's rename it leg top, top. So now we can take this
and put it into body top. And that will be our, that'll be our legs that we
can adjust as we need to. But ultimately, I
think this looks good. I want this a just a Farnsworth
more round in the front. Okay. I think that's good. I think that's perfect. So now let's do the other leg. Alright, so let's
clone them both. Gizmo will just bring
them right over. I kinda want it to be reversed. So I'm going to go to symmetry. Local and flip
objects. Did it flip? I don't think it flipped. Did not flip. Rearing right to left. It's not doing anything.
Interesting. But that's okay. So let's take move. I'm just gonna make
move really big and I'm just going to put
another bend in it. Let's turn symmetry off. I'm gonna put a bend in it. It looks like the other foot. Yeah. I just want a
little bend in it like that. I think that's perfect. So we'll take the leg
and just adjust it, just make it work for this side. It isn't a little bit of
a different position, so let's take this
one and we can just rotate it, move it
up a little bit. And then we can go to tube
and we can adjust this tube that will go round the back in. Suggest it a little by little. So that it makes sense. Here we go. Just the foot is angled
up a little bit more. Plenty to get a view
for this as well. So maybe something like that
I think is pretty good. So we're gonna go
to View, add view. We'll name this Trio. For the Trio And then you can make
just little minor adjustments as you need. As you can see there everything
is a little far apart. Not really sure why that is. I think it's just
a matter of taking that leg down and back. Move it over a little
bit. I'm going to take this tube up. So let's go back
to our Trio view. It looks okay. And then we can just kind of like
bottom line, bottom. Oh, this is the other
little confused. Now. Potty bottom. Turn those off for good. I think that's what that was. Yeah. She got to make sure that we were using the bottom all
the stuff from the bottom. Everything still looks
good. It's good. Or a Trio view could
just be the foot, could just be the foot position. We'll turn it a
little bit this way. Maybe up a little bit. Okay, I think
that's pretty good. We can always adjust it a
little more later if we need, but I think that's
really good for now. Okay, so the arms are
gonna be pretty simple. We'll just use a
tube for this arm. Can use path and we
don't need snap. So as Arms are going
straight out like this, so we'll go one there
right by his ears. You can hardly see his ears. So we'll just make two, maybe we'll make this
a hard angle there. So we'll do something like this. I think I want them
coming straight out where his ears are. Something like that. Then just use tube and we can
just make it perfect. Okay. I think
that's pretty good. I think that's pretty good. The only other thing
that I wanted to do was slice the body. If I can get that done, then in the next
video we can work on the hand to slice the body. Let's use split, or might
not an orthographic. Oh, we should be
an orthographic. I think I forgot to switch
back a while ago. That's okay. No, no, not a big deal. It's just better to
Sculpting orthographic. See, this is why we
Sculpting orthographic. So I'll have to adjust this
a little, a little later. So to make the cut in the belly, we want to use split. I like to use ellipse and
amino start somewhere up here. I just want to make just
something like this. I think that might be perfect. So something like that. Let's voxel remeshing
each half at 01:50. So do the top half and the
bottom half at 01:50 or so. And then we'll do a couple
of round edge on each. Maybe 3123. Okay. We'll come back and
we'll work on this hand, and then we'll work on the
other arm and the other hand, we will keep this party going
20. Arms & Hands: Okay, So Hands, again, we're going to use the
cylinder to start with. We use the gizmo to bring it
all the way up so we can, this will be our work area. We can go ahead and bring
those other spheres of two. If we add a sphere,
can bring that up to. Okay, let's make sure
we keep everything labeled so things
don't get hand. I'm gonna take this the bottom and just put it
down here for now. This will be, this
will be finger. We can clone it, make it thumb. Ball. Is that will be
the ball of the thumb. That's gonna be in this area. So we'll go back
to the cylinder. That's gonna be the poem. Lets bring this out. It gets a little confusing
when you have so many layers, things always get connected before I want them
to be connected. So we'll go back to this
cylinder and we'll name this. Okay, so for poem, Let's go ahead and validate it. Snap 90. So we're going
to bring it forward. Remember we're looking
at the front now. This is gonna be the
palm of the hand. We're just going to
make one hand should cover all of these fingers
are slightly different, but I think easily adjustable. But I'm going to try to
stick to just one hand. We'll clone it. And then we'll use it for all
the other Hands as needed. So we're bringing this together. Let's make it a little
bit bigger. Like so. Okay, so something like that. We can move this finger
up. You can validate it. This finger up the way. So let's take this,
let's turn on the green. So we want green
and red symmetries. So we'll use move. I'm
going to tap front, will turn on symmetry here. And we want to make that same
shape that we did before. So we want to make
something like this. Think that works. Okay, so something like this. And let's make the thumb here. This is actually a pretty
good spot for the thumb. The Scene has a little thick,
thin it out a little bit. And I'll send this
out a little bit. Can validate the thumb ball2. I'm just going to use move
and just kinda move this in the general area at this kinda comes off the
palm a little bit like that. Then we have this finger. Remember we want
to stretch it out. We don't want to use this red. We want to use the green. So we switched the symmetry. Okay? Looks like
we're going to take a quick break here
when that happens. So what I'm going
to do to prevent it is go to my settings and to battery and then
put it on low power mode. It shouldn't do that
anymore on low-power mode. Okay, So we'll go back to
Nomad Sculpt and back to our hand and make sure
that this is in-focus. Okay, so I'm just gonna
do some simple hands. This comes cleanly off and just makes it a
little lump there. So I'm just going to
continue to move it. So it's just sort of lined
up with you can also, oops, you can also adjust that, but I would take Symmetry off
if you just want to adjust the thumb side of it. Okay, so that's pretty good. Can move it a little more
towards the front of the poem. This is gonna be the
front of the poem. Okay? So now this finger
we're going to stretch. We already put it to
the vertical symmetry. You can see the green line. Now what we have to do is
make it a little smaller. First, symmetry. Change this to vertex. Then we can stretch
it like this. Take it off symmetry and just
make it a little smaller. Let's look at the width
with this pretty good. Length is pretty good. Okay, so now we
can just make one. Oh, you know what, we should voxel remeshing this to,
let's to quick save. And let's voxel remeshing this At 200 gizmo or pivot. Let's sit the pivot. I think we sit them
at the bottom always. So let's hit the pivot there. Because this is finger, so it will clone this
and move it over a bit. And then we'll clone it
and move it over a bit. So he's got the three little
sausage fingers here. Let's make the palm and the
thumb a little bit bigger. The thumb ball up
here by the palm. Make a little bit make them a
little bit bigger this way. Okay, perfect. Can make them a little smaller. We can make the width
to kinda make the, the fingers so that
they're coming out of a central point. They're not like coming
like a pitchfork. There. It's like it's, it's round and the fingers are sort of like
coming out like this. That makes any sense. So let's take this little
fumble and clone it. Let's just take off the
ball. And let's move it. Here. He usually
all the fingers are gonna be around here. Big. Okay. So
something like that. Now we want it to be a
little bit in front of hand. And I rotated a little,
tick it off snap. I want to rotate a
little bit this way. Here we go. So
something like that, I think is perfect. Now let's take, let's actually cloned this,
Let's try it this way. Let's clone it. And
then with the clone, we can use the
Move tool and make the actual thumb just
move it into place. So the reason why
I'm calling it, because I noticed when I did the last one to form the actual thumb piece
a little bit too much. I liked doing it that way, but I don't want
the thumb itself, the integrity of the thumb
to be changed. That much. So something like this. I'm going to use
drag and just try to I could just try to get it
even with the other shapes. To get even with this. Can think that it looks good. That might still be a
little bit too big. I can't really tell
if it's just me are still might be let's
take the thumb thumb. Make them a little
bit smaller. Okay. I think that I can rock
with that. The fingers. I'm going to bring
this one a little bit. Move this one over a little bit, maybe tilt this is pretty good. This one we can kind of stretch a little bit, just
the middle finger. I keep trying to tap
on the other one. There we go. Okay. So something like
that. I think that's a thing that's a
fine looking hand. Yeah. Okay, baby.
Okay, so let's do save hoops. So do Save. And then we can, Let's go ahead and how are the thumbs and all
these ions are actually okay, maybe let's make this Hand, hand All this thumb sections
I'm going to join. This is gonna be thumb.
So we just joined all those pieces and
we'll call it the thumb. And these
are the fingers. So we can go ahead and
connect these for now. And just connect
all these to hand. You can call yours hand though. If you want. Let me be
professional. Change this. Okay. So now everything
is together. Okay, So this is the you can this is this
will be his right hand. Is up his right hand,
I believe. Yes. So this would be his right hand. I'm gonna clonus that way
we have it locked in. So this is the hand. We have it locked in. Let's name this hand and zero. Now we go back to
this hand and we can just move it into place. Moving into the general place, shrink it up, something like that. And we're going to assume that the other hand is pretty
much doing the same thing, the other arm as well. So one thing that
we did for the arm, Let's go back to
the arm real quick. Is we, for the radius, we've made this side
a little bit bigger. I think. Want to take this off. Actually looks, it
looks okay like That. Looks better without
the hard edge. So I'm gonna bring this a
little more into the hand. Actually, let's move
the hand a little much. The handle little better. Let's go to our view. Okay,
so if this is our view, the hand, Let's turn it
a little more this way. You can't see the thumb at all. So it's gonna be
pretty much like that. Then the foot will go there. Okay, that's good. So we'll just make one side because
we can always just, once we make this arm
and get everything set, then we can just mirrored
to the other side. Okay, so now body mid, body made head eyes. So there's gotta be some
move this up and over. So we just have to
find that body. I know I have it somewhere. That's oh, so somehow I
must have moved this up. This must have moved up somehow. So I'm not sure why or how this is body
made. I was right. It's just in this spot that
I would want it to be. It's above this one. So I mean, that
happens sometimes, but at least we
found I found when I was looking for something
to do pivot center, the pivot that would've
helped me out. So that's body Mid. The other thing is now when
I move body mid, oh good. It's not moving me. It's
about moving anything. I think it's because
I'm one vertex. If I was on automatic and group, it would move everything. But it helped because I was on vertex and I never
changed it back. So that's actually good. So as long as you
locate body MID, we just want to move that
back into the proper place. So body mid, the belly
is gonna be on the hat. Oops. So the belly is
gonna be right on the hat. Like this. It's actually
not that far, that far up. So it's probably about there. So now I'm going to head. Oops. It Eyes, legs mid. See, that's everything.
If that's everything. But we don't want
to move body made me want to keep the
body where it is, just move everything else. So now we have this. You can sort of move
this into position so the head would be on
the top of the body. This is annoying, so I'm gonna
move this out of the way. Potty top, just in the way. Exhale, even know
why you're visible. Okay, so let's go
back to this guy. Head to the foot. Now we're just moving
this into place. Now that I'm looking at it So leaned back in the lecture a little
longer to share, a little longer and they're
a little more in front. I think that's okay. Let's move the body. Tilt the body back, and move it back. Okay, that's a
little bit better. The man has a swish this hat
Down a little further to. So that's also something
that we can do to kinda make a
little bit more room for that character on top, we can smashed his head down. And we can take this leg, sort of move that into place. Open it up a little bit. Okay. We can adjust the
leg a little bit. So I think I'm going
to adjust the leg. Then adjust the foot. Make sure I'm on the foot pivot, center. Pivot. So now I'm
just going to adjust the foot so that it's in
more of a correct place. According to the leg. Stretch
it out a little bit more. Smurfs seems to have long feet. I'm going to go back to
the leg and open it up. So it's essentially just going to be just
making it work now. Making it work with the space. Opened up a little bit. Okay, I think that
actually works. So now I'm going
to take the hand. Let's see if the,
if I take the hand, the whole hand,
nothing but the hand. So now we can move this
hand in a better position. Can just kinda leave it there. So if we look left,
it looks pretty good. Obviously, this is
way too far back. So we'll just take
Let's see, body MID. We don't want the
legs and the feet. So we'll take everything
else and we'll do suggest it so that it's better. So maybe something like that. Yeah, I think that
looks pretty good. So we've got that. We
can always we can always adjust the ears so
that's not a problem. We just want to kinda get
everything sorted, set. Make sure you go to your view and just make sure
it's not too crazy. We can still adjust
the head and bring it forward, things like that. So next I think we'll
copy this hand and we'll, we'll, we'll copy the arm. The hand will move that up. Then we'll start doing the
top one and little by little. And then eventually we can
voxel merge these guys together once they feel a
little bit more stable. Because also we might
be able to just move the whole thing, tip the whole thing forward to. So there's a lot of options. We're just going to
continue to block these in a little bit faster pace. Alright, so yeah, the next video is we're
just going to continue doing more of the
blocking of our Trio
21. More Trio Blocking: So let's bring the hand. We can bring the
hand and the arm up. So we'll go ahead and let's see. Okay, here's the bottom. See, where's the arm? Where the arm went,
but here's the hand. So we can go ahead
and clone this. And let's, let's name this Hand. In middle. Hand, middle lets move
up to the middle area. So body mass, I'm
gonna put underneath, but I don't want to
really connect it. I'm trying not to connect. Let's connect it down here. There you go. I just want to put it on its own thing
under body Mid. But I just didn't want to
connect it to body mid. Don't want to connect
it yet because I don't want I just want it to
be separate for now. Hand, middle, body, Mid. I'm just going to
collapse these. So we can find that arm, which I don't see
too. Oh, there it is. So somehow I must have
put it in the leg. So that's the only
That's the other thing is it's so easy for these
things to get lost. And we really have to be
diligent with naming things. Arm bottom. So we're gonna take our and
bottom and just bring it out and then we can clone it. I'm not sure why it does that. It's just when it has
a lot of things that resets but you can't see it.
So that's a bit annoying. So arm middle. So just rename it arm middle and then bring it
up to the middle area. We'll bring it up here. Okay, good, good, good. So now we can take Hand middle and our middle and move them up. We can kinda just move
them in the general, the general area here. Okay? So what I wanna do is I want
to take so body bottom. So what the whole body bottom, not the legs. Excuse me. So we can take the hand
we can take arm bottom. I just want everything
from the bottom. Let's make sure that
this is everything up. We're missing the body part. So we'll get that too. Is that everything? Yeah.
Okay. So I just wanted to take the bottom Smurf. So just select all
the bottom Smurf and then the middle
Smurf as well. So body mid handmade and our mid osha to
the legs as well. I'm gonna do these legs to, for the bottom one, even
though they're hidden. I'm still gonna do the legs. I'm just kinda tilt it. Let's go to pivot
and bring the pivot down to the bottom of the foot. Then hit pivot again.
I'm just going to pivot this forward like that. So I think that'll
help us out a lot with the balance in helping it
look a bit, a bit better. Okay, I think that's good. Then the other one's
gonna be leaning forward. So that'll sort of
balance this out. And there's also
things we can do, like we can take the body here, Hand, middle or middle. And let's just see. So I expanded body mid
and we're just going to take everything except
for the leg and foot. I think we can leave
that where it is. Let's do pivot and move the
pivot down to the bottom. Maybe right where it touches
the hat. Hit pivot again. And then we can move
this forward a bit too. Okay. I think that seems pretty good. It's actually might be
okay even without it, to be honest with you. But either way, you just
have to make it look right. But it's a good habit to
get into organizing your, the pieces so you
can select them all. So I'm going to actually
do that. Do that now. So for example, our middle, okay, that's in the right spot. Let's just collapse everything. So we can see this
is Hand bottom, so I'm going to rename
this Hand bottom. So essentially just go
through and click things and just make sure that
we know what it is. So I'm going to rename
this Hand backup. We don't get it confused. And I'm going to move it down. I'm just going to move
it away from everything. Okay? Now we just have a
random sphere here, which I think I'm
just going to delete because I don't know
what that's four. So we have leg leg. These look great. So these
are part of the bottom. And we can actually
add those two. Body bottom. I'm going to take this leg
and add it to body bottom. Okay. Our middle
finger, hand, middle. Okay. Good. So we can again, we can adjust the hands and
stuff as we move forward. The hat I need to have, rascal need to have. So if there's no hat
for body middle, then we'll just
take it from here. Let's find the hat.
We found the hat. Let's clone that. This one will be Hat bottom. Okay, so that's Hat bottom. We can collapse that this
will be Hat middle pyramid. So this one's hat mid. So we're going to bring this up and we'll put it
right under arm, middle because we can
unhide these legs. Okay. Alright, so everything
was looking pretty good. So now let's take that hat
that we just brought hat mid. And this hat has to go on
his or her head as well. We'll bring it down. Maybe
something like this. It looks pretty good. So now
that we have the hat there, I think we can do the top body. Let's find that body top. There it is. We're still
in vertex. Unhide it. So let's take it off of a line. If you're a sauna line, I
think we're going to stretch this body and I'm actually
going to move it. So this is like just kinda like an a different
angle than we have here. I'm just going to
straighten it out because his back isn't really that curved in this one. Sort of just forward. When you give them a little
bit more on the front side. So it might be just
something like that. Now this body has to go, I'm going to put it back
to a line and hit left. Okay. So the spot he has to
go probably around here. Seems like I think that
feels about right. So we need another head. So let's undo all of this and
lets actually copy hat mid. Let's clone that now. And we'll make this hat top. So now we'll take that and
move it all the way up. And we'll Nestle
it under the head. He top. I'm just gonna read
the name of this head. Top, body, top, whites top. Anything else that
might be confusing? Foot the top. Okay, So let's I
just made visible, oops, everything on
the top part now. So we can kinda see
what we're doing Okay, So body top is
already up there. So we'll take head, this one, P2, whatever that is, Eyes bought, ice bottom. Now this should be Eyes top. That can be confusing. Hopefully that's correct. So let's take
everything except for body top because body
type is all though, is already up there. So all these top pieces
just want to bring up, you know what, I
did the wrong hat. I did the wrong hat. I'm
going to take this hat, delete it and I want to, I want to copy it from the
bottom hand from body bottom. So I want to clone this one
and make that had taught. That way. It'll, it'll
already be on the head. Now we'll take this one and move it up where the other one was. Head Top Hat top. Okay, So now let's
try that again. We'll select everything having to do with the top
except for the body. The body is already there. So now let's move
this. What's up? It's perfect. So it's moving everything except for the body. Will move it back
to general spot. Will move it back to
the general spot. And let's take the head
and move it forward. So we have head, head
Top Hat one tourists, that's the hat brim. I'm just going to
rename it at brim top. Are these the Pupils? Those are the Pupils. Just going to
rename this Pupils. Taught me rename this
Pupils top as well. But there are also
Eyes, Eyes Wide, top. Okay, so it's right above that. Okay, cool. Alright, so now that will take everything
connected to the head. And we should be able to just
move this forward. Like so. Maybe it's looking a
little bit more downwards. Like that. We can go in and move these
Pupils really quick. Pivot, center pivot. We'll move these down. These little details we can
do later, but that's okay. So we'll move those down
looking pretty good. So the only thing we
might be able to move, I'm not sure what I guess it looks I guess
it's going to look a little bit more balanced with the arms. So let's, let's make sure
we bring the arms and stuff up to body top. I don't think we
copied the arms. So let's let's see. I guess these aren't, these arms and Hands
are a little different. So let's just take lets go to, I think we want to
take the bottom one. Let's find the hand and
stuff on the bottom. So there we go. Hand, bottom, arm, bottom. Let's Nestle the arm. So now we'll take this clone it. And we'll rename this one. Hand arm top. I'm going to rename this too because I'll forget where I put the arm and arm bottom. So let's take Hand
hand, arm top. We'll move that up to
the top one. Leg top. I'll put it right underneath for I guess I'm
going to connect it. That's fine. We're going to take hand Arne and move it up. We're still in vertex. So I can move it straight up because
again, we're in a line. I guess doesn't matter, but
a line does make it easy. Sometimes. We'll move the base of the arm essentially
to where it would go, which is like right
under his chin. So it'd be like right there. Let's move the pivot point. Actually, let's not
move the pivot point. Let's move the hand first, since it's hard to select. So I'm gonna go to Hand I want to take everything
except for the arm bottom. I'm just going to put
this generally in the position in space. And it's right by his nose. Go left. There we go. So we
want it down by his nose. Something like that. Open up
their wrist towards the arm. So now we'll just go to
this arm and we can go back to tube because
we didn't validate. And we can straighten
out this arm. So Arms pretty straight. Okay. That's pretty good. But we want to make
it under the chin, pinch more straight under the chin. Like so. Let's check the
length of the arm. Length of the arm is good. So now we can take
the hand and we can Let's take that off. So I'm just making sure that I'm selecting the whole hand. Now we can move it
into place again. But according to the arm, or in conjunction with, I should say, the arm. Sometimes nice to use big fancy terms when you're
making Smurfs on an iPad. Okay, So that looks pretty good. The hand back a little bit. Let's take a look
at the Trio view. Okay, Trio view looks good. And from the Trio view, we can also adjust it. So we're just seeing more
of the back of the hand. But what I want to get it away from the face a little bit. Okay. So I think
that seems right. Okay, so I want to take a look at
the other view as well. Let's do a Save. I don't think I've
saved in awhile. So we'll do a Save. I just want to check it
with the other views. Okay? So we're going
to have to, okay. This is looking pretty good. I'm happy with this. We can, lets see. Hats don't really
have to be separated. This hat and this hat don't really have to be
separated anymore. Okay, So this is pretty good. I think this was a good place. Let's just adjust this little
his little leg for now. Make it a little bit bigger. I want to take this foot pivot, center pivot and move it down closer to where
it's going to be, which is around they're
pretty much in his hand. But we can move
the hand up a bit. So it looks like it would
be right in this area. So we'll take the leg and tube. Actually we can use the
gizmo first and just print like top. Trip. Put this back to
vertex, autism vertex. Oh, maybe it's not
going to work. You bought monkey. That's okay. We'll use the tube Tool and we'll just bring the tube down, move the leg up
and into the body. Just move it down like that. We can move as little bud up to. So I'm just using
move symmetries on and I'm just going
to move as little, but This hat, I'm
going to move that to so that the head is kinda smushed, smushed down. Excuse me. Can take this body, move it down as well. Then let's go back to this leg. And these are all just fine adjustments that
you are going to have to do. I'm just just as you go. I walk contact with the
hat and everything else. We can bring this part
out a little bit. Okay. I think that's good. Okay, I think that's good. For this. The balance
looks pretty good. I think we're doing well. The only thing else
was in the next one, we're bring the head
down and we'll just continue to tweak
and work on our Trio
22. Final Trio Blocking: Okay, 22, final
blocking the cell trio. So again, I don't
think I'm going to, I don't think we
want to block on the other side because I
think we can just Mirror. We can just do one
side and Mirror. It looks like all the hands
are in the same place except for this one, except
for this hand. So since that hand is not there, lets take these Hand middle and our middle. So let's clone. Let's make sure we move arm, arm little up to there. I'm going to unnecessarily
with Hand middle. So this would be
the new version. So if I'm looking
at the front here, our middle, okay, I'm going
to necessarily as well. So this is a bit annoying. I just hid the regular hand, the one that's going to
remain on this side. So this would be
Hand our middle. This one is gonna
be Hand L middle. Because this is gonna
be the left hand. So we hit the one that
we're going to keep. This is the clone. We're going to start
with this top view here. So we go to symmetry. And actually we can
turn the y-axis off. I can't remember
why I had that on probably to edit this hand. But I think we can just do
mirroring right to left. So hopefully that works. So we just hit right to left. And then yes. Okay, That's good. So now let's just go down
and do right-to-left. Okay, so let's go back
to the thumb world. You were right to
left. There we go. So we do finger world
Mirror right to left. The finger went all
the way down there. So I'm going to undo. This is why we turn off
this axis and back to this axis. Little tricky. So remember we're on the finger. Make sure that the
symmetry is just X world. And then Mirror right to left. There we go. Finger ex, turn that one off
world Mirror right-to-left. Why did this did show up? I got nervous again. Go
back to this finger. X-axis world, your right
to left. There we go. So the arm, actually it, actually we can just we can just move the
arm with the gizmo. So I'm gonna hit front
and then I'm hit a line so I can just
move it straight over. Oh, you know what it did? So even though even though
this is all hidden, I think when it mirrored it, just it kept the
other one there. But that's okay. So since it
did that, That's alright. We'll just go to trim. I
thought it wasn't orthographic. I don't know how
I keep switching back to perspective by accident. I really want to be
an orthographic. So we're in trim and which set to go back and trim
all the stuff on the left. So remember, the right hand, the one that we want
to keep is hidden. So we're not, we're not
messing with any of that. We're just going to do each one. Maybe we can take Let's see
if we can take them all. I know I can't trim. It
has to be one-by-one. So I'll just trim
using the rectangle. Go down. Trim. Tab that one. Trim. Tap that one. Trim. Okay, that's perfect. So let's go back
to this arm now. So this arm is
sort of balancing. I want to go to my Trio view. There has to be reason that it keeps switching to perspective. I got to figure that out.
That's very odd. Extremely odd. Okay, so this arm
is straight out. So we'll connect
this to the body, will make the arm
shorter course. Connect that to the body. Back a little bit. Careful not to make the arm too long. So I think something like that. And then we can take the
hand, but not the arm. I'm going to disconnect
the arm for now Then we'll take left arm. I'm just labeling this so
we don't get confused. Left arm, middle. So we'll take the hand and
we'll just reposition it. So we'll turn it around
and find it. It's home. She looks pretty good. It
actually looks almost perfect. This up smudge. Let's take a look
at our Trio view. Trio view looks okay. The only thing is let's see how it looks out still
in perspective again. Okay, You know what, I'm
gonna figure this out. We're going to figure
this out together. Okay, update pivot. Still orthographic. Seems like anytime
I select something, I'm trying to figure
out the moment that it starts switching. I think this hand
needs to be out here. Oh, you know what it is? I wonder if I hit Trio. It's going to perspective.
That's what it is. So I'm going to switch
to orthographic and update this. That's what it was. So I must have when I went
to one of these other ones, these are both orthographic.
Okay, so that's what it was. I kept hitting trio and it
would switch to perspective. Okay. So now we want to
just put this hand a little more like this. Maybe bend it forward
a little bit. Okay, we just want to match
this where it is in space. It's not going to be exact, exactly perfect, but
we can do our best. I think that's
pretty good. So now I'm just going to take this. I'm going to move the pivot. Let's take it off with a line. I'm going to move the
pivot to the base of the arm. Hit pivot again. So then when I rotate it, the base of the arm will
pretty much stay in the same spot. Who go. So something like that. Or they can just go be
in a rascal behind me. Okay, so now we can
unhide the other one. Okay, that's great. So these are pretty good. I want to make the those are the feet are a little
small, but that's okay. We can do that in
the next video, we can make adjustments. We just want to worry about
this Blocking for now. Hat brim and had, had top this back. Okay, so maybe
something like this. I think that works. And maybe I want to move the
head up a little bit, tilted a little bit. So let's take the head. Pupils are all of that stuff. Everything's connected.
I'm going to hit a line so I can just move
it straightforward. And let's look at our Trio view. I think we need to
update our Trio view. So let's add a new one
view when they miss one Trio for an orthographic. Okay, good. So at least now we can see the top one as well. Okay, So it looks good. We don't really have
to turn I thought we might have to turn
the head a little bit. Sometimes it's nice to
play things to camera. For example, like opposed to just turn his head a little bit more so you can see a little
bit more of his eyes. But I only think he
needs it that much. Maybe just maybe just a smudge. Maybe just a smudge. But I think I want to
move him up a little bit. So if I take the head body
top, think I just want to move The arms versus Arms.
Oh, there they are. So that it's all
this stuff here. Hand, arm top. This should be everything. Where is this arm? Arm top? Seal? These things
get really annoying. Where's the hand top? It's in there? Why
wouldn't it select it? Maybe we go back to auto. So now let's select everything
else except for the legs. I don't think we want the legs. Hopefully everything
will move this time. Yes. But we didn't
want the legs. Let's go back to vertex. There we go. Now we're
cooking. That's what I wanted. Maybe even bend him down
even even a little bit more. Move them up a little bit. Okay. I think that feels a bit better. We can take this leg
and use tube and just adjust as we need. I like it. I like it. Excuse me. This town it looks smidge. Okay. Alright. This looks good. Something is bugging me
about how close the arm is. I think I need to open
up the arm a little bit. Hand, arm top. It's the body. I'm just
going to open it up. That feels feels a bit better. I'm going to take the
hand, not the arm. Is moving on it, on the move it up a little
bit. There we go. Okay, so now let's, let's, let's put in
there little tails. I'm pretty happy with this. So let's just put in
there little tails. Or we could use that sphere, that random sphere body. Oh, you know it, before we do
that, actually does matter. We can put those two,
we can put the tails. And so let's do add sphere. Let's call this tail. Tail Trio. This one
will be bottom. So bottom till Trio. We're just going to validate it. Then I'm going to clone
it on it again, I guess. So then we'll go to Name
and we'll just name them, their perspective funds. So this can be top. This one can be middle. Whoops. It'll tell. Lets bring middle tail into
the middle body section. So we'll just kinda snuggle
it right here. Maybe. We'll take the bottom tail can be smuggled into
the body bottom. And the top tail. You can take this
and Nestle with the top body, Party top. And let's do a quick safe. So we're using top tail Trio. I can see. So I'll just bring
this. That's the worst. That's how you lose your
symmetry when you're trying to just use the arrows. But all this other stuff on
the gizmo gets in the way. That's one of my pet peeves. I wish you could just
lock just the position because you'd be trying to
move something and then it'll turn and you don't notice it. But if you do that,
the symmetry is gone. Now that we need it here. But just in general, that's why, that's how you lose
your symmetry, is because of this gizmo will move this little tail or I guess has to be
a little bit bigger. Maybe stretched a little bit. Okay. So I think something
like that is good. Move it in a little bit more. So this one is middle tail. So we'll move that
to the middle. Approach should have
shrunk them all first because it just made one tail and then
just moved it along. Okay, so we have the middle one and shrink it
a little bit more. And this one should
be the bottom one. I can ever select it. Here we go. Now we already trimmed the
body on the bottom one, so we have to make sure that it's below
that trim line reps. So maybe something like that. I think works. Squash this
a little bit too inserted, just angle it up a little bit. Feels, feels right. Squash it a little bit and
then angle it up a little bit. Just feels right. Okay,
we'll do a quick save. Okay, so that's pretty
good for the Blocking. Few minutes left in this video. So maybe we can trim these. So we'll look at the top view. Let's go to this top
body and solo it. Actually cancel it because
we have to make room for the the legs with to make
sure we're in the right spot. Okay, So let's take split. Remember we're just
on this top body will take split,
we'll use ellipse. We're going to start
somewhere up here. I don't have circle. So hopefully we can
just make this and make it a nice clean cut. So maybe something like that. Just has to be above his leg. That looks okay. But I think I want the line to be
the opposite way. So maybe on the side is
better. Let's try this way. Yeah, I think that's I
think that's better. Something like this.
That's better. So that's a nice,
That's a nice coat. We'll take this body
now and we have to do the same thing and
that actually worked. So I'm going to turn it
to the side like this. Use my ellipse. It looks like a good
cut, so that's good. Now I'm gonna do a quick save. Now I'm going to voxel
remeshing each piece. So voxel 3D mesh around. We'll do like 175 or so. Let's do three round edges
to three, excuse me. So we'll take the bottom part. Voxel 3D mesh 175,
rounded edge 123. Same thing for this body. Voxel 3D mesh 175, round edge 123. And
then the bottom. Taking everything in
my power not to repeat the same words over
and over again. It's good. Let's plot this. This Hand really quick. But not the arm, just the hand. Okay. Yeah, I think I think
we're good with the Blocking, so next we'll just I think we just need
to do the details. We need to start remeshing. And but yeah, we're making
some great progress. Next video, we're
just going to clean, clean this up a little bit,
maybe make Adjustments. And then we can start
voxel remeshing and mirroring the arms
and stuff like that. But the bulk of it
is pretty much done. We're we're very close now. We've made great
progress, great job
23. Trio Adjustments: Let's get busy with
some of these Hands. Really need to work
these hands out. I think we voxel
remeshing everything, makes sure that you're saving over and over and over again. Make sure you save
because we're a bit high The Scene vertices. But as it is also
because we have been a lot of these extra pieces. Alright, so let's go ahead and adjust these fingers a little bit so they look
more like they're holding. We're just gonna
we're just going to put a little bend in. So nothing too crazy. We'll just take each one together and now
they're separate. So I'm gonna push. Actually we might be able to use symmetry. Let's see if the symmetry
is still together. I don't see it local. Okay, yeah, so we're not
going to worry about symmetry because I
don't see it at all. So we use the Move tool
and we're just going to push and pull these fingers. So they have a nice
bend in them like this. So that's good. Then we're gonna go and then
we're gonna move it. So let's go to
pivot, center pivot. We'll move it back down. Or backends in space
where it should be. You can actually move
the pivot to the base, taken off of a line. So I'm just moving the pivot so it's like kind of lined up with the finger at the base. So then when I
move it, it's just gonna be moving at the base. Shrink it a little bit
because it's the pinky. Okay, I think that's good. So now we're just
going to move down the line and just adjust
these little fingers. Center pivot. Looks good. This one is a little
bit more bent. So we can do the same thing. We can move it a
little bit briefly, want to bend it a
little bit more. You can also take like
select Mask and lasso. And you can lasso part of it. Use your Gizmo. Change the pivot on the gizmo to hear hip pivot again and then you can bend it a little bit. If you want to do that. Then just clear your mask. Then you have a finger that's
a little bit more bent. So I don't know
where the gizmo ways pivot center pivot. There we go. So I'll just move
it up like this. Maybe on an angle it
out a little bit. Move it up a little more, just so it's lined up with Hand. I think that's good. You can kinda just fine tune
these as you need. But I'm just gonna kinda
fine tune them really quickly because I think
we're in a good spot. We don't really need
to do too much. Okay, So as for the hand, I'm gonna do round edge once, twice, three times a lady. So then I'll take
Move and see if the symmetries there on the Hand tool symmetry
is all weird. So that's okay. We're
just gonna, I'm gonna put the hand up a little bit. Maybe pushed from the side, pull up from this side. Just make it nice and round. And then just move it back. Pivot, center pivot. And I wanted to just
move it straight. So I will just
change the pivot a little bit just so I can
move it straight back. Like so. K, That looks good. So now just suggest
the thumb as well. Just use your Gizmo
pivots, center pivot. We'll just use the gizmo. And I really want this to want it to be
something like that. Maybe it will shrink
it a little bit. It looks a little big. I can move it back
a little bit more. So there we go. So that's a little bit better. You can experiment
with rotating. It. Could also use move. Actually, we don't want
to use move yet because it's still a bit it's
still separated. But I think this is good. I feel like I do feel like the
thumb is a little bit low. Lift that up there and it just looks a
little bit too big still. Okay. So I think they can work. If you're going to move,
remember it just moves. It will just move the
individual shapes So just keep that in mind. If you want to move it and
make it a little more perfect, which you know, I
always want to do. Okay, so that's good. The arm looks good. You can put it a
little bit higher. You can adjust it however you need. But I think
that looks good. The only thing that I wanna
do is let's validate this. And then lets me use flattened and just flatten
this out so it's a little more flush with the hand. So something like that. So now I'm gonna
hit Save. Anytime I do a bunch of work, I hit Save. So now we can, I'm just going to adjust
this a little bit. Make it a little bit
smaller for the pinky. Okay? Alright, Good.
Well I'm gonna, I'm gonna adjust this to
just a little bit more in line with the column. Okay, there we go. So now
we can take all of this, this whole arm and we can voxel remeshing
everything together. I'm going to hit
Save again because I made some, some changes. Now, Hand all of that we can
voxel remeshing together. So let's do that at 200 and
see what it looks like. Okay, it looks good. I think all of these squares
we can just smooth out. We could go back
and sub-divide it, but at this point, we're just going to
keep it trucking. And on the next one we're
we'll know that we have to sub-divide the arm piece. It's a little funny. It
looks a little funny there. But I think it's okay. So now we just want to
smooth this out and make it a nice smooth cartoon hand. If we need about,
if we need to voxel remeshing lower
than we'll do that. But I think it's okay for now. I'm going to use move
and just adjust this a little bit. Go. It was just sticking out
a little bit too much. So just smooth up everything
and then it should, should eventually
look like a nice, clean, simple, cartoony hand. If you don't like these
little, these creases, you can flatten
them out as well. It's too crazy, can just flatten
it and then just smooth. Make it a little, a little
bit more of a round. Look. Same thing with here. I get a little bit of something,
just flattened it out. Smooth. It looks great. Okay, so now we can
jump to this leg, which I think it
looks pretty good. Let's voxel 3D mesh. This head will take the head, does everything
but we don't want the eyes and stuff like that. So we need to be
mindful of that. Just want the head and the
ears. Where are the ears? Oh, you know what?
I think I joined them. I joined everything. Perfect. So we can
just take the head. I'll do a quick Save before
I voxel remeshing at 200. We'll do about, we'll
do about 02:15. And then we'll just
smooth. Our ears. Probably could use symmetry. In turn, symmetry on, I think everything is
pretty much symmetrical. So we'll just smooth
these parts out. Get everything nice
and soft and round. Okay. So the ears
are bit in the way. I think we can just kinda
squeezed the ears back towards the face a little bit. Then we can take this foot and we can use move when we
don't need symmetry. And we can really
see what I'm doing. We need to just push it out
of the way. There we go. You just want to
just push it out of the way a little bit so it looks like it's okay if it's
smushed up against his ear. I'm okay with that.
But it just needs to really look like it's being
smashed up against the ear. So I might move the
whole thing over. And then take this leg and
move that over as well. So I think that's a
more okay with that. Then we can take move and just adjust the
ears as you need. Maybe drag is better. We don't want to really
move the whole head. So we can just use
drag like that. You can even flatten the ears a little flattened, smaller. You can flatten the
ears a little bit. So it kinda looks like there's some pressure from
the feet on the ears. So something like that. Just so we're gonna look
like they're smushed between the ears. That's fine. That's enough for me. I'm
okay with that contact. We just have to remember that. All the fingers and stuff. So I'm going to push,
I'm going to use Move. And kinda pushing here
where we drag is better. Just push in where
that thumb is. So it's kinda nice to
just makes it look like there's some pressure
there from the thumb. So let's take this
arm and arm bottom. Let's clone. It. Will go into
our symmetry world. Should we have the right
we don't need why? Turned off and then flip object. Now we'll take this leg. This leg is pretty good. I think I'm happy with it.
Once you're happy with it, we can validate it. Then we can merge
it with the foot. If you want to still get crazy, you can do things
like inflate and you can make that little thing
that we made before. Smooth it out. Let's
voxel remeshing the foot. Like 200. Now this should
be much easier to do. Make sure Ron and fleet like so, then we can smooth it out. Just get that little bit of
wherever you want to call it. Are we gonna do some
around this side too. So let's do inflate. Make sure we get this
side to smooth it out. Get it nice and smooth. And then we can voxel 3D mesh as voxel remeshing this to actually you know what
before we voxel remeshing. Take these to join
them together. So this is the leg mid clone. Symmetry. Make sure
that we only have the X world flip object. Good, perfect. Love it. So let's take this piece, enjoying it to the legs. So both of these legs, we'll take this
piece and we'll join them together. Like that. Lets bring this up
to body mid split. So there's that,
there's that good. So we can actually voxel
remeshing this bottom part. Lets save. So we'll take this whole bottom
part, not the tail. And we will voxel remeshing
this now altogether. So we'll voxel remeshing. I'm going to voxel
3D mesh around 300. What we should have undo. So let's separate this, let's take this leg and
let's sub-divide it. So we'll go here. Multirate
is sub-divide twice. Take the other leg
here, sub-divide twice. Now let's take all of
these and we should be able to just voxel remeshing altogether around
where we had 300. Remeshing. We shouldn't
get such hard lines. Perfect. So that's
good. Smooth, a bit. Smooth up here,
symmetry has gone, so don't worry about that. Just be careful when you
smooth up near this. You don't want to
pull this line. You don't want to pull this
down too much. See that? So he just wanted to be
careful towards the top. Just go very gingerly towards the top to
smooth that together. Same thing on this side. Everything else should be
good. This a little bit Okay, Good. Okay. So those legs so yeah, this bottom half looks good. So let's take this bottom half. And these VDS, which I feel
like are a little small, maybe they're just
not long enough. I'm gonna take this leg and
just put it down a little bit more. Trio view. Yeah, This needs to be, it's turned a little too much, so I'm going to turn it little bit and I also want
to make it longer. So I'm just going to just
the pivot like that. So then I can just
stretch it long ways. I think I want to put a
little bit more of a bend in it. Okay, cool. So now let's validate
this. Validate this. So we validated our
legs, but remember, we're gonna go ahead
and sub-divide twice. So we'll take this
leg, sub-divide twice. Phi are good. I think the feeder good. I don't think we have
to worry about that. So let me hit this bottom half. So let's do a quick save. And now we can take body, bottom, leg, bottom
foot, leg, bottom, foot. So all of that we can voxel 3D mesh together.
So we'll go here. Voxel remeshing it,
300. Do we want to do? I'm just gonna
remeshing it first. Then we can smooth all of this. Probably could've flatten that bit out before I box
where you meshed it. But that's okay. Just
a little flatten. It goes along way. Actually, it's
annoying me. So I'm going to go here and
smooth this first. So they don't want
to worry about that. Now we take the body, bottom leg, foot, leg, foot, voxel remeshing it, 300. See, you can go fast, but it can only go so
fast. As in the end. You don't want to
go fast and then you sacrifice things that you're looking at
it all rendered. You render it out.
Everything looks nice and you're looking at it and
all you can see is like, I wish I would've
flatten this part. I wish I would've hit undo
once and changed one thing. We don't want that. Okay, Really
gingerly at the top. Okay, I can see some ripples
here so you can make smooth, really big and just
get rid of those. And this was because we probably could have subdivided
the feet as well. That's why that's happening. But that's okay. But is looking good. I can't tell if those are
ripples are just the screen. Probably just the screen.
Okay, good. Let's save. Alright, good. So we'll come back
and we'll do some more Trio voxel remeshing. Save
24. Trio Adjustments & Remeshing: Okay, So let's continue
voxel remeshing. We're gonna do these,
these hands now. So these fingers will just have to arch them a little bit. They look very similar
to the other one. Actually, I'll do
select Mask and lasso. And it was actually not
bad just bending them. So I'm going to lets
move the pivot here. Then we can just bend
them a little bit. I think that worked nicely. Move them up a little bit. So we'll do select
Mask. Move to pivot. Okay? We want to make sure that the top is at least smooth like that.
So I'm moving it up. I need to do the same
thing with this one. Just move it up so that top
one is not like a huge divot. I think this one is okay. Maybe we'll just make
it a little smaller. Pivot, center pivot anytime
I don't see the gizmo. Okay, so let's
clear these masks. We can actually
just smooth these. First before we
even voxel 3D mesh, which is smooth
out these fingers. Got these little
sausage fingers. This we can do rounded
edge a couple of times. To get that nice and round. We'll take move and
then put our bend in it, like we always do. So we'll pull that up. Pull it up, nice and good. Push, maybe on this side. K, go back to your Gizmo
pivots center pivot, since the gizmo likes to just
go wherever it wants to go. Oh, let's do that. Ally line doesn't help.
So let's set the pivot. So let's tap on pivot and let's move it so we can
just move it straight in. So backoff pivot,
we'll move this down. We'll find a nice spot for it. I think that's good. We need to bend it
a little bit more. I think that's good. I think
we can adjust these fingers to be a little bit more
in the right spot. So it's tricky.
Trying to do this. K, That looks good. I would like to bend all
these fingers at the base. I can select them. Pivot center. Then I'm just gonna move
it down to the base of the finger. Here we go. And won't bend it forward. Align it up a little bit. Something like this. Then this one pivot center. And then we'll move
this towards the base. We can take it off of a line but only needed to be aligned. We'll just bring it
to the base tap pivot and then move it forward. Maybe open it up, maybe
tilted a little bit that way. Back a little bit. Move this over this over until
this one way more. Okay, we'll take a quick look. Now this is the pinkie, so this one can be a
little bit smaller. So maybe it's something like
that, I think is better. Take your time with it.
This is not easy stuff. This is very intricate. Even for me. It takes me a long time to really get them in
the right position. But this is when you want
to do this tricky stuff. You want to do it now. Okay, I think that looks good. Did a lot of changes
with the thumb before. So we're going to have
to do those again. Pivot center, maybe
bring this to the hands. Okay. You can kinda move it wherever it's
easiest for you. But I think I just
need to do that. I don't think I wanna make
them a little smaller again. But I think that works for me. So I'm gonna take move and
just kinda move this sphere. So it's just a little more
to flush with everything. Okay, I think that's good. That's good. So we'll take
this arm, will validate it, and can move it married
up to the hand. We want. Maybe we'll make move smaller
and push this time. So we don't run into that
problem we had before. Okay, I think that's good. You can use drag and pull up on the bottom part of the
Hand tool a little bit. Kinda get it even. There we go. So I think that's good. So
now I'm gonna hit Save. And I'm going to voxel remeshing this hand because I
think it looks good. I don't think we
need any issues. I don't think we have any
issues with the foot. I think that's working well. These ears, Let's move the ears even before we box
Remeshing the head, that will that'll help us out. Actually, you should have
done that on the bottom one. Maybe even, maybe even put them down or maybe even move
them down a little bit. So you can see a little bit
more of them at the back. Maybe we want
symmetry. Here we go. I think that's alright. I'm gonna take this foot and I'm going to lower it a little bit and move it away. Maybe even just
turn it slightly. Okay, I think that's good. Now we can extend this. I think that's good. So let's voxel remeshing
all of this stuff together. I want to move this thumb. I'm going to smooth that part
of the thumb a little bit. Okay. So let's voxel
remeshing the thumb, the fingers, the
palm, arm, middle. I think that's all.
Great. Do a quick save and then voxel remeshing. I think we'll do 200. Oh, I forgot the arm. Got to sub-divide the arm. Sub-divide that twice. Everything else should be good. And I think that's everything. Will voxel remeshing had 200. Okay, much, much better. So now we can smooth. Smooth this thumb. It's nice
that when you smooth it kinda takes a little bit
of mass away as well. So it's actually okay
that the fingers are a little big or at
least the thumb. Okay. Great. Okay. So this all looks good. I'm going to take this foot and just stretch the backyard
a little bit more. Okay. So let's validate this leg. Let's go ahead and
sub-divide it twice. The foot. Let's subdivide once. So we don't run into
that same issue. So we can go ahead and
voxel remeshing this. I think 200 is good. Or around 200. Yeah,
I think that's good. Can smooth this out a
little bit. Perfect. Let's take this leg top clone. It will go here,
world flip object. Okay, So now the
other ones here, but we can actually
adjust this a little bit. We wanted to pivot center pivot because it's not the same. He's not holding this foot. So if we want, we can adjust
this foot a little bit. We'll be easier if we change
the pivot to the base. We changed the pivot to
the base of the leg. Generally. So maybe like there. So now that the pivots there, we can place the base
where we want it. And then we can adjust our leg. Maybe something like this. Can use move and just kinda
maybe move it a little bit. Just kinda make it
perfect where we want it. Maybe down. Make move small so we can kinda just
make smaller movements. So maybe his foot is on his ear. I like that and we can take
the ER and we can use drag. And we can make an allowance
for that weight on the ear. You know what? Let's
turn off symmetry. And just work with this one ear. You're the one, the
other ears busy. So I'm just going
to push and pull. So it looks like this
ear is being affected. Kind of watch the rest
of the face though. We bent that ear a little
bit. It looks good. I'm happy with it. I think we can voxel remeshing this face. I'm gonna do a quick save. Let's voxel remeshing this face. And I think the head one, good, everything is
connected, That's perfect. So head one, Let's just remeshing it at like
to 25 or civil. Okay. So I had one all solidified. Let's go ahead and smooth it. I think we can use symmetry. Although I think it's fine. It's not exactly symmetrical
since we changed the year, but I don't think it's going to have too much of an impact. So I just want to make
these nice and round. I don't really like
this, this piece. So anytime you see
that on an here, I'm just going to flatten it. Hits solo. So I can
just see this and just flatten out, flatten
those edges. Okay. So again, it's not bad. When we get a little rounder. Alright, cool, cool, cool. We can also add those
little things too. We use inflate those
little pieces. They kinda came
off, it looks like. So I'll just add that and then just kinda
smooth it a little bit. Give us that little piece back. If you really want to add
some details, you can add, lets solo it again.
You could do this. You can add a
little crease here. Can you hear that? Smooth it out of it. Look good in that ear as well. Okay. Good. So we did this this leg part. We didn't we didn't add to
inflate. But it seems okay. So it's tapped this way. My ooh, since I locked it. So what tab here? Solo. We
can add in these little, these little bits with inflate. Like so it should be able
to just smooth them. Lead smooths. Okay. Sort
of breaking a little bit. Does break a little bit, but I think it looks actually
think it still looks okay. Can you use crease? Maybe we can enhance
it a bit with crease. Soften that crease lineup.
I think that looks good. You can also add them on the top two to really get
some separation. And then just smooth it out, make it nice and
organic looking. We'll solo. And we'll do one on this side to inflate. If there's a way that I
can do it without getting that breaking the clay. See you spit her if I do
it on the leg. The leg. I think that is a bit better
to do it more on the leg. It's solo and test
out in the back. It's pretty good and we'll
go ahead and do cool crease. Okay, it will smooth it out. And so at least we
have a little bit of a subtle subtle break where the foot goes into
the little shoe type thing. Okay, Good. Oh, and
I guess we didn't 3D mesh the legs together,
so let's do that. So body top. And we just need
to find the little leg top. Leg top. Okay, that's great. I think we voxel remeshing. We don't need to do
multigraphs or anything. I'll do a quick save
like I always do. Then we'll voxel
remeshing it works. We mentioned around 325 or so. And then go ahead
and smooth it out. I can really tender. Tender for the top. Everything else looks good.
25. Hand Dialing: Okay, So I think we can
go ahead and this is arm. Let's move this handout because the arm looks a little
bit longer than the hand. So let's move this
hands straight out a little bit. Maybe up. Particular Trio
view. It looks good. Thumb is quite big though. The thumb is quite
big. Lets see. So this thumb, Let's tap the three buttons
and separate these shapes. We can take this in the
middle and can scoot that up. Actually you maybe we can
just make it smaller. So we'll make that smaller. And we can trim the
bottom is or another. I thought the thumb was
coming out of here, but this is actually the palm. Okay. I think
that's pretty good. Can take this and make
it a little smaller as well and just move it
back a little bit. Okay, I think that's good. I think that's perfect.
Okay, So the poem, I'm going to do a quick save. Now we just want to voxel
remeshing all this together. I think it looks good,
the positioning is good. The arm looks good. Arms a little vague
on this side, so I'm gonna make
it a little smaller item in the opposite. Yeah. I think the arms
were smaller here. In bigger at the hands. That's a lot more
aesthetically pleasing to me. Okay. Why I kinda got my wires crossed and
did it the opposite way. This one is still okay.
I think that's fine. Although the arm
is a little low on the arm is a little low. So I just want to
try to bring it up so I feel like the arms
should be closer to the neck. So let's sub-divide this part. That way. We can just
Remeshing everything together and we don't have
any of those weird things. So let's validate this. So we validated that
obviously we have to multi raise and sub-divide
twice. For the poem. Let's do round edge
a few times on the palm to make
it nice and round. And then we can sub-divide it once a multi careers
and sub-divide. So that'll make it
a bit stronger. And again, this part is
supposed to be more flat. The back part of our, see how their risk goes here. The back part of our hand
is the smaller part. So actually need to
take the hand again. We can put the, we can
put the thumb back. Actually, we can just take
the whole hand and move it. I just want to slide it down. This way. Down. Yes. Something like that. Okay. Who and actually,
I don't even think I bent any of these fingers. I could dum, dum.
So let's take move. We'll move this up. We'll make it nice
and round like we do. You push up a little from the bottom and then
pivot, center pivot. So we can kinda move this back. Pivots looks like
it's all messed up, so we're just going to have
to adjust the pivot most times so we can move
it where we want, which is just packed down. Okay. That's good. So the fingers we can take move and just bent, put it, put a nice
little bend in them. Okay, nice little bend. Let's move the pinkie over. So pivots, center pivot. Let's just move this over a bit. That pivot, center pivot. So now I'm just gonna
kinda bend these a little bit and put them back in place. Take a look at our Trio
view. It looks good. Probably twisted book.
I think it looks good. Pivot, center pivot. These pivots are so off So unhelpful. So I'm going to move this back. I think I want to actually
move these other fingers up a little bit more
instead of so far down, if that makes sense. So basically what I'm thinking
is if we look at the Trio, you can see his fingers, you can see more of the
back of his fingers. So I'm going to keep not
put them down so far. I'm just going to put
them up a little bit more so we can see them. It'll be nice to see
a little bit more of the separation
of the fingers two. Another thing that might
help is if we take the whole hand and actually
just the pivot here. If it'll let me I take the whole hand and just move it a little bit more like this. I think we'll see a bit more in that view. Let's
check it out. Okay, yes, so now we can see
a bit more in that view. We can see a bit more of
the back of the fingers. And actually it looks
like this finger is down a little bit further. So I'm going to
go back on what I said and put this one
Down a little bit. Just cheating and using
that little round thing in the middle to kinda freestyle. Okay, I think that's good. That looks almost perfect. The only other nit-picky
thing is we can put this pinky down
a little bit more. Let's move this. I'm just going to
use move and just connect that a
little bit better. Good. I think that's good. Okay, so now it's just a
matter of I'm going to use move and just kinda
bring some of these things together
a little bit better. So that this to help with
the smoothing process. Everything is pretty good, but I just wanted to marry things up a little,
a tiny bit better. Any place where, where it looks like it might be
a bit difficult. Loops. Like there's a lot
of space here. So this is the kind
of thing. I mean, I'm going to actually
move this up. Then you go back to move
and just go like that. This maybe I'll bring
it down to the finger. See that this is what is
more difficult to smooth. It makes it easier if you just
bring it closer like this. The same thing here. Just bring these bits up a bit. You can get rid of that
probably just with smooth, or we can just move it as
long as we're on that finger. Everything else looks good. Looks like it might
be a little close. That's bitter. Round this
out a little bit more. Okay, good. I like it. I'm actually going to use clay. I'm just going to clay in
a little round bit here. Since this is the
prominent hand. So now you can see
the other hand, we have another one here too. I usually don't put it in. I mean, these are very
cartoony. But why not? So add that in there. And we can voxel remeshing. I think we can voxel
remeshing this whole arm. So we'll take the arm and hand
and everything connected. Still quick save. Let's see, let's check
out the numbers here. Looks like everything
should be okay. Thumb might have some
issues with the thumb, but we'll see, Let's do
voxel 3D mesh, like to 50. Be surprised if no one's
like why does he choose these different numbers?
It's usually random. 200 is like my go-to. 200's the perfect median. When I'm voxel remeshing, soft enough to get smooth, firm enough to hold
decent amount of detail. I just go from there.
I need more detail. Then eventually I this box
where Image higher I go box remiss have five-hundred. It'll be harder to smooth. So you want to do the
smoothing earlier on. But sometimes it's
a mix of both. Like for example, now Voxel miss a 200 because I'm going to smooth
this hand together. But when I voxel 3D mesh
with the body and the face, I might Remeshing like 600
because I don't want it to affect any of the details in the face or the body
or anything else. So that's why. And also now this
finger is now the hand. Whereas before we
had fingers and thumbs that were like
individually 50,000, 60,000. Now the whole hand in
the arm is one-fifth. So it's a bit smaller. Okay. Good, Good. That's good. He's finished. He's already meshed. He's not really
messed with the body. Okay, so let's do
this little guy. So he's just reaching. Have to do this little guy. So we'll make him this one is just like the hands are
pretty much the same. We'll have to just
work on those. I'm gonna do this little
thing that I did with the thumb since the thumb
was giving me issues before. I'm just going to separate now and do the little bit of the
edits that I did before. So I'm gonna make this smaller, this little piece, whole
thing a little smaller. Then make this part a
little bit smaller. And just maybe use move and get them nice and smooth
together. So they look good. I think that's perfect. The only difference
with this thumb. So these two as the great
thing about separation, that the reason why
I joined it is just in case I needed to do
something like this. So this thumb is a little bit different in a little bit
different level location. More in the front.
He's reaching. So it really has to look
like he's reaching. So I think it's just going to
be a little bit different. So I think I should stretch this out more like so. And I think I should move this whole thumb area needs
to be more like this. Let me change this pivot. And of course, things like this. I mean, you're going to
have to go your own pace. But hopefully the main
thing is just seeing like my my thought process, why I'm doing certain things. Take as long as you can do them. Because it's gonna be I
know it's hard to follow some times because I'm
just thinking on a whim. But hopefully I'm
explaining that the reasons why I'm doing certain things. You
know what I mean? Like for example,
like I just want this thumb to look
like she's reaching. So it's not really on the side, it's more on the front
of his little hand. And also sometimes I just have to experiment and see
which one looks better. See it's still
looks a bit weird. We'll come back and
work a little bit more on this in the next video. I think I maybe just need
to rotate it out a bit more. Something like that. We'll see. We'll continue
remeshing this stuff up. I think the next video might
be the final Remeshing. I think we can do final
Adjustments. Final Remeshing. We'll see, don't forget to save
26. Final Hand Tweaks: Okay, So I think I need to I think one of the things that
might've been bothering me was this part of the thumb, I'm going to pivot center pivot. I'm going to use move
and bend it like this. A little hard to navigate. I think I actually wanted
to give it less bend. So think I'm going
to move it here. Then put it a little straighter. So something like that. So we put that thumb there.
I think that looks better. And now we can just maneuver this this little part
to work with that. Instead. Going to make sure
doesn't get warped to warped. Okay, I think that's better. I think that's
much, much better. So now I'm just going to take move and I just want to marry. I know I keep saying that word, but it's only were they
really makes sense here. I want to bring this like
chicken bone up to it. I just want like a smooth sorry, I know I'm moving this
thing around a lot. A lot of moving pieces. I think I just wanted
like a smooth line like this. I think. I think I can get
that with move. I would also like it to be
smooth with this thumb. So I'm going to stretch it up. In the bottom part,
maybe I'll just stretch it out like this. So again, it marries up
with this ball here, which I can also kinda stretch. Make that work. Okay, I think that's decent. The only thing I wanna
do now is I just feel like it's a little too far away. If I can find that little
centerpiece. Bring it in. And I don't know what happened.
I thought I made it flat, but I need to make it more flat. Here we go. I think something
like this will work. There we go. So we want
to shapes like this. I know it's, I know it's tough. But again, see if we made a
nice chicken chicken leg. It just gets a little tricky. So just take a good look at this and just try to figure out also, you can look at your Trio. You can see how
the fingers look. Looks like I can actually
bend him more forward. Let's take a look at the Trio. Pretty happy with it. See
how we're seeing the back of the hand and not much
of this one thumb. So what that tells me is
I'm going to take all of these and I'm just going to, whoops, not the arm. I didn't remeshing
it did. I know. So let's get rid of the arm. Pivot, center pivot. So I just wanted to adjust
this a little bit more. It's a little
tricky. Gizmos, the worst pivot center pivot. I can't I just okay. There we go. Hopefully
this has here we go. That's much more helpful. Take a look at our Trio view. Okay, that's better. But his fingers are pointing
up more. Trio view. Okay, that's, that looks better. That looks better. Okay, so now we just need to stretch this palm a
little bit like this. Kinda get that flush. You can validate the arm. I'm just going to use Move and kinda move it a little bit. So let's go ahead and
move these pieces. So now I'm just going to stretch this like we've been doing. Make that palm nice and round. Then move it down, pivot
center, pivot, back down. Maybe a little bit more And somehow we moved it over. So just make sure that you you watch it because sometimes you can kinda move off center. You just have to kinda
get it back into place. Let's bend these fingers now. A nice little bend
in these fingers. Also trying to keep them
like a fairly even with y's. So I pulled from the top
and I push from the bottom. Okay. Smooth them out a little bit to get some of that
roundness back. All right, so let's move
these fingers back. Pivot, center, pivot, rotate. Little bit. Take a look at our Trio view. Looks good. A little bit
more of a bend in this one. I'm going to move all these
pivots are bugging me. Pivot, center pivot. Okay. So these were actually in
pretty good positions? Just the pivot again. You put this one a
little bit up higher. Also, this is the pinkie, so I'm gonna make this
a little bit smaller. I would like to open it
up a little bit more. By rotating this way. This one I'll rotate
the other way. Maybe rotate it back even more. Let's take a look at our trio. Okay, It's not
bad, but this is a little bit far out for me. So I'm going to bring
it down more like so. Okay. I'm good with that. So let's go to this part and
let's do some round edge. Do a couple because
it's somehow it got a little bit thicker than needed. And all either
purchase the good. The only other thing is this
arm is a little little pig. Their we'll just move that. I'm gonna do the same
thing. I'm gonna use clay. I'm just going to clay in
the other part of the poem. So that will also help us
with our, with our smoothing. Alright, so let's save. The thumb looks a little big
compared to the fingers. These fingers gets smaller. Lets me call these a
little bit bigger. Okay. It's better. I'm going to use flatten
and just flatten this palm out a little bit. Because right now it's very
far away from the fingers. Can also use move
and just maybe we'll just pull the
fingers down a bit. Okay. I think that's good. Do a quick save. And then we'll take
this arm and the hand. Oh, do I need to subdivide this? Subdivide this twice. The Arms subdivided that
twice, sub-divide this once. Everything else should be good. I think the thumbs good. Can sub-divide it
once if we want. Now let's take all of this and voxel 3D mesh at 250,
I think is fine. Then we'll do a nice little
job of smoothing this out. Hopefully it starts to look like that magical cartoon hand. We've intended. Love when it comes together. Get everything nice and soft. Beautiful. Okay, so let's take this hand and
we'll clone it. Will go here. Make sure
we just have the x-axis. And I think maybe
just flip object. You just flip object. That looks great. But I think
we want to twist this one. Let's see, pivot, center pivot. So they're not so
exactly the same. Separate them and maybe we'll just twist them a little bit. Just slightly adjust
their position. We'll bring this arm out a bit. Okay, that looks good. You
can also use move little bit and to just adjust
the whole thing. As long as the Arms
still looks okay. Arms Tool looks array. Okay, that looks good. I want to smooth
out. There's a lot of seems very deep
inside the hand, which I don't really
like too much. So I might add a
little clay to it, then just smooth it. So it's not so deep. I think I need to bring out this little chicken
bone a little bit. Probably do it on
this one tad bit too. K. I think that's good. Let's take a look at our Trio. Four. It looks good. We can probably bring this
arm back a little bit too. It does look like
it's out a bit far. So I'm just going
to try to sneak it back into the body a little bit. Thinks something like that. We'll look at our trio again. Okay, I think that
feels a bit better. Smudge More. And then I'll use
move to sort of move this part up a
little bit into the body. Okay, good. Alright, let's save Oliver legs. This is all one. Okay, the hats. So if we have this hat, I'm just going to
voxel, voxel remeshing them together. Like 150. Smooth out a little bit. I think they need
to be separated. Same thing with this one. Take the hat box 3D mesh. 165 should come up with arbitrary numbers
that I always use. Two or three instead
of 200. I don't know. I don't know why. I
don't know why either. I'll do we do this
hat but didn't do this 11 thing I'm thinking
of with the hats as I might want to bring the hands down a bit
more in the back. Fill me they need to be
little stretched out a bit. Same thing with this
one. Bring it down. This one too. Let's go ahead and take this hat
voxel remeshing it. One-sixtieth, five. Give it a little smooth. The crevice even know
really doesn't need it. That's okay. Give it
a little extra love. Now let's just slide this back. Bit. Like so. Okay, good. So I think we can Let's do
the lets do the Mouths. I think when we come back,
we'll do the Mouths. And then we'll just demo, just put everything together. We'll figure out the Mouths. I don't want to voxel remeshing the arms and the bodies yet, only because if for some reason we do something with a Mouth and we need
to change the head. We want to be able to change, we wanted to make those changes. Also, I want to box 3D mesh
the head with the body. The top part of the body will do all that at once,
going down the line. So next up will be the
Mouths, trio, Mouths
27. Trio Mouths: Okay, so now we want to go to the head and we want
to use regular mask. So we're gonna make
this little mouth. So his mouth is only
open a little bit. And it looks like it's might be on a little bit on
the side of his, on the side of his mouth. So let's make it mask
from an unmasked. So let's make it a
little bit here. Really simple. So
something kinda like that. Use unmasked and try to
make it a little sharper. But I think something like that could do a little more
right under his mouth. So maybe we'll try
something like that. We'll stretch this. Okay, So I think
that looks good. I'm going to use the gizmo. I'm gonna go to the mask and the mask tools and
then invert this. So then I use gizmo and we'll just push
this section back. So that'll give us
the mouth cavity. Now we go back to our options
and we can clear this. So then we have something like this. It looks pretty good. So I'm going to voxel
remeshing this at 300 and replay going to
do this a few times. So I'm going to 3D mesh at 300. So that's going to harden, harden that up a little bit. So now I want to take inflate and we're going to sort of build out
like an upper lip. So I'm going to start here because he's gonna be
smiling a little bit more. So then I just want to make
an inflate line like that. I'll go over the front and
then I'll make over it once more just so it
sticks out like that. Okay. So I'm gonna
do the same thing, but I'm just gonna do it
along the bottom middle. Sort of like that. So
let's refresh this at 300. So that'll solidify those up. We can smooth it
out a little bit. And this is kinda how I build certain things
little by little. I just do them very,
very little by little. Smooth decided bit more. Okay? So something like
that I think is okay. I'm going to add in this crease, actually before the
crease, Let's use drags. So let's make his, this side of his mouth
more like a smile. So I'm going to use chat, drag fairly small and
push up in this corner. Even inside the push
up on this corner. Maybe a little bit on the lip. So this is gonna give
me that natural smile. So something like that. I would like it to be curved. It's a little tricky. I'm going to move in real
close and see if I can. Kinda helps. Going
and close helps. So the only thing
here is I kinda wanna make another sort of crease. I don't want to make
this smile the same, but I do want to make
it like a crease. So we'll just kinda do this, call this back a little bit. Something like this. I
think is pretty good. I think that's a
pretty good start. Maybe I'll make drag a
little bit bigger and just kinda fold in these
lips a little bit more. Okay, so I want to bring this whole section
out a little bit. This whole bottom section from his lip might have to kind of brings out the top a little bit to maybe drag is a better tool. That's not bad. Not bad. Okay? So just essentially,
I want to have the lips kinda
protruding like that And we're going to
have to do a lot of remeshing and a lot of
smoothing to clean this up. But, you know, step-by-step. So now let me use flattened. And for this lip, I'm
going to start sort of underneath and then come on front and then
back down underneath. So I'll show you what I mean. So I'm going to start sort
of underneath with the flattened and then I'm going to come up towards the
front of the lip. Then I'm gonna go back under that kind of under
underneath towards that crease. So something like that. And I kinda want
this bottom half, like the part that's going in the mouth is need
to be too sharp. So that's why I'm
just going over that bottom part
little bit. Okay. And I also want to flatten
the bottom part of the lip. Kinda just in the
center. Top center. Sort of like that. Think
that looks pretty good. So I'm going to go
ahead and smooth, smooth all this out. So let's add a crease now. Let's add a crease right here going into the
actual crease whips, you don't want to be on sub. Just regular crease
is pretty good, but maybe I'll make
it a little lower. Here we go. So now that
part where I put decrease, I need to drag that anymore. Because that's gonna give
us that natural cheek area. We can add some clay there too. You can take clay. You can embellish that. Because that's what gives us
those cheeks when we smile, it's the fact that our lips are pushing up on certain spots. So then we can smooth. And that's pretty good. So I'm going to save them in a voxel remeshing
the head again at 300. Again, this is just to
solidify things that we're doing. Kinda help. It's set. K. Pretty happy with
this, actually, not sure how much more need
to do with this bottom lip. See? Yeah, kinda like it. I think I can bring it
out a little bit more. By out. I just mean
like straight out. The only thing that
I would like to do. So I'm gonna, I'm gonna protect somebody you
select Mask and lasso. I want to protect
this whole top half. So I'm gonna go over
this cheek that we just made and through that crevice. And then inside the
middle of the mouth, and then inside this
crevice as well. Now all of that is protected. So the only other thing that
I think might look nice, I use move fairly small. And I move this up because
this doesn't have that much. So it has less space there. Yeah, I think that would be
I think that looks better. You can try to do it here as well. Okay. Alright. Yeah, I think that looks good. And I'm going to try it. I don't know if it'll look. Something is a kind of bugging me about the bottom
part of the lip. Maybe it needs to
be a bit more flat. Let's try that. I think I might just like less of
a crease on the bottom. Maybe just like round like that. So let's get rid of this mask. So we'll go to mask
tools and clear. And we'll do voxel
remeshing it 300 again. Again, that's the kinda clean up what we did in solidify it. And now we just
have to smooth out these little spots
very gently though. We don't want to undo the
work that we just did. That a little bit
inside of there. Okay, I think that looks good. We have these little pieces, very small pieces that I
want to try to smooth out. And now let's do
our crease again. Now I'm going to use the
curve that we made from the push to kinda just Enhance our little crease. We can do a little bit of
that on this side as well. Okay. So that'll make it look like just more of
a natural crease. And then of course I'll smooth it because I had just moved everything to really
keep it looking organic. I think that's great.
Okay, not a bad profile. The only thing I think
the profile might need, you might need a little bit
of a chin or something here. So let's see how that looks. Sometimes it looks
weird when it just goes like right to the bottom Mouth. Sometimes it's a chin type
area can really help. Maybe even rounding out
the whole bottom of his of his face might help too. I think that looks pretty good. Okay. I think I liked that. He doesn't have any teeth. But let's see what my
spheres want to do. So at a sphere, pretty small. See how they look. Let's go ahead and Mirror. Okay, whoops. Okay, so if we do
something like that, bring them four again and clone. So when we clone them, you
can just move the other ones. We can kind of pretend as
though they're in the mouth. I'm gonna keep it on a line. We can kinda put it sort of
like where these would be, which is here in angled
back a little bit. These would actually
be angled a little bit as well, like that. Okay. So let's see how lets see how
these little dentures look. They're all in a
mirror. So we'll have to deal with all
it with this later. Let's do pivot, center pivot. Whereas the pivoting,
where you pick pivoting, let me just grab these
two. Here we go. Now we move it in there. And we have two. How's weird? Very strange. Let's take let's see. Let's join these two. Let's join them. Oh, Todd. Let's see what's the best
way to handle this issue. Let's put it on auto. Well, actually, let's put
it back to where it was. This is so strange. Strange how it
reacts. Sometimes. It's very odd. Where
is this gizmo? Just please let me
just move this back. Sometimes the gizmo is
can be your worst enemy. I just wanted to move that in there and then move it all over. Tilt it will take these and put them up
a little bit more. Take these and stretch
them out a little bit. So something like that. Those some spheres back there. I think it helps.
I think it looks better. So I'm keeping it. I'm going to validate this. Or I probably could have not. This one is Mouth is like that. So this might be the only teeth. Tethys bottle. Okay, good. What does this tourists? This is the hat. So
this is the bottom. Foot three. So this is the body. Bottom. All right,
let's do a quick save. Okay. I'm pretty
happy with that. He needs a Tongue to as
he the body in there, Let's push the body down. So let's push that body down
so we don't have any issues. At any point. Maybe
drag is better. Okay. Because we can put
a little tongue in there. Let's go back to the teeth. And fear. Media. So little, tiny little something
doesn't really need to be to have many bells and whistles. Most people might not
even notice it's there. But we know that's the key. We know it's there. I think that's good.
Alright, cool. So let's save that one is good. Next we'll do this guy's
mouth, open mouth. So we'll have to figure out
the dynamics of that again, 2D is never one-to-one. So this one's a little tricky. It's gonna be a little
tricky with the lips, but we're going to
have to figure it out. So that'll be up next. Mid lips. Lips, lips med,
one of the two we'll see
28. OOH Mouth: Alright, so for this
little guy is Mouth. I think we'll weave. So we did it one way.
Let's try a different way. Let's use layer and sub. So it's just kinda
like a kind of a nervous, oh, oh Mouth. So we'll we'll just do
something like this. I think something
like that looks good. So we can actually, we can use mask. We can solo this. So we use mask and
will mask the inside. Now that we made that
shape with layer. Then we can go ahead and invert. And we can move
this deeper inside the mouth so we don't
have to worry about it. We can go ahead and
clear the mask. Un-solo. Un-solo, Han Solo. These got a little funny too. So let's save. I like this so far. Let's save, and let's voxel
remeshing this at 300. And let's actually
smooth up here too. It looks much better. Okay, Now I'm going to softly
smooth out mouthful area. Like using words
that aren't words. It's actually not bad. Do I even need yeah, I guess he needs
some sort of lip. Maybe we'll give them
Michael little bottom lip. Let's use I'm pleased
when actin kinda funny. I'm gonna do clay and
then I'm gonna go here. The falloff seems normal. Scaling and stuff seems normal. Here.
Everything looks good. Clay has been acting
a little funny, haven't been using it that much. So maybe we'll try to use
clay for the bottom lip. Make it a little bit bigger. Here we go. So just give them a little something down there. You make it a little bit. Let's see how that
looks when we smooth it out. I liked the way it looks. I just want to I
just want to pull it out a little bit and maybe drag. I just want to extract
it a little bit from the mouth. Oops. Oh yeah, I think that's
probably good enough. I don't even really think I
need to much more than that. We don't really
don't need teeth, but let's make a little Tongue. He doesn't have a
little tongue in there. So let's add a sphere. Okay, so we'll make it small. This could actually
be a tooth as well. So let's go ahead and clone it. Let's validate. This one will be Tethys middle. Let's clone that. And just name this one
Tongue, Tongue middle. Okay, so we can go ahead
with Tongue middle. Move. It doesn't mean much for this. Maybe a little bit, maybe
a little bit of a bend. But I think that's even too
much squid and slurp that in something like that. Yeah, I think that's good. So let's see if we've maybe
we want some teeth as well. We'll make these
smaller flatten. Oops, oops, whoops. Those into place. And actually we can do, if we do show line again, right now, we
should be in the X. We can do symmetry, and then the vertex can do
that whole thing again. You take off, take
it off symmetry. We can put it back to auto. And then we can voxel
remeshing this small, like 140 Smooth it and then
give it a nice bend. Flatten it. I don't know. Maybe you just want like
a little bit of teeth showing or is that I
think I like that, you know, I love teeth. You know, it's hard for me to
do anything without teeth. So this guy definitely
has teeth and I think we can have plenty of time to
work on his little Tongue. So he has, lets use
the crease for him. Let's go ahead and solo it. So he just has irregular smile. So maybe we don't need symmetry. Maybe we'll just go like this and then bring
this down and around. That looks weird. It's a little more balanced. It could a little deeper. Okay, so now the Tongue
coming out to little, it's not as easy as it
seems unfortunately. But you know what, let's just use it and
let's just use a sphere. Let's go ahead and sphere
this little Tongue. Move it up. They look good, which is that simple Mouth. I really liked them with
that simple Mouth front. So we'll sort of
put it into place. So this one, I'm
gonna do a little bit differently than
the other tongues. So I'm going to flatten it out, make it pretty small, maybe stretch it a little bit. And I want to, I'm going
to validate and then I want to flatten. This Tongue. Can turn symmetry on. I want to flatten the sides. You can smooth them out. And I guess we can put
that little thingy there. So let's open up the bottom a little bit to
make it rounder at the bottom. That needs to happen. We can make this really
small and like okay, I think that might work. I don't really need to be a crease on that
part of the tongue, but the drawing does have it. So I don't know this. We can add it for now.
Because I feel like decrease would be on the top and I feel like it was Tongue
was actually like this. This would be the
bottom of his tongue. But we're not gonna
get too crazy. We've already
gotten a lot crazy. So I think we're good. Suddenly problem is the
Mouth is a little too high. Maybe not, maybe we
can still salvage it. If we make this a
little smaller. Make it a little
smaller. Let's turn it. I'm just going to
continue adjusted wire to turn it off of a
line. That'll help. Maybe something like that. But I think I want
to move each side, so I'm going to
keep symmetry off. Just move each side. Maybe pull a little bit with move to give it
like a nice curve. I think that makes sense. And I want to bend
this into the mouth. So I'm just using move to
bend it into the mouth. A bit. Lock so I don't keep touching
other meshes. Here we go. That's not bad.
It's not terrible. I still want a bit
more of a curve here. So I'm just going to
continue working this. Okay? So now what we can
do is also we can make another lip on this side so we can use clay or
inflate its try and fleet. So now we're gonna
be on the head. Oh, I locked it. So
now we're on the head. If we make them more of
a lip, you know what? I think that will work,
but I think we need to voxel remeshing his head. Somebody hit Save. Let's voxel remeshing
this head like 300. Again, the reason
I'm doing it at 300, because there was this
Hrdy voxel remeshing. It wasn't interesting. Let's check everything. Was it? Oh, no, it's I think it's joined. That's what it is. It's joined. It's not Remeshing. Let's just check I
separate. Check these out. Yeah, these we need to
subdivide and sub-divide twice. This one. Here sub-divide twice years,
sub-divide those once. Just make them a little bit
bigger so we don't have that. You know, that 24,
I think the nose, let's sub-divide the
nose wants okay. So I'm going to save this. Don't want the Pupils. We don't want the
I don't want this. I don't want to think just this. So all of this we can, or maybe the nose, I don't 3D mesh
together with it. We can do the nose too. So let's voxel remeshing
all these at 300. Here we go. So let's smooth. It turns symmetry on in
smooth out our nose here. Smooth this out.
Smooth out the ears. And again, you can flatten
the ears if you want. I don't really like when
they're so sharp like that. Flattened nose out. With all this out,
hopefully the heck covers most of that,
will un-solo it. See you how we're doing. Still looks pretty good. I'm going to use
Move and I want to still puff out this
Tongue a little bit. I don't want it to look
like it's going like flat. I want us to look
like it's curling in, but not like it's
not like it's flat. So you need a bit of an angle. Like it's coming out and
then it's turning upwards. Okay. So something like
that I think is good. Let's hide these hands so
we can see a bit better. Hide this one too. Okay. Back to the head with time. Okay. We have few more minutes. So now let's try
clay on the face. Let's see if clay can give us
leg a little bit of a lip. Smooth. Let's see. This way to do this. Let's use crease again. Let's turn off symmetry. Try crease again. Let's take drag and
work on this smile. So let's push this in. Drag a little high. It's the only thing
that bugs me. Maybe we can make
the eyes higher. The Eyes and the Pupils. Might be a good way to
remedy this problem. Pivot center. To come on, You can't, we won't go
into center. Pivot. Sometimes it's the worst. So maybe we can move these up Bit gives us a
little more space. I think he's still looks
pretty still looks just as cute with the Eyes up. Okay. So the only thing is this
little section here. Let's try layer. With layer. It's going to make an actual
depression in there. So maybe that's what we need. Let's try to smooth it out. See what lets try
to move the tongue, finagle the tongue so it actually looks like
it's coming out. Just a lot of push and pull. Maybe drag, drag works. Puff it out a little
bit here too. I think that's good.
I think that's good. I like it. Can smooth
out the head a bit. Smooth these bits out. And now let's just use crease one more time right
in that crevasse. So we use crease one
more time there. Maybe even drag and just press, depress this in a little bit. It's going to make
them look like she's going to sell the
smile a little bit more. But we definitely have
to smooth over here. Sometimes you just have
to crease and then smooth crease and then
smooth until it looks good. I'm happy with that.
Happy with that. Flattened looks good. I might even pinch the angles on the tongue just to make, to make them a little
more prominent. Then you can also
add a little bit more of a crease to the Tongue. He looks like we need it
looks like on with this to be round, equally round. So I'm just going to have
this part out a little bit. Here we go. Okay. I think
I'm happy with that. I want to use
crease in sub and I just don't like how
much area this is. So I'm going to try to
pretend like the lip starts here. So I'm on the head. I want to pretend like
the lip starts there. So I'm just using
the reverse crease. So hopefully if I smooth it, it'll just look like
that's the lip. It's a little sharp there. They Down a little bit more. Okay. I'm cool with that. I'm cool with that. Lets bring
the arms back. Okay, cool. So the Mouths for good
and wound come back. We will, lets just put
other parts together. We'll do some last details, but we'll put all
the parts together
29. Final Assembly: So give your models
of good, long look. Twirl it around, make sure everything is as
you want it to be. Add little details. I think I'm going to add in like these little things on the ears that I don't really see anymore. At a little bit of those.
This one's are good. This one not so much symmetry on and just kinda at them again. And once you're good,
once you're good with it, we can voxel remeshing
the top halves. So I'm gonna hit quick save, since we're about to do a lot
of voxel remeshing it safe. So we'll take the head. Okay. So top body split
in the head and the Arms. Where's the arms? There we go. Arm. Arm. Okay. Good. So all of these,
the body, whoops. The head top and the two arms, we went up voxel remeshing
all those together. I'm gonna do it at like 400. Then I'm gonna go in and
smooth out just the last bits. Whatever I added, I'm just
going to smooth this out. So it looks good.
Everything else looks good. All the details still look good. You can smooth out
all this arms. He's got a little
attached there, but that's okay. Not too bad. Who was a little
annoying though, is a little annoying. If that happens, there is
a way to mitigate that. Just take move and maybe move it slightly move the
arm slightly down. I'm thinking needs
to be that much. Hopefully that's enough. So we'll do Arms, head, and the top body split. We'll do the same thing, 400. There you go. Good. So now we just need to
do the same things again. Smooth that out and
then smooth out where the neck meets the arm
and all that good stuff. Good, Perfect. Love it. Okay, that one's
done. Let's hit Save. Let's go on to this guy. One last look. Make sure everything is
as you want it to be. I like it. I'm happy. You spent a lot of
time on these things, so we just got to see
it through to the end. So body mid split, head. Where are the arms? I'm going to move
body mid split here. Middle tail. Where
the Arms. Oh, okay. So that's finger
and that's hand. Okay. Those are the arms. I'm just going to join those
and bring them up here. So body, Arms, head, do a quick save. And then I'm going
to voxel 3D mesh, same thing, a 400. Okay, Good. So now with symmetry, is there anything
we need to smooth? Cyclic, smooth, a little
bit of this nose area. That nice and smooth. Smooth into here. Get that looking
nice and smooth. My favorite part I
love smoothing stuff, how this looks a little bit too. Cylinder. So I'm just going to smooth the heck out of
this, his little hand. We can take Symmetry off. So it looks a little less
like just a cylinder. It looks good, great. I'm happy. Let's take the back of the ears. Looks good. Okay, so now onto
the bottom one, this one, we have
a lot of details. So we just need to
be a little careful. So we have the body. Is this, well, that's the tail. Let's see where the arms. Okay, Here we go, arm, arm. We have those. Let's go
ahead and join those And head. Okay, quick save. And I just the
reason why I save so much because if I
do get a crash, I don't want to have
to do any steps again. I just want to jump
right into it. So 400 3D mesh. Keep an eye on your Mouth. Mouth still looks good. That was one thing I
was worried about. Hands and everything
still look good. Smooth all of this out. Again, careful on
this bottom crease. You don't want to pull
that up too much. Looks good, wonderful,
wonderful, wonderful. Very happy with that. Without the ears, I think we
added those little things. One little thing
that looks good. There's going to
see you can push the foot up a little bit, but I like that It's so
depressed in the hand. Now's a good time
to add details. Like if you wanted
to add details like like say on the foot, you want to add it like his fingers actually
like Pressing on, pressing down on these things. So this is a good time
to do things like that. These little details, they, they don't look
like much, but they really make a big difference. And personally, I love
doing details like this. Even if they're very subtle. I still, I still like it. And even after I, even
after we work a ton, we spent a ton of time. But these little details, they really make it
worth it for me. K. So we'll do a little
bit on this one to be nugget in inflate. Sometimes I record and then like after like
15 min oh my God. I hope I press record. We'll do one here. Those out. Okay. Okay. Good. Good, good, good. Okay, so now I did want to do a little bit with the
hat to with the hats. So I'm going to press down a little bit on the hat
where there's weight. And I wanted to do inflate, we can make it a
little bit bigger, maybe lower the
intensity a little bit, and just use inflate. Inflate across the top. It's gonna be a little
difficult to see. You could take this body
blending, turn that down. So it makes sure
we're on the hat. Inflate. Just kinda
little too big. Just inflate in front of that. Let's see how it looks. Okay, I think there might
be. Okay, lets bring the body back to opaque. And then let's smooth out. Undo that smooth. When
I show you around the hat, the hat part out. Yeah, I think that's good. I think that makes sense. Can do a little bit here to inflate. Maybe, maybe not, maybe
just the front. Okay? This one I think is good. We might put a little bit of an inflation maybe around here. See how it looks. If we soften it. Yeah.
I don't mind that. I don't like the
back one though. The sides I think looks good. The back looks for
some reason it doesn't look. Natural domain. Can even add a little crease, maybe not inverted though. So just regular crease. Okay. I think we merge
them. All right. I think we merge them all. Okay, cool. So the next part, what do we need to do next? Think, think, oh, eyebrows. I'm gonna do eyebrows
and eyelashes. The only tricky one is this one, because this one is a little bit easily because he got like
a little bit of a sudden
30. Joining the Fun: All right, so I lets us jump right into these
eyebrows and eyelashes. The rest are really
simple. Ready done them. We know how to do it. We'll
just use Curve and snap. Make sure you're on the face
to something like that. We can get rid of these. I had a feeling that
was going to happen. It's kinda silly, but alright. Alright, so we made that we turn snap off. Okay, so now we'll
turn on spline. Let's good. So now
we will hit radius twice so that we can just
adjust this as we need. It looks great. I think
that looks pretty good. It will make this a
little bit thicker here. All right. Yeah, I
think that looks good. We can go ahead and mirror. It, will save us a lot of work. And we can validate it. Hit it with the round edge. A couple of times.
If you want to, you can flatten it,
but you don't have to keep keep that one round. Keep that one round.
I feel like I need to just just a little bit. Okay. Same thing. Tube, curve and do
the right here. Like so. Spline
will turn snap off. We'll make it bigger to
start with this Time. Radius twice. Make the middle one's
a little bit bigger. Then we can start
our little taper. Going to add an extra one here
to help with their taper. Be a little too big. Okay. Bring it into the mesh. Bring it into the mesh. K, Something like
that I think is good. I feel like I I tend to put
them a little too much, not enough on this side
and More on the inside. So I'm gonna change that today. It's always good to know
things that you tend to do so that you can fix
them, change them. So I'm gonna delete that one. Push this inside the
body little bit more. So it's not so
it's not so round. Sorry, it's little
hard to navigate. But I think that looks good. Make sure that this
is here we go. Good. So I'm going
to validate those. These are both
going to be black, so I think I'm just going to
validate them and call this Lashes, middle. I could probably
do the same thing on the bottom. Two. Yes. So I'm gonna take all these well first and then
take this and validate it. And I'm going to take
all these enjoin. This will be lashes. Bottom there altogether. These are all together. Now we just have to
do this little guy. We'll do curve. Let's do path for this one. Let's switch it up.
So we'll start here. Okay, I think that's brilliant. I should have actually been
changing this to flat. It kinda just forgot about it. Hopefully you can
hear the music. It's gonna be amazing
when I'm able to move. Why is that twisting it? When I'm able to move and have like a quiet place to work. Cannot we cannot wait, folks. I think that's
actually pretty good. You know, I probably
don't have to. I kinda wish I didn't
make these sharp. I probably could have just kept them a little bit thicker. But I didn't think about
it. But this looks good. Let's go ahead and mirror it. And I think that looks ooh, Is it a little off here? It's a little bit
different on this side. So the symmetry is a
little bit different. So we can validate, I'm going to split
with rectangle. I'm going to split this one. Oh, wait a minute. Let's see. Let's go here and validate
this whole thing. So the see, these are the Brows, Brows top, but we
need to split it. So we have this one. We'll just take split with rectangle and we'll
just split that. And then we'll take this one and just move it over a little bit. Pivot, center, pivot. There we go. Let's hit them both
with a round edge. Okay, let's smooth
the bottom of this. The bottom is kinda funny. Try move. Smooth it so
it's like in front. I don't know what's up with the bottom, but let's Remeshing. Maybe, maybe that'll help. Even if we Remeshing like 150. Then try to smooth that. Yeah, that's better. Smooth this part as well.
I'll go to this one. I'll do the same thing,
voxel remeshing around 150 and then just smooth out the front and smooth
out the back part. The back, the tube, back to curve, snap is on. We'll do the some eyelashes. K just like that. So we will spline radius twice. So we'll make it a
little bit bigger here. One can be a bit smaller. That goes into the mesh, will turn snap off. That way we can bring
it into the mesh. This looks good, but let's just move it back a little bit. Perfect. Now we'll shrink this. Maybe we'll add another
little note here. Good, I think that
looks perfect. Try to keep it straight,
straight as possible. This can go inside
a little bit more. It looks great. Let's Mirror
it and see how off it is. It is off. But we're
going to validate. Then we're going to
validate the mirror. So we'll go here.
Validate Join children. Let's do a quick save. I think I've been saving enough. Then we're going to split. So we're going to
take split rectangle, we're going to split this one. Make sure we're
tapped on that one and then we can move it over. Pivot, center pivot. We move it over. And maybe we need to twist it a
little bit this way. It's a bit hard to tell why
it's not perfect match, but that's way when I say I'm just trying
to match the two now, I'm just trying to
get them fairly even. Sometimes it might be easier to just do the whole thing again, but I'm resisting.
I'm going to use move I'm going to slightly move
this over, even this one, I'm going to slightly
move it over. Then back to this one. I'm going to move again
and slightly move this where it should be, which is like right there. Just the end. I want to go
inside the mesh. Perfect. Like pull this
over a little bit. Okay. I think that's good. Save. Okay. The only other thing that I was
talking about before, I think I wanted maybe
inflate will work. I don't think I
want these to be. I think I want to put some more, a little more mass
on the, on the end. Wonder if symmetry we work. Let's smooth and
let's see if these, I mean, that's pretty
much what I wanted. Maybe clays better. Let's try clay. I think that looks a
little bit better. Maybe I'll take flatten
and just flatten this end. I think I liked that
a little better. Oh good. This one
only needs one side. Oh, there's another way to
do it to you can take drag. And you can probably just
kinda stretched this like so. That was way easier to straighten out this
bottom part two. And we can even do
pinch down here. Actually pinch probably
isn't a good idea. It straight. I'll
leave it alone. Okay, That's good. This one looks good. I'm going to use drag and just
adjust it like we just did the bottom one
because the bottom one was a better way to do it. Yeah. Because
eyelashes are usually thicker on the inside and then they taper on the other side. So that's good, right? So we'll hit Save. Okay? Alright, so anymore D20, another little thing
we can do is take each body, find the tail. Let's find the tail first. So this is the top tail, top body and we can join them. So middle tail. To find the middle body. It'll tell where's the middle
body. Oh, that's head. Oh, middle till they're
right next to each other. So I want it to be
named middle tail. I know I want it to be named. So I'm going to
join it like that. And then I'm going
to middle body. Okay. So this is lashes, middle. So I'm going to adjust
that teeth middle. I'm going to just
all of these things. I probably don't need to
do that, but that's okay. What does this tourists?
That's the hat. That's the hat, middle hat brim. This is just hat Top. Hat, top, body top. Just doing some,
some housekeeping. I think we'll just do
this for a few minutes. Eyes white Pupils. Okay. Sphere. What is the
sphere or that's the Tongue. Only midtone top. Sounds like a dictator
or something. Okay, So leg, leg, top leg, mid, middle body. Let's move the leg down
underneath the middle body. But actually there all the
same color, aren't they? So it might be wise to
actually connect them. In a sense. Lashes,
bottom Brows, top split Just the what is this? Oh, this is the eyebrows on top. Okay. So these two
I'm going to join. Oh, here we go. So this is the so we're
going to join this. So these are the lashes top. Lashes top. We're going to move
up to around here. Mirror split. What does that? Oh, I thought we are we missing something? We're missing. Okay.
So lashes top. Let's take Mirror split. So we'll select that one and
we'll select this one last. And then just join. So now they're altogether okay. Lashes, bottom, Tethys bottoms
fear, what is this sphere? Oh, that's the Tongue. Name. Bottom. Tongue, hat, bottom, body, bottom. Okay, Great. Floor.
Alright, so let's save. Okay, So these are actually
all gonna be the same colors. They're gonna be the same
colors and the same textures. So I think what the
smartest thing to do is like take this body. The body top, middle body, bottom tail. Okay, where's the bottom
body? Oh, that's this. That's head. So I think we
take these and we join them. All of these things
are gonna be blue. All these other things
are gonna be white, the same color of white. So that top. These legs, not the is because there's
gonna be glossy white. Leg, mid mid, bottom, bottom body will join those. We'll just name it bodyweight. Okay. Lashes, lashes. Lashes can join all of those Tongue. Tongue. Just joining all the things that are gonna be
the same colors. Super simple. So the name is Tongue. These are Pupils. I whites, I whites. Whites. Will join all of those. We'll take them out.
What is this head? Oh, this is the body Blue. Take these out. These are the Pupils
on the bottom. Bottom Pupils. So this is middle Pupils. Top Pupils. Okay. So this is, I'm just kinda name
of this lashes. Okay. Teeth, teeth. Teeth can go together, will join those Tethys. Bottom Tongue or that
another Tongue here. Where's the top? Oh, I guess
they all have tongues. So we wanted this one. Let's go ahead and
validate that. And Tongue will join those. So that's the, those
are the tongues. Okay, good. So everything is
together. Looks good. I think next we'll come
back and just set up our we'll set up like
a little backdrop. And then we will position
them next to each other. And we'll go from there. Alright, great job.
We're almost there.
31. Setting The Scene: Okay, So let's, let's get rid of these
things on the bottom. Remember we made all these. I don't really think
we need them anymore. Let's just take a look at them. The two Hand backups,
I'm gonna hit Solo. It's a cute little hand. Cute little hand. But we can always know what I'll do. You
know what I'll do? Let's take this backup hand,
will choose everything. And actually let's take each little finger
and let's decimate. It. Will take each finger. Go to here. Ms. Decimate. Palm is small. All
of these are small. The this little thumb
part is not small. So let's decimate that to
everything else is small. So I do like this
little hand and it'll be good to use
another characters. So one thing that you should do if you make something
that you like, like this hand backup, what you can do is join
it or not join it. We can go ahead and go
to the little folder, export as a Nomad, only include selected
five objects like this. You'll asked you to confirm. So then you can export that. I'm going to save to File
and Save to characters. And I'm going to name it Smurf. I'm just going to
emit cute Hand. Save. So now we have this little cute hand. I
can just bring it over. I don't have to have to model it again if I don't want to. And also what's great
is I can take these. I'm not going to use this box. So just make sure that
you just her selecting these and you can
delete delete them. We don't need them anymore.
What does that look? That is anyway, so
let's bring back, Let's un-solo everything else. Things still looks good. So now let's go ahead and
bring this stuff back. And I think I did
I make a backdrop. I think I recorded myself, me. Oh, yeah, I did record myself making the backdrop.
That's right. I forgot all about that. So you can go to the little
folder, add to Scene, important new file,
fresh backdrop. You can add it in.
You can bring it up till it's about
where the floor is. You can cool like this
to stretch the backup. So now we can get rid of
this one that we just made. We don't really fresh
backdrop is better anyway, so let's just delete this. Now we have fresh backdrop. Hope I didn't delete any.
Oh, here at here it is. Okay. So let's print
all of these back. And we'll select all of this. So hopefully this is all know, it's not body, body. Maybe that's everything. I got the hat. As Barry had bodyweight. Tethys think. Oh no. Okay. I got to reassess.
Reassess. Okay, So I'm gonna hide all
of this stuff. We've got to find our
original guy here. So this is the original guy. Everything looks together. Okay, so it's just
hat strawberry. Okay, So it's just this. Okay, good. So now we'll
put it back to the front. And let's hide. Let's hide the
backdrop really quick. So let's just scroll down
and hide the first backdrop And now it's important,
I think that we look at the whole image waxy. We can just look at him for now. Let's move him over
a little bit and then turn him take it off snap. So we'll take it off snap will turn him a little bit like this. Now we'll go back into
these characters. Will select all of
these characters. Make sure that we're
in the front again. And we'll move them
over and turn them towards this little
guy like this. So I think it's
something like that. We can bring in the image. I can find it.
References, we'll tap on here, import photos. You know what might
actually be nice as well if I just made, I might want to make this in Procreate this orange
backdrop. That might be nice. I think we can do it. Actually, I think
we can do it here. So let's say we have this
image open transform. Let's make it a little beer,
lets put it over here. This is good. We can actually switch to
perspective, make this bigger. So it kinda makes
sense for them. The perfect spot, that one is touching the
ground a little bit. He's a little bit
off the ground. I'm okay with that. I would like to put
the words they are to lets bring in the words. So let's lift first, let's open up to it on top plus AD and we're
going to add a brick, aka a box gizmo. We're going to bring
it up. You know, we're going to solo it actually. So now I'm just going
to make it bigger, stretch it out this way. So now I want to, okay, so let's hit the
gizmo again, three dots. And let's do the post
subdivision up to like yeah, like 258 K. So we're gonna
do something like that. Let's hit a quick save. Lets bring in the word tap on the stamp
tool. Let's clone it. Stamp word. Stamp word is now
on the bottom here. So now when we go
up here to alpha, Let's tap on that. Let's import photos. Okay, so let's try the first one and just see what happens. Okay, so you can see that the falloff is not in our favor. So actually we need to scaling, so we need to scale this back. Number one, fall off. I just want this to be flat. I wanted to be a flat fall off. I'm not gonna mess with
that for this pressure. Let's see how it looks first. Okay, doable. Let's go back to
the options stroke. Let's lock the rotation. So this should be straight.
Okay, that's good. So now take it off of sub, Maybe that'll be there we go. That's better. That's
exactly what we want. So we just need to voxel
image this even higher. So go to voxel remeshing, and this is 765, so that's really high. 1.64 million. So that's very high. Our project is
getting very high, but we will be able
to cut that down. So we'll go back
to the stamp word. Start in the middle. And we'll go something
like this. It's perfect. So now we just need
to trim the back, please the rectangle, what? We can put it back in
orthographic for this. And then just use
the rectangle too. Yeah, let's do that. Trimmed. Then we have
this right here. So let's remeshing it. Remeshing it like 350. Okay, it looks pretty good. So let's take
rounded edge and see what rounded edge
can do with this. Really don't want those
like rib Ruby things. That's pretty good.
I'm happy with that. I'm okay with that.
I think that's good. I don't know how many
times I'm going to say it. Okay, so now we can
actually decimate this. So let's go back into here
and will decimate this down. Doesn't need to be that
big. Still looks great. Okay, we'll keep
it at 16 for now. I might actually want so this, Let's just label
this word or less, just nimble that the Smurfs. I want to add hoop, notice sphere. I
want to add a box. We actually could have, probably could have used the other one. But just in case I
want like some sort of backdrop for the word. I don't know, just for
some reason it just feels right that this might
have some sort of backdrop, Something like that. And so now I'm going to validate this and I'm going to
round edge a few times, so it's nice and round just like the word I'm going to decimated bunch of times. Okay, so now it's 1,000 and wonder if I can
decimate it again. Still looks good. So now I'm going to
clone it and make one a little bit
higher and a little bit wider and just move it back. I don't know. I personally didn't. I just wanted to do
something like that. So I'm going to join these. And this would be Smurfed box. If we need it. If we need
it, we might not use it. Okay, let's get it off of solo. Let's take this and shrink it. We can put it kinda like here. Maybe a little bit bigger. Maybe we can actually
turn it like this. Move it back behind them. But then turn it. I
think that looks great. Let's see what out the
box also looks good. Maybe even a little lower. Okay, so let's go
back to perspective. So now this is the front. Lets tilt it because that's
the image is actually tilted. So let's do that right there. And let's update one of this, update this first view. So we're going to
update this first view. And then for this, I think
we'll straighten this out. Actually. Move it
back a little bit. Actually, no, it's
moving forward. Okay, So this is how
it looks in the front, which is really nice. Maybe move it even over
a little bit more. Okay, I think this looks good. So let's see what do
we wanna do next? I'm so excited. Let's save
first off. So let's save. I think. Okay, we don't really need to look
at this anymore. I think we can look
at the backdrop. Let's just bring
out the backdrop. Fresh backdrop. Whoops. Like suddenly undid
can move this down a bit. Actually, no, let's
move it up like that. Make sure we're in perspective. So it'd be something like this. I'm gonna go ahead and update
the second view with this. Alright, so now my Before we get into lighting
and stuff like that, I think we will just
switch from Metcalf to let PBR K. And so now, just make sure you have the environment
that I've included. When you have the Environment
Image, just tap here, tap Import Photos, and then you import that photo that
you want, it will show up. It'll look like this. I'm not sure what
the numbers will be, but we'll be turning them off
soon, probably around 2.9. But we're going to turn this
off soon when we come back. So the next video, we will light the scene. So we'll we'll
adjust all of these. I could probably do it. I can probably just do it now. If I take everything and make it like a sort
of terracotta color. And the reason I do
that is because when I do that before I light
and I'd like to light. While everything is neutral, like a neutral color. White can be too bright, black can be too dark. So just a neutral color. If I paint everything this
color than it's neutral, it's similar to the
mat cap that we use the whole time, but
it's different. So now we have it
looking like this. So now we're good for lighting. So we can light it. After we light it, then we
can do the, the colors. And maybe we'll start
with the background. We'll try to get it that
bright orange gradient, but we'll see next
will be lighting
32. Lighting & Coloring: Servant do a really
simple lighting setup for those of you
that are joining us. From after this first
little character, you should be able
to jump right in. All the lighting is gonna be the same. So we have the front. The only thing we
did with maneuver him a little bit so
you just have to angle him kinda how you want it and then just
like from there. So I'm going to start here. I think do we set this? Yes, two is the perfect scene. I think that's the
perfect kind of setting. So that's what I'm
going to light with first for lighting, the first thing we
wanna do is go into this lighting panel and
turn off the environment. This environment is mine. We should have downloaded from the Projects and Resources, but for now, we're just
going to turn it off. Everything should be black. So now we're going to
add our first light, headedness, light and
looks beautiful already. So this is gonna be
our first light. This is going to
be the key light. So we're going to
tap key or type key. So this is the key light. This is the key light is the
main light of the scene. And this is a sunlight, so it doesn't matter
where we move this. I like to put it generally where the light is coming from. So the arrow is pointing here. This feels like it's
where the sun would be. So that's great. So the intensity, I'm going
to put it up to about two, maybe even a little
bit more, 2.5. I'd sometimes I tend to
make my seat a little dark, so I'm trying to work on that. So 2.5 is where
we'll start that I like to go into these three dots and also put on softness. Now again, we're not
in post-process. And actually you can
turn these down a little bit because this will
kinda tax the system. I have my iPad on
low-power mode, it seems to do better that way. I'll move it up a little bit. Okay, So we have
our first light, we have our key light. And can good, we can clone that key light.
It's really bright now. We call them the key light. We'll rename this one. Fill. This would
be a fill light, might use it for something
else later, but that's okay. So I'm going to move
this over to this side. I'm going to move it down. Now. I'm going to put it
on the other side where the shadows were. So maybe they're
see this is off, see all these dark shadows on this is filling
those dark shadows. Maybe I should do it. No, I think that's good. Okay. So as long as it's filling those shadows, It's
doing its job, but we're going to turn
the intensity down, way down, off, on. So it's just a slight fill
of those dark shadows. We can leave that as is. Now. We'll take, we'll
clone this fill light. And this will be a rim light. So this rim light will hopefully lead up the rim of
our characters. We're gonna make
that a spotlight. So now I'm going to
scroll out and I'm gonna put it back here is okay, but I want to turn it so it's kinda hitting the characters. Maybe like from up top is
kinda nice. I'll move it over. So maybe it's coming
from up top over here. What I just did have
those other little things that are solely there just to get the way when
you're trying to light. So I'm going use this
orange node to make this brighter or brighter to make
it the cone angle wider. Now we can kinda just move it until we kinda get what we want. Can move it over a little bit. Not getting too much on him. Okay. So now there's
a little bit on him. Okay. I like that. Like that
better. I think that works. But we can turn this
up a little bit. Let's think that's pretty good. Experiments and move
it around until you get it to a
place that you like. Maybe I'll move it
back a little bit. Okay, Let's check out our
whips checkout, our view. It looks good. See nice
rim light looking good. So next, let's just
add another light. So we'll go back to our lights. Will duplicate that and
let's just name this TED. This is also a spotlight. Let's make this one cool. So let's go to the color and put it up to
the bluish color. Maybe add a little bluish to it. Let's move this over. And I used to do this always
on the top facing straight down, right over them. Which is kinda Fun. Little
bright. Let's turn it down. So that's kinda Fun having
it right over them. You can, you can kinda
play around with it. Maybe it's a little
more in front of them. And you can spin and adjust
the lights as you wish. It looks great. And honestly, I think
this is this is pretty good as is
with these lights. The only thing that I would say is just play around with them. You might want disliked to be coming from the,
from one side. You can kinda do that. Kinda makes that a little
more brighter as a little, a little bit more to them. But it's tough enough. Sometimes you just
have to go, go back and forth and see
what you like more. I like that, but this feels
a little bit more dynamic. I'm going to make it a
little bit brighter. It's kinda nice on that word. The rim light seems like
it's a little bright to me. The rim light seems
a little bright, so I'm going to lower
that down a little bit. Okay. I'm gonna go
back to my view. Where's my view? My view is
I think it's number two. Okay, so that's, that
looks really nice. So that's just a really
simple, easy lighting. Some of the things that I
like to do while I'm in this phase is we'll
take the bodies. So all of these bodies in his body body a. I'd like
to make them subsurface. So we go into here subsurface
and I'm bring the depth down, something like that. But I do like subsurface. So you can kinda play around
with that and use that. But I like to do
that, especially for the bodies that helps
you get like the ear, the subsurface
scattering, things like that just
looks really good. I'll probably wind up doing
it everything subsurface. But yeah, that looks great. So now, how much time do we
have left? So let's save. Look at what we have
made folks. So good. Okay, so now the
next thing we can do is sort of color this. I kinda want to color
the backdrop first. I want to see we can
get that working. The backdrop is orange, but it's like an orangey
yellow in the image. Let's take a look. Let's hide rich backdrop. So it's orangey on top and
more yellowy on the bottom. So let's just paint
the whole thing. Yellowy. Okay, So I
guess that works. Then. I'm going
to scroll out and use Select Mask with rectangle. Now I'm just going to select
it maybe down to here or so. That might be okay,
we might be alright. Now let's change the color
to something more orangey. Maybe something like that. We can get rid of the mask. And maybe even take
the mask again. Maybe even do a little bit of a gradient and the middle
that might help us. So I'm going to
do both of these. And then I'm gonna
make a new layer. And I'm gonna make it just a little bit in the
middle of both. Little bit brighter
orange paint all. Let's get rid of the thingy
That even do anything. I don't know. Maybe I
didn't do pain all. Okay. Maybe I needed to
be a little bit darker. Okay, that's a
little bit better. So now let's take
a smoothie ***. Smoothie *** is smooth tool with zero intensity.
That's all it is. Smooth tool with zero intensity. And we should be able to
smooth this out very nicely. We should be able to
get a nice gradient. But I guess not interesting.
Yeah, I guess not. Let's see what happens if
we oh, my own a layer. What if I bring that town
and then try, There we go. There we go. That's better. How did I do the
opposite colors? How did I do that? Sometimes I don't know where I don't
know what my issue is. Pain all. We're going to invert the mask and then we're going
to do that yellowish color. Clear, smoothie PUE. Okay, that's a little
bit more accurate. What I was thinking before.
I think that's pretty good. You can actually
move it back to, lets move it back a little bit. Okay, So good. Crisis averted. Let's hide the fresh backdrop. Let's save. And let's actually, this is just for me. I wanna do a save as new. Just because I liked
this terracotta so much. I'm going to save one as terror. And then I'm gonna
open up what we just were working on. Okay. I always do that. I always
like to save an extra one. So now we can color
in our Smurfs. Here we finished lighting.
You can do Coloring as well. Why not? So first let's deal
with the hats. And where's the other hand? Well, this is easy, simple. We'll just make
the make it white. Maybe not too rough. Paint that white. Oh, one other thing I forgot. Adding the environment back. So we add the Environment
back and we turn this down, maybe like 1.2 over. So let's till it
looks a bit bright. We'll turn it way
down. Maybe like 0.5. Okay, so now let's
paint this way as well. And now his little
legacies are also white. The eyes are going to
be white but glossy. So we turned down the roughness. Same thing here. Paint. And the little Pupils
are all the teeth. Let's do the teeth where we're, while we're still doing the
white. Here we go teeth. White. But it can be glossy but maybe a
little bit of roughness. K teeth. The teeth and Tongue together. Let's separate those. Get this Tongue out of here. So that's the Tongue. These are the teeth. We
can join those backup. Then we can paint them white. The little bit of gloss. Okay. Smurfs looks
like it's yellow. So we'll paint that yellow. Now the Smurfs are blue. I don't know why I'm
speaking like that. That's a rule ahead. It it's tough when, when you take your
Apple pencil away, a light goes to a bunch
of other colors. Okay. It's a little too green. I think that's it. Ten the roughness up. Maybe right around there. Right around 0.6. I
think that works. On all of these. We'll
paint that the same. All of these are going
to be black and rough. Pupils are gonna be
black and shiny. Glossy, I should say. Same for those. Same for those lips. Here we go. These
are black and rough. I don't have those together. I shouldn't have those together. Brows and lashes. Just join them. Paint
them both black. Okay. Tongue can just
be a nice baby pink. Even though they're
Tongue is a very red. I don't want that.
I want them to be like a nice baby pink Okay, something like that. I think it's good. Tongue paint. It should go for
all of the tongues. Okay, so let's say
it's looking good. Really good. He's a little bit far away. Right? Let's take all of these. Maybe not the sign. Let's leave the sign alone. Let's just move these forward. And it feels a bit better. Even though I still want
them a little bit closer. Okay. I'm just
going to hit Save. I think we colored everything except for the
little Jell-O thing. So this can be white, maybe a little bit off, wait. Maybe a little ground in
there and maybe leaving a little mental illness to
kinda give it a little, something little icing, feeling, a little bit of roughness there. Something like that. This, Okay, How big is this? So that's 370 K massive. Lets save, and let's decimate. The next video. We're
gonna do a lot of decimating. What am I doing. So the globe here to miss
decimate, decimate, decimate. Huge. Definitely doesn't
need to be that big. So now I want to make this
I want this to be all. I wanted it to be like a
yellowy kind of thing. Deny. Or we could do subsurface with a
very high depth if we made it like reddish. Kind of interesting. But not really what, I
don't really like it. I think I want to undo that. Um, if we were gonna
make it yellowish, I think I would do refraction. Then interior roughness. Think I would do
something like this. It's kinda cool. That's
originally how I pictured it. I think I want to
make it a cake. So if you want to do a
jellyfish, that's how you do it. But I think I want
to make it a cake. Cake would be would it be burnt? Would it be a little bit browner
on top or on the bottom? I love that color. I think we can take the
metal miss out though. So we'll paint it that color. Maybe even a little more rough. And I think the bottom would
be a little a little darker. I'm not mistaken.
So we'll use paint. Actually, we can
just do select mask. We'll do it this way. Pain all clear that mask. And then smoothie PU, we can still do
symmetry, maybe not. Then just smooth it. So I think we need
a lighter yellow. A yellow looks a bit lost. So I'm just going to paint
a lighter yellow on top. Now I'll use smoothie poor
but a little bit smaller. Just kinda shaded in
a little bit more. And I wanted, I just want to
paint a little bit more of the lighter color
towards the bottom. And then smoothie
*** really softly down here. Okay, good. Alright, so next we'll color the berries and then
we'll just start do some decimating so we
can get our size down. Because it's a bit two is still a bit too high now for me. Alright?
33. Final Touches: Okay, So that looks good. We can just color
these little berries. So the strawberry. Let's go ahead and color
this strawberry color. Which I think is like that. I think it needs
any mental illness. I don't think that'll make
it look more strawberry. A little bit of gloss, maybe. It's kinda hard.
You think you know exactly what a strawberry It
looks like, like the color. But it's actually not that easy. But I think that
looks pretty good. It looks a bit. Now
these raspberries. Raspberries. Okay, I think all of
these are the same. So these are like raspberries
sort of closer to magenta. Little bit. I guess they're read to their more red. I definitely want to do
subsurface with these Suarez. Subsurface. Want to add
some depth to them. This red for this
strawberries. Bugging me. I guess it's just gonna be
read to these barriers. However. Where's
the king barrier? There it is. So I think
all these barriers are those and those can be
there could be blueberries. Could be. They would
be sort of like that color is kinda nice. You could also be a
little bit darker, almost like there's some sort of like blackberries or something. Lets take what
blueberries for now. This icing. How
big is the icing? The icing we can decimate. So let's decimate that down. Okay, I think that's good. Let's make this subsurface. Bring the depth
down a little bit. This cake. Let's also
make that subsurface. And we'll bring the
depth of that down. Okay, cake is small,
strawberries, 24 K. So let's decimate that. Maybe twice is good. This little stem
should be green. Maybe something. Take the metal NAS out. I don't know if this would be the same color or if this would be stem ish STEMI color. Think it'd be more of
a brown. You asked me. Okay, let's decimate these. Misc, decimate, decimate, decimate K. Because these are so tiny that they
don't really need to be as big as they are,
That's pretty small. I didn't group the
raspberries today. Where's the king
barrier there it is. So all of these, I'm going to join together and just name them blueberries. See what size they are. Blueberries are 43 K, So let's decimate those. There are only spheres K. And let's group these
rasp, rasp berries. Join 36. It will decimate those twice. The Plate. So we'll do
a little silver Plate. Think silver is already here. So we'll do that. Silver always looks crazy. Unless you bring the roughness up to get that
like silver color. It will take some of
the middle miss out. How much wanted to be white? I'm honest. We're just like
a different color Plate. Maybe like a wooden plate. You know what,
We'll just go with the we'll go with silver. Goes something like that. K goes something like
that. What is old? He was like, why did the
teeth look so funny? So the teeth subsurface bring the depth down to
maybe like 0.1 or so. And also we can decimate them. These are 51 K decimate, decimate, decimate
them down to 3,000. Tongue is 43. So we're definitely
going to decimate that down to five K might
be able to do more. I just don't want to just kinda taking baby steps
right at the moment. Plate is small,
blueberries are small. Let's go to these teeth. Decimate these 12, will
just meet them again. See how they look.
They look okay. These are 78 K, so we
can decimate these. The eyelashes and
eyebrows and stuff. Okay, still looks pretty good
to the same thing with him. Meet decimate. They
still look good. His hat, we can decimate their hands and everything. This is 745 K. I'm
gonna do a quick Save. Then I'm going to decimate. He wants twice. That's good. So their bodies also want
to decimate maybe twice. Okay. All of the eyes we can
decimate maybe twice. Pupils. Those aren't too bad. The Smurfs thing.
Oh, that's good. We already decimated that. This thing. Just the floor. Can decimate that. 1.24. It's not too bad. Oh, the tongues. I don't think we did
much with the tons, but just in case
decimate those twice. All right, so let's save. So now our project is one point
to three of the gradient. If I can bring it
down under 1 million. We want this stupid box here. I don't know, I
kinda like the box. The box is tricky for me
because we could take like can make it orange, would match the motif. Or we could just leave it. I think this needs
to be green as well. I'm going to take this green. This green. Maybe just
a little bit darker. Alright, I like that. Is this subsurface,
all this stuff. I want subsurface and just bring it down so you can
still see it pretty clearly. But I definitely
wanted all subsurface The blueberries to be Blueberry to be subsurface them know, bring it down really low. I think we did the bodies. We did the bodies that we do, the white will
subsurface the white, we'll bring it down.
Tongue subsurface. Town. Also the Tongue might need
to be a little bit more red. Okay, with that. Okay. Alright, so I think
that's pretty good. I'm going to turn this image off and bring back our backdrop. Okay, let's go to our
view. Looks great. Let's go to post-process.
Will turn this up. Looks really nice. You bring the exposure up, make our scene brighter. K. So the only other thing
that I might do is make the Pupils a
little bit smaller. That's the only thing. I'm gonna do that real quick. I'm gonna turn off post-process
and turn this down. I'm going to save first. See, this should be in mirrors. So let's see what looks like if the Pupils are a
little bit smaller. Interesting. There
we go on his better. Come on. Gizmo,
work with me here. I'm going to bring it
down to the bottom. K. It looks good. I'm going to see what
they look like if they were even a little bit smaller. I'm going to change the
pivot so I can just move them in a
direction I need to. That looks good. I think I like them better, a
little bit smaller. Let's take this one. We can just use vertex. Let's see what that does. Pivot. Hopefully it still moves both. Yes. Great. To make this small amount. Maybe we want them
looking a little bit up up at his little Smurf buddy. I think it might look better
if they're all looking down at the the dessert. I want to move them
closer together. Like his eyes. Pivot, center pivot. We're going to make them
smaller like we made the other rascals Eyes smaller. Move them up a little bit, maybe this way bit. I think I liked that better. His eyes are kind of small. I don't think I need to
make his any smaller. Think his Likud out a little bit. Okay, cool. I'm happy. I'll go to View and number two, make it a little bit
bigger. Like that. I'll make it Trio. I'll name this fin. Let's check out post-process. Turn this all the way up. I need to adjust any of these. Turn that down a little bit. We want if the field okay, it looks pretty good. It's a little light.
It's little bright. At yellow is very bright. Let's turn this down. Turn the environment down. Let's check it without
these keys layer, this key is quite bright. Turn it down a little bit. Phil is, okay. The room is okay. In Top-down looks good. But maybe just wait, maybe
not maybe not bluish. Change that to
white. Okay, cool. I'm happy with it.
I think it looks good. I'm going to save. Yeah. Okay. I guess sometimes it's hard to just get a nice
view of what you wanna do. We go, alright, I think,
I think that's it. I'm really happy with this. So much Fun. Hopefully
you guys liked it. Hopefully you will
give me a review. And posterior work, even if
it's just this little Smurf. I'm probably going to work
on this a little more. If you want to see the finished the absolute finished project, then I'll, I'll tell you all about
that in the next video. We'll talk a little bit
more about the Smurfs. But yeah, I mean, fantastic job. This was very, very tense, very tough characters
to get right, especially in this
very difficult. So if you made it this far, then I am very impressed. Even if you just got him done. I'm very impressed. Alright,
I see in the next video
34. Export & Goodbye!: Okay, two other little
quick words of wisdom. Just for Fun, I added two little raspberries
on the ground. I adjusted the little box in the word make it
made it touch the box. But here's something
really cool. So you could go on the word, I want to make it brighter. So I'm going to clone
the word, the Smurfs. So now that word is cloned. Now I'm gonna go to the
materials, do additive. And I think I'm just
gonna leave it at that. You can raise this to
make it more bright, but I don't want it super, super bright because
I wanted to, I want it to be easily readable. And sometimes like
if you do always unlit, it'll be too bright. Because glowing will be
a little bit too bright. So that's just two
other things that I just did that I
wanted to show you. So you can get the word nice and bright and make it look
good. Alright, that's it. Okay, congrats on
making it this far. Exporting your render. Your render is just your image. So when you want to export, firstly, you want
us mixture that you save before you try to export. So just make sure that you save. Now, once you saved, go down and you'll see here the export said or
the Render Settings. You can export this if you
want to save your project, if you want to send it to
another iPad or something, you can save it as a Nomad. Just make sure that you
don't have this checked. Or else it'll only
send one object. So you can save it as a Nomad. Is this if you want the
file, just for nomad. If you want to send
it to Blender, I'm gonna be sending
that to Blender. I'll make a video on YouTube, so make sure you check that out. That's a G LTE F, but I'll walk you through that. I walk you through the best
practices, what I like to do. And we'll light will make the scene in Blender.
It'll be awesome. So if you want to just
render the image, so you just go down to
the Render Settings and you have your ratios here. I'm gonna do mine in for
K. Usually 1080 is good, but sometimes I do
videos in for K, So I'd like to have
nice crisp images. So I'm gonna do
for K, just makes sure that your post-process, when you turn post-process on, this is all this stuff
that you kinda go through and see what you want to
change and things like that. But the default might be good because this is
a lot to go through. And you'll just have to
kinda go through and see what you like and
what you don't like. You want to have your lighting and all your stuff done before you come in here and start
messing around with things. See, it's a very, very different look with each of
these settings. So just go through and mess
around with didn't have FUN. But you want to make sure that all the bells and
whistles are up. So max samples full resolution, turn this all the way up. Match frame sampling.
I usually put it at 500 when I'm working,
I have it at 100. But when I'm exporting, I put it up to 500 samples. I think that I think that
makes for a clearer image. So as long as that's
all together, then I go here and export
in for K. Now notice for K, you can see the crop. So that's why I
squeeze my image down a little bit so it
can fit in this crop. You can still see the sides, but I'm okay with that. We'll actually now that I've
now that I've mentioned it, I'm just going to
go to the gizmo and the background and
just stretch this. So you actually don't see that. So I'll go back to my almost
call them up. It's Smurfs. Now that I've made a little bit, a little change,
I'm going to save. Yes. Then I'm gonna go down. Export is for K. So I will show you this
image once it's finished. I think that's about it. I'm gonna get back behind
the camera and give you a personal heartfelt,
warm farewell. I'm super impressed that you were able to
get through this. This was such a technical
class is very difficult. I had a lot of Fun making it. I hope that you're okay
with a faster pace, but that's kinda how
it is once you do, once we did that one character, It's like we had the
blueprint for the other ones. So hopefully you hung in there and hopefully
you enjoyed it. And I know it's kinda tough, but once you get done
and once you have something really cool to
look at that you made, I think it's
completely worth it. Alright, let me jump in front of the cameras so you
can see my face. What's up, guys? Welcome back. If you got through
that, I'm so impressed. Even if you're just
did the one Smurf, that's not an easy Smurf, but hopefully you came away with the key takeaways
is that you can pretty much Sculpt any character
that you want to make. Put a box here, put a
sphere here, use a tourist. Just figured out how
to make things simple. Because everything,
if you break it down, starts out simple and
then it just gets more complicated along the
way. So hopefully I made that clear enough and clean enough and
smooth enough that you feel like that you have the
competence that you can make any character because I
guarantee that you can. I've never made a Smurf, but we figured out and make
this Smurf together. I want to give a shout out
to the original artists because anytime I do ART,
that is someone else's. I always want to give
that artists prompts, give that artists respect. I just want to mention that. So I pulled up the
original Smurfs artists. So this is right from Wikipedia. The Smurfs was first created and introduced as a series
of comic characters by the Belgian Comics
artists pay you the pen name of Pierre
Clifford in 1958, wherein they were known
as laser shrimps. Sorry, but that's
the best French that I could do on that one. Yeah, PEO, he's a Belgian
graphic novelist. And apparently he's the one
who created the Smurfs. Hopefully he's the one that drew the exact Smurfs
that I showed you. It's kinda hard to
be, to be 100%, but he's the creator of the Smurfs and we just
made some Smurfs. So I want to give
him a shout out. I mean, I know he's
no longer with us, but I was gonna to give the proper respects to artists because that's just what we do. You know what I mean? I wouldn't
be doing what I'm doing. I wouldn't be as
inspired as I am if it wasn't for the great artists
that came before me, the great artists that
I always looked up to, that I still look up to artists
that are better than me. Artists that are early
on in their journey. I want to help them
along the way. That's just my vibe.
That's just how we roll. Make sure you rate and review. Hopefully you enjoyed the class. Also make sure you
upload your projects to Projects and Resources. If you want to tag me on
social media like Instagram, just make sure you
tag me at drug-free, Dave, because that
way I'll see it. I don't really tip my messages
too much on Instagram. But if you actually physically
tagged me in your post, then I'll be able to see it
and I'm happy to repost it. Also, I'm gonna bring this
project over into Blender. Nomad Sculpt is amazing, but the renders in Blender or on a different level cycles
rendering is really cool. So I'm going to bring
this Sculpt into Blender. I'm gonna do all that
and a YouTube video also have a ton of other
things on my YouTube as well. 3d printing, lots of
Sculpting, lots of tutorials. I think I post content
about Nomad Sculpt and 3D modeling pretty
much every day. So hopefully I will
see you there. Youtube.com slash
drug-free Dave, but I'm drug-free Dave,
across the board, TikTok or YouTube, Instagram. Not very difficult to find me. And with that, I've already
taken up a lot of your time. Once again, I appreciate
each and every one of you. This was really Fun. And I'm looking forward
to the next class if you have any suggestions on things
that you want to Sculpt, dropped me those notes. I'm very open to seeing what
you guys want to Sculpt next because we can pretty
much Sculpt anything. And I really enjoy it. I love Sculpting and
I love teaching. Alright, keep drawing,
keep Sculpting. Now see you all in
the next video.
 Dave Reed, 2D & 3D Illustrator - Brooklyn, NY