Transcripts
1. Class Introduction: After the success of the
Back Room series came, Pixels at 17 years old. Filmmaker and new Tuber created a new series,
The Oldest View. Most of the action
in the Oldest view takes places in the mall,
located underground. And looks so realistic that many people think
it is a real mall, but it is an animation
created in the free program. Blender The Mole is a replica of the Value
View Mall from Dallas, Texas which was built in
'70s and demolished in 2019. In this ten hour long tutorial, I will show you how the
process of creating a mole and animation looks
from start to finish. I spent a month making
my version of the Mol. Combined with six years
of experience in Blender. This is the final result. We will go through
all the process of creating such
a large project. From collecting information, reference images, organization, to modeling,
texturing, overapping, lighting, animation,
post processing. And at the end of the tutorial, you will be able to create
the animation you are watching with the tutorial. I will also share the Blender
file I used to render this animation with
all the assets ready for the asset browser, as well as instruction
on how to use files or at your animation for
Youtube or other purposes.
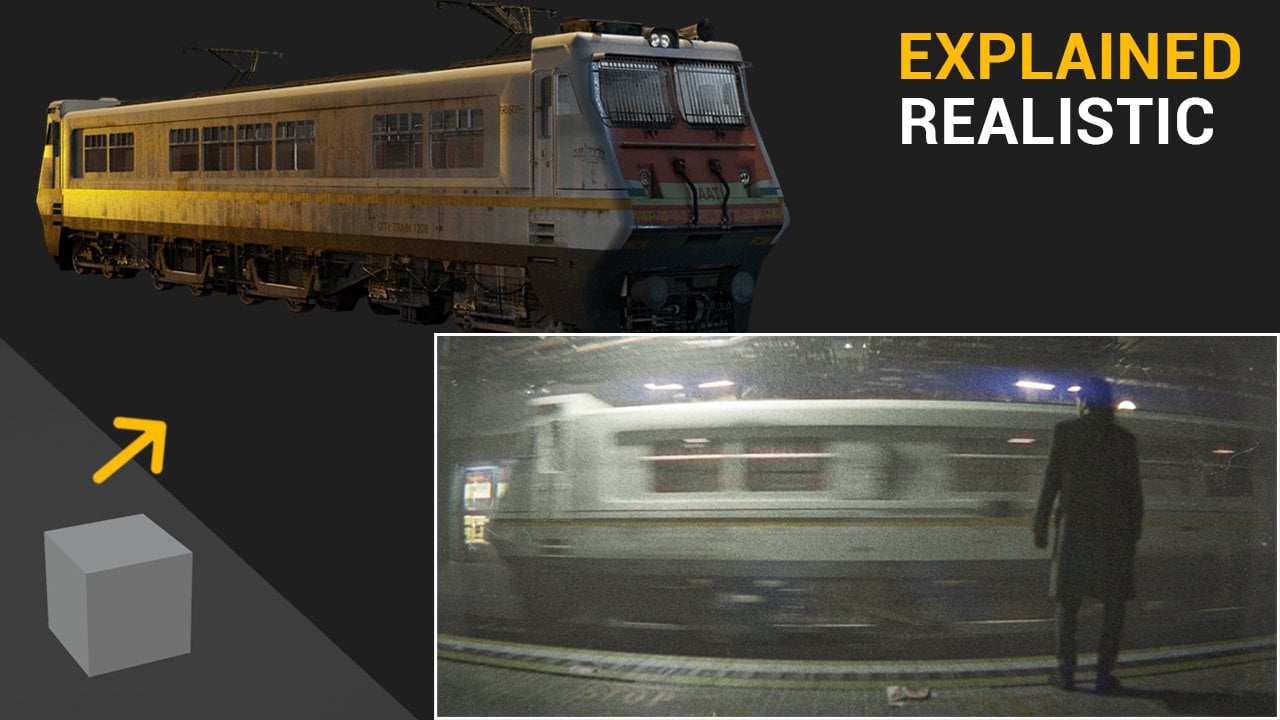
2. Introduction to the project: Hello and welcome to
Anew Blender Tutorial. The Oldest View is the
name of the series that Km Pixels published
on his channel. And as you know, I'm
a big fan of me. Pixels work and I have already done backrooms tutorial
and pull rooms in the past even in has never made a pull rooms video and many of you asked for a liminal
space version with pools. I done pull room tutorial also, but that's past and we
are now here to make the oldest view or more from
the oldest view videos, which in reality was Value View Center More
from Dallas, Texas. In this tutorial, we will model the more and make an animation. But this is first of
all, blender tutorial. The oldest view or more is just a team that we will cover. But more important
are skills that you can learn and apply
later to anything. In this tutorial, we
will go through a lot of things from
modeling, texturing, lighting, animation, post
processing organization, a large project like this. And much more the more was destroyed in 2017
and no longer exist. But there are still
a lot of photos on the Internet that we
can use as reference. In pixels version, the longest part of the action in the more was in
the part three. If you don't watch
the whole series, you can watch some
parts from the part three to see how the renderings and animation look like can
make everything in blander. That's what we will
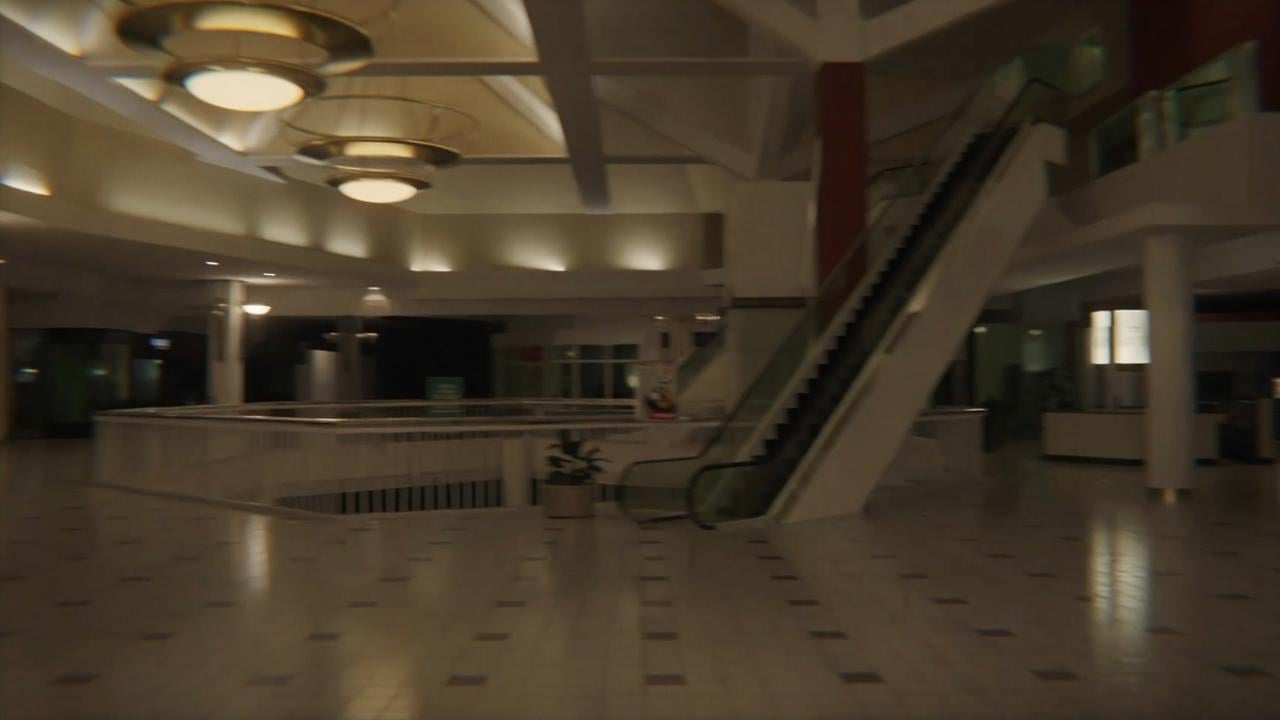
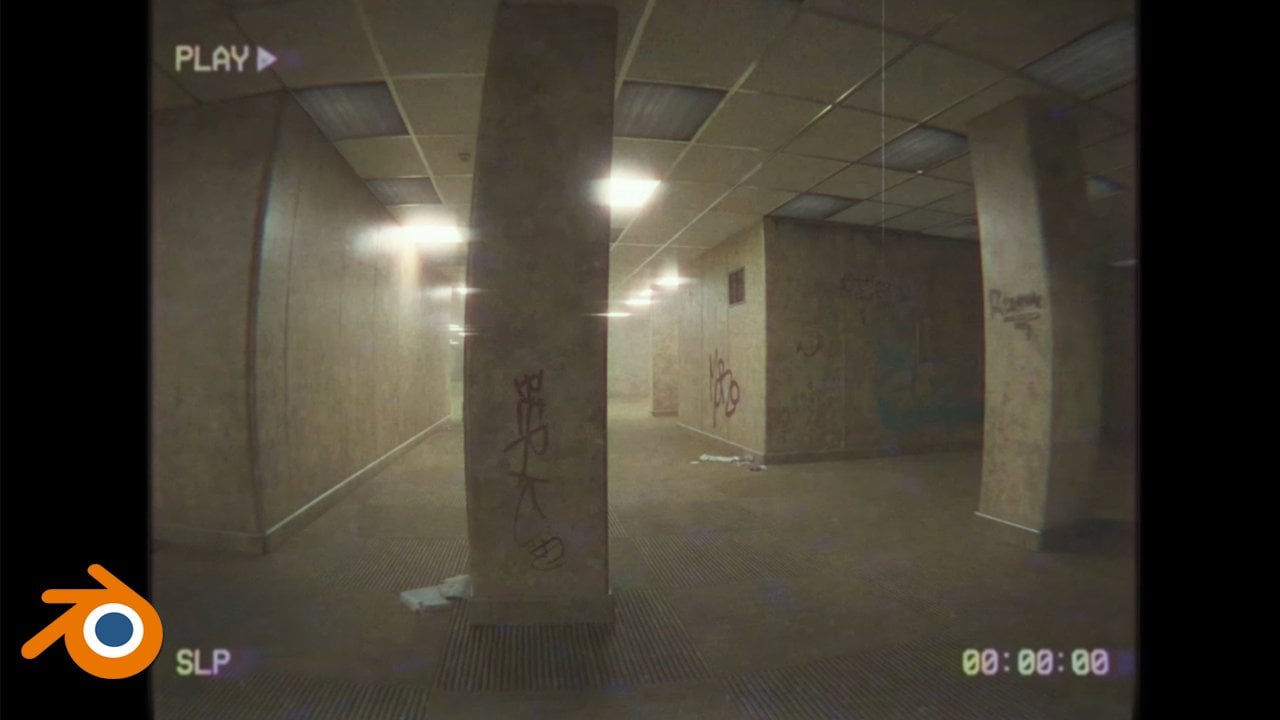
do in this tutorial. This is my version
of the animation, and by the end of this tutorial, you should be able to
do something similar. Tutorial, I will
also share with you my original blender file from which I render
this animation. So if you get stuck somewhere, you can watch how I did
it or you can just use my blender file to create your
own animation or version. In addition to the blender file where everything is together. I will also share with you
separate assets that you can add to the asset browser
for future projects. Or you can just use Control, C and Control to
copy the assets you need if you don't want
to use Asset browser. But we will go through all
this in the tutorial even if you don't want to
follow the tutorial in the way to build a
more from the scratch, but just use my assets. My recommendation is
to watch the tutorial so that way you can use my
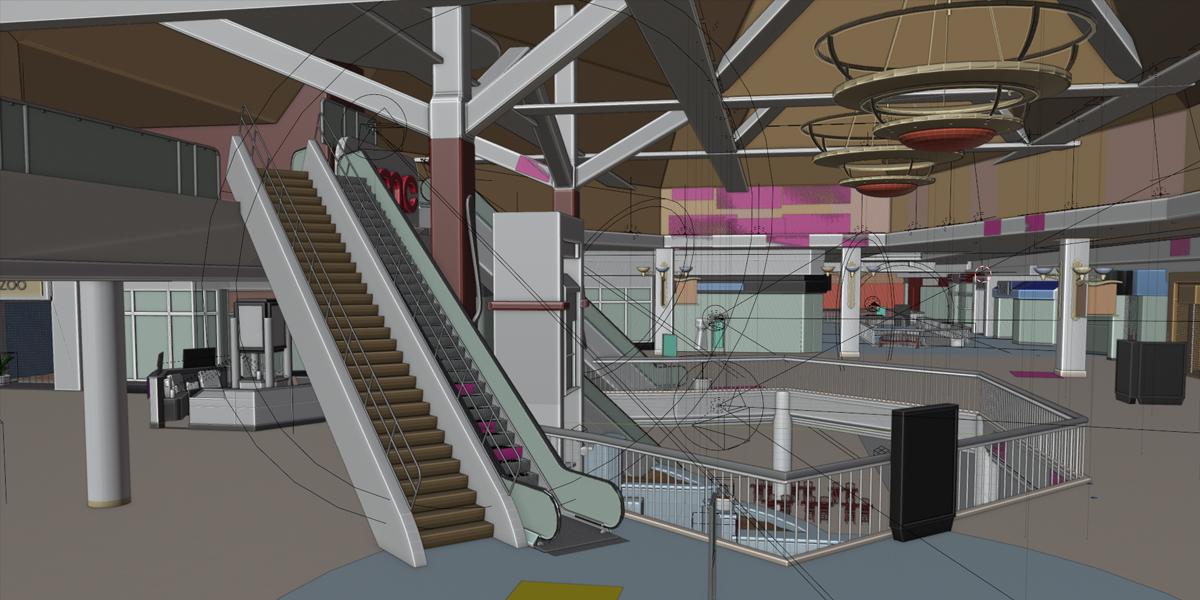
blender files correctly. This is how the final
blender file looks like. I spent three or four weeks
to build just one floor and part of the lower
and upper floors that are visible in the camera, you can see that there
is a lot going on here. But let's now start with
making the more for real. We will talk more
about all that later.
3. Start with Blender: If you have never
used Blender before, you need to go to Blender.org and you can download
Blender for free. And I will also use Blender
4.0 Next step I usually do, I create folder
where I want save all these files so I can
copy address with control C here and I can go with file
and I can now save this file. I will call this the
oldest tutorial. We can now save this file. This is my last
blender file from which I render all
this animation. And this animation
list about 6 minutes I need to finish sound design and then I will upload
this animation. I think I will also share
this video file with you. I will also share this original
blender file with you. If you want, you can make your
own animation and version. And I will also give you a video instruction how
to use this blender file. I will also share this
resources folder with you. So here you can find all
textures we will use. In this tutorial, I put some test renders
on my social networks. And some of you asked me where I found all these high
quality and nice textures, but I didn't use any high
quality or pay texture. If you look these folders, you can see mostly blurred and low resolution
stretch textures. And this is what I
use in this project. Best and high quality
textures I use in these projects are
maybe these three which I download from Mbncgortexture.com
If you look here, you can see that this is
less than one K resolution. All of the rest of
this texture here are very small and
very broad texture, but they still look good
in my final result. For example, if we look
this small plaster texture, you can see resolution
is about 300 pixels. But if you look, for
example, in final render, you can see all the nice
detail we can get from this low quality and
low resolution texture. For example, here
on this ceiling, you can out all these nice
details we can get from this very low resolution
and blue texture here. Most of these textures
are just screenshot from Youtube videos or for
example, these stickers. I just go to Google
and I search for Click zero photos
and then click here. And then I search for
stickers or something and you need some time to
find textures you can use. And then I just make calls
of all this and then I reuse the stickers J peg in a lot of place
on this surrender. For example, I can project
this same texture here, here, here, or this place here. We can use only one, this texture in a lot of place. But the only point of what I talk is that you don't need
high quality textures. And you don't need pay for textures to
build a project like this because this is
architectural project, best way to start with
floor plan or blueprints. I search a lot on Internet for blueprints or floor plan for
this value more from Dallas. And I didn't found too much. I decided to make a
screenshot from pixels video. Then I put this in Photoshop perspective fix
perspective of this image. And this is what I get. Basically, I just care
to make this line here parallel with this line
here and also this one. And then this perspective match. Pretty close. You can see that this image
is not high quality. So we have also a lot
of blur lines here. We don't see all these details, but this will be okay
for us in this tutorial. This is pixels widow
and here is where I take screenshot
of this floor plan. If you look at this window,
you can see that in have much more details
about this mall. I think this is because
he lived around this area where the small so I think he
collects much more, the blueprints and
information about this mall. But I didn't found too much. I found some Map like this one, but
this is not so useful. We can see here just
hallways, not the door. This is best floor plan we
can use in this tutorial. Our mall will not be so
accurate and precise like in Kane pixels video because we don't have all
information we need. But I think this
is not important. And nobody except
people who in this will not know that this column maybe need to be here, not here. Or for example that this store doesn't exist in this place. We just need to make as
much more details we can and this place
will look real. But I also try create as much more details
from original mall. I collect a lot of reference
images, for example, if you this place here look pretty similar like this
one from my render. Basically, we will do as much detail as we can and we will try to
follow as much we can these reference
images but we will not care about all details. So we don't need
place any store from this original more in place. We just need to
fill all this space with as much more
details we can. If you wonder what is this
small software is Pureref. You can download
this if you go to Pureref.com and you can
download this for free. How this works,
you can just open this software and you can d
here any of these images. For example, when
we are in Blender, we can quickly just
click here and we zoom here and we can take look on this
reference image. All settings you need to use this program
is on right click. You can, for example, go here to save this
very simple program. You don't need even
tutorial for this. Just place this drug
and drop image here. And you can zoom to
any of this image and you can use this reference. And all these images in this
reference is from Internet. I think I cannot share
this file with you, but I think you don't
need this file because in this tutorial will work
on some details here. I will also take look
on this reference. You can look on this reference
inside my window here. But if you want, you can just
go to Google and you can search for Value Dallas, Texas and you can find
all this reference. I also share one link with you. I will paste here all links
we will use in this tutorial, so it will be much
more links here. From this link here, I found a lot nice images
from original Mal, and if you want
another great source, I use a lot to build. This is this widow. This is seven years old widow. Just maybe a few weeks
before this small was demolished because
this is this scalp. A lot to understand. Where some things
from this small. For example, we now that this
place here without this, do I have a problem to
understand what is this? But when I watch this video, I know that this
fence here from this, do I also take some
screenshots, for example, for this logo and I know that this is wood and
things like this. What I do, I basically place
this map in middle and I try to connect reference
images with place on map. For example, this fence here I found from these images here, you can see this fence here. And also this is from me pixels video Later when I
will model this place, I can just follow this line and I can watch all this reference.
4. Blocking scene, part 1: When we have all things
we need and when you understand how I
collect these things. Let's start with Blender. First we save this file. I will now copy address with control of the
resources further. And we don't need this, we need map plan two. I will go to Blender and
I will press num seven. We will now import reference
image and we need to be top orthographic view
with the numbed seven or with view viewport top. We can go to top
portographic view. We can now go shift a. First I will delete
all these things here. You can press A to
select all this, or you can just drag
and select all this. And we can now press delete, because we don't need this. Now I will shift and I will search here for
image reference. I will now go with control V to paste
address of this folder. Here we can search here. I will select this map plan. Next step is to build basic
shape or blocking scene. This is what I saved last time. Just to understand
how this look. Basically we need
just basic shape of these stores to understand
where to put things here. We will start from one
of the stores here. Let's see on our reference
how one of these stores look. Basically, we have
this part here, and then this 45 degrees corner, we can see this corner
in our reference. But one thing is
very important here, we need to build this in about real world
scale dimensions. Let's now try see
dimension of one store. Let's imagine human
about this area. This door is about 3 meters. We have maybe 1 meter here. This story is about
4 meters tall. On this axis we have
maybe 6 meters. So now we can back to Blender
and we can start placing. We can go with Shift and right click about this area,
where is this store? And we can go with
Shift, a mesh cube. If you press on your keyboard, you will open this
item tab and we can type dimensions on the axis. I will type 4 meters. We cannot see anything
because this is the axis and we are in top view. I can go with num seven
to top portographic view. Here you can see
that this is y axis. On y axis, we can type
here 6 meters on x axis. We can type here anything, but I will type maybe ten. We will see only front
part of the story. We will not see anything in background but ten or 12 meters. Okay, Now we know that this story is about real
world scale dimensions. And this floor
plan is too small. Or this reference image. I will zoom this out.
Scrolling mouth. I will select this reference, we can rename this to reference. Just double here and
you can rename this. Now we can to scale
this reference image. I will scale this a lot. I want to this cube match
with this shop here. I will now take this move tool. We can now just place this here. Another way to move this is if you press you
basically grab this and you can now press
to move this on y axis or and then X to
move this on X axis. If you want to see this
reference image under this cube, we need click here to go to
X ray mode or wire mode. I will enable both of this
and shortcut for this is z. If you go for example
with z and you can now go to solid view and
let's disable this X. Or you can go with and go to W. We need scale this
reference even more. So I will press S scale this up. Let's now select this again, and let's try to see
how we match up this. Now I will make this
store even bigger. So I will type here
maybe 20 meters, okay. And we can now move
this to about here. Just be sure when you
make you are happy. Just go with file, save to save changes here.
5. Blocking scene, creating one store: Next thing I will do here. I will go with amped one. This red line is world x axis. I want to bring this on zero. On world x axis, this is 4 meters and the origin of this
object is in the middle. I can just type here
two and it will line up perfectly
on world x axis. Now I will make this
corner which all the, almost all these stores. So we can now go to solid
view and to change object, we need to go to edit mode. If we now select this
object in object mode, you can do simple things like scale to go with or
rotate with the. We can make few of these things, but to change shape
of this object, we need to go to edit mode. To go to edit mode,
you can select Object and go here to edit mode. And now we can model
this object shortcut for switch between edit
mode and object mode steps. If you press tab, you can switch between object
mode or edit mode. I will now press Tab and I will now select this Edge select. We have here vertex select, edge select, and phase select. We can also switch
between vertex, edge, or phase select with 12
or three on keyboard. Because we need edge select, you can click here or you can just press two on your keyboard. And we now choose
this Edge select. Now we can just click here to select this edge and to
select another edge. In same time you need hold
shift shift, Add selections. Without holding shift, you
will just select another one. Without this one, just hold shift and select
another one here. Now we just need make be to make corners like in
our reference images. We can do this with control B, but when we go with control B, you can see that this is
not 45 degrees angle. And I will now press
Escape the reason, because scale of this
object is not one, because we changed the
scale of original cube. I will now press tab
to go to object mode. I will press to open this
step. We can see scale. This cube is basically stretch on x axis and that's why we get more bevel
on this x axis. And to fix this,
we just need tell blender to back scale to one. To fix this you just need
press control and apply scale. Or if you cannot remember this, just go to object, apply scale. In most times you want
scale, keep to one. Just be careful when you
change object in object mode. For example, if you press S Y, you always need go with
control and apply scale. Okay, now when we fix scale, we just need to go
to edit mode again. And with holding ships
like these two edges here. And now when we go
with control B, you can see that this
is 45 degrees ankle. But I will press escape and
I will go with number seven. I will try to follow
this reference here. I will again go to wire
mode and x ray mode. And I will go with
control B to make bevel. Now I will go to
go to object mode. And let's try line up
this little better. Now if we move our holding
middle mouse button, we can navigate around
this store here. And if we go to solid view, we can see that we have one
store sitting on ground. And with real world about
real world dimensions, we can now continue creating another store
here with Np seven. So we can back to top
portographic view.
6. Blocking scene, more stores: Now build another stores. And we don't need to
do all these things, we can just duplicate this one. But I will close this
timeline because we will need this later at the end
of this tutorial. Not now. So we can, when we see
these arrows just quick, right click and join
areas and click down. Now when I have selected
this store here, I can duplicate this, but I
will do one thing before. For example, if you just, you will select not
just this cube, you will select reference. This can cause a lot of problems because if
you didn't know that, you select both of this object. For example, with Y, you will duplicate both of this object which
you don't want. I will now select
this reference image. I will make this impossible. You just need click here and you can activate this
selectable tool. Now we can see this
here in our layer. I will just click
here to disable this. If you want select
this reference image, you cannot do this anymore. For example, if you
want to disable this from Viewport, for example, make render, this will be
still visible because this is still visible in render
it disable this render. You can also cl here. This is Selviewport. This is render render. We don't need this
Viewport make selectable. Now I will press ship
D and after ship D, I will press Y to stick
this only on Y axis, so we can now move
only on Y axis. And I will place
another store here. Now I will again go to X
mode to see this reference. Also, frame mode,
you can see that this store is smaller and how we can make
this store smaller. Also, you can go with y
and scale this on y axis. But this is not correct because this corner is not
more 45 degrees. We basically stretch this. Only correct way is to do this. In edit mode, we have selected this store and I will press Step to go to edit mode. Now you can go with
vertex select, but I will choose
select for this. Now I will select only
this part of the store. Now you can go with and Y
to move this on y axis. Or if you are beginner, you can just use this
mode tool here and you can just move
this to about here. You can see that because we do this inadded mode scale
is one, which is correct. Now I will go with Y again, and I will play this part here. And I will go with Tab. Now I will move to
about here, okay? And now we can go again with
tab to object mode, shift y, place this here, tab again, and move this to about here. Let's now go with tab again, Shive Y, let's place this here. And now we can go to edit mode. And let's now see
what we can do here. I will select this part here. You can use again select
or vertex select. And let's move this about here because we want to
select only this vertex here, vertex select, or one. Or keyboard. And select this. Let's move this here. Let's now see how this look. If we rotate this, we can see that we
have here five stores. Let's now continue
with this process, Shift the Y t. Now we need to select
this part here. But there is one thing
you can make wrong. If you just in solid view, you will select only
top part of this store. If you don't see this, you will move this on y axis and you will get this but we don't need. I will go with control
Z and X ray mode. And in x ray mode you can select all vertices
which are not visible, which are in same place on the axis which we have
in this example here. The vertices here and this one are in same
place on the axis. You can select this
only in x ray mode. I will move now to here, Tab I will go with ship Y again. Let's now move this here. Tab, Shive, Y. Shive, y. Let's place one
here again. **** y. Let's move this about here. I will not care about
this hallways here, because this will not be
visible in our ender. I will just go, sh, y. Let's now continue
with modeling. I will move this little
out. I will go again. Let's move this part here. I will now grab this edge here. Move this about
here, and this one. Okay, I will move this one
here. Now I will go with that. And let's now grab these
two vertices here. And let's move this about here. When you go to object mode, you can see that origin
point is now here we want back to
center of the object. I will go just click
Set Origin to Geometry. This happened with all
the change in edit mode. If you want, you
can set origin to geometry and make
this to geometry, but this is not so
important for us now. Let's now make this store here. Because this is line
up on world axis. This one, this floor plan is
also line up on world axis. We can just go with shield
to move this about here. Now I will go with a z
n air to rotate Z axis. And 90 is value of 90 degrees. Now we can move this store here. Now I will go again with tab. Let's move this here. Let's also grab
these two vertices. And let's move
this about Here we have another store we can go with dry click
Set Origin to geometric.
7. Finishing blocking: If you want to practice with me, you can continue
following the steps. But I also save this
first step last time. If you don't want to follow
these steps anymore, you can just under resources, find this step one
floor blender file. But my recommendation is
to continue practicing and following this first
step. You have option. But I think I will not
complete all these stores, but we will complete this
part here and maybe this one. Okay. I will now go with shift
the X to go to Edit mode. And now I will select
both of these vertices. And let's move this about here. I will now move this on X axis and then on
Y axis about here. Next is this shop here. So we can basically
just go with ship D, X and we can place this
here and we can go with Z to rotate this
only on the axis. I will now try make this
parallel with this line here. We don't need to be
completely precise, but let's try line up this here. Okay, this look pretty good. And now I will go to Edit mode. And let's go to x ray mode. With the holding shift, we can select both
of these vertices. Now I will switch from global orientation
to local or normal. Now we can just move this, okay? And we can do same
with three vertices. I will select this
two and this one. And now we can switch
from global to local. And we can now move
this on local y axis. Okay, To go to object mode, I will now rightly set
origin to geometry. And now we can go with shift
y tab to go to edit mode. And let's move this here. Tap again to go to
object mode, shield y. Let's go to xy mode. And tap again shi Y tab again. And let's place this here shifty and place this last shop here. Let's make this big shop
here again, go with Shy. Now I will go to
Tab to edit mode. And let's move this about here. Let's now move this on X X. Let's place this one here. We can delete this
vertices here. If we rotate our scene, we can see that
this is edge I will delete and this slow edge here. Let's line up this one here. Okay, I think we need one loop
cut here to add loop cut. You can go with control
to create new loop cut. And we can now move this here. Okay? And now we can
select these two vertices, and we can move this on x axis. Let's now go to another side. And to go to another side, we can just go with shift
D, X and move this here. And now I will
press X minus one. With X minus one, we can flip this on X axis. Or if we now go with control Z, we can go more of it. Now we can go with z 108. This will also flip
this store here. Okay, and let's place
this two position. And now I will go to tab
with tab to edit mode. And let's line up this here now. Again, tab ****, the y
tab. Let's move this here. We can make this
smaller if you want, but I think this
is not important because this part
will not be visible. But let's also
make this smaller. With holding shift,
we add selection. And let's move this
about here now again, **** y, and let's
place one here. Let's now select three vertices. And let's move this to here. Tab again to go to
object mode Shay. Tab again to go to edit
mode, withholding shift. Let's select this
three vertices. Let's move this to about here. This edge here is line
up on global axis. We can now switch to global. Now I will select the vertices
here and this one here. And I will go with Y zero. With Y zero, we will line up these two vertices
perfectly on X axis here. Now just be sure to
select this space here. And now I will go with to
extrude and Y for y axis. Now again go with
to extrude and y, y axis to about here. And let's now move this edge
to this corner here. Okay? Now we can move this part here, but if you want, you can again
select these two phases. And now we can go with
for x true x for x axis. Okay? And this story is
line up on global x axis. So we can just duplicate
this with shape x x axis. And let's place this here. And go with z to rotate
this on 90 degrees. Now, tab to go to edit mode A. Duplicate this shape x
T ship x shave x again, let's fix this part here. Okay, let's first select
only this edge here. Now I want to just
select vertices. You can select this one. And let's place this one here. Maybe this one here. Again, if you want,
you can go with this slow edges to delete
this one we don't need, maybe we can just press
control to bevel this. Now we finish all
this block here. Now to switch to another side, we can again select
this store here, shift Y again S Y minus one. To flip this on y axis. Now we can continue
modeling this block here, but I will not
continue with modeling the stores because I
do this last time, this least maybe 30
minos or maybe 1 hour, and it will be just
repetitive task. We will not learn anything new. I want to save some time
for me and for you. And I will just open
this Blender file, which I will share with you. This is the first
floor file and I will enable this
background image. You can see that this is not
background reference image. I will first I will go to my original blender
file and I will press enable this reference
image in selection. We can select also
this reference image. I will press A to select all, and I will press Delete. And now we have empty scene. I will go to the
blender file here. I will press A to select all, I will just go
with copy objects. And now I will go to
original blender file. And I will just paste
this object here, but you don't need to do this. You can just open this blender file first floor and you can just
continue working here, which is my recommendation. You can continue
practicing this. You can go to Xd and you can just continue practicing where
we stop last time.
8. Floors: And if we now go to solid view, we can see that I also last time create
this ground floor. So I will delete this to
show you how I create this because we are now
perfectly on X axis. If I now go with Numpad one, you can see that we are on zero. On X axis, we can go
with shift a mesh plane. And I will press scale. I think last time I go with 200, I will type here 200 because
we model second floor. I will rename this plane
to second floor here. Now I will go with shift D
here and I will press five. Now we create another floor
here which is on 5 meters. The stores here are big
4 meters on z axis. If you look this reference, we have this part which
is about one meters. That's the reason I create this little bigger than
this wall here. We also have here, if you look this reference, this is second floor. We will model all this. Now we have first floor and also we have third floor
which is only cinema, but this will be for us, only ceiling back here. And I will select
this second floor. I will press, I will go with shift D and I will press for, grab for z axis and minus one. Minus five, Okay? And if we now go with amped one, we cannot see this because this plane don't
have any thickness. But we create first
floor here, second here. And we create this
ceiling or roof here. Let's now rename this. It will be easier for us when
we select this object here. You can find this if you
scroll mouse and you can see that we found this
selected object here. But there is shortcut
for this blend. If you press Full Stop key on ramplder will navigate to
this selected object here. Now we can go with
double click and we can remain this third floor. I will select this plane down and I will rename
these two first floor. If you are lose with these
shortcuts, you can basically, if you are beginner
you can just go with shift D and hold Z and
just move a little down. But I will delete this object. Let's now disable
this third floor in view port here because we
want model this second. We can keep this first
floor if you want because this is under this second floor. Let's go with Npevenre. Let's take a look
my last animation to understand better the floors, all this here is
second floor and all animation happen
in the second floor. In first floor we just
take a this area here, this is this area here. We have third floor which
is basically ceiling here. But let's also disable this first floor because we
don't need this for now. We will need this only later when we will model
this part down. Okay, so let's disable
this also in selection. Let's also disable
this third floor in selection and in Viewport, Okay, now we have only
second floor here. Let's also disable in selection, this reference image here. We cannot move
this accidentally. Okay, let's go with P seven
and let's go to x ray mood.
9. Holes in the floor: Next I want model here is
this holes in second floor. This is how this looks. So basically we have this
holes and this fence here, we have 1234567
of the holes here in second floor, Okay? This is another example, another one here. This one here. Let's disable X
ray mode for now. I can easily select this
first second floor. If I press Full Stop, amped blender will navigate
to this second floor. And now I will go to x ray mode. You can skip this, but usually
we can do this with K. If we go to Edit mode,
if you press for, we can do this, but this
is not correct way. You will see why we will get the extra edges we don't need. I will now go with control Z. I will do this with
control R as much I can. I will go with control
R and I will add as much look cuts I can to
isolate these parts here. Control R, click. And let's now move this
to this edge here. And let's add one here
to this edge here. And let's go with
control R on Y axis. With moving mouse, you
change Y or X axis. And I will add one on
Y axis to this edge. Control R again, I
will add one here. Now I will continue with loop cuts to isolate
this part here. Control R to cover
this edge here. Control R here, and
another one here. And let's go with one
more on x axis here. Okay, let's now cover
this part here. Okay, Now we have
this selection here which we need also
for this part. We have these 34 phases here. Let's continue with this
part here, control R. Let's cover this part here. Okay? And we have one more here. Now we can start using knife without creating
too much mess here. I will go with K for knife, and I will click here. And I will also click
on this edge here. And now I will
press Enter again. Stick here and here and present. Just continue following
this reference image. Okay, Now we can now we can
go with phase selection. And we can select
all these phases. And we can now, let's now
disable this x ray mode. Now I will press delete phases. And we have this hole we need, we don't see this
hole because we have this reference image here. But if you disable
this in Viewport, you can see that we
have a hole here. Let's back this reference
image and let's go with pad seven
and x ray mode. We can now continue with Knik. Stick here and here. And let's enter again. Let's again select this phase. If you can select this phase, that's because we
are in x ray mode. And sometimes you need to
click a few times to select this in X mode, this is basically transparent. If you cannot select this, you can just go to solid view and you can
press Delete Phases. Let's go again with K. For here, enter, let's press here. And let's stick to
this vertex here. I didn't do this last time, but I think we also need
to keep this part here. I will go with
control R for now. We will see later I will
add one look cut here. And now we can press here. And again. Okay, now we can select
Pass we don't need. And we can press Delete phases. And let's go with K here. So K and Enter and delete phases. Okay, now we have all
the holes we need.
10. Adding thickness to the floor: The next thing I will create here is thickness of this wall. You can see that we have
small part here and then we have about 1 meter big wall. And we have also
these few steps here. I also create this
in my last reader. We can create this easy
if we go to Brander. If you press A to select
all the second floor, let's navigate to about here. And I will go with Z. I will hold to stick
this on Z axis, so this will be the small part. And now I will go with Z. Again, this will be
this thick part of about 1 meter without click anywhere, Without
dislecting this. I will press to insert this, I will move mouse on left. Now I will press again for
extrude and for the axis. Again to insert this extrude and for the axis.
And move this down. Okay, let's see how this look. We can do this one more time. So I for insert and for extrude, and Z for z axis. Let's now extra this
small part out. This part, I think
this part is too big. With selected holding a, we can select all this loop
and we can bring this up. But I want to bring
all these lines here. We can do this if
we go with numped one to front ortographic view. And with X mode, we can basically select
only this line we need. Okay, so you can see that I
select all these lines here. Now we can go with for
grab and for oxystem. We can bring this little up. Next thing I want
to create here is this small part I want
extrude this inside. But before I create this, I will just check
for double vertices. I will press A to select all, and I will now press
three for search, and I will search for merge. I will here merge by distance. You can see here that I
don't have double vertices, but double vertices
is very easy to create without you want this. For example, if you
select this space, if you press for
extrude and then you change your mind
and you press Escape, you create double vertices. And this can create
a lot of problems. If I now go with a to select all and three and merge by distance, you can see that I remove
four double vertices. Now we can extrude this inside. We can select, for example, this one with holding shift, we can add selection. Or you can click here
with holding control, you can select shortest line
between these two phases. Control is much
easier than shift, but this is not also
correct way because we have another shortcut here which
is old with holding Alt. In edit mode, we can
select the whole loop. For example, if
I, if I hold Alt, click here, you can see that
I select all this loop. But I don't want this loop here. I want this one here. You need click about
this edge here. You will select this loop here. But I don't want
just extrude this. I want extrude this
along normals, you can skip this part, but if I for test, press a ex, I get this. I can move mouse left or
right, but I don't want this. I want extrude this
along normals. I will now press control
Z to undo this step. I will now extrude this
along normals with old, old, and now extrude
along normals. You can see that this
is very sensitive. I will press shift to
make this less sensitive. With holding shift, you
can be more precise. Now, I will move
this out about here. Okay, Now I will click here. We have this part here, but without clicking anywhere. I will go with control
B to add bevel here because I don't want
later select this again, just go with control
B and add maybe one. Okay, I will check scale of this and you
can see that scale of this is not one
control and apply scale. And now to go to edit
mode and now control B. And you can see that
this now work correctly. And we can maybe add
one or two loop cuts. You can add loop cuts
with scrolling mouse. Okay, I won't keep
this very low polys. I will add only
one loop cut here. I will go with tu lo cuts here. I will do this again and
I will score mouse up. Okay, Now I will click here. Let's also create bevel
on these edges here. You can see without that these edges are not so visible because they
are perfectly sharp, they are completely
on 90 degrees and light cannot hit
on this edge here. You can see in my render how these bevels are
important because we can see all these shadows
and highlights on the bevel edges here. Bevel is one of the most
important thing for realism and you need to add bevel to
all edges in your render. You can see the nice highlights on this bevel here
and also here, and even on this one, Just be sure to avoid perfectly 90 degrees
corner in your render. Let's now add bevel
on these edges here. We can go with okay. I think I'm not sure
how this happened, but this face should
be inside here. I will move this
inside and let's also move this edge inside. Okay, now this is correct. And I will again go
with A to select this loop and shift to add
selection. And A again. So basically you need a can shift in same time and click
this edge and this one. Okay, Now I lose this loop, but I will click here again. Okay? And now when we
have all the selected, we can go with control
B to level this. Just one slide, bevel here. Now you can see how this is much more visible
than before. We can make this bevel
even more smooth if we go with right and shade smooth. But now just be sure to enable this under data
properties auto smooth, we can avoid this
bed shading here. You can see a big difference between edges here
and this one here, which is basically not visible. This is in our viewport. This will be case in render
without being edges, it will not be visible. But there is one thing we
can do in blender port to make this more visible
and easier to work. You can clear here and you
can enable this cavity. And now we can see now all these edges will
be more visible. And you can also enable
set this to boat. It will be even more visible, but just to know that this
doesn't create bevel. This is just a tool in viewport which help us to
understand better what we do. We need to create all the bevel to make this visible in red. I will go again. I will select this
object and I will go tab to edit mode with a select. I will hold a click here, shift old click here and
repeat this two more times. And I will go with control
B to add one level here. I will go with click here
to select this loop. And al extrude along normals, move this little out control B, two level this, okay? And let's repeat this part here. To go to edit mode. Select shift shift old
and shift old here. Control to add bevel
phase selection here and to select this loop. All extrude along normals
and shift for slightly move. Extrude this inside the
control to be level. This part We have two more again here, two to go to select
to select this loop. Shift control to level
this now face selection, old Alltel normals and shift slightly move and
control to level this. We have two more he. Let's first go
with select Shift. We can basically select this here in same time again, shift. Let's go with control this. Let's pay selection. And click here with holding. Go with shift to a
selection, Get to select. Okay. I will go with control Z. Okay? And we have now
both of these selected. And we can go with all Xt along normals and control or be okay. And now we are finished
with the holes here.
11. Fence: Next thing I want to create
here is this fence here, this part down, and
this metal chrome part. And this part look
pretty complex, but we can create
this very quickly. I will go with very
clear here and I will, I will try with Al. I will hold Alt and
I will click here. You can see that I
select half of this. I will now click here with
holding shift to a selection, and I will now continue
with holding control. Control will find shortest
line between these two edges, in this case control. Here you can see that this work and now I will
go again with control. And now I select all
this line I want. Next I want to separate
from this object. I want to make this
another object. I will go with shift
D. If we go with, you can see that
we can move this, but this is still
part of the object. To separate this, we need press P and separate
by selection. Now if we select this, you can see that we select
only this edge here. And I will go with Try Click
and set Origin to geometry. I want to keep this edge here because we need this
for this part down. But I want also create another
one for this fence here. I will go with shift D and Z. I will move this slightly
up now I will go to Tab. It's step to edit more. Then I will press
A to select all. And this part here is height
about maybe 1.2 meters. I will now press for Ex, for the axis and I will type 1.2 Now we extrude
this for 1.2 meters. I think this will be enough
without clicking anywhere. I will duplicate this one more time for this
metal part here. I will go with D and
I will bring this up and I will again press
separate by selection. Now we have one for
this metal part, we have one for this part, and we have the pass
for this fence here. Okay, let's start
with this part down. I will go to edit mode. With tab I will press a, let's go with extrude this
on Z axis, about here. Now I will press A to
select all this part and A extrude along normals
with holding shift, we can move this slightly, but I will go with control Z to undo this step
because we have problem. And I will again go with Z
to just extrude this up. You can see that when we press A and all extrude along normals, you can see that this part out, but this part here, go inside. I will go with control
Z to undo this. That's because of wrong
phase orientation. If we go here under overlays and if we enable
this face orientation, you can see that this one is
blue and this one is red. We need to fix this.
And we can fix this if we press
A to select all. If we now press F three. And let's go with
recalculate outside. Let's see how this looks. This will now work. All these faces
are blue outside, but we also need to
fix the faces here. I will do this manually. You can see that some of these are in the wrong direction, and I will select
this red manually. Now I will press F three and
I will go now with flip, so we can flip these normals. I just want to make blue all these faces
which go outside. Okay, F three and flip. Okay, let's try to
explain how this works. In blender, we have positive and negative face orientation. Blue is correct and
red is incorrect. Basically, when we add, for example, another cube, we can see that we have. Blue or correct side outside, but let's isolate this
and red color inside. But blender doesn't know if we want to place camera
inside or outside. So if we want to make
render like this, this is correct but if
we place camera inside, this will not be correct. This red or negative
face orientation can affect bed to our
shading or textures. Texture can look different inside of this cube and outside. But in this case, for example, we know that we will place
camera outside this cube, so we want to keep
blue color outside. Let's say how we can create
negative phase orientation. For example, if we go
with shift and play, it is not same if we
extrude this out or down. For example, if we go with Z, we can see that we extrude
this blue phase orientation. But if we move this down, you can see that we now create this negative phase orientation. Okay, let's now delete this
and let's back to our scene. We create this red or incorrect face
orientation in places we don't want this because
we extrude this in opposite direction that we need. We can fix this quickly. For example, if you
press A to select all, I can press three
and I can go with recalculate outside
or I can press flip. In this case is same for
this fence part here. We just need to be sure that all faces inside are same color. In this case is not important, is this blue or red? Because we will create
this fence here. But for now, it's
important that all parts inside this same color
also with this part. Because when we use A or
extrude along normals, we get problem like
we get before. Now because all
this part is blue, I can now disable this
phase orientation. And I can go with
tab to edit mode. And I can press a to select all. I can now go with all and
extrude face along normals. And you can see that
now all the go outside. When I have selected this, I will go with control
B to make bevel. Okay, we now create
this part here. Okay? I will go with
control Z because I want to make this bigger. Now, whole extrude along normals and let's
make this bigger. I will now press to scale
this inside a little, okay? And we can now go with
control to bevel, easiest way to create
this rounded part here is with curve objects. We can now select
this edge here, but this is for now just edge. We can go with right click and we can cover this to curve. Now this is curve, we get
this curve properties here. And under geometry bevel, we have this depth option here. With holding shift, I
will move this slightly, I will basically this
curve here if you want, you can add more resolution
here and also here. For now, I will not
convert this to mesh because I won't keep
these settings here. Maybe this is too thick, but I will see later. For now, I will just go with Z and I will bring
this slightly up. Okay? The last part we need
to create here is this fence. I will simplify this, so you can see that
this go with zig zag, but it will be a little
too complicated. I will just go with control R. I will start adding
loop cuts later. We will convert
all these loops to this mesh control R, and let's just scroll mouse
up to add the loop cuts here. Okay, And now we can select this object and we can add one modifier which
is wirefdifier. This modifier will basically
remove faces and it will, it will add thickness
to all these edges. Okay? And we can now
withholding shift, move this thickness to
increase the thickness. And I will click here to
boundary this without. And this is basically
close the faces here. If we now want to add one level here, we
need to apply this. But let's see,
thickness of this. I think this is pretty good. I will keep this about 0.5 and I will now add
thickness to this. We can do this later,
but let's do this now. I will go here to Apply. And now this is basically
just mesh without modifier. And if we go with
tab to edit mode, we can press A and we can
go with control B to bevel. And we can add just
one segment here. Because if you add
more segments, this will be too heavy
for your computer because we have a lot
of this fence here. Okay? But again, if
you go with right, can say smooth, this
will look smooth. And I will now enable
this out of smooth, you can play with this angle. Blender will basically smooth any angle which is bigger
than this value here. You can see that this
is about 35 degrees. Okay? This is how I this
part here last time. Let's see how this
look in my renders. We can see this part here. And of course also here, I think I last time
create also this part. But what we can do, we can basically go with she Z. Maybe we can bring this part here because I see also this
on this reference image. Okay, let's like this
for now and we can make this metal part bigger
GC to bring this little up. Let's keep this for now.
12. Finishing the fence: Let's now practice
on this part here. We can select this edge here, and let's again check
this face orientation. This is all blue. Let's
go with tab to edit mode. I will select this edge select
and I will try with old. This now works with select all this loop and
I will go with shield Z. Bring little up
separate by selection. Now I will select this part Z. Bring this little
up tab to go to edit mode A to select all. And now for z axis and 1.2 or if you have a
problem with this, you can just press and
you can move this up. It will work, but I will
want to be precise. I will press Z 1.2 Now I will press L to select just this part
separate by selection. Let's now select this. Okay, now this is a
little hard to select, but I want to select
only this edge here. Okay? So achieve the Z, bring this up, try click, convert this to curve. And now we have curve
properties here. And let's bring this
depth to about, let's see, value I use here, 0.84 and we can just
copy same value here. Okay? And let's also
increase resolution A. Let's go with the GC
and bring this up. Okay, let's again select this edge here to
go to edit mode. A Z with holding shift I will
move this slightly here. And let's now check again. Face orientation, again,
we have problem here. And let's select only this part. And if you press numpkey, we can isolate only this part. If you cannot find this Nups key or you have
named, you can go with View. Local view and to local view. Again, local view and
to local view or Numpy. Let's now this again because we have every
other red face, we can fix this only manually. I will select this phase, withholding shift
to add selection. I will again select this
phase which is ready outside, and also this one. Now I will press three
and I will go with flip. Search for flip. Now we
flip all these normals. Let's now back here
with numpalash key. And let's do same
with this part. Numpaslash key,
Select this phase, which is read
outside this one and this 13 flip and now
we fix this problem. Let's now disable this
phase orientation. Let's select this part. Down tap to go to edit mode. All extrude along normals, extrude this outside A to
select all control B to bevel, to bring this little down, I will go with A and shift D, Z to bring this here. Okay, Now we just need to make this fence to go to edit mode, select and control R. Okay, now we can go again
with Napeslski to bring this here and the
coherent search for wire. Let's increase this thickness. Let's press S to scale this down because now this
intersect with this part. Let's compare with
this one here. I think this look pretty good. We go with value of 0.05 and we can later add the same
value for next one. Let's go again with S Z
to scale this lit up, I will apply this, okay? I will go with
control and I will enable this boundary
to close this part. Okay, let's go with apply this
tab to go to edit mode A. To select all control B and
add just one segment here. Okay, control B. Okay, and let's just
check double vertices. So I will press three and I
will search for merge by.
13. Placement of columns: This is what we have
for now and I will go with Numpad seven to
top portographic view. I will enable this
reference image in viewport and also
switch to X, Y mode. And if mode, we can now
continue with adding details. And if you look these
cubes on this floor plan, we have a lot of them. These are the columns here. You can see the columns
here. Let's now create this. I will go with shift
and right click, we can place origin here. If we now go with
shift A and cube, we can add cube, but this cube
is by default two by two. I will say this axis 5 meters, because we have 5 meters between the ceiling
and the ground floor. And I will bring this up, I will say this x
and y axis to one. If we go to solid view, you can see that
we intersect here. We need to place
the 22.5 which is the middle of 5 meters because the origin
point is in the middle. If you look this reference,
you can see that. Let's go to X remote. You can see that
this is too big, but it is impossible. This is about three by 3 meters. But this is impossible
to be big like this. This is just okay, I think I figure
out what is this? If you look this reference, you can see that we have
these holes involved. This is not just this part, is not just this column, it is also holes
in this ceiling. But this column is maybe
0.9 or 0.8 meters. Okay, if we remove x ray mode, let's go up and let's
find third floor. If we enable this in viewport, this should be stick
in ceiling here, but I will now disable this
third floor in Viewport. And I will now go with
naptkey to isolate this object so we can work
only with this object here.
14. Assets: I try found better images
than this one for reference, but I didn't found too much. Mostly these images are like this one brewer
and far from camera. I decided to use for this tutorial my last
object as reference. This is what I do
last time and this is how this column look like. I will basically take
a screenshot of this. I will use this as
reference for modeling. In this tutorial I past this image here in
reference folder. You can use this and
you can use pure. But you can also import
reference image inside Blender. When you see the arrows, you can go with right click
and horizontal split. And you can open
here Image Editor. And now you can click open and I will now open
this image here. We can keep this reference image here and we can
always take a look. When we start modeling, there is one thing I
will show you now. I will share original
blender file from which I render
all animation. But I also prepare separate assets of all assets
I use in this project. You will get this blender
file and let's see how this looks here. A assets, basically all assets
I model from this project. Let's go to here. We have here all lighting
assets I use in this project. And here is also this column. If you don't want to model this, you can always take
any of these assets. But for the purpose
of this tutorial, we will model a lot of things. Again, before we
continue with modeling, let's quickly go
through these assets. I will go with it. Click because I enable
this lock camera to view. We have here lighting
assets and columns. And we have the wheeled photos are basically from my journey. I generator and I
place this over all of this mall here, stickers. I put a lot on doors, windows, and glass things. You can see example here. I place one here,
another one here. And through all the small, I place these tiny
stickers here, You can see the photos. Next is this bigger details. This is high detailed
guest service we will use in this tutorial. I think we will model
also this later. We also have this bench
and chairs from mall, and the three things are just for background
or inside stores. I use this a lot. Inside stores,
this simple object here is just one column
with projected TV here. But if you isolate this object and if we
go to render view, you can see how this
looking render preview. Very simple model
can be very useful in background or inside stores. Here we have more
interior stuff, so all these things are pretty
low poly but works pretty good inside stores and in
background for example, you can see this
model from here here. This is not great model, but it just feel that
something is inside the store and it is much better than this
store is just empty. You can also note this
column with TV here inside. Next thing is this
interior emissive rooms. This is basically just
low poly interior. To render preview, you
can see how this look. This is looking render preview and if we go
to solid preview, you can see that
this is basically just one cylinder
with a few cubes. This is how this
looking render preview. I think I place one of these
stores inside this place. And also here we have the
emissive interior stuff. Basically just a cubes
you can put inside store, and your store will
look much better. I also create a few walls with
a few different textures. Basically, I make one Jpeg
image with few brick texture. And this is very useful
also to just place inside stores to make wall with
another variation of texture. Next thing we have
here is brand names, basically all the stuff
are just logos of stores. You can see a lot of
this in render here, another here, and one here. Basically, I model a
lot of these things and I save a lot of time later. Here we have Romo materials and I watch a lot of
references from original more, so I want to keep this as
close as possible to original. This is also very useful. We can see a lot of
this stuff here inside, one here, another
one here, one here. This one here is also from original model.
Another one here. Last thing I say for you, but the most important
thing are these stores. We have 30 stores here. And you can see that
most of them are high quality with
a lot of details. You can see how this look, all of them are textured and
with bump and roughness map. Let's look this one for example. You can also note that most of these stores have interior and all these tiny details like stickers and columns.
And these things. You can also note
all the roughness and bump details
which all stores. I will make separate video
how to use all these assets. And all this will be
ready for Asset Browser. I add some things before in Asset Browser and I will
show you how this look. When you place this
in Asset Browser, you can just drag and drop
and this is ready for use. All these stores are
basically one object, you don't need to care about
collection and the thing. It is very simple
to use a lot of these things we will
model in this tutorial. You can use assets, but my recommendation is also to watch tutorial
to learn something.
15. Lamp modeling: But let's now back to modeling. And now we will model this lamp. Here. You can go
with a new object, but what I usually like to do, I go to edit mode
and I like select one part of this object and
I usually go with ship D y. And now I can scale
this down or with S Z, scale this on the axis. But one thing you need to know this is now
part of this object. If you want to
separate this object, you need to press
P and separate by selection can work
only with this model. One thing you can also do, you can press again
Napeskey to isolate only this object here because we don't need
this column here. Okay, let's now
create this bevel. You can see that we
have this bevel here, but I also want to
create this hole here. I know that it will be easier
if I isolate this part up, because if I start
creating this hole later, I will have problems
to create this bevel, I will go first strike click
and set origin to geometry. Now I will go with
to go to edit mode. Control R for loop cut. And I will scroll mouse
up to add two loop cuts. Now I will press SZ to
scale this on Z axis. Okay, Now I can create be vel, if you remember we create
bevel with control. If I press A, you
can skip this part, but if I press control, you can see that we
cannot bevel this vertices because this
is just a plane. We need Bevel vertices. For Bevel vertices, we have another shortcut which
is control shift. I will select the
four vertices with holding shift and now I
will press Control Shift. And now I will scroll mouse
or just move mouse down. You can see that we
have one problem. I will press Escape and we need back scale to one
control A, apply scale. Now we can again go
with tab to edit mode, control control shift B. And we can now bevel this, but we need opposite direction. We can see that we have bevel in opposite direction and
there is shortcut for this, and short cut is for profile. I will go with control
shift to bevel. Move mouse up or down, and scroll mouse up to
add one more segment. And now I will press hold on your keyboard and we
can move this inside. Just click, okay. Now we create this bevel, and let's now go with two on keyboard to switch to
select or just click here. And now I will go with control R to add
one loop, cut here. Click and control to bevel
this scroll mouse down. Okay, now I will, holding shift, select these two edges and
control again to bevel this. And let's now press
Delete faces. Now we get the holes here. This is just a plane,
we need thickness. And we can go with a and
y to move this on y axis. Before I click anywhere I
want to bevel this edges, I will go with control. Now let's bevel. But you can see that
this also go to negative direction or
opposite direction. You can keep this if you like, but you can again press P
and you can change profile. Okay, now we create this battle. Let's now create
this light here. I will go with Numpad
seven to top portographic. I will go with shift A
and up if you want to, Before you click anywhere, you can change
resolution of this. But I think this is good enough. Maybe I will go with 24
to keep this little more. And we can now move this
here and press to scale. Okay, now I will go with Ped, one to front orthographic, but this is all down. I will bring this up about here. And now tab to go to
Edit mode, Wif mode. And now I will select this top part and
press delete vertices. Okay, And now L to select all and to scale this on the axis, I think we can also delete this part here, delete vertices. Let's now go with LZ. Okay, let's now create
this bottom part. We can do this easy. I will remove this x ray mode. And let's go with
face selection. Select this part here. If you want to
make this smaller, you can just press to insert, But I think this is okay. I will just go to move
this on Z axis down. Okay, I think we
can insert this. I will press to insert this. And we can now go with
Z and move this down. I don't need too much
mesh here, so I can, if I press, if I press
delete and limited the sole. Now we can create
this part here. We can create this
easy with control R, one loop cut here, and one up
now with three on keyboard. Switch to face selection
to select this loop. Old to extrude this along
normals and move mouse out. Okay, now let's create
these two small parts. Control R to add one loop. Cut control or bevels,
crow mouth down. Now, withholding old, select this loop and withholding
shift and old, we can add selection
and select this one. Control B to extrude a long normals and
move this out again. Let's now add a few bevels. I can go to select to add
selection and old shift alt. Let's select these three
parts and maybe this one. Now, I will go with
control B for bevel. But I think I will add
only one bevel here. Look here. Okay, this loop loop. But we can go with right
click and say smooth. And just be sure to turn
this out of smooth here. Let's now create
this cold part here. We can go with tab and control
R to add one loop here. Now I will go with selection
to select this loop. And now I will go with shift D. With holding Z, I
will bring little. Now I can press and
separate by selection I want separate this object from this one because later will
be much simpler to add this gold material and I think it will be easier
to model this part. Let's go with right click
and set origin to geometry. Let's as to scale this with tab, we can go to edit mode to select all and all extrude along
normals and just move this out. Let's now press L to select this part
here and ship the Z. And move this down.
And now I will press S to scale this about here. Okay, now we just
need this part here. I think I will need
more mesh for this. I will press L over this part
and I will click subdivide. Now I get a double mesh here. If I now go with old, I want select this loop here. There is one option
in blender which is called check disselect. If we go select and click Check, blender will select
every other of this, but we can increase
this value here. We can select less. This
will press to insert this. If we now press as we get, scale this to this bounding box. But if we switch from bounding
box to individual origin, we can scale each of this
piece by individual origin. You can imagine that each of these pieces have
one origin here. And now we can press
to scale this. Now I will go with Z. To move this down, I will
now back to bounding box. We again have one point here, and we can now scale this
to this center point. If I now press scale, we get this. Just bring this up. Okay, I think last time I do
something similar like I do. Now if we go to object mode, we can see that this is
separate object from here. Let's now make this
small part here. I think I will go
with amped one. And I just want place this
in middle of this object. I know that this is in middle. I will go with shift
rightly to set origin here. Let's go with another
cubes and scale this down with an pad three. We can go to side view. And now I can move this here. I can just press to scale
this little more and y to scale this on y axis. Okay, Let's see how this look. I think this part is straight, but this one is curved. But let's check
thickness of this. I think we need to scale
this little down and then scale on Y axis. Let's go with not three, let's bring this up. And now I will go with shift D, Z to bring this one down. Okay, what we can do now, we can go with tab to go to Edit mode and add
one loop cut here. Now I will go to x ray mode. I can see this edge here. And I can select this edge here. This one should be here, but this one should go down. I will bring this one down. Now I will go with control here. But let's first check
scale. Apply scale. And let's go with tab control to bevels, okay? Something like this.
And we can also add edge to this one
tab to go to edit mode. And let's bring this little
up control and bevel. Let's add a few levels here. Let's see how this look. Okay, let's go with, I will do this manually, but you can press A
and go with control B. But then we create a lot of unnecessary loop
in this edge here. I will go with and shift all. Just select these corners. Let's go with control.
But just one lot. Okay, tab, select this one. Tab again to go to edit mode. Here I will just
press control B. Okay, Again, I need to apply scale tab control to
bevel if you want. You can also add here loop cut and smooth this to make
this less perfect. All these three parts
are separate parts, but we can join this
with control J. Now, this is only one object. Let's now add this
small part here. We can go with tab to edit mode. And we can just add one look
cut here and maybe one here. We can now grab these
faces and move this down. Okay, And if you want, you can grab these four faces and you can add another bevel, just scroll mouse down. I want only one segment here. Now what I will do, I will
join this to one object. If I select all and
go with control J, I can still separate this part. If I go to edit mode
and if I press L, lender will remember that
this was separate part because we separate this
object from this one, it will be easy later to add new material
for only this part. Another shortcut for creating. Let's say we want select
only this part down. We can just click here
and we can go with control numpad plus
to expand selection. This is easy way to select, for example, only
this part here.
16. Lamp and promo material modeling: You can see that we have
two variations of this. One is without this part and
one is with this part here. Here is example with this part here which have some promo
materials or something. Let's now create
this in Blender. First I will go to Object mode, and let's go with Shift D, Y, move this here. And now we can go with
Umped three to side view. We can make another variation
with this part here. I will go with Numpad one. I will again go with
shift and cube. Let's this down. You can see that this
is stretch on axis, but it is smaller on x axis. I will press X, okay, Now I will go
with Numpad seven. And let's move here. This here. Now, I will also
scale this on y axis, y. This should be a bigger
than this part here. I will scale this little more. Let's now go with n
three to side view. And let's bring this
down maybe a little. Let's go with control
to apply scale. Now I will go with control
tab to go to edit mode. Control to add and
scroll mouths up to add, Tu lop cuts here. Let's go with y to scale
this little y axis. And now I will go to x ray mode. I will bring these two parts up. Let's now bring this little
more up, this one down. Okay, Now we can just smooth this with holding shift and
select these two parts, these two edges and
control to smooth this. But one thing I want
to do here, scale. You can see that this part
is thinner than this one. I will select these two edges here and I will press
to scale this down. Maybe to scale this
only on the axis. We can also select
this part here. And we can press to
scale this down. Let's go with nope
three to side view. And now I will select
this edge here. And with holding shift, I will add selection
control to smooth this. Okay? But I want to
make this more intense. I will bring more down. And this one more up. Okay, let's now go with
control to see how this look. Let's go with Olga shift
to select these corners. Let's select also
this one with shift. And let's go with
control B to be level. This scroll mouse down to add
maybe only one lo cut here. Okay, so we get this part. Now let's go with the shade
smooth and out of smooth. Now I will again go with mesh, shift and mesh and cube. And let's see this down. Let's to this part here
to go to side view. Bring this down, S, Y, Z. To scale this Z, Xis. And place one here. And also x to scale
this on x axis, control A applies scale. And we can go with
b to edit mode, and we can go with
control B to add. Okay, now we just need this paper because I want
to follow this shape here, like in this example. I will start with
this object here. I will go with tab to edit mode. We can select this loop
here, withholding control. I will shift the Z. Bring this numa three for side view and let's
scale this little down to make this smaller. And now I will go with Z. We can line up this part down. If we press Z zero, we line up this on Z
axis by value of zero. Let's try press Delete, Limited the soil to
see what happened. Okay, we can clear
this unnecessary mesh and we get only this part. Later, we will create
material for all. The last thing I will do here, I will select all this and control J to join
this to one object. Now, this is only one object, but let's also do
with this control J. And now we have one variation
and another with this part. If we now back to our
scene with no plash key, we can grab these two parts. We can also grab
this column here, and let's again go with Nph key. Let's now go with
Np seven to top, portographicZ or minus N. We can place one here. If we go with ship D, we basically duplicate
all this mesh information and we basically
make another object. But if we go with
all the in blender, we just make instance of this object and
that's what we need. Now alx, I will now go with x minus to flip
this on x axis. Let's place this one
here, for example, if we go to edit mode and if
we change this mesh here, you can see that this also
affect to this right side. That's what we want because
later when I add material, it will also affect this one. We don't need to do this
on both sides because we use old D. But for example,
make another variation. If you want project
here, another texture, then here you need to
delete this and you need to go with side
another object. Let's now go with
old and y here and let's go with y minus one
To flip this on y axis. And let's place one here. Okay, let's look reference here. We need to bring
this a lot down. I will select all these pieces
and I will move this down. Okay, this is how I
create this column here. One thing I need to do here, I need to this edge. Let's first check scale
Control A, apply scale. Let's go with tab to edit
mode and A to select all. And let's go with
control B to be, I think I will select only this, four edges here and I will
barrel only this control. And let's play
with this profile. If you hold, you can
change this profile. This is then 1 meter,
maybe too much. I will press, has to scale this. I will type here maybe 0.9 okay? And I will keep this too. I think we need five here. Just one thing I need
fix now I need to move to this wall. Okay, let's, again, you can
see that we now change scale, but this is not so important
that we can now back scale to one later. We will create material
for this part here.
17. Gold material: We can now start with Materials, and I will open new tab here, just right click when
you see these arrows, Horizontal split,
I will open here, Shader Editor, But when
we work with materials, we also need UV editor. I will split this window here and I will open
also here, UV editor. I will also switch to
Material preview here. First material I
will create here. We need to go to
Material Properties here and I will create
default material. This will be basically white concrete material or white cluster we will use
in all walls in our scene. But we will back to
this default material. I will first create
gold material. Let's now select this object and let's create new material. And I will call this gold. First I will choose color
which look like gold, which is something like this. But I think I will copy color I used last time in blender. You can just put mouse over
this color and you can press control C. You can
go here and press control, and you can see that
we change color, but you can also
copy this he code. Because you cannot
copy this color, you can just copy my hex code if you want
exactly the same color. Okay. And because gold is metal, we need to bring
metallic to one. Gold is also shiny, so I will bring
roughness all to zero, but we will make a variation
in roughness later. This already look similar
like gold or fake gold, but we can improve this. All materials have
variation in roughness. If you look this object here, you can see that this
is perfectly shiny, but no material which
is perfectly shiny. So I want to add
variation in roughness. For this, I usually
use concrete texture. Last time I used this one from Texture.com but because
Texture.com is not more free, I found one this
concrete texture on MB and Cg.com which
is free CC zero. You can download from
this link if you want or you can use
any of this you like, but I will also share
this texture with you. So you can just bring
this in blender. Okay, this is my
old blender file. I need to bring this here. You can just drag
and drop this here, or you can just copy
this address and you can search for shift
and image texture. And then you can
open this image. When we work with materials, we need one add on which
is called Node Wrangler. If you are brand beginner, you need to go to Edit
Preferences, Ads. You need search for Node Angular and just click here
to activate this ad. Also click here to click
here and say Preferences. Next time when you open Blender, it will be activated. Now when we have the sled control shift and
click on this node, we can see how this texture
look on this object. You can see that
this is stretch. And that's because by default Blender UV map
to project texture. You can see that if
you press control, select this node
and press control, you can see that
Blender by default. But you can change
this if you want. But I will make this to U and we can now
create our UV map. To create UV map, we
need to go to edit mode. Press A to select all. If we press on keyboard, we have a lot of option here. Mostly I use Q projection
or smart QV project. And let's go with
the Q projection. Okay? We can see that this
is now correctly projected. We can also play with
scale on left here, where is UV editor? If I press A, I can select all. And now I can press S to
scale this down or up. Okay, now I will go with color M. We can tweak this color. If we move this on right, we add more black color. And in blender black
color mean value of zero and white color
mean value of one. We need now back this material with control shift
and click here. If we now plug
this to roughness, we will get variation
in roughness. But because we want to make this pretty shiny
with some parts, which will be dirt, I will move this
black color on right. But I don't want
completely shiny because black color
is value of zero. I will bring this
little to white, okay? And also this white color. I will bring little to black
to make this less dirt. Okay? This is a
little too tense, so let's bring this
closer to black. Because we before use
all we don't need to change for this one. So it will be exactly the same, like this one here. I think it is still
a little too shy. So I will bring this
little up. Okay.
18. White glass material : And let's now create this
white glass material. We can also create this easy. And I will create first here. First I will go with new
texture and I will call this we bold because we will create later
variation with light on. Now we need to
apply this material to this part and I
will go to edit mode. And let's see how
we can do this. I think we can go with
all this middle loop. I will go with control nap to expand selection
a few more times. Okay, now I have
selected this part. I want to apply this
material and I will now press a sign here
to make this shiny. We can also bring
roughness almost to zero, it will be shiny. But we can also use concrete. We use before concrete
texture I ever search for image and I can now find
this concrete texture here. Let's again control shift, click here to see how this look. We can scale this a little. I will scale, I will
again go with color M. Let's back this material
with control shift. Click here. Let's plug
this to Roughness. I will now go to object mode. And let's now move
this to right. Okay, we can preview this better if we click
on this node here. I don't want to make
this completely black. Let's keep some
white parts here. And I will also bring
this to black, also, this closer to it if you want. You can also use concrete, concrete texture in color input. You can go with
mixed color here. Let's put this value to
completely to white. And let's use this
concrete texture value a. And let's now plug
this to base color. Now we can choose
how much we want. This, if we go all to left, we basically choose value a. And if we go all to
right, we choose value. But I want to keep
this almost wide. I will just add, most likely to left. To add this third part, I think I will create
another color M because this one for roughness is
not good for base color. We can again, go with color Mp. And we can plug this here. And let's go with control
shift and Cl here. I want to keep for value a, I just want some parts of black. But we have here a
lot of black color. I think I will invert this. Okay, so this look much better. And let's now plug this two. I will plug this to value B, and I will now choose here
completely white color. We can again use this slider. But one thing you can do, you can set this to multiply
multiply blending mode. We'll keep only darker
parts of value B. Now with multiply blending mode, we can keep on the
dark parts here. I will now move this to
left to reduce this part. But if you want, you can
also change color of this. For example, you can add
here maybe brownish color.
19. Emmisive material: So this is light of variation, but let's now create
light on variation. I will select this object here, because I want to turn
light on this object here. I will first select
the gold material, and now everything will
be this material here. But you can see that we have stretched texture
and we need again, go with tab and press eight
to select all and projection. And now maybe scale
this little down. Now I will do same
as I do before. I will select this
loop here and I will press Control lamp path
plus to expand selection. Okay, I will add new material here and I will
select this white bulb off. And I will press as sign. But now I will also
create new material here. I will press and I will again
select this white bulb of. Now I will click here and I will create new
variation here. If we click here,
we basically create new material base of
this node set up. Okay, And I will rename
these two on now, I will go to Edit mode. We have selected this part, so we can click here, a sign. But if you don't have
selected, for example, if you go to Edit mode
and click anywhere, you can just click here and select one part which
use this material. And now you can click Select. Blender will select
all these parts which use this material. And now we can
switch to this one, and we can click Assign. Now nothing happened because these two materials are same, but we will now start
changing this material. Because I need light here. I will go with emission node. I will miss the two materials. If for example, plug here, you can see that we now have
emissive material here. But I will mix these
two materials. We can do this if we
go with control Shift, right click and
you can just drag, you can mix the two materials. Or you can also go with
shift and mix shader, because this is sad,
this is not color. In this case, we use shader. If we now move all to left, we get this node set up here. But if we move all to one, we get this emission node here. We can for example, increase the two value of 21. Thing you need to know,
this is material preview. This is not render preview, but we can now switch
and enable preview here. But before I do this, I will
switch from V to Cycles. What is different between V
Render engine and cycles? V is designed for game. It is much faster
but less realistic, but for this we need realism. I will use cycles which is
slower but more realistic. I will also switch to GPU. This will speed up
your render process and I will bring samples here, maybe just 222 and maybe
here 244, final render. This is Port and we
have Port render here. If we now click here, you can see that Blender start counting 222 because
we said here 222. But if we press 12,
Lender will, okay. We cannot press F 12 for now because we
don't have camera. But this value of 40 will
be for final render. We are now in Render
Preview and you can that this is much slower. That's because
Blender now calculate all these lights bouncing
and if you want, you can here under light path
change this light bouncing, but I will keep
this on the fault. Now one thing you can
know that this is pretty bright and not only
from this light here, but we have also color which
come from world settings. I usually bring this
almost to black. In this case, I don't want any lighting which
come from outside. I just want all lighting
inside this mall. Okay. We now have
a real preview of this material and we can now try improve this material here in real world with
emissive materials, we have always parts
which are less bright. For example, this part here,
which are more bright. We can add quick variation
with noise texture. I will go with shift and
I will search for noise. We can again go
with control shift. And click here to
preview how this look. I will go with color ramp again. Let's tweak this little
to make more contrast. And now this will
be more visible. But we can also play
with this value. I think the scale
of y is too much, so I will bring this to one. Okay, So we can create some variation with more light and less light with
this color ramp. Now I will go with
control shift and click here to back
this material. And now I will plug
this to strength. You can see what we get. But now we need back some light because we lose a
lot of light here. We can do this with nodes. I will go with shift
and I will search for now I will
multiply this value. I will choose here,
multiply but not with value of 0.5 I will value maybe ten. Let's see how this look. Okay. Now we can play with
this color ramp here. This is too intense, Let's reduce this black
color about here. And you can also play with
this scale value here. I want to make this smooth
and not too intense. I'm not sure about
this value of ten. We will see later when we put this in more.
How this look. One thing we can also do here, we can change color, light. You can do this here. But there is one nodinge ladder which is called black body. So we can search for black body, we can plug this here. This node basically represent
temperature of light. If you go to Google and if you search for
black body color, you can see that this
value go 1500-12 thousand. This basically go from
orange color to blue color. We have another graph here. I want between four or 51000. I want keep pretty white, but I also want to add little orange color
to this light here. Let's try with 3,500 but I
will go with 4,500 here. If you want more light, you can always change
this maybe bit to 20, but we will see for this later.
20. Plaster material: Let's now back to
Material preview. And let's create the
default material reviews for this column here. I will again go with
concrete texture here, so I will search for
image texture and I will select this concrete and with control shift
and click here, we can see how this looks. And we can go with to edit
mode and UQ projection. Okay, Now I will go
with mix color here, because I want to keep
this mostly white. I will set first color to white. I will plug this
to second input, and let's plug this
to base color. We can also go with color. Let's tweak this little, okay? And let's now back
this material. And we can now set
this to multiply. Now we can choose
how much we want. This dirt part here. I will reduce this a lot. I don't want this to be visible. We can use the same
texture for roughness, so we can go with
another color ramp. Let's plug this here. Let's see how this looks. I want to make
this pretty rough. I don't want too
much black color. I will bring this up, okay, And I will bring
this little black. And now we can plug
this to roughness. If you bring this black
color, bring more to black. You can see that we will
get the shiny parts. Let's just for move on. Right, you can see that we
get the shiny parts here. But I think this is too intense. I will bring on left to white. We can also use this for bump. I will go again with ship D to make another variation
with this color rampant. I will go with bump and we can plug this to height
and to normal here. Now we get a lot of bump. I will now tweak
the settings here. I will reduce this
distance to maybe 0.1 also this stye just
a slight value of this, but last time I also
download this from MBSCG. This is displacement map
of concrete texture. And let's now bring
this also to Blender. And we can use
also this for Bob. If we now go with Control
shift and click here, we can see how this look. But if we now go to edit mode, and if we press A and for
example you can skip this part. But if we scale this, we also
scale this texture here. That's because both of
these use only one up. We can fix this,
go under UV Maps, let's rename this two. We can call this
maybe concrete dirt and we can create another
map and we can name this maybe to concrete for bomb. Okay, so now if I select this up and if
I go here with up, I can now choose
this concrete there. Ten, plug this here. And now I will go here with another up and I will select
this concrete for bomb. Okay, now when we have
selected this up here, you can also see here, okay, you can also
see that we use this second map now and we
can now go to edit mode. And if we now change
scale of this, we don't touch and we don't affect this
first texture here. Okay, now we can play only with this concrete for bump up, but I will use very slight
value of this texture here, so I will not care
too much about this. Let's now back
this material here and we can now go with
another bump node here. But because this time I
will not use color ramp and we need only black
and white value here, I will say this to
non color, okay? This is not so important. It will also work without this. But this is correct
way how we do this. Now we can plug one bump to another bump and both will work. I will plug this here, you can see that
we keep this one, but we also add another
layer of bump here. I will again go with 0.1
here to bring this down. Let's bring this
strength hold down, we get the small tiny details, these lines here, okay? We can maybe add little yellowish color
in color input here. We can add more
dirt if we move on. Right, I think this is okay for this plaster
or concrete material.
21. Promo materials: We need create
only one material. For this column here, this is this flag here. I will select this object, and I will go under Material
Properties and Clear here, and I will call
this flag for this. I just go to, I think
on Flicker.com and I search for all papers or the credits or
something similar, and I make colors of
these two textures. We can now bring this here. Let's just plug these
two base colors. Now I will press Step
to go to Edit mode. And let's select this part. And let's assign this
material here. Okay? And now I will go
with projection. And let's now has to scale, and we can now
project this here. I will go with x minus
one to flip this to another side, okay? But if you want to make
another variation, I talked about this before. I will now delete this
object and I will go with shift x and x minus one. Because last time I use
all this second object, copy all the values
from this one. But now I make another
variation and I can now reproject to this paper
here x minus one. And let's project this here. If you want more
clean space here, we can maybe go with control
R. This will not work. I will go with K and I
will just stick this here. Let's now select this part. And let's just scale this all
down to two yellow color. I will go with Z 90 and let's
project this yellow color. And now we have this
clean space here. Let's do this also here we can improve also this
material with mus grief texture. So we can add some bump here. Let's bring roughness maybe 2.2 to make this
little more shiny. But I will go with
grief texture. If we now press Control
Shift and click here, we can see how this look. I will bring this value. I will play with this value to get something which
look natural. We can now go it bump, We can plug this to height
and this to normal. We will get effect of crumpled paper or
something similar. But I will reduce this a lot. Maybe here 0.1 and maybe here also 0.1 It
will not be so visible, but you can see that we
get some distortion here. Okay, we are done with
this column here. Let's switch to Render
Preview to see how this look. If you want better preview, you can alas, just
go with point lamp. And we can change settings here. So I will go with maybe 200 so we can see how this
looking. Render preview. Okay, I will delete this slight. Now let's go to shading. There is one thing
which is important. You can see that in Viewport, shading, all these
materials look same. But we have one option here. When we select one color, we can go here under
Viewport display and we can change color of each
of this material, which will be
displayed in Viewport. For gold, I will add
this goldish color. Now we know that this part, this gold material and I
will go with white bulb off. For this, I will maybe
add bluish color. I know that this part is off and I will go with
reddish color. Maybe, let's add just color
for this flag, maybe green. Okay, so now we
know which material is applied on which
part of this object. And next thing I will do here, I will make variation
without this flag here. I will basically
duplicate this lamp here, and this column, and this one. And I will go with ship X. Let's now select these two
objects and let's go with all X. I will just press
Escape and Z night. Okay, what I will do now, I will select all these
objects here and I will go with control J
to make this one object. And I will also do
same here, control J. But when I press control J, I get this message that active object is
not selected mesh. I think that's because
we use all D for this. Let's try join the two. This work if you now go with control J. Now this will work. Control J again and
control J again. Okay, now this works and we have two different objects here. What we can do now, we can
go with num key to back to our scene named seven
to top ortographic. Let's now back this wire mode. And we can now place, okay
let's select this object. And we can now place this on place where
these columns go. Okay, let's duplicate
this with all the x. Let's place one here. And I will go again, all the X. And let's place another here. Let's now duplicate
this one with a X. All the X again. Let's now use this one. Holy Place here,
and al D X again. Okay, let's now select this one. This one here. Let's
place one here, all the X, let's
place another here. We cover most of
these columns here.
22. Mirror modifier: Next thing I will model is this middle part on first floor. This escalator and
all this stuff here. It is a little more complex, but I think we can do this. First, I will go to Blender, and I will open here
reference image. To move this on, right,
we need to go with middle mouse or scroll button. And now I will click here. I will find my reference
image. Okay, this one. We can maybe bring this
little up and so we can later zoom here
and see how this look. Now I will go with numit seven. And you can see here that
I will go with Ump seven. And this black cube here is
this elevator in the middle. We can go with Shift and right click and we can
place origin here. But just be sure to nothing is selected because this
object selected. If we now add new objects, this will be part of
this I will create here. And I will shift. And now we can go with x
to scale this on x axis, you can note one thing on all this part
that is symmetrical. Everything you can see on left is same like this part on right. When we know that
this is symmetrical, we can simplify modeling
process with mirror modifier. To use mirror modifier, we need split this cube on. I will go with tab.
I will go with control R. Now I will
select this side, and I will press
Delete vertices. Now I will go to object mode, and if I go here under modifier, I can search for mirror. I will add mirror modifier. And I will click here Clipping
to join this middle part. Now if we go to
Edit mode with Tab, you can see that
everything we do on left, it will happen on right side.
23. Elevator and escalators: I will now enable
this first floor. If you remember, we disable this first floor
from visibility. So I now need this first floor in view port so I can
move this all down. And let's for now disable this empty or this reference image. Okay, I will now grab this and move all
down to first floor. Okay, But I think we need to move this first
floor little down because we have now
thickness of this wall now. It is not anymore 5 meters. It is about 3.5 or 4 meters. I will just go with numpad one. I will go with, and I will
move this little down. Okay. Now I will select this T. Let's now move
this more down. You can also see
that this go all up, this is our third floor. And you can see
that is almost in the same position I will enable now also
third floor here. And let's move this all up. Okay, about here. Let's now disable again
this third floor. Let's now build the escalators here if we go with tamped seven. And if we back this
reference image, we can see where these
escalators need to be. And let's now go with wire mode. When we are in edit mode, we duplicate, for example, this phase from this object. This phase will also
be part of this object even for let's disable
this x ray mode. If we duplicate this with
D and move this on x axis, this will also mirror
modifier will also work on this separate part because this is the same
object like this one. Okay? Now I will go with
Z to scale this axis. And let's bring this up. Let's move this here. Now I will go with Numpad seven. And let's go with Z to
rotate this on the axis. Now I will switch from global to normal orientation and
we can now go with Z to extrude this on the axis. Okay, now I will just
reduce thickness of this, but I don't need anymore
the reference image. I will click here.
And let's bring this. I think we need to
keep this down but this escalator need finished
about this line here. I will bring this all down. Next thing I will do here, I will back to global
orientation and I will add one, look at here, maybe one here. I will go with phase selection. Let's select this and I will go with control lumped plus
to expand selection. And now we can just
move this on axis, but this will not
be our escalators, this is just blocking. We will download
the escalators from Internet for free and
I will show you how. I don't want to spend
too much on modeling all these details you can
see on the escalators. We can save a lot of time if we just download this
model from Internet, but we will do this later. Let's now build this big column here with these
three parts here. I will again go with
face selection. Select this part, shift the x. Let's move this about here. You can see on this reference that this intersect
with this wall. Okay, so we need to
move this about here. And I will now go
with x to extrude this on x axis and
move this inside. And also this part, this part here is lined
up with our third floor. But this go more up because you can see that
this third floor hole here. I will select this part here and I will go with numbed one. We need to move
this much more up. You can also note that this part up is thinner than this one. We can do this easy. If we go with to insert, we can move this
little up and now z. To extrude this on Z axis. Okay? I will go with
control Z and scale. Little more and
let's now go with Z. Let's now make these
three parts here. We can go with control R
and add one loop cut here. Now if we select
these three phases, we can now press to insert this, but we can also insert this
from individual phases. But I will first make this part thicker. I
will move this out. Okay, let's now
select this phase, This one and this one. And let's go with twice. I will press, let's now go with S Z to
scale this on the axis. Now I will switch from bounding both to
individual origin. And let's maybe scale
this little on Y axis. Okay, I want to scale this
middle on X axis, source. Let's now select
these three phases. And let's go with all X
strode along normals. Now bring this up. Okay, this is something
similar from this reference. You can see that this go
from this 45 degrees angle. But maybe we will
change this later. I think it will be a
little complicated to get this 45 degrees angle.
24. Elevator, details: Okay, we will see what
we will do later. This, maybe we will
keep like this, but maybe I will
try rotate this. But let's continue with
this elevator here. I want to make whole
in this middle part. And we can do this easy if
we go with edge selection. Let's isolate this part
here and also this part up. I will now, okay, let's go with control
Z and move this down. I want isolate this part here. Now I will go with Y
to move this inside. Okay, let's now make this
elevator which is here inside. I will duplicate
this face with ship. Now I will go with Z
to scale this down. Let's bring this up. I will also move this part out of this wall here, for
example, like this. And now we can select this
space and we can go with E, Y to move this out. We can also model at
this detail up and down. We can ex, this glass part. I will go with control. Add one loop cut here, another one for glass here. And let's add one here
and another here. Okay, now we can grab
these two parts and we can go with Y. Extrude
this little out. And let's add one look cut here. This part will be for glass. I will go with Y. Move this inside, okay? And let's create
this detail here. Control are here and
another one here. And one look cut also here. And we can now tu this
inside and move this inside. Now before you click anywhere, you can see that we
get the extra edges, which we don't need to
delete these extra faces. You can just click here,
Dissolve orthogonal edges. Blender will delete
this for you. Let's make this bevel here. We will do also this one here, which I will show
you one method, you can get the nice details. Let's first make this one here. I will go with control
R. Let's go with control or extremal this out. Go with control to make bevel and scroll mouse up
to add one more segment. Let's now make this bevel here which is a little
more complicated but we can also do this easy. And I will show you how just go with control R
to add loop cut here, control B to make bevel
and scroll mouse down. Now ex along normal,
move this out. Okay? Now with select and
old select this bottom part. If you now control, you get bevel like
we usually get. But if we score mouse and
add more segments here, we can shape this bevel here. Before you click anywhere, you get the Bevel properties. And I will now switch from
super ellipse to custom. Now we can basically shape
this bevel as we want. Basically, we can
drop bevel we want. Okay? You can play with this
curve here and you can make shape you like more
geometry you add here, it will be more smooth, but I think this is enough. Okay, now we have three
more levels here. I will go with control and I will scroll mouse to time to get these three
edges Control, scroll mouse, hold down all the extrude
phase along normals. Now I just want to
make a classic bevel. I will go with control B. You can see that when
we scroll mouse, we get again custom bevel. But just be sure to disable
this and it will be normal. We get a lot of details with
this bevel very quickly.
25. Fountain modeling: Let's continue with
this part here. I will go to Edit mode with Tab, and let's now duplicate
this phase here, shift y and place about here. Now I will go with two for
select, two for select. Let's move this about here. Now I will go with
three for phase select. And I will go with y to
extrude this y axis. Now I will go with
control R loop cut. Let's go with three
for phase selection. And let's go with num
seven maybe and y. Let's now go again with y. Now I will grab this phase here. Let's go with x. I will
move to this place, and now I will go with control
R to add loop cut here. And let's now move this here. But one thing I want to do, you can see that this
part is thinner. I will go to x ray mode. Then let's grab this. We need
to grab both of this edge, so we can just grab
this face here. And now I will go with,
I will line up this. I will also select
this edge here, and I will go with R Z. I will also try line
up this little better. And let's now go
with control B to smooth this part, okay? And now we get this part here. But I think I need to
move this more inside. I will go with up at seven
and I will go with undo. It will be much easier
if I move this. Before I do this, bevel, let's now move this here
and let's grab this edge. And I will move this about here. And now I can select
this edge here. And I can go with control. Okay, now I will
go to solid view. And let's select the faces here. I will select first one, and with control I will
select all the line here. You can see that this go up. I will go with Z axis. We have one part which
go up even more. Let's select these
three faces here. Let's go again with, okay, maybe we can move
this escalator a little. I will go with
control lumped plus. Let's now back this to normal. Let's move this little out. Next thing I see here, I see that this
part is very big. Maybe we can select a few of these phases
with holding shift. And I will now back to
global orientation. And I will move this about here. And I will also
rotate this axis Z. Now this look pretty similar, like this part here. Next we need to create
this wall here. I will rotate this. And I will go with control
R to add cut here. And let's now select the pass. And let's go with Y to
move this on y axis. Now I will go with R Z
to line up this Alita. One thing we can do here, we can try make this
parallel with this line. I will just move this here. Okay, Now we have
this nice corner. But more correct is to
move all these lines here. I will select all
this, and let's now move this about here. Next is this part here. I think we can select these pass here and we
can just duplicate this. There is one shortcut
for selection. If you hold control and shift, you can select all phases
between these two phases. For example, if I
select this one and go with control shift, I can select all the
paces here, shift and Y. To move this about here. I will scale this on X axis, X and y. I will also
scale this on Y axis. And let's bring this,
let's also scale this on axis to bring
this to about here. Now I will go with
all and extrude this along normals
and move this out. Okay, Now we can go with
control R here to add cut. We can select these faces and
we can go with ex y axis. Let's now just select
this corner here. We can just line up this. We can see one wall behind. So we can create this quickly. I will go with shift the
X of this on Y axis, Y. And let's move this
about he and X.
26. Fountain modeling, part 2: Let's now create these
small walls inside. For this, I will go with tab, select this object, Tab, select this face here. Shift the Y, z to
scale this down. Three to move this down. And also x to scale
this on x axis, okay? And let's scale this
a little more now. I will go with Y control R here with phase
selectionect this phase. And let's now go with,
again about here. And let's now go with control R and x. I think we need to move
this little on y axis. I will move this about here. And let's now move
it, control R here. Now I will select
the faces here, and I will go with
Z to bring this up. Now we can go with control here, and we can now connect this piece here with
this wall here. Okay? And this looks similar like
in this reference image, but we can see in this
part very intense bevel, and we can create this quickly. I will grab this
edge and this one. I don't need this one here, but I need this
one and this one. I will now go with
control B to bevel this. Okay, let's now create
this part here. We can start with
these phases here, select first one, and with
control, select all this. And let's now go with
maybe normal orientation. And I will go with ship D and Z. Let's press X to
scale this on X axis. Let's see how this look. Okay, and move this little down. Now I will go with or
extrude along normals. In our reference,
we can see that all these parts are extruded up. So we can do this quickly. I will select all
these phases here, shift and control to
switch to another area. I will again go with
shift and control. Control and shift
here control also. This one here, Shift
control and shift. Now I will go with E and Z to
bring extrude on the axis. Let's now back this to
global orientation. And I think I just need, I
need to press again and Z. Okay, now this is
extruded on the axis. Now I need to select
also this part here. I will go with control
nump to expand selection. Now I can go with old
along normals, okay? But I see one problem. So when I go with all
this part, go inside. And this outside I
think I need again, check my face orientation. I need to fix all this. I will press A. I will press L to select
all these loose parts. Or you can also press A
and you can press three and search for
recalculate outside. Okay, now we fix this phase orientation and let's now remove this from port. And I will again
select this quickly. Shift control.
Shift shift control and shift control here. And also this part now control lumped to expand selection
or extrude along normal. This work, correct? We have also this part here. Let's quickly create this. Let's go with strike
this phase shift. Y, z, to scale this on Zxis, Z to move this down. And X to scale this on X axis, y to extrude this on Y axis. Now I will extrude
this few times. X, extrude one time X. Again, I think this
will be enough. Let's now move this out, y, and move this about here. Now, what I will do, I will on y axis
one time and again. Okay, also this part here
is bigger than this one. Let's just grab these
faces and let's press C to extrude this on the axis. One thing you can here, here we have also glass. We can select the edges here. This one with holding
control this part here. Now I will go with E and Z. To extrude this on Z axis, pick and see this
black material here. We can create also this quickly. Let's go with control. R and control are here. Let's select the phases here. I will select this
with shift and all extrude along normals,
phase orientation. But now I need to do this
manually because this is just a phase and we cannot use recalculate outside or inside. With holding shift,
I will select, let's now press three and flip
now we can just flip this. Now all t extrude along normals and now we can
create this part here. I will now also press control B. So I can level this, we can create black material. First material for this object here will be applied
to all this here. I will first material,
choose this default. Now I will create this new one and I will call this just black. For this material,
I will just choose black color and all
these will be fine. I will also set
black color to port, so we can see here in port. And let's now select
the faces here. This 1.2 here. Now I will go with control, Lampet plus to expand selection. Okay, and let's now
go with control and just drag and dislect
this part we don't need. Now I can just select this
black material and assign. Now we have black material
on this part here.
27. Glass material: Let's now quickly create
also glass material. So I will bring this
shader editor here, and I will create
glass material here. And let's now isolate
this part with Nuke so we can focus
only on this part. And now I will go to
Material Preview. If we go with Tab and
with a to select all, we can just quickly unwrap this. With projection, I think we
have one problem we need fix. All the parts are default
material, but if you remember, the default material
have two UV maps and we didn't create
this for this object. I will go here, under
object data properties, we have this default map, but we don't have this concrete. Just remember these
two concrete. And you can see that now
we get something here. I will create a new one
and now I will create, rename this to this for bomb. Okay, just double
click, press Enter, and you can see that
now this is not read, that means that we have this. Now, when I have
selected this one, I will go to edit mode a. And again, projection, we
should get this lines here. You can this work, but it is not too intense. So you can see this line here. When we scale this up, we can see that we
move this line here. Let's scale this a lot to get
more of this tiny details. It increase, for
example, to one. You can the bound details here. Okay, I will not
bring this to one. I will bring this maybe to 0.2 But let's back
to glass material. I will select this
glass material here. I will go here with
glass shaders, shift and search for glass. I will delete this
principle, BSDF. I will go with Transparent. We can go again
with control shift and we can mix the two shader. And basically we will
get transparent glass. Let's now select
these spaces here. Let's assign this
glass material. Okay, I don't need to. This part, let's
back this default, just this part here. Maybe we can make
this little green, a little green effect. If you click here,
you can preview how this glass material look, but this is just
material preview. If we switch to cycles, it will look more realistic, but we need light. Of course here I will
add one point lamp here. And I will bring intensity of this light to
see what happened here. Okay, but let's back to
material preview and we can again add some roughness
details to the glass. I will search for image texture. I will again use the same
concrete texture here. Okay, let's go
with Control Shift and click here to
preview how this look here for example. You can go with, you can choose any of
this map from list. But when you don't
have, that means that we use first one from list. Because this node don't have up, that means that this is main up. We need to select this one. And let's now scale this. Let's go with color M. Black part will be shiny and the white part will be rough. I will select here, almost black color, but
not completely black. Let's reduce this white
color here or this dirt. And now we can make this material with control
shift and cl here. And we can use
this as roughness. We should get some dirt on
the glass and imperfections. Okay. So you can
see how this look. But let's play again with map. Maybe this is too intense. I will maybe add more of this
dirtiness but less intense. Okay. And I will also create
bump with grip texture, shift A and grip texture. And let's again go
with control shift and click here and let's
bring this value down. Okay, I think we need
to bring this up now. I will back this material
and I will go with bomb. Let's plug this to height
and this to normal, we get this effect. Let's now bring this
maybe 2.1 and this all down just slightly
effect of this. Bob, Let's now again wish to
cycles to see how this look. I will now delete this slide. I will back to our
scene with Napes Key. Also for glass material. I will change this
Viewport display color to something greenish. So we know that this is glass, but we have glass also here. Let's go with to edit mode. Select this face here. Let's also assign
this glass material. I see now that this column
go inside this area. But where we take a look
on this floor plan, we can see that this area
is smaller than this one. But I think this is a mistake when we look this
reference here. I think all these
are symmetrical. But we can fix this
later when I apply modifier or we can just
move this part on. Right.
28. Soil, material: Let's now create this soil
part so we can see soil here. And also on the parts here. I will select these edges
here and I will go with shield and Y to move
this on Y axis little. Now I will move this down
and let's extrude this. I will just press,
maybe we can move this on y or x axis a little, just to cover this place here. Okay, Now I will select
this part here and control. I will now go with
subdivide this few times. Now before you click anywhere, we have this fractal option. If I move this up, you can see what happens. So basically we get the
imperfections here. I will now press and
separate by selection, we can now bring this
a little up with GC. Just go with GC, and let's bring this up. And we can also go
with shade smooth. I'm not sure why this happened, but let's try it out of smooth. I think this will be fixed. Now, the last time I
covered this with planes, this will not be so visible. I just want to make
some imperfection here. Let's quickly create
new material. I will, I will click here, plus I will click here, New. And I will call this soil. I will share this texture
with you, this soil texture. And let's now bring
this little up and we can now bring this here and I will
switch to material preview. Let's now plug this
to base color. Okay, so select all
this and assign, to assign this material here. Let's see how this look, we need to unwrap this again. I will just be sure
to select this first one because we don't
have any UV map here. And go with projection. Okay? This will look
pretty good from distance. If you want to make
this more darker, you can go with hue
saturation and value node. And I will bring little down. I will also use this
texture for bump, I will go with color M because I need to cover this
to black and white texture. I will go with bump. Plug this to height
and this to normal. We will get more bump here, let's bring this maybe
0.1 little here. Let's now also cover
this part with soil. For this, I will go with ship. For this object, I will remove this radii
or mirror modifier, so we can go set
origin to geometry. And let's just cover this
part where we need this soil. I will press to cover this
and maybe rotate a little. Now I will go with Tab
to go to Edit mode. With x ray mode, I will delete all this part. I don't need delete vertices
and delete these vertices. And there is one tool for selection in blender
which we can activate with C.
You can activate this brush tool and you
can also seas part. We don't need to
delete vertices. Okay, I now delete too much but I will switch to
vertex select, select. And I can also delete
this part here. Delete vertices and see again. Okay, but this is
not so important. Now I will just go
with all the X. And let's place this here. Okay, And now we
cover also this part. I just want to bring
this little up.
29. Details: I just figure out that I
record about 4 hours of tutorial for now and we are still almost
at the beginning, so we need to speed up
a little this process. I will not continue
adding too much details, but my recommendation
here is to add bevel on these hard edges so you can select these edges
which are visible. Just go with control B. Just add bevel to
these edges because bevel will always be
visible in final render. You can see on this
reference that we have also gray color. I will quickly create another variation of
this default material. I will click here to Plus and
I will search for default. I will click here to Create new material
and I will call this. Now I will go with
Tab to Edit mode. Let's select this part here. Let's see on this reference. Okay, all this part. I will now assign
this gray color. I will change color
of this here, also inside this part. Let's select, I will try go
with control Shift and click here to try select all this
part and also this one here. Let's apply this, the gray material and also
this part here. Let's also add some levels here. Let's select this agent
with holding control. Let's try select all
this line, okay? And now control control also here. One thing we can quickly model is this metal part
and this cable here. I will just shift
here mesh cylinder. I will go with control
Z because I want to reduce this mesh density. I will say this maybe just
has to scale this down. Now move this and z
to scale this z axis. Now I will create another
material and I will call this maybe metal black. We can now go here and we can
bring this color to black. I will also bring
metallic to one. Let's go with Naples Key
to see how this looks. Now I will also go
with image texture and again with concrete texture, maybe we can plug
these to base color. Let's first apply
scale control A. Apply scale, and now we
can go with Q projection. Let's scale this up. A. Let's see how this looks. Okay, let's go with
the shade moot. Now we have metallic,
simple metallic material. But if you want to
make this more dark, we can go with ship and use saturation and
just bring while down. Okay, I will also plug
this to roughness. I will go with color ramp. Let's plug this
also to roughness. Let's move this to right and
just reduce this shiny part. Okay, let's now back with Naples Key and now we
can make cable here. To make this cable, I will
use the curve object. I will go with shift A and I will find here curve
and busier curve. Now I will go with the Y
n to rotate this Yxist's. Let's go with numped
one. Numped one. And let's go with x ray mode. We can see where is this curve? I will go with Ump
three to line up this, a little t. I will
go to Edit mode. And let's now go with x
to line up on x axis. Let's now back to numped one. Let's see our reference. So I want to make
this curve here. I will grab this bottom part. And I will go with Z and Y, Y to rotate about here. And now let's go
with, to grab this. Let's now go to
rotate this again. I will go to extrude
Z for Z axis. Let's go with the Y to line up this on Y axis, okay? And we can press
As to scale this, but I think we need
move this down. And let's rotate this a little. And now scale this. Okay,
let's move this with up. Now this is curve objects. So if we go to curve
properties here, we can go under bevel
and increase depth here. With holding shift, we can slightly increase
this depth here. And let's now try make
this more natural. I will try rotate this here. Now we can create maybe
another material. I will call this
just black, black. And just a black color here. Also in Viewport, we can
just change this to black.
30. Escalators: We can spend the
whole day just adding details to this part and
looking this reference image. But because I need to speed
up a little, this tutorial, I will now import the escalators from sketch fab and I will show
you how I do this. I paste this link
I used last time, so you can just click
here and you can paste this link in your browser. And I will just copy
name of this object. You can just, I think you
need to make a free profile. And then you can download
models from Sketch fab. I will here download three D model and we
have blender file here. Just click here to download. And now we can
download this object. This is model I
choose to download, but if you go to search, you can find maybe better model. Or we can also think
about paying some models, but I think this one
is pretty good for us. We can see that we can find
a lot of escalators model. Now when I download this, I will go here and I will
go with extract files. Let's now open this object here. This is what we get. And when you download
object from Internet, you need be careful. First you need to
check textures. But because this
object doesn't have any texture or materials, we can just check me density. I will back to default
vendor layout. I will plus and I will go
with general and layout. This is what we get when
we open Bender first time. If you now select this object, first I will check if
there is any modifier. We don't have any modifier,
but if we go with, you can see that messed density
of this is pretty high. We need to reduce this a lot because this can slow
down our scene a lot. I see that I have a lot of
me density on the stage. I think we need only
one of these stages. And then we can use RA, modifier Modifier work
similar like all blender. Blender will load only
one of these stairs and all rest stairs will be just
instance of this one stair. I will now try isolate
one of the stairs here. I will rotate this on y axis
until I see the stairs. And I will now go to x ray mode. And let's try select only one
of these stairs here, okay? And now I will go with
ship Y to move this here. And let's now go with and
separate by selection. Now we have one of these
tastes we will use later. And I will go with rightly
set origin to geometry. Okay, And let's now go
with Numpad seven and to Edit Mode tab to
go to Edit mode. And now I will delete
all these stairs. I don't need anymore. I think I can
select this better, so I will again go
with x ray mode. Let's select all this part here. Let's now go with control amped. And now I will just
press delete vertices. Okay, so you can see that
our scene now is much faster because we delete
a lot of vertices here. And let's now fix this. I will go with amped one to
front, ortographict'sow. Place this state maybe here. Let's go with an up at
seven to top portographic. Let's now place this in position and I will press S Y to scare, stretch this little on Y axis. Let's first stay here
and bring this down. Now I will click here on modified tab and
I will search for R. Let's now play
with this offset. And I think I need to go to minus one here on
Y axis, maybe one. Let's see how this look. One is too much, so we have big hole here. I will bring this down
also here on x axis, I will bring down to -0.9 I will go here, maybe 0.85 Or 0.9 also here. I will also go with 0.85 until I connect
these two stairs. And now what we can do, we can just increase array here. But we need to be in
front ortographic. We can now see how this look. Let's try increase this count. Okay, so we need to play
again with the values. I think I need to go
down with this value. Maybe 75 or 0.78 okay? And let's bring all this down to move this down and
maybe little on x axis. Let's move this about here. Next thing I will do here, because I don't want to apply this modifier and I want to
stick this object to this. I will just parent
these two objects. But before I do this, I think this doesn't look good. I will go with upped one. I think we need to
move about here. Let's again with Y to
scale this on y axis, Okay, Now I just need
to fix this part here. I will go with Tab
to go to Edit mode. And let's now select, maybe this part here. And let's go with shift D x. And let's just fix
this hole here. Okay, Now this look pretty good. And now I will
select this object, and the last selected object
will be this one here. And now I can press control
set parent to object. What we do now, when we
move this main object, this object will follow
this object here. Okay, Before we copy
this to our scene, I will go again with tab here. And now I will press
a to select all. And I will go with mesh, clean up that's in my geometry because I want to reduce
this geometry here. I will type here maybe 0.2 This now delete
80% of geometry, but I think I need to delete even more because we
have a lot of mesh here. We don't need,
let's bring this to 0.1 or 0.05 If we go to object mode, we can see that this
still look pretty smooth. We still have enough geometry, but we now have also optimize objects we
can use in our scene. Let's go to t. I will
go again with mesh. Cleanup that geometry,
but now I will back this 2.7 to delete maybe 30%
more of this geometry. Let's delete limited
dissolve also. Okay, this will delete all
this unnecessary mesh. And I think this will
work pretty okay. And let's enable this
out to smooth to see how this look low poly object. And I will also reduce this mesh a little if we go
with Tab And if we press A, we will select only
this part here because for rest we
use RA modifier. And I will also go
with mesh cleanup. That's geometry. I maybe said this
2.5 or 0.3 okay, this will still look
pretty good from distance. Now I will select both of this object and I will
go with copy objects. Let's now paste this to
our paste object here. And let's now
select this object. And this states will also follow this main object because
it is parent to this one. Let's now, instead
of this part here. Okay, So I will go with L Z. Z more. And let's try
place these two positions. And let's now bring this down. We can also use Z to stretch
this a little like this. And let's bring this
part about here, okay? And let's go with S Z again
to bring this even more down. Now I think this is on place. I will select both
of this object and I will go with all X to move
this to another side. Let's now go with Z. Okay, we use individual
origins here, so we need back this
to bounding box, and let's now go Z. Let's place another here. This cannot be
perfect because we make this side smaller
than this one. That's the reason why this
is not parallel and perfect, but this is not so important. Let's just check this part
which go down this look. Okay. Now I will just go to tab. I will press Naples key to
isolate only this object. And now we can remove
this part here. Let's go with tab to edit mode. And let's now press L only on the left side because
this is mirror object. Let's delete vertices
and we will delete both of let's now see how this
look with the stairs. If you want, you can apply
glass material here. I will go to Edit mode. And first I will press A, and I will go with UQ projection
to make basic UV map. And now I will select this part, which I know that is glass. I will apply glass
material here. First I will, I will
remove this material and I will choose for this metal black material
we create before. Because I want to maybe apply this material to this part here. If we now change viewport
color for this material, you can see that all these
objects have this material. We can check this also
in material preview. Okay, I need to select
both of this material. Let's both of these objects. So let's see how this look. Now select this material, and let's go with projection. And let's scale
this a part here. I need to create
another material. I will now just put focus
on this glass part. Let's now click here, and
let's choose also Glass here. Let's go to Edit mode
and select this part, which will be glass, this part here,
and also this one. Let's now assign
this glass material. Okay, so we have
a glass material here and let's also
play with this un grub. We can make another variation
of this glass material. If you just click here, we make another variation. And now we can play
with this value. I see that this bump
is too intense. Here, I will reduce this to 0.05 and also this
roughness is too intense. We have a lot of this dirt part. I will just move
right to reduce this. And let's also bring
this closer to black. Let's for this rest part,
create another material. And I will click here and I
will call this chrome metal. Metal. And let's now just, first I will select material
where I want to apply this. Let's select this part here and all these parts
with L for loose parts, okay? So let's also
select this part here with just press L to select this loose part. Now we can assign this chrome metal
material and now I will bring metallic or to one. And I will bring
this color a little more to gray roughness, to 0.0 0.0 point, maybe 15. Now we have very clean
row metal material, but let's again with image texture shift and
search for image texture. And let's again
concrete material, let's plug these to roughness. Now I will again scale this up. Let's go with color ramp. Let's move this all to right. Black color is shiny. I want to reduce this
a little and I will also reduce this white color. Okay, so we get all
the details here. Let's now also apply
here black material. I will go here plus and I will load this black
material we do before. And let's now go
to edit more than, let's press L to
select this part here. Let's assign this black
material just a sign. Let's do same with
this part here, okay? And now we can back to
our seat with pesky. And because we use all, we also apply this material
to the stage here. You can see how the stage
look in my last render, so all these details
will not be so visible. So you can know
that we have glass here and some metal
material on this part. And last time for
this part here, I didn't use Romtal material. I see, now I use the
default material, but I think we can keep
this Chromtal material. And let's take a look
from this angle. In most cases, this
is far from camera. We will not see, for example, that we
decimate this part. We don't need care too much
about all these details. Even here when we come
close to the stage, you cannot note this
bad mesh details because everything
happened too fast and we will add later
a lot of motion blur. This will look good in camera. Much more important thing than nice topology is to as much you can low poly because we
build a very large scene. If you care about nice topology, you can kill your blender file. And at one point you will not be able to open your blender file. Or if you want to
make animation, you need to keep
render times faster. For example, I render 6
minutes for this animation, and let's try calculate
6 minutes in second. This is 360 seconds. Let's now multiply
this by 24 frames. I render about eight or 9,000 frames here with 100 samples, I reduce this to 1.5 minute. And this is how much minute
I need to render this. If we now divide this 2 hours, I need 216 hours,
about this value. And let's now divide
this by days. I spend more than one week
to render this animation. This is my graphic card, you can see that I don't
have a strong computer, but I still can render
this animation. Here you can see
specification of my computer.
31. Third floor: This is what we have for now. And next ceiling, I will now
enable this third floor. I will click here to selectable and also enable
this inview part. If you look reference images, you can see how this look. We have this part here which is about five meter from
the second floor. But you can see that we
have this extruded part here on this reference also, we now need to create
this extruded part. And it is a little complicated, but you need just watch a lot of references
because we don't have any blueprints or floor plan we need guess where
the walls go. I see that this extruded
part follow this part, but we can see that we
have much more space in this area also. We have this corner here, this part here follow this area. But then we have extruded part, because upstairs is cinema and we need to create
this corner here. You can see on this
reference also. We also have this 45
degrees angle here. I also note these columns here. One of these go
straight to ceiling. But I think I will
cheat a little and I will follow line
of these columns. I will stick all these
columns in this part here. Let's now go to Blend. I will select this third floor and I will go with number seven. I will go to x ray mode. This part here is
where Cinema go. This is this one part here. I will go with tab to
edit mode with two to select this select and let's
add one loop cut here. I will add another
one to about here. Let's now isolate these columns. Let's add one line here. I talked before that
we have more space. Let's find this image, okay? You can see this fence
here and we have a lot of free space on
this area left and right. I will add one look at to about here and another one here. This space will be this
free space we have here. Okay, Next we have
this 45 degrees angle. And I will add out
in the middle here. And I will press control
to split about here. And let's add another
one in the middle. And control to split this. Okay, Now I can go with K
for knife and I can make the 45 degrees angles
here and enter. Okay, now we can go
with phase selection. And we can select all these
phases we want extrude, but you can try select
this wire remote. But it will be a little hard, so I will switch to solid. Now, I will go down to see
how much I want extrude. Let's now take look,
how big is this? I think maybe about 2 meters. But I will just press for
extrude and for the axis. Okay? And next thing I do, last time I press
to insert this. If you get something like this, you need press
twice or I want to remove the individual
faces twice. Once. And let's
insert this here. And now I will bring again lit up and we get
these nice corners. And if you want, you
can go more with S. Okay, I also see that this, I think this is not
90 degrees corner. So we can also fix this easy. I can select this edge here, and this one with
holding shift and press X to scale this
on x axis inside. And now we get this nice corner. I will back little,
this outside. Okay, this column here
is in empty space. I will just cheat a little. I will move this little on x, or you can also grab
this face here, and you can move this
little on x axis. This is not so important. Okay, let's move
this to about here. And also, we have the
same problem with this. One thing which is important
is this edge here. You can see this extrusion. And this is also important for lighting because if you look
at this reference here, you can see that lighting is placed on this
extruded part here. That's also how I
do in my later. You can see that
Place lighting here, We can do this quickly. I will select this
object tab to go to Edit mode selection. And let's add one loop cut here. Now I will go with
phase selection. And let's click about
here to select this loop. Now I will go with all three. Extrude along normals
and move this, do with holding shift, you can move this slightly. Let's see, how big
is this, okay? I think this is good. And I will now go with
control B to bevel. Let's first check
scale with N. Okay, We need apply scale. Control A. Apply scale now I
will go to edit mode and I will go with
control to bevel this.
32. Third floor, part 2: When we take a look
on reference image, we can see that we have three of these beams on Y axis
and two on X axis. You can also see this here. And let's now try create this. I will rotate to this area
and I will grab this face. Select this phase shift to
scale this down, maybe X. Let's all this down. Let's place one in this corner. Now I will press to Y axis, extrude, stick to this wall. You can also go
out of this world. This will not be
visible in render. Next, I will press L to
select this loose part, and I will place one in middle. But let's see where is middle. I can go with control
R and Blender will add perfectly in middle. And I will press
L and now ship X. Let's place one in middle. End again, ship the X. Let's place one here. Okay, let's now
add two on X axis. Let's take a look at reference. We can see that this
one on x axis is. Stick to this part here. Let's try this. Now, I selected this. I will go with shift x. Now I will go with 90 degrees. Okay, I will bring
this little up because now this
intersect with this Z. And let's move this
little up now. I will select this face here. And I will stick to
this end of this. I will go with num seven
to see where is this. Let's now just stick
to this wall here. Okay, let's back to here. I take a look on reference
and I see that this part here is stick to this part here. But it is a little up, but not as in our case. You can see big difference between this part
here and this one. I think this is pretty okay, but this thing here is not good. I will go with Napa key
to isolate this object, and I will go to
go to Edit mode. We still have this
mirror modifier. We can fix this quickly. I will select this one. To select this phase, we
need to go to x ray mode. And let's now select this one. Now we can play with this. And I will press Numpedkey. Back to our scene, and
let's now make this better. Okay, so I think this is much more close to
our reference image. Now I will back to object mode and select this object here. And let's now maybe move
this little on x axis, so I can press x about here. I will now select this one L, and we need another one. About here, shift the y. Let's move this about here. Now I will press L
to select all this. We have one more, I think here. Let's now go with the
control to add Bevel. Let's now try bring the
escalators to second floor. You can see on this reference. So we have two down and two on the second floor
which go to the cinema. Let's now try. I will
select these two objects and I will go with and
Z to bring this up. Let's also go to X and
y axis to about here. Let's bring this more up, okay? I will go with pat seven
to top portographic view. And let's go with x raymote. I think this should be
parallel with this fence here. I will go with Z to
rotate this axis. Okay? I'm wrong, this is not
parallel with this line. This should go more
close to this part here. I will go with z. Let's now move this about here. And let's rotate this. Okay? And let's bring this down. Okay, we extrude this too much. So let's also fix this part. I will select this part here. And withholding, I will
select all this loop. And let's see what
I also select. I need just this part
here and all about here. And now we can move this out, but because we add bevels
here, we have no problem. If we go with Y, we get this ugly part here. But we can for this, use
proportional editing, and we will avoid this problem. Let's go with GY. Move this about here. I will also go with
control lumped plus, okay. I also want to select
this part here. Okay? I think I also want to move this part here.
I will click here. And withholding
control, we can select all this loop and withholding
shift and control again. I will select also this part, and select this part here, and this part here, okay? Now, I will go with Y to move
this little inside, okay? But I will also move this
little on y axis, or y. Let's move this closer to here. Now, we can just go with
control mp, Select all this. Let's go with Y to ex y axis, okay? Now have more sense. We have now axis to
this third floor. And let's also make
space for cinema. If you look this reference here, you can see that we have another rooms on this third floor. So we can create this quickly. I will add maybe one look at
here and another one here. And let's now select
these two edges. And X to scale on X axis. Now we can grab these two faces. Let's go with Y to
move on Y axis. Okay? So now we have
this space for cinema. Maybe we can also
bring this part up. I will go with control Z because I use proportional
editing here. Let's now move this up, but I will add one
loop cut here, because this part is
connected to this one. Let's now just move this up. Let's press once, and now we can move this up without
affecting this part here. Okay, now we have
nice play for cinema. This process looks a
little like a puzzle game, and that's how it is, because we don't
have blueprints. We have only the
reference images. But in case we have blueprints, we can do this very
quickly and very precise. But let's now try duplicate
this to another side. I will go with old D and
X to move this on X axis. Now I will move this
about this place, and I will go with Z to
rotate this on Z axis. Okay? Something like
this. We have more space here because we follow
this reference image. But if you care about this, you can see on my last animation that I also didn't do this. Correct. If you stop here, you can see that
because I bring, to match up the escalators, I've made stairs here in real. There is no stairs. I improvise this part but this still, okay. Nobody will know this except
people who was in this. You can that this escalator
is not where in real mare was but this still look okay and nobody will care
about this details. Only people who was in
this more will know that this escalator
need may not here. This is still maybe too empty. But I think later we will model. You can see the chairs here, tables, and we will also import
some plants in this area. And later when we
create these tiles, it will be much better
if you want high, low poly mesh here. You can go right click
and shade smooth. And now you can enable this auto smooth and
this will be smooth, but this can also look nice. If we go with shades flat, this can look like seams or
something I will see later. Now I will select
this third floor here and I will hide this in Newport, and we have now clear space
for continue working.
33. Chair, modeling and texturing: Last part was too complicated
and more stressful. Let's now make
something more fun. Let's model this chair. We can find this
retro chair in this small and I think this
really, this retrovibe. Let's now model this chair. But I didn't find
better reference image than this one for this chair. I take a screenshot from model model last time
I save this image. We can now go to blend. Can replace this reference image used before with chair
reference image. So you can find this in
your resources folder. Okay, let's now zoom this here. And we can now start modeling. I guess that this part is maybe 40 centimeters on x and y axis. Let's place maybe origin here. And let's go with shift. And now we can press nplakey
to isolate only this cube. And I will type here
maybe 0.4 on axis. This part maybe 4 centimeters. I will type here 10. We have base for our chair, and I will go with
control A and apply K. I will also share this chair model and
all models from this, but this will be just for practice and learning
modeling skills. Let's now try model, this shape we have here. I will go to go to edit mode and let's
add one level here. Let's go with control B, Scroll mouse up to smooth this, but not too much because we
want to keep this low poly. Maybe we can scale
this little on x axis and add bigger level here. And let's now also
select this top face. And we can also select
this bottom face. And we can at
another level here. Okay? And let's now go to
object mode to add new object. And I will deselect
this object because I want to make this
separate object. And I will go with shift a cube. Let's scale this all down. And I think this is
about 80 centimeters. I will type here 0.8 and maybe this part is
maybe 4 centimeters. 0.04 okay, I see
this part go out. I will go with control R and I will add one
loop cut here. And let's go with x ray mode. Let's move this part about here. And we can also move
this little out. Let's now go select
this middle part. And let's go with control B. Okay? I will also add
one loop cut here, and let's smooth this. Maybe one here,
smooth this a little, and also smooth this part. Okay? And let's now
go again with tab. Now I will select
these edges here with hold to select
all this line. And we shift and go
to another side. And let's select also
this part, okay? And I will shift just a
selection to these top parts Here we can make this rounded with
control B for L. Okay? I need to apply scale again. Control and apply scale. Let's now go with control
and let's so this, okay? And let's go with ship D, X, move this to another side. We can use also mirror
modifier for this, but I will not
complicated too much. And I think this will be okay. I have hole here,
I'm not sure why, but I will press L And let's
delete this part vertices, but let's try rotate
this side, little out. I should do this before, but let's see what happens if you use proportional editing. And if we move, I need to
make this brush smaller. So I will press and I will screw this brush down
to make this smaller. Now this is a little hard, but we can also go with
maybe a little with Y. And let's move this
letter on side. But I definitely
should do this before. Now, it's a little complicated, but we can just make a
little imperfection here. Okay? Now, I will shift the x, and now I will go with x minus one to flip
this to another side. Okay? And we get the legs here. Now I think I will
duplicate this. I will go with an up three
and I will go with ship D Y. And let's move one here, maybe Y minus one to
clip to another side. And I will go with
tab to edit mode. I will delete these
vertices here. I will again go with the
proportional editing. And let's move this inside or we can just disable proportional
editing and we can move this about here. Okay, let's now go with ship D, X and X minus one to flip
this to another side. Now we have base for our share and let's make this
part which go up. I will go with another object. She scale this again to 4 centimeters of 0.04 Let's press x to
scale this on x axis. Let's go to top
ortographic view with number seven and S x again, Let's make this bigger here. And let's again
control a apply scale. Let's see shape of this. I want bring this middle part
up and also on y axis here. Now I can smooth
this with control B. Okay, let's bring
this little more up. Let's now go with control B. Let's again select these
edges here with holding. Shift and hold. Now just shift to select
these edges here. Let's go, let's check
first scale, scale is one. Let's not go it tab
to go to edit mode. And let's smooth
this with control B. I will press L to select all and I will go with S Z to scale. Stretch this little on, Z axis and maybe stretch this little on is okay. Now I want to create
this middle part and we have cours or here. But if we add new
object, it will be here, but I want cours or
to this part here. I think I can do this if
I select this object. And if I go with shift and maybe to select,
okay, it works. I now brings to
this middle part. But you don't need. Be too precise and you
don't remember this, you can just go with shift
and click here, about here. Sometimes you need
be super precise. You can go with
the shifts and you can just click to select that. Let's now create
this middle part. I will go with shift a cube. Again, I will type here
0.044 centimeters. But this y axis, I want just 1 centimeter.
Type here, one. And now I will, I will
rotate this here. And I will press Z
to scale this axis. Move this little down. And now I will first
apply scales control. Apply scale tab to edit mode, control R. And let's
move this inside a lot. Let's also move this
part down, put here. Okay, let's move this
little more inside. I also want to make
this sticker in middle x scale, this on x axis. Now we can go with
control B to smooth this. Let's again select
these edges here with shift control or shift and old I will now go with control B to be also
the scroll mouths down, maybe just to look cuts. Let's now press L ship. The X, move one on X axis. I think I will rotate
this little on Y axis, L Y rotate this little outside and shi the X and L Y again. Let's now make this black
part with leader here. I will select this space and
I will press to insert this. But if you go too much with, you get this intersection here. There is one wave. You can control this. You can press and
insert just a little. If you press to scale, you can see that you
fix this problem. Now I will again go with, just bring this up. Let's go with control
B to bevel this, okay? We bring this too much in air, so I will bring this down and let's now just level
this to smooth this. Okay. Now we have this part. We can later add this
leather material. When I finish with modeling, I will just all this
part and I will join this with control J. I also
forget this part here. Let's see what we can do. We can select this face. We can go with she. Let's now move this
to about here. If we press Delete, and only faces we have
here, option only pass. We can keep this part
here, this edge here. We can select this with all. Let's scale this. Now
we can go right click. Okay, I will separate
this for now. Separate by selection. And now I can select this
object and cover this to now we get curve
properties here. Let's increase depth. Okay, This is a shortcut
to create this part. Let's now scale this down. Also, I will grab all
these edges here. Let's move this little inside. Let's also select all
these edges and maybe scale this and move little
inside. And also this. Okay, now when we
are happy with this, we can maybe reduce
a little resolution. I will now go right click
and select this object. Right click can
cover this to mesh. Now when we go to edit
mode, this is just mesh. This is not more curve. Let's now go select
all this control J, and now we have our.
34. Table and chairs: We are done with chair and
let's now model this table. This is what I do
last time and we can model this very easy. I will go with shift a mesh cube and I
will type here on x and y. 0.6 on the axis, again, 4 centimeters of 0.04 Okay, This will be base for our table. Let's now bring this down. Control aid to apply scale. Control A, apply scale. Now I will go with T. I will
level this with control B. This reference is
not so visible, but we have read
plastic part here. I also made this last time. When I do this. To this, I will press Insert this. I always like Add, we can create this easy. If I press for Insert. Let's press again. Now we have this
middle edge here, but let's press to
back this a little. If we now with Select, we can withhold,
Select all this loop. And let's go with GC. And bring this down. And we have nice seam here. If you want, we can again select this
one. This edge here. Okay, this will not work. I will here and I
will go with shift. Let's manually select
this part here. We can also go with control B to add the small bevel here. Let's now model
this bottom part. You can see how this look. We can go with shift, I will select this object, and again I will go with shift
and cursor to select that. Now I know that cursor is
in middle of this object. And let's go with
shift cylinder. I will reduce this maybe to 24. Let's now scale this
down n go to side view. And let's, let's move this here. And we can go with the temp to go to edit
mode, x ray mode. Let's now just select this
part and move this down. Okay, but not all down because I want to
make this part here. I think we can do this if
we just few time ext this. I will go with A and
now press to scale. And again, and now again as to scale, Z again. And let's again as to scale. And maybe last time E and Z. Okay, This looks similar
like this part here. And now we can maybe
move this little down. May also to line up
with this chain here. Okay, Now I will go with shift or let's now bevel
this to smooth this part. Now I will go with control
J to join this object. We can go with the right Quick, smooth and enable
auto smooth here. For chair material, I
use this wood texture. You can find this in
resources folder. First, I will select this chair, and let's bring this up. And I will go to Material,
and I will call this, this is wood texture in Blender. Let's now switch to
Material Preview, and let's plug these
to base color. Okay, I need to join
this object here, and let's check
scale is now one. And let's do tab
Q, Q projection. Let's see how this looks. We can maybe scale this. If you want to change
rotation of this, you can go with Z 90. We can rotate this in
opposite direction. But I think this
look pretty good. And I will now just create
some roughness and variations. Shift and search for color. M, plug this here
and to roughness, okay, black part will be shiny
and white will be rough. We have too much
black color here and I will reduce to
make this less shiny. We can use the same texture
for bump shift a bump, plug this to height
and to normal, bring this to 0.1
This maybe also 0.1 Maybe we can change
rotation of this part here to go to Edit
model and maybe night. Let's also go here with Shmoo, I think this is too bright. I will go with another
mixed color node. Let's plug this to value a. And I will go here
with maybe black. And we can now
darken this chair. Let's create a material. I will go to tab here and I will create new material and I will call
this black leather. Now I will go to Edit mode and I will select this part here. I will go with control lumped, all this will be
this black leather. Let's now change
this color to black. Okay, I want to add some imperfection for
roughness and we can again, go with concrete texture. Let's go with control
shift and click here. And let's see how this look. Scale this little down. Let's now go with the color M. Let's now plug this
to roughness, okay? And bag this material here. I want to make
this pretty shiny. Because I think leader
is usually shiny, Okay. I change the saturation here, so I will bring this to white. And let's play with
this value here. This look okay. Now we need to also
create bump letter. Usually have this
small dots for bump, last time I use Voronoi texture. And let's now create this. We can go with shift and search
for Voronoi texture here. Now I will go with
control shift to preview this node here. And I will increase this scale, maybe 200 and you
can see what I get. And now I will go with Colm, I changed from three D to you can play with
these settings here, and you can see that you get different material when we
change this option here. But last time I go with two D and you can also play
here with scale. Let's increase
this maybe to 400. And now I will go with bomb. Plug this to height
and this to normal. Okay, I will play
with the colors here. We have too much contrasts here. Let's also bring this to
0.02 We have one error here. I plug this also to normal. Let's unplug now.
Look much better. So we can maybe increase this to 800 to get the
small tiny details. This black color is too black. Let's reduce this a little. Let's add more imperfection
in roughness value here. But we put too much time in something which
will not be visible. This is only a few seconds
where I see these chairs here. Let's now add this
wood material material for this table here. And I will go with projection. And let's scale this a little. I will add the new material, and I will call this red. But I will delete for this. For now, there is one
thing we can do here. We can select this material and click to Create
New variation. And I will now call this red. Okay, let's now go
with Edit mode. And let's press
control plus two. Also select this same here, and let's now click
here as sign. Now, nothing, because these
two materials are same. And let's now change
this to red color, but I will also put red
color in this A value here. I will go with control C and control to choose
the same color here, but let's now just choose a
slight variation of this. Now if we go with color ramp, if we plug this here
and this two factor, let's now go to object mode. Now, black color here, blender, we lose this color and there
is white color blender, we lose this variation. And let's now try to tweak this. Okay, just for test, I will change this
maybe to blue color. Let's see what happened. Okay, this happened because
we add all color, just black. You can see when we move this, we have two variations of
color. But I will not. For this blue, I will use some orange color or
red For this material, I don't need this
very strong bump. So I will go with 0.01 Also, I will play with this
roughness value. I need more shiny material. I will just bring
this more to black, and also this part, okay. But this bump is still to
intense 0.001 is enough, I think, okay, this
maybe too shiny. You can see here that
is pretty shiny. So I will also reduce
this about here. And let's add more
imperfections. Let's add more white color here. Let's see how this look. Oka. But I think this is
still too shiny, too bright. I will bring value down
to make this more dark. Now we just need
to metal material. I will click here to plus I
think we have black metal. I will search for metal and we make this metal black material. Now I will go to Edit
mode and with L, I will select this
part here and assign. Let's see how this, I think
this look pretty good. And let's now scale this
up to get the details. But I will also make another variation and
I will click here, plus I will call this more bump, Metal, black with more bump. And let's now make
variation of this material. For this, I will go
with noise texture. Noise texture. And let's go
with color M. Plug this here, and let's go with
click Control Shift. And click here to
pre with this note. And now we need to increase
this maybe to 200 or 100. Now we can go with Bump and plug this to
height, remove this. Now plug this to normal. Now we get this nice
bump, but again, too intense 0.1 and
maybe here 0.1 Okay, we have too much of
this white color, which come from the
concrete texture. I will go with mix, mix color. I will use this for value A, value, I will use
just black color. Now we can choose
how much we want, the imperfections here, and how much we want,
just this black. We can make this more shiny. So I will increase
this black color here. This bump is still
2,100.05 Okay, I think we have
nice material here. Let's now place the
chairs to position. I will just change
Viewport color here. You can see that all
this default gray color. And I will first select
this metal black. And let's change
this to black color. I will rename this too. We will later maybe s and
we will not find this. Let's change this
to brownish color. Let's change this
red color to red. Okay. And we have
this black leather. I will also change
this more to black. Now I will go with Napa Key. And we have here this
chair and this table. And now I will go to about
here. And let's move this. I think this look
may be too small. I will scale this
but not too much. This is about real
world de measures. But I think we made all
the more, little bigger. I will bring this now with GZ. Let's place this about here. Let's take a look at
where I placed this last time on this area down
and also on this part. This is where this
restaurant is. But you can take a
look reference and you can also place this in
other places, in more. And this is rendered
from king pixels. And you can see that he put also these chairs to
another position. So we can see this bench
here. And also here. I think this is how
it is in real mall, but I don't see this chair in real mall
here next to store. But you can be
creative and you can place these chairs
where you want. Let's now back to our scene, and let's go with numpt seven. I will now duplicate
this with alt D. Not shift D, al D and x. Move this about here. And we can go with R Z to
make some imperfections here. Let's move this chair here, X, z a little. And al D, Y, Z 108. Now we can move this
here and maybe all Y. Place one here. All the X, all to Dyx. Again, let's also place few
of this here in this area, a Y. I will just duplicate this few times with
X, rotate a little. If you press shift with shift
you can repeat last step. This is shortcut to
duplicate this few times, I will go with a Y. Let's place here where
this will be more visible. You can also select
this with mouse drug. And you can select
all this object. But you need to be
careful because now you also select this first floor. And to dissellect this, you can go with
control and just, and remove the selection. And now we can just
move this here. Let's go with all
x one more time. Okay, so now we have
a nice restaurant.
35. Store 1, modeling: In next part of tutorial, we will model few stores. I showed you before that
I model about 30 stores. And you can download this
from this Assets folder. But in this part of tutorial, we will practice
modeling and I will show you how I made all these stores. I think we will start
with this Gregory store. I will isolate this store. And let's see how this look, because I have a nice
reference image here. And we will use this
also a texture here. I know that this Gregory
store go to this part here. But you can see that whole, this part is just one object. And I will go with numpkey. I will now isolate
only this part where this Gregory store. Let's go with Tab
and L. Now we have this loose part separate
by selection also. And separate by selection. Now we need only this part. I will go with Numpy twice. I will also make
one loop cut here. Okay, we have loop cut here. I will go with up seven x
ray mode phase selection. Let's now separate also this part here and
separate by selection. Okay, I need this part. I will go with control Z. Let's select this part. And now, separate by selection, now I will go with
Naples Key twice. And now we have only
this Gregory store here. I share this texture with you. I will blow this texture here. Middle mouse button to move. Now I will open this image here. Okay, now we have reference
always in this place. I see that the
shape of this store look a little different
than this one. And I need more space here. And I also see on
this reference image, we can do this quickly. I will go with, I will select this loop,
I will go with 97. And let's move this about here. We can also move
this little inside. Okay, now we have this
corner and this part here. Let's also move this little out, this little out. I will start with loop cut here. I want to isolate
this part here, control R. Let's
bring this here. I will go again with
control R and add one here. We can see that this part here is almost 90 degrees angle. Will add another
support loop cut here. And let's now line up this Z. Okay? Now I will make this
part which is extruded out, and I will start
adding lop cuts here, one here and another one here. Let's also add
same on this part. Let's now select
all these parts. And let's shift, and
let's extrude this out. I will go with and y to extrude. No, I think this is wrong. So I will go with
control Z and I will go with all along normals. Okay? This is the correct way. I think we can also extrude
maybe y to extrude this on Y axis and maybe Z to rotate this and try
line up this part. I will now add
another loop cut to isolate this red part
which go on top. So control R, I will select these two
phases and I will press and separate by selection. And we can now
convert this to me. I will go with set origin
to geometry and let's go, okay, I will separate
this part from this one. Let's delete this,
Delete vertices, and now we have only
this part here. I will go to object mode
to check scale control a, apply scale and set
origin to geometry. And now we can create
this mesh here. I will go with tab
to go to Edit mode. And let's scroll mouse up. Let's add more on x axis. Now we can go with
wire for modifier. So I will click here under
Modifier and search for Wi. Now we can play with thickness. I will set this to boundary and I think thickness
of this is okay. I think this is 2
centimeters here. Maybe we can bring
this little down. I think this is okay.
I will apply this. Let's assign this robe
metal material to this. Okay. If we go to
Material preview, you can see how this look. But I will create
another variation. So I will click here
and I will call this more rough because this looks too shiny
for this material. I will just quickly bring this
roughness closer to white. You have preview of
this material here. I think this is pretty okay. Now I will use all to duplicate this object
to this part here. But let's first
move this inside. First I will go with y. Let's move this inside. Let's now back to solid preview. And you can that, but we have this
empty space here. Let's fix this. I will select the objects here
with holding shift. If we now go with y, we get this problem. I will go with shift the
y and move this inside. And now I will press Y to
extrude this on Y axis. And now this have more sense. Okay, let's now select
also this part here. Again, I will
duplicate this with shift D and I will now press all to extrude
this along normas. Okay, let's now duplicate this is here and I will
go with pat seven. We can also go to x ray mode. Now I will go with all the x. And let's go with Z to
match this angle here. Now we can switch
from global to local. And let's now go it, old D Y to duplicate
this one more time. We can also scale
this on y axis, it will not be visible or
you can go to Edit mode. And you can cut
one part of this, but because we use all, it will also cut part of this. I will just stretch
this a little and I think this
will not be visible. But you can also
see that this part is connected with roof inside. Let's see what we can do here. Let's see what happens
if I go with x. Okay? We get the same problem. I will go again with shift x. Let's now truex, and let's
move this about here. Let's see if we move
this on y axis. Okay? I will add one cut here and we can just
move this inside. This is not a perfect solution, but it will work now, we can create this sign here. I will go with a selection. I will, we are now in
local orientation, but you can see that
this is not correct. And let's go to normal. And now I will go with D, z, move this little out y. Let's scale this one. X axis, x also. Okay? Let's go with z
to extrude this out. Help to select this loose part. And let's scale
this little down. Okay, let's see
another one here. I will go again with shift D, z. Move this little out, S, Y to scale this on y axis, X to scale this
little on x axis. And Z to exclude this on. Let's intersect this
with this part here. Let's also add this column here, which is visible here. I will go with shift like
click and just with cube, not seven, x ray mode. And let's place this
inside num ped one. Bring this down and tab
to go to edit mode. Let's select this top face and
let's move this on z axis, we have this black part
which is extruded out. Let's see how thickness of this, I think I will scale
this on x and Y axis. You can go with X and Y, but there is one
shortcut in blender with which you can scale this on
X and Y axis in same time. First we need press to scale. If we now press shift Z, we basically remove axis. Now only X and Y axis is left, and we can now scale this
only on X and Y axis. But if you are beginner, my recommendation is
just go with X and Y. This is easy to
remember for you, but I will go with
shift z and I can scale this on both
axis in same time. Now I will go with one
loop cut face selection or ten or extrude along normal. Move this out. I will go with L control to
add one level here. Okay? And I see one
column in this corner. So we can go with, let's
go to global orientation. And let's go with shift D, x, and y to move these
sources on y axis. Maybe about here. And I will move this, maybe a little more inside.
36. Store 1, texturing: I don't see this side part
in this reference image, but last time I just put glass here and glass always
look nice in render. So we can do this quickly. I will again go with
tab to edit mode. Let's now add two loop cuts
here and another one here. Let's now select this part. We can all extrude this out. Now I will go with
X. Move this inside. Let's now click Desole
Orthogonal Edges to remove this part here. Okay, We can now assign
glass material here. I will select Default Material, because first
material we add here, it will apply to
all these objects. And let's now add
glass material. Let's go with ten A sign. Let's press A and Q projection. This glass look
pretty bad because we have to intense this bump. And let's bring this hole down, 0.001 And let's also bring
this scale, maybe just to ten. I think also this
imperfection is not good. Let's first scale this a little to make the
details smaller. Let's also play with
this value here. Let's now create Made
Material for this. And I will click here
to New Material. I will pull this Gregory store. Let's now port this
texture in Blender. We can now plug
this to Base Color. Let's now go with Edit mode. And I will press a to select. I will just select this part
with control and we can now assign this Gregory
store material here. Now I will choose this Gregory store
texture in UV editor, and we can now try project
this better in UV editor. Let's first select
this part here. I will go with control
plus projection. And let's first project on
this brownish material. I will also do same
with all these parts. Control LampQ
projections. This part. Let's also scale this down. You can scale this all
to one pixel and it will be same color in all this place, but I want to use
more than one pixel. Because even if we
scale this all down, we have some variation here. I will just move this
part here in this place. Okay. Now I will project
this part on this red color. We can scale this, Let's project on this
reddish color here. Okay? And let's also do
same with this part here, to this brown color control, Lmpd plus to expand selection. Let's go with Q
projection again. And let's now just project this again to this brown color. Let's place this logo here. I will go with control amped
and I will place this on. I will go with projection, and let's place this first on this white color because this logo was too blurry
and low resolution. I create this logo in Photoshop, we can now just grab
this faces to scale. We can now project
this logo here, x minus one, to flip
this on x axis, okay? We have this part here. Let's try project. Let's
go with projection. I will first go with control, lamp projection to
project this part. Scale this down. But I'm not happy with this because you can see that
this is too bright, because we have light here. And this is not how
we should do this. I will project here in this
part where we have a shadow. Okay, now this look much better. But let's again
covid control num, grab all this area
and let's now project this with L. We can also select Lose part
here in UV editor, zet enter. And again we have
one more part, L z. Okay, let's also
fix this part here. Control lamp projection. And again project this
on this brownish. This is ceiling we do before
and let's move this inside. Now, I will select
this part and project, project on this
red color here, x. And let's just project
this here. Okay. We can see that we have
white ceiling here. Let's grab this project
on this white color. We have some bluish color
here on I will also, we can select first part. And now with control and shift, we can select here and we
should select all this. Now I will go, I don't
need to project this. This look pretty good. I can scale this all down and I can now project this to
this greenish color. Let's go to object mode. Let's fix this part here. Let's also project this
wall to white color. Now we have white wall here. Let's fix this part here. Projection, scale this
down. Project this here. And let's also select
this part, projection. Now I will select
this column here. And I will also go
with projection. And let's project this
to this red color here. Now I will press L over this
column. Delete vertices. I will just duplicate this one, I don't need this.
Reproject again. Y. Next, I will add more details with this
concrete map, views all time. But let's also fix this part. Okay? I will now go with
shift and image texture. I will choose concrete texture. If we now go here with projection
and back this material, you can see that we now destroy all these UV
maps we do before. I will go with control Z. I will now create another map. This base map is for
this Gregory store. If you want, you
can rename this, or you can keep this name. But I will go with, let's
rename this Gregory. Let's now select this map from here and plug this to here. Now I will create
another map which I will call complete shift up. Let's select this concrete
material, plug this here. And now, when we have selected
this concrete material, we can go with a projection and we can just project
this concrete here. Next, I will back this material, and I will go with color here. Let's make a
roughness map again. Let's see how this look. We can try the default values, and let's plug
this to roughness, and let's see what we get. Get this roughness
variation here. And I will also use this form, just a little bump, bump, plug this to fight this to norm. But let's go down with this. 0.1 and 0.1 is
still two intense. 0.02 we get just slight
variation with this bump map, but we can also use
this incolar input. This is still too intense. Let's also bring this volume up. We can also put this
in color variation. We can mix this color M
with this Gregory store. Here I can go with Shift
and right click to mix. Now this is set by
default to mix, but I will use multiply, multiply blending mode does multiply blending mode dark part from this material and
multiply this texture here. We will basically take
only this dark part. Let's now move this all to one. And you can see that we basically
darken this store here, but this is too intense. I will just use very
slight value of this. Now we just need add some
bevels. I will go with Tab. And what I can do, I can manually add bevel
to all these edges, but if I select a
press control B, I can add bevel to all these parts because I already add bevel
to these parts. Here I will press P and
separate by selection, also here I will
make one object from this two columns and now I can add bevel to
all this area here. Let's go with Set Origin
to geometry tab to go to edit mode A
for select all. And let's add Bevel. Okay, this is how this look. We have one problem here, but let's fix this quickly. Okay, I will go with
control and okay, I will do bevel again. I will press A, but I want
to dilect ground here. I don't want be this because
this is just creek problems. Dielect all these faces, we don't need this one. Let's now create
del with control B. This top part will not
be visible in vendor. But if you want, you
can just select, okay, we need to select
this Gregory store. And now scare this down. One thing I will do here, I will delete and
limited the soil. This will delete all
this unnecessary mesh we create with this barrel, but I again destroy P. Let's select this and let's select this Gregory store projection. Scale this down to
this white color here. I also here. This is one store, and last time I make some
assets for Interior. And what I do, I place this to Asset browser. But I will show you how
we can do in Window, which I will prepare
for the assets I will share with you last time. I just go to assets I save
in this asset browser. But you can just open this lender file and you can just copy some of
these assets from here. Okay, So we can maybe place
one couch on this area, maybe next to this wall. And we can also place
maybe some photos here. Now I will select all this, let's go with Y night. I think I will go with X 108
to rotate to this direction. And let's place this
weird photos here. Now if I said this,
let's move this, let's move all this on x axis, this one on Y axis. Now I will scale this down with, or you can change this to individual origin and you can scale this by individual origin. One thing you can also do, you can use this store
inside boxes I also create. Let's for example, let's see how this look first in
Render Preview. For Render Preview we need light shift and
light point lamp. And let's increase
this value to 200 Y. And let's place this here. I will duplicate this
with ship the X. And let's place one inside. Okay, This is how
this store look. If we, for example, grab this store inside, we can this inside the store. I will quickly go back to
material preview and let's go with Z, 180 num seven. And let's place this
here, scale this down. I will go with S Z to
scale this on Z axis x. If we now go with
render preview, we can see how this
looks and now we don't need to strong light.
Let's delete this. Now we have all these nice
details with this emi cube, which I also share
here in this file. I think this file, okay. We can select this
emissive cube here. I will now back to
render preview. And if we now go
to Shader Editor, we can see here no
emissive control. If this is too intense
light for you, you can just bring
this down maybe to one with this color ramp, We choose area
which is emissive. If we move this, all right, only this TV will be emissive. But if we move to left, we change area
which is emissive. You can also play
with the Vis, okay? But I like to keep
this very subtle. Maybe 0.2 this is how
I create this store. Now if we go with Naples Key, we have this store here in
place where this cube was.
37. Store 2, modeling: But in this area we
have maybe 100 stores. I created about 30
variation and later I duplicate some of
store a few times. But this will not be visible
in render and nobody will know that some of these stores
are also on another place. I just care that same store
is not on same place. For example, if I
duplicate this one, I will place this
store to maybe here or here one store is finished and let's now
model another one. And I found this nice
reference image. We can now build
this store here. You can find this store two Jpeg image in
resources folder. And I will now import this here in where we can take a look. I will press Enter and I
will search for store two. Now we have nice reference here, I'm not sure where
this store is. Maybe on first floor, but let's now pretend that we won't place
this store here. I will select this basic shape of store and I will
place names Key. I want to make this
little bigger, so I will go with X. Now I will go with control
A and apply scale. Let's see what we have here. We have here one angle and this part is
parallel with the male. Let's now do this. I will go with tab
control R and control B to bevel and scroll mouth down because we need only
two loop cuts here. Now I will go with Y
to move this inside, Maybe S X a little. Okay, now we get this corner. But this part is parallel. What I will do, I will go
with numer seven if a mode. And let's now select
this edge here. This vertices here
with holding shift I will go with y zero to line up with the
world y axis, all 20. Now we can move this out, we get now this basic shape. So we have this parallel part and now this angle and
also on another side. Let's now make this part on top, I will go with
control R about here. And now we can go with, you can see that this go out of this part, this glass here. I will go with p seven and out. You can also note that this
part go to this light here. We can just extrude this. I will select this
pace and this one. And now I will go with whole
extrude face along normals. Okay, now we have
this extrude that would I will create
this with control R, control R and add one loop, cut in middle and
control to split this. And now select this part
and all x along normals. I see also this part
which is extruded and also on another side
and one small on top. Let's also create this
quickly control here, another one here and one on top. Now I will, with holding shift, select all these
parts I want extrude, you can go with Y or old extrude along
normals. I will press Y. Let's move this out. Okay, we can also
extrude this small part out because I see also
this part go to about. Let's now create
this metal part. We can also create this with all or extrude along normals. Just control R, Move this down. Select this first phase
and with holding control, select this last phase. Also select this one. With shift extrude
phase along normals. Next we can create
this mesh here. But because we
create this before, I will just go to object
mode with naps key. I will back to our
scene and I will select this mesh from pre. Again, I will select
object and I will back to local view. And now we can go here, we can delete this part, delete faces, and now I will just place
these two positions, numpad seven and wire remote
so we can see better. And now we can move this.
38. Store 2, texturing: Let's now create some materials. I will switch to
Material Preview, and I will here select
this object and I will create Vitamin World Material. Now this material will be
applied to all these objects, but let's now create assigned
materials we have from, before we have this
metal chrome material, I will go to plus I will choose this
metal Chrome more rough. Now if we go with
step to edit mode, we can select all this part
here with holding control. Okay, first I need to click two with holding
control to this part, and now I can continue. Let's go with control
Lamptl to expand selection. Let's now assign this. I will first go with A to select all and UQ projection to
create a basic UV map. Next is glass. I
will click here, plus I will select the glass
material to go to Edit mode. And let's check where is glass? All this part here
is glass, a sign. Now we come back to
Vitamin World material. So I will select
this here and let's now bring this
store texture here. And plug this to Base Color. Now we can start project. I will start with this logo. Let's now select this part. Withholding control. I will now low this image here. Okay. This is store two. Okay. I will now use
project from wrap options. I won't make similar angle of
camera as this image have. I will go to about here. I will go with project from. Okay, so you can see that we get similar angle on this story. And now we can just
press to scale this, you can see that this
work pretty good. And now I will go with
control to expand selection. And I will select this part, which is good with
holding control. Let's go, now I will
go with projection. And let's now press to select, let's now project this about he. Next is this part here. I will again select this
object tab to go to edit mode. Let's just select this
space and let's again go similar angle and we can go
it Project from view, okay? And now we can scale this
to this place, okay? And also with this one to select all and
move Project is here. So I will press and okay, and we can also fix this
part here, project from. Let's also make this part wood. But I think this
will not be visible because we will place
another store here. But let's select this part. Projection, scale this down. I will now select also
this part and projection. We can create bump map
from this texture, but we will not get
too much details because we stretch this a lot. We can use another
texture we use before. To save this map, I will create another UV map. I will call this vitamin
Another map will be okay. No Se, we can sell
this vitamin here. Now I will go with Image
texture and I will select this. Oak would use before, but the oak is just the
name of texture we created. This is of I will
search here for. Okay, now we have
this image here. And I will now plug this, and I will select this oak. When we have selected this map, we can go with control shift. And click here. I will now
select all the Q projection. Okay? Scale this little
up, this look okay. And now we can go with color M. And bump and plug this to height
and this to normal. Now we get pump details
from this texture here, which is much better
than this one. And I will bring this value
down and also this one here, I think this should go
to opposite directions. I will select this part here. Maybe control lump,
we've selected up here. I will go with zit To rotate
this two opposite direction, we can click here int I think this bump should go to
opposite direction. This is before and after. Also, we can use this texture
for roughness detail. I will go with another color, M. Let's plug this here, and let's plug
this to roughness, okay, Is too shiny, so I will just bring this
black color more to white. Okay, I think this
will look okay. Let's make also this more up. This bump is maybe too intense, but I will also scale this
all up to get more of these tiny details if you want. You can also use this
texture, maybe this one here, to add some details
in base color, not just in bump and roughness. You can go with
shift, right click, you can mix these two textures. Now if we go all right, we get this texture here. If we go all to left, we get this texture
from this image. But I will say this to multiply, multiply, I will just take dark parts of this texture here. If we move this up, you can see that we just take
some dark parts of this. But to make this more intense, you can tweak this color
ramp. Okay, let's trivial. Okay, now we have only
black color here. You can now clearly see what
we get. This is too intense. But we can only take dark
parts of this color. Okay, but I will keep
this very subtle, maybe just 0.1 You can also note that we have
wood behind this glass here. Because glass is transparent, this will be visible. So what I will do, I
will go to Edit mode. I will select this space, and I will go with y. We can now move this inside, This is now not visible, but let's go to x ray mode. And I will go here to material. And I will assign this
material to this part. And I will select
this oak vitamin. Let's now go with Q projection. We can maybe project
this to this area. Now this is not visible, but I will first
go to edit mode. And let's go with hived X. And move this also to
another side here. But if we now go to cycles or render preview,
we should see this. Let's go to cycles
and let's go with light, maybe point lamp. Let's increase
this to maybe 200. Let's go with ship Dy to
duplicate this one inside. And maybe ship B x here. You can see how this look. I will select this
texture here, okay? I think now I select this
part and look to stretch. So I will try this, maybe x minus one, to rotate this two
opposite direction. Let's now try, fix
this up a little, Okay, this will always be
stretched because we don't have right angle
for this logo here, but I think this is much
better than nothing. But let's now back
to solid Preview, because we need other levels. First, I will jump
to material preview. To fix this floor here. This ground here. I will
select this face here. I will just project to white
color scale this all down. Maybe project this to
this white collar. Okay, let's now continue
with adding bevels. You can see that this is not one part of glass
we have seen here. And I think this Sam
is very important and this will add
a lot to realism. I will select all these pass and let's now go with control B. Withholding shift,
we can create bevel. Now I will go with all
to extrude this inside. Let's now go with
control lamp at plus to expand selection. And now I will go with control B again to add one level here. If we now jump to cycles, you can see this nice seam here. Okay, we have a lot
of corners here. And I need, I want to add
a lot of bevels also here. First, I will select this
part and withholding control. I will select all this line
to switch to another edge. I will again, with shift, shift and control together. Shift to switch to
another position and control shift control. I will again, with
shift and control here. Shift here, and here. Let's now add first bel. I will control to bevel. Let's now go with
these edges here. If you are a beginner,
you can just hold shift so you don't need remember all these shortcuts
but help in this situation, you can just
withholding control. Select all this line. But plunder found this
line at the shortest part. I need click here, Shift and then I can
use control again. Shift. And control, shift here. Let's now create
another control. Let's also create bevel
on this part here, but I will for now select only
these phases and this one. Now I can just go with
control and I will add bevel to all this line, okay? And now when we go to cycles, we can see that this
look pretty good. You can see all these nice
pebble we didn't have before. I will now jump
to asset browser. But you can open my blender file and you can import some assets. This is the oldest view. And let's now maybe we can
bring these shells inside. Okay? But I will place this
here and let's now go it. Y num seven numbed one. Maybe we can place a
few chairs also inside. And I will also place
this column inside. Okay? And now when
we go to cycles, this should be much better. Okay? This look pretty good. But maybe we can just
bring saturation down because we have now
too much color here. I will just go with saturation value
and I will just bring saturation or 2.3 Okay, this is not too intense, but we have a lot of details. I think it is, again, too much. So I will delete this part here. We are now done with this store. Now when I pressed numpakey, I back to our scene. But I need now move this out. But I also need to move all these things
with this store out. But because I didn't
parent this before, I now need to select this and
how to select this store. I will show you,
easiest way to select all this is nump seven
and with x ray mode, I will now, I will first delete all these slides
because we don't need the slides in our scale. If you want, you can
keep one light inside. I will bring this down
to maybe 20 and now I will just select all the store and all these things inside. Store withholding control,
I will all these things I don't need, okay? And this store here. Now, I will again
go with Naples Key. I will shift, select
this big part here. And now you can see that
we have all selected. But this part here is yellow. That means that this part is main selected or last selected. If we now press control, we can parent all
this object inside the store control and
separate to object. Now we parent all this object
with this main object here. If we now go with, you can see that all the objects
follow this main object. If we now go with,
for example, x, you can see that we also scale all the objects together
with this store. This is very helpful
in this case. And if I now go with Naples Key, I can now move this store here, and I can now easy
separate these two stores. I think I will move
this little inside. Now I will scale this store. Maybe I will later make
another small store here. When I duplicate this object, I'll just move to the store I need back this with
old deal text. Let's place this here.
39. First render: Let's now make
first test render. For test render, we
need the camera. I will delete this slide here with right here to
place here camera. I will go with shift and
I will go with camera. I want to bring this camera
to about human size, but because I think
we make this small, little bigger, I will
now go here with cube. This will be 2 meters. I will bring this maybe
about 1.9 from ground. Okay, Now this should
be about human size. Now I will delete this cube, I don't need this anymore. And I will press on X type here 90 to line up on 90
degrees on X axis. Now if we press numer zero, we switch to camera view. And for camera settings
I just bring this, this focaline to 30. I think all these settings
I use as default, I use as this default
resolution 1920 by 108. There is a lot of way you
can navigate cameras scene, but my habit is this way. I usually just drag this
location and rotation values. This is how I like to do this, but you can find
also better way to navigate inside C. Okay, so let's now make one test
render from this angle. Let's enable this.
Okay, this third floor is enabled in render and we
can now make test render. I will just check
render settings here. Okay, we have 40 samples
which is pretty enough. I will press, well, this is what we have for now, but we need add here a lot of
things to make this better. One thing you can also I usually do is I like to
split this window. When I make test
render on left side, I will press and to
remove this step. And I will switch
to render preview. And I will now enable this
in view port, the ceiling, you can now just move camera to another angle
here to see how this look. This looks pretty bad because we didn't add too much light, so it is pretty dark. And you can also disable this
overlays here on left side. Let's try with a
few lights here. You can see that when we
start adding lights here, we can go here with
the area lamp. You can see that this
become much better. You can place one lamp here near store to get
the nice highlights. And maybe one inside all Y, okay? And if we now go with 12, we can see how this look. Let's now quick jump to
composite or so we can make this render a
little better quick. I will enable click here, use nodes and be sure to
enable this backdrop. And now I will go with
Control Shift and click here. And we can now press
to O this out. If we add the simple
lens distortion and the globe effect, this will look a little better. I will go with lens distortion and I will plug here first. Let's now click here to fit. And let's add some distortion. You can see what
this effect does, this ad distortion on the edges. But I usually go with maybe 0.02 dispersion with a chromatic
aberration on this edges. This is very intense. But I also go here usually with 0.02 We can also add simple globe and I
will search for glare. I will maybe try with folk glow. In this case this is not
so visible because we don't have too much
a missive materials. We have this hole here. But when you look
this reference image in all the small,
this is uneven. We have now this part here. But if you take a look, okay, this is not a reference
on this reference image. We have something different
and here is different. And also here. But I think it is important just
to fill the space. To make this better, let's quickly do this. I will disable this render
preview because this slow down my computer and I will also
disable this third floor. What I do last time
I just go with, let's maybe select this
face and now I will go with ship Y, Z. To extrude this on Z axis, I will just move this, I will try all of this
shape of the stores here. Maybe x, Z 45, and maybe now y to about here. And Y again line up this and
now we can maybe trudex, maybe Z to rotate this
a little, and now X. We can now manually just
place this here, Y. Let's now render this citing
this now should be better. But there is one
thing in Brandon, you should know we
have now slot one. And if we now select
this slot two, you can open Image
editor with 11 11. And now I will switch from
slot one to slot two. Now I will press again
12. Just one problem. We need to apply the
fourth material to this. Because this material here, I will, I will go to Material tab and I will add
here the fourth material. But I think this have more
sense if we separate this part tab to go to Edit mode
separated by selection. Now we can remove all these
materials and we can just choose default material here and tab to go to edit
mode projection. Let's now make render here. One thing you can do
to make this better, you can always add some seams
or extrusion or bevels. I will do this quickly. Maybe one out here and maybe
we can select this part. All Ext. Now I will press maybe L
control all the parts. Maybe we can add one Sam here. Control all extrude
along normals. Maybe select this
edge control again. Okay, let's now try make
another render on slot three. This first J, you can
skip between the slots J, second render and third one. You can see that when
we add more details, this just become
better and better. You can see this nice
seems here difference between this render and my
render is only in details. You can see that this
look much better. That's because I add
all these details here, these tiles on ground. I have the photos, small details, promo materials like this and all the
shop are finished. That's the main difference between the renders
and this one. In this project, I spend maybe two or three weeks
just modeling. In this tutorial, we spend maybe just six or 7 hours modeling. That's the main difference
between the renders. I also put here
some color grading. We will talk later, but this part here is
without color grading. So you can see how this
look directly from vendor. You can see that there is
not such a big difference. I just put some
color correction and some effects like glow
and things like that. But you can also see that render from Blender can look also nice, but because I render this
only with 100 samples, you can note this logging effect and all the things I don't like, but that's how it will take
too much time to render all this in more than
100 samples I use. But I think if I render this
in maybe 1,000 samples, this will look much better, especially with motion blur. Now this guy will run, and with motion blur,
this look even better. When we stop here, you can see a lot of motion blur and we will add on that later.
40. Tiles: Let's now create these
tiles on ground. Because these tiles
are everywhere. I need something
little better than just blue low resolution
stretch texture. I found some nice tips on polygon D. You can go to Google and you can
search for polygon. Okay, polygon Don. And you can click
here and you can download this Don here. You have instruction
how to use this Don. And I will not talk
about this here. I will just show you how this look when you style this said. When you press and
you get this step here and these tiles are
free without paying, you can just search here
for maybe free tiles. I'm not sure what I
searched last time, but I found these tiles here. Maybe this one. But I think this
is not important because you can just copy these tiles from my last project here. How you can do this? You can select this ground here. Hello, it's me from future. And I think I forget
to record one part, how we can copy these
tiles to our scene. I will go with shift A. We can duplicate this object, and then we can just
copy this material. But I don't want to
duplicate all the material. I will go with cube. Now I will go to Edit Mode,
Face selection. And when I select
these tiles here, I can see the blender navigate
to this material here. I know that I want
this material. I will go to object mode. I will just drag this
material to this cube. And now I can copy this cube. And I can go to my another scene where I want to paste this. And I can just paste
this object here. And then I can just drug and move this material to this part where I
want to apply this. Okay, If I remove this, I can just D and move this here. Now I don't see anything, but I think this is
because we don't have any UV projection here. So I will go with a.
Let's first check. Okay? Scales one now tape to
go to any more projection. Let's now scale this a lot. We need scale this. You can type here maybe ten to scale this ten
times and maybe five, Okay, this is too much. So two scales, two time
more, something like this. And now I will go here to
shape the editor here. And you can see that I make some adjustments
to this material. You can play with these
values here, for example, if you want to change hue or this color make
this more green. Or you can also add saturation. And all these things, I will go with control
Z to undo this. You can also play
with this scale here. You have a lot of option, but I also makes adjustments
to this material. Let's select this texture here. This is one K
resolution texture. This is not too big, but let's now apply
this texture here. This is what I get from polygon. And I also make one tile
here with this brown color. I also make one
adjustments to get this original from original. More you can see how these tiles look with this concrete texture. I also add some
imperfection to ground. You can note some concrete
dirtiness here on the tiles. But this is not a whole
set up for this material. If you are advanced
blender user, you can click here and you
can see also how this look. I think this is texture
I change in Photoshop. If we go with 11, you can load this
texture and you can see what I do in Photoshop. I basically just color this one of these tiles and when
we put this on repeat, we get this effect. Okay, But because
you can just copy this material from my
last blender file, you don't need care too much
about all these details. Let's now make another
with these tiles. Let's go to slot three. And this is without
tiles, tiles. You can see that this now become much better With
just one material, we can find better angle. So you can switch again here to render review and
let's back this third floor. And we can just move camera and try to find a
better angle for this.
41. Compositing and lighting: Panting. I forget to tell you we are now in render result, You can see that we don't have any distortion and dispersion. That's because we
plug this only in U. If we search here, not
you can see difference. But I will get back
here to render result. I will jump to
compositor when we are happy with the nodes here, we can just plug
these two compositor. This will also be
in render result, but we can also add here
another glare effect. I will duplicate this and
let's try with the streaks. This is effect what
we get and let's now maybe fade this a lot. Okay, I think this is
still too intense. But if you like this
detail, you can keep this. We can reduce if we
go mix node here, second input will be. Without this, I will just plug this one and now we can
choose how much we want. This second glare, If
we move this on left, we add more this effect here, because this is value of one. We move closer to value of
one and this is value of two. I will move this two, maybe maybe 0.8 okay, we have small effect
of the streaks. Or we can maybe change
these two simple star. Okay, let's bring this to 0.9 Now this is render
results we need. Plug this to here when we are okay 11 again and
we get this effect. Let's now apply this chro
metal material to this part. It will look much better. I will go with six and I
will back here to net zero. And let's select this
object. This is still curve. Because this is curve, we
cannot make any UV map here. And I will go with, try
click convert this to Mesh. Now I will search for
from material. Let's see. Okay, so this is without
any roughness map. Maybe I need another
one, Chrome metal. Okay, this have this roughness
map with tab to edit mode. First I will go to object mode. And shay, smooth to smooth this and maybe turn
this out to smooth. And let's now go with
tab, maybe Q projection. I will go with you
Smart UV project. If we clear here. Let's
see how this looks, okay? But this is all gray. We cannot see
anything happen here. So I will just make
more contrast here. Okay, Now we start
get some details. Let's now see how
this material look. We get some imperfection here. Now, we can make this more
intense before and after, but because we don't have
too much light here, this is not so visible. And what I do last time, if you look my renders, you can see in most
of the renders here, I have much more
lighting because I parent spotlight
to this camera. You can see this effect,
especially here. You can see that we have
one spotlight which follows our camera or flash
light effect. You can imagine that this
guy in hand have flashlight. And I can now do this easy. What I do last time,
I just go with ****. I click to about here
and I go with light. And I select Spot Light here. Okay, Now I will press and I will rotate 90
degrees to x axis. Now we can play with the values. If you go here under
light settings, we can increase
this maybe to 200. Now we can play
with this radius. I will bring this radius maybe 2.5 I will maybe
increase little. This spot size. With spot
size you cover more area. What I do last time, I think I made this
light more orange. So first I will try to line
up this little better with camera. Okay,
Something like this. And now I will select camera
and I will go with control. Now I can parent this object, this spot light to camera. Next time when we move camera, this light will always
follow our camera. I can just split, move this out from
this camera a little.
42. Plaster material, improvement: This is what we have for now. We need later improve
this material. You can see that I have
more details here, but I'm not sure if we have this default
material on this ceiling. I will select here, default material and we
need to create this map. I will go here, under
data properties, under maps, create this map. And also for bump, okay? Now if we select this object, all the third floor we
can go with projection. And let's now isolate
only this object. And I will now, for now, disable this render because
this can kill my computer. And I will now move
this about here. And let's switch to
material preview. First I will select this
map, and let's scale this. We can see some details here. Let's first check,
scale this one and again, Q projection. And let's scale this. Let's now select second, again, Q projection
with second map. Now we should start,
see some details here to see better. You can click here with
Shift and I click, you can preview on
this note here. And we can see how this look. And I will scale this up. And now we can also preview
only this material here. And this is concrete map, so we can also scale this. Now when we are happy
with both maps, we can make this material. This now should look better. In render preview,
let's go with spot six. Okay, this is before and
this is after we get some details but we need also make some bevels here to
make this even better. For example, we need
all these edges here. Maybe control with control B, maybe we can make
some seams here. Also, again, control B. Okay, let's zoom this a little. Control B to bevel this
lo mouse down a extremal, we get this same here, and this bill look
better than before. This is before, but I
will show you how we can improve this material later with this plasterboard
texture here. With this texture here. Let's now create this detail. First, I will create
new material and I will search for default, and now I will create
new variation. I will call this plasterboard. Now I will import
this image here. This image, and let's
drag this to blender. Now, I will place this here, and let's see what we can do. First, I want to
create a new UV map. I will go here, under UV maps, I will call this map board. Let's now you up and
let's plug this here. I don't want to apply this new
material to all this area, I just want to apply this
to some of these parts. For example, on one piece here, I will go with control R and
maybe move this little on. Right now with face selection, I will select this part here. And I will now go to
Material Properties. And I will assign
this material here, but I will change viewpoint, display color for this. Now when we are
in solid preview. Okay, I think I didn't
apply this material. So let's click aside. Okay, now we know that we have on this
part, this material. Now I will select
this plaster board. And now I will go with Control
Shift, and click here. And to Material Preview. To see how this is projected, we need to go with projection. And let's select this
plaster material here. Okay, and we can
now project this. Correct? So I will go to this
area to see how this look. Okay, Now we need to mix this base color with
this new texture. I will back this
material and I will move this little up now. We can bring this material
here and we can now mix this texture with
this new texture here. Shift right click. Let's now say if we go to right, we get only this color. But if we go all to left, we get this default color. But I will try with
screen blending mode. Screen blending mode will
take only bright part of this texture, bottom
texture here. But I want isolate
now this white part. So I will go with color ramp. Let's plug this here. Let's see how this look. I want to isolate this white
part from this dark part. I will move this all to right. Okay, now we need to mix this base color with
this new texture. I will back this
material and I will move this little up now. We can bring this
material here and we can now mix this texture with
this new texture here. Shift right click.
Let's now say this. Now if we go to right, we get only this color. But if we go all to left, we get this default color. But I will try with
screen blending mode. Screen blending mode will take only bright part of this
bottom texture here. But I want isolate
now this white part. So I will go with color ramp. Let's plug this here. Let's see how this look. I want to isolate this white
part from the dark part. I will move this all to right. We know that screen
blending mode will ignore all these dark parts and
take only these white parts. Let's now see what we get so you can see all the
white details here. But if we make this
default texture more dark, this will be even more visible. But I think I will
make this yellowish. Okay. But now we need also bring this yellowish
color to this material here. Okay. Now this is same, but we now need to isolate
this little better. Okay, So we get this effect, but this is now too intense. So we can bring this
factor to left, or we can bring this white
color more to black. We get the same effect. I will play with this factor
and let's see how this look. Okay, now if we want to
add this detail also here, we can go again with
control R. We can now select these two faces,
assign this material. Let's just be sure to select
this up Q projection. And let's now project
this where you want, okay? I think this is
still too intense. But let's make one test so we will see better
how this look. You can see this nice details. So let's go before
and after this, and this is after we can
see this nice detail. I also place this
detail in this render. You can see this detail
here and also here. You can also note small lines here and especially
here in this place. Now, you just need take
some time and you can just place this in all
places you want this detail. For example, you
can add one here. Again, selection, assign this material
Q projection and project on this area here.
43. Project breakdown: This is my last blender
file and I will not model this light here because we already model this
light on this column. It is very similar process and you can download this asset in asset folder or you can
just copy this from this file. You can not this part
here which we didn't model and I create
this very quickly. So what I do, I just go
with plane, I cover this. Now I go to edit mode, and I press to insert this. If you press Z, you can move this on Z axis. That's how I basically
get this part. And now I just need to apply this material
and it will look nice. I also just add this grid. This is just a simple cube. I scale scale this in middle, and I duplicate this few times. I noted this detail here. This is how you can
create this part. And this part ky is
also easy to create. So if we go as we do
before with plane, let's press as to scale. This control A applies scale
and now tab to edit mode. I now just Z to bring this up, I will now scale this even more. We can select this part here, maybe control to be level
and now all extrormals. This will work. And
maybe another bevel to smooth this salt. This spoon and fork is
model from sketch ub. When we go to sketch B, we can just search and
we can find a lot of free models we can
download In second, I just apply this
Chrome rough material, you can see how this look. One thing you can note here, if we isolate the second floor on the reference and
also on my render, let's take looks on
some references. You can see that we have
different tiles on some area, for example here
and also this on first floor we have this marble texture
on this part here, this is just tiles. But here I think I place
this marble texture. If you want to use
these textures, you can just go to edit mode, select this face, and blender will navigate to this texture. I will not build all
these materials now. But what you can do, if you wonder how I
made this material, you can look to
this shading tab, You can also see how
this material look. This is black marble. I think I found this on MBN
CG and I use base set up. I use this also for
roughness and also for bump, and I also add here some
leaking or dirt texture. Let's take a look here. So
this is just simple tiles. I also download
this from polygon. You can find a lot of free, nice models and you
can use this for free. Let's take a look at
this material here. Okay, This is the second floor, but let's also isolate
this first floor. I think I make a
separate plan for this. I will go here and
select tiles here. And let's, let's
see how this look. These tiles here
are from this part. When we take a look down, we can see the big tires here. Let's see how this
I basically go with checker board texture. If you go here, we have in
blender checker texture. Let's see how this, if we go with plans to scale and let's new material
checker tiles, we can go with checker texture. You can now plug
this to base color, now you get basically this and now you can
choose second color. If you want. You can go
with control and maybe rotate on Z axis on 45
degrees to get this effect. I will now delete this,
what I do last time. I just mix this with
concrete texture from texture.com to
get the imperfections. I also use this for uphness. I use combination of the
two texture for bomb. Let's see how this bomb look basically I get
these lines with combination from this
concrete texture, okay? And then I place this plane
down and I get this effect. These planes here are from
Botanic Don which is not free but you can find a lot of free planes model
anywhere on Internet. So you can just got five
and you can search for plans or you can go to three. You can just click here to
Free Collection and you can download all the nice
models for free. But be careful, this
is high quality model with a big resolution texture
and a lot of polygons. So just be sure to
reduce texture and mesh. But let's see what
we have on Sketch. I think if we click here, we will get mostly free models. You can see that you
can download a lot of these three models. I think you need to search for this icon if you
want to download for free or Another great website is CG Trader Plants. You can click here
free and you can find a lot of free models. This lady here is free
model from sketch B. This is Profile of Virtual
Museum from Poland and you can find a lot of high quality three scans
here I found this. I download this
three D model for free and this is a
very high dense model, but I reduce this me density at here you can see how
this look in my render, but here you can find a lot of similar things and photo scans, all of them are
very high quality and you can use this for free, and I think this is zero. So I will share this model with you
with this Bender file. In Kane version there
is a rolling giant, but I didn't find any
high quality model and I didn't want to model. If you search for Rolling Giant, you can find some models, but these models are not high quality and
they look pretty bad. I think this one is best model, but when I download, the texture doesn't work. I decide to use this model. All the Mo materials
are very easy to model. Let's isolate this object Here I will show you
how I made this. Basically I go with cube and
let's scale this all down. I will scale this up and
maybe scale this on Y axis. Now we can go, let's go
control a apply scale tab. We can select both
of these pass. Now if we press, we
can insert this. If we now enable this don
which come with Blender, go to Edit Preferences
and search for Loop. We can find this loop tool
and just activate this Don. When you go with try
clicking Edit mode, you get this loop tool here
and just click Bridge, okay? And now we get this shape here, and we can go with control here. Now we can grab these two
parts, these two phases. We can go with Z, bring this down again. I will go with control. Place this here.
We can now select these two phases with holding shift or true along normals. Again, we can isolate the
add the two look cuts here. And we can just extrude
this on X axis. You can use mirror
modifier for this, but I think I will just lose time with
the mirror modifier. This is also very quick. We can now go add one
cut here in middle. And we can now, just now we can apply here
this metal black texture. But just add one bevel here. Select all control be to
smooth this a little now. Okay, I make double
vertices here, but you can avoid this if you go manually with control and shift, you can isolate all these parts. And now you can be level, then you can be level all this. Let's take this material we
have here, metal material. I also found this nice image. You can see how this looks. I just project this
image on this part here. I grieve texture for bump to add a little
imperfection skill. You can see this nice bump here, that's how I create
this promo material. But we have also here a
lot of similar things. Let's isolate this. And I
save all this in this file, you can just copy and
use this in your Mol. This part here is also
very easy to create. Let's go with cube, shift a cube, and let's
isolate this object. And what I do, I
scale this z axis, and then I scale this a lot. Control A applies. I just subdivide this few times. Okay? I will go with
control Z because I subdivide also this part
which I don't want. I will select only this space and subdivide this few times. Now what I do, I press twice to insert this
on individual basis, and now I just go with all extrude along normals
and I extrude this inside. And I again go with control, naped control to
bevel this, okay. I get all this part we
can see here in minute. Then I place a few area
lamps in few of these holes. You can just go here, shift and light area. Scale this down and GZ, move this little
do with all D x. We can just duplicate this
few times or all D Y. This is how this looks. On this column here, you can see the type project image of three and you can
see how this look, Let's isolate this column here. You can also here
in shader editor, see how I do this. Basically, this is image of this tree and what I do isolate, I make black and white map
with color m and then I tell this and this second value here. Then I get this
tree model of this, which also looks nice in, but you can also
download this in Apec for this cinema here. I also make this texture. This is what I
make in Photoshop. Then I project on
this store here. And I also make few of the three D models to make
this more three dimensional. I also add few look cuts here. This is the final result. You can see all
these nice details here on this wall here. I also project image from original mole,
which is this one. I also project this part
here on this area here. I like to take texture
from original mol because this can make this our
end more realistic. I also project this in
one of these walls, this octopus here, we
can see how this looks. This is basically just
projected texture on one plane. Let's talk about this IMC logo. Let's find this model here. Okay, here we have this model. And what I do last time, I basically go again with, let's copy address of this
border image images plane. I import this model here, z minus net, Okay? We are in local view. I will back to global and Z
minus light to rotate this. And let's place this here. What I do last time, I basically cut this with knife. We can go with front
orthographic view and I will flip this X, X minus one to
opposite direction. Maybe there is a better
way to make this logo. But what I do last time, I just go with K, I just start cutting this. Then when we are
finished, we can delete. We can just take this part
and we can shift D Y And we can now go with Y
to extrude this and make three D model
from this control B. But I will not now
go with control B. Let's now just go with L to select this loose part
and separate by selection. Let's delete this back when
you see this transparent, we can disable this if
we click here to show back space in material
properties, okay? You can smooth
this, maybe we can. Let's try subdivision
surface, okay? This will not work, but if
we go with Tab, for example. If we select two phase two
edges and we go with try, click and subdivide, we can
get one extra point here. And we can basically just
smooth this a little manually. I just create a few points
more to smooth this, okay? But from distance this
look pretty good. And you can see how
this look in red. Okay? We see small part here and also here. Nobody will note that
this is not perfect. But if you want, you can
also smooth this manual.
44. Animation: In this part, we will
create our first animation, and if you look my last
render, you can see what I do. I animate only camera and I get effect that someone
walking through the more with camera and this
effect is very easy to create thanks to an hubert who created one add on which is
called camera shaky five. Now I will close this step because I don't need
the references anymore. And if you now select camera, so you can click here to this edge and you
can select Camera. And now we have
this add on here. To install this add on, you need to go to this link and I share this link with you. So just copy this link. And I also past this link here, which is tutorial for this add. If you want you can take
look to this nice tutorial, but I will also show you
here how to use this add. First, we need click here
to code and download zip. Now I will copy this address and you just need install this. Add Edit Preferences, ad
click here to install. Select this Camera shake. If I add on, click Install, and I do this before and just click
here to activate this. Or then you will
get this step here, camera shake five
and how we have here predefiniteda shake or animation if you click
on plus here you get this investigation
animation by default. But first I will close this step on left because
we don't need this. Instead editor, I will
jump here to timeline. If we now press space for play, you can see that we get
this camera shake here. We can also insert
the key frame. If I press here, you can see that I insert
the key frame on frame 25. If I now go to, for example, frame 50, and if
I type here one, if I press again, if I now press space, you can see that I get
slightly moved here, and then I increase this
value here or to one. But I will now press
A and delete this. What I do last time, I add more than one the presets. And you can see that
I use investigation. Zeke walked to Store
and Handicame run. But let's first set
this to zero and let's try another one. I will go with this Z. And you can see that
this Zc animation is very low intense animation. We basically get very
subtle movement of camera. You can increase this here, you get a little more of this effect or you can
also increase scale. So let's see what this does, okay, Now it's a
little more intense, but I will back the values to one because this animation
is very low intense. I will not play too much
with key frames here, but with another animation, I will play a lot with
intensity and influence. Now we try to create the
effect that this camera, or this guy, walked
through more. First I will select
this third floor. And I will disable
this in Viewport. And I will go with Numpad seven. And I will now select
the camera here. Now I will insert the
first key frames here. We can go now on right. Let's now just move this guy
to maybe this position here. If you now press here, if you back here to zero, you can see that first this guy is staying on place and then he go through this place here. But first I will move over
to right to slow down. Let's move this to slow
down this a little. Let's see how this look
in camera perspective. This is still too
intense or too fast. But I will just move this
guy a little on left. Then I will now
press I now here, where this guy start walking. I will add another presets here. So I will click Plus, and I will choose Walk to Store. Okay, now I will go to this
frame, this guy staying. And I will say this
to zero, maybe 0.0 0.01 Just a subtle movement. And now I will press here. When this guy start walking, I will go here with 0.2 I know that this
animation is very intense. I will not go with value one. Maybe here this guy
starts walking faster. I will increase this
maybe to 0.4 Let's see, now if we go with a zero, we can see how this look. Okay, so you can feel
this walking effect. But I think I maybe
increase this value. I go too low with this value. Maybe 0.5 If you enable this out of king
button, for example, if you now change
this value to one, you don't need press because how talking you will remember
every change you made. But just be careful
with this option. I will disable this because
if you, for example, go here and if you mess
something with this value, you will not know
what you do. I will. Okay. Just be sure to
select only this key frame. I will disable this option. Now we said this to one, let's see how this look. Now you can feel
this walking effect. I also use another one which is hand R. This is very intense. If you now press space, you can see this effect. I will go here to zero
to insert key frame. When this guys start, I
will go with 0.1 maybe. Let's see this effect now, okay? And now, at this point maybe we can insert two key frames. And a few seconds
or 1 second later, we can maybe look to
another location, for example, about here. And this is effect we get, okay? This is too intense movement. So I will maybe just
slightly look around here and then maybe to another direction and
we get this effect. I have very intense
movement here. I will go with this camera, maybe to this direction. And let's see how this look
with this camera here. I will maybe rotate
to this area. Now maybe I will
go with num seven, again, maybe 100
key frames more. And I will now move maybe to this fence and maybe
rotate to this area. Also, if you move
this x rotation, you will look down or up. X down or up. Maybe we can take a look down. One thing you can do
here, more in focus. You can select this, you can go here under camera
properties due for display, and you can increase this or
to one to make this black. That's how I get
this effect here. You can see that in this
animation I have the cuts here. And that's because when I
finish render this animation, I jump to another location in. You can see now that I'm in another location,
for example here. We can do this easy. You just need to
select camera camera. And this light here. Now, I
will duplicate this **** y. And just be sure to
select camera, okay. Select camera, press a, select all key frames, delete. And now we can jump
to another location. For example, here I will
back this to 90 degrees. Now you need press
control num zero. Because if you just
press Um zero, you will back to
this default camera, to this main camera. To make this camera, you need to go with
control numer zero. Because if you press
full stop Ump, you will see that this
is another camera we can rename the two animation one. And these two animation two. Okay, now we can start animating
maybe this camera here. But let's press, well to
see how this part look. I will go with Nampa seven now. And now we can start making
another animation here. Because last time I will now select this camera,
what I do last time, because if we select
this first camera, I animate this maybe
300 key frames. I will now start
from 300 to maybe 1,000 Now I have free space on timeline to
animate another camera. I will start this
animation from 300. And I will select this camera and press
to insert key frames. And now we can move
maybe to about here. And let's now walk maybe
to this area here, okay. And I to insert key frames and we get rather
animation here. At this point, maybe we
can insert key frames. Now we can maybe move
camera to this side. We get this effect a
little too intense. So we can always
bring this on, right? And maybe at this
point we can look to this area, okay? And now we will stay
on this position. So I will press to
insert key frames, but because we stay, we can bring intensity
of all this down. I will go here, I will first press to insert all
these keyframes. And now few frames later, I will bring this to maybe
0.010 0.01 also with this Z, I will go maybe 2.5. Now here we get the fact that
we just staying in place. Okay, But this is too much. We basically stop all animation. Maybe at this point I will
insert key frames here. And few frames later, I will increase this
investigation to one. Let's now see this effect. But we can just moved
with Z axis and to make a feeling that this
guy look around, okay? But this is too fast. Just move this on right now. This is too slow. You just need to play a lot
with the files.
45. Rendering: And that's how I made the
five animations here. Now we will render this. I will show you how
you can render this. I will go to this
folder and I will create folder inside this, I will maybe create
animation one. Let's copy this folder. And now I will go here under Output tab and I
will set this folder here and select this one and accept this is fhere our
animation will be saved. I will change the PNG to J peg because PNG
files are too big. Let's now play with
this samples last time. For final animation, I
go with 100 samples, but this is not enough. Especially if you look, this area look a little better because we have a lot
of lighting here. But in this area where
we have less lighting, we get a lot of
this glitch effect. When you have more light, you need less samples. In dark area, you
need more samples. Last time I go with
the value of 100. But I cannot afford
more samples because this animation like
this will take weeks. Because I render maybe
10,000 frames here, each frame take me
about 1 minute. And if I increase
the samples to 200, it will maybe double. But you can decide
about these samples. My recommendation is
maybe 200 or 500 samples. But before you start
rendering final animation, you need to make
first test render. I usually make test renders with maybe half of this value. When you set this to
50 instead of 100, you will speed up your render by four
times or three times. When you increase this
resolution here, you get one. Imagine this frame here, you get one frame here, and another one here, and another one here. You render basically
three times bigger images and you slow down. When you increase this to 100, you slow down render
time by three times. For test render, I usually
go with half of this value, and with very low
samples, maybe just 20. Of course, you render
the key frames here. So we start from 300 and
we end to 1,000 and we can change maybe to 700 or 750. Now when you said
all these things, you need to render animation. This take only 7
seconds on my computer. Now you just need to go to your animation folder to
see everything is okay. This is what you can see that
I get these frames here. One thing I forget to
mention is frame per second, and by default is 24. I keep this default while I let few minus to
render this animation. And let's see how this
unfinished mode look. You can now go to any video editing
program and you can import this animation sequence. Because this is sequence, you just need to
select first one and check image sequence here. Now you just need click open and we can now
bring this to timeline. And let's see how the 2 seconds
of animation look like. I will duplicate this few
times so we can see that. Okay, so this is only 2
seconds of animation. And you can see how
this look pretty similar like in
my final renders, but little empty because we didn't add to
much details here. This animation here, you can see how this look
in bigger resolution. This is the test I made last night for final
animation here. You can see that I bring
a resolution all down and I also go with
maybe 20 samples here. Only difference between
this animation here and this one is that we didn't
add too much details to the renders why I made
the test animations. Also, I take a lot this renders and then I
make another decisions. For example, I know that I need add here some
imperfections. I need to fix this
part, which is bad. And then I go few frames
later and then I look this area and maybe I
will add something here. This is why you do test renders, this photo, little stretch. So I need to fix all
these things when I'm happy with this renders, then I make a final render. This is reason why you
need to make test renders. One important thing I forget to mention is you need to
enable motion blower. You need to go to render and just enable
this motion blower. I forget for this animation, but if you take a look this final animation
without motion blower, you will lose all these details. For example, when I run here, you can see that I get
a lot of motion blower. Just be sure to enable this, I render a little more
of this animation. So let's now see how this look. Just select first frame here
and let's import this here. Let's see what I render here. This is without motion blows, it will look a little
bad, but let's see. Okay, this is too fast, so we need to slow down this. Maybe I can slow
down this here for about 50% Now we are in after effects and I will talk about post processing, but this is result from blender. This is before and this
is a after effects. You can see that
difference is very subtle. I think this is good for you because you don't need
play too much with post processing because renders blender look
are pretty good. But I will show you
what I do last time. But before we continue
with the post processing, I will show you also how
you can animate this lady. Because maybe you are wondering
and I skip this part. Basically what I do, basically you just need to
grab this lady and you can go with nut seven with, you can just insert key frames. And then of course you just need to move this
to another location. If you now press, you
will get this effect. That's all what I
do for this lady. And now you can maybe set difference here and
maybe you can rotate this, you get this effect. Okay? One suggestion is
to animate also this, to make this blinking
and what you can do, you can just grab this light. Let's go with Naples. Key To bring this light here, you can just click here. Use nodes to get the nodes. Now when you select
this emission material, you can just press to
set key frame here. And maybe you want go one
frame. Just move this here. And now you can set this to zero and press I will more or two. And I will now again
set this to one. If you want, you can
duplicate this few times. Control C, Control, place
this here, maybe here. Now I just press control V, then you get light
blinking effect.
46. Post-processing part 1: Let's now talk about
post processing. And you can see this
very slight difference, this is before and this
is after post processing. Basically you can maybe
just a little more glow and all these other
things are pretty subtle. Of course, you don't need to
use after effects for this. You can use any video
editing program. But I will show you what
I do last time here. We have a lot of layers, but all of these
are very subtle. So you can see only
5% here, 22 here. But let's start with blue. What do I basically
add Gci blue to 300? And I said this to screen blending mode and
only 5% opacity. But if you increase this to, for example, 50% opacity, you can see what we
get basically get volumetric effect or something
like haze or dust effect. Of course, you can do this in any video editing or
graphic editing program, just had blue to screen. You can play with opacity. I basically replace
volumetric effect, which in blender will take
a lot of time to render. This is before and after. Next layer here is
a color correction. This is before and after, but I said this to 222. Let's increase this
value, this is before. In after effects I
use lumetri color. This is settings I change. I basically add little
more temperature up, tint down to get a little
more greenish tint. And I just increase little
highlights this effect I get. I see that this is maybe
too intense for me, so I bring this to 22, very subtle effect here. Next layer, I disable
this orange solid. This is basically just
this orange solid color. And when I said this on top and said this to
screen blend mode, I said only this to
1% This is 10% Okay. I now delete this. If we said this to 10%
you see what we get. I basically add the orange
tint over this render. Last time used this only
1% this is before and after I add this because in pixels version I see
a lot of yellowish tone. In all more, I just want to
add the subtle effect of this yellowish tint,
orange, tint yellowish. Okay. Next is film convert. This is plugin
which is not free, this is before and you can see that I also
use very subtle effect of this f basically
this plug in, you get all these film options I have here, pre
definitd options. And you can see that
when I change this, I get different look. This is basically
something like lots. You can find a lot of free lots in after effects or
any adult program. If you search for lumetry
color in after effects, this is Lumar color. And you can find here a lot. Let's disable this pad. And also under Creative tab, I think we have a lot of
the predeferated options. If you like any of this, you can just bring opacity down to maybe 20% and you can play
with these lots here. Okay. But I will remove this and I will back
this converted. Not sure anymore
which one I use, but this is not
important for now. Okay, I tried this Dehenser
Don which is not free but, but I didn't pay
for license so I, I disable this and
I will remove now. Next is vignetting effect. And what this does this I'll just add slight vignetting effect
on the edges here. If you see this here, this is because I use another paid Don which is called Sappi from Boris effects. They contact me to
try the products, that's the reason
why I use them. And if you buy this license, you get all these effects. So you can see a lot
of these things here. I try some of them and
they look pretty good. Of course, you can create vignetting effect again
with lumetri color. And you can just
find vignetting, you can type here
maybe minus two. Let's now disable this
and increase this to 100. So you can see this
vignetting effect here. All these settings
I use in Sapphire, you can also find
in after effects. But with Sapphire plugin, you get more advanced options. For example, in after effects
you have a few options, but with this or Sapphire glow, you get a lot of more
controller here. This is before and
after Sapphire glow. Nice thing here
if you don't want play with all these options. You can click here
to load preset. You can find a lot
of precepts here which another users
say For example, if I click here I can
see how this look. I can use some of this which other people save or you
can save your process here. This is nice thing about
this Sapphire add, of course all of these
controllers here and you get all these
nice handy things. You can play with these values
of the editing program, you can find the globe effect, you can just slightly increase
this globe effect here. In after effects you
also have grain effect, but I also play with this
sapphire grain effect. Again, you have a lot of
these controllers here and a lot of presets which
other people save. Okay, I only use 6% of this. If I increase this to 100, we can see what I get. Maybe I can back this to ten. That's because I use
another grain from Sappi. This is ultra grain. And let's see how this look. This is another type of grain. This is before and
this is after again. You have a lot of prices and
all these controllers here, this is another effect. I just play with all this. I try a lot of this and I
like this flicker remove. Let's see what this does, but this is only 2% Let's see what I get
when I increase this, maybe 50, I get more light. And I'm not sure what this effect but I just
like result I get, I use this maybe just 5%
Next thing I create here is slight haalation effect and I talk a lot in
my last tutorials. So basically I go
here with find edges. I will say this
for now to normal. Basically I go find edges
here to find these edges, and then I tint
these edges to read. I just play with these levels to isolate only small part of this, and then I brewer
the edges here. If I now set this to screen, I get dihalation effect. You can see this red
glow around these edges, but I use very low
value of this may be just 20% and you can see this subtle
effect before and after. This is before and after. Another nice effect from Sapphire or Boris effect
plugging is this Jpeg damage. If we move this value
closer to zero, you can see this
Jpeg damage effect. This is me pixels widow, and you can see this Jpeg
damage effect in black areas. You can see all these parts, maybe just one color. I also add a little
value of this, but this is of
course too intense. Let's try it, 0.2 this
is still too intense. So you can see before and
after. Before and after. You can see a lot of this. But last time I use also
very subtle effect of this, only 0.45 And you can see it's not big difference
before and after because this will kill
your render quality. But if you want to achieve
this or the retro effect, you can increase this. This is what I do
in after effects. But I will show you
one free program where you can find a lot
of nice free effects.
47. Post-processing part 2: This program is called Up Cut, but this is not
sponsorship video. I just like the software, you can just go here to download and you can
download this for free. Let's now open this program. And I found here are a lot
of nice and free effects. This program is so simple
you don't need even watch Tutorial for you just need
click here to import. For example, I import
one of these videos. Just bring this to timeline. Now you can click
here to search for, maybe you can play with
these adjustments. For example, you can
increase temperature. Ten things like this. You have a lot of options here. You can find a lot of
free filters here. For example, if you
just click here, you get this color grading. When you like this effect, you can just drag
this layer here. Okay? This is before, and this is after, but this is too intense.
I will delete this. You also have the sliders here, so you can bring intensity down. But I will not talk about all these effects. You
can play with this. I found under Effects here, these are filters
and under effects, maybe under retro tab, I found some nice things here. If you click here, you can
see all these effects. For example, this one. Again, you can play, you can test all this. And if you like some of this, you can just bring this
and enable these layers. Last time I found
these two effects, nice smart sharpen edges, I will now disable
this first one. Let's talk about
the sharpen edges. If we now increase the values, you can see what we get. Okay, Let's go about here. And this is before and after, especially the sharpen
effect is nice. If you increase this,
you can see effect, we get the sharpen
edges on highlights. This also look very nice retro, If you want to achieve
this all the camera, you can play with
these effects here. Let's go to about here. And this is without this
effect and this is width, I think this is a very nice
effect you can get for free. Let's now enable
this Smart sharpen to see what this does. Again, we have this
sharpen effect. You can also add the small
value of this if you want. Okay, This is just range. And filters, if you want to
get all the camera wipe, you can increase
the filters here. This is blue okay before
and this is after. I will use this
for final renders, but not too intense like this. So you can see that
this is pretty intense. But the small value
of the effects I think I will also use
for final renders. Of course, you can play
with another settings here, you can find a lot
of nice thing here. This slide show
effect is also nice. You can see before and after we get this color
grading or filters. Okay, I think this is
all for this tutorial. If I remember
something I missed, maybe I will record
one part more. But for now this is a
for this tutorial and all project files you can also download with
this tutorial. Thank you for watching and
see you in the next file.
 šime Bugarija