Transcripts
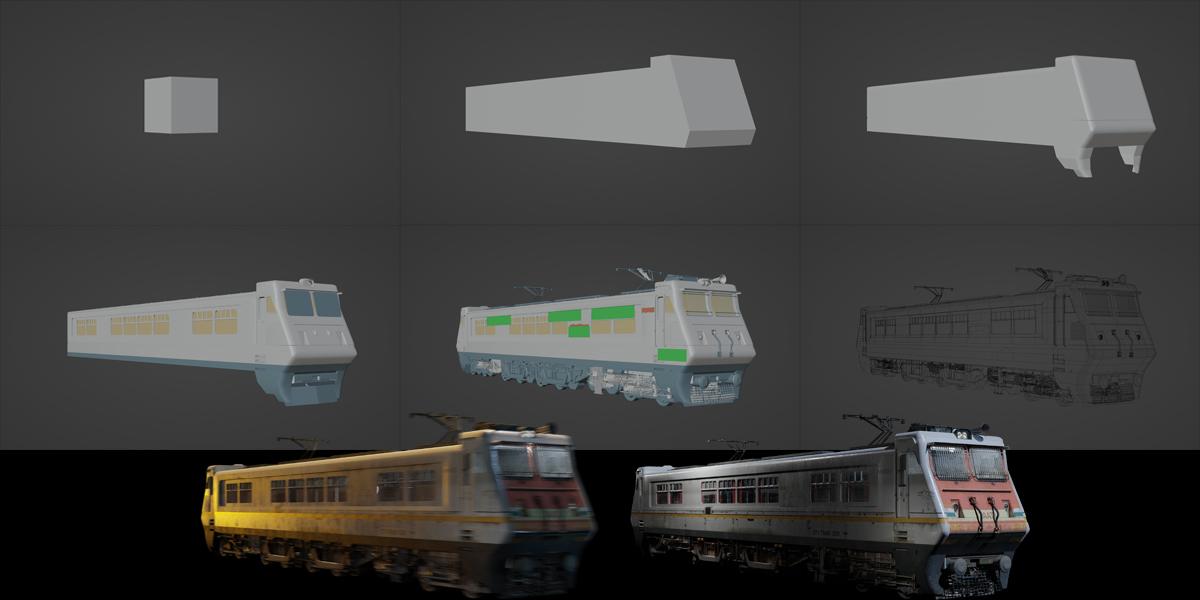
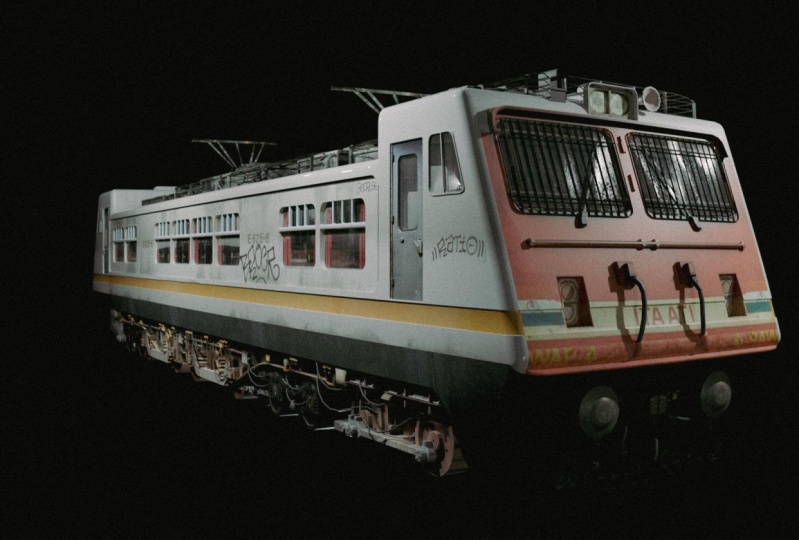
1. 01 - Introduction: When we open Blender, we get default cube. How to convert this cube to hide the data realistic chain. There are a number
of ways you can approach modeling and
texturing in Blender. In this tutorial, I will
talk about the approach that gives the most realistic
result in the shortest time. This is a technique I learned in my four years of
Blender experience. In this three
hour-long tutorial, create that shrink down
to the smallest detail. You can apply the
technique you'll learn in this tutorial to create
any realistic modelling. Talk about the steps you need to take before they
start modelling to make the process as
easy as possible and how to organize Texas at material blender
in order to work week. What are the most
common problems you may encounter and
how to solve them? How to use tools
for modelling and selection quickly with
the help of shortcuts, which modifiers to
use and much more. The tutorial, step-by-step and suitable for beginners as well.
2. 02 - Import reference and base shape: We're now in Blender. And first I will save this file. So file save. And I create that this
Train tutorial folder. And my recommendation
is to create a folder where you want
to save all these files. And I will call this tutorial. I will save this file here. First. I will close this timeline here because we will not
create animation. So just right-click here and
join areas and click down. And now I will go with right-click here
and horizontal split. And I will make place here
for our reference images. Here we have to
reference images. And I cannot share
these images with you, but I share links with you so you can download
these images. Or you can just take
screenshots of this image here. And then you can go to Blender. And here you can open image editor and you can just
load this reference image. You can simply skip this part because I will keep all time Open this reference here and you can look this reference with me. And you can zoom this with
your resume on your mouse and you can move this with middle mouse button
on your mouse. And you start model
something like this. You need to first
create basic shape. And we have here one Cube. We have another Cube here, which is little
bigger on z-axis. And with this shape here. Now we need dimensions by I. This is maybe
two-and-a-half meter on z-axis and also on x-axis,
about two-and-a-half meters. And I will go here with 1.6 m. So we can now back to Blender, and now we can select our
Cube and we can press N. And if you, for example,
delete this Cube, you can create new
one with a and Cube. And now I will press N
to open this item here. You can under dimensions here, type two and help. And y-axis 1.6. Then on z-axis 2.5 meter. And I will read
middle mouse button rotate this Cube or
in this direction. Now we need to create
this part here which is about 15 m. So I will
now go to Edit Mode. You can just press
Tab on your keyboard to skip between
object and edit mode. And now I will select
this edge select, or you can just type 12 or three to skip between
vertex select there, select them Face Select. And I will, with
the edge select. And with Placing mouse here, I will go with Control R. And I will place
one loop cut here. And I will move this
almost two top here. So we can extrude
this part here now. And now I will select this face, select and I will press E
for extrude Y for Y axis, and I will type 15. Now we extrude this part for 15 m. We can now this part here, this edge here is
this edge here. Now I will add one, look at here with
Control R again. And I will bring this down. We can now select these two
edges with holding Shift. And we can now move
this one y-axis. And also we can now move
this insight on Vioxx. And now I will press numpad three to go to right
orthographic view. And we can line up this. First. I will select
this edge here, and with the number three, I will move this here to
line up this edge here. We can now create this
yellow line here, so it will be easier to
understand this shake later. We can go again with Control R and we can move this
down to about here. Don't go too much
down because we will later create
this bevel here. And if you, for example, just go with all down and you will let them know to be
able to create bevel, glucose or this edge. So you can select this edge
with the holding Control. Know holding alt. And then just click here. You can select easy, all this edge here. And you can move this up, the double tap G, double tap G. And
you can move this slightly on this axis here. Now, we can go with Control
B to bevel this age. And if you scroll mouse down, you are a lot of
loop class here, but we need only one
loop class here. If you will. For example, here, we will deselect this edge here. And if you want,
select this again, you can also go with holding
Alt and you can click here. And you just need
to click few times to select this line here. And now I want also create
lethal extrusion here in geometry because we will create this yellow line
later with material. But I want to see this
whole time and I will go with E and extrude
face along normals. And I will now hold Shift
to move this slightly. And I will move this little in, maybe just few millimeters. Now, I will click
here and you can see that we have also
this geometric. And to make this more visible in solid preview,
I will click here. And I will enable this cavity. And I will also set this to screen to vote to
make this more visible
3. 03 - Details and main bevel: If you go with Control B, we have space to bevel this. And now we need to
create this part. Now. This edge here is
this edge here, but we have here this
part which will go down. And we have also this on this. And to create this, I will just go with this edge. So select this edge
and go with E. And now press Z to stick once the axis and just move this down. Hello, again with E
and C and move this. First. I will go with Control Z. I
will scale this on y-axis. So SY to scale this on y-axis. And I will now go
again with E and Z. Stick on z-axis and scale
this again on y-axis. And let's move this
little to about here. And I will create
this part here again. So E, Z. Let's move this
again to about here. And I want make this cut here. I can just go with for tonight. I can stick here and talk about here and just click
left mouse and press Enter. Now we can select
this vertex select, and we can delete
this vertices here. Now I will go with
select here and I will select this holding, shift, this three edges. I will more this, I will select these two edges and I will move this
little insight. Let's move this one the x-axis. I want to select this, this and this edge here. Now we can move this inside. Now I want select
only this part here. And let's move this
little more insight. And let's see how this
smoking to orthographic view. And you can go to front orthographic view
with numbered one. Well, you can go with you. You Import and I think
this is a little too big. So I will select
this two edges here and you need to
be an X-ray mode, because when you are in front orthographic who can select
only visible edge here, but we can also on
this edge, the ground. And so always use
this x-ray mode. You are in front, right or top orthographic view. And just move this vector up
and maybe this little hit. Okay? And now I will disable this x-ray mode and I will
now with holding Shift, I will add selection
here and I will go to Extrude and X4 x-axis. And I will move
this to about here. To get this far. Here. We can see that this
is pretty light up into line up this perfectly. You just need quick S to
scale and X or X axis. So this is only x-axis and zero. So zero. Or you can just press S, M, hold X and we can move
this to line up this, but it's much simpler
if you just press S. And I now see one problems, which can be big
problem right there. All these vertices
here are collected. So all these connected. But this one is not
connected because we don't have any
looked at here. If you press G, you can see
that this is just here. In age, is not connected
with this part. And this can be
big problem later. So I will now control are I will move this
loop cut here on left, and now he's still
not connected. So we need to connect
these manually. If you go with you, you can see that we have two separated vertex
here and I will now select one end with holding Shift,
select another one. Now we need press F3
and we need such mulch. Merge on blast furnace or same. So just click Merge last. And now we want like
this vertices here. And now we connect these
two vertices in one And now we have this
shape or so here. We don't need this opposite side because we will use
mirror modifier. To use mirror modifier, you just need make loop cut
in middle of this object. So I will go with
Control R and just click here to look at the
middle of this object. And I will now press Escape
to escape this mood. And now I will press Enter. And now we need to go talk orthographic view
with number seven. And in x-ray mode, willing to select
this right part here. Press delete vertices. So we now cut this angel, and now we can use
mirror modifier. I will go here under modifiers, and I will go here under mirror. And this is by default x-axis. So this is, you can
see x-axis here. So this is correct and
just click here clipping. So Blender will
automatically merge this middle part in one
part with the SQL API. And now everything
we do are left. We also do automatically. Alright, so you can see that this right part is just
middle of this left part. And because this
object is symmetrical, we can just more left them. Blender will copy
all this on right. Now we can create the, you can see levels here. So we want bevel, this edge here, this part here, this part here, and also this part here
and all this slide. And we don't want bevel this, you can see that this
is pretty sharp. So we can start selecting. And I will now holding, solve it, holding Shift, you just add selection. So you basically need
click one by one edge. But you can see that
we have tiny edge here and it will be problem
to select all this. But we have also one
option in Blender. And if we select with
holding Control, you can select all
connected lines here. If you press here,
you can render. It will automatically connect
all these slides here. And if you now press
Control and go here, Blender will find shortest
path to this line here. And this is in this example. Not good because we
want to go here. So just with holding Control, click here. This three edges. Now we can, for
example, click here. And you can see that
Blender find this as shortest path to this edge here. So we need to go with
Control Z to undo this. And we can click can
manually here, this edge. And now we can click here. And Blender will
connect all these part. Okay, and now to skip
to this part here, we need to press shift. So shift out selection and just go with Shift
and click here. And also this part here. Okay, and now we have
selected all these lines. We want bevel and I will
now go with Control B. I will bevel this and
with scrolling mouse up, we add loop cuts. And I want keep
this low poly so I don't want to look too much. Look class here,
maybe three or four. Okay, and then just press left mouse button and
we add bevel here. This is destructive bevel. That means that we
cannot go back later. You can go with Control Z
if you are not happy now and you can add another bevel
and it's controlled BY, but just be sure to you
are happy with this bevel, because we cannot
make this claim. What is my recommendation now? Because we will add
the details here and you can maybe make
fewer mistakes later. So it's good to have
backup of this object. So can always back
to this stage here, and you can do this easily, just go with Shift D and X
and move this to about here. And you can press
M to make this in one collection and you
can call this vector. Now, just press Okay, and we have collection
here and you can call this maybe step that one. And you can just disable this in Blender and also in viewport. So this object is here
if you need go back. But it will not be
visible until weekly. Backup. Object. Now, maybe we should do this
before at bevel, but if you are happy
with this bevel, you don't need worry about this. And now if you want smooth this, you can go with
right-click Shade Smooth. And we need to enable this
under object data properties, this auto smooth and
now this loop much, but now I want create
this part down. So let's see how
this look and we can just go to Edit Mode. We can select with
this edge here. And I will go with E, extrude this on the axis lethal, and I will move this inside. And now I will adjust again, go with E and Z to
move this down. And maybe scale this Sx to
scale this little on x-axis. And just again E. You
can hold Z for Z-axis. And let's, let's move this
inside, a little outside. And we can just bring little down to make these little
bigger, this edge here. And if you want to can grab this edge here
and you can move this, so on x-axis, but
just be sure to not go out of this edge here. Now we have basic shape here, and now we can project
images on this object, then it will be easier
to continue Modelling
4. 04 - Projecting image on model: And I created this collage and I will share this
Texture with you. So this is how this look. And basically what I do, I go to textures.com and
I download few images. I want use in this
on this train. So this is how this
image is slope. So basically we have this yellow only for this
yellow part here. So this is just rust metal because we will find lots
of these examples here. And also this, we can use
this yellow line if you want. And this, we have this windows and this
part go on bottom here. And also this one, and we have also
another windows here. Now I create a collage of all these images in
one for K image here. And it will be much simpler to have all these in one image. So we don't need create a lot of different materials later. And now I will copy others. There is this image and I will go for us
to material preview. And I will now go to materials properties and I
will create new material here. And I will call this three. We can now open
this new tab here. So you can just split
this window when you see this cross and move this left. No, I think I will create this. So I will join these
areas and I think I will create one window here. So horizontal split. And I will also split
this on vertical. So we can open here UV editor because we
will need UV editor. And on left I will
open shader editor. And now when we have, when we select this object, and now we can, when
we select this object, we can rename this default
material to train. So we have trained
material here and I can just bring this collage
inside Blender. And I can paste this here or I can go with shift
day and I can search for image texture and I can
open this is not referenced, just goulash image here. And now I can connect
this here to base color. And now we need just
unwrap this correctly. And you can see that we have this scale here which
is not uniform. And I will go with Control a, and I will apply scale to one. So unwrapped, we will now
work much better than before. And when we go to Edit Mode, just press a to select all. And I will now go with you,
maybe Cube projection. So we have, when we press U, we have all these
default projection here. So we can try two
different types here. Maybe Smart TV project
will also work good. But I think I will
start Cube projection. And now I will
press L over this. So I will press a to select all. And I will project
this to this white, this main part here, the white material here. I will make this reference here. So you can see that this part down will be this
black color here. And we have our
yellow line here. You can see this yellow line. So I won't keep all
these nice details over this yellow line. So I will just move it to G.
And if you press as you can, move on and z-axis. But you can just go with G.
And I think I will scale this down to catch
all this area. Here. We have this. So this is yellow line and we have
nice details here. Okay? And now if we go
with base selection, we can make this
yellow line visible. So if you press all times, you can select let's few
times low with all. Thank This face, these don't work, but if you now just press this first part of yellow line
and with holding Control, you can select all this line. So just press first-line
and last one here. And Blender will, with controlled connect
all these parts. Now we have this line
here and if you decide, for example, this here, you can with a select all. And you can now with the G, move this down on this yellow line here.
In the null Ivan. Press S to scale
this a little too. Just make to catch more
of these textures here. So I want also
this details here. I will press S to scale this. And with the G just moldy sweet. Or maybe, if you want
to can also maybe project this on this to
get this texture here. But I will now go with
this yellow line. And I think I don't
want all this to black. So I will go with Control R
to add while loop cut here. And now we can just paint this part down to
break with holding control. We can select this part. If you want to line
up this perfectly, you can always go with
select this with control. And you can press S, Z zero to line up this perfect. So S is zero and you will
line up this edge here. And now we can go with control. Hold, Shift to add selection. So shift will add selection and control with, will
remove selection. If you go with control
and box select, you will remove selection. But I need to shift here. Let's just move this down. This black color. I will scale this to get
more or less Texture. And I will tell you can
select a loose parts. So I will select this part
and I will project this here. I will just scale
this on y-axis, so I want this part. So as Y minus one. Now we can rotate
this basically and it just so we can stick this part
on this black color here. And let's scale this with them z-axis to
catch more Texture.
5. 05 - Creating windows: Now we can add windows here. And to do this, I will select this part here. And let's see how this look. I want Windows, want
this area here, and I will go with numpad. Numbers. Three is
right orthographic, but if you click here on y-axis, you can navigate to
left orthographic view. And I want to line up this
edge here so I will go with k. So if you press K and we can stick
to this axis here. And now if you hold z, you can stick this
only on z axis. And now I will connect this to this edge
here and press Enter. So now we can perfectly
lined up this edge here. Maybe we can also line
up this with SY is zero, so S Y, Z line. Now also this. And let's add another edge here. So K fork knife z for z axis. And let's connect this. If and I will select
this face selection. Here. We can now press
I to insert this. And this will be placed
for our windows. And I will now go with E to
extrude and x for x axis. And with holding shift, you can move this
slightly inside. Okay, this will be
area for our windows. And what I will do
now, I will adjust, go under this UV editor
and I will press G. And I will project this
on this window here. To make this window
a little smaller. I will just press S and scale
this to make this smaller. And we can go with G
again and move this up. You can stretch this a little
bit fuzzy if you want. Or S y. Let's make like this. Okay? Next thing we need to do here is we
need to go with edge, select them with
Control R. We need to isolate these windows here. But you can go and add to low
costs for each window here. Or you can just place one loop cut with control are in
middle of this window. So you can see this
middle part here. So let's do this. So just place with Control R while loop cut in the middle of
any of these windows. So controls are in
place this emitter, and I will now select them. I will go with S,
Y zero line up. These are lethal to keep
this orderly or clean. And I will go again. Now to skip to this edge here, I will call it all. And I will click here. And again SY. And again hold and click
here. S y is zero. So all select this
SY zero and do this for all these edges. So S1 is zero and Y Z. Okay? And now I will select
all these edges same time. So to add selection,
just hold shift. So shift out
selection called also ought to select
all this slide and just start clicking
on this edge. So hold on same time,
shift them all. Okay? And now when we have
selected all these edges, we can go with Control D and scroll mouse down to
add only one loop cut. And now we can cover
all these windows here. And this is not perfectly
because this reference image is not perfectly line
up on 90 degrees. And we can just go
with, again with all. And we can move this If you move this
on y-axis to get this stretch, also this UV. And we can fix this easily if we enable this under Options, this correct base attributes. Now we can move this and we
can line up this perfectly. Or if you don't have enabled this correct face attributes, you can do this
with double tap G. So if you go with one
g, you will get this. But with double tap G, we activate this correct
Paste Attributes one time. But I will keep this for now. Enable all time. So all. And now we can go with a G, but just be sure to
stick this on y-axis. So g of y, one move
only on y axis, J, y, z, and y here and just collect all this fixed,
all these edges. So all ten g y. But this is not so
important to be so perfect. And this is all up to you, but I will try and
make this correct. Okay. And now we need while loop cut on
top of this window. So we can, let's see, we can clean up this
edge Rift S, z zero. Now move this down. Just take this on
z axis, so hold z. And let's go again with
Control R, S, Y zero. And now go with G. And
call this one z-axis. Or you can go with
G, G, G twice. And it will stick on the app. Okay, so now if we
go to solid preview, we can see that this
is all line up, but we can now select this face. Is it holding Shift? And we can make real
geometric here if we go with E and X to
extrude on x-axis, and if you move this
inside a little, we add geometry here. Okay? Now I want to make
these levels here. You can see that
all these levels, and it will be little
hard to select all this. So we can select, let me
select this edge here and we can now go to right side and
select all these edges here. But I found the easiest way to select all these edges
if we select one. And if we now go with
Select Similar length. So blender will select similar linked vendor will select a similar
length like this one. And we selected
everything what we want, but we selected also what? A lot of things we don't need. So you can see all this. Length here is edges
here is selected. But we have also a
lot of selection. We don't need to
remove selection. We need hold control. And if you hold
control and we pay, for example, go with box select. Left mouse click and
just go with Box Select. Let's go first with
two X-Ray mode so we can see edges behind. So just now holds control
and with book Select, deselect or you don't need, you don't want Bevan. And I will remove all this. So here is our windows and
we can go with number three. And we can select
all these lines. So we can deselect
all this here. And also all this line
here we don't need. And also all these lie down. Okay? And we also don't want
bevel these edges here. So control and
remove all of them. Okay, and I, I remove wall, so this one I want, so go with Shift
to add selection. I click here. I think this is now okay. And we can check
if this is okay. If we go with control B, control B and just move this up and let's see what we have Okay, Eggo with escape. And I see that we have
selected this part here. Here, which we don't need. So go with control again and
deselect these edges here. Let's go again with control
V and move my mouse up. Okay, I think this is okay. I have only one program. We have these two edges here, so Control and deselect this. Let's go again with
control V. And I think now this is okay. We have, we have also
programmed to control, deselect these two edges here. And if you want to
can shift and you can also bevel this coordinate. So we can also build this. But if this don't work for you, you can go manually. So you can hold shift all time and you can
just click here. And you can rotate and move. This object can manually
connect this AGC want bevel. But this will take
a lot of time, lot of more time. Okay? Now, when we have selected all these edges here
in these corners, we can back to material preview. And we can now go
with Control B. And we can bevel
these windows here. And you can see that we
get to this problem here. We get overlapping vertices. But I will for now. So if you go to this point where these two vertices thick, we don't get problem, but when we cross this slide, we get to this problem. So if you want to
add small burner, for example, you can add
this without this problem. But I will for now ignore this problem and I
will fix this later. So I will just for now follow this reference image
here and I will try out bevel. This bevel. So control be about here and scroll mouse up to add maybe two or three loop cuts. And just click. Okay, and now we have
this nice beverage. But we also have
these problems here. And fix this problem here. Just move this one on left
and this one on this one, alright? And this one on it. Okay, and also this here. So you can also go with a G, but be sure to stick on y-axis. So this red line is y-axis, so G and Y, and we'll just write
this somewhere. So g, y. Now we fix this problem, and we need to fix this on
all these windows here. So move this right,
this one on the left. And the same with down and no more overlapping. And I forget before, I should do this before, but you can every few
steps make new backup. So you can go with the x and just press M and add this
to backup production. Now, this disappeared because
this is backup collection is disabling a render and you can call this step
after Beverly window. So this will be a little too
easier to understand later. And if we, for example, make mess with this step here, you can always enable this
in viewport and you can. So both of these are now
insane place so it can move this left and right. If you miss, you have
problem with this. You can always
back to this step. And you can again with this
step with creating windows. But I will now
disable this and we can continue working
on this model here. And I will now go to
material preview. I like this texture or
window of windows here. And if you like this green part, it can be, it can
look pretty nice. But I want back white color. In all this area where
there is not Windows. I think it is much
easier if we go to left orthographic or right
orthographic view and T3 with x-ray mode and
select all this part here. This part down is okay. Let's now dissembled
these x-ray mode and with holding control. And books select, just
remove this kindof switches. Okay. Now I will go again, right? So he left orthographic and I will go with
you, project from you. Okay? Now we have this uniform part here and we can easily scale
this and project. Okay, only bad part here is
that we get these stretches. Here. You can see we get
stretched apart here. But because this is
only white color, it is not so visible. And I think this pretty good. Now. We have only this
bit shadow here, but you can see
that this is Blake painting breakup and
we will see later maybe we will also pay this
6. 06 - The front of the train: Okay, Let's now play with
this front part here. And I will now go
with the non pet one. If you go to Edit Mode, we can select this, this part here, but I
see one problem here. So I will go to
solid Preview and let's select this part here and let's move
this on x-axis. We have problem with this
mirror modifier here. We just need to stick this on X. And we can now connect
this perfectly. Okay? And now I will disable
this x-ray mode and I will go to
material preview. And I want select box, select this part here. And with control, I will remove this part which is
project that correctly. But I want keep this. So this is okay, this black part here, but this part down is not. Okay. So I want with holding
shift, I will select Doors. So this part here. And now I will go with when
we are in front orthographic, I will go with you,
project from you. And now we can go with the G. And we can move this and project on this part of Texture. Just press S to scale this down. And written G, place
this in this part. Okay? So we need scale
this down to about here and just Projecting this. So this part, these two faces
here is this part down. Look correct. So consider this window here
is not perfectly align, it doesn't, because this Texture is not perfectly on 90 degrees. But I will for now
hold the Control. Remove this selection down so we can play with the rotation. So have a go with and I will
try lineup this window here. Okay, Now this looks
much better and let's now select only
this part and we can press S and we can scale this and we can
reproject this heat. Stretch this later on x-axis to catch more
of this part here. But I think I will move this. No. Okay, Let's let's try make this little
more like circle. So ESX. In the next step is just start adding more geometry
and Details here. So I will go into edit mode. And I will go here tonight. So K and just try cut this here. And I will now select
these two faces. And let's see all reference
for all this look. So we need to extrude this in. So E N, Y and move this inside. And if you want to
can press X and rotate this on x-axis
solid and line up this. Okay, and we can now
also add bevels here. So I will go with
shift or you can, if you want to go
with control to find shortest spot to this edge. And I will just bevel this. With Control B. You can also select
this part here, but this will stick
to this edge here. So I will just bevel
this line here. So Control V and just
one or two look cuts. Okay, and if we go
to solid preview, can always see how this look. I think we get this, we'll little bit shape here. It is not big problem, but I think if we go
again with Control Z, if we add three loop cuts this, we'll fix this shading program. So this is with one loop cut. So it can go with one or three. I will go with only one. Now we can continue fall of this reference image and we can start adding
more details. I can go with K fork knife And why? Fork, knife and X to
follow this x-axis here. And we can just make cut here. And if you go with
control, be, okay, I have selected this part here, so just select only this part
here and go with Control B. And let's go with knife again. And let's make one
small part here. And now we can extrude this. So first, I think
this is not stick on this train here and I will go with share with D to
duplicate this object, Shift D and Y for Y axis
and lovely weekend, want to rotate this little on X and Y X draw this on y-axis. And then we'll go with control
plus to expand selection. And then we can
go with Control B to bevel this one
time. So only one. Look at here. Ok, We have
this nice detail here. And now we can create simple
lighting so we can go to Blender properties and we
can set this to cyclists, to CFL this looking
render preview. And I will send samples to 100. And if, and I'll click here. We can go to render preview and see how this look
in real lighting. I will bring this
more and more to black because we will
use maybe a sun lamp. And I will go with
shift day life. We can go with sun. So we can place some
here and I will rotate this maybe on z-axis. So why or okay, and I will change this
color or maybe two bluish to create tonight atmosphere. So this will be maybe more
light, more than son. And if you want to remove
these slides here, can just disable this overrides for second and I will create. So if we go with Shift
and right-click, you can change origin
where you want. So this works also
if you disable this overlays and just
it's just not visible. So I will go with Shift a lie. Let's place one point lamp here and we can increase
maybe this 1,200. Okay? And you can see that when we
create this geometrically, this reacts very
good with lights. Maybe shift the NY. We can also place one lamp here. Or we can just keep this
sunlight for this part here. But this is just the
four tests so we can in between solid preview material
and render preview later. I will now back to Materials. And in this stage, we just need to continue Modelling over
this texture here. So I will create this part here. So Shift and right-click
to place origin here. And now we can go with
Shift a and with cylinder. But just one thing you need
to know if you have selected this object and when
you add new object, this new object will be
part of this object here. And if you don't have selected, this will be separate objects. So I will select this object
and I will go with cylinder. And before I click anywhere, I will bring this to 16 vertices to keep this
little more low poly. And if I go with like, okay, I, I forget one thing. If we go to Edit mode, this will be part of
this object here. I will go edit more than now, shift a and the cylinder. And because we have
this mirror modifier, we get to object here because we are in
edit mode, so X-like. And let's, let's for now disable this clipping and let's
try to scale this down. And we can unpack these click. Okay, and I will just
try project this here, and let's move this
out on y-axis, and let's try model
this part here. So I will With the S Y. And we can
rotate this site here. And I will now select this face here and
then we'll go with control be, to advance bevel. We can scale this and we can go with E to
extrude and why or why. I think this is
pretty okay and you press L over this part, we select loose part. We can stick this here. We can also bevel this
here with Control B. And you can go S to scale. Move this out and you
can again this bevel this with Control V to
make this more smooth. And now I will select this middle part then with
control lump at plus, expand this selection and go with the numpad one
to front orthographic. You project from view. And find this, select with a and G S to scale and
project this on this part. And I think we can project
this little better. So I will go with number one, you project from
view and let's see, plus a hearing UV editor. And let's find this box. And let's just play this here. So G, project this
to about here. And I like this part here. So we can create
separate plane here. If you have, if it with Shift
and click here in middle, we can create new plane here. So let's get this sum S, Z to scale this on z-axis. Let's place this here. I will go with
Control a and applies K. And now we can go with this. This is separate object
without materials. So just go select this object. Scroll down to material and
drink this material here. And now I will go with your
project from you and a, to select this and just project this on this part. I like. Let's go Sx to stretch
this little home x-axis. Or we can scale this down. And when we scale this down, you can see that
these don't affect this UV because we have this
correct base attributes. So we can scale this under urea is zero or X, X. And let's project this here. And now we can move
it knife and we can start cutting
this part here. And we can make create geometry. I will this here. And now we can select this part here and we
can extrude this y-axis. And we can go with Control
D to add more details here. And if in our will to solid theory can
hear how this look. And I will now join this with this train of select the
boat object with Control J
7. 07 - Materials: Let's now play little
bit materials. So we have this strange. You can see that this
part here is shiny. So all this is shiny. And we have pretty rough
part with this metal down. And third material. Here we have this
glass material. And now all this is
just one material and I will now separate
this three materials. I will call this train shiny. I will now duplicate
this material and select again this material here. And if you break,
if quickly here, we create another
variation of say, Materials and rename
this to Jay rock. Let's click again and select
any of this material and create today in glass. Ok. And now we can make variation
in this three materials. So this is Shiny. Shiny means that we
need roughness down. And you can see that we
get this shiny part here. This rough material. I will bring specular down. So if we bring specular down, we basically get
less reflection. But this object here is
only this shiny material. So I will select the part where I want
this rock material. So if I select this part here, Let's select this part here. And if I select this
rough material, I can now click Assign. And you can see
that this change, so this part here is
now Rough material. And to make this more visible, I will now go all down
to viewport display. Can I will change this color. More tube-like can
maybe a little bluish. If you now go to solid preview, we can see each part
have rich material. So now we know that this is Ralph material will not go with Control Z to select this again. And we can play with
this rough materials. We can deselect, select
disrupt material. And I will be expected
or down to make this more dark and
less reflective. And now we can just easy
separate these materials. So I can also mark
this part here. Holding Shift. I
can select this. You can see solid. This is now a rough material. Okay, this part inside
this steel, shiny. So let's bring this
to rough material. I'm not sure why I
cannot select this. Okay, Let's bring this to and you can see now
big difference. So we have this very rough, non-speculative part
and this shiny part. But we will also add the
roughness and bump map later. Let's now select this
glass materials. So I will maybe
some another color here for this glass
material in Newport. And we can now select
holding Shift, select all these glass part. We didn't model for
now this last so I will this only on
this part here. Select green glass
and assign different. I'll go to solid period. We can see that this
glass material and let's improve little this glass. Now, if we now you know, here on shade tab, we say, Hey, I've selected this
train glass and I will go with the glass be SDF, and I will go with transparent. So now if we go with if you
have enable Node Wrangler, so under Add-ons, just search for node and enable
this Node Wrangler. You can go with right-click and Shift or Control
and right-click. We can mix these two shaders. And we can plug
these two surveys. Or you can always
go with Shift a and just search for mix. This is mixed RGB,
so mix shader. You can manually makes this. Now we have combination
of glass, transparent. So we can basically transparent
glass here. You can see Looking render preview. We can basically
transparent glass. One note here, I use old version of Blender because new one, threshold time and I'm not
sure why in new version, I'm not sure if this mix
shader is still here. Or you can mix RGB or
you have only one mix, which is called mics. So just don't be confused. This is now say, and what I will do here, I also want keep, I don't want perfect glass here. I also want to keep Texture
of this glass from before. So I will plug this here. I think I will go with diffuse. Diffuse be SDF is just color. Color, roughness. If you go with, for example, make some Gb, you cannot store because
you'll get this error. Because this is just
color and this is shader. So we need brilliant also shader and we can mix only shaders and diffuse this
basically just color. He's just a color
with the roughness. And I will move this
here and maybe we can unplug this from here
and then we can mix this. So this is glass transparent and this is the
pills if this color. And we can now choose
how much we run. Just basic Texture here, or how much we want
this transparent glass. So I will go or two
left and I will choose more this glass shader. But I also keep this
nice texture here. Okay? So you can choose
how much you want to Texture one or Texture
glass or just this texture. But I want also add little
distortion on this glass. You can see that this is just
perfectly flat and I can do this if I go with sheep day and if I search with
mouse-click detection. And if we click, if you go with Control
Shift and click here, we can preview this mosque Texture and I think
these look pretty okay. You can scale this little
output if you want. This look like glass. We can use this bar. I will go with Control Shift and click
here to bake this material. And I will now go
with mom. Here. Let's plug this to height. And now we can use this as bank. So we can plug this here. And we get this nice distortion. And you can also apply
this heating for one. And I will now bring this
distance maybe just to 0.1. And now you can play
with this train. Okay, and now this
look much more like glass and later
we will just add some roughness
details here to make this little more realistic. Okay, let's now add the
roughness and Details. And I go under pixabay.com and I just found this texture here and I
will share this link. It, you can just
download this for free. I think I will go with
this one is too big, so this is 8 mb, so this resolution is okay. So I will go to download here. You can download this
without registration, and I will just cut this here. I will paste this image here. Let's select this
train shiny material. And let's now go shift a
search for image Texture Open. And let's find
this texture here. And let's now go with control. Let's first go with chlorine. Because this is not black
and white image and we need black and white image in order
to work this as rapidness. So I will plug these
two roughness and let's now go with Control Shift. And click here to see
how this is projected. And you can see that this
is not projected goods. So let's go with Control T. And If we change UV, we also need, we also change UV for
this texture here. Because we can split this if
you create another UV map. But I will not
play it with this. Now. I think I will drive it. May be generated
projections here. Okay, I save this image is classic JPEG and I will
share this image with you. And let's now just
blow this image here. And I tried different projection
mode and I think this window work for me and you
can scale. This is one. I need more details. So
I will go with maybe three or maybe four. Okay? And you can see how
this look and you can solve basically in Blender, black color means
roughness of zero. So if we move this to right, we get more black color. And if, and how
big this material hit Control Shift
and click here. All this black color
is shiny parts. And all this white here
is this rough part. This window projection is little annoying
because it's moving. When we moved Kimara, the pains of camera angle and I think I will just
make these to UV. And still, they still
look pretty good. So you can see how these look. Maybe we can scale this and we still get all
these tiny details. Okay? So black color means shiny
and white-collar mean rough. Now we have too much this white color and I will just bring
this more to break. If you move all down, we get
completely shiny object. And I will bring
this to about here. So we get a lot of shyness here, but we also get this
variation is in roughness. If we want that
little bump here, you can also go with mom. And you can add connect these two height
and this to normal. And we get now a
lot of bump here. But everyone on this shiny part keep this very, very subtle. So I will go with, now let's, let's try use this texture. So I will go on again,
New Color Ramp. Let's plug this end. Let's now plug this to fight. So now we get to this Texture
for mom and we get all these nice been details here. And I will break this down. Maybe this to 0.05. So we have a little
bump details here. And we have also this
roughness, the text. And let's now skip
to another material. So this is, let's, let's make the shiny material. Let's now just copy this. So we can select this here. We can, and we can bring
this here, then paste. So we can also use
this roughness. But because I want to make
this more rock, this part. You can see that this
is still not shiny because we bring this
specular or down. But if you want to
can make this more rough up being this
more to white color. You can see this part here. Now we can use this
also for mom and mom. So let's bring this fight
and lesbian L2 norm. We have a lot of bond
here on this part here, but not as much as this. So I will bring this. We can roto reflection here because we kept wrote up completely black color scale. But we will change this later. Or we can just bring this
black color more to what? And this could fix this problem. Okay, now we can
add more text here. And let's bring this
solve some more to white. And let's bring
this details down. So maybe three. And let's also copy this
for glass bacteria. So I will go paste. And let's plug this
also to wrap this. So I will plug this
here to roughness. And also here. This is glass and we
want to make this shiny. So let's bring this to
black to make this shiny. And also this part. Let's create this texture here. Little. Let's now see this
quickly in rather trivial. So Cassie, more flights, how this reacts, it lights
8. 08 - Adding details: And let's add these
details here. I think it's much
easier to just go here. Select this face, and
I will go with shield. So we have another base here, and then we'll go with S
to scale this one z-axis. And let's place this here. And if you now go with E, Y, we can extrude
this and y-axis. Let's go with Control R, scroll three times and we can
now scale this on y-axis. Or I will go low
this individual. So I will go with
all, select this. If this here, and
let's place one here. Now I will go with
holding Shift to add selection and select
all these three lines and Control V to bevel this. Now I will just extrude this. E and Z X2 this on z-axis. And let's stimulus here. If you want to get, make some small variation and
we can move this site. And let's now. So I would press L
or at least select all this L over this part and
Control V to add one bevel. Now just again, I will, I'll go line up to
about 90 degrees. You project from you. And let's make this shift. And let's just three
project this window here. Let's try plays this here. So scale this down. Press X to scale this on x-axis. And let's try just
mentioned this image. Okay. So now we have real
geometric here. If we go to solid preview
or render preview, this will much for, this will react with light
much better than before. So Gy, let's see how this, and I will now just roll it. So this is part of this object, but if you go to Edit Mode, we can select this shape and move this on
another windows. And let's get this on x-axis. She will divide them again. And you can see, I
will go to handle. We can say, because we have this correct base
attributes that we also moved up here. So if you go hit Shift D, right, you remap, it's
also move it here. Before I duplicate this, I will for now, well, this correct base attributes
and go to the right. Again, and I will
repeat this so it's SY. So shape the Y. Ok. And now we just duplicate all
time only this UV map here. But if you want to can. Now we project this. If you go to UV editor, here, we can go with the
G and we can move this to make some variation. Okay, Now these two
are little different. Next, this window here. So let's go again to edit mode. Select this object, and let's try the loop cats
here with Control R. Let's make this a correct base attributes and
let's move this. Okay, I will go with
double-tap G here. And let's just look cuts here. Okay, I can only
add here as you can always connect this with Nike. So K, and let's connect
this part here. Okay, now we can extrude
this and y-axis. So select these faces here. Why? And store this inside. And we can go to solid preview. And I will press S to
scale this little. It will be much easier
to see this edges here. Let's now Edge Select and
select the first one. Holding Shift. Select
all these edges. Let's make two material
preview to see how this loop, let's now go to control
the bureaucrats here. So this will be our window. Let's now select
this face is here, and let's apply
glass material here. Okay, Now we get this glass. And again, I will go here with the mesh blade night game this and go over
this window here. And we can reference, so this one here. So let me go to Edit Mode. Draw our and scroll mouse up to what to look cuts and I will
Sx to scale this on x-axis. About here. Let's go with the tool cuts
z-axis and less busy here. And now I will select
this four vertices here. Now, if you go with Control
V, This will not work. Okay? This work. Know, if you go with control
V does not work. I go with Control Shift B. To bevel vertices, you need
to go with control shape. So Control Shift V and
move mouse up to you. Okay? And now I will add this
mesh on the x-axis here. Now we can go with
what the fire. And let's bring thickness, maybe a little down the road. Rotate this on the x-axis, so I have X and let's
line up this little. And now I will select, this may be rough material
and let's see how this loop, this is thrifty, right? So we can go to
Edit Mode project. This may be this whitish color or maybe they're right here. Let's see how this looks. Okay, you can keep for now
like this same time to shift the index and
let's play some other. Let's keep this scale, this little nicks and she did in this, right? You can just read project, maybe get more variation
9. 09 - Curves and cables: Let's now create this
Curves or this virus here. First I will go to material preview and let's
add this detail here. And we can go with, can I cut this part here? Enter and let's now go with YX through this and
y-axis and go with Control B. Now we can stick
these wires here. So to create this virus, we need to go Curves. And I will go with the
shift and right-click price origin here and
Curves, Bezier curve. I will go with X or Y night to rotate this on y-axis and
we have our curve here. I will press S to scale this. And now if we go to Edit Mode, we get basically rotate this. So let's do this one. So select this
vertex down and X. And let's now let's go with
numpad three to side view. Let's see how this
look. I will just go. And I was thinking this here. Stick this to this part here, and let's think this down. And if we select
these two vertices, you can go with right-click
and sub-divide. We get one here, so you can rotate this. And let's see how this look. Let's go with number one. Okay? Now we can, because
this is kind of object. We have Curves,
properties here and under Geometry and bevel, we can increase this depth here. Just move your left mouse. With holding Shift, you
can move this slightly. And let's see how this look. So we can now bring this here. We can stick also this here. So I go with next and to
rotate this one X axis. And want bring
resolution a little down because I don't
want too much mesh here. Maybe 28. Okay,
and we can now go with the shift D example. Let's create one here and just make some variation. Rotate. This may be your
next success of why. We also have Curves. Here. I think I see in this reference
images this virus here. We can also, I will duplicate both of these shift D
and move this on z-axis. Let's Plays two
wires here holds. And you can make variation. Let's increase that. This may be little
more dicey one here, so we can duplicate this
one more time Shift, Z and X there, white knight. Let's place one here and
scale this on x-axis. Now, I will just select
all these Curves. I will go with right-click
and convert this to mesh. Now, this is not
anymore curve object, this is just basic mesh. And if you go to Edit Mode, we can basically unwrap
this correctly now. And I will add this
rough material. And let's now go with you. Unwrap and let's or use smart
UV project maybe for this. Okay, let's now
project this may be on this black color here. We apply only this material
to this object here. And let's now select all this object and
low with Control J. Now this is only one origin. And I think this is pretty good. And let's see how this
token, that premium
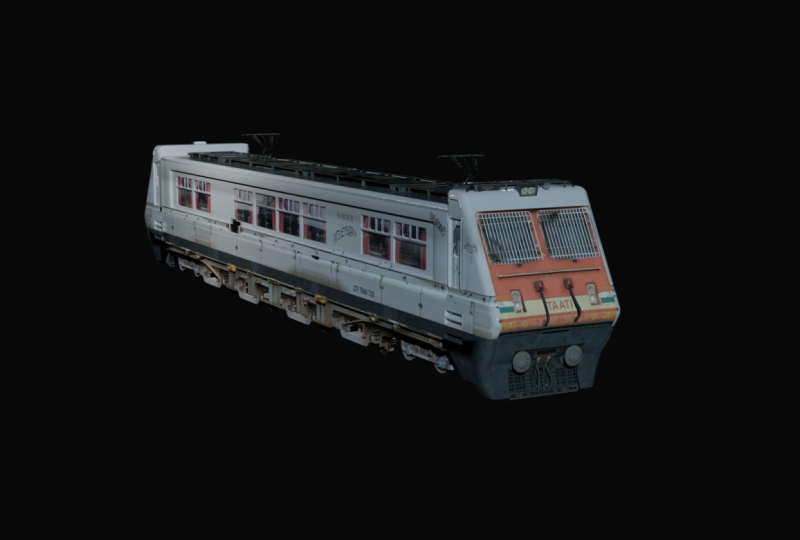
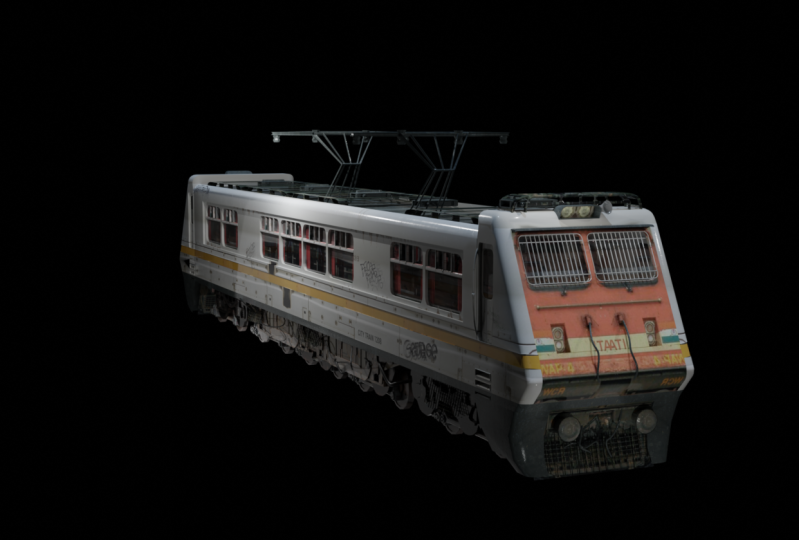
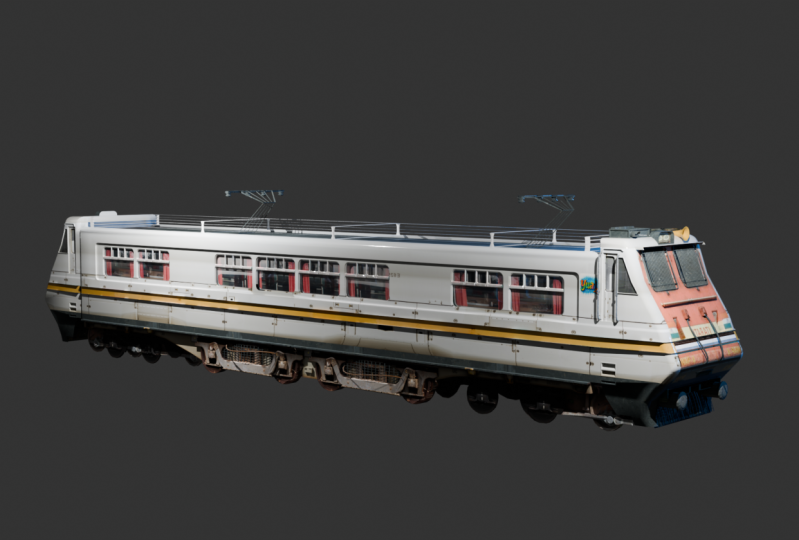
10. 10 - Adding more details: Okay, so you can see that
more details we add to this Train look
better and better. And let's continue creating the tastes and let's
create this part here. So I will go to Edit mode. Let's make these overlays here and let's try
create this part. First time we will
create this part here. Let's go in. I can just go with K here and I can make this. It will be, I will try
just bevel this edge here. So control shape will
be to bevel edges. And let's create this
coordinate here. But let's see. Let's press Delete and
limit that disorder. Okay, this will not work. Let's see how this look. I think this is
still pretty good. We get this small,
small shading here, but we can use this age
to add this part here. Now I will go with
Control V to bevel this scroll mouse down because I need only one edge here
and I will now go with E, Y, two extra this on Vioxx. Okay, I think this
look pretty good. We just may evoke
this with two down. And we only have this
richard Texture here. I will go to Edit mode. Let's select this object
and go to Edit Mode. And I will just try project this on
white-collar face selection. Let's select this part here
and let's go with control. Numpad plus. And I will now deselect this
part with holding control. Deselect this part, which is okay and let smell
your project from. You may be endless. Just place this on white color. Okay, I think this looks
pretty good format. So next is this detail on top. Let's see how we can make this. Let's go to solid preview
and select this object. And let's go with Control R
and odd monologue cut here. Let's now I will just
dissolve this edge here. So all tend disorder edge. So now it's much clear and we can select this bar,
maybe this part. And I will go with E and Z. And I will not go with less
zero to line up, please. Let's now try also this, solve this edge here. I will just select
these two edges here. This whole edge and this one. And now we can make bevel here. No, I want to bevel
this edge here. So select this edge and now
bevel to make this rounded. And now we can easily select
this part and we can press, I said this and let's go with E right next
to this on y-axis. Let's see, maybe we can
delete this face here. And let's connect this Let's see what this
project at here. So we just one project, this, select this face down. Let's go with your project
from you and a to select this. And let's project
this, this light here. So G, and you can move
this, this on x-axis. And this looks pretty good. So we can also select this. This face is here and we can, or I will sign this place outside and I will go with plus. So we can select this, both of these part
and with control, I will deselect this part. Let's go. You unwrap. Now, let's see.
Let's press a and let's just place this on
this black color here. See how this looks, okay. If you want to can
also play with this. You'll project unwrapped. And let's just now the novelty
and now all this is black. You can see that we have
some details on roof and this part looks here like Cube. So we can easily
create your shape day. You bend. I will scale this on z-axis. Sy over SX, make
this smaller than Z. And let's bring this here. Apply scale and to
add more details, you can always go with it twice. So I, II, and he said this
on individual orangey, all E extrude a log-normal. We get more interested Cube. And I will go with control plus or a to select all
and Control V and b1. Scroll mouse down to add
one or one bevel Hit. Okay. Now this rough Material, Let's projection. Let's scale this just on break. Or I think I will be some
this with more details. Let's see how this look
and we can use this nice the text here so we
can go it took night. We can just cut this to
add more details here. And let's extrude
this Z Control B. Maybe to bevel this. Let's move this little up and let's now look at
texts through Z. Bevel this just to
create more details. And lets us get his son z-axis. Okay, Let's try create this part here. So I will go here
to edit mode and let's throw our cut here. It says, if you go with right-click and sub-divide
this two times, and people go to
Edit Preferences. And under Add-ons, you
can enable Loop tool, which can be Blender. So just enable this here
and you can go with right-click and you will see this look to here and
we can click here. So now we get to
circle from this mesh. And what I will do, now I will go with E, Y In EY again to extrude this. Now we can select maybe only
this part here with control. Let's, let's also this one. Let's now extrude this
and y-axis. This here. If we select this
middle point here, we can enable
proportional editing and we can now move it G, white. Scroll mouse down to
make this brush smaller. Now we can affect
only this area here Okay, and maybe we can
select these two vertices here and we can go with
GY, move this insight. We get this shape here. I think it's little, too big, so we can select all this. In x-ray model. We can move this and let's disable this
proportional editing can, can move it to SY squared this on y-axis
and move this here. We just need maybe
grab this correctly. So Control Plus you
smart theory project. Now let's scale this down and
play this someplace like, okay, this looks much better now and let's
see, during the preview, we can maybe add my white
point learned here. So it will be, these details
will be more visible. Okay, let's delete disliked and let's back to material preview. We can continue with
the Adding details. And I see also this wife's
here. So I will go again. Cube. Sy. Let's play this sound very middle and
clearly some y-axis. And let's, let's give this
little more apply scale. And now we can maybe to look
at scared and press six. Let's bet on this edge here. Control V. One will cut. And let's part one. Here, maybe I'm unable to. And we can again
quickly get a lot of details which modifiers. So wireframe, Let's
complete this. And I will apply this
now and I will go away a and Control V to
bevel this one. But, Okay. And let's also add this. Let me, we cannot shiny
material here under materials, so I will go train
shiny and let's you, you smart TV project maybe. And let's place this
may be again on this black color in it. Let's see how this look too big. So as Z scale this on z-axis, let's bring this may be down. And let's now create some
details on this roof. It is not visible here, but I see that they have
some something here. So what I will do, I will select holding, shift this edges here. And I will go with
rough material. Here. You are rough
and let's go with it. And let's just place this
here on this black part. And now I will go with
easy to extrude this down. If you want, make this part. We can also try make this. Maybe Blake. I think I will keep this for now white and to add more details on roof, I will use this object here. So shape the Y. And let's rotate this. Let's just place this
here and scale this. Let's get this part on y-axis. And this on X. I will now scale both
of these object. And let's try play this here. How this tool. And I will go with the why
and move this here. And maybe we can rewind. Maybe we can make
this bigger on y-axis Okay, this will add details on roof and this will look
good from distance. Let's try create these quickly. And for this I will go with, let's place with Shift and
right-click origin here. And I will just
now go with clay. And I will go with
Nike this down. And I will go with X
now to rotate this and maybe let's scale
this on Excel on Z. I want create this
part for now, so Rx. And now I want you
to edge select and I will select this
part here and I will go with E and Z. And let's scale this on x-axis
and let's get this down. What I will do now, I will try make this part here. So Z. Let's go with select
this edge here, E, X and X. Let's scale this down. And I will now just create, you look cuts here. I will go with Control R. And I will maybe
scale this on x-axis. And this, Let's press
X to rotate this. So next, let's bring
this maybe down. Okay, something like this. Now, let's take all
this loop from this. If we now go to
wireframe modifiers, again, we can get
lot of details here. And I will now just bring this crease,
this thickness here. And let's create
this rough material. And you are wrapped and let's place this on black color again. Let's see how this
looking render. This is a pretty good, but when we create more
disagreeable slate that we can stick to these parts and
it will look much better.
11. 11 - Doors, windows, trumpet: Let's try create,
feel the taste small. If we go to cylinder, I will go over here, maybe to just eight. And let's scale this down. Let's try go with
Philip cuts here. And I will select every
other All to select all this line shifts to
skip to another row. And again, let's press
S to scale this. Let's also select this one
and let's try scale this. We're now in individual origins. So you can press now, as we scale this under these
individual lines here. We can some random objects here. So we can just now
same material. Let's say you are wrapped. Let's place this on
this black part here. And let's get this on z-axis. And we can place this
Cube places here. So let's place the one here. Shape the X and Y are here
and maybe shape here. And let's make this smaller. We can, okay, this one,
this toy is too big. So let's scale this down. Let's go with Control J to know. We need first, apply this
wildflower modifiers. And I think I will
go to edge mode and plus a and Control
V to bevel here. And let's now select all this in object mode and go
with Control J. We get much more
details quickly. Okay? But I think I will improve this part later with
some more details. Let's place one, maybe here and she'll DY and
let's place one here. Let's try increase this. Son made me to two or three to get more light
than maybe these two. I see nice trumpet here. So we can also
create this quickly. And let's place with Shift. And right-click origin here. Cylinder. And let's
increase this slide. And let's see how
we can create this. If you press numbered slash key, we can just isolate
this object from other object from
sin because now it's little hard to rotate this. So number slash key. And with numbers latchkey again, we backed off, see what
you can go with you. Locale do and talk
with local view. And I will scan this or y-axis. Let's select this part here, this face here, and
let's scale this down. Let's extrude this on y-axis and let's try select this
old and control big. So I think I was
scared this down. Let's not worry, controlled be. Okay. And let's scale this
down and select this face. I to insert. Let's move this down. Lessons are scared about heat. And maybe one more times I, and let's scale this insight Okay, and if you want to can
add cantaloupe, got here, one bevel here we control be. Debate this smooth. And let's now with
number slash key. Back to all seen. This looks too big, so we can scale this and
y-axis and scale this down. And let's place this here. And let's this shiny
material here. And let's see material
preview you smart TV project. And just place this one, maybe white color here. And let's go with right-click. Shade Smooth. And
you can turn on this normal to make
this more smooth. And let's see how this look. So I project this
completely on white color. Maybe a little too wide. Maybe on this gray color here. Let's now select this edge here. Control V to bevel this
scroll mouse down, go with all T and X
through this on x-axis. And let's see how this
looks in Blender. Let's just try out bevel here. So select this edge here. And also with shifts, skip to this part
and with control, select this down
and let's go with Control V. I will now
try go with tonight. I will stay here and I will go with click and Z or Z axis. And let's move this
down and press Enter. Make one cut here. So Z equals z-axis, and let's stick here. And now I can rotate this
on x-axis to line up this. And now we can use
this to make Doors. I will select all this
and I will go with E, X and external this on x-axis. And let's just go to
material preview and let's select this face here. And let's get in UV editor. Press a to save this. And let's just
reproject this here. And I will go with Sx. And now we can just go
with I will select this. I will go with Control or
to add here, another here. And let's look class here. And let's again E X to X
through this on x-axis and press S to scale this to make easy to
select these edges here. Control Shift or Control
V to bevel edges. Okay. I'm not sure about this. Gray Doors solid, so in blender material and I will now just select
this window here. And I will go with control
plus to select this door. And I will now holding control, just deselect this
part which is okay, and now I'll go with two
project plan view and let's make this
white color in it. Okay, I think this is better
than this in gray color. And let's see called the slope. I have this weird shape here, so I will try this. Let's see, call this loop. Okay, nice much. Let's now try create
this window here. So I will go with K for tonight. And why for y-axis. And let's also go here. So K in Blackboard y-axis. And I will also try connect
this just in this part here. We can use this part. So I will go with, Let's go with a to X to
the next four x-axis. And let's now press I to
insert this high twice. So just, just press it twice to remove this
individuality selection. And I will go with the X
and X to this insight. This is, this will be
our window and let's also try go with old, select this line here. And also shift and old to
select this line here. And again here. I will now move with control to remove this selection
I don't want. Let's go with now
with Control B. And we can smooth this
and check this scene. Render preview. I'm trying Garbo in this shading here. I think rehab selection, selected one part we don't want. Okay, if you add the small
amount of this bevel, it will work correctly. So let's see how this loop, and I will, I think this is, we extrude this too much. So I will select this part here. Let's move this
here and let's go with uncontrolled
be to add Bamba. Okay, this now should look good. And now let's just apply
glass material here. And let's see where
is this projected? So it can also project
this on this part
12. 12 - Creating more details: Let's add these details here. So let's go towards
solid preview. We can just go to Edit Mode. Select this object,
remove this, back, these overlays, and let's
see what we can do here. So I will basically
go with K and Z. And let's select this. Let's go here. Also it, K and Y, or Y axis. So K MY. And we can select few
of these pieces here. And we can now press I to insert this and
I twice to set this on individual and E X and
move this down and maybe we can move
this down or up. Let's keep this down. And we can also add
fuel Bibles here. So Shift and Control. And now to skip to another
part, Shift and Control. Let's go with
Control V and out1. Bevel. If you want to can,
maybe we can extrude this part to add more details. So E, X, but not too much. Just tell it. Okay. Let's see
how this look in Blender. And we get much more details and also nice bevel
here so you can see how this get to dislike. I made this text here so we can maybe project, maybe here. Or let's, let's try
project this here. I will go with the K
and Z four z-axis. So we can now go with Control V and we can
bevel this part here. And let's smell. Take this. Let's try project
this text here. Or let's not. Let's just go with you. Number three, you
project from you. Okay, but I think I will, I will go the one cut here also. So K and Z. And I will select
multiple this part. And now I will go with left orthographic
and Q project from you. Okay. And I think it's a little too late now
and I will continue tomorrow. Let's continue with
tutorial and let's try make this small part here. So I will go to solid
preview and edit mode. Maybe we can cut this part here. So I will go with K. I will
connect these two here. And now we can go to
vertex, select them. We can select this two vertex and have you go with
Control Shift V to bevel. And I will scroll mouse up
to add to look cuts here. I will go only with three. I will now connect this two
vertices which are too close. So I can enable
this tool here and I can just go with double-tap G. In Blender will
automatically connect this to double tap G and
just snap this here. Maybe these two here. I will make one small cut here. So I can grab modeling
this part here. With holding control. Now I will go with
Control V to bevel this. Now I will go with E and X
flux through this annex apps And we have one nice detail. I think I see one candle here. You can see this line and also on another
side of this door. And also on this reference. So we can create this easy. I will go with Shift and right-click to
place origin here. And we can go with shift a
curve and we have here part. And I will move it to
rotate this y-axis. And we can scale
this down with this. If you go to Edit Mode, you can just extrude
this on x-axis. But I don't want to
smooth this edge here, so I will just bring this vertex up to about here and
also this one down. Now, if we select this
vertex with holding Shift, you can go to extrude
this on x-axis. And now because this
is curved object, we have proper case then
under Geometry and level, I will increase this depth. And I will also bring the
resolution might be two. And here maybe to eight. Now we can go with right-click
and convert this to mesh. If you go to Edit Mode, we have now mesh. And let's just bring
this material here. I will bring this shining
material, this object. Let's try project. This may be to this red
color to see how this look. I think I will keep this light. So just go to Edit
Mode and G hearing oriented to just bring
this glycolic maybe here. Okay, and just go with the
lubricate one on y-axis. And we can add
more details here. If we just go with base
selection and if we go with all, we can select one on this face. And I will go with T
and X2 along normals. And if you want
add more details, you can hit Control R
and scale this down. Or control B and D Again, just to add some
random details scheme. Okay, and now I will
delete this one again, go with Shift D or alter
D and move this here. I will connect this
to one objects. So just select both of these
single with Control J. And one thing I want to do, I want bevel this edge here
because it is reasonable. And you can see maybe
that this is bevel, but this is smooth because we have enabled
this cavity here. But if we turn off this cavity, you can see that we have
very hard edge here. And I will now go to Edit Mode. I will select this
easy with holding Control and just
clicking on this edge. We can select easy
all this edge here. With control you
find Blender will find short path
between these edges. And if you're, for example,
click here blender. So I go with this way. So just click every
few of these edges. And I will now go with
Control V and I will add one look for this windows here I think take a lot of time to select
all these edges. So we can do one
thick weekly heap. If we go to Edit Mode
than they selection, we can quickly select
all these windows. And now I will go with
the control numpad plus to expand
selection to this area. And now I will deselect
this windows with holding control and with
that mouse drag. So we can just remove this. And now I will plus I certainly. And we can go to
extrude this alone. And they will move this in. And if you go to render view, we can see how this loop. So we get nice details here
13. 13 - Wheels and engine: Let's now create this
Wheels and engine here. I will go to material preview. And for this, I will use one add-on which is called
images as playing. So you need to go to
Edit Preferences, Add-ons and just search for images and activate this add-on. And now I will make
this overlays here. And now I will place the Shift and
right-click cursor here. And if we now go with
Shift a and under image, you can find here if images
are splaying add-on. And I will close same this
collage Texture here. And I will go with
important to us plane. And I will scale this up. One thing I want to check
here is face orientation. And if you go to solid grave, you enter under overlays. We have face orientation here. And you can see that we can read cool or visible
in Canberra. And this is not good because when we have
red color we can get bad shading or your
Texture little different. To face this, you need
to go to Edit Mode and select this face and just
press F3 and search for flip. And now we can flip
normals and now we can see that in our camera is blue, so that's correct color. And I think I have
enabled the snap tool, so just disabled this and
also proportional editing. I also see that here I
have red color and I will select this object and
just select this basis. And also the three in this lesson disabled this for now and now we can continue. And I will go to
material preview. They just check with
the numpad nine. We go to left,
left orthographic. Okay, so non-flat line is right. Respected. We need, I
will scale this up. And they will now go
with the number slash key to isolate one, this option. Now I will go to Edit
mode and with Control R, I will cut this
three images here. So Control R and move
this loop cuts to about here and one here. And also this cut, this part. Okay, and now we can
select faces lineage, so it holding Shift. And now I will go with
Control I to invert selection and press
delete faces. Now we have only part we need. And I will also separate
these three images. I will select this
and it holding Shift this part and
I'll press P selection. So P two separate by selection. Selection and now just
back this origin. So you can see that we have
origin in the same place. And I will go with set
origin to geometry. And let's now start Modelling this grand cutting, this part. So I will go here with Control R. And I will separate
this part here. And let's now start
with K with tonight. And we can now just
follow these lines. Can cut this part. Okay, just K and
just start clicking. You don't need be
perfectly precise. This will not be
so much visible. So just try cut this part and just connect this to this
edge and press Enter. And now I will go again with K and just continue cutting this Okay, and I will also
cut to this part here. So Enter and just repeat
to this three pieces more. Let's now go with
play selection. And we can now just
select this face is, and let's select
all. So this one. And I will are the experts
do this on x-axis. And you can see this
little texture here. So you just named rule
under Materials noun and you can find
this show backspace. We can fix this quickly. And let's now go with control
be to add small bevel here. I will continue on with cake. So we can also cut
this part here. Okay, Let's try fixing this. You can also go more in
details and also gotten this color here. And this group. Now I will select this
part and E X instead, this inside and
this two outside. So let's select this part and extrude this on x-axis also. Let's extrude these
particles and maybe Control V. And you don't need care
about this part here. This overlapping because it will not be visible
from distance. And this Wheels here. You can also go with
a knife and cut. But let's try do
this with Adding one sphere, Somesh,
cylinder, cylinder. And I think I wouldn't
go here it 16 vertices and there we go with X-like, know, right now, some y-axis. And let's get this down
and try and match this. Now, I will go with Sx
to scale this on x-axis. About here. Let's apply scale. And now, having just read
here this same texture, you can see that Blender create new Texture with this image. And later we will change
this to Ray Bartlett smell. Bring this texture here. Your projects for you. And let's just select this
day and bring this here. And try mentioned this real. Okay. I think we need ruled this way, minus 16, minus one, and this is not correct. But we get also this
might detail here. So I will sell you this, select this face
and I will go with I. I will go with Control
V to add small bevel here. Let's suppose scale
is wonderful. That's okay, and
that's not controlled. 2.1 bevel here. And now select this face
and you can go with, I said this here. And they will go up again
and I will not press this. And I remove this
little insight. And I will not Tonight and I would just cut
this part, this horse here. And you can also make one
cut to add this edge here. Let's, let's try it with
Control V to bevel this. And now we can just move one of these and we get this edge. Okay, let's continue
with tonight. So price K, and let's
not this part here. So K again and just add to this. Let's select this face. Then I put X through this one. X-axis would be, let's
this box on x-axis. So Bx and Moodysson front. And now we can just duplicate
this with the lightning. And you'll get rotated one. But I will keep like this. And every now and just cut this part of image
we don't need. So again, K. And let's
just cut all this part. Let's do this Q and K. And let's also,
let's isolate this. You can select this select
smile, just delete faces. Now I will continue
with more than K. So let's also cut
this part here, and also this part here. Okay, Let's also extrude this. So a and B. And we have this
spherical objects. Keith and I will shift a and
I will go with the cylinder. And let's keep this 16
and plus COVID FYI. Now as the night TO z-axis. And let's scale this
down to about here. And I will go with
SY to about here. And now I will select face here. Let's just bring this out. And let's go with EY again. And now I will go with, I will do the same on left side. So EY here. And let's with holding Shift, select both of these phases. Let's now just go with
Control B to bevel this. Okay, but plus X K. So
Control a and apply scape. Let's now go with B. And we get this perfect bevel now because scale is correct. And now I will just bring
same material here. And let's go with you project from a to select
this object here. And let's bring this in. Project this on
this part of image. Okay? And you can
shade, smooth this. You can go with
share with the why. I will just also bring
this in UV editor here. And we get to this, I think
double vertices here. So we go, they go too
much with this bevel. Let's try fix this
with merge by distance Let's try increase
this here to 0.01. Okay? I will go again with
three image by distance. And we fix this problem. Now, I will add this line here. So I will go with the shift right-click and
let's go with cylinder. And I will go now of it, maybe a vertices here. And let's go my
scale this all down. And now SY, scaling. So let's bring this
in front here. Control I apply scale and
now we can project from you. And I project this
on this slide here. So Eric's to rotate this
wetland G or graph. Okay? And also we need that this
material to this object. And now this looks pretty good. I will now just select all these objects and
I haven't just go with we can select this box select and
we can go Control J. But before I will just fix this, you will be problem here. So G and x2 this on x-axis. Okay? And now we can
go with Control J. Now we have one part
of Wheels here. And I will now do same with
these two images, heroes. To create us much more details. Let's change this Texture, which Blender create with
this image too rough? Train for this texture here. I think this is too long Texture
and it's basically just, this part is repeated on another site and we can
later just duplicate, we can model just one part here and duplicate this
mirror modifier. And I will now go with Control R. And I think this
part here is middle. And I will now delete this face. So delete these two phases. So delete faces. And we can now more than
just this part of image. And I will also control our, I will cut this part up. Maybe to here and now
just delete vertices. And basically I will just
go with K with knife tool and I will do same as I do here. And you can decide
how much you want. Go with the details. And I think I will just speed up this process now because, because this will take
a lot of time and you cannot learn anything new, I will now just go with
setToOrigin to geometry and I will just start cutting Now, when I make all these cuts, I will just select
this part here and I will go in control
I to invert selection. And I will go through
this on x-axis. I will extrude this. Heaviside, this part here, and I will extol this in next to extrude this inside. And you can explore
this, move this. And you'll pieces little out. And maybe we can add
bevel here it will be to catch some light selected. Let's go with Control
V and one segment. And now I will try
also cut in this. Now I would just bring same
materials to this object. Another, then don't object
here we can use later. Let's scale this. I will go same with
this object here. Now, we can delete this part. We don't need delete basis. And I will first
explore all this out. Now we can extrude
this field parks more. So let's also cut
this part here. So E, X. And let's
throw this bot. So first I will cotton
this pipe here. Let's bring this material here. And now we have three pieces. We can use this
Wheels and engine
14. 14 - Placing greebles on the train: Now we can make with NumPy
slash key to all seen. And we can go to material
preview and we can start placing this G and X. And I will replace this
maybe to about here. So you can go with
trumpet seven to see better from where
you want plays this. I will also bring this
home object here and this. And I will skip this lethal up. Let's bring this up. So first, I will the scale
this object out and I will go with D. Let's apply
skate shoe the right. Now, S minus V1 to flip
this to another side. And we can now clinic this
here and let's get this up. And I will now place
this subject maybe here. And let's bring the
mental on x-axis. And to can just go with the D Y. And let's place this. And let's scale this object
and let's try this here, or we can just maybe intersect
with this one. Right? And let's, Let's get this. Now. I think it's much
better if we go with, let's, I will now
delete this object. I will go with all to the
instance of this object. So all these more correct and
I will just make this here. We can now start duplicating
this with all the day. So this all day will
save some memory. And it will load a little faster because we just made in
stars on this object and if, and it moved, just
added this object. So let's dig. So when we edit one object with also this one because it is just Instance, so this object. And let's bring this up. Let's also go with toast, right? And let's place one
side dialectal. Okay, let's see how
this look in.blend. Try out more details
so the white, Let's see how this looks like. This looks pretty good
from these tasks. And even if we zoom here, you can, you cannot
notice all these details. But on this task, this
look pretty good. Because we don't use
mirror modifier. This will not be
on another side. But let's try join all
these objects or Control J. Now we can just go
with all the texts and X minus one to
flip this on x-axis. And now we have also
this on another side. Just bring this site. And if we want to can add your summer pipes
here or cables. So I will go with sheep, they in Curves, Bezier curve. And I will go with number
seven silica, take this, Nike. And let's now just
go to Edit mode. Let's rotate this here and Sub-divide. This
may be two times. And now we can place
some Curves here. Some cables. So you can move this with
the G scale, rotate. And now I will just
increase under Properties, I will increase under
bevel this depth. And I think I will just
create new material and I will call this just Blake. Blake and I will add color here. And I will just bring
the roughness down. I don't want to
shiny object here. And now we can just bring
this resolution little down. Okay, and we can
now go with shift the why and maybe we
can place one here. And we can make a
variation on this. And we can make
difference between this depth here, thickness. So let's make one, this one or less thick, and I will bring also
this resolution down. Let's also duplicate
this one more time. Let's see how this
look in Blender click. Okay, we get some
extra details here. And now I will select
all these cables. And I will go with right-click
and convert this to mesh. So now this is just mesh. And I will join this
with Control J, so we can more
control over this. And I will duplicate
this one more time. Let's bring this down and
maybe a little more insight. I will link this flip-flop or maybe heap. So let's see how this look. Okay. I like this mesh here so we can just duplicate
this shape, the right. And now I will obtain this. The Nike has the minus sign. Now let's scale this on
x-axis to line up this salad. And let's try just place. May be here, so I
will scan this down. Okay, this is not visible, so I will Control Z and
let's move this out. Still not visible. Okay, now this easy, but let's see how
this look in render. Okay, I like this
details so you get extra little switch this
shape the why, let's place. Okay, you can see this
mesh here and also here. Let's duplicate one more time. I will go with all
the places, one here, and I will delete
these two and I will again go with the okay. Let's go with now because
this is use all to the, we can select this quickly. So select link, object data and Blender will
select all this object. I will go with Control J to
doing this to one object, and I will now row with the D X. Now let's move this to another
side and Sx minus one. Let's just bring this
to another side here. Okay? Let's try place one
point lamp here. You can see all these details in wanting, you can do here if you have some greebles assets, you can also place
on this train. I will show you how this looks, or I will make another horizontal
split here and I will go under assets browser. I have a lot of these assets are greebles, assets from Yahoo, but and I made separate
video about ASA browser in, you can find on my PhD on, and just now, show you
how would this look. So one example, I can just, let's find some
pipes here maybe. So I can just bring this Cube. This is not so good example, but I can easily just
take this object. Maybe. Here. I get new tastes very quickly. So if I go to rendered view, I can see how this look. I can maybe bring
another set here. Maybe these spikes here. Okay, This one is too big. And this is just example. I will not do this now. So I will delete
all these assets, but just one advice when you're use assets
from one other sources. My recommendation is to
check your Materials, send your Texture, because when you import
the assets from Internet, they can have very
big Texture and this few pieces of assets can be bigger than all of
your objects heat. So my recommendation is maybe to check your textures here. So you can go with F 11 and you can load
this texture here. And you can, if
you want to resize this texture here so you can see dimensional, so this textures. You can also check, check with this object. And let's go to Edit Mode. And you can check
mesh density here. And if you want to can
go with mesh cleanup, and that's image geometry. And maybe if we
go here with 0.5, we can reduce this mesh
density by 50 per cent. So just be sure to use low poly objects and
with low textures. Maybe I will play with
these assets later. I will now remove this
and I want to keep this object only the assets
we create in this tutorial. I will now close this browser
15. 15 - Graffiti and leaking: Let's now add some Graffiti
on this train here. So I share a few photos I
take in my neighborhood and I think I will copy this
one and maybe this one here. So I can share this
also with you. I will paste this
under images and I will share this to
textures with you. But you can find a lot of
similar textures on Internet. And let's now add
the two Blender. And now I will
paste origin may be cute and shipped a image, image size plate
and maybe this one. Let's just check
base orientation. I want to clip this clip. And now I will go to Materials
review and edit mode. And they will go
with the cake again. And I will just try separate
this 50 or maybe three. This three takes Cube, savvy, just try cut this. Now, I will go to edit mode
again and base selection, we can be selection. Now we have three
different pieces here, and let's adjust setToOrigin to geometry and narrow. Now, I will play with
this materials here. So first I will remove
this Alpha value, which Blender create by default because we
don't have our a value. This is not PNG, this is Jake bag, and that will create
my own one of them. And I will use this
column input here. And Blender value of white
values, value of one. So if we plug this value here, all right, part will be, shouldn't be not visible. And I think we need to this. So I will go with the
left color on left, with white collar on
left. And let's see. Let's just tweak this until we see only this
black paint here. Okay, I think this looks
pretty good for now and I will just try playing this on this. So I will move it to
scan this all down. Let's place one here and
wanting click and we can go to solid trivial and I will
call this material Graffiti. And now we can go. Now under view-port display. We can add some color here. And it will be much easier
to place this on this. So it can go with the G, X and hold Shift to
move this precise. Okay, let's take this
place, this spot here, and let's also placed on here. So scared is now G X and
just move more precise. Let's see on the slope. So
now we have this done here. Let's try with another
Graffiti Texture I share. So let's make this overlay
send image images as plane. Let's bring this here. Gx.
And because I want Stripe, use shrink wrap modifier, I will not go with K because I need sub-divide this later. So I will just try cut here and now I will select this
face control I, the big basis. And let's check just quickly, base orientation applies cave and set origin to geometric. Let's first this
material color ramp. Plug this vector and
these two alpha. And now just invert this as before to isolate this black
color from this background. And to make this less intense, you can always bring
this white color more tube-like to make this
small transplant. Okay? And now I will use
shrink-wrap modifier. So if we go here and you can
find this shrink-wrap here, and we can target use this train You can see that this
stick on this train. But I will add a
little offset here. If we want, we can maybe
project this to this edge, but for this we need more mesh. So if you go to Edit mode, you need go with
sub-divide and you can see more mesh we add here, it will be more smooth. But this shrink-wrap
also depends how smooth is this mesh here. And we don't care a lot of
details here and lot of mesh. So it can be little hard
to project list here, but let's see how this loop, okay, We have nice detailed
on this page here. Let's see event that. Okay, this is just like let's, let's add another point Blender
here to see this letter, G. Whichever one problem here. So you can see that
because this is not perfectly stick on
this surface here, we have poles of shadow here. And I will go to
under older crop. And she said, I will
just under visibility, disabled this in shadow. I think we removed little
shadow from this object. Now. And this part here
is just Texture. And they will also, for this
material removed shadow. Now we can do same
width leaking Texture. And I don't care of
any leaking Texture, but I found few of
these textures.com. So you can just search
here for leaking into, can download this for free. If you click example here. I Feel free account
here and I kept every day 15 credits for free, square here and download. And I get some message
from you that texture.com, It's not more free, but for me is three, I'm not sure why I
get this message. But you can find similar Texture or lot
of sight on internet or you can just go to Google and you can try find
similar Texture. And this to Texture is PNG. So this have Alpha value. But if it's not the case, you can always size or let
this pass. We do before. I will now try place this here. So I will go image,
image as plain. And I will take this one. So you can see that
too because we can now offer why do and
because this is PNG, we can just place this
here and this already, but I will just
replace this here. Because this is too intense. You can always go with them. And you can bring
this white color to black to make
this less intense. Okay, so you can see
this nice detail
16. 16 - The final part: One thing, great, forget heap. So you can see that this
front part of train is also, I think on this side. And we can do this easy and I will just take
this overlay and let's just duplicate
this front part. So I will go with the X and
I will bring this here. And now I will go to Edit Mode, X-Ray mode, and just, let's try this here. Let's go back to Notepad three. Let's now go to x-ray mode. And let's go with tonight. So I will move with K. I will go to Edit Mode. So K and now press Z
to stick on z-axis. Let's first stickies and z-axis, but to press C to cut through. So I will now just
make one cut here. And if we now delete this part. So let's just select this
object and let's now COVID box select in X-Ray mode. And if we cut, delete
these vertices, we should keep, say,
this part here. So let's see how this loop now. Okay? So now we have, we have all this part, save it. Now I will go with number seven. And I will just take this 180. And let's place this. Let's see, learned that
we will the slope. Okay, I think now
this is similar, like this reference image. We are almost done
with this tutorial. So you can get to
this technique Sulla, and you can add much more
details if you want. And now we have one problem, because we have lots of objects here it is very hard to select all
these objects. And if we, for example, one, copy this and paste
to another scene, we need to select
all this object, but there is one solution. We can pair and this
object to one object. And we can control this is, and I will show you how. First, I will select this three glimpse and
this three light source. And I will press M
and I will call this. Okay, now we have this in another collection and I
will just disable this from now from viewport. Viewport and we have two
more light source here, so I will bless them and just add this to
light collection. And I will delete this camera
because I don't need this. And now we can only Lisa
train here in Newport. And I will now go with Shift a and I will add empty object. So just fight empty here
and I will go with Cube. And I will now just cover this train with this empty Cube. So SY scale this on y-axis. And basics to scale
this on x-axis. Sz. I just want to cover this Train to make
this more visible. Now, what I will do, I will just go to
x-ray mode here. Because we have only this
train object in our scene. I will press a to select
all these objects. And you can see that this
empty Cube is yellow. So that's mean that this
is Lux selected object. And if this is not case
with you, you can. For example, if you have
this object yellow, you can always go with Shift
and click to this object. And now we can go
with Control V. And we can parent this, all this object to
this empty cube. So this yellow object. So I will set that
at all object. And now if we grab this object, we can control all this
object with just this Cube. So we can now easily scale this if this is
too big or small. And we can rotate this
with the likes of life. And we can easily
move this over. One last thing I will do here, I will press again a to select all and I will just
new collection. I'll, I'll call this. So for example, if we
make these slides here, we can always just go
to Train collection. We can select all
this object varies. And if I want, for example, use this train in my
Subway, see ligated before. I can. For now deleted this train here, which I download from internet
and I can now just rock here and I will select all this object inside
this collection. And I will just go with objects. I will place this object here. I can now just with, just select this empty queue. And I can place this easy, my C. Okay, and I can scale it by one. And let's just play. I will make good test renters, new train in this scene. And maybe in future I will record tutorial
about this scene. But for now we're finished
with this tutorial. I will also share
this project file, which you can use this thing if you want
to in any purpose. And this is all
for this tutorial. I hope you love something
you see you next time.
 šime Bugarija