Transcripts
1. Introduction and promo video: Hello and welcome to
the new tutorial. As you know, I
previously recorded for our tutorial on how to
create backroom symbol into a lot of people who
are the tutorial and some of them asked me if I could make a tutorial on poor rooms. I did some searching on YouTube. And there aren't as
many pogroms videos as there are bathrooms videos, but they are watched
a lot and I haven't found any tutorials on
how to create rooms. So this one, if it's
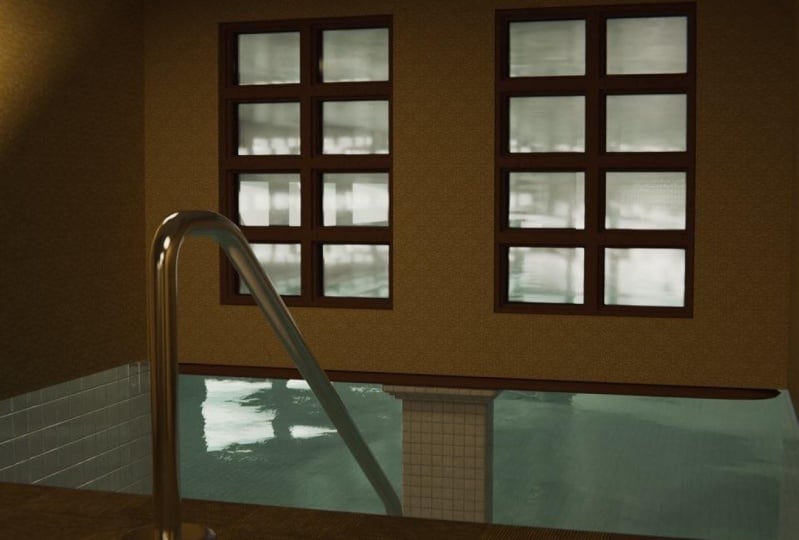
not the first week, definitely be the most detailed. In this tutorial, we will create the animation
you are watching. Step-by-step. Tutorial will
be adopted for beginners, but we will also go in depth to get as many details as possible. I will show you how
to model pool rooms, maze of different shapes non-destructively so that we can easily change the
construction. Later. We will create an animated, realistic water and
other materials. And I will show you
how to get cost six without slowing
down render time. We will create daylight
lighting for open spaces between those and lighting
for closest spaces. I will show you how to create
realistic camera movements and how to add a lot of
details and imperfections. Post-processing, you
will get an authentic, we can just go with the new details silent
for this tutorial.
2. 01 - Introduction to Blender (general): If you are completely
new to blend there, I'm going to share with to
our terminal window I made for a pass tutorial where you can learn the
basic of Blender. If you have experience
with Blender, you can skip this part. You can download Blender
for free at blender.org. First, I will introduce
you to Blender a bit. After that, we will
start with this. See, this part is intended
for Blender beginners. If you have experience, you can skip this part. Since blender is a large
and complex program, I will try to show
you only the basic in about 10 min before we start working on to see when you open Blender
for the first time, we see a lot of options. The good news is that
you don't need to know most of them
to create a scene. We will spend most of our
time on the Layout tab. And we will also use shading
for creating materials, UV editor for projecting
materials on 3D objects. And finally, a bit of
composite determine. All these tabs above are actually made up of
these tools here. E.g. layout consists of 3D view port and timeline
because we will use them a lot. They are here by default
when we opened Blender. We can create a workspace according to our
wishes or needs. E.g. if we separate this window, we can add UV editor
or shader editor, or another 3D view port. Here. In the 3D view port we have three
objects by default, camera, object and point
line pass light source. To create a render, we must have at least one camera
in the scene. To switch to camera view. We can go to view cameras, active gamer, but all these
options have shortcut keys. Searching for this option, for this menu is waste of time. If you use blender, you have
to learn some shortcuts. We will cover the most common
shortcuts in this tutorial. And with time later
you can learn shortcuts for advanced
options as well, e.g. to switch to camera view, the shortcut is not at zero. Then we have our select a
camera in the Properties tab we can find option for
this camera, e.g. focal length, which
is actually zoom, Depth of Field and others. Each object in the scene can be deleted by Delete key or x. In Daniel, one can
be created with shifting or by
going to add menu. We will mostly use the options
under Mesh that we have basic geometric
shapes from which we can model anything we
want in the edit mode. Once we have the
camera and object, we can make the first render. Shortcuts horrendous, F to L, or you can go to
Render, render image. We now see our object because
we have a light source, which is this point lame. If we remove the point
lamp and press theft, Well, we still see something. And the reason is because
in the word Properties tab, you have a darker gray color, but not completely black. Which means that our ward or
environment ME, sunlight. If we switch to black, we won't see anything. Lighting in Blender can be from three different
types of sources. The first is worth
or environment. They're in additional to call. Or we can also use an
external file called HDRI. We can find many of them
on the internet for free. And we can also use procedural our sky texture
with comes with Blender. We create the second
group or flight with Shift D that we have a point, sun, spots and area. Each of these source
emit light differently. We can also turn any object
into a light source if you k tan emission material
for this subject in shaded in red there we have
to render engines. The first is EV and
the second is cycles. Evs less realistic but is
much faster than cyclist. If we can be very realistic,
similar to cyclists, but you need to know how
to set some settings manually While cycle C3
realistic by default, because it's a physical base
path tracer render engine. Speed depends on
the computer power and seen optimization. In the Properties tab, we have our different options. One that we will use often
is the Modified tab. There we have a large number of modifiers that speed up
the modelling process. E.g. the array modifier enable us to quick can
easily duplicate soldier. With the mirror modifier. We can easily mirror everything we do on one side
to another side. With the Boolean modifier, we can cut one
object, hit another. There are many other modifiers. These are just up
to you that we use. Most of the tools on the left allows us to
quickly transform the object. E.g. we will often use the move, rotate and scale tool, but we usually use
them with shortcuts, g for gravity,
therefore rotate and S for scale most often
combine it with X, Y, or Z for X, Y or Z axis. E.g. if we press S for scale
and then x for x axis, you can scale the
object only along the x axis or y to rotate
only on the y axis. Or G to move along
the z-axis only. To edit an object, we need to go to Edit Mode, the shortcut for this system. Then we have three
types of selection, vertex, edge, and
face selection. We can jump between them with
12 or three on keyboard. Now we can grab vertex, edge and face and scale, rotate or grabbed S or G. There are a large number of portion that we
use in edit mode. Some that we use often is
Control R to add a loop cut, extrude, and control B2B. Shortcuts that we use often
to navigate through the scene is numbered one for the
front orthographic view. Number three for the right, paid nine for the left, and the non-bird,
seven for the top. You can get the same by
clicking on this gizmo. By pressing the Anki
reopen additional tips. You can find all this in
Properties tab and much more, but this is sore cough, or these views over the
first three types can be blender and the rest is the add-ons that I
personally style. We will mostly use
the transform tab. We can see location, rotation, scale, and dimension. There we can see the dimensions
of all selected object.
3. 02 - Start with the scene - Making walls and work with reference: The best way to start
doing anything in Blender is to collect
reference images. As the main reference, I will
use images from this link, which is backroom. So Wikipedia. You can find link in the
description screenshots from this video because I
want to combine the backroom, send the pool rooms in one part. I would take this
image as a reference. The best way to always give reference images at hand
is the pre-program period. You can download it for
free at pure ref.com. Simply slide images into
it and at anytime you can open and zoom images or
move or scale the window. If you don't want
to use pure ref, you don't have to because I will open a reference images
in the tutorial. I will share of dress images. You can make the maze
according to your wishes. But for the purpose
of this tutorial, I made the floor plan of
the maze so that you can follow this tutorial and get a similar result
to me if you want. If you haven't ever
used vendor before, you need to go to blender.org. And you can click here to download and download
Blender for free. And then install Blender. Next I will create
pool rooms folder. You can create this on your
desktop or where you want. So we can say Brent file here. And now I will copy this address and I will go to blend it and File. Save As. And I will call this four
rooms, rooms tutorial. And now we have our file here. I prepared this
ground plane image, and this will be a
finance for our tutorial. And this is how I imagined
All rooms last time. And I will now just
quickly show you in 3D space how this look. This part here is
rooms and this is all, this is pool rooms. And last time I
started from here, and I look around this bedrooms and then
I go with stairs down, and I enter in pool rooms. Then I go with this stays here and came down with
these tails here. Look around this area
here in the line to go with this zigzag maze than
entering main pool room. This time we will get
similar result by this because they will
fall of this ground plane. But later when you learn how to make your
whole room so you can make Maze about
your wishes or e.g. you can always edit this file. I will show you just quickly
how you can do this. We can add another
room if you want here. And I will show later cows. So this is just example. We can extrude this part
here and make another rooms. Okay, and now we have another
room here and you can make another animation if we want
to enable a little here. And we can quickly out there. So this is just an
example how you can use this file and make weekly
another rooms here. And I will show you in this tutorial how you
can do all these. Now we can back to
our blender file and I will select all these three
objects we get by default. And I will press Delete on
keyboard or x on people. And I will delete
these three objects. And the next I will go with numbered seven to
talk orthographic. And if you don't
care, none paint on your keyboard, can go to View. Report. And now we are
in top orthographic. It is very important to
be in top orthographic, we'll run very important
reference images, e.g. if I rotate scene like this
and if I go with sheep, say an image reference. And you can see that this
image is now on rotation. And this is not too useful. So I will delete this and
I will press number seven, and I will go with sheep a. Image reference. And I will now import
this ground plane here. This increment here is
big 1 m. So if we go e.g. a. Cube and we can see here the scale of this cube is 2 m. So this much two of
these increments here. And so we know that
this reference image is about five meter
on the x-axis, and this is too small. So for this purpose, I made this reference cube here, which is ten by 10 m.
So what I will do here, I will go with Shift a cube. I will type here. Then you can type
one-by-one or you can just drag here and
type ten here. And now I will, I will scan this reference image to match
this cube, this part here. So I will scale this more. Let's move this
one, y and x-axis. And so I mentioned this here. We can go to x-ray mode
or just via remote, and we can now see our cube
here and I will scale this. So you can always use shortcuts. Shortcut for grub is
G. And if you press X, we can move this on x-axis. So Gx, Gy. And scale this little more. Okay, this looks pretty good. And I can now make
to viewport display, and I will now delete this. We are now sure that these
match real world scale. We can now start
creating roles here. But before we start, let me just bring this
reference images to your rep. So just select all reference
images and bring this here. And now when we are in Blender, we can always go here
and right-click, we can move this. We want our scale. And we can zoom into
our reference images. And you can see that I found reference for
this part here. And this image here is
reference for this part. You can see similar shapes here. And all these bevels
we will add relate. This entrusts to pool room says reference for
this part here. And this zigzag. Maize is referenced
from these images.
4. 03 - Creating walls: I will first put a star here because we will start
from this point. And I will go with
Shift a and plane. And I will now back to
the selection tool. And you can see that
this plane is little under this reference image. And I will go with G and
Z to bring this up. Okay? Now I will go to edit mode. With this vertex select, I would say at least
three vertices. So select these two. And with holding Shift,
select this one. And let's delete,
delete vertices. Now we have only
one vertices here. I will press E to extrude, and you can see various
y-axis and also here. And I will press Y
to stick on y-axis. And now I will press E again, and I will now go with x axis. So x for x sub c and e, and y for y axis and
E for Extrude and X for X axis, the Y dx. Now I'll just go with the
extrude and I will stop here. And we can see our
zigzag line here. And I will not follow
all these points here. I will just go with it to
extrude them x for x axis. If you don't see this line, you can always press
a to select all. Now I will make two point
and I will start from here. So E and X for X axis. Again, and just try match this. And also here I haven't,
doesn't go away. And we will later, this is exact effect. Now I will go with, I will select one vertex here
and then we'll go, it should be move
this, this point. And I will now go to extrude
and I will place about, here, is let's be sure that
these two lines are parallel. So I will move this slit here. Okay, this looks pretty good. And now I will extrude
this one about here. And extrude and X4 X axis. Now we have only edges here. And if we now press
E for Extrude and z for z axis and 64 6 m we get. But you can also, you don't need to do this, but you can also just press
E and E z for z axis. And you can look here and
just bring this to 6 m. But I will be more precise
and I will press Z and six. Now we can create this
zigzag effect here. So I will select this
edge select and I will go to Edit mode
and let me add, then. Loop cuts here. So it's Control R and scroll mouse plot
them, look cuts here. And I will do same
to another side. So Control R. And then this loop cut. And now I will select every
other couple of Lucas here. So select first one
and hold Shift. And just every
other couple here. And we are now in global
transfer orientation. And you can see that this
match globals, x and y-axis. What if we change
here to normal? This will be vertical
to this face is here. So we can now move
this on x-axis. Lethal. And I will now select other
examples here of these edges. And I will move this
again on the x-axis. And now I will do the
same on this part here. So control are about ten loop
cuts and Control R again. And now move this on y-axis, on the x-axis and select
every other here. Move to opposite direction. Let's now get this
back rooms, walls. So I will go here with Control R. And I will
add one edge here, this part and I will, I will now lead to
global orientation. And that will go with
Extrude y or y axis, and those stick to this. And now I will add
one. Look at here. With Control B, we
can split this. And if you have more
than one edge here, you can scroll mouse down. And try mentioned
this part here. Now, I will press Delete
and delete faces. To create this force. I will just go with
select these two faces and Shift D and X for to move on x-axis and
now extrude and x or x axis. If we now press L
over this part, B, select a loose bar, L and L here. And I will ship them again. And x for x axis and
move this to about here. Okay, I will press S and X to scale this petal on exoticism. Also this top part. Let's also select this edge, select annex to this part here. So I will now select
this edge here, then p y and p y.
5. 04 - Non-destructive bevel: Now we will talk about bevels. And if you go with number seven, this reference, you
can see that you have reference for bevels. And if you want, you can
follow these lines later, but you can also create
levels by your wishes. So I will now show you
two ways to create bevel. First way is destructive level, so you don't need
all of these steps. If you're selling
this edge here, and if you go with Control V
and it will scroll mouse up, you get this bevel. But the problem with this
destructive bevel is that if you change your mind and if you want the smallest bevel here, you cannot go back
and you need selected one-by-one this and delete it and try to fix this problem. This is called destructive
bevel because change your mesh and you
cannot undo this. You can undo This few minutes, but later, you cannot
anymore undo this. So we will use non-destructive, which is bevel modifier. I will show it to
common problems levels. If you set this e.g. to 1 m, you should
get 1 m level here. But if you don't
get this result, that's because probably you have double vertices and you can go to Edit mode and you can
press a to select all and F3. And you can search
here for merge. My distance. And
you can click here, and this should
fix your problem. Another common problem
here, if you e.g. have to face is facing to
another direction, e.g. if you go here to
face orientation, you can see that we have blue color here and
red color here. Rtp flip this
normal orientation, you will get I will just print out of
this bevel modifier. And if I go here with Control B, you get this problem. We always need to have
blue colors, very K-map. So because camera is
inside this object, I want to have blue colors
inside and red colors outside. So I will just go
to object mode. I will select all these red
faces, which is inside. I will not press F3 and I
will flip this and make this blue. This one. And this part here is
not visible in camera, but I will also flip this. So just flip this normal
send. Everything. What is visible in our
camera must be true. Okay, Here's or row
inside this look correct. Now just in this space
orientation here. Now we can back out
by the modifier. And to pay e.g. 1 m here we get 1 m level. And I have this problem. Let's, let's check this
place orientation. Yes. We can see this program. So after the flip. And this works now and I can get this program here because when
I extrude this base here, I get also this number here. So we have less disabled. Or secondly, you can
always save money back. By clicking here. I will
just delete basis with it. Okay, let's look now and also I will delete
these faces here. Let's look better now. Now we have another problem. If we remove this, we can or cannot hear more
segments to make this smooth. And if we change
this value, e.g. the 0.2, we add the 20 cm, so bevel here, but also
on all these edges. But I want to control this. So I want more level here. And lesbian up to this
suggests maybe only 1 cm. And we can control this middle. If we change here. Limit method from
angle too late. Now when we're in edit mode and then we select
one of these edge, we get this input here. Okay, First, I will see
these two angle per second and I want to see
how much better that I want and reaches
maximum value of one. If we increase this
value from 0.2 to one, you can see that this level
just stopped working. So we can hear e.g. 10 m. It will be same. And the reason for this is
if you see this wall here, distance from this is
about 1 m. Distance from, close it to edges is this one. And this one is about
1 m and difficult. More than one midterm level, these two vertices stick
one to another end. We cannot go anymore
with this level one. So this is a maximum level
or it can heal and I will not go with more than 1 m is big because these
have no sense. I will go to I was
adjusting this one. And now I will make
to wait method. And we can now have when we go to Edit mode and
when we select one edge, we can see here level rate. And we can add here
percentage of this value. So if you aren't given e.g. 0.1, we add 10 cm and Bevel here because this is ten
per cent of this one. If we add here 0.5, 0.5 m. Okay? So I will now select, we know how this works. I will now select
these edges here and I will now odd maybe here, going zero to maybe
just two centimeter. So you can see called the slope. And I will, but here I
will add a lot of bevel. It will look our reference, we have lots of levels here. So I can go to Edit Mode and select this,
select all this. And I will go here all to one to add a lot
of levels here. And also fear with
this for second goal, maybe 0.1 to 10 cm. So 0.1 more level here. And I will add a lot, lot on levels here. So I will go with all these
edges with a value of one, which means 1 m level. Okay, just increase this one
and we get these levels. Let's add lethal level here. So 0.055 sentiment. And also here, maybe point line. And for this zigzag, we have a little
problem because I want a lot of them
are here more than 1 m. So if you want to
deselect on one edge, you can hold Control and
just drag over here. And I dislike this. If we increase this one, we get only 1 m and we
cannot go more than one because we stick on 1 m
and because of this war. But I can fix this quickly if I separate these 2
v from this one. So I will go here with
Control R to add a loop cut. Then also here. I don't want to
separate from this edge here because I want
that bevel here. And I know that I don't
need bevel on the spot. So that's the reason I add
another loop cuts here. And I will loosen this part. Now I will go to base selection
and I will call the Shift select all this recipe selection. Now UP ADH levels here, e.g. if I go to one, I can now increase this white. So I can go to, I can go to seven here, but I will go maybe 2 m. Now we can select all
these edges here. And also on this side. And I will now include
this all to one. And now we can control this. This bevel here only
with this wire here. Let's say two meter is good and I will now increase
this number of these segments here
to make this motor. Okay, and let's
increase this a little. We get this nice shape. And we can always make later and we can
make test renders. You can always play
with these values. And that's the reason we
use this weight method. And now we have two
separate objects. So this is one object
and this is another. And this is not a big problem. Just be careful
later when you add materials to add to
both these objects. And the only problem here.
6. 05 - Modeling stairs: And now we can continue
with modelling. Because background
on forest floor and for Rome sits down
and we have steps here. I need to eat ground
floor or back rooms. And I will select
this edge here. And I will go with Shift
D to duplicate this and z to move this on z-axis. And now we can extrude
this on the x-axis. And I will go to this line here. And we can now create steps. So I will go with Shift D
and move this on x-axis, and I will press
P and selections. And now we separate this
selection, the selection. This edge here is
another object. And I will go, I will
go with the object set origin to geometry
to move origin here. We can create staves
from this edge here. I will now press numpad slash key to isolate only this object. And I can work only with
this, only with staves. You can go to view, local view and toggle Local. And again with this option, you back to our scene and shortcut for this is
numbered slash key. And we can now convert
this edge to stage. So I will go to Edit mode and I will press
a to select all. And now I will go with E
for Extrude and X4 x-axis. And if for x2, again, the z, for z axis, I want just measure this
monster is about 0.4 m. So I will make this
cube four measures. So let's bring this
here and let's, we can see that this
data is too big. I want go to about 0.4 m one. So select this line. Of course I will just
select this space here. Now let's move to about here. And this part look good. Okay, This T, Okay, and I will now go with another
modified array modifier. And we need change this
x value to minus one. So this now vote
opposite direction. We want minus one. And also z-axis I
want bring this down. Also minus one. Now if the ad level, so I will bring this back down
and I will change this to n. And I will type here
maybe 2 cm per level. And we have bevel,
nice bevel here. And I will just bring these
segments, maybe four. And we cannot add Bevel here because this is only one edge. And to fix this, we can always select
this edge and we can next door this on z axis. And now we have level
also here. Okay? And I accidentally turned on
this proportional editing, just click here to disable this. Okay, and now we have
our states and we can just come back to array modifier and we
can increase this count. And I will now back to our
scene with numbers less key. And I will increase
this few more times. Let's now play this part here. So I will just, I will
go with you and I will put here and go
with sheep take cube. And I will skip this one z-axis. And it will go
with number three. You can line up this precisely. I will go just with Sx
and scale is on x-axis. I will now select, Face, Select and bring this to
about here and this one here. And I will not go with this bevel modifier because I
will not change this later. So I will get this problem. That's because your
scale is not one. So Control a and apply scape. And now your bevel
will work, correct? So Control P, two segments and
this would be pretty okay. And I will also add Bevel
modifier for this edge here. So I can move it 1 cm. Analytical level, maybe two
centimeter and segments here. And if you want you can go
right-click Shade Smooth. But when you say smooth, I usually use this. To auto smooth. You can see a little different
on this shape. I will make this
here to Other side. So I can, I can duplicate
this phase, e.g. so shave the moon,
the sun, y-axis. I will add one loop
cut here with Control R. I will now move
this edge here. Okay? And now I'm going to pose
with a to select all know, because we select
also this part. So you can go with L
to select loose part. And I will go with E to
extrude and y for y axis. And I will extrude
this to about here. And I can just move
this edge here. I will just move
this to about here. So when we go to number seven, we don't see this box here. But we can fix this quickly
if we select these rules. And if we add solidify modifier, I will type here 0.14, 10 cm. Okay, I disable this here. If we select this
another part of horse and we can also
solidify and we can also 0.1. And now when we go to
with number seven, we can see this horse here. So it's little easier
to work for us. And I will now stick
this to about here. And I just want
make this parallel. So let's move to about here. And I will now go hit Control
V to bevel this part also. Let's now create this
two staves here. And if I can do this, but if I copy this with Shift
V. And the final thing, this Mozi axis, you can
see that this don't worry, because if we add here
solidify modifier, we get this real problem. Here. We get this
intersection and we level. So this will not work
for this part here, and I will just go with
another object here. I didn't go with shift day and you and I will type here 0.4 m. And now we can scale
this one x axis. I will now again go with the Nephites first key twice
electron at this object. And that was good
descriptor on z axis. And I will go with,
are they modifying? Not on x-axis, I will go
and y and z minus one. And now we can increase this. But here, -0.9. So it will just intersect. Click on this part, maybe point. Now we can go with level one. We need the Apply scale. You can see this level kids, so high price gate length, I will not hear centimeter. Can we come back to our
scene and you can just place this top position
and proud one more. Stay here and holding
x and play this.
7. 06 - Floor, Water line, Ceiling: Now I will create floor,
waterline, and ceiling. So I will disable
this reference image. I don't need this for now. So I've been just
creep enabling render. So we will not meet render this and I will
disable this viewport. So we can always late
at this if we want. Now I don't need this. Also disable this selection
tool because we don't, we will not use this anymore. Now I will go with sheep. I will just keep playing. That will go with number three and just be sure that this is this much this line
down. Integral. Now scale this. And this will be our floor. This will be typed on floor. And I will now cover all
this with this Tice. So there is a way you can
make types only on this part. Very old pool rooms. We can e.g. you don't
need all of this. If we go with Shift D
and move this on x-axis. And if we apply this body parts, if we go to x-ray mode and
select this bottom line here, which is d and peace selection. We can get only this agent, e.g. manually connect this end. But this is too much work for this and I will not
go with this method now because we don't see these extra parts
in render late. So I will not most
time with this method, so we can just make
one big plane and I will go with those
same with water line. So I want our waterline
to be about 1.2 or 1.4 m from this ground because
we will walk through this water and I don't
want too much water here. So I'm gonna go again, 1.2 m. So this is
just a reference. I will stick this to
ground and now we can see how much we want water here. So I will go with Shift D and Z. I will scale is a little. So we can easily select
these ground and this water. Now we can delete this cube. So now we have round
and we have water line. Now because all this is great. It's a little hard to
understand various water, various ceiling
and various roof. Later when we create, I will create a weekly material
for these objects here. So this all this will
be dice, white, dice. I will be white. But I will not now, for now create shader. I will just go to
Viewport display here. So you bought this
place is visible only in our viewport
in solid preview. But because we spent a lot
of time in solid preview, I will just for now create color for these
different materials. So this is white and this
is why white material. I will just bring this
and drag this to here. And now this is also
y times material. And the next I will select this water and I will create another material
and let me call this one. Will go all down to
viewport display. And I will add
here bluish color. And now we know where it is. Our water. And this ground
is also white tiles. And now I will create a
material for bathrooms. So because this is part
of the same object, we just need to click here
on new materials and I will call this dark rooms. I will go for display and I
will change this to yellow. And you can see that
nothing changed here because we need apply this
material to our wars. So I will go to Edit Mode. I will for now disable
this solid line. Because now we have
double basis here and this little card to select
this and see what's happened. Okay, Let's now disabled. We solidify and
select all roles, which will be backroom wars. So select all this. Okay, and I will now go and select this bottom
walls and assign this. Because this is one big part. I just need to add
a loop cut here. I will select this
again and just make this white
thighs and assign. Now it's much easier
to understand various bark from
senator is why tides and we create another
one materials and I will call this
backroom scarp. I will add another yellow
color, something like this. And I will now select
this face here. And this will be
carpet material. So select this
material assignment. Just make a model
Blake, too much. Now it's much easier
to understand. Now, we will k ceiling. And for this ground
and waterline, we don't need to care about this extra parts because it
is not visible in the render. But with ceiling is little
different because we will use some lump for lighting. And we will create windows here. And if we keep this extra parts, this will block out light. So I will go with shaving
day and I will duplicate this ground and I will
move this on z-axis. Let's make this
solidify modifier. This object, because we
don't see these slides. And I will now cut
this with ignite. If you go to edit
more than a few, select this vertex select. And we can now press
cake work night. And we can just cut
this extra parts. So I will just start clicking and I will now connect
to this edge here. And then we press Enter. And we can e.g. just select this
space and delete. Okay? And now I will
go again with k. You don't need to be so precise, but just gotten this far. Okay, this part will not
be visible in our render. So I will not lose
too much time sheet and I would just go with K and just enter. We can now delete this part. Delete this face here. Now let's connect
to this excuse. So K and stick here. And now we can continue. Okay, Control Z
and now continue. Press Enter. And now we can delete
this face and this one. And now we can rename
this to ceiling. If we want to be more precise, you can always go to Edit mode. And if we select these two, and if we go to right-click
and sub-divide, we can add another point here. And you can always
be more precise, but I think this is
not important for us. This is just one method you
can make this more precise. This have this white
tiles materials or the ceiling material and other strange viewport
color to more complex. So this is our ceiling, and I will now find
this in Newport. For now.
8. 07 - Rounded stairs and array modifier: Next I will create here is
this rounded staves here. So I will now make this
reference image in viewport. And that will go with not that seven to top orthographic view. And I will go with promote an x-ray mode to
see how stays here. So I will now
select this host of selection and I will put this course or in the
middle of this stage. Now, I will make this select the box tool and I
will go with Shift a, and I will go with cylinder. And let's scale this down. And now I will
scale this z-axis, so S, z and scan this z-axis. Now I will deselect this
object by clicking here. And I will go with number
seven and we'd shipped a, I will add, I will scale these
to match this line here. And if you go to Edit Mode, then press F. We can feel this. And now we can insert
this width to about here. Now I will select these
two objects and I will, let's not put slash key to isoelectronic these two objects. Next, I will select
this circle here, and I will select this face selection and
select only one space and press Control I to
invert the selection and now press Delete
and delete basis. And this will be one state here. I will now bring this down. And I will go to Edit mode. And I will raise a to
select all n extrude, E for Extrude and z for z. Now, we need this and we can
go with array modifier here. But with this relative offset, we can array this only on x, y, or z axis. Array this around this
rounded object here. So I will use empty plane. And I'm going to
bring this down. And I will play this around. Now, I will change from relative
offset to Object Offset. I will select this
empty object here. First thing we need
here is scale to one. So I will select this object and control a and apply scale. This empty object. We can control this
array modifier. So if we select this object properties or
same options we have here, we can now rotate
this empty object and we can control this
state with this object. I will now select
these steps here and I will just increase
this account. Now with this empty object, we can control rotation
of this staves. And we can control distance
between two states. If we move this down, we also move this stays here. I will now scan
little this stage. So I will go with S and
scale this little on x-axis. And I'm going to also
select this edge here. And I will move this
little annex, Texas. I think we can intersect the
salad on how this part okay. We can also separate
them like this and I will stick this
part in this column here. I would just move this on y-axis and maybe add a little more rotation here. Okay? And now I will
select this object and I will also go to modify. And I will add two
centimeter here. And you will segment scheme
with the numpad slash key. I will make two. I'll see. Now I want to make this
whole scene ceiling and ground rules. So there is few ways you can
make holes in our plane. And I will show you
quickly how you can make this three examples so you
don't need to follow this. This is just e.g. so I will create a plane
and I will move this here. And I will duplicate this three times with shift
and move on x-axis. First way is with the
Boolean modifier. So if I had a cylinder here, I can add more you
on what the pyre. And I can use this circle, this cylinder to make
a cut in this object. So if I apply this and
delete this object, I have circled here. And then I can control with
Edge Select and control. I can select all this slide. And I can extrude
this one z axis. Next, if I go to Edit
Preferences and add-ons, I can enable Loop tool, which come with Blender. So you just need to click
here to enable this tool. And if we now go to Edit Mode
and press I to insert this. And if we sub-divide
this few times, we can go with right-click
and we have few options here. And if I press Circle, we get this circular mesh here. And I can now go with
E and x2, this z-axis. We'll go with Control R.
And total costs here. We get one vertex
here in the middle. And we can now bevel
this with Control Shift V. And it's crawling mouse. We can add more mesh here. And if you press P, Now, we can change
profile all this, so P. And we can
make silicon here. And I will now go with
right-click and circle this to get a
perfect circle here. And I can now go with E and Z. We can now delete this. We can read number
slash key back to our scene and I will
use first method, which is a Boolean. So I will select this object and I will go with Shift D
to duplicate this object. And I will press S
to scale about this. And I will now
select this plane. And I will go with Boolean
and select this object and just apply deleting
these objects here. And now I will select
this select tool and with Control and clicking, holding Control and click, I will select all
these lines here. I will press E to extrude
and z for z axis. And if you press F, you can feel this. Let's make same with ceilings. So I will next ceiling
in Newport and revolve. It will go to x-ray
mode to see this line. So I will go with,
now with Shift D and S and scale to this line here. Okay? Now we can select the ceiling and
go with Boolean end, select this object and
apply this modified. And now we can delete this
and select ceiling again. And it's called him control. We can select this line. And now E to extrude
and z for z axis and f. To fill this, we can now disable this
reference image and you can see how this loop, I will now add Bevel here. So first, we need to
apply this scale. And that will go with controlled
a scale and edit mode. And with calling control, we can select this line here. And if you go Now
with Control V, you can add them here. And over. Those same with this ground. So we can check scale here. So Control a and up by scale. And now select this line here and go with control
V and then aunties. And we can go with right-click, Shade Smooth, and
turn on auto smooth. And they will know, disabled
the ceiling in viewport.
9. 08 - Non-destructive windows: Let's now add plus camera
in scene and try first. And so I want to put camera 1.8 m from ground because
this is a science of human. So I will add this cube and
skeletal down to about 1.8. And now I will put cursor here
and I will go with K-map. Now we can delete this cube. And I will set this
x-axis to 90 degrees. Now we can rotate this on z OS. And to switch to camera view. You can go with numbered zero. You can go with view, camera. Set active object.
And now we are, we are in camera prospect. So let's now make windows here. So I will go with tonight
at 7.2 top orthographic view and I will make our
empty our reference image. So I'll call this reference. I will now play
this in viewport. We develop them and x-ray mode, I can see I mark where I, where I put windows last time. So you can follow this or you
can make your own videos. But I would call this
reference. For now. I will disable this. I will get q, which will be
our Boolean objects here. So I will go with Shift a, and I will go with cube. And now we can back to our reference and
we can match this. So I will go with
this and scale this. Scale this on z-axis. I don't want two
big windows here. Okay, something about this. Now, I can select
this mole and I can add Boolean modifier here. I can select this cube
if we now press F2, well, we can see that we still cannot see
through this window. And the reason for this is because this Boolean is visible. I will, I will rename this
cube and I will call this. These Boolean cube is
visible in our render. If we click here and
disable this in render, we can now press F2. And now we can see
through this window. And we have our
little lighting in our world properties by default, because this is not
completely black. So we have some lighting. We can select this
object and we can in object properties said
this in viewport boundary. Now we can see inside this cube. And because we need a lot of
windows here, I don't want, every time I need one window,
another Boolean modifier. And there is solution for this. E.g. if I go with D and
move this on x-axis. To warp this as Boolean, I need again go with another Boolean and select this object and
disabled this invented, but there is metal
solution for this. So we can disable this Boolean. And if you press, I will delete also this cube. And if you press M, we can add this in collection. I will call this collection. And now if we select
this wall and we can change these Boolean from
object to collection. And I will now select this
Boolean collection here. And if you now go
with D and duplicate this Boolean object and
move this on x-axis. We can see that this
object work as Boolean because it is set in
Boolean collection. Every object which is in Boolean collection week
now work as Boolean. So we can now press F2. And we can see that this works. Okay, so I will now
move with numpad seven and go to x-ray mode. And I will. Just duplicate this. Okay, before I do this, I want to make one thing. I see on the reference, this nice windows scheme. So I want to make
this part here. So I will delete
this and I will go with Shift D and
this one y axis. I will remove this object
from this collection. Just derived. Can click here. And now I will call this window. And I will also select this row to this object properties and
I will make this texture. Let's now delete this
face. And this one. And I will now press
Delete and delete faces. And we can move these
two edges inside. Then I will move this
one a little more. And we now have this frame. And now we can duplicate these two objects to get
involved if numbered seven and back to x-ray more than promote and I will go with Shift D and move this on x-axis. And again, all the xs. Now we have five windows
with this phrase. And I will make
test render. Again. I haven't bringing these
samples down maybe to keep because this is so slow. But now let's see
how this looks. Okay, and the reason I don't see this render preview is because I forget enable this vendor bottom here so we can
make another test. One thing I forgot to tell you, if you're hearing
the noise of ticks, this will be much faster
than this opening image.
10. 09 - Lighting and first render: I will now add more
light to our world. So I will change to two so we can compare before and after. And I will go to shading tab. And here from objects
change to work. And I will set this
value to maybe ten. And I like this yellowish hue, yellow, this atmosphere,
this rendered. So I will change this
color to something more. And now we can make
another render it. If a plus and j, we can skip before between this slot skin, smoked one, slot two. And I will now change
this to slots T. And you can see that our sky, this should be sky
is also yellow. And we can change this quickly. Back to them. We can duplicate this
background note, and we can change these two little bluish
color and light. But note, we can tell blender to use this
only for lighting and this, this will be visible
only in camera enabled. Node Wrangler. Here you go. You need to go to
Edit Preferences. And don't send search for Node Wrangler and
enable this not regular. We can hold Control
Shift and right-click. We can this together
and pour mix vector. I will use camera array. Now if we make another render, you can see that now this bluish color lender
use this second input for something what
is visible in camera and the lender use this
first input for lighting. I can change this to
blue to see better. Okay, this is too intense. I don't want to straighten
these two colors to match. So I will bring
this to about here, and I would also bring
this to about here. I usually for this second
input, use HDRI image. So e.g. if you love IT,
environment texture here. You can select the
HDRI and you can find a lot of this for
free on the Internet. E.g. we can use any of this. Let's use this chilies here. And if we now plug
this here, instead, this blue color, we will use
this image in background. And let's see how
this loop render. You can see this forest
now in background. But because in our
animation we don't look much through this window
of maybe just one or 2 s. I will use only this blue
color because this has DRI. We have slowed down
our render time. So I don't mean this
this animation. Let's now back to Layout. And now I will add
some lump here. So I will split
this window here. So when you see
this little cross, you can move this right
and left eye will go with the number zero
to switch to camera view. And I will press N
to remove this tab. And I will go this render
preview here on left. And now I will enable
ceiling in our viewport. Reason why this is completely
black now is because this Boolean objects are
not disabled in view port. Disabled this. We don't need click any
of these one by one. We can disabled whole collection in render and also in viewport. And I will also disable
this reference here. Okay, and now we can. With Shift a and
we can add light. And now I will try to take n. So first I will
increase this to maybe 50. And I will go here
with yellowish color. And now I will play with
this rotation of this. So I will go with f, x and rotate this on x-axis. And we can see this
some shadows here. And I think I will rotate
this little long z-axis. And on x, it'll be
increased this angle here. We get this soft shadow here. And if we go down, we get this hard edge
here, hard shadow. I will erase this Up to
smooth this shadow here. This is okay for now, but we can always change
this some settings or voltage settings and we can easily change color here if
we want really atmosphere, you can add, change
this to bluish color. Yellowish atmosphere like this. You can always change this color or bring this and maybe we
can bring this down. So we will see later at the end when we finish
the rest of this scene. Let's now join this and we can continue with adding
windows here. So I will disable this syndrome and I will
make this reference image. Select our Boolean. Boolean is now the
same, the viewport. So we cannot see, but if we enable this, we can copy this Boolean object and I forget add this
to our reference. But I also add big
videos here and here. So I will go with D. And I will move this on x
and y axis to about here. And we can rotate this
one z axis by 90 degrees. And I will press S and I will
make me big pin talks here. And I will go with D and
Y to move this on y-axis. And the reason why
this is so slow. So if we go with
all the end mode, this, you can see
that this is so slow. And the reason for this
is because we have this level and so I get pi
Boolean enabling viewport. Then we can for now disable this and now this is much faster. So I think initially
this wall skews, so I will make this
modifiers here, but I will disable the
two modifier here. And I will go with Boolean because this is another object. So we have one row
and second row. We need to add
another Boolean here and set this to collection. And if we look our reference, you can see that the
IARC also windows here, because without
Windows, this will be completely black or
completely dark. So we need also windows here. And I will go with
shading dy or dy and x. On x axis. This is still a slope. So I'm going to also
disable this now. Okay, and then now
this is much faster. So I will now rotate this. Along z-axis and I think
this Windows is too big, so I will scan this. I make small windows key. Let's now we can now change this to normal orientation
and we can now go with D and move this annex. We can easily move
this also on y-axis. Here. The x and I will
add another one here. And all the y. And I will now add window here for the x and one here. Okay, I think this is enough, we will see later when
we make test renders. So I will do same
with this part here. So d y and put one window here, the x and one here. And let's add fuel
to another side. So all d and y. And let's put one
here and another. Okay, let's Malbec
our modifiers. So select, install and enable
this modified syndrome. Then the viewport
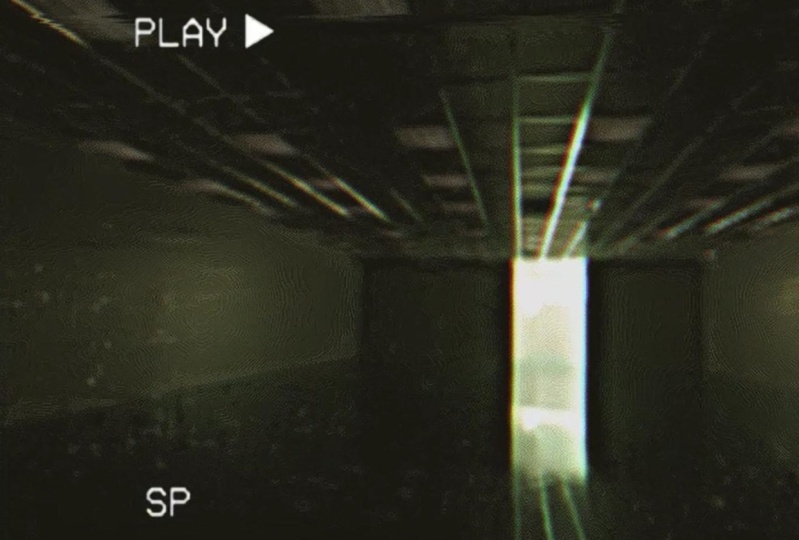
review and also this backroom SEM pool rooms are located in early
19th and they are recorded with VHS camera. And I served for
which I just came another solution and I
found these values here. So I will type here 640, 408. Now, if not zero, We can see this four
by three aspect ratio. And you can audit our
render time is now much faster because we
use this low resolution. And if you want, you can
double the resolution. And now we get
much more details, but render time will be about
three or four times slower. And you can decide what
resolution you want. But this time, I will go with this original resolution and we will get blue rent animation, but this is what I want
achieve. This time. I will go with the original
camera resolution. And now we can make few test renders because we
create all these windows. I will duplicate this. I will, I will make these
two global orientation and I will go with Shift D and I
will duplicate this camera. And let's place one camera here. And if you press lamp at zero, you can see that this
is still main camera. So we need to press control Z. And now we switch
to this k manner. You can go with view cameras, set active object or skin. Now, I will obtain this
slit along z axis. I will have to well,
to make Testament. And let's for this test render with lumber resolution here. One thing which is
important here, by default, camera focus instead on a focal length is set
to 50 millimeter. And I went last time, go with 25 mm. So you can see the difference between this is actually
a Zoom cameras on. If we bring this down, we can catch more of all seen this before with 50
millimeter zoom, and this is 25. And I will keep this.
And I will also set 25 controller up at zero
to switch to this camera. And let's make other tests. And I will now Shade Smooth. This Shade Smooth, right-click, Shade Smooth and
enable auto smooth. And also within this box
here, Shade Smooth. Smoke.
11. 10 - Modeling Backrooms windows: Let's now create this
little window here. I will select this wall here, and I will go to Edit Mode and select I will go with Control R. And I will add
one loop cuts to this state here and
also to this war. Now, I will select
these two edges and I will press f
to fill this space. And I want to extrude this and add thickness to this mode. But be careful here
because if you remember, I talked about this
bevel modifier. So this level depends on
how close are two vertices. And if we now x2, this wall index, you can see that we lose
this bevel modifier. And we can fix this easy if I go with Control Z and
I will join this again. So f, We can fix this API, just press P and selection, and now we separate this goal. This now don't affect to this bevel modifier
and to this wall here. Now I will go to Modify tab and that will remove all
this module here. And I will go to Edit
Mode, select this face, and go to E to
extrude and x for x. Now we can add windows here. You can see here, I will go isolate this object with the numpad slash key or
you can go with you. Local view, toggle Local view. And we can now create windows. So I will go to
Edit Mode, select, and I will go with Control
R to add one loop cut here, but I will scroll mouse up and
add another loop cut here. And if you press S and Y, we can scale these two edges. And now I will go with
Control V to split this. And this will be space
for our windows. Okay, something like this. And now I will go again with Control R and hard
lung lobe cut here. And another. Next I will breach these
phases, two phases here. But before I do this, I will duplicate this shape, the x because we will use
this space for window frame. So now I can, I will press, select this and press P and selection to separate
this object. I will go with objects
set origin to geometry. And also here. And now I will go to Edit mode. Select these four
faces with holding Shift and right-click
and breach. And we can now create window
with this plane here. So if we look to reference, you can see that we have one blue cat on z-axis
and two on y axis. I will go with Control R and scroll mouse and add
three loop cuts here. And now I will press
a to select all. And if you press,
I mean seventies. But we need to insert this
on individual origins. So I will press by twice. So i, and now I will
scale this down. And now I will press Control
I to invert selection. Or we can go with the
select and inverse. Now I will go with E to
extrude and x for x. Next I will select again
these windows here. And I will press I again. And E, extrude
them X for X axis. And I will move this. Let's create materials now. So having both to Material tab and I will remove
all these materials. This material and we'll
be back on wards. So I will remove
these two materials. So this will take one in this
backward works material. And I will add here. Would material has changed, viewport color, brown,
dark brown material. And I will also add
here glass material. And now hit this glass selected. We can just click
here and assign these glass material and
I will change your color. Bluish color. We can add also been modified. And I will go with one
sentence, maybe two. Okay. Let's now move it,
shift D orbitals, the d and y for y axis
and move this on y-axis. If you want, we can select
these two objects and we can go with all the d and x. Move this on x-axis and z, 9,108 to rotate this on
z-axis by 180 degrees. And I will now create this
double window frames here. And we can now, it's not that
slash key back to housing.
12. 11 - Modeling details: Now I will create this piece of wood or what
material is this? I'm not sure, but I will go with non-fed slash key
to isolate this object. And we can pay selection, select this face is down and I will go with Shift D
to duplicate this object. And P selection. Select this object and
set origin to geometry. Go to Edit Mode and
press a to select all and Sx to scale this on x-axis and E and Z to
extrude this on z. Now I will select
these edges here. I will go with Control
V to add Bevel. And I will change, remove this material
and I will add this. Here, would frame. Let's now create
this column here. So I will go with
numpad slash key to isolate only this object. I will go to Edit mode. And with Face Selection, select this face and Shift D to duplicate this
object and P selection. Now we separate this
object and we can go to Edit mode and this a
to select this object. I will go with Sx to
scale this on x-axis and scale this get
along y-axis also. Now, I will go with E
extrude and z, z-axis. And I will press
I to insert this. And we can move
this little down. And I will press I again, e to extrude and z or z axis. Let's again insert
this and move this down and E, z again. Instead this again,
and move this down. And instead this one more time. I will now press E
and Z for x0 and x2. This all done with holding Alt. We can select this line here. And I will, I will select this select Edge Selection
and it called the goal. We can select all these slides. With holding shift. We can multiple this selection. So I will go again with all with holding Shift and again with all three can
select all these lines here. And we can move with control
V and add that over here. And let's hold Alt
and select this line and also this line here. And we can also add lever here. But you can also always
go with bevel modifier. And I haven't changed this
material to whites, blacks. Let's now pay this metal part. Set origin here. And I will go with
plain mesh plane and x like to replay this one, x axis by 90 degrees. And now I will go with
the edge selection here, and I will bring
this to about here. Let's see various
waterline here. Okay. Now I will go with numpad one front orthographic
view and I will go with the more than x-ray
mode to see various states. So I will, I will try and make this
parallel with this stage. I will create this part. So I will go with Control R
and add one loop cut here. If we select these two vertices, Empress, we can move
this up if you want. But if you want to
be more precise, we can go with s, z zero to scale this. To work. This is zero and z axis and now they are
perfectly align it. Move this along z-axis. I think we need to
move this down. Let's try like this. So I will select only
these four edges here and I will
press P selection. And now we can
delete these faces. We need only these edges here. And if we go to Edit Mode and select the winning select
points, we want level. So these three points here, and how we can level vertices
with Control Shift and B. And now we can scroll
mouse and odd. This bevel here. Okay, And now I will
convert these to curve. So we can go to Object, convert and convert
this to curve. And now we have here properties. And I will go to
geometric bevel. And I will add that if we can increase
resolution if you want. Now we can add that. I haven't moved maybe 6 cm. And now I will go
with Shade Smooth. Let's create this detail here. So I will add, I will go with Shift a and, and I don't need too
much vertices here. So I will go bring this down
to 16 and scale this down. And S to scale this one z-axis. Let's play this, place, this request as z. Select this face here and go
to Control V to Bergen this. But before we do this, we need Apply Scale
Control a and applies and now Control V. And then on this, we can always later back to this geometry level and
we can change this later. Next, I will select these two objects with not put seven go to
talk orthographic view. And with all the next, I will also place this
object here, so every night. But I want to rotate this
one minus nine, minus nine. And let's play this to this
stage and bring this down. And all to D and X and
move these sorts of here. And let's add one camera here
to make one test render. So I will go with Shift D X. Okay, but we need
to make this window transparent and we also need hard lighting to
this, but crumbs.
13. 12 - Materials - Metal chrome: Let's now start with materials. So first I will k this
metal chrome material. Let's add here. And we can now go
with the shading tab. And when we switch to this shredding company with also switch to material preview. And let's press and up at zero. Bring this camera view. And I will now back to object. We can start creating
materials here. First for metal, I will bring
this metallic told to one. I will bring the roughness
for now to zero and we already have nice
metal material. And let's also bring this
material to this object. But I want add variation
in roughness here. So for this, I usually use concrete texture and if
you go to texture.com, you can search for it here. This first results are BBR, texture and unit page,
this PBR textures. But if you scroll down, you can find one in
which texture here. And you can use any
of these. You like. I think I used this
one last time. And I will share
this link with you. But you can download
this for free. And I will now open
folder where I download this and I will just
bring these two blenders. And now I will go with them. And I will plug this roughness. And if you press Control
Shift and click on this node, we can see how this texture
is projected on this object. And because this
is just one curve, we cannot unwrap this. So I will not use UV
map for this object. I will go with, I will
press control and select this texture and
press Control T to get this texture coordinate
and mapping the node. Then I will try it, generated projection
here or object. And I think this
looks pretty good. We can change this scale here. I don't like this edge here, so I think I will change. I will use this
concrete texture here. I will share this link we would do if I find this texture, but you can always
find flexion you like. I would like to Blender
and let's select this material and I will
make this maybe 21. Okay? In blended white color means value of one and a black
color is value of zero. So if we change, if you
make this material by clicking Control Shift
and click on this node, we can change the roughness. Roughness means completely
shiny and roughness zero means completely
shiny and roughness one mean completely wrapped. So if we now know that black
color is zero and y is one, we can control this
roughness value of Q. I want more black color because I want to
make this more shiny. But I also want
some these details. So we can make more conscious. Move this white color and left. Okay, and let's now create
this glass material and we will see better when we put some light through
this window here.
14. 13 - Materials - Glass: Now I will select this window
and go to Shading tab. And now we select this
last material here. So if we switch to Shading tab, we can see that we have
glass material here. And I will not put
slash key twice. Bring this object here. Let's now delete this case. It will be SDF and let's
go with glass material. And if you plug this here, we can see that we
have glass material, but I can also mix
this with transparent. So we can see
through this glass. And you can go with
the mix shader here and you can plot this
one here and one here. But you can also go with
Control Shift and right-click. You can just connect
these two and you will get this
mix shader here. Let's now add more details. I will again go
with image texture, and I will use this concrete
texture I use before. If you press Control
Shift and click on this, we can see how this
texture is projected. We obviously need an
abrupt this and I will press U cubed projects. We now project this
image correctly. And if you want, you can always, you can press Control T
here and we can scale, change these k, maybe 1.5. We can now use this tool, roughness here, same as before. So I will go with them and I
will bring this black here. And you can take this black and white to
get the result you like. And I don't want to
be completely rough. So we can also bring this
white color or more tube-like. Something about this. And I think this is
better than before. And we can add all solid
will bond to this Windows. Now they are perfectly flat. So I will go with sheep, they end with Muslim
texture here. And if we press Control
Shift and click here, you can see how this
mass move texture look. So I will change this scale. Okay, and now I
will go with bond. So Shift D and I would
plug these two height. And I will plug this
here to normal. And we can make this material with Control
Shift and click here. And you can see
what result we get. So this is obviously
too intense, so I will bring this down
and straight also down. Okay, and now we can see
through this glass material.
15. 14 - Backrooms - lighting: If you look my last
bathrooms tutorial, I talk about how to create
this ceiling panel. And I will not do this again, but I haven't shared
this file with you. So you can just open this blender file and you
can use this ceiling panel. But I think I've
shared this part of tutorial with you so you can learn how to create this. In. For now, I will just show
you how we can use this. If we go with RA modifier, I will remove this for now. And if we now select this object and
we can go with an array, we can just lay this on x-axis and we can add
another array here. And we can bring this x axis, 0.1, y axis to one. And now we can add
this one, Vioxx. And how to turn on or
turn off this light. So we can go to material here
and we can go to Edit mode. And if we select this slide, we can just select this slide. So I will rename this to light, this light on this slide. And now I can select this face here and I can just assign this
slide on material. And if you want, we can apply
this are the modifiers. And then you can change this slide thing to
without affecting this, another part of this panel here. So I will assign this turn
off this light, lights here. But when you assign
this as a modifier, you can see that these
dots are now too big. This must be texture
because we use generated projection, not uv. So you can just scale this up and fix this little dots here. But I will go with Control
Z because I don't want to apply this array
modifier here. And now I can turn off this
array modifier and I can now select this object,
right-click copy objects. And I can pay this out. So paste this here and I
will now set this on place. So I will go with Nike and
let's place this here. Because we already have
this ceiling material here. So I will I will go with all high to make all these hybrid materials sent me back this
seeming material. So I will create, I will select this
object and I will press M. And I will create
new collection, and I will call this. Okay? And now we can put
all these objects, ceiling objects in
sealing collection. Okay? Let's now bring this down. And we can select this with
G and Z to about here. And now we can use a modified array and I will go to minus 12
opposite direction here. And let's call this four
times and another modifier. And on the y-axis. And we also need
this panel here. Okay, and let's now press as
well and seek all this loop. And now we have a
lot more light. And let's switch to
material preview. I want to place
this in the middle, so I will go with g and y. And I will place
this to about here. And now we can, let's
see how this looks. Okay, Let's these little more. So I will move
this y-axis again. And let's add one more. Because I will make
one room here. I would also add one
more array here. And now I can apply this model. Okay? Now I just want these dots here. So I will go to Shading tab key twice to bring
this object here. And just select this
funnel material. So because if you go to
Edit Mode and select this, you can see that this is Spanner material and this
is like on this slide. So I will just bring this. So this is what a noise
texture and bring this up. This look good. Now, let's fight this here, and I will create
another camera here. So Shift D and move
this on y-axis. And let's rotate this
camera to about here. And control number zero
to switch to this camera. And we can now make test run. I think we have too much
lights now in our seams, so I will go to swap two. And let's make
this hallway here. I will go to Edit mode and hit Control R on one loop cut
here and another here. We can just go to Extrude and white port
y-axis and let small. And having just select
this face, delete space. Okay? Now I will make this ceiling material, ceiling panel here. And I will turn off some
of these slides here. So I will select this one. And I will go to
materials and light off. Light off and also this one. Okay, And one thing
I want to fix here, because we can this
intersection here. I will select this
role and I will move, and also this one. I will move this to this line. Okay? And these have
much more sense now. And I will also do this
with this work here. So let's move this
to this edge here. So this is a water line. And we can move this
waterline to about here. And this part here is
backroom some ground. So I will also select
this part here and move over to here. And we need more
ceiling to this area. So I will go with D and y. Ok, and now we can
make another test run. And you can see that light
can go through these parts here because they are
not perfectly connected. And we just need to increase this ceiling here
to cover this part. So I will go with Control
R with K for time, and I will just hold y for
y axis and press Enter. And now we can go with E
to extrude this part here. So e and y just covered this
part and old some of this. And I will also extrude
this part here, so e and y. Okay? And we can also bring
this ceiling whittled down. You can create an
atmosphere you like, but I think this
is too much light for this part of bathrooms. So I will just play with this and I will switch
to material preview. And we can with numpad
slash key isolate this object and you can see
how much light we have here. So I will, just, so we're here and I've adjusted
all these slides here. So let's select this and just assign the
sleight of material.
16. 15 - Backrooms - wall material: Let's now back to Layout tab. And I will now select this bedroom wall material
and I will go to Shading tab. Let's now create
this material here. For this, I also go to texture.com and I served
for, for wallpaper. And I found this textures here and plus time
I use this one. So I think I will try to find this texture and
share the link with you. But you can use any
similar texture for this. So I will bring this to Blender. And I will now connect
this to color input. And we need unwrap this. So I will press a and
you feel projection. And now I will go
with Control T. And I will just scale this
maybe ten times or 50 times. Okay, I think this looks
pretty good, maybe 60. And we can now just create
week material here. So I will go again
with follow them. And I will plug
these two roughness. So I don't want
this to be shiny, so I will bring this light color down, something like this. And I will also use this
color them for bond. So we can plot these
two pipe and to normal less than begging
this material here. And this 0.1. Bring this down because the backroom
small sub pretty yellow. So we can make this
with a yellow color. So this will be color 1.2 will be this yellowish color here. So we can set this to multiply. And we can choose coal much
we want this yellow color. I haven't bring
saturation a little down. And we can now make
another test run. Okay, this is so yellow. So I will bring this
saturation more done, something like this. And I would also go here
with hue saturation. And I'll bring this
saturation of this texture. And shy another test render. I think we can see too
much of these flowers here and I'm going
to scale this more. So I will bring these
two might be 80. I will change this
multiplied to mix. So now we can choose how much we want these flowers
or this color too. I will go to about this value
and change this color here. And I will make a
few hallways here. So I will now, let's find the ceiling materials
here and let's go with Control R and maybe
three cuts here. And now we can hit
control V, split this. And we can now use all
to extrude face normals. We can move this out. And let's see how this works. And we can also bring value on this slide down
if you go to Shading. And you can see
here is a volume, this slide and I will bring, this may be okay, and I turn off the slides. I keep only few here. And we can now
select these camera and control numbered zero. We can make test render here. This is resolved
before and after. I want to make less
space in between these 2 v. And I want to put
this in the middle. So I haven't just
do this quickly. Let's select these two. Ceiling. And I will go with the G and X. And let's move this here. Let's now select this. And I will move camera
a little on x-axis. And let's now make wonderland. Next, I will improve
this roughness map here. So we use this flower
texture for roughness also. And I will now select this. And I will go to Shading tab. And instead this
texture, wallpaper, I will go with concrete texture, image texture and concrete
texture we used before. So Cassie call this look. And now I will go with
Control Shift and click here to see how this book here, and I will go with Control
T. And let's scale. This may be totally okay, this look good and I will
now go with tolerance. And let's try plug this. So if we press Control Shift
and click here to bring back our material and I
will plug this too rough. This is before and this is up. So they get more details here. Okay, and now we will
create a carpet.
17. 16 - Carpet texture: For carpet texture,
I go to ambient cgi.com and I will
click here to material, and I search for carpet. And I download this one. You can just click here
and you can download this. And this is how this looks. So I will copy
this address here. Now, I will go back to Layout and select this color texture. So I came back to sharing
the tab and we can now select this
principle be SDF. And we can press control shift. And now I will
paste this address here and I will select
displacement and roughness map. And now I will change
this scale maybe to 20 or 50 or seven. I think this displacement
map is too intense, so I will scan this
for 0.1 and 0.2 here. Let's now add some
dirtiness or stains here to this carpet because
now look too perfect. So I will go to slot for
the scale to maybe 50. And this looks too saturated. So I will go with the
Hue Saturation node. I will bring this
saturation a little down. And now I will go with Shift
a and massively protection. If you press Control
Shift and click here, we can see how these look. I will also go with
the color ramp. And I will move this
black color here. And very slight cooler, there will be our stains. So I will play with
this value here. Okay, something like this. And now I will go with Shift D and duplicate
this hue saturation. And I will plug this here and I will now go
with saturation all down with value also down
to make this more darker. And now I will go with
Control Shift and right-click to mix
these two texture. And for mixed factor, I will use this color ramp. And now I will make this material with
Control Shift and click. Okay, I think I need to
invert these two colors. Now we can see this dirtiness, all these stains here. So I will now doing
these little more. We can increase
this and make more visible if he'd move this
white color on left. And I will now add more black color here because
this is still visible. This is before and
this is after. I will now add more lights here to make this more visible.
18. 17 - Tile texture: For tile materials, I will use these tiles texture
from NBN cgi.com. So if you go to Materials
and search for times, you can find these types 107 texture and I
used to k image. And I will share
this link with you. This is how this look. But I also want to
add more details. I will mix this with the x concrete shader
peck from Chaco fool.com. And you can download
this from this link. So if you go to
chocolate fool.com, you can click here to
store and products. And you can go here
for three category. And you need make three profile. And then you can download
these shaders bundle. And you'll get a lot of this three and
high-quality shaders. And I use this shader. So let's now create
these types material. I will, I will
select this object and I will get the
numpad slash key and isolate only this object. So we can use this for real
and odd here, white material. Now, I will go to Chez the term and I will
press number slash key. I will now copy
this address that I download these
tiles from MBA CG. And I will press
Control Shift and tea, and select this color, displacement and roughness map. And we can now go to edit
mode a to select all and you, your projects to unwrap this. And now we can scale
this value, maybe 2 ft. This displacement
map is still ten, so I will bring this maybe 0.1. And you can see how this book maybe also here, 0.1 or 0.05. And you can see how this loop. But if we zoom here, you can see that we get a
lot of these big cells. And because this texture don't
have enough information, I will also use this chocolate
for concrete texture. I will mix these two
texture together. Let's now open this charcoal for texture and you can
use any of these. But I use last time this number. So we can double-click here
and we can open this shader. And I will now right-click
and copy object. Back to our scene and
this object here, and I will now
select this object. And you can see that
these objects have this material and I will just select all these
and let's delete this, fall this, and let's paste this here to white tiles material. And I will now delete this one. Okay, Now let's go
select this texture here and go with
Control T. And scale. This may be 20 or 15. If you want, you can play
with these values here so we can increase contrast here,
saturation, brightness. And also we can increase
glossiness. Or bomb. I will know for this
type of texture here. So I will first go
with this color map. Okay, and let's now go it's Control Shift and click
here to see how this look. So we need scale this, so Control T and scale
this maybe to five. E.g. and even more, I think maybe for now I will increase
this black lines here with color ramp. We can all mix this to
color the color map. So I will go with RGB and I will plug
these two color one and these two color too. And we can plug
these two base coat. Let's press Control Shift M, like this material here. Okay? Now we can choose
between color one, which is this tile
from NBN cgi.com, or this chocolate for texture, which is color too. But we can also
multiply this and take a darker color from
both of this image. You can choose how much of this concrete
information you want. And we can also add
more contrast here. If you want. To get more
of this concrete look. Okay, I will add more conscious, but I will also go down
with this value here. Okay? Next, I will go
with the bump map. So for this, I will use this displacement map and displacement and bond
par, very similar. So I will now plug
this to scale this. If we go with the Control
Shift and click here, we can see how this looks. So we need also
scale this 40 times. And I will just plug
this, this vector. Okay? And now I will
go with Shift a. And I will plug these two
height and these two norm. Let's bet call material and
we can now see what we get. So this is too intense
and I will bring this top 0.1 and also 2.1. And next is roughness and roughness determinate
called glossy will be, our types will be. So I will go with color ramp. The white-collar
mean value of one, which means completely
rough and black color, is value of zero, which means completely shiny. So if we increase
this black color, you can see how we get this
more glossy look here. And also if we bring this
color morph to black, we get more reflection here. But I want this lines
here non-reflective. We can mix these two texture. So I will go with Shift
D. And if you plug this, this texture and
with control shifts, we can see how these look. I want, make this white. So if we tweak this color ramp, we can get the white color here. Now we can, we can move this here and we can with Control
Shift and right-click, and we can make
these cool textures. Let's go with Control Shift and click here to see
how this looks now. So we get this white color here. Now we can see that we don't have reflection on this part. So let's play with this value. If we increase more co-op, we can see that there is
no reflection on this. I think this is too glossy, so I will bring this
red color and this one. And also this one. Okay, and now I will
back to Layout and let's go with number seven
and duplicate this Command, Shift D. And why? And let's put this camera here. And now I will go
with control lamp and zero to switch
to this camera. So let's move this here. And let's rotate this one z
axis and also bring this up. This is what I get. And we can say that
maybe this bump is a little too intense, but the rest look good. Okay, and we can now move this camera and tried this
from a different angle. So let's make one
shot from this angle. And before I made test renders, I will also add this
texture to these objects. So I will select this
white tiles material and when this here. And let's go with your project. First, I will press N and we need apply scared
control a scale. And now we can go to you. You feel projection. This look too small. So I will just scale this
down and make this bigger. Let's now add this
material also here. And let's go to Edit mode. Press a to select all
and view your projects. And we need scale
this down a lot. They need the unwrap
this part here. So I will press a to select all. And let's just check scale
this one and your projects. I made a few test renders
and you can skip between this slot with pressing
G on your keyboard.
19. 18 - Ceiling texture: I will now enable
this ceiling in Newport and we have
this ceiling material. And I will now go
to Shading tab. And I will go with
English texture. I will use concrete
texture I use before. Let's press Control Shift and click here to
see how this look and solving it will
go to Edit mode. Press a to select all. And you do projection. Let's press Control T and scale. This may be 50 times. Let's vector. I will now use this
roughness maps. So color ramp like this here and plug these two rough and
make this material here. Let's isolate one of
these objects so we can see better, but we can. Okay, Let's tweak this a little. I don't want this completely black and completely
shiny parts. So I will bring this more twice. Okay? And I will also use
this for a bump map. So shift take bomb, plug these two phi n and bring these 2.1
and this all down. This is before and after. And we can see
this details here. And we can also add little of this concrete
in color or inputs. So we can go with color ramp
and we can also plot this.
20. 19 - Ocean modifier: Next we will get here
is what our shader. So first I will switch to solid preview and I will hide this ceiling
from viewport. And I will select this line. And I will scan this maybe to 20-byte and set the
origin to geometry. And I will move this here. First. I want to add
some real geometry here. And for this week are here. Ocean modifier. Next I will apply scape. So control a Apply Scale. And now we have a
few settings here. And this setting, this resolution
is actually sub-divide. And if we go to wireframe mode, we can see how this looks. And I think this value
of seven is okay. I don't want to high
density mesh here. And this, I will
keep this to seven. And the next, I will scale
this size down to about here. Now, next important thing
here is this spectrum. Here by default to
this turbulent ocean. And you can try
different types here, but go with this shallow water. And the next important
thing here is this race. So I will scan this
all down to 0.1. And you can also play
with this fetch value I, I try different values skipped. So if you go down, you get, you get to this more,
this tiny waves. So I would go 100 or
200 to smooth this. Okay, I think this is still, the scale is still big. So maybe 0.05 because this is a pooled water and we don't need too
much waves here. And I think this is
pretty okay for now. So now we need to
animate this water and for animation reuse
this time option. So first I will go to
first keyframe here, and I will press I on keyboard
to insert this key frame. And now I will go maybe to 100. And I will set here, fine. And press I to insert. Now if we back to playing one, and if we press Space, we can see our animation. If you want this
animation to be faster, you just need to move this left and you can see what we get if
we press Space now, we get much faster animation, but this is too fast. So I would go maybe to 150
and let's now, let's paste. Okay, and we have one problem. When we cross this
last keyframe. This animation will stop. And we can repeat this
if you press Shift E, and if you choose
leonardo extrapolation. That's mean that this animation will be on repeat all time. And now we just
need array this and we have here this array
oxygen under repeat. So let's now these
few segments here. And we can move this here
and just increase this on X. And I think this is m. Let's add one on y-axis here. If we know what example switch to this camera with
control lambda zero. We can preview this animation.
21. 20 - Water shader: Next, this watershed. So if we select this
and we can see that we have water material here and
I will go to Shading tab. And I will press numbered zero to switch to
Gemara Preview. And let's press number slash
key to beg to our state. And be sure that here
is the material. First, I will delete this principle because
the F and I will go with glass transparent. So if we mix Control
Shift and right-click, we can mix these two materials and I will plug
these two circles. First thing here, if you
search on Internet IO. So you can find this index of reflection
list and you can see that the flexion
of water is 1.333. Here, recover water and I
think for water is 1.333. So this is water. I think. You can find this list online for different type of
glass material. So I will type here 123 tree. And we can now make
first-place trend. I will pick store
things I see here. First one is get the
light to this area because we need to bring
up this ground floor. And second this unwrapped. It's not correct
of this part here. So let's fix this week. I will turn on from this reference image and I will switch to
material preview. So first I will select
this floor and I will go with G and Z and
break this rate law. Okay? Select this water
material and let's make, let's see how this looks. So we can see something
because you can see this, the format, the times here. So we see our water material, but this transparent
value is still dominant. So I will now bring
this all to 0.1. I will change this
color on water here to something
like blue or green. And let's now make
another test render. Okay, I see that I forget
the unwrap this floor tiles. Also. You can see how big is this. So let's, let's now
pick also do this. So basically we can select
all this part and we can press a to select all
and new projects. And that's for now, just
hide this waterline. And we need big scale of these two match
these timescales. So I will go to UV editor and I press a and I will
scaling this up. Okay. Now we can
make a test render. So F to L and I will
back to Shading tab. And I will now get
this water line. In viewport. This is a before and after and
look much better. Next I want to add here
is bombed details. And I usually see that people use Muslim texture for this. But I think better
solution for this is if you use image of water, because muscular texture
is computer-generated. And it's always better to use the image because
you will always feel that something is
computer-generated. There is one better thing
than one still image. We can use Window Animation. And I'm found one, this nice video animation
or for free on pixabay.com. So I will share this link. It you can just click
here and you can download the native resolution. And you can just download this, I think without registration. And we get this file. And now I will bring this
animation to Blender. And I see that this Please 38 s. So da by 24 frames per second
is a lot of frames. So I will bring this here. And because this
animation we need set, how much frame is
this an 800 value? Because we don't need more
than 800 frames here. And let's click here cyclic
and the outer refresh. And we can now play this
in real time in viewport. If we press Control
Shift and click here, we can preview this. And I will go with Control
T because this is, you can see scale on this
is too big and I will set here scan this may be 20 times. And if we press Space now, to start animation, we can
see that this is unlimited. Okay? And now we can
use this for bump. So first, I want to convert
this to black and white. And I will go with follow them. I will go with the bump. Plug this to height. Now we can plug this to normal. And we can see already
a lot of bomb here, and it will play plus space
and play this animation. We can see how this looks. But I will scale this
down, or 0.0, 0.2. And also on this slide here, you can see all
these details here. Maybe we can bring
this 2.0, 0.4. And let's now make
one test render. So I will go to slot
three and press F2. And so this is before, and this is after. You can see lots of these
time it takes here. So before and after. But we can also increase
this if you use this value for us displacement. So I will search
for displacement. And I will also use this
texture plug to hide. And I will also use
small value of 0.02. And I will copy this here. And let's plug these
two displacement. And you can see now,
big difference. Maybe this is too intense. So I haven't bring this down and let's move it to
another test run. I think this is too intense, so this is before and after. Let's play with
this a little more. I made a few test and I go with this value or width to 0.002. And you can copy these
values if you want. And this is result I get. So this is before and after. And we have one
small problem here. You can see that this
repetitive texture here, you can see these tiles here. So we can break this if we
go with the Muslim texture. And I will press Control Shift and click here and we can scale this maybe to about here. And let's now mix these
two texture with control. And no, first, I will
go with color m, So I can control
over this texture. Now, I will mix
these two texture by holding Control Shift
and right-click. And now by default, the mix. Now press Control
Shift and click here. And we mix these two textures. And you can see if
we go all to one, we get only this texture. And if we go all to zero, we get only this one. And I will now set
this to multiply. So it will take black
parts of both texture. So if we now go to one, we get both of these
texture makes sense. And I will just fade
this black color here. Let's give this a little more. Okay. Let's now make our material here and
let's see what we have. So e.g. I. Will just make this
black color to see better. Where is this black area here? We get this tiny race. So you can see that we fade this tiny waves here
around this area. But if we move on to zero, we make these tiny lay
the eggs from this area. I will not completely fade this, but I will go to about
maybe 0.5 or 0.8. And let's now make your
test renders here. So I will select this camera here
and then we'll go with control not at zero. And let's make now one tester. And then from this end.
22. 21 - Caustics: In this part we will
create caustic. And you can see
here examples how this loop and also here in this renders lander Lewis new costing
option two versions ago. To make this costing to work, we need three condition. And first one is
light source or son. Second one is glass material, which is this water, and third one is ground. This costing will be visible and we have all
these three options. But there is one problem. Because we have
ceiling in our scene. We need some heating
through water and may cause things
on this ground. But because of this sealing, the sun don't hit our water. You can see in render preview that I'm getting all
of this works here. And that's the reason why this costing option
will not work for us. So we can only make
fake cost sticks. And I will show right there how. I will now show you
how you can activate this course takes in Blender for another scene where you
don't have the ceiling. So you need to select the light and you need enable
this shadow caustic. And then you need to select this water or glass material
and feed on shading. You need a neighbor.
Shadow costing send object will be displayed. This need be receiver shadow. And this should work
as caustic snap. And you can find many tutorials on YouTube
about this new feature. I think this is not
physically accurate because they need some heating through water to get costing. But I like this text here. And I think this is also
not physically accurate. And also this because
you need water here and sunk it into
water to get costing. But I like these states and if you're not
overkill with this, I think it will look very nice. So let's now create this fake. To create Paco sticks
we need now for this image because I want
to make this animated. And because I want also
share this file with you, I'm limited only on the texture
I can pound and I found this one on pixabay.com and I will share this
texture with two. And we have a small
problem here. This types are visible
and it will be visible on our ceiling and where we want
displayed this costing, but this is best I found and
I can share this with you. But you can always go
to Google and you can search for cosmetics
with the texture. You can find a lot
of options here, which is paid mostly. Let's see some examples. So you can see on
shutterstock.com how much options you have here. All these are wide
quality and really nice. And if you want, you can buy better texture or maybe
you can find for free. Let's now create fake caustic. So I will put one here. And I want this on ceilings, so I will go with
the ship they liked, spot lung and X1 family day. Next. I will add fake ceiling here. So I will go with plane
just to show how this, Let's imagine that this is
ceiling and I will scan this. Let's now select both
of these objects, and let's go with numpad slash key to isolate only
these two objects. And just for to
show how this work, we need to go to Select wrote on this object
to go to Shading tab. And let's hear this number slash key twice to
bring this object here. Switch to render preview. But because we have
lot of sun here, I will go to work. And just for now, I will bring these
two values to zero. And let's select
this slide source and let's bring
this might be one. Because I won't cover
more of this area. I will scale this spot size. Now, I will beg to object. And then we have selected
this object here. We need click here, Use nodes to get notes here. Let's now bring our
caustic window texture. Now we can plug this straight and you can
see that we didn't get anything here because widow or image texture use
by default UV map. And first I will bring this, brings to 200, and I will
click here auto refresh. And I will now go with Control T. And you can see
that uv is by default, but we need change
this to normal. And now we can see our
video texture here. Now, I will go with
color ramp here. And I will tweak this, isolated this course take from this and make this more visible. But if we change radius
down, we will get more. This tastes. So if
we change this up, we get soft light here. But if we change this, scale this down, we get
sharp details here. I will go to about here, 0.05. And you can see how
we can see this. Clearly, this course
sticks and this types, and I will try to isolate
these types from this course takes its little hard because this texture
is not so good, but I think this ties
are not so big problem. And if we now press
Space to play, you can see that
this is animated. And we can also use color here. So this will be blue because this texture without
one is blue. But you can use a small
value of this color. If we go with hue saturation, we can be saturated this a lot, but also keep a little
bluish color here. Now, when we see how this look, we can now delete this plane because we don't need
this and we can get to World settings and
bring our likeness. And nothing slash key. I will bring this
little orangey z-axis, so g Z to bring this up. And now we can use this over RC. So all the X, then we can place one
here and one here. Let's try make test render. So I will duplicate this camera. She is the x and I
will place about here, control up at zero. Let's look to ceiling. So let's try this angle. This is result I get and you
can see few cos x cubed, but we can make this
more visible easy. If we go to layer properties
step and you need enable this shadow pass and then
you need re-render this. And now we can go
to compositing. And if we go with Control
Shift and click here, we can skip between this
process and this is image path. And this one is Shadow Pass. So I will now mix
these two together, which makes RGB and plug image
here and shadow pass here. Now, if we go with
screen blending mode, screen will ignore blacks
and keep only white values. Now with Control
Shift and click here, we can preview this node. And you can see this
cost x squared. And now we can choose how
much we want this input two. And you can see that this
shadow pass is not in the noise that you can
enable denoising data here, and it will go hit Shift D. And the noise. We can plug this here and
this should work. Okay, you can see that now it's a little bit and you need to load
this whole time. But we will do this later
in post-processing.
23. 22 - Imperfections: Next, I will add
some imperfections. And the first time
we start with tiles, we have only this
repetitive tile texture through all this area. And I want to break
this with some details, some tiny details, and
some imperfections. So first, I will copy
this object with Shift D. And I will move this on
x or y axis to split this. Okay? And now I will remove this modifier
to speed this up. Then I will just, well with the Shift V and
copy only this space here. So Shift D and Y. And now I will go
with P selection. And I will delete
this second object, and I only need this part here. Now, I will go with number slash key to
isolate only this object. And I will go with set
origin to Geometric. Next, I want only
cut this part of, part of this area,
maybe ten of these, ten by ten. This tight. So I will go with Control R
and I will add one loop cut. And I want to be precise. This line here. So if we move this on x-axis, we stretch this type texture. But if we press G twice, so g, G. And now we can move this precisely without
stretching texture. I think this option is called
correct base attributes. So you can try now,
it's Control R. Yes, if we enable this option, we now can move this
without stretching texture. So let's cut here. And let's add one to about here. Okay? And I will now select all
these faces I don't need. And I will press delete faces. And let's set origin to John it. Next I want real geometry here, so I will move with
control arm and Outlook cuts to match
this timescale. Let's now move to Face Selection and press a to select all. And I will now press
I to insert this. But I will go with I twice. So instead this on individual
origins in the dual basis. So I said this just a little and now we
can, okay, This is too much. So I twice. Let's now go with E to
extrude and y for y axis. Okay, and now I will go with
Control B to bevel this. And scroll mouse up
to add one loop cut. Okay, and then now we
have some geometry here. And I will now make some
imperfections scheme. So I think I will
go with shade flat here because we get Shea
smoothies with shading. And let's now select
few of these faces. And let's move
this along y-axis. Now let's press X, Y, or Z to make it to
deform this later. I will now go it's Control
B on one level here. So I will now get along
y-axis and I will now go like this little on patrol
be to add one level here. Let's go with and
why now x or x axis? And let's add one bevel. So why might it be at x also can control B. Okay, and now we have piece
of real geometry and we can stick this
through our walks. So I will bet with NumPy
slash key to our scene. Let's place this, duplicate this to time
and place over this. So I will go with g x, x-axis. But if you press G
x and press Shift, you can move this more precise. I will now also go
with G and why. And you can see all these bevels here and all these
imperfections. So first, I will make
the camera here. So I can compare this
before and after. I will move this to about here. And I will press Control numbered zero to
switch to this camera. And let's bring this little up. Rotate on z. Now let's move this sweater. So for now, I will move this on y-axis to remove
our endurance. So we can compare this. Now when we have, before, we can skip two slot tool and we can now make
this part here. And we can also
duplicate this with all the and all this area. So I will go into g, y and hold Shift to
be more precise. Okay, and now I will go
with all the x here. And we can also apply
this to all this. So all this is before and this is after. And you can clearly see these bumps here
and imperfections. Maybe it's a little too intense, so you can always select
this and press G for y, for y axis and hold
shift and move this vector. Okay? Now.
24. 23 - Leaking and Graffiti: And the next we can use for imperfection is leaking texture. So if we go to texture.com, you can search for leaking. And you can find this
PNG textures here, and you can download
any of these for free. So I will now, I download few of these here. And I will now back to Blender. And I will set the
origin to this area. And I will go with Shift a image and the unit first
go to Edit Preferences. Hey, don't send
unit enable this. Head on images as plane. You just need to
enable this here. And when you go with sheep take, you'll get this option
here, images as plane. I will now select this. Any of this you can use. What I will go with this one. Let's just so I will now press, select this and press like
Ivan just for a second, check this face orientation
must be blue here. So this is okay. Let's now back to material
preview and let's play this. And let's scale this down. We can control this intensity of this texture if we go to Shading tab and I
will press numpad. We can see here this solving. We don't need isolate this. And if we now add color in
between in this Alpha value, so shift the color ramp. We can control
intensity of this. So I will bring
this white color. I will bring this
white color to black. And you can see how we control
density of this opacity. Okay, and let's now go with D, Z and rotate this on
x-axis and by -90 degrees. So x -90, 90 for 90 degrees. And let's place one. And we can now go with d, x and move one here. You can also create
another material, maybe with this texture and you can place this
all of this area. I will also duplicate this one. So this window, so all the X. And let's place one here. And let's now make
another vendor. One thing you can do here, so it's easy to see
where is our texture. You can always move to
looper viewport and we can say pupil color for this texture here.
Viewport display. If you set this to green, you can see that this
intersect a lot. So I will go with g, z and we can see where
are our ligand texture. So let's duplicate this
with all the g m x. Next I will add
here is graph it. So we can go to
texture.com and we can search for graffiti. And you can download
any of these texture, but I usually want
high contrast texture like this so we can blacken
graffiti on white background. And I download through
all of this here. And I will now set cursor here. And I will go with the
shift day images as plane, and I will select, let's select this one. So let's with 90. Let's check this
orientation is blue. And now we can make two material preview and
let's scale this up. Now, if we go to Shading tab, Let's go with NAFLD slash key
to bring this object here. And let's go to material free. And we can see that this is
connected alpha to alpha. But because this is JPEG image, we don't have alpha value, but we can create this manually. I will go with color ramp. And I will plug this color to all white color
means value of one, which means completely
transparent. So I want to make this
gold texture transplants. So I will just invert this. Okay, and now we isolate
this graffiti from this. I will now, let's make this a little better and
we can see this part here. Okay? And now we can go to
edit more than we can go with k. Now let's separate
these three graph. Hit Enter, and I will
also make one cut here. And now I will select
this part, the selection. And let's also separate
this and this. And I will now just set
origin to geometry. And we can now place
this over this, over this walls here. So I will place just
for this place, one here and one here. And I think this black
coral color is too intense, so I will make the shading tab. And I will just say this. If I bring this black
color, now, I need bling. Bring this white
color, mostly black. And we can fade this
strong black color. I add two graffiti here just for tests and you can
play with this oscillate. And next imperfection I
will add here is garbage. So I made this
photon scans before, and I will share this
file with you so you can just double-click
and open this file. And I will now hopefully
few of these pieces. So right-click copy and we can now paste this to our scene. And I will move this here. And next I will press M. And I will create
garbage collection. So we can always go
to here and we can easily remove this forum from Render if you
want or viewport. And now I will, Let's
find this line. Because I will place
this over this ground. And let's copy
pure this with all D. And move this on y-axis. And let's place this
two pieces here. We can scale, these are lethal. We can see here that
something is underwater and replace this basis
on this area in here. Okay, and I figured out
that I use all this without compositing
nodes. We do it before. So this look a
little unrealistic, but you can see this
hi garbage here. So I will now quickly fix this compositing node and I will make refuse to
testify on that slate.
25. 24 - Big room - Poolrooms: In this part we will talk
about camera animation, but we forget make
this big room. And I will now show you
how you can make this. Let's make to render
and this big room, nice position about here. And I will set the origin, of course are heat and
I will go get sick. They make a cube. And I will type here
6 m before no here. Meter. I will line up this
with this object and we can just go
with number seven. And I will update
this on z-axis. Now we can change from low
ball to normal orientation. And I didn't go with Sx
to scale this an x-axis. I want make these
parallel with this. And SY to scale this and y axis, or you can make this big one. I will go up to about here. Next time we will apply
scale with Control a. And I will separate
this ceiling. So be selection. And let's press M and add
these two ceiling collection. And we can enact this
stone ceiling big room. Now let's disable
this in Newport. And now I will just
make lower here. You cannot live out in the middle and then
we'll hit Control V. Now just press Delete. Let's now select this fall
and I will move it to the Z row it SY to
scan this and y axis. And let's move here and E and Z. And this is the axis because we are in a normal orientation. So I will now press L. Let's first apply
material and Umrah. So let's start here. Tie white dice now carry out
which two material preview. And we can select all
these a few projection. And this looks good. And now I can go with L. And now we can change
to local orientation and shape d y for y axis. And we can go with Shift
R to repeat this process. And now I will press L over all these parts and
she would be x. And we can move this face. And let's also move
this ceiling here. And now we just need copy
this ceiling lights. And I will go with sheep, the y. And we can rotate this z-axis to line up with this object. And now we can just go or they modify and make these count and also modifier on y-axis. Okay? I will also now disable
this viewport and we can add here modifier, maybe five centimeter. And you can also
add the graffiti, leaking and garbage and
other imperfections. And just be sure to add water here so we can get
this water line. And I will duplicate this and
move this here and rotate. Let's now move on camera here. Protest. Ok, we need to fix this problem here so we can move all this
on y-axis, so g, y. And you can go to Edit
Mode and bring this here. And this one here.
26. 25 - Camera animation in Blender: Let's now talk about
camera animation. So first we will talk about
this field, the focus effect. So you can see this nice effect here and I will show you
how you can make this. Let's turn back to Solid View. And I will find
this evening here. And I will start with
this position here. So control now at zero to
switch to this camera. And for this effect
we need object, we will put in focus. And because this hole
here is one big object, this is not a good
object to make in-focus. And for this I will
use empty plane. So this is just empty object which is not visible in camera. So Shift a and I can
put this to about here. I will go to material
trivial because we can preview this field in material prevalence
numbered zero and select our camera enabled that
we can set focus origin. And this is this empty. Now, if we go with f-stop down, we get this, the focus
here in our camera. But I will go to 0.0 because we will now start adding keyframes
to our animation. We need set. Because we will now start insert the
keyframes on this timeline. We need to set a
position for star. And I don't want to
start from zero. Because if I change my
mind later and if I want something
behind this point, I can always use this
to add something here because we
cannot go to minus. I will sit here on Foundry. And this will be stopped
for our animation. But if I change my mind later, I can always go back to zero and I can always
add something here. So let's now bring this
to 101 keyframe here. So this is 0.02 value, which is completely almost
completed, the focus, and I will now go to about here. So 24 frame is 1
s and let's see, 12 ramus about 2 s. I
will also insert it here. So all this area
will be the focus. And let's go to
about a second more. Let's say here maybe 0.020, 0.01, and add another keyframe. And I will now go
with 0.02 here. And now I will complete
with the focus. This is crazy too. What we get from this. And you can move this closer to make this faster if we want. Let's delete. Delete this middle
keyframe here. After this keyframe here, we don't need
anymore this field. And we can disable this. If we press here. We can except the brain. And all this area left
is with the tag field. And now we can go
one, more or two. And we can now disable this
and press Add keyframe here. And you can see now we have
enabled that that field. And after this, just
all these disappear. And to get to this
camera down effect, we can just, now, I will insert keyframe here
to location and rotation. And I will go about first frame and I will
bring this x axis down. And I will press I here
and we get this effect. And this is so slow, so we can always move
this here to speed up. And how we can know
which of these points are or dislocation of rotation, which is what this focus. So we can, if you press
this button here, jumped to keyframe, we can
see this yellow color, which means that this
keyframe for this. And if you now click
one more time here, we can now see
yellow color here. And this is for this. Stop. And this one is
for this rotation. And we can always
change this solid line. We can press here and tie here to insert another keyframe here, or overwrite this value here. And the main tool for this
realistic camera animation is one, encore camera. Shake it. You can feel that
this looked like a man walking through this area. And I will show you now
how to get to this. So I will share
this link with you. So this is a link where you can download
this camera shake. If I add on, you can click here and you can
download the zip. And then you can save this
to your computer and copy this other swear
I download this. So you can just move this here. And we can back to Blender. And now you need to go
to Edit Preferences. Add-ons, install, and select this zip file
here and install add-on. Then you'll get this Gemara
shaky Pi add-on and just click here to activate
this and say preferences. So next time when
you open Blender, it will be enabled. Or then when you
select your camera, you can see here camera. And now we can add
animation to this camera. So we just need press, press plus here
and we can choose here type camera animation. So if you space on your keyboard
to play this animation, Let's bring this.
And 0.21 thousand. You can see that our
camera is animated, but we have a few types here, and this is investigation mode, and you can try all
of these presets. This is why congruent. And you can feel that this has this look like bike animation. And some of these presets are events like this one and
some of these are subtle, like this one, but you can always make this
inference bigger. Here too. We can increase this and
you can also play it. But for this animation, I will use this to store. And I will make this
one goes to one. And now we can start
going through this area. So let's see various lost this keyframe for
location and rotation. Okay, I start from here and now I will move
this to about here. And I will move camera. Now. I will press I. And let's see how this works. This is too fast, so just bring this
right. Still too fast. Okay, Let's look
better and let's now go to camera view to
see how this goes. Okay, this looks pretty good and I will now play with
this while loop here. So I start slow. So I will press I concert
keyframe here and I will now, when we speed up, I will now bring this
influence, maybe two. And let's press
insert keyframe here. You can see that we intend to this animation when
we speed that. You can see this value
here how they speed up. And let's try it. Okay? And now when we come here, we can bring this a little more and we can go little
on the y axis if we want, and we can stop here
and if we want, we can rotate this
and look around. Let's insert keyframe here, and then we can back out to about q2 and
we can look down. And let's see how this looks. Now, when we stop here,
we stopped working. So I will, Let's see rice. Okay. Now I will bring this to one. Here, we've completely stopped. So I will go and
you point to one. Okay? I mean, it's more
than this robotic mode. So just make more space in between these keyframes
too small to this. You can add the keyframe between
these two small to this. So I will back to about here. Let's move the keyframe between this. Let's call this loop. Let's now continue
with this animation. So I would bring
this to about here, and I will take this here
and let's add a keyframe. And because we
start walking here, I will add another keyframe
here to about 0.2. And then because
we start working, I will make these two. Okay? This is too fast. So let's see. This is my
position, location and rotation. And here we start talking. So I went back to about
here and let's see now. Okay, this looks much better. Then we can go with number
seven and we can now. And then we can start to go
through these steps here. So I will take this on x-axis. And let's see how this, okay? Because we now go down
with this tape skew. This is z-axis four meter. And if one goes down
with this tape, we need to bring this
camera down about here. And I will now instead
location and rotation. Now let's see how this,
because we know this stage, I will influence this a lot. So I will send this. Okay, For this maximum,
for this animation. You can see how this book, I think this is when it's
slowed this selector. So I will put here
value of four, but I will also add
maybe one to three. And you can play
with this animation. And I will stop here
because there is no sense to add all these
keyframes. Last time. I spent about 2,800 keyframes
to get from this point. And I go through this area
here and through this lab. And I enter in this main room
and IL-4, this need 3,800. The keyframes, which
is divided by 24, which is 110, is about
two-and-a-half minutes. So this is seconds and
this is about 2.5 min. For all this animation.
27. 26 - Export and render animation: Now we will talk how to
export this animation. So for this unit, make folder on your computer. And I made this
animation folder, and I will go with seven. Because I made a
lot of tests for this long copy these others. Now, in our property step, you need select here for that. When you want to
save your animation, I will select this folder seven. And and now when
we go with Render, Render Animation, this animation will be
saved in this folder. I will load resolution here. 50% of this value just for test. This is just for testing. We can just go with
render, render animation. We can see what we get. Okay, and if we now
go to this folder, we get to this animation. And this is blank because
when we start this animation, we look this to this floor
and this black color is okay. So we can see Mike last
time when I render this. First time when you
make this animation, my suggestion is to go with the low resolution and low while your samples here to
make this animation. And then when you
make test animation, you can see how this
look and when you are here for you, for
final animation, you can increase this will go
to 100 or more if you want, then you can go
with these samples up and lost time for
final animation. I go with 500 samples here. But I will stop
this animation here because I need to one thing
before I continue with this. And for final animation,
I need shadow. Here. You can see this
shadow pass here. If I increase this opacity to 100 and if I break
this to normal, this is how this
shadow pass look. You can also hear,
see here how this, we need this shadow
paths to increase visibility of this
course sticks here. So if I said this shadow pass to screen to ignore this Blake value scale and keep only this
white values here. We can clearly see
this cos x here. And this is also animated. So you can see all
this goes to x here. And this is animated. But this is obviously
too intense. So I will bring this opacity
maybe to just 10% or 15. And you can see this
nice effect here. We cannot get this without
this exporting this shadow. And I use prime end probe
or this just for this test. But you can do also this in Blender or any other
video editing program, like After Effects
and DaVinci Resolve or any similar program. So you just need said
this shadow pass over this main animation and just set the blending mode to screen and just
bring the opacity down. But we will talk about this
in post-processing part. So you can skip this for now. I will just now
show you how we can export this set of paths. So to export this shallow
parsing it go to here to the Layer Properties
tab and we need to enable this shadow here. And now we can go to composite or we can see now
here this shadow. For this, we can use
to go with shift. We can use file output node. And we can plug
this shadow here. And I will now back to my
folder where I render this. I will just create this, you can call this shadow. And I will now paste this here to output
properties folder. And I will just select, double-click to this
folder an asset. Now, when we make when
we go with Render, Render Animation, this
shadow pass will be safe. But we need to be
careful because we use this lens distortion and
this distort our camera. We also need duplicate this and we also need
paste this here. Let's now go with Render,
Render Animation. And after few minutes, we come back here and we can see that we have
here shadow pass. And now we run the same time. And we can see when I
render this last time. So I also try glossy direction
is ambient occlusion, but I didn't get the big
difference with this process, so we will not include
this in this tutorial. But if you want, you can also, if you want to add
to your scene, you can also go with
the midst past. And you can use this to
miss in your render. But I don't want this
now and I only go with this set of paths to
get from this course takes. And when you're finished
with your rendering, I will show you how we can
make animation from this. So I will copy these others. We can do this in any
video editing program. Last time I use crime approach. So I will also show
you the prime X Pro. So let's start with new project. And just double-click here. And I will go with
this folder and just select the first frame and
the image sequence opened. And just move this
here, and that's all. So now you can press space. We can load this NIMH. And now we can just go
with File Export Media. And we can select the destination
folder, e.g. desktop. And we can Call this animation. And just click Keep
to export this. And if we want, include
this shadow pass, we can just go to
this shadow folder. Important also this put this shadow above this
animation screen blending mode. And just bring the opacity down. And we get this score. Let's now export
this from vendor. So we can go here
to video editing and editing and art
image sequence. One difference
between primary pro and render video editing program is you need to select hold Shift and select
all this animation. To select all these. And here we have
our animation here. Now you need a select
destination folder. And then you can go with the
render when the animation. This is all for this
vendor part of tutorial. In next part we will talk about post-processing and we will
do this in After Effects. We will try and
get old camera be cages to look and see
you in next part.
28. 27 - Announcement : If you don't see After
Effects part for now, you can come back
here for a few days. And the reason for this is because for few
days this Friday, I want be on time to
upload this tutorial. And I didn't record After
Effects part for now, but when I added all
these videos and upload, I will come back and
I will record after a fixed part and I will
upload them, holds.
29. 28 - After Effects post processing 1: Hello and welcome to the last part of the
pool rooms tutorial. In this part we will talk about post-processing
in After Effects. I should finish this
part a month ago, but I got stuck creating
other animations. I made this scene and recorded
our tutorial about it. But I don't want to stop here. I continue to make
animation inspired by car. I mainly animated car driving. And finally, I collected
about them animations. Because I'm not good
at writing stories, I decide to create
something fast and dynamic. These days, I will
start recording a new tutorial where I will talk about some of these things. And when I record the tutorial, I will pause the animation
on my YouTube channel. The new thing is
that apart from CG, I discovered another method with which I can create
animation, which is AI. We all know that
AI is coming in. My opinion is that
visually see how we can include it in workflow
and combine it with CG. This rabbit was created and animated entirely with AI tools, and I will talk about that
in the next tutorial. But most of these things are
still created in Blender. I also mix multiple styles, e.g. this animation was
created simply. I just created a simple
shader and made a few cuts. I will also talk about
this next tutorial and let's start with pool
rooms post-processing. Now, I tell you last time
that you should render only this main render
and this shadow pass. But I also render
ambient occlusion, glossy direction and miss and
you don't need to do this. I made this just for tests, but I think only this
part is important for us. If you want to render. Also, this process would
just need to go to blend that end. In here. In layer properties,
you just need the neighbor lossy direction shed of an ambient occlusion. And then you need to go to
compositing and just connect glossy direction to file output
and create a folder here. And you just need the
select this folder. And you also need to add
this lens distortion because this will
distort our image. Let's now open After Effects. First I will copy
and relocation to this folder Control
C. So I don't need to search and I will now go with new composition from footage and I will pay
this address here. And now I can select
the first sequence here and just click here important JPEG sequence
and click important. And if you see this message, just press Caps Lock. And we have a one small problem
because by default this is 30 frames per second and
our render this in Blender. In a 24 frames per second. We need more time here. So I will go to Composition
and Composition Settings, and I will add here
maybe 40 s more. And you can see that
we get more time here. And now I will select this sequence and I
will set here 24. And now I will just extend this. Here. I will now move
this timeline here and I will go to Composition, trim composition
to working area. And now After Effects, we've got this part will now rename this domain maintenance. And I will also create folder
to keep this organized. And I will call
this the lenders. And we can just drag
and drop this here. And now this is in this
folder and I will go, I will now save this file. And I'll call this four rooms and spaces. You can see that this
is our animation. You can zoom this with your mouse or you can
also zoom this here. Okay, Let's now import
another renders. So I will go with
a shadow first. So again, select this first, this sequence and import
jetpack sequence. And rename this shadow. And bring this in this folder and in our timeline and
cups look to replace this. And also you can see that this is short-term than this one, because this is 30
frames per second. And just select this and click
here and set this to 24. And we can see
what we have here. This shadow passes,
adjust our cost x. And I will now mix this with
blending mode to screen. Screen will ignore blanks
and keep only white color. Now you can see all these
costs ticks on our ceiling, but this is obviously
too intense. And I will press T to bring the opacity here and I will set this may be to 20 per cent. And you can see this goes takes and I think this is too intense. I want keep this subtle. So I will set this maybe to 15%. And I think this is okay now, because you didn't
render this passes, I will show you now you
can skip this part, but I will show you how you
can use ambient occlusion. Mr. Grassia, direction. So I will now own for ambient occlusion and I will
just do same as before. So the name is A0, 24 frames per second. And I will bring this here. And for ambient occlusion, I use soft light blending mode. And you can see
before and after we just get more ambient
occlusion here. And let's see how
does this look here. But the last time, maybe just 20% of this, just a softer effect. And you can see this
on these edges mostly. So I will increase this
a little too soon, but let's import lawsuit
that action now. So GAL4, velocity direction
and 24 frames per second. For velocity direction, I
use screen blending mode, and this will increase
glossiness in our render. So I will go with screen. You can see how we increase this reflection with this path. You can see especially
here on tiles and water. And I think I didn't use the
noise, therefore this path, so you can see this those here. And I will use maybe
only 20% of this. I'm just doing this to 100
to see better these details. Okay? And last one
here is missed. Missed and 24 frames per
second and bring this here. So with Miss, we can get
missed in our scene. Let's go here. And if we set this to
screen blend mode, we already have missed. And if you press T, we can control how much we want this mist in
our scene, e.g. 50 per cent. And you can see how we
can easily missed here. And if you want, you
can with the thing that quickly changed
color, we can e.g. odd yellowish color here
or any other color. But we can use also this for
more advanced stuff, e.g. we can add some
window overlays here. And I will now create
the overlay folder. So we can bring here some overlays and you
can skip this part. This is just e.g. if we, if we find on internet something
similar like this, we can bring this
in After Effects. And I will put this
in this folder. We can now bring this here. In the first level,
scale this down. And now I will set this to screen blending mode to
ignore black colors here. And I will also go to Effects
Control and with levels. Make more contrast here to
isolate this black background. So this is similar like
the color ramp in London. And I will move
this black colors here and make more
conscious click. Okay, and now we
can use this mist. You can see that this
is black and white map. And we can use this aspect
or to control this smoke. So if I set here, luma made this smoke effect will appear only radius white
color in this mist MOP. Ok, and now I can also bring in mist levels and I can control where I want this mist overlay. So if I press here, I can isolate and see what I do. And we can now control
this map here. And if we now press space, you can see that this is animated because we
use with our 56. You can see that we have this
smoke effect in this task. And I think this,
this is just e.g. but this is not good with
the overlap for this. I don't want to use
this in closed spaces, but I use this a lot
in this example. So we can see this smoke with
the overlay in background. And this is much,
much better example. And I use this with
overlay also here. Maybe it's not so visible, but it is here in this
transcend behind this car. Okay, let's see how this look. And I think I will press T here and I will bring intensity
this to 50 per cent. And I will press S to scale
this and make this smaller. But we get this edge here so we can fix this
if we use masks. And if we just add
further to this mask, so maybe 200 pixels sense
now this edge disappeared. And I think this is too
fast with the footage, so you can see how
this is false. We can play with this semi can
just slower than this 200. Now it's slower and
we can see how this, okay, this is just example, how you can use miss passed. And I think this is
not so good example, but I think you
understand point of this. And I will now remove this move and miss because
I will not use this. I think I will bring
this path here and I will just use this as Screen blend mode to add a small amount of white
colored in background. And I will just press T and I will send this to maybe
just ten per cent. And this is before. And one thing we can do to create a volumetric
or haze effect here, we can duplicate this may render with Control
C and Control V. And we can go here to Effects
Control and we can search for Gaussian blur. We cannot raise the value here
for about two, about 100. And now we can send this to, I think to screen blend mode. We can just keep normal and we can press T and bring opacity. Maybe 250 per cent. This is too much. This is before and
this is after. And I can keep this
but maybe not 50%, maybe ten or 15. And if you want to
make this intense, you can use 20%. But I think this is
a little too much. But we get this little case. And volumetric effect here. I think most important thing for post-processing is overlays. And I always try point and
collect good overlays. And I made half of job
just with overlays. So I will share this file
with two and you can find here all these overlays
I use in this scene. So let's first. So first I will go back to project and I will select all this renders. And I will go with
right-click and pre-compose. And I will move this
to a new composition and I will call this main page. And now just keep
this organized. So if you want make
changes on this footage, you can always
double-click and you can open this composition and you can again play with this passes here and
these values here. E.g. we can always change
these values here. And now we can, now we have a clean
workspace here. And if you don't see
these options here, you can find this
option clicking here. And also for this
stretch and duration, you can click here. And here. Let's now bring
some overlays here. So I have some sources here. And first one is, let's play with this length. So you can find this
on this website, on, for this link I
will share with you. And you can download
this for free. You can just click here and you can download this for free. And this is just a lens there. This is just one image. So you can choose any
of these you like. And I think last
time I used this one and this one because this
look like water on camera. So I will bring this one here. And I will bring this
in overlay folder. And now we can set this
over our main composition. And I will press S to scale
this and scale this down. Now, change the blending mode. I think I will use screen, but I can always, you can always try this or that or flight them because
they are pretty similar. This light, this
odd or solo mode. But I will go with screen. And we can just press T for opacity and bring this
maybe 30 per cent. And you can see that now
we have this overlay. We can see this overlay here and this look like water on camera. And I will scale
this up a little. One thing you can do here, you can change,
animate this opacity. So I don't want to keep
this all time too intense. So I can e.g. start with when I go in
water to maybe 40 per cent. This is too intense. But if I press stopwatch here, I can add a keyframe
here and I can. Fade this effect after
32nd of working. So I cannot hear
maybe ten per cent. And you can see that we
just fade this effect. Let's bring this one also. And I will press S
to scale this down. And we can add this
screen blend mode. And I will fade this a lot, maybe just five per cent, just subtle effect here. I think Dan is too intense. You can see a lot of
these details here. So maybe plus y per cent. But I also use this in
a lot of my vendor CPU. Look there is this less? Okay if we go here, various back home
so you can see that this is too intense, so I won't bring this down
maybe to two per cent. And also this one
is too intense. I will set also here
three per cent. Let's bring another
overlay and I will use overlap on this site and this is only
one overlay end. I will share this link with you. But I didn't use this
last time because this limitation is
only 40 s here. We can look this, but
it will always go 0-14 s. But if you have some
short which edges animation, you can use this. I will just see how this looks. So bring this in this
folder in our composition. And I press, I will press S and scale this down to about 22%. And I will set this to
screen blending mode. And we can always stretch this a little API and
disabled this connection. And let's stretch this little
on the z-axis. So maybe 25. You can see that this is visible only for the seconds
and now disappeared. And to make this loop, you can just go here, right-click interpret
footage and main. And let's hope this
maybe ten times. You can see that this
is all time here, but always start 0-14 s.
If you want to use this, I will go with the opacity to maybe 30% of eight this solid. The next over, let's say
we'll use in tutorial is from this guy, Jake Bartlett. And I found this on skill share. So if you don't care
profile on Skillshare, I will share this link with you. And this is my profile
you can find here my some of my tutorials also. If you register it
from this link, you'll get one month for free. And then you can find this guy. And I found this overlays
on this tutorial here. We can just look
in After Effects. If you click here, you can hear on
project and resources, you can download this here. And this is how this book and this tutorial is best. We can just tutorial I found and if you make a
profile on Skillshare, you can make
recommendation is to watch this tutorial and you can
learn a lot of things here. But for now we will
use this overlay. So I will start with this one. So we can bring this
in After Effects. Let's bring one here and
let's see how this look. So let's press S
to see how this is original leakages
resolution. This one. So this match perfectly
with our resolution. And I will now maybe go to Screen blend mode to
keep only white colors. And I will go with
50% of opacity maybe. Let's see how this. Our After Effects now
become little slow. And if you want, you can
bring the resolution to call. And now should be little faster. Or if you want to can
always disabled this last overlays and the
preview only this new one. And later we can make this. Now press paste, this
shouldn't be lethal. Foster this green line
means that this is loaded. So we need the weight lethal. If you want to preview
this in real time. We can just make this here
and press paste again. Now this is real time. For my opinion, this is little, this animation is
little too slow, so we can always speed up. If we change this
to 50 per cent, this year will be faster. Okay, this is better now. Okay? And I want to
repeat this every maybe ten or 20 s. And I can now precompose this with right-click and move all
attributes into new composition. And we can call just
this week pages. Now, if we go Double-click with this and open
this composition, we can see that this is
also about 3 min and we can go with control C and control V. And we can
duplicate this a few times. And now I will just spread
this out in our timeline. And dipping back to
our composition, we can, if we press Space, we can see that this, this will repeat in our
composition few times. Okay, we have one here. I forget one thing
which is important, we need to set this to
screen blending mode. Okay? We can also use this to
displace our footage. So I will go to main footage
and the effect control. And I will search for
displacement pump here. And now we can use this
VHS drift displacement. And you can see that
this already works because these
displays are footage. And we can see, we can e.g. just bring intensity here to
see better how this effect. And I will use this pixel around option to add color here
and see how this look. If we use this VHS footage, this composition to
displace our footage. And now this is not
adjust the color. This, this effect to this main. Okay? And this is nice about, this is too intense, so we're back to main
footage and I will maybe use only three
pixels of this. This is horizontal
and this is vertical. And I will also bring this down. Maybe we can creep like
this to fixed cells. And to avoid these edges here, we can just scale this
maybe one process. And you can see these
little ribs here. It's not too intense, but it's, I think this is nice detail. And now we can also make this color input
and all these overlays. I think this one is good. So we can try also make displacement with
this footage here. So let's bring this
footage in our project. I will bring this, I will disable this for
now because they slow down our footage and you can
see that this is so short. So we can go right-click
Interpret Footage, Main. And let's plug this 22 times. Still not enough. So
for the fourth time. And now we can just
bring this here and we can precompose this. Let's call this static loop two. And now we can go
to main footage. And let's just add another displacement map
and let's use this new one. So VHS static loop
to us displacement. Let's now disabled this in our preview in from color input. And now we can see that this, this should effect
to our footage. And I will trace this. Maybe 20. See how this look. And I will disable this
first one for now. Just to see this one. You can see that we get
all these glitches here. I think this is nice
effect but dense. So maybe we can keep this
on all the white pixels. Or three. Let's
scale this footage. Maybe one pixel is small, so 12. And now you can see that
this is a subtle effect, but we see all these
little distortion here on these edges. Okay, This is example how you
can use displacement maps. And we can also use this
in our color inputs. Just set this to screen. This is too intense,
so maybe 20%. Before we continue
with overlays, I will bring opacity
on this lens. It look too intense. So if you want to skip
to this keyframe, you can just click on this
button left and right, and here is 40%. I will bring this
maybe to quantify. And this look, okay. So here is only ten per cent. And I will also bring
opacity on this. We can just static loop. So I will set this maybe to 105.
30. 28 after effects post processing 2: Next we will use here is
from Premium Beat and you can copy this link here. And you can download this
pack from this link. And let's see what we have here. So you'll get these assets here. We don't need this
aspect ratio because we use original VHS resolution. When we export then add
this video on YouTube, you will get this black
box or left and right. So I will now use this
statically the asymptote. And you can see that
this is salt and then 1 s. And let's import
this in After Effects. Now we can put this here and you can see
how short is this. So we can really zoom this
timeline to see this here. And let's now bring our course are here and
let's see how this loop, I will press S to scale
this and scale this down. And let's also set this
to screen blending mode. And I will press T
to bring opacity, and I will set this
to 50 per cent. Now I will just
pre-compose this. So right-click. Move all attribution,
new composition. And now I will
double-click here. And so we can now
go with control C and control V and
double this two times. Now it can spread
this on our timeline. You can see one here
and another is here. And we get this nice effect. And we need to set this
to screen blending mode. And we have here, we can just overlay
and we'll also bring this here and to our timeline. And I'm going to press
S to scale this down. Because this is short. We need interpret this. So Interpret Footage Main. And I will set this
here, maybe 15. And now we have, now we cover all our timeline. Because this overlays
mostly great. We need use this
overlay blending mode. So if you want to remove white
colors from your overlay, you need use this back here. To remove black colors. We use this spec here
and remove gray overlay. But mostly we use this
overlay blending mode. This is very subtle effect. So this is before and after. But if you add levels here, we can tweak this overlay. Let's isolate only
this overlay end. If we tweak this, we can get more information. So you can see how this look. I will not use this
levels too much, but we can increase little
visibility to this slider. So let's now see how this
looks in our composition. Let's just for test. Make more conscious here. You can see how
now this is easy. Because we have here five
or six these overlays. With the Screen blend mode, we can pre-compose all of them. So select first one
and hold Shift, and we can select all this. And now we can go
with pre-compose. And I will call
this just overlays. Now we can always back here and change something
if you need. And of course we need set
this to screen blend mode. And last video
overlapping we have here is from Max NOVAC. You can find him on YouTube and you can download this with
opec from this link here. And this is what you get. You get a lot of these
overlays and you can look at them and you can
find what you like about There is a lot of
things can find here, and I think I will use this one. So if you look at my
ballrooms, we though, you can note that this
is a start of my veto. So what we can do here, we can bring this in
how overlay folder. And I will now make
this, move this, select all this, and I will
now make more space at start. And I will move this
little m, right? And now I will set this overlay
here and scale this down. And let's move our
cursor here and let's find something
interesting. So if we remove this and let, we can find something we can use for beginning of this video. Okay, maybe we can use this, the tail end. Let's
see how this works. Okay, let's use this
part to cut this. You can go with
Control Shift and the and now we split
in this lesson, I will now delete this
part we don't need. And I will now set here
also screen blending mode. Now we can see little background here and let's see
how this loop. And now we get this
interesting start. And maybe you can use
also this overlay. Let's see how this look. And let's get this up. And let's try with the
Screen blend mode. And you'll get this effect. We can keep this butter. Not too intense like this. So I will press D and
I will bring opacity. Maybe if there is one thing, you need to be
careful because we disable all these overlays here. We need this. Okay? I think we little
overkill with this, all these overlays
and maybe we can press T and bring opacity of
this folder to maybe 60%. And we are done
with this overlay. So you can download
them from these links. You can play with this overlays. And let's now add genetic
correlation effect. It basically add red glow
around the highlights or edges. And this is effect we
can find in old cameras. And because this is old camera, Let's try k this. Now. First I will go with
new adjustment layer, and I will go with
find edges effect. We can see how this looks. So I will disable this
to make this faster. And now I will go with thin because I want to convert this two edges to red color. I will select this
red color and, but I will go more with orange. Okay, and now we'll
just inverted this. Now, I will go with
clever because I don't want too much
red color here. So I will just bring this no, this one to make more conscious. Now I want to prove this. So I will go with fast rule. I will set maybe here, then this is too
much, so maybe five. And let's make this more orange. We need to remove
this color scheme. So I will go with
screen blending mode. And you can see
before and after. This is before and after, we add basically this red
color on these edges. But let's play more with this. So I will make this to normal. Let's go with curves. To increase. These are lethal and I will maybe make this fast balls move three to get more sharp this and more intense
this red color. And let's now see with
the Screen blend mode, you can clearly see
this red edges. So let's see before and after. And I think this is too intense, so I will bring opacity
made because as 2%. Now this is just subtle effect, but we can see this
red color here. And the next, we can add
this little lens flare. So when we come here, we look on this Windows and listening and we can
make lens flare here. So I will go with new adjustment layer and I will rename this to lens flare. And if you search here for lens, I will show you one paid
option if you want. So it is called optical player, and we have a lot of
these plaintiffs here. If you want to consult
for this add-on. And you can choose the type
of this lens flare here. And now we can use this
screen blending mode and you'll get this a
lot of options here. There is free option
here in After Effects is called len square. So we can bring this here. And you have three types here. So you can search between
different lens type. But I will use this first one and let's see how we
can use this here. So I will first open
this effect here. Because we will add
some keyframes here. First, I will, I will add here zero per cent of this
brightness because we don't need here this lens flare. So I will send this to zero. And the first check that
this stopwatch is enabled. Soviet can add a keyframe here. Okay, And now I will also
bring this zero to about here. And now when we look
through this window, I will add here maybe
maximum value or maybe 30%. Okay, Let's first add
this to this window. So plebs center to this window. I think this is maybe low. So let's try with 50 per cent. You can see that this
lens flare here. Okay? Now when this
window disappeared, I will also back to zero. So we have only this
lens flare on this area. You can see this here. Okay, Let's bring this
intensity maybe to 70%. You can see here. You can see this lens flare. One thing I will do here, I will try to follow
up this window here. And I will also click
on this stopwatch here. So we can add the
position of this. We can follow position
of this window. I will change position
of this center here. And now I will try and
follow this window. Okay? Now I will click here. And now I will try follow-up position of the
center of this symptom. Next, keyframes here. Next is here. And I will go
maybe two or three frames more and just try fall
off center or this. Okay, This is enough
because here is opacity is only 8%
and here is now zero. And this means that this
is more reasonable. And let's see how this thing. And we get this
nice effect here. Okay, this is how you can
add that this lens flare. And let's now add chromatic
aberration effect. I will, again right-click here
and new adjustment layer. And I will call this chromatic. And it will search here. You can find chromatic
aberration effect, but I think this is
not so good effects. You can see how this look. A little weird. We can use this little of this effect. If we go close to zero, we basically remove this effect. So I will go maybe
minus five here, maybe just five and
here maybe just ten. And now we have this small value of this chromatic aberration. Increase, this chromatic
aberration effect. I will go with China. And now basically we can blow your different color channels. So we have here red,
green, and blue. We don't want all three channels because that then we will
get clustering bluish. So I want only maybe
red and blue one. So I will go with
maybe 15 on red. And you can see how this look. And I will go with blue. Maybe. I think this is too much, maybe. Then this is before and after. Let's bring this resolution
to fall to see better what Maybe Last one thing here is color correction. So I will add new
adjustment layer, and I will call this C, C for color correction. And I will place this on top. And let's now move it. Lumetri Color, which is main color correction to tool in After Effects
and Premier Pro. And there is one
problem I didn't note. Because of this lens, we set this to screen
this lens flare effect. We get lots of
bright color here, so I will make this to normal. And we can see how this
lens flare effect look. If we go here, is our window, we
get to this problem. This part here is too bright. So we can just select this
lens flare and we can just add simple mask to keep
only this part of lens flare and to
remove this part here. And now we can go back
to our color correction. And let's see what this weak
edges make characteristic. So first I want to pay this. So I will bring
this maybe to 100. This is too intense,
so I will maybe bring this down, maybe to eight. Okay, and now, because we
lose a lot of contrast here, I will bring us to 100. I think this is also
intense, maybe 60. And I will bring
this. Whites don't. Maybe to -50. I will also bring
vibrance down maybe to -20 to fail
this color scheme. And the next I will
go with unsharp mask. And now we will make a
lot of detail with this. So I will make this to 20 or 30 and maybe we can
play with this volume heroes. This is before and after. And I think I may be
overkill with this. So I can later easy bring
opacity down with this. But I will now try. Maybe more sharpness here. And maybe we can use snake
here and you can play with these tones,
shadows, and highlights. I think more vintage color
is green and purple. So I will try out purple color here and you
can see how these look. And you can play with
these colors here. I think this is too intense, so we can add just a
little purple color in highlights and
green in shadow. Okay, so this is before
color correction. And if this is too intense, you can always go with
T and we can bring opacity to maybe 50 per cent. And this is before or before post-processing
and this is after. We are done with this tutorial. We are here more
about 1 h, I think. And this is too much. And just to know that too, you don't need to follow
exactly this process. You can always play with
overlays and you can tweak this color
correction values and maybe you can
get better results. Then I get when I do last time, this, I also get a
different result and it's all about
tweaking these settings. So you can always play
with all these settings. Thank you for watching and
see you in the next tutorial.
 šime Bugarija