Transcripts
1. Robot living room scene PROMO: Hello and welcome to a new 4 h and 30 min long
step-by-step Blender tutorial in retrieval Kate, as seen with our robot
in an old living room. In the first part, we will
create the living room mainly using reference image that we will use for most
of the texture. In the second part,
really create and animate the robot and
place it in the sea. Also talk a lot about lighting cameras,
post-processing and more. You will also receive on all
Apple Macintosh modeling and texturing tutorial
listing 2 h and 40 min.
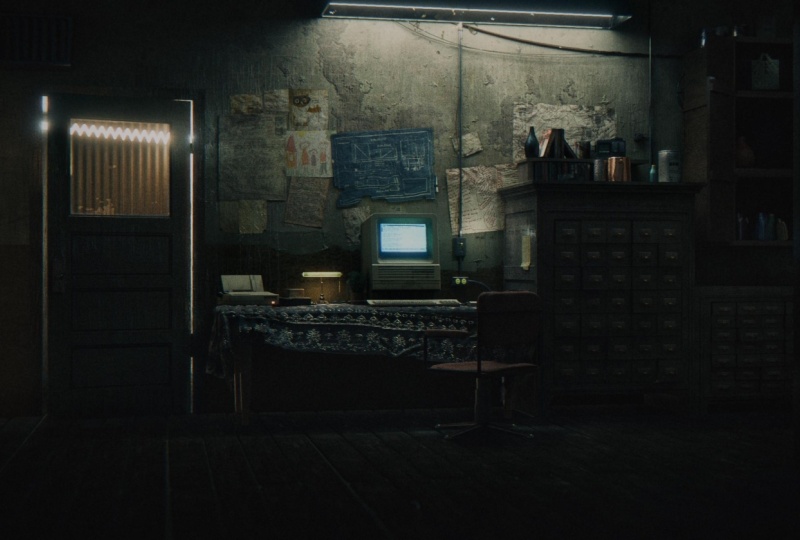
2. Creating a room: This scene is a
part of my surfing created in blender that I
will leave it to you now, if you are already
watched the film, you can skip the next 2.5 min. I already made for
tutorials on the topic of this film so you can
look for them if you want. If you are completely
new to Blender, you can also follow
this tutorial. I will try to explain each step and adopt the tutorial
for beginners. If you are completely
new with Blender, you can go to blender.org and download and install
Blender for free. Now we can open Blender. The first thing that we'll
do here is save this file. So file save and navigate to the folder where you
want to save this file. And I will call
this. What's seen. We have three objects
by default here. First one is Camera
Cube and light source. I will delete this
point lamp now. And it could delete this cube. You can add another
object with Shift a. And because we want
to create this room, I will start with a cube. If I press N on keyboard, reopen this tab here with all these settings for this
object we have selected. And I will now enter
dimensions of our room. I will set 3 m from z-axis
and 6 m on x and y axis. And if I go with numpad one, I go to front
orthographic view with numbered seven, top
orthographic view. And you can also see
this short class here in view, Viewport. And here you can see shortcuts. You can see that the
right total traffic view is number three. You can also navigate
with these gizmos here. You can rotate on x, y, and z axis. I will now go with numbered one to run total graphic view. And I will go to Edit Mode. And shortcut to skip between object and edit mode
is on keyboard. I will select this face select. We can jump between
vertex select, Edge Select and Face Select. And you can also
go with shortcut. Shortcut is 12 or three
on your keyboard. And now I will select
this front wall. Because we don't see this
front wall in our camera. We don't need this fall
and we want to see inside. So I will delete this with just press Delete
on your keyboard. Then delete base. Here will be our robot. And I want more control
what is inside this room. So I'm going to go edit more
than with Face Selection. Select this ceiling. I will go with P and
separate by selection. Now we have two objects. One is cube and since
our ceiling is cube one, so I will rename
this to ceiling. So just double-click here
and you can rename this. And I don't want
delete this ceiling because we can see
this in our render. But I can hide this in viewport. So just click this icon here and our ceiling is not
visible in viewport, but it's still visible. And now we can battery
what is inside our room. Before we continue, I just
want fixed two things here. First one is scale, because we scaled
this two times on x and y axis and
1.5 time on z-axis. We will have problem later when we create textures
and modifiers. And just, this is just e.g. if we create new material
with checker texture, if you go to material preview, we can see that our
texture is stretch. This is saying with modifier. If we go with e.g. with bevel modifier, you can see that we have
more bevel here. Then here. If we go with Control
a and apply scale, you can see how now
barely work properly. And this will be saying also the two materials later
when we add texture. So now our scale is one
and this is correct. I will now remove this
because we don't need them this level now and
also material. And second problem is with
the face orientation. By default, Blender don't know, varies our camera
inside or outside cube. So by default is outside
the correct face, but our scene will be inside
this cube and our camera. So we want to flip this. And I will go to Edit Mode
and press a to select all. And I will now press
F3 for search. And I will search for click. And now blue side, then correct side,
this inside R cubed. So I will now turn off this face orientation
and we can contain. Now I will go to front orthographic view
with numbered one. And I will bring this on x-axis. Here. You can go with Move tool
or you can just press G to grab and z for z axis. And now you can move. And if you want to
be more precise, you can hold shift. And now you can move this slide. Or we can just type
here 1.5 m. And this will be exactly on the x axis. Behind this door
is another room. And we can create this easy. Just select this Edit mode. Select these three edges. We can go with E, extrude
and hold y for y axis. And now we can press F to
connect this face here. You can also select
this edge here and go with the whole z for z axis. But it is much easier. And we also have one hallway
in this direction here. We can see in this camera angle. Here is one hallway. So we can go with Control R.
And if you move your mouse, you'll get to this loop cut on different position and high one. Look at here and I will
move this to about here. And now I will select this
face and E to extrude. And we can just move or
you can hold x for x axis, but now we stick one x axis. And we can create this folder. If you want, extend
this hallway. It is not a good idea to select this face and move because
we get these problems here. And better solution for this is to go to talk
orthographic view. And with this edge select
and with x-ray mode, we can select on this line
here and adjust this. And now we can turn
off this x-ray mode.
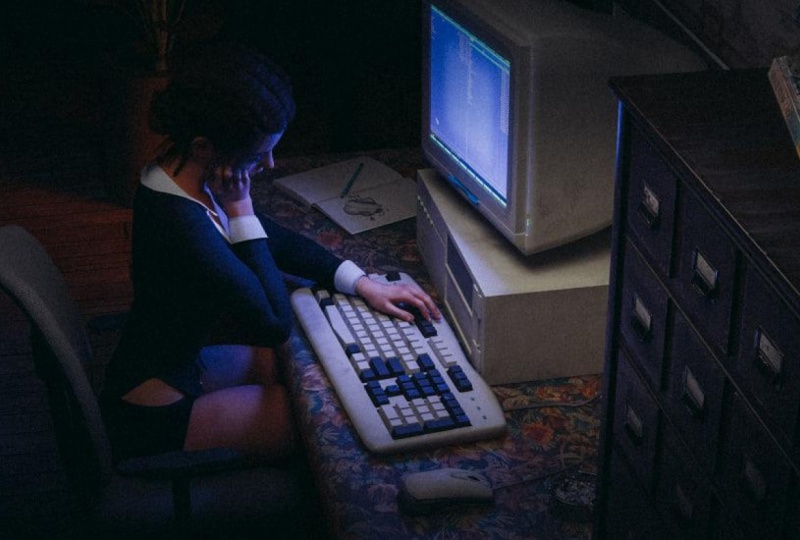
3. Unwrapping reference photo: The first thing I would
recommend before you start working on a siem is to
find a good reference. I usually use
Pinterest because it's best place for
finding inspiration. This is the photo I
use as a reference. I want to extract as many details as
possible from one photon. Because if I use a large
number of textures, each texture is photographed in different
lighting conditions. Your render may look
realistic because the textures and
colors do not match. Haven't shared this link
with you and you can just right-click and
save this image. Now we can go to Blender. I will place, but
as material here, I'm calling this reference. And now I will go
to Shading tab. And you can see that we are
here in material preview. So we can see our texture here. So I will go to
file where I save this image and I will just
bring this in Blender. And if we connect
these two base color, we can see that we have
textures on our walls. But this is not done
projected properly, so we need to grab this. And I will go to Edit Mode
and press a to select all, and press you to
autograph and projection. And this is now
better than before, but is not good. So we need to go
to UV editor end. On the right. You can also
turn on this material preview. And if you don't see this icon, you can just grab this with mental mouse button,
scroll, scroll button. And you can move
this and turn on the material preview and
are left with a select all. And we can now
project this better.
4. Planks on the floor: I will now create floor
textures and I want to put par, cats or planks on my floor. So I will go to layout. And I will hit also turn
on material preview. We can go to with Shift
a and add one cube, and this will be one plane. So if I press Slash
key on numpad, I can isolate only this object. And we can work only
on this object. And you can find also this
option here in your local, we'll toggle local view. So I will put the dimensions
and this will be one playing this on
z-axis, maybe 2 cm. On x-axis, 15 centimeter. And on y axis may
be 1 m or 1.2 m. I will now apply scale
with control a scale. And I will add Bevel modifier
to this sharp edges. So go to Modify tab and
then this is too much. So I'm sending this
to maybe 5 mm, 3 mm onto another segment here. Next thing, I will look here
and go to number seven and duplicate this object with
Shift D and x or x axis. And I will move this to
center of this object here. So you can see where
it's centered. And if I select this one and press G and why I
move this on y-axis. This. And now I can duplicate this again with Shift D and X for x-axis
and move to here. And we can select
all this object and we control J joining this. And now this is only one object. Now I will go with
either a modifier. And you can see that
these two objects are connected perfectly here. So I will just said here, little offset, 2 mm or four. And now we can write
this a few times. We can bake with numpad key and see how
much we need from this. We can also add this, add another array here, and just change this vector from x to zero and on y, on one. And I will just play
with this value here. You can hold shift for
slightly more than this value and
just connect this. And now we can create discount. If we select this object
and if you go to edit mode, you can see that we
have only few of these. For this part gets. So if I go to none but seven
to top orthographic view and press L over this one part
to select Hello spot. So L is called key to select. Only one part of this. If we want to make more
space between these two, we can go to select
this one and move here. And this will affect all
this on a modifier here. So we can play with only
with these four packets and this will affect
two or floor. Now we can create
material for this floor. I will select this object
and go to material. Then Ben, for this. I will go to Shading tab. And with slash numbered key, I will isolate only this object so we can see better what we do. And for these textures, I will use this one
from NBN cgi.com. You can download this for
free and I search here. And maybe you can
try another one. But I will use this one for now. And you can just click here
and download any on this. And I use two k image. This is how this look
venue known all this. I will copy this address
here with Control C. And in blender, you just need to enable
this Node Wrangler read, don't just go to Edit
Preferences and type here road. And then I met this add-on when you're selling this
principle because df and click Control Shift T. You can paste here
others to your section and you can open all these and make setup for this
principle, BFF. I will select only
call on normal. I think this one normal
and the roughness. And now we have all this texture sent to our principle here. Now we just need unwrap this
and I will go to UV Editing. And I will select
all these four with a and go with u
cubed projection. And I will let go with a
to select all and z night. Rotate this by 90 degrees. And now I can select
one-by-one this space. So I would go with a to
select all and scale this. One of these. I can get
this later on x-axis. And you can move
this with a G. A G, and you can move this
and scale this S to scale X or X axis and
scale it along y-axis. Now we come back to Layout. And you can see that
this four blanks are repeated two or our floor. But I think this is no
problem because this will be barely visible in our render. So, but if you want to fix this, you can just apply
this array modifier. Now you can unwrap
more on this basis. Just go to UV and
you can project this to any of these blanks. And I will now try to match
this texture with this one. And this is what I
told you before. If we use a large
number of textures, we need much one texture
with another one. So I will go to Shading tab and go here with Shift a and search for
hue saturation mode. And I haven't been this value down to make this more darker. Something about this. And I will bring our
saturation down. And maybe I can play with hue. So if you go up, you get and this
bluish color and down, who get this reddish color? And I will go maybe 47 or 40. Maybe like this. I'm not sure how
this normal map. So I would play a
little more with this with Node Wrangler. If you press Control Shift and click on one of these nodes, you can seek out only
this one node loop. And this is roughness and
this is normal map, normal. You can see how these look. I will now add also written
this roughness map. So I can move this here and
I will go with a color ramp. And I can plug this here. And I will search for bump node and plug these
two high-end to normal. And with Control. Shift and click on this. You can bake these
materials here and I will now bring
this all down. You can see how this looks. I just want a small
volume of this. Okay, and now I will
bet material here and I will also use this normal map. So I can just plug
this normal to normal. And now I can vote, I have normal map here
and this bump map here.
5. Table: Now I want to create
this table here. And we can make to layout. Table is usually on the height
of about 0.84 from ground. So I will set this to 0.8 just to see where
I will put our table and I will now go with
Shift a and add a few. And I will set z-axis to 2 cm, maybe on x axis, 1.4, and our z
axis maybe 0.8 cm. Now I'm doing this
to a bolt here. And now I will delete these two. Why don't need anymore? And I think this is
maybe a little too big. So scaling down and apply scape. And because this is a clot, they will lose got
simulation here. So I will back to Blender
and with numbered slash key, isolate this object and
shifting on one plane. And I will bring this over table and the number
seven go to talk orthographic view and kilter know wireframe mode
to save that down. And S Y scale on the y-axis. And it tastes x, k to
x axis to about here. And I will now turn
off this mode and with control a Applies k. Now, if we go to basic
properties tab here and this clot and press space, we get this because we
need collision object. So we need to select
this object here and set this as collision. And you can now press
Space. We get this. This isn't because we don't
have enough information here. This is just one plane. So we need to go to Edit
mode and with Control R, loop cut here in the middle. Now press a and sub-divide
this two times. And if I press space, now, I get something, but this is not enough
information here, so I need to subdivide
this three more times. And now if I press Space to
play animation, I get this. And I will go with
right-click and say smooth. And I think this
looks pretty good. And if you want more
information here, you can go here in
what, the far end, another subdivision surface, and this will be more smooth. Now we can apply, Okay, I think maybe we need apply this modified first
and then someday. You don't need to do
this, but if you want, you can go to sculpt mode. And here you have clot brush. So you can select this and you can just move in odd more
orange color scheme. I think this is too intense. I'm bringing this down. And you can play
with this radius. Also. You can see falling again, these more wrinkles here. This is optional if you want, I will not play this. And we can now set
texture for this object, select this object and go to material properties
temp and for this, go to shading here or press a numpad slash gave rise to bring this selected object key. For this table, I use this wallpaper texture
I found on texture.com. So you can just search wallpaper and you can choose any of these, the shelling with you. So you can download
this for free. Just click here. And this is my
textures.com folder. So I keep this side, keep this organized
for next time. Meant here is my more paper
folder and I will bring this here and we can connect
these two base color. I will just go to you edit mode and press
U and U projection. And we can scale
this in UV editor. But we can also not wrangler
enabling just click here and Control T. And we get this texture
coordinate and mapping node. And we can now scale
this two or maybe four. And now I need something
for roughness. So I usually use concrete
texture for this. And I search for concrete and leaking and I found this one. And I will also share
this link with you. I will bring this in Blender. And I will go, it will just Control Shift and click
here to see how this look. If you want to go with
Control T and scale this. But I think this
looks pretty good. So I will move it here. And if I connect
these two roughness, we get some roughness
variation here. And we can tweak this now. And now you can see that various black color is
shiny and various white. It's not fine. But I don't want too much
black color here because this shiny area
looked like a mirror. So I will bring this down. I think this looks okay. Okay, This is shiny. So I bring this more to white. And then this one is, I don't want this
too rough area here, so I'll bring this
more to black. Maybe we can play
with the scale here. So I'm going to try to get this line here.
So I've invented to one. And just to note that all these tiny details is
not too much visible in this camera angle and also
here because it's blue or red. But maybe you can use
this for next project. So I will delete
all these details. And I will now use this
concrete texture to add more variation to
this chlorine could, so we can go with another one of them with Control
Shift and click here, we can see how these look. I want the more dirtiness
varies in this white area. So I will I don't want
too much this white area, so I will bring this about here. And I will now go, it makes RGB here. And I will connect
this two factor. And now various,
right color will be this one color and various black color
is this first column. Okay, So I want
here black color. And now we can control
how much we want this black color
with this slider. This is too much. So
I've been doing this. If you go on to left, you can see that we added
too much this dirtiness. So I will just add
a little of this. Okay, we can increase
this light color, so this is too intense. I'm bringing this to right, and, but you can also just
move this more to Blake and to set the
opacity of this. Okay, this too much. So something like this. Now we can play with normal. And I will start into a
mass grave texture here. Control, Shift and click here. We can see how this look and I will play more with this because this
is a stretch on this side. So I will move it to control T. And by default, this
procedural textures are connected to generate it. And I will try with UV. But the new way I get this seems here that we try.
We talked check. Yes, and this is
the best solution. So I will now just play
with this value here. And we'll hear written
bomb search bar. And now I will connect this to height and this tone, normal. And just begging this material. And we can see how this looks. So I don't want
too much of this, so I will bring this down. And we can add more
of these sprinkles if we use some textures. So I found this texture
here on data.com, and I will share
this link with you. And now I bring this texture in Blender and see how this look. So we can go again with Control
T and scale is maybe too. Because we need the black
and white map for bump. I will go with color ramp. And now this is black and
white and I will go with the mom and plug these two Pi. And you can see how this look, this is too intense, so just bring this down. And now we can plot
this first bar here to the normal here. And now we can go through this in color from this texture. And we have this Moscow, Moscow texture or bone. And we can try also add. Tiny micro details on
this bumpy surface. So I will try more
with Voronoi texture. And I will increase
this to maybe 500. And now I will go with Control
T and try play with this. So I will try with objects. And here you can play
with these values here. So maybe two. I think this is best solution. So I'm going to color ramp. And I will bring this
more to a white. Okay, maybe something like this. And now we can add another bump. Plug these two height. And you can see how this slope. So I will bring this all down to 0.005. And I will play with
this a little more. Okay, maybe something like this. And now we can connect this, this bond to this second bar. So we have 12.3
left of bump here. And now we can maybe
increase this and you'll get all these
tiny details here. Now we can back to Layout and
create legs for this table. And I will move it to the
non-bird slash key to this, to our scene and with material. And I think I will
make this more darker. So I will work to shading. Here in color are inputted hue saturation
and hue saturation. And just bringing this rather dark and four legs, I will move it to shift
day in our data cube. And I've said this z-axis to 75 cm and x and y axis to 5 cm. Now, the number seven,
I will say this. Here is two position. And I was selling this
table and bring this now, but we have another part here. So bring this down. Select this leg
and go with numpad slash key to isolate this
object on go to view, local view and
toggle Local view. And now I will scale this
one y-axis, so S, Y. And do it the numpad one, go to front orthographic
view and to x-ray mode here. And in edit mode, select this bottom
part and scale, this scale, this top part. And now I will select
these four faces here, four edges here, and move it. Control bill. And you can go right-click
and say smooth. And just unknown
here, all the smoke. And now we can pick two obscene. I think I will skip this
on y-axis little more. We can make two material
trivial and select these walls material and just drag and drop this
material and also to flip. You want to wrap
just done a row. Okay, I think we need
first to apply scale. We can go now. You projection. Yes. And now we
can project this. Let's bring this here and we can project this, maybe on this. Now we can just duplicate
this three times. So non-fed seven, alter the x. And we can select this
and also all the y or y x. I don't like this
bright color here, so I will just project this. Will rotate this on
y-axis by 180 degrees. So air y and y. And that will scale this a
little and bring this here.
6. Door: Next we can use the door. So I will start
with cube and this will be our reference shift, a cube and dimension. So Doris is usually
about on x axis, 0.9 m. And on z axis may be 2.3 m. And scale this
on y-axis. So S Y. Here, we'll be out to our door. And I see that this door is, this doesn't match
with our reference, so I will just go to Edit
mode and try mentioned this a little better movie to UV editor and just
make this here. And we can just scale
this little down. Here is our door frame. So I will scale is known and
try and match with this one. Now we can add a loop cut
in the middle of this door. So I will go with
Control R Mutt. You can see that we cannot
thought on this wall here, so we can go with number one, n with k Fortnite. So I will go with k
and z for z axis. And now press Enter. And if this is not on the, in the middle of this
volume, can move this. But you can see that this
effect on how you remap. So we can activate this correct
base attribution option. And now we can move
this without effect UV. Now we can go with
Control V to this. And we can add here
the controller. You will cut and just
move to a vote here. And we can now delete this. Now we can go with Face, Select and select
this face here, and we can go with
I to insert this. And this will be our brain door. So I don't want this
render on the bottom, so I will go with
key again and Z. Just connect this here. And G and C Again. I have here vertices
that I don't need. So I would select first one and second
one and how you will go with depth three and
search for lost. Or you can type here
and just click here. And now these two will be
connected at the last one, the loop here again. So just type, just press F3 and connect
this last one in the null. We can select this here and
extrude this on y-axis. And we can go with Control V to Beverage Control V and just move end with scrolling Mouse. Add one more look at. And we can see here. So just select
this edge here and hold Shift and this
one and also shift. And we can move
this y on y axis. You can use this
arrow here or you can go with a G and
Hawaii or y axis. Now we just need reproject
this UV map a little better. So I will select this face here. And I will scan this
on z-axis, so S, z. And you can select this vertex select and just
select this part here. And there are small. Okay, and this one also, I project this here. So you can scale this and
something about this. And this follows. I think I will project
this one also here. Now, I want to remove this
door frame on this side, so we can select this here and UV editor just
more of this later. I don't know why I
made this law too big. So I can select this, select and in wireframe mode, I can select this part
and move little though. Okay. Now I can separate these doors. So I will go select this door, n plus P in selection. Now we separate
these by selection. But you can see that
our origin is here. So I will go with object
set origin to geometric. And now our origin is here. I will go to Edit Mode
and face selection. Select this door and go
with E, extrude and y. For y axis. I will
just move a little. And now I will go with
I to insert this. And I will go with
control are about here. And Control Alt and scroll mouse up to two more cards here. And I will select this tree with holding Shift and Control V. Select this face here. And I will extrude
this on y-axis. And maybe we cannot
hear bevel modifier. Just type here maybe three or 4.1 more loop cut. And now we can go to UV
editor and fix this. We can either
donate this object. So I will select this face
here and check this here. And we can select
all these side with holding Shift and we
can project this here. And this one here. Just grab this edge with
g and you can move this. So I don't want too
much of this shadow here because render
already create this setup. So maybe just to here. And we can also
project this one here. So J to grab and move this and this one here. Okay, and I will try
to do project this. Maybe here. It'll end this one. And maybe this part here. So Z to rotate along z axis
and we can scale this. Now we can create class
material for this part here, I will select this
door and go to Material Properties tab and we are the new material
I'll call this glass. Now go to Shading tab and double-tap numpad slash key
to bring this door here. And now go to edit mode. Select this face and selling
this material and than sign. But I want to delete this make face because glass
is transparent, so I don't want see
this part here. So delete face. And now we can either
go with roughness all to zero and we
transmission all to one. We can also project part of this image texture to all
glass so I can go sheep, they image texture
and select here. We can now see part
of this image here. And I will go with a mixed RGB. If we mix this with white
color or we can choose how much Yvonne this image
here or white color. Okay? Just a little of this image. So the next we can add here is with a
variation to roughness. So I will go with Shift
a and image texture. And we can type here concrete because we use
before this concrete texture. We can also use this, find this texture here. So I will go with
color them this here. And to reflect, I want
to go with Control Shift T. Control T to bring this
mapping and load here. And I ran scale this
to about maybe three. And you can play with this
location while you're here. Okay, something
about this major. For now we can choose how much
roughness we want here. Blake is shiny. Okay, I want inverted this. Some bright color is shiny, so I will add more right here
and made me more contrast. Now I want to play more bitten
this route door material, but because we share the same material for all
these vaults and door, I want separate this material. So I will go here and click here to make new material
from this one. And I will call this door. And now we can go
to Shading tab. And this is adjust e.g. if we try to extract
from this material, you can see what we get. Solving get a lot of
this pixel because this image is low
resolution image. So we can not use this as mom. And for this, I
will use this image from textures.com and I will
share this link with you. So this is how this material. And we can bring
this now in Blender. And we can use this for
roughness and form bonds. Because this is a different
texture than this one. We need another UV map. So I will go here and
create new UV map. I will go here with UV
map and select first one. Here, select another one. And now we can go to Edit Mode, select all and qp projection. And with Control
Shift and click here, we can see how this
will be my blue. So we're going to
go with Colorado. And I will go to UV
Editing and just scale this scale more. And we can make the shading tab. And now we can use
this for roughness and we can connect
these two roughness. And now we can tweak these black and white color
to get the reflection. So blood cooler is
shiny and Vi case. I don't want to shiny this part, so I will bring this
down more to wipe. And this finally come to blood. Volume is same for mom. So Shift a and search
for mom and connect this to fight and to normal. Now I will move a distance 2.1 and play with
this coil here. We can also add a little of
this color in color input. So we can mix these two colors. And with hologram enabled, you can just hold Control, Shift and right-click
on my mouse. Just connect these two. And now if we go with this one, this one texture completed
like is this one texture. So we can choose how much
we want this texture here. But I think this texture
here is too bright. So I mean, look here with hue saturation and
bring this all down. And also saturation. So now we can add a little
of this texture here. I don't want to match this
second texture because I want to keep
color for this one, because this match
this reference. So I will just use
a little of this. Or maybe we can play with
these different blending mode. And I will try with multiply. We cannot heat or
so little bomb. So go to Shading and double
top number slash key. And just, we can use
this little bomb. She stayed current. Mom, connect to hide. But because this is a
low resolution texture, I want just a small
volume of this 0.05. And read this down. I will also add this wood door material to this frame here. So because this is
part of this object, we need to select all this and new material and
select this door wood. And now we can select
this part here. And with control
and plus on numpad, we can expand the selection, so Control plus or non-fed and three times and
assign this material. And you can see that
this doesn't look good. So I will go with Control
Z to select this again, because we need another app, this, but we need another UV map here
because this object, this material, using
this to UV map, and you can see that
this one is red. That's because we don't
have UV map one here. So just click here plus. And now we have this UV map. And now we can go with
you, your projection. We can go to UV editor and the double slash key
ring this object here. And let's just scale this. But I wanted this to go
two different directions. So I will rotate
this on z axis by 90 degrees, so press Z. And this one also maybe a little too
dark, this material. So I will have him back in this video here, 0.8. And the remote will
happen on this color. And this Luca more dark than
it is because of reflection. So if we just remove
this material, you can see that there is no
variation in that flexion. So this, this is the reason
why this look more dark. But we can also the art here, reflection so we can move it. I will go with color
around here and plug this. Okay, but this is too shiny, so I will bring this to light.
7. Camera setup and lighting: We can set the camera now
and let's try first render. So I will select this
camera and I will go to Render properties temp and
said these two cycles. And GPU. And I will go with
1,200, 850 resolution. And you can see how this look. This wide camera, I
look more cinematic, so I will go with
this resolution. And we'll now, if you don't see these options here
and just press N. And I will set this x axis by 90 degrees rotation
and here on the zero. And now we can split
this window here. So just move this on right. And press numbered zero
to switch to camera view. And now we can
write a set gamma. And we can bring this
z-axis down to about here. And I will go to camera
settings here and I will set this to around. I will bring this
camera more down. And they can also rotate this little-known z-axis like this and move on x axis only. When we said these
two panoramic, this lens go all down to ten. And if you press this
value can see what we get. So we need to make
this to about 50. And I will also make to render
properties tab and I will send the samples to
Turkey. And also here. Now when we press F2, well for render, we get this. I see that we forget to
bring this ceiling up. You just need to unhide this
ceiling here in Newport and we forget to bring this up. So just bring this up. And now we get this. So we obviously need
more light here. So I will set to slot three so we can compare before and after. We can now also activate
this render preview here. So I will hide this for now. And I will add one area
alarm here this long. So I will set the origin here and I will
go with sheep day and with light and
airy along here. I will try lethal
mentioned Islam here. So I will scan this on y-axis and maybe
building this tool. And we can see our
render on left, but we can also press 12 to make rendering
in a new window. So this is without light
and this is a bit light. Now we can see our floor. And I will also add one
area alum from this side. So I will go with sheep, they lump and I'll bring this. And let's rotate and X4, X axis. I will scale this
to make this light. So now we can make test render. And this is before and after.
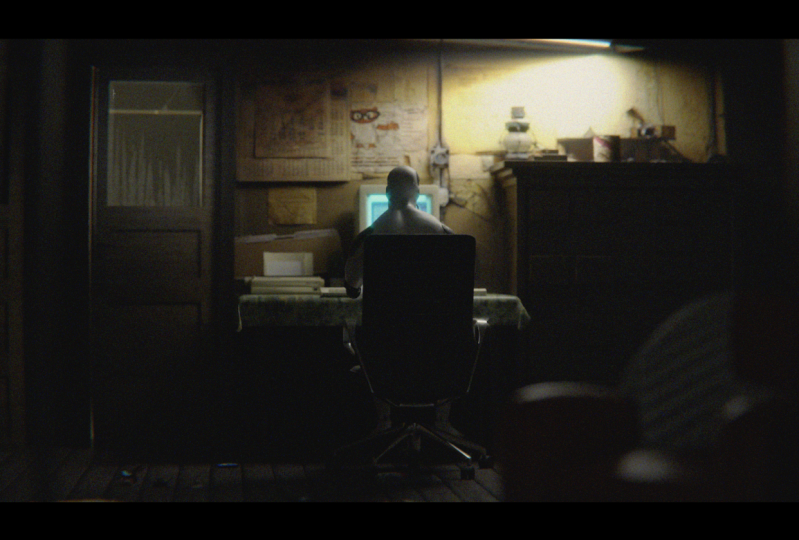
8. Cabinet: Okay, now we can continue with modelling and adding
details here. So I will join this area
and high this ceiling. We can create this cabinet here. So I will set origin here and
I will go with sheep day, and I will set this
to 1.4 m on x axis, 0.5 and 1.5 on the axis. Okay, I think this is too much, so I will scale this with this. And I will scan this
little one z-axis. And maybe a little on why. Now we can control with
control a Apply Scale and we can go with
numpad slash key. And we can isolate
only the soldier. Now we can bring reference here. So we can always take a
look on our reference. So right-click horizontal split, and then out here I will choose Image Editor,
search for reference. And now we can zoom here and
see how this does not look. Now we can make this part here. And you can move this with
the middle mouse button. I will go to Edit Mode and select this face
and press E, extrude. And S for scale. Move this little up again with E to extrude
and z, or z axis. And I will go again with E, S to scale and again for
Extrude and z for z axis. And we can see also
this part here. So I will select this face
and go with I for insert. And then again we
tie and the Extrude, then the y for the y axis. And I will now press S to scale. And maybe one more
time, I will go with, I want to extrude again. And now we can press Control
plus to expand selection. And with control, just
drag and select this. And we can press
E for Extrude and y for y axis to bring this side. Also this part here. I see this park in the middle, so I will go with the edge, select them with Control Alt, Control R, R1. Look at here. Now we have two phases here. And if you press, I mean, sell this boat together. But if you press I, I twice, we can separate this. And now I will press E for
Extrude and x for x axis. Now add Bevel modifier here. And maybe one more segment. And now with the
numpad slash key, we come back to our scene. And we can grab this material here with
all these details. So this is good. Now, because we have
here two uv maps. One UV map is this reference image and
another UV map is a good image. So you can see if you
go to shading term. We use UV map one
for this reference and another UV map for this
wood from textures.com. So we need also select this object and create
new UV map here. And now, when he selected this UV map from
textures.com image, we can go to UV
Editing and edit mode, select this object on the right and go with
you view projection. And now I will go with the numpad slash key to
bring this object here. And we can now. On the left also select
all this with a, and we can project this, scale, this on the left. And now we unwrapped all this
lesson about the tastes. And now we can go to UV maps here and select
this first UV map, which is for this
reference image here. So we can go to UV Editing and
search here for reference. When we go with u
cubed projection, we can see that we don't touch this roughness and bump map. So we work only with
this UV map one. And we can project
this about here. So I will select these two
faces and I will go with control plus and more. And I will now go with
you, project from you. So we can now project
this Robinett here. Okay, I will select
this face here, and I will now play with this. So g or grab vertex select, and we can project
this to about here. So I want to mention
this line here. And now, because we
don't have this problem, so I will also project this one. This 1234. Zhe, grab this here
and project this here. And now I will select
this face is here. And so I mentioned this. And maybe we can go with K and speak to this program here. So just move this and
also this part here. So I will, I will go with these two parts here
and bring this here, rotate on lethal on z-axis. These two parts. And I will just
bring this part here is just grab this and scale. And also this part. And we can project
this part here. So we can go to side view. And we can select all this. And you project from you. And we can scale this
and bring this here. I will grab this part here
and try project here. We can make this more
three-dimensional. So I will set origin here and
I will go with Shift a and not Q. I would press them here. So we can see
dimensionless heat. And I will set y-axis to 2
cm and scale this on x-axis. And I will go now with
Control a to apply scale. Now we can bring
this material here. But we also need another UV map. This is for
reflection and bumps. So I will go with UQ projection. And I'm now back
to a steel beam up and I will project this. I will also go
through projection and I'll project this here. So S, x and S to scale this. And we can imagine
this little letter. And we can move it to
the bevel modifier. And I will send this maybe three centimeter,
two centimeter. Now this is too much, so I will go with maybe 5 mm. And I will add one more segment. We can go with Shade, Smooth and turn-on out smoke. And now we can just
duplicate this with Shivani and move on to this one, e.g. and having just project
this also here. So G and move this here. And we can make
this a little more open, especially this one. And rotate little,
maybe on an x-axis. And a little on why us. And we can just
repeat this process. So she'd be z and x and move this huge project, this. Now we can make test
render. So well. And I get this
weird shading here, and this is because
of shade smooth. So I will, I will go with
straight flat for this. And I also want a
more variable here. So I will go to level model
type here, maybe 9 mm. And I will just copy this. And you can make this
render preview with f 11. And now I will set to
slots two and press F2. And if you press the G key, you can compare
before and after. This is before and after. And I will now set slot three. And I also think that
this roughness and Bob, the details are too small. So I will go to UV map here and I will select all these and I'll scale this down like this. And also with this one. Just select this second
UV map and scale this. And maybe we can read
all of this leucine. So another UV map, I think in this doesn't work. So we need one byte 1
s UV map and scale it. Maybe this bump is too intense. Here. We go, here. There's just little down.
And let's try make render. Now. I will just move this to
slot for and copy this, duplicate this slide here. Shift D and Y and bring
this value maybe 215. Because these slides don't
get to these levels here. So I just want little cheating and try and get this reflection on
these bevels here. And this is before and after. So we get a nice reflection here for k, but we will play with
the lighting later when we finish all
this modelling. And now I see that
also here projected. So I want maybe we can
move this sweet alone. Let this table. Just select all and
move this left end. Also this cabinet here. You can select all and
just deselect old. You don't need to move this little or left
or you can go to UV Editing and with
the numpad slash key, just select this and
deselect this x-ray mode. And now we can select this face and we can reproject
this a little better. So just be sure to select UV map one because this is UV map
for this reference image. And we can scale this
and move on x-axis g, x. Now I want to scale this down. And now g and x
mode is on x-axis. Now it's a little better.
9. Creating details: Because we have one other
room behind this door. We can put some
lights also behind. So I will just open this door and make
this more interesting. So if you go with air and z, we can rotate this on z-axis. But we rotate this
from middle of this door so we can go
to auctions and origin. You can move this origin here. And then I will just
remove this option and we can now rotate this door. From this point. Now we can put a light here. So Shift day in the
life and limb here. But we can work
this in real time. So left, I will go
with the numpad zero and the non
viewport render preview. So now I will increase
this light, maybe two. And I will set this
like yellowish color. We can play with this
here and see what we get. So if I go closer to this door, I get this nice reflection. Roughness this. So I will go to here and maybe
increase this value. Okay, something like this. And I will now just re-project this role because we
see this calendar here. So just go to the editor
and maybe scale this. Now I will make test run that. So this is before and after. And I think this is too intense. So I will just bring
this value to. And maybe we can scale
this radius, of course. But if we increase this, if you go more with this sample for about 100 here in render, we will see more details. So I will go with 200. And I will make this
value to maybe. Now we can make test and when we increase
this render samples, this will take more
time to render. So last one was 7 s and
this one is my second. I don't see enough details
here in roughness, so I will play with or more. And I will increase
this to maybe a T. And now I can see
better this details here. And this is before and after. I like these details here, but maybe it's too intense, so I will just set this
to make these 250. Let's add more details
on this glass here. And if you look this thing here, you can see this
rounded dipole does. And we can create
this easy. Now. So I will join this area now and I will make this equal
to zero. It will be easy. And later we can rotate again. And with lumping slash key, I will isolate all
of this object. And now in edit mode we can
duplicate this face here. So Shift D and P by selection. And just right-click and
set origin to geometry. And now we can scale this on x-axis and control I apply scale and I will go to
Edit mode, you Projection. And next thing I will do here, I will go to Edit Mode. Control odd, odd,
one loop cut here, and move this on y-axis. Now weed control V, We can bet on this
and shade smooth. And now we can add
a modifier here. So we can level. Also. You can remove this and we cannot modify and just
increase this call. I will also give solidify
modifier to add some thickness. And we can go with 1 mm. Now, I will apply
all the modifiers and doing this
behind this glass. And we can now selected
go to Object and go to Control J and make test. And this can pan
because I click here, it will disable this
in under previous. So we can go again. And I will, I forget,
rotate this door. So I will make origin to objects or set
origin to geometry. And I will move
this origin here. And I will not rotate this door.
10. Ceiling light: Let's create this
alarm here now. I will go with you. And just a note this
origin here and scale this and X for X axis. And so I mentioned
this object here, so I will scan this more on
y axis and z equals z axis. Okay, and now we can go with the numpad slash key to
isolate this object, to control light,
to apply scale. And we can bring here this. I will go to Edit Mode. Now. Select this
face and bring this down. This part here. And I will now press S to scale. And I for insert this
and x2 and z for z axis. And extrude again on
z-axis and scale. And I for insert again, extrude and z for z axis. To get to this part. And now we can select this edge
here or this way and bevel. So I will select this edge, select and hold Control. Now first, the first
select this edge and now called control for
the shortest path. And click on the last one and to skip to another
side, hold Shift. And then our control again. So shipped to skip
to another part, then control for shortest path and shift and control again. And if you select one edge, you don't want and you
can just hold Control and just drag to remove this. And now we can go with
Control D to bevel. And I will now select Face, select and delete this
part, this face here. And we can select, we can
make this rounded edge here. So we can select this hole, this edge of it holding
Alt, and just click here. And now we can e to
extrude and z for z axis. If we now press S to scale, you can see that this
is not a good idea because we get more
extrusion here. So I'm going to Control Z
and you can go with Alt S. Or you can go here to
mesh transform shrink. And now you can scale this. And we can add that also here. So hold Alt and click here
and Control V to bevel. All here, control V and heroes. And I see here some details. So we can just set origin here and we cannot
want a cylinder. And I will bring this down to 60 vertices and scale this down. And they're slighted
or no error. Why? And I don't say
this sunlight axis by 90 degrees and scale this down. In edit mode. Select
this face here and go with Control
be tuberosities. And I can duplicate
this on x-axis so shielded and x and S, x minus one to scale this on
excellence is by minus one. And this will
rotate this object. And now I will select
all this and Control J. Now this is one. And now we can create
material for this. My recommendation is to download this free peck from so-called
full. You can go to. So colorful.com. And here on store and products, you can find this free category. You just need a first
register for free and you can download all this
shell shader back 43. And this is how this look. So I will go here to metal and I will use this material here, copy this object here, and paste this here. And now I can just go to
Material tab and doing this. And just done over
up this Select, go to Edit Mode a to select
all and you do projection. And we have easy and
free material weekly. And right-click and say small. If you don't want to
register to Taco Bell, you can create similar
material quickly and damages. So now we can call this metal and we can use this image texture and
this concrete shader. We'll soon before
concrete texture, last project this here
and with color ramp. Plugging these two roughness. And here you can bring
metallic to one. And also we can add some bump. Hello. We can just go
with Bomb here and plug these two high and this to normal and bring this all down. And I will just ask a
scale DC machine control T. And I will set this
to five or three. And we can do projection and rotate this z-axis
by likely degrees. So now this text should
go in this direction. And we can make this
brownish color ramp and just change color here. And you can also add
more variation here. Okay, something like this. But I will make this
so-called materials. So just remove this one
and select this stroke of poor kid and go to Layout
and lump at slash key. Just back to our scene. We can bring this here and
I will scan this source. But I think this is too bright, so I will go to them. And we can just change
the brightness here. Bring this down. Here. We can see a
lot of emission, so we can add, let me
see cylinder here. I will set the origin. She ran, go with shoot
day and with cylinder. And now I will rotate this
on the y axis by 90 degrees. Scale this down. And
exports fell on x-axis. And I will create new material
and call this emission. Now we can make to all seen it, not backslash key and you can
create material for this. So I will just bring this
down with G and C and G and X for X axis and scale
a little more on x-axis. And we can delete
this principle. We SDF and go with a mission and plug this here and bring
this value to maybe 20. And now I will go with
D and duplicate this on y axis with the left. Well, we can see how these look. I will select all these, all three objects and I
will rotate this z-axis. To mention this image here.
11. Creating details: Now we can make this calendar here more three-dimensional. So I will go with
set origin here. And I will go with the plane x, likely to rotate this
axis by 90 degrees. And first I will try and
mention this big calendar here. Scale on x and scale on z. And I will duplicate
this material here. This material here, and now I will click here to
duplicate this. And then we'll call
these posters. And we can now go with toilet more than you
project from you. And we can go to UV Editing. And we can project
this hero colander. So just k this. And now I will just
make some cuts, one loop cut here, and I will
bring this to about here. And Control R to add loop cut
here and bring this down. And with Control V,
just smooth this. And also we can add
thickness here. So modifier and
solidify. And 1 mm. Just the first apply
scale with Control a. And we can make this
look more like paper. So I will go here
with another bump. I'm not worried
too much texture. And if we click here
with the control and shift and we can see how this looks. So I
will bring this. Now. I will go with
another bump plug. These two high-end is to normal and make this material with Control Shift
right-click here. And just bring this all down. And we can see now
before and after. So just make two, well the result, and I will go to slot five
and make test render. And now we get to this nice shadow here
and all these details. So this is before and after. Maybe this mosque of
texture bump is to ten. So bring this down. And we can do saying
with this small one. So I will just duplicate this
one and scale this down. Scale on z axis and on x axis. And we can go to
Edit Mode and you project from view and just project this
on this small one. So S, X and Z. And we can also create
this little gear here. And this book says to
add more details here. So I will set origin about
here and go with number one and ship they end up
cylinder and scale this down. And scared this
little one z axis. And I will now bring
this material here. And in UV Editing, just project this select. I will go for us to meet you. Project from you. And project this here. So G to grab. And now you can turn off
proportional editing. Then just project this. And this box is we can just
add you scale this down. Scale on X, Y and Z. Control a Apply Scale and
the modifier maybe two millimeter and shift the z and the rotate this
z-axis and maybe scale. And we can also
bring this material here and go with it more than you
project from you. And we can check
this maybe here. Okay, I just want to
fight this game here. So just bring this here
and rotate with them. And maybe make this bigger.
12. Depth and field: Now because we can a
lot of empty space on this right side and
especially on this website. And I don't want to
lose too much time modelling all these details
to fill this empty space, I will create a
vignette and go object and try hi, this empty space. So I will speed this
window here and on the left side
that will go with the number zero to
switch to camera view. And the right side, I will go with the shoot
day in our cylinder. I will scale this down and
mouse scale on a z-axis. So S, z. I replace this
object here in coordinate. You can press N to
hide this tab here. Now just select this object here and drag and drop
this material here. And in edit mode, UV editor, we can project this. So just sx squared
this on x-axis and no first applies
cake and novel. You unwrap or UQ projection. Now just project this here. Right-click Shade Smooth,
and on the left side, I would go with cube. So sheep take you. And now I will go closer
to the camera here. So I will go with s, z, scale on the axis, scale and level modify. And also bring this
material and project. Or you can also
project this here. And I'll select the camera. We can add that field here. So by default, mainly focuses on this distance of 10 m.
And if you limits here, you can see where is our focus
and it's almost perfect. But we can bring this value
down and put the focus here. Or we can select the object
that we want in focus. And I will put in focus
this table for now, but later we will change
this to compute that. When we add the computer here. And now we can go
down with this stock. More, we go down. We will get more blue on this
object in the foreground. I will go down to maybe 0.5. But first I will
switch here too. And then the preview. So you
can see when we go down, we get a lot of glory here. But I will go to zero point. And we can now make test
render before and after. Okay, this is a before and I will now bring this
maybe closer to camera. And this form also. But because I have lots
of empty space here, I will try with
smaller objects here. So Shift D, X and try
skate this all down. And scale is on z axis. And I will move this
closer to the camera. And she will be, I will duplicate this
object. One more time.
13. Adding assets: Now we can bring some
assets in our scene. And one great source for free, especially interior assets is this Bonnier News 3D gum road. And you can download
this for free. And you have a lot of
high-quality free assets here. And the last time I know that I will try
to find this here. I download this one. And you can just open this link. And you can set here
your donation or you can go with zero and download
this completely for free. So I will just copy this
object from this scene. But when you download this, this will look like this. So you just need to
open another file and just copy object and
paste to our scene. I'm going back to our scene here and paste this object here. Of course I will share
this link with you. So we can place here also, I will go something about this. And we can see now on
this looking render before and after, because we need the CEJ for
this table of his child, I find great one for free
also on 3D shaking.com. So you can go here on
library and collection. Here you can
download this chair. So just go here with download. You'll get to this render file. So you just need
to open this file and copy this object
and paste to all seen. So I will just
rotate this z-axis. So z and rotate this
and move to position. And later in tutorial, we will put the robot
here in this chain. I will also download this
banana plant or free. And we can put this in C. So copy these two objects. This is too big, so
I'm scared is known. But you need to be careful with this object because
when you select this, you can see that there
is some keyframes. So just right-click here
and clear the cramps. And now we can move this object. I will go with the
render preview here. And maybe we can put this here. Last assets we will
impose here is this asset I will
share with you. So you can open this file, and this is how this look. This is all I made. I model this printer
and computer. And if you want to learn
how to model this computer, I will also share almost three hour long
tutorial with you. So you can learn and make
this computer from scratch. Now, you can just
copy this object and paste to our scene. And these two are
just photos cans. So I will go to this x-ray mode and select
all and copy objects. And now I will close
this window here and I will paste this scene. Before we click anywhere, we can just move and
set this to position. So we can go with the g, x or x axis and y axis. Okay, this will opt to be
perfect because there is some difference
between this scene and my seam so we can like this. So all this computer
and this mouse and keyboard is
parented to this cube. So now we can just select this cube and place
just computer. I think I need a scale, this table, let alone y-axis. We don't have enough space here. And move this printer. This one go into walls here and the slump go here. Now, I just want to make this cable 3D object so we can
make this easy with curve. So put the cursor
here and move it, shift a Bezier curve. And now here is our current, but I will rotate this
on y axis by 90 degrees. So Aaron, why 90? And now we can go to Edit mode. And we have the
two vertices here. And I will select this one
and take this on x-axis. And they will also
scale this all down. So press S to scale. And we can go to properties
and geometry Melville and just add some that go with
maybe 1 cm here for 0.06. And we can move this here. And we can create
objects. Blake. And I will just
go with roughness down with the black color. And we can also extrude this for the next four x-axis
and maybe move this here and rotate on y-axis. And scale this down. Then we extrude one more
time and scale this. And if you want, we can play
more with this material. So. I will just add some here. And I will go with the
Noise Control Shift and click on this node. We can see how this look. And I need to call a ramp
here to make more contrast. And just scale this. Just add more details here. And now we can add more
color variation here. And we can move it to the image texture and
concrete texture here. And plug this roughness
and move it to go ram. And I will go with Control
T here and project this may be to object. Okay? And we can now play
with this roughness. And they can also move it
to mix RGB and plug this, making this to color and
set this to multiply. Okay, we just get
some more variation. This cable, this is before and we are done
with this camera angle. Later we will add the more
the tastes in After Effects. We can switch to
this camera angle. Also Kit robot and
this animation. The end we will, we
will also created this, our camera shake and
render this out. So for now we're done with
this first part of tutorial. Now, I will just render this in high resolution here and I will go into hundred and maybe to five valid
sample send them, just make one final render
for this camera angle.
14. Compositing in Blender: I will now just go quickly to composite door and
just add q fx cubed. So we can click here, Use nodes. And with Control Shift
and click on this layer. We open this here and we can
go with me to zoom this out, or all three to zoom this in. And we can go with sheep day
here and search for clients. We can add some lens
distortion here, 0.03 and lean lens
dispersion here. And just set this to fit. I think this is too much. And I will also go with
a left shift. They lash. And I will go with two focal
glow to add some low here. And I think that we
bring this down. And we can also add this
simple star maybe or, or streaks. Then you can play with
these values here. But because this glow
effect is too intense, you can always go with mics. And one will put B will
be this reduce glare and one and the second input
will be without this glare. And now we can choose
how much we want. So if you go more left
or right to left, we will lose all these glare. And if we go all right, we will add these
two gloves here. So I will go into maybe 0.2. So just a little left here. And below. When you are happy, you can connect this to compose. And now this will be
our render paths. But more of this post-processing we are later in, After Effects.
15. Camera animation and details: Hello, It's another
day here and I was not completely happy with this
where we stopped yesterday. So I try and improve
little list. And this is what I get. And this is after,
After Effects, but I will explain this at
the end of this tutorial. I also made shortly the
animation about this. Okay, and I will
just explain what I do yesterday in Blender. This is before and after. And first thing
you can note here is this little atmosphere. And you can easily create this. This is just one cube, which we'll go over
all this place. And I go to Material
tab and create this new material and
call this volume. And go to Shading tab. Simple volume. Plug
these two volume and you can go with
density with 0.01. And you can add a little
yellow, orange color here. Now you can hide
this view port here. And now it's enabled only
in a render preview. Next thing is disliked
behind this door before us, too bright and tuplets. So I moved this in this
coordinate so I will show you before was bigger. And here I wrote here. So I just moved, close the door and just bring
this radius down. And I get to this
difference here. And the next two can notice
this garbage on floor. This, this is Photoscan I made before and I will share
this file with you. So you can just pick
this copy and you can start placing this in C. So just so move scale
and try positions. And you can duplicate
this with all day and rotate and scale. This is before and after. I also add this, these posters here
because I feel that this is so empty space. And you can just duplicate this would shift D and move
on x-axis in scale. And you can note that we
don't have handled here. So I model this quickly. This is so easy, so I will show you
how you can do this. I put pulsar here
and go with sheep. They thought that cube scale this down and we can
scale this on z-axis. And non-paid slash key. You can either let this object
and I will scan this on y-axis and apply
scale with Control a. And now we can
select this face and I for insert and SC
for scale on z-axis. And now you can extrude this y-axis and control
our while loop cut. Extrude this on x axis. We can now add the subdivision
surface for the preheat. And if he cuts here, we can small to this. And I will select this face
is huge. These edges here. And we'll go with Control
V to Barbara this and just got ski. And I will also bevel
these edges here. So with Control and Shift, you can just select all this. Control is for shortest
paths and shift this if we just want to
select Y one by one, Shift and Control key
and control again. And now Control B to Bob Alice. And I think we don't need
subdivision surface more. And now we can back to our
scene and this material, I use this metal from chocolate. So just select this object
and bring this material here. And go to Edit Mode and
new and cool projection. And we can see how this look. And you can know
that this door is rotated on z-axis
by these values. So just copy this with
Control C and they don't. So this then always
aligned with this door. And we can also select these two objects and go
with Control J to join this. And maybe with
autosomal t. Next, you can know this too
bright reflection here. And I reduce this a
little. So you can. First thing you can
do here is having just bring this render preview. If you rotate this
war on the Axis, you can reduce this. This is first thing you
can do, and secondly, if you will here to
material and I will just bring this reference material. And you can make
new material here. And you can just bring
this back right. Now. This is second way
you can reduce this, that flexion here. So this is before and after. To make this animation here, I made a few things. First, you can note
this camera shake, just a small movement and I make this camera shake if
I add on from Yahoo, but you can just add
here camera shake type, but this new one, head-on don't work for me. I don't know why. Maybe I just
made the reinstalled this. So I use this old version. So you can just
choose type here. And if you press Space to play, you can see different
type of movement. And you can just play
with this value here. So if I put these all to one, it will be little more intense. So I go with this standard
come and I bring this to 0.5. So just small movement here. And I will share link and so you can download this for free. Next, you can notice this
light blinking effect. And we can create this is just
select this light source, go to Shading tab, and I will delete these
key frames for now. So we just need
to put keyframes. If you don't see
this timeline here. Just go right-click here
and horizontal split and bring this timeline here. Just put the mouse over
this value and press I. And I will go maybe 50 times
more than plus cy again. And now I will go
one or two friends small and go with the one. And now the top ten breaths. I again. Hi here. And now we can select all
this and Control C and just bring this to
all this timeline. And if you know, press space, we can see how this blend. But I also do this with
this light source. So you can go to Shading tab and just make sure
to click here, use notes and you'll get, you'll get these nodes here. One thing here, if
you click here, you will use these keyframes. So visual to select
this emission node. And just when I
insert keyframes, so I go here with 1-0, 0.1, and we get this result. For render this, just
make a new folder. So I will call
this animation to. And you can copy
this address here. So you just need to go to this random properties tab
here to output properties and here in output set your
random folder, or 70s. And I go with double resolution here with the 200 samples. Now, just go to Render,
Render Animation. And this will take about 1 min to render
1 min for one frame. And I have 150 cranes here. We have this image sequence. And you can go to any
video editing program. And I will just show you
quickly in Premier Pro. So just select first
phi and challenge. Check this image sequence. You can open this animation. And now you can go to File
Export and Export this. Just select file where
you want to export this and name and export. And in blender, you can go to
here with all the editing. If you don't see this, you can go here to
be the intent here, and go to Add Image Sequence. In blender, you just need to
select all these sequences. Shift. And we have
our animation here. You can set here output, folder and file format, and just render animation. And this file will be
saved us, we Delphi. But we will do later
this on this in After Effects and add
some overlays here. And f x. We are done with
this first part of tutorial. Now we will create robot
and another camera angles.
16. Creating robots: Hello and welcome to another
part of this tutorial. And in this part we will create robot then put them
in this chain. But because this tutorial
is already too long, we are here almost
3 h. I will not go to every step of
the robot creation. And if you want, you can follow me and
try create a robot. But if you don't want to, you can just open this file. You can select this robot here. This is already animated. So if we press Space, you can see and you can just copy this object and back to
our scene and place them. This change. I will place this and I will press M to create new
collection I like, I will call this robot. So if you click anywhere, you can just select
these two objects here. And you can go with the
smooth tool of orangey and takes what,
x-axis and y-axis. And I will just place
this robot here. Okay, here is our mouths and
more of this robot here, and on the z axis also. Okay, We have some space here. But this part is not visible
like this keyboard here. So I don't want the
intersections here in this area. And I will now move
this change to position and just gave it to okay, I will now save this file and we come back to
this robot assets. And if you want to know
how I get this object, this is from windswept, I download this object or three. But you can find this object also here in this file
so you don't need to download is first I
will delete this. All mature here. And I will rotate this axis by 90
and scale this down. If we go to Edit mode, you can see how density
of this mesh is too high. So we need the radius. These are lethal. If you go to select
all and go to Mesh. Clean up but decimate
the geometry. You can see that this
is not a good solution because we get a lot of
these trees and the angles. And this is not a measure
we can work with. But there is another
solution in Blender. We can go here in modifier. And I will remove this
modifier for now, and I will go with the mesh. And we can go with
this work cell size. I will go with maybe 0.6. And if we now apply this
modifier and go to Edit Mode, we get a little better
mesh than before. So we can now go
to shade smooth. And now we can try
get this seems here. But if I compare these two mesh, I think I need more mesh here. So I will go again modifier. And I will go with. And apply this. I think now is the better. So I will go with Shade Smooth. And we can go to
Edit mode and we can try select one of
this line here. So I will go with, I will isolate on it this object with the
numpad slash key. And I will go with control and try select all these lines here. But if you get to
this problem here, you can just go with K and
connect this vertices, so K, and when you stick
to these vertices, and this is not a perfect line, but this is not so important. Now, we can try select all these with just all and
click on this line. And now we can go with
control here and just select this line and connect to here. And now we can go
with Control V. And we need just
one segment here. And now I will go with E, extrude along normals
and more mouths down. Extra this in. And now with control plus
to expand selection. And we can go with
me to this electron. This is how we get
to this seam here. Numpad slash key to beg to our
scene and this scene here. I get all these methods. So you can also
create this head. Just connect this parts here. And you can try it all. Select this line. Okay, this doesn't work, so we can go with control and
just clicking on this line and Control V to this. All of the extrude
along normal mouse now one-third plus two X band selection
and just the solid. So this is how I get,
this seems here. And this part here I
skipped this step. Can also do this. Select the part of
this like this, and then I'll go with Control B or E. Mouse down. And you can also scale this in. And now with control plus
somber and control B. And we get this line.
17. Details on the robot: And to get this horse here, you just need to
go to Edit mode. First thing you need
in Edit Preferences. And they built this loop tool, search for loop and enable this here to enable
this loop tool. And now we can select
these faces here. And we can go to right-click
and sub-divide two times. Now, right-click Loop
tool and circle. And I will just send these two individual origins and scale. These are lethal. And now with all the
extrude along normalcy and move this down and Control Plus. And just add a
little better here. To get this metal
part. Here I go. I will put the cursor here and
go with Shift a and plane. Scale. This scale on the
y-axis and rotate on x-axis. Applies k. And I will go to edit more than
subdivide this one time. And now I can try and get
this basic shape here. Setting these tortoises
and scared on. Not even just more
of this later. And this one. And this one. Oh, no, I will go here with a subdivision surface modifier
and with those segments. And we can also move this. And now we can go with the
shrink wrap modifier here. And for target, objects
are in this human. And just said this offset a little unsure, I move this object
little too much. And you can also in edit
mode, try move this. Maybe I can add more segments
here in the subdivision. When you are happy with this, you can go with
the Shade Smooth. You cannot hear solidify
modifier to get thickness here and with the auto smooth here. And then you can apply
all these modifiers. Before I apply these modifiers, I will hide this
solidify modifier and I will just make
a few holes here. So you can go to, you can first apply
these two modifiers. Go to Edit mode. And you can create false here. So just like before and
just go to sub-divide two times and circle
and scale this down. And now I will delete
these faces here. And I will repeat
this two more times. Faces. And now we can add the solidify modifier here and get some thickness. This is too much. And we can apply this modifier. And I will go here, select this line, control. And I will go with
Control V to burn this. And we need also better this. We need to do this before, but I will just quickly,
I will shove it all. And control, select this line here and go with
Control be tuberalis. And you can see big
differences between this hole here and this one. This is basically how
I get this shape here. And we can add this
material here. And just you smart UV project or projection
and in UV editor, just project this
on metal part here.
18. Details on the robot 2: And this one part here
I get with this method. But first, we need
the holes here. And I will show you
how you can make this. We can go with cube, scale this down and
scale this on y-axis. And you can rotate this
glitter on x-axis. And those get this more on
y-axis and apply scale. Scale is sweet
alone x axis also. Now we can select this
object and we can go with Boolean modifier and just select this object and
apply it in this modifier. And now we get holes here. But if you want to get
this nice shape here, I will go with Control
Z and back this. You can play with
this cube here. So I will go with
Control R here. And also here. In x-ray mode, I will
select this tool and just scale these are lethal. In with Control V, you can smooth this. I was just more of
this later on Let, and with Control V, you can smooth this
scalar a little more. Control me. And now we can go with Boolean modifier
and select this object. And apply this. We get just a little. And now we can try
get this part here. So I will go over it again. Plane. Rotate this on x-axis
and y-axis by 90 degrees. Scale this down. Scale on the axis. Apply scale and we can try it. We can subdivide
this one more time. And I will move this
two vertices down and move this here. But to get this shape here, I will also bevel this one time. And we can now move it to the subdivision
surface modifier. And we can shrink, wrap, modify, and target is this object and we
offset this little 0. Now we can play it
this shape here. I will add one
more segment here. Or no, I won't try this shape. And I can scale this
line here, S z zero. Okay? I think you get the
idea of how this works. So we can just shade smooth this and you can apply
these modifiers. And I will subdivide
this one more time. And you can create some
holes here with Loop tool, scale this and delete faces. And now you can add solidify modifier here and
just turn on this auto smooth. And then you can apply this solidify modifier and
you cannot some variables here with Control V. And also to this part here.
19. Greeble assets: Hello, It's another
day here and I spend some time to make
this as a PECC. We can use this now for this mechanical
stuff in our robot. And wanting do need to know
when you work with Blender. You don't need to know
model everything. And you don't need to make every time
everything from scratch. You just need to
collect asset Peck and make your asset library. So you can just save these objects and in
folders on your computer. So next time I need some plane, I can just jump in this
folder and I can open, like if I want to display
and I can just jump here and copy this object
and paste to my scene. You can organize your
stuff in folders, but there is better
solution in blender. You can use this asset
browser feature in blender. You can see how these look. I made this image folder because this is
all assets Chrome, I mesh, and e.g. if I need a door, I don t need spin
to model this door. I can just bring this
here in my scene. And how to save this
in your browser. You can just, first
thing you need to do because this file is
saved in this folder. You can see this folder here. I will copy this. But this folder and I
will back to Blender, go to Edit Preferences
and hearing file paths. I will add this others here, and I will call this my boss. And just say preferences. And now I can select this
object and this object here. And just right-click
here and mark US assets. And now I can create here. Okay, Here is my folder and
I will just bring this. So I will go also all this. You're able to make another folder here
and I will just bring this here and save. And next time when
I opened Blender, I can open here awesome browser and I can
find this object here. And I can just bring
this to my scene. And you can save all of this. So you can use
this for next time is just select this
and mark US assets. And you can now just bring
this in this folder. But this is not asset
browser tutorial. I just want to show you this
option and you can search in YouTube and you can find lots of videos about
this oxygen here. And we can now back
to our scene and continue working on our robot. So we can copy some of these assets and we can
start placing on our robot. So I'm going to hit Shift
D and I will go with non poetry to write
orthographic view. And I can rotate this on y axis by 90 degrees and
also on z axis. So Nike. And we can start placing
these in our day. And I will go with non pet one front
orthographic view and I can rotate this
on y-axis with them. Maybe we can use these objects. So Shift V, and again with the number
three and number one, skip from right ten different
orthographic view and you can place this in our road. So I will rotate
this by 90 degrees. And maybe we can
place this here. And this don't care
too much sense, but more details you
add to our scene. It will look better
and interesting. So I will add a lot
of details here. And I will, I can rotate this
z-axis and on the x-axis. And maybe I can put this. Okay, and I will shift the, duplicate this or with
all the and I will go with S minus one to skip
this on y-axis by minus one. And I will place this here. You don't need to
copy every step here because I don't know
also what I'm doing. I just try to be creative and you can do
everything you want. So I would try to these objects, the z and rotate on y
axis by 90 degrees. And maybe we can place
this above here. Maybe rotate this on y-axis. And now we can use this object. And you need to know that
this object is clearer. So we can copy this
to object shift D, Z and place this about here and rotate y
axis by 90 degrees. And rotate on y-axis again. And now we can place this maybe and rotate again on y. And because this is, this object is curved, you can play here with this. So if we go to
geometry and Bevel, we can bring this value
down and make this thinner. Maybe are more point. If you go to Edit Mode, we can grab this. This is only three vertices. So we can play with this vertices and we can
change this current object. Okay, there is four
vertices here. I will delete this one. And we can also
duplicate this with Shift D and move this on y-axis. And we can add more level here. Maybe we can use
this object also. Shift D, Z and move this here. And error why Nike? Number three and
bring this here. I rotate this on y-axis. Scale this down, and we
can scale this on x-axis and let alone x-axis. Now, when we are
happy with this, we can select all these
object and with all D and Y, move this on y-axis. And now press S Y minus one
to flip this on y-axis. And now we can go with air. Why again, to rotate is no x. To rotate this on x-axis solid. And now we have
same on both legs. I think we made a lot of space
here between these parts. So we can bring this down. We can also bring
this material here. And now we select all
with a new projection. And we can project
this maybe here. And now with all to D, shift D and Y, move this on y-axis, scale this on y-axis
by minus one. So minus one to flip
this on y-axis. And we can change a
little this UV map. And now we can go same
with this arms here. So lumping three. And we can place here and notate this on
x-axis and scale, these are little on z-axis. And also on x-axis.
Applies scale. And we can play with
this object little more to get this
rounded edge here. So it controls our
scale is on y-axis. Okay? I get this weird
shape here because we are, we rotate this object
and we are now in global transfer or attention. So I will set this to local. And now I can scale
this on the y-axis. And I can go with
Control V. I was kinda small and controlling
be odd to Lucas here. But this is too much.
So I will scan this on y-axis and an x-axis, Patrol a and applies cake. And I will now back to global. And I will duplicate this with Shift D and move this on y-axis. We can just rotate
this one -29 degrees. So just add minus,
select this object, these two objects
and with Control J, make this just one object. Now we can select
this object and go to Boolean and pick this as
the reference object. And we can now apply this
boolean object and delete this. And we have holes
with this nice shape. Now you can play with
these green balls here. But I will try to copy on this object and go with
she'll di and tri rotate this x-axis and also on z-axis. And I will scale this down. So you can go with the number
72 top orthographic view with an app advantage
front orthographic view. And with non petri to write
orthographic view and just adjust the rotation
to all three axis. And we can now duplicate
this shift D and Y. And just adjust
this one left hand. And you can also copy this object here and
move this on y-axis. This for c, I'm just
kind of object. So you can create this
curve, Bezier curve. And you can rotate these
on y axis by 90 degrees. Scale this down. Then you can play with this
curve and rotate this. And odd cannot
nephew better, well, so just a line num this Z. And now you can apply this
curve modifier and curve. And you can just go over to mesh and you can know the
material to this object. Okay? And this falls here. We talked before about this. You can just select
this face and suddenly my two times
and go with circum and non-intensive gate is
low and delete this face. But I will not talk
more about modelling. You can play with
this or you can just copy this object here
and place to our scene. And I will now talk a little about material and texturing.
20. Creating materials for the robot: So we can create this new material and then
I will call this test. And let's see what we have here. So we can start with bomb and
we have scratches texture. I will back to
this test material and I will bring this
scratchy texture here. And this is from
CCS textures.com. And you can download
this for free. I will just bring this here. I will make this week's
material tutorial just for learning. And you can copy this
material. If you don't want. Do all this from scratch, you can just copy this material and you don't need to do this. So we can now go and
plug this to normal. I will go here,
we can call them. Okay? And one thing you
need to know because we will use three
different texture. One is these scratches. And I think this one is
four plus t texture. And first one is this
this graffiti object. So we need the three uv
maps and I will go here. And I will call these scratches. Now I will go with UV editor. You will know then select these scratches UV map
in front like this. And now I will go to Edit Mode, select all you feel projection. And now we project these
switches texture to our object. But you can see how
big is this scratches. So I will go to UV
editor and just create these little more,
something like this. And now I'll bring this down. But I don't want a lot of these details so we
can tweak this with cholera am and remove
this noise here. Okay? And let's see what is next door or this color input. I use this material,
this texture. And you can see how this loop. So this is just a
yellowish plastic. If you don't want to
use this texture, you can just go with
little yellowish color and it will look fine, but we can always get
a little more detail. Image texture. So I will also use this one. And I will go with
the image texture and probably these
two base color. So we have this and I will
create another remark here. And I will call this color
because this is called input. And I will go with, you
will know UV map node. Then select this UV map
and plug this here. And now we can unwrap this
with Q projection again. Now v, because we have
selected this UV map, we don't touch these scratches, we work only on this. And I will find
this texture here. And we can just project this
on this yellowish color. Okay, and now we get
this yellowish color here from this texture. And the four roughness. I usually use concrete texture. So you can download. If I find a lot of
concrete texture. Three on textures.com, you can just click here and download
some of these texture. I will use this one. Here. I would go with color them
and plug these two roughness. And I will take the new map
and call this concrete. You will note and
select this UV map. Now, you go with
you to projection. And we can see how this
concrete texture look. So we can go to the
editor and scale this, maybe this look better now and we can adjust
these settings a little more contrast. So black color is shiny. And why color is? We don't want. If you pick this material here, we can see that this
part here is too shiny, so I will bring this
like color or more to y. And we can just make more conscious cues
to get more details. Okay, this is too shiny, so just bring this down. And we get some variation
here in that lecture. And maybe we can use
this also to specular. And next is this sign here. So you can see how
this texture look. I made this in Photoshop and
we can make to shame them. And now we can select
this material key. Then we can move it
Image Texture and find this texture here. And now we can create
another muffin, I will call this logo. So we can note here, select this UV map.
Plug this here. Now if you click Control click and Control Shift and
click on this texture, we can see how this looks. So we can go to UV editor
and you, your projection. And now we can scale
this on white-collar. We can back to Shading tab. And now we can
make this texture. So this will be color two
and this will be color one. And we can now multiply this, move this all to one. And because multiply, blending mode will
ignore white color. And this is the project, this texture on white color. It will be visible only
this texture here. And now we can go to
Edit Mode and select part revamped, put our texture. And now I will go with you, project from you and UV editor. I will project this
on this part here. And you can see how these look. And we can go with number
one and we can also add this logo here. So I will go makes you, you. And I will project this, this logo and you can
see how this loop. One more thing I will do here. I will just add a
little color to these scratches to
be more visible. So we can also input go
to Color, to base color. And now I will go with
another mix, RGB. And all these will be color one. And the second column will
be for now, red color. And now we mix this to
call on my 50 per cent. So if we move to right, this is all red. And if you want
left, this is this. Take only this color. I will not use this
slider for vector. I will use this input. So we can use these
scratches texture here. I will just make a little more
conscious and now we can. This material, and we
can use this aspect of inverting these two color. So column one will
be this red color. We get this red
coloring, our scratches. But I will not use red color. This is just to show
you how this works. And I will move
it like for here. And now our sketches
is more visible. This is all about texturing
and we can now animate this. To animate this robot, we will use Mixamo and make some ways three, online service. And you just need to
make free profile. And you can find here a
lot of characters sent, a lot of animation. So I can select one of
these just for tests. And now we can go
to Animation tab. And you can find here
a lot of animations. And I can search e.g. and you can find a
lot of animation here and you can apply
to our character. And one thing we
need to do here, we need bring this
color to mix them. And to upload this character
to make some more, we need the fixed
two things here. First, this must be one object. We have here a lot of
different objects. And you can go with select all this and go with Control J. Now this is one object. But if you get the error
message here when you try joining this,
all these objects. And that's because you have modifiers here or you
can occur objects here. And you can just select all this and go to Convert to mesh. And now you can
move it Control J and you can join
this to one object. And now we just need to
convey this to FBX or OBJ. Because if you go here
to upload character, you can see that we get only
this MDX and OBJ option. So I will copy this and
go with new file here. So File New. And I can save this
and delete all this and just paste this here. And I will move this to center. I will go with File Export, and I will export
this as OBJ object. And I will save this here, and I will pull this over OBJ. And now we have
this OBJ file here. And we can go to mix some more. And I can select this line here. And I make a big
mistake here because I didn't rotate this object
properly in Blender. So I need this again. If you press numpad one, this is front orthographic view. So we need to rotate this
on z-axis by -90 degrees. So f z minus nine. I will go with File export, OBJ. Export this again. Okay, and now I will
go again, upload. And now this look correct. We can now click on Next. And we just need
set points here. And you can see on the
right reference image. So this is chin. I will place this here. Click on Next. And now
our object is animated, so we can click here to next. And we can select
any animation here. And I will search
here for typing. And I think I use this, this animation last time. And we can all go to Download
and select here FBX 7.4. And we will render this
in 24 frames per second. So just download this object. You can save this
on your computer. And now we can back to Blender. And we can go to
File, Import and FBX. And you can find your vx objects on your computer
and just import and VX. And when you see
these points here, you know that this is
important correctly. So one thing which makes some
of this object is so small. So this object is
less than 1 cm. And to fix this, just press S to scale and
50 to scale this 15 times. And we can see that
this object is too big. So this no, this object
is here is too small. So you can just select
this bone and we can scale these little more. And this is now about
two months size. And we can run program
here. I don't know. Is there a chance to get object? Don't mix some of its texture, but we don't have texture
to this object here. And we can just bring
this texture weekly. So I will just copy
all these maps. So I will remove from
this object, this UV map. And so we have removed one. And another MOP is this number. So I will create another UV map and one is in these scratches. Okay, Just to note, this
is all the material without these concrete and Okay, and now I can just select
this object and I can bring this last time I call
this body of material. So I can just bring this here. And I can select, I just need to select
this first UV map. And I will go with
you to projection. And Justin UV editor project
this to this material here. Second, the UV map. I will go with these scratches
and I will go with you. You projection. Now we project these
scratches here. You can see this purchase and the last UV map is this
number. So I would move it. You will projection again and project all this
to white color here. And we can just bring
this text here. So this number is skipped. So I will scan this and
fudging this Here Weekly. And I've lost some project, this project from you and we
can project this logo here. And on this metal parts, I will just bring this. So I will just copy this material and I will
read another material here. And now I was just reading this. I will go to Edit Mode and first L over this part and
I'll sign this material. I fix this problem with
materials and you'll be maps. So I can just now select all this copy object
then back to my scene. And you can just paste
this object here. Now grab this bone here, and you can rotate and position
this robot to our scene. And if you press space, you can see that this
robot is animated.
21. Adding a camera to a scene: Now we can create
this side camera. So we can make to our scene. And I will go with sheep day
and create another camera. And I will press R to
create a rotation. And now I will send this x axis, 90 degrees and z axis, also likely degrees -90 degrees. With numbered server go
to top orthographic view and we can place them are here. And if you press the number zero to switch to camera view, we can see that this
camera is still active. So we need to go to first select this
camera here and go to view cameras and set
active object as Canada. And now we can see that this
camera is now Main Camera. Now I will split
this window here. And I will press N
to remove this tab here and turn on this
viewport render. So we can see what we do here. Just, I will bring
this viewport samples for maybe five because
this is slowed down my computer and I will now
bring this z-axis camera down on z-axis to maybe 0.8. And the four solid about here. And I will rotate this one
x axis a little too high. This object here, we can
find this in render preview. So if you can find
this object here, so press on numpad give or
full stop key or dot key. And now you can find this
selected object here, and I will just write this
in render and in viewport. The next time you go
to camera properties, and I will send
this to panoramic. And I will go a bit
like this to fit this lens or maybe a little
more to zoom this glittering. Maybe to 55. And move
this little on that. And I will go here
with depth and field and select this object,
us focus object. And I will bring
this f-stop down. Maybe zero point, sir. No, I will make one test render. So we have here 300 samples. So for test time, we'll go with 100. And I will bring
this resolution 100. And I will not press the first time we said
this slot to one. So we can later compare. I think we have to
bright area here. So what we can do
here is I will copy, duplicate this door with Shift
D and move this on x-axis. And I will create
vignetting object here. You can see here. I will rotate it some z-axis to make something like
shadow here on left. And I want to bring
this closer to camera so it will be blue, red, and we will not
see what is here, but I will just create a
dark area here on left. Okay, this is before and after, and maybe these too much, but this help us to bring
this factor in-focus. Next problem I see here is this too bright area
and a lot of light. Let me just remove this slide because I
don't need this anymore. Maybe I'll bring
this down to 15. And I will now select this
object and go to UV editor. And we are here in
material preview. And you can see that this part is projected on bright area. So I will pick
this justice more, this one, this darker area here. And we can compare
before and after. Okay, and I think now it's
much better because we have more contrast between
this object and background. I think we can add some
details on this in background. So I went back to lay out. We can copy these posters here and go with Shift D and X for X axis and z. Nike LC -19, and rotate this
axis by 90 degrees. And we can go with G to grab and X4 x-axis and hold
Shift to slight move this. And now we can move
this to this wall. We can also duplicate this. Again, we'll assume
d and we can place this maybe on this wall here. Okay, this is barely visible, but we have some
small details here. Before and after.
22. Lighting and bokeh: And because this
computer emit light, we can put some area along here. I will set the origin
to this computer. I will go with light
and airy alarm. Now we can rotate
this on x-axis. So x and the scale is down. I'll take more on
x-axis to mention this computer monitor angle and scale this
with blond x-axis. And we can set
this bluish color. And you can see here
how this effect. But I will bring
this value and maybe just maybe I'll move this a little on x-axis. And maybe lethal also on y-axis and to see lethal this
light on computer. Okay, or we can, I think he's better solution to rotate this
computer algorithm. So z and rotate this one z axis. Now we can see this
bluish monitor here. And I will bring this
volume, maybe just three. Next I want to create is some bouquet effect
in background. So we can go to another slot
and I will set the origin to this wall and I will go
with Shift a and b cube, and this will be our
emissive objects. So I will go here to material
and I will call this one. Now I will go to Shading tab and I will delete
this principle. We're df and emission here, and we can plug
these two sulfate. Now this is MAC object. And I will just scale this down because this is too bright. And we can see that we have
already bouquet effect here. And now I will select
this camera here and I will set
this ratio to two. And this usually scale, this will carry
on z-axis button. Now, we scale on x-axis. So I will, I don't know
why this happened, but I will go with
0.5 and we get this anamorphic
look over K effect. Or you can, maybe we can, we'll be cured with
one and we can scale this slide on z-axis, so S, z. Now I haven't maybe 0.6 here. I will also duplicate this light here with Shift D and
move this on x-axis. And I will create
another material. So just click here to
duplicate this first one. I will call this mock-up to, and I will just pick
this orange color here. And if I scale this object, this object, go out our room. If I scale this object up
or we get more light here. So I will bring this,
scale this down. And we can duplicate
this one more time with Shift D and y or y axis. And maybe create
another material here and the reddish color here. And I will duplicate this
one more time and more ones. And to see better
this bouquet effect, we need more samples
scaring render. So I would maybe 500 here. But I think this is too bright, so I will bring this
down to maybe 0.5. And also here, maybe point to and for this one,
maybe just 0.1. And we can now make
a test render here. I play little more with this. I'm okay and I think
we just need to keep this YOU down of this
in this material. So just bring this
to about 0.05. And this is effect I get. So this is before we don't want this destructive
strong lights here. So just keep this subtle. And also I bring this
saturation to this red color. Now. And this is before and after.
23. Rendering: And now we can set our camera animation here
and we can render this. So if you look this camera here, you can see this
small camera shake. And we can create this easy. So I will just now
joining this area and select camera here. And we can go to this camera, shake if phi or this is
the version of this. So I will just select
this animation here. In this space. We can see this
slightly moment here. So maybe I can send this to two. And now we can choose how much
frame we want render here. So I think we can go
with maybe start 80-150. And this is, and I will set
this to 24 frames per second. So we have 70 frames by before, and this will take
almost three-second. And this animation here is, I think 2 s and help second. And I think this is enough. Now I will go to my Render
folder and I will create this animation tool folder. And I will just copy this
address here with Control C. And here we can This others and select this folder and
just click Accept. Now we can set this
render properties here. We can bring this
resolution to 200 and you can choose how much
sam Plus you want here. Maybe I will go with 300. So this depends on
your computer and how much time you want
to spend to render this. And one thing we need here
is this glossy direction. Then they're also saw just here. Layer properties step select this lawsuit direction and in composite set to this glossy
indirection folder here. So I will go here in my
animation to folder, and I will also
be glossy folder. And now I can set this
here in this file. I'll select this folder
and click Accept. And now we can file
a save this file, and we can go to Render,
Render Animation. And now after rendering is done, you should get
something like this. So I rendered this already before and I will
not do this again. So we have here render paths and glossy direction path. And now we can open After Effects and make some
post-processing.
24. Post-Processing in After Effects: Okay, we are now in
After Effects and I will start a new
composition of footage. And I will select this
first frame and just check this JPEG sequence and
we can import this. And I will just delete
this sequence now and select this sequence
here and set this to 24 frames per second here. And also in Composition. Composition Settings also set this to 24 frames per second. And I will just increase
lethal this time here. And now I will bring
this on position here. And now we can trim this. So just move this timeline to this sequence and
go to Composition. Composition to work in
area and aftereffects. We've got this unnecessary part. And I will save this file. So file save, as I will call this, are almost seen tutorial
and just save this file. And now we can bring this
glossy direction parcel. Just select for a sequence
and the sequence. And for this, we
can rename this and call this velocity direction. And we can bring this
over this part here, but you can see that
this doesn't match with our last sequence. So set here also ten for
bringing this to end. Now I will set this
to screen blend mode. So this will ignore blanks and keep only white
color scheme. And we can see how this loop
could before and after. I don't want too much
reflection on this area, I just want reflections on this robot then
maybe this computer. So I will select this, the pen tool, and I will
make a mask around this. And we can delete this unnecessary point and
just smooth this mass. Okay, and then now we have
this glossy part of this area, but we can also this
strong edge here. So just press M, select this or you
can find mask here, or you can press M for mask. And we can now set this
feather to maybe to plant it. And now this will
smooth our mask. So this is a before and after. And you can see how
much details we get on this robot with this
glossy direction path. Next, we can go right-click
and new adjustment layer. And we can call this law. And we can search here on
effects, phenomenon for globe. And now we can play
with this value here. We can increase this radius here and hold this low intensity. I will bring this little down. Okay, this is a
before and after, but I think this is too intense. So I will press T for opacity
and I will set this to maybe 20% or maybe 30. We can now create some
red glow on the edges. So I will duplicate
this composition here. And I will rename
this to collation. Now, I will go with
find edges effect here, and this will just
fine this edges here. And I will now go with thin. I will call on this to read. You can pick these little red, orange color here and
just invert this. And now I will go
with the levels. Just tweak this. I don't want too
much edges here. So I just want this highlights, select this highlights here. So something like this. And now I will go
with a Gaussian Blur. And we can set while
you're here maybe. And we can also select
this horizontal here. And now I will go
with books too broad, this a little more
than maybe I will set this to two or maybe five. And we can now set this
screen blending mode. So this will keep only this, this will ignore
this black colors and keep only this
red color scheme. You can see what
effects we get here. I'm going bring this to two. And we get this red coloration
effect on the edges. But this is too intense, so I send this to
maybe 20 per cent. So just a subtle effect here. And next time we'll create a new adjustment layer and call this search for
accumulating here. And willing this effect
here and just send these two final output
to cover all image. And I will go with
this codec 800 t. And I will say this. If we increase this, we
get a lot of green here. So maybe 0.80, 0.8 here, or 0.6. Now we can add a few
color correction. So I will go with
adjustment layer and I'll call this CC base. And we can search
for Lumetri Color. And I call this base
because firstly, we'll just play with this
base color correction. And here you can just
play with this value. You can go about 110 -100. I will go with the plus. To add more, this
more color here, maybe just plus ten. And within you can go plus 20 or minus ten plus odd more
magenta or pink color here. So I will go with minus, minus five to add then this
green greenish tint here. And we can play
with this exposure. I think I will go with plus, just a little maybe point to. And with contrast dye will, I will bring the contrast down and I will bring this
highlight source or down. So if we go with plus 100, we get a lot of you wrote down, but maybe just minus ten. And shadows also I would
go I think I will go hit the plus just a
little bit twice. I will go down maybe to -30. And I think I will bring
blacks to make it plus one. So this is minus one
and this is plus. And we can now create
another color correction. I will call this
color correction because we will now play
only with this tab. And the reason I want keep
this separate so I can later easy check this and
see difference. So I will, now, I would think I will
bring this sharpness. If you go with all with 100, we get this sharp slope. But this is too much. So I will go maybe to ten. This is before and after. And maybe we can add this
little vibrance key. So this will add
color in our scene. And here I will set this
bluish color to shadow. Just a little and orange
color to highlight. This is before and after. So you can see how we get this bluish color
to this dark area. And even this is too much. You can always go with T and set the opacity maybe to 60%. I will create another color
correction layer here, C and I will call this S curve. And I will go again with Lumetri color here
and here with curves, I will just be
slightly S curve here. So this will fade
blacks and whites. So I will bring these legs up and just add more contrast
here in the mid tones. And bring also whites. And you can see
before and after. And I think this is too much, so I will bring this
to 50 per cent. Next, I will just bring
two overlays here. One is this dust overlay. And you can find this
for free if you search for the walnuts and
dust overlay scheme. And I think this is this one, and you can download
this for free. So I will just bring
this in After Effects and I will set
this here and just set this blending mode to
screen or flight then or odd, I think like them
is less solution. So I will say this
maybe about here, and we can set this opacity to maybe just five per cent if you press Space. And when you load this, you can see how this loop, we just get this effect here. And the last time we bring
here is scope or overlay. So this is just PNG image with these black bars here and with
transparent background. So I will just bring this here. And you can press
S and scale this. And this spring, just a
little cinematic look. You can also find
this on internet. Just search for P&G. P&g let bars. And you can download any of this and just bring this
in After Effects. Now if we press Space, we can see how this
animation loop, This is our animation. And now we can export this. So you can go to File export. You can export this directly
from After Effects. But my recommendation
is to search for Adobe Media Encoder and
download this program. And this will be automatically connected with After Effects. You can go to File, Export and add to
Adobe Media Encoder. And with other Media Encoder. You can render this
quickly and you can save a lot of A1 A5 size. So you can see that you can, we can enter this
only four megabyte. If you increase this betrayed. This goes only to maybe
20 mb for all animation. Which is great. So we can
go here and hit Okay, and just press this
star, then that. And then we are done. We get our animation. This is all for this tutorial. I hope you learned something new and see you in the next one.
 šime Bugarija