Transcripts
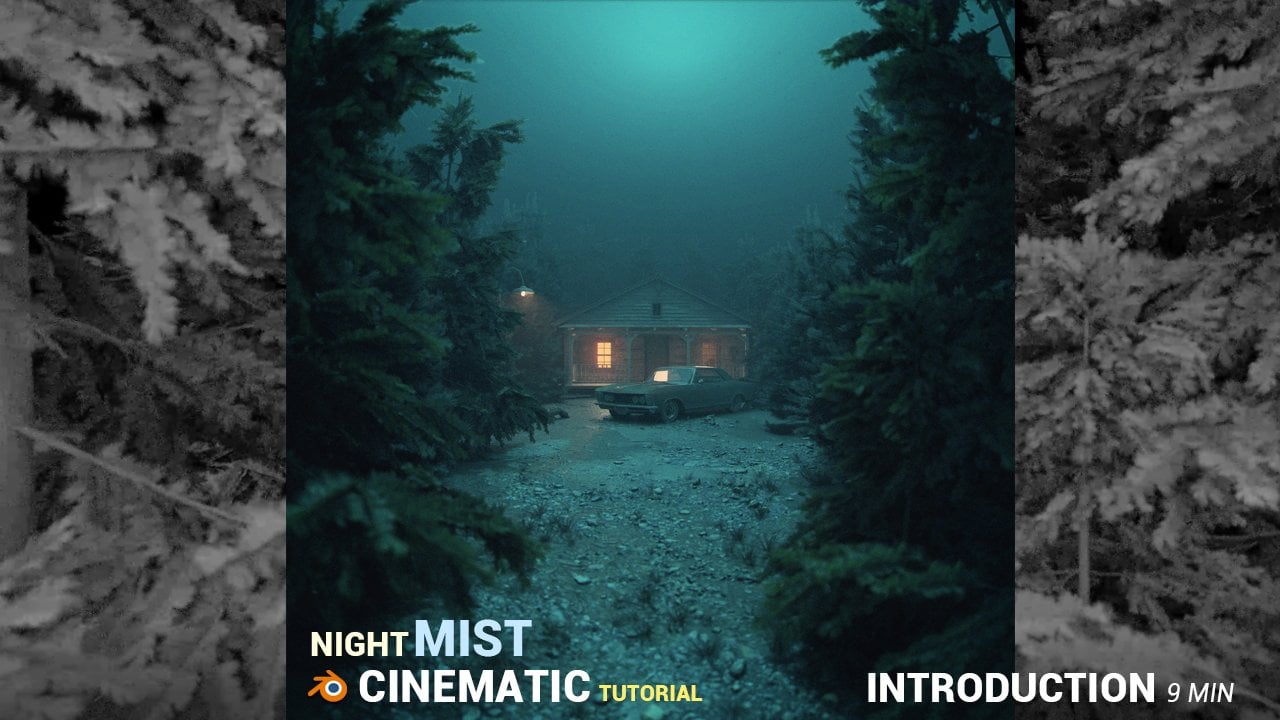
1. Introduction to the tutorial: Hello and welcome to
the new tutorial. In this tutorial, we
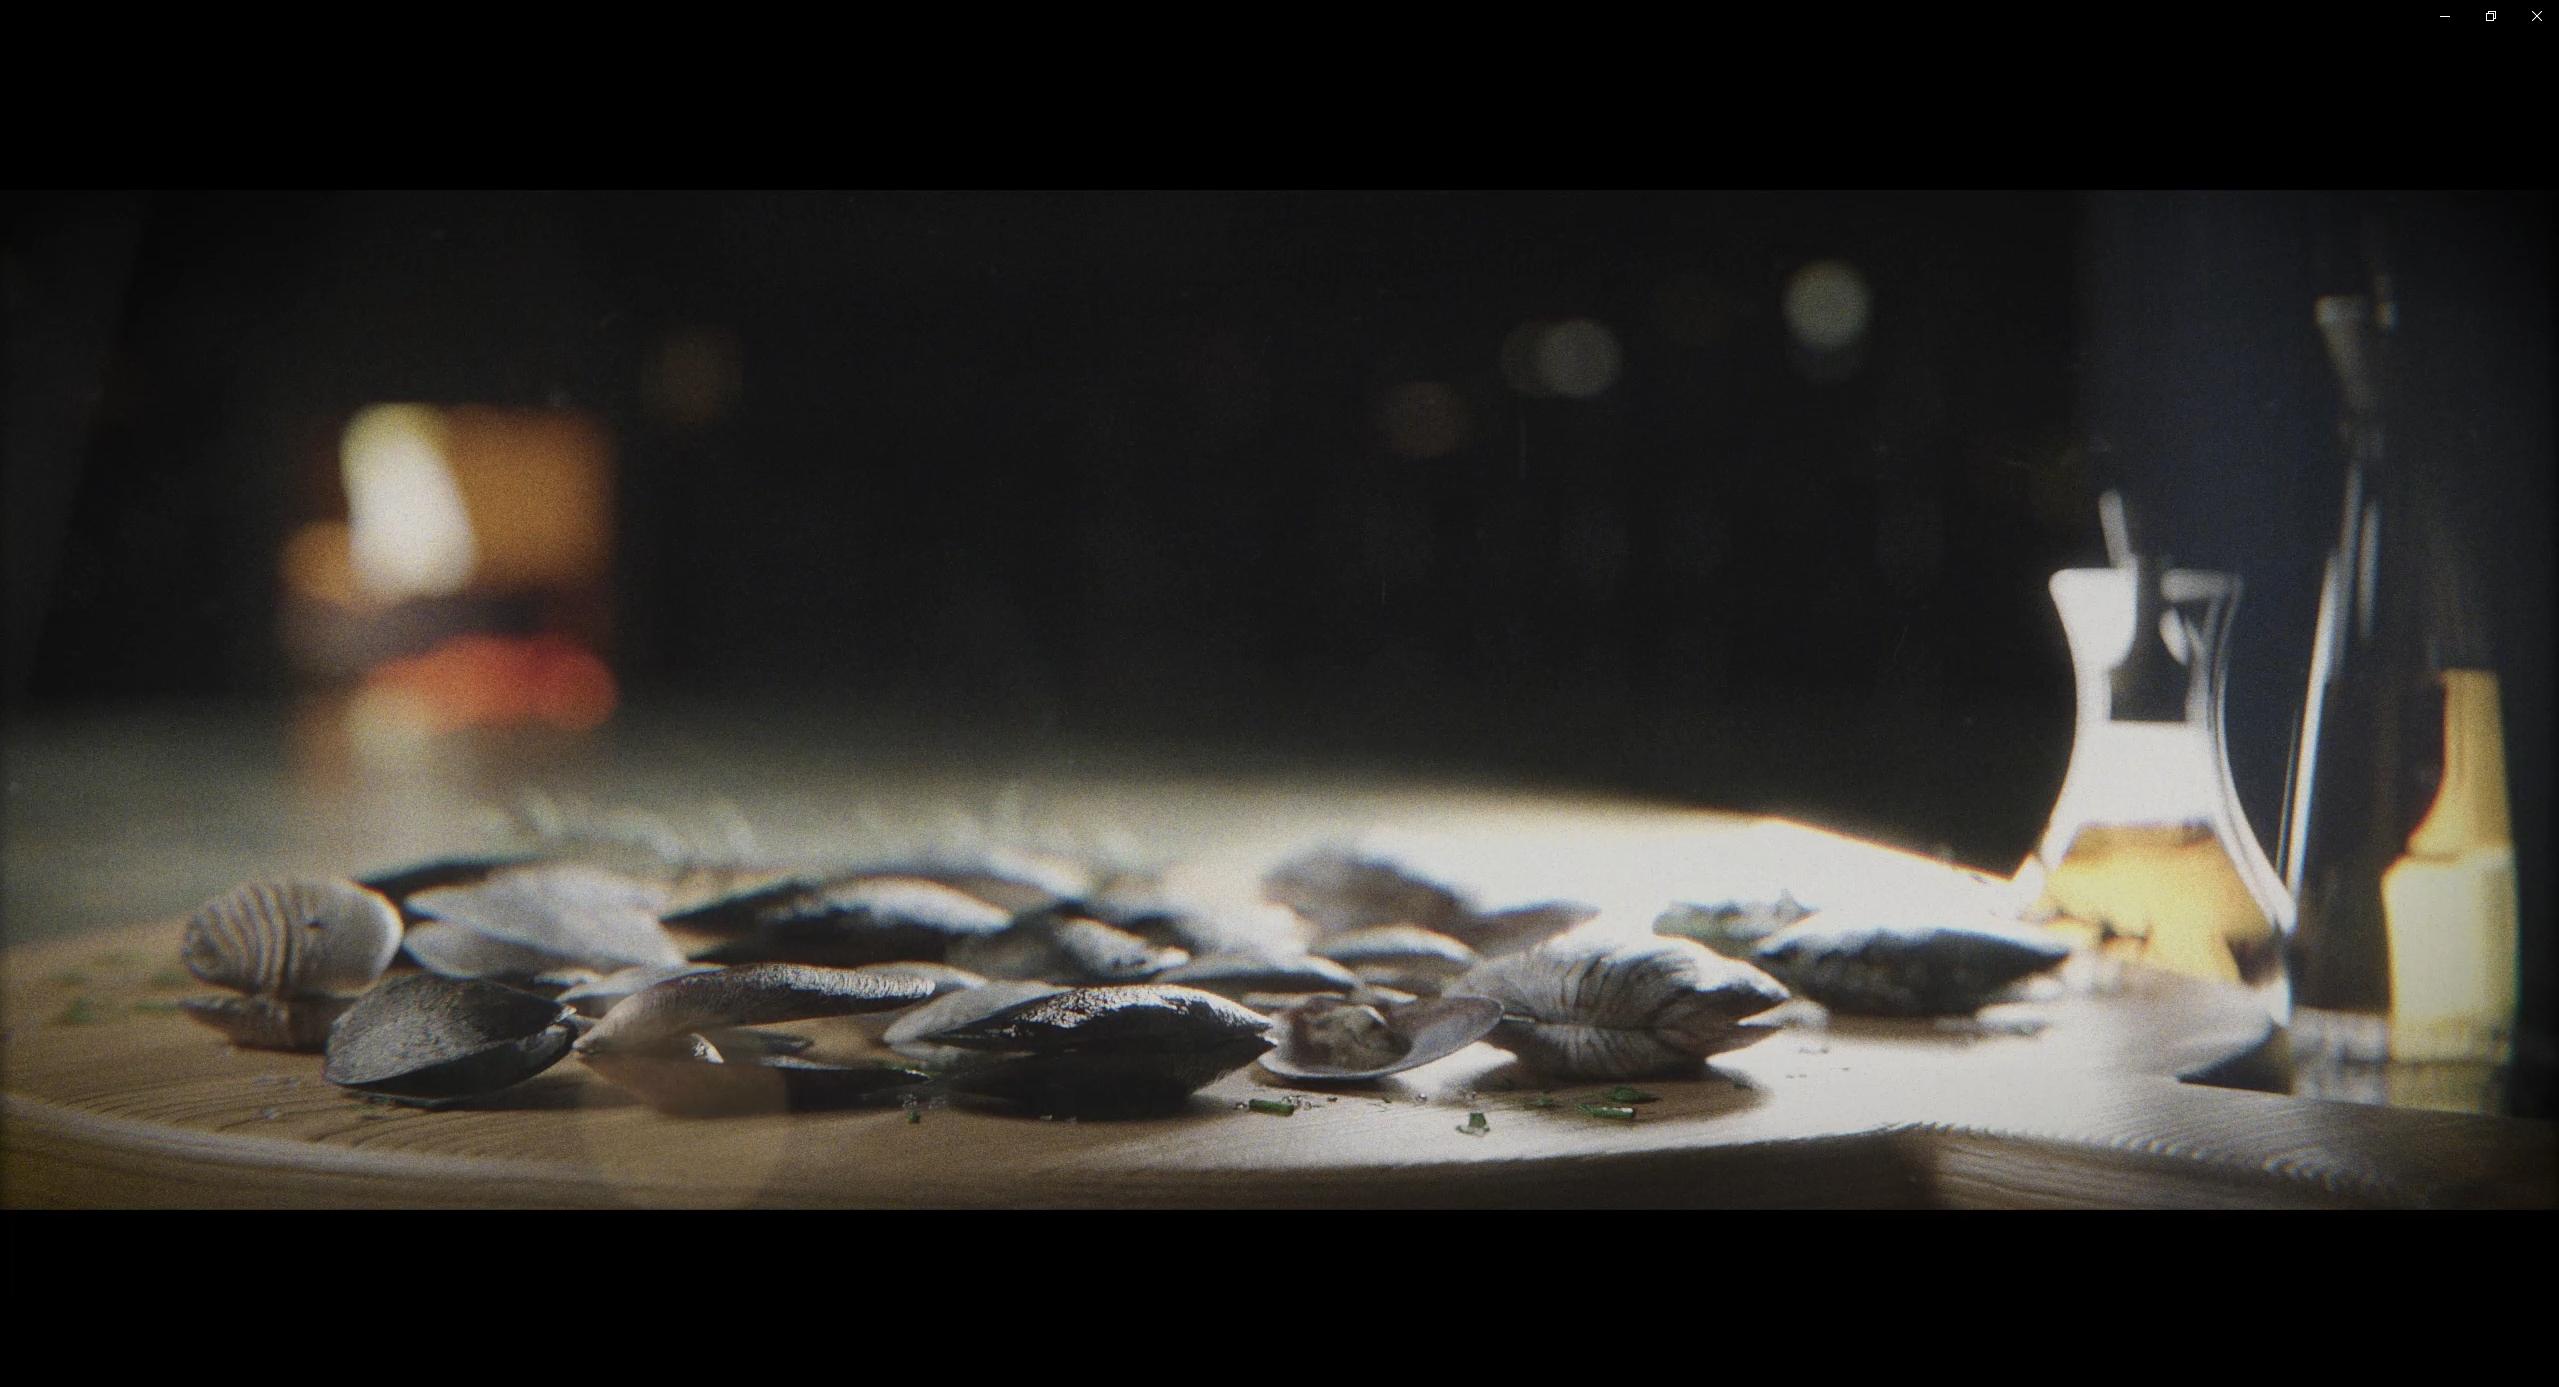
will create and animate this cinematic scene
free program blender. Step-by-step. We will
talk about modelling, texturing, unwrapping, lighting, post-processing
and more. The entire process of creating
this scene is recorded. So the tutorial is easy to follow even for a
blender beginners.
2. Introduction to Blender general: If you are completely
new to blend there, I'm going to share with to
our terminal window I made for a pass tutorial where you can learn the
basic of Blender. If you have experience
with Blender, you can skip this part. You can download Blender
for free at blender.org. First, I will introduce
you to Blender a bit. After that, we will
start with this. See, this part is intended
for Blender beginners. If you have experience, you can skip this part. Since blender is a large
and complex program, I will try to show
you only the basic in about 10 min before we start working on to see when you open Blender
for the first time, we see a lot of options. The good news is that
you don't need to know most of them
to create a scene. We will spend most of our
time on the Layout tab. And we will also use shading
for creating materials, UV editor for projecting
materials on 3D objects. And finally, a bit of
composite determine. All these tabs above are actually made up of
these tools here. E.g. layout consists of 3D view port and timeline
because we will use them a lot. They are here by default
when we opened Blender. We can create a workspace according to our
wishes or needs. E.g. if we separate this window, we can add UV editor
or shader editor, or another 3D view port. Here. In the 3D view port we have three
objects by default, camera, object and point
line pass light source. To create a render, we must have at least one camera
in the scene. To switch to camera view. We can go to view cameras, active gamer, but all these
options have shortcut keys. Searching for this option, for this menu is waste of time. If you use blender, you have
to learn some shortcuts. We will cover the most common
shortcuts in this tutorial. And with time later
you can learn shortcuts for advanced
options as well, e.g. to switch to camera view, the shortcut is not at zero. Then we have our select a
camera in the Properties tab we can find option for
this camera, e.g. focal length, which
is actually zoom, Depth of Field and others. Each object in the scene can be deleted by Delete key or x. In Daniel, one can
be created with shifting or by
going to add menu. We will mostly use the options
under Mesh that we have basic geometric
shapes from which we can model anything we
want in the edit mode. Once we have the
camera and object, we can make the first render. Shortcuts horrendous, F to L, or you can go to
Render, render image. We now see our object because
we have a light source, which is this point lame. If we remove the point
lamp and press theft, Well, we still see something. And the reason is because
in the word Properties tab, you have a darker gray color, but not completely black. Which means that our ward or
environment ME, sunlight. If we switch to black, we won't see anything. Lighting in Blender can be from three different
types of sources. The first is worth
or environment. They're in additional to call. Or we can also use an
external file called HDRI. We can find many of them
on the internet for free. And we can also use procedural our sky texture
with comes with Blender. We create the second
group or flight with Shift D that we have a point, sun, spots and area. Each of these source
emit light differently. We can also turn any object
into a light source if you k tan emission material
for this subject in shaded in red there we have
to render engines. The first is EV and
the second is cycles. Evs less realistic but is
much faster than cyclist. If we can be very realistic,
similar to cyclists, but you need to know how
to set some settings manually While cycle C3
realistic by default, because it's a physical base
path tracer render engine. Speed depends on
the computer power and seen optimization. In the Properties tab, we have our different options. One that we will use often
is the Modified tab. There we have a large number of modifiers that speed up
the modelling process. E.g. the array modifier enable us to quick can
easily duplicate soldier. With the mirror modifier. We can easily mirror everything we do on one side
to another side. With the Boolean modifier, we can cut one
object, hit another. There are many other modifiers. These are just up
to you that we use. Most of the tools on the left allows us to
quickly transform the object. E.g. we will often use the move, rotate and scale tool, but we usually use
them with shortcuts, g for gravity,
therefore rotate and S for scale most often
combine it with X, Y, or Z for X, Y or Z axis. E.g. if we press S for scale
and then x for x axis, you can scale the
object only along the x axis or y to rotate
only on the y axis. Or G to move along
the z-axis only. To edit an object, we need to go to Edit Mode, the shortcut for this system. Then we have three
types of selection, vertex, edge, and
face selection. We can jump between them with
12 or three on keyboard. Now we can grab vertex, edge and face and scale, rotate or grabbed S or G. There are a large number of portion that we
use in edit mode. Some that we use often is
Control R to add a loop cut, extrude, and control B2B. Shortcuts that we use often
to navigate through the scene is numbered one for the
front orthographic view. Number three for the right, paid nine for the left, and the non-bird,
seven for the top. You can get the same by
clicking on this gizmo. By pressing the enter key, we open additional tips. You can find all this in
Properties tab and much more, but this is sore cough, or these views over the
first three types can be blender and the rest is the add-ons that I
personally style. We will mostly use
the transform tab. We can see location, rotation, scale, and dimension. There we can see the dimensions
of all selected object.
3. Modeling Mussel : Hello and welcome to
another tutorial. In this tutorial, we'll
try create this scene from start to finish in
free program blender. To create these
shells. First thing we need here is texture
of the shelves. And I made these
colors in Photoshop. And I've shared this
texture with two. And I will also show
you how I made this. I go to Pixabay, Unsplash and Google Images
and search for shelves, texture and I copy some of these textures and make
colors in Photoshop. So we can use this
in this tutorial. I will share these
colors with you. I will now open
Blender and I will save this file on my computer. I enable this
screencast keys so you can see what I'm
typing here on left. And I will now go
with the numpad seven to top orthographic view. And I will import this
reference image with shifts. This image is two-by-two
meter by default, but or shell is about
five centimeter. And I will go now with Shift
a and I will add a plane. And I will type here
five centimeter. If you don't see this tab, you can press N
on your keyboard. Now I will select
the reference image, and I will press S to scale this down to
match this shell here. Now we know that this shell will be about real-world scale. You can go to wireframe
mode or x-ray mode. To see this reference image. I will select Image and I
will go to Image Properties. And I will bring opacity
of this reference image. Now I will go into edit mode and I will select Edge Select. I will move this to
match this shell. Now I will go with
Control R and I will scroll mouse to add
three loop cuts here. And I will add subdivision
surface modifier. We can now start
modelling this shell. I will select this
part here and I will go with this and
I will scale this. And I will go now with G and move this to
match this shape. We can increase this
subdivision value to, to get more smooth mesh here. Now I will go with vertex
select and I will select this vertex and I will
press G to grab this. And I will try follow
shape of this shell. I will add to look cuts on the y-axis with Control
R and scrolling maps. Let's follow the shape of
shell a little better. Now I will try get this curve at the
shape of this muscle. Now, I will go with solid mode. And I will select these
two middle vertices with holding Shift. Enable this proportional editing and try with this sphere brush. Now, I will press G to grab and z to stick only on z axis. But we have problem,
remove all up. And that's because
our brush is too big. I will go again with G and Z. And I will scroll
middle mouse button up until I see this brush. Now rescale brush and
I will go with a G, and I will bring this up. Again J and bring
more if you need. I will turn on proportional editing and I
will bring this vertex down. And this one up. I would pay through more with
this proportional editing. Now, I will try get
this edge here. And I will go with
the numpad slash key to isolate only this object. Now, our workspace is cleaner and we can focus
only on this shell. If you don't have
a numpad keyboard, you can go to view, local
view, token local view. If we try move this vertex down, this will not work because
we need support edge here. So I will go with Control R and I will add one
loop cut here. Now we have more
control with this edge. I will go down and
lethal on y-axis. And I'm in those
same thing here. Now we can go out from local blue with an
op-ed slash key. And I say we lose some of shape
now and I will back this. We can go to Edit Mode and
select these two edges and j, we can adjust this. Now we can add thickness
to this shell. So I will go again with NumPy slash key to isolate
this object. And I will now select
this solidify modifier, and I will type here 1 mm. Let's now create another
side of this shell. First, when it moves
Origin to about here. And in object mode, I will go here to auction, and I will select this origin. Now we can move
origin to about here. With numpad one. We can check
from orthographic also. Now turn off this origin. Now, we can rotate
from this point here. I will duplicate this object, but not with Shift D. I will use the Soviet make instance
of this object. So all day, move this down
and now to rotate this, scale, this on the
axis by minus one. So type S, Z, n minus one. Now we need to rotate
this on y axis, so x and y. And those same with this one. And we can see here that they
are connected to one side. So we can go with x and
rotate lethal on x axis. Now we can go to Edit Mode, then we can connect
them on this part. Because we use all today
and we make instance. We added both at the same time. Now to another app, this, when it apply modifiers, we cannot apply this because we have two instance
of the same object. So I will for now delete this
one and apply modifiers. You can see that this shelves
are very thin on this part. I will do this manually.
4. Unwrapping and materials: To make this thinner, we can add a loop cut
here with Control R. And we can press
S to scale this. And now we can go with
right-click and say smooth. Turn on auto smooth. Now we can create material
and I will call this shell. And we can go to Settings tab. We can bring this
image in Blender. And we can connect this
to the base color. And if we go to
material preview, we can see how this look. We can go with number 72,
top orthographic view. And we can go to Edit
Mode and press a to select all and you
project from you. Now I will go to UV Editing tab, and I will place mouse on left. I will press a to
select all and G to grab an S to scale and dry
place this on shale image. Now we can use proportional
editing and shortcut is 0. And now we can
select part of mesh. You want Edit. And we can now
go with G to grab scroll, mouse to adjust brush and
adjust mesh if you need. Now I want project
this bottom side on this part of image here. We can use this gizmo
to turn on shell. And we can go to Edit mode. And we can select one face
in the middle and go with control numpad plus
to expand selection. Or another method. You can select one
face and we can go to Select Similar normals. And if we increase this value, we can select more
similar normals until we select all we need. Now, I will rotate
this gizmo to bottom orthographic and I will
press U and project on New. Now we need place
mouse and left. Press a to select all and S minus one to scale on
the y-axis by minus one. S to scale and play with proportional editing
if you want. Now we can create simple
node setup in shading tab. Now I will go with
Shift a and color ramp. And I will go with
bomb and plug, color them to hide
and bumped to note. Now we get bumped
about too intense. And I will bring this down. And if you have
enabled Node Wrangler, we can click on
with Control Shift and click on this bump and
we can preview this bump. And now we can play
with this color ramp. I will go with
another color ramp. And this time for roughness. I want to make this
shell a look with in vendor Brett polar is zero, which means no rough or shiny. So I want more black here. This part here is
look too perfect. I want to create
another layer of bond. I will go with the
noise texture and another bump like
this to height. And I will go with value of 500. And I will plug
second bump, bump. Now we have another
layer of bump and we can bring this value down
to keep this subtle. Now I can duplicate this
with Shift D and S, z minus one to scale this
on z axis by minus one. Right, to rotate this on y-axis. I want make variation
in Bhutan party in UV editor because both
sides now look same. Now we can create
meat inside shell. So I will go with Shift a
and I will start with Q. And I will scale this cube, Sx to scale this on x-axis. S5 for y axis and z for z axis. Control our for loop cut and turn off
proportional editing. And move this edge down. Now a to select all right-click and sub-divide
in down left corner. And we have this fractal option. I will increase this to
the form, this shape. Now I will add subdivision surface modifier to smooth this. Now we can apply subdivision
surface modifier and we can add here
same material. Now we can grab this Bit. Edit Mode is to select all UQ projection or
smart TV project. And we can project this
on this texture here. You can scale this S, y, x, z. And you can also
right-click Shade Smooth and you can go with proportional
editing if you want.
5. Modeling the second shell: They can now start
with second shell. I replace cursor here
and I will go with Shift a plate and I will
press S to scale this down. I will now grab this edge and I will press Sx to scale this on x-axis and add three loop cuts on y and three on the x-axis. Now we can go with
subdivision surface and we can start shape this. I will now select
these three edges and I will go with
proportional editing. And I will go with a, G and
Z to bring this fancy axis. And you can play
with this brush, so you can scroll
mouse up or down. Now, I will select this slide
with called the control. Because this edge here is to round that for me
I want scale this. And if I press S is zero, I scale this on z axis to zero. I don't want to go to zero, so I will press S z points
to now, extrude this down. So I will press E or
extrude and z for z axis. Now, I've unscathed
by 90 per cent. So I will go with s, z 0.1. Now I will press S and I
will scale this out edge. I will now go to object mode. And because this is too
big for our reference, I will scale all this down. I will now go to edit mode and I will select this tree vertex. I will move this on y-axis. And I will move this one little
n to get this shape here. Now we have basic
shape and we can apply this subdivision
surface modifier. Now, Ivan, select
every other row. So I will select first stage
and withholding control. We can select last edge and then that will connect
all edges between. Now to skip to another row. I will now hold Shift, and I will again
move with control. So Shift and Control. Shift and Control. I will press S to scale this. And I will move this
little down on Z. And now when we go with Shade Smooth and we don't
see a lot of depth here. So I will back to
edit mode and I will go with Control V to bevel this I will also bevel these
three lines in the middle. Now we can apply
same material here. Go to material preview, up at seven to top
orthographic view, edit mode. Select all of it, and you
project from your UV editor. Scale this down. I think I don't wrap option for better for this than project from you. So I will go with
you and unwrapped. And this part goes down. So rotate this on z-axis, S to scale this on x-axis. And we can fix this part
with proportional editing.
6. Modeling of the third shell: We can now add thickness
to this shell. So first I will apply scaled, so Control a and scale. Now I will go to
solidify modifier. And I will type here
1 mm or even less. I will set origin
here like before. We can duplicate
this object with Shift D and move this on z-axis, little s, z minus one to scale this
on z-axis by minus one. X to rotate this
little on x-axis. I haven't duplicate this
meat from first shell. So Shift D right
to move on y-axis, X for X axis and
scale and rotate. Because these three
shells are very similar, I will copy this one and I would just make
small adjustments. I will go with Shift D. And
I want scale this on z-axis. So I will type S Z for
intake. Scale this down. Now I will go to Edit mode
a to select all unwrapped. And I will now go to UV editor. And I will project
in this shell here. And if you want, you can
use proportional editing. I will also make
small adjustments in this 3D model with
proportional editing. Now, I will again rotate
this on x axis with x, duplicate with Shift D scale
on z-axis by minus one. So S, z minus one and
rotate again on x. Duplicate this again with
Shift D. And this one here, this last part b here. S to scale this down, go to x-ray mode. Then we can press C
to get this brush. And now we can select
this last part. Now Gs to grab and y for y axis. And we have enabled this
proportional editing. I will repeat this again
with smaller brush. Now on this and the
project in UV editor. Again duplicate this
and scale on the axis. In this short, I use
mostly this muscle. So I decided to make another
variation of this muscle. I found this image online, but because this is not zero, I'm not sure if I will
share this link with you, but I will definitely try take photo of
muscles and I will share maybe another imagery to this link and we can start
modelling another muscle. We can now import
this as reference. So shift a image reference
and we can scale this down. Now, duplicate this
first shell with Shift D and rotate and try
place this image. X minus one. Go to wireframe mode, Edit mode, and we'd see
select part of this. Now with proportional editing, we can adjust this alley. It is really important
to hide this white part. So it's scrolling mouse. We can make this brush
bigger and with a G, we can move this. Now I will go to material
preview and Material tab, and I will duplicate
this first material, and I will call this
shell to material. Now I will go to Edit Mode, select all with a
new project from you and see you later
in post-processing. Scan this on x and y axis. So S XX, XY and play
with proportional edit. Okay, and we duplicate
this material, but we forget to
change this texture. So just select this new
texture and this should work. Now we have two variation
of muscles and I will now delete this reference image because we don't
need this anymore.
7. Cutting board - Modeling and material: Now we will create
this cutting board. I will just copy this from my last five to see
how big is this. To have a nice reference. And I will go with Shift a
cylinder and press S to scale this numpad one to front
orthographic view. And you can copy
these values here. And on z-axis is for sentiment. Now I will go to
Edit Mode select, and I will say this
metal part here. Now I will go with Control
V to bevel this edge here, and e to extrude
and y for y axis. Now I will admit
holding Control, select this top edge. Then we are done with the
top edge shifts to go down. And then I'll continue with control and select
this bottom part. So control. And don't forget to select
these two edges here. And don't forget apply scalar. So Control a and apply scale. Now back to Edit Mode
and Control V to bevel this and scroll on your
mouse to act. Philip cuts. I will add only
to look cats here because we will use
subdivision surface modify, right-click and shades for. I will go to Edit Mode, then I will add a loop cut here. But I think this is
not visible in KML. This part is also not
visible in camera. Model this. But you can always add a loop cut here and scale this on
x-axis if you want. For our material, for
this cutting board, you can use any wood
texture you like. But for this, I will use this
phrase shader from Chaco for.com because we get
all maps are ready set. And I will show you how
you can download this. So you will need to
go to store soccer for.com and then two products. And then you can click
to this free category and you can download this
reshaped the bundle. But you need to first
make free profile. And then you get a lot
of this free shader so you can use in any project. I've been going
this route category and I think I will use this one. So just double-click on this blender file and
open this shape there. Now we just need to
select this object, right-click copy
object, and back to our that file and
paste this here. Now go to materials and we can just drag and drop this
to our cutting board. Now you can see that we have all shader setup here and if you want to can
change some settings. But I think we don't
need to do this now. We just need to go to
Edit Mode a to select all and unwrap this
with u projection. I will delete this one. Now we can set render
settings and camera. I will go to Render
Settings and I will set to Cycles render engine Few. And I will go with white
cinematic resolution 1,280.557. I will find out camera
and I will select camera, and I will select
x-axis tonight. I will move camera
to about here. I will go to camera
properties tab and I will set this to 60 millimeter depth and filled with distance of 1 m. And you can turn on these
limits in reports so you can see where it's 1 m. And I've
said this viewport size 2.1. So we can make this
camera smaller. Now I will go with LZ to rotate. This came around z-axis and for the shelves
will be to about here. So I will bring this limits
or focus to this area. And I will go with
the lamp advantage front orthographic view and I will bring this camera now
and also cutting board. And you can go with the ramp at zero to switch to camera view. And you can adjust
this on z axis. And let's see, I'll reference. I will rotate this
little down on x axis. But we can always adjust this camera later
when we add shapes. Now, I will join this
part of shells with meat, so we have only one object. So just hold, Shift, select all three parts
and go with Control J. Now this is one object and
repeat this for all shelves. I forget, make bottom
part for these shells. So Shift D, Z, Z minus one and rotate
this little annex. I think we make these
shells little too small. They are about three or 5 cm, but I think in real life they
are maybe seven or eight. So I will select all shapes and I will press S and
I will scale this up.
8. Composition and lighting: We can now start placing these
shells on cutting board. And I will split
this windows here. So when you see these cross, you can move this on right. I will put the mouse
on the left side, then I will press Samantha zero. So we have now on left side our camera view and we
can work on right side. So we can go with number
one or number zero. And we can start placing
this on this board. And you can use X and Y or Z to rotate this and
imagine this support. We can use only this
top part of this shell. If we go to Edit mode, and if we press L
over this part, we select the loss part. And now we can go with P
and separate by selection. Now we can go with
shaving D and we can move this on x-axis. And I'm enjoying
this shell again. And I will select this object
and I will set origin to geometry to make origin
in center of this object. Now we can set lighting
to make a first render. I will send this render
samples to about 100. And I will send this to 200. So we will get a number
resolution here. And I will press F2
to make first trend. You can see that we have
already in our scene, and that's because by default
we get to this point. I've been now deleted
this point lamp. And if you go to work properly, you can see that this color
is not completely black. So we also get the lights from
this board or environment. I will make this
a little darker. And lithium we can now go to start to
so we can compare later and we can make
another test with SQL. And you can see
how this look now, I don't like this look. So I will go with Shift a and
I will start with Ariel em. I bring this up and I've
answered this slide to opposite sides of camera
to get a nice shadows. And you can use x or y
to rotate this slide. And I will go to another site and I want to just get the
silhouette of these shells. So advice to rotate
this on my axis, place to about here. And I will go to Properties tab, and I will bring
this to maybe 70. And if you scale this slide too, will get softer shadows. If you want to shut off
silver, scale this down. And I will now go
with text well, to make another render. Now you can play with size, position, and the angle of
this slide to get you like. And you can make test
renders to another slots. So it can later compare
before and after. Jump between slots. You can use J key venue or haven't opened
this image editor. I think I like this one. Look more cinematic. To me. I decided to add the one point
lamp here to another side, the value of ten. You can see before and after. So we get nice details here. And we highlight also
this level here.
9. Salt and parsley: Next thing I will create
here is little salt dots. I will place origin about
heat and I will go with Shift and press N to open this
temp and type here 1 mm. Now I will go with
right-click and sub-divide. And I will use this
fraction option. I can right-click Shade Smooth, and I will create
new salt material. Now, I will open
shading tab and I will press number slash key to
bring this object here. With the transmission
almost to one. And with roughness
almost to zero. I will create a little variation in roughness with noise texture. So Shift a and search for noise. I will also go with color ramp. And I will scale this to two and I will make more conscious. Now, black area is roughness zero or
shiny and white area is roughness one or Nora. When I get these two
roughness and play with value until you are happy. I don't want to completely black or completely shiny part. So I will bring this
black to white. Now back to Layout. And I will go with all today and I will
start duplicate this. And I will use S to
scale and to rotate. We can select one
and we can go to select linked object data. Because we use all day, we will select all of these. Or we can use select the link material because
they are same material. Now I will set this to
individual origins so we can scale them on
individual origin. Now, I will duplicate
this a few times. And I will go with F 12
to see how this look. Negative tail I want to
bring in this scene is this little parsley
leaves or branches. I will start with plain
scale this down with us. And I will choose this shelf
material views before. I will go to Edit Mode and you project from you and I
will now go to UV editor. And we have this
parsley leaks here. Now I will go to Edit mode and I will press cage for knife. And I will try cut
part of this here. So K and start clicking and just try cut part of this here
and then press Enter. Now delete these
faces we don't need, I mean, may cut inside this area with key and now we
can deform this. You can use
proportional editing, but very small brush
and you can press G. Evelyn go now with
shift day and cylinder. And I will scale this to 1 mm. Nike to rotate this on x axis by 90 degrees is right to
scale this on my axis. But we have too much geometry. So I will go with mesh cleanup, and that's my geometry. I will go here with maybe 0.3. And I will go with Control
R and add fuel up cuts. I will select this face and
I will go with control. And we can select these
shelves material, edit mode and you
unwrapped UV editor, scale this down and
place somewhere. Where is great. Now we can select this green
parts and we can scale and with all the duplicate
and place overseeing. If you want to separate
this part in edit mode. So set mouse over
this part and press L to select Close part and be
in separate by selection. I think this looks too small
and it is not so visible, so I will scale this up. We can also add
here more geometry and they form these to
make this more visible.
10. Table cloth and oil bottles: Next we will create
here is table. I try with wooden table, but I think these don't
work because it's basically murdered with
this cutting board. I think we need more
conscious and something darker to separate this
from this cutting board. So I decide to put here
something like tablecloth, similar, like this one I
made in random before. I will now join this
area with right-click. And I will go with Shift
a and create playing. And I will scale this and move the numpad zero go
to camera view. Control a to apply
scale and the numpad one for front orthographic
view and bring this down. For texture. I go
to textures.com, which is free, and I
sell it for more paper. But I think I will share
this link with you. And I use this texture here, but you can use any
similar texture like this. I will create a new
table material. And I will go to Shading
tab and I will select this plane and with
numpad slash key twice, I will bring this object here. And I will also drag and
bring this texture here. And plug these two base color. We can see that this
texture is seamless. And if we select this
and go with Control D, we can scale this texture up. We can see in this table
is not so visible, but we can also create
more details here. I will go with mask, grip, texture and color ramp. And I will plug
these two roughness. And with holding Control
Shift and click on this node, we can see how these look. And I will go here with 500. Because I want make
this table more glossy. I'll bring this white
color to black. And I will also use this to create a little
bump details here. So plug this color them to height and this bump to normal, and bring this value all down. Next thing we can do here
to improve this material, we can add some wrinkles. And I go to Google and
download this texture. And I will now
import this implant. You can use any
similar texture and I will now create
another layer of bone. I will go first with color ramp and plug these two height and the second bump
to first bump. I will go with Control Shift and click to see how this look. And I will now go with Control
T and I will scale this down and bring this value down. I want to make this more
darker and less saturated. To put this cutting board
and shelves more in-focus. I will go with hue
saturation node. And I will bring this
value and saturation down. Next, we will bring in our
scene is this oil bottles. But we will not model this
because it will take time. And this is something I
made for my last scene. So I will share this object with two and I will show you
how you can use it. This is surrender. I
made the last time and we will use these
two oil bottles now. So you can open this blender file and you
can go to wireframe mode. And you can select
these two bottles. And if we holding Control, you can select the
objects you don't need. And now we can go with
right-click copy and we can back to our blender file
and we can just paste this. I will go with numpad
zero to camera view, and I will go with
Z to rotate this. For now, I will keep this here, but we will see later maybe we will change position of this. I will also use this two or
three rows Marina branches. I will share this file with
you so you can open this and select one branches
and right-click and copy. Paste this in our same select this and we can
now position this. You can use x or
y to rotate this. This is not so visible
because it is out of focus, but I think this is
very nice detail.
11. Background and bokeh effect: And now we can start
creating our background. And for background, I want create this
nice bouquet effect. I don't want a lot of emission object in background
to get this book here. And I will try to get
this from one image. I tried different images here, and I go to pixabay.com
or Unsplash and I search for something like
Night Kitchen lights. And I found that this
one work good for me. You can download
this for free from pixabay.com and I will
share this link with you. I will now go with Shift a. And under image you can
find these images as plane. And if you don't have these
images are spraying option, you need to go to
Edit Preferences, Add-ons and you can
search here for images and unit activate
these images as plain editor. And I will now
select this image. The images as playing already created this material for us. So we can go to Shading them with the double tap
on numpad slash key. We can bring this image
here so we can see what I will connect this to specular roughness
and I will create bump. Bump is not so important, but we will get
some extra details. One thing which is important for us is to connect
these two emission. And I will now go to render preview to see how this looks. And I will go with the color
ramp and plug this here. And to base color, which is important here, plug these two emission string. Now we can, This black and white sliders
tell blender very light. Now, I want to position
this image somewhere in background and this will
create bouquet effect. And David rotate this all songs. Next I want do here, I want to create some real
geometry from this image. So I will make this
image material hit Control Shift and click on this image to see
better what I do. And I will now go with Control
R and add a few loop cuts. But because this
is in background, will not be so visible, it is not so important
to be precise. Just add some geometry here. Now I will go with
Face Selection and I will select some of this phase should be kitchen
and I will go to Extrude. And you can go with
Control V to bevel this. You can also press K to bring this here and you can
cut some parts here. Extrude this out then
level with Control V. And then how to make this material
just go with Control Shift and click on
these principle-based year. I want to add more colors
to this. I'm okay. We can go with hue saturation and plug these two, this image. And I will try go with this
saturation to about ten. And then now we get this
yellowish color here. But I think we have
too much slice here. I think I will cut
some of these parts. I will just bring this up to remove some of
these lights here. And one trick here, if
you go with separate RGB, you can split between different color channels and
you get different results. So you can play also
with this option. And you can see a difference
in my test renders. I would just now for tests, try different images here and
you don't need to do this. And let's see how this look
with different images. Now, I will make same
thing on the left side. So I will go with Shift
a and I will create plane scan this
move to about here. And I'm gonna rotate this
on x axis by 90 degrees. And I will just bring this same material
to this object here. But for this, I will
use another texture, so I will duplicate this material and
create new variation. And now I will use another image here and I will
share this link with you. But if you want to can use
any similar images like this.
12. Shelves and background: I see that we have
too much lights here, so I will bring these legs up. I will scan this
image and I will add a while loop cut
in the middle with Control R. And I want to make a coordinate of
this second edge. So let's move this on y-axis. And now we have
another wall here. This strong glide here
is from this area. I haven't put this Stormlight to another role to
be less visible. So I will go to UV editor
and I will press S x minus one to scale
this on x-axis. And don't forget to make this material Control Shift and click on this
principle. Guess. I would just putting
saturation down because we have too
much color scheme. Let's now create something
more three-dimensional. So I will try create
these shelves. I will start with Shift a and q. Let's scale this with Sx, S, Y, or Z to get a shape like this. Let's now apply
scale with control a. I will now go to edit mode. And with Control R, I will add to look at
some x and y-axis. You can use a wireframe
modifier here. But we can go also in edit
mode and with Control F, we can choose this
wireframe option here. And on left bottom corner. Before you click anywhere, you will get this option here. And we can now
increase thickness. But you can also use a modifier
and you can find it here. I will now in edit mode, press a to select all and
Control V to bevel this. And let's quickly
create material. So I will call this black metal metallic to one, roughness almost to
zero and color mode to right-click and say smooth. I think this is too
dark to be reasonable. So I will put more
white color here. And we can see something here. But I will bring this small town and I will
duplicate these shelves. And then we'll put one
on the right side. So shift D is E to rotate this. And with NumPy zero, go to camera view to see
where we want to put this. And I think we have
small problem. Both catch too much lights because we have
very low roughness. So I'll bring it
up mess with love. We have a lot of empty space
between these two images. And I think we need to create something with another image. To fill this space. I go to textures.com and
I search for shocks. And I found this image. But you can found any similar
image because this will not be visible with just need this
to fill this empty space. I will go with Shift a image, images as plane, and I
will choose this image. Now we can just place this
scale and place in background. And now I will, with
an Ampere's slash key, bring this image here. And I will try create
some geometry here. We can control our
guts and we can, with Face Selection,
Select surfaces and width. We can extrude this. You can see that this
is barely visible. And let's now create
this file in background.
13. Creating a fire and a fireplace: For firing videos without
plane from pixabay.com. So you can go to Windows
and you can search for Phi. And this is one I
download last time. And I will also go with Shift
a image, images as plane. And I will select
this video footage. And if you press space, now, we can see that this
is animated and we can play with this
now in shading tab. I think this is too big, so I will cut this part and
I will go to Edit mode. And with Control R, I will add a loop cut. And we can delete this
face. We don't sneak. I will delete this
principle VSTS. I would plug these two emission and I will bring this value to five to set the
origin to geometry. And now we can just place
these two position. Let's now look like a
fireplace in background. And cool thing about
this is that this is animated and this will bring
a lot of life to our scene. Let's now try create
real fireplace. So I will start with a cube. In edit mode, select this top face it to
extrude and S to scale. When we select one phase, we can press I to insert it. And now it to extrude
that vie for Vioxx. And let's for this
use brick texture we download before from
chocolate for.com. So just copy this object
and paste to our scene. Now we can just bring this material here and we
can delete this plane. First in object mode, go with the Control
a and apply scale. And now in edit mode, go with a to select all and new Smart TV project.
To unwrap this. I would just bring
the saturation down. I think are seeing
a little too dark. So I will just increase
this to light source. But we can always make some adjustments here
in color management. We can do this in real time. So I will bring this
image editor here, and I will search here
for random result. We can now play with
these options here. And I think I will go with
medium, low conscious. We can play with
gamma and exposure. And I think I will bring
this exposure little up. Now we can go to compositing
tab and I will click here, use notes and make sure that this magazine
of peace afterward. Now we can hold Control
Shift and click this render layer
to bring this view. Now with V on keyboard, we can zoom this
in or all three. To zoom this out. I will start with length, dispersion and
distorted or node. So I will search for length. So Shift a and less. And I will use here a very
low value, about 0.01. Make sure that you
turn on this fit. And dispersion also maybe 0.02 to get some chromatic
aberration on this edge. Then repressed after we
get rendered result. But this is plugged
only to human node. So you can search here, you know, this is
before and after. You can see this nice chromatic
aberration effect here. Let's now add some
globe or glare effects. So Shift a and glare. I will go here with focal glow. I'm going to bring
this size down. If you select this node, you can press M to mute this. So we can see before and after. And when you are happy
with the result, just be sure to plug this
lastNode to composite. Now we can back to
3D view port here.
14. Vignetting object and compositor: Next thing I want
to create here is some vignetting object
in front of camera. I will go with Shift
a and the cylinder. And I will bring
this vertices to 16 because we don't
need too much mesh k. Let's now scale this down with S and dry place to about here. S. To scale this on the axis. I will now create
tweak materials. So I will just go with
a light blue color. Duplicate this object. Then I will rotate
this on x and y-axis. And I will play this
in this corner. So this is before
and this is after. So you can see that
this is barely visible, but you can feel that
something is here. If we want to make this vignetting object
to more visible, you can move this
out from camera. And if we want to
make this more blue, can bring this closer to camera. Duplicate this one
with Shift D and I will bring one closer to Kim and I looked at the list surrender
and I think that these shells are
still too small. So I scale this up and I
think this looks much better. So you just need
to select a few of these shells and press
S and scale this. I want my animation
least about 5 s. So I will go here
with 120 frames. Now I will select camera
and I will go to frame one. And now I will set mouse
over this location and rotation and I will
press I to insert keyframe. Now I will go to last
frame and I will let mouse-click
moon this z axis. And they will also play
with this location. If you hold Shift on keyboard, you can move this slightly. Now, press I to insert keyframe. And if you press space, we can see that we
animate our camera. Now I will use camera
mobile add-on, but this is all version. You can find the new version, which is camera shaky fight. And you can watch
this YouTube video to find the link and instruction
how to use this add-on. And I use this Z preset
with a value of one. Now I will prepare folder
where we will say our Render. So because this
will be test one, I will also create all that one. Now we need to go to
Output Properties tab and we need to select
this folder here. Because we will also use glossy direction in
post-processing. You can go here to layer properties temp
and you can enable this. See that action passed. And now you need to go to compositing. And now I will go with
five output node. And we need to plug this. Now, I will duplicate
this shape, the lens distortion, because
this distorts our image. And I will plug glasses
direction here. And I will plug these
two file output. And now I will go
to our folder and I will great GAL4
glossy direction. And now we can back to
Blender and we can select this output folder,
redirection and asset. I will select the heat J peg. And maybe I can
increase this quality. Frame rate is 24, which is okay. We can save this and we can now go to Render, Render Animation. After test render, I decide
to put one motor lump here, so I go with area alarm
and with value of night. This is before and after. I finished with Render and my recommendation
is to first go with low symbols value may be
50 to make test render. And when you are happy,
you can increase maybe to 500 for final render and see you later
in post-processing.
15. Post-processing - Grain, Glow, Chromatic aberration, Halation: Let's open After Effects and start with new
composition from footage. Select a sequence of main render and check
this JPEG sequence. Now select these sequence. And because we render
this from Blender in 24 frames per second, click here and set this
to 24 frames per second. Double-click here and select this first frame or
loss election paths. And said this JPEG sequence and important this
glossy direction paths. Said this also to 24
frames per second. Now I will bring these
glossy direction on top. Right-click and rename
this to glossy direction. And set this to
screen blending mode. Now we increase reflection
with this glossy direction. But I don't want the whole area. I will select this
pen tool and I will drag mask over this shelf. Now we have this hard edge and I will search here for
mosque and I will increase this whether
this is before and after. But this is too intense. So if we select this layer and
if you press D on keyword, we bring this opacity and I
will set this maybe to 20%. I will now make this
more cinematic with two black bars on
top and bottom. And for this I will just
use simple PNG image with black bars on top and bottom
and transparent middle part. You can go to Google Images
and you can search for PNG cinematic bars and you can download
any of this image. Now we just need
select this image and press S to open this scale. And I will bring this down. Now we can turn off
this proportional here, and we can scale this on x-axis. And just be sure that this
layer is always on top. Next we will add here is green. So search here under Effects
to add grain effect. But let's first look here with right-click and make
new adjustment layer. Bring this effect here and
set this to final output. And you can choose
here type of grain. And I will go with
this Kodak ate D. And I will bring this
down maybe to 0.8. Let's now try to lower effect. But we already had
some glow in vendor, so I will not add
too much load here. This is obviously too much, so I will try here
with 90% or even more. So if you bring this value up, we fade this glow effect. And I will bring this low
intensity, maybe 2.1. Let's now add some chromatic
aberration effect. This is too intense,
so I will bring, this may be two minus four. And maybe here for. Let's now create bluer or volumetric effect and create
new adjustment layer. And I will call this blue. For Gaussian blur. I will set here
value of about 300. And let's now press T to
bring this opacity here. And I will try to
get value of 20. I will set this to ten and
we get more atmosphere here. Next is correlation effect. Collision effect. Basically take highlights and add the red glow. And you can see how this look. So first create a
halogen adjustment layer and go with find edges effect. Next I will search
for tint effect, and I will call
out these two red. And I will check this invert
button to invert this. Now we call these edges to read, but this is too intense, so I will search
here for levels. Bring this like Scala to write, to remove some of
these red edges. Now we need this. And I will search here
for Fast Box Blur. And I will set here
value of about five. Now we just need set this to screen blending mode
to ignore blanks. And we get this red color
over this highlights. I will draw this little more. But this is too intense. So I will bring this opacity
maybe to 20 per cent.
16. Post-processing - Color correction and lens flare: I will go now with
optical flares. And I will search for
this effect here, but I'm not sure if
this is a paid add-on. You can Google, but you
can find createdOn, which is called Lens Flare. With Lens Flare, you will get less oxygen than with
this a paid add-on. But maybe you can still
find something you like. And I think I will go
with this option here. And only thing we need
to do here is set this to screen mode
to ignore blanks. And then you need to set this main position
and direction. If you want, you can
animate the opacity here. So I will start with
the first frame and I will set to zero. And click on this stopwatch
to add a keyframe. Now we can move
this timeline and we can add different values. We can now copy this and
duplicate to this right side. Now we have animated
optical flares, and I don't like this
too bright part here. I just want to keep
this part here. So I will go with the mask and I will select only this area here and add that to this mask. Let's now go with the
color correction. So new adjustment layer, and I will call this CC. I will go with the
Lumetri color effect, which is main color
correction tool in Premier Pro or after effects. Basically, here you just
need play with this value. So I usually go with up and down and see what
is best for me. And I think I will
here go to minus. With the tint effect. I usually go to minus to get this greenish look because I
don't want purple look here. I will keep this
exposure to zero. I think this is okay. I will go with black slip up
to fade this black color. We can play with saturation. So if you go down, we get more black
and white color. Look. And if we go up, we get more colors here. I will go here with Nike. But you can also play with predesignated loves
Chrome or dog. I will go here again
with Lumetri Color. And under this quadratic term, you can find a lot
of these slots here. You can find lots you like, but all of them are too intense. So just bring this opacity down. Now when we are done, we
can just render this out. So you can go with File Export. But for this I use
Adobe Media Encoder. I will go to composition. Add to Adobe Media Encoder. You can download Adobe Media
Encoder and it will be automatically connected to your Premiere Pro
and After Effects. And then you can export
your videos much faster. I would just play with
this bit right here. And you can see that this
window is only 40 mb. And if we export directly
from After Effects, it will be much bigger. So this save time and
space on your disk. And now we can just select folder where we want
to export this. That's all for this tutorial. Thank you for watching
and see you next time.
 šime Bugarija