Transcripts
1. Backrooms in Blender Introduction: Hello, guys, I will
disappoint you, but backrooms does not exist. It was created in three D
software mostly in Blender, which is free and powerful. Even K Pixels created his
backrooms in blender. Software, I use blender
and after effect. The good news is that a
step by step tutorial on how to make backrooms
has finally been recorded. The whole process
of how the video you watch was made was recorded. In the four hour long tutorial, you can create backrooms
with a lot of details, even if you have not
used blender before.
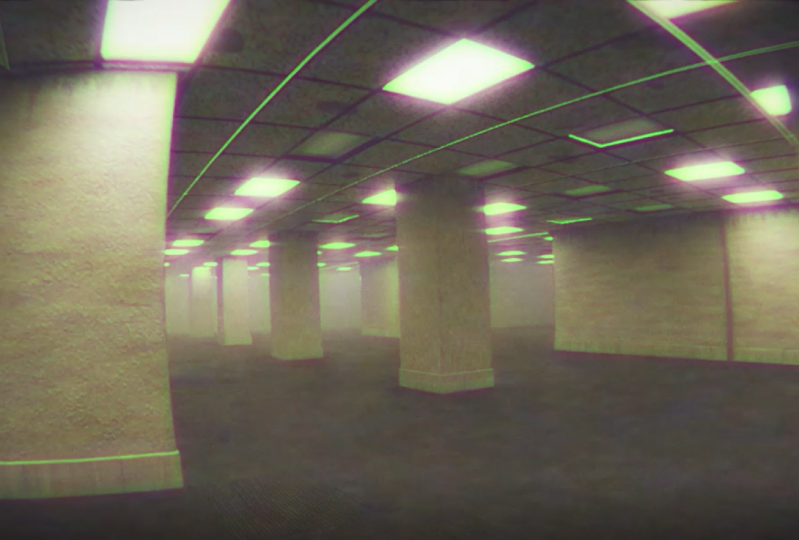
2. 01 - Setting up a camera and creating a maze: Hello, everyone, and welcome to the most detailed backroom
tutorial you can find online. We will try to achieve a classic backroom space
look of office rooms with yellow walls and carpets with as much
details as possible. In this tutorial, we will
create realistic lights, pipes on the ceiling,
ventilation system, stains on the floor and ceiling, graffiti garbage on the floor, smoky space, and even reptiles. Let's get to work. If you are completely new with blender, you need to go to blender.org and download your
free version here. When you start new project, my recommendation is to first create folder
and I will call this 60 because
this is 60 project, and I will call this terms. Now we can open blender and go to file
and find your folder. Okay. I will also call this
crums First thing here, I will this cube and
this light here, and I will go to render
settings and here we have two render
engines, V and cycles. V is much faster but less realistic render engine is more for games and
stuff like that. We will go to cycles to GPU. I will bring the samples down to maybe 20 and for render also. Okay. If we select camera
and press zero or RPD, we switch to camera view, and now we can see
resolution of our scene. I will go to Output
property step and set here 1024 by 768. And the reason for this
resolution is because I want to achieve all camera we look. So this is aspect ratio
for this camera look. If we press on our keyboard, we open this step here, and if I select here camera, this is location
rotation and scale of our camera and I will
now press one on NPD, we go to front autographic view and we can
see where our camera is. So I will bring this down
to about 1.8 meters. Because this is
height of human yes. I will type here 1.8. I will rotate this camera
on x axis by 90 degrees. When I press now n zero, we switch to camera view. Now I will press seven on the switch to top
orthographic view here. I will go with
Shift A and create first object and this
will be our room. I will go with cube
and I will enter here dimensions of 50 meters. Now this is 50 by
50 meters and on Z axis is 2 meters and I
will bring this to 4 meters. I will press numb at one. I will bring this
up to this x axis. To be more precise, I will say this 2 meters. First thing I will do
here is fix the scale. You can see that our cube
is still two by 2 meters, but this stretch 25 times on x and y axis and
two times on Z. For example, if
we go with bevel, you can see that our
bevel is not working because this stretch 25 times. This will also happen
with materials. Also materials will be stretch
and some modifiers also. To fix this, I will select this cube and press
Control A and apply scale. Now this is all one. If I now try with control B, you can see that now all
levels work correctly. Next thing I will do here
is delete this ceiling because we will create ceiling later and now I want C inside. Go to edit mode, select this phase with phase
selection and delete phases. In object mode, when we go to overlays and
face orientation, we can see that inside this red color and
outside this blue. And because our scene
will be inside this cube, we need tele blender to
flip this because red color is incorrect and this can affect our shading
and materials. We need clip this. I will go to edit mode, press A to select all press
three and type here flip. So now blue coral is inside, and that's correct for us. Now, I will turn off
this face orientation and press num ped seven
for top portographic view, and I will select our camera
and move camera here. Num zero camera view, and so I will keep top portographic view
and I can rotate camera here on the axis. And I will move
camera more on left. Okay. And you can easily navigate the camera
with these settings here. Just slide this. Okay.
3. 02 - Creating carpet material: Okay. Now we can
start with materials. For back room floor, we need the yellow carpet. You can see reference here. So I found the nice
one on BncG com, and I will put links
in the description for all texture I use
in this tutorial, but we can go to material
and search for carpet. I use this one. I download this two K texture and you can also download this
and this is how this look. Okay. And now I will copy this address with Control C. So I don't need later
navigate to this folder, and I will back to
Blender pet seven to top photographic view and switch here to material preview, and go here to select
objects and go here to material property
create first material and I will pull this carpet. Now we can go to shady tab, and here you can see carp tecture You need enable in added
preferences not regular. Now when you select
here principle, BSF, you can click you can
press Control Shift T, and now face here. Address where is your texture and we can select maps we need. I will go with color
displacement and ness. Because we use displacement map, we don't need this normal. I will just click texture
setup and we get this. And we can now go to edit
mode and in UV editor, and I will also turn
on viper shading here. If you don't see
this icons here, you can just move
this with mouse grow button and turn on phaing here and go to top
Potographic view and on left side press A to select
everything and scale. This is one way you can fix
this UV and another one is to go to shading tab
and just scale this, bring this scale up like
ten times or 50 times. I think I will go maybe to 17 Only one thing
I will change on this material is a some stain
or dirtiness on the floor. I will go with shift A and
search for mas grave texture. If I hold control shift
and click on this texture, we can see how this look. I will now select this and control and we get this texture
coordinate and mapping. I will bring this scale to 50. And I will play with this scale. I will bring this down. And now I will go with color m. And there is a white color, there will be our
stain or dirtiness. So I don't want too
much dirtiness, and I will bring
this something like this. Okay. Okay. And now I can use this black and white map to add stains on this floor. I will go with mix RGB
and plug this here, I can use I will click press Control shift and click on this principle BS
DF to back our texture. I will use this as
you can see now is white color is
this color here. Okay. And where is black
color is this one. So I will not use
any of this color. I will just go with hue saturation and plug this
here and this one here. And now you cannot see anything because this default value
is same like this one. So I will go with
saturation down and you can see some stains here. And I will go also with value
down to be more black Okay. And you can also
change this hue value. If we go more up, it will
be more bluish color, and if we go down, it will
be more reddish color. I think I will go
maybe with 0.6. I will just increase scale
or if we go down with scale, the stains will be bigger. I think I will go maybe 0.5. Okay. And you can plainly told these values here?
4. 03 - Creating wall materials: And now we can create
material for this vs. I will go to lay out
and add new material here and call this
vs. Go to edit mode, pace selection, and hold shift and select
all these phases. Select this material and assign. I see a few bedroom tutorials on YouTube and what
most people do is just go to shading tab
and go to texture.com. Like you can go to
texture.com and search for wallpaper and you can
download any of this one. I think I use this
one last time. Most people bring
texture in Blender. And connect this to base solar and we can go with Q
projection to unwrap this. Now I will select all this
here and scale this up. And scale more And if we go here
to the preview, I will add some light here. There is no variation in roughness specular and there
is no bump information. You can go here and go
with color ramp and plug this top roughness and bump. Now this is a little
better than before we get some reflections here and
we get some bump here, we have better
solution for this. Now we can see that we have more glossy and bump
information is flowers, have no to sense because behind this wallpaper be concrete
or plaster texture.
5. 04 - Creating wall materials, mixing materials: I know where we can find
some good concrete texture. This is Chaco fool.com. You can download this, go to these three category. I will put this link
in description. You need first register
for free and you can download all these
shaders for free. This is how this loop, and I will go to concrete and get them this
concrete texture. I will use this first one. Just open this file, cochlea this object
and paste this first, select this object
and I will remove this material and I will go to new material and choose
Stroke all concrete here. Now, we can come back
to viewport shading. And I can, you can see in the viewport
shading, this is black. You can change this four here. Here in the Viewport Display. I will change this. Hello. And now we can
select this material. And if we select this color, this material here
and go to Edit Mode and select this
face is assigned. You can see now is this
force is yellow and we know that these words have different
material than this floor. So I will now delete this and go back to
viewport shading. And we can see how
this looks like. I think I will go to Edit mode, go to UV Editing and scale this little down a little more. And this looks pretty good. Now. Now you can see
that we have with this material or this bump specular roughness
information here. So I will go to shading, select this material
and go to Shading tab. And you can see how this rook, if we open this group, you can see what is behind this. And now we can use this wallpaper texture will
download from textures.com. So I will just bring this here. We need only colored
input for this texture. So I can go with makes RGB. Plug this here and
this texture here. Control Shift and
click on this to see how big is this texture. And I think we need to
change this texture. And I will go with Control T to get this
mapping node here. And I will scale
these two or three. Maybe 2.5 connect this
principle of VHDL. We have same reflections
here and bumpy information. And now we change only
this color texture. And I'm going to bring
this all to one and we'll multiply four bedrooms. We need more yellow color. So I will go with another mix and set this to multiply them
again and plug this here. And I will go here
with a yellow color. And now we can control how
much this column we want. But we will play with this
later when we create lighting. I think this is too much
lumping formation here. So I'll bring this down.
6. 05 - Ceiling modeling, Blender shortcuts: We can now create ceiling. So I will delete this
light and we don't need another one here. And read. Now that said the seven go to orthographic view
and create plane. So I will now press numpad period key to
isolate this object. And if you press this again, we're back to our scene. So now we can work with
this with this object. And I will press N on
keyboard and go to transform. And I will set the x-axis to
three meters and y, y axis. So I will now go with
Control a and apply scale. If we go to Edit Mode
and press Control arc, we can add a loop cut. And if we scroll up, we can add another loop cut. So I will go with two loop cuts. And now this part
here, one meter. And I will go with
Control R on x-axis. And I will add five
loop cuts here. In edit mode. If I
press a, I select all. And if I press I, we can insert this. So if I press, I advice, you can insert
individual faces. So I can get this. And I will now extrude
this finance on z-axis. So E to extrude and
hold z for z axis. And I will select
the funnel sphere. And I will extrude this even more because here we
will be like later. So it to extrude and z for z. One thing do we need to check
here is face-like patients. So go to object, moved to this overlay here
and tweak face orientation. And because this is a part which is
visible in our camera, we need to flip orientation. So I will select I am
the F3 and type three. And no turn-off this. And now I will go
with level modifier here to get to this level here and move
it to one centimeter, maybe 05 centimeters, 005. You can type. And
another segment here. I think two is enough. And I will go with Shade Smooth. And then on a normal mouse, I think we're still
this too much. This is my reference and I will share this reference
images with you. This is maybe only
two millimeters here. So I will just quickly fix this. Select on this basis. And if you press G and Z, so G is for grab
and g is z-axis. We can now move this. And if you hold Shift, you can move this slightly. I think this is just a
few millimeters here.
7. 06 - Material creation and UV: And we can now start
creating material for this. I will start with this here. And this is usually
like aluminum or metal. So I will the new material
and call this my talk, grow with the
metallic gold to one. And we can turn
on this material. And I will bring
the roughness down. Either now go to Shading
tab and we can use this. You can search for
image texture and use this concrete texture to
create variation in darkness. And if I press here, and I'll pick period
key for selling this object and
the numpad period key we can heat are also
isolated this object. So first I will
again two material them and create
another material. And I will call this. And we can now select a, we already decided
these phases and then we'll assign
this material here. So we can now see only
this metal Chrome here. And I will now connect
this with the color ramp. And two, roughness. And if I press Control Shift and click on this color ramp, we can see how this
loop I will now we'll do Portal graphic
view in edit mode. Select the old and
you project from you. In the UV editor, we can select this concrete mop and see how the slope and
I will scale this up. Black color is completely shiny and white is
completely wrong. So I will, I want to be this part shiny Simon
being like color here. And now we can see
how this looks. So if you go more like me, completely shiny and I will
bring this to light and this more to like, maybe more consciously. Okay, now we can add some
roughness variation. And I think this is enough
for this texture here. So we can fix this
stretch is here. If we select this basis and just go to this angle and
this new project from you. Now this is much better.
8. 07 - Procedural materials in Blender: Now we can create
the texture for this one as a reference, and we want these dots here. And we can create
this completely in Blender procedurally so we don't need any textures for this. I will go with Shift a and
type water-in-oil texture. If you press Control
Shift and click on this, you can see how this look. And I will increase
this to about 75. And weed control D, select this and press Control T. We get this mapping node. I will play with this scale, something like this. And you can copy
these values here. And I will now move
to follow them. And just to increase a
little contrast here. Now we can plot this base
color and also to normal. So I would go with ****, pay a lump and connect these
two height and to normal. And now we get this
strong bond here. So I would bring this down. I think I will move
this too strong. So I will bring
this white color. Now we can create
these stains here. So I will, this small little
n will be Moscow texture. So type Musgrave. And also select this and Control T to get texture
coordinate and mapping. Note, Control Shift. Click on this. And I
will now play with this. Okay, maybe something like this. And I can also go
with the color ramp and various white color
will be our stains. So I don't want too much. This white color here,
something like this. Just, just try with this slider, we get natural log. So I will play little
more with this. If we bring the scale
down, it can be bigger. So I wouldn't go from all this. Okay, We come back to this later when we see
this with lighting. And for now I will
go with comics GB and make these principles
and these two color one. And these two factors. Now where it's okay to
connect these two base color. And now very light color. It will be this color. So we can put any
color you like. And I will go about this
color and make this darker. Maybe make more
conscious to see. But on this end, here we can see how this book and this is now
completely white. If we bring this more to break, it will be less visible. So I would go about
here and make more conscious still visible. So bring this down and
blaming this color here. And you can play with this one too late, late,
that awesome. So I think that this
looks pretty good now and just make this more visible and this
edge a little sharp.
9. 08 - Adding lighting to the scene: And now we can create
the texture for light. So I will add another texture, heat and cold this and select this face and
assign this texture here. So I will use these textures, these two texture
from textures.com and I will put the
link in description. I will bring this texture first. Because this is two
different texture and we need different UV map. Here, we can first
few remarks by default and I will go to UV map, name this key, and
select this UV map. And now we can connect these
two base color and see how this project is. Go to orthographic view with not at seven and
New Project from you. And now we can scale this. And I will select this one, the g here, and also this one. And now go to select
this light mob here. And now we can
close out of this. So select all day and
rotate on zee bike night. And I will know I
mentioned this. I think this looks good for
now and now we can go with another texture here and we will mixing
these two texture. So I will create another
UV map and go to UV and connect this with Control
Shift and click on this, we can see how this look. So we need go to
UV editor and sues another texture here and
just scale this to this a. Okay, now we can see how
this look and now we can make this texture. So I will go with mics and
connect this to color tool. And I will go here
to multiply it. And now we can choose how much we want any
of these textures. So I will bring
this to about here. To turn on this slide, we can use also this texture and I will connect
this to emission. But now I will just
go to work tab and bring this
completely to malloc so we don't have
any light XM this and go to viewport shading here. And now you can see better
how this light look. And I will go with
math and reading this. Now we can control this
much we want to like here. So I will set this to multiply. And now we can increase our light. And maybe
I'd be moving. And Ivan create one likely to. It's not working like
he's turned off. So I can go to
Material tab and on another material and select light material here
and duplicate this. And call this light off. In edit mode, select this face
and assign this material. And I will now just
turn off this. Not all to 0 or to
maybe 0.1 or 10 vector all seen with
numbered period T. And we can place this position and bring this on z-axis to four meter because this role is
also four meters. And now we can go to modify and doesn't
bring this column. And this is on x-axis. And on another array modify
and change this on y-axis, minus one, minus one. If we now go to
render preview here, we will see how these
cooking cycles. So I think I will put now
go to select camera and go to Properties tab and
set this to panoramic. And I will go with this lens. And this is now more like a GoPro camera or
security camera. And because we want VHS
look like old camera, there is more sensitive
care, less, about 50. But for now, looking better. We can see more details
with this lens. So I will keep for now, plenty, but we will see later what
we will do with this lens. So I will now rotate this one z-axis and
position this camera. So this is a rendering viewport and to get a random
new window unit, press F. But I will first increase the
resolution number so we can see, but and maybe I'll name this samples to 40 to get more details
and render this again. And I know that something
strange with these panels here, and so I forget to connect this. If I go to Panels,
material and shading, I forget connect this principle to material goods so
we can make this now. Okay, this is before and after.
10. 09 - Creating walls: Now we can create some walls. So I will back to layout. I will split this window here. So just put my mouse on this
edge and move this on right. But now we can turn on the preview here and we can
see what happened here. The next thing I will do
here is select the ceiling, press M to order this
object to new collection. And I will call this ceiling. This ceiling is ceiling
collect, collection. So if I press this button here, I will hide this viewport. And on left is also
dark because we have all lights in
the ceiling object. So I can just bring some
lights in properties here. And then now we can see
what we do here on left. And now I will pick some walls. So cursor here and
shift take cube. And I will start at 1 m
cube and the z-axis is 4 m, because this force is also
four meter on z-axis. And I will bring this to 2 m. And now this is
perfectly on floor. And we can turn on this material preview
here and bring this selling this object and
bring this material here. Now in this is stretched because we first
need to apply scale. So Control a and scale. Now go to edit more
than you do projection. If you now go with S
to scale and x2x axis, we can scale this object, but we stretched texture
and we can go to Edit Mode and select this face
and move this on x-axis. We also stretch this texture, but we need the non, this correct Paste Attributes. And now if I move this, we don't stretch out texture
and we can work with this. And the next thing we
look here is a modifier. So I will go with maybe
five centimeter cubed or for sentiment. And the more segments we can right-click and
say smooth to this. So we get a nice edges here. And this wall is too thick, so I will move this on
y-axis, something like this. And now we can vote with the numpad cell and
to talk orthographic view. And we can duplicate this
object with shaving D and Z, Nike to rotate this axis by 90 degrees and we
can play with this. I think I will duplicate this. Shift D, move on x and rotate this by 90 degrees and start placing
this over our scene. So maybe we can, we can go to Edit
Mode and select this face selection
and this x-ray mode. Because if you don't
select this x-ray mod p, select this top face and
one text to this or more. We get this. We need to go to x-ray mode. And now we can select this face Shift D to duplicate this again and take this on
z-axis by minus nine. So as z minus Nike, and maybe I can
put 1 mol scheme. Then you don't need
to do what I do. You can be creative
in this process. I haven't tried to eat
somewhere. Cool on scared. I will duplicate
this object with Shift D and move this here, and it's just a column. I will set origin to geometry, objects set origin to geometry. And if we go with alta di or Shift D to duplicate this with
Shift D and with all day, we make a instance of
this object and this. So I will go with Aldi
and put one column here. And with shift arm, we can repeat the last
process. Shifts are. And now we can create columns the same
distance from last time. Because we use the, if you go to edit more
than one object here, we added on this, and now I will turn on this ceiling to see what
we have on left side, I will go with f 11 to open image preview and
then go too slow too. And I love this app. To render this. I will try now rotate
these lights here. I will go to three and plus z, Nike to take this on
z axis by 90 degrees. And we can hold this position. We can go with a G takes, and now we can move this
on x axis to about here. And now G and Y, to move this on y
axis, it is, I mean, just a few centimeters here
on our array modifier. And this was with our panelists. So this will not be perfect. Like before, I will
those same on this. Are they on x-axis? So just 4 cm. Now you can see we split this. Okay, I will first lecture all settings to
completely black. Because before I see
some lights here. And this is before, and this is after. I think now is a
little better when we rotate this lights
and panels here. And I like these
imperfections here. Maybe this is too much, but I like this one here. And you can see also
I think here we have problem that now our walls intersect with
these lights here. So I will try. I will select this walls and
just move this on x axis. I will put this in
the middle on this. This is before and
this is after. That you can jump between these clots if you press
J on your keyboard. So before, after. I will not keep
this shade smooth because when we
click shape flip, you can see that there is
difference in shading. And this is before and after. You can see how this
effect on our shading. I usually fix this problem. When I apply this modifier. Then you can like go into Shade
Smooth and this big face, select all these big
basis and shade. And now this works because
we can shade this face mood, these bevels here and all
these big phases is correct. But I don't want now apply
all this bevel modifier. For now, I will just go with select all this
object and move it. Shaved flat. These walls seems like
they're too dark. And I will try to fix this. I will go select this folder
and go to Shading tab. And maybe we can go
with another node and algebraic curves here and
add more white holes here. So if you go down, it
will be more Narcan and of this more white color, more upright, too much
and too saturated. So I will add another node hue saturation and maybe being
this little down. If you go like something
crazy like them, it's going to be
completely saturated. And if we go to maybe 0.5, this will be desaturated. So I will go to about maybe 0.7. Okay, and I think he's
better than before. I will also add more white
color to this cartilage here. I think this also
too much saturated. And if you look, our
ceiling is look. There is also yellow color, but it's not, it's
perfectly white, but because this
carpet illuminate yellow color to
floor to ceiling. So I will try out the right
color to this carpet. Also. Select this object and select go to material them and
select carpet texture. And I will just mix RGB
here and here, white color. And now we can decide how
much light color I want. So if you're being
told this to one, it's going to be
completely white. So I will just maybe 10%
or 7% to white color here. Maybe it's too much, just fine. This is before and
this is after. One thing you can do with these color correction
is if you go to layout and I will
just connect this, I will remove this left side. So just right-click here and join areas and click on left. So we can go to Image Editor and type here random,
random result. If I go to Render properties
and to call our management, we can choose between
contrast here. So now it's medium contrast. If we go with high contrast, at this high contrast, look even more or low
contrast or very low. You can just bring two medium and play with this
exposure and my wife. And two back again to 3D view port and just go here and press three developers here.
11. 10 - Lighting and atmosphere in Blender: If you look at our render now, we can see that we have
perfect alignment. This turn off and
turn on lights. And I think it's time to
apply this array modifier. So if we want other
dislike to be turned off, we can not do this
because we use a modifier and we can only
change the slide here. And this will affect
all these panels here. When we apply this array
modifier we can make anymore. So I will make just one
backup of this object. So I will go with Shift D
and move this on x-axis. I will press M to add these two new collection
and call this Mecca. And now we can backup
collection here, and I will just turn off
this render view-port. So if we forget something, we can always use this backup. And for now, I will
apply modifiers. Now, we can turn off for
the non-annual this slide. So if I select this slide
here and go to material, preview and selling
these lighter assigned, we can turn off this light here. Now we have a problem with
stretch texture here. Because if you go to material
and panels material, use this generated
texture projection. And because we now apply, modify this, this object is about ten times bigger and
also this texture here. So we can learn this
material preview here. And I haven't just play with
this logo here to fix this. And on this list, those are water-in-oil texture. So just play with this again and fix something about this and this stain or
so It's too big. Now. Press Control Shift
and click on this. We can see where is our stain? This is our stain, this light color here. So I will also play
with the settings here. This is too much things. So being this black
color here, okay? And just basic
principle be as df by clicking Control Shift
and click on this. And what we can do now, we can turn on and turn
off any of this slide. So just go to Edit
Mode, selection. And let's turn on the
slide here, wiped off. Or we can turn on lights here. We can now play with
these slides and make more variation here. And I think there is too
much lights on this area. So having, I think I will turn the knob
on this slide here. I will turn off this one. Here is too much lights for me. On this one. You can play
with this as you like. So I will also turn
off this light here. And we can speed
through this window again and see that preview. So zero to camera preview and turn on this
render preview here. And I played with these slides
and this is what I get. I don't know a lot of
lights and background because I don't want to flip. Look like is when
everything is too bright, this looks too flat and I want
more contrast in my scene. So here is like bright area and here is these
stances, dark carrier. So I create this more mystic and the horror is
atmosphere with this lighting. And you can play with this light and create
atmosphere if you like. So you can see how
easily we can change the atmosphere in our scene
with playing with lights. One thing that I want
to fix here is I want to discard that
to this edge here. We can do this in UV editor. Just go to Edit Mode and select this floor and go to UV editor. And now we can on left side, select this with a
and press G and X. This is X axis and you can hold Shift to move
this slightly. This is before and after.
12. 11 - Modeling ceiling ventilation: Next detail we can create
here is ceiling ventilation. Something like this. I will create one here. So select the ceiling, go to Edit Mode and
select this face here. And with Shift D, copy this object and now
press P and selection. And now we separate
these by selection. And this is now a
separate object. And go to Object Set
Origin, origin to geometry. And now with the
numpad period key, isolate only this object and
remove all this materials. Now, we need to create
this rounded edges here. So because this is playing, we need a control Shift. Select this and go with
the control should be. And the scroll mouse to get
to other modal class here. Okay. The next thing we need
to insert this plus I. I want to get
to this part here. Now. So press I to insert this. And if we go too much here, we get the intersection here. Solution to fix this is to
go with I to insert this and then click and then
go with S to scale. And now we can go deep, how much we want
something like this. And now press again and S to scale and go to a with numbered one to
front orthographic view and bring this up. And now we can go with the solidify modifier keys
to add the thickness. And I will increase
this to 2 cm. I will apply this modifier here. And this bevel don't
work. I think. I will remove this bevel and I will create a bevel manually. First, I will increase
this face here. It seems that the
taste too small. We can do. We can
select all these old. Now, I will go with
control here and control and the
scale a little bit. That's okay. And now we can go with
I will select this edge here and go all the way. And with Control
V to bevel this. Okay? And the next thing
I want to do here is create these plots also. So I will move it to
shift D and S to scale. This is one, 2.3. So I want to scale this part. I will go to Edit mode. And I make one mistake. I made them for bevel first, then, now I have too much
loop cuts for selection. I showed this before, but we can, we can
quickly fix this now. It's not a big part. So I will not to go
back and do this again. Okay? With this, we
can scale this lethal. And I will quickly lose
saying with this one. Now we can go with that. We can select all these parts here and we'll, we'll Control J. And now this is one object because they need to
go from a local view. So numpad period's key
here and I will now press M and create another collection. I will call this dictates. And now we need to
select the ceiling. Go to Edit Mode and
select this face here, and grab this blue line this up. And now our ventilation
is reasonable. I haven't tried to make
this more visible. I am not happy with
this material, so I will go too slow too. Then I later can compare
these and the first selling this object and
create new material. And I will call this
ventilation ceiling and go to Shading tab. And I will read the
numpad period keys, bring this object here. And I will go here with the gradient texture with Control T to get a texture
coordinate and mapping node. And if I press Control
Shift and click on this, you can see how this look. And I want to rotate this
y-axis to 90 degrees. Now this go from
from down to up, and I will go with color ramp. And now we can add
the color here. Now, I want to add
white color here. Inside. I want odd little, maybe this brownish color. And then I want more
black color here. So we can connect
these two base color. Okay? She will black
color and here, like a little brownish color. Okay. This is a before and after. I think is so much
better because we are the little separation
between this here. Now we can add this in several
places in our ceiling. So I will to talk
orthographic view. And we can just read
all the copied this or which shifts the end because I will not change
this object later. It will be same. Old time. I will go with you all
today and just make, make instances instead of copy. So go with Aldi and
just more solar. And maybe I can place one. Okay, Let's see, where is this? Maybe I can place one here. Okay, then I will just select the ceiling and the ceiling, this face. Grab this real axis
and move this up.
13. 12 - Wall ventilation: Next we can create here is this volume ventilation
and this is reference. So we can create this easy. I will put one here
on this floor. And I will go with cube shaped, take a U-bend risks, and I will scale these to 1 m. I think this
is also too much, so I'll scale this down
about this and well, with the numpad period key
to isolate only this object. And I will scale this on
X-axis about this and apply this scale control
a applies k. I will select both of these
spaces and press I to insert this unit. Enable this add-on tool. Here. Just type group
and enable this add-on. And now we can go with
right-click Loop tool and breach. And maybe we can try
create this seam here. I will go with the control
refers to bevel this. But I don't want to live in this part which is not visible. So I will just select
this face and go with Control V to bevel this. And maybe we can
select this part here. And just small little
suppress G to grab. And X4 x-axis and hold
shift to more dislike. Okay. I'm not sure if this will
be visible in our render, but we can try. Now we need this part here. I will copy this face here and go with Sheila Lee and
hold z for z axis. And now I will press
P and selection, separate these by selection. And objects set
origin to geometry. And now I can extrude
this on z-axis. And the ADH level here control
V and just one segment. So scroll mouse down and
press and rotate this, press X and Y axis or y axis. Okay, this go down.
Something like this. And now with all d
and z, copy this. And now press Shift R to
repeat the last process. Okay, something like this. And now I will select all
and go with Control J to convert this to one object
and set origin to geometry. And I will now bring one of these free chocolate
for materials here. And I will go to metal and maybe I'm going
to go with this one. So just coping this object and paste this here and
bring this material. And I will select all this and you will read a select with a and go with you to projection. And now press numbered period
key to beg to our scene. And if you have a program
with the navigate to this, we can always turn off in
viewport this ceiling. So now we have a
cleaner look for this. And what I will do here, I will move it shift day. And so we need the cut, this part here from this war. And the scale is two. About this. And now select this wall and go to modifiers and odd
Boolean modifier. And now select this object. Now we cut these walls, this volt with this object, but we can see behind
this object here. So we need to select
this object and go to Viewport display
and set this to one. Now we can see that we can cut
this object with this one. And I will move this
on x axis inside. But now if we go with F, okay? This is now black
because all ceiling is, all light is on our ceilings, so we need the non
renewed our ceiling. So we have three back
our lights here. And then we can see that our cube is visible
in the render. So I will call this
rename this cube. Just double-click here, and
I will call this Boolean. And now I will hide this render. So just click here and now this will not be
visible in our render. And if you don't see
this icon here and just select this icon here. And if you now go with now these are boolean object is not
visible in render. Well with Shift a and add another tube and
scale this down. First, I will set
origin to geometry. So I'm now see very center of
this object and I will move this center and
scale this z-axis. Okay? And just add one bevel thrombi and
just one segment. So first, Control
a and apply scale. And now we can add the
liver and Control J. And then all this
is all one object. And I will go again with
Select All and you feel projection to fix
these problems. This is no better and just, just get this solid and
move this Humboldt here. And now we can adjust
this Boolean object also. So S z to scale along
the z-axis and S y. And this can be sunlight. And now we can also
duplicate with this. It should be and move on y-axis. And I will turn off this
ceiling in viewport. Now we can navigate easy. And I will place one maybe here. So I will update
this z axis by 90. So z naught z minus nine
and place one maybe here. And now we need
another Boolean here. So selling this ball and odd Boolean modifier and select
this Boolean one object. Okay, Now we got this law here. If you want another
ventilation on same role, you can just go hit
Shift D and move this on x-axis and you can add
another Boolean here. But I will not. I don't
need another one here, so I will go with control Z.
14. 13 - Smoke detektor: Next, I want to create this
smoke detector like this one. I will put the cursor here. And the goal with
Shift a and cylinder. Scan these down and
scale on the axis. So press S and Z and you
can scale on z-axis. And then this small. Now press Period key to
isolate only this object. And now I will press I to
insert this and move this down. And I will do this
again one more time. And now it to extrude and z for z axis control V two level. But we need to
apply scale first. So Control a and apply scale. And now we can label this
called all end with this edge, select, select this edge
here and also Bella. And this one. Now with controller or the long loop
cut here and maybe one here. And I will now select
these two faces. Select first one and hold
Shift and second one. And now I will skip this too
and repeat this process. Now. I will go with
alte to extrude this enormous and move inside
and press delete faces. And I will now create
two lights here. So I will move it. I sell this and
extrude on z-axis. I can bevel this
also it's Control B. And now I will go with control are an odd one loop cut key. Selling these two edges and
go with Control V and x2. This on z-axis. For this object we can treat, we can use this
ventilation ceiling, your material before. But I think this
transition is too intense, so I will duplicate this object because it's
ventilation ceiling two. And I will go to Shading and
the number tilde key twice. Bring this object here. And I will just smooth
this transition. And maybe we can go
with Shade Smooth. And the normal scheme. For this slides, I will add
the red emission material. And I will select these two faces and go
with control plus on it. And now I expand selection to this area and
I will go now with a sign. Now we assign this material
here and I will go to Shading tab and delete
this principle, beers df and go with
shift day and emission. And plug these two surface. Choose a red color here. I will now animate this material to look
like it's blinking. I can do this is by splitting this right-click on
this edge and split this by horizontal and having
chosen our timeline here. Now on the first frame, I've said this string to
find, to increase this. And I will put my mouse over these five and press I
to insert keyframe here. If you don't see
this keyframe scale, you need select this node here, and I will now go
to maybe about 20, which is about 1
s 24 premise 1 s, I will now go again. We tried to insert this again, and now I will go two frames and set
this to point to one. Like now it's almost
a turnoff, 0.05. And press I to insert
this keyframe and go 20 frames more and press again. And now I will copy this. Go two frames more
and just paste this to repeat this animation. You can see now what this
slide is now anemic. So if we go to cycles, we can see better. Now we can make it all seen with an armpit period key and
make a tester ended. I think I will scale
this one z axis. And maybe it's going to be. And I will go with D and more. This one here. Here is our smoke detector. And I think is maybe
a little too big. I will just scale this. We can scale bolt
if we select both of them and go to
individual origin and press S. And I will now
Baker bounding box. And I will just select this
ventilation ceiling material. I don't need this
timeline anymore, so I will join these areas. And we can now make some
duplicates with oldie and place this over our ceiling.
15. 14 - Pipes: We can create even more details on ceiling and I see somewhere, but I can find now like
these two are open and we can see pipes
behind these two. So we can create this also. And I will go to Edit Mode, select this ceiling. And I will now delete
this, these two faces. And now with an unpaired seven, I will go to top
orthographic view and put the cursor here and hit Shift a and
create a cylinder. Okay, and I will remove this because I have
selected this ceiling. This is now one
object, one object. So I will press L over this cylinder and press
P and choose selection. And now we know this
is another object. So because this was a part
of this ceiling object, we copy these materials and
you can see also copy this. So now this is a
separate object. Then we can go with x. And we also called the
origin from this ceiling. Okay, we have a lot
of problem because we create new object
with selected, this one. I will go to set
origin to geometry. And now it might take to rotate this on x axis by 90 degrees
and scale this down. Move this up and
scale on the y-axis. And this will be one. And now go with
Control a and applies k. I will now create a new material and call this
file and go to Shading tab. And with the period key twice. We get to this object
here and now I will use this material
from textures.com. And I will put the
link in description. So I will bring this to render and connect
these two base color. In edit mode, I will
go into production. Now say it's smooth and I
haven't done auto smooth here. And we can in UV
editor just scale this a little more detail here. Maybe a little more. Stroller and control me. And all t and they've
stood alone normals. We can add this detail here. I will select this, hit
Alt, this edge here, and go with control V. And then repeat this
and maybe here. And I will now, I will skip this little end. The lubricate this object. I can rotate this
maybe on, on my axis. So press X and Y and
maybe rotate the solid and shift dx and maybe I'll wait one more. I think this looks okay for now, but we have a few problems here. First, this, I've seen this guy here which
is completely black. We have this intersection here. So I will bring this up, select this shift and G
to grab the z for z axis. And you can hold shift
for slight more. And to avoid this sky here, I will just read some plane. And I replace one plane here. Like this is another ceiling. And I think I will
extrude this z-axis. Now, delete this face here. Okay, I think now
it's much better. We cannot see this guy anymore. We can create the mesh
here like so. I will try. I will duplicate this object. Should be. And now we can
move this on the y-axis. And I will press P to
separate these by selection. And we can go with
the numpad period key again to work only
on this object. And I will remove
this material and on the pipes material, same material like before. And now I will go with
added more than control are a lot of Lucas here. On the x-axis also in the
press a to select all. And now we can go to Face a poker face and this face
again and these two quads. And now we get
this type of mesh. I can go with a modifier or no, I will go with Control F
and go here to Washington. And before clicking anywhere, you can find this menu here and you can change the
thickness of this. Maybe 1 mm centimeter. I will remove this
bevel modifier because this creates
a lot of mesh here. And we can see how this looks. So I will first set origin to geometry and now with all
the make a duplicate. And let's see how this loop now. This is before and after. I think this measure
densities to high soil. You can change this
or I think I will, I will remove this. We don't need the
complicated this too much, so you can choose what to like.
16. 15 - Post-processing in Blender: I think we can now go to compositing and make this
a little more realistic. So first, I will
go to this layer properties tab and
turn on Miss past because we will use miss
passed later in compositor. And I can see how
this Ms pass loopy. If I click here and go
to this miss passed, and I can go to Properties, and I can see tab. And I can change
the look of this and this value is missed start. She's like 7 m from from
camera to miss the start. And this is where missed end. And I will try Ableton,
this value here. And now I can, I will make here, combine it. And now we can press F2
and render this again. And now we can go to compositing and click
here, use notes. The select this node here and go with Control
Shift and click here. And now we bring this over
note in to our scene. To zoom this out, you can press V or all three, doesn't this scene,
this compose node, these are random result. And if we search here, we can also see we were not. And now they are saying, and I will now just
disconnect this because Don't confuse
you because this is now same and we can work
here in viewer node, which is what you see here. And when we are happy
with the result, we can plug all these to
compose node to our render. We can start now with glare. So shift day and search for I will go with fog globe here and we get
this nice glow over lights. So I will bring this
if we go up with this faded this here. I will copy this again. And I will now go with streaks. And I will say this
because it's too much. And we get these details
here and also here. And you can see before
and after if you select this node and press M to mute. And this is before. And now again M, and this is after. And I think this is too much. I want control these
two nodes together. And I will go with mics. And I will connect these two. First input and
this one to last. Now I can. So this second input is one hand first is zero, so I can choose
how much I, right? So this is without
glare and this is it like 50 per cent of this glare every war about 50%. And you can see that
this is not real time, so you can read this. Next. We can add
the lens distortion and lens and this person just by lens distortion old and I'm
going to bring this fifth. And if you increase this value, we get this wide angle camera. And now it's more like a security camera
or a GoPro camera. And I don't want
too much of this. Maybe just a little. And if
we increase this dispersion, we get this effect. So I want to also literal
this, maybe 0.04. And this is before and after. Now we can add
this to our scene. And if I press Control Shift
and click on these nodes, we can skip between
these policies key. And here is how our
midst first look. I will go with next RGB here
and first color will be, this will be first
color, all these nodes. And second color is white. And I will use this. Mix us vector and
plug this here. You can see how this looks. So various white color in our midst Is this color and all the various black
is this core here. So I can change this white
color to any color you like. And to control how much the intensity of
dismissed, we can use, color them in this miss paths. So if I bring down white colors, it will, it will be
less missed here. And if I bring
this bright color, it will start from, from far or opposite. But I will not use
this white color here, and I will use a blue marble. So miss this, usually blue. So I can go with blue. And I can plug this image here. And now we can increase
this to about 300. Okay, we need the date.
It's a little too slow now. We get to this image, just blue or red. And I can use this here. And with Control
Shift and click, bringing back this here. And this slowed down a lot. So now you can see that here is a little rodent and it's
not too much visible, so I will bring back this white
color to be more visible. Okay, and we can add even
more white color here. And this will add
the more mist here. I will just plug this
in composite node. And this is our random result. So I will go with f 11 to make our image editor
and you need to wait. Okay, this is allow render
result and this is oval node. And you can see the difference. And this is with
compositing and this is, I think this miss
false is too dense. So I will bring this
little more tube-like. Okay? This is before and after. And now when we are
happy with this, we can plot this to compose. Because when we press
enter, we get this. And this is just a viewer
node to see what we do here. And this is just a simple
compositing post-processing. And we will do all
post-processing later in, After Effects. And I note one problem here. You can see that this path
is not match with our scene. And that's because we, our main render, the source light and this
light blue here. We need copy this node
here to our miss paths. And you can see now
this fix our program.
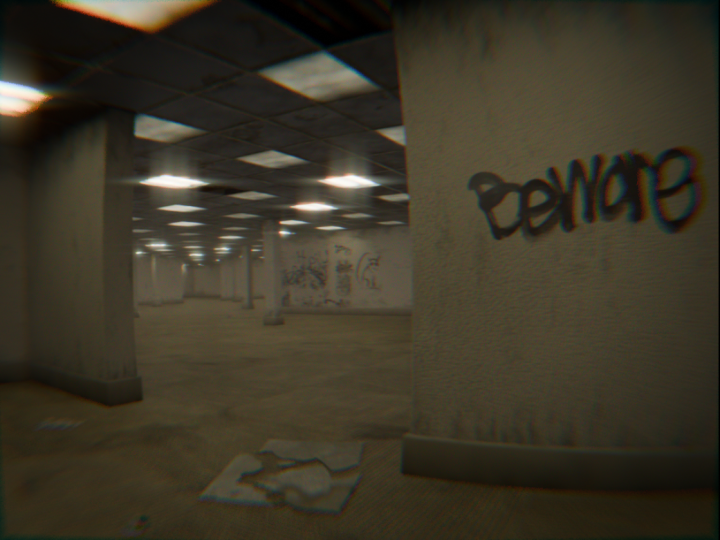
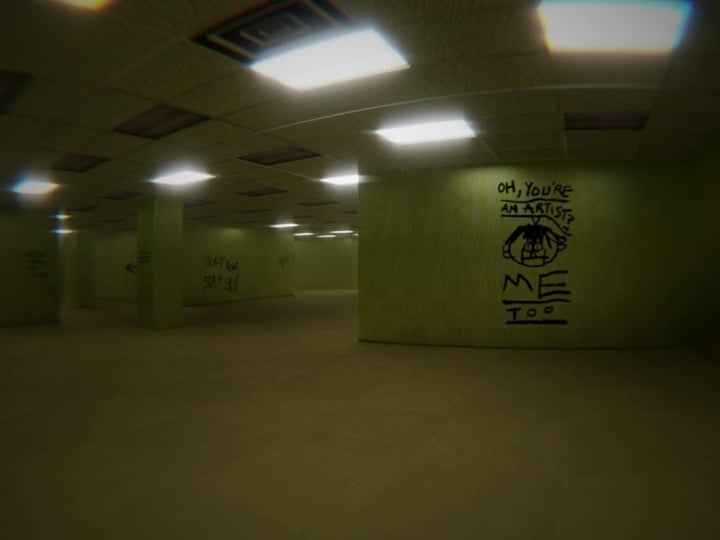
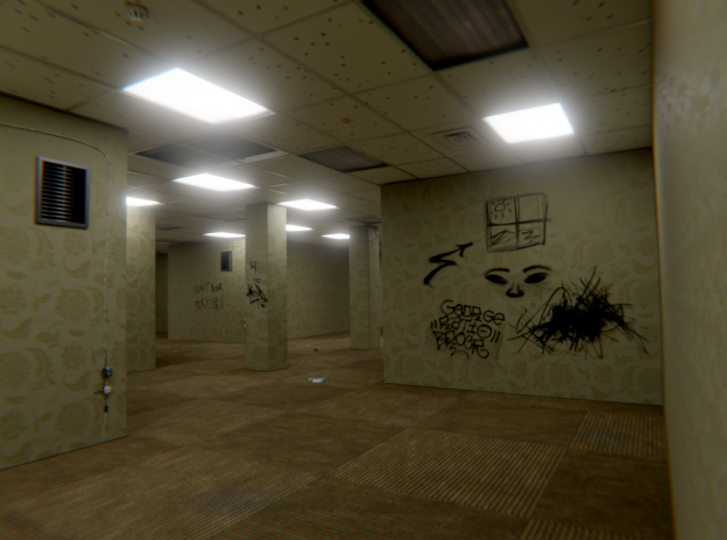
17. 16 - Graffiti and leaking: Now we can get some
graffiti on walls. And this photo site
take yesterday, and I will share this with you. But I also find some
textures on textures.com. And you can go to textures.com
and search for graphics. And you can download
any of these. But I, I try and find some
high contrast the graffiti because I will isolate the fetus from background
with color ramp. And I don't want to download
something like this one. And this one is good because
it's black on white. Then I can easily isolate a
background with color ramp. And this one is also this one. This one. This one
is a bad example. And we can now jump
to blend them. And I will put the origin here, copy address of this folder. So now we can go with shift day. First unit enable
images as plain add-on. So you need to go to Edit
Preferences and search for images and
enable this add-on. Now we can go with sheep Tay, and image images as plane. And I will navigate
to this folder. I will start with this one. And I will go with a G and Y. And Moody's salad alone y-axis. Because before it was
overlapping with war. And now I will go
to Shading tab, double top numbered period
key to bring this here. And now we can see what we do. You can see that we have
Alpha value plug in alpha. But because this is just a
JPEG image and it is not PNG, there is no Alpha value. And I will unplug this and I
will go with cholera and I will try and get the
alpha value from this color information
like this to Alpha. And now you need to flip this here and I
will try to isolate this background from Lockheed, something like this. And I will not go with
completely with black. And we'll just add
a little white. I will add just a
little red color here. So all graffiti will
really tell a transparent. Okay, and I can go with k. I
will remove this part here. I can go with Control R
and remove this line here. And just delete this edge. Okay? I think it's
better if we select these vertices and
delete vertices. And you can see that this is a simple but effective way to add graffiti or anything on war. And this brings a
lot of the two RC. So I would just make this more, a little more transparent. Because before it was too dark. And I see this line here. And I can go with K. So just go to any more
than press K. And you can always cut some of this and remove these vertices. We can now add the
more graffiti. So I will add the one I
take what all yesterday and just go with shipped
a image, images as plane. And I will go with this one. And now just go with my T to rotate this on z-axis
by 90 degrees. And I will check
face orientation because if you look
at this on this side, and now it should be red. And red is incorrect. So I will take this on
my 180 degrees on z. So I will now move this little. And we can repeat this
process. We look before. So colorRamp and inverted this here and we
can see our feet. This green color is too strong. I can go to Shading tab and I can add hue
saturation node. And I can bring the
saturation down. And you can now repeat this process and add more
graffiti to this false. And I think I will speed up this process or skip
and see you later. I can also use
this technique for the dirtiness or
leaking on the wall. And I search on
texture.com leaking, shoot and I download. Some of these textures. Should take image,
images as play. Rotate this on z axis
by 90 degrees, G and X. To bring this here. And just check the
face orientation is good and I will
go to Shading tab. And because this
is a PNG image and this Alpha value works now. So I can just go here
and put this position. Because this is transparent. You can always go with Viewport display here and
now I can see my texture. So I will go with the g
x and bring this here. I will also shift D and bring
this here on this area. And I can scale this one z axis. And this is before and after. And I will add another one. I will go with this one here. Shift images as playing. I think this one is good
and rotate this one z axis. And bring this here.
18. 17 - Garbage and details: We can now add some
garbage on floor. This is Brent by I
prepared for you and this is photo scans of
garbage I made. These days. We can
put this on floor. And this I also take photos and only this object and this is like electrical installation. And I will start with this. So I will copy this object. And I will fight ceiling or no. This here, and
here's our object. I will put this on
this also rotate this on the axis by 180 degrees. So z 180 and stick to this rule. Okay, something about this. And I will now go
with the curve, shift day occur
and Bezier curve. So first I will set origin here and now go with
curve, Bezier curve. And I can rotate this on
y axis by 90 degrees. And I can now go to
edit mode and this. So I will isolate this curve and I can go to number
seven and line up this. And now we've turned on
petri to write orthographic. And I can rotate this on x-axis and line up
for this wholesome. And now we come
back to our scene and I will go little
out with this. And now x2x to the n, z for z axis. And we can extrude
this one z-axis. And the Extrude one y-axis
also and rotate on y-axis. So SYN or Davison y-axis. And go to number seven and
rotate this one z-axis. And now we can select these vertices and
press S to scale, to scale this here. And I think we can
rotate this one x axis. And we can now, or
the thickness to our curve and this
will be our cable. So I can go to occur here
in the tab and geometry, and I can add that
here in better. So I will go with 1 cm. And I will also extrude this z-axis here and scan
this and rotate on x. And just more here. I want to bring this object
here in the foreground. I will also duplicate this
with Aldi and move on y-axis, then rotate on z-axis by rotate
Z or two by -90 degrees. And I will put this
one on this wall here. I think this cable is
to white and to clean. So I will try make a
metal texture for this. I will call this gamble with
numbered period key twice. I really try and add
some dirt in SQ. So I can go with noise texture. And with Control T or the texture coordinate then mapping note and we can see, okay, I will add
more details here. First time you try
with the object. And we can see some
variation here, but we need to call them. And tweak this. And I will go with more details, could be something like this and I can just know
more colors here. So first, I will
go with brown and maybe little yellowish
and the right color, but not completely white. This is before. And this is after. And I forget one thing here. I will add this graffiti,
two separate collection. So I will select all
these graffiti and press M and create
a new collection. And now we can
easily remove this from our scene if we want
later and keep this organized. And those same with
this leaking textures.
19. 18 - Lighting and details: Remove this ceiling
huge in Newport. And we'll do this. I will share with you
and I will copy this here and just read control
removed camera and this floor. So I would copy this and
paste here in our scene. And I will bring this empty
space and press M and other, these two new
garbage collection. And I can now alter
the move to our scene. So just all D and
move on x-axis. And they were just checking, is this one floor? And two can play with this. No. No, I didn't make
one test render. This is how this loop for now and I will play
more with graffiti, this leaking texture, garbage, and see you later. Before we continue
with the curation, I think it has more sense to
make all walls and the maze and predict where our character came and I will go through. So then we can decorate or I don't want to
long animation here because these costs then
the time and I want to maybe 30 or 40
s long animation. We can make our
character through, through here and maybe, maybe I can make a
longer hallway here. And I will now start
to copy this evolves. And you don't need copy me because in bedrooms,
everything kept sense. You can just make random
volts and it will look good. So I think all call
they will be here. So I can duplicate
these columns here. It's shaped D and rotate this
on the axis by 90 degrees. So 90, and maybe I can put this here and look
within this one more time. And with shift or I can
repeat this process. I can duplicate this
fall and go with D. And also this should
be around the x-axis. You can jump between object more than edit mode with them
button on your keyboard. And you can jump
between this vertex, select the Edge, Select
and face select. If you press 12 or
three on your keyboard. So I need to select, and I can select
these tools here. So I would select
this row here and the control deselect this floor. We need more space here
so we can go to Edit Mode and select, just move this. And now we can more space. And also on Vioxx, they will duplicate
this row here. Maybe I can just next to this. And maybe I can
duplicate this shape and make something like this. And this is a uniform, but I think it can be. It can look good. So I will just make
one more here. It should be and all this way. So go to this area. What I think here's
two empty, so. Maybe we can duplicate
this ball and place here. And we should lubricate this
and repeat this process. And we can take this scale
is on x-axis by minus one. To flip this like something
like this and duplicate this. Now we need the
more sealing keys, so I will just duplicate this. It should be and
this one y-axis. And in edit mode, just delete this vertices. And I will just move
this precisely. So for glib and y, for y axis, I will join this. Make one object
and it should be, I can move this on x-axis. Okay, I think this is enough. And I will just move
this wall here. Now we can go through
all these walls in render mode and see how these
look and play with light. So I will turn on ceiling
because this is our writing. Here. I will move it. One
solution, extend this 200. Now all render time. It'll be three times faster. Step 11 and these two slot one. So we can later compare results. So I will now press F2 well
and see how this look. Okay, this, this
is first frame and this local wood because
we said this early. So I can go to second slot and I will press the number
zero, select our camera. And in x-ray more than we
can select our camera. So we will go through
this way and I will set camera here and we'll
do another render. Okay, I like this
dark area here, but I think he is too bright. And first time we
rotate this camera to see better what
happened here. And maybe we can
do the same with our camera animation later life. Our guy look through
this hallway, so I will move it left well, okay, that this area is too bright so we can
play with light. And we can now turn on this material preview
to see our lights here. And I'm enjoying this ceiling. So now we have one object here, and I can go to edit mode. With this face selection. I can select some of these
lights and turn off them. So I can go to material properties and
assign this light off. Now we can compare
before and after. Okay, I think I didn't
select these slides here. But I want to keep this area a little bright so
I will try this. Okay, this is a
before and after. And I just want to make one role here because this here we see Blake and we can continue with going
through scene. So I will select Camera here. You can jump to number zero
and select this plane. And now we can go
through this area. So I will move camera here
and rotate this on z-axis. We can jump to slot four
and see how this area, okay, in this area here, I will turn on these two lights and now we can compare
before and after. So this is before
and this is softer. I want also likely in
this hallway here. So I will select this. And I can, I'll
play with this a, I think this is methanol, so you can play with this more and you can make
atmosphere you like. And we will also go
through this hallway. So I will put the
camera here and rotate this one z-axis
to see how this look. So I will go with g, y for y axis and move
to this line here. And this is before and after normal intersection
here with lights. I think you understand
this process. So we need to go through
area where our camera will go later in animation
and fix intersections, lighting and add more decoration like a graffiti,
garbage or similar. So I will play with
this and see you later.
20. 19 - Skirting: I'm done with the
declaration now and I add a lot of graph. It's garbage fives, ventilation, smoke detector and
all this stuff. And now we can continue
working on new stuff here. The next thing we will create
here is edges around walls. And I think this is
called an English molding isotopes for molding and I found something similar. So we need something like this. And the first, I will
select all walls and I will join
them in one object. If you select rockets
on something another, which is not what you
can easily dislike, this hold Control
and just slide. Now you deselect a boat
objects and just hold shift. And you can select this fall. And you need all time hold shift when you're
selecting volts. So I think I'm done. We don't need the
select this war because they are not
visible in camera. I need select this one. And now I will go
with the Control J. And now all these
walls are one object. And I will now go with numpad to isolate this
object and numbered one through four front
orthographic view and turn on x-ray mode here. Go to Edit Mode, select Edge Select here. And I will now select
this bottom part of this. And now go with Shift D
to duplicate this object. And you can see we isolate these edges down and now I
will press P and selection. And now this is a
separate object. We can select this and this one. Back to our scene it
non pet period key. And then only select
these edges down. Okay, we need to go down
and she resolved edges. And the next thing I will go, I will do here is
go to Edit mode. Press a to select all and E
for Extrude and z for z axis. I think I need more these edges. So I will go with the G
to grab hold of z for z axis and ships for a
slightly more of this. I think this is good.
And next I will do here is I will go to modify and
odd solidify modifier here. And now we can add
thickness here. And this level is too strong, so I will add one or zero q. Okay, We can try it. And I will now on the
other material for this. So we need to delete
all these materials. It's X7, this real, so this material is this one. So I will need, I will keep
this first material here and you can remove
material in edit mode, so you need to go
to object mode. Then I will now delete
these two materials and duplicate this one
and call this edges. So now we can go to Shading tab and numbered period key twice. We can bring this object here. So I think we can try
not to be doing what with like a generator object. Okay, I think this
looks pretty good. I will now just change this color to make difference
between this and so I will add something about this color and I will bring valuable down to
make this more darker. And now we can make test render. And this is before. And I think I don't like this too saturated color and haven't
tried play with this. And also the little
more thickness here. Maybe about 3 cm. And maybe it's too dark. But you can play with
color. You like. So I will I will add the
more yellowish color here and maybe bring
this little off. And we can see this little
blue, red dirtiness here. So I think this is from
this texture here. And I will go with Control T
here and adjust the scale, this ball, maybe
five times or ten. And if you see this image here, you just need to switch
to run the result. And you can make
another render with it. And if you don't want too much flour and
concrete texture here, you can add another mix here and mix all this
with just a colo. Okay, and then now you
can choose how much you wanted this textures
here or just color. And Davis talk on about 50% here and you can make
another test render. Okay, I think it's a little weird for
now and I will stop. We spend too much
time on these edges.
21. 20 - Seams: So now we can try another detail to bring
a little realism. So if you look at these walls, they're completely
perfectly flat. And because this is
a carpet on a wall, they shouldn't be
some cuts or seems. And I will show you how
I do this last time. If you look at this render, you can see cuts here
and also here one. And also in this area
and this logo in random because this catch lights, I think this is a
very nice detail. And you can see also
on this renders, you can see this here. And it's much better
than we do these things. And also here. And one here. We can create this very easy. So I will first
find the ceiling. I think I will duplicate
this face here. You can duplicate any phase and I will prove it should be. And big selection. And now this is a
separate object. And I can just add
solidify modifier or just extrude this on x-axis. And I just want to maybe
1 mm or 2 mm here. So I will, I will
go with G to grab x or x axis and hold the Shift to slightly move in this set origin to geometric and scale. This on y-axis. Can place this
object in overall. So I will go with g, y for y axis and hold shift
and move this about here. And duplicate this with all to D. So all we need Apply Scale
because we can see that our weather doesn't
work correctly. So control a scale. And now this works correct. And I think I can scale
this more on x-axis. And I will bring this, the segments to three
and Apply Scale again. And with all the, duplicate this again about here. And now I can just copy this
and put on these goals. And we all day and
move this position. And all the again
and XX x1x axis. And we can repeat this
process with Shift R. And if we go with double resolution
here and with more samples, this will be more visible. Okay, you can see how
this is an hour visible. This is without
and this is wheat. And we just made now copy
this and place to place.
22. 21 - Spider web: I said in the beginning
of this video, we will make also a spiderweb. And you can see in this, my random how this
detail look like. But I try in vector form, send the list no tomorrow sense because it's not so visible. Because our camera is always far from ceiling and the walls. But I will show you
how I do this here. So you can see this scene and you can see this nice
detail here and also here. And inside this object falls. I download this
image from fixed, some band is free. You just need to
search a spider web. And now I go to blend that and
I make same reduced graph. It's just the import
images as plain. And plug these two color and
plug these two color ramp and you just need to isolate
lakes and white color here. To make this spider transparent. I think you can
also plug these two admission straight and you can, or you can increase
this visibility of this spider web because this white color
on our little MAC. So this is before and also can make this plane more
three-dimensional. If you go to edit more
than press K work knife. If you cut this object,
something like this, and you can now back to Layout and I will now
go with subdivided. And you can see this temp here. And if you go with fractal, you can deform this solid. Now this is more
three-dimensional. Or you can go with
selling some work. This is angle with
proportional editing and with G and C. You
can also deform this. And now you can just
copy this object and we can place where you want. And I can scale this
rotate and position. And you can see how this render. This is adult and this is sweet. So you can decide if you want to detail and you can
play with this. And if you want to delete
all this in same time, you don't need
click on each one. So you can go to
select linked object that because we use
old D or you can, because they are same material, you can also move it
select linked material. And this shortcut is Shift L. And now you can choose
material or object. And I will delete this.
23. 22 - Flash-light in hand: The only one light source we have in this scene
is from the ceiling. And if you look my last render, you can see another
one source here and this Cerner present
battery light in hand. So you can see this
through 4D render. I think this helps create multi-color
atmosphere in our window. So we will create this
now. You can see here. And this is especially visible when you
are close to moles. So I will show you how
we can create this. Remove this ceiling
from Newport. And now I will go with I will put the cursor here and go
with Shift a and add light. Spotlight. And I will bring
this up to about 1.81, 0.6 meter, maybe, because
our camera is on 1.8. And if we imagine that this
is in the hand of this guy, I will bring this little down. And now I will rotate this
by 90 degrees on x-axis. And also I will follow the angle of this
camera here and z axis. Something about this. Or maybe we can copy
this notation here. Okay, and the next
thing I want to do is parent is to object. And first I will select the
light source and then camera. And I will now go with
controlled p set to object. And now if we
animate our camera, you can see that our source of follow-up came out all time. And if we select
the light source, so we can see in this object data properties
tab called disliked, like look and I think I
will bring this maybe 16. And you can increase revenue
source and spot size. But we'll try and make this standard to
see how the slope, okay, and we remove our ceiling. And that's good for now. So we can clearly
see how this look. And I think I will
go with radius down to two cover less a here. And now I'm back on a ceiling, then we can make
another test trend. And you can play more
with this setting, so can increase or decrease
this power of this slide. And I will bring
this radius down. If you look this,
my last render. You can see that in this
area there is a few lights, but when I close this door, there is there is no
lights in all this area. And I think I get this dramatic and
horrible rich atmosphere with only this light met that in all this area is only
these three lights. This one, this n, These 24 lights and most of these slides come from
this battery in here.
24. 23 - Camera animation: And the next we need to
do is camera animation. So we can imagine that our character will go
through this area. You will find something
strange here. That's how basically every
veterans with the finish, so I can replace
for now tube here. Just to know where our
character needs to go through. And I will show you two ways. You can animate camera. First way is a better way. And this is this add-on, Gemara. Shaky, my add-on from Ian Hubert and this
course, I think $7. So I will share a link with you. But if you don't want
to buy this add-on, I will show you a free solution. So first I will show
you a free solution. First thing, I will
increase this timeline here to maybe 1,000 frames. And we said here, frame rate to 24. You can see here in output
probabilities here is 24. So if we have 1,000
frames by 24, we get the 40 1 s
long animation. So I think we need
more seconds here. Here. I will select camera
for now and I will set. I think I have a range here. So I will delete this one. And I will set camera to
first two position here. We will start from here. And I will rotate
the camera a little. And we are now on frame one. And I will show you how we can animate Gemara like in any game, which WE as the
buttons on a keyboard. So if you go to 02
camera view and there is one option or call
in their view. Navigation. Navigation. And if
you click here, you can try to play with double VA is the buttons
on your keyboard. And you can see that we can well through our scene like in game. And now when we know how
to go through scene, we need just record this. So I will make two camera view. If we activate this
auto gain button. And if you press Space, we start our animation. So now we need to go to View Navigation and
walk navigation. And if we now go
through our scene, we can see down that we
record our animation. Now we can select these keyframes
and bringing these two. First one. And if you press
Play Space bar is for play. Our animation. We
can see that we have recorded the
animation here. And if you want to speed
up this animation, you can select all
these keyframes. And you can scale this, press S and X for
scan this on x-axis. So SX and just put moles
on this area, S and X. And now you can see
that we scale this. Basically we slow down. We need scale this on
this, on the left side. So we speed up this animation. If you are not hip,
how you record this, you can always delete these keyframes here
and start again. The one-to-five will
show you here when you press Space to play, you'll navigate to
this new navigation. Navigation. We lose
a lot of time here. You can go to View
navigation navigation, and if you click
right-click here, you can add to favorites and now you can press
shortcut you want. So you can see I
press Shift F here. Just don't take like S and G a because we use this
shortcut for scale, Grab, Select and similar. So that's the reason I choose
a shift up because I know that I don't use this
shortcut before. And now when I have
a shortcut for this, I can try again with this. And now I will press
space for start and shifted for navigation. And now I can use
the buttons skew. Bring this first frame now
and I can see how this look. We have another problem here. I will press space
now and Shift F4 walk navigation and which WE as
the I will go to scene. But if I look up to ceiling, you can see that we
will go to space. And if I go down, we will go through floor. I want to all time we give
this guy to 1.6 meter. And how we can do this? We can do this easily with
shortcut G. So are we press Space for Start Animation, Shift F for work navigation, and g for gravity. And now I can go with WE. A is d. And I can move my mouse. And you can see I'm still
on 1.6 m on z-axis. And I will try last time, I'll record something
with this method. So turn on this auto king, space for Start Animation, Shift F for work navigation
and the g for gravity. And now we can go with
double V. Is the liking gay. You can move your mouse and
look to floor or ceiling. Various Cuba will be like
a monster or something. And I will look on
this object here. When I'm happy, I just click and press Space to
stop animation. And I can bring these
two first, Graeme. Okay, I will delete this one. And we can bring this start and you can see how this looks. And I will speed this with
Sx and bring on left. And that is flipping. So you can make
this look better. If you want. You can
smooth this animation. You can open this
window here and I will go to graph editor. If you go here with
the smooth case. And you can see that
the shortcut is Alt 0. So you can click here or you can go with the shortcut Alt. Oh, and you can see how we can smooth this animation here. This will be more
smoother animation. Now, you can do
this if you want. This is how you can make
this animation smooth. But if you want, make this animation more shaky, you can open here location. So I will select for now x
location and I will press, if you don't see this tab here, just press N on left side. We can add noise
modifier on this x-axis. So I will select here noise. And if you press Start, now you can see
that our animation is noisy on the x-axis. So I think this is too much, but I will go down with
these values here. This is still too much. I want my 0.14, 0.05, 0.01. So you can see that we can get a little shape on the
x-axis, but we can, we can copy this here
and we can go to Y location and paste this
also on right location. So we now have shake
on x and y axis. Then we can do this, also leads to z location. And you can play with
these values here. But I will now show you
another way how he can animate came out with
this add-on here.
25. 24 - Camera wobble addon: And it will join Ian
Hubert petri on, you can go to this
add-on tab and you can find this Gemara
shaky fire Aidan here. And if you click here, you can download
this from this link. And to install, just need to go to Edit Preferences installed and select it from your computer and click Install here
and Save Preferences. Here's a venule next
time open Blender, it will be when we select
camera and you go, I will go to numbered
zero to camera view. In the camera properties tab, you will see here camera
shake it by Arlen. I will add the new
shape type here. And if you press space, you can see that our
camera is now anemic. And you can choose this. You can just type from here. So if you select this
by quantum gravity, you can see how this look. If we watch this video,
you can see that they record this in real life. So motion tracks, camera shakes from real life
than it had been movable, Lego with car and
today phone or camera. We record this, this animation and you can see if
we select this, our car window that this
looks really they dry. You can play with. We can
test all these camera shake, but I think I go with, last time I go with
candy, come around. This, look really like a. We go through this. We will go through this space. Can play with these values here. And if I increase
this to two times, this will be much more intense and you can place also
play also with this game. I think this is too much. You can also go
down with this one, you too small to this animation. And you can also combine two animation here you
can add another one. And like if you add
this by Robert, you can see that both
of this animation, but this one is too intense, so maybe we can adjust
our little Otis. Okay, I'm going to remove
this and keep only this one. And the only thing
you need to do with this ethanol is odd
more keyframes. So old guy go from this area and I will now go to
about 20 frames more. And I will move this
guy here and rotate a little camera and
add another keyframe. Sweet. And I will go to about here and
move this guy here. I'll rotate this and
insert keyframes. Okay, this is now too fast, so just increase this until this loop nacho comes to here, and now I will add
another keyframe here. Rotate camera, and
insert keyframes. And you can also, I will now go to here, and we can go between
these two frames. And I will go to
camera perspective, and I will also look to ceiling. Now and see how this look like. He looked to ceiling. And now I'm going to
go to about here. Rotate camera, lethal end. This is too fast and I
will adhere to floor. Move this a little on z-axis, insert another key frames and I will go a lot of frames or more now. And I will move this to the end and insert keyframes
to see how this looks. Too fast. And I think
this is still too fast. You can add the key
frames in between, like I will insert a keyframe
here and on this area, we look to this hole right here. And now I will make look to these following any cell keyframes and
we get this animation. Now what we are here, where is our master? And I will now insert keyframes
to this influence here. And I will now go with influence more down and
set another keyframe here. And you can see
where we stop here. And we look now to
our monster here. How we can find this keyframe. You can just click
this button here. And when you see, when is this yellow, we find these keyframes. So I will go to this one and I will increase
this influence liter. And we tie here. And now we can see
how these look. I think we can add here this investigation
type, camera type. You can see why I like
this setup because we can control everything with
only ten keyframes. And we get to more natural
camera movement here. This is too fast. I will play more with this. But I hope you understand
how this works.
26. 25 - Mixamo: I'm done with the
camera animation and I will show you how these
look in material preview. Now we just need to replace this cube with
something interesting. We need to fix two
things here because we join all these
balls together. Now we need to fix this
Boolean like this wall and the Boolean again and just
shows this object to fix this. And I have 2 mol here. So another Boolean. And so this object. I will also active
in this motion blur. And this will add a lot
of realism in our render. So I will go, I will activate
this rolling shutter. And if you go more
with this value here and less with this value, motion blur will be
more reasonable. So I will go over all
these values here. Now we just need to replace
this cube with something interesting and great
software for this is Mixamo. Luckily, you don't need to know how to make a character
send the animation because this is not easy and we can do easily
with this software. So even just need
make a free account. If you go to Character stamp, you can see a lot
of free characters. You can try any of
these you like. After you choose your character, you can go to
Animation tab and you can add the animation
to this car up there. And I think I will
choose this one. But you can choose any
of these you like. So you can search for this name. And for animation. I will use this one
crawling backwards. And now we can download this. You just need to click here
to download and choose this vx 7.4 and the 24
frames per second. And you can download
this animation. And now we'll just move
this to your computer. Now we just need to replace
this cube with our character. So the width of this cube. And go to File Import vx and vy. Find your FBX file
on your computer. Okay, here is our character. And you can see all these
keyframes are here. And I will now move our
character to position. We can move timeline here
to see where is our wall. So we need to put a character
to this wall camera. And I will now rotate this
on y axis by 90 degrees. On x axis by -90 degrees. So plus x minus nine. And you can also hit G to
grab x for x axis and move. Now, I want more, this one y-axis, so g, y, and we can move
this out of here. And also g z for z axis. And now I just said, okay, not this one. This one. Now, I haven't said that
this character is moving when this guy with the
camera comes to here. So I will say camera
and let's play. Okay, here about
11,000 is frame. I want, this
character is moving. So I will now select this bone. And I was like these
keyframes and move to here. Okay, But this
animation is too long. So I will cut this. I want to cut all
these keyframes before and after this. Now we have only this
part of animation. And now I want
these two position. Okay? I want to start getting them
moving a little before. So I will move this on
that and let's try again. And I can see now this
in camera perspective. And now we can make one test
render to see how this look. And I would just
rotate the camera on x-axis here a little. So I will put one
to keep them here. And now we move
camera on x-axis. And seeing all this look, not ceiling and we can
make a test render. I think this character
is a little too dark, so I will just play
with this material. I will go to Shading tab. And here in color input, just add RGB curves
and bring this up. Two materials, so on
doors. So it at least one. Same thing. With Mixamo. You are not limited only to
these characters. You can find here. You can upload your character. And I found, I will show
you how I made this one. I found this for this human-based mesh
for free on blend sweep. And I download this and
important in Blender and I make some changes see in
modelling in materials. So I just cut this part here in with the Boolean and
just add some greebles here. And the model, this part here. And then I export this
file, export FBX. And then I upload this
to mix some more. You can go here to
upload character. And now we just need
to set the points on here so you can see
referenced on the right side. Now we can apply any of these
animation to our character. Now when we are done, we just need to render this. So I will make viewport shading here and go to Render Settings. Then my suggestion
here is to first, first time we select camera to see various when our
animation is done. So I will stop to about 1,200. And we need to
render 1,200 frames, which is divided by 24, which is 50 s. And my suggestion here is
to first render this in a very low resolution and see how these look in
when you are happy you need, you can increase the resolution. So I will send this to 50, 50 per cent of
these values here. And I will go with low
while loop samples maybe and two samples. And now I will create a folder where I
want render this animation. And this will be test for. And here in output
properties and just choose this folder and
send this to J peg. And now we can
start render this. So just go to Render,
Render Animation. Okay, This least
five second frame. And just check your folder here. And this will take a
walk handled two tau, 1,200 by 5 s, 6,000 s. And this is in minute
hundred minerals. So after 1 h and 40 min, you will see how this
look and then you can go. If you are not
careful, you can fix some issues and
if you are happy, you can go with the
double resolution here and with more samples.
27. 26 - Creating an animation: Now we are done. We
can see how this look. And you can see that this is a low resolution,
low-quality image. If you hold the button for next, you can see how this look. But I will render this out
to animation goes smooth. I will show you how we
can do this in Blender, but I really liked that. It was aftereffects for
this because I will also do post-processing here and some other stuff
in After Effects. I will go now too,
video editing. And here I will go to Add Image, Sequence and navigate
to your folder. So I already rendered
this high-quality image. So I will go with these images, see here with a select
all these images. And click here. And now you can change
your resolution. And I will go here with
24 frames per second. And here I will
have three types. And I will go with me. Shows here all live
in a very one. Save this video and you just need to go to
Render, Render Animation. Here is our render. And if I open this now, this will be 24
frames per second. And the final render I
go with this resolution. I increase this to 150 and
I said samples to 200. And I get this resolution
here, 1536 by 1152. And if you look
bedrooms example, as you can see that most of them are not in high resolution. You can see how this
is blue or red because they mostly try achieve old
camera wake edges look, which is not a high
resolution camera. So if we go down
this resolution, 100 or 5%, it will also look good
because you will get this old camera effect, low-res. So you can decide
how much you want, the sample size and resolution. If you have a slower computer, you can go down with this. If you want more details. You can, you can go up
with this resolution. Because I worked hard
on all these details. I will increase this resolution. And I will try make something
different with this Render. Blender assignment for my last, Malcolm's widow are in a
lower as in low variance. So this is thousand 24 by 70068. And you can see how this loop, this loop also good.
28. 27 - Post-processing in After Effects: Now we can do some
post-processing in After Effects, and I will share
this file with two, so you can open this file. And this is mostly just
a color correction. And later we will also
add the UK just overlay. And I cannot share overlays
V2 because it's not mine. But I will show
you where you can download the package,
like this one. And how you use this. First thing you need to do is delete my render result here and just double-click here
and import your renders. So just check this
important JPEG sequence and for this here, set to 24 frames per second. And now move this
to bottom here. And you can see that
this resolution is too big for our resolutions. We can change this
solution here in a Composition and
Composition Settings. And this is my resolution
and this is a duration. So you can, if you run the
more frames you can change. Here. Durations. I will now select this render result
and press S to scale this. And they will scale this down this new line and go to Composition. Composition to work in the area. And now we will cut this
part we don't need. Now I will turn off all these effects and I will just quickly
show what I do here. So first one is green. You can see before and after and just a little green here. So I will delete this
and you're just going to go to New Adjustment layer. And I will rename this to grain. And just go with the
auto-grade effect. And this here. And you can set this
to final output. And you can choose the
type, grain type here. I think this is too much. So you can put here
maybe 0.5 hour. You can rest t here and set
the opacity to maybe 2%. Because I don't want
too much on this green. Next thing here is this
color correction one, and I call this S curve. And because I use this
in algebraic curves, I use this S curve here. So I just want to show this
strong black colors here. And also whites. You can see this affects mostly film and this is the example. So you can see this
black color here and a black color in this film. And also white wash out. So you cannot see too strong bright colors
and those strong contrasts. So you can add this curve
as current vertex here. Just go to Lumetri Color. And lumetri color
is in After Effects is basic color correction
total with all this option. And you can also add
this in Blender. If you go with sheep
day and color, you get all this color
correction tool here. In after effects. They are
mostly in this Lumetri color. So if you don't
use After Effects, you can also play
with the blender and try and find
this option here. You can also search for curves and just add
a few points here. And you can also
make S curve here. So I will now go to Curves and just make them
slightly S-curve here. So bring the blacks
more to whites and whites more to black and
make a little contrast here. Okay, I said to opacity to 22. So this is 100 with no past. I will set my thirties. Next one is color
correction base. So you can see effect of this. Mostly add a little
green tone here. I will set this
opacity to one harder to see better. How these look. I can do to Lumetri color here. And second one is just I play with this color waves
and I add the little green to midtones rule used to shadow
orange to highlights here. And the first one is just basic color correction options here, I added this thing minus, so this will add more
green color here. If I go to plus, it will add
more reddish color here. And I also add highlights, shadows, whites and blacks down. And I go to saturation down. So if you go up, you'll
get more colors here. If you go to zero, it will be black and white. But I will use only
20 per cent of this. So this is a before and after. So just little greenish
tint because I think this is too red and yellow for me. Next is violation effect. And you can see how this look, this basically add
the colors to light. Maybe this is too intense, so I will bring this maybe 30%. Some cameras have this effect
and you can see how this look here. In this example. I will now delete
this and I will go with control C and
control V, lubricate. They send the result. And I will now precompose this. And I will call this hellish. Now we can work only in this composition
and this is folder. If I click and double-click here and now open this only
this relation here, then composition is in this tab. So I will now go here with the levels and can
bring this here. And I will now, if you see this red line here, just press Caps Lock
to reference this. And I will now isolate
only these lights here. Next I will go with thin. So I won't cover this
white color to red color. Mutton, not completely wet. I will go with a little
bit orange color here. Next I want to lower this. So I will go with
the fast growth and send this to five or ten. Now I will go with
curves to expand this curves and just
bring this value here. So it will be now more expanded. And we can now back to our composition and
we can set this, we can set this to screen
to ignore black color here, a screen blending mode. So we'll ignore black
color scheme and keep only this red color here. So you can see this red color over this over our lights here.
29. 28 - Post-processing in After Effects 2: Next is vignette. So this just add a little black corals
on these edges here. And this is another
Lumetri color here. And just down to vignette. Just if you go with plus, this will add the white colors here and it will go with minus. This will add black
color sphere. And this will put more
focus in the center. So you can go to minus three. This is before. Next color
correction here I call VHS. And you can see
before and after. And this is three tenths. So I will bring this down later. And I will show you what I
do here in Lumetri Color. I play with this
main settings here. So I bring this exposure up. You can see how this look, if I go down to minus
one is too dark, so I go to 0.6. And I just bring a
little contrast and I'll go down with whites
and go up with blacks. But I think most of this happened here in these
adjustments tab. So I feed to feed
them to produce plus 40 and go down
with this Sharpen. And if you go up with this sharp and we get this
sharp edges here, and we don't want this in a reheat to achieve
because it just looks so. If I go down to minus ten, we get this blue red edges here. I will go to minus phi. Also vibrance down.
So if you go up, you'll get more color here. And I don't want too
much color here. So I will go down. And I just add the little purple color
in this shadow tint. If I go here, you can see how this layer, this is still
greenish now and I'm just a little too
purple color here. The next is channel blue effect. And this effect, we
can separate the red, green, and blue color scheme. So if I go here with 15, you can see how the expand
this red color here. This is before and after. And I also do this with, okay, I put this only in
one channel, blue, so I bring up a red
color and blue colors. And you can see the
effect of this. And this is similar like
chromatic aberration effect. But the chromatic aberration with other effects to
all three color scheme. And with this channel, blue or blue arc
control only red and blue colors and I keep
green colors to zero. So I will delete now this chromatic aberration and they're not this channel Breuer. And you can see how this look. Next I use is this
unsharp mask effect. You can see before and after. I just said this store
30 and reduced to sell. Next is turbulent
displacement effects. So you can see before and after, I will delete for now and I
will go with the new one. So you can see the
effect of this. And I will bring this to
maybe just one or two. And with complexity,
I will go to ten. This will add more
little details here. And this is to ten, so I
will go with one event. The nice thing here is
that you can animate this. So if I have a play with
offset and evolution, so I will set
keyframes to offset. And I will now go through them
small and just move this. And just repeat
this a few times. And we can now copy
these keyframes and just repeat this
with Control C and Control V. Just duplicate this effect to all our timeline. And now we can see how
this looks if we press the spacebar to play
this animation. But we need the rate for this green lines
to be in real time. Okay, I'm about to show
you how these look. I will just bring this to three. Because now is not so visible. And you can see
this, this effect. But this is too intense. I equal to one point. Just a little this distortion. This is before and after. I found most of these
characteristics in this window here. So if you want more
deep explanation for all all of these
settings here, you can watch this video
and this is in Premier Pro, but Premiere Pro is just a smaller version
of After Effects. So you can see in this video you can just copy also
in After Effects. And in this we have
just two layer. I'll just basically add more
this leakages effects here. So you can see how
this effect of sin. And the last one is
the Lumetri, exposure. Lumetri and I just go up to this exposure and
contrast and shadows here. This is before and after. We are done with this color
correction and all of this I will do later
is just a recap, just overlays I found
on the Internet. So I shared this file, links to video overlays
used in After Effects. And you can download this
tool package for free. And this is what to get. This is from Premium
Beat overlays. And this is from Max NOVAC, we cages or less. This is how this look. And my recommendation
is to try all of these overlays and see
what is best for you. I will start with
this aspect ratio. So this is just a PNG image
with black and white color, ends with this age
red edge here. So I will now go to project
and my recommendation is to create a new folder here
to keep this organized. And I will call this overlays. And I will all important
this speculation for start and put
this in this folder. And I will set this to top
cups look to refresh this. And I will go to S
to scale and see various My going this down. Okay, here is my overlay end. David just said is here to about 67. And this is before, and after. We just get this
blue, red edge here. This widow or less, you
just need to make one, repeat one things over and over. So just important this here. And I will go now with
this leakages, green, this in this folder
and send this over all this color correction. And I'll press S to scale this. Scale these down because
this is high resolution. And now you just
need to set this, change, this blending mode here. And this blending modes here, we'll ignore white colors. This one will ignore
black colors and this one will ignore
gray tones here. So because this is
because this is Greg, I will go with overlay and
you can see how this look. But you can always try a different blending mode
and see how this slope, this is too intense, so
I will go with overlay. And the nice thing with this OLS is that this is animated. So if we press Space
and play this, you can see how this
little life to our scene. I will now add this
statically the Occident, and this is only
one less than 1 s. And you can see all this look. So I will screen, maybe no screen I think is odd. Too intense. I think screen. And you can see how this looks. If you want to duplicate this, you can go with Control C and Control V and just
move this here. And now we'll repeat
this again and again. But my suggestion is do
this in one composition. So just go to pre-compose. And now we can keep
this in one folder, so just double-click
here and we can copy here in this
composition, this q times. And now we just need to
move this in our timeline. And now we can get to
our main composition and we have this
fx over and over. I will now are the one
overlay from Max Novak back. I will go with this one. And if you don't
see this overlap, that's because
this is too short. This overlays is list the
20 s and our animation is 54 s. So I will also
add this to composition. And now I will just duplicate
this. Move this here. And now we cover
all this timeline. And now I will send
this to screen, checking this scale here. And maybe we can add this one
at the beginning of video. And I will call this
just to 2 s. So select this and go to Edit
Split layer here. And I will delete this
part here and I can, maybe you can see
how this looks. Okay, I think this
looks pretty nice. I now see that I forget
to share this link with two because I use this overlay
also and I like this one. So we get this text here. And if I forget to share
this link with you, you can just Google
this website and just, just copy this name
of overlays in Google and you will
find this overlap here. So I will import also this isn't to scale this and
set this to screen. And I think this is, this text is too sharp. So I will go with
fastball root here. And I will move this to maybe
not too much, maybe two. And we also need to expand
this to your timeline store. Precompose this
number, click here, and just both be
this good times. Now set this
composition to screen. You can play more
with this overlay. So I will stop here
and I will now show you how you can render this out. So we can enter this
in After Effects. If you go to export, but size of this
video will be so big. So my recommendation
is to download this adult adult Media Encoder. And now when you
download this program, it will be connected with
After Effects automatically. So we'll just go to composition, add to Adobe Media Encoder. If we click here, we
can see that our window is only 71 mb big, which is almost nothing. And if you increase
this a bit rate, it will be the size will be bigger button this will add
more details to our videos. So I will now choose folder where you
want to save this video. And you can notice this will take about 2 min.
30. 29 - Sound design: I'm done with the rendering. And the last thing that
I will show you here is how I add the sound effects. Sound effects theories
from this video over. But you can see here that
we don't have sound. And I will do this
in Premier Pro. Premier Pro is just smaller
version of After Effects. You can do this also
in After Effects and blender with the editor or
any video editor program. In Premier Pro. Is
this so simple? So even if you don't
have experience, you can do this easy. I will open up Premiere Pro. And I will just make
new project here. And I will say in this on desktop and just drag and drop this window we made
here on the timeline. And you have 1 million options for finding the sound effects. You can search here
for sound effects. And you can use arc lists. Epidemic Sound or premium. But I find this is
not completely free, but you can download
this soundly. And you can find a
lot of sounds here. But if you want to unlock
all of these sounds, so you need to pay $15 per month so that
you can search here four steps and the steps, steps, you can find
a lot of free. All of these are free
and this is paid. So you can play this
and see what you like. Okay, I've searched for reading. I think we can move this one. Only thing you need to
do this is just drag and drop and copy part of this
and important primer. Okay? And this is too intense, so I will bring this
down to maybe minus. I think this is too fast, so I will now just so well
done with this speed. So I would say
maybe 50 per cent. And also too intense, so I will go minus ten. And you can also
add keyframes here. So if I go here, maybe -30 and beg to minus ten. We can see here, you
will see now this. Okay. Hello here with -40. And you can bake here. Maybe we can search for
horror, horror or MDS. Just for and maybe we can try this just
the same as before. Okay. This is also too intense, so I haven't been to -15. You can also go to
YouTube, YouTube Studio. And here two audio. And here you can also
found a lot of effects. You can just click here and
download this and import. Also in Premier Pro. You can also search for music. And if you click
here on category, you can easily isolate this. So I will click here
on dramatic, filmic. Or you can find, I think, horror category or dark, I think that category I search. So I will now remove
this and Sorry, I find that dark. Okay, here is a
calculation dark. You can play a lot of this
and download one you like. I use this one from
YouTube Studio. You can set it for this time. You feel like this. If you click, right-click here, you can add another layer here. And now you can add that
this ECS also here. You can also cut this audio
in this knife or razor tool. I'll just put moles
here and click here. And now you can
delete this part. And you can do the
same with window also. Then you are done.
You just need to go to File Export Media. And just saying this
they want and choose name and click Export. That's all for this tutorial. Thank you for watching. I hope you learned
something new. And see you next time. They enjoy in the
final animation.
 šime Bugarija