Transcripts
1. Intro: Hello, I'm there to lean. And today I'm going to
show you how to draw. Iris says at first to a, we'll draw a flower using
a where a clear reference. The second option will be
a little more complex. On it. I will show you how to distinguish that beautiful
from zero ordinary. How to focus on the
most important, how to see as a
simple into complex. So let's get started.
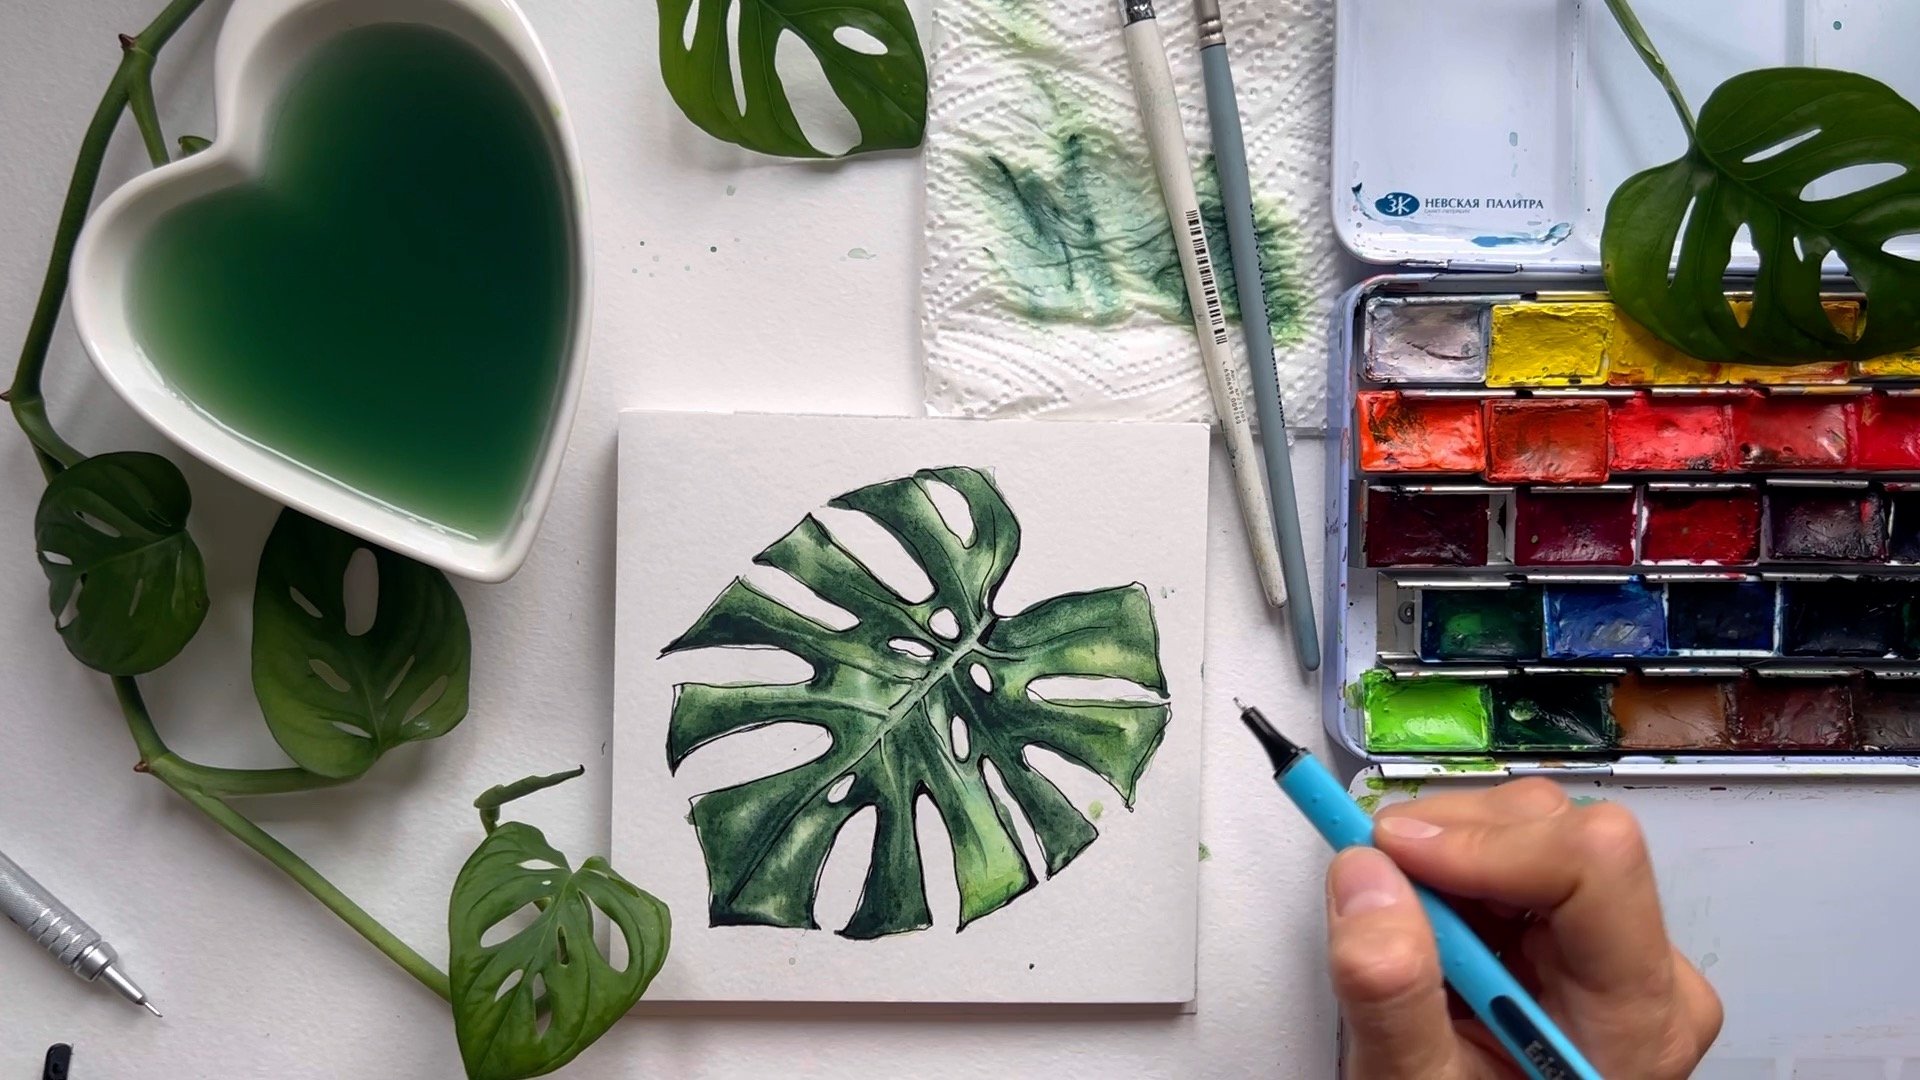
2. Materials: Let welcome everybody and let me tell you about the materials
that I will use today. I need watercolor paper or
watercolor, sketchbook. Watercolor paints. Water tissue, brush. I will use soft brush
with a sharp tip. I think this one brush
will be more than enough. Pencil and eraser or a
neck black liner pen. And also I will use a clip. That's all. So let's start
3. Part 1: Pencil drawing: I have already talked
about the materials. So let's get down
to the main pot. I will fix the paper was a clown for convenience
to walk with. And I will start with
a pencil sketch. First of all, it is
necessary to determine the placement and sketch
out the basic contours. This is needed. So that would don start
drawing the flower until we're completely sure of its correct
placement on the paper. Otherwise, we would
have to erase, redraw. And it always undermines our
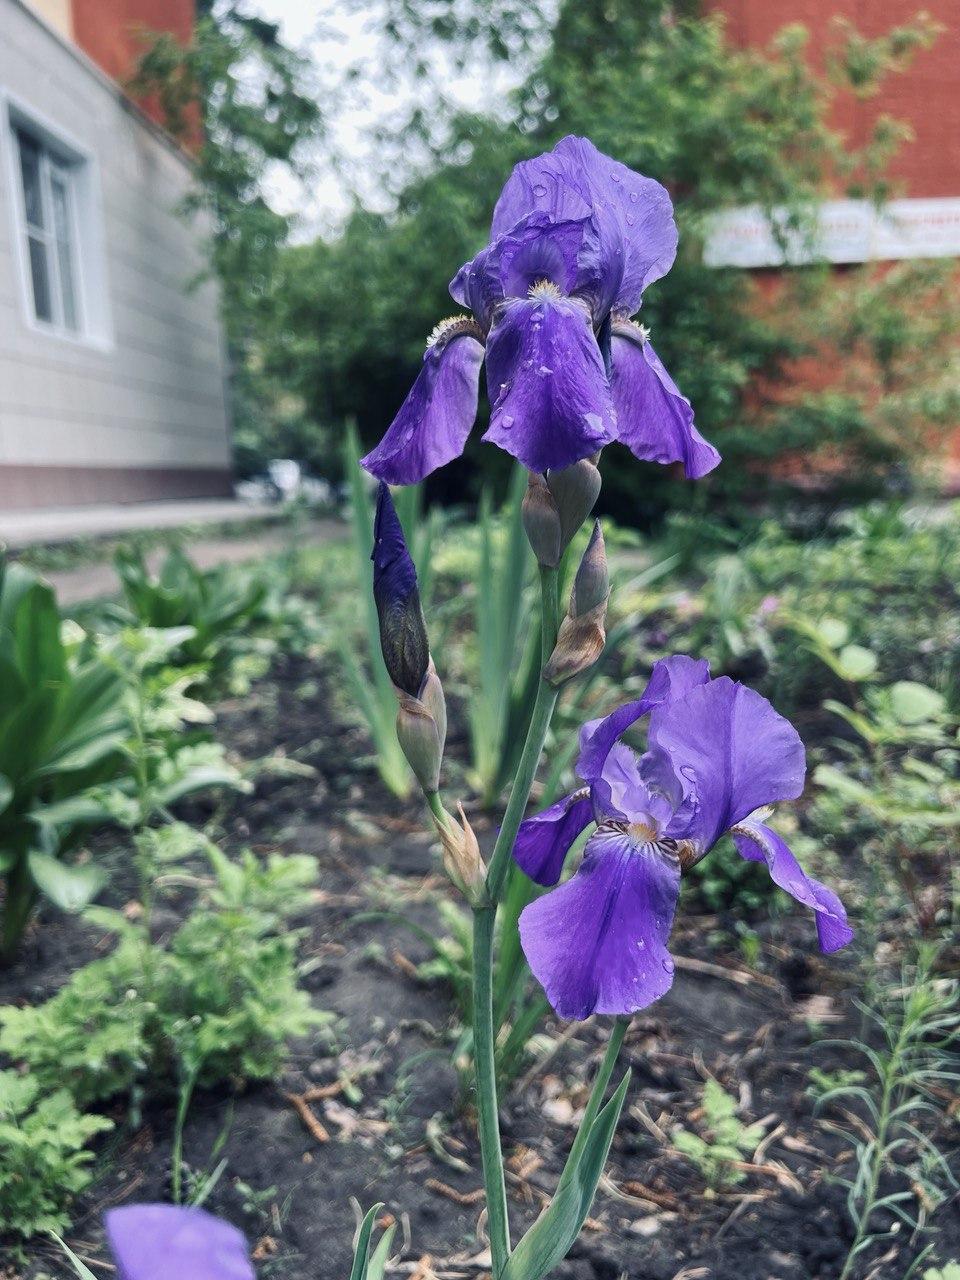
desire to continue drawing. I want to draw to flowers
and one unopened bud. I do not want to place the
Iris right into center. So it is necessary to find such a place that the flower
looks most advantageous. We will have three objects. Determine the largest of them. Hello HL, smaller
and less smallest. The largest flower will be here. Small like here. And the, but here. When we understand the
placement of the flower, we can move on to the details. The top flower is
divided into two parts. And I'll roughly sketch
how this will look. Here is about it slightly
merges with the flower. I really like this
intersections of objects. When one object goes beyond announcer and gyrotron
creations from one to another. This makes Beecher are
sketch more integral. Zara will be a
node's about here. And here is a small flower. I want to battle to
touch this term. Something like this. Now we can erase unnecessary
lines, Z confuse us. Then we will draw the
flowers in more detail. In any case, I don't want to overload the Pencil
sketch with details, but give free rein
to Watercolor. So I will only draw a
significant places, mug borders and
underline like lines. I emphasize the
main central petal. I'm done with the top flower. Now, I'm smoothly moving down. Right here will be
the largest bought. Here will be a very small one. I also decided to draw it. On this side, the
second bloomed flower. I want to keep a gap between two petals because
it looks beautiful. More air is brought
into the picture. And I will mark the main
petal on this flower. Let's draw the last
petal right here. You can take another
look at the draw when I finish what you're
seeing is necessary. Possibly mark like lines. So the Pencil sketch is
now ready with an eraser. I will reduce the intensity of color so that the Pencil
is not so contrasty. I highly recommend you to
get such an eraser or NAK. If you don't have one yet, it doesn't scratch the paper, doesn't smear the Pencil and
doesn't leave leaned behind. No need to shake Anniston off every necessary
scene for an artist. So it's time for watercolor.
4. Part 1: Preparing the color palette: And now is a perfect time
to move on to Watercolor. Our flower is purple, but I want to slightly diversify and make
it more picturesque. And therefore, it is very important to determine
the color before starting walk and make a preliminary coloration
of the Flowers. Now, I will show you how
I usually choose colors. And today I want to
use four colors. The first tend main
one is purple. And to each I will be
mixing other colors to understand how beautiful is
they will combine together. Next, I will take yellow for bright spots if it
were to get muddy. Now, I got to experiment and
switch to another shade, but it fits perfectly. The color is called
Neopolitan light yellow. Next, I take ping, combine. It combines beautifully
with purple and yellow. The first color
is emerald green. There is no much
formed anywhere. Beautiful shades
are obtained and mixtures with all colors. We can clearly see and
watch hades is sketch will turn out like I ever scene. So let's return to the
sketch and collaborate
5. Part 1: Watercolor washing: Before you start to study
the flower carefully, we're its lightest areas. And whereas the darkest ones. Try to keep this arrangement
at least minimally. I'll start with pink. You don't have to
draw the place is right clearly
alone. The outline. You can finish it with a
liner, leaving white spots. I want to place bright spots. And then already on the shirt
I'm mixing another color. I will go round the white spots. That is, if you want to
leave a white stripe, you can just carefully go
around it with a brush. Know that purple is very
saturated in itself. And if you need transparency, takes the maximum amount
of water and minimum of pigment and die immediately mix sick color into
the dark places. It may seem that at this
initial stage ever seen merges into one that
there is no volume. But don't rush to conclusions. We will add volume and
Details with a liner. First to make a light feel. Try to connect the details of the sketch together immediately. The flower and this term, so that it all looks
integral and United. Choose the colors carefully. Even the green I check
is not too bright, but mixed with the colors
I have already used. So that every sin Los harmonious and in the
same color palette. You can take more water to
have time to make transitions. Here will be a smooth translation
from purple to green. You can mix in the yellow
color, adding bright spots. I make a transition from this term to the
flower immediately. Mixing colors. On this flower, I want to denote more light and make
it less saturated. So as not to, I drag too much attention. Don't forget about the serum which I wanted to
leave unpainted. Well, let's add dark accents, pots that will create volume
and enlivens a Drawing. This point, the initial layer of watercolor wash is ready. If you wish, you can add more details with watercolor
on top of the dry layer. If you want to make some
elements more vibrant, you can highlight them with a liner or define
them with watercolor. I'm going to add
just a few details. I strongly advise not attach the areas where beautiful
wash effects had occurred. It would be better to
focus on other areas. And perhaps even cava Zoe's that didn't turn
out quite as well. Even with such large brush, we can denote small details
if it has a sharp tip. This is, in fact is
the main criterion. When choosing a brush. I will add some bright axons, highlights the Details, and
Duggan the shaded areas. If you wish, you can add a few light spots and
Zan dry out, walk. Lots attention to the sketch. Zone. The scene I don't like is even sized gaps
between the petals. They seem to be compatible
with each other. So Sam should be
slightly reduced. On this side, I will
make it smaller, so it will look more harmonious. Now, that's all for sure. Let's proceed to dry
and with a hairdryer, and then we will
walk with a liner
6. Part 1: Details with a liner: Let's move on to the
most exciting part. When the drawing becomes
even more wavered. Now we're going to emphasize
the brightest spots. Hide unnecessarily once, and sampling join a
creative process. Here I want to add
light detailing. The beat tensor wanes. You can lay the lines
on top of each other. The most important thing
is not to make the outline identical precisely
alone the age. In some places try to
go beyond the line. In others, on the contrary, go into the drawing so that
it looks more interesting. On the main petal, I want to draw more details to highlight the main character. Here, I've captured a
large uncolored area because I want to land Tony it. And that Alito chaos. Here, I'll draw the wanes, add some Iris specific details. You can emphasize
the white places by darkening the
flower behind them. To bring this part
even more forward. There will be minimal details on these petal because the lag, how the washes turned out, I will slightly underline them and leave all the main
beauty untouched. Some areas can be left
untouched by the liner at all without making
a round outline. Lead diabetes such
on the statement. I'm going lower. I'm getting to this term. Lead lines here be buried somewhere more shadow
somewhere left hand colored. From this, the draw
away and will only benefit and we'll
look more attractive. The darker the area is less noticeable as a liner detailing. Lines are more reasonable
in light areas. But nevertheless, it
adds its own nodes. We have last flower left. Here. The upper part
can be untouched from the left side and the lower part dark
and, and winds added. Also unevenly underlines
a distant petals. So when these vitality and
play on one side alleged outlined be more pronounced and the other a
minimum of detail. To avoid all this, look into uniform, you can
add an additional area. And last petal remains. To highlight it. I will resort to the massive
of negative draw when I will call it the
area behind it, so that the petal counts
on the foreground. Here, I will draw the
pattern more carefully. Our sketch is nearing its end. Here you can move
favorably highlights a petal connects
these black lines, lead them to the center so
they don't look at out. We have such a picturesque,
bright sketch. You can take lighter
shades if you want to play more attention
to the liner details. It all depends on your desire. And young girls. I've got a minor incident known. There is an unattractive
stain here. Let me show how it can be fixed and SaaS diversify the sketch. I'll try to remove it
as much as possible, but it won't go away
completely because the parabola has a very
saturated pigment. Let's just slightly diversifies. The background, blurs the
boundaries of the flower. And immediately with a wide
places with clean water. Don't forget to
cover the dry pot or a clean share it if you
don't want the splashes to reach their to take some purple paint on the brush
and slightly sprinkle it. Immediately remove the excess
drops with a clean brush. I also want to add
some yellow to introduce light shades
into the drawing. Carefully sprinkle
it with a brush. Well, now the blood is not visible and the background
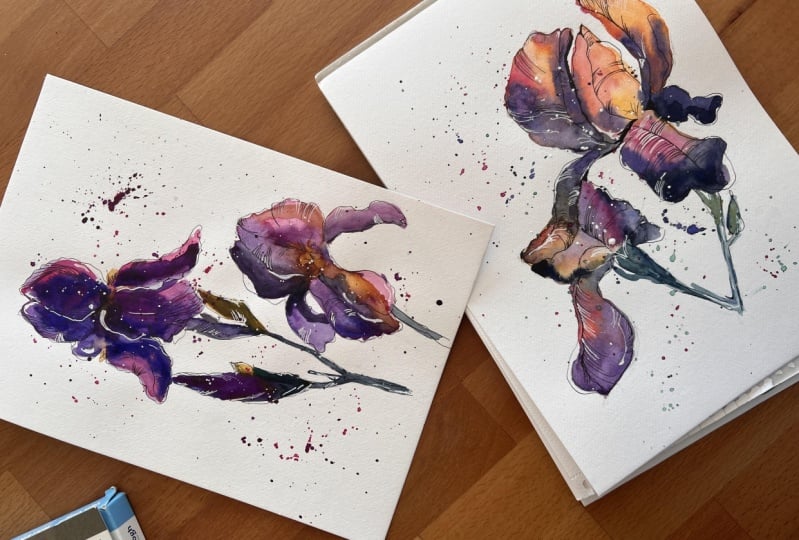
has become more interesting. With this, our first
flower is ready. I hope it was useful
and interesting. And get started on this catches. Keep it a light mode. Not expecting Anniston
began CRS from the South. And when you're ready, let's start the second
part of this lesson.
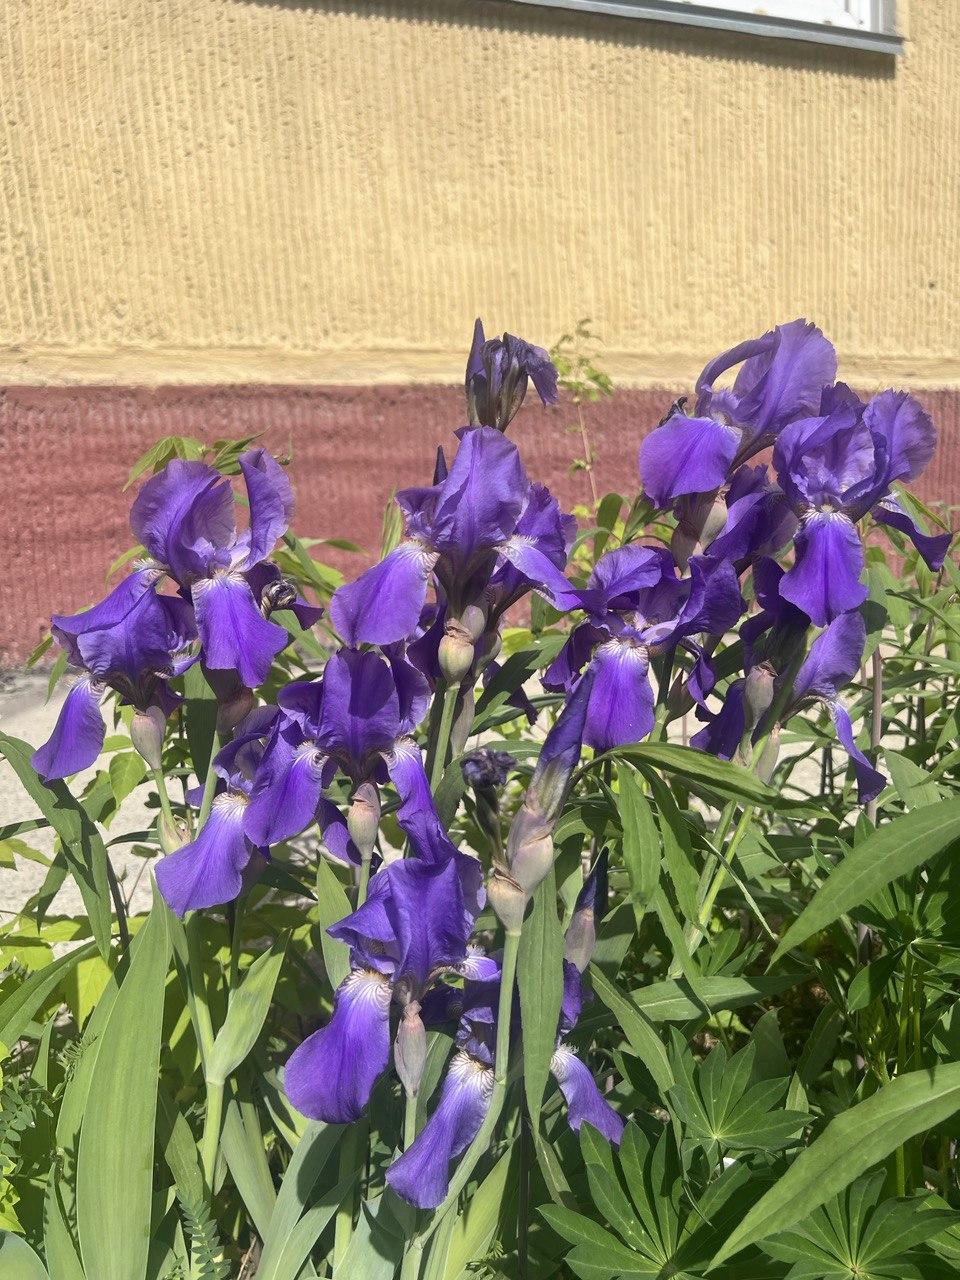
7. Part 2: Pencil sketch: Well, the next task
will be slightly more complicated because in reality, it's easier to draw
from a radiant, beautiful reference
where Erikson is clear and understandable. It's more difficult, wonderful
water is not quite clear. When your eye
characters some Details and your brain wants to
draw ever seen at once. Don't understand
what can be drawn here and how to do
it beautifully. We want draw all these
bunches of flowers. I suggest highlighting
two objects to Irises that are
adjacent to each other. We'll try to sketch them. We will use a lighter
tone so that we can walk more with
a liner pen later. We take these two flowers
and choose the composition. And the top will
be a lot flower, and here will be a smaller one. What do we see? This flower is divided
into three parts. The top part is a lower petal. The petal go into the side. After I determine the location, I realized that this all
will be reaching the edges. I want slightly
reduce the size so that it's not so large
and Luke's harmonious. Below this battle will
be the second flower. It consist of the top cap, stem. Decide live. When we understand
the composition, it will be easier for
us to move further. Now, let's make a band cell draw when sketch it in more detail. Here are very beautiful
upper petals. I suggest to study
them carefully, see where they come from. The reason nausea petal
on the site at petal in the background and allied
part in the middle. The research an apparent line in the center
of the flower. Here I will draw the side petal. And here will be as
small shaded area. And by the way, we immediately ugly
numb the unnecessary. On this Art we'll see
some sin dog osteon. It's also was
drawing this battle. Maybe not as big, so it doesn't attract
too much attention. Next, we make a
clarifying movement on this battle and proceed
to the next one. The man petal of the
second flower is roughly the shape on such a long stem. Behind the ear to we'll
see secondary details. We will also let
this scare them, but not so Bradley. And we will pick the side petal. We just have to add the stems and the dark
leaves in the background. I want to slightly connect
them to unify the competition. We ended up with a
Drawing on this format. Let's clean it up, remove the intensity of
the Pencil draw when, and proceed to the watercolor
8. Part 2: Watercolor washing: I suggest we keep
the same colors, but take less saturated shades and makes more the translations. We start from the
top and smoothly makes in all the colors
we've used before. That I'd be less
tonal decisions here, but more watercolors,
most translations. I want to convey his
lightness of the flower. You can take more water
to be able to mix. Makes most foundations
from color to color. If necessary. You can add darker colors. I really liked how the top
of the flower turned out. And they will slightly
increase the saturation. In some places. On this side, there is a
shaded saturated area. In market right away. Here is a dark spot. And now we move to
light and airy shades. Now we're making
beautiful gradients and we smoothly transition
from one petal to another. You can wear this area
again, if it's dry. We'll mix shades and
smoothly move down. Towards the bottom, the
pattern gets darker. What we'll also
draw the petal in the background
with a dog column. Here, I will leave a blank space is saying it will look more
interesting in that way. We move to the side petal, make an NP teres. Then we move to the stamps. We smoothly makes purple with green at an odds are
used shades to eat. We do these so that the picture looks more natural
and harmonious. To prevent the edge of the leaf from attracting too
much attention. You can remove
excessive broadness. Live in the color
semi-transparent. Well done was a watercolor pot. Know what will drive their
**** again and to walk it. Who is a liner pen?
9. Part 2: Details with a liner: And Z is intermediate stage. You might seem that the
sketch is not bright enough, but all this will be adjusted and it will
the final touches. Pay attention to the
places that turned out. But to color, well, I like the saints that
have appeared here. So there will be a minimum of Pan detail in, in this part. Alonzo contour, I
want to add strokes. Here will be the
medial over the baton. And the main contrast in
lines will come from weight. You can leave things
and sat not show which petal is in front
and which is behind. Because if you all
will guess and imagine some things himself. And now we will just add
beautiful lines and details. You can add details and pieces. We'll end the places the
tourism May 2 is use a most hi, I'm outlining the
contour of the battle. Bring in part away too light. You can introduce
small chaos and unclear lines in
their background. Led displays be out-of-focus. I want to emphasize
the petal again, my shading behind it. This will bring it full that you can add a few
dark spots here. And then we'll move
on to the side petal, barely noticeable Details
through willing to wanes. I want outline and draw
the contour from the top. I move on to the law of flower. It's rarely not
so much in focus. So I want or a, we'll its details and nuances
in this March detail. Only from the top, I will highlight the
shadow side or a wheel in the heterogeneity
of the compensation. On one side to petal
will remain on drone. And on the second, I will add an edge. I will highlight is tense, and they are completely
out of forgoes. So I will add minimum details. Now, let's add the
final touches. Every beautiful edge
has turned out here. We'll leave it as it is. Frozen side, we will slightly
emphasize it may come. The doc will add lines to the bar to show the unity of the compensation
and compatibility. All we have laughed
in the shadow part. These can be depicted moles, Kimara to clean sam points, however, I was highlighting
and drawing attention to. You can even just shared it. Well, is the second
sketch is also ready and they wanted
to show with it, it's not necessary to have a clear and beautiful photo
in order to make on sketches. Sometimes our photos are
not of the best quality. So I recommend you not to
look for the perfect picture, but use what you already have. Photo on nature. Now, is it time to dig
into old photos that may not have seen so attractive
and suitable to you. To the pods that you like the most and express it on paper. Show how you see
it specifically. So we have such an interesting
Laurie background here. Let's diversify this one too. But this time I suggest
no to whiten it. But making splashes
on the dry paper. You can lot and remove excess moisture and
color within napkin. If you wish, you can add
splashes of another color. But be careful. Don't overdo it to the Details and don't
spoil the competition. That's it. Our Iris lesson is over. Thank you for your attention. Now it's time for you to draw. You can start by
using my photos. Practice, get the hang of it. But I also highly recommend
using your own photos. If you don't have them, take nuance and get
started on your sketches, can lay your vision, walk boldly, but without
expecting a grant result. Do ever sandwich
pleasure and joy?
10. Outro: That's all from me. I hope I was able to convey
the most important thing, how easy and without much preparatory walk to
proceed to flower sketches. The main salt is that
sketching is easy and fun. Practice and enjoy the process. Improving your skills
time after time. Loan to see Joe and
subjects everywhere. Long to find beauty
and can weigh, eat in your wax. Draw what attracts your
attention the most. See you soon
 Natalia Nikitiuk, Capturing Life's Beauty