Transcripts
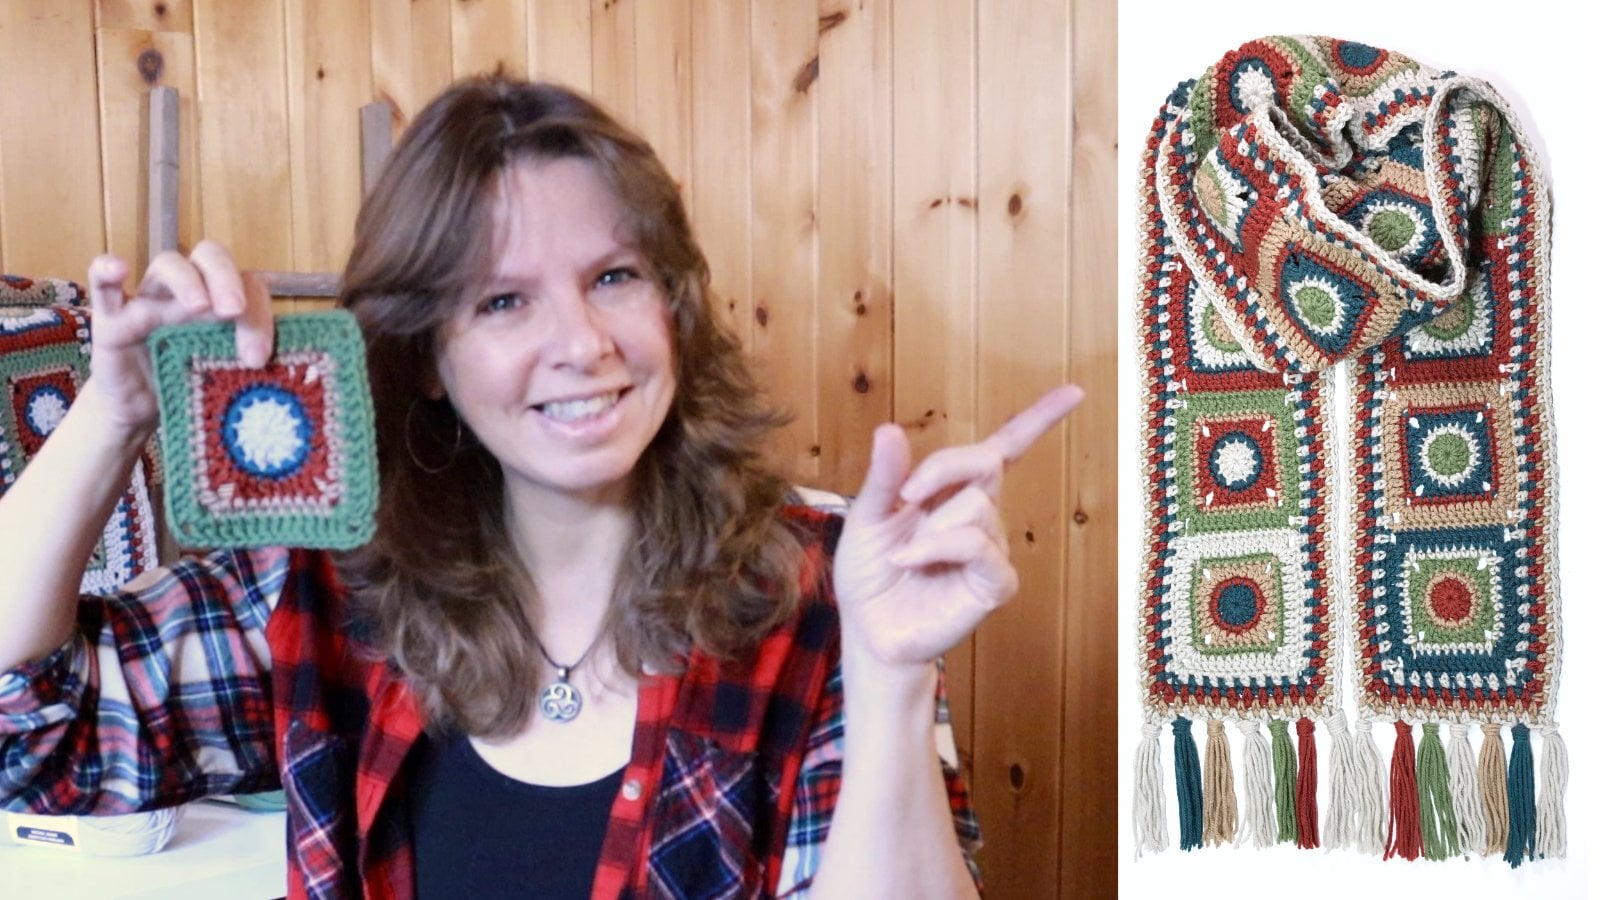
1. The Giving Square Crochet for Creativity , Compassion and Connection: A lot of us are
searching these days for ways to get more
creative and to find a calming and relaxing
activity that helps us step away from
the busyness of life. We're finding our way back to the joy of the simple things. Hi. I'm Jane. I'm an author, teacher, and pattern designer. I have a passion for sharing colorful and creative
crochet ideas. I love to express
myself with color and texture using
my own two hands, and crochet is how I do this. It's not just a great way
to spend your downtime. It's also a great way
to connect with others. The inspiration for
this class comes from the joy that you receive by giving from your heart and how we create connection
through sharing, either through the activity
of crocheting with like-minded peeps
or through gifting loved ones with handmade items and giving back
to your community in meaningful ways that re-energize you and
provides for others. I always like to think my crotchet items all come
with a great big hug. In this class, I'm going
to show you how to make this fun and simple
little square from beginning to end
and we're going to finish it off as a
cute little coaster. Then we'll take it to the next level and I'll
show you how I sew these squares together to make bigger projects such as trivets, place mats, and if you're up for the challenge, a blanket. All done with this
same square pattern. As a bonus, I'll show you how I add an alternative
decorative border. The project for this class, of course, is to make
the square itself. But then I'm going
to challenge you to give it away to someone you care about or to a cause
that speaks to your heart. Self-care is legit. If you want to keep
this first item that you make so that
you can look at it everyday and be proud that you made that with your own
two hands, then go for it. We'll finish off with
some inspiration of a variety of beautiful
designs you can make from this square and ideas of where you may want to share
your work with others. If you're ready to share a
little heartfelt creativity, let's get crocheting. I'll see you in class.
2. Before we Begin: Welcome to class. I'm
so glad you joined us. Before we get started,
I wanted to share a little bit how this
class is going to roll. I'll be referring to
the written pattern for the square
throughout the class. You'll be able to find
the printable download of the PDF for this square under the Project
and Resources tab. I'll be using a
worsted weight yarn for this class which is also referred to as a number 4
medium weight on a yarn label. You can play around with trying different yarn weight and
hook sizes as there's no need for gauge when
making coasters or blankets. It's just a guide to get
similar results to mine. In this class, my square
comes out to 4.5 inches. Thicker yarns will give you a heavy fabric and
larger square and thinner yarn weights
will give you a looser lighter fabric
and smaller squares. Play around with it and see
what you like to work with. Yarn care is a consideration when making items to give away. Simple is always better. The easier it is to look after, that's what you're looking for. You'll want to pay attention to the care instructions
on the yarn label, making blankets to
give to a charity they often have
guidelines as to fiber content due to
possible sensitivities and they want to be able
to watch the items easily. Have fun with color. You can make these squares in as many or as few
colors as you'd like. There is no hard and fast rules, just a lots of room to play. We're going to tap
into our creativity and create a handmade
item infused with love and care and we're going to use it to
brighten someone's day. Now let's talk about the
supplies I'll be using. I'll see you in the next lesson.
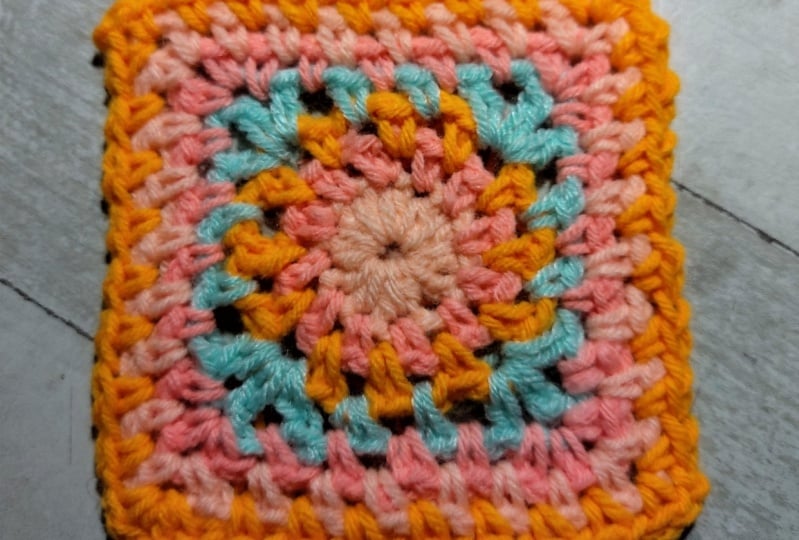
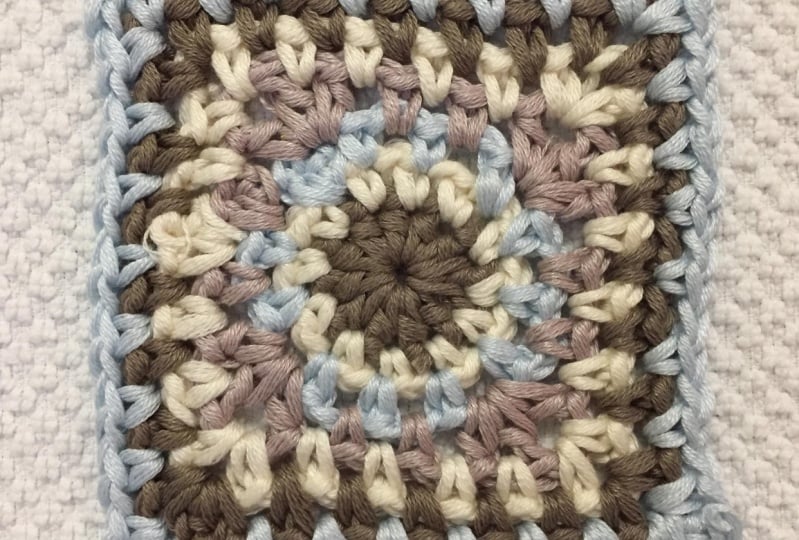
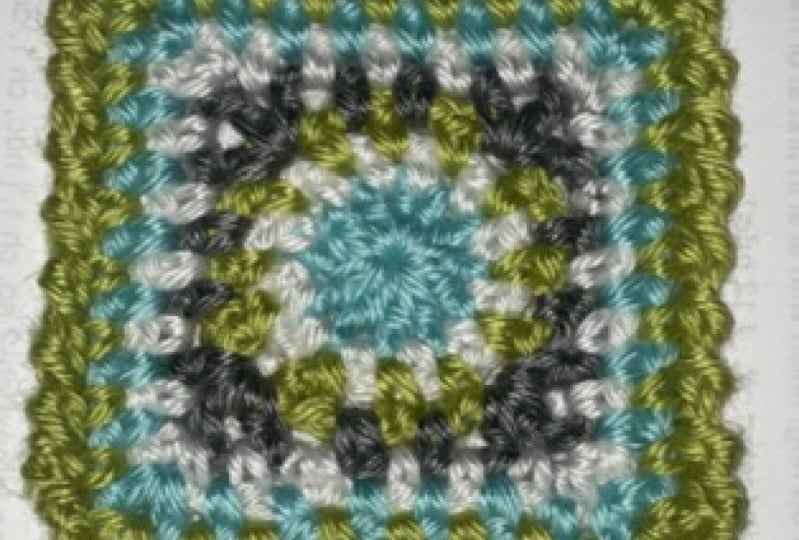
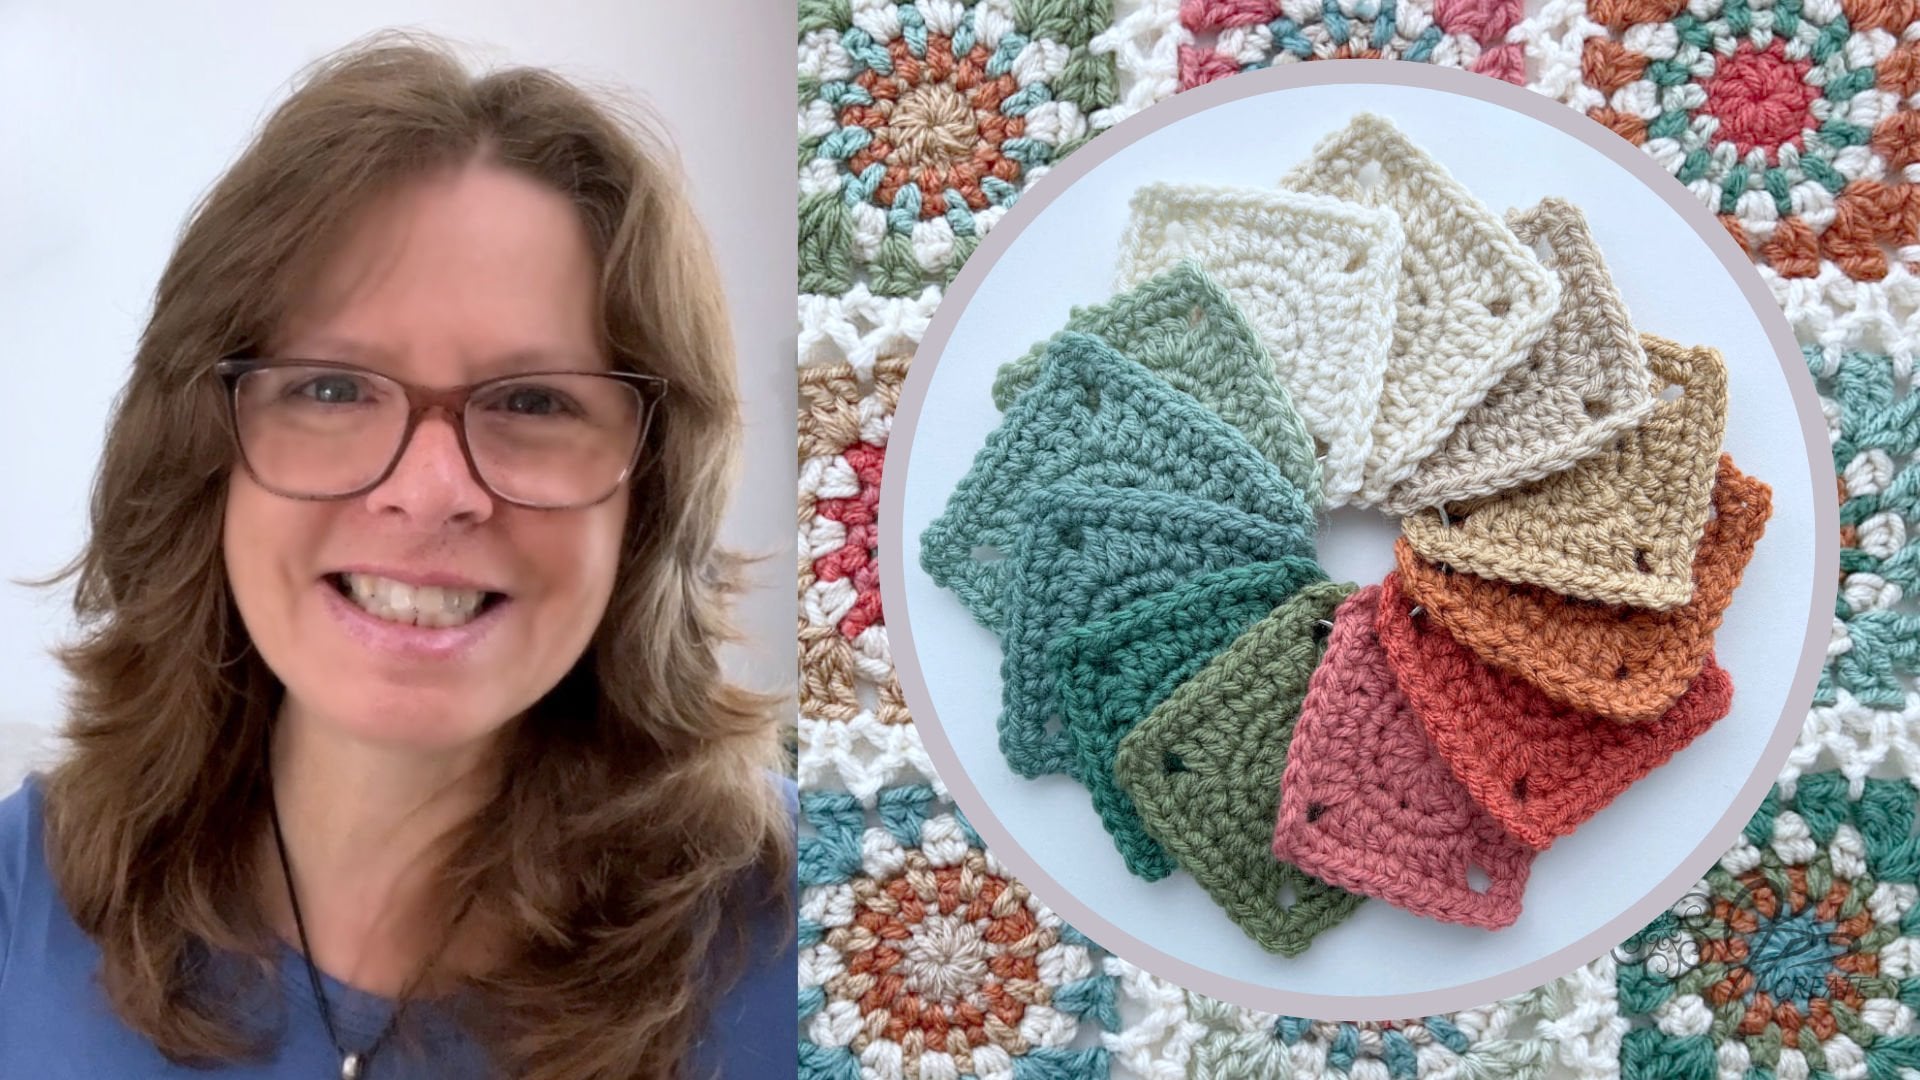
3. Supplies and Tools: In this class,
we're going to work on the four-color square. The four colors I'm going to be using are going to be my beige, my neutral is going
to be my off-white, then I'm going to use
this nice teal green, and a medium gray, because I can use scraps, I love making this
project out of scraps. I usually look for
colors that I've used in other projects
and I can use up. It doesn't take
very much at all. If you want to make a set, it doesn't take much. I like to wrap my balls in
these center-pole balls. They are so much easier to use and I do have a
tutorial on that in a blog post if you're
interested in learning how I do that just using my hands. In addition to our yarn, we're going to need our
crochet hook and because I'm using a medium weight
number 4 yarn, which is a worsted weight, I'm using a
five-millimeter hook, and it's the hook that I'm
most comfortable with. Whatever your hook size
you're comfortable with, with a yarn that you're using, that's the hook to use. I'm also going to need
a pair of scissors and a darning needle
and my darning needle, I like to use a metal one with a large eye so that I can
get the yarn through it. Once you have your supplies, we can get working
on our project.
4. Foundation Magic Ring: Starting with our magic
ring and color A, we're going to put the
cut end of the yarn over our palm with the cut
end facing towards us. Then you're going to hold it
in place with your thumb, and you're going
to wrap the yarn over your first two fingers. Then you're going to bring
the yarn back underneath. Make sure you give yourself
enough yarn to work with. You're going to bring
it back underneath, crossing over the yarn
that's already there. Holding that in place
with your thumb as well, and then wrapping it over
your three fingers this time. Then we're going
to take our hook, and we're going to go
under the first strand, and over the second strand and hooking it,
pulling it through. Then you're going
to twist away from you and then back towards you, so that the loop gets
twisted onto the hook. Then we're going to lock it
in place with a chain 1, so we're going to go under
our yarn from the far side. We're going to pull it
through and create a chain 1. Then we can slip our
fingers out and we have our magic loop with a chain
1 locking it in place, and we're ready for
our first round.
5. Round One: So Round 1 assets
work a total of 12 half double crochet
into our magic ring. And we're going
to work a Chain 2 which will count
as our first one. So we already have
a Chain 1 there. So we're just going
to chain one more. That creates a Chain 2 which also counts as our first
half double crochet. So now we have to work 11
more half double crochet into the magic ring. So our half double
crochet is going to be wrapping the yarn
around the hook first. So you go take the
hook under the yarn, then you're going to
go into the ring. So putting your hook into the magic ring under both of the strands
there and then again, we're going to grab the
yarn from underneath, wrapping the yarn over the hook, pulling it through and now we have three loops on the hook. So the magic ring can be floppy, so you got to keep it in place with your finger and your thumb. So I move those up to underneath these three loops
and then I pull up on the hook and
down on my thumb to create the space to
pull the yarn through. So you're going to wrap the
yarn over the hook again, and you're going to
pull it through all of three loops on the hook, that's a half double crochet. So that takes a little
bit of practice, so don't worry about that. So we're going to go ahead
and now we have two, again, we need 12 total, so let's work another one. Yarn over, insert
into the magic ring. Yarn over, pull the yarn up. Three loops on hook. Make sure I secure
it with my thumb. Pulling up on the hook. Not too much, so I pull it out. Yarn over and pull through
all three loops on the hook. So now I have three, so I can go ahead
and I'm going to make sure that I get 12. So we'll just keep
pottering along, make sure you have enough yarns
so you're not pulling too tightly on your piece of work. It's going to look
wonky to begin with because it's a very loose
ring at the moment. You're going to think that
this doesn't look right, but it does, because
we're going to cinch up that ring at the end. I'm almost there. I'm going to count my
stitches to see where I am. So these little v's
are my stitches. So I can use them to count. So 1, 2, 3, 4, 5, 6, 7, 8, 9, 10, and then this little chain
to hear it counts as 11. So then I need one more. So this will be 12. I'm going to leave my
hook on the loop or leave the loop on the
hook, I should say. And then I'm going to find
that cut end right here. Holding at the base of my last stitch with my
finger and my thumb, I'm going to pull that strand. So pull it slowly, so it works its way in and it cinches up the hole
in the center. So now I can place my thumb
and finger on that hole and just give it an extra
little tug to pull it tight, and it gives you a nice
little look there. Now we want to finish off, so we want to cut
this yarn 3-4 inches, I usually go, pull
the yarn through. We're going to finish off with an invisible join this round. So an invisible join
is we're going to take the yarn we just cut
and we're going to put that on our darning needle, and we're going to make like a mock stitch so that you
can't tell where I joined. Let's move in close here so I can show you
what I'm doing. We're going to take
our needle and we're going to go into
the second stitch, which is really the first
half double crochet because our first
stitch is the Chain 2. So we're going to miss that Chain 2 and we're going
to go under the two loops of our first half double crochet stitch and we're going to
pull the yarn through, just gently, not too tight. Then we're going to
go back and go back through where we came
out of to begin with. To see how the yarn came
out of this stitch, well, we're going back
into that stitch and you're going to just
nice and gently again pull it so it looks
like the rest of the stitches and that's
an invisible join.
6. Round Two: Moving on to Round number 2, we're going to need
our neutral color, which is color B. In this case, it's my off white. Join color B with a slip stitch in any stitch from Round 1. I will join anywhere and I
like to move a little bit from where I finished off so that when I go to
Darren in all my ends, they're not all in the same spot and they make my square bulky. Anywhere else on here, I'm just going to go under
the two loops created by stitch and we're going to
pull up the yarn to join. This is joining
with a slip stitch. Then we're going to chain one, and then we're going to single crochet in same
stitch as joined. Go back into that same stitch
and wrap the yarn around, pull it up, two
loops on the hook. Wrap the yarn around, pull through both loops. That's our single crochet. Then we want to chain one. Now we have a star,
which means that we're going to be doing
some repeating here. Single crochet in next stitch. The next stitch over we're going to work another
single crochet. Then chain one. Then it says to repeat
from start 10 more times. You can pause the video. Meet me back at the
end of the repeat, and we'll finish up the round. Here we are at the
end of our repeat. We have done it 10 more times. We want to slip stitch in the
first stitch of the round, which is right here. We want to put our hook
under the two loops. Yarn over, a slip stitch, pulls it through that loop and through the
loop on the hook. Then we want to fasten off and we do that by
cutting our yarn 3-4 inches and then
pulling it through. That finishes the round. That's a fast and off. Now we should always
count our stitches. You can do this before
you fasten off, just make sure you do count them at the end of every round, we should have 12 single crochet
and 12 chain ones bases. So 1, 2, 3, 4, 5, 6, 7, 8, 9, 10, 11, and 12. Then we have a chain one
space beside each one. We have 12 chain
one's bases as well.
7. Round Three: Now we're onto Round number 3. Round 3, we want our
nice teal color. Round 3 starts with
during colors C, which is RTO with
a slip stitch in any Chain 1 space
from previous rounds. These Chain 1 spaces are
the ones in between. We can join anywhere. I like to join somewhere other than where I finished off, and we will pull up a loop and that's joining with
a slip stitch. Then we want to Chain 1. Then single crochet in same
Chain 1 space as we joined. You just want to work
a single crochet in that same space. You always want
to make sure that your end isn't getting
too loose on you. Then we go Chain 2, 1, 2 this time, and then we have a
star, which means we're going to have some
repeating coming up. Single crochet in
next Chain 1 space. The next Chain 1 space is here. Single crochet in there, and then Chain 2. Then it's as you repeat
from star ten more times. Go ahead and pause your video
and finish your repeat, which is a single
crochet Chain 2, and I'll meet you back here
at the end of the repeat. Here we are back at
the end of our repeat. We did it ten more times, and now we want to slip stitch in the first
stitch of the round. We want to go into that
first stitch right here. Pull up the yarn,
pull it through, and through the
loop on the hook. Then we want to fasten off. We cut the yarn 3-4 inches, and then just pull that
yarn right through. You've completed Round number 3. Let's just check again that
we have the right number. We need 12 single crochet
and 12 Chain 2 spaces. This is our first
single crochet here, 1, 2, 3, 4, 5, 6, 7, 8, 9, 10, 11, 12, and then there is a Chain
2 space beside each one, so there'll be 12
of those as well. Now we can move on
to Round number 4.
8. Round Four: We're ready now for
round number 4. If we look at our square, we've done this part here, and now we're working on
squaring off our circle. There'll be a little more
involved in Round 4. We're going to use our color D, which is our soft gray and
we start off with join color D with a slip stitch in any chain 2 space
from previous round. I'm going to pick
a spot that isn't where I've already been joining. We're going to go up here and I'm just going to
pull the yarn through, that's our slip-stitch join. Then we're going to chain 1. Then it asks us to
single crochet in same chain 2 space as joint, so there's our single crochet. Then we have chain 1. Single crochet in
next chain 2 space. Right over here is our
next chain 2 space and then chain 1. Next on our pattern,
you'll see there is a square bracket. The square brackets, what I use those for if there's
something that has to be worked into a specific area so what you want to do is look ahead to where the
square bracket ends and see what it's going
to ask you to be doing. I see the first square bracket, I follow through to the
last square bracket and then I see all into
next chain 2 space. That means all of
this is going to be worked into the
next chain 2 space, which is actually going
to be our corner. Let's go ahead and do that, following what the
bracket tells us to do, half double crochet, so all into this
next chain 2 space. Half double crochet so that requires us to wrap
the yarn around, pull through another one so there's three loops on our hook. Yarn over and pull through
all three loops at once. Then we chain 1, then we're going to
work at double crochet into the same stitch. Wrap the yarn around, hook goes into the same
space, pull up a loop. Now we're going to do wrap
the yarn around through two loops and again wrap it
through the next two loops, that's your double crochet. Then we want to do a chain 1 and then another
half double crochet, so again, you're going
to wrap the yarn around, insert into the same space, we're still in the same space. Pull up a loop, wrap
the yarn around, and pull through
all three loops on the hook and that is our
half double crochet. Then we chain 1 and we reach the end of our
square brackets. All of that happened into
this one chain 2 space. Then we see a star, so now we know
whatever happens after the star is going to get
repeated a few times, it's a section in itself. Single crochet in next
chain 2 space, chain 1, single crochet and next
chain 2 space chain 1 half-double crochet chain 1 double crochet chain
1 half double crochet chain 1 all into the
next chain 2 space. What we did back here, we're going to go into
this next chain 2 space. Half-double crochet, pull through all of
the three loops. Chain 1, double crochet, now we do two loops and two loops and I'm
running out of yarn. I give myself a little leeway here so I don't create
problems with my tension. Chain 1, half-double crochet, pulling through all three
loops, and chain 1. What you're seeing here is we're turning a corner so you're getting a gradient of
height on the stitches. We have half-double crochet, then we do a longer stitch
double crochet at the corner. Then we come back down to
a half-double crochet, then we head back into
our single crochets. We just finished
this square bracket again and then it says, repeat from star two more
times. We do everything. We go back to the star and we repeat all of that
two more times. I will meet you at the end of the repeat and we'll
finish off this ramp. Here we are at the
end of our repeat, and we're also at the end
of our round in this case. Once we finished the
repeat two more times, it says to slip stitch in the
first stitch of the round. We go here, this is
the first stitch here. Insert our hook under, wrap our urine around, pull it through the
stitch and the loop on the hook, then fasten off. We do that by cutting 3-4 inches and pulling
the yarn through. Again, that will be
left to learn in later. We have completed
round number 4.
9. Round Five: We're ready now for
round number 5. Round number 5 is going
to be the first one who asks us where to
specifically join. Because now we're working with
this square and we want to set up the next set of
rounds appropriately. You're going to use your color B sits my off-white
and it says to join color B with a slip stitch in first Chain 1 space
from previous round. Here it is. If this
is the first stitch, see where we ended here. If this is the first
stitch then this is the first Chain 1 stitch. We want to join right into
there and we want to pull up our yarn joining with a
slip stitch in that space. Then we want to Chain
1 and then we want a single crochet in the
same space that we joined. Now we want to Chain 1 and single crochet in the next
Chain 1 space over here. Then we want to
Chain 1 and we want a single crochet in the
next Chain 1 space, and then we want to Chain 1. Now we have a square bracket and that usually means it's
all into a specific spots. Go to the end of
the square bracket and see where it's
going to be all into the next double crochet stitch which is this post right here. You're going to work into
that stitch at the top. We're going to do a
single crochet into that stitch Chain
2 and then another single crochet into
that same stitch and that creates our corner. Then we go ahead
and we have a star, which means we're headed into a large repeat section and
it starts with a bracket. The bracket, again, if we go to the end of
the bracket it's going to tell us to do whatever
is in it five times. We're going to Chain
1 single crochet into next Chain 1 space. That's the first time, remember the brackets
are five times total not five more times. That counts as our first-time Chain 1 single crochet into next Chain 1 space,
which is this one, that's two times and then
we do it again three times, moving across the top, four times and we have
one more time five times and then we Chain
1 and we moved to a square bracket and we've been to the square
bracket before. It is the single crochet
Chain 2 single crochet into the next double crochet, so we're doing
another corner here. Single crochet into that double
crochet stitch from below Chain 2 and then single
crochet into it again. Now we hit the star
and it says to do everything from the
star two more times. We're going to go back find our star and we're
going to do it two more times and I will meet you back here at the end of that repeat. Here we are at the end of
our repeat on Round 5, but we're not finished
the round yet. Let's see what it
has left for us. After we've finished our repeat
from star two more times. It says then and we
have a round bracket, Chain 1 single crochet into next Chain one space, Chain 1. We have to do it twice. Single crochet into next
Chain 1 space there, we've done that twice. Now Chain 1 and then we slip stitch in the first
stitch of the round. We just go in here,
we slip stitch and we pull our yearn
through and I've already cut it there, so we're done. We just have to cut
that 3-4 inches and we have finished
round number 5.
10. Round Six: Now we're ready for round Number 6 and we need a color A, which is our beige. It asks us to join
color A with a slip stitch in any corner
Chain 2 space. We get to pick again one
of these four corners. We'll just do this one
here and we'll pull up a loop and that's our join. Then Chain 1 and then single crochet in
same stitch as join. Now we have a star, which means we're going to be
doing a repeating section. Then it's followed
by a round bracket, which means it will
be doing a small repeating section within that. It asks us to Chain
1 and then work a single crochet into the next Chain 1 space,
which is right here. That's once, and it wants
us to do it six times. We do it again. That's twice. Moving along the top. Again, that's three times
Chain 1 single crochet in x, that's four times, Chain 1 single crochet, and next Chain 1 space, that's five times Chain 1, single crochet in next
chain one's base six times. Let's go back and make
sure we did that. We did Chain 1 single crochet. So 1, 2, 3, 4, 5, and 6. We did our first round bracket. Then it asks us to Chain 1. The square bracket, we look, it's going to be single
crochet Chain 2 single crochet all into the next Chain 2 space. It's going to create our corner. We're going to go into
this Chain 2 space and do a single crochet, Chain
2 and a single crochet. That's our square bracket. Once we complete that, we hit repeat from star. So everything we just
did is our repeat. You're going to repeat from
the star two more times, and I will meet you back here and we can
complete the round. Here we are back at
the end of the repeat, but we're not finished
the round yet. Let's go ahead and read the instructions and see what
happens after the repeat. Once we've finished the
repeat this two more times, then we have another
round bracket that says Chain 1
single crochet, next Chain 1 space. Then we're going to
do that six times. We recognize this,
this is from before. So Chain 1 single crochet and we're going to do
that six times the total. That's two, that's 3, 4, little more yarn here, five, and then this will be six. We did it six times, and then we want to Chain 1. Then we have square bracket, single crochet Chain 2.
That's all this time. Into the next Chain 2 space. We wanted a single
crochet Chain 2. Here we are back at the
beginning of the round, so we want to slip stitch
in first stitch of round. We slip our hook in, pull up our yarn,
and fastened off. Here we have to cut our yarn 3-4 inches and pull it through. That is round Number 6. You're starting to see a
nice finished coaster. Now we're going to
go ahead to Round 7, so we can finish off R-square.
11. Round Seven: Round number 7 says
to join colors c, which is the nice teal color, and it says, join colors
c with a slip stitch in any corner chain to
space from previous rounds. Again, easy to find one of these four corners
and we'll pull up color c. We're
going to chain 1, single crochet in
same chain 2 space, and immediately we move into our star repeat and
a round bracket. A round bracket is chain 1 single crochet and
next chain 1 space, which we're familiar
with that now, and it wants us to do it seven times this
time. That's fine. We're going to chain 1, single crochet in
next chain 1 space, that's 1, 2, and I'm just going
to push through these and I'll meet you
back here at the 7, and 7, and then chain 1 single
crochet now we're into a square bracket and our square bracket contains
our corner information. Single crochet chain 2, single crochet all into
the next chain 2 space. Single crochet, chain 2 and single crochet into
that same chain 2 space, we've created another corner. We're at the end of our star, and it wants us to repeat
from the star two more times. It's going to take us
down to this corner, and I will meet you there
at the end of the repeat, and we'll finish this round. We've reached the
end of our repeat, but not the end of our rounds. Let's go back and see after we've done the
repeat two more times. It says then we have
a round bracket, chain 1, single crochet and next chain 1 space seven times. Been there, done that.
Let's do it again. We have chain 1, single crochet, that's one, and then we'll just work
our way across doing it seven times total. This is number 7, chain 1, single crochet chain 2 in the square bracket into
the next chain 2 space, which is the same one
that we joined in. Single crochet
chain 2 slip stitch in the first stitch
of the round, and pull all the way through, and then you can fasten off. Now, before you cut, I have decided to leave
four inches but if you plan on sewing
these squares together, I'm going to suggest
you leave a minimum of 10 inches on this last round, so you can use it to join
your squares together. It just makes for
lessons to dine in and everything
serves a purpose. That gives you round number 7, and you have completed
your coster.
12. Darning in Ends: You've finished your square, but we still have
the ends to work in. You could also work
your ends in as you crochet the square,
but in this case, we've love them too
darn in at the end, which is the easiest
and most common choice for when you're
learning to crochet. You'll see here, I have
two ends of each color. For every color that I
joined, there's two ends, and of course, I have them
dispersed around the square. We're going to grab our
darning needle that has the nice big hole
in it for the yarn. I'm going to start
with the center one to show you what
I do with that hole. We'll put our yarn on
our darning needle or whatever way
works best for you. I like to fold the yarn over top of the darning needle
and then I pinch it with my finger and thumb and
then I pull it out and slip it onto that loop
and pull it through. That way I find it
goes on nice and easy. Now we're going to work
on this center one. Often there might be a
little bit of a hole there, so you just take that
and you're going to go under these strands around here. Go under a few at a time, pull it through, and as you're
pulling it through, give it a little up tug, use your thumb and your
finger to hold that center. Give it a little
tug and it closes up that center nice and tight. We'll continue around
just a few stitches at a time and just giving it a
nice gentle tug as we go. If your yarn falls
off your needle, just put it back on again. Once you've gone
around, at least once, I don't see it fell off there, you'd like to leave
your ends, as I said, about four inches minimum
so that you've got something to work with because
you can always cut it off, but it's hard to
turn in a short end. Let's go one more batch here. I've gone around once. Now with the center, It's always nice to turn back around. Where I came out, I don't want to go
right back in there or it will just undo
what I just did. You want to go over one strand and then work
your way back around. Again, I go into quite a few here and pull the yarn through. I'm getting to a point
where I don't have a lot to work with anymore and I
think that's pretty good. I've gone around once and
then I've gone backwards. At this point, I can cut this off and it's
important to cut them off as you work them or you'll forget what you worked
and what you haven't. I cut them off fairly close
to the surface but not so close I'm going
to cut my work because they will work
their way back in. I just give it a nice
little cut right there and that's your
first end worked in. I can do the same with this one. But what I'm going
to do now is go out closer to the edge
and show you one that has chain stitches because they get worked in just a
little bit differently. Let's take this
one in the middle, this green, and we'll
try working that one in. Again, put it on your needle. Since I have this
chain stitch here, I can't really just
work it straight around or it'll show through
those chain stitches. What you want to do is work
it up into the stitches, so just grab it in some
loops that are on the back here just a loop there and
a loop there. Pull it up. Give it a nice little
tug, but not too tight, you don't want to pucker
any of your work. Then I'm going to go under
and you're basically following where your
stitches are going. I'm going to go
under these two gray loops and now you see I worked back into
another single crochet here and then back up again.
I'm going to follow that. You can go under
any of these loops. You're moving in a
general direction here under the loops
and just again, not puckering it too much, but snug enough that
it doesn't show and working back up
following your work. You're going to go along there
for a couple of stitches. I'm going to go one more
time here under this gray. Now I've worked it from
here all the way to here. I can keep going
to work the end in this way and then that'll
be a good four inches, or I can turn around,
which I like to do. I'm not going to go back
in where I just came out. I'm going to go back in here sometimes because
it gets short here. I have to go ahead
and put my needle in and then just zip
that into the hole. That's why it's nice
if the hole is big. Then I can pull that through
in the opposite direction, or I can do a little
bit more here again, following back the
course of the stitches. I'm just going to slip that in. I have to twist my end
because it's starting to fray and then I can pull
that through as well. That's nice and secure. On a small square like this, you don't have to worry
about long darning in because there's not a lot of
movement in a small square. Here we are, the one
we just worked and I'm just going to clip that
close to the work. Now you've darned in the
one and you see that you can't see it in these
chains stitches. Now if your hands
work to the front, which they very well may
and I'm just going to force this one too because I ended it here and it probably will, we can see that
just hanging out. They're just a little
fray. Those will happen. You can either tuck
those back or you can just trim them off
a little bit more. Be careful with your scissors. Do not cut your work. Trim it off a little more and it'll just fall to the back. Sometimes when you
cut them at the back, you've left enough that it'll
work its way to the front, trim it off a little bit at the front and it will work
its way back to the back. The other thing I had said is that you can leave this end. This one I didn't in
particular for sewing, I should have left it a
little longer and I didn't. But you can work those
in just on the edge. I'll show you if you
need to do that, they're a little different
because you don't have a whole bunch of stitches
to work those in on. What we do here, pulling this out of my way, it gets easier as
you darn them in, you have less in your way. I just go back into a
stitch from the top. Now, I'm going to work my
way along the stitch line, but I'm going to go
into these loops of the chain stitches to
hide it at the back, you can see that, and then into the stitch itself and then back into
the loops of the stitches, and then back into
the stitch itself. You just keep going
along there just working into those loops, and then back into the stitch and you work your
way along the top. I do get asked if
I knot my ends. I almost never do with larger weights of yarn such
as the worsted weight. The knot will inevitably work its way to
the front I find. There's always the exceptions, but as a general rule, I do not knot. That's just a
personal preference. I find it depends on the design and the yarn you're
working with. We'll go a little bit further here and then I'm just
going to clip it. I don't reverse on this one because these will
be worked into a seam and that'll give
that extra support, so it'll be whip stitch
over when you do the same. You can go ahead and
finish the rest of these, and then your square
will be complete. When you're done,
the back will look as neat as the front
for the most part. If you're working a blanket
or a larger project, I like to work a small
batch of squares and then darn any
yarns in as I go. It's nice to save
up a batch and then just put on some
relaxing music or movie, or an audio book, and
darn those ends in.
13. Joining Squares: To join the two
squares together, what we've done here is
a simple whip stitch, and we've done it in
the Chain 1 stitches. You can see with this square, this Chain 1 single crochet on the last
round that we did, we're going to work into the Chain 1 spaces to sew
our squares together. I've gone ahead and
done two squares here. But I'm going to show
you how I created this. When you finish off
your last round 7, it's good to have a
long length of yarn. I leave at least 12 inches
and then I use that to sew up my squares so I don't
have extra ends to work in. I'm going to go ahead
and place my squares, and I'm going to put this
end onto our dining needle. My dining needle has
a decently sized hole here so that it's easy
to put the yarn in. Then I like the ones that
don't have a super sharp end. They're dull, so I don't end up picking my
finger all the time. We're going to start
by working from this end up to this end to
join these two squares. The yarn comes out of
this square on my right. I'm going to put it into
the Chain 2 corner, coming from the back to the front to join these
two at the bottom. Then to anchor it, I'm going
to go back into the Chain 2 on the right bottom corner. Then I'm going to come back
up again on the left square. Then I'm just going
to secure that. Not pulling too tightly because you don't want
to pucker your seam, you just want to pull
it nice and gently. That anchors your yarn
in place at the bottom. Now we're going to work our
way up a simple width stitch, which is just working
around the seam. We're going to go into the
next Chain 1 space right here. Then we're going to go across. You work from front to back, and then you work from back to front through the corresponding
Chain 1s base across. Let's Zoom in and
take a look at this. Now we go to the
next Chain 1 space. We go from front to back. Then on the corresponding
square Chain 1 space, we go from back to
front and we pull. I use my thumb just to hold it so this doesn't get all knotted, and then I just gently make
it so it lies nice and flat. Then we move to the next one. Up to the next Chain 1 space, and then across to the
corresponding Chain 1 space on the next square. Pull up your loop
nice and gently. We're going to get
a slanted line across here with our yarn, and again into the
next Chain one space, and we're going to keep
on going like that. We're going to create
this nice loose seam, but it's actually
very secure seam. I'll show you when we get to
the top what it looks like. Keep on going across and you're slanting upwards
by the looks of it. You're actually going across to the corresponding Chain 1, but it looks like it's
slanting upwards. After you've worked the
last Chain 1 space, you want to go into the corner. We're going to go into
our Chain 2 corner on the right side. Then we're going
to match over to the Chain 2 on the left side. You go from front to
back on the right and from back to front on the
left, you pull it up. Then to secure it,
we go back into that Chain 2 space
on the right side. Then what I do to
completely secure this yarn is I go to
the back and I lift up this loop that I created
on the last time around, and I take the yarn through and it just
gives it a nice little, kind of a little bit
of a slipknot there. It's not really a knot,
but it secures it. Then I can use this
for sewing more, or I can just turn that in. There's the seam of the first two squares
we've put together.
14. Joining Rows of Squares: Now once you've sown
your squares and strips, and you can sow as many squares to make these
strips as you want. You can make it into a blanket or you can just stay
with these four, which will make a nice trivia. We're going to sow
the strips together. In this trivia, but this
will probably be enough, these 12 inches but if you're
sewing a blanket together, you're going to need
a much longer piece of yarn to work with, and we're going to put it
onto our darning needle. Now we're going to work up here. So it's the same concept. You're going to
work into the chain to space across from it. Back into the chain two spaces that you started
with on the right, and once more into the chain
two space on your left. You could be sewing this in the reverse direction just as
long as you're consistent, your slants will always
go the same way. Then we go into our next chain, one space, and we start
working up the first square. I'll go ahead and work up to this corner and then I'll show you how I work this corner. Now, I've reached these
four corners and I do a little bit extra
here just to secure the four corners to each
other before I move on and keep moving up to
the next set of squares. I'm going to take my needle, and I finished in this last
chain one on the left, I'm going to go
into the corner as if I would just in
a normal sew-up, and then I go across to the corresponding corner
and I pull the loop up. Then I go back into my first chain two corner
on the right side. Normally, this is
where I would end if I was just sewing
two squares together, but I don't want
to keep on going, so what I'm going to
do now is go up into the chain two of the square
above on the left side. So, working from back to
front, I just pull that up, and then I can go back down
into that corner again just to give it that extra loop and it just gives it an
extra secure in there, and then I start going across and now I'm going to work my other rest of the way up here. So I go into the
chain two space of the new square on the right, come back to the chain
two space on the left, same when I came out of, and then I will continue
on up into the chain one spaces and I will
continue on with my square. What I've done here, is the loops that have always been slanted in this direction. There is one that's
going to come back down in the
opposite direction. For me, that secures
that corner. As long as I'm working
in the same color, you're not really
going to see it, first of all, and it actually matches these loops right here. So you're working
along this way and then to match these loops, now I'm working along this way. So you want the slants
to all be the same way, so when you're lining
up your strips, you want to make
sure that you're slanting them all
in the same way. If you're always working from your first square up
to your top square, these will always be
in the same direction, but you can get your strips
tossed around if you've just done a whole bunch
of strips and now you're putting them
back together. That's what you
want to look for, is that these slants all match, so that when we come
up here and we do that extra little stitch to
tack this corner together, it matches these slants. I don't really have enough
yarn here to finish this. Normally, I would cut
this even longer. If that's the case, then I can
darn this one in and start a whole new piece and just
finish up to the corner. I'm going to go ahead
and finish up to this corner and then
we'll take a look at it. Now we have sown four
squares together, you can sew as many together now as you want since you
know how to do it. This particular one would
make a nice trivet. To finish this off, I'd like to add an edging
around the entire piece. You could work another round
just as you did round seven, or you could work a
couple of those rounds. But another option is what
I call the quartered edge, which is made using
reverse single crochet. In the next lesson,
I'll show you how to work this edging around one of the squares that you've
made in place of around seven to give it a unique
and finished look.
15. Alternative Edging: You can see that
this coaster has a different edging than
the one we just did. I'm going to show you an
alternative to the one that's in the pattern so you can
get this nice corded look. It gives a nice finishing touch if you want something different. This edging can be used
around any size of project, just working it on after all
your squares are joined. Or you can work at around just one single square to give your coaster a
nice finished look. In this lesson, I'm going to
show you how to work it as an alternative to round
7 on your single square. We're going to go back
to, this is round 6, it's finished and then
we're going to use our teal to do a different
kind of round 7. The way you're going to do
this is you're going to join it in any one
of the corners. You're going to just
pull up a loop and chain one just like
you normally would. But this time we're going
to be working backwards. Reverse single crochet works backwards to what you're
normally used to. Normally you would be
working down this row, but you're actually
going to be working in reverse to what you normally do. We have our join and our
chain 1 and we're going to work a single crochet
into that chain 2 spaced. We do this by going
down and under. You're twisting your hook and putting it in and coming up
the other side of the yarn, wrapping around, pulling
the yarn through. Now you want to do
this nice and loose. You want two loops on the hook, they're going to look twisted
and then you're going to wrap the yarn around and pull
it through the two loops. That's your first
reverse single crochet. Let's zoom in and see
what we're doing Here. Our second stitch, you're
going to take your hook again, rotating it so the handle
goes up and the hook goes in and under into
the next chain 1 space. You're going to wrap
the yarn around, pull it up, nice and loose. Again, two stitches on the hook, but they look crossed, yarn around and
pull through both. So you want this to be nice and loose or you're going
to pucker your work. If you're finding
that it's too tight, you can't seem to
get it loose enough, then I would suggest you
either go up one hook size or two hook sizes to
get it nice and loose while you're
practicing the stitch. Again, we're going to
go onto the next one keeping everything loose, rotating it and going under. Then you're going to grab
the yarn at the back, pull it through again, nice and loose with
these two loops, yarn over and pull it
through the two loops. I'm going to move a
little faster here and just show you under, grab, up, and through, under,
grab, and through. That gives you a better idea
of how the mechanics work. This will take practice if you've never done
this one before. Be patient with yourself, but it does come with time. I'm going to work over
to the corner and show you how the corner works. Just moving slowly
again in and under, so that the hook
is just going in the opposite direction to
what you normally would. Instead moving forward this way, you're actually moving
the opposite direction so it's a little awkward. We've reached the corner, so now I go into the
corner the same way. Then I want to do
two stitches in that corner so that it doesn't
get a rounded look to it. I find the best way to
do this is to chain one in-between them and
then go in again. You want to try not to
keep as much of that stitch out of the
way as possible, and then you complete
your second one. Then just pull it out into shape because they
tend to overlap each other and sometimes that can ruin the nice corded look. Then we continue around
the opposite side. Again, nice and loose. Just do a few more here. You can see here how the corner has a nice sharp corner to it; it's not all rounded. Again, once you
complete all that, you'll end up with this
nice quartered look to your coaster and it gives
it a very different look. If you're up for a challenge, that one's a fun one to try. Again, it'll take practice. It's not something
you're used to, so once you get the hang of it, it's a really nice way to
finish off your coasters. Congratulations, you've
finished your square. You've learned how
to dorn in your ends and you've sewn some of
these squares together, you've even learned
a fun edging. In the next lesson, I'll share some inspiration on
what you can make with the square and how you can share your
creativity with others.
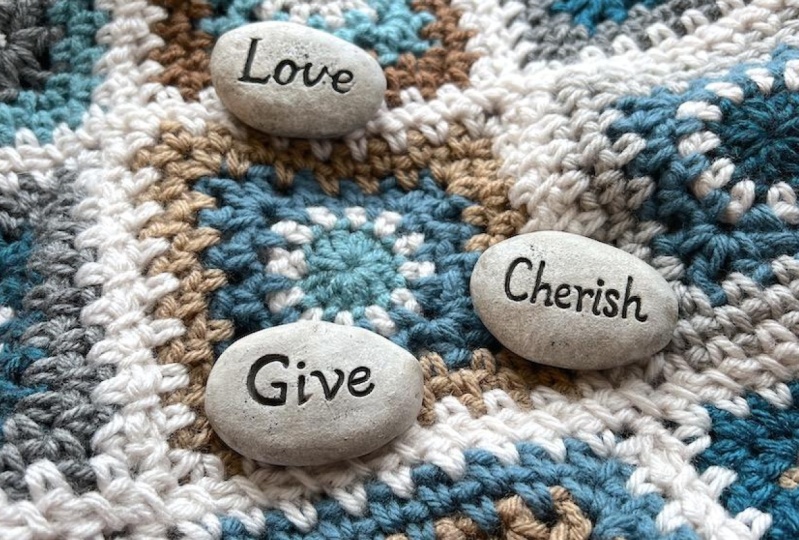
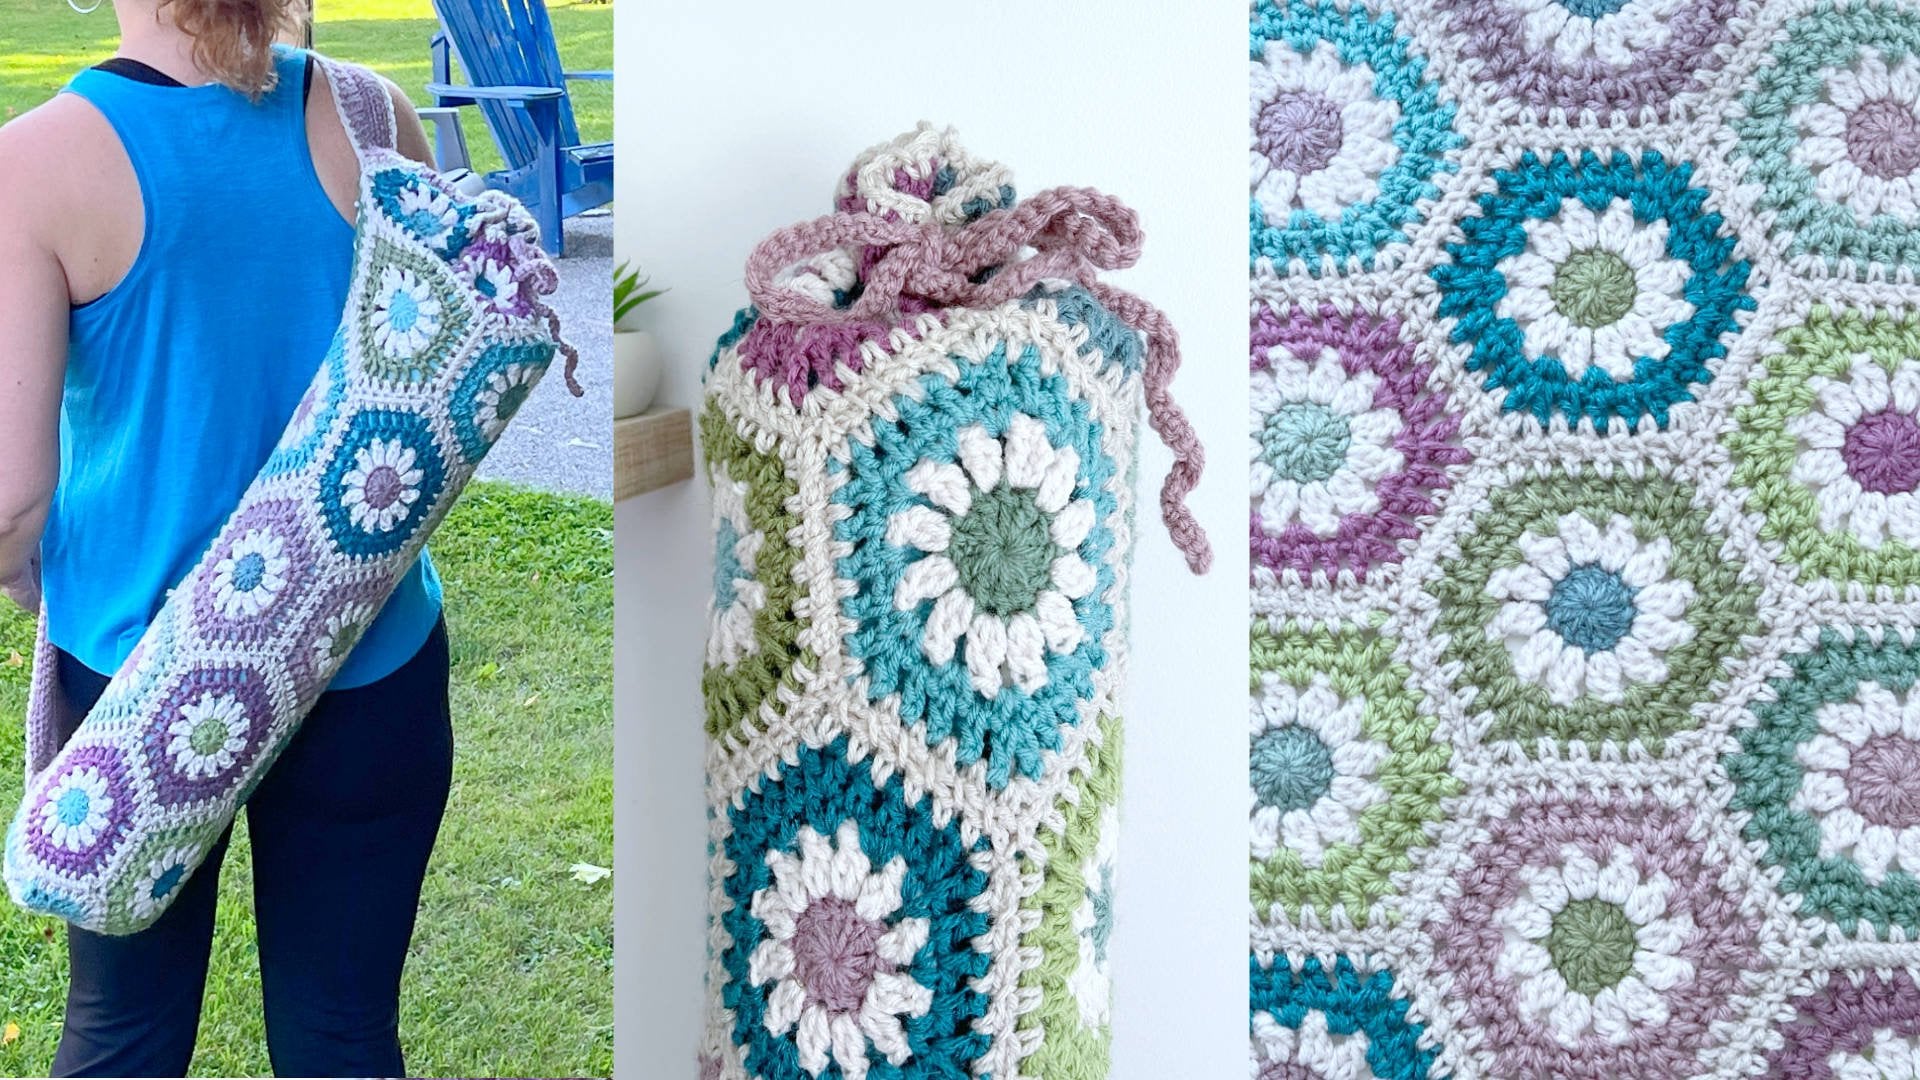
16. Inspiration and Your Next Challenge: Now you have all
the skills you need for making your crochet square, sewing them together, and
even adding a nice edging. Now for some inspiration
on what else you can make. Of course, these squares
make great little coasters. You can sew some
together to make derivates or
placemats or you can go big and sew a bunch
of them together and make a throw or a blanket, all from just this
one little square. You can change up the
size of the square by decreasing or increasing
the number of rounds, for example this
trippin was made using squares with only five rounds, so they come out
a little smaller. With these endless ideas, what will you do with all these wonderful projects
you're going to make? If you remember,
the inspiration for this class was to share
your creativity by making a handmade item from your heart to brighten
someone's day and give someone something
that they will be able to cherish for years to come. Something that lets them know by the very act of creating
it that you care. You can give your cherished
item as a gift to a family, or to some friends, or even to your neighbor. Of course, sharing the
love includes self-love. Maybe your item is
something you want to gift to yourself and feel the love you put into
it as you use it in your daily life,
completely legit. If you feel pulled the share one of your projects
with your community, then I suggest looking into local charities or
care facilities. Many places will welcome your handmade item
with grateful hearts. You can check ahead of time
to find out if they have any guidelines or if their specific items
they're asking for. Some of the places
you may want to contact would be hospitals, nursing homes,
homeless shelters, cancer centers, animal shelters, hospice care centers, churches, or veteran centers, or there could be
others you think of. Once you start asking people, they will guide you in
the right direction. The world of handmade giving is a very welcoming
and friendly place. I end with a reminder to post your square in the
project section. You can post your
progress as you go and then you can update us when
you've completed your square. Then if you'd like to, and only if you want to
share this part as I know, giving handmade and can
be a very personal act. If you feel comfortable
sharing your journey of how you gifted your
finished cherished item. Thanks so much for joining me in this class and I'm really
looking forward to hearing how your crochet
creative process stood out and how you shared a little piece of your
heart along the way. Thanks again, and
enjoy crocheting.
 Jane Snedden Peever, Living the Creative Life