Transcripts
1. Welcome !: You struggle to find time
every day to make a sketch? Sketching every day
is really magical. And by sketching
everyday objects, you will notice beauty around you that you didn't
notice before. Sketching everyday objects offer me but always to my sketchbook. Those of you who know me know that I love to sketch
tea and coffee cups, and maybe you even tried my tea and coffee cups
challenge classes before. In this class, we will
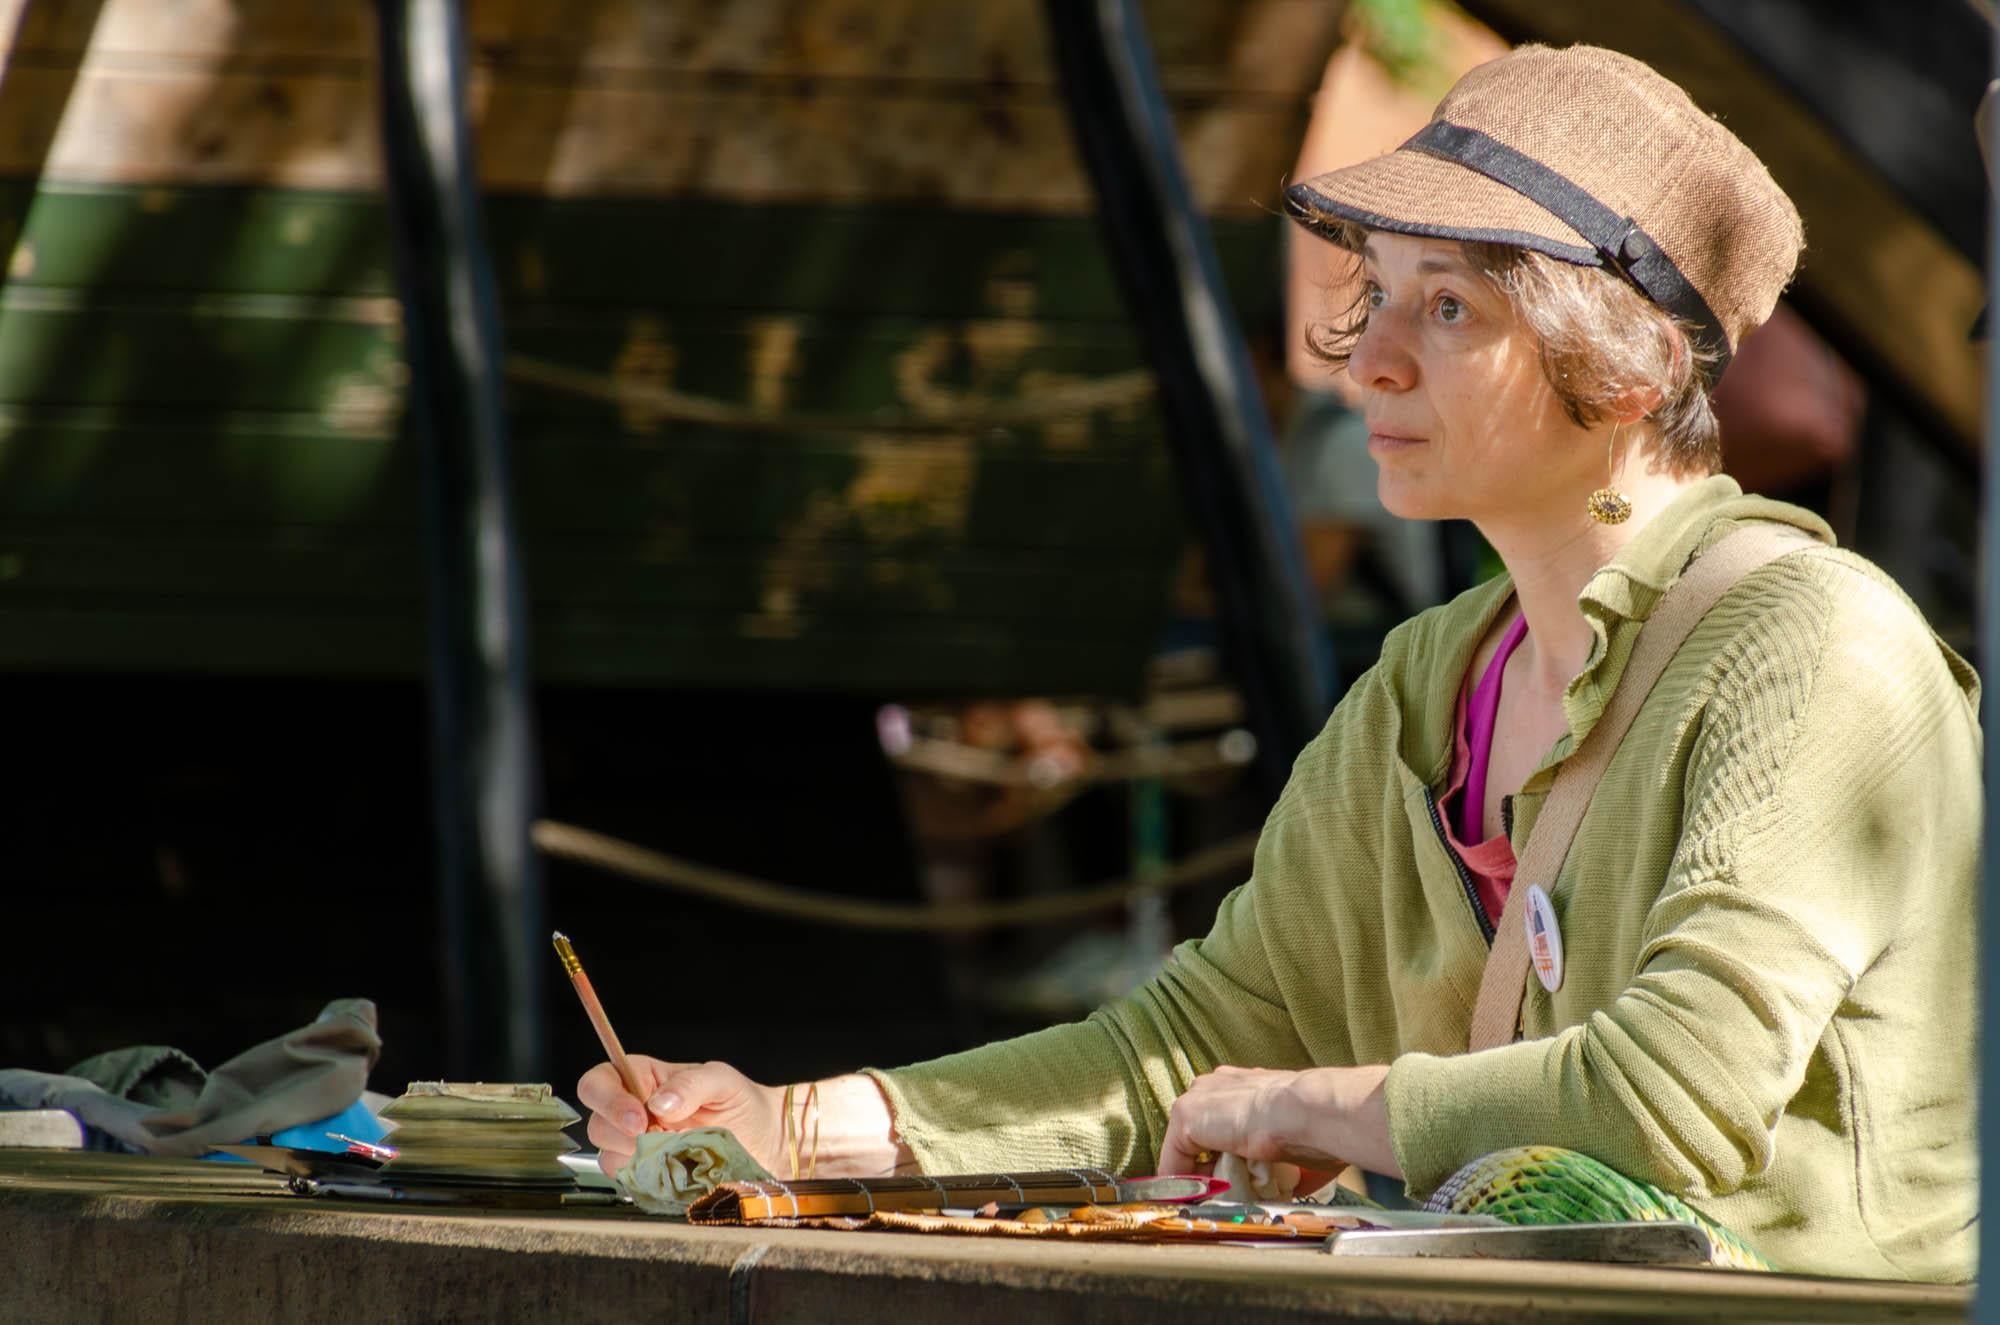
do a teapot challenge. I hope you will join me. Hello, I'm Barbara. I'm architect, urban sketcher, and author of several
travel sketchbooks. And I also did drawing to architecture students
at Brussels University. So I hope you will
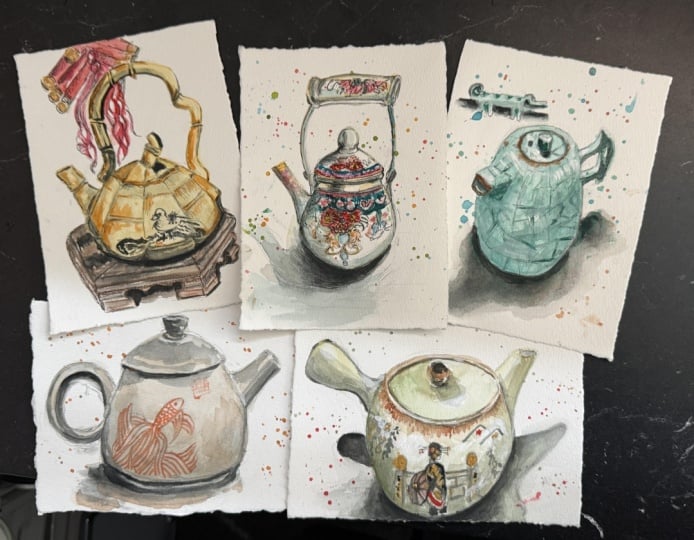
join my class. And as a class project, I suggest you make at least five teapot sketches to start this new
habits with me. In this class, you will learn valuable techniques to elevate
your watercolor sketches, how to confidently
combine watercolor with color pencil for
vibrant bold lines. Class project will be to make a series of teapots
of your choice. At least five sketches is helpful to create a
collection and a habit. Don't hesitate to add other art supplies you
have in your own closet. You don't need to
buy the ones I use. Sketching a teapot a day
will boost your skills. The more the better.
2. Day 1 : Red Dot Japanese Teapot: So in this video, I will sketch this Japanese
teapot. I love it. I bought it in Brussels in
one of my favorite tea shops, and it's very special
because it was broken once, and a friend repaired it for
me using kenzugi which is a Japanese way to repair pottery with glue and some
gold in the glue. So it has these
beautiful golden scars, which fit well with the
red dots on the teapot. So I start with color pencil. It's a watercolor
pencil by Fabo Castel, and it's a grayish green
watercolor pencil. And so I use this sketchbook, which is already full of tea sketches and teacup sketches and also some coffee
cup sketches, and it has nicely smooth paper. And if you want to
use color pencil, I advise you use smooth
paper instead of textured paper because if
you use textured paper, you will have interrupted
pencil lines. As a shadow gray, I use my mixture of ultramarine blue and
transparent orange. And I like to start with the shadows first
because in that way, I don't lose the drawing I made because the shadows
accentuate the drawing. And it's also a way to integrate the shadows better because I
will paint over the shadows. So the shadows will be
under some layers of color this is Alizarine crimson red, and I splashed it
in the shadow wash, so it blends with
the shadow gray. Again, you don't have to use the colors which
are there in reality. I used green pencil lines, and there are no green
lines in my teapot, but I figured that
the green lines will dissolve a bit and fit
well with the red dots. H And now I draw the dots with a
watercolor pencil. Again, a red watercolor
pencil now because I want the red pencil lines to dissolve
a bit in the watercolor. So I use a watercolor pencil. It's a very playful teapot. I like this teapot, but of course, if you like
to sketch something else, feel free to use other reference photos or to
sketch whatever you like. When you sketch, it's important to sketch something that you
like, of course. Don't sketch anything
that you don't like. Otherwise, you will be
bored when you sketch. So for the red dots, I use Winsor red. It's a very red, red, warm red. And I also add some Elsyine
crimson in it to have some different kinds of red
in the wash. On the side, I use zarine crimson
because it's a cooler red, and I like it because it mixes with the
red watercolor pencil. And Lizarne crimson fits better with the
shadow on the side. The darker you go
in the shadows, the more light you will
bring in your sketch. So I will put another layer of shadow gray while the
red is still very wet. So the red goes into the shadow. I always like to add some of the color of my object
into the shadow. Also, when I sketch a building, I like to add some of the color of my building
into the shadow. It connects the
shadow to the object. And now I erase some watercolor
wash with a very hot, synthetic brush to soften
some edges of the washes. And I add some red also for the dots to make them stronger. When you try to erase something, some wash with a
synthetic brush, be careful not to
damage your paper. Some paper is a bit fragile. And I add some color
pencil lines around the lid of the teapot to
make a darker shadow line. I like to do that with color pencil because color
pencil gives a nice color. This is a oper jean color, and it's a luma
colour by Kandas. But if you add some color pencil which is not watercolor pencil, your paper really has
to be completely dry. No, I erase a bit
Color wash to give some texture and
light reflection on the lid of the teapot. Don't do this with
natural hair brush or you will destroy your brush. I add some color pencil to give some more texture
to the red dots. And I add some extra
dark color pencil where is very dark shadow. Now it's time to add some gold. This is acrylic Kach paint. So it's waterproof and it's dry. And I put a rethi golden kinsugi
glue line on my painting.
3. Day 2 : Green Japanese Teapot: So this is a teapot that I got from a friend,
a Japanese teapot, and it has nice little
tec ups with it, but I'm just going to sketch this teapot in this sketchbook. As you see, this sketchbook
is a collection of teacups, and some of these
tec ups were part of my tau challenge
classes in the past. And also, some of these sketches in
this sketchbook were published in my book about Japanese tea that I published in 2025 with the Somier
Izalin Lanois. This sketch is made in
watercolor pencil by andas. The museum Aquarel Range. It's a very crazy
watercolor pencil and Toquas is one of
my favorite colors. I start by wetting the
paper first because I want a watercolor wash with
soft edges in the teapot, and I make a first
wash with green Earth, and I add a bit of toquas in it. The toquas I add in it is Sleeping Beauty
by Daniel Smith, and it gives a lovely mixture because the green
Earth is granulating. And I add some watercolor
pencil lines in the wet paint, which gives some nice greasy
lines in the wet paint. The bottom of the teacup, I make with forest green
paint by Schmincke, which is also a super
granulating paint. I love to mix
different pigments, different colors in
watercolor washes while they are still wet, so they blend into each other. Again, don't worry. Just use your favorite colors. Don't worry if the sketch is a bit wonky and not
totally correct, and just use your
favorite colors because the purpose
is to sketch and have fun and not to make photographically correct
observational drawing. I add some anciana
watercolor pencil lines on the wet paper because
in the ceramic, there are some terracotta
lines visible, and it's very beautiful with
the green and the torquis. And now I add also
some Bnciana paint, which fits very well with the
green and torquis as well. And Bnciana bleeds a bit into the wet paint into the green
and it gives a nice effect. Then I let the
painting dry and I wet the paper again
to add some shadows. And now I use violet Tundra Volet by Schminke for the
shadows because I think my usual wash of
ultramarine blue and transpent orange will not be so nice with the green paint. So I take these violet paints. And I wet the paper
first to have some nice soft edges in the wash. As you
see on the table, the edges of the shadows
are also quite soft. I also add some shadows on
the top of the lid and on the handle and the mouth of the teapot to make the
shape stand out a bit. And I add some extra
turquoise touches to give it some playfulness. I use my small synthetic brush to erase a bit of
watercolor edges. This brush is by
Rosemary and Co. It's a British brand, and it's called the
eradicator brush, and it's made to erase a
bit of watercolor paint. Be careful when you
use it on your paper, make some tests beforehand to make sure that you
don't damage your paper. And I splash a bit to give
some texture to the teapot. Then I let the
painting dry again, and I do some pencil
hatches on it on the dry paper with
normal color pencil. So this is not
watercolor pencil. And I just do the hatching
in the shadow side. And I will correct a bit. The shape of the tepot, I find the belly
of the teapot is a bit too much to the left, so I'm going to erase it
a bit on the left side. And I'm going to add some splashes to
hide my corrections. If there's a part of your
drawing that you don't like, just splash on it so
you take the attention away of what you're fiddling and what you
don't like so much. You can hide a lot
with splashes.
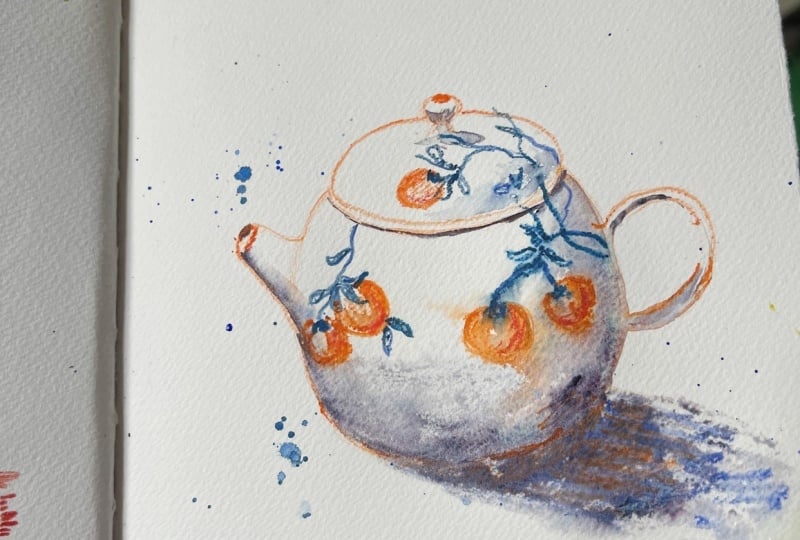
4. Day 3 : Chinese Teapot with Koi Fish: So now I'm going to sketch this lovely Chinese
teapot I bought in China in April 2025 when I did a travel
sketchbook trip to China, and I bought it in
the Yunnan Province. And I loved it so much
because of the shape and because of the
beautiful coy fish which is drawn into the ceramic. And this is actually
one of the objects which made me want to make
a tepot sketching class. So this tipot has a
lovely round shape, and I use a color pencil
like nag, omo color pencil. So it's not a watercolor pencil, so the pencil lines will stay visible when
I paint over them, they will not dissolve. The teapot is quite black, but it's so warm, brownish black, and I
will not make it black. I will make it more brown. But I start with wetting my paper because I want
soft edges in the shadows, and I start by painting the shadows to make the shape
of the teapot stand out. And as the shadow gray, I use my mixture of ultramarine blue and
transparent orange. I look carefully where
the shadow is darkest. So it's at the bottom
of the teapot and under the lid and on
the little handle, and this way, the shape
immediately stands out, and it brings immediately
light into my sketch. That's why I love starting with the shadows and also because the shadows will be absorbed and integrated into the painting
when you put color on them. Now I will add some brown and I leave the paper white where
there's the most light. And I add some sepia brown
and also some burnt umber. I absorb excess paint by
brushing the hair of my brush, the clean hair of my
brush in a tissue, and then I dip it in the battle of paint
that I want to absorb. I also splash some light
red by Winsor Newton. Just use the colors that
you like in your sketch, even if they are not
there in reality. Now I want to add
the inscriptions and the coifsh in a soft red pencil. This is a soft red pencil
from prisma color. It's not a watercolor pencil. And I try to draw it, but the paper is still humid. And then you better stop because you damage your paper if the paper is still humid. I try to sketch with
a watercolor pencil, but I don't like it. So I wait until
the paper is dry, now it's dry, and now
it works perfectly. No. So I hope you like this video. No progress without action. Just chooe a favorite
teapot or an image of a teapot and make a sketch
yourself to try it out. I soften the edges of the
shadow with a synthetic brush. This is rosemary and cold brush. And now I want to draw
the Chinese characters. I try with a greasy
white pencil, but it isn't white enough. So I add some white fine
liner to finish it. To finish the shadows
on the table, I wet the paper first
because I want soft edges. And then I add some gray on the mixture of ultramarine blue and
transparent orange, and I add some gray
on the wet paper. The darker you go
in your shadows, the more light you will
have in your sketch. So don't be afraid
to go really dark. So have fun with your sketch.
5. Day 4 : Chinese Calligraphy Teapot: So this is another
Chinese tea pot that I brought from China. I brought two of them, and this is one of my sketchbooks I used in
China and it's not full, so I will sketch in
this sketchbook, like I sketched the previous Chinese teapot in
this sketchbook. So this is a
sketchbook made with HanamlaPaper by a
friend of mine, and I love HanamlaPaper because it's very smooth,
very white paper. I make this sketch with
a watercolor pencil, so the lines will dissolve
when I paint over them. So don't worry if your drawing
is not really correct. Wonky lines are
beautiful, and anyway, they will dissolve
a bit when you paint over them if they're
in watercolor pencil. This time, I use a color, which is also in the teapot, kind of terracotta
burnt sienna color. So let's put some paint on this. As a shadow gray, I use my mixture of ultramarine blue and
transparent orange. And I first put the dark shadows to make the shape of the
teapot stand out. I wet the patch
first when I want soft etches in my
watercolor wash. So when you put your paint watercolor paint
on the wet paper, the etches are diluted in
the water on the paper. And where I paint on dry paper, my etches will be very neat. So it takes time to
experiment with the water, with a good paint consistency. So don't be too hard on yourself if it doesn't
work immediately. You can fiddle in the paint as long as the paper
is really wet, but don't add too
much water on it. Otherwise, you will have a
kind of cauliflower effect. Usually, I first paint the teapot and then the
shadow on the table. So now I did the
other way around, so I leave a white line between the two of them
because the teapot is more wet than the paint for
the shadow on the table, and I go over it afterwards
when the other part is dry I will do several
different washes here. Now, I add transparent red
foxide by Daniel Smith, and I love this a lot because
it's very granulating. It's not really the color
of my object in reality, but I just use my
favorite colors. There's no one
coming afterwards to check if everything is
correct, so don't worry. Just use your favorite colors
and play and experiment. This is just a sketch. I want to go dark in this
teapot because at the end, we will add the
beautiful drawings and calligraphy on the
side on the teapot. And I like to add some color pencil when I
need some really fine lines. You can just do parts of
your sketch in color pencil. Just do what you like most and
what is most easy for you. You can absorb excess paint by cleaning your brush
first and then pressing it in a tissue, and then you can go and absorb excess paint
in your sketch. So I left the pitch to try to
add another layer of color. Now, I add light red
by Windsor and Newton. No, it's getting quite orange. I like this. It's a
very happy color. And I also add some raw amber. And when the paper is dry, I add the calligraphy
on the teapot. I try with a crazy white pencil. This is a white
pencil by the end. And then I add the red
with a red, greasy pencil. The calligraphy is not
completely correct, of course. I just tried to copy some
of the Chinese signs. And I find the white
is not so beautiful, so I will add some light
yellow pencil over the white. I hope you like this video. Please tell me if you have any questions and
have fun sketching.
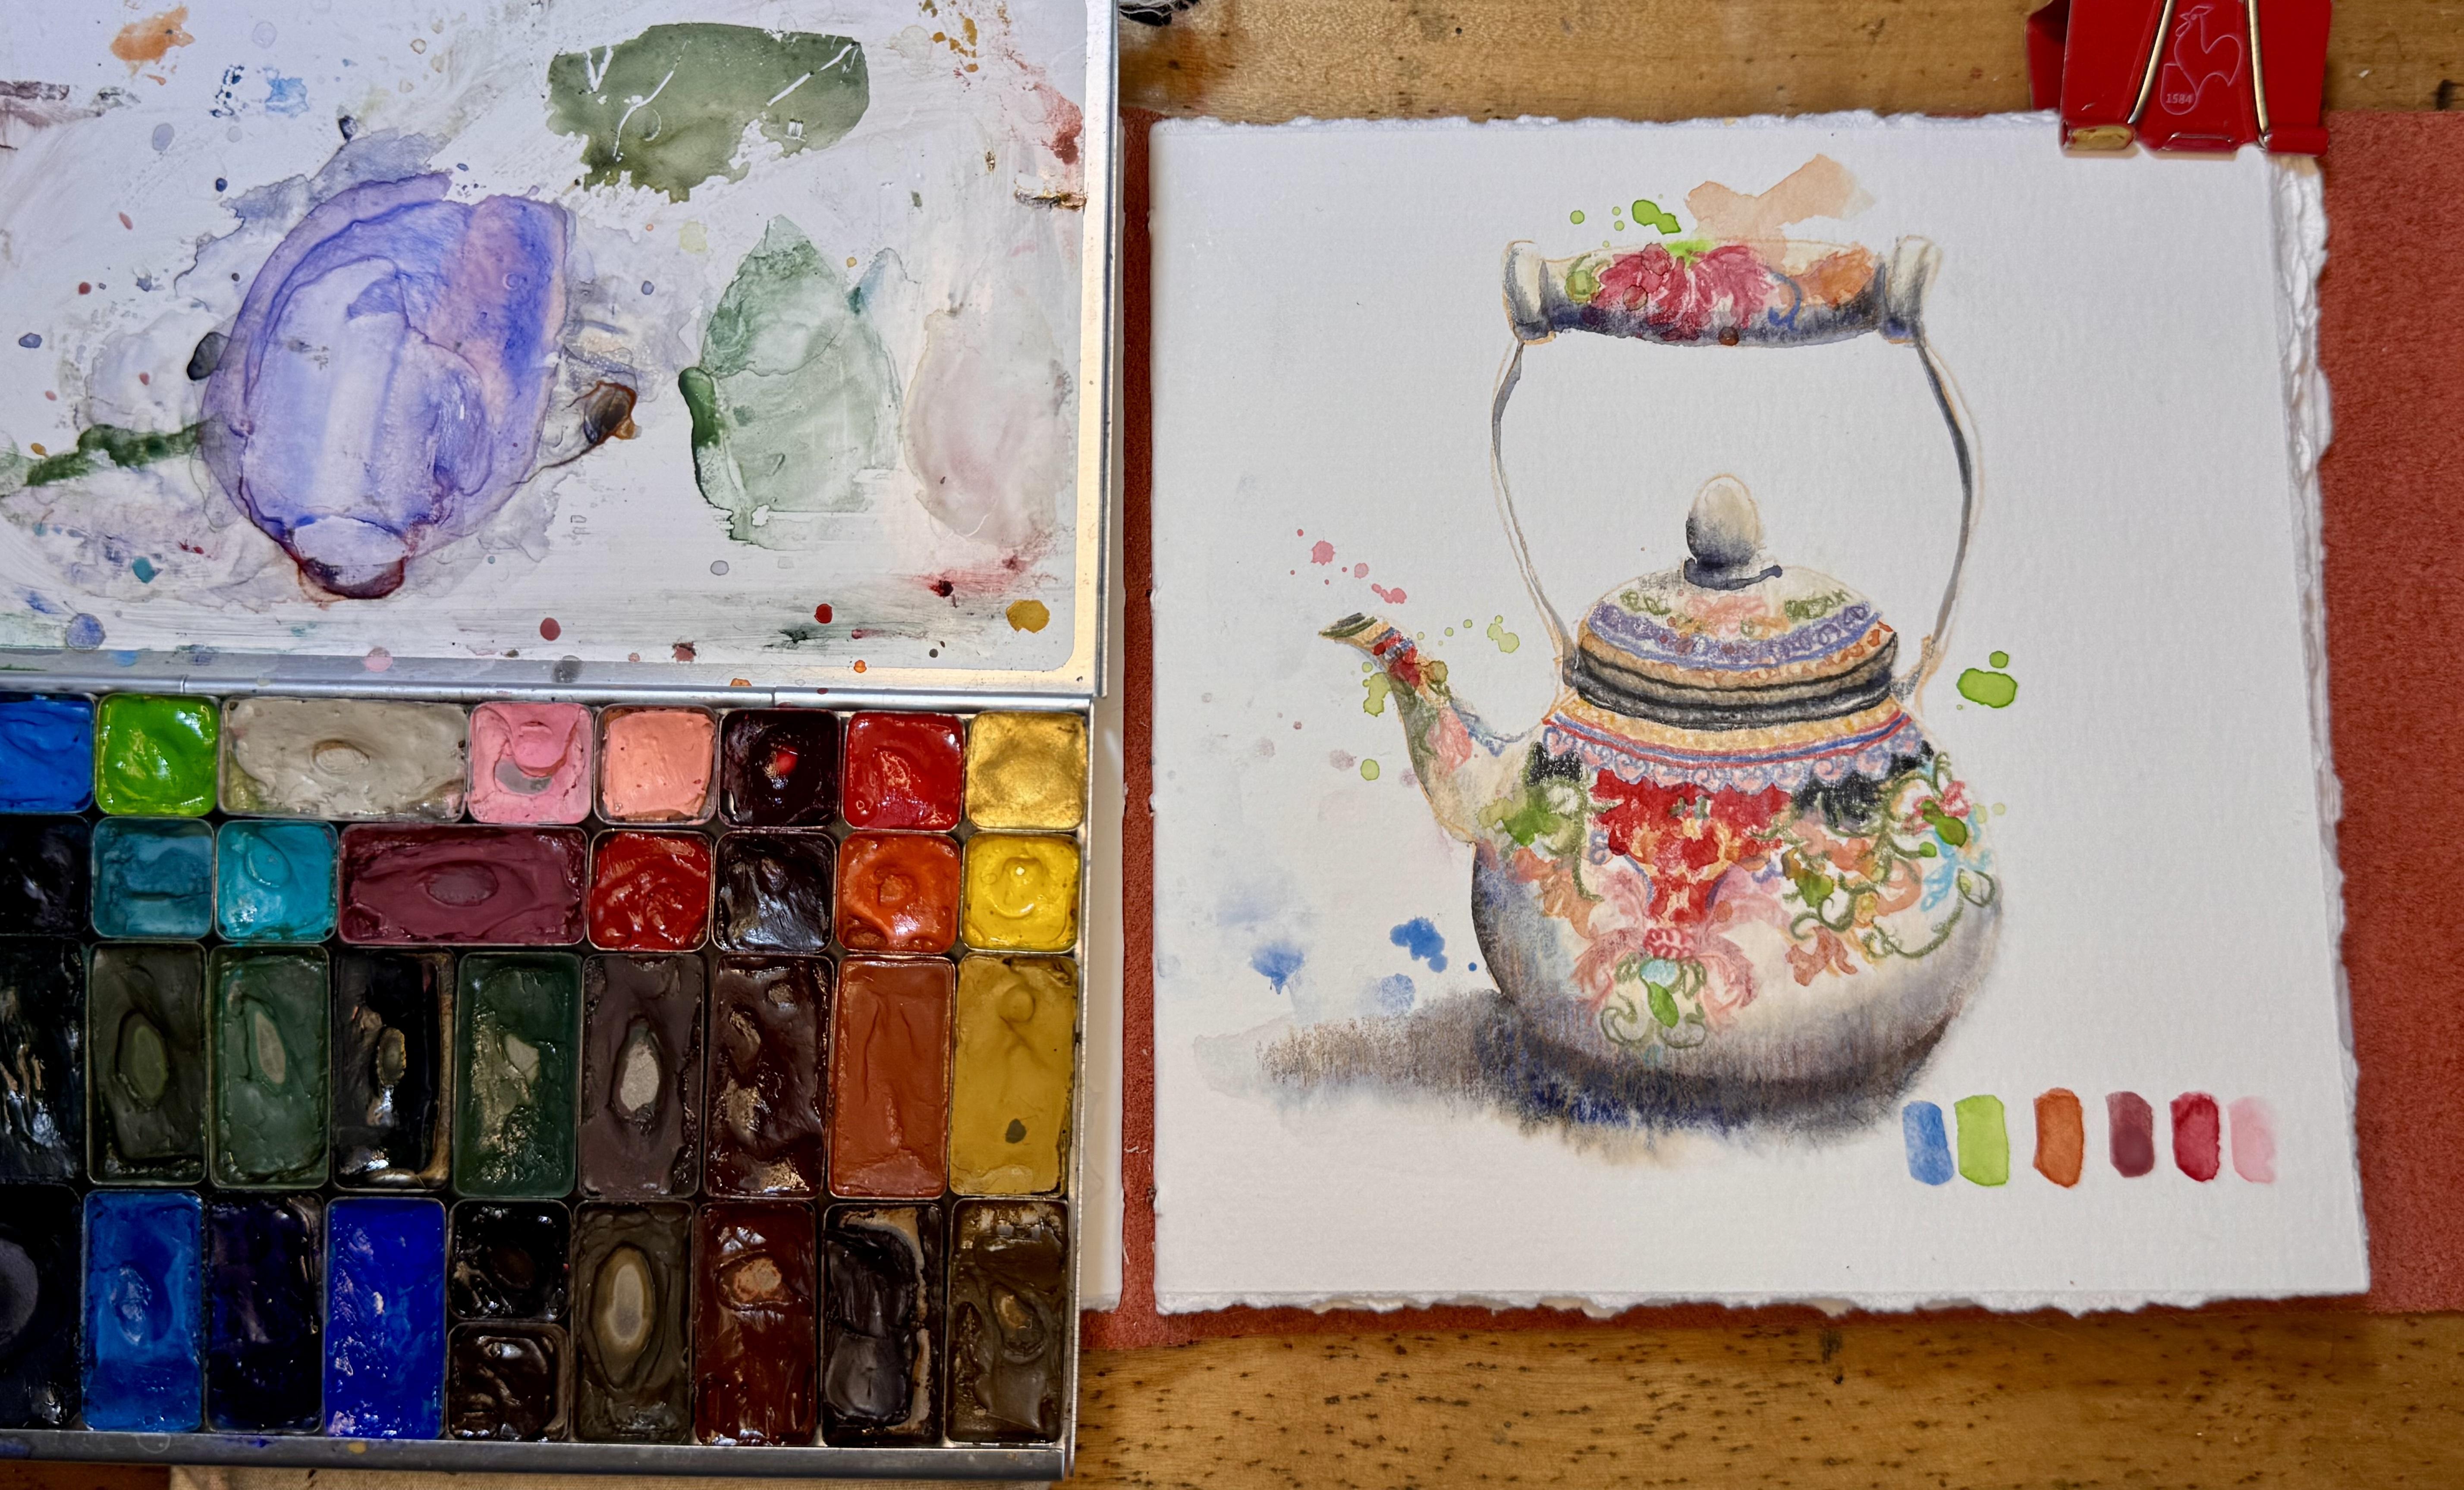
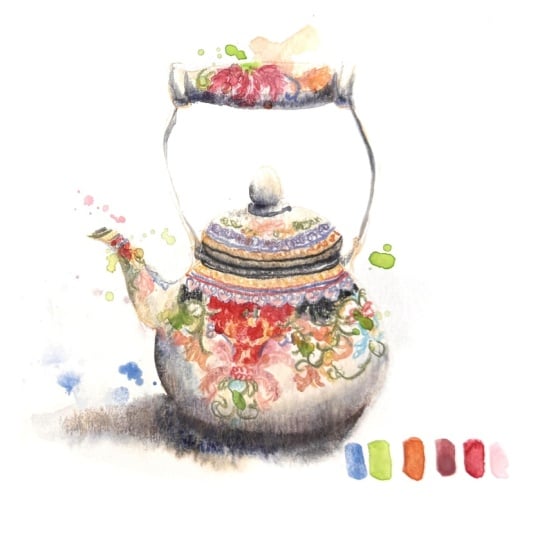
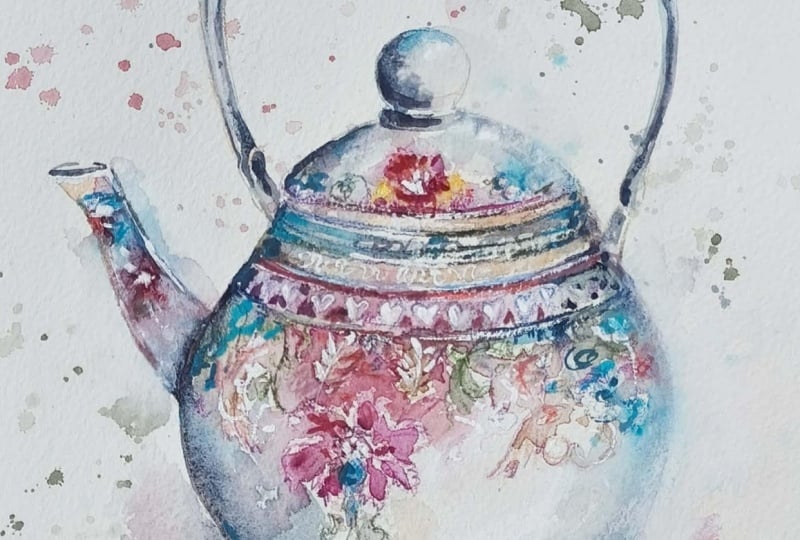
6. Day 5 : Flower Teapot With Background: In this video, I'm going to sketch an Indian flower teapot. It's a wonderful teapot picture I got from Izalin Lanoi who is a T some with whom I wrote the book
about Japanese tea. Well, she wrote it and I
did the illustrations, and I asked her if she
had some lovely teapots for me to inspire
me for this course. And she sent me this
gorgeous picture. So this is a really fancy teapot with amazing flower ornaments. And because it's such a
color party in this teapot, I choose to sketch all the ornaments in
different color pencils to have already
beautiful flowers in my sketch before I start
some watercolor paints. So again, choose the
colors that you like, and don't worry if the ornaments
are not totally correct. I just make a suggestion of
all the ornaments I like, and I simplify the shapes, and I use the colors which I have at hand
and which I like. I use color pencil, so not all watercolor
pencil because I don't want the shapes to dissolve when I will put my shadow
in watercolor. When you sketch ornaments
like this on a tipot, pay attention to the
round chip of the tipot. So the ornaments
are a bit curved, and I sketch them in a way to
accentuate the round shape. And so when the ornaments
come to the side, I will make them a
bit more simplified. And I follow the round
ship of the teapot. Also on the handle, the ornaments are a bit tilted to follow the round
shape of the teapot. So be careful not to flatten your sketch when you put
some ornaments on it. I have accelerated this video because coloured pencil
takes a lot of time, and I don't want
you to be bored. So in reality, I don't
hatch so fast, of course. So now I add some shadow gray, and it's my usual shadow gray with ultramarine blue mixed
with transparent orange. And I use for the mixture, I use transparent orange and ultramarine blue by
Windsor and Newton. For the shadows of the teapots, I wet the paper, so I
would have soft edges. I want soft edges
in the shadows. So I wet the paper first, and I will splash
some color in it. So I splash already
some colors in it, and I splash some colors, which I find in the
ornaments of the teapots. Now, I erase the edges
of the shadows a bit with my synthetic brush
because I want soft edges, and I found them too hard. On the red, I had
Alizarine crimson, and I try not to be
too precious because the temptation to detail all these beautiful
ornaments is really big. So I really try to simplify them So this is rz Disreen crimson and
then potters pink. In reality, the pink is much
brighter on the picture, but I want to have a
more neutral pink. And now I add some light red by Winter Newton instead
of the brighter orange. I find the shadow on
the lid very hard. I will take a bit of the shadow gray away
with my synthetic brush. Be careful when you rub the paper with your
synthetic brush, not to damage your paper. Make a test before because
if you damage the paper, you won't be able to paint
on it anymore afterwards. So I clean the brush,
I wet it a bit, and then I rub the paper, and then I dab it with a
tissue to take the water off. Now I add some black
watercolor pencil on the humid paper to
have a greasy black line. I like to soften the edges of the shadows because it makes
the round shape stand out. I add some shell pink splashes. This is my favorite pink. And some grass green, really bright green splashes. It's such a happy color. And then I add some erlean blue. Oh. If the splashes are too dark, I immediately absorb them. And to give some more
body to the white teapot, I put some very light
yellow color pencil. It blends the colors
together bit. And so it's a bit less white. And then I add some very light
terracotta hatches on the shadow gray
to make them warmer. And to make the teapot
stand out a bit and make a suggestion of the vegetation behind the tepot in the picture, I will add some
color pencil hatches in the background
around the tipot. It really makes the tipot stand out to have
a dark background. So I could do this background
with watercolor, of course, but I want to experiment with the hatching
with color pencil. So I choose to try
the color pencil. I first make a gray hatch
to darken the background. And then I will go over it with some shades of green and
also with some terracotta. And I use only colors which
are already in the teapots. But on the top of the page, I add some terracotta hatching. And you see when you add some lighter color pencil on top of the dark color pencil, you close all the white
gaps in the hatching. I finish with some apple green, which I use in a really wild
way to suggest a vegetation. I go in all different
directions. So this is my experiment, and I think it makes the
teapot really stand out. I hope you like it.
Tell me what you think, and if you give it a try,
7. Thank you: Thank you for
participating in my class. I hope you enjoyed
your sketching. Did you manage to go nicely
dark in the shadows? And did you use your
favorite colors? Did you take time for playing? And how did it go to add color pencil to your
watercolor sketch? Be sure to share your
finished project so that everyone can get inspired
by your unique creations. Thank you so much for
joining me in this class, and I love sharing this
artistic journey with you. Please consider also
leaving a review. Living a review is truly
helpful for the teacher and to help other students discover classes that they love. And of course, don't
hesitate to reach out with any questions or thoughts
in the class discussions. I hope to see you in
one of my next classes.
 Barbara Luel, Architect, Author & Artist