Transcripts
1. Welcome to the Coffee Break Sketching Challenge!: Do you struggle to find time
every day to make a sketch? Sketching every day
is really magical. Let me guide you in a
doorway to my sketchbook. Sketching everyday objects like coffee cups in this class. Those of you who
know me know that I have a lot of teacup
sketches in my sketchbooks. And in my other classes, I sketch teacups and I
want some variation, so I started to sketch coffee and coffee cups because
I also to drink coffee. So I hope you will join me, and let's make it a
Coffee Cup Challenge. Hello, I'm Barbara. I'm an architect, urban
sketcher, artist, and author of several
travel sketching books, and I love to sketch
my sketchbooks. So in this class, we will just sketch coffee cups and coffee
pots in a sketchbook. In this class, you will learn valuable techniques to elevate
your watercolor sketches, how to confidently
combine watercolor with color pencil for
vibrant bold lines. And your class project will be painting your own tea
or coffee cups for minimum five days to
build consistency and experimenting freely with
those exciting techniques. Don't hesitate to add other art supplies you
have in your own closet. You don't need to buy the ones
I use. Let's get started.
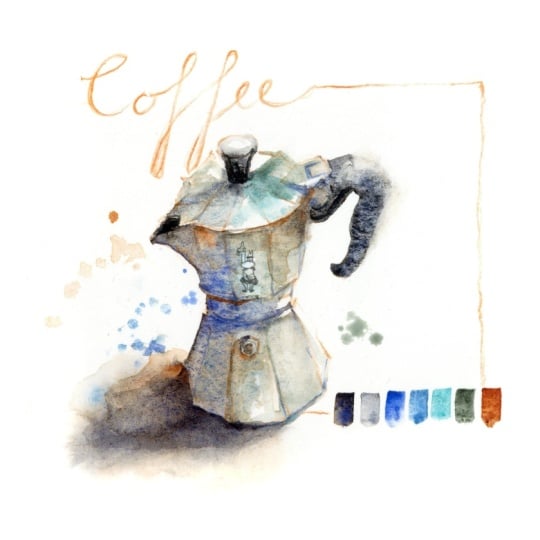
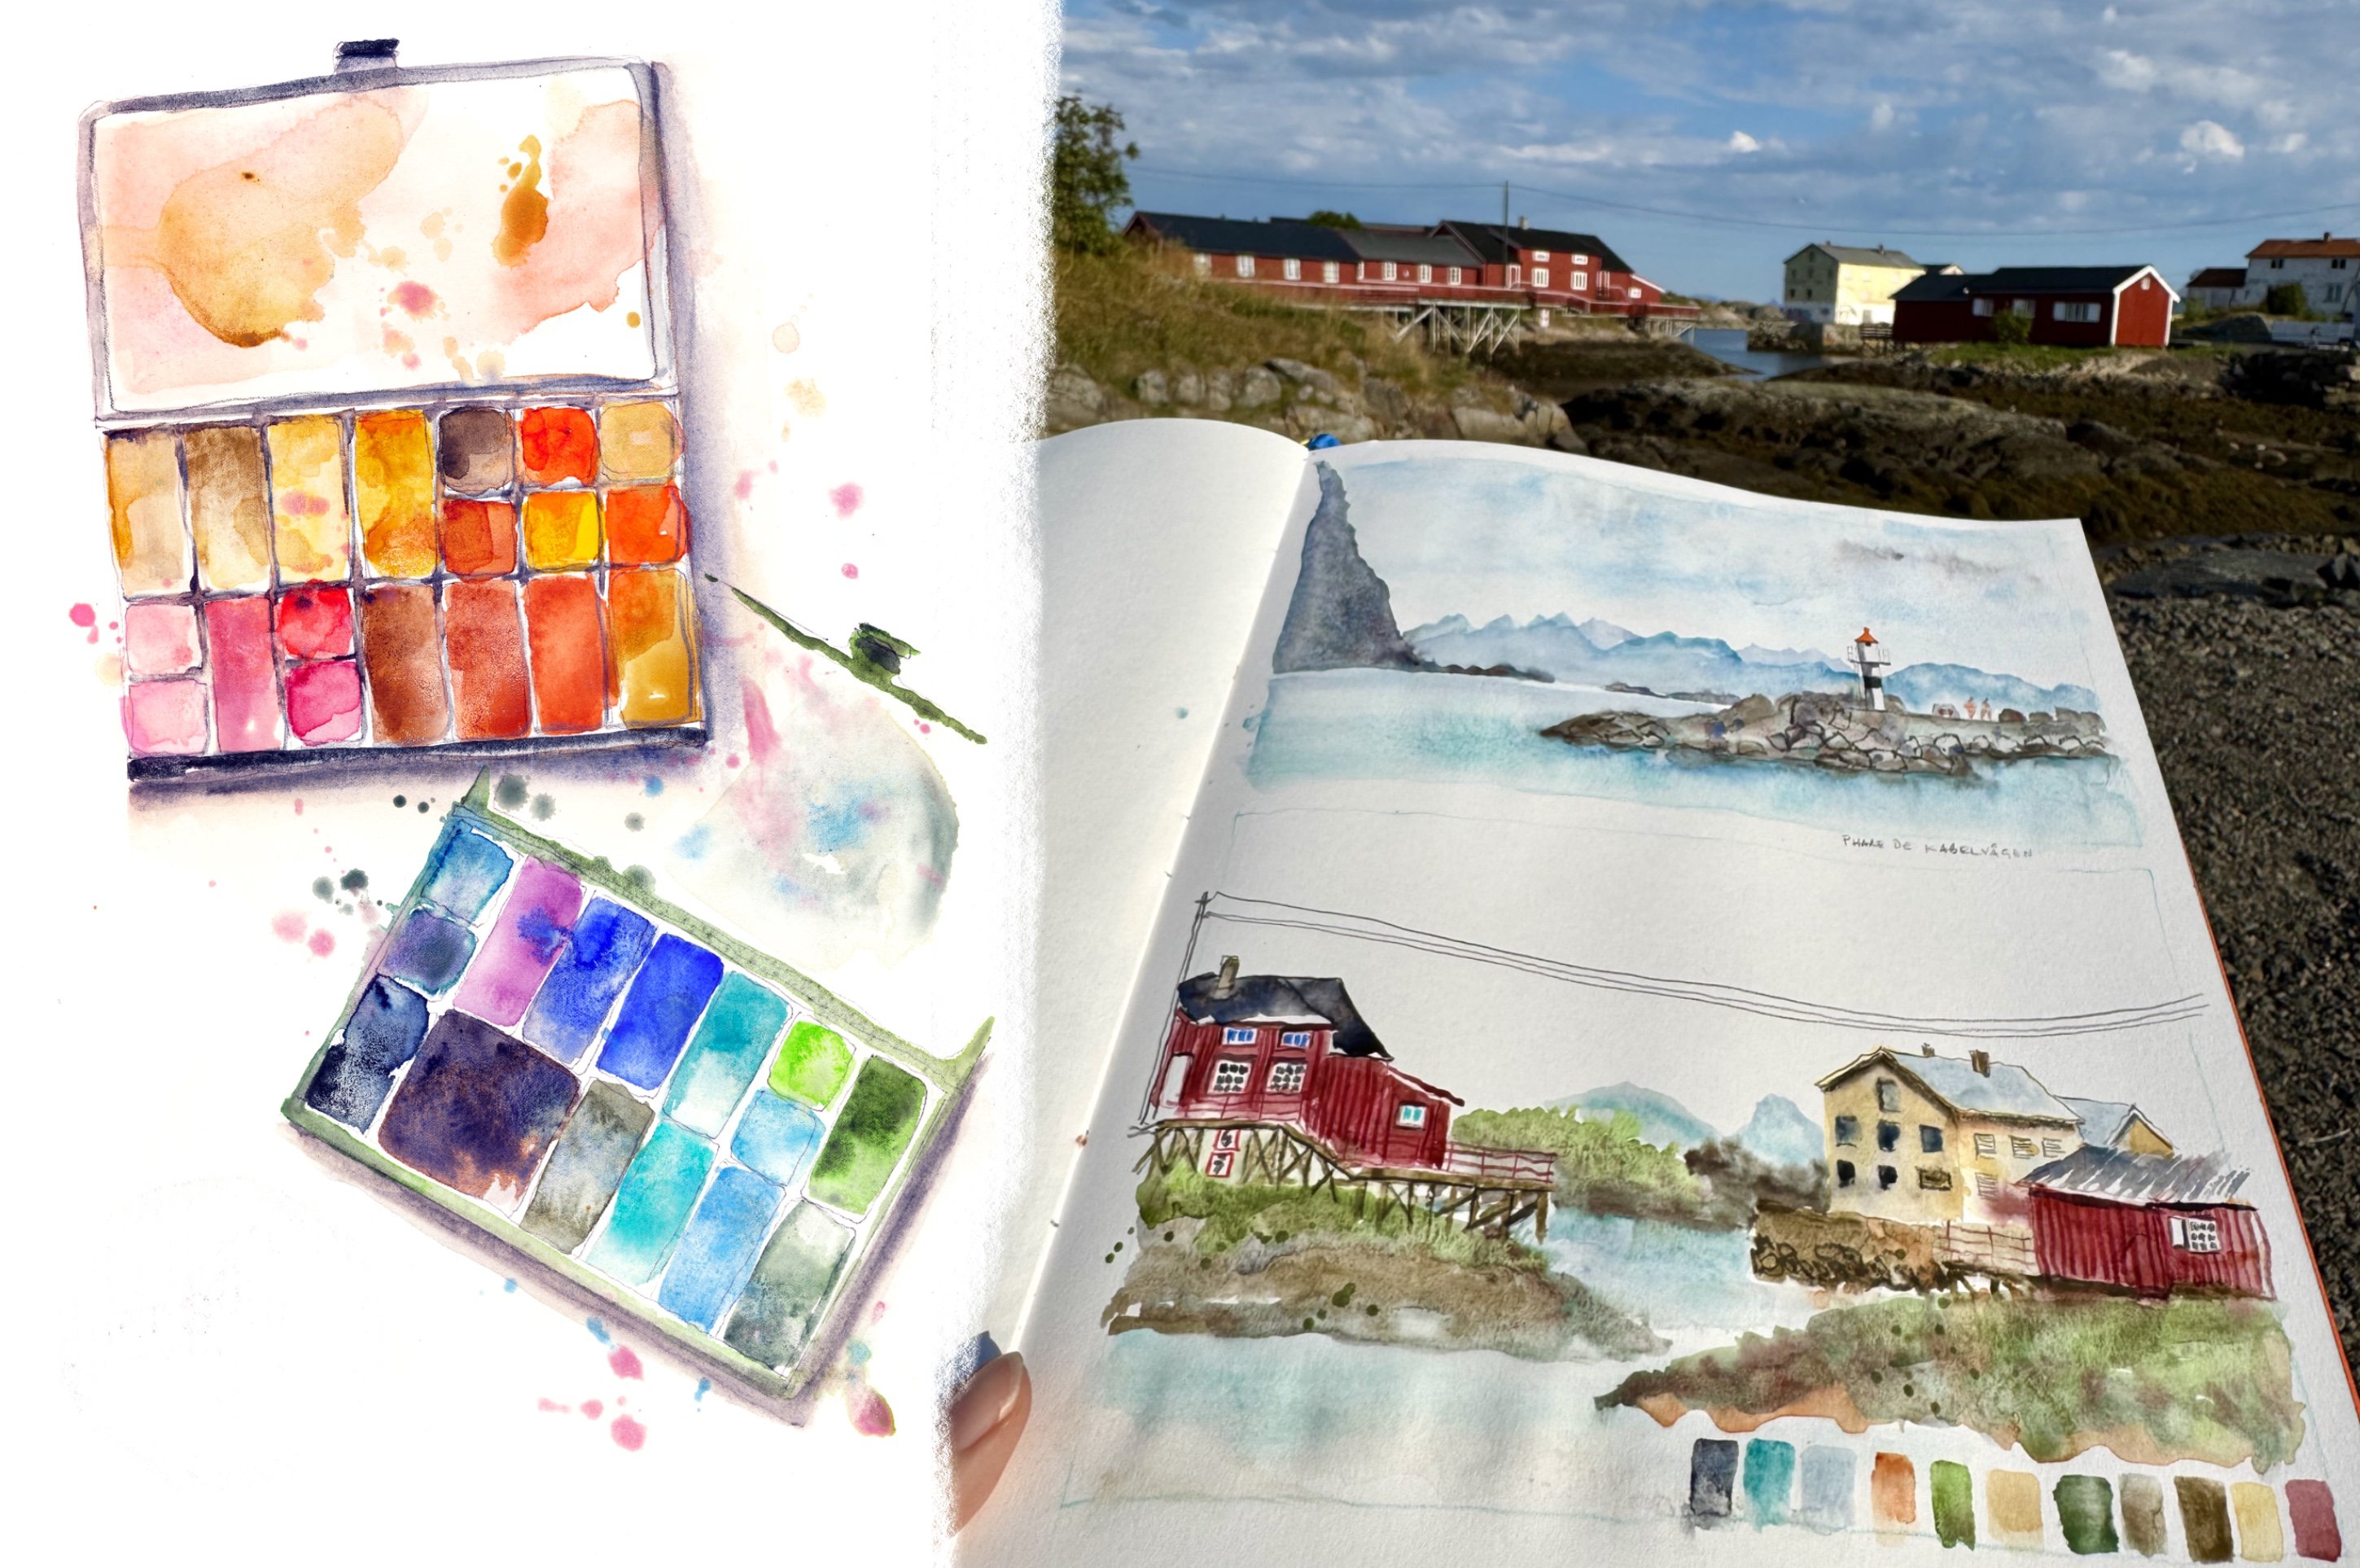
2. Day 1 : First Sketchbook Page with Coffee Pot: Welcome to this new
coffee sketchbook Klaus. I love to make thematic sketchbooks to
have a drawing ritual. And here I'm starting
together with you a coffee themed sketchbook. I use a sketchbook made with Hanam paper by a French
sketchbook artist. I will make these sketches
with mixed media, and I will mix watercolor with watercolor pencils and with color pencils and sometimes
a bit of gouache. Or a bit of graphite pencil. I start by making a sketch
with watercolor pencil, and I choose a coffee color. And then I wet the page
first with clean water, and I put my shadow
on the wet page. And I do this to
have soft edges. When you paint wet in wet, that means watercolor
on a wet paper. You have soft edges, and you see here that where I put the watercolor
shadow on dry paper, I have a hard edge. As a shadow color here, I use my mixture of ultramarine blue and
transparent orange. You can also mix ultramarine
blue and burnt sienna, as long as it's all
transparent watercolors. And the transparency
of your watercolor is indicated on the wrapping
of the tube or the pen. For those of you who already did some other courses
of me, you know, I love to splash and I
splash my favorite colors, and I splash only colors that
I also use in the painting. To absorb excess
water and paint, I clean my brush in the water, and then I press the hairs
of my brush in a tissue, and that way I absorb excess
water and excess paint. So here I sketch the cover image of my coffee sketchbook
and photo coover image. I wanted to sketch the
iconic leti coffee machine. It's for those who
don't know it, it's Italian coffee machine. I have different sizes of
violet coffee machine, and this is a small one, which I put on my
desk as a bottle. It's always better to draw from real models than
reference photos. For the fine lines, I use watercolor pencil, and I use it here in the watercolor paint on the wet papers which makes
some nice greasy lines. It's sometimes much
easier to make watercolor pencil lines than
to draw with the brush, especially if you're
not used to it. Don't hesitate to just
use your color pencils. To erase some watercolor edges, I use a hot synthetic brush. It's the eradicator brush
from Rosemary and Co. But you can use any
synthetic brush with strong synthetic hair, and I rub a bit on the
paper to soften edges. When you do that, you
have to be careful to test this so that you
don't damage your paper. Some papers don't accept
this kind of manipulation. If your paper is too fragile, you might damage it. I also add some green
Earth because I think it's nice to render the
aluminum of the coffee pot. So when the paper is dry, I darken the shadows, and the darker you
make your shadows, the more light you will
have in your painting. So I absorb the paint on the edges of the shadow
to soften the edges. I want soft edges
or the shadows. If you want to splash, you will have to test with
different kinds of brushes, and it works best with thicker brushes and
with natural hair. The hair has to be
quite flexible. It's difficult to make nice
fat splashes with tiny brush. And with synthetic brushes, sometimes it's a
bit more tricky. And I add some coffee
colour on the edges of the coffee pot in Bernsiena to make it look a bit older
than my new coffee pot. You can just add any
colors you like, really. Always sketch what you find
interesting and beautiful or funny and never sketch
things you find boring. Otherwise, your painting
will be boring, as well. And just use colors
that you like, even if they're not
there in reality. Just put them in your
palette and use them. Doesn't matter if it's
not there in reality. You can just do anything you
like. You are the artist. So now I have to draw
the little Boleti man. It's a funny man with
a big moustache, very typical for
the Ballet brand. And then this painting
will be finished. So I hope you have fun starting this new sketchbook because you just train your
skills by doing it. And as long as you're having
fun, that's the main part. Please post your sketches in the class project
on the platform, and let's go to the next sketch. So at the end use a graphite pencil to
shop on some lines, and I put the title
in my sketchbook, and then it's finished. Let's sketch some
coffee cups now.
3. Day 2 : A Vintage Cup with Spoon in Watercolor & Watercolor Pencil: So the picture of
this coffee cup I'm sketching now is taken in a restaurant which I loved going to but which disappeared
after COVID. And the owner of the restaurant had very
lovely vintage cups, all kinds of cups with
plates underneath, which didn't really
fit the cups. And it was always
very lovely with nice little napkins
with red stripes. So I use, again, a gray shadow on a wet paper to soften the edges of the shadow
to make it softer. And I will suggest
the drawings on the cup without really making a photographic
paint, of course. Don't forget to make
your shadow also inside the cup to bring
light in your painting. And the shadow inside the cup has to be the opposite
of the shadow on the cup. And as a coffee colour, I use burnt amber. And I also make soft etches
for the coffee because there's also some coffee of
the coffee cream on the cup. And I will draw some of the drawings on the cup
in what I call a pencil. And then afterwards, I will
add some paint on it, too. And so, again, I am
just suggesting them. We are not cameras
or copy machines, we're just making sketches. But if you love to make very detailed sketches,
please feel free. You just do whatever you like to do and whatever
you find beautiful. When you have some different
objects in your sketch, it's good to connect
them together, and you can do that by
connecting the washes together by using similar
colors in the objects or by connecting them
physically together or by using splashes of the same colors which
are in the objects, those splashes also
connect the colors together and different
objects together. So I use brnt amber and
raw amber for the coffee. And also, I repeat the colors
elsewhere in the sketch. For the gold, I
also use raw amber. So be careful if you sketch
a cup from the side. The cup isn't round, but it's an ellipse, and the drawings on the side of the cup have to
follow that shape, and also the contents
inside the cup, the coffee or the tea
has to be parallel to the ellipse you have drawn
for the opening of the cup. For the paper napkin, which is crumpled on the side, I try to follow it the
lines of the red napkin. So I use scarlet red
by Daniel Smith. And then I also use some
butterspink for the flowers. I like butters pink. It's a kind of vintage old pink. And I put like a
red heart inside the flowers to make
it more vivid. And my shadow gray, again, is a mixture of ultramarine
blue and transparent orange. So when the watercolor dries, the colors become lighter. So I add another
layer of shadows on it to make the shadow stronger and to make
the light stronger. To make the reflections in the metallic spoon is
also always bit tricky. And these reflections
are usually just reflections of the objects
which are near the spoon. So I use a blue, which is serle in blue. And then I use a green for
the leaves on the flowers, and I don't want it
to be too vivid, so I use forest green by Schminke which is a nice,
granulating grayish green. When you splash, it's good
to make the splashes quite soft and to make
sure that they are not stronger than the colors
you used in the painting. So don't be afraid to
darken your shadows. It still darken the shadows at the end because
they became so light. And the darker your shadows
are in your sketch, the stronger light you
will have in your sketch. So if you want to
soften the edges, like I did also in
the Violette sketch, you can use a synthetic
brush and make sure to test it on your paper and not to wrap too hard so
you don't damage your paper. So it's a synthetic
brush synthetic hair, which is quite strong. And don't do this with your natural hair brush because it will
damage your brush. So let's wrap up this painting, and I hope you have
fun with your caps. And let's finish this and
make another cup tomorrow. Don't forget to post them
in the class projects. I look at all the class projects which are posted in the class. Oh
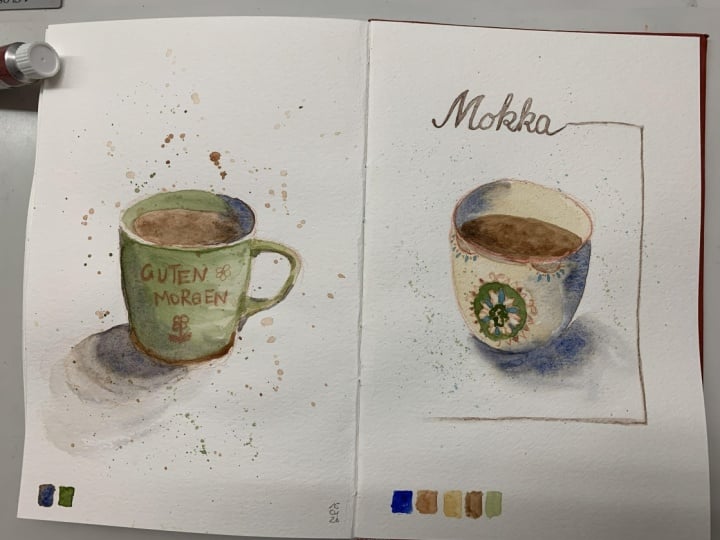
4. Day 3: A Mug in Watercolor & Watercolor Pencil: Today, we are sketching a coffee mug. Actually, I never drink
coffee from coffee mugs. I always drink
from smaller cups, but I loved this coffee mug. I saw it in Norway, and I love the text on it. It says, um, ife without
coffee, depresso. I found it a nice word game. So I start again with a
watercolor pencil sketch, and I make a watercolor pencil sketch because I don't really want to see strong lines in
my sketch in the beginning. And I first wet the page again
to add some shadows with my shadow gray of
ultramarine blue and transparent
orange on a wet page, so I would have soft
edges for the shadows. And the soft edges, I find essential to show
the round shape of the cup. And when the shadows are dry, I will use forest green
from Schminke for the cup. I find it looks a bit like
what is on the picture, and I will also use burn sienna for the coffee
colour and some raw amber. So I waited until
the shadows are dry, and then I make the
green from the mug. And where the shadow is, the green will be stronger, darker, so that means more
paint and less water. And to have a
lighter watercolor, you just have to add more water to have
a more tilut paint. And where is a lot of light, it's best to make as
much diluted paint as possible to have
very light color or to just leave
white of the paper. And I pay attention
to have white paper between the coffee and
the outside of the cup. So it is like the reflection
on the ceramic of the cup. And I forgot to make the
bottom terracotta color. So I dilute the paint a bit in the bottom
to try to erase it. And then I will add while
the paint is still wet, some burnt sienna, and the burnt sienna will
flow a bit in the green, which I find nice. When the washes flow
into each other, they are connected
into each other. I find the cup looks
a bit like floating. So I have to darken
the shadow next to the cup and to connect
it better to the cup. So I add some darker
shadows and I add the shadow also a bit
on the bottom of the cup. For the text, I use orange pencil because I think
with my granulating green, it will be a bit
difficult to read if I make it in white gouache paints. And I find the orange
fits well with the bottom color in bunsena and I use a terracotta
watercolor pencil so if you don't like
my cups or mug, you just use any reference
picture you like. And I also love to
see sketches of cups you use every day at home
or in your favorite cafe. So please just use your own cups and your
own reference pictures. And that way, it will be
a personal souvenir in your sketchbook and not just
sketch copied from my cups. I look forward to
seeing your cups
5. Day 4: A Romantic Cup in Watercolor & Watercolor Pencil: So let's start our third cup. And this is a really
romantic cup. And it's very special
to me, as well. I took this picture
when I was staying at a friend's place in Ile
de la Regnon I was to give a lovely
watercolor workshop at the festival of travel
sketchbooks just after COVID, so I have great souvenirs. I start again by wetting
the page to make very soft shadows with my shadow gray of ultramarine blue and
transparent orange. And I want to make the
shadows really soft because it makes the cup looks more
round and also softer. So look well when you
make the shadows, look well to the places
where the shadow is darkest. So under the cup and just next to the
cup is really darkest. So I try to add already concentrated
paint where it's darkest. Be careful when
the paper is wet. When you add extra paint in it, you have to be careful not
to add too much water, otherwise you will have
like cauliflower effects. I use a watercolor pencil on the damp page to make already a nice
orange line in the cup. And I will use light
red by Winter Newton. This is a nice terracotta color. And I will also use background for the ornaments of the
cup with diluted raw umber. Now my shadow is dry so
I can add extra paints. I absorb excess paint
with dried brush. So I have dipped
the brush in water, and I have pressed it in
the tissue to dry the hair, to absorb excess paint. For the coffee, I
use burnt amber. And I will draw the ornaments on the damp page with
watercolor pencil. And for the big
drawing on the cup, I use a terracotta color. In watercolor pencil, it's the Karen dash
supra coolor soft. It's a great watercolor pencil, which I was already using
when I was a child. I really like it. Again, I make a suggestion
of the ornaments. And for the small drawings, I use an orange pencil, also carndage but more orange. And when the paint is dry, I will color the ornament. So I use a light green. It's the first green by
Sminka and a Serden blue. I like the soft colors in the reference picture
in the real cup. So I try to use that to give
the impression of the cup. I add some bright
green splashes. I add some sap green
to make it more joyful because I find the
forest green a bit too gray. And the ornaments in the
shadows are less detailed. That's on purpose because
when it's in a shadow, you don't see it so well. And for the Cerlean blue parts, I just make some
spots suggestions. We soften the edges with
the synthetic brush. And I detail some
ornaments a bit stronger. When the paint dries, the colors lighten a bit, and I found the drawings with
the pencil a bit too light. When you start to
like your sketch, it's better to stop. Sometimes I tend to overdo
things because I'm having fun, but it's better to stop when you start
to find it beautiful. Well, now I'm
overdoing it again. And I add some coral pink
splashes just for fun. This is one of my
favorite colors. So how are your
coffee cups going? If you prefer, of course, you can sketch cups
with tea in it. Please share them online
in the class projects.
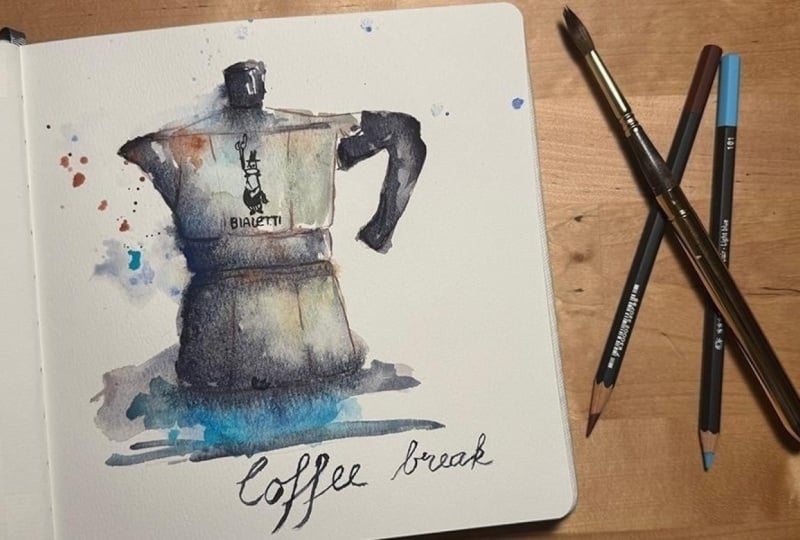
6. Day 5: Bialetti Coffee Cup with Watercolor, Oil Pencil and Color Pencil: So today, we are going to sketch this beautiful Bialetti coffee
cup I got from my sister, and it has this
funny Bialetti guy with his mustache and two
little hearts next to it. So as this is a
white ceramic cup, the challenge is, again, to give the whiteness some shapes and reflections and to make the cup look round. So I first make again a drawing, but this time with orange
carandage color pencil, so no watercolor pencil and these orange lines are going to give the sketch
some playfulness. I start again with
the shadows with my gray mixture of ultramarine blue, and
transparent orange. And I make a first layer wash of raw umber for the coffee. It has some crema on it, the espresso, which
is raw amber. And I wet the beach
first to make the rest of the shadows on
the cup and on the saucer. If you have a
watercolor wash for your shadows with
too much hard edges, you can just add some clear
water to it to soften them. You better do that
immediately so that the fresh water mixes
with the watercolor wash. I think this spoon has
some very nice details. I want to accentuate with some reflections on the metal
and then a wooden part, which dcmpensates to
the plain white cup. For the rest of the coffee, I use raw amber, another layer of raw amber
and some burnt amber. And I add some
details to the spoon, and I will darken the shadows. For brushes, I use Winsor
Newton sable brush, and this Japanese sable brush. They both have a very fine tip, which are good for fine
details and for drawing. And I've used some potters pink to give some reflections in the ceramic and also some
coral pink from Daniel Smith. This gives some volume to the white ceramic and some reflections in
the metal spoon. You can just use any
colours you want. I also like to use lin
blue and torquis for the metal spoons and to give
some reflections in white. Oh Again, if you want to soften edges of watercolor
washes which dry, you can use a synthetic brush. I draw the Bialetti in
black pet oil pencil. So this is not a
graphite pencil. It's a oil pencil, so it doesn't smudge. And afterwards, I will throw the red hearts in Karin
dash color pencil. And then I will add a
layer of watercolor. But you can also just
leave it in color pencil. And and to bring some more light, I darkened the shadows. I will add some green Earth to give some extra reflections
to the white ceramic. A No, I draw the violetin in black
watercolor because I find the gray pencil
looks too gray. I mean, the black pencil
lines look too gray, and I want him to be really visible and to stand
out as a focal point. So I draw over it
with fine brush and black watercolor and
little hearts in red because they're
not visible enough. Hold your brush very straight to have control over
the tip of your brush. If you tilt it too much, you will not control the
thickness of your lines. So now it will be time to stop. I hope you had fun, and I look forward to seeing your cups in
the class projects. Please tell me if you have any questions and
enjoy yourself. The more you enjoy yourself, the more you will sketch, and the better your
sketches will get.
7. Bonus Day: Cup in Watercolor, Wax Crayons & Color Pencil: Hello, everyone. Welcome in
this new coffee cup video. In this video, I
start my drawing with water soluble wax
crayon by Carendase. They make nice greasy lines. When you draw a coffee
cup seen from the side, pay attention to observe well the curve of the top
and bottom of the cup. It's an ellipse shape, so it's not round, and the bottom of the
cup is parallel to the and also the saucer
is not really round. That is, if you want a
realistic drawing, of course. I add some orange lines. I like this orange. It's also a watercolor
pencil by Kara dash. And so as you see, I have multiple lines. Most of the time I only
have one continuous line, but here I have multiple lines, and they will dissolve a bit
in the watercolor to give some extra color because the edges of this cap
are with some gold. And so this orange and this ochre color will give some extra color to the
gold edges of the cup. As a shadow color here, I use tundra violets by Sminke, and tundra violet is super
granulating color by Sminke. I have been erasing a bit, which I don't show in the video. And so the paper
is a bit damaged, as you see in the
shadow of the cup. So be careful when you rub with a brush or with an eraser
on your watercolor paper, be careful not to damage it. It was a nice sunny day
when I took this picture. And so the shadows on the
table are with sharp edges. So I paint the shadows
on the table on dry paper and the shadow inside the cup and on
the side of the cup, he painted on wet paper to have soft edges to
make the cup look round. And when the watercolor dries, it becomes a bit lighter. So I add some extra layers in the shadow to make
it a bit darker. I draw the flowers with
watercolor pencil, also by carndase and I will draw the green leaves of the
flowers with wax crayon. It's new color wax crayon by carndas like the one I
used to draw the cup. So it's also water soluble. For the coffee, I will use
several shades of brown. And so also when
you pay attention, when you sketch the
content of a cup, is it tea or coffee? I will always follow the
curve on the top of the cup. So the edge of the coffee or the tea is parallel
to the top of the cup. And if you want to absorb
excess paint or excess water, you clean your brush in clear water and you press
the hair in a tissue, and then you can
absorb excess paint. I splash some pink, some potters pink and coral pink to suggest the flower
decorations on the cup, because I don't want
to throw them all. I also add some pink
reflections in the spoon, and then some of the flowers and I dip a watercolur stick in the wet paint to add
some opera rose. It's a watercolur
stick by Daniel Smith. I don't have opera rose in my palette because I
don't use it a lot, but it's nice to have some oprah rose spots
in the flowers. So these watercolor sticks are just solid watercolor paint
like you'll find in the pans. So again, if you don't find all the colors you
need in your palette, just use your favorite colors. It doesn't matter if they're
not there in reality. I darken the shadows
on the table, and I like this blue
table in the picture, so I add some blue
in the shadow. If you have a spoon on your cup, don't forget the
shadow of the spoon. Then I add some
green of the leaves. I use forest green by Sminge. It's a kind of muted green. I mean, it's a grayish green, not very warm green. I don't want the leaves to
attract too much attention. I want them to go to the background so that the
flowers attract the attention. I don't like the
spoon very much. I think I will make
it a bit darker. I don't like the side of the cup because it doesn't
have a nice curve, so I correct it with
my synthetic brush. I rub the side with a humid synthetic brush to make it a bit softer and
to suggest some reflections. Be careful when you do that. Make sure to try it out on your paper so you don't
damage your paper. I add some shadows
to the handle. And I add some shadows from
the handle on the cup. The cup has really a lot of nice shadows on this
picture because of the sun. And I add some opera rose. I wet the paper
first and the stick, and I dip the stick on the flowers to make some nice pink texture
on the flowers. Now I have to be careful not to overdo the decorations because this cup has really
a lot of details, so it's tempting to
sketch them all. I find the shadows next to
the cup are not dark enough. I have been trying to
do it with watercolor, but I will complete them with a bit of color pencil hatches. So if it's too complicated for you to do it in watercolor, don't hesitate to add
some color pencil. Sometimes it's much easier
to add some color pencil. Also, for the nice
decorations next to the cup, I will just add some color pencil lines because I don't want them to
attract too much attention. So I'm just making
a suggestion of these geometric shapes next
to the cup on the saucer. And I add some lines in
golden acryl gouache. So this acryl gouache is not water soluble
anymore when it's dry. So it's best to use a synthetic brush because if you let it dry on your brush, the brush will be damaged. So I use a very fine
synthetic brush, and I rinse the brush
immediately afterwards. I add some hatching on the
spoon to make it a bit darker because I find it too distracting with the decorations on
it that I painted. So I just make it a bit
darker with a color pencil, so the drawing would
be easier to read. I use first dark pencil, like some sepia color. And then I add a
white pencil on it. And this makes the
lines a bit smudged, so you don't see them so much. And I erase a bit with
the synthetic brush. I erase a bit the
ornaments on the spoon.
8. Coffee Cup Wrap Up: You made it. Congratulations.
In this class, you've learned
valuable techniques to elevate your
watercolor sketches, how to confidently
combine watercolor with colored pencil for
vibrant bold lines. Enhancing textures
and depth with watercolor pencils and adding crisp finishing touches
with color pencil, enjoying a playful
and relaxed approach to overcome creative logs
with your watercolors. And I hope this will help you with all your other
sketches as well, and not only with cups. Be sure to share your
finished project so that everyone can get inspired
by your unique creations. Thank you so much for
joining me in this class, and I've loved sharing this
artistic journey with you. For more inspiration, you can follow my work on Instagram. And if you like to receive occasional free tips
and free tutorials, please subscribe to
my website and you can get my newsletter
with videos and tips. Please consider also
leaving a review. Leaving a review is truly
helpful for the teacher and to help other students discover classes that they love. And of course, don't
hesitate to reach out with any questions or thoughts
in the class discussions. Happy sketching and thank you.
 Barbara Luel, Architect, Author & Artist