Transcripts
1. Welcome to Modern Sunflowers Painting Class: Hey there Queen Bees. My name is Amanda from the bust artists.com, and I am a self-taught artists ready to show you the magical world of acrylic painting. That'll drop kick your fear of failure and fill you with that delicious creative, artistic competence that you deserve. Welcome to your modern sunflower class, where we're going to be deep diving into blending, layering and how to create detail line work to create a stunning modern-looking sunflower seen if you've always wanted to make some paint slapping magical art with acrylics or have occasionally dabbled here and there on the canvas. Or you just want to brush up on your acrylic painting skill and how to paint sunflowers using layering and detailed line work brush techniques. This is the class for you. Each lesson within this class is broken down into key steps, building from each other to give you a final gorgeous painting at the very end. And in this class I will show you all supplies a, you will need to complete your very own sunflower acrylic painting. Contend it's not that many supplies, including my favorite art supplies that I personally love using for all of my paintings. You'll learn specific techniques that'll get you tickling the canvas faster. Like how to create a blended background, how to mix colors, how to color block and layer your paint to create depth and eye-catching magic and how to add details in your line work to create a modern style to your paintings. And could I mentioned you'll be leaving with your very own painting at the very end. This class gives you the hands-on kick in the pants approach that you need to paint with acrylics and fall in love with the process. We're gonna be covering a lot of information in this class, but by the end you'll have the knowhow and most importantly, the competence to create gorgeously colorful acrylic art. So head on over to the next video, and I'll see you there.
2. Painting Materials You'll Need: Welcome to the course and I'm gonna be showing you the materials that we're going to be meeting in order to complete our sunflower in a vase painting. So here's just a couple of things that I have at the ready, happier and 11 by 14 acrylic pad, it's in the profile position, meaning that I have the tape down to the long side so it's taller so we can capture a great deal of space with our flowers. And I have a tape down so that while we're working, our acrylic pad doesn't warp. Now I'm using acrylic pad because it is much thinner than say, a canvas, but you can use any sort of support that you deem necessary, like a canvas or what have you. But this is something that I like to work with because it saves space and time and the colors are going to be using for this painting are the following. We have a mid yellow, you have a Cerulean Blue, We have a burnt umber, mars black, as well as some titanium white. This is pretty simple, pretty basic, but this, these will be the top ingredients that we will be using to make our painting. So it doesn't have to be that complicated. And I have here a palette knife so that we can do some necessary mixing for our paints. And as her brushes were going to be using the following. I have here a three quarter inch flat wash brush in Number ten, Filburn brush, a number ten shader brush, as well as a number 0 detail round brush. And you're also going to need a jug of water just like this, as well as a little towels to mop up any message that you're going to be making. So with that being said, you have all the materials that you need in order to get started. So let's go ahead on to the next step.
3. Step 1- Painting the Background: To start with our painting, we're gonna work with the background first. I always like to do background first and then we work on our details and what have you. It makes it a lot easier for us. So what I'm gonna do is I'm gonna take my three-quarter inch flat washed freshmen just into my water. Give it a nice little double row on the table itself. And then what we're gonna do is we're going to grab a little bit of that burned number. When you add some of that white to it. Just like cell. And when to go back in with water again, has a watt really water this down. And then what you're gonna do is you're going to make a horizontal set of strokes on your canvas just like so. And I keep going back in with white with my water every now and then just to make sure I'm getting good ample coverage. And I'm making sure to leave about maybe three to four inches from the bottom here. Actually, I can maybe go down a little lower. Now that I'm looking at this, I'm also trying to make sure I get the edges as well. If you're working with a canvas, use wanna make sure you also get the other edges of your canvas like the sides. Because if you want to hang it up as it is without a frame, is just going to look a little awkward when there's no paint on it. So we've got we've got that going on for us. Very nice. So I'm going to do about that much of the background in terms of using our burnt umber here. And now I'm going to go in, utilize another color, which is going to be our Cerulean Blue. So who's going to take a little bit? I'm not even going to wash my brush to be honest with them. And then take some white and combine those together. I really want to get a nice pale blue. Because like so what's a mater? And then I'm going to continue doing the background. Now. I'm trying to work a little quickly because I want to get some sort of blending happening with this layer with the blue. So I'm just trying to work on the faster side to make sure that those blends happened because blends happen when your paint is wet. Okay. Acrylic paint is a slightly different medium then say watercolor, because you can't necessarily go back in on dried layer and expect it to mix together like a watercolor. Watercolor is pretty water-soluble and not water resistant when it's exposed to water. Whereas acrylic paint, once it's dry, it's water resistant and cannot ever be reactivated ever again. And you get a little bit here and there, it's fine. All you're trying to do here really is just try to establish some sort of like color, color mood going on here. So I'm just constantly maintaining those horizontal strokes for now. And I just occasionally go back in with water just to smooth out my paint and just help what the overall coverage. So we're going to leave it at that for now. We'll do this in a gray, so we're just going to grab some white. Grab a little bit of black, just a little. We're just gonna create like a nice grey color. And then we're just gonna go ahead and add that in. For now. Now, a lot of what we're doing either called the under painting. If you're seeing like you lay down your first layer of colour and then you're thinking, you know what, I could do a little bit more with us. You made the first layer, so now you can always go back in and add more layers. So usually the first couple of layers in a painting that you want to build on is usually called an under painting. So it's your opportunity to block in color and kinda see where the color patterns are going for the most part. And of course I may go a little darker. Sound, little bit more black. Who's like that, but we can always go back in later, refine those color as we see fit. Okay, that's excellent. Okay. So we're gonna give a brush and then just pat it on our towel to dry and we set it aside. Ok. So once this background dry is what we're going to start to do is add in our vase.
4. Step 2- Painting the Vase: So our painting is relatively dry at this point. We're going to move on to the next step and we're gonna go ahead and use our number ten shader brush. This is a nice flat brush. It helps us make those nice, crisp edges are we're looking for and all we're gonna do is dividend some water. And then we're going to grab some titanium white. I'm just gonna make sure my brushes nicely loaded. And then what we're gonna do is we're gonna make the outline of our base. So the base is gonna start like right around here. We're gonna give it some room along the edge here. So I'm just going to maybe take about an inch from the bottom. And using the tip of my brush, I'm just gonna make a straight line. And it's going to be about, I'd say this is about PB totals, 55 inches or so, kinda like that. You can always expand on it. You can always make this bigger if you like, which I might do. So a little bit bigger. Okay, once you have that line established, then we're going to round the edge. So we're gonna take the still working with the tip of the brush and around the edge and bring it up until the line and form a nice vertical line, kind of late that hay and same here. It's going to round it and bring it up. So be concerned about this being super perfect, doesn't have to be. Okay, so you're gonna bring it up. And now this part is purely up to you. How tall you wanna make your base. But not thinking I want to make it. I wanted to make it, make it go like right about to hear. Now you're not gonna see the edge of the base because it's just going to be over abundance with flowers later on which we'll put in. But you're just, you're just going to establish that line so that you know where it ends. So it's going to be about that big, about that high. Okay. And lastly, your vase has a little bit above a handle to it. So I'm going to choose probably right around here on where the beginning of where this vertical line starts. And using the tip of my brush again, I'm just going to make a line that's coming out like almost like a Y shape. Then it's going to come out and then come in and goes out. And then comes in. And then I can just add more meat to it. So I'm just going to go back. Not another stroke. Just helped me establish that. Ok. So once you kind of have The general shape going on, all you need to do really is just fill this in with white, will be going back in very soon and adding a little bit more details and stuff. But for now we're just gonna try to cover this up with white. Now you can choose to continue using your your shader brush or you can move over to door. Three quarter inch flat wash brush because again, that's just bigger bristles and it'll help get the job done a little faster. So I'm gonna do that actually, I'm gonna move on to the bigger brush just so we can help me get the job done faster. When it comes to painting, it, it all comes down to light. Your preference, what you'd like to use. If you see that I'm using a starting brush by your know, your feeling that you want to use another type of brush. Hey, go for it. You know, it's not set in stone. These are just the materials I like to use that I find are very helpful for me to get a job done. Doesn't mean it's the end-all be-all. And you'll notice too, I'm kind of making my strokes but not going straight horizontally. You're kind of bending there, curve a in the middle. So that just helps me create this illusion that this of a rounded shape for the space. Now I want to make another mention as well. If for some reason you don't like how the shape of your bottom looks like you think it's too flat like I kinda have here. You can always just wait for this to dry and then go back in with your gray and fix it. So I'll just demonstrate to you really quick as to what that looks like. So I'm gonna do is going to take my three-quarter inch flat wash, get my black and white, that same colour that we made our our ground here. And then you can always just paint right on top and adjust. And then you just have to do a couple of layers to cover that up. Very simple. Same here. And that's the beauty of acrylic paint. It's really good for covering up mistakes. If you feel like you went too far with something, you can always just go in and fix it. Just like that. So now that you've done your vase, the next step is to add in our flowers. So we're gonna go ahead and do that in the next lesson.
5. Step 3- Painting the Flower Petals: The first thing when it comes to doing our sunflowers is we're going to make the center of our sun flower, that nice large Brown Center. And we're just going to be using are burnt umber. To accomplish that, I'm grabbing my number ten Philbrick brush here, and I'm just Debian of my burnt umber, giving it a nice coat. And then what we're just going to simply do is make some circles. Very simple. So in my first circle here, just like that and I'm gonna make, I just want to make sure that my circle is fairly big. So maybe it's like 2.5 to three inch diameter. And it just it's just like barely touching the tip of that that bowl. Okay. Because later on we'll be putting the petals. So you just want to establish this part first and then it covers on top. Okay, let's do another one this time. We'll do one that's this way. And instead of a circle, it will be curving in this way. So it's kind of like a backward c like that. And then we'll do another one right around here. So I'm just establishing the centers of the flowers first before we even do our pedals. Okay? Okay. And then we're going to do another one maybe like right around here and the other half moon. The one here. Yeah, I think that's good. That's good for now. We can always add more. Later on. We're gonna give our Philbrick a nice rents. And then what we're gonna do is grab some of our mid yellow. Now we're just going to start to do the petals of our flower. Okay? So to start, we're gonna start with this big one right here. Now the way I like to do sunflowers is by layer. So we're going to start by adding in the petals. Now. The petals, they kind of build on each other and then they built by stroke. So I'm going to leave a little bit of space between the center of the flower and the first set of petals. Just like that. Okay? And the petals are next to each other. Kind of like this. You just can use your brush to get that nice pedal shape. Just lay it flat and pull. And I'm just going to do that all around the center of that circle itself. You can go in and do another, another raise sat around. But this time you're going to be overlapping that and the inside portion of that flower. It looks kinda weird right now. But you're just building, we're building the first layer. Okay. So that's pretty much done. Let's move on to the other flowers. So I'm just going to give it back in the mid yellow. And then for the, for this flower here that's pointing to the side, petals are going to be a little bit different. We're going to start with the first pedal that comes out like this on the very top. And it kinda curves upwards. Then we got another pedal that's gonna come up in curve upwards. Okay, so it's kind of, it's a perspective thing. You want to force our perspective of this looking like it's off to the side. So that's really all you're gonna do here. You're looking at the side of the flower. So obviously it's not going to be pointed out straight like this is gonna kinda be curving inwards towards the direction of that center of the flower. So just going to continue on with our strokes. And this time we're just going to point them downwards. Okay. Just like that. So that's one part. Then we get to the part of the flower here. And they come out. And again, trust me, it looks weird, but you're just building layers at this point. Okay, now let's continue doing that. Now these flowers are kinda pointed upwards, but a lot of their part here is just covered up. So you're just gonna see. Regular petals coming up like this, going all around. And then you'll see more pedals kind of covering up. The side here. Can occur is outwards like that. And then you just gonna repeat unless he is renter, repeat. This one is sort of pointed out this way. So once again, it's going to have some petals kinda covering up the side. So now you can take this opportunity. If you want to add more flowers, you can go ahead and do that. I can go back into my brush up a little bit at in that flower Center where I see fit. Again, you can go crazy with this if you'd like. So I think I want another one. You know what? Yeah, let's do it. Let's do one that's here to a half-moon. You kinda know how to do from now on really. So this is just time for you to play. I'm going to add more. Go for it. I'm going to add two more, I think. Couple of one side. Then. Again, this is just on the other side now, a couple of petals I cover on one side. It means that we pointed downwards. Now, don't be concerned just yet about error. You're still seeing stuff coming through from underneath. That's okay. You're just establishing layers right now. You try to figure out where they're, where everything's going, okay, this is kind of like you're under painting for your flower. I can go back in now and just add a filling some areas with yellow. Just the kinda cover that up, make it seem a little bit more full. And you know what? I'm going to add a couple more petals to speak louder. Go back in, redo those petals. But this time I'm going to add a little bit of white to that. Yellow we are, we're just working with. And the weight will actually help this make it a little bit more opaque for us to work with him. Since her petals are not pretty much dry, we can go in and make a second layer. And you can really start to see optimal coverage. So you're just going to repeat literally what we just did before. So I'm going to start with the first layers. So I'm going to go with the center flower here. I'm just gonna make the set of pedals like we did before. And you can already start to see there's better coverage. But this is building, we're building layers. Ok, this is how, this is how a lot of painting happens is building. Okay? So whenever it comes to art, it's not about the first layer, is the first layer and then you're done. That doesn't work that way. You gotta keep building. I'm just using the brush edge or the broad side. Tell me, achieve that. Those particular strokes I'm looking for to represent our petals. And I'm just going to repeat all the other metals. So you can already start to see how much the colors are popping out. So I think I'm pretty good with the pedals. Let those parts right? So we'll see you in the next step.
6. Step 4- Painting the Leaves: Next we're going to be making our leaves, which are a green color. So all you're gonna need is some yellow and some civilian blue. And add those together to get a nice green. Maybe a little bit more on the Cerulean Blue side, just so it's like a darker green. And we're going to be using our detail round brush for this part to make the leaf color or it's make a leaf shape, you're gonna make a line coming down like this of a curve. And then line comes back in just like that. Pretty simple. So you're just going to make these triangular looking leaves and then fill them in. And we'll, we'll add them like sporadically throughout. Usually leaves around. Sunflowers are in encompassing like the rollover. But in this case, because there's so many sunflowers and here you may not be able to see all the leaves, so we're just going to add them in sporadically. Especially like on the inside too. We can have some leaves covering up some of the petals just like that. Or we can have some of it's showing up but then it gets covered by the other petals. And of course, if you feel like you made a mistake or you know, you wanted to do a little differently. Always waiver the paint later dry and then you can go in your adjustment. Now some of this works, we're advantage because when we first made our background, which was blue and then we added NB, yellow, the petals. You already see some great popping in already naturally, which is, which is really cool. So that kind of works in our favor. We want to add that many extra, this green color. Now I'm going to want to add a bit more detail onto the glass itself. And the reason why I'm mentioning this now because we'll be using a bit of that green color to help us achieve that. So I'm just going to grab my three-quarter inch flat wash brush, dividends on water, grab a bit of that green and yellow and white. And then combine that together. Sweat a little hint of that green. And then just using the broadside your brush. Just gonna add in a little bit of that green. Just like that, and a bit more to that. And I don't have a lot of paint on my brush just a little. Just to help me carry out some of that paint. Same on this side as well, just a little bit. And I want to cover all of it just just a little more, maybe a little bit on the handle as well. Okay. And that's it. So now that I have all of this, what we're going to start to do is add in our details, all those little things that make the scene really nice incomplete. So we'll do that in the next lesson.
7. Step 5- Adding the Finishing Detail Line Work: Okay, so now we're going to start to do our details. I'm going to run my detail round brush and we're going to grab some black. Okay? And now we're just going to be doing outlines. And this is what makes this gives it a stylized look. You don't have to do this, we don't want to, but this is kind of what I like to do with my paintings. It is a style look and it kinda gives it a bit more of a modern edge. So I'm just going to start by adding in a nice crisp line to the edge of our vase. Ok. Now you can take this opportunity to make the base even skinnier if you like it and you can always go back in with pain to fix it up. So I'm just going to slightly adjust the shape of the bays like I think I made this a little too broad. So I'm just going to make a line and it's going to curve inwards. And I can always go back in once this dries and in just fix the surrounding areas. But I'm just gonna do an outline Roman bays. And my lines are not perfect. Again, this is a style look. So not too concerned about making this look completely straight. Then you're going to add some little lines along the edges to show how rounded this base is. I don't want to do too many black lines, just a little, some on this side. So again, it's a style to stylize. Luck doesn't have to be perfect. And then I'm going to go in and start outlining like the leaves and what not. And again, I'm not too concerned about making sure I capture it all. It's a way to just show a little bit of style. It's a little bit on the messier side, which kinda adds the more abstract appearance of this. And then once you kind of have a good understanding or against a comfort level, we can start doing the pedals and do each and every single one. Now, like we mentioned before, sunflowers have multiple layers of petals. So really a sunflower pedal kinda has this like dome-like shape that comes to a point. Okay, so I'm just literally going around each of the brush strokes that I made. And making those nice. Crisp lines and making those shapes. And of course I'm making sure my brushes always nice and wet and lubricated so I can ensure that I get these really nice looking, nice looking lines. And then I'm also trying to stagger the petals that they're not always like one on top of the other. It's more like each of the petals are in the crevices of the other. So like this is, this is a crevice, crevice and the petals starts here. See what I'm saying? Don't worry about making this trying to make it look perfect. It's supposed to have this nice, really messy luck. We've got pretty that logs. It really starts a pop. And then we'll continue on. So again, I'm going to follow the direction of the petals. Just to again elaborate the flow the petals and make sure that we got that established. And I'm not looking to cover every single pedal with black line. I kind of like choose it as I go. If I leave some some yellow uncovered, that's totally fine. And you know, I'm also making multiple layers of petals around like the centers of those flowers here. So even if you'd maybe didn't represent it as a brush stroke, you can totally take advantage of that with your, with your black outline here. Think I just went ahead and added more layers. Those petals, just by showing them as an outline. And we're also gonna do some along the edges. We're going to do like a squiggly line around the edges of the centers of those sunflowers. Just doing a nice squiggly line. Just take my brush, go back and forth along the edge, follow it. And you want to make sure your brushes nicely lubricated while you're doing this. And you can even do little random lines like that too, if you're not comfortable doing squiggly lines. This is, again, it's, it's to show a little texture. Because usually the centers of sunflowers, Of course, it's like where you get sunflower seeds, right? And it's got that fuzzy texture to it. Will help you accomplish that. Next, we're gonna add some white highlights to this. So again, with our detail brushes made sure it's nice and clean. We're going to take some white. And then we're just gonna go into some of the petals and adding some white accents to the petals. So I'm kind of just picking some pedals at random and adding in some of the white. But look how clean that starts to look right? Look how pretty it just starts to look a little bit of a catch to your eye, gives that nice contrast. And almost making, it makes it look like sort of a jeweled. Which is really nice. And then we're just going to go into the rest of the flowers here. It's the petals ad where you see fit. Again, I'm just kinda going at random, picking wherever, wherever it looks good to me. And again, I'm not focused on being precise with my brush strokes. Just kind of letting it free flow. And even on some of the leaves too. So let's highlight is look how much different that looks. It just seems to like pop out at you. And I'm also going to add some highlights to the flower centers as well. Not all the way around us on some parts. So I just take my brush and kind of just doing a little bit of an adapt dab, dab motion with the edge of my brush. And lookup pretty just look how, how much that comes alive when we do that. So this is the Jess rates. So you can add as many flowers over and over and over again, you know, so this, this is really the basic steps on how to do this. So you already see that I added more flowers like on the top here because I just found I wanted to fill it out a little bit more. But you totally have that freedom to do whatever you would like. And I'm also gonna do some link with species that come out of here. So I'm just gonna take my brush with some white just make some lines coming out. And I'm just going to stagger around a little bit. So you get some coming out here. Maybe got some coming out here. I'm kinda like varying the lines a little bit longer than others. And got some nitrogen here. Similar to come out here and listen to how pretty that looks. It just, it just adds more like dynamic. There's one more action happening. Some of it could be covering the leaves, others could just be behind it. It's up to you how you want to do that part. Will say cell. Pretty simple. And then you can always go in, fix around your background as you see fit. So I'm going to probably just do a little bit of that. Fix the, fix the edge here. And because my leaders have dried, I'm able to build and cover up as I see fit. And I can always go back here with the white. Just do a very light layer on top. But when I laid down previously here, just see, you know, in case you feel like it's too much or, you know, you went a little overboard. Can do a nice little brief covered in that. Okay, so that's how you can go about making your very own sunflower painting.
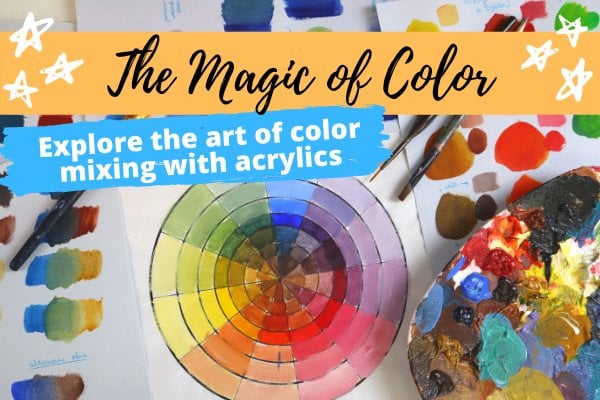
8. Final Thoughts & Next Steps: And that concludes our modern sunflowers class. I hope you learn something new and that you're excited to dive more into the world of acrylics and all it has to offer and making gorgeous art. So I wanted to offer some next steps. Well, the first thing I always recommend is to play and experiment and give yourself that freedom to play around with your acrylics and supplies and keep on practicing and know that as a first-time acrylic painter, you may not get the results you want the first time or the third time, and that is totally okay. You're not supposed to get it right on the first go. It's really not about comparing yourself to others, but comparing yourself to yourself. I also want to offer you to challenge yourself when it comes to your painting experience. One way to do that would be to do this whole, entire painting again without actually following the steps along with me. This is a really great way to take up the training wheels and learn a bit more as you go along. And trust me, totally, we'll learn something new every time you step up to the canvas and please share your completed projects with me. I hope to see them. And you can do that by using the class Instagram hashtag, modern sunflower and tag me on Instagram with my handle at the buzzed artist, I would love to see what you come up with. So if you really want to dive deeper into the magical world of acrylic painting, but you're just not sure how to get started or what supplies you'll need. My skill share class that magic acrylics, acrylic painting basics for beginners will help you answer all of those burning questions like, what supplies you need that best suit your project? How to mix dozens of bright colors without paying hundreds of dollars in pain tubes. And how to stay motivated so that you're always brimming with ideas for future paintings. If you've always wanted to make some paint, slapping magical art with acrylics occasionally have doubled here and there on the canvas. Or you just want to brush up on your acrylic painting skills and learn something new is the class for you. And you can find that via the class URL dbEST artists.com, forward slash acrylic, dash magic, or in the class notes, if you want to go a little further with acrylics and manipulate them to make them look like watercolor and make some really cool art. You may want to consider taking a master watercolour effects with acrylics class. This is a great way to harness the power of acrylic paint while at the same time giving you the smooth, sexy natural blends of water color with the versatility and water solubility of acrylic paint. And I show you how to do all this in bite sized lessons that are easy to follow and very hands-on. You can find this class via the URL V bus artists.com, forward slash watercolor. And finally, if you want to explore the wide world of color with acrylics and get a look behind the curtain on creating heads snapping super colorful, eye-catching paintings. You might want to consider the magic of colour class. This is the complete guide to creating eye-catching vibrant colors and pallets that'll turn heads and not require a bajillion art supplies. You'll learn how to paint any scene or picture using your own colors without needing to follow all those YouTube tutorials, even allowing you to go off script and add your own style. This class will help you create vibrant, eye-catching acrylic paintings without the fear of messing it up. No more praying and hoping that your paintings turn out halfway decent in this class will help you understand and know that you will not fail. Keeping you feeling motivated and positive, even when you're painting doesn't look like it's going in the direction you want it to. So if you want to check this class out, just go to the bust artists.com forward slash color class. And of course, if you want to see the full listings of courses I do offer, you can just go to the bus artists.com forward slash courses. Once again, I want to thank you so much for being a part of this class. Don't forget to use class hashtag and I cannot wait to see what you create.
 Amanda Rinaldi, Teaching you to Art with Confidence