Transcripts
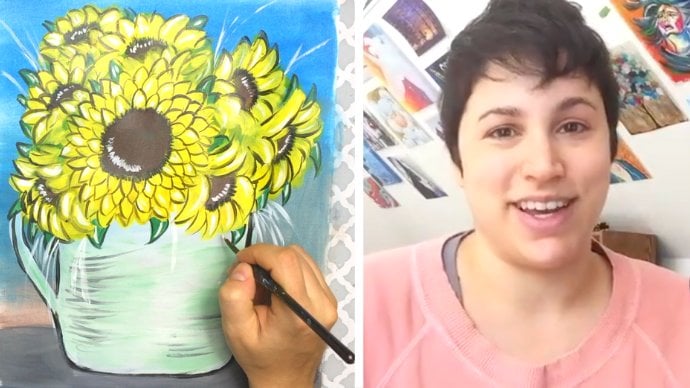
1. Welcome to the Class!: Tell me, if I were to take a quick peek into your Canvas would I find the grass you painted looking more like armpits doubled, and graceful wispy blades or that your paintings look splotchier than a bad tan day at the beach. Okay. Look, acrylic painting doesn't have to be that hard. You just need to know how to master your brushes and show them who's boss. Which is why you'll need an up-close and personal guide that'll get you quickly slapping paint onto Canvas, making things you actually love, and keeping you brooming with ideas to create more. Hi there, I'm Amanda from thebuzzedartist.com. I'm a self-taught artist ready to show you the magical world of acrylic painting that'll drop-kick your fear of failure and fill you with that delicious creative artist's energy that you deserve. Welcome to the Paint Slapping Magic of Brushes. This class is made for every kind of person, for beginners who are just starting to paint for the first time with acrylics and want to learn some useful brushstrokes that are most commonly used in lots and lots of paintings, and anyone who wants to learn to create better trees, branches, clouds, backgrounds, and thinner lines, even if you've never touched a brush before or have no idea what to paint. Now, this class is Part 2 of acrylic painting basics. If you haven't done my previous class, the Magic of Acrylics, be sure to take that class first before you hop onto this one. A lot of the lessons we learned in that first class will be applied to how we treat the brushes in this class. Each lesson, we'll go through a specific brushstroke or technique, breaking it down step-by-step to create a tiny painting in mere minutes. Like how to create super sharp lines while making trees and branches. How to apply paint smoothly without causing blotchiness and easy tricks to make flowers and leaves. Most importantly, you'll learn that acrylic painting is a really fun thing to do, and not something that'll make you want to burn your Canvas and swear off painting for the rest of your life. By the end of this class, you'll have the know-how and most importantly, the confidence to create many of the most common brushstrokes and techniques many artists used for their acrylic paintings. Head on over to my next video and I'll see you there.
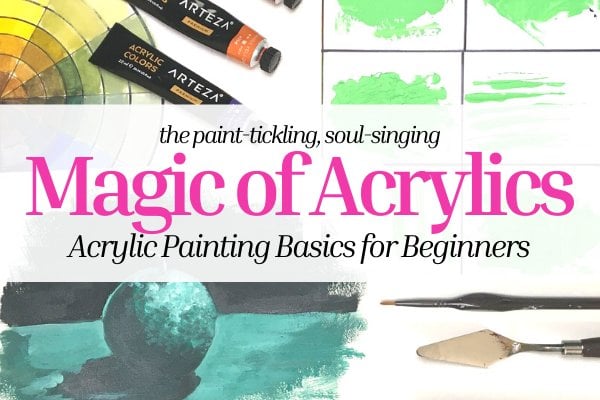
2. Supplies You'll Need: Hey there and welcome to the class of paints slapping magic of brushes. I am so excited that you're here. Now before we dive into this class, I want to share with you a few of the supplies that you'll need to actually do this class. Very lucky for us we don't really need that many things. We just want to understand the techniques and strategies behind each of the types of brushes we want to use to get the types of paintings we want to get. To start off, let's talk about brushes. The types of brushes that will be very helpful for you to have would be a flat wash brush, a round brush, a flat brush, a filbert brush, and some detail brushes. You can either go with a detail round brush or you can go with a script liner brush. Honestly, as long as you have one or the other, it'll help you in the long run to learn some of the techniques and strokes, totally optional and angled brush, I don't normally use angled brushes in a lot of my paintings, but there are a few good uses for them. When it comes to brushes, as long as you have these certain types, that'll help you in understanding areas techniques and stroke that we'll cover in this class. Then you'll need some sort of palette like pallet paper or a plate or a paper plate to help you put your paint onto and some sort of canvas or canvas paper or some sort of painting surface of your choice to use for the demonstrations. You can use any color paint that you like. There's really no requirements on any specific color, as long as you have maybe about two or three that you can work with, you're more than ready to go and you'll also need a cup of water, a little towel for the side, and some masking tape or washy tape. With that being said, you're ready to start this class. Let's head on over to the next lesson.
3. Choosing the Right Brushes: Paint brushes, they are the conductors of your entire painting orchestral masterpiece, directs paint, shows movement, and gives you specific textures and strokes. Your brush can make or break your painting. Understanding which ones you should use and what they can do to help you get an awesome painting is pretty important. Before we go into what our brushes can actually do for us, we got to first talk about brush anatomy. Every brush has the same, similar components. Let's take this brush for example. This is a three-quarter inch flat wash brush. You first have the handle, every brush has one. Some are made with plastic or wood. In this case here, this is a Simply Simmons brush, this actually has a wooden base with a plastic coating on top, which chipped away. Having done painting for quite a while now, I've actually started really liking the more plastic handles because it's a lot easier for clean up later, and it also extends the lifetime of your brush. When it comes to choosing a handle, you got to choose one that you like the best. Try out a few and see which one feels the most comfortable in your hand. The next part of the brush anatomy is the ferrule. This is usually the metallic part of your brush which connects the handle to the bristles themselves. It clamps together all of the brush bristles together. It's actually what determines the overall brush type and shape. Then let's go and talk about the bristles themselves. Now, bristles are considered the actual part of the brush that you paint with. Bristles can be made from a variety of materials including animal hair or synthetic fibers. In the case of Simply Simmons and the brushes that I tend to use, I like to lead towards more synthetic fiber brush bristles because, again, it just allows for very easy cleanup, and I think it actually makes the brush last a tiny bit longer. Next, let's talk about the different areas of the bristles. One is the toe. The toe is this area of the brush, the very edge. The body, this is pretty much the area, the middle part of your bristles, basically between the toe and the heel. When you load your brush, all the paint will nicely gather inside the well of the body here, it holds it very nicely. Your body gives your brush a particular type of strength, artists like to call it a springback or the ability for your brushes to spring back into the same position that they are right now. If I were to take a brush like this and use my finger, bend the bristles back, and it springs back just like so. I like to have a brush that has very good springback. I really I'm not a big fan of brushes that are very, very soft, those are more preferable for watercolors. In terms of acrylics, you're going to need something that can give you a good amount of pressure and springback so that it can withstand the friction of your canvas or whatever surface your painting on, and be able to carry and transfer your paint effectively. When it comes to picking a brush, just listen for the springback. Of course, it's all preference. If you feel like you'd like something that's maybe a little more stiff or something that's got a little bit more give to it, that's totally something that you can go ahead and try out for yourself. Lastly, in terms of brush anatomy, we have the heel. This is where the bristles go into the ferrule. Now that we've gone over brush anatomy, let's talk about the different types of brushes and the strokes that they can give you. Firstly, you have your flat wash brushes. These brushes are flat, they have a flat ferrule, and the bristles are nicely spread out. You can get a lot of coverage when you're actually going ahead and painting. It's great for covering large areas like backgrounds, and can be used for washes, base coats, applying glazes, and finishes. Typically, you'll get a large, broad sweeping stroke. Next is a shader brush, also known as a flat brush. The difference between this brush and a wash brush is that this brush doesn't have as big of an area that it covers. Even though they're the same shape as a wash, you can use them flat or on the tips to create crisp edges and precision control. You can use flatter shader brushes for blocking in colors, shading, blending, highlighting, doing smaller washes, and smaller brushstrokes in general. Now let's move on to our filberts. Now, what's unique about the filbert brush is that it has a rounded tip. This rounded tip is really great for creating strokes with soft, rounded edges. They're really great for filling in circular areas and blending. My particular favorite thing to use filberts for is for soft-looking objects like hair and clouds, because you can achieve those nice, rounded, soft edges. The next kind of brush is a round brush barrel. Itself isn't flat as it's circular in shape. The bristles all have the cylindrical shape to it and they all come down to a point at the toe. What's really advantageous about using a round brush is that you can use it at its point or apply pressure to make thick to thin strokes. You can use this for detail work or filling in large areas. I actually like using these for shadows. Now, another type of brush that I always use that I totally, totally love are my detail round brushes. A detail round brush has a round ferrule. Therefore, the bristles will be nice and round, and they come to a very nice point. I love using detail brushes because I love making details in my art. It really is the secret sauce behind making those nice, crisp lines. They are really amazing for line work and for outlining, especially when I make my pop art, and the paint can actually be thinned out with water so you can create an even more inky consistency to create those nice, smooth, crisp lines. When it comes to detail brushes, they run a variety of sizes. For the most part though, usually start at zero for zero detail round brush, and then they get smaller and smaller. You'll see that this one here is actually smaller than this detail brush. It's a 2/0. This one here is a 4/0, which is even smaller. When you see fractions on your detail brushes, higher the number gets, the smaller the brush tip will be, and therefore the smaller your strokes and your details can get. Honestly, I always recommend people start with a zero detail round brush and feel it out and see whether they like to go smaller or bigger depending on their preference, like using a round brush instead of a detail round. You may be wondering, I have seen detail round brushes, but what is the difference between that and a liner brush? A liner brush really is the same thing as a detail brush, except that the length of the bristles are much longer. A good medium between getting very fine control details and longer flowing strokes. Beginner or somebody who has a certain preference, sticking with a detail round brush gives you the most control over your strokes, especially if you're just getting started or you want a little bit more control because you have a little trouble directing your paint. I always recommend going with the detail round as opposed to going for a liner. Liners are a bit more advanced. They have a little bit more of a gift to them. It's not for the faint of heart. A lot of paint brushes or most of them anyways actually come with numbers on the handle themselves. These numbers just represent the size of the brush because you're not only just going to get one type of round brush. These round brushes will come in different sizes. For example, this is a number 8 round brush. Then here is a number 3 round brush. Same kind of look, same kind of achievement you can do with your strokes except that bristles themselves and body are much shorter and therefore you can get more detailed with the round strokes. Long story short, if you're dealing with your typical brush, the higher the number, the bigger that brush will be. Of course, if you're dealing with the detail brushes which have fractions, the higher the number on the numerator, the smaller that brush is. There's another example too, this is a one-inch flat wash brush. This is a three-quarter inch flat wash brush. Now when it comes to washes, they go by the actual width of the bristles themselves. As you can see here, this is about one inch. Therefore you're going to be getting one inch of coverage with every brush stroke that you make. This is the three quarter inches. But again, it goes back to numbers, the higher the number is, the bigger that brush and the brush stroke will be. I know that there's a bajillion other brushes that are out there that I did not mention here, like angled brushes and fan brushes. But when it comes to choosing the brushes that can give you the most versatility, that can help you do the most stuff, the ones that I have shown you here today will get you there and will definitely help you achieve a lot of your painting goals. Now that you know about brushes and the strokes that can make, it's time to play. Identify the different brushes you own according to the brush types we just mentioned. With paint, observe the various strokes each brush makes. Feel free to share your brush study in the class project area. Have fun.
4. How to Load your Brush (+ Improve Your Brush Strokes!): In this lesson, I want to talk about something that's just a really basic foundation when it comes to applying paint and adding it to your brush. That is called loading paint onto your brush. Lot of beginners from what I've seen will take their brushes like scoop up a ton of paint with it and then start painting. Then they experience a lot of problems because they just have way too much paint on their bristles. That is one of the key mistakes that a lot of beginners make. We're going to just talk about how to properly load paint onto your brush so that you don't have too much. First of all, what I always like to do with every brush is I like to slightly lubricate them with water. I just dip it into my water, I dry it slightly on my towel, and now it's ready to receive paint. Then what I like to do is I go to my paint puddle. I usually like to have a little puddle of paint on my palette. Then what I do is I don't go right straight into the middle of the paint puddle. Instead, I go to the edge and I start to puddle out a bit of color. I take a little bit at a time like I'm pulling at it on the edge. I don't want to take too much all at once, so I coat it on one side. Then I turn it over and I do it again on the other side. But I never go in the middle of the puddle and just grab all of it. At least on the beginning when I'm just starting with all this and trying to get the hang of it. Once you understand how to manipulate acrylics and you can go and break some rules. But for now, if you're just starting and you're trying to figure things out, what's up, what's down, it's better to do it this way just to get the feel for it. Once you have that, you have yourself a properly loaded brush so it doesn't have too much paint. It's on dripping, it's not globed with paint. It's just enough to start doing the job. You can go ahead and start painting away. You have to reload, just do the same exact thing. Go back to your paint puddle, coat one side, coat the other. Make sure you don't have too much excess paint. Then you're ready to go. That's how you can go about loading paint onto your brush.
5. How to Apply Even Coverage (+ Get Better Backgrounds): Now I want to talk about how to get even coverage on your Canvas using your brushes. There is a little bit of controversy that I found behind this, some people like to blame their paint. I tend to err on the side of, it's more technique-based. I'm going to show you some techniques to help you get even coverage using just the right brushes and strategy so that once you're ready to move on to a nice premium paint, you'll have a much easier time going about doing it as well. I just laid out a couple of boxes here. I just wanted to give you a few demonstrations of what I'm going to talk about. When it comes to creating even coverage, you want to think about a, what's the surface area you need to cover and b, what type of brush can easily get you there. So, for example, I wouldn't necessarily want to paint this large surface here with the detail brush because that would take forever and I have much more strokes to make, and the more strokes you make, you're going to see more spochiness and that's just the name of the game. When you're working on a surface, try to figure out what brush size will work best for that surface area. If we're looking at the square, I wouldn't choose a detail brush to fill that and I probably wouldn't even choose a flat brush to do that either because it is still on the small side, although you still can get away with it. In fact, I would probably go for my wash brush because, look, I can do less strokes to fill all that in. Basically, I'm trying to figure out what brush is going to give me the least amount of strokes to get it all covered up. When people are painting, especially when you're trying to paint only a certain area, a common problem that I see is people spreading their brush and they fill, they fill, they fill, never quite gets the edge. You are little afraid that you're going to paint over, but what ends up happening is when you have to go in and fill those areas, you're going to end up getting very uneven looking coverage. One thing I always recommend everybody do is just paint over the line. I know this might sound a little controversial, but in the end, it'll help you get an even coverage and when it comes to acrylic paint, you can build layers one on top of the other when the paint dries. You can also do a little trick where you can take some tape, like washi tape or masking tape or painter's tape, and just put it over the area that you want to have painted. That's another great way to get even coverage without going over the lines if you don't want to do that. I'm just going to go ahead and just apply my paint. I like to make sure that whatever area I cover, that I try to evenly cover it as much as I can so if there's excess paint on one corner, I smooth it out and I make sure that every single area that I want painted has an even distribution of paint, that it has the same amount of strokes as all the other parts. That is how you get even coverage. Now that I've done that, I can just lift up my tape and voila, I have a clean area that has a lovely even coverage. So now let's go to these boxes down here, long rectangular box that definitely won't fit my wash brush. So we're going to move down to another brush size like my flat brush. Now this one is a number 10 and it just so happens to be almost like the exact perfect fit. So I could just go over this with my paint and just go slightly over the line, make sure every area has the same amount of strokes. Or I can just go in with washi tape, cover everything so I don't have paint going over the lines. Once again, this is a little small and this is just the right length so we're going to go with the wash brush, we're just going to paint that in. I'm just going to make sure that every part has had even coverage of paint and that there's just equal amount of strokes on all surfaces. Remove the tape, there you go. But in even larger surface, we just have to make sure once again, that same amount of strokes are being applied. I go back and forth in that area, applying the same strokes in the same direction throughout. I can even go horizontally too. But as long as you choose one direction to go when you're applying that coverage, you'll be good to go. That's how you could apply even coverage onto your Canvas using your brush and just a little technique.
6. Fun Colors & Layers with Masking: Now, I want to touch on another really cool technique. A lot of artists like using and that's called masking. Though basically, you use some adhesive like a washi tape, painter's tape, isolate certain areas of your canvas by placing the tape on it, and paint over the tape and then remove the tape afterwards to create really cool looking patterns and abstract backgrounds and whatnot. You can do this over an already painted surface, you can do this over a blank canvas, it's really up to you. You can do any pattern that you see fit. I have here some washi tape that I'm just laying down and I'll just do it in any pattern that I like because tape has some straight edges to it. You can really play around with different-looking shapes and you can get really crazy with it. If you want to make sure the paint doesn't seep underneath, just make sure you go with a nail or the tip of your finger and just smooth out the edges of the tape. Then we grab your brush and I'm just going to grab a random color, we go with blue. Just paint over the area I want. I can paint on the inside of the layer, I could paint on the outside like this. Let's go with some yellow to override it. You can just really play with the colors here. You can even blend with parts of the blue and just play around. Once you have that, you can go ahead and remove the tape and you can get some really cool-looking effects. Of course, you just want to make sure that you're careful with ruin the tape, I took a little bit off my paper, but you guys get the gist. You see that you can make a really cool, almost like abstract, modern-looking painting with a technique of masking, super fun, and it's just got so many possibilities for you to try. I hope you enjoyed that lesson.
7. Add Awesome Texture with Scratchitti: Now there's also a really fun technique called scratchitti which involves adding layer of paint and then scratching it off to reveal layers beneath. It's a really cool way to add texture to your paintings. I'm going to grab a darker color just to show you the effects of this. Grab my wash brush and I'm just going to add some blue right here. I'm going to add a nice thick layer too. Then once I have something I want to lay down I can take the other end of my brush like this and just make some scratches, so I can do different patterns. Now, what's cool is because we already laid down color underneath. It starts to really shine through and just look how unique that is? I can do different line work if I'd like. But it just adds so much variety and just spunk really to your painting. You can use other types of paper like this and just push out the paint, scratch it off. You can use business cards, you can use credit cards, you can use any sort to scratch the paint off. You get really cool looking patterns and texture. If you want to add a little bit more of intrigue, you want to add a little bit of personality to your paintings, consider doing scratchitti.
8. How to Create Smooth Color Blends Like a Boss: In this lesson, we're going to talk about how to make colorful even blends. What I'd like to usually do is use a flat wash brush. This is a brush that has a flat body shape and it helps you cover large areas and they're also really, really good for blending. I'm also going to go with three different colors just to show you how to do this, as well as a little bit of water on the side. To go and blend you're going to want to think about the colors you want to use. Now typically, if you want to get a really nice-looking gradient that looks very natural, you're going to want to tend to get colors that are closer to each other on the color wheel. For example, pink, red, and yellow are on the same side of the color wheel. You're going to get really nice, pleasing-looking blends. Now it's not to say that you can't use other colors that are opposite the color wheel like blue and red, for example, you're just going to have a bit more work to do. We're going to start off with yellow, pink, and red. First thing I like to do is I like to first grab the weakest color pigment, weakest color pigments, usually are yellows, you need to use more yellows to help bring it out more. I just load my brush, then I go to my Canvas. I hold my brush on the side, like this. I just go back and forth. I choose to do horizontal, you can do vertical, this is totally up to you. But I go ahead and spread my color down to about a third down of the paper. Now without actually rinsing my brush, we're going to go in with the pink this time. I'm going ahead and grab that. Then I'm just going to leave a little bit of white space. Then I'm just going to wet the same strokes, lay down the pink. I'm going to go up into the yellow. Just like that. Know already you're starting to see a blend happening. Now here's something very, very, very important to note. You're going to want to do well, you're blending while your paints are wet. That means you have to work a little fast. You can't just put down yellow, wait an hour, and then come back and try to do a blend with your pink because it's not going to blend, you're going to have to do the whole thing from scratch again. Now I'm going to rinse my brush because we lay down our color. Now I want to go back in with the yellow again because it's such a weak pigment. Then I'm just going to go over that transition point where the pink and the yellow meet. I'm just going to reinforce that, want to bring the color up and then bring it down into the pink. That helps to create an even smoother gradient. I'm just adding layers, going back and forth until I get a nice blend that I'm happy with, and it's okay to keep adding layers. Really, this is the gist of blending. Let's continue, let's go ahead and add some red to all these. I'm just going to rinse my brush out and go grab my red and then leave a little space and then we're going to add it in and bring it up. It's very important that when you're blending, you always crossed the colors, okay, that's super important. A lot of beginners who are just starting their acrylic painting journey get so nervous when it comes to blending because they want to keep all the colors in their zones but what happens is you just get color splotches. I don't mix well together so you have to go into the color boundaries, clean my brush out, grab my pink, go back and reinforce the pink. I don't go up a little bit. Not too much, but I really want to reinforce the transition between the pink and the red. I'm going down into the red. Again, my red is wet so it's going to accept the pink and blend really well into it. You see how we just created a really nice-looking blend from yellow to red. You can totally do this with any two colors, any three colors, just employ the same methods over, over, and over again. I want to also add too as I'm going into the opposite color, I just ever so slightly take off the pressure off my brush so I'm not bearing down and pushing all the color out onto the background. I really want to facilitate the blending, but I don't want to push on all the colors all at once. Do you see the difference between what a gradient like this with opposite colors would look like versus similar colors? Just keep that in mind when you're doing your color gradients. That's how you can go about doing a blended background.
9. How to Paint Thin Crisp Lines: In this lesson, we're going to talk about how to do detail lines and how to get them to be really smooth and crisp. I'm going to be using a liner brush, which is little bit different than a detail brush. But you can also go with a detail brush as well. This is just to give you an example of what the difference is between a detail round brush and a liner brush. A detail brush has a shorter brush body length versus a script brush has a longer body length. This is really advantageous for doing script lining and detail line work because you can really get those lines be crisp and clean. You can do this method using both types of brushes. You can interchange them back and forth. But I'm going to go with the liner brush for this demonstration. I also have a glass of water next to me, and this is really important when it comes to doing detail lines. You want get your paint water down just enough so it becomes like an ink like consistency. If you happen to have a heavy body paint or more like a fluid paint, you would just need to vary the amount of water or acrylic medium you put in it, or you can just get acrylic ink and that'll do just fine for your liner work. What I'm going to do, I'm going to dip my brush into the water. You get it nice and wet. Now what's really important here, I'm only grabbing a little bit at a time and I want to evenly coat my bristles. Just remember that lesson on even coating. What I like to do with my detail and my liner brushes is once I have the paint, I twist the brush just so I can squeegee off any excess paint so I don't have a lot of extra drips. That's very key and important to do. Now once my brush is nicely loaded, I'm going to get to my canvas or my paper. The tip to using a detail liner is smooth, consistent, even strokes. You're going to want to place your liner brush almost perpendicular like this, and then use the pivot of your palm right here, or you can put your arm under your hand like this and work. But as long as you have some surface that's comfortable for you to do those consistent strokes. Also you want to hold your brush pretty close to the ferrule so that you have much more control because if you hold your brush out like this, that's a lot less control for you. Better to hold it like this and to just move from one pivot point. Let's just go ahead and start to work it. It's always important to just go back in, rewater your brush every few strokes. Of course, this takes just a little bit of practice. You just want to see and understand how your brush feels in your hand as you're doing this. I am going to just do a series of squiggly lines just to get the hang of it, and do some straight lines. You can play around with the pressure points. When you place your brush on your paper and you press hard on it, the line becomes thicker. But then when you release that pressure, line thins out. Pressure, let off pressure. You can get varied line weights by just playing around with the pressure points of your brush. Just keep redeeping every few strokes. You want to keep your brush nice and lubricated and filled with paint so you can keep doing your thing. Once you've gotten some confidence, you can actually start writing your name. One thing I noticed when I started doing this as I actually like to have my palm on the table, and I like having my brush at a slight angle. Not exactly vertical, but just at a slight angle. Play around, figure out what angle works best for you, how to hold everything and just practice with your brush, and have fun. That's how you can go about using a liner brush or a detail round brush to create smooth, crisp lines.
10. How to Paint a Tree (+ Love the Process): In this lesson, I'm going to show you how to paint a tree. A lot of people get really scared when it comes to painting trees because they look so complicated. But I'm just going to show you the basic formula behind creating a tree. All you have to think about when it comes to trees, it's a series of lines and a lot of them form the letter Y. What we're going to use is a flat brush. These brushes are great for making straight lines, especially if you need to do a bunch of straight lines without a lot of work. With my flat brush, I'm just going to deep it in some water and nicely lubricate it and then I'm just going to grab my tree bark color. In this case, I just have the color brown, but you can use any color you got and I'm just going to make sure it's nicely watered down. I want my paint to be able to glide, so I just add a little bit of water to the paint puddle as I'm coding my brush. We'll start at the bottom here. I put my brush bristle down like almost perpendicular. That's the edge of the bristle there is what's going to give me my straight line. You can even touch the edge of your canvas with the brush bristle and you can already start to see how it makes that nice straight line for you. Remember to hold your brush close to the feral. We're going to move our brush upwards and we're going to make a line. I want you to keep a nice even pressure, maybe a little on the light side. I'm not expecting you to be perfect, I'm not expecting you to have the perfect straight line because think about it. Trees are organic matter, they really don't always have to be super straight. There's always some wigglyness to it. We just did one side of the bark. We're going to go ahead and do the other side. Just depending on how thick you want your tree to be, I'm just going to go ahead and repeat the same stroke on to the other side. There you go. We just made the other side of our tree. Now, before we go and fill that in, let's start to make some branches. I want you to think about the letter y. The letter Y is exactly what I use when it comes to creating branches. If I have a straight part here, I'm going to show my brush at 45 degrees. Then I'm just going to use a tip very gently and pull out a branch like that. That's it. What's important is you want the branch bottom to taper very smoothly into the trunk of the tree. I see a lot of beginner artists when they make a tree, the branches come out straight out like this. Some trees do that, but if you're trying to get a really nice typical looking tree, you want it to come out at a 45 degree angle, the way you can't tapers out. Then I'm just going to thicken the base of that branch going into the trunk of the tree. Something to remember is the letter Y when you're making branches and when the branch base goes into the trunk of the tree, branch base will be thicker than the branch tip. Look at any tree, you'll see this constantly. It's got a thick base than our tip. Just simply repeat. You can do another branch off the branch. Think of the letter Y and you can always downgrade to a detail brush if you want to get smaller branches. If you're thinking, I think I need to go down with my brush a little bit to get even thinner branches, go ahead and do that. Remember, if you want thicker lines, press down on your brush and then release pressure as you get to the tip so that it thins out. Pretty simple. You're just going to repeat that for as much as you want, for as many branches of your tree. Then if you want to do roots and the same thing as branches, they come out like the letter Y. They're like so. You're really just repeating what you did on the top to the bottom. That's how you can go about painting a tree with tree branches. Very simple formulaic. You can just do variations of this with different types of trees. But now you know the gist of how to do it.
11. Stippling Part I: Leaves (That Look Faraway): Now, in this lesson I'm going to show you guys the stippling technique for making leaves on branches. I'm just going to opt a brush with a bigger brush head, brush right here. Honestly, you can really do stippling with many types of brushes. One is a number 5 brush, the head is just a tiny bit bigger, but I think it's going to do the job quite well. We're just going to grab a color for our leaves and we're just going to say that our leaves are going to be green. I'm just going to load my brush. We're going do some stippling. We're just going to dot the leaves onto the branches. What I like to do is, I like to start with the edges of the branch. I like to see where all the leaves will go, then I slowly work my way in. If you have a tree that you want to use for reference to see where all the leaves are, you can go ahead and do that. But this is basically how you would go about doing tree leaves without having to paint every single leaf of a tree. Because if you had to paint every single leaf on a tree, you'd would be here for the next three weeks, because there are so many leaves on a tree, It's almost impossible to capture everything. This is like a shortcut. I'm just going to add some leaves on the front here, just to give the illusion that there's more leaves. That's how you can go about using the stippling technique to create leaves that look far away.
12. How to Paint Grass Like a Pro: I want to show you how to create grass and how to put that into your painting. You recall from when we did our detail line work, when I showed you how to use a detail liner script brush. The technique behind that is pretty much the same technique we're going to use to make grass. Because it's grass and I want it to be a shorter grass, I'm going to use a round brush. If you want to use a liner, that's totally okay. I'm going to dip my brush in some water, get it nice and wet, remember a lubricated brush is a happy brush. I always turn the brush to make sure I have an even load and that I don't have too much paint. The thing with grass is it comes in multiple lines. I go straight up, sometimes to the side, sometimes to the other side. Grass is just a series of lines. I'm going to take my brush, I'm going to hold it down, perpendicular or if you're comfortable with it being slightly on the side, that's okay too. I'm going to take my brush. I'm going to put it down with a slight pressure and then I'm going to move my brush up, release the pressure, and lift. What that does is it creates grass root that's thicker and a grass tip that is thin. Bring my brush down, pressure, release pressure up, pressure, bring it up, release pressure, pressure, get it up, release pressure. Now when it comes to grass, you're going to do this over and over and over again. You'll get faster at it too. Then you'll notice too, I put my grass in clumps. That's giving the illusion that there's just more grass than there really is. If you'll notice, my grass is not all standing straight up. Some tips I go to the side like that. Others go to the left like that and they overlap each other too, very important. Grass is not just like this linear thing, there's just multiple bushels of grass. We're just going to do that all over our tree base. You can also vary the length of the grass. You do some that are very short. You can do some that are very long. It's totally up to you how you want to do this part. I usually like to work this way. Sometimes you'll see some people that like to do the grass, they start at the top and then they go down. I would say as a beginner, you want to just stick with you go from the bottom up, just with the way pressure works, usually when you first put your brush down, there's most pressure and then you can always release later. I find that's just easier for beginners to do. Once you get the hang of it, you can play around with how you put the stroke in. But usually if you want something to appear like it's got more weight on one end than the other, you want to start with the area that has more weight to it and then taper off. That's how you can go about painting in grass.
13. Stippling Part II: Flowers (That Look Faraway): Now I want to show you how to do the stippling effect, but adding flowers that look far away. We're just going to grab whatever brush you would like to use. I'm just going to grab my Number 5 round brush and I'm just going to grab the color red just so it stands out. What we're going to do, is we just do the dot technique. Now I like to make my flowers break on the top of the grass to make it look like the grass is the stem of the flowers and I don't want to do too much. That's how you can create the illusion flowers in a field.
14. How to Paint Rounded Flower Petals (Violets, Daffodils, Jasmine): Now, we're going to talk about how to make flower petals. This is all basic, but it's just a really good way to understand how to make certain flower petals and understand the shortcuts of how to do that. I'm going to show you how to make rounded flower petals. You can also do this with leaves as well to make this rounded shape. This is more common with daffodils, violets, and jasmine flowers. They all have a very similar looking petal shape. We're going to grab our trusty filbert because once again, he makes really, really, amazing rounded edges. He's already been tossed in water and dried with our little handy towel. Let's grab some paint. I'm just going to evenly load my brush. Don't want too much paint, just evenly loaded. If we had a straight line here, I would want to start my brush at a 45 degree angle, just like that. I've got the brush coming at a 45 degree angle, we're going to bring the brush up, we're going to turn it until it's horizontal at the top. You see how I've made that really nice rounded shape on the top. Then we're going to turn our brush completely vertical again, and then bring it down. It may not be perfect on the first go, but that's okay. I want you to practice doing this over and over again. So 45 degrees, bring it up, turn it till it's horizontal, turn again till it's vertical, and then bring it down. It helps create a rounded edge, a rounded tip that comes back to a point. Again, I just want to make sure my brush is nicely loaded and also lubricated. So 45 degrees, turn horizontal, turn it again till it's vertical, bring it down. Then you'll get the hang of it once you do this multiple times, it'll come easier to you. If you actually want to create a flower, you just want to start at a point, then start a 45, bring it down, rotate your paper, do it again. Forty five, turn, bring it down. Turn, bring it down. Turn, bring it down. Turn, bring it down, Turn, bring it down. One more, turn, bring it down. There you go. You just made your flower in less than 30 seconds. That's how you can go about making rounded petals or rounded leaf shapes.
15. How to Paint Thin Flower Petals (Sunflower, Daisies, Spidermums): In this lesson, I'm going to show you how to do thinner rounded petals and leaves. This is almost identical to how we did the rounded shapes of the petals using the filbert brush. But instead of going with filbert, we're going to go with our shader brush. This brush is really good for helping us get those more thin lines that we're looking for. Or if you want even thinner petals, you can always go with a filbert brush that has a smaller size head. Either one of those can work. But we're going to pretty much be using the same technique. These types of petals are more common in daisy, spider mums, and sunflowers. I got my brush, make sure it's lubricated, and that it is loaded with your paint. I'm going to take my brush and I'm just going to angle it slightly to the left. Doesn't have to be quite 45. We're going to bring it up, turn it till it's horizontal, turn it again till it's vertical again, and bring it down. That's how you can get an even thinner petal. Bring the brush a little angle to the left, up to the top, turn it horizontal, turn it until it's vertical again, and bring it down. Keep practicing this so you get the hang of it. This is almost identical to doing the other technique and so we're using a different brush. We're not really using a 45 degree angle, although you could if you'd like. Then, if we want to actually create a flower, same technique. Start at the center of the flower, bring it up, vertical, back down. Bring it up, horizontal, back to vertical, and down. Bring it up, back to vertical, and down. Bring it up, down. Up, pull down. Up, horizontal, vertical, down. Horizontal, vertical, down. You can just keep repeating that if you want more petals in there. You just keep repeating these strokes until you've got something that you like. That's how you can go about creating thinner looking flower petals and leaf shapes.
16. How to Paint a Pointed Leaf Shape: In this lesson, I'm going to show you how to make a pointed leaf shape. We're going to be using a angled brush for this step or you can go with your shader brush. Totally up to you, but this is a little easier with an angled brush. Totally not required, but I had it in my [inaudible], so we're going to use it. We're going to make sure it's nice and wet. Evenly load my brush. Always evenly load people. To start, I'm going to take my brush with a tip side down like this and going from the straight line here at a 45 degree angle since it's already there. That makes our job easy. We're going to bring our line up like that, then we bring it down, curve, bring it back up again like that. Then you can go back to the beginning here and just fill in the area. That's how you can go ahead and make a stylized leaf. You can go ahead and just practice this a bit more, angled tip down at a 45, go up, down, back up again, and then go back to the beginning, and rounded out. Just like that. [inaudible] up, down, back up again, start at the beginning, rounded out at the bottom. That's how you can go about doing a pointed leaf shape.
17. Painting Clouds Part I: The Sky: Now, I want to create a sky. I'm going to use technique or creating even coverage to paint in sky. I'm just going to use my tape to block off the area, so I have an easier time containing it. Now for my sky, I take my wash brush, grab some blue then we're just going to apply that right over here. Then I'm just going to grab a little bit of that pink because I want to just do a little nice blended gradient, so you can start just mix and matching techniques here. It's really a fun time. Then go back in with the blue. I'm going to wait for this background to dry and then I'm going to show you a scumbling technique to create clouds. I'll see you there.
18. Painting Clouds Part II: Scumbling Technique: Now I'm just going to remove the tape. Now we're going to do a technique better known as scumbling. Now scumbling is just using a brush and paint without really any water and you will apply a thin layer of that paint over typically another layer and the previous layer will show up underneath. It's a really cool way to get different effects, especially if you want to do something that looks like vapor or that looks like steam or clouds. I'm going to show you how you can use a scumbling technique to create clouds. Best brush that I have used in my experience to create clouds is a filbert brush. A filbert brush is just a brush that has a rounded tip. It is fantastic for making anything with a rounded edge clutch to have in your paint arsenal. I grabbed a little bit of white and I'm just going to evenly load paint onto my brush. Now because this is scumbling, I don't want too much paint, so I just take my washcloth and I wipe off any excess paint. I don't want that much on my brush when we're scumbling. [inaudible] a cloud over here, we're going to start with a very light pressure. With a circle motion, just create a little puff right there. Then I'm just going to create a large base, as I'm doing the circular motion, very light. Mind you on my brush. Clouds tend to be like hairy and big on the top and they flatten out depending on the cloud. But in this case we're just going to do clouds that flatten out towards the bottom like that. You can also do a couple. They come off the other. Now my paint is still a little wet from beneath, so a lot of that blue was catching through, but that's okay. You can still see that these are clouds that it's creating that illusion hanging over the atmosphere here. This is just basic, but when you were thinking about doing clouds, when you're just starting to do clouds, think about making them puffy and they're more white on the top. Then they flattened out towards the bottom. If you have a reference picture of a cloud, play around with that. It is really a lot of fun and it's a great learning experience to see how clouds form. Now I'm just taking my brush and just very light, doing some straight lines and doing a little scumbling here and there so it's barely transparent. Again, it just creates this illusion of a very cloudy looking sky. Fun part is, there's not that much paint on my brush. This is creating a beautiful dry brush technique for me. You can always go back to previous clouds you made add more white build up so it looks a bit more white on the top and then it blends into the background, towards the bottom. I'm just adding a little bit of white here and there. Primarily in areas that I think there would be light touching it. A little honestly can go along way here. Then I just want to feather that out because I think I added too much there. [inaudible] forgiving that is, I did a little too much, but then I can just go and remove the paint off my brush and then just scumble and go. It's really fun. Spread the paint out. That's how you can go about painting clouds using the scumbling technique.
19. Still Struggling? Try This!: Now, here are just a few extra tips I want to leave you with as you're going about your painting journey. You may run into some of these issues, and if you do, just keep watching this video to understand where you went wrong and how you can go ahead and fix it. Now, I have seen people complained to me that when they make some of their lines, that they just look really stumpy, that it just doesn't look like it has any finesse. The reason behind this has a lot to do with how much paint you actually have on your brush. If you have way too much paint, it really gives you a lot less control when you're starting to do the various brushstrokes that we've covered in this class. What happens when you have too much paint, it can go all over the place, and you really don't want that, especially when you're just starting out. When you are running into issues of lines looking stumpy, be sure to evenly load your brush with paint and make sure that you don't have a lot of paint on your brush. Super important, do not put a lot of paint on your brush because quite honestly, you're going to have a lot less control in the long run. Now, have you ever run into an issue where you find your paint is not really spreading evenly, it's giving you the splotchy looking effect? Unless you're trying to do a dry brush technique, you do not have enough paint on your brush, and your brush is not diluted enough. You want to make sure that you always have enough water on your brush and that you have enough paint on your brush. Again, make sure it's evenly loaded. Very important that your brush is always evenly loaded and lubricated because a lubricated brush is a happy brush. That helps to spread out the paint very nicely. Of course, you always have to go back every couple strokes to reload and have yourself ready for the next step. Now, have you ever run into an issue where your lines just look a little too faint? For example here, if you notice that some of the lines came out strong, but then there were other lines that just faded out a little bit. When this happens, unless that was intentional, what may have happened here is that you do not dilute your brush enough for the paint to fully spread out the way it should. You would either want to add some acrylic medium to help stretch out your paint pigment a little more or just add a little bit of water. You want to just be careful. You don't want to add too much water because after a while that may actually dilute your paints so much that you lose pigment. In this case, you probably are in good hands. You just want to make sure your brush is always nicely lubricated and has enough water to go the distance. I think the motto for this class is a lubricated brush is a very happy brush.
20. Thank You & Next Steps: That concludes the Paint Slapping Magic of Brushes class. I hope you learned something new and that you're excited to dive more into the world of acrylics and all it has to offer in making gorgeous art. What do we do next? Well, the first thing I always recommend is to play and experiment and give yourself that freedom to play around with your acrylics and supplies and keep on practicing. I know that as a first-time acrylic painter you may not get the results you want the first time and that's totally okay. It's not about comparing yourself to others but comparing yourself to yourself. I want to also offer you to challenge yourself when it comes to your painting experience. One way to do that is to repeat the same strokes over and over until you get the jitters out. Then try making a flower or a tree without following the tutorials. It's a really great way to take up the training wheels and learn a bit more as you go along and trust me, you totally will learn something new every time you step up to the canvas. Please share your completed projects because I would love to see them by using the class Instagram #paintslapper and tag me on Instagram with my handle @thebuzzedartist. I would love to see what you come up with. Now if you want to slap more paint around, I did want to mention that this same class that you just took is also offered on my website with even more bonus content like my Artist Idea Blaster and a detailed printable instruction guide that perfectly summarizes all the key steps and strokes for many of the painting techniques you learned in this class. If you want to get lifetime access to all the videos here and never have that, I don't know what to paint feeling again, you could check it out at this URL below. Like I mentioned in the beginning, this class is part of a two-part acrylic painting basic series. The first one is The Paint-Tickling Soul-Singing Magic of Acrylics class, so if you were too excited and skipped over to this class and haven't taken the Magic of Acrylics class yet, I highly suggest you do it. If you want to take a deep dive into the magic world of acrylic painting but you're just not quite sure how to get started, this is a great class to help answer all those burning questions like what supplies do you need, how to mix dozens of bright colors without having to buy hundreds of dollars of paint tubes and ways to stay motivated, so you're always brimming with ideas for future paintings and you could check it out at this class URL below. Lastly, if you really want to dive into the world of color, color mixing and color palettes, The magic of color is a great class for you. You can learn to paint any scene or picture using your own colors without having to follow all those YouTube tutorials even allowing you to go off script and add your own style. This class will help you create vibrant, eye-catching acrylic paintings without the fear of messing it up, so no more praying and hoping that your painting turns out halfway decent. You can leverage the tools that you already have to turn your paintings from meh to wow. You can go ahead and check this class out at the URL below. Of course, if you want to see the full listings of courses that I do offer, you can just go to thebuzzedartist.com/courses. Once again, I just want to thank you so much for being a part of this class, don't forget to use the class hashtag and I cannot wait to see what you create.
 Amanda Rinaldi, Teaching you to Art with Confidence