Transcripts
1. Welcome to the Class: Are you ready for a wildly colorful and fun painting adventure with unicorns? Get ready to make your own rainbow unicorn in this bright and magical acrylic painting class. Hey there, my name is Amanda from thebuzzedartist.com, and I am a self-taught acrylic artists ready to show you the colorful fun world of acrylic painting that'll fill you with that delicious creative artist's confidence that you deserve. Welcome to rainbow unicorn painting class. If you love all things unicorn, colorfully vibrant rainbows, and everything in between. This is the painting class for you. This class will show you my entire step-by-step process of creating a spunky eye pleasing painting featuring a unicorn, with beautiful wispy hair, iridescent coat, set against a bright sparkly rainbow background. In this class, you'll learn how to choose an expertly mixed colors to get the right shade for your painting, how to create a smooth blend to create a bright colorful rainbow, and how to paint a unicorn silhouette, layer paint, and use details to really make your unicorn come to life. This class is for beginners who love acrylic painting, bright colors, unicorns or all the above and want to try their hand at it too. This is also for anyone who wants to create a stunning acrylic masterpiece, even if they've never touched a brush before, or have no idea what to actually paint. By the end of this class, you'll have the know-how and most importantly, the confidence to create gorgeously crazy cool paintings, that'll leave you feeling proud and in awe of your new found skills. Head on over to the next video, and I'll see you there.
2. Painting Supplies You'll Need: Hey there everybody and welcome to your unicorn painting class. This is super fun. A great way to just let loose play with colors. If you're a big lover of unicorns, this is super perfect. There's just a few things you're going to need in order to do this painting. One, you're going to need some pre stretched canvas, canvas panel, or even some type of acrylic paper or watercolor paper is perfect. In this case here I'm using an 11 by 14, but you can use any size that you have on hand and I will also be including different size traceable for a couple of different size canvases so that you can choose from those traceable and accordingly with your canvas size. You're going to be needing a few paint supplies as well. You're going to need three paint colors and a white color. We're going to be using this particular color here is turquoise. Basically, you just want to look for any type of blue that you have is fine. But if you're looking for the type of blue that I'm using, I'm using turquoise. It has a bit of yellow in it. I'm also going to be using a scarlet red. I'm going to be using the color yellow as well as a titanium white. I have them already prepared on my canvas here. I'm also going to be using three brushes. I got myself a three-quarter inch flat wash brush. This is just a brush with a flat head, really great for covering large areas. A number 8, filbert brush. The filbert brush is characterized as such because it has a rounded edge on the brush tip and it's really great for making more rounded areas, which is perfect for the unicorn. Then I'm going to be using a number 0 detail round brush as well, really great for detail line work. We're going to be using those primarily three. Of course, if you've got something that's similar in your arsenal, that's perfectly okay too. You don't have to have exact brushes or colors that I am using, but as long as you've got the general gist, you're good. Then we're going to have a cup of water, as well as our pre-printed traceable for the size canvas that you're using. In addition, you're going to want to use some tau wall on the side to just mop up any paint that you're going to be using. Once you have all your supplies ready, you're ready to move on to the next step. Here we go.
3. Step 1: Painting the Rainbow Background: First things first is I'm going to go ahead and make my background. We're going to pull our 3/4 inch flat wash brush to do this for us. I'm just going to grab my water, dip my brush in the water to get it nice and wet and lubricated, and then I'm going to go and grab some yellow and just cope both sides of my brush like so. I don't want too much paint but just like that. Then we're going to start going on our Canvas and using vertical strokes, we're going to go ahead and add the color yellow to the left side of the Canvas and I want you to be generous with paint at this point. We're going to probably make a band of yellow that's probably maybe three inches in thickness. Again, I want you to not spare any expense when it comes to the paint. When you're applying it, you want it to be pretty wet because we're going to move on to the next step, which is adding another color and we need this to happen quickly, because with acrylics, they dry fast. We're going to need to make sure the colors are wet when we're blending. We're going to go now, I'm not even going to wash my brush. I'm going to grab red this time like so and I'm just going to give myself a little space. I'm just probably going to start like right here. Maybe give myself about half an inch of room between the red and yellow and then I'm just going to take my paint, make another band, and then I'm going to start bringing it into the yellow. Very slowly and gradually. I'm making sure I'm putting the majority of the paint like right over here and then I carry it over into the yellow. Because my yellow is still wet, it's going to want to blend. It's already starting to make the color orange if you're noticing because red and yellow make orange. Now I'm going to take my yellow and I've already gone ahead and rinsed my brush. I go back to the yellow this time and I'm just going to reinforce that transition point between the red and the yellow. Because we're dealing with yellow going back into red, yellow is a lot weaker than red. That's why I'm going back in with the yellow so I can reinforce that area. Then also just help that smoother blend so it can happen a little better. Once I have that, we're going to move on over to here, the next band of color. Well, actually, we're going to go and extend the red out just a little bit more. I'm just going to grab my red again. Just go into extended tiny bit more. Because we already made that orange transition, so I just want to reinforce that red a little bit more and I'm bringing this almost halfway across the Canvas at this point. Without even rinsing your brush, I'm going to go in now with the blue, and I'm probably going to just leave myself a little bit of space right here and now that blue in. Now, because I didn't rinse my brush, it's actually going to come out looking a little more purply, which is what we're going for. Then I'm just going to make sure I bring that blue over into the red and blend, so it makes this purply color. This is where a lot of beginners start to panic, they're seeing it's not really blending as well as they would like. What you're going to do is you're going to rinse your brush because you want this to happen while the paint is still wet remember, grab that red and then come back to this area here where the transition happens and start to blend. Yeah, and you're going to start to see it gets more purply. That's what we want. You just got to keep working that, keep blending, keep working. Blending takes several layers to accomplish, especially the more smoother blends. It's okay to have to be doing this several times, you're on the right track. I'm just going to rinse my brush and go back in with the red. There we go. Now we're starting to see that seamless transition happening. Then from there we're going to reinforce that blue. I'm going to grab me some more blue with my rinsed brush, I'm just going to pile it on just like that. Here I'm just going to round out the rest of the background with this blue carried over into the purple, so it reinforces that transition and bring it back out again. Then just make sure you get the sides of your Canvas as well as you're doing this. Now, at this point now I'm just going back and forth with my previous colors, reinforcing the gradient areas and making sure that they all are blending nicely into one another, which I think is happening quite well. Now that this has been done, we're going to wait for this part to dry and then move on to the next step.
4. Step 2: Adding Paint Splatter: Now the next step is going to be doing a little splatter effect, and this is again just to give you a bit more of that messier abstract version of this unicorn. You can go back in with our three-quarter inch flat wash brush, and this time around, we're going to go then just grab a little bit of that yellow. Now, depending on the type of paint you have, if your paint is already pretty liquid like mine is, you don't really need to water down with water as much, because what we're going to do is we're just going to load your brush, then you're going to set the bush back, and then flick, and it creates this really cool splatter effect. Now, I'm taking the yellow, and going to where the blue is. By doing that, it creates this nice contrast. I'm spreading that color over to the purples as well as the red, so you get a nice transition happening here. You can also take another brush like this. Just do a tap. Warning. This is a little messy, so you're probably going to want to sit down a tablecloth if you are worried that you're going to get paint on things, because you will get paint on things. Just to note, the harder I hit, the more that splatter becomes more crazy. Just play around with this part, have fun, and see what happens. Once you got that first splatter effect, you can go ahead and rinse out your brush, and we can go back in now and grab some blue, and add some splashes of blue on the more lighter areas. You're pretty much going to repeat the same exact thing, just like so. This splatter effect is so cool, and plus, if you have other types of paint that you haven't used yet and you want to put them in this painting like other colors, you can go ahead and do that. Just like that. It already has that magical unicorn feel. You guys, it's great. Just to make this even more fun, I'm going to grab my blue again, and I'm going to grab some red this time, and I'm just going to make the color purple. Just like that. Then I'm going to add some white, and lighten it up. Maybe add a bit more red. If your purples aren't coming out as purple as you want it, most likely you want to add some red to it. Now it's a bit more like a violet color. Once you've got that, we're going to do another splatter, but with the color purple this time. I'm just going to grab a little bit of water just to help me get the splatter effect going, because sometimes it just likes to stick to your brush and not go anywhere. Once you're happy with all the paints splatters that you've added here, we're going to let this part dry completely so that we can go ahead and add in our final step, which is our unicorn. I'll see you soon.
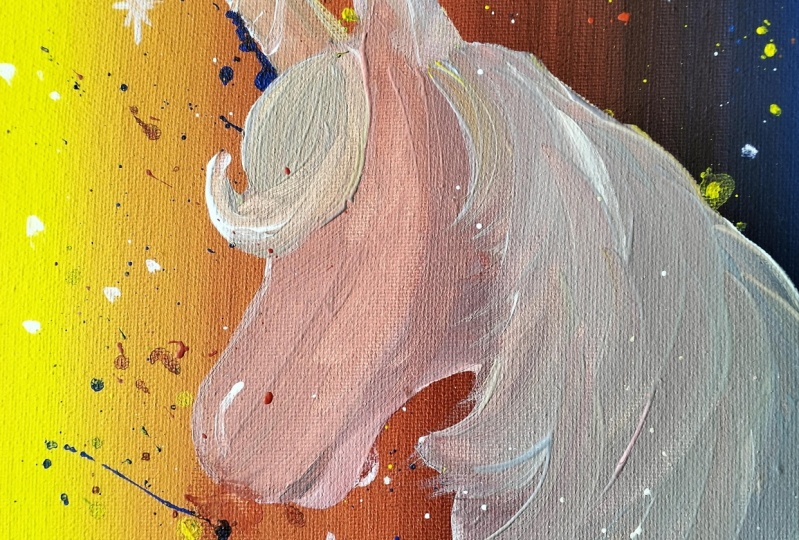
5. Step 3: Painting in the Unicorn: Now that our canvas has dried up, we're going to go ahead and add in our unicorn. You're going to go ahead and grab your stencil and then you're going to flip it backwards. Because we're going to do a little trick. Once you flip it backwards like this, you either can grab some transfer paper or in my case here, I just grab some charcoal, like a charcoal pencil like so, or even some chalk works too. But what we're going to do is we're just going to add in lines in the general vicinity of our unicorn outline. Again, this doesn't have to be completely perfect, but this is just a way for you to help with the transfer process so you're not repeating the same things over and over again. I'm just going to go ahead and smooth it down with your finger. This will get a little messy. If you haven't figured that out already in this painting, that painting is a little messy and that's perfectly okay. By smoothing it out like this, it just helps so that a lot of this doesn't get rubbed onto the canvas itself. Now that you've done that, we're going to go bring our Canvas back and we're just going to lay our unicorn on top and you're going to just decide where you want this. I want the point part to be a little closer to the top and then I can always add in a little bit more of the unicorn body down here. This is honestly up to you how you'd like to do this. Now that I've done that, I just grab any pencil and very gently, I'm just going to follow along the line of my unicorn. You want to be very precise at this point because you already laid down carbon on the other side. That carbon's going to transfer at the exact pressure point that you are setting down right now. You can even go beyond the stencil itself if you wanted to be a little more creative. I'm just going a little further and once you are done with that, just simply lift the paper and you have your unicorn outline showing. What we're going to do is we're going to grab our 3/4 inch flat wash brush and we're just going to lay down the outline of our unicorn with our white. You're just going to take your unicorn color, which is our white, and then fill it in. Fill the complete inner part here and then you're going to start to see your unicorn taking shape a little bit. Now, in my case here, even though I went ahead and dried this, some of the colors are still showing up from underneath and that's okay. You can do multiple layers of white here. But it's just important to lay down the first layer so that you can go back in once this layer dries and add in a second layer of white. But if you like this more iridescent white color that's happening here, just go ahead and run with it. When you get to the point where you want to make the hair and it comes to a point, you're going to want to just turn your brush to the tip and work from the tip just like so. That's how you can get away with it, with just using one brush. If of course, you're low on brush stuff. Then we can move on to our filbert brush and that's where we're going to just add in more detailed portions here. I'm just going to load my brush and I'm just going to add in hair. I'm just going to go and take some liberties really. Just add in more hair tendrils because it's fun. I like doing this with the smaller brushes that I have on hand. I'm just using the tip of my filbert brush to help me get those really nice-looking strokes. In fact, I'm actually just taking more liberties than I originally had with the traceable and just adding more hair, more hair texture. Because I personally think that looks cooler. If you want to just accentuate the horn, bring it out a little further, you can do that. I'll even switch over to my detail brush in order to do that. I'm just going to try to round out the hair follicles a little bit more so it just looks a little smoother. I'm doing that by just curving my lines a little bit. Really, it's up to you how you want to do this part. If you want to have a unicorn with even longer hair, you can just with your brush, go to where his chin is and just make a line like that. You don't have to fill the whole thing in. I'm just going to do wisps. In fact, it looks better when it's not completely filled in. All doing this with your detail brush. Make the hair as wavy as you'd like. You can even add more locks if you want. But I think this looks really cool and every time I'm going back in with the lines, you can see the white more and more. I think that works for me here and in fact, if you want more locks coming out the side, you can go ahead and do that. Same concept. I like that. You guys such cute. Again, you're not completely filling in all the hair. You want to give it wispiness and I think that's going to be very, very nice. In fact, add some more wispiness here. Because, why not? I'm pretty much starting the wisps like right around here of his head, his or her head and then just making my wispies just like that. Let me do more wispies. You want to do another opposite wispy, it's good idea. You can see that this painting is actually relatively easy in terms of what you need to put on. It's just back to texture. Once you're satisfied with how you've got things going, you can just go back in and refine and add details to your heart's content. Just so I can clean things up a little bit, I'm going back in with my 3/4 inch brush, just adding another layer of white on top just to clean things up a little bit, smooth it out. If you want to continue adding more and more white as you go, and just continuously making this into a white unicorn instead of this iridescent looking unicorn, by all means, go for it. But I'm actually really liking how iridescent this looks.
6. Step 4: Outlining & Details: I'm going to back in with my detail brush again, and I'm just going to go ahead and add some white outlines to the entirety of our unicorn, just to establish, that is here in the scene. Again, to just reinforce more of the hair, I just add more and more wispy if I want to. Just for good measure, I'm adding some wispy at the top there, so you can never have too many wispy. I'm also going to add a little bit of a line, a diagonal right at the snout here just so shows like the horse's nose, like his little snout.
7. Step 5: Adding Stars and Dots: Lastly, we're just going to add a few stars and then we're going to call it a day. I'm going to keep using my detail brush, dip it in white, and I'm going to make some stars. I'm going to start with a vertical line, like so maybe like an inch or an inch and a half. We're going to make a T-shape like this, and then we're going to keep crisscrossing kind of like so. We just repeat that, so we can make the stars really small. We can make them really big. But just adding a few here and there really adds a more magical touch that we're looking for in our little unicorn. You can do some white dots too, to represent the more smaller the stars. Or you can do a splatter effect with white as well if you'd like. I think for the sake of my sanity and not having to do a massive clean-up, I'm just going to do dotting, instead, not bad that's stippling. You can even add a few in the hair as well. Add a bit more of a jewel-like effect. Just some from the head, like a crown almost, some around the horn. It just looks like a little crown. Once you have something you are liking, you're pretty much done. Congratulations, on making your cute, whimsical, wispy unicorn.
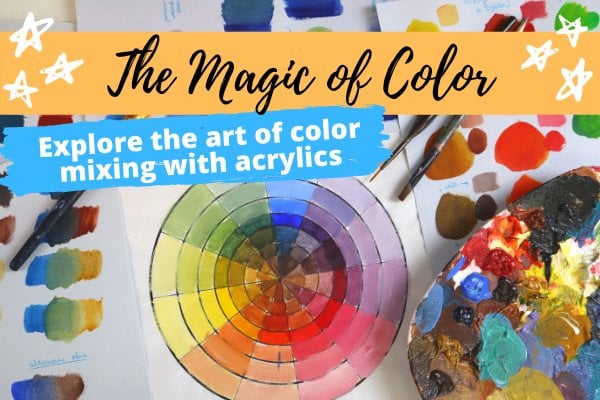
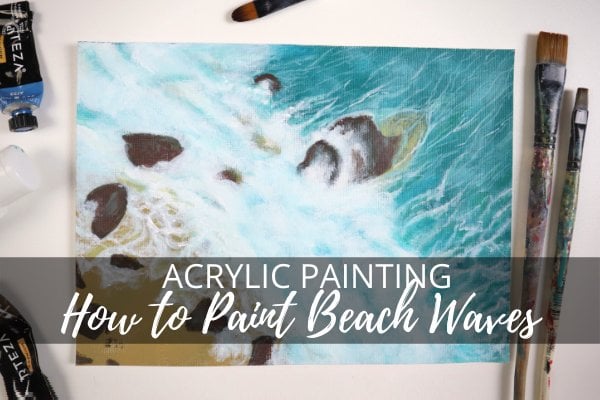
8. Congrats & Next Steps: That concludes our rainbow unicorn class. I hope you learn something new and that you're excited to dive more into the world of acrylics and all it has to offer in making gorgeous art. I wanted to offer you some next steps. The first thing I always recommend is to play and experiment. Give yourself that freedom to play around with your acrylics and supplies and keep on practicing. I know that as a first time acrylic painter, you may not get the results you want first time, and that is totally okay. You're never really supposed to get it right on the first scope and it's really not about comparing yourself to others, but comparing yourself to yourself. I also want to offer you to challenge yourself when it comes to your painting experience. One way to do that is to repeat this painting over and over without following the videos and really take your time with each step and make it your own. It's a really great way to take out the training wheels and learn a bit more as you go along. Please share your completed projects because I would really love to see them and you can do that by using the class hashtag, #rainbowunicorn and tag me on Instagram with my handle, @thebuzzedartists. I would love to see what you come up with. Now, if you're just scratching the surface with acrylics and you really want to learn the magical bare-bone basics, you may want to consider taking my class, The Magic of Acrylics, where you can deep dive into the magical world of acrylic painting and help you answer all of those burning questions associated with it, like what supplies you'll need, how to mix dozens of bright colors without having to buy hundreds of dollars of paint tubes and ways to stay motivated, so you're always brimming with ideas for future paintings. Or if you want to harness the power of acrylic paint while at the same time giving you the smooth, sexy natural blend of watercolor with the versatility and water solubility of acrylic paint, you might like my master watercolor effects with acrylics class. Finally, if you want to explore the wide world of color with acrylics and want to look behind the curtain on creating head snapping, eye-catching paintings, you might want to consider The magic of color class. You can see all the classes I offer through my website, thebuzzedartists.com/courses. Thank you once again for doing this class with me, I hope you thoroughly enjoyed and learned something new. Don't forget to use the class hashtag, #rainbowunicorn, happy painting.
 Amanda Rinaldi, Teaching you to Art with Confidence