Transcripts
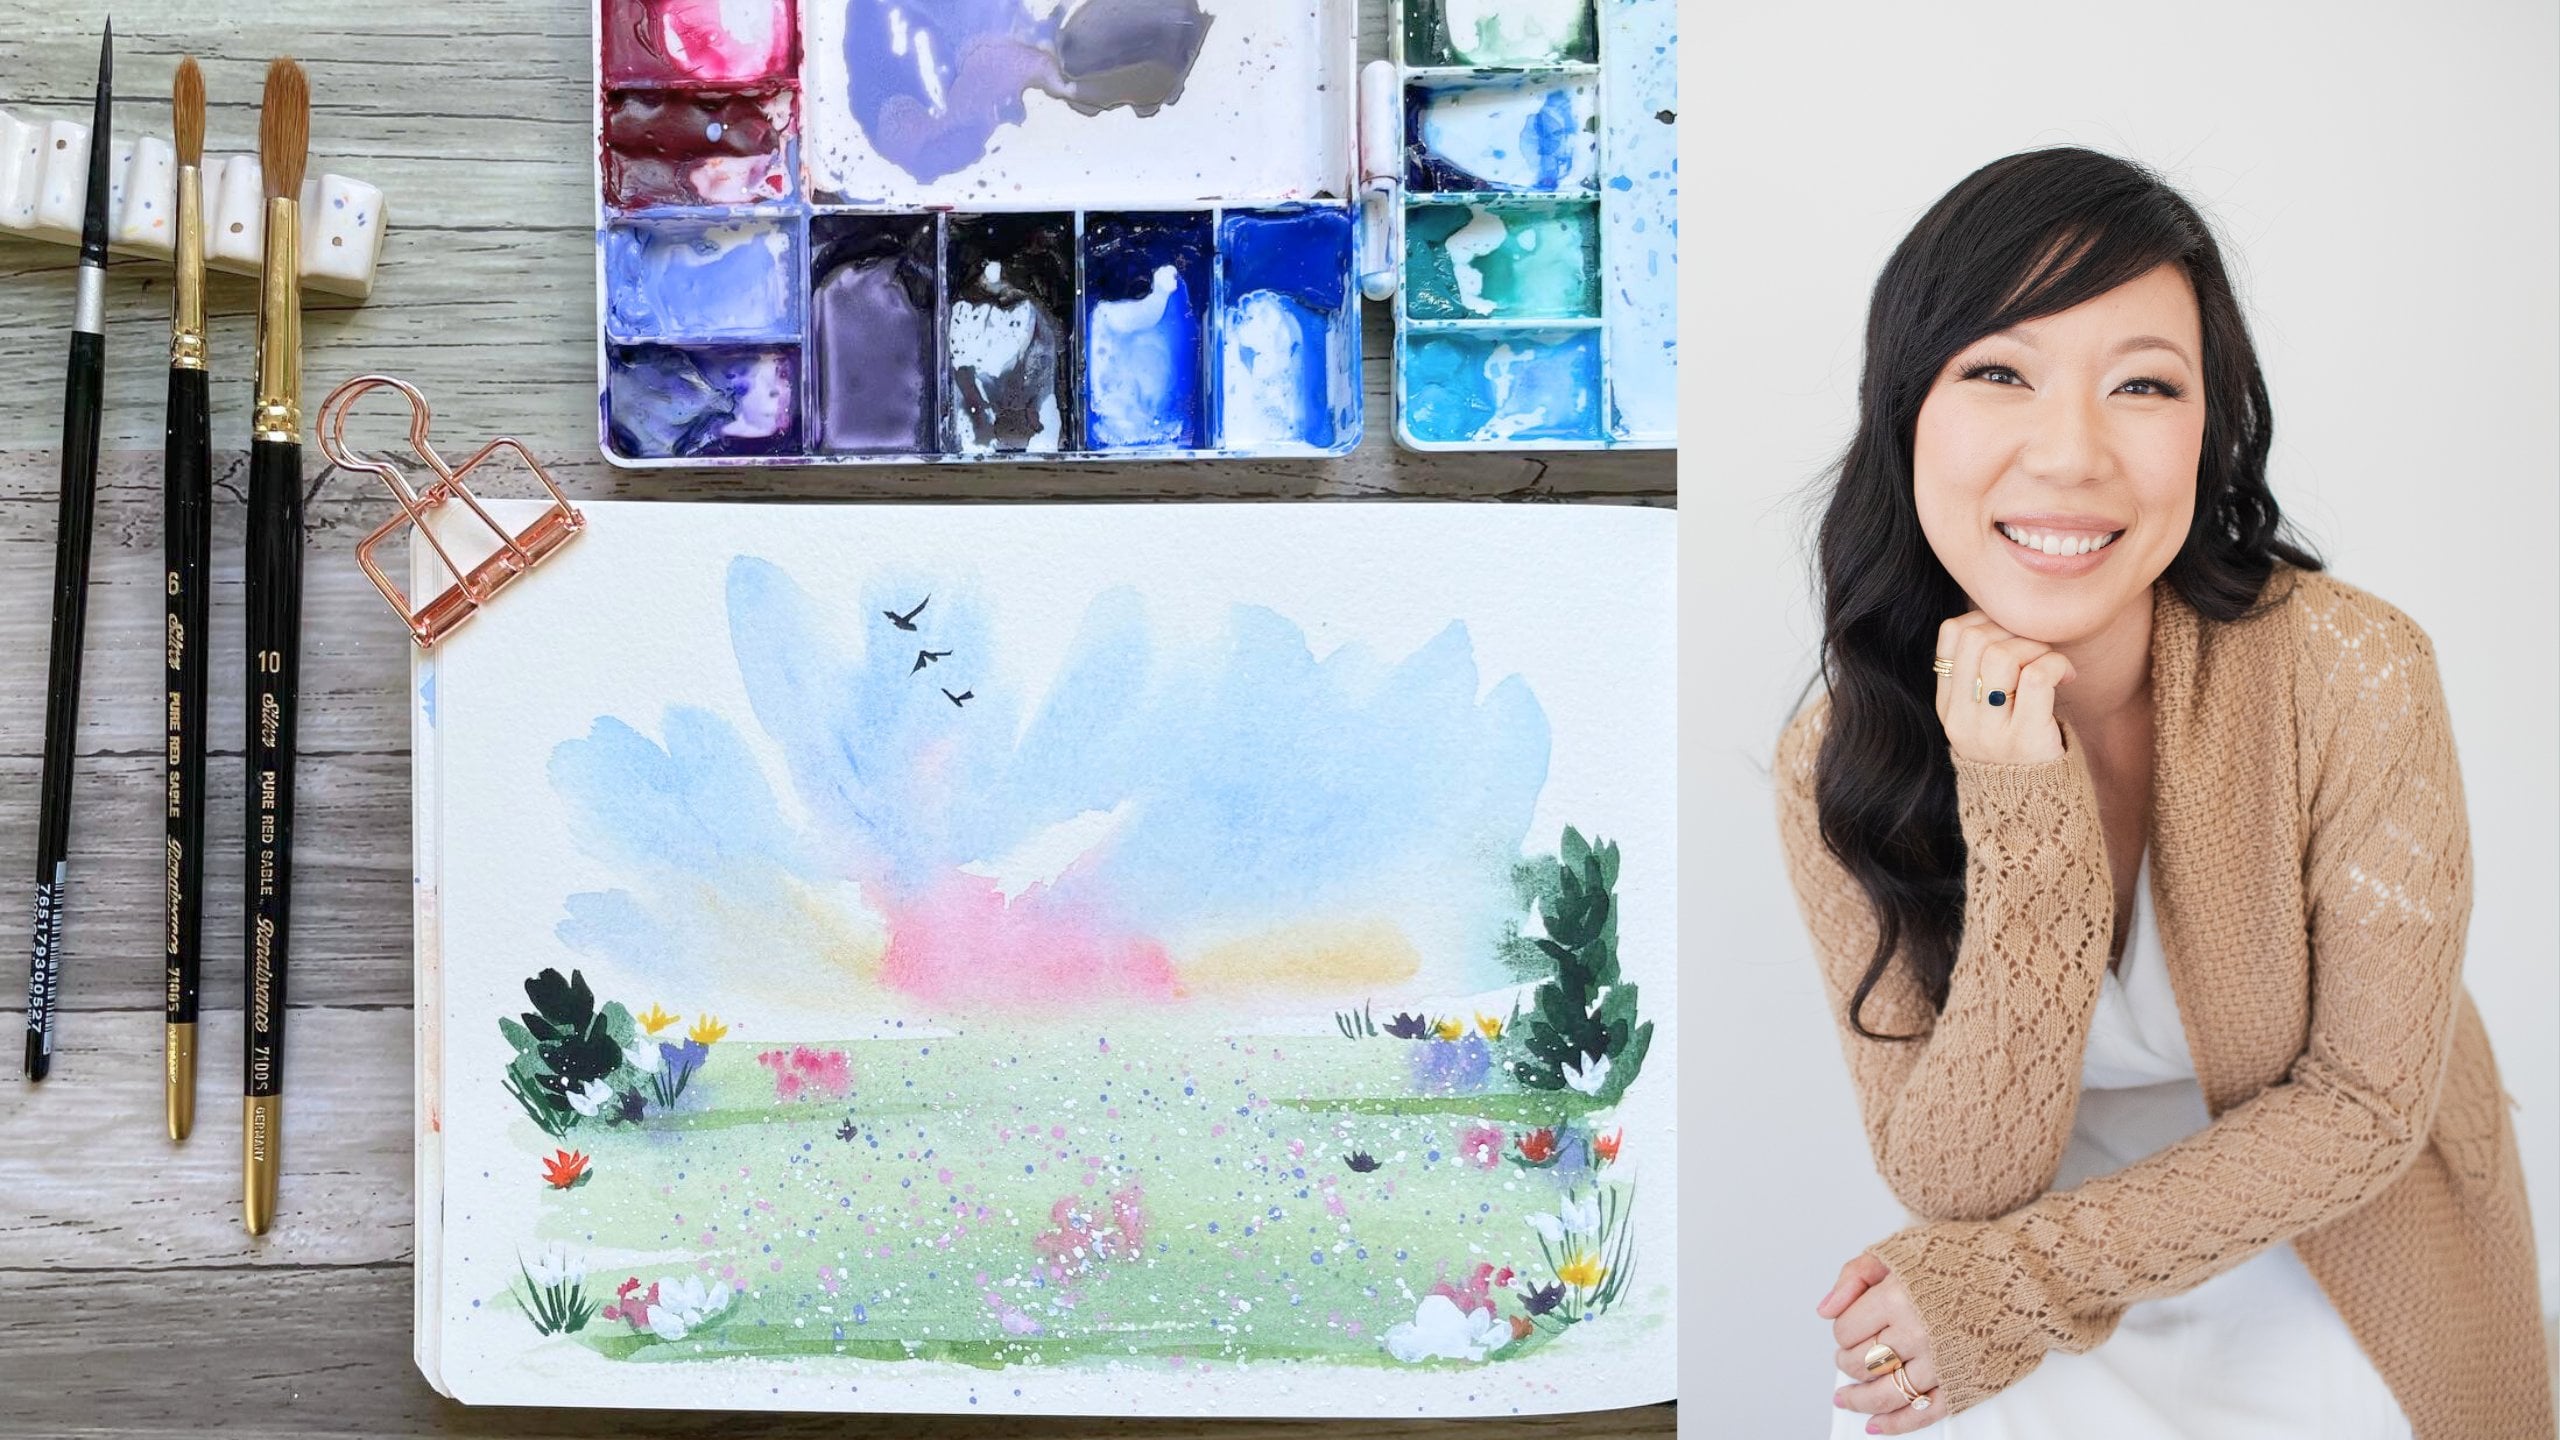
1. About the Class: Hi, Welcome to summer Polaroids, a class on painting, Loose
Watercolor Landscapes. My name is Madeline, and I'm an artist and
content creator on Instagram, tiktok, and Facebook. I also teach on
patreon and YouTube. In this Skillshare class, we will be Painting
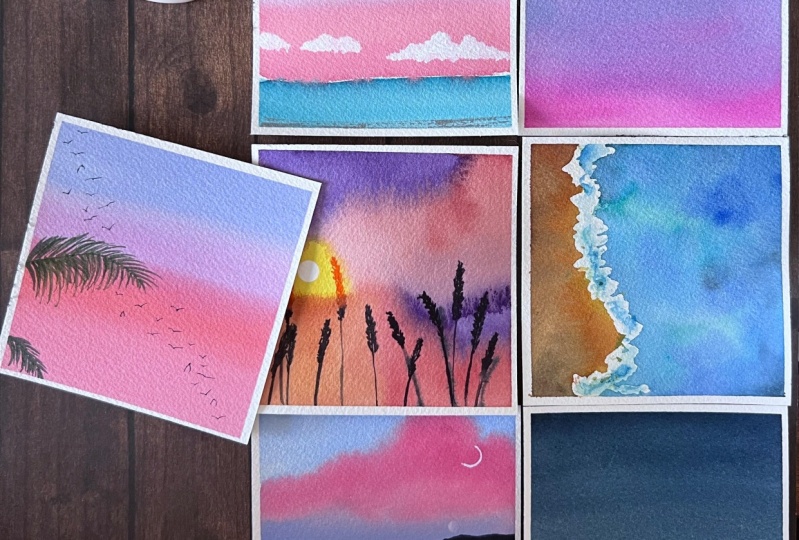
seven mini landscapes, all inspired by reference photos that conjure up the
feelings of summer. We will be Painting
sunrises, sunsets, beaches, Nights, skies,
and so much more. I can't wait to have you here and I'll see you
in the next class.
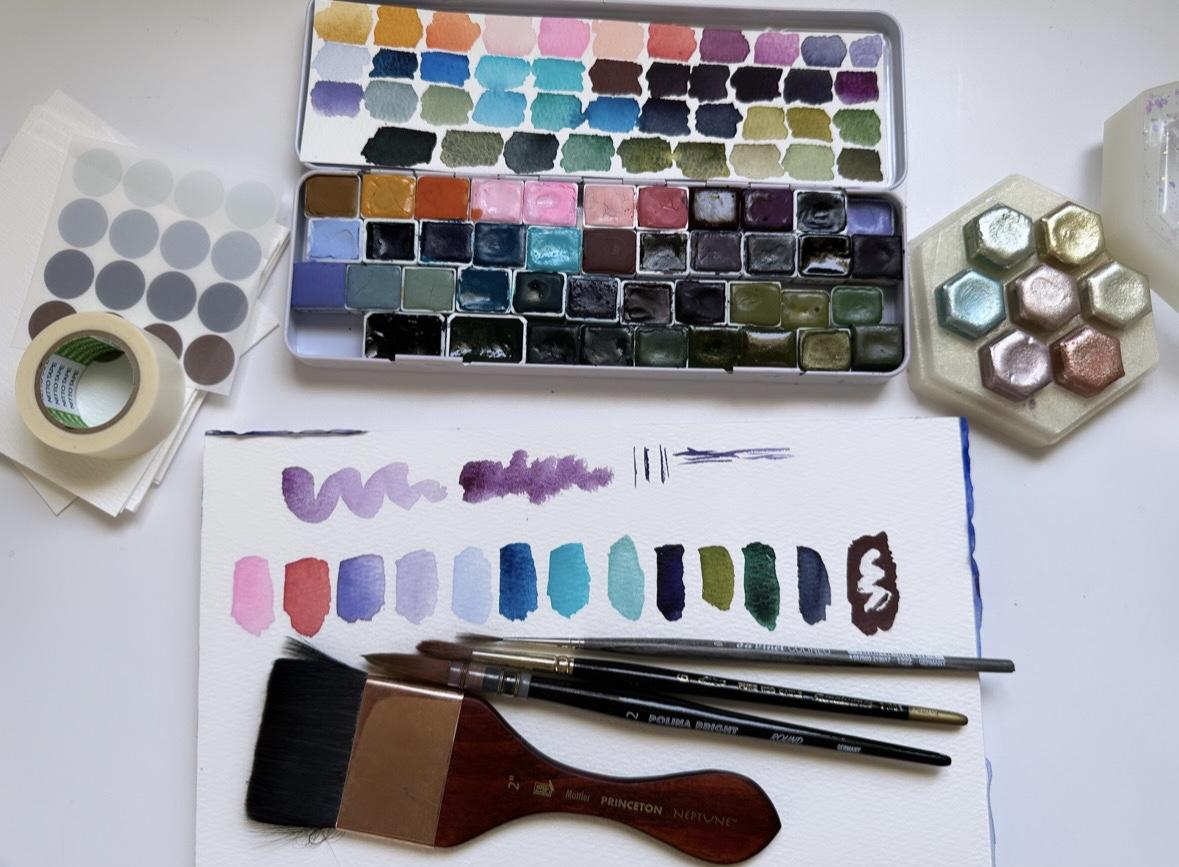
2. About Our Supplies: Let's go over Our Supplies. I would like to start
off with sharing the different types of brushes that I will be using
in this class. The first one is this Princeton
Neptune mottler brush. It's a very big flat
brush essentially, and I use it to a wet the paper. This brush just makes
it easy to rewet a large surface area of
watercolor paper at one time. And next, I will be using
several types of round brushes. Round brushes are
brushes that have a rounded head and are
used for Painting. Most of the illustrations
in this class. Ron brushes, however, do not
have very uniform sizing. So it's gonna be
hard for me to tell you a specific size
of brush to use. It's gonna be based on
the brands that you have. But if you look at
this brush on the left is around to the middle, one is around six. And the one on the very
right is also a round six. And so you can see that the
two is bigger than the other. The size two is bigger
than the two on the right. So basically just go with your favorite round
that you'd like to paint with and you'll be fine. There are a few differences in the types of round brushes. So this one that I'm using at the moment is a synthetic round. Synthetic brushes are
a little bit firmer. They're like pretty springy. And you get better control with these types of
synthetic brushes. And this is a I'm
Kolinsky hair brush, so it's made out of
real animal hair. And generally animal
hair brushes are kind of like softer and more absorbent. So you'll get a slightly
different brushstroke between the synthetic and
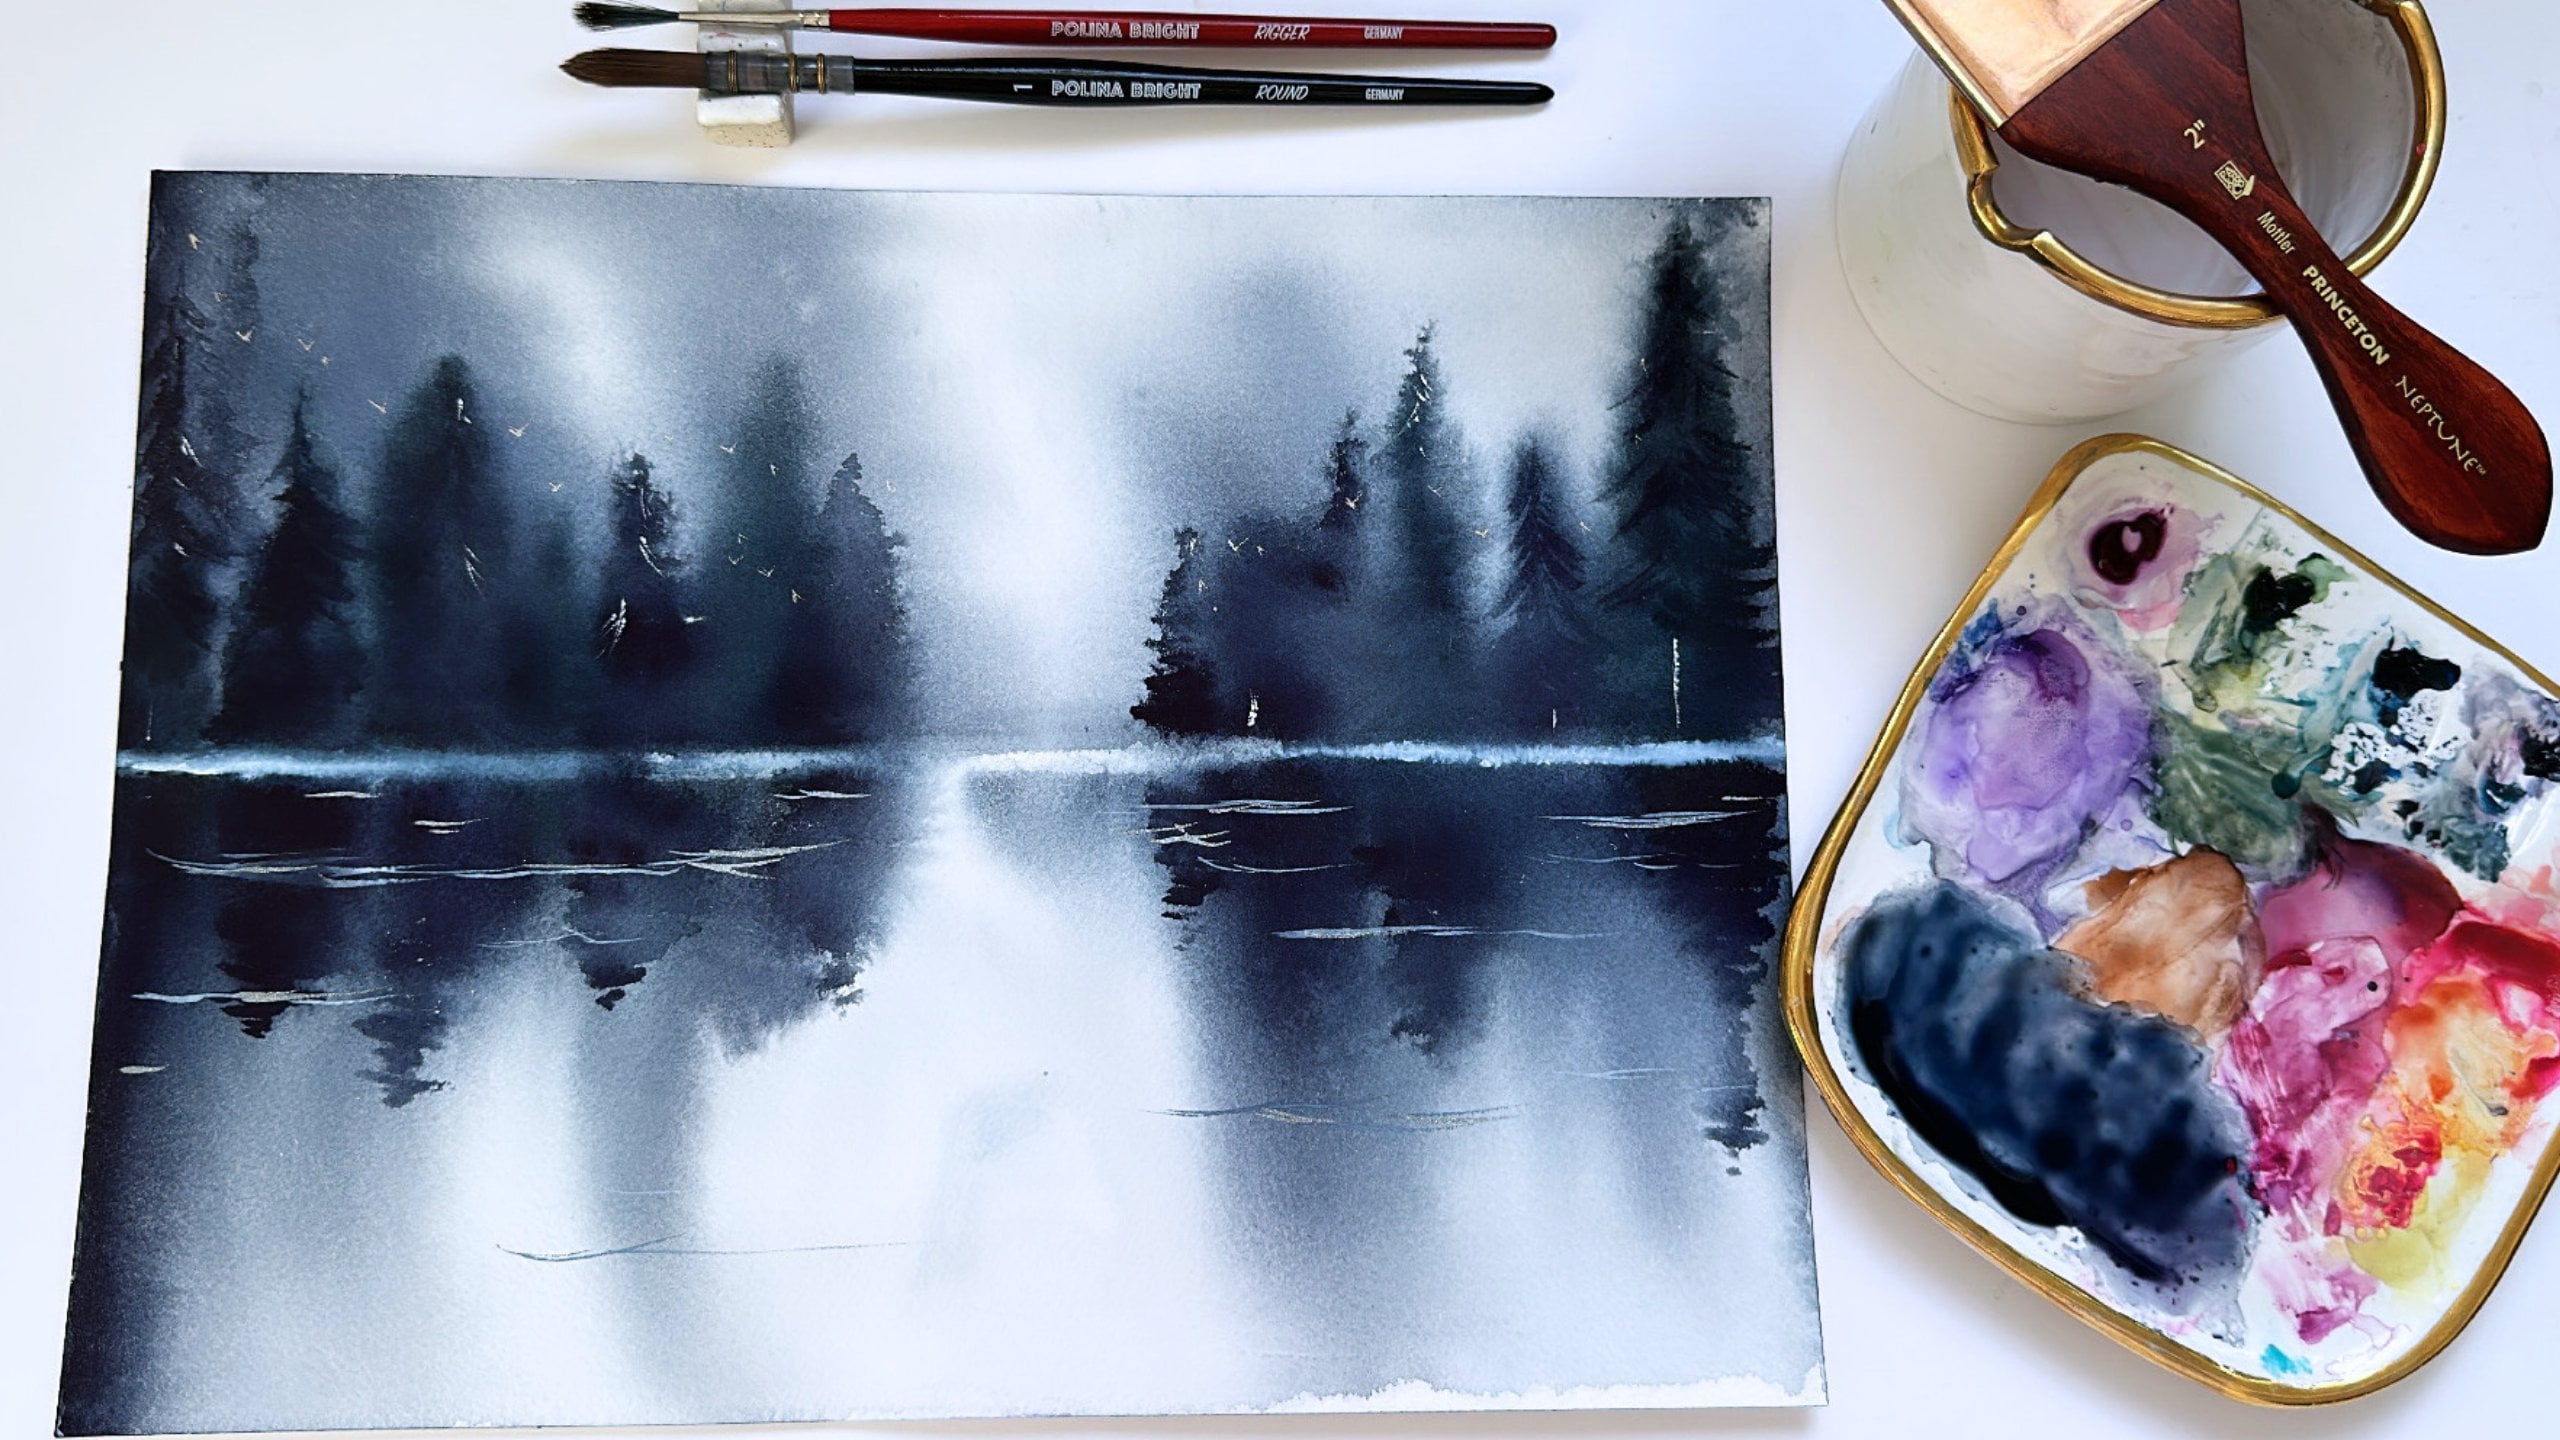
the anime hair brushes. The next brush I want to
talk about is a liner brush. This is a brush
that's very thin and long and makes really
excellent fine lines. And we're going to
use this brush to be painting some of our palm trees. And you just get a much finer brush
stroke with this brush, in contrast to,
say, a round brush. I also want to caveat that the round two brush
that I'm using, the Polina Bright brush, it's sort of like a hybrid
round slash mop brush because it's like
pretty absorbent. But if you are
round brushes don't hold that much water or paint. You can also use a
mop brush to do some of the background
washes, specifically. The next thing I want
to talk about are the watercolors that
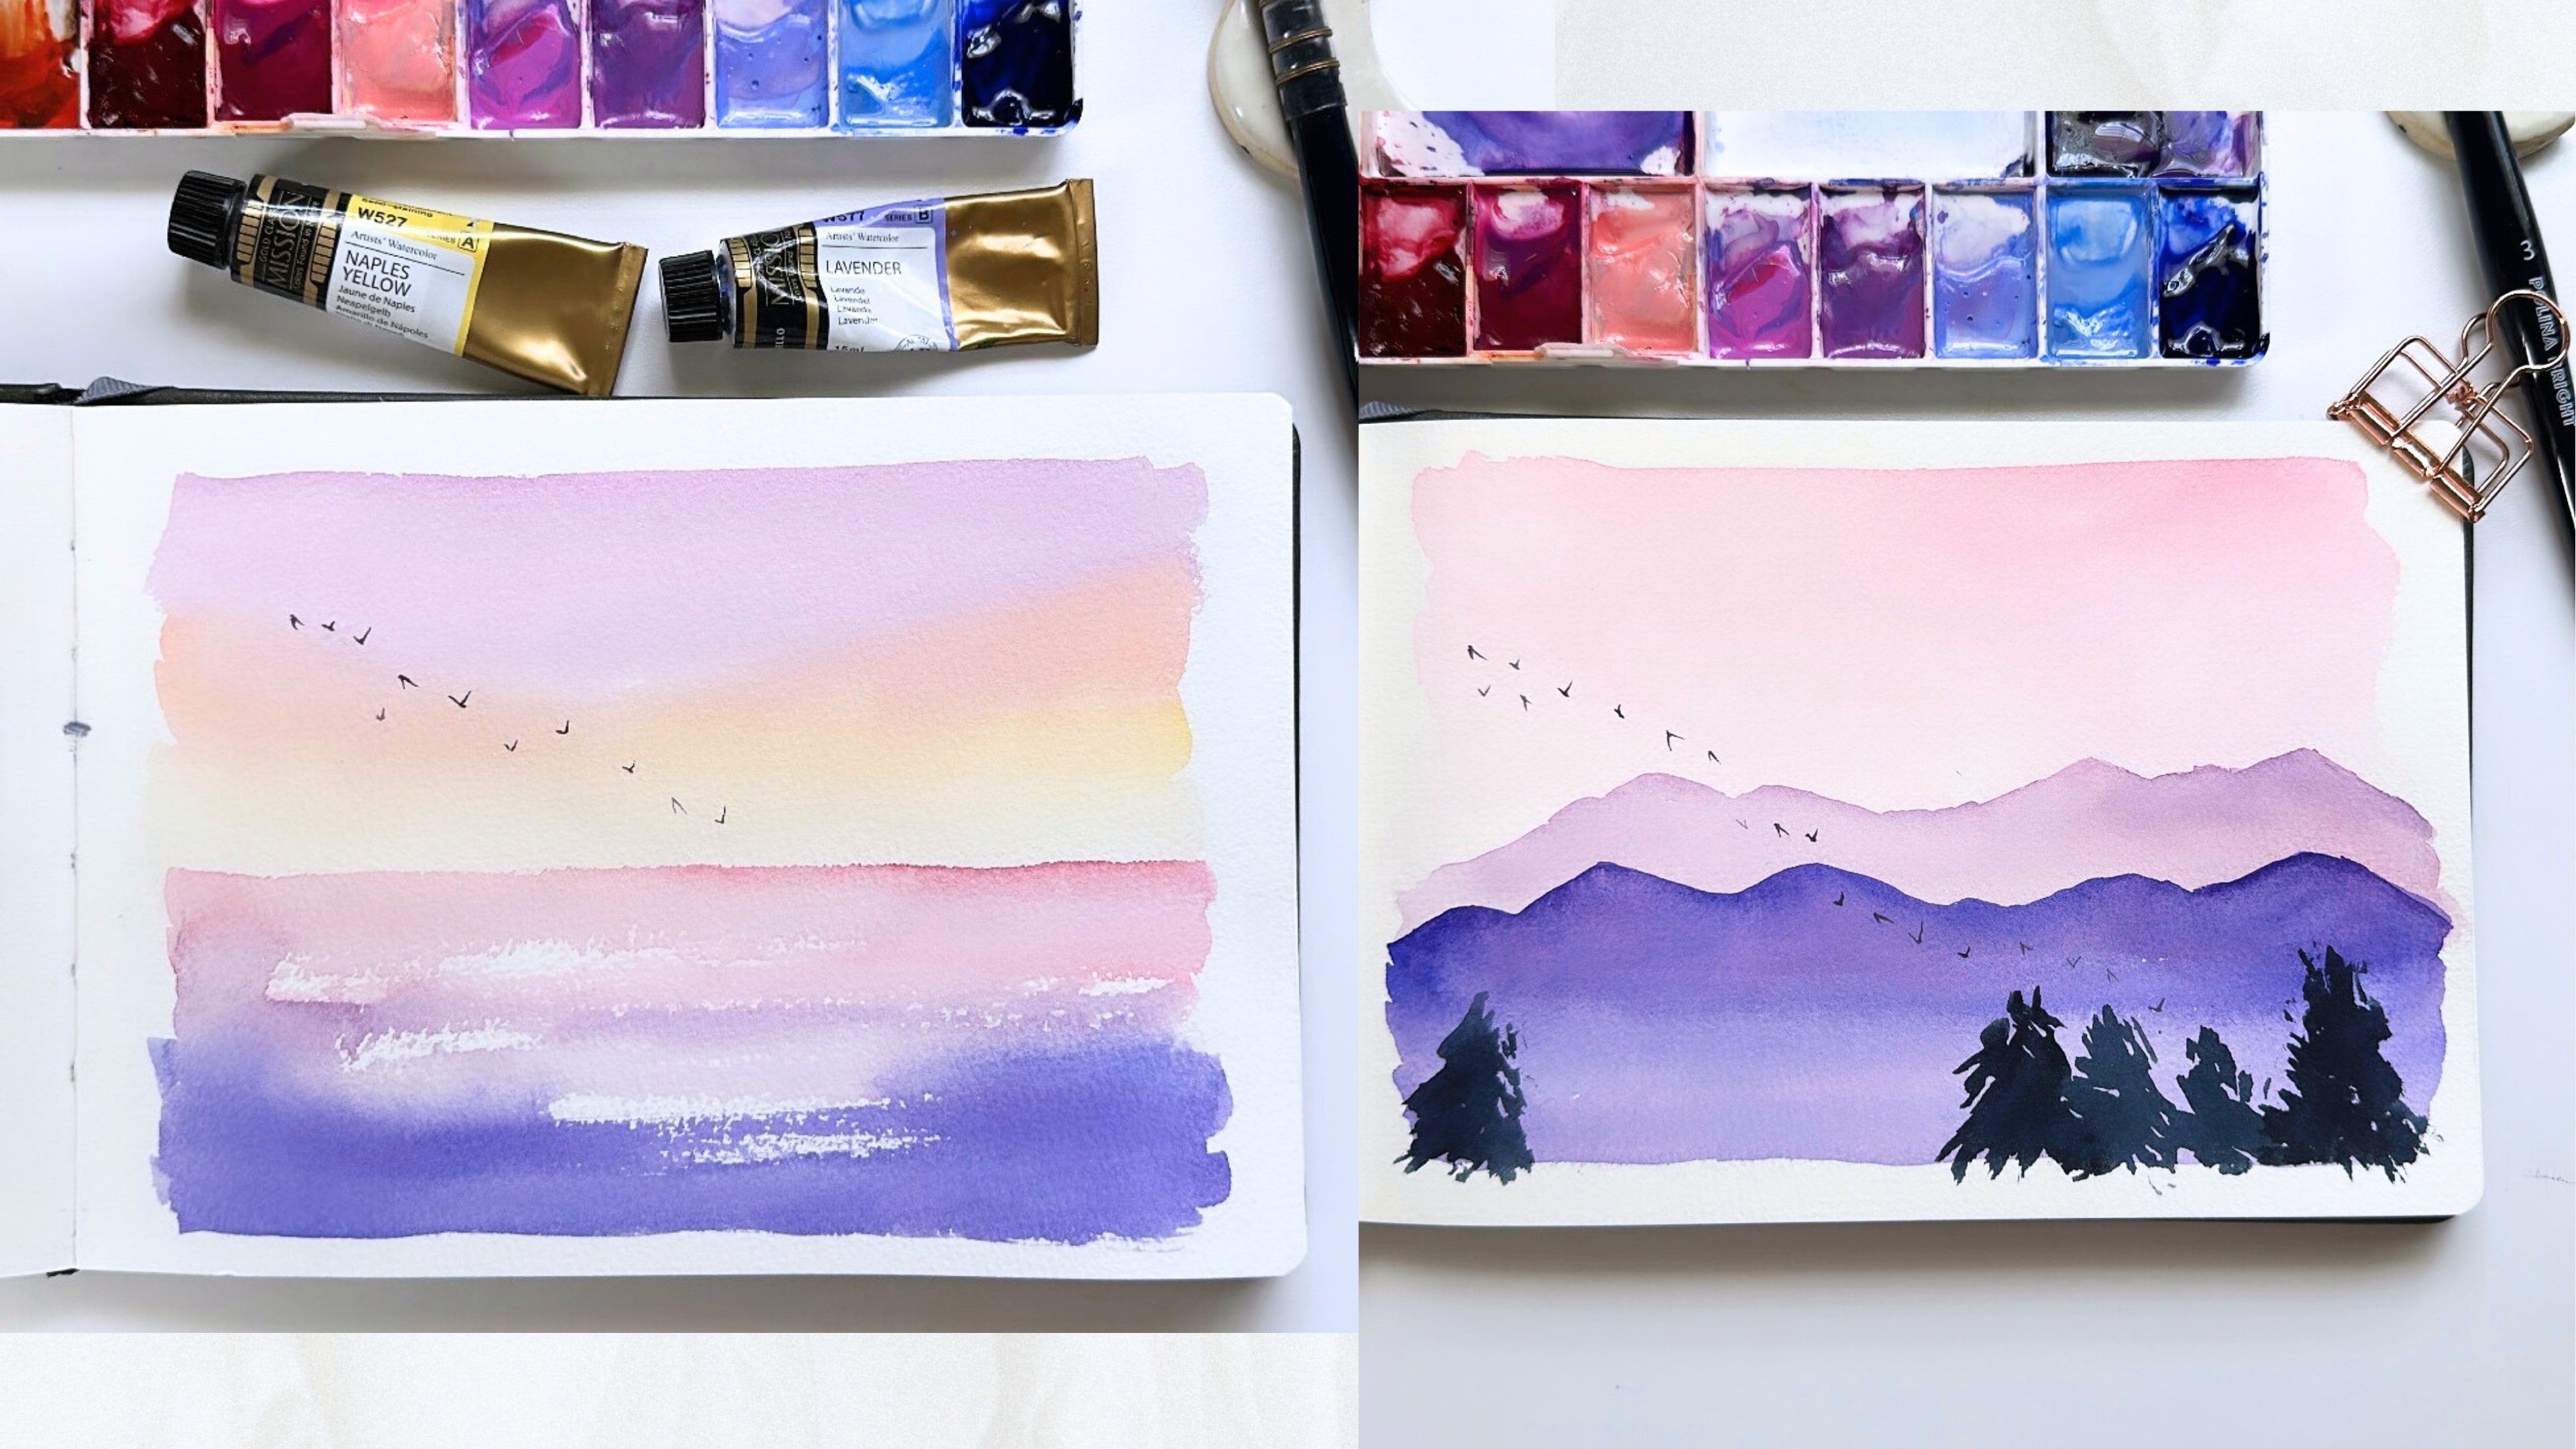
I will be using. For this class. I am going to be using
some Handmade watercolors. And Handmade
watercolors differ from brand name watercolors
because you get a lot of premixed colors. So you probably won't find a whole lot of pink
colors and brand names because usually that's a mixture of like a cool red and white. But if you see here my palette, I have several different
Pink half pans. So I'm just going to swatch out the colors that I
used in this class. So I have a soft baby Pink, a more kind of dark, coolish color, a
lavender, purple. Another lavender but a little
more pale, a light blue, a phthalo blue, a cobalt turquoise and maybe like a lighter
cobalt turquoise. A deep purple, kind of
like dioxazine purple, a warm olive green, a cooler forest
green, and indigo. And I also use a brown
kinda like a step, Yeah, but I forgot to swatch it. If you don't have these colors, you don't necessarily need
the exact same colors that I use to still paint these
pieces in the Class. But for a lot of
the pastel colors, you can get those colors by simply adding white gouache to any cool red or blue
or turquoise color to get that pastel feeling. I also use some metallic paint. I use a blue metallic paint. If you have it, you can use it, but if you don't, it's
not completely necessary. The next thing I want to
talk about is white gouache. This brand is Dr. Ph. Martin's and it comes in a tub
and I just really love it. It's like a really
opaque white that Just makes painting white
details really easy. The next thing I want to
talk about is masking fluid. This is the masking
fluid that I use. It's by the brand P PBO. I don't know how
to pronounce it, but it's very liquidy
and I like it to I'm gonna show you what
masking fluid is like, but I like to use
a silicone brush like the one that I'm using. It just makes applying and cleaning the masking fluid
a little bit easier. Rather than using a brush. If you do use a brush with it, I do recommend using an old
brush and really dipping your brush in like
soap or something. So be before putting it in the masking fluid
because if you put just a regular brush
straight into masking fluid, it will ruin that brush. So I I'm gonna grab my
Hot air tool and dry off this masking fluid
and then I'm going to paint over it and give you an idea of how
people use masking fluid. So you'll know
that masking fluid is dry when it feels sticky, but nothing comes off onto your fingers
when you touch it. And I'm gonna grab my
paintbrush and just paint a dark color over the
masking fluids so that you can get a better
idea of it does. And now that the paint is dry, I'm going to use my gum eraser to remove the masking fluid. And all I do is just
kinda like erase it. And then the masking
fluid comes right off. And then you see the
white watercolor paper that you've preserved
underneath. Masking fluid is a
really cool tool to use with watercolor. The next thing I want
to share is that I use this whole
binds Soft tape, masking tape to tape off
my watercolor paper. I also use these. This is washy tape in
the form of circles, and I like to put them down to kinda cover up
either a son or a Moon. And it's an alternative
to using masking fluid. And I also use a Hot air tool
to help speed up dry times. If you don't have a Hot air
tool, you can just wait. But I like to paint
quickly and I like to paint a lot at once. So I really enjoy
having a Hot air tool. And last but not least, I will be painting with 100% cotton watercolor paper
for landscape paintings, because there's more
paint and water involved. I think 100% cotton
paper is the way to go. You can get more
affordable cotton paper. This paper that I'm using is the student grain line of the brand Baohong
and it's there, rough grain texture paper. It's in my opinion, the closest, more affordable option to say like arches
watercolor paper. It's a lot cheaper and it
has pretty similar texture. And it holds water
really, really well. But I'm gonna show you in
the next class how to, how I cut this
watercolor paper and how to get them ready for painting. The last supply is
some jars of water. I have lots of jars of water, jar for washing
off dirty brushes and picking up clean
water for new paints.
3. Preparing the Paper: Now we're gonna
talk about how to prepare our paper for painting. So I'd like to get my 100% cotton watercolor paper in a larger sheets or blocks. And after I either
take it off the block or flatten it from
a role in a sheet. I bring it over to my
paper cutter and I cut the paper up into
smaller, miniature sizes. And the size that I'm
going to be using for today's class is going
to be four by 4 ", 4 " wide and 4 " long. To start off, I want to show
you how I'm going to tape off my polaroids sized
watercolor paper. So I have some masking tape
with me and I'm taping down the upper and left
and right borders, leaving just a very tiny edge that is going to be
kept as the border. And for the bottom
piece of masking tape, I am going to leave a
whitespace gap that is equivalent to the size of the borders that we
previously taped down. Now our paper is ready for paint
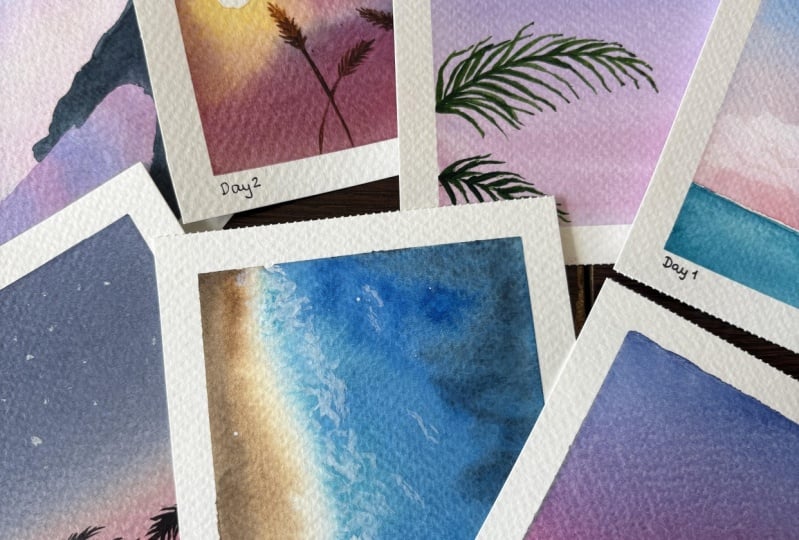
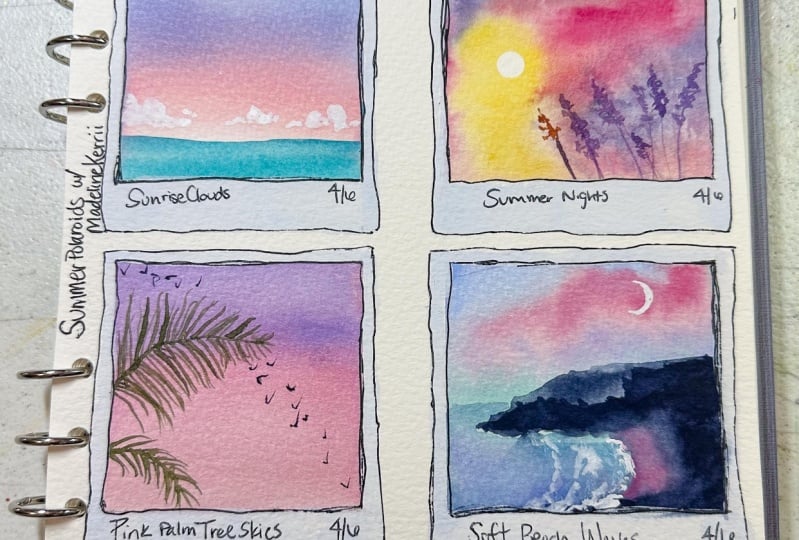
4. Day 1 Sunrise Clouds: Welcome to day one of my
summer Polaroids series. Let's begin the
first class project. Today's polaroid is
called Sunrise Clouds. Let's take a look at
our reference photo. The reference photo for this
very first polaroid has a really bright blue upper
sky that fades to Pink. That is contrasted with a really nice teal colored Ocean with some Clouds kind of
sprinkled here and there. So I'm grabbing a
light blue color along with some lavender. I have a round two brush and I'm going to slowly
create that sky gradient. I'm gonna grab in some coral color itself just
a little bit darker pink. Now, I'm going to dry this
layer with my Hot air tool. And I'm gonna come in with
a Teal color for the Ocean. When I paint landscapes, I primarily paint from
reference photos. And I like to simplify the reference photo to
just a very few elements. And that helps me to stay
loose because it gives me the freedom to not overwork too many parts of the composition
of a reference photo. For this polaroid, I'm focusing on the
gradient of the sky, the Ocean, and the little bit a fluffy cloud set we
see above the ocean. Now I'm going to come in with some Dr. Martin's
bleed proof white. It is a white
gouache watercolor, basically meaning it's
an opaque white paint. And I'm going to grab a softer
around brush so that I can get that kind of
fluffy Soft cloud. And I'm just going
to paint some clouds right above the ocean horizon. The brush that I'm
using to paint these Clouds is a bit softer. It's not as firm as the first
brush that I was using. And if you look, you can
see that I'm just making really small circular motions
to capture these Clouds. And then now I'm going to
grab some metallic paint. I'm going to grab some
blue metallic paint. And I'm just going to drop
some into our Ocean to give it just like a tiny
accent of light. And I like how that looks. So we're going to
dry this layer. And once everything is dry, we can peel the masking
tape off of our polaroid. This is day one, Sunrise Clouds, and I hope you will come back tomorrow to paint
day two with me.
5. Day 2 Summer Nights: Welcome back to day two,
Summer Night fields. This is our reference
photo for today. And when I look at this photo, I see just a really
warm summary Sunset with the silhouette
of some wheat stalks. So I have my polaroid watercolor
paper taped down already. And I have these
little stickers. They're like washy stickers
and I'm going to use it to tape off where I
want my son to be. You could also use masking
tape for this step, but I found that this, these little stickers just leave the perfect little
circle for the sun. Now I'm gonna grab my flat
brush and I'm going to wet the paper because our
background is a bit blurry. And so I want the colors to
flow together really well. So I'm grabbing a dark purple and I'm dropping
it in the corners. And now I'm going to grab some
yellow and we're going to give the sun that
sort of halo feel. By blocking off the sun
or masking the sun. It's going to keep that
little circle white. And that's going to give our son that really
bright feeling. I'm coming in with
a stronger yellow just to create that light
underneath the Sunset. And now I'm going to grab
some pinks and reds, and I'm going to start to fill in the whitespace
that we have. We want to drop all the color in while the entire paper is still wet so that we
have really soft edges. Now, the tricky part for this little polaroid is to
paint the blurry wheat stalks. I'm not going to try the
paper with my Hot air tool, but I did let
five-minutes go by and my paper is no longer
glistening but it's still damp. This lets us paint these wheat stalks without
the paint blooming too much. So these wheat stalks are
not entirely Wet on Dry. It's kinda like
Wet on damp paper. But because it's just a
little bit damp or not getting too much movement
with these brushstrokes. I'm also using a liner brush. And I'm basically making
the thicker wheat stalks. And then for the tail
of the wheat stalks, I'm doing a very
light brushstroke. I'm just going to paint a few, so we're going to dry that off. And then now we're
going to paint some wheat stalks
that are in focus. I'm using that same liner brush. I'm going to paint one
kind of close to the sun. And so I'm using actually some orange is kind of
like an orangey red. And then for the
bottom of the stock, I'm gonna go back to
a dark purple color. And that'll give the illusion
that the upper half, the wheat stock is being
illuminated by the Sunset. And so you see how the brush strokes that I'm painting now, which is Wet on Dry, are a little sharper than when we painted the ones on the Paper was still
a little bit damp. I'm going to paint another
wheat stock right here. And the trick to painting
these is to getting the bottom stock
to be very Fine. I find that when my brushstroke for the stem of the
stock is too thick, it kinda looks a little funny. I just go very light when
I'm painting the tail. And then now I'm going to peel off my little washi
stickers sun. And that's going to leave
that Bright Sun set for us. And then I'm going to dry off the few wheat stalks
that I just painted. And once everything is dry, this polaroid is done. This is our summer
night fields polaroid. I hope to see you
back again tomorrow.
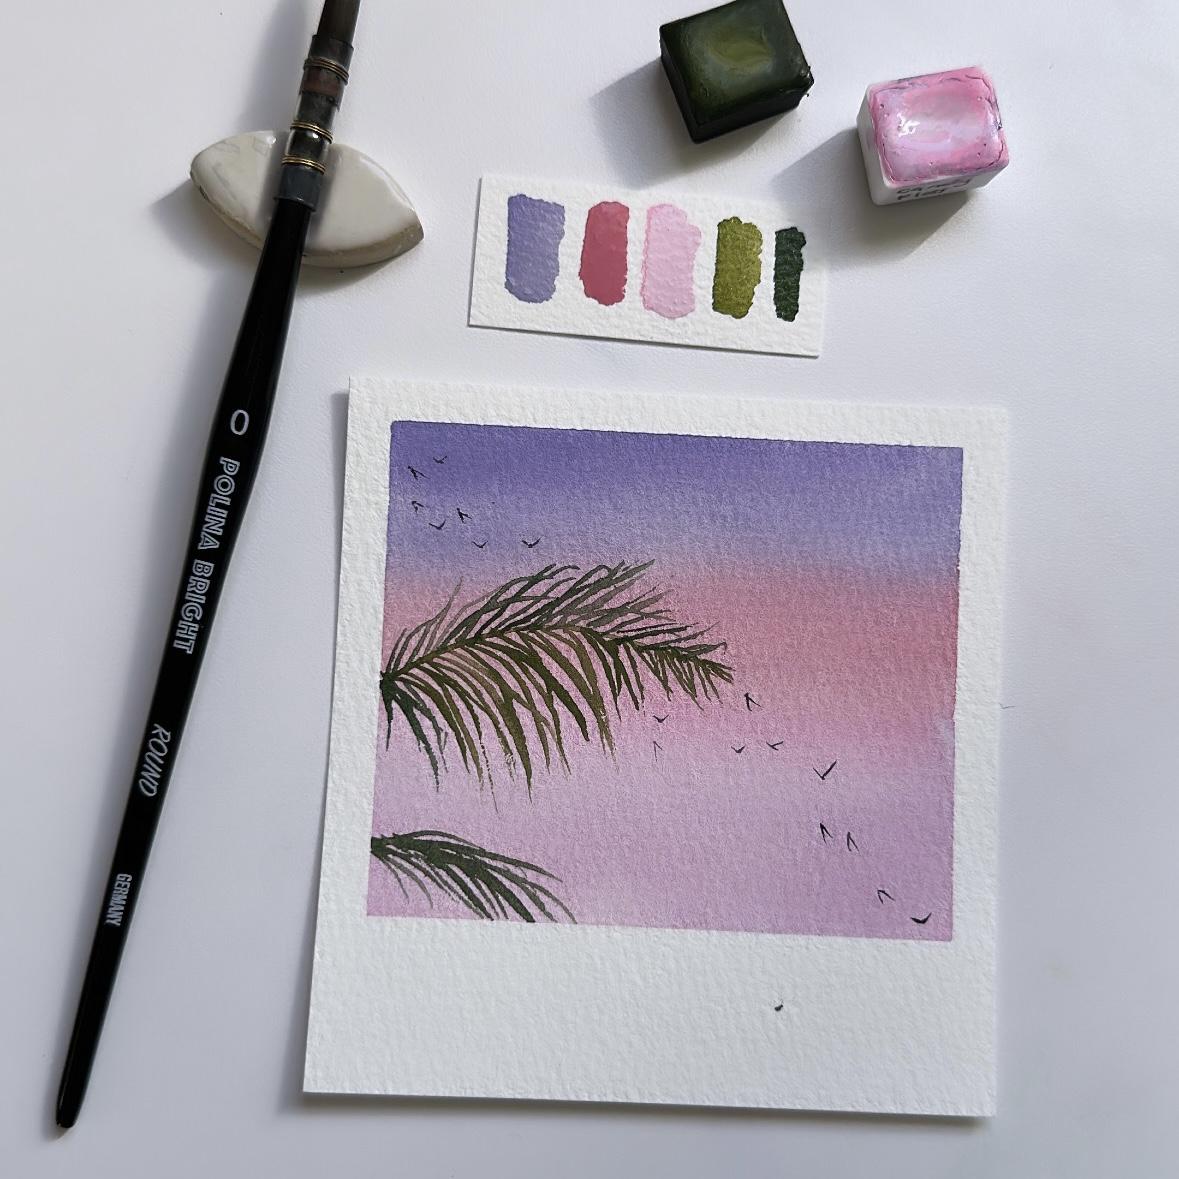
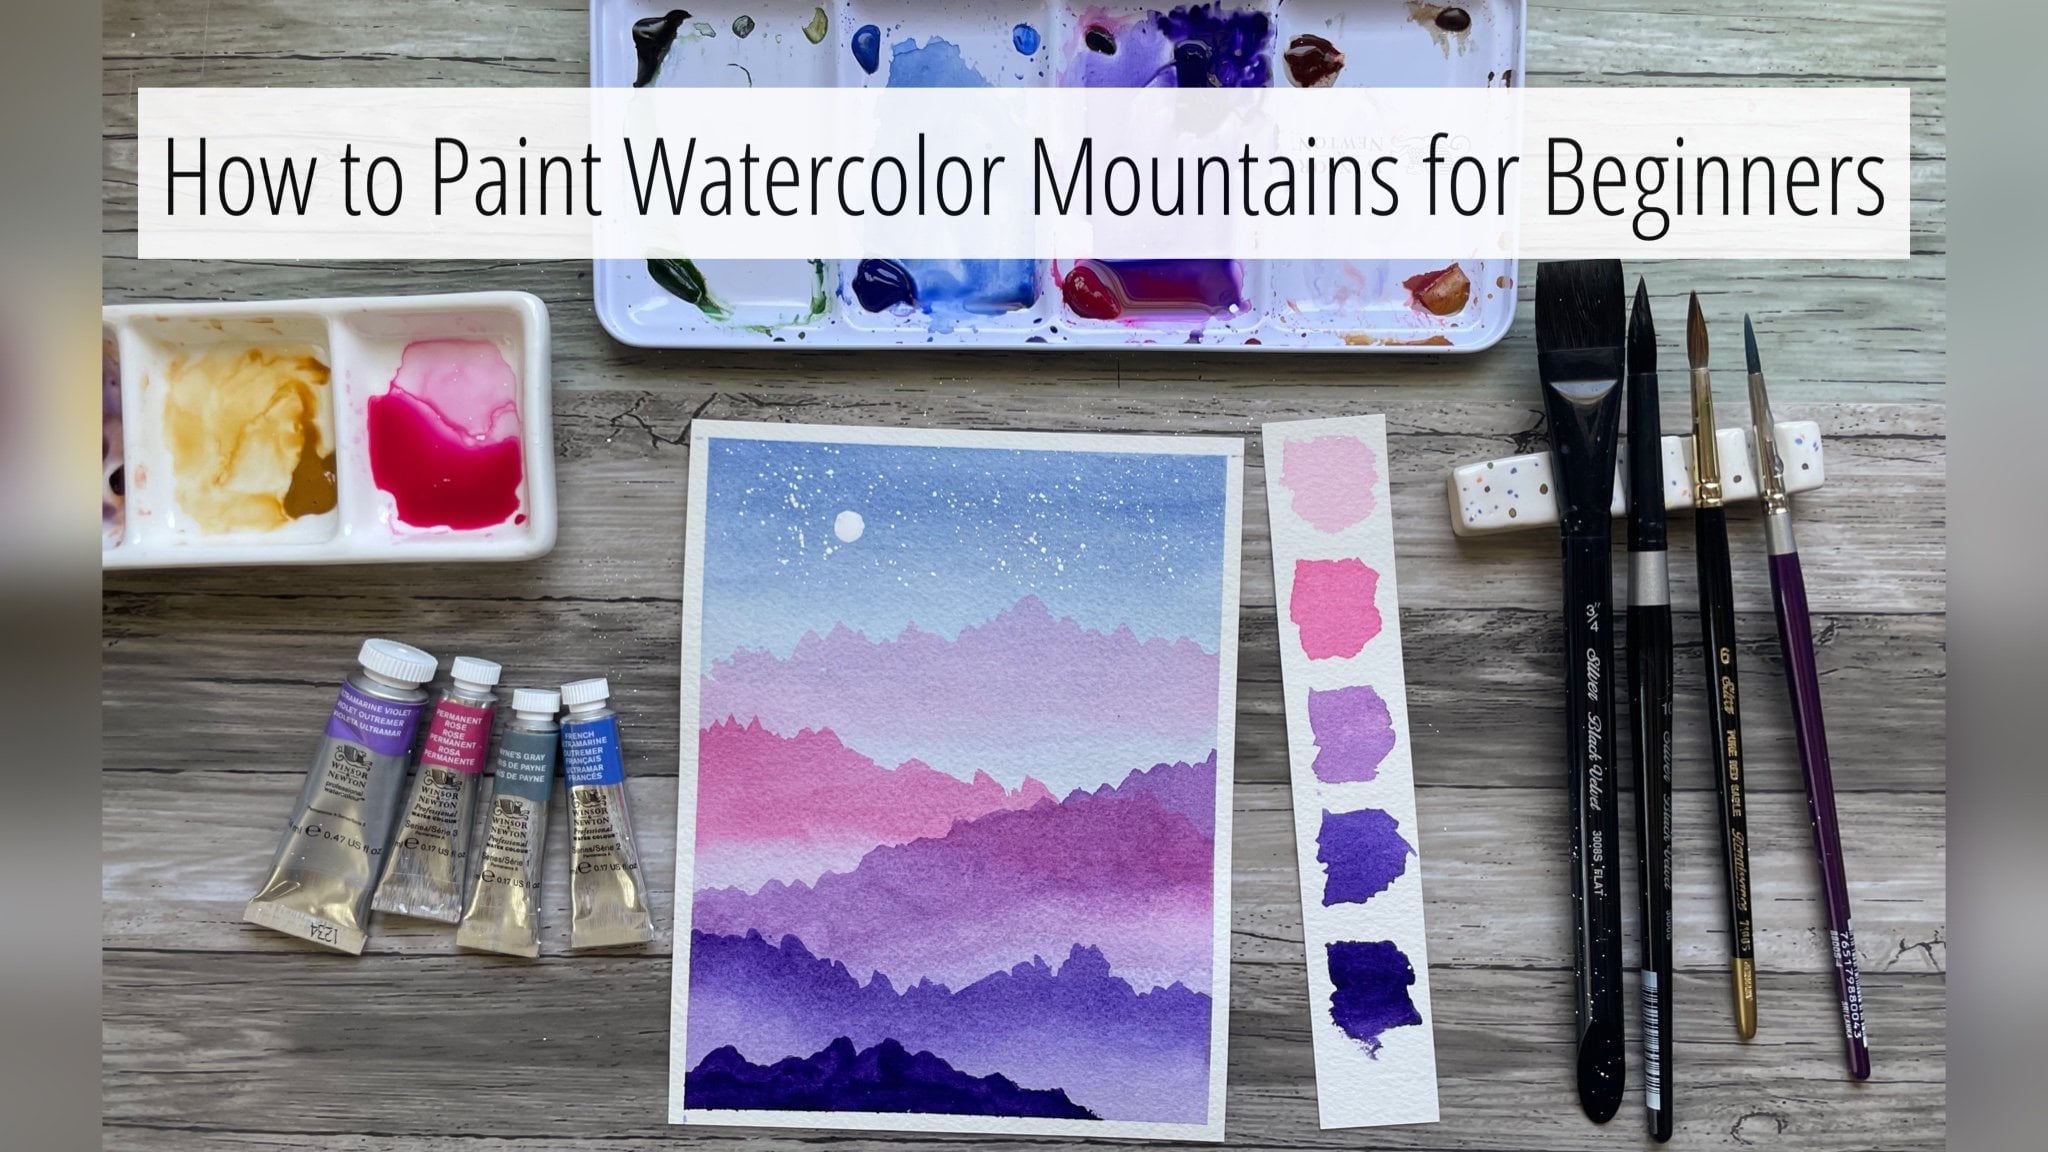
6. Day 3 Pink Palm Tree Skies: Welcome back to D3. Today we're gonna be painting a pink and purple sky with
some palm tree branches. This is our reference
photo for today. I just love how summary
palm trees feel and this is the perfect reference for a simple, loose landscape. The sky for this piece is
really just two colors. It's purple and pink. So I'm just grabbing some
pastel lavender and a few of my pinks to
create the sky gradient. Feel free to play around with different pinks and
purples for Your sky. I'm choosing pastel colors just because I like
how soft it looks. If you don't have
any pastel paints, you can pretty wet the
paper and then come in with a more watery consistency of paint for a lighter
value and color. Now we're going to
dry this layer and we are going to start painting
the palm tree branches. I'm using my liner
brush again and I'm grabbing a very
light green color. I want to pull our reference
photo up again and just remind you what these palm
tree branches look like. I'm using a liner brush and I like using liner brushes
for palm trees because it allows my brushstrokes to
be a little bit looser than if I were to paint
with a round brush. And it just really liked the
fine lines that I can get. The leaves at the end are going to be a
little bit shorter. Then now I'm going to take a darker green
color and I'm going to paint the other upper side. I'm trying to vary the
direction of my brushstrokes. And now I want to
paint the lower one, and I'm gonna do it
with a darker color. Then, now to just finish
off this landscape and give it a little
bit more dynamic, I'm just going to
paint a flock of birds flying upwards towards the
left corner of our sky. And then now we can
dry this layer. And once everything is dry, we can peel that
masking tape off. And this is day three, Pink Palm Tree Skies. I hope to see you back tomorrow.
7. Day 4 Soft Beach Waves: Welcome to Day for
soft beach waves. This is our reference
photo for today, and I just love how calm
and relaxing it feels. It reminds me of just a
quiet beach sunrise morning. So I'm gonna start
with our soft sky, which as you know by now, I really love these sort
of like soft simple skies. And I'm going in with some light blue and some light pink. I really love how the sky, the colors that reflect
on the ocean are kinda of like a mixture of the
blue and the pink. And we get kind of like
a really nice purple. And so I'm going to
paint the ocean here, Pope purple with a
little bit of pink. And then I'm gonna
come in with some, some turquoise to sort of
give it that blue color. And I'm going to dry this layer before we start painting
the black beach. So I'm going to follow the reference photo and
I'm going to come in with an indigo and I'm going to paint the beach like we
see it in the photo. And then I'm coming in
with a clean brush and I'm smoothing out the line where
the ocean meets the sand. So you kinda get that soft. You feel like the
water just washing up onto the waves right there and
you don't see a hard line. So I just did that by grabbing, by wetting my brush
and coming in and sort of smoothing that line out
while the indigo is still wet. You don't want
your brush to have a lot of water on it because
that could create a bloom. Just rinse your brush
and then dab it up that excess water to
really smooth that edge out. Then now I'm gonna come in with some turquoise and some blue and I'm going to kind of
loosely paint the waves. Now. I'm going to grab
some white gouache, and we're just going
to really lightly tap in some white to create
the foam from the waves. Then now I am coming in with my liner brush and
that white gouache. And I'm just going to paint
a tiny moon right here. And that's it for day four. This is one of my favorite
pieces from this series. I hope I'll see
you back tomorrow.
8. Day 5 Treetop Stars: Welcome to day five. We're Painting Treetop Stars. This is our reference photo
for today's polaroid, and I just love this photo. It reminds me of that
feeling you have when you look out up into
the night sky in the summer and you
just feel thankful that summer can be a time where things
slow down a little bit. So I'm going to
start by creating that pink glow on the
bottom of our sky. And then I'm coming in with a darker indigo for the
upper half of the sky. And now I'm going
to come in with a clean brush and I'm going to connect our
colors in the sky. I'm going to leave the middle
section of the sky lighter. Otherwise, I think
the dark indigo could possibly
overpower the pink that we have on the bottom. I'm just going to add one more brushstroke
with some more Pink. And now I'm gonna grab my Hot air tool and we're
going to dry this layer. Make sure to really pick up
any excess water so that you don't get any hard lines
when you dry your piece. Now, I'm going to come in
with my liner brush again. And I'm going to paint
these Palm Tree Tops. Because these palm trees
are a lot further away from us than the polaroid
we painted earlier. The treetops to me kinda feel like little bunches of Soft, kinda like balls with
tiny leaves poking out. And so I'm basically making an upwards
brush stroke and then I'm coming down like
an angle like that. Then I'm giving it the extra little fluffy,
smaller brushstrokes. I really love liner brushes because you can make such
a variety of brushstrokes. When you push the belly
of the liner brush down, you can sort of get like
a thicker brush stroke. And then if you paint
with a liner brush, kind of like an a
90-degree angle, you can get really
fine lines to. So I'm just alternating using the belly of the brush to make those thicker brushstrokes. And then making
finer brush strokes, fraying out on the outer
sides of the tree tops. Now I'm going to grab
some white gouache again, and I'm going to paint
some larger Stars. And then I'm gonna do
some paint splatters to once everything is dry, that is our polaroid for today. Treetop Stars. I hope you'll come back and
paint with me tomorrow.
9. Day 6 Teal Ocean Waves: Welcome to day six,
Teal Ocean Waves. There is nothing
that screams summer more than an aerial
shot of the ocean, like our reference
photo for today, this polaroid is going to
be a little bit different. We're going to play
around with masking fluid and I can't
wait to get started. I have my masking fluid here
and I have a silicone brush. And I'm just going to
like really loosely, almost in a sloppy way paint. I'm some kind of like, I don't know what
these called zigzags, kinda just like random
brushstrokes that are going to portray the foam of the
crashing waves that we see from the aerial view. Now, I'm going to
wipe the masking fluid off the silicone
brush and dry this. You'll know that it's dry
when it feels like sticky, but nothing is coming
off onto your fingers. Now, I'm going to
grab my round brush and I'm going to start dropping in some
turquoise for our Ocean. I'm going to drop
in some turquoise, some brighter turquoise
and some blue. And they want everything to
mix together as it's all Wet. I'm dropping in some
darker blue now. And as you can see, some colors just move a lot
more when it's wet on wet. So if you have a
color that blooms or has a lot of movement and
you want of control it. And you can use the tip
of your brush and you can sort of guide where
that color goes. Now, I'm going to start
painting the land. I'm grabbing in a warm yellow and I'm just dropping it in
where the masking fluid is. Then now I'm going
to grab a warm brown and I'm going to
paint the rest of the land. I wanted to give the corners of the landscape a
little bit more depth so it doesn't look too flat. I'm going to grab a
dark blue and drop it in on the corners
and the sides. And that'll just
help build depth. Now, I'm going to dry this entire layer
and I'm going to use my gum eraser to remove the masking fluid and I'm going to rub off all the
masking fluid. And then once we have the
masking fluid removed, I'm going to grab
my liner brush and I'm just going to grab
some light blue and I'm going to fill in
the white area with just some color so that it looks a little
bit more natural. So I'm just dropping in
color and then I'm using my liner brush to I'm wetting it and then pulling the
color out a little bit. So now I'm coming in with
just a wet brush with just water and I'm
softening these lines. And I like how that looks. So I'm going to dry this layer. And then is our
polaroid for today. I hope to see you tomorrow
in our last class.
10. Day 7 Sunset Moon: Welcome back to Day
Seven, sunset moon, and congratulations
to making it to the very last class
of this series. This is the reference
photo for this lesson. And today's Polaroid
is the definition of a quick and easy
watercolor sketch. I'm going to use some
masking fluid and my silicone brush
really quickly to paint off the tiny
crescent moon that we see at the very top of
the reference photo. Once the masking fluid is dry, I'm going to use my Five
brush to wet art paper. And I'm going to
grab my round brush. And I'm going to start at the top of our sky
with some blue. This is a watery mixture
of indents from blue. And then now I'm going to grab some permanent rose
and I'm going to mix it in with that
blue to get a purple. And then I'm going
to grab some of the permanent rose just straight up. And I'm going to mix a tiny
bit of it with some Naples yellow to get a warmer pink. I liked the colors, so I'm going to dry this layer. And then I am going
to rub off the masking fluid to show
our little tiny moon. And that is the last
class for this series. This is date seven, Sunset moon. Be sure to check out the next class where
I share resources for your class project along with other classes that I'm
teaching here on Skillshare
11. Resources for Your Project: Thank you for taking my
class here on Skillshare. I hope you enjoyed this class
and it's now your turn to paint Loose Watercolor
summer Polaroids. I want to help you navigate
the Skillshare page a little bit so that you can see all the resources
available to you. If you head over to the
resources tab under the class, you will see on the
right hand side, resources and downloads
available for you. I have included
the final piece of each lesson as well as all seven reference
photos that I use. And they are all available
for download right here. If you would like to
create a class project, which I would love
to see your work hit the Create Project tab and
then upload the image here. And under project title
you can write your name and then click the green
button that says Publish. If you enjoyed this class, I would love if you
left me a class review. That is how the Skillshare
algorithm knows that students are enjoying my class and it will recommend it
to more students. If you would like to tag me
in your work on social media, you are also welcome to tag me and I would love to
interact with you. If you enjoyed this class. Be sure to head over
to my profile where I have a list of all
my recent classes. I hope to see you
in another class.
 Madeline Kerrii, Watercolor Artist