Transcripts
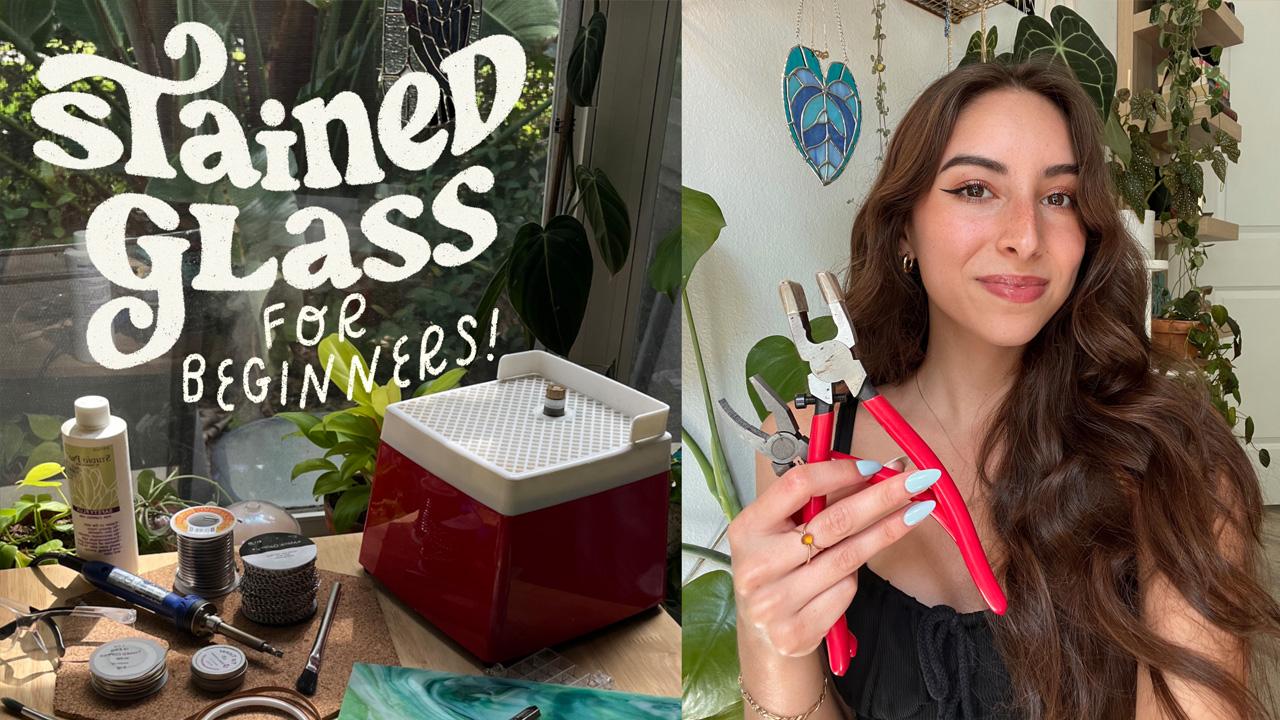
1. Introduction: Hey, everyone. My name is Amaya and I'm a
stained glass artist. In this class, I will
be showing you exactly how I make my sticker
patterns for stained glass. We will start by
drawing our pattern in Procreate and then cut it
out using a cricket machine. I'll share the exact sticker
paper that I use for all my patterns so that you
can start creating your own. Turning your patterns
into stickers is a game changer when it comes to the process of making
stained glass. This ensures that your
glass cutting is precise, and these stickers stay on great throughout
the grinding step, which is key for
getting all the glass to fit together perfectly. If you're just starting
out with stained glass, you can join my previous
class Stained Glass for Beginners to get started
on your first piece.
2. Drawing the pattern: Okay, so let's start off
with creating the pattern. I am in Procreate, which is where I
draw everything. And this is an 8.5 by 11 inch canvas
because that is the size of my sticker paper that I will be that I will be using
to create the pattern. So first thing I'm going to
do is bring in my pattern, my design. So this
is just a sketch. The size of this is
about five by seven, which is what I want
the final panel to be, so I'm just going to
leave it as this. So over here in the
corner, we see our layers. I'm just going to create a new one and lower the
opacity of my sketch. And then the brush that I use is under the painting section, and it's the round brush. And the key to
getting smooth lines is adjusting the streamline
and stabilization. So I normally keep it
pretty high around 60%. And then for the brush size, I keep it about two to 3%. And that spacing seems
to be good for me. The line work always
ends up having enough space in
between for the foil. Okay, so now we can
start our line work. I'm going to go over
into the settings and then canvas and turn
on the drawing guide. We're going to be
using the symmetry and the drawing guide to help
get perfect line work. So first, I'm just
going to start with the straight line since that is the majority of this pattern. I'm just adjusting the grid
size so that it lines up. And then make sure that
you are on your new layer. And then if you turn on click on a layer and then turn
drawing cyst on, this will give you
perfectly straight lines. And then another
thing that you can do is to make sure that you have everything even and it's symmetrical is go into
the symmetry section, and then I'm going to do
vertical to do the side lines. And then you can hold to get a straight
completely straight line. Okay. And then to draw the stars, I'm going to edit
the drawing guide. Under symmetry, I'm going to choose quadrant and then just adjust the blue point to be
in the center of the star. And then so that I don't
have to draw another star, I'm just gonna copy
this and paste it. And then to finish up
the remaining lines, I'm just turning the grid
back on and adjusting that. Mm. Okay, so we have
our line work done. I'm just going to turn off the sketch and then turn
off the background layer. And now I'm going to set this up for cutting out in
the cricket software. So since this is small enough, I can fit two on a page. So I'm just going
to turn it and then duplicate that, drag it down. I'll enter them. Okay. Now I'm going to create
a layer, another one. And all we're going
to do here is just create some sizing
marks in the corner. And the reason that
I'm doing this is because if you don't have
these markers in the corner, the cricket software
will resize it. It will basically stretch
and warp the image, and I will show you
what it looks like if I do enter this sin
without the marks, so you can see
exactly what I mean. But I'm just going
to save this az PNG, and then we will bring this
into cricket design space.
3. Cutting the pattern: Alright, so I'm in the
cricket design space, and I'm just going to
bring in our pattern. So this is the pattern
without the corner marks, just so you can see exactly what happens when you don't add them. We're going to
choose single layer. And then since the
size that we created the canvas was 8.5 by 11, that is what I'm
entering in here. So, of course, it
just gets rid of the blank space around
it and resizes it. This is not the correct
size that it should be. So I'm just going to go
ahead and delete that, and we're going to bring in the correct one with the
corner marks, and there we go. So we can go ahead
and make this. And always pay
attention to where it shows the outline on the mat. That is where you
want to place it. And then the setting
that I use is this one, the premium vinyl
permanent glossy. That is just the
setting that has worked best for cutting
these stickers out. And I just keep it on
the default pressure. But depending on the
blade that you're using, you can just adjust it
to whichever you need. So now let's go ahead
and cut this out. So the sticker paper I use is by the brand koala and you
can find this on Amazon. It is the mat vinyl
sticker paper. And here you can maybe see
where it cuts out each time. So that's where I'm going
to stick the paper. And now we're ready
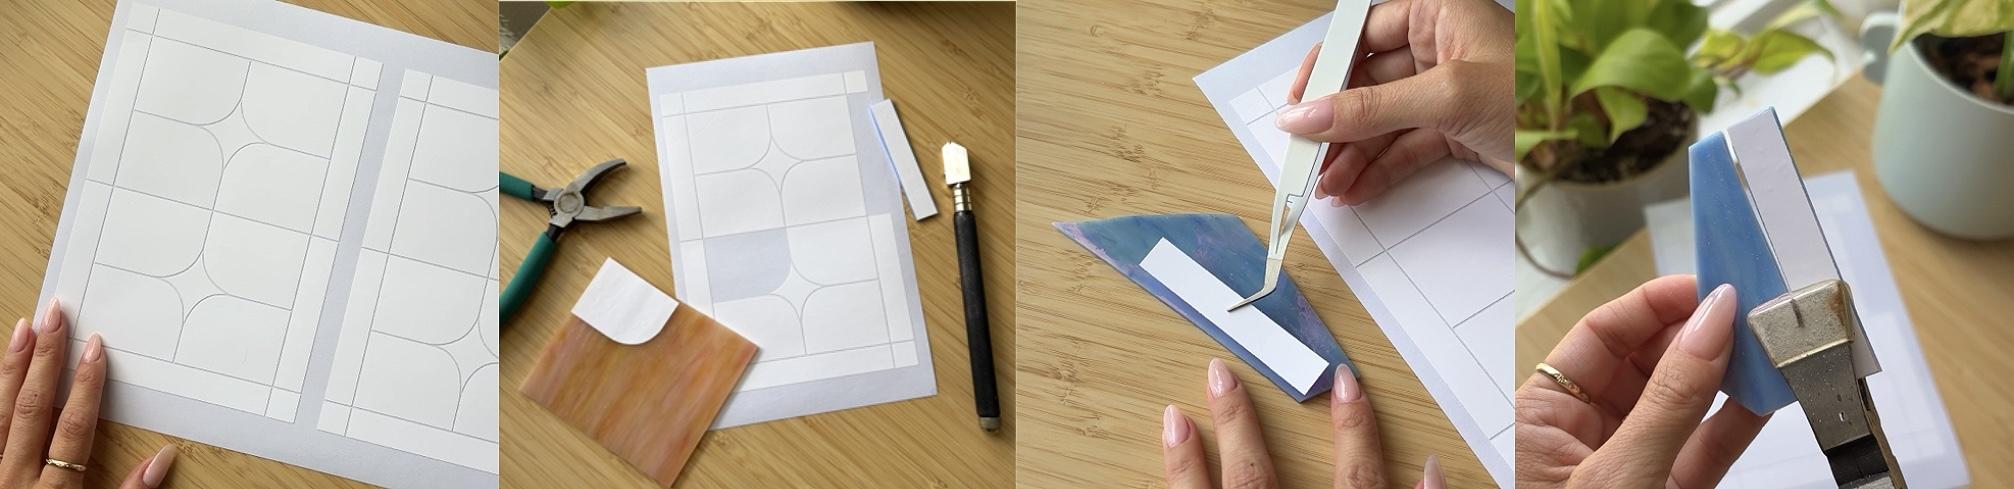
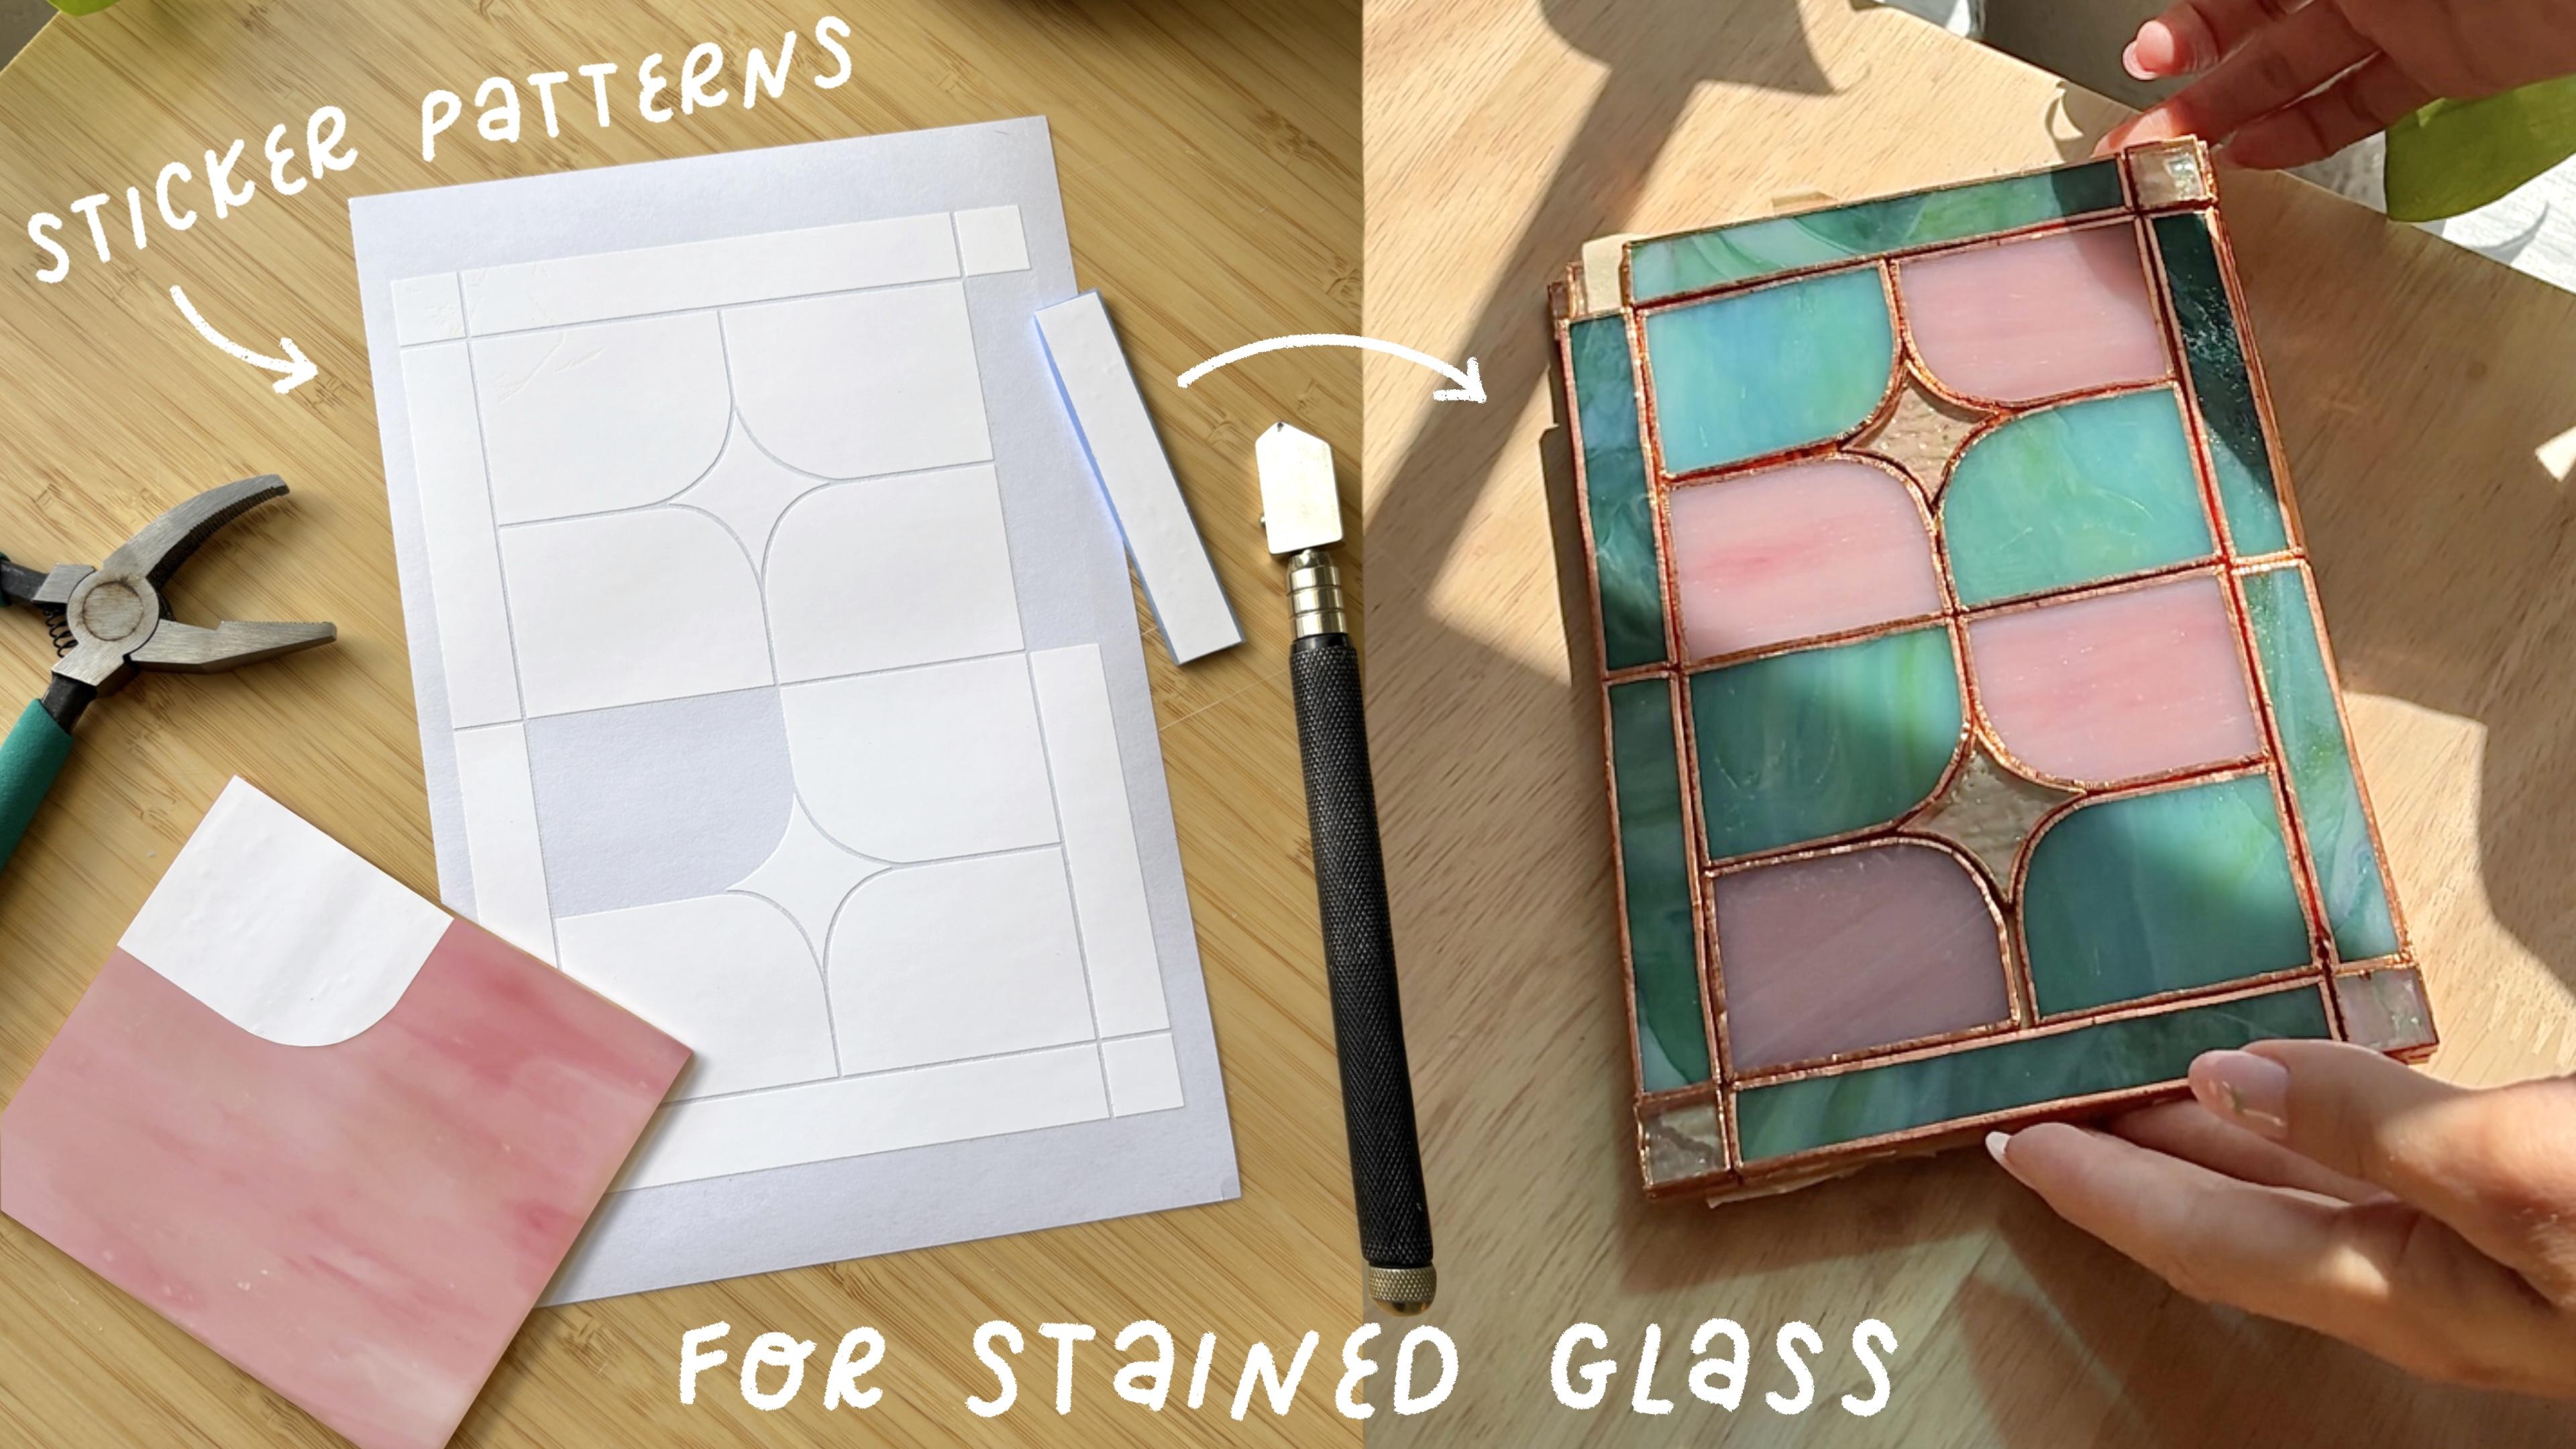
to cut this out. Alright, so now I'm just going to peel away the background. So just all the extra. And now remove the linework. And here's our finished
stained glass sticker pattern. So now we can just number
these with, like, a marker, and then peel them off, stick onto the glass,
and you can get started making your
stain glass piece. The sticker paper
specifically is waterproof, as well as tear proof. So it is really good quality, and it will hold up all throughout the
stainglass process. Because they are waterproof, they do stay on
perfect well grinding, and they help so much for
getting the perfect shape. And just to give
you an idea of what I ended up making from
these sticker patterns, I made this stained glass lamb. So definitely the stickers are great for getting
consistent pieces, especially when you're working with a lot of pieces like this. So yeah, if you
haven't used stickers for stained glass, you
definitely should try it.
4. Project: For the class project, make your own stained glass
sticker pattern. Either start by drawing
your pattern or turn an existing pattern into stickers using the
steps in class. Share a photo of your sticker pattern in the project section. I'd also love to
see your completed stainglass piece made
from this pattern. If you're trying stained
glass for the first time, make sure to watch through my previous class for
the full breakdown of supplies as well as guidance through each step of the
stained glass process. As always, if you
have any questions, let me know in the
discussions page, and thank you so
much for joining.
 Amaya Jade, Artist and Video Creator