Transcripts
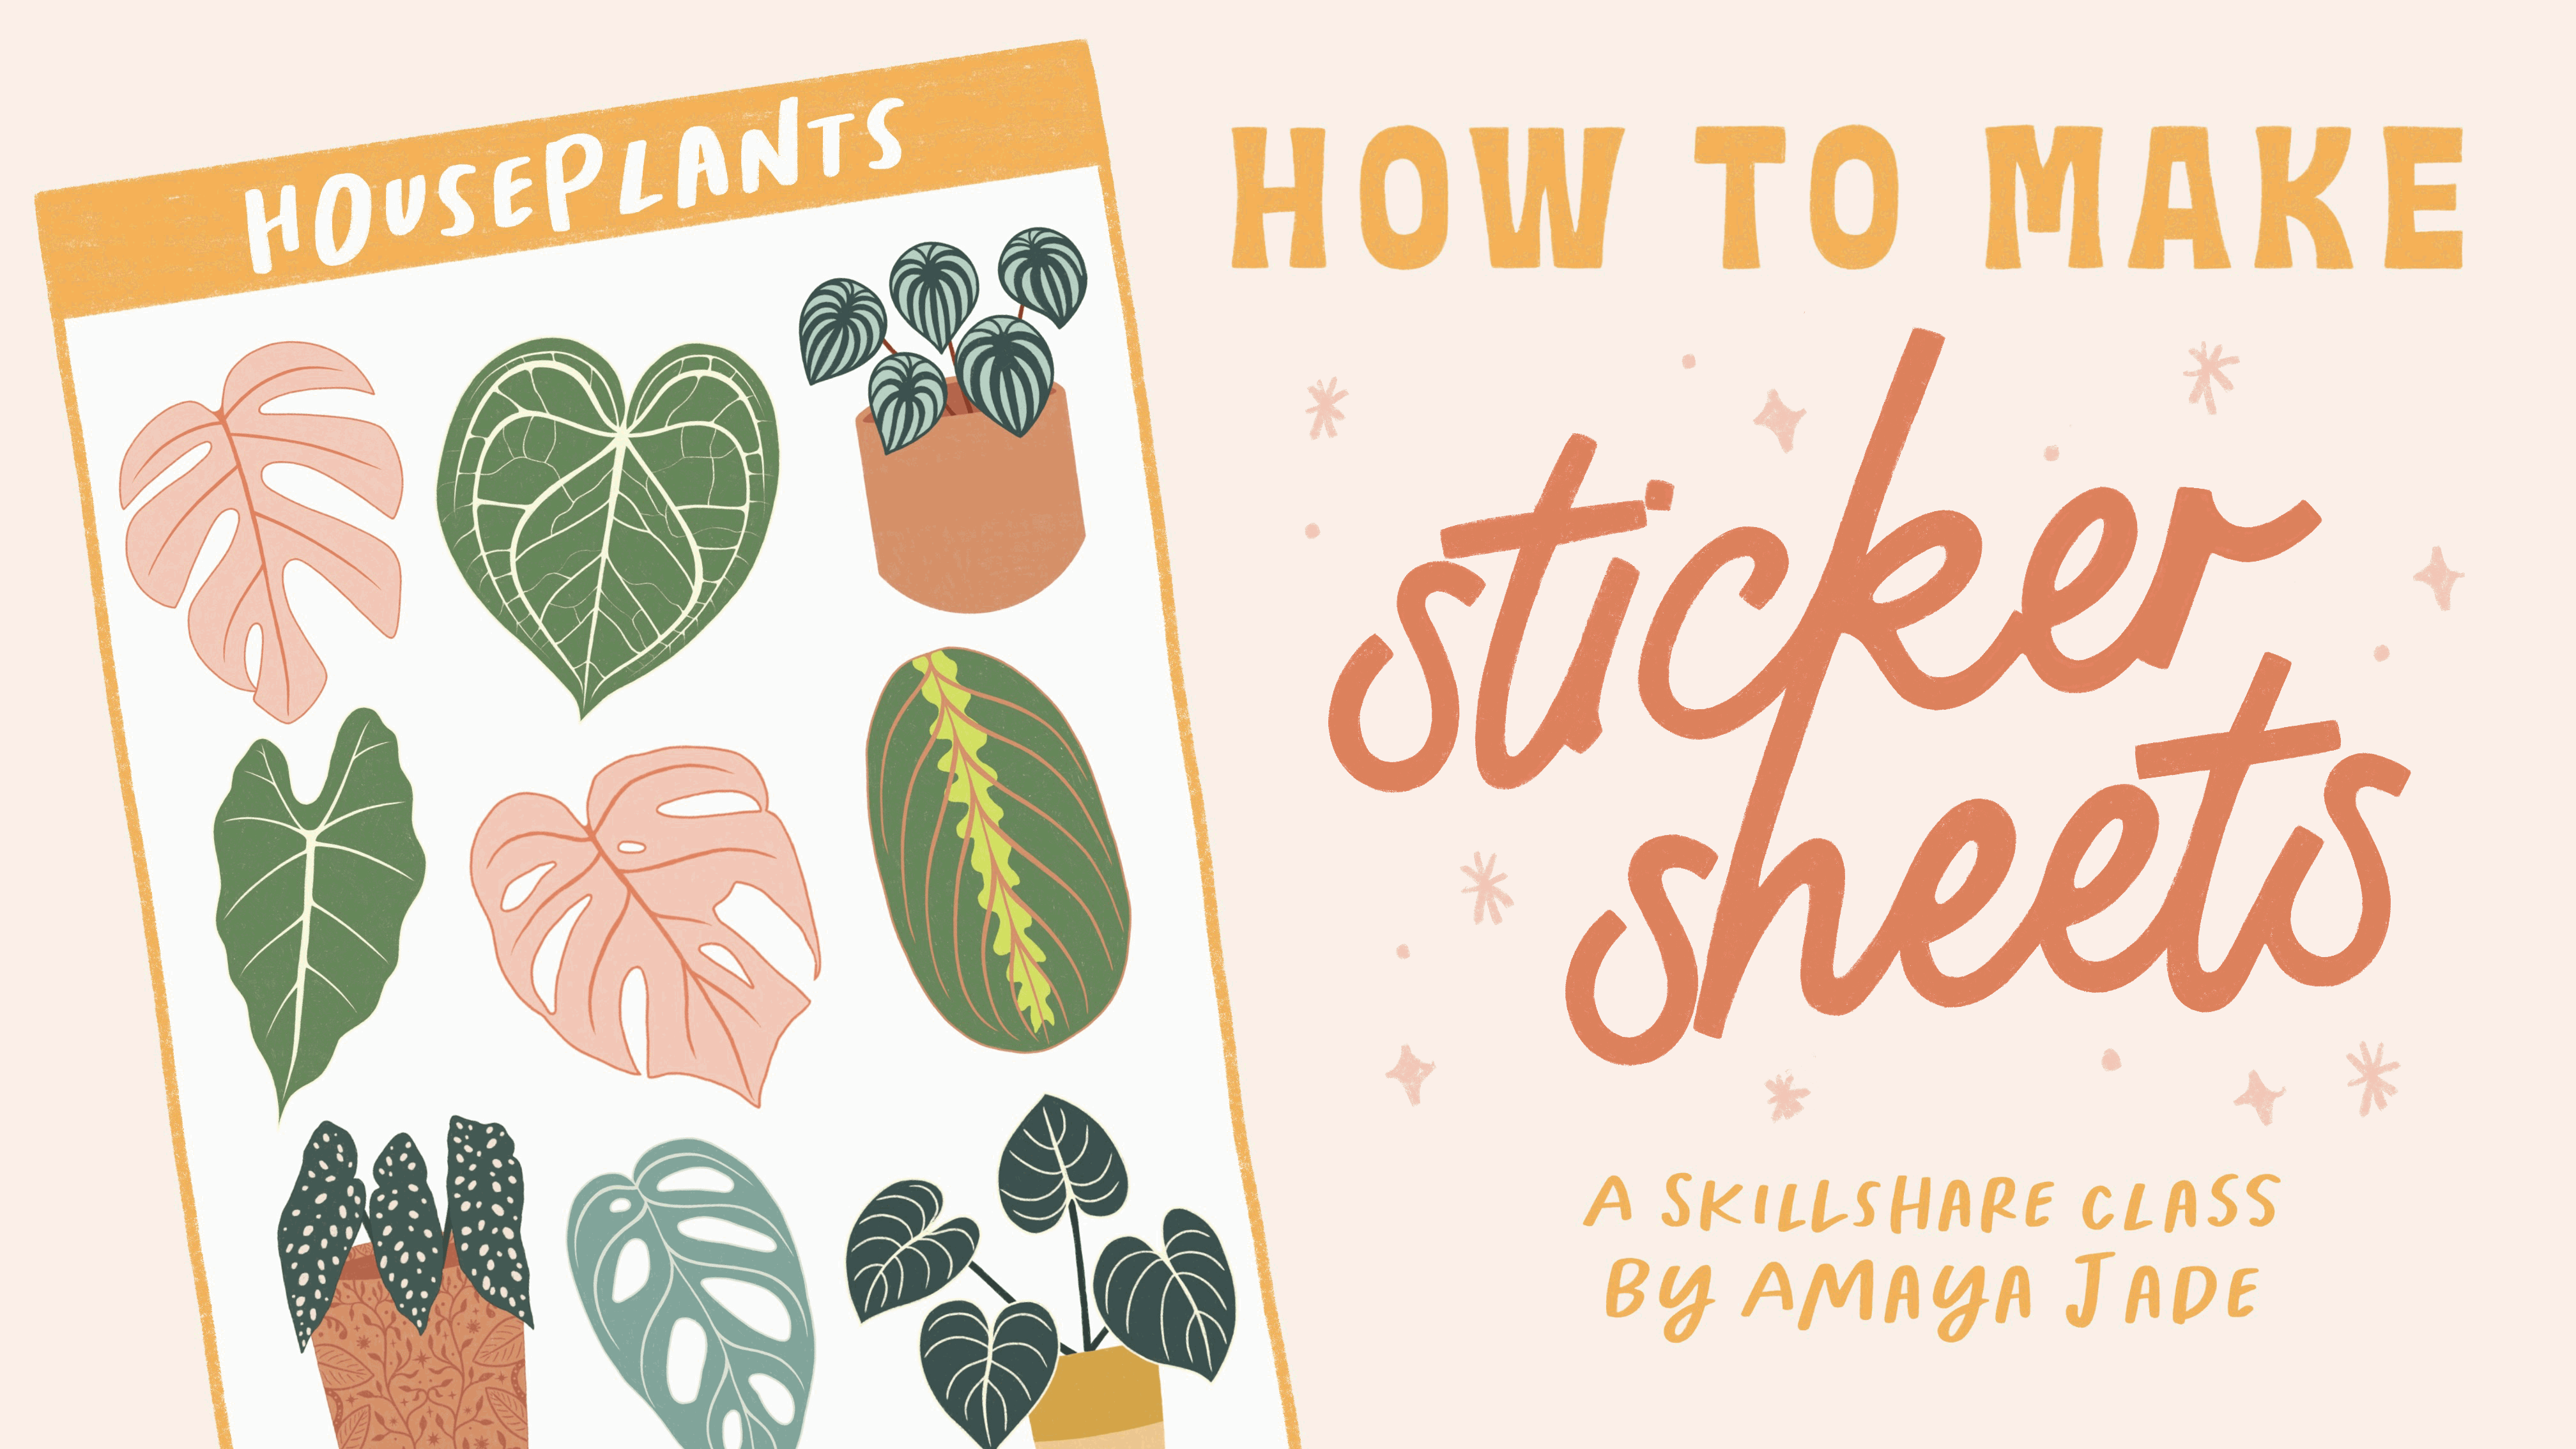
1. Introduction: Hey everyone, My name is Maya and I'm an artist
and video creator. In this class, you'll learn how to create
sticker sheets with your own artwork using Photoshop
and the cricket machine. We will set up the sticker
sheets in Photoshop, upload to the cricket
design space, and then print and cut
the sticker sheets. This class is recommended
for the intermediate level as some basic knowledge of
photoshop will be needed. Students who are beginners
will still be able to easily follow along as I walk you through each step
of the process. By the end of the class, you'll be ready to
turn your artwork into sticker sheets that
you can either sell or use for yourself. If you've got some
artwork ready, join the class now to get
started on your sticker sheets.
2. Software & Materials: First I will quickly go over the software and
materials needed. So for software you will need Photoshop and then the
cricket design space. And then for physical materials, you will need the
cricket machine, of course, a printer. And I will have the printer that I use on the screen if you were interested. Sticker paper. This one is from
online labels and it's the standard white mat in
half by 11 sticker sheets. And lastly, you will need a paper cutter or you
can just use scissors. And now I will show you how to create the sticker
sheet in Photoshop.
3. Making the Sticker Sheet in Photoshop: Once you have the
artwork that you want to make into stickers, we are going to go
into Photoshop and actually create the sticker
sheet in Photoshop, are going to click
on create new. 6.75 inches by 9.25 inches is the largest size
that the cricket can cut. This will be the size of the
sticker sheet so that we can use up as much of
the paper as possible. If you actually want
your sticker sheets to be smaller than the size, all you'll have to do
differently is and turn your Canvas size here. And then also enter
in that size when we are in the cricket program
uploading the sticker sheets, and I'll leave the
resolution at 300. And we can go ahead
and create the canvas. Now that we have our canvas, I'm going to unlock the
background and we can start bringing in the
individual stickers. From here, you are just
creating our sticker sheet, making it look the way
that you want it to. And it's a lot of
trial and error. You can move things around
and that's totally fine. So I'm going to bring
my stickers in. What I'm going to do
is drag them up to this tab and drop it. The reason I'm doing
that is because this brings in the full
resolution of the artwork. And if I just dragged my artwork straight onto
the canvas like this, it doesn't bring in the
actual size of my art. If we drag it from here and then to the other canvas like this, you can see that it's a
lot bigger than that one. So I'm just going
to delete this. Start over so that you can see. I'll just drag it from
here to the other tab, bring it into the canvas
like that, just drop it in. Then Control T is to resize. Think. See, I actually don't want
to start with a sticker. I'm going to delete that really quickly and
bringing a different one. So I think I'm gonna
start with this one. I'm going to just start on the bottom right corner and work my way up to the top of the sticker sheet to
make things easier. What you want to keep
in mind when you're bringing in all
of your stickers, is to leave a little bit of space between the sticker
and the edge of the paper, just so that nothing
will get cut off. And also keep in mind that we will be adding a
stroke around the stickers, so that will take up a
little bit of space as well. Go ahead and bring
in my next sticker. Control T to resize. You can make these
whatever size you want. Move them around. You can duplicate them. As many as you want, as many
as you can fit in here, just depends on how big you
want your stickers to be. Nothing right now is permanent. You can always move them around until you have them in those spots
that you like them. I'll make this one a
little bit bigger. Now I can go on to the next row. I'm going to have just
three stickers in each row. Okay, so now that I'm nearing the top of the sticker sheet, another thing you
want to keep in mind is if you are selling these stickers and
you want to have your business name or the name of the sticker
sheet at the top. Then make sure to
keep a little bit of space for like a little
banner at the top. To display that information.
That's what I'm going to do. I will be showing you
how to do that as well. If you start to get too many
tabs appear at the top, you can go ahead and
just close out of them because you don't
really need them again. Now here's the last sticker. Once you have them
all on your Canvas, you can go ahead and
just move them around, tweak them a little bit
to how you like them. You can also move
the stickers using the arrow keys if
you only want to move them like a tiny bit. Once you are happy with how your stickers look and
how they're all laid out. We're going to select
all of the stickers, each layer hold Shift to
select all of the layers. And then we will drag them into the little folder
icon at the bottom. Drop them into there
so we create a group. Now we can go ahead and
double-click on this group. We're going to add a stroke, going to leave it at 13 pixels and the color white hit Okay. You can go ahead and turn
off your background, or even changed the
background color to a darker color so that you can see what you're working with. So right now it looks a
little bit of a mess. And that's because
my artwork must have had just little marks
that I couldn't see. So that's why it's got the
stroke in all weird places. The next step is to actually
clean up those areas. If you have any of
those marks showing up, all you want to do is go and make sure you're
selected onto the group. Then select on the sticker.
So just click on it. Whichever artwork has a mark, and then just erase it. And make sure to select
on each sticker. When you move over to a new one. You just want to get the lines, the edges of the stroke to
be as smooth as possible. Also, I'm using the
scroll wheel on my mouse and holding
Alt to zoom in and out. So that's a really easy way. Using quick way to
zoom in and out. Areas like this where
there's cutouts. I'm actually going
to fill this in with white just because I don't want the crickets put out
the super tiny areas. Just to make it look
a little bit nicer. I'll be doing that next
after I've done the cleanup. Of course, if you mess up, you can always hit
Control Z to undo. Okay, So I've
finished cleaning up. Oops, I missed one spot
and we're going to do I've finished cleaning up and now I'm going
to go in and paint. So I'm going to
use the brush tool and make sure I'm on white. I'm just going to fill in the
little teeny areas that I don't want cut out like that. This I'm going to leave it like that. I think I'm happy with this. Alright, so once I've
cleaned up the stickers, we're going to hide the group. Were just do that and drag it down to this plus button down
here to duplicate it. Now this bottom layer, we're going to select that. We're going to right-click
and merge group. So that this way the artwork and the stroke are
together in one layer. Basically what we're doing now
is creating the cut lines. So the top layer, this group up here is the print and the bottom layer is
going to be the cut lines. So now we're going to mouse over this image of the stickers. We're going to hold down
control and click on this image that these
stickers are selected. We're going to edit, fill. And we're going to
fill with white. Hit. Okay. You can hit
control D to deselect. Now if we hide the top layer, you can see that this
is the cut lines. We're going to turn
off the stroke on the top layer since we no longer need
that. Just hide it. Like that. Just because it's
no longer needed. Now we can go ahead
and make the header. What I'm going to do is
use the rectangle tool and just go above the sticker
sheet in the corner and drag. You can make it whatever
size you want it to be. I'll put it about here. I'm going to double-click
on that layer. Go to Color Overlay. And then I'm going to
just pick a color. I think I'll use the yellow. Well, so you can either turn off the background layer or
change it back to white. I'll leave it that
white for now. Just so that I can see
what this is looking like. I think I like that,
so I'm gonna hit okay. Now you can go ahead and
type out the name of it, your business name, any information you want
to put at the top of it. If you're wondering the font
I'm using is called Maiden. I'm just going to leave
it as this for now. All right. There we have it. There's the sticker sheet. Once you have the
header, we can go ahead and turn off
the background. In our going to save. We're going to save
this as a PNG. We're gonna go to file. You can either save
as do Export As, which is what I'm going to do. Whatever you want to save
it, that's up to you. Make sure it's a PNG,
and we can save it. Make sure to save a PSD as well. Just so that you can
always go in and edit it if you need
to make any changes. There we go. You've made
your sticker sheet. Now the next lesson we
will go and upload it into the cricket and
set it up to cut.
4. Uploading the Sticker Sheet to Cricut: Okay, so once you are in the cricket design space, we're going to click on New Project and the top right corner, click on Upload, upload image. And we will bring in the PNG of the sticker sheet that we just made. And I'm going to go ahead and click on moderately complex because that seems to work with pretty much anything. Hit Continue, Continue. And then select Print, then cut image. So it's the one on the right. And click Upload. So now we'll click on Upload and insert images. Right? So here is where we have to resize it to make it the size that it actually is. So go ahead and unlock this button right here, where the size and the width will be 6.75 and the height 9.25. But of course, if you made your sticker sheet a different size than you will need to enter in the size that you used. And just click Enter or hit Enter. And then for the position we will put 00. So now it's aligned in the right spot. So we'll go ahead and click, Make it. Hit Continue. Select, Send to printer. Make sure to uncheck the ad plead and select US system dialogue. So select your printer and then your settings that you want to use. I'm selecting plain paper, high-quality. I'm using 8.5 by 11 paper. And those are the settings that I'm going to be using. You can go ahead and print it. And the material setting for paper depends on how new the blade and the cricket is. If you've just put in a new blade, then it might not need to be cut on a higher setting or you might have to go lower. But I'm setting two papers. So just keep in mind that the material setting might be a little bit different depending on your machine and how new your blade is. And that is how you upload your sticker sheet to cricket and send it to cut.
5. Cutting the Sticker Sheet: Now we can cut our
sticker sheets out. At this point, we have uploaded the sticker sheet to the
cricket design space. We've printed it out and
set the material to paper. Now all we have to do is
place the sticker sheet onto the mat and make sure you've lined it up
on the top left corner. Insert the mat into
the cricket machine and start cutting it. Once it's done,
you can remove it. To peel the sticker sheets off. I always turn the mat upside down and then just start
to peel the mat away from the paper on a flat surface so that the sticker
sheet doesn't curl up. And now you can just cut
out the sticker sheet. Then I just leave it like this. But you can also go ahead and round the corners if you'd
like them to look that way. But that is basically it. That is how you can make sticker sheets using
Photoshop in cricket. Now that you know
the basic process of creating sticker sheets, the possibilities are endless.
6. Class Project & Thank You: For the class project, follow along with
the class lessons to create a sticker sheet
using your own artwork. Uses the class project section to share what you've created. You can either share a photo of the physical sticker sheet or an image of the mock-up you
put together in Photoshop. I've created my own class
product to give you an example. I'm looking forward to seeing the sticker sheets you create. And if you have any
questions at all, please be sure to ask me
in the discussions page. If you were interested in
similar classes to this one, you can follow my account so you don't miss out on my next ones. And thank you so much
for joining this class.
 Amaya Jade, Artist and Video Creator