Transcripts
1. Introduction: Hi, my name is Amaya and I'm an artist
and video creator. In this linocut
printmaking class, you will learn how to
create linocut prints using beginner-friendly
steps and techniques. Whether you're an artist
looking to expand your skills or just wanting
to learn something new, this class is perfect for anyone interested in creating
their own linocut prints. We will go over the
supplies and tools needed, how to prep the block, transfer your drawing, tips
and tricks for carving, and printing the final artwork. By the end of the class,
you will have learned everything needed to
know to get started. Once you've got the basics
of linocut printmaking down, the possibilities are endless. Join the class now to get started on your
own linocut print.
2. Supplies: First we will go over
the supplies needed. This is optional, but I do
recommend using a bench hook. It's just a board that hooks on to the edge of
your desk and holds the linoleum in place while
you are carving and printing. It's extremely
helpful when carving, specifically because
this way you don't have to hold the
linoleum in place, and you don't risk
hurting yourself. You can use both hands to carve, which gives you more control. I just made this one myself. They're easy to make, but
you can also find them online for pretty cheap
if you want to buy one. Next is the linoleum. This one is by Speedball, and it's a five-by-seven block. This one is mounted, but you can also get unmounted ones, it's just up to your preference. Mounted linoleum blocks
like this one will hold up better if you're going to be making lots of
prints from it. You will need parchment
paper if you're transferring a drawing
onto the linoleum, a pencil to transfer
the drawing. Then an ink pen to go over
the pencil on the linoleum, so that when you're carving
the lines don't get smudged, and so you can still
see your drawing. Next you'll need a cutting tool. This is the: Speedball
lino cutter, and it has three different
blades, a small v, large V and a large U. I recommend getting one
like this to start out with, because it's just one tool
with interchangeable blades. I'll go over the
different blades more in detail in the carving lesson. Then paper. When printing it's
much harder to transfer the ink if the
paper is too thick, so choose one that
is fairly thin. I'm using the Strathmore
printing paper. You'll need an ink roller, and then the ink
that I'm using is the Speedball black
water-soluble ink. Then you will need a surface
for rolling out the ink. Most people use a piece
of glass or acrylic. I'm just using a sheet of aluminum foil and
taping it onto my desk. Finally you will need
something to apply pressure when
transferring the ink. Typically a barren
is used for this, but I'm just using the
lid from a candle. You can also just use a spoon. Now that we've gone
over the supplies, in the next lesson
I will show you how to prep the block
before carving it.
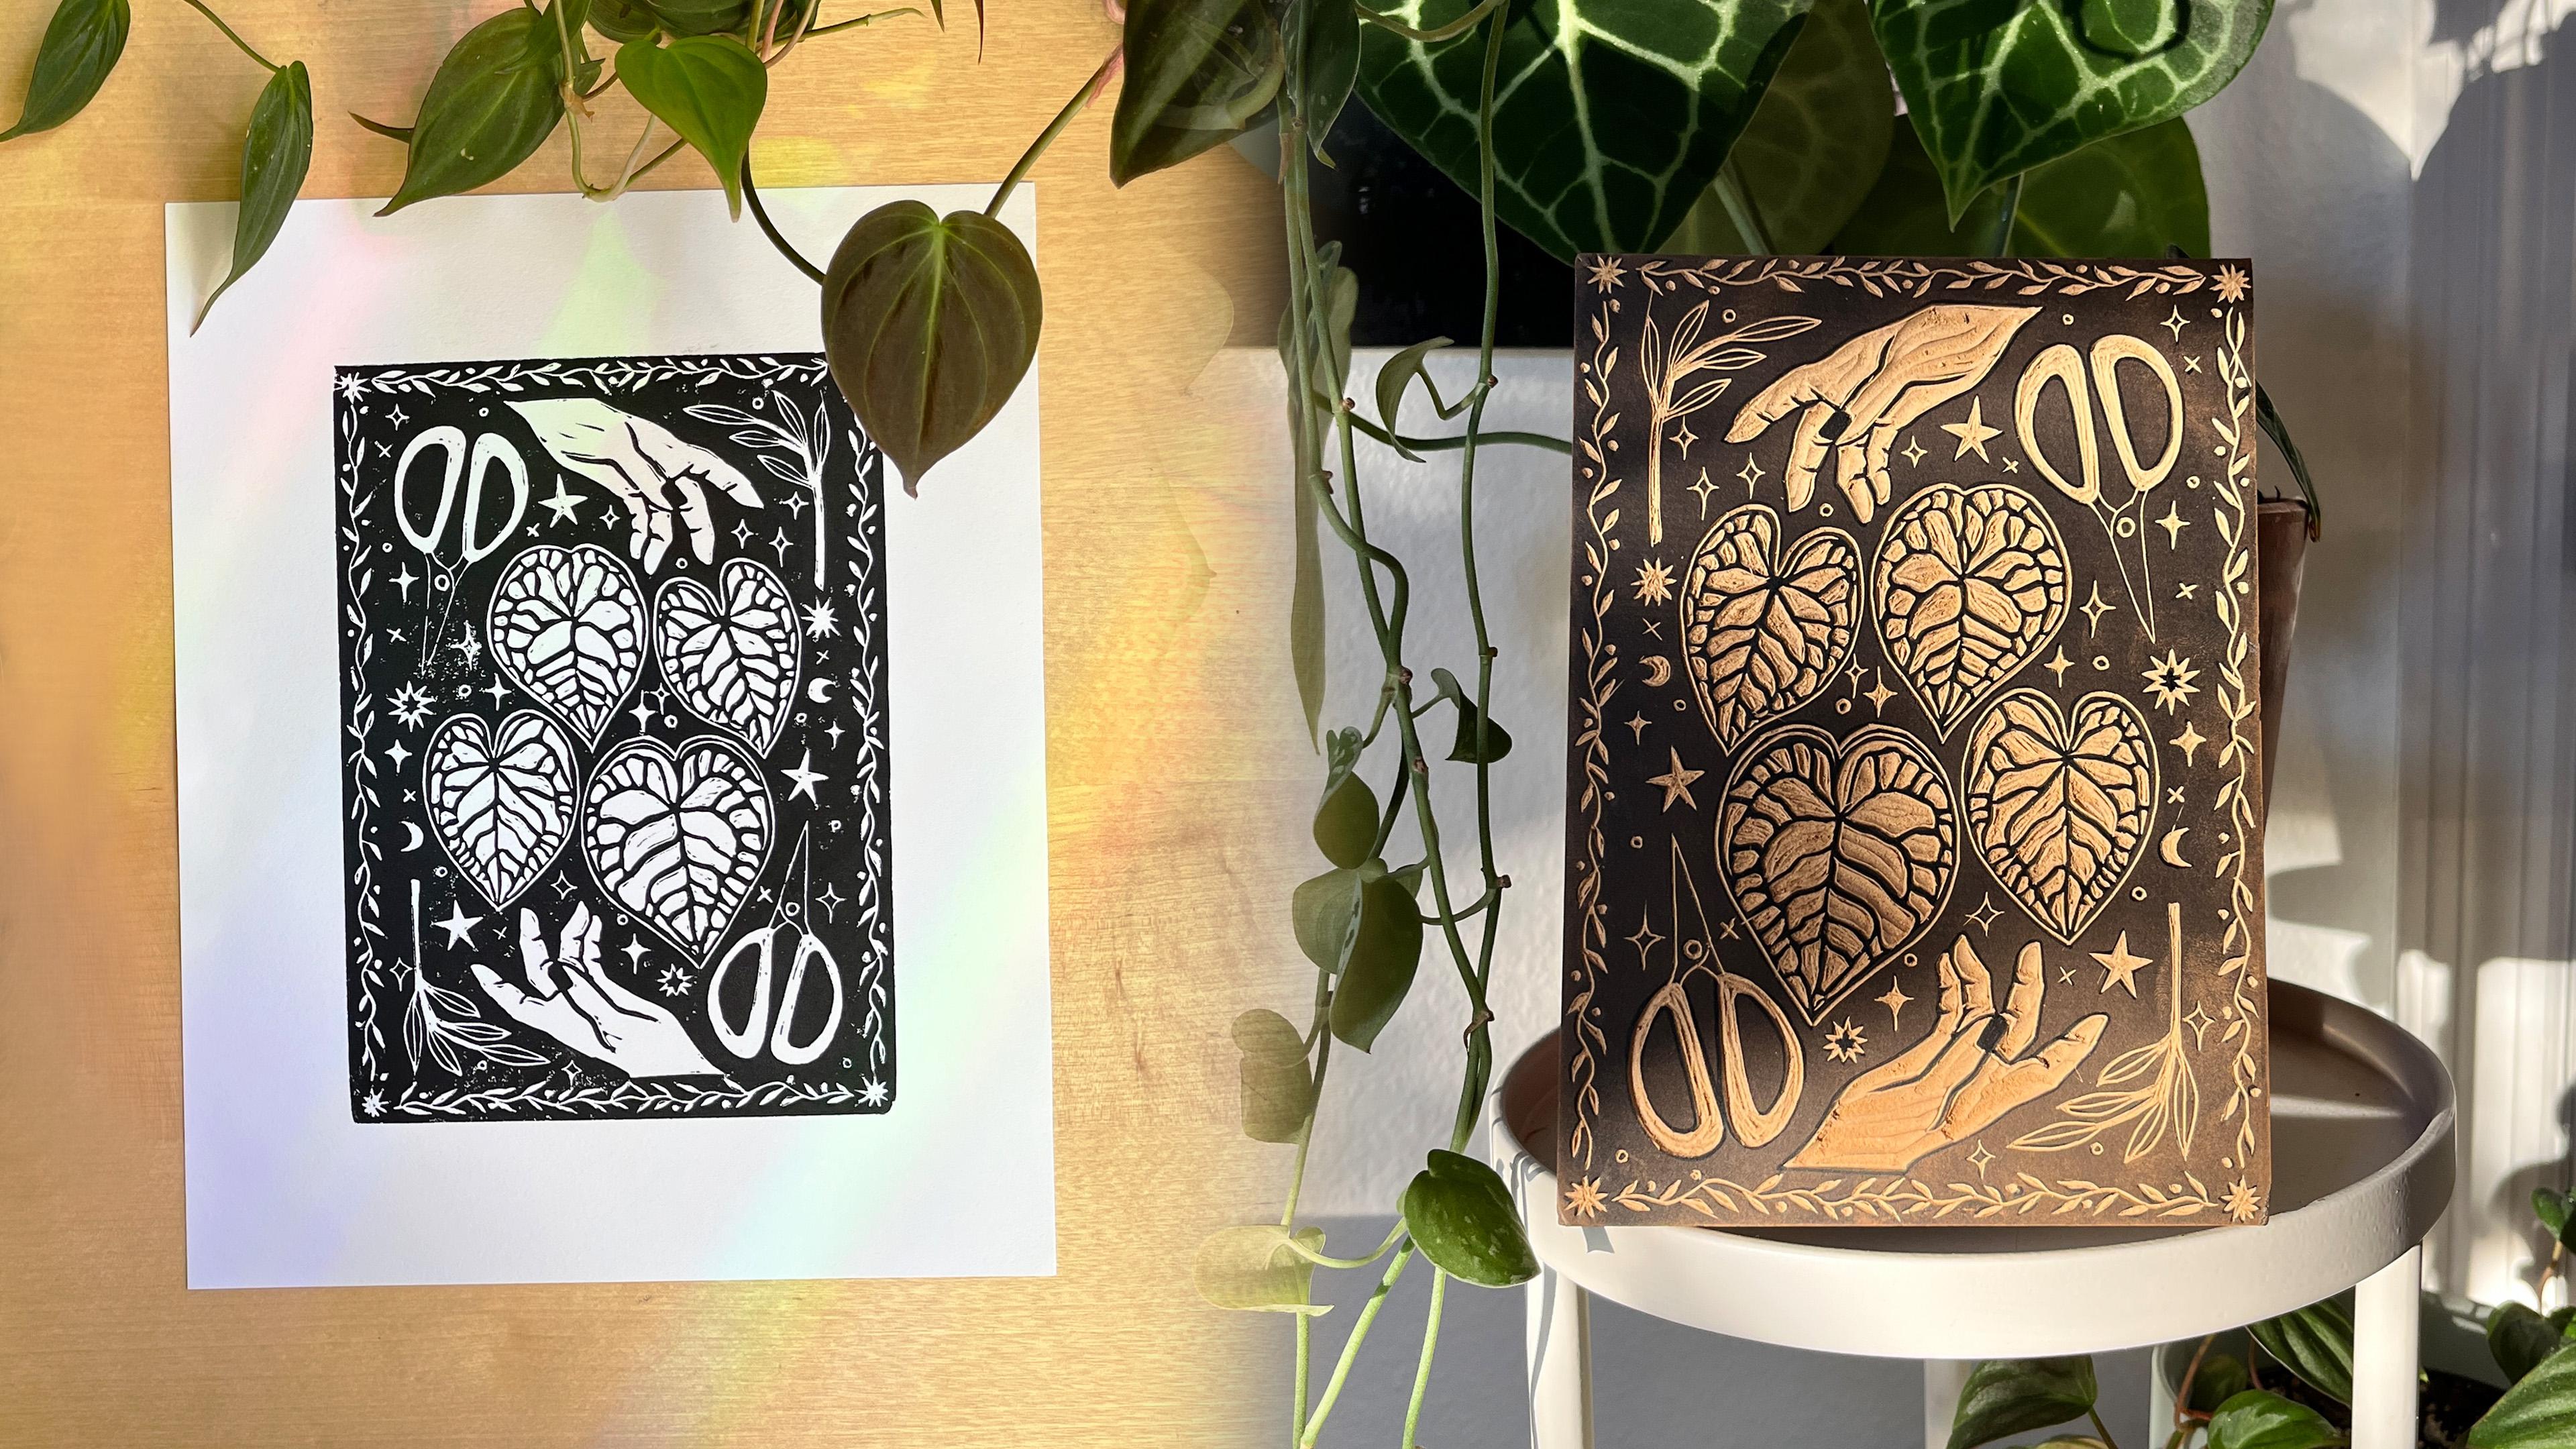
3. Prepping the Block: Before we start carving, the first thing I'm going
to do is stain the block. This way you can easily
see what you've carved out and it just helps
you make sure that you've carved out everything
that you needed to. It will also give
you an idea of what the final print is
going to look like. I'm just using watercolor
to stain my block. But you could also water down some acrylic paint or stain
the block with some ink. Here's a clip from the carving lessons
so that you can see why staining the block is
super helpful when carving. Then I did two coats of that. Then I just make sure
that it's completely dry before we move on
to the next step. Now on to transferring your
drawing onto the lino. You won't need this
step if you're drawing directly onto the lino, which you can do of course, but just remember the image will be reversed
once it's printed. I'm using a piece
of parchment paper and I'm just outlining my block. I drew my artwork on my iPad, so I'm going to show
you how I transfer it. When I created the artwork, I made the canvas five by seven, so it already lines up
onto my block nicely. Placing that paper over my iPad. I'm locking the
screen so that it doesn't move around
when tracing. You just begin tracing. That's how I transfer my
digital artwork onto paper. But if you already have
a sketch on paper, you can just move on
to the next step. The next step is transferring
the drawing onto the lino. You're going to cut
down your paper to the size of your
linoleum and then place it drawing side down on the block and just tape the
edges so it doesn't move. You will go ahead and trace over the drawing applying a
decent amount of pressure and I'm using a thicker
graphite pencil to make sure that everything
transfers nicely, even the small details, and you can also make
sure that everything is transferring by just lifting the paper up and seeing
how it's looking. The final step for
prepping the block is to go over that pencil
transfer with a pen. Sometimes the pencil lines
can be a little hard to see and it will also smudge
when you're carving. Using an ink pen over
it will help to keep the drawing visible throughout
the carving process. With all that said, we will
move on to carving the block.
4. Carving: Now onto carving the block. First I will go over each of these blades and what
they are used for. Size 1 is a v, and this is used for
carving fine lines and really any little details. The Size 2 is a V. This can also be used
for small details, but because this one is
a more narrow gouge, you can vary the
widths of your cut, so you can get thinner
and thicker lines. Size 5 is a U, and this is good
for carving away large areas of lino because
of how wide it cuts, but you do have less
control with it. I'm placing the block in the
corner of my bench hook. If you aren't using
one of these, you could use a rubber mat under your block to help
keep it in place. If I start out with a v so you can see how thin it carves. You want to angle the
tool down into the lino, just make sure that
the whole blade doesn't dip under the surface otherwise you're
cutting too deep. But if you keep it to
parallel with the block, you'll barely be carving anything away and you're
more likely to slip. That can also happen if you're
using too much pressure. A technique that you can use for your carving
process is to start off with a v knife
and just carve around the outline
of the shapes. This gives you a
clean cut and gives you a better idea of
what needs to be cut. Once you carve all around the
shape you have an outline, take the V knife and follow
around that previous cut. Once you've worked your way
around with the V knife, use the u knife to clear
away remaining spaces. Using this technique protects your outlines and
keeps them sharp. I decided to switch to the V fee knife since that area that I'm
carving first isn't small enough to need
the v. I'm going along the straight lines first and then rounding the corners. Here you can see how the V knife is still able to cut thin lines. But when carving small
areas like I am here, it's going to be
easy to accidentally carve away something
I wasn't supposed to. For this leaf, I will
be switching to the v. For the majority of
carving this block, I switch between
those two V knives, and I really only use
the u knife towards the end to carve any
large remaining spaces. The sizes that you use will mostly depend on
what you're carving. How simple or
detail your drawing is and the cuts
you'll be making. For example, if you
have any shaded areas, you could use the v to carve super thin lines and use a
cross hatching technique. Here you can see how I
hold my carving tool. You basically want
to hold the tool in one hand and use the
other to guide it. Make sure to always cut
away from your hands. Never cut towards
yourself and it's also good to keep your body weight behind
the cutting tool. Make sure to carve slowly. This will give you more control
and you avoid slipping. For my drawing, I really
only needed the u knife to carve out the remaining
spaces in the hands. But you would also
use this knife for carving out something
like a background. When using the u knife, try to keep it flat
to the lino so you don't end up cutting
into it too deep. This prevents you from
going through the back of the lino if you're
using an unmounted one, and also prevents the
lino from ripping. If you're carving too deep, what can happen is the
piece of lino you're carving will rip or break-off instead of having
a smooth edge and that will affect the final print because it won't be a clean cut. If you happen to accidentally carve away something that
you weren't supposed to, you could glue that piece
back on or you can just continue carving and try to
make it look intentional. For the most part, I
leave the mistakes. Usually, they end up not
being very noticeable anyway. Personally, the u knife is
the most fun to carve with. It's really satisfying to
carve away big chunks of lino, but don't get
carried away with it because since it is
such a wide blade, you don't have as
much control as you do with the others and it can be super easy to carve away something that
you didn't mean to. Then finally I'm
switching back to the v to carve the border. That is the carving process. It's super fun, but it
can take a long time, so make sure to take breaks. This is the completely
carved block. Now we can move on to printing.
5. Printing: Once your block is
completely carved, it's time to begin printing. I'm just leaving my block on the bench hook for printing
so that it stays in place. Taping down aluminum foil to use as a palette for the ink. I just have my paper on
the side ready to print. You just want a line of ink and roll it out just the
size of your roller. Roll the ink up and down
and then side-to-side. The goal is to have
an even layer of ink on the palate
and on the roller. The ink should have a texture
somewhat similar to this. Roll the ink over your
block for this first print, I did not use enough ink, so you'll see what
that looks like. Use a little more ink than
you think you might need. Keep the block inside up
and layer paper on top. I'm just lining the corner of the paper to the
corner of the block. For my final print though, I will be printing it on
the center of the page. Once you've laid the paper down, you just need to
apply pressure to the paper to transfer the ink. You want to take your
time with this to ensure an even print and make sure that you get all of the
little details. Now, once you've gone
over the entire block, lift up the paper and you can see how your
print turned out. Look at it to see
what needs to be adjusted to achieve a
better print for mine, I can see that I didn't use enough ink and that's
the main issue. But if I look closer, I can
also see that I didn't apply enough pressure specifically in the corners and near the edge, but adding more ink is definitely going
to fix most of it. Let's go on to the second print. For the next sprint, we are
rolling out a little more ink and making sure that
the entire block is coated with an even layer. Again, I'm just lining the
paper up with the corner of the block and begin applying
pressure to the print. Before lifting the
paper up completely, you can lift up the corner to check if it's
completely transferred. I can see that mine looks
better than the first print, but could use some
more pressure. Then here's what it looks like after applying a little bit more compared to how
it looked before. You can see it's
a little better. Here's the second print. It could still use
a little more ink. You can see the white splotches where the ink didn't transfer. Then if you look in the
leaves specifically, a lot of the white areas
do have some bits of ink that transferred where I didn't completely carve away the lino. I decided to keep it though because I do like the
little imperfections, but you can always go
back and carve away anything that you don't
want transferring. Here's the print compared
to the first one. It's a pretty big
difference when printing the first couple of times is just trial and error, figuring out the amount
of ink and pressure needed to achieve
a smooth print. I'm doing a third print. Now that I have a
feel for what I need to do to get a nice one. I'm going to print it in
the center of my paper. I'm just going to eyeball it, but here's how you can make sure it'll be lined up
nicely in the center. Just use two pieces of
paper the same size, lay one paper down first
underneath your block. This is going to act as a guide. Then place your block upright in the center where you want
it to be printed and then lay your printing paper
on top by lining it up with the top edge of the paper guide and then smoothing it down. This is a good way to make sure your print is lined up
correctly in the center. Here is my third
and final prints. Of course, you can keep printing to get it just the
way you want it. But that's also the
fun thing about linocut printing is
each print is going to be unique because each print is not going to turn
out exactly the same. At this point, you have
watched the entire class. You can go ahead and begin
your own linocut print if you have any
questions at all, just let me know in
the discussions page and I'd be happy to help.
6. Project & Thank You: Now that you have
completed the class, it is time for your project. You will create your own
line of cut print using these steps and techniques
you learned in the class. Begin by transferring
your drawing onto your block and then carve. Enjoy the process because
this step can be tedious, but it is rewarding
in the end and it's super fun to see how
your print turns out. Once you block is carved,
you'll ink it up, and print onto a paper using the methods
learned it In class. Once you've finished, be
sure to share photos of your final line of cut prints in the project
section of the class. I would love to see
what you've created. Finally, thank you so much
for joining the class.