Transcripts
1. Intro to Sparkly 3D Lettering in Procreate: Hi guys and welcome. My name is Dolores ask
Grant and I'm coming to you from sunny,
Manitoba, Canada. So today's class
I'm bringing you is all about 3D lettering. I've been wanting to
experiment a little bit more with creating this
sort of laddering. And I've come up with a
different technique than what a lot of the tutorials
teach you online. There are many, many
different ways to add a 3D drop shadow or box-shadow. And this technique I'm
gonna be showing you uses the motion blur
to create the shadow. So it's really interesting, quite different, and I think you're going
to have fun with it. I love this color scheme and I really wanted to add
some sparkle to it. So you're going to see
as we go through and add some sparkling shine
and luminance to it. So there's lots of steps. It's not really a long class, it's only five lessons. But I think you're going
to really enjoy it. Now if you're interested
in following me, make sure you hit that follow
button right up there. And also check out my website
at Dolores aren't dot ca. Add your name to my
mailing list there. I sent all kinds of different
things out from that site. So it's probably a good idea
to be on that list as well. So I have, I made this sound like a class you might
be interested in. Alright, let's get to it.
2. Lesson 1 Overview and Inspiration: Hi guys, welcome to lesson one. Lesson one here what I
wanna do is give you an overview and some of the ideas that I have
swimming around in my head. Let's get to it. When I decided I
wanted to do with 3D lettering class,
I decided to, first of all do better
research because I had seen a bunch of tutorials on this subject and I wanted to see if I could
do it differently. So I watched a few videos
and a lot of them were, I think, prior to this particular
technique being common. So I'm hoping that you haven't seen the technique that I'm
gonna be showing you today. We are going to be
doing it in Procreate. So this search that I did here was 3D lettering in procreate. And there are, like I said, tons and tons of tutorials. So you could definitely watch mine and then watch a
couple of other ones just to see what there is
different about them and what else you could do as far as
decking out your lettering. So I thought the other
thing I would do is to show you a few examples on Pinterest to
that I collected. And the funny thing is I was
collecting the reference for this class and I ended up getting inspired
for another class. So I have one that is
strictly lettering and then the other one is a more of an illustration class. So it's more to do with painting in a
particular technique that we will come across here as I take you through some
of these examples. So this is my board
lettering ideas. And this is a good one for
you to go and take a look at. There's a lot of pins 239 pins. So I've been collecting for quite a long time when
it comes to lettering. And you can go right down to
the bottom here and you can, you're going to see
very different looks and different things
that either I've tried in the past or
you've tried in the past, you've seen a really good
example is this sort of look, which was really involved, was really trending
a few years ago with that sort of chalk look. So this is like a
chalkboard and I did some art like this probably
three or four years ago. So that's kind of not
as common anymore, but you can see as you work
your way through here, a lot of different
ideas for lettering. I like some of these posts batch explain the whole
design process. You could definitely do a bunch of sketching before you start. I didn't do that for mine. I just kinda went
for it because I was more or less experimenting with whether or not I
could pull off a look that I wanted what this
particular technique. So I ended up doing three
or four different samples. And this was one of the ones
that I use as inspiration. So I'm gonna be showing
you that piece that I produced using
this as inspiration. It's not the one that we're
gonna be doing in class, but you'll see how you
can take someone's idea and adapt it to yours and of course change it
up to make it different. So my look for my lettering evolved
quite a bit over time. I ended up coming across the
art of this young lady here. I'm going to pull up my
favorite piece of I saw. This one I think is just
incredibly gorgeous. So this girl goes by JP. Thank goodness because
I wouldn't have known how to pronounce her firstname. And I loved the look of this. This wasn't in the end, the kind of lettering
that I wanted to do. But it definitely inspired
me for a different project, which you'll see in my other class that I've done
basically at the same time. In fact, I'm recording
them this week, both of them together. And in that class, we're gonna do more
of this sort of a look like it's 3D ish, vivid, sort of a
colorful floral. So that is the other
classes are doing it. So definitely, I mean, all of her work was
very inspiring. I would tell you to just
look her up for sure. Here's another one, and I
just love her floral work. And if you click on her
name in one of those posts, he'll get to her site here. Illustration x. I'm not sure what
website that is, but it reminds me a lot
of Behance because she's got all kinds of different commercial
work that she's done. And just look at how
stunning this is. It pretty much all of her
work includes lettering, not all of it because here's
a piece that doesn't. But for the most part, I think she must be
very well-known for her lettering and gets hired a lot to do
that sort of thing. But I found that her florals
were equally as impressive. Here's that mango piece
again, which I really, really love now as far as the lettering goes now
here in Pinterest, we can also take a look at
3D lettering in procreate. I bet you, a lot of those same examples
will come up nose, but this one I remember seeing when we did the Google search, but you can definitely find
tutorials here as well. And some ideas. This one isn't quite as
satisfying to go into because it brings up so much other junk that you
don't want to be looking at, but I guess we can
do it like this. Once I take a look at
one in particular, then I'll see all of the
ones that are similar. As far as the style
of the 3D lettering. I'll be showing you
that right away. So I won't take too much time here looking through examples. But I think it's gonna be a fun project is
not too difficult. It's only going to
take a few steps. And then we'll figure out all the really easy ways
to create that 3D look.
3. Lesson 2 Type Set Up and Adding Dimension: Hi guys, welcome to lesson two. In lesson two here we're going to set up
that initial type. So we're going to
start by working with motion blur to give
us that dimension. I know it sounds weird, but I think you're gonna find
that really interesting. Let's get started. So I'm going to work
on my standard, 12 by each campus that
I usually work with. And it's 300 pixels per inch. So it's a half size of 24 by 16, which is a common size that
I use for art licensing. So it's just kinda
become my go-to size. So what I'm gonna do
here is first of all, start with my initial lettering. So I want to insert text, so I have to go to the
Actions menu here, add, add text, and you're gonna get this basic
text box here. You can either double-click
on it to access the editing or you can go
into the edit text mode here. So right now, because I
had white selected here, that's the color of the text. So let's just first start
by selecting a color here, because it's the one
that I have selected. Whatever color I choose
is going to show up here. Let's look back at
that sample documents so that we can see
what I've done. That project was something I did quite a while
ago because it was way down on my
class projects here. But what I did here was
kind of a dark teal color. So I'm choosing that darkest
teal that I do have there. And now with procreate, you can just double-click on
the text and highlight it. You don't have to necessarily
go in here to edit texts. It accomplishes the
exact same thing. You're basically
at the same spot. You can select your text
and make any changes. With the interface
for type here, you can just click on
any part of it and it's going to bring up
the larger interface. And what I would suggest
is that you choose a really heavy font, something like this one. And it's kinda hard to see. Highlight. I'm going to just enlarge
it a little bit here. There are so many nice ones
who we could choose from. This is the one that I did use, and this was a font
that we used or I had bought for use in the Affinity Designer
clauses that I did where I needed some nice bold text
and I want it to be into g. So I like this one. It's going to work
well for my project, but really you can work with almost any bold
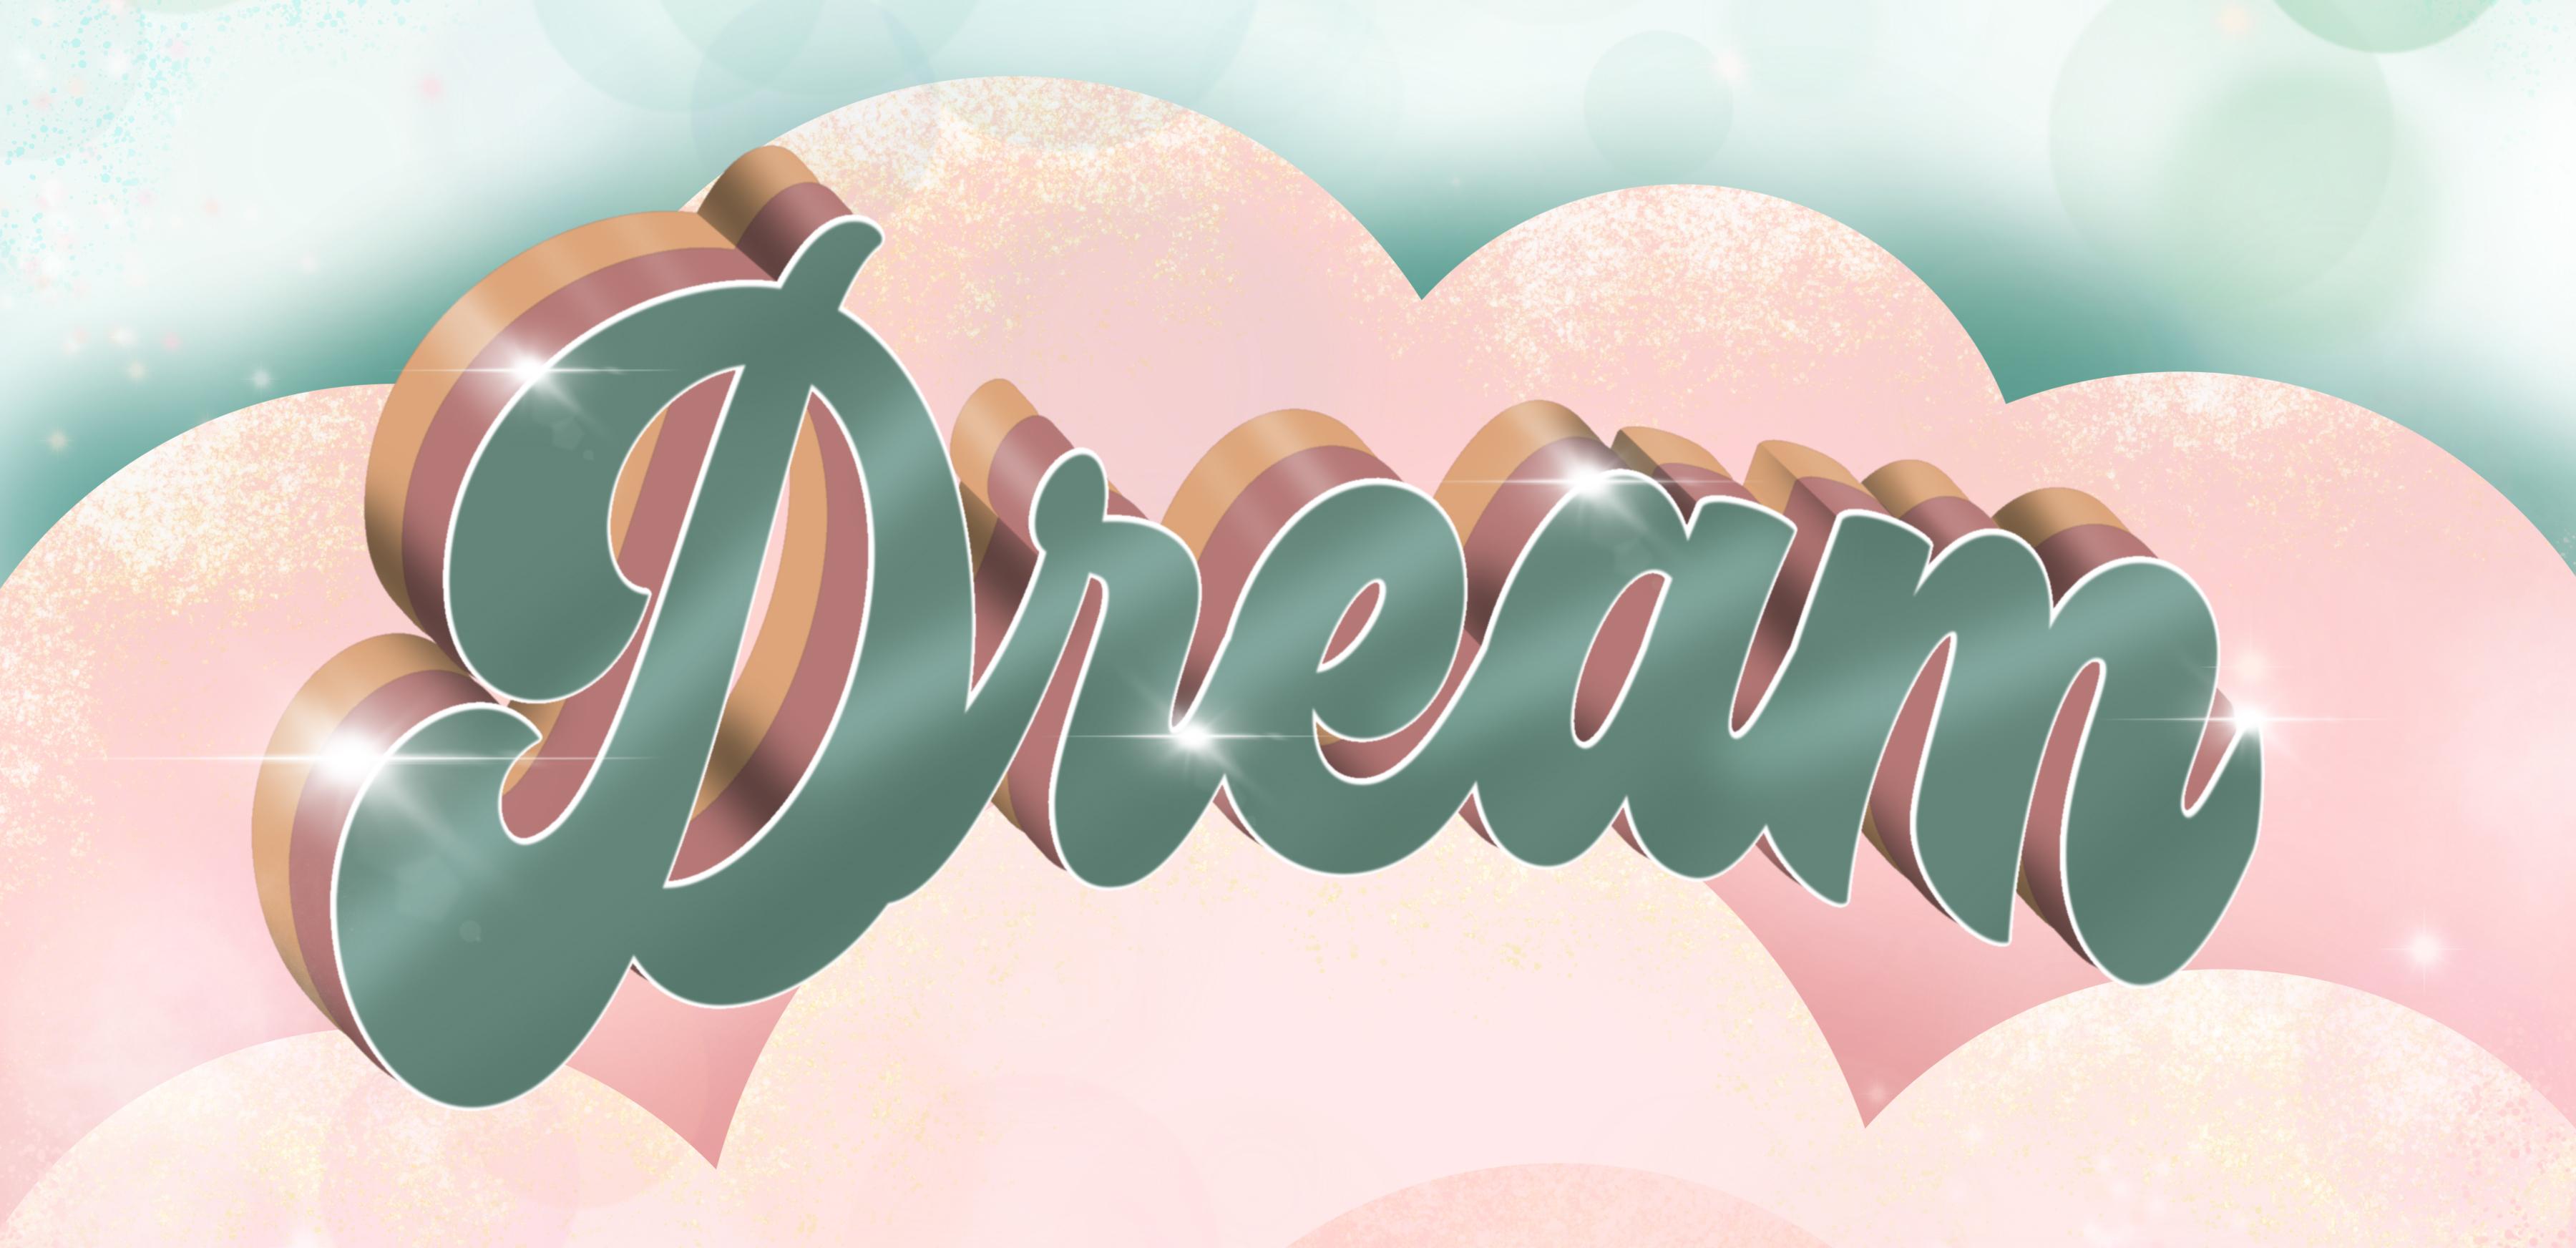
texts that you have. So decide on the look that you want and then just make a call. So I've got my lettering. It's nice and dark size-wise. Maybe I could go a
little bit bigger. And let's think of a word. I think I did the word dream, so maybe I will do, to do that one again, kind of a common word that we use quite a bit
in art licensing. I just need to enlarge
my textbox so I'll edit the text display and
just enlarge it. And it looks like
I could go bigger, so I can just enlarge it
with the Transform controls. Okay, so now let's take
another quick look at this and think about whether
or not we might want to experiment
with the shaping. I liked doing the shaping at
this stage because sometimes when you do a bunch
of alterations, texts after the fact, like let's say we did all of these drop shadows and we
had all of these outlines. I find that they aren't
as sharp if I do the manipulation or the changes in the shape at that point. So I'd rather do it right
at the beginning here. So let's just take a
look at this lettering. We can select it just by clicking on the
Selection tool there. And one of my best or
most favorite ways of doing it is using the warp. And I find that this
gives us a nice amount of control without distorting
it too extremely. So we can, I think I'm just going to put a
slight curve on it, but I find that this is
probably the best way. You can also do it. Let's de-select by
clicking on that. And now I don't know if you
had a chance to read that, but it said that the layer
has been rasterized. So when you are gonna
do changes like that, once you have made
those changes, there isn't any going back to
the altering of your texts. So you might want to before doing it,
duplicate your texts. So you've got that original untouched and then go
in and do your changes. So that was the one method and the other method would be
to go into Liquify here, set your push, and make changes
by altering in this way. The one thing I will caution
you with this though, is that sometimes end up
with slightly fuzzy edges, but it's completely up to you. I would do some experimenting. You have to be careful
with that push because depending on like imagine the brush
as a large circle. The very middle of the circle is what does the distorting. So you have to experiment with that to see if it's going to actually mess up the shape of your letter to the
point where it doesn't look the
way you want it to. Take some time to experiment
with this technique. You think something
like that could work. So either way is okay
for this project, but just keep in mind
that your layer will be rasterized and that
sometimes it introduced. A little bit of fuzziness
if you use this technique. So I'm gonna go back to using my warp and hide that other one. And I'm not gonna go
too extreme with that. I mean, that looks a bit weird. So maybe I would undo that and do a little bit
less over on this side. And remember that
you can grab it anywhere to make changes, not just the corners. So I quite liked that. And I think that what
I would do is also rotate it slightly so that my lines are a little
bit more vertical. And that's the first stage
of doing the lettering. Now what I wanna do is I want
to create the drop shadow. You've probably, or you will remember the techniques that we used when we were
creating a shadow. Let's say we wanted to just
have the basic shadow. And let's say we did this one in a darker version and we just
wanted a drop shadow there. One of the ways we could do it would be to use
the Gaussian blur and blur it and then
duplicate that several times. And it would give us that
sort of thick, deep shadow. But what I want is something
really dimensional, so I don't want to use
the Gaussian blur. What I want to use
is the Motion Blur. And this is another one
that takes a little bit of experimenting with to decide on how you really
want to work at. You can just pull from
side-to-side and you can see that it is spreading it
but only from side to side. You're not getting
that overall spread that you do with the
Gaussian blurred. But the thing that's cool
about this one is you can actually hold at an
angle so you can get the angle matching and giving you one
of those sort of straight line edges that you see in a lot
of drop shadows. Now, I've done that to
twenty-five percent and I might back that
up a little bit, maybe to 16%, because what I wanna do is have
two of these shadows. I'll leave it at dark right now. I'm eventually going
to change these to be those sort of pastel
colors that I have. But I want you to be able
to see this really well. So we've got the
motion blur on at 16%. I have pulled it basically at a 45-degree angle
from top to bottom. And now what I
wanna do with that is duplicated a few times. And you'll see this
is the same as when we did those really
thick outlines. We would duplicate
too many times, but all of those into a group, flatten or emerge the
group do it again. And you see how sharp
this is starting to get and we do
it a couple times. Again, you can put these into a group and flatten the group. And then the last thing
I would do here would be to also select the layer. And we're going to
want to fill it out. It's going to fill with
whatever color I have here. So at this point, I
could choose one of my candy floss colors
and hit Fill Layer, and then I'll get that
color as my fill. I would do that a
couple of times. One of the reasons is that it
does leave a little bit of a haze of the original
color that you had. So I would select again feel
and it disappeared already. So that's exactly what I needed. Now the cool thing
is that you can take this and line it up perfectly. And you can see here that I get a beautiful straight line right from the corner
of my lettering. And that's exactly how those dimensional letters
are supposed to look. That's exactly how
you would have that second bit of dimension. So I think we're off
to a great start here. I love what I'm seeing and I
think we can now move into the next lesson where
we're going to do some of the enhancements
to this lettering. Alright, I will see you
in the next lesson.
4. Lesson 3 Additional Dimension and Enhancements: Hi guys, welcome
to lesson three. In lesson three
year, we're gonna be using my two favorite
blend modes, add and multiply in order to add some highlights
and shadows. And then I also want to
go through and create a tiny white outline to go around the lettering to
make it really stand out. So there'll be a little bit
of experimenting there. Let's get to it
already then we've got the first drop shadow
depth that we're looking for. So let's duplicate that and I'm going to move it so
that you can actually see it. But what I wanna do here
is change the color. So the main thing
that you could do is this is probably the easiest. You can definitely
go into hue and saturation and make
your changes that way. But what I wanna do is actually select it
here and then I'm going to fill it with whatever my next color is that
I'm interested in doing. I'm going to experiment, maybe I'll try this
1 first and then we'll see if that
one looks okay. And if it doesn't, then I'll change it. So I'm going to go into here and fill the layer
with that color. And obviously this one would
have to go underneath. This is a little bit different
than the setup on my original because on that
one, as you can see, I had pulled the
shadow to this side, so I forgot to
mention that that of course that is definitely
your prerogative. You can move these shadows
and things any direction. Once you've created them though, you'll find that the don't necessarily
work in the same way. So let's line that one up. I'm lining it up right here. So you can see these
are lining up. And I'm thinking something
somewhat like this. You can definitely
use your tapping to really tighten
up the position. And actually I don't mind that maybe I will leave it that way. I just found that
for myself it was easier to pull the shadows the way I wanted them
in the first place. But now that I've
done it this way, I actually don't mind it. The other one that
I showed you to, my original also had the
shadows much deeper, so I did something
more like that. So I could still do
that because I did make the shadows big enough that I could get a good
amount of depth. So maybe I will leave it. I actually don't
mind it that much. So one of the things
that I did find was that because this lettering, that tones or pastel like a softer kind
of a color palette, that there wasn't a lot of definition between
these different, especially the front layer
to the shadow layers. And so what I wanna
do here is create that white kind of a shadow to go around the outside
of the latter rain. So we've done this before, but I think it never hurts
to repeat instructions. So I'm going to duplicate it. And then I'm going to, let's just colorize it now. So we're going to select it
and a switch to white here, or one of the really light
colors on your palette. If you want to go back to
your disk, you can do that. And to know that
it's white for sure, double-click on it and
let's fill that one. Oops. Let's select it first
and then fill it. So we've got the white. Of course it's going to
end up being underneath. But what we wanna
do with this one is to use the Gaussian blur. And we're going to
blur it and we're only going to go a
tiny little bit. So right now, keep an
eye on your blur there. And I'm going to go about 5%. So I know you can
barely see it there, but what I'm trying to do
is a really thin lines. So here we're going to do
that process of duplicating. And you can see that that 5% already gives us a
fairly heavy lines. So I don't know, I might end
up wanting to change that. We'll see. So I'm duplicating
it. I don't know. You can duplicate as many
times as you want then put it all into a group. So I got about ten
there, I think. Flatten it. Then you can duplicate it again and you see how much
thicker my line is getting. So maybe I won't duplicate it. I'm just going to try to
work with this one here. So I'm going to select
it and then fill, and that's kinda
sharpening it up. So we'll do that a few times. So select, Fill, select Fill. And in my opinion, that's thicker than
I really want. I think I'm going to go
right back to when I first had that layer before
I really blurred it. So I think that's about there. Maybe let's go back
right about there. Okay. So there it is, Where
it's just solid. So I haven't done
any blurring here. Now, I'm going to go
back to the blur and I'm only going to go I'm
going to try to present. That seems like little and
you can hardly see it there, but you'll see that as soon
as I start duplicating it, that that line thickens up. Now that might be a
little bit small, but let's just
airy through here. Group flattened, duplicate
that a few times. And you don't, that's
not bad really. So let's just do this again. Group it, Blanton,
it, duplicate it, merge it down, and then now
I'm going to do my feelings. So I'm going to select and
fill, select and fill. And I think that 2% was
exactly what I needed. So keep that in mind
when you're doing this. So select and fill
one last time, and I've given myself
a lovely clean, sharp little white
release there. So now that we've got that, let's take a look at some of the other things that
I did to the lettering in the other ones
so that you can get an idea of the type of
things to look for. So I bet you, I went 3% on this one here because
it's a little bit thicker, but I do like that other one. So I think we're
okay. So you can see here a few things that are
happening on this lettering. I have a light kind of an airbrush line going through wishes giving us some
dimension there. I've got some areas that
are a little bit darker, a little bit hard
to see because of our subtle color scheme here, but I've got a little bit of a darker area
going through there. And so those two things I
think I'm going to accomplish using the ad and
multiply blend modes. Once we're done that, then we're going to be
able to start doing some of the shadowing
and highlights on the drop shadow here. So let's go and let's work
on that lettering first, just the front, kind of
darker version of it. And it's funny when you go back from that other
document to this one, how flat this one looks. Here, let's just add a layer, make it a clipping mask. Let's change this
one to multiply. And you know that
when we're doing that and we select the
same color that when we airbrush or put a line on there and
use the Gaussian blur. Let's do it that
way just for fun. So let's do some really wide, couple of really wide
lines throughout here. You could be
methodical about it. You could say to yourself, Okay, I want it to be darker on the
bottoms of the lettering. This isn't going to
be real dimension is just going to be a suggestion. So you can do
something like that. Gaussian blur is very forgiving. So we can go in there
now and blur this. And you can see how just that slight tonal difference makes quite a impact on the
overall look of it. So again, remember you can dial it back a little
bit if you want to. And let's add another layer. And on this one we're also going to make a
new clipping mask. And this one, we're going to put the ad blending mode on it. I'm going to stay with that
color for the time being. And we're going
to experiment and see how that looks
for our highlights. So again, Posca paint marker or any thick
marker that you've got. And this time I'm kind
of going through the, what would be the
center of a lot of lettering and Gaussian blur. And you can see how that instantly gives us that
feeling of metallic. Isn't that pretty
here now you can make your adjustments as far as the depth of color
that you want, how intense you want
that difference to be. And I think I'm going
to land at about there. And I'm happy with
how that looks. So the next thing is
going to be adding the dimension to our shadows. And I think let's do
that in the next lesson.
5. Lesson 4 Shadow Highlights and Dimension: Hi guys, welcome to lesson four. Unless it for here
we're going to be really adding the highlights and shadows to the shadow itself. So to the drop shadow, we're going to add that using multiply and add blend modes. And also that technique, blurry and adding a sharp line to really have it stand out. You'll see what I mean
when we get to it. Let's get started. I think what I'm going
to do here is to kind of tone down these to
highlight the shadows. Because I wanted to do a
little bit more of that with the depth shadow and also
the dimension back here. So I'm just going to
turn this right down. And I'm gonna, I'm
gonna do here is group my two that are
my depth shadows. And I think at this point what I can do is duplicate this group. I'm going to keep one just
for safekeeping and hide it. And then this one here,
I'm going to flatten. So now these two are
actually joined together. That'll just make
it easier for doing all of the stuff that
we wanna do here. Let's go back to the original
documents so that I can show you the kind of look
that I'm trying to get here. So I'm trying to drag and create this sort
of a shadow here. But the important thing is
that I want to be able to put a really sharp edge on
any of the ones that sort of work to create
the shape of the letter. All of them are going
to have a shadow at the bottom of course. And then we're going to also
pull a highlight there. The highlight is going
to be where we'll probably add some of
this sparkle at the end. So let's go ahead and do that. And it's pretty much the exact same processes we used before. In this case, the perspective
is going in this direction. So that's what we're going to do to add that shadow
in everywhere. I'm going to grab
that same color, so that's that darkest
green that I have here. But I'm actually gonna go
even a little bit darker. And the first thing I
wanna do is shadows. I'm probably going
to end up having to use a blending mode
to make that work. In fact, maybe let's just
neutralize this to be more of a dark gray
at this point. And we're going to add a layer and create
a clipping mask. And then I'm going to use my Posca paint
marker again to pull some deep shadows
in anywhere that I think would naturally
have deep shadows. So what I wanna do
is wherever there's kind of a point in
the letters there. So wherever you see
something like this, a change in what
would be the planes. So that's one plane and
then this is another plane. So where that changes, I want to really draw
attention to that, make it nice and sharp. So I'm pulling below or above on any of
those lines there. So in a case like this with
the top of the letter, because that's got
a point there. I want to have shadow here
and I want to do that here, down in here, and then
basically all of the bottom. So like in a case like this, it's literally going
to be all one color. So I'm just going to I don't think it's going to
actually really matter because we're going
to apply that blur. And I've got the line going on this side,
you can't see it. If I were to unclip it, you would see it back. I'll keep it clipped. And same thing with here. So you're kind of almost not
even on the image itself, you're just below it. And this one, I guess we're never going to really
see anything there. But I could do it, say
along the bottom here. So probably maybe in here. So just really lightly put it in there and maybe a little
bit higher on that E. And I could put one here
because I want to do a slight change right
there and right there. So I don't know, I may
have these lines a little bit too wide
at this point. I'm going to use the blur. I think we need one
here actually as well, which is put one in here, maybe a little bit lower. And you see how I've tried
to keep the angle basically following this line right here. So that line is what's telling you the
angle that you need. So now let's blur it so you can see how much we've
really softened it up. And then what we wanna
do is an eraser, that's also the
Posca paint marker. And so you might want
to change your angle, whatever you need to
do in order to pull a straight line from wherever
there is a point like that. So we're going to go a little
bit bigger with the eraser, probably bigger than that even. And you see how I'm trying
to pull right from that. That's, that's what
they're to this spot here. And you can pull,
remember with the eraser, you can get a straight
line and then erase all of the overpaid over spray. That sharp line is exactly
what you're looking for here. So you can see how dramatic that makes that shadow as
opposed to these here. So now in cases like this
one, There's no point, there's no actual
change with the plane, so you will just
leave that one here. You would drag and
have a straight line across this way and then
erase all of that off. So wherever there is a
change in the plane, so wherever there would be like a little jog and the
lettering there, that's where you want
to sharpen it up and really emphasize
that would be very conscious of that angle
though that's really important that you keep that
same angle for everything. So when a case like this, What are we going to do here? We want that line
to go across here. And you're going to
erase all of that off. And in this case, I want the shadow to be same thing on the
side of it there. So this part here, so this is where I'm
going to draw my line. And I think here, I also
want to pull a straight line across here and erase
all of this in-between. So see how that line
follows wherever I have it. And I think in a case like this, I would have to
actually work on that, getting a little bit
more shadow in here. So that would be,
I want this to be light so that it makes
this one look dark. But the neat thing about it here that I could keep
this dark area. And one of the things I
wanted to do then it's not necessarily erase it with
a sharp line right here. So here I could switch
to an airbrush. So I'm in my eraser, but I want to choose
the airbrush. So let's locate that. It's up here somewhere. I always keep the air
brushes near the top. I'm gonna go to a soft
airbrush, not sure of the size. That's way too big. So I'm getting a little smaller. And I can erase silent off, maybe even smaller so that I don't want
to hit that at all. So this is what I'm doing is
just this area right here. So you can see how
that's worked so that the light is at the top and then it comes
down to a shadow. Light at the top comes
down to his shadow. Here. I could even use the
airbrush eraser too, dial that back just a touch. So I'm going to quickly go through and do that
on all of these. And then we're going
to do some highlights. So I'll just leave
this shadow layer for now because I can
go back and finish it. I'm going to add a layer here. I'm going to make it
into a clipping mask. And now I'm going to
do some highlights, so you can do that
again. Two methods. You could use, the
Posca paint marker and the Guassian blur, or you can opt to
go straight into your soft airbrush.
So it's up to you. Some people just find it easier to see all of these
straight lines here. This is the white paint. It's a little bit almost
looks like I'm erasing, but why don't we just put
a little bit of color in the background
here just so that we have just something to show
us that this is not erased, but that is pure white. I think I'm going to go
more to a bluey color. So now you can see
where my line is. So I'll go back to that layer. And so in this case, what I'm doing is lines, wherever there is a
plane that juts out. So wherever there's a curve on the lettering is basically
where you want that to be very careful that you don't accidentally switch to
your brush what her to your eraser because what
you want is to brush this line on and
also be careful to keep it white and also follow that angle that you've established as the
angle that you want. So here I'm putting or maybe a bit thick because
they're going to spread. I'm going to go a little bit
smaller and add one up here. You could have multiple
lines and you'll see that as soon as I blur this,
it's going to look right. So I'm blurring,
blurring, blurring. And you can see how that's
creating that look of shine. So that's about 8% and I think that's kinda
worked for that. The other thing you can do with that other layer
that you had there, decide on whether
or not black is truly the best color to use
there or whatever that was. Kinda teal color. You do want to go in here and set this to
Multiply blend mode, because that actually makes
it a lot more cohesive. So here I'm dialing
it back to about 78%. I'm on multiply. And that works better because
what it's doing now is making it look like
just darker versions of that same color. Then with the highlight, I would go in and put it on AD. Or you could decide on whether one of the
lights works better like this is the Hard Light ad definitely makes it
look very metallic key, but it might be too much. So you could also pull
that back a little bit. If you feel as though some of these are just a
little bit too bright, you could also go back with your eraser as soft
airbrush and just kind of soft and soften it just by brushing lightly
with the airbrush. And I really love it. I really think that looks
super Metallica and quite fun. So I think in the next
lesson we're probably ready to start adding
some of those twinkle. Alright, so I'll see you there. That's gonna be fun.
6. Lesson 5 Adding Clouds and Background Bling: Hi guys, welcome to lesson five. So this is the fun part. We're going to add some
of that twinkle and interests with lighting
in the background. We're going to experiment
with a few of the built-in Procreate
luminance brushes. So let's get to it. Okay, so now it's time to
have a little bit of fun and really add a bit
of Twinkle to this. I think I want to at this
point to kind of create that background that
we are aiming for. So let's take a look at
that again so you can see, so really basically it's
just sort of like clouds. So we've got some
big circles here. We'll build it up so that we've got two or three layers of it. I think she was probably good. And then we'll add some twinkle and sparkle to
that with clipping masks. So I'll show you what I think is the fastest
way to do this. So let's for now just put
all of this stuff because we know it's all
time-related into a group. You can go through and
rename this if you want. The type or typography
or whatever. And then we're going
to add a layer here. I'm actually going
to move it down. Oh, I had a blank layer
I could have used here. I'll leave that one
because we can, well, let's delete it. And I'm going to start by
using the ellipse selection. And let's just draw
a nice big circle. You can keep it
as a full circle, symmetrical full circle by
holding one finger down, we're going to fill this one, and let's just choose one
of our background color. So we're going to first
choose the color. We can change this,
but I'm going to start with a soft pink, so we're going to fill this. So we've got the
first circle here, and what we're gonna
do is duplicate. This is a nice big circle, so we know that if
we make it smaller, we can keep it nice and sharp. So I'm going to make an
arrangement of them. Again. If you use
your uniform here, you're gonna be able to keep
it as a perfect circle. And remember that if you go over the edge you
are cutting them off. So keep that in mind. I'm going to just hide
this one for now and decide on whether or not this
one needs to be changed. And I think I want it to
be a little bit smaller. And I think these I'm going
to have as my first level, so they're going
to be down here. And what's plus this
one's the other one. No, This one. Okay. So that creates my first
sort of cloud shape. I can combine these into
a group and flatten it. Then I'm going to use this
one to make my next level. And so I do want
it to be behind, so I know that's the
proper positioning of it. Let's just use Hue
and Saturation. Go quick to just change
the color of that. So I'm going to desaturate
it and lighten it. Okay, so that's
the front clouds. It doesn't matter what
keep those light. And then that back one could
be this color for now. And maybe in this case I'm going to sort of build it up so that it kind of alternates
here with that set. So maybe this one will
have four circles. So before I cut one
off at the edge there, I'm gonna do a duplication. And then that way I know I've got full circles here that I can manipulate,
Something like that. It's so quick to do
something like this. You don't realize how
effective it can be, even though it's just
such a quick idea, look how nicely that
fills out our background. So let's also group
these together. And in this case, I'm going to flatten them. And you can see
that this one would have this empty
space at the bottom. I don t think it's
100% necessary, but a kind of Bruce's
stuff to fill it in. So we've got our
two levels here. Let's go back and
look at the original. And what I did here is just a really light dusting of glitter on the top of
both of the layers. So let's go into my
glitter brushes. Aside on what we wanna do there. I've got my brushes, the brushes, a
little star on them. So that's why I can scoot them really quick because I
do use them quite a bit. And we have to decide on which one of the things
we're going to use here. So I don't know,
It's tough call, we might want
something like this, which is kind of faculty
looking sequence. So let's try that one. So we're going to
make a clipping mask. So add a layer above, make it a clipping mask. And I'm not sure what color we're just
kinda gonna go for it. So this one is not really giving us a lot of a
metallic look here. So let's try another one. Maybe this foil with light
going a little bit bigger and that's giving us
more of a metallic look, still not quite what I want, and it might be just the color. So I might be wanting to switch to a different
color here. So let's maybe
experiment with a, yellow and C, and that's blinky. Talk about bling
That's bleeding. So I like this because
you see that it's got kind of two tones to it. So that's really cool. So what I would do
here is kinda aim for up and past the
edge of it there. And I think scumbling
maybe works. So I'm adding it really lightly because I know that I can build something
like this up. So let's look at the brush
because I want to see what Shape that I've got there. So this one, this shape here
which is a combined brush. So this has got two
different shapes. And the edge of it right now is this kind of a rough
shape like this. So what you could do if
you have this brush set, I will give you a
copy of this one, but let's duplicate it. And I think I'm going
to put that right into your set right now so
that I don't forget, I'm going to drag it in and do I even have
that set made yet? I'm not sure that I made
the set yet, honestly. So let's make, I'm going
to call this 3D lettering. So let's go back to
the bling set here. This is something I
would suggest you do anyways is if you're
going to alter a brush to make a duplicate
of it and put it in a new sat for a
particular project, particular project
you're working on. So that if you do what I'm
suggesting that you do here, which is to alter that shape, that you're not affecting
your original brush. These were really complex
brushes to put together, and I know that without
a lot of experience, it's pretty hard to try to go back to what you
had originally and then you'd have to
re-import the brush set in order to get
the original one back. I'm gonna go into
the source library here and I am going to just change it to soft edge,
so something like that. And let's see how that works. So it might not make a
huge amount of difference, but I think it's a
little bit softer. You're getting less of
that sort of brush, brush edge, rough brush edge. Everything I need
to do here too, is to go into the properties
and just make it bigger. And remember that when you
have a dual brush like that, you need to enlarge
both of them, both of the shapes. So that's working
out a little bit. I don't know, maybe
it's just not the best choice that
I should have made. So let's go back to
our experiments here. This one looks like it
could have potential. Oh yeah, that's what
I'm talking about. So that is superbly a
kind of liked that gold. It's definitely
different than what I had in the original, but it's another
really cool look. So I'm going to grab that one
and put it into your set. And I'm gonna go in
and make it bigger. Now, this one is already big. So let's go into this one
that looks ginormous, but I think that's
kind of a neat look. So it's different than my
original, but pretty cool. And again, you can reduce your
opacity a little bit here. Or you could go into your
hue and saturation and experiment with
what color family you might want to have it in. So I do like the gold myself, but you can dial that
back a little bit. You could saturated or
more saturated, less. And then you can also
brighten or darken it. And I think that one probably you wouldn't want to mess around with
that one too much. So I would suggest if you have that brush set that
you definitely do some experimenting and
come up with a couple of different methods to try
just to see what works best. I would also on a
layer like this, add a little bit of
dimension in the sense that we've got some dark
going in back here. If you look at my original, I've got some dark in behind. And that's easily
accomplished either with the sample that same color, add a new layer, make it into a Clipping Mask, set this one to multiply
or Linear Burn, and then use the
big soft airbrush, set that quite large and
then aim inferred down here. And you can see that what's
happening is it starting to darken where it
goes in deep here. So that's giving a little
bit more dimension. This might be a little
dark for this lettering. So you could also go in
and lighten that original. So you could try it
with just opacity, or you could also go in with
hue and saturation here. And either bright and
that's kinda cute. That's got a real
pastel feel to it. Or you could also
change the color here. Sometimes the contrast
is better than having it as one of the
colors that's in the piece. So you can experiment with that. I mean, that doesn't
even look half bad. So think about that. Again. This is where your
artistic license comes into it and you decide on the
look that you want. I'm going to have a lot of little adjustments to make here, but I'm just trying to get through all of the
different techniques so that you know how to
move ahead with your piece. I'm going to take
some time off camera now to do some of those
little adjustments. And when I come back to you, we'll discuss all
the little things that I've done to enhance it. And we will at that point then be ready to add some of
our sparkling shine. Alright, I will see you in
that last likely last lesson. See you there. I'm gonna see you in that. What will probably
be the last lesson. Alright. See you there.
7. Lesson 6 Twinkle and Light Flair Enhancements: I've done a few little
things here that I'll point out before we get started. I added a duplicated
this big one in the background and I
brought it down here, I'm flipped actually just give an additional layer of cloud. I changed the sky
color slightly. And then I added a layer underneath all of the
different cloud shapes. And I just took my really
big airbrush, soft airbrush, and then went in and kinda
scrambled in a bit of a shadow behind the clouds to
really make them stand out. And I also darken my
lettering just a bit. So I went in and just chose
the layer that I want it On, went to hue and saturation. Then I just reduce
the brightness of it to make it a
little bit darker. I don't want to
adjust that anymore, so I'll just leave it. You can do so many different
things at this point, but I think I want
to just start by adding a tiny bit
of texture into that sky in the background. So I'm going to add a layer here doesn't
have to be clipped. And I've put into your set my fine kind of a
misty splatter. So with that, I would just scumbling and a
little bit of texture. I know it's hard to see. I could go a little bit
darker just so that you can kinda see what the
texture look like. That's what it looks like. I'm going to go a little
bit lighter though. And you can, of course go in and increase
your brush size. In this case, you
might want it nice and large so you can fill
in a little bit more, but you're really just
doing it lightly. You don't want a lot
in there is just to add a little bit of depth
to that background. So you could definitely
spray it on. You could put it everywhere
really if you wanted to, I'm going to reduce
the opacity of it. So it's just there as a really
fine and light texture. And I know with
these pastel colors, it may be hard for you to really see on the screen
what I'm doing. But I think that that just adds a little bit of
atmospheric texture. Now, you could do the
same thing by adding a layer on the top
and then going around and kinda
doing the edges so that you've got a little bit of stuff happening all around. You could have that in
more of the pink tones. And that's just kinda giving a little bit of
framing going on. And you could also use
your extra large airbrush to add just a little bit of
darkness around the edges. I mean, it's really subtle, but it does make a difference if you were to see this without
it and then with it, you would see how much
that really adds to it. And I think that the kind of
changes in value on some of these areas is going
to be what really makes our lights kinda sparkle. So that's our next step. What we wanna do now is go
into our luminance set here. Remember we found it up
here, yes, here it is. And for the background, I suggest this bokeh light. Bokeh lights are just
kinda what you would see really out-of-focus
in the distance if you're looking at lights. So it works great to add some of that atmosphere I'll just pointed out here on my original. So you can see and you
probably noticed it at first and just didn't really think about what that was. But I just atmosphere, that atmosphere we can add here. I'm going to use this same
kind of a green color. And let's put that on its own layer just in case we
want to make some changes. And you can see that it
has kind of quality, light and color
changing qualities. So depending on how
hard you press it, you get darker versions of it. I don't want it to be that dark. So I'm just going super, super light and adding a
little bit here and there. Switch to your alternate color to add a bit here in the front. And you can see that
that's going over my lettering at the
moment and I'm probably going to be moving that layer down to be below the lettering. But you can see that
that's just added a little bit of
atmosphere there. So now in the luminance sat, there are a lot of fun things that we can experiment with. But the main one that I
want to use is this flare. I think that the flare is really nice if it's done
in a really light color. And I'm going to
probably just go, actually, let's just
try straight white. So what I think I want to
do with the layer is to add it wherever I had this
kind of a highlight here. So you don't want to be
doing too many of these, but I think that we should add a new layer
here for the flares. You could label that and then just experiment with
the size that you want. That one's almost perfect. And you can see that
all it takes us or tap. And you've added
your little flair. So experiment with the size. You might want to be a
really small Twinkle. I think I liked the
slightly bigger one. And sometimes it's hard to get it exactly
where you want it. So do a little bit
of experimenting. This is another
reason why it's great to have it on a separate layer, because if you needed to, you could just select it. Let's switch to
freehand and select it. And then you could just move it around or enlarge
it if necessary. So I'm gonna do a few of these, but not too many. So I'm just looking
for highlight areas or maybe something like this at the very end of the lettering, maybe one in the middle. So what have I got here? Five of them, 12345, that might be all
we really need. I already think that's too much. If I add that kinda nice this just sort of swing
them around like this. So I'm doing kind of
like a large letter M, like a zigzag line. And that kind of works. If I was being really
methodical about it, then maybe I'd want
this one to be over here and then have
one more up here. I don't know. It doesn't make
that much of a difference. I think I'll just
leave it like that. And I really like how that has just instantly
given us that. That makes it look so dreamy. Pardon the pun, I shouldn't have y on their dreamy
would have been cute. So let's look back
at the original and see if I'm missing
anything here. And I think we've got everything going on that we
originally set out to do. This one maybe has a little bit more contrast with the shadows, so you could definitely go
in and make those changes. So at the end, that's
what you wanna do. You wanna take,
let's take all of these lettering unrelated things and slide them right into
the lettering layer. I'm going, Oh, I can't do
that because it hides it. So let's select that and
make a group out of it. That way we can
move it around or enlarge it if we feel like that would make for a better layout. And I do like that a little
bit bigger in there. And then I think I want to go in and kinda slightly darken
some of those shadows. So here I would, I think use hue and
saturation to do that. So that's kinda nice. That gives a lot of depth there. And remember that at any
point you can still go in and use your Gaussian blur. Even though we did that
originally with the airbrush, we can still go in and soften
that airbrush a little bit, just to really make it
blend out a bit better. And we can go back to
whatever layer that was where we added the
shadow for the clouds. This darker color. I think that was
this one here. Yeah. And I had full opacity there. So the only way to darken at this point would
be then to go into hue and saturation
and brightness, and then just reduce
the brightness. So these are all little
things that you can do to further
enhance your layout. But I think, I think
we've done it. What do you think? You could add a little
bit more of the lighting? You could definitely experiment with some of this other stuff, like, let's try this glimmer, add a new layer. I think I'm going to pull this
right to the very top and see what that would
look like if we added just a couple of
taps of glimmer in there. So that's just a little tiny bit more of a light treatment. I have no idea what
this light leak does. I don't know if
I've ever used it, so I'm going to put it
on a different layer. I guess it's like when you're exposing film and
a little bit of light leaks in on your film
and bleaches it out a bit. So that's definitely
a possibility. What about if we
did that in a pink like if it would mean
that that's all right. I mean, that's kind of a
neat edition so you can experiment with that nebula. No idea. Let's try that one too. Let's make it pure white and see whether that actually
looks like anything. Not really. I guess these
are things that maybe on a darker layout would turn
out completely differently. So you definitely
have to experiment. I've done just
totally passed alloc. And That's kinda got me on this particular color
scheme and look. But you could go and
experiment and I'd love to see your ideas
for something like this. There's definitely some things
that I can do here with the shadows and stuff like
that sharp shadow is great. And I probably should
have had something a little bit here or along with my lettering to really completely
flesh that out. But I think overall, I am very happy with the
finished result here. I hope you will be
with yours too. I can't wait to see
and I will wrap up. See you there.
8. Lesson 7 Closing Thoughts and Wrap Up: Hey guys, welcome
to the wrap up. I hope you're happy with this
design that you've done. I really thought that it
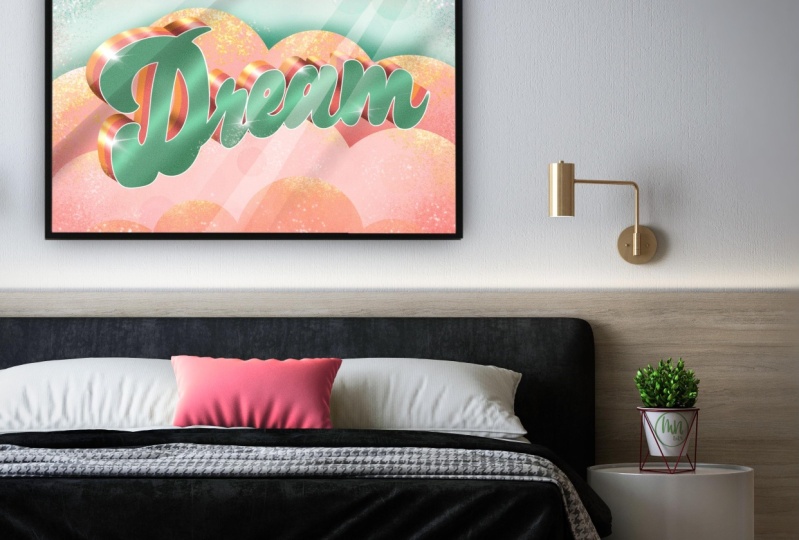
turned out quite nice. And I think it would be
a really good piece to use for some kind of wall art. So I'm giving you a nice little mock-up here that you
can experiment with. The mock-up has a solid black as a placeholder
for the picture. So what you're
gonna do is import your artwork that you've
exported as a JPEG. So it'll be all on one layer. And you're going to
bring that in and define it as a clipping mask. And it'll clip to
the black rectangle. And then you're
going to use that and resize your
artwork accordingly. So that will have your artwork on this beautiful
wall art piece. So you're gonna be able to
show off what you've created. I really hope that you
post your artwork. I love seeing what you do. And if you ever post
on Instagram or Facebook, definitely tag me. Dolores aren't counted up. I would love to see
what you've done. Thank you so much to all
of you who have been mentioning my classes when
you do post your art work. It's really helping. And I love that we're
introducing new students to everything that
we do because I think it's so much fun
and I love sharing. So anybody that I get a new student is just
exciting for me as a teacher. If you didn't use so
at the beginning of class and you like
my teaching style, I was suggesting hit the
Follow button up there. That way you're in
forward if any of my classes as I post them and anything else that I
sent out in the way of information to all my followers. And also don't
forget to check out my website and add your name
to my mailing list there you'll get a pop-up right away that allows you
to add your name. And of course,
when you're there, I would strongly
suggest that you check out everything
I have to offer. There are lots of free resources in the artist's
resources section. So definitely check that out and just take a
good look around. Thanks again so much
for hanging out with me today and I hope to see you
in all of my other classes. Bye for now.
 Delores Naskrent, Creative Explorer