Transcripts
1. Intro to Checkers, Gingham and Buffalo Check Patterns in Procreate: Hi guys and welcome. My name is Dolores Nas. Granted, I'm coming to you
from sunny, Manitoba, Canada. The class I'm bringing you
today is a very short one. And in this class
we're going to be creating a bunch of
different patterns. These are very basic patterns, very easy to create. We're going to do a
checkered pattern. We're gonna do a gig and pattern and we're gonna do
a buffalo check. I'm going to be
explaining the difference between both three
in the first lesson. Then we'll go onto
producing them. Now I wanted to mention that if you haven't done so already, hit that follow button up
there and that way you'll be informed of any of the
new classes I post. As I post them, make sure your name is on my mailing
list on my website at the Laura start dot
ca because that way you'll be informed of
anything that I post there. I'm going to be alternating
between Skillshare and my website with my classes. Just so you know, I wanted to make sure that you're
on that list as well. Like I said, this will
be a very quick class. So let's get into that
first lesson now.
2. Lesson 1 Overview and History of Gingham: Hi guys, welcome to lesson one. Lesson one here I just wanted to explain the difference
between the checkers, the Gangnam, and
the buffalo check. So I'm gonna give
you a little bit of a history and that'll
get us started. I'm in the midst of designing a bunch of
fabric collections. And one of the things that
I'm doing as a coordinate in one of the sets is to
create a Gangnam pattern. That got me thinking
about teaching a class to explain the difference
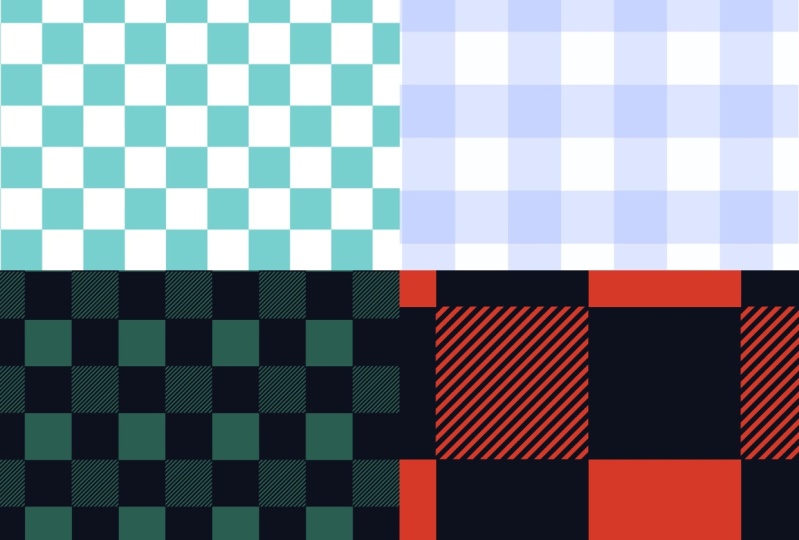
between checkers, ganglion and Buffalo plot. This class is going
to show you how to create three of the variations of checkered fabric
that I'm talking about. This is what I would
consider a checker. A checkered fabric is simply
two squares repeated. And you can see that
there's no variation in the color or tone
of the squares. You've got just a straight Ear, a straight black and white. You can have it red and white. Blue and white doesn't matter, but you won't have any shading on your
pattern whatsoever. Now, I give them like this, you can see has two different
shades of the blue. In this case, the
repeat would have the darker color is sort of in-between value
and then the white. That's what a Gangnam is send. Then the last one
is a buffalo plaid. And the variation of Buffalo apply that we're gonna do
will be just like this. We're going to have
a solid square, then the same color used
on a square beside it, but with some of the color cut-out with
stripes in this way, and then of course
the solid color. So those are the
three different ones that we're going
to take a look at. I want to talk to
you a little bit about the history of Gangnam. Like where did it
first originate? Where did it come from? I am giving you a link to
this story here because it has a great amount of information and examples
attached to it. So you could really
go and check out this article and read everything you ever wanted
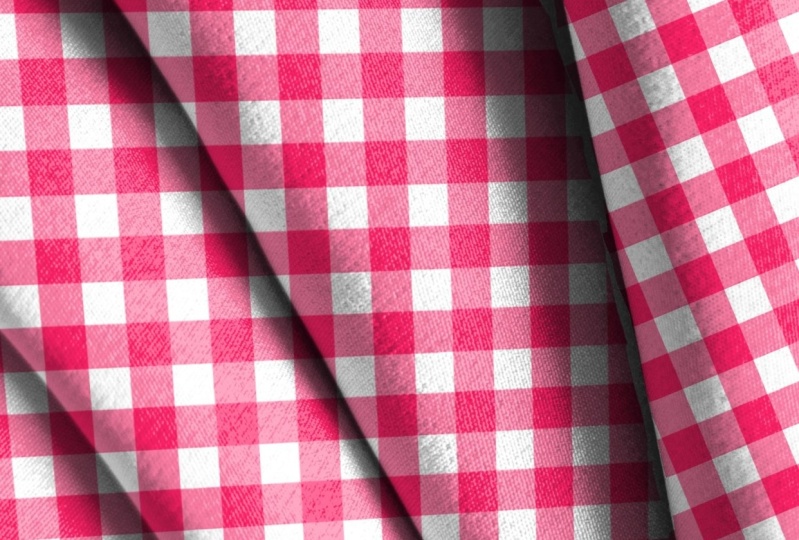
to know about Gangnam. Now, give them itself
was first made in Asia and possibly Malaysia because
the Malaysian word Gang, Gang, spelled GnG and then ANG provides the root
for the English word Gangnam. It was popularized by the Dutch and English in the 18th century. And then the pattern
is repeating checks, typically a crisp white contrasted with a
bright color that pops gig them is impossible
to screw up. Literally. It goes with just
about anything. And the beauty of it
is it can be seen in any direction and
absolutely work. Now getting him came to
the US or North America in the 19th century and it was
used to create durable close. It really took off as a
domestic fabric in 1916 when a Kansas City
designer named Nellie dawn created a pink
Gangnam house dress. She sold and q match, and this is in 1916. She sold 216 dresses at a
dollar a piece in one day. And then the dress became
a phenomenon before that, women mostly did
their own sewing to create their clothes. But in this case, it felt perfectly justifiable to spend a dollar on a dress. You can probably remember Judy Garland wearing a
dress in the Wizard of Oz. Think back and look back at a lot of the big
stars of the day. Doris Day for example, she even war give them. So it is a fabric that has
stood the test of time. I think it's just one
of those really fun and easy projects
that you can do. And the resulting
pattern that you create can of course
be used in anything, not just fabric design. You can use it for
scrapbooking, for backgrounds. We can create a brush
with it when we're done. We're gonna do all
of that in class. So let's get started. I'll meet you in
the next lesson. See you there.
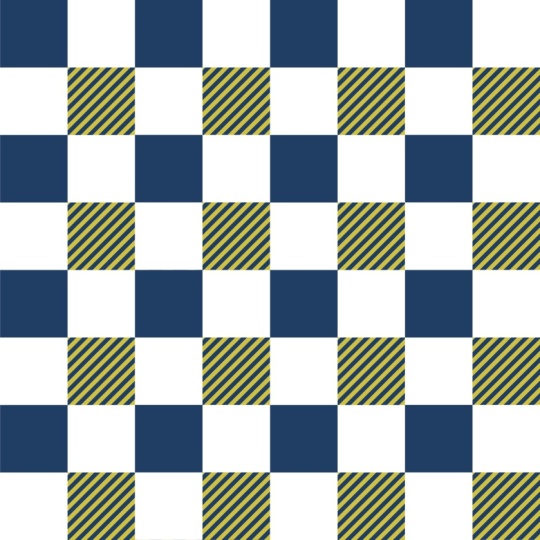
3. Lesson 2 Create a Basic Checker Pattern: Hi guys, welcome to lesson two. Lesson two here we're
going to be producing the basic checkered pattern
after we've created it. We're also going to use the pattern to create
a pattern brush. Let's get to it. Alright, let's get started
by doing the checkers first, I'm gonna use a
document ten by ten. I think that's just an easy
proportion to remember. And let's just do a black
and white checker just to be able to just change it
to any color afterwards. Because what I
plan on doing with these patterns that I
create today is make pattern brushes
that I can use in mixed media pieces are
really brand new thing. Really great backgrounds,
anything like that. So I am going to
start by going to my Canvas settings
here and go to my drawing guide,
edit drawing guide. So I can make it just four quadrants
because for checkers, that's all I need
is just the four. Now, after that first lesson, you understand that checkers
are literally full-on color and then white or whatever your
alternate is going to be. I'm just gonna do this as
a black and white checker. And I find that the
easiest way to do this is to just
layer with black. Then grab my selection tool and make sure that snapping
and magnetics is on. And then just pull from this corner until I hit
that centerpiece there. Now I can duplicate
this and drop it into the opposite corner
and then I just need to have the ground filled. So I'm going to add a layer here and fill that
one with white. Like I said, you could
do this in any color, but because I'm gonna
be making these into brushes that I can
then apply color too. And I'm perfectly good with working just
in black and white. So now we've got these three
layers which we can group. And then I'm going to
duplicate the group. I always like keeping
my initial grouping in case I want to go back
and make some changes. And then this one we
can just flatten. The cool thing about
this now is we've literally created
our pattern already. What I'm gonna do
is duplicate this, merge this one down, and then duplicate it again. And you can see I've got a perfectly good
checker pattern here. You could keep going. You could flatten
or merged those two down duplicates and
do the same process. It depends on the
scale that you want. So let me just hide this
one so it's easier. And you can see how easy it is for us to line it up perfectly. You can see that yellow line
pop-up because I've got the snapping on and without having a bunch of
other layers going on, it just perfectly snaps to
where it's supposed to. We've got our pattern
beautifully created here. And we can merge this one down. And now we're ready to create a pattern brush out of this. I bet you never thought
it would be this fast. What I'm gonna do
here is I'm going to three finger swipe
down and copy it. Then I'm going to go
into my pattern brushes. And you can duplicate a
brush that you already have. And the grain, which is
basically what we're doing here is we're going in and we're going to
the grain setting. We're going to Edit, Import. And in this case
we're gonna paste and there's my black
and white checkers. You have to hit Done here twice. But you can see here
now that I have a perfectly suitable black
and white checker brush, I can even go in and
change the scale. You can see here as
I changed the scale, what happens to the proportion of the pattern within the brush? I could also go in and change
the shape of the brush. So in this case, you can
see the jagged edges here. If I wanted to have something
a little bit more soft, I could go to the shape here, hit Edit, go to the
Source Library. Airbrush or something with
little bit of texture. Let's just try this one
for the heck of it. And you can see how
that changes the edge. You can go in and make
other adjustments. I've got Jitter on, which is what's giving
that edge there. You can take that
jitter right off and then you're gonna get
just a solid edge. And you can also go into
properties here and make your brush
quite a lot larger. Let's go back and take a look now at how that brush can work. So I'm going to add
a new layer here. And I'm going to choose a color. So that when I'm painting this, I'm not painting
black and white. I'm literally painting
the checker is right on my document and in color. Of course, at this
point you could go in and if you're working
on this one brush, you could make changes, for example, to the
color dynamics. You could change it
so that your hue can shift depending on how you
want to work your brush. It's completely up to you. This is all experimental. You can do whatever you want. You can change the
saturation, brightness, the darkness, all
that kind of stuff. The best thing to do is
to go in and experiment. It's set at red. But you can see here that because of the settings
that I put in, I'm getting those
kinds of changes. So it's changing the hue. That's mainly the only
thing I changed in there. I think the fun part
of having a brush like this is experimenting
with colors and whatnot. Basically that's
it for checkers. Now we can do the
actual gig them. In the next lesson
we're going to focus on creating the Gangnam. I'll see you there.
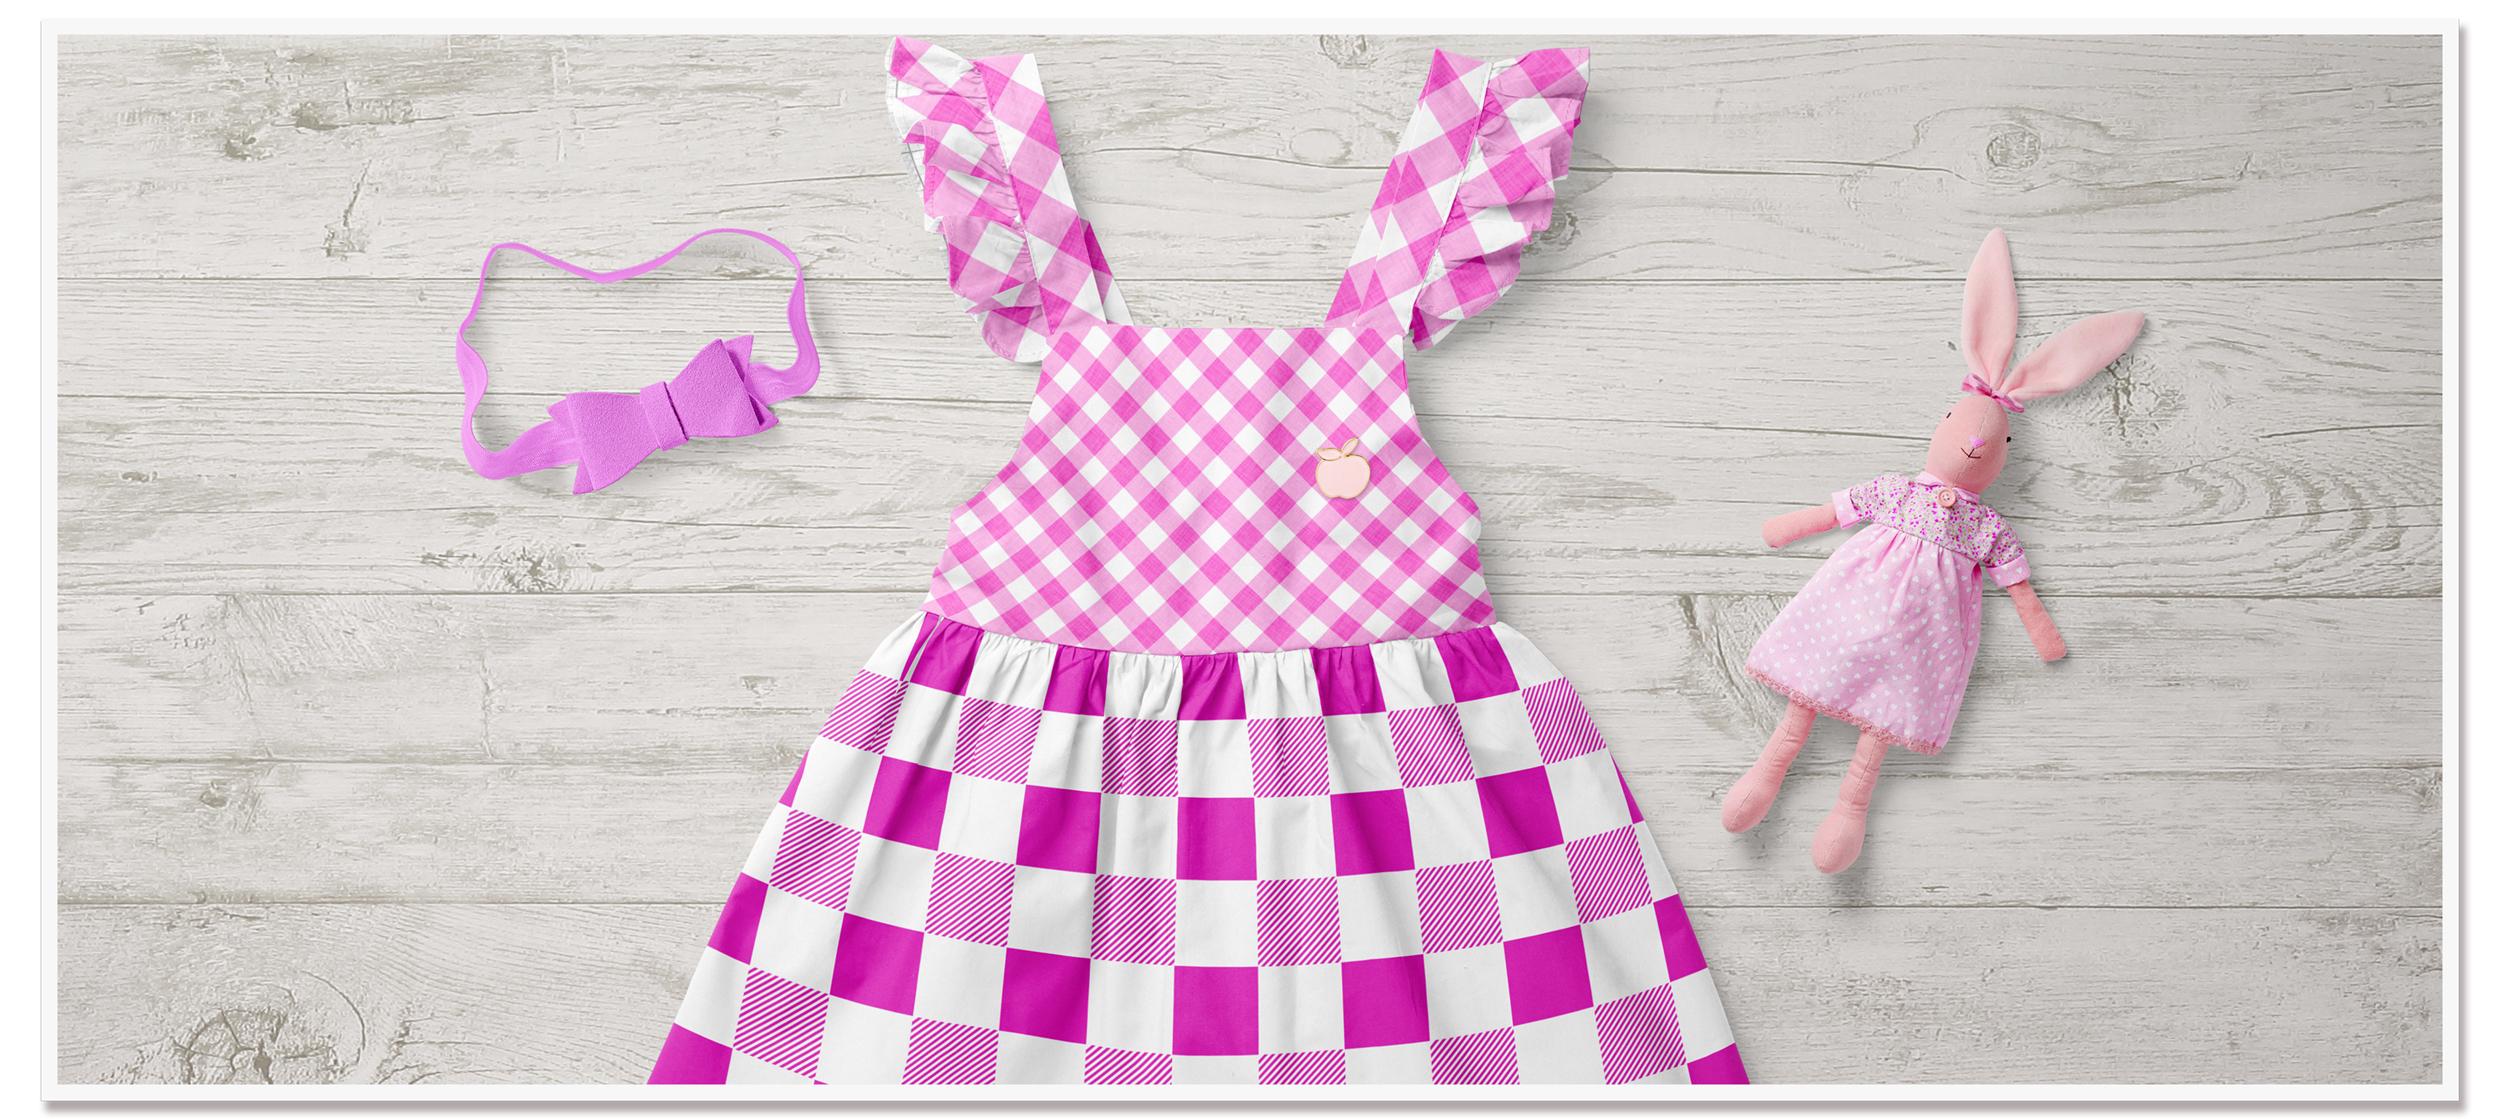
4. Lesson 3 Gingham Pattern and Brush Creation: Hi guys, welcome
to lesson three. In lesson three here we're going to be producing the Gangnam. The Gangnam is what
I have featured on my title slides with
little girl's dress. I hope you like it. It's actually super easy
to produce as well. So let's get to it. You've probably
guessed how easy it's going to be to
create our giggles. I'm going to start from scratch. So you can decide whether
you want to do it on the same document or do it
on a different document. And I'm still going to
create in black and white. I'm going to add
a new layer here, fill it with black, and then I'm going to just
put it in the one corner. Now, I'm going to
duplicate that one, but instead of bringing it to
the opposite corner there, I'm going to put it
on this side and I'm going to bring the
value of it down. I've got it at about 50% ish, I'm gonna go a little bit less. So that's 40, 41%. Let's put it at an even 40. And then let's duplicate this one and drag it
over to this side. And I know it's hard to believe, but we've actually got
our pattern there. That's all we need for
creating this gig them, I'm going to group these. Then we'll duplicate. I'll keep this one on
standby and this one here, I can now add the layer so
that I can put the white in. We're gonna drag
that to the bottom. So now we've got the
four that we need. And I can take this whole grouping and bring it into the
corner like that. I'm actually going to merge
this down because it's so easy to create flattened, I should say not
merge and I'm gonna duplicate it and bring
it over to this side, merge it down and
then duplicate it. And then we've got our gig
them just as easy as that. I could tell today's class
is going to be a short one because everything
is so easy to do. I'm going to merge this down. And now let's go ahead
and make a brush with it. So I'm going to copy
that for three fingers, swipe down and then copy, and let's just duplicate
that last brush. And remember that brush we
have those color dynamics on. I'm going to go into
the green here again, and I'm going to
paste my pattern. And you could see from
what I had there that this is double the scale of the other one because
we didn't do the repeat, we didn't make it smaller. So that could be something
that might be okay, but you might want
to go in and change. You can see here that Gangnam
has worked perfectly well. And just for the fun of it, let's go into the color dynamics and change a couple
of more things. So I'm going to have it
adjust saturation as well. I'm also going to
go into the Apple Pencil and in this case, I'm going to change how the opacity is
affected by pressure. I'm not sure if
that's going to work, but we'll see I'm going to
go back into my document. Let's hide this layer and add another one and choose a color. I'm going to just randomly choose a teal color and
let's start painting. So you can see that if I
put no pressure on it, it stays at that purple
and if I press on it, cut it is up to
that green color. I think this could be super fun and you could
definitely go in and experiment like you could keep
that brush, duplicate it. Go into the Settings
again and back to the color dynamics and change everything just to see what it's going
to look like. I'm not going to cover what
all of these different things do in this class because
I've covered it in others. And you could also go to
the Procreate website and read up about
changing color dynamics. But I guess because I've got
secondary color here and I did specify changes
with a secondary color. I'm going to turn
that off. There. You can see it's already
starting to make a difference. I think maybe what
I'll do is go in and just change a couple
of other things here. And you can see here as I apply different amount of
weight, it changes it. I mean, it's not
much different than the other version that we did. So you'd have to go
in and experiment, but you could also switch to a different color altogether and you're gonna get
a different effect. And I can see this being really fun for creating backgrounds, Let's say for scrapbooking. Or again, as a greeting card and we
fill in a whole background, just fill the entire
thing at one of the texts frames that you
created in the other class. A nice deep purple. And we'll make that bigger. And then you can of
course, fill that with a nice background color and
add your wording over top. You can go to add text
and we can type in. Let's just type the
word love, creative. Change it to a font
that you ever drop it. You can go in here and go
to Edit Text and then you can go back to doing
whatever you were doing. I'm going to use
a nice bold type. And I'm going to change the color of it to
that deep purple. And let's move it
into position here. And I mean, how cute is that? You can see that in a scrapbook page or
as a greeting card. If that plotted the background, that's just so fun
and versatile to use. The only one we have left to
do now is the buffalo check. So let's meet in the next lesson and I'll show you
how to set up that.
5. Lesson 4 Buffalo Plaid Creation: Hi guys, welcome to lesson four. Less than four here is probably the most involved pattern swatch that we're going
to create today. We're gonna do the
buffalo check and the alternating colored corner
is going to be striped. That'll give it the
contrast that we need. Let's get started. Okay, that's it for that. So let's put all of this. I'm going to put all
of this into a group and high-touch and then we can start working
on the buffalo check. So we're going to
start with black. And the first thing
I want to do is create a bit of a
stripe that we're going to use for adding the texture to our
alternate squares. I'll show you the
fastest way that I know off for making a stripe. I'm going to add a layer
here and fill it with black. Then I'm going to bring that do free form and bring
it to halfway. Why there's nothing. There we go. I want to keep this with transparency in the
background on this half. I'm going to fill
this with white. We're gonna put them
together in a group. And I'm not going to merge the two together like I did
with the other patterns. Now in order to start
working on our stripe, I'm going to duplicate
this first one I will bring right down to. I don't know why it's not snapping in the middle
here I'm going to go to my Canvas and edit the drawing guide
and just make sure that I have yeah, I guess
that's the problem. I hadn't just on vertical, so I want to switch it to
quadrant and then I think then my don't they aren't
snapping closest document. Some kind of a glitch happening there have been it up again. And then let's see, I've
got my snapping on, so it should be working
and see that right there. And it just does not want us. Strange. Try this group here. Well, I'm going to
just eyeball it. So that's going to bring
that black over top. Because what I want to
do is I also wanted to make it half size and I just don't know what's
happening here. I'm getting some kind of
a glitch with micrograms. So I'm going to
actually turn off, procreate while I'm at it. I'm gonna always all of
these open documents and things, reopen it. And I mean, that happens. There's times when the program just doesn't do what it's
supposed to be doing. So you just have to restart it just like any other program will go back into
that document there. And I'm hoping that
it's now going to work. Let me just delete that one
because we can use this one here to create our first
duplicate of the stripe. And now you see it's working. So I'm going to duplicate, drag that one down. So we're starting, we've got
part of our stripe here. Now what I can do is
duplicate this group. So I'm gonna make a subgroup within the group
and duplicate it. I'm going to throw that
white into that group. Let's shut everything else off. And I'm gonna put
it background color on here right now just so that we can see our white when
we're working with it. So you can see that the
white is just on the 1.5. You see what I want to do is just duplicate it
again so that I can use as a means to snap my stripes to the
center line there. So now that I've got that group, I'm going to duplicate it. I'm going to flatten
each of these. I wasn't gonna do that because I didn't want that
white to be in there, but I can still
eliminate that after. Now I'm gonna take each of these and bring them
to the halfway point. And you'll see that the
more times I repeated, the more stripes I'm getting. So I'm going to fast-forward
it here for you while I go ahead and repeat
this process a few times. For the strike generally, I'll do the halfway point, duplicated and then
bring it down. So I'm slowly think I'll only have to do
this one more time. So I'm going to merge
that down, duplicate it, bring that to the halfway point, and bring that to
the halfway point. So what we needed
this for is to be able to make that checker
that I wanted to. And I'm gonna show
you how to do that. We're going to merge
these two together. And what I want to
do now is rotate it. And because we've
got the snapping on, we can have it rotate to the
exact point that we want. And that's the angle
that I wanted at. So if you were doing it, you can watch your
rotation points here. But what I'm trying to do
is a 45-degree rotation. So you can either rotate
it there or you can do one hit on this rotation here. Actually, I'm going to
keep going because I want it to be that angle. And I'm thinking this is still a little bit too thick for me, so let me just go back. I'm going to duplicate it again, and I'm gonna go one more step. I'm going to merge
this one down. And then now this is what I will rotate two hundred forty
five, forty five degrees. I only need it in
this one corner here, so I'm going to bring it down. You could actually bring
it right down if you want. Or I think I'm gonna have the white kind of
at the edge there. And then let's make a new layer. We'll poor black into that. I'm going to make the
square that we need. Now this square we also
want to use for selecting and eliminating some of this extra striping
that's on the side. Let's duplicate it. And bring it down
to this corner. And let's use the
automatic selection to select everything you see I'm selecting all around that box. I can use that on this
layer for cutting. And then I can just
eliminate that square. I've got everything I need here. I'm going to show that
white square again. And now this whole thing here, I can put together so you could, you could decide whether
you want to keep those original rectangles. I mean, it's probably not that big of a deal to draw them, but I like putting
them into a group, then it's easy to flatten it. And then we can use it to
do each of the corners. Merge this down, duplicate it, and we've got our buffalo check. I'm gonna do this a little
bit of a smaller scale. So I'm going to merge
it down and I'm gonna do that process again. So I'm duplicating
and putting that one the other one and
then I can merge it down. Then I only have to
duplicate one more time. And these two, I can merge together and you know
what the next step is? We do a three-finger
swipe down and copy. Go into our brush set
that we want to add two. And let's duplicate
that brush again, going to Grain, Edit, Import and paste, hit Done. And we've got our buffalo check. I think I might in this case increase the scale
so that we can see that nice little
alternate square and maybe go back and just reset all of these
to just be normal. You can also go in and just type in the new
number that you want. That's probably faster. If we put 0, it resets it to non hit Done and add another layer
to test that out. I'm going to put my
background color back on just to white on that layer. And let's do Paul Bunyan read. You don't want to click kept
that scale the way it was because now I think the
scale is too small, so I'm gonna go back
into the grain, make it quite a bit larger. And there we go. As far as buffalo check goes, I'm gonna go into my
properties as well and bring that to the
maximum as far as size goes. Yeah, that's worked
out for buffalo check. Now the other thing you could do is fill with pure red and then go in with a black over
top to get that real mean, I don't know about you. But in Canada, this is
a very popular and it's like everybody owns something with this on it.
Yeah, there we go. Now we've created Checkers, we've created Kingdom and a buffalo check
all in one class. How fun I'm going to meet
you in the last lesson, I'm going to have
a few mock-ups to show you just for the fun of it. And yeah, that's it for today. I'll see you in the next lesson.
6. Lesson 5 Testing the Pattern on a Mock Up: Hi guys, welcome to lesson
five. Let's add five here. I just wanted to show you some finishing touches that
we can do in Photoshop. And then we're going to add
the pattern to a mockup. Let's get started. All right, I thought I'd
just give you a quick lesson on using your pattern
design to put on mock-ups. I'm on my desktop here
and I'm in Photoshop. And this is the one that I
use to do my title slides. With most of the
mockups that I buy. I have something
called Smart Objects here in my layers palette. And to change the pattern, all I need to do is double-click
on one of the shapes. Here I've pasted one of
the kingdoms that I did. In this case, I had added a texture and I
also rotated it to 45 degrees once it's
in this PSB file, which is attached to that
baby dress as a smart object. Once I pasted it in here, then it would show up
here on the dress. So if I were to change it and I've loaded my
patterns in here. So let's say I was gonna
go to this buffalo check. I could click on this
pattern fill layer and do things like reduce
the size of the checkers. I could also add an
adjustment layer here, and let's change
the color of it. Here I would hit
colorize and move my sliders here until I found
the color that I wanted. This is going to look
weird with that other one, but I just wanted to
show you how it works. I'm not sure if that's
close, but let's just hit Save here on this document and it takes a minute
because it's updating the smart objects
as you see here. And when I go back to my little dress and actually that doesn't even look out bad. I've created a new pattern
on the bottom half, on the skirt part of this
little dress that just shows you how first fatalities
to do in Photoshop. I'm gonna walk you through
each of the steps. Now, I brought in
my pattern here and in order to save it
into my patterns, right in my Photoshop here, all I need to do is hit this plus button
here are plus key. When I hit Plus, it's going
to allow me to name it. So I'll call it
munging them too, because I already
have one there. Here. It shows up right
into putting into the geometrics folder
that I have here. And if you were to
double-click on it, you could go back to the
naming of it or whatever. Now when I want to
apply it to something. So here's a greeting
card mockup. I brought in that
multicolored one I did and threw it out about
black backgrounds. I thought that might
look pretty neat and actually I really
like it quite neon. Sort of finish. If I wanted to change
this card to be this pattern that I would double-click on
that smart object. Now it opens up in its
own separate PSB file. I can fill it with that pattern. And of course the scale
is completely off, but here I can make
the adjustments. So I could go to,
let's say 20 years, Let's go 15% even and say, Okay, now here I could just leave
it in black and white if I was to save it and go
back to my greeting card, you'll see that it's replaced it with that black and white. Let's go back to this
one and we can do things like add a hue and
saturation adjustment layer. Remember that we just
need to double-click on that, double-tap on it. What we need to do
here is attach this to this by making it
into a clipping mask. And you do that by
hovering over the line that separates the two
and option clicking. And then here we would colorize it or do whatever it is that we want
to do with it. This is a nice sort
of a picnic color, picnic blanket color. I'm going to go a little
bit smaller to see if I can get that edge a
little bit nicer. You can only use round
numbers here, I guess. We'll hit OK, Save. And this is going
to totally clash with everything else
but my mock-up. But you can go in and
change the backgrounds. And you can even go in and change the envelope color here. Basically in the same way, you can just use this hue and saturation layer to
change it darker. This is going to
totally clashed, but I just wanted to
show you how it works. And wow, that's a
bright envelope. The same thing goes with
the checkered pattern. In this case, I did
exactly the same steps. Double-clicked on
the smart object. That took me into this, that I have a hue and saturation adjustment
layer in here. You can change the color to
whatever it is that you want. Let's maybe go with
a softer pink. And I want to change
the scale again. So double-clicking on the
pattern adjustment layer, and let's go about 40%. Save it. Once I go back into
my main mockup, you can see here how it
has replaced it with the one that I just
made super easy. This is in Photoshop. I understand not all of
you will own Photoshop. I plan on doing a class on how to do the mockups
in Procreate, we won't have the advantage
of the smart object, but a lot of this
stuff we can also do with the use of a mask. So that'll be a new class
for you at some point, I just wanted to quickly show you if you do have Photoshop, this is what you could
do to show off your, a new pattern that you created. And I think with
this one I go to this and last but not
least, the buffalo check. So in this case, I've created an
already pasted in the buffalo check on the
front of the shirts. So close that one down. You can see here the
ones that aren't done. So let's go into
the sleeve here. I copied that from the
other document or from the front pieces just to
make it as fast as possible. The other one, save close. And you can see now
that we've also got a really cute shirt with
that buffalo check pattern. And I did it in
this color because the cuffs were already
in this color. But if I wanted to, I could go in also and change the color of
those individual items. But it's kind of fun to see
it on a mockup in the end, I think it really helps to visualize a couple of different
things, the scale of it. You can make some
decisions about color and even the angle. So with that little baby dress, it was kinda fun to try the pattern at a
45-degree angle as well. So experiment with
stuff like that. If you do have
Photoshop, if not, I will be doing a
class on how to use mockups in Procreate. All right, that wraps up our
class for today and I will meet you in that final wrap-up
lesson. See you there.
7. Lesson 6 Conclusion and Closing Thoughts 1: Guys, thanks so much for hanging out with me
today and I hope that you're happy
with these extra little patterns that
you've created. I always suggest that
you create brushes with these because you never know
when you could use them. Sometimes you just need a quick
background or you want to add it to some mixed media
piece that you're doing. And having it there in your pattern brushes is
just the most useful thing. I use these pattern
brushes all the time. If you didn't do so at
the beginning of class, make sure you hit that
follow button up there. That way you'll be
informed of any of my classes and any of the new
things I sent out his post. Also, make sure you add your
name to my mailing list, like I mentioned
at the beginning, because there I'm gonna be
doing some alternate stuff. And of course that's where all my artists
resources are as well. So you definitely want to
be on that mailing list. Don't forget to check
out my Pinterest sites. The loris art the loris and
aspirin and teach them to low-risk aspirin for all
kinds of artists resources. And you might be interested
in checking out my stores. I've got one on Sawzall.com, that's probably my biggest one. I sell lots of cards on condyle. So you could check that. You could also
check society six. And in Canada here
at Art of where, you'd like that art of
where site because you can order your own products
with your own artwork. So maybe check that out. And yeah, definitely
practice or experiment with creating products for yourself based on some of these patterns. Use the patterns
for all kinds of different art or on different markets that you
have just to test it out. It's always fun to just
play with the scale and figure out what looks best on something that
you're designing. I really feel that
Mock-ups are the last test that you should always do
when you create a pattern. I guess that's it for today. And I'll say bye bye for now, and I will see you
in my next class. It.
 Delores Naskrent, Creative Explorer