Transcripts
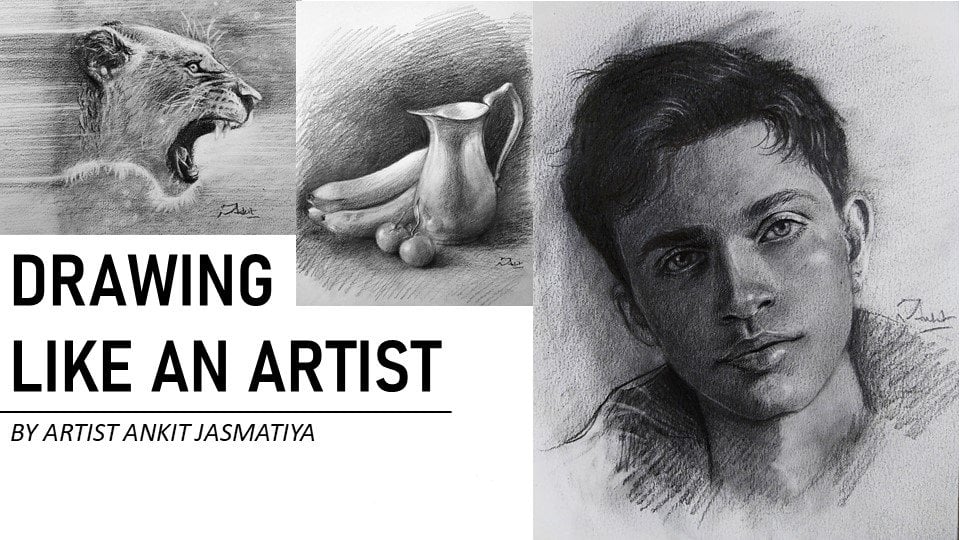
1. Introduction to Class: Hello everyone. My name is Ankit and I am welcoming your on my newest pollution class. First of all, let me tell you something about myself. I am an artist, basically based in India and I'm walking in the street for almost ten years. And basically I'm working on dry medias like pistols, graphite shuffled, and color pencils as well. So this class is basically mean for pistols. And I'm thanking you all for the last two classes. What I have uploaded on his skin shared, that worked so well. And many of you get benefited from their class as well. I'm thanking you so much for the support that you have provided me honestly share as well. I have more than three lack subscriber family on my social media cones. And where I upload to Daniel's art videos and sharing my experiences with you all. Now let's just talk about this class. This class is for pistols, and it is basically for software skills, but you will definitely come to know about differences between oil-based to software stills, hardware stills, and the other type of waste does as well, like Pan pistols as well. So this class is for feminization with a BS stills and how actually we can draw, how actually we can get better on Bed-Stuy day by day and how actually you should practice on baselines. So you will come to know everything about that. And particularly how should be your approach to achieve the base rent rain? What should be the process for that? So we will discuss each and everything about like we should also know about the materials and what are the benefits of particular material when it comes to paste and string? Because paper materials are really, really important and they have a key major role in this particular drain. So this is basically dedicated for all the pistons level and move on to really want to learn pistols in a better way and they won't do draw basins as, uh, as they are called media. This is all about the introductory thing. By the end of this class, I am a 100% showed that you will definitely learn each and everything about Bayes cells. And you will be able to draw any portraits, any still life, anything, whatever you wanted to draw. Because I have covered almost all the portions like a still life portraits and on different people and what are the results and how you should actually use only peaceful pencils and not the business of block. So we have covered almost everything, whatever based on should have. So let's have a beautiful Beginning of it, and we will learn with each other. So let's have a beginning of it.
2. Introduction to Pastels: Hello everyone. Let's just begin with the first episode. In this episode of this class, you will understand about the different type of tools, what began use in spatially for soft pistols. And what are the the mandatory tools and what are the other tools which are, which can be used? First of all, list. Let's understand about the best tools. What are the pistons and how we can basically disintegrate the different, different art materials. And for understanding it, Let's just categorized into different categories. And for this, we can differentiate pistols with the other kind of crystals with their physical property and that chemical property. So as far as the physical properties are concerned, there are two kind of basins which are soft whistles. And then the another one is the heartbeat. And there are many other companies which are making different kinds of basal-like, medium hard or medium soft vessels. These are different instance, but these two and then if we talk about the chemical property, we have oil pistols as far as the oil properties are concerned. Okay. So there are three different thing. What we can see or hear the Haar basis software cylinder and the oil-based hills. You know, first of all, understand about the soft crystals, which is very important because all these episodes and this class is basically dedicated for soft pistols drawing. So you must understand about soft pistols and what are the different ways to use it and how you can identify the software Eastern, and how we should basically, you use soft pistols, different styles. So first of all, let's see, this is the software still what I am going to use, the brands. And I'm not here to basically let you under understand about marketing the brand thing. And here to basically let you know, though, pistols and the property you can use whatever brand you want. And this is basically how you identify this office. And whenever you are rubbed video finger with a core, you can easily get the, get the element, the dry pistols element. And then over here as well, you can see if, if it is a right, it is very much, very much Hugh separative tendency which can easily orally with another, another tool. And this is basically a very, very important as far as the shape of the pistons are concerned is what I have legacy nor here. That is the rectangular, square shaped based stuns. The another one which is here. This is an, a different ship having a different shape and shape are very important when you are not going to draw something and how comfortable you are with the leadership team. So let's see this one as well. These are cylindrical one, these are the circular one. And with a half stick of size, which is very comfortable in holding. And you can see these are all also very soft. Wherever you are in love with your hand, you can see and feel that, that boundary element or deal on your head very easily. So this is the way you must identify the software installs as well. Also, you can use it in a different manner. You can use the sites of the baseline as well as the tip of the pieces that we will discuss about later. How to hold the pistons in a different manner. And you, whenever you are using it in basically changed, it's shaped like this. Many of the other artists actually actually sharpen these pistons as well for getting the, getting the highlighted points as well. That we will also see how we can basically change its shape as well. And there is another kind of crystal. This is the last one. This is hard, obviously you can see the stick or here, this is harder as compared to this bit shinier. And you can't even easily get yet the lines. You can see that I have to put some pressure on the the hand to get the basic lines under my hand. So it basically understand how the, how much the probability element is there, the software, the pistol is. The more the body element. More than pestilence software.
3. Pastels properties: And the contribution of the first episode. In this episode, we will discuss about how you can basically see the Pistols, which are soft in nature and hard in nature and how they will really getting things or paper. So this is the one type of soft pistol Would I have seen over here? And this one is another type of software student. There are two different kind of software, so you can easily see the outweigh element. The difference in the production of boundary adamant in Boulder software still has the right one is less powder creating element. And the left one is more software as compared to the generation of powder elements. And let's see the, the harder one as well, the hard surface, you can see that the soft crystals are very soft in nature. And if you're just using your fingers to mythically smudge these venues, they can easily spread over onto the paper. Now let's see this heartbeat style as well. So the hard pistol is basically less production of the element and you can basically define the lines as well. Basically defined the venues as well, very, very confidently. As far as the smudging is concerned, you can have you can have the option of that as well. But the powders production is very less. You have the option of smudging it using your finger as well. You can do that. But you have to put a little bit more pressure as compared to the soft crystals. Now let's see about the oil pistols. They are chemically different product as well. And because they are having oil into their core as the which will really don't allow the allow the piston store to get setter under the table. You'll see that these are, these are the patches of oil which being revealed from the Pistols onto the cardboard on the backside of the Pistons. And these are the oil pistols. What I usually use. You can see the merit is very strong enough to hold the boundary element into it. And it won't allow, basically due to overlay onto any paper that easily. You can see that how it basically overlay onto the paper has spent. And there is no such powdery thing onto the paper. There is no such dust or powder which basically come when you are using these pistons. You can it's much these basins as well as similar to the soft distance but little bit difficulty. You can find that you have to put some pressure. What I am doing, you can see or hear and I'm just putting the heart pressure onto the, onto the paper. That that will really help me to do is much these value. So that you can see I have already applied to layers and there's no such element, dust, element, powder, dry powder element. There's no such thing as theory. This is all about different properties of different pistons. And see you in the next episode.
4. Intro: Pan Pastels surprise: So this is the step owners episode in which you will learn about band pistons and what our pan pistols and what are their qualities, what are their properties? So this is a glimpse of that particular product. We will definitely make a particular episode wise class on bandwidths are drying as well in the coming days. But here you just have to see the product. So let's see this product as well.
5. Pan Pastels surprise: So this is very surprising thing that we have another product which is very different and very unique one. Let's see what, what are these kind of products? So these are basically bamboo stools and this is quite different as compared to the premium space tells what we have discussed in the last episodes. What are these? So these are these gaming different bands. And you can see that how a y print BR, the production is very vibrant and there are specific tools which can be used to get these crystals onto the tools and smudge it onto your paper. These are whenever, if we're going to talk about the production, and production is very fine, very smooth. But at the same time it's, let's powder creating onto the paper. But it's very small and you can basically use these pistons like append things onto the paper directly in don't, you don't need any water or any other thing. Basically is much these values. You can see how easily you can orderly. Lighter values over the dao can end with alcohol use onto the knitr backgrounds. So this is the xy introduction to bank pistols. And I just want you to get the FMLA rotation with these kinds of questions as well.
6. INTRO : Pastel Pencils: And this episode we will learn about pacing pencils and how actually pencils can, can create a major difference in the particular drawing and how helpful they are formed pistols going because pistol block are very thick and it's very difficult for basically for someone to get the details from them. So Bissell Benson's obviously have particular person to basically get better details onto it. So let's see about business pencils and spit.
7. Pastel pencils: Now let's talk about base utensils. What are their use and how we can basically utilize these pencils with a soft pistols blocks as well. And how we can individually use them for making a beautiful basal drain. So these are the pencils which are been used many of the artists solely and as well as when the pistol blocks, these pencils are very premium pencils as well. But at the same time they are very efficient and very so you can see these pencil. They are very beautiful and they are having a very thick core as well insight into it. What you can see over here. And these pencils are very Luke ways. They are very similar to normal colored pencils. But inside the core it is very much different. They are very powder creating pencils and they must do to have a very soft core as well. You can see or hear they are very career producing. At the same time they are creating dusts onto the paper so that you can easily blend these pistols. Because another soft basis or you just can draw our whole bow plane using these pencils only as well. But as far as they are very expensive, it's good to avoid using these pencils only. That, that would be more economic to mixing these pencils with another pistol blocks as well, which make you more efficient and more economic. As far as I wanted to read, things are concerns. So they are very beautifully built pencils. And we will see in an upcoming episode how we can utilize these pencils as well.
8. INTRO: Papers type: So this is a very important episode of this class because we will be going to discuss about the peoples and what are the papers which are possible to draw pistons rang because every paper is not mean for piston ring. Like if someone want to draw on the Bristol paper ops or if someone want to draw on the smoothly plant, it's very difficult for someone to draw peaceful drying onto down those paper as well. Because you need a rough textured paper you need and rough paper, which does actually have some Teton to it or some texture onto it, which really hold the boundary element of the Pistols. So this episode is very important. You will be going to learn every product in the market these days and what are the possibilities we can achieve onto those papers as well. So watch it very closely.
9. Paper types: Textured: Well, this is very important episode of this class as we are going to talk about papers. And people really play a very major rule whenever you're talking about pistols. Because every paper is not suitable for pistols as well. Like if someone wants to use every paper, it's not that suitable for our any smooth, but it's not bad suitable for history. So this is very important class and all your doubts men definitely component by steam disk episode desperate. So first of all, software-based cells are very boundary as we have already discussed. So it definitely requires some greens are some texture on the paper which actually hold these, these powers are, it should have in a deeper manner. We should see that it would have some teeth are taught on the paper as well, which definitely hold those powders into their teeth or enter their grain as well. So whenever you are going to deciding paper, suitable paper, for instance, you must have seen this thing that the paper mustard have some grains, some texture on. Some something, a angulated something which is which is having a property to hold some powder thing on doing. Like if someone wants to use a Bristol paper for PESTEL is not a very narrow recommended thing or pieces. So we can easily categorize space two papers required. This will be inverse. That is, money is textured one down, another one is standard one. And the third one is that green even. So you can see on here that I have write down these papers as well onto the paper. And after tools in these papers, you must have an understanding of the sites. Like few companies, make the two different sides of the paper media to different properties like this. One is a texture LAN you can see there is a honeycomb or diamond texture onto the paper. Can see we're in and then the opposing side is the greeny site is even cite and this there is a little smooth as compared to the actual outside. You can see that these are detections. Mitch easily can be identified by using it closely. So the texture can be of 9-1-1. And that can again be of honeycomb structures as well. So these are the names and you can, if you want to buy on somewhere, so you must have knowledge of these tetra name as well. So let's see a few of the drawing what I have done using detection side of the papers or this one is the first string I have used a fixated as well-known book. So you can see that the texture is very much rebelling. And it showing that square shapes all donated a honeycomb ship. And it gradient the drying very beautiful and it definitely will. Let you have a beautiful understanding of advantages of pistols as well. Let's see the other one. This one is another one using these textured papers. So this will definitely help you to create a blue deeper texture onto the paper and retain the beauty of the growing ins. But, and now in the coming episode, we will discuss about the other side of the paper and how we can draw it onto that as well. And that standard papers as well we will discuss in the next coming episode. Let us discuss about under papers as well.
10. Paper types: Sanded & grains: Now lets us talk about a standard rivers and why they are being used widely by many of the artists for premium quantity finished work as well. So if you want to draw something which is very realistic and very hyper-realistic, These people are very much used by many of the artists. These are the Mac papers, these are based on MAC paper. And this is basically the cardboard on which the layer of the sand has been ablated. And, or, or to that standard thing you have to draw. And as its name suggests, it's very grainy, very sandy. And you can see my art work. I'm just taking this for the example so that you can easily understand that how much finishing you can do in a very small piece of time like this I have completed and just within three hours. And you can actually get the hair line details as well, which is very difficult and pistols as well. But by using the sand paper, you can actually achieve the most realistic and hyper-realistic work in a very simple manner. Also, these people claim that you don't need to use any kind of fixative as it retain all the Holden dry basins or don't do it and you don't need to any kind of thing. Then again, there is a buttery pre-party also given with the paper so that you can retain it for the longest time and further, you don't need any kind of application of executive to retain it for longer time. So it is basically finished artworks, realistic artworks. And, but at the same time, it's a little bit costly as compared with the other people. These people are very costly in terms of price and availability is also a little bit big issue as compare to the other person will. Now, let's see the grainy one. This one is the greening paper, which is adding some tools, some medium, medium tools, paper. You can see our art again, kind of paper quality paper on which you can use mixed media. So this milk read a definitely a beautiful drawing. What I have done over here, you can see it's a beautiful scenery. But at the same time, for retaining piston for a longer time, it is a very big challenge. And for that you can actually have to use some kind of fixating or you need to put some butter paper onto it so that you can retain it and don't allow anyone to touch these baseline. You can see that I have used fixating on to it. That's why it's not coming out so easily. As compared. If I didn't use that, it will definitely come out as you've seen. And the scenery thing now, or this one is another example. Another beautiful example of the drawing. What I have done on the greening paper and I used to fix a demo here. So you can see that not much of color is coming out after using the fixed later, but why it is always a colored that, that come out so easily. So you always have to have a few more list in terms of that. And I always try to retain it by using the wetter papers as well. And also a minimum, we came to conclusion. We have to say that grainy paper are less texture and less deed. I must adapt, say this as compared to the election one. But at the same time it's very economic. And anyone who want to, I want to pose to you the piston blame. You can actually use these paper very effectively. And these are very economic paper. And I also suggest you to begin with these people that green, even Ashford ones. Once you get hands-on this pistols think, then you can move to undersand it when as, because they are quite costlier as compared to these two. And the last most important LinkdIn. What you are going to use for doing it should always have some, don't actually use. It has to be don't paper. Don't use whitepaper for peaceful, right? Because it's a very important thing to understand, because many of the business are asking for that, right pistol is a very important tool for getting the highlights in pistol drawing, as in the other media like colored pencil. You don't have to do much with the white colored pencil. But here, there are significant amount of role that has been given to weight based on lock piston colors on top on one as well. So it's very important to use them.
11. INTRO: Analyzing Papers: In this episode, you will learn about process for blending. What should be the tool that has been used for blending the pistols? Because pistols you know that they are very dry and their powder elements. So it is very important for someone to basically known this fact that how he should blend it on or how much that particular thing. So this episode is basically mean for that as well. You have to use your fingers and you may have other options as well. And what are those options we will come to see in this episode? So let's have a beginning of this episode as well.
12. Analyzing Papers: So now we will see all the three papers and we'll see how the different smudging and different results can be optic. So just retracting the topmost paper is the sand M1, which is the right finance val. So it can't be that much use, but we can see that how the smudging thing and how they will begin our visceral blop onto it. And then the dream and the gray one, that is the green paper. And the bottom most, which is the black one. It is a textural element, which is having honeycomb texture on, you can say the diamond detection as well. So let's just understand this thing that how that can be different on different inverse of resistance and how the paper play a major role in eastern drawings. So I'm just using normal soft pistol is block. Just getting some some highlights onto the beam person, some layer onto their people equally. I am putting equal pressure every day. And you can see that honeycomb V1 is creating that texture of the paper. And other ones, don't that effect often do that. Now if you want to smudge so for signed it, but it is very difficult. If you want those much, the single color, you have to have two different colors for smart inequality. Now, for the green one, you can do very easily and you can see already and I'm just applying the same paper using my fingers. And you can see that the results are very beautiful. And in the last one, the tech shirt on, you can see that blending. It's so beautifully done. So this is why most of the our desk deals textured paper or an economic textured paper, which allowed them, though basically, is magic very beautifully. Standard one is not that easy even to blend actually. And also the single color won't let you those such requirement. No such thing as well. When you are using DO different color, I'm using here. Then there is the option of bending them. Now let's try four door different colors and using the green one and the Regiment. And now I'm trying to mix them, both of them using the fingertip. So while mixing it, you can see that then the door tricolor are there in the Santa paper. That is a possibility where you can actually bend them. Similarly, I am doing it for the green paper as well. And by this, you can easily see and easily understand the differences of the paper and why. You must want to have a knowledge of this thing. When to use which refer to now. Or here, you can see that the blending can be more drastic and can be more easy as compared to the US and admin. And the turbine, the tetra Edelman. As you know, it definitely allow. You don't you don't know as much blending as you can see where here I'm using the fingers. And you can see that it is very simple, very easy for the textured paper to be, which can easily be blended for soft vessels thing. So that is why many of the artists are using the texture honeycomb papers for festival, but there are different usage of different papers like sandpaper is used for realistic and hyper-realistic grain. And there's a best paper and liberal and most premium when as, when the green pepper is basically used for the purpose made, you want to have a paper which is having less and less textures. So this is the way you can easily access different papers for different usages and their limitations. So this one is the standard one is difficult to blend. Net as what we have seen or here. And green one is easy to blend. And the third one is the easiest, very easy TO basically blend the Pistols. So this is all about how the paper again, react.
13. Process for pastels: In this episode, we're going to talk about the process. What should be the process for peace to drain, and how we should actually initiate and how we should actually finish it. And what should be the blending techniques that we should use for pistols? Because it is very important though, how you should use these boundary element onto your grain and what are the tools basically you can use for naming it up. So basically there are many techniques for blending it up. There are techniques which doesn't require the blending the hazard. But I will definitely let you know that how actually you should work on it and how you should lend is desperate. So first thing that most of the artists use, NAT is finger. Finger is the most easiest and the most convenient way to basically blend it up and using the coalition that I did. The most. Most recent techniques, most pernicious technique is very, I'm using the centralism, using my own fingers and try to do not try to put that much of pressure onto the paper. You should armies use less spatial initially so that you can blend it evenly. So these are the results. Forefinger. Does a tool which is available in the market. And these tools are basically used for band piston ring. But I have seen that many of the artists are using it for the software, something as bad. And few which, which are having a few program with a finger drained as they having lot of selecting in their hand. So for them, the stool are just a boon and they can actually blend pistons may conveniently without implementing their finger as it gets, if it gets wet, it will definitely create a problem for bending surfaces. So these tools are very helpful for those who don't want to use their fingers has been, these are software tool that's available in the market. And it is basically for Pan pistons tin, but many of the artists I'm using it under normal software source has been. So always, remember this thing that if you are using the finger, it's always better. And onlys even get definitely better results as compared to South result. As this tool won't allow, that might've smooth rendering. So this is very important for anyone to see. But if somebody does not have that much of oxygen, that is, if it is having, many of you have seen, many of the historian doesn't have this kind of problem that they get. And their hands sweat too early. And Darfur 20. So for them, this tool is, is automated V, we can see that I have been told a friend colonized, very remarkably. So. And that is also possible for you to actually do the branding thing as red. So you can see the difference as the fingers. The vending is not that effective, that, that hard, but very small transitions. And in that definitely landed completely and then remove the Pistols from the people. So they're a little bit not that economic side. As far as the fingers are concerned. As most of the basins had been kept in the dorm that we don't want actually. So using the finger is the best way to basically blend this in. Other, many people are asking for whether we can use a paper, are brought, soap cloth can be used, and many of the artists are using it. God can be used. But paper, I don't think that paper is that much of audit people to stump is not sufficient enough to basically blend up salt crystals. Now, we're going to discuss about the approach of what should be the approach of making a drawing. So the only apricots that, that is a best approach you can actually use for a pistol drying that is, from going from dark to light. This is the only approach that you can use in every offload. Ryan and I am using it for the last four to five years almost. And getting the best results always. So whenever you see anything you want to draw using the beast alone, you paint using the piston. Always find out the most darkest portion, draw it, and identify it on the paper, and then go with the lighter domes. As always remember to go from dark to light. If you reverse the process, then it wouldn't be difficult for you to basically more time also, first of all, and then it does not conveniently, because at the end you again have to use a lighter tones. So it will enhance the process team. So the best approach for drying is from going from dark to light. And this distinguished we'll discuss in the next episode. We'll take our inferences valid example as well, how we should actually do such thing. You can see or hear as well, I have created a melt and how the lighter domes can be actually books so profoundly wonder Dow Jones has been. You can see that I know I'm using the white light is very much convenient to again, the highlight thing in software sand, you can see that it is very easily orderly. That are cartoons is that. So this is all about the approach. And the next episode we're going to discuss in detail with the reference thing. But always remember that you should go from dark to light tones.
14. Holding pastels: So this is again, a bonus episode of how he should hold a pistols. So holding pistol and gripping OR pistol is something which is very important part of getting the effect drying and how you actually master in based. And so there are many kind of holding the pistons like you can see the shape of the pistol. First that you have to understand this, this piece to be delivered. I am using here desired in the form of law, but they are cylindrical in shape. So they are again, a half sized half block. You can save money, her thing it half log. And this one, the other one is having a rectangular shape. They're not circular. And if you really rapid out sticker, you can see it's shaped, which is rectangular in size, and many can use it from breaking it from the center to making it a half say shape. Because the gripping is something which is very, very important for us and when to change the style of drying and how he should, he should hold the piece tools. So you can see that here I am using a pen holder grip, which is a very common grip. How you hold a pencil or pen, this is something that you do it in this state. Another kinase using the size of the Pistols. This is time. And it really cover up the people in most prominently in the time. And it reaching really effect the time taken by you and the area on which you want to draw. So it is something position which is known as LIDAR and sites. Both the conditions are used by the artist. And this one is also the site if it's having the long side. So it really help you to basically use the most of the pistols and try to cover up the, the people in less time. And it really affect the drying as well, how they affect the drying that we will talk that in the coming episodes and how really you can change the venues. You can bury their techniques and by using the sites of the base, this is very important part because you have to understand it. And there is another way to hold it, having it vertically and using the surplus in meter. So both the three methods which I have told you here, pinhole and then the sides. And the third one is a circle ism. So all these techniques, all these holding of the particular beastly are really helpful for you to understand and how you should use them. So it's up when you basically how you can basically use the pistols. But my choices using the sides of the pistons and many of the other artists are basically using it. So I hope you understand the point.
15. INTRO: Dark to light Approach: This is very important if he sold, you have to understand the approach or should we your approach to basically get the reserves and how you should approach in a better way and how you should approach in a particular way to get the particular isms. So we will discuss about dark blue light approach, what I had been using it for the m, for the ears, and what other artists are also using these approaches when there are many artists who are using the Foundation approach as well, in which they overlay a particular foundation, Leguin foundation and when. And then they approach with the other layers as well. But here we shall discuss about the dark to light approach. So what do you need to do? Basically whenever we want to draw anything, suppose any object on any board rate. You first have to identify the dark portion on that particular subject. For that, what you need to do actually, you have to squeeze your rise a bit and see the possible dark patches onto that particular subject. Then she read on the paper first, you have to use the brown, the number, and then the black. Find, find these colors first, and then find the lighter portions. And this is the, one of the most advantages thing in the pace of learning because you can actually add to you lighter values onto the drying later on as well. And this is something which really created a major difference with pistols and with other medias like colored pencil it, you do not have that kind of possibility. A few, particularly draw something dark. You're not able to lighten it up with the other, other lighter colors. But in based tools, you actually can achieve dark tones first and then lighter tone onto them, or link lighter tones as well. So let's see this episode. This is very important episode in which we will talk about the approach thing. So which will definitely help you to draw anything using the pistons.
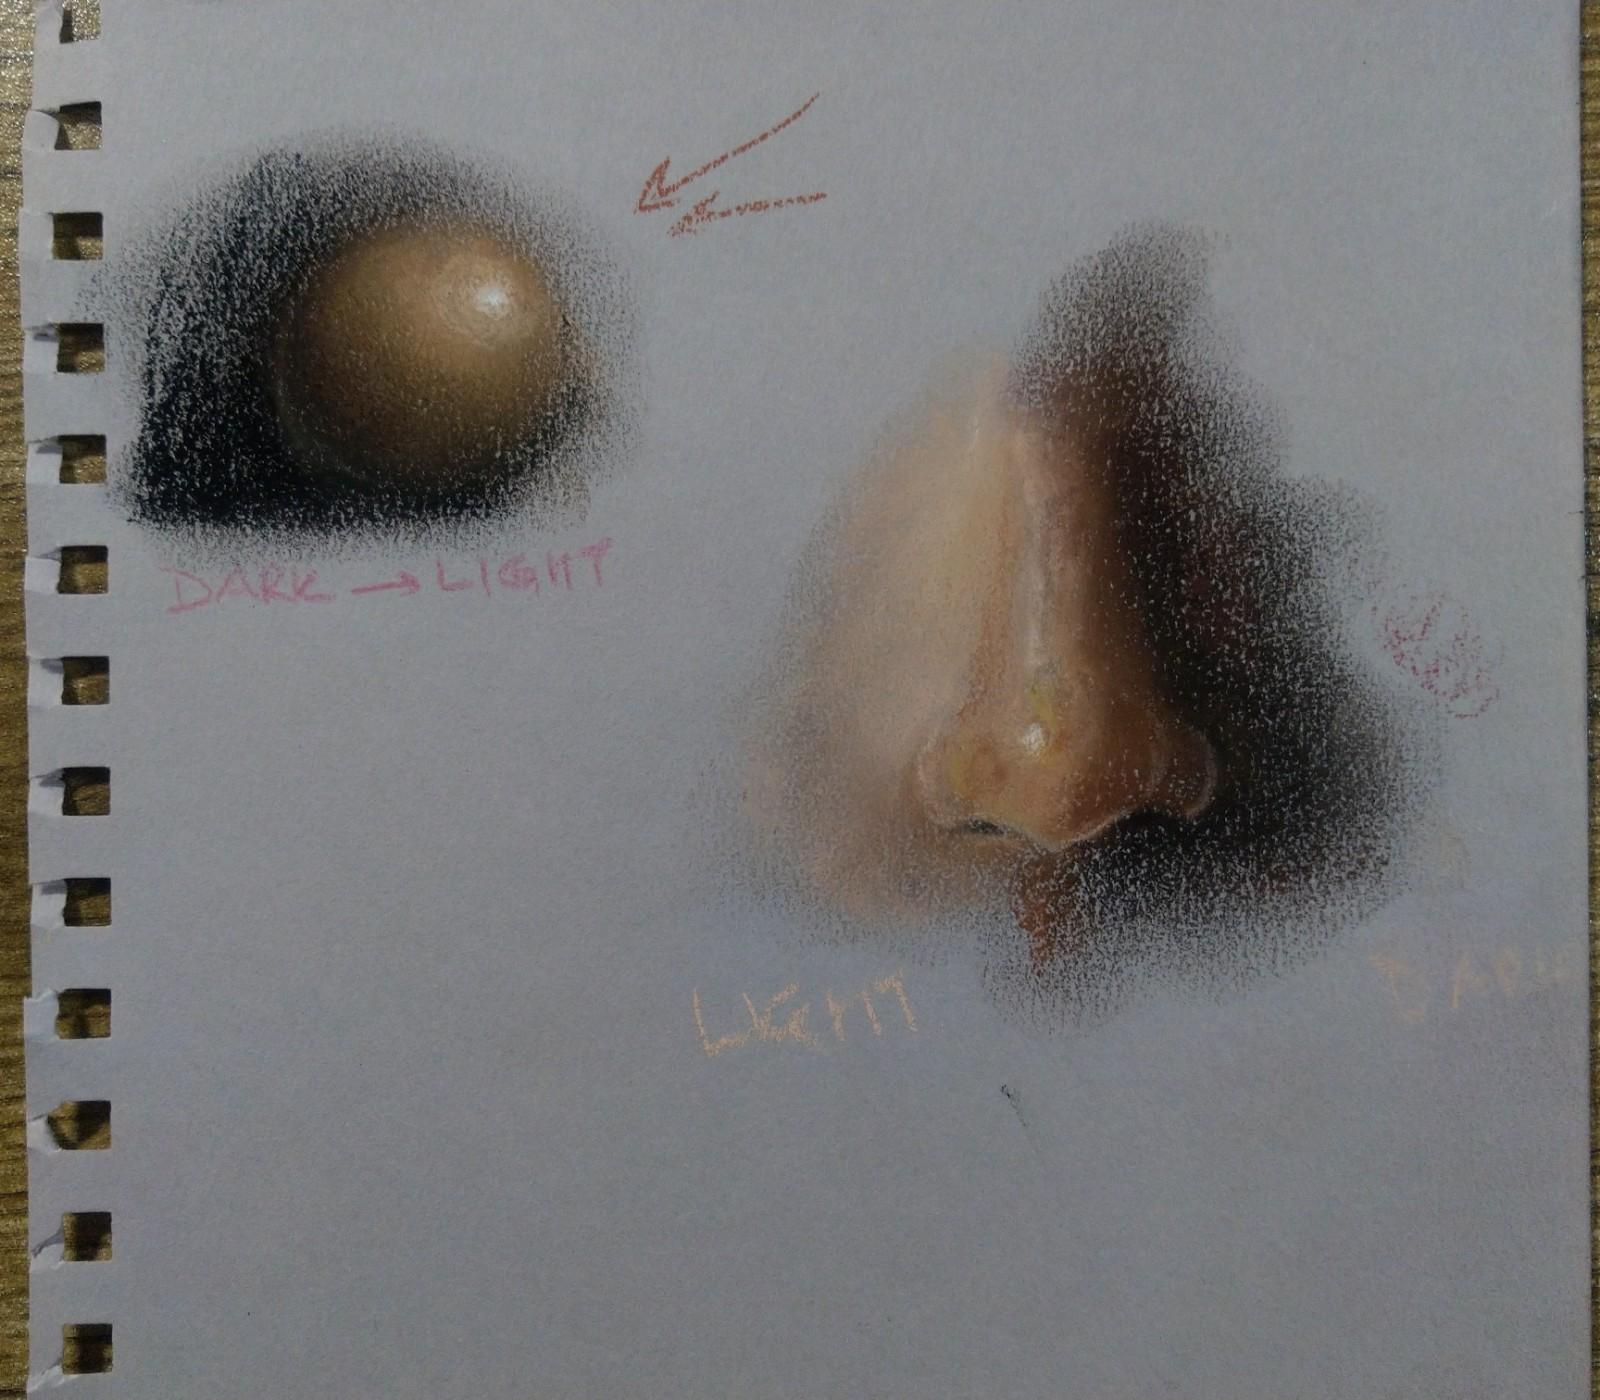
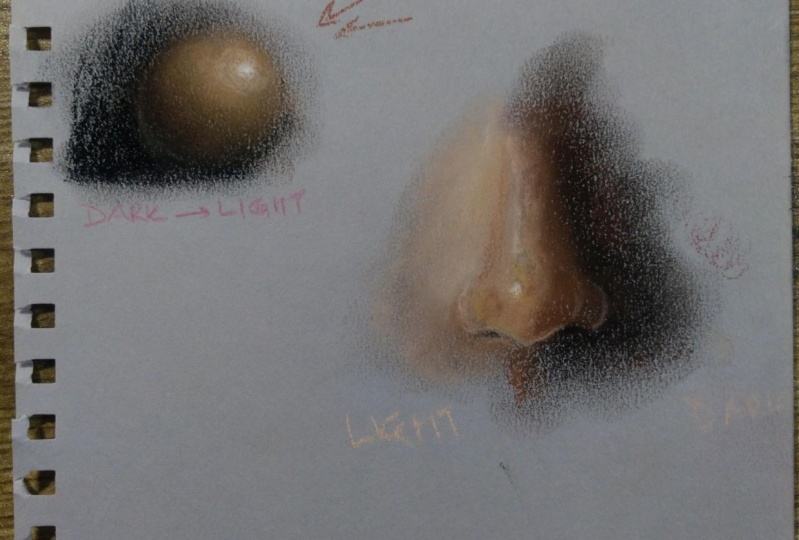
16. Dark to light Approach: Now let's talk about how we should begin from dark to light shapes and how actually we should need to work for soft piston ring. So I'm just taking the example of the spear and I'm just going to draw this using my observations and there's nothing such measurement ing or here. I'm just taking it as a reference thing and I'm using the darkest possible color images, brown or black, initially to basically get the first Dow Jones. So what you need to do always, whenever you are going to draw soft crystal growing, you always should begin with the darkest most possible colors, and then you should go towards a lighter tones. This is the most advantageous thing as far as that drying is concerned. As other media don't allow you to do such tanks as well. But here, there is a possibility that you can actually overlay lighter tones onto the dark tones. So the exact thing I'm also doing, I'm just having some backgrounds as well. This is just a expressionism is tied starting. We are not discussing here and discussing here about the realistic gardener. We are just discussing here about how we should actually begin from dark tone to the lighter tones. I'm using black as well. Then I'm using the Brown. Or these are the most darkest possible colors that we can use in this. Then we begin with the actual colors, which is green, are pale, yellow, or red. Then this color will be used. So whenever you see anything you want to draw a say is in its still life or in some portraits, always tried to find the most darpa stones possible in the portrait and draw that dawn's first. And then you should think about what, what is the real tone of that brightness. And so I'm using the dark green as well. I am having some limited amount of commerce in this segment as well. The colors I'm using that is only tardy sheets, so I do not have the colors, but I'm just trying to basically let you understand that how you should actually get the, get the exact thing and how you should actually express your drawing software through drawing onto the paper. I'm using my finger as well. And if you see this whole episode very closely and dried herbs, our EV, each and everything, you will definitely understand how actually you should draw any self-paced. And right now I'm using the red tones as well. Which is, which is, you can see there's as an image as well. So what is elements here is only for the referenced and I'm not trying to copying it exactly. I'm just I'm going to taking this as a refreshing thing and try my own expressions. Tried to draw my own expression. I am using the backgrounding as well, using my own interpretations because it is not there in the in the real image. I'm just trying to put some extra effort on to that as well. This is very important as far as the software still drawing are concerned bear you are very much free for drawing, for capturing big area. So you definitely try to have some background reading as well. Now I am using the leafy green color as well, forgetting some highlights and the edge of that dark portion. So you can see that it is very easy in software, so drying that you use lighter tones or do their dark tones. So always remember this thing in advance or you are not going to draw soft piston ring. You have to find out the most darkest stone and then find the lighter tones as well. Now you can see I'm finding some lighter don't suspect, and smudging each and everything. We need to lead, but do not try to ease much everything. This is very important key don't key thing for bring software. So do not try to smash everything. Led, fewer strokes be there so that it can show the presence of that software. So the strokes on that softness tilting and using the more lighter tones as well, the yellow tones. And use your creative freedom answer. Don't try to just copy, paste each and every thing. Use your own interpretations, don't own expressions. Expression of colors. That will definitely help you do, do express yourself to create, to become a real artist as well. So you can see that how I am defining the edges, the right edges are using the dark tones and light tone simultaneously. I am using the cosine paper for that, trying, if you want to draw this on the sandpaper, it will definitely take a little bit more diamonds compared to the draining paper drying as well. But you can get these details as well over there as well. Because that covers also sorts for software syncing. Now, I think it's time to basically use the lighter tones. I'm starting with the middle yellow colors. And then I will do the last highlighted things that is white tones as well. So always try to get the details in the descending order from dark to light. Now you can see that I am utilizing white as well. So it's very important to use right at the end. Did his via monitor is saying the thing that you should automate the yield on a good, don't Bieber, don't use the complete whitepaper. Otherwise, using white is becoming buoyant, difficult for you. Basically orderly. And also it won't look that good has been if you are having a white paper. So try to have some Don papers. I'm great. Dawn Beach, I'm black. Lag is always best when both are based and drying isn't. So now on the other features are finishing part of it. I think I have I have Don knew each and everything what what is actually required to get the growing thing done. And now you need to just, just figured out how much expressionism RL is and you can actually NTU. And it's not about the time thing that if you do have enough time for that, you can actually get that it is as as close as possible, as close as you want. Actually. It's a venue that how much time you actually want to indicate on that. Frank. And many of my followers are basically asking for Darth Vader. We can use basically Benton has very sort of presenting. So yes, definitely. You can use in these triangles where you can use base two pencils as well. But I will definitely recommend you to first call widows of piston blocks so that you can enjoy the effect of software or something. And no, Matt Ryan, to try to stick to one style of artwork like you want to draw something realistic next that you always try to get the strokes of dead software slid block that will create drying more beautiful. So I would definitely suggest you do dry with a soft piston blocks only. And after them that when you are experienced in independent venue, have achieved a lot in it, then you should go with the best inventors as well and dry something, something realistic or hard-driving elastic things as well. Definitely. So I think I have covered almost each and every aspect in this drying. And next, I, I have to speed up this one. Now. There is only a few parts of finishing is there? And there's nothing that much data that can be discussed. So I hope that you really understand each and every aspect that how you should actually begin the drying and how you should actually end up debris. And this is just for demonstration of these ten overlaying techniques from dark to light, don't women are discussed and many other aspects in the coming episode of this glass. So just keep watching it. I definitely am sure that you will definitely understand it in a grocer manner as well. So see you in the next classes.
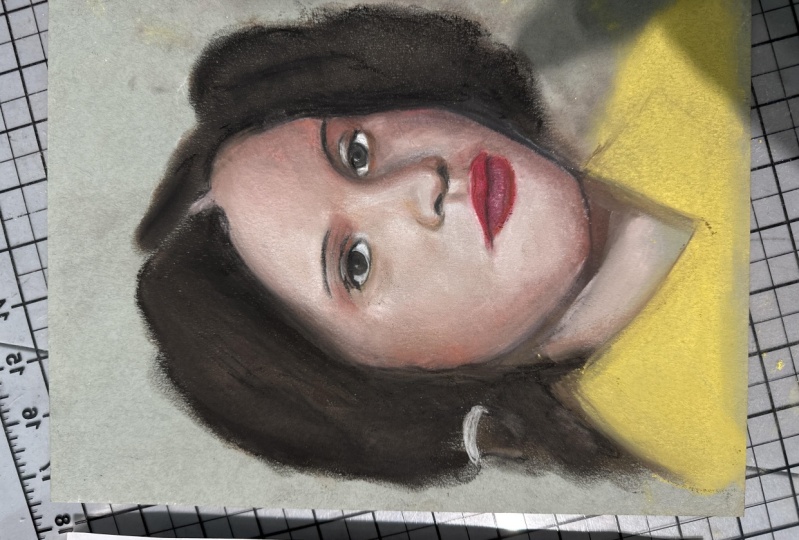
17. Getting Values: So here we will understand about how we should get the venues and how we should work from dark to light. For obesity, for when we are going to draw any portrait. So, you know that cooperate is something which is having certain kinds of values irrespective of the speed of that particular person, is just important for you to understand that how much you want to raise the value and how much you're going to go with a dark value. So hi, I'm here showing you how you can actually get the proton, how you utilize the white as well. So here I am just taking a simple example of drawing a sphere. And first of all, I did with the black one than the brown one. And then I'm smudging who think. Then I am using the Dawn, which is little bit lighter than this one. I like a tear of watercolor or a light brown color. And see where here. I'm using the weight room. You can see the Terracotta is, but can use that as a. Now I am using the flesh color. So I am now drastically changing as few colors in trying to mixing it up. And just here to let you really understand that how you should actually work this phenomena on the portrait drawing as well. So this is very important for you before going to learning for appropriate when you need to understand this, then I am using again, a very light and bright color as well, of a similar flesh color from a similar fresher. I'm using the differentiate. Now you have to understand that how you can actually get the small highlight of white and things will definitely can go change. You can see or hear. I just highlighted a small spot of light. And this is the way that many of the times you can utilize this particular style. Like I am going to show it to you. And the other example is, well, let me finish this first. This sphere first. So that you can actually understand the complete process that how you can change a circle, a two-dimensional solid tail, into the three-dimensional spear using the skin tones. So you can see over here that how this, right, actually helped me to get the certain highlight. And how we can actually actually evolved the particular, this particular subject into the desired result. So this is the process by which we can say how we should go from dark to light. And this process has been used in corporate doing as well. Or if you want to draw something still life, then you have, again, have to evolve this process because this process is really much ample. Let say. Let us take another example. I'm going to draw a nose. So how you actually get the nose, the shape of the North, how to utilize the right color as well. So I am just trying to get this, get Shang shape of nodes using the brown and the black initiation. Basal drawing is very raw, very rough. You don't need to find certain kind of outlines. You just have to go with the flow, just try to get as high as possible, then dried, finish things initially, and then try to blend it up. If you want, if you want to blend it up, it's, it's up video basically, whether you want to blend these things or you want to retain it as well. And try to finish things using the pistons as well. The more the process can be accepted, then I'm using the light brown in the similar manner as I did with a second sphere journey. I'm doing here as you can see that again, I'm trying to get few details of the Not going to finishing it up and not going to use any kind of case two pencils, I'm just using the pistol blocks. And you can see that I'm again using the flesh color, that light flesh tint to this as the process of getting the one part of the appropriate, it's dark. And the other part is like, there are many kinds of examples that you can take in which you can find the appropriate, which is having one sided is dropped in the another side is very Getting the highlights of sun rays. Or you can say that the room light. So there you can use this process. And it really helped you to basically Evolved, evolved venues. And I'm using the small, tough cleaners, but this is something that I have already told you that do not try to copy the real administrator to get some kind of academic knowledge as well. Of, of alpha over body color and flesh. That there are certain kind of colors which are not visible from the outside. But it is there in the form of means. And the form of small knows that you can actually actually assume only the many kind of shapes are there like purple color or green color. So this all you have to actually, if you, if you really try to try to give it to appropriate, definitely create a certain kind of changing sense of maturity of your portrait hazard. You can see that I'm again trying to get the second layer of the drawing as well. Now I'm using the white. And again, I'm going to give it a little kind of cubic kind of highlighting. And I'm not going to not going to finishing it using that color is but I'm just trying to using it in a very small portion, but just little bit hint of debt and things will change that you can see that how the things have been evolved from two-dimensional to treat them is nothing. So this is the process that you would actually use for getting the features of the culprit. I think this is the most helpful. Met had that what I have talked to many of my historian's, forgetting the particular, particular shapes and how to get the reinstate poker. Using the Pistols only pays two blocks, not going to use any kind of base two pencils. So I think that you really understand that whole process, what I have elaborated easier. And this kind of process we are going to use in portrayed rang in coming episodes. So with that, because we are going to cover three different grades using three different techniques, different kinds of materials as well. So upcoming episodes are really interesting. So watch it completely carefully so that you can actually get the complete detail. See you in the next episode.
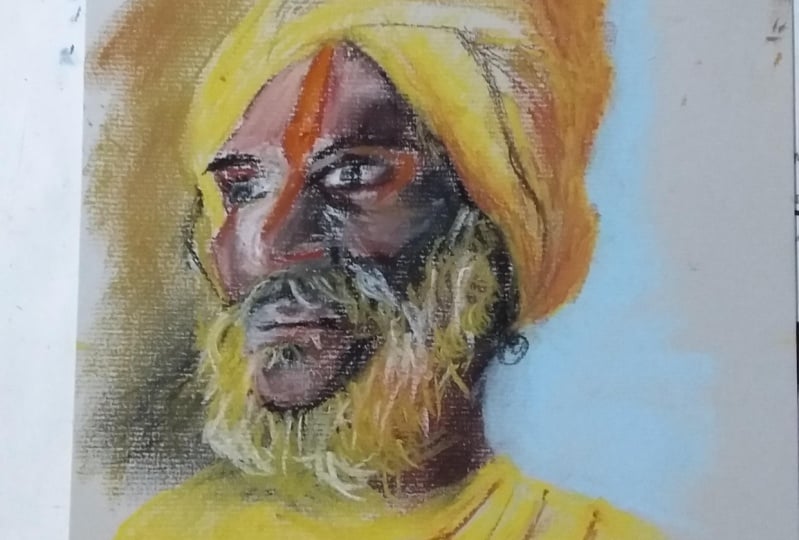
18. INTRO: Human Portraits study: In this episode, we will talk about human bought rapes and how actually we should achieve this art and values and how we should actually use our white based ol block as a highlighting dune and how actually it really changed certain things and pistol grain as well. So it's a major advantage is that you can use white player pistol block in your drawing. So let's see this episode as well.
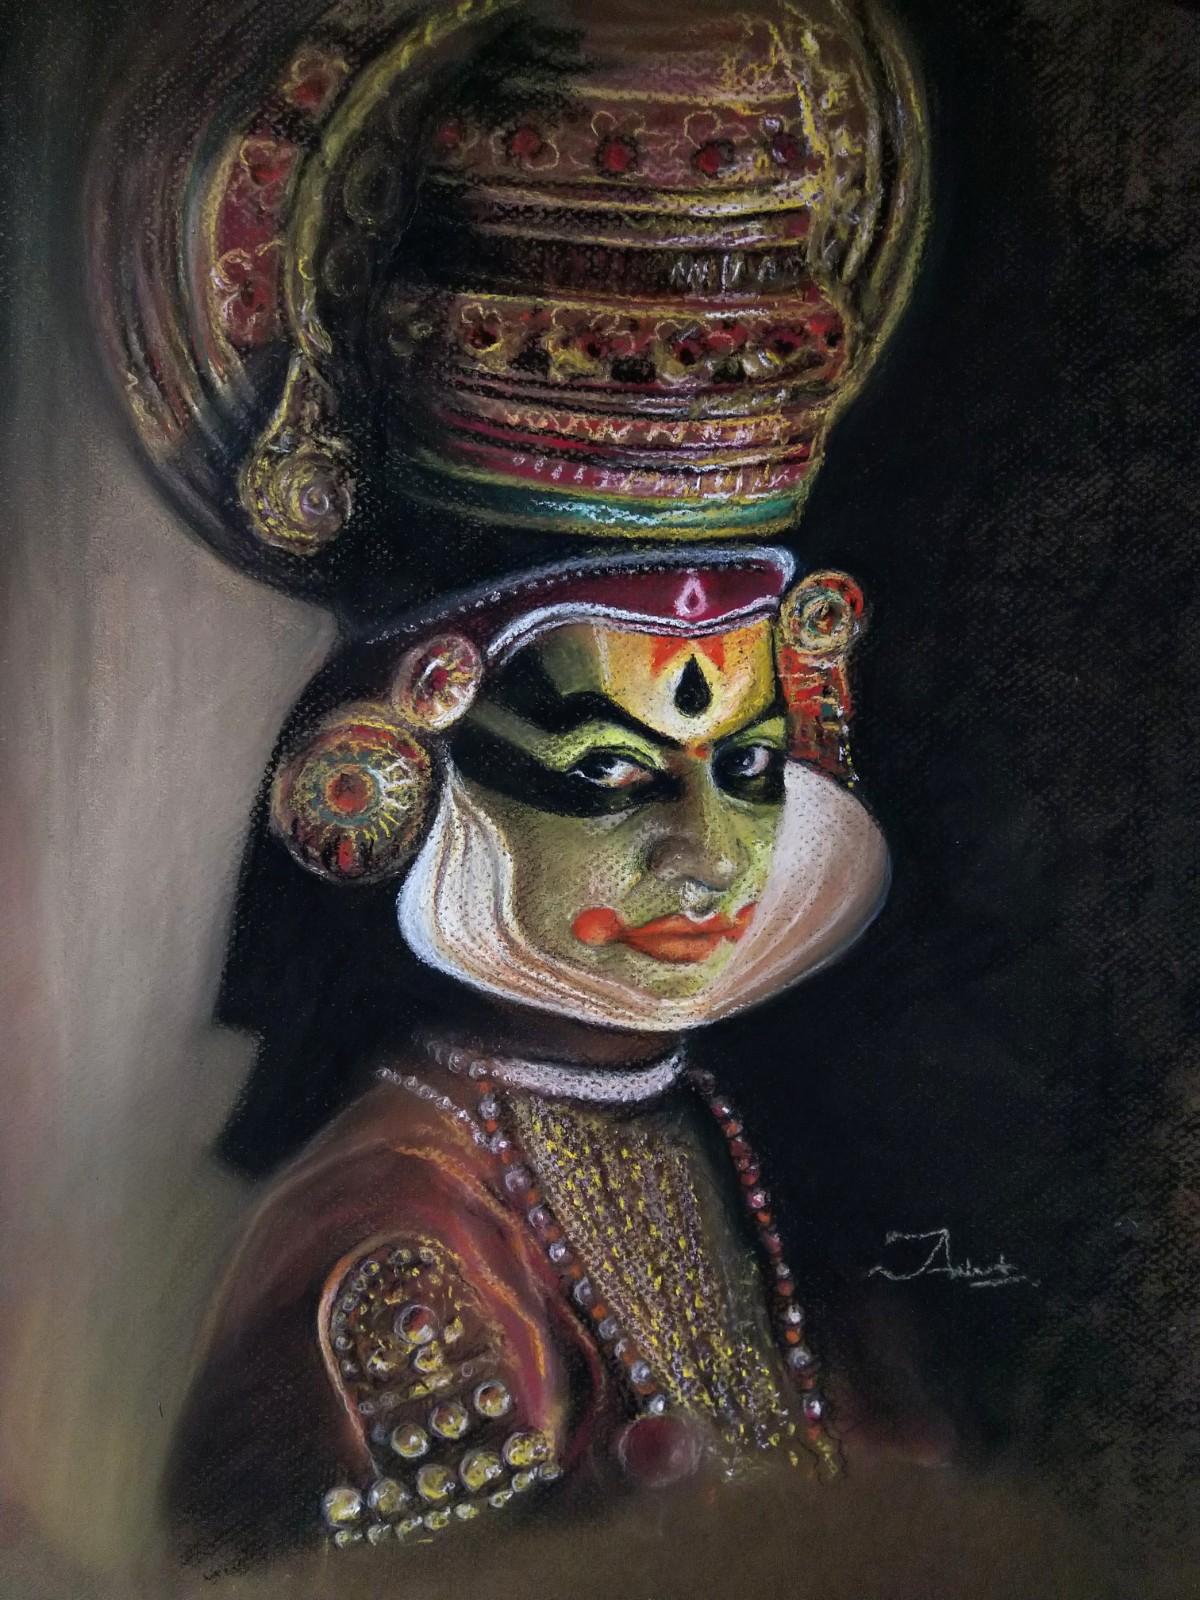
19. Human Portraits study: Getting form: Now let me talk about human booklets and how actually you should draw it on paper. So this is a textured paper, honeycomb texture. But it is. And how we should actually get the details using an artistic approach and not a very realistic approach. Over here. I am just going to finish it to the 1311. I'm not going to finish it to the limit or to the extent for the realistic one. And just trying to get the expression thing done and rest, I will leave it as it is because I just want you to understand this process has been, this is very important and this is very, very important for live is study are, if you run out of those, I missed getting him out though the sketching them. So this will definitely help you do basically good, quick, random. Think of anyone of whatever place you are and just get the, get the quick random and the outline of that person. So like I said, I am just going from the dark tonight in the face, you can see that, oh man, you just leave it at that. That is not that important. Main bonding is the human face. And for phase I am just using the dock is 2m. Okay. And the darkest Osbourne don't is brown, black all this. So I'm using the brown trying to see whether the dawns can be obtained and measuring it. Unlimited measurements. There's nothing much with this. Just try dominate the proportionate face. And just again that within my proportional values are ok or not. I'm using the blocks only software, so I'm not using any kind of peaceful pencils. Initially, you can see that I have taking few major mental height and width. That is any pencil you can game that for getting the measurement in because blocks are not in that lengthy enough. So we're there. I took any events. You can take any pencil and then market for the distance of height and lips. Or you can see that this is just for the measuring things for getting the correct proportion on the base. I can use Fenton measurement technique has been found that are getting the exact values. But here my purpose is to create an imaginary human portrait where I can actually relate it to the. Do the reference by. Now you can see that I'm using the dot phones on their dominance, but, but actually it's not that important for me. I'm just here to let you see the real thing, the real human face and the features of the human face. Other things that you can do it very well. And you can use your own interpretation or your own creativity has been for that. Then you can see I'm using the black aspirin. So for beginning and imported it just a you can begin with the black and grown. Then you go with some agenda are all called corner. Okay. So that will come later on then the flesh and the flesh tone colors. But don't begin with a fleshed intervals. This is, you have total number always. Unless get the dark Miss. Deblocking has to be done with enough homes. Now I'm identifying eyes on this portraiture. Well, this is also a many, many artistic approach and it's not that easy automates, but I definitely recommend this to anyone. Or wonderland. Software is done in a real manner because this is something which is, which is basically need to be used by soft Bristol artists who actually want to explore this field. Then he definitely had to learn these techniques. You've got this as a very rhythmic and it requires the skills for you to basically understand light shapes, understanding of hues and colors, which is very important for anyone to learn are. So you can see my single stroke and they'll create a feature of the particular person. This is the power of software suing. You cannot get that which we deal in other art medias, light colored pencil or let's say graphite pencils. Even the top weren't done since I'm not that efficient to get that details. So in the dry media, I will definitely say this thing, that software still are very quick way than them and that is why many of the artists are using it for the non time as. And now you can see that I am using some highlights and some light. A Terracotta owners as well. You can see from the closer that things are very, very messy. And you cannot find any feature or deal. But when you see it from a certain distance, you can definitely get the features in them that this is the beauty of this particular texture. People. You don't need to see it from the very new. You have to see it from a certain distance, put your brain to the certain distance and see from the farm that what exactly an artist had duplicated work there. That is why I definitely recommend every artist or every beginner who actually want to actually have to see this processes like I'm not smudging each and every day. Many of the artists are actually using distinguish as well. There is much everything and then they tried to get the realistic results. But here, I'm not doing that as well. I want my pistols, stroke and media. They should live in the present tense when I'm using light inside the eye. You can see that how the things are actually changing and how the features are actually revealing itself. Even if you're not satisfied with something, you can actually rub it using the finger, gently rub it and then again redraw it. So these are something which you don't need it is, or for that or software, so you don't need any kind of a razor. You can see that I didn't mention anywhere above the idiots 13 in a dome section. So you must always remember this thing that you don't need any kind of tool if you want, but change certain windows. You just have to use your finger to Arabic are user growth to rabid and then redraw it a lean on, do that same thing. And you can see that I am getting some detail of eyes. And by using the white highlights as well. This is very, very important thing. And I will continue with this class, this episode in the next episodes where I don't want to get into Rush and dry, don't finish it in one episode. So that you can actually see each and every detail on this boat redrawing. It is very important for everyone who wants to learn four plates using taught distance. We will see you in the next episode of this particular portrayed.
20. Human Portraits study: highlighting values: So here we're going to finish more details and try to get more values. As the first layer, what we applied in the previous episode is, is the preliminary layers. Now we are working on the secondary and towards failures as well. And we must understand the process. This is very important. If you are understand the process in a correct manner, you can draw any profits. So here you can see that when I'm going to draw the beard, the white here. So this is very important in when you are using the Pistols, you must have a clear idea about understanding of shapes. How you Attorney process through dark or loose end to the light when he says, but now you can see or hear I'm going to use that are dawn's first. And you know that the heat of beer, we'll be white as in the original image or if someone wanted rather, or isn't a picture of the olson. So beard here must be white. So what would be the procedure for that? So you can see over here that I am using the dark dawn's first and then I'm approaching it, right? Or don't satisfy. The best suggested approach for that as well, is you have to select two or three colors with yourself and try to finalize the appropriate when those 23 color themes. Like what I am using here is terracotta governor brown, dark brown and black. And then the flesh color flushed into colors, and then a white color. So there are 34 basic primary colors for any kind of operates. If, if the skin of the particular person is very, very bright or very late. So you must use some light tint color like terracotta and then the fresh state. But if the person is having a dark colors on his face, like then you should definitely go with the black and the brown. What exactly I'm doing over here. In this approach, you just have to see the overall composition of the poor and wanting to finish each and every detail. Few details or must be left leg that only and do not try to finalize them. But in, in this kind of approach, you must have that kind of approach where you actually need something which is very quick, very spontaneous. Then you want some quick results as well. So here you can see that I am using the black as well. I am showing you the exact, exact real-time video and with few timelapse thing so that you can actually get eaten every step, the strokes, and how you should actually use the pieces you can see in the video. That doesn't actually need that kind of explanation, but only by watching and eliminate viewing this video, you can get the actual position of my hand and how actually I am using these tones to get the values. Then you can see over here that I'm using the light yellow color as well for beard because there is a shared sunlight shape that is coming onto the face of the sand and that is the actual team of the appropriate as well. The yellow color is the most prominent colour in this or appropriate. As you see the man, I'm going to finish it up. You can see there are many, many different domains of yellow. So you have to, whenever you draw with software, fix the theme of the appropriate. Many borders have been done using the Green's. Many had been done using the della vendor color, the Bhopal color. So there are different approaches for that as well. So you can see that I am using the dark dawn's first. Even I know that I need to use some white highlights. So this is the process that you need to learn. You have to use first dark tones, and then you can identify the lighter tones. The light tones are yellow tones. So this is the wave you should approach. And this is one of the way that you can actually approach. Basically, there are also other ways as well in which artist actually identify singular here and then identifying in-between them without don'ts. But that approach actually worked pretty slow. But that approaches not very recommended due to its longtime taking approach. So artists need to identify the process and need to use those approaches which actually less time taking so that artists can identify dimension of so you can see that how I am actually doing such details and how I am identifying those Ruisdael using the right highlight pistol. And this is why I always use some tonal value of people. That people should be. Some tonal valued people. It should not be white, pure white. Otherwise these detail actually cannot be identified that easily. So whenever you are draw any for, for trade, using the Peace tells, you must let those paper, which do have a tonal value, let's say gray or beige color, black color. So all other different colors as well are stone colors. So that would be very, very interesting and that would be very, very important to use such colors as well. So you can see the strokes, what actually I am applying or here. You don't need to follow the straight lines trying to actually get the real texture or meal flow of the air. So as you know, the Sant beard is very clumsy and then it having, it is examine more cards rather than the straight lines. So always try to create the curved lines rather than straight lines. And this will definitely help you to achieve more real the texture of the hair, of the beard, particularly. So this is the way actually you should approach and you should actually go. Now actually you, if you want, you can get more details using more variant currents as well. So this is definitely that one days of pistols in which you actually get more variation and more vibrant range of color you can actually use. So I'm just using the light colored background as well as sky blue colored background. I'm just applying. And this is the way we should actually go for portraits ad. You can, Many people ask for that background drawing and how actually they can create a beautiful background. So for that, I am always recommended to use different background for the two sides, two different sides. So one side you should apply the dark tones and the other side you should create a highlighted portion. So it will definitely create variation, beautiful variation of bare ground. And it will definitely enhance the value of the main portrayed. So you always have to choose these color very wisely so that the main feature of that whole baud rate should definitely reflect itself. Four quarters Well, you have to create us properly stroke. Do not try to actually get into the den and just try to create a random strokes that would definitely help you to actually achieve real texture and definitely show your stroke strength. This is very important thing. You must have a shoulder strength of your best strokes. You cannot use it in a very mixing movie. Because this kind of more credit should have, should have that kind of approach in which you create strokes and limits. You elaborate your strokes as well to Kelvin seat and can judge your talent in such a way that they actually see the extent and what is actually the floor that particular stroke. So I hope that you really understand what actually I have mentioned over here. The details are not so important. Here. My main focus is just four and appropriating the main features of the face and the other features like other details of the appropriate like plot and Darwin. Or there, I am not very concerned about the particular team that whether it looks real or not. So for me, those things are secondary. My family priority is just to create a beautiful portrait of the human face. How to draw exact human head. So that, that would be moral paradise. Think other details are dust. Need to fill it up in a way to actually express drying in a better way. Now I'm using the white highlighting thing as well. So the base layer as dark, then the second layer is little bit, little bit less darker as compared to the, the lowest one, let's say the low, lowest monies that Brown and then the apparent on onto it. You use the data and then undo it, use yellow colors, yellow hundreds. And then on the top you can use the right highlighting tool as well. Might be cells. So you can leave the poor pad or here as well as it is finished. But if you want to actually enhance more values, you can use a few pencils as well, like Chow hold pencils. So these are the pencil you can actually use to enhance more values and define more venues. In the next episode, I'm going to tell you how we actually, you can use these pencils sharp or fences on appropriate to basically get more detail. Baudrillard, more refined portrait. So let's see, in the next episode.
21. Human Portraits study: finishing using charcoal pencils: So in this last part of this episode, we're going to draw it using the pencils as well. These pencils, maybe chalkboard pencils or chalk pencils that you can use a pistols things. I'm not going to use many pencils or here, I'm just going to use two pencils. Fun is the black charcoal pencil and the another one is the white shop or dancing. So only these two pencils, which are very much easier to actually get from the local market. And you don't need to invest so much into it at, as these are not that expensive as well. So you all, you need to have just two simple Pencils of job board of any brand. And which one is the black chop wood. And then the other one is a white shuffled. So if you do not get the white charcoal pencil in the market, you can use other crayon, right? Highlighter, thinks as well, which is very much possible to get in the local market as well. So what you have to do, or here presently I'm just finishing few other details like the Tobin and the end of the upper end of the portion. It is not that important thing. So I'm not discussing these things or here. These things are very, not very primary things for poor printing that you actually can get these details very easily. So my aim actually do let you really understand how actually we can use pencils, basically, chalkboard pencils in the portrait. So when you use white blood chow hall and white sharp fold, it actually help you to get my new details. What you cannot achieve using these pistol blocks or what you will find it difficult because the paper is very textured you can see. And it's very difficult for someone to use these blocks in the minute details and fill those minute details. So for that, you have to use or you should use, I should say you should use. And the particular pencils for that. Charcoal pencil is very much convenient pencil for someone to use with pistols because they are pretty much similar with each other. And as far as their properties are concerned, their chemical properties are concerned and they suits with each other as well. Many of the manufacturer are also using different color of core pencils as well. Like they, they say it, or chalk pencils. So that can also be used with a pistol blocks. And how to actually get the details we're going to see in this last episode. And presently I didn't tools as of now I didn't introduce any kind of pencils. I'm just finishing it using the vista blocks. You can leave the portrait over here as well as and really doesn't event that much required to finish these kind of stuffs because they are more towards artistic rather than the realistic one. But if you actually need to create it to the next level or you actually need to finish it to more realistic one. So you have that that option to basically use such several pencils as well. If you do not want to buy a pistol pencils, as they are very little bit expensive, not very, a little bit expensive thing as well. And start very suitable for everyone too. But Jesus thing. But if you have charcoal pencil, you can use them and get these details as well. So I am just closing it up a little bit, zooming it up so that you can actually see how I'm using these pencils. So you can see that I have zoom it up a little bit and you can see that it's very easy for someone to be inserted or lay. Sow hold vita, hold onto the pistols. And it is the most advantageous thing what I think with a pistols that you can use lighter tones on to the dark tones, as I've already mentioned in the previous videos, previous episodes. So this is the best thing and this is the most convenient thing for any artist actually required these kinds of liberation with the material. So someone actually can use lighter tones onto the dark tone. So you can see that I have almost finished it. And I just little bit use these kind of pencils as well. I'm not going to use it more rigorously. I rather I used it in a very minimalistic way. So here you can see the results as well. And I hope that you really liked those reserves because they are more towards artistic one and not the more realistic one. But at the same time they are looking more and more beautifully expression of that particular image. I personally really like these kind of stops rather than the realistic one, but we will discuss that one also in the coming episodes. So just be here only. And you will see that how can I am using those things as well. So I hope that you understand whatever I have told you over here.
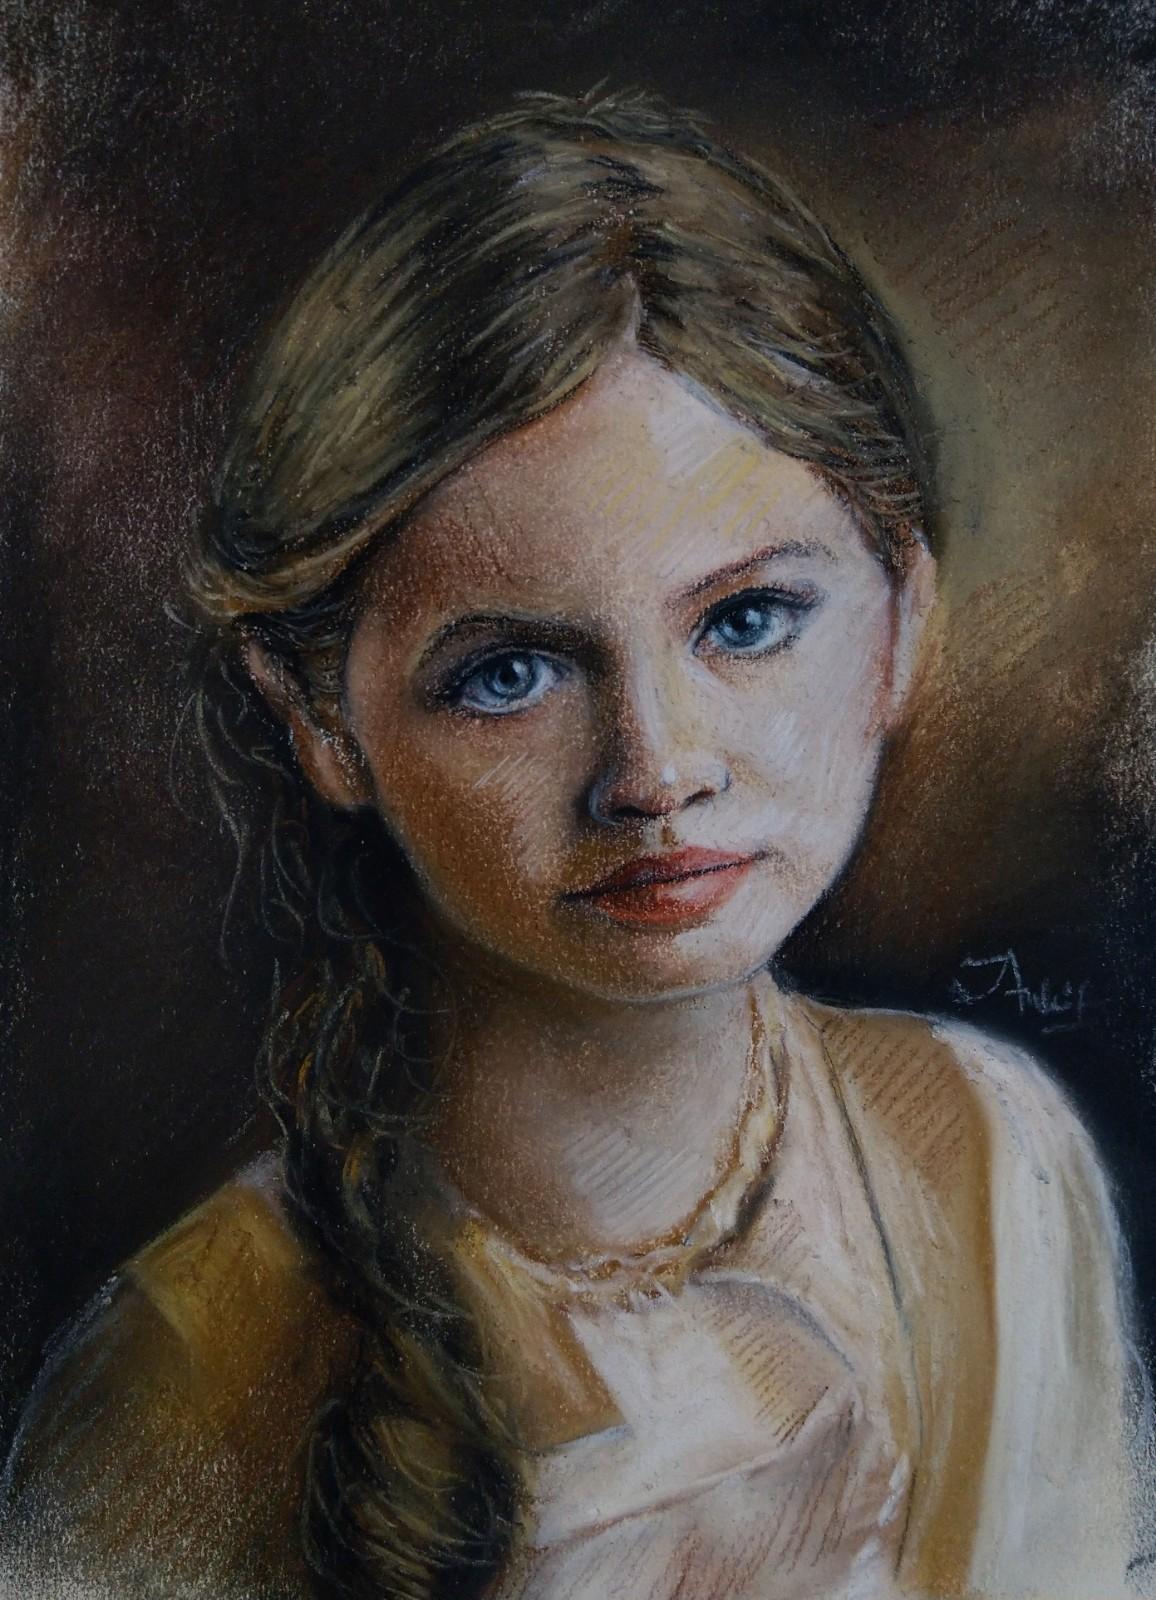
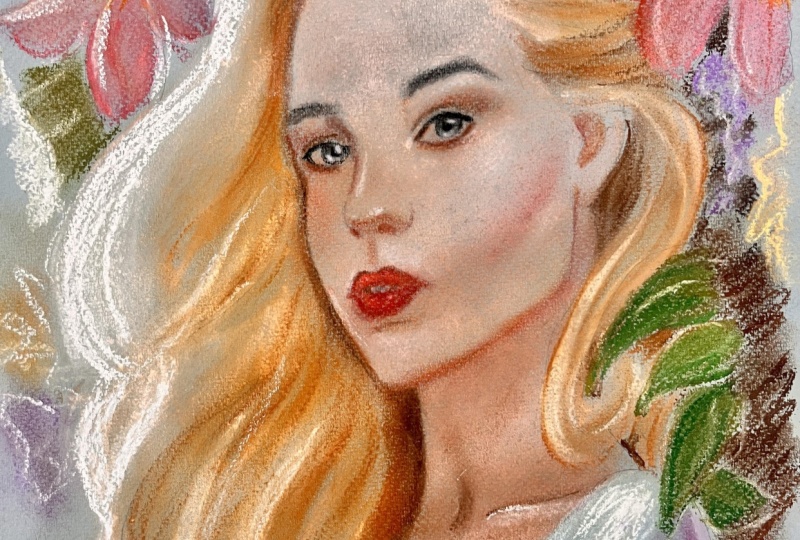
22. INTRO: pastel pencils approach: In this episode, we will talk about pistol pencil drawing and how actually we, we are only going to use piston pencils are and we're not going to use pistol blocks. And what should be the process then? And we will also talk about green Foundation. Approached us when and how we should actually get the foundation first and then we overlay certain colors onto it. So there are many other approaches as well, like some epsilon when use green Foundation, some other can use the read Foundation as well. Some use orange foundation. So it is something that someone wants to create a base under painting thing and then they have to recollect other colors as well. So baselines, as I already told you, that there is a possibility for you to basically only one color onto the other pillar. So in this particular episode, we will going to draw pasted pencil writing onto the sandpaper. So let's see how we can achieve that in self-censorship.
23. Pastel pencil approach: prepare foundation: Now we are going to do another experiment using a different people and different pistons. So here I'm going to use pistol pencils and how you can actually use it alone. I mean, you don't need to use a sub-blocks and directly using pistol pencil and how much it is economic as well. Because as you notice the pencil out, not that economic as well, and not that cheapest, but we all know that they are very price even. Saw what I'm actually doing. I'm using green one and getting a base layer. These papers are sanded paper, as I have already mentioned in the previous episodes. These are standard paper. They are more grainy and sand kind of effect you can see on the paper as well. So I'm just Foster did a small piece of under painting thing, grain formation and when to fix it again as well. Going to redo it again. But first I am just trying to get some outlines. I'm using the pencil measurement technique and getting the form external points of the particular full credit. Using my own interpretation or one Imagination and moved to draw another portrait. So you can see I'm using the first two basic lane, which one is a horizontal line and the vertical line. If you want to learn this technique of getting the outline, you can see my another classes in which I have already told about these things, in which I'm going to tell you about how you should actually get the outline of the ball grid using pencil measurement technique, or using light and sheets techniques. Or I've already mentioned these things in my previous class, or I am not here actually mentioning it again. So you can see that I'm using the pencil measurement technique and also the, somehow the luminous matter does, but implementing those things as well. I'm using the lighter highlighting pencil or a flesh colored pencil. This is paste to pencil. It's very easy to actually get the details using these pencils as they are very small and very easily you can actually get those details and getting the outlines. So I'm just quickly wrapping this thing up. And these things are not that important. Because if you want to learn outline, I have already told you there to go to my previous classes of skill share in which I have told you in detail about how to getting Dao glands thing. So I'm just having a rough idea about the outline because these outline all are also not that fixed. As we move forward we see there will be a lot of changes in the particular, the particular features. So it's not that important to basically how. Exact outlined. You just need to fixed few lines, that that's it. And after them back, you can see that you can change certain thing. It's not. Lead other media. Color pencils where you have to first fix the outlines and then you have to fill the values. Here. You can have as many options as well. So now you can see that I am using the green Foundation, which is very popular and are particularly using the on the sandpaper. It works so beautifully. So I'm just applying the Dream Foundation. Many other artists are using the other foundations as well. Some are using our red Foundation Summer orange one. So some, some are the white one as well. So here I am using the green one, which is very popular as well. So I'm just trying to getting some values on the paper using the cross hatching media. You can use that argue. If you want to do the condoning thing, you can do as well. But cross hatching is more easy and more understood in a broader way as well. So I use that and then I am going to use direct ons. So whenever you have green as a foundation and you are using the light or red color, you can see that you actually get the perfect color of the face. And initially you can't find that very helpful. But when you are using more lighter colors like flesh colored something, you can see that in the background of the particular image you can actually see then how that green Foundation help you to actually achieve that realistic tones so far are realistic drawing hyper-realistic brain. These techniques can be used. I would really suggest you to not have that kind of problem with the financial thing. You can definitely tries and a gripper once because these people are really helpful and really beautifully created so that even if you are not that grow into the restaurant drying, you can actually get the best out of it. So definitely it right, so that you can see the beauty of that paper and how you can actually get the most often those pistol thing like if you really want to draw using the pistol pencil only. These people are the most helpful paper in that regard. So you can see that they are very breakable and they often lead brick. So this is something which is very, very demotivating factor or a very disappointing factor. B, the pistol pencils, but you cannot do anything with that. Even the best fiscal pencils are also GET break mostly. So you can't do with that, but always tried to sharpen it with a very, very good quality sharpness. Or you can use the knife as well to get, get the LED in a proper ship. So now you can see that I am going from light to dark, and I'm now I'm using the features colors as well, like the red or the dark red and then the brown one than the black one as well, the chocolate colored as well. So I hope that you got my point. I'm going to meet you in the next episode of this particular region we continue destroying to finish it and we see how the results can be achieved. So see you in the next episode of this class.
24. Pastel pencil approach: creating features: So I'm just continuing with the previous episode and now I am drawing the lip, the lip ocean, the upper lip and the lower lip. I'm using a crimson color, red, crimson gunning for that. So here you can also see that even if you do not have fixed the outlines, particularly, you can eventually change or moderate the certain values. And don't be worry about those specific outline details. And try to actually focus on the layering process, how you should live it, and how you should achieve the particular proportion values using our changing the certain dimensions. So by mixing these pencils with each other, you can identify the boundaries and redefine the boundaries of particular feature. So outline over here is also not that as important as it should be in other drawings like other windier drawings like refi trying or it's a hole right here, or colored pencil, right not the top of the current pencil is more prominent with outlining. Here, you can change certain values, dimensions of perspective or the proportion val values. And you can add on venues as well. So you can see that I am now I'm using the left hand corner. As you know, as you have seen that I have used green foundation and then the red or red foundation, and then I'm using this flesh color. So eventually at the end you can see that I have achieved a very, very realistic dome of the particular, particular human face. I'm using circulation method as well. You can see that I am circulating particular portion, many dimes has been. Now I am doing doing the hair thing. And here as well, I'm just trying to get the preliminary details. Multivariate raw effort. And then I am using the yellow ochre color and highlighting those portion. So you can see already that again, onto that dark layer you can actually get the lighter tones has been using the different Bunsen. And this is the most advantageous thing I have already told you in previous episodes as well, that this is something which really stand out. Pistols. We can say that by the virtue of this, using the lighter tones on the darker values, we can say that pistols really stand out on the top with, with comparison with other medias. Because this kind of liberation is really makes it more convenient for artists actually. Now you can see that I'm using the white don't. And exactly getting the most highlighted portion of the portrait. You can see that I am using in the circulation method as well. I'm not doing it with the middle cross. I thinking I'm mixing it with a circulation methods so that it actually Orly smoothest angle. And we can achieve it to the most possible refind venues of the portrait. Now you can actually see how the real Flesh tint color, the particular phase can be achieved by using these pencils. You can mix it up too many layers as much as possible. This is the quality of sandpaper. You can go up to almost six to seven layers or other paper. It is not that possible if you want to draw it on the greening paper or on the textured paper. So it, it, it is not that possible for you to actually go to back layers only I think due to three or four years are enough for that paper and then the paper is not responding when the particular thing, if you are really sharing it with different colors, it won't allow it. It creates, it creates. Now, what should I say? It actually damages the paper. But over here, the damage, damaging of the paper, it, it's not, not there. So you can actually get more layers, six layer, seven layers. And nothing is happening with the paper. Paper will be like that, as it is what was in the beginning. So this is something which is a really, really interesting and really, really appreciating for quality of the paper, particular quality of these papers. This is why these paper are very expensive as well. And this is why many of the artists are basically using it for the realistic artist styles. Many of the artists are basically using a standard paper and then they are using the pistol blocks for the larger area, and then they are finishing it with a pistol pencil. And this is, I think, something which is very economic and vary. So always remember to do those things as well. You have redacting financially secure. So you have to think in that way as well. And I can say that it's basically a video that how much detail you are actually seeking in the particular portrait. If you want more details, more refined details, you can actually get it by giving it more time. But if you do not have that much of time, if you're not able to concentrate on normally you do not have that kind of patients for the particular and growing. You can actually finish it due to limited time extent. Do not extend it for a longer time. So that will also be helpful in that way. But actually these people required 34 layers to basically getting things into shape. If you are going to, going with this paper, I need only allowing a single layer or two layer. So that way you will not actually get the most of this paper. So for getting the most obvious paper, you have to actually allow three to four years, at least three to four layers. So I think the best way for that is to using the Dow Jones fast on the green foundation first. Then the occur are a red foundations so that you can actually have 2-3 layers already on the paper and then go with the flesh colors. That will really help you to actually achieve the desired results I am using. This is also a very interesting thing. We using a five size sheet. It's just for the trial purpose. This paper and small cut-out of the particular paper. I'm not using a fourth sheet or years. That's why I'm not able to get such details, but I'm trying my best to actually let you understand each and everything are each and every details as much as possible because the damage had been squeezed to the smaller portion. And it's not that easy actually to get each and every detail, but I'm trying to actually get most of the details. And eventually I am getting those details as well. So I am finishing it. This particular portrait in the coming episode as well. And you can see that how I'm going to finish it and trying to highlighting all darkening few more areas in the coming episodes. So just be here and see the third episode as third particular part has been in this episode. So that you can actually get the exact details. Howard, I achieve the particular details. So see you in the next part of this episode.
25. Pastel pencil approach: finishing value: So this is the last part of this episode and we're going to finish it to the possible extent. And how actually we get the most realistic results when come to learn this thing as. So here I'm going to finish with the with the lower portion like neck and shoulders. And I am applying the same principle. I am using the dark color first. And then I will going to use the light-colored says, well, the drone. So you can see here that I am finishing the poor grade and no M applying the Veda portions as well. And and I just want to try to try to pop up out fueled the values for that. You can use the brightest and the most darkest color. So you can actually create the contrast. The contrast is a most important part for getting the realistic portrait. So you can see that I am no, I, again, identifying the dark portion, the darkest portions. What we can possibly achieve if we do not have that. And off now pencils for that, you can use chalkboard pencils and they work very phenomenally good this portrait. And so using those pencils, very phenomenon. And they work pretty well for the pistons pencil. So you can use to hold pencils by itself Olin Lecture whole pencil for highlighting things. So do not try to put pressure on basic and fundamental understanding of using Biscop. And so you have to have a very light pressure. The Bentsen, as these mental are very powdery in nature. So you do not need to put more pressure. You just have to create more layers with less pressure. So always tried to do such thing that to try to put more pressure, but try to add more layers with a light pressure. Now you can see that I am also using the charcoal pencil, black charcoal pencil. It is very dark in nature. And it really helped you to actually get the exact values and exact details. So four eyes or other dark portions under areas which are very dark. You can use this pencil and just confirm this thing that whether the, whether they are sharp or not, if they are sharp enough, you can use them for the minute areas as well. And I always exist. You do use sharp Benson's for that. For defining such values are defining such area. You need to have a very sharp end of the pencil. So you can see that I am defining eyes and depth using the darker. Similarly I'm going with here as we define the dark portions, the shaded portion. So that it can actually differentiate an actually really emphasize the light color. And getting the expression of the culprit is the most important feature for any kind of water during and similar thing actually apply with a peaceful drying as well as it's not a very different thing with the other drying techniques. So here also you have to have captured the, the expression of the particular portrait and do not try to actually peter real limits. Rather, to go with your own interpretation of colors and expressions. And try to get, expressionism, tried to get into, get more variation of color as pistol actually allow these things to do onto the paper. So you have to use, you can use many color as much as possible, as much as you possibly, actually. Now you can see I'm using the white charcoal pencil as well. This is the most brightest pencil, which is far more brighter than the pistol pencil. So you can use these pencil as well for the highlighting of the particular subject. Now you can see I'm using the flesh color as well for the neck portion and the shoulder portions. So here we also have a process that is known as the Green Foundation process. I use the information first, then the red one, and then I use the flesh colored portion. So you can see I can also do the same thing with the other foundation techniques. Like someone may have a brown Foundation or someone can use with the red foundation colors. So it's up to the artist and what kind of result they want and what, what really sought to that style of art. It's basically depend on that factors. I am really much convertibility between volition, so I am going with this. But when I use the pistol block, I usually go with a dark to light process and using an audience, I used to use dark colors. And then I'm going to be the lighter tones. So whatever the details I am having, I don't think that it really need that kind of explanation because it's not that major part of the portrait, the mean part that, that our features, what I am already captured and explain to you other features can be done or not. It just depends on you. If you want to finish it, you can do that as well. So now you can actually see that Francis, in different kinds of people, I have already used the textured paper. Then the greening people for the still life, right? The textured paper is for the centroid, and this one is the sandpaper, the third category of the people, which are costly and expensive, but they actually produces the most realistic results as well. So now you can actually evaluate yourself and choose yourself that which kind of results actually you want. But I would rather suggest you do initially go with a textured one or with the green inside. Well, that, that is very much the image, considerable and very much the economic for you to actually start the piston ring. Then afterward you, you must have tried ascended prefer as well. Because these people are very, very much dedicated and very much dedicated for actually these kind of artwork and the salt pistol out against it. So you must use sandpaper once. All our journey. So I'm just adding the highlighted portion on the neck and the shoulder, is that and trying to finish this poker as close as possible. And it really helped me to understand the particular feature, particular expression on the procreate. I am actually not in a hurry to basically finished things, but to injury and just thinking about net how much I actually can contribute to those appropriate through to get it venue. I'm using many pencils as well, like crimson and then the bard amber color, as you can see that I have created that forelimbs were full of dead flesh. The length. This is only possible in these kind of people because these people are really allow you to get up to that kind of details. So I hope that you really have the understanding of these kinds of people and how you can actually get the results using only the pistol benzenes are not using the basic blocks and how you actually get the process thing done and how to negate the approach, correct approach for that particular grain. I hope you really understand these episodes. And in the coming episode, I am going to tell you about the greeny paper and how you get the exact realistic booklets on grainy people saw coming episodes are for that as well. And I hope that you really like that thing as well because that thing are more economic, far more economic as compared to the scientific reports. So we see those if sunsets, but now you can see I'm using the blue color and it's very important and very, very beautiful to actually get that differentiates as well. Which really created a second kind of expressionism in your portrait. So I'm using the color as well in the filter portions. But don't put that much of pressure. Use it very lightly. So I'm going to see you in the next episode. Populated.
26. Finding Realism: primary layers: So here we will talk about another approach in which we can achieve very realistic and very hyper-realistic kind of results on a greening paper. So how actually we can get these kind of reserves? A venue need to use a grid method. Suppose you want to resembled some booklet or you want to get the exact value of the booklet, you can actually use this method. In this method you actually draw the our glands first what I have already drawn. You may use greet method or you may use pencil measurement technique. You can simply do any other matter like like many other artists are using plotting methods, et cetera. So you can use that method for outlines. When you fix the outline, you have to use fast soft Mr. blocks for the larger area coverage. And the approach should be the same. You should go from dark to light. So I'm using the darkest Don'ts first. And then after that, I'm going to use the lighter color assessment. So outlines had been drawn using the peace repentance. And he can use base two pencils or you can use toward pencil has been foreground lens. And there is a possibility that you can really change the color of the outlets as well after when you went to finishing it with the other piston colors. So in this matter and we're going to use pistol blocks and bestow Benton simultaneously. But initially we need to use a pistol block first so that we can actually capture most of the area, larger area with a pistol block. And it really reduces the time. And it really saves your art material as well as, you know that piece repentance are little bit more expensive. So for coverage to the larger, you can use these blocks. So here you can see that as mentioned in the reference photograph, I am actually getting the first darkest Dawn, which is possible in the book that many of the time you can actually exaggerate few, doc williams, You don't need to exactly follow the real image. So you can actually enhance few dot domes. There's no such thing to worry about that. Now you can see that I am using another lighter tone, which is which is lighter than the previous one. The previous one, the first one is the more stockists. And then I'm using the Terracotta funder and the crimson color. It's not actually crimson. It's it's a brick color. What you have seen in the bricks that collect that kind of old. So it's basically depend on that. The range of the parent, what you do have. If you have a wide range of burner, you can select those colors as well, which is not there in the small and really very off color. So if you do have, let's say 20 sheets, or you will have a sheet, or you have a 40-year chips. So it's up to you that how much kind of variation in the color you do have. And if you do have a wide range, it would be easier for you to actually get the exact leakiness, odd exact color, what is there in the real image? Now you can see that I'm using other lighter tones, the flesh color and then the white arrangement. So this is basically the process in which you will from dark to light AS darkest, lightest I can say that. And in every book review actually need to identify that which is the darkest one, which is the lightest one. And you have to define it completely of the artist. And it's nothing like that. Somebody else is going to tell you about how you select your collapsed itself or you can use your own creativity and freedom to basically choose the variation, the range of the colored, what you can use. So instead you do have that kind of advantage. If you do not have that kind of wider range, you can actually do such thing within small ranges, but let's say you go have only 20 sheets are credit for ships. You can also use them. Now you can see that I'm using my finger as well to basically It's much view of the pistons, but I recommend you do basically is much only then when you actually find all the layers. We do not need to do it on every layer as it makes the will create more plain. So do not try to make the portrait plane rather than to create it more towards the artistic went and tried to, tried to have some kind of textures of the particular pistols, the lives of the victims who would write a smudge everything. Otherwise it won't it will look like just a photograph. Mckeon who shouldn't have that kind of approach in which it should look like an art of Islam and it should flip this drops of blood. Now you can see that I am drained the eyebrows such investment. So many of the artists are using this technique and they're getting very good resumes and very satisfactory results as per the requirement. And this is the greeny paper, as you, as I have already told you, that these people are our way economic. And you can buy them of different brands like Sattler or standard ONE paper or history or art. Again, people, there are many kind of gripper as dilemma and burn. Also have different dynasty forbidden zone one. So you can have that kind of paper which is a little bit of grains on it and it's having a dawn texture. Don't papers. So this really help you do actually create good masterpieces. And then you have to have use some kind of demo. Good. Next episode is all about those things that, in which we talk about how to represent a pistol discussion. I've been asked me that and this has to be addressed. Now I can see I'm finalizing few here as well. And as this is the first part of this episode, I'm not trying to keep putting things into Rush. I just want you to see each and everything that how actually I am getting the don'ts. And if you really understand only the dawn of the forehead, What I have done, you do not need to need to follow each and everything what I am telling. Just try to capture the light and shapes. If you do have that kind of sense, you would write with a lightened shapes thing. You do not need to follow in generating. We just have to have a sense of that, that how you should go from dark to light. Now you can see that I am using the black colour as well for the eyebrows. So you can use the sides of the pistons and you can use the tip of the Pistons. It's basically in this kind of technique. You can use both sides of the pistons. You can use the longer side as Monod up dip of the instance. And when you are initiating these four grips, you find it difficult to actually get the details. But when you are having some kind of layer, some layers onto the paper, then you can actually evolved that book rate falling. So it's a process of evaluation are whatever they say it is a process of getting the features from nothing. Ok. So you can see now here as when I am using chalk pencil for getting the outlines of the eyes and defining the venues of the eyebrows and eyelashes are the upper eyelid. So it's basically, you do this technique. In this kind of technique, you have to actually defining such values using the pencils. And for the Smart section you are using the pencils and for the larger sections, you can directly use that be sub-blocks. As you know that I have already mentioned in the previous episodes as well, that you need to use multiple layers. You should not use a single layer and then try to get into details. Are less driving rules. Two layer three, layer four for anything. If suppose if you want to draw the, draw the eyelashes are if you want to draw the eyebrows, are if you want to actually draw the iris of the eye. So even then that eyeball, suppose if you want to draw, so you must have two or three colors or there has been. That is only something which help you to actually blend it and get the real texture of the particular portion. So this is very important thing and you should actually follow these simple steps to get realistic bordered. And he kind of portrait, let's say our district board create art. And he got enough pop art of style. What you have to use this technique. This technique is not only mean for realistic article, The statement are basically used for any kind of art, but what kind of style you want. But the technique and the basic fundamental can never change as you know. So similarly, I am finishing the other ions with and and this is the basic advantageous thing nowadays that you do have that enough Pistol pencils and pencils nowadays that, that really help you to actually get the, get the minute details as well. In earlier days, these art materials were not there. So we are very lucky to have this kind of material which really help us to basically get our desired results on the poor credit, right? So I hope that you really understand what I have told you all here. I am going to continue this bore grain drying on the next part of this episode. And stay tuned with that because you have to see the results of this particular cooperate. And I hope you like it and see you in the next part of this episode.
27. Finding Realism: cheeks & jawline: So here we are coordinating with the previous episode, and this is the next part of that. And here we will talk about the chin line and the jaw line, the cheeks, and how you actually initiate clips and northern sweat. So these are the features we're gonna go over here. And you can see that I am using the chalkboard Benson's. As of now. I haven't used any kind of risk repentance to now. And it looks pretty good as far as the, really tomorrow is concerned. If someone wants to use base two pencils just after the software suit blocks, they can use it. But if someone is much more experienced in Pisa, right? He really doesn't need to actually rely on BEC pencils like E only need fuel Benson's late black and white SAW these black and white pieces. Pencils are Archea, weapons that are easily of lipid. And if you do not have that piece of answers, you can use shuffled mentors as well or as an alternative. And just few glimpse for base repentance that what we're going to use in the end of this portrait, right? And you can see that how I utilize those pesky pencils for better, better evaluation and better resemblance of the particular corner. So that really helpful, that is really helpful with debased repentance. Initially. And as far as now, the things up answer, I haven't used any peace students Alam just relaying on visceral blocks. And then the chalkboard Benson's are white and the black chop wood, Benson. And I, as I have already drawn a portrait that you have seen on the textured paper. I didn't use any kind of risk depends on what did I just used. Chalkboard Benson, the white one, and the new Blackman. So it is very much possible for anyone who wanted to draw a watershed line using only visible blocks. So you can use job or pencils in the and the place of visceral mental anything ship someone do not have this preventively, can actually use chore pencils in the place of them only. You need to have white shovel Benton that, that is something what you need to buy. Other than that, the black travel, perennialism, almost everyone would have, I guess. Here you can see that I have used crimson, red color or you can see that a brick colour for cheeks and the jaw line. This is the preliminary lens. You can use brown as well for that, but it's OK in that it's something to the artist. I left this thing through the liberation of dark as I am. I don't want to I don't want to really let you copy the process. I want you to have your own process and your own interpretation of the portrait. So this is why I'm not fixing you for the use of particular color. I want you to explore more ways and more dramatic use of colors. Many artists I have seen that they use many kind of purple colors. Poppins are magenta colors for the portrait. Many other use fluorescent Stellar. So it's basically an artist distinction that which Gallery actually bond your shear to the point to use. And it's a great thing for any artists to use their own interpretation and use their own innovation for drying and important and do not follow the principle for using color templates are getting the correct color, exact color for the vitamins. The something which really ended the end of the creativity of the particular artist. So I don't suggest you to do such things to using the color palettes are kinda dropper to exactly get the color, what it, what is there in the real image, and just try to find the closest teller. Europe color box. My station for you too is to actually get your own interpretation. Use your own intelligence on creativity for getting the realism. And as, for, as much as the Expressionism. Not only the realism does try to get the Expressionism does try to get their own expression or an expression of your own self rather than, than to copy the real image. And you know, what is the most challenging part in the reported right? It is not the eyes. It's actually the jaw line. And how do you actually get the get the choppiness? Are the clumsiness, flesh. What you need to actually show it on the paper. So it is not that easy thing. And I think that many of the other artists are also agreeing with me that getting that flesh portion of the cheeks. And again the, get the curvature and get the yet valley in the popes or the, it's not that easy thing for any artist to express those things because it looks really pretty much flat. So you have to give a lot of time for the cheek portion, the Jordan portion, and how you actually show the curvature thing, which is going in into the jointing and then the neck portion. This is something which is which is little bit how having a difficulty and same thing goes with the ellipse as well as you can not use a more proportion darker colors or there. So you have to use colors pretty much, pretty wisely. And you have to use your own intuition. I'm just giving a few details of Erasmus, but I'm not going to finish in it. It has, this is just the just below the right hand of my self, so I do not want to finish it now. The venerable venue going and finish it. Then the envy tried to, It's those things again. Progress on just the strength to create a glimpse of that as well. That would finish because I think that that kind of pair prioritize in my portrait to do it. I know that you guys can do much better than me in that particular thing. And I know that you guys can really capture these thing and learn these things so well. So I don't think that I need to explain it. These things rather, ie, I tried to let you understand how you actually get the features and how you actually get the, get the expression of the particular Portrait, how you have to look at the colors. So that is my key priority. For this particular class. You can see that I have used black and then then the proper color and tried to get the details as as minimalistic as possible. Neck is also not that kind of gravitating in my total classes. You can finish it. And I know that you can do that as well if you if you can finish the most difficult part, which is the features of the face, you don't need to learn anything else. Because the fifth, I think the fist is the most difficult part in any human anatomically. So this is something which we really, really need to take care of it because there are many kinds of features or they're like eyes than the nodes and then the lips. So you have to really. I'll get each and every detail. You need to learn each and every feature individually as well. So my whole aim is just to let you really understand these details deeply. That is why I am not covering other things like how you can finish the neck or how you can actually finish the hair, the dress. These are the secondary three ohm and for this classes, but this is very important and how we should actually begin the lip and how we should finalize and fished ellipse. So ellipses again, another very difficult portion as the features of lips and the properties of the lips are very soft and these color are very thick. As you know, the visceral blocks are very thick. So defining the lips and saturating it from our city, getting it from one to another. The upper lip and the lower lip, it's very, very tedious stops on any artist. So what I am doing here, you can see that I have just created the red aroma around lip, and then I am just defining the values using the chalkboard, Benson, the blackjack, or Bentsen. But you cannot let the bloodshot opens in media, you have to smudge it with light and shade things for the upper lip and then the lower lip as well. So it is very important for any learner on a beginner or an artist to understand how he should actually finish the ellipse. You can see over here that there is a green lane which is blue to the laurel. It should not be there. And it should have melt or mixed bit blend with the the other, the flesh colors, which is decides to this. So this is actually happen when you use the top weapons in the black charcoal pencil. And how you actually mix it with a, with a different corners is something which is not that easy. But you can see that I am trying to actually using the flesh color, whirling that that portion and density data how I am doing it. Looting the side edges of the soft bristle block and trying to get the details. You can do that thing very easily if you want to use the pizza pencils. But here I am not doing that thing. Just because I Irene module to really understand that you can do any portrait without debits repentance as well if you are experiencing it. But if you do not have that kind of experience and if you are just a big menu, you can use this repentance for the painting. I will also use if it's unpleasant, but presently I'm not using it, will finish few of the things which is I can use fuel diagrams which is not available over here. So that we will see in the next coming part of this episode and how we should use those pensions as well and finish the portrait in a more accurate or more realistically. So see you in the next part of this episode scheduled.
28. Finding Realism : Lips anatomy: Now, in the continuation of the previous part of this episode, we are here in the second last part of this video. And in this particular video, we're gonna talk about how to actually finish the lips portion. And you can see that I'm just trying to zooming it up and you can see that how I'm actually finishing it using charcoal, pencil and feel highlighted oh, pistols blocks. So it's not that easy thing. First of all, that that is something I need to say. Take a lot of time and lack of understanding of light and shapes and how you actually achieve the particular shade of the lips to fostering thing which you actually need to understand that if someone is someone has a looking forward and lights are coming from the front side. So this is a 100% showed that the upper lip is darker and the lower lipid lighter in complexion. So this is something which is a thumb rule for any kind of portrait you draw, which is a front, front looking face and the light is coming from the front side. If the light angle as scenes, then the thing will indefinitely, which is so generically, and this rule can be followed. So as I'm zooming it In doing, you can see that how I am actually getting the values. And here you can see that the phase is little bit upward direction. And this is why the certain values to change. You can see the real image as well. What I am boasting here on the corner, and I am adding another color, which is orange-ish. The base layer was read, upper layer was little bit are unusual in nature. So this definitely, this combination will definitely change the scenario. And this really helps us to basically get the details. And I'm using the charcoal pencil as well that you can use base repentance as well. I'm not here using the space for pencil and using it in the and of this ball grip. When we're going to finish it out to four, adding few more colors, I am going to use those pencils as well. But here I am using the TOEFL pencil only. And you can see the light is coming from the right side. So there has to be a dark shades, which is a cast shadow of lipids and the lower lip and then the nose as well. So by this, you can actually get the details. Again, try to summing it up. Now you can see that how I am actually using charcoal pencil in the circulating motion and then sometime I'm using the cross hatching thing as well. But altogether we have to mix it up. So either way you're going to use these Benson, You have to going to blend it using your finger so don't worry about the strokes. Does try to keep it small. And even now I'm using the whites Apple Pencil and it's very helpful to actually get the lines of the lips. And my desk, you can actually get the most realistic results. So this is something which is very much helpful for artists to basically elaborate such details. Nijinsky, I'm adding more layers using the pistol blocks. If you do not want to know. If you do not want to actually make things more difficult for you, you can use directly PESTLE pencils as well for the minute area so that it would be easier for you to actually get the details more prominently. But if you have that kind of knowledge in that particular field, you can actually do in this wave as I am actually doing. So, having a little bit of knowledge of lighten shades and having some confidence onto the Visigoths, You Can, you do not need any kind of other tools. But if you really want to make things more finished, you can use these kind of prints. And now you can see that I am creating a spotlight on the nose thing and this is the reflection light. You can see. This definitely does kind of highlighted portion really change them complete picture from two-dimensional to three-dimensional. So always remember to put these highlighted details in your brain which really change its dimension. And it really helps you to actually get the closeness to the resemblance of the particular properly. Then you can directly use the pistol blocks as you can see here, I am using the basic block has been. So it's basically a video that what exactly you want and how much confident you are in your bristle blocks. If you gain certain kind of entrepreneurs on that precede block, you don't actually need any kind of any other kind of pistols. Pencils or pencils, pencils, other gradients as well. So finishing really take a lot of time and a lot of patients is also required or there. But at the same time, freely. Motivate, you will actually get the most of the details in the booklet. Now, similar to the Hera, as I already told that out, at least two to three layer you have to put everywhere. So here's, well, you can see that I had, I did it. I did the base layer with the brown, and then I am using the black as well. Later on I will use the chrome yellow coordinates with. So by this, by the virtue of the SQ can actually get the details as well and get the realism as well. So as I have already told you, even if you are seeing the color is black. For here, you actually have to use at least two or three colors simultaneously. Don't go with the single colored. Otherwise it won't blend perfectly. And it would be very difficult for actually do, for people to actually absorbs such things on date. So this is basically a continuous process of getting the values and seeking more and more detail from the paper. It, it is something which is really important for artists law understand about papers and what is the psychology behind using this art and kind of paper for certain kind of trying. I can see I'm using the yellow light yellow color, Camilo color for basically getting the strokes. I'm using the flesh color as well. That's very helpful. This flash colors are very helpful for getting the highlights. Don't use, right? Otherwise it look like that. You're drawing right here. So don't try to go with directly with the white here. Go with colors which is pretty much similar with the face color. And then you can actually get the real action of the year and the real tones of the year. And at the end you can actually use the white as well. So there has been, you have to go from dark to light. If you use that our colors first, then for light colors you do not. You should not use directly by. First you go with the yellows and then the flesh color, then will be the right one answer. And always remember this thing that thinks what you'll do on pistols cannot be re-used. So it can be changed from one-dimensional to other dimension, can be changed using the peace tilts only you dont need to erase it basically. So it, it really helpful for you to actually make things wrong and then try to recollect it. It really, it really helpful in particularly field of the pistons. So I'm going to finish it in the last part of this episode. So stay tuned. I'm going to finish this portrait completely. And the second in the coming part.
29. Finding Realism: finishing using pastel pencils: So this is the last part of this particular episode, and here we're going to finish it using pistol pencils. And now we're going to introduce piston Benton's as well as you have seen the previous part of this episode, ne only used basic blocks and the ciao hold pencils. So here I taught that we should use piston pencils as well and how to use them. And how actually we can get the advantage of these basically pencils and the colours which are not that easily find in the pistol blocks on the corner of what exactly require a very minimalistic amount of adding on to the particular portrait. There, there is a strong possibility of using these, like you have seen in the, in the near the cheeks. Also you can see that I'm using and the nodes as well. And I'm using a very light manner. I'm not pressurizing it and usually using the sites of the pencil, not the tip of the pencil. And then I am using pink and feel crimson color. Ok, and then click color so that it actually melt with the previous Pisaster Bloc collapsed actually accepts each and everything what actually we need to put into the portrait. So this is something which is very much ME, much difficult for someone who is a beginner. But it's, it's, it's something that you need to understand and you need to follow in your drawing as well. But definitely it is a little bit having a difficulty in if you're a beginner and you can't even get the pistons on the correct position. That is why we actually suggest the beginner artists to basically begin with a pistol blocks only ought to begin with the papers to pencils only and don't revert right? Mix the boat. But when you have something, something in your drawing any, When you have an idea about how to actually use these materials separately, then there is a possibility and then there is the option for you to actually explore both in both the depends on the blog at same time. And this is actually very much beautiful. Payments attractive for anyone to actually do such cooperates because these portraits are very much resemblance and allow you to basically draw other more strict realistic portraits are if someone is very much interested into. I've heard less appropriate than these material are very much helpful for them to basically draw such orbits. As you can see that I am using the word white Bentsen as well. Which of these filters very much helpful for any artist. And I recommend everyone to basically buy such pencils, which is a whites or events. And it definitely help you to draw anything, whatever you want to draw. It's also very much comfortably with any other kind of materials like soft pistons or chapels, or if you want to draw something on torn paper. So these Benton at the job would wait until it's very much helpful now. And for pizza pencils, there, there are certain kinds of ranges of liberty with what I have seen you in the introductory episodes in which I have introduced a pistol pencils. But I what I felt for red wine. And if you do have a and some amount of visceral blocks, let say you have a 4048 shapes are toxic sheets or more than that, then there is something which which is like that you only need a few recent Benson's, especially for horse portrait ranks, not for that and rank them. I'm mentioning here only for properly drain, you only need 12 to 24 pistol pencil steps it. And if you do have a range of corporate colors, there are sudden gametes which are making it far, especially for the corporate segment. Probe or breaks set C. So you can buy them as far less it set off trademarks are up 24 had been by them and then you can use them. This wins are any help you to actually achieve more details and more resemblance in the color of the real from the real image if you want to. One of them period. And the principle of using them, he says to use from the sites of the Benson and not at the tip of the Bentsen as the paper is green even and it's not that heavy as lead. The people what I have used or here it's somewhere around 150 degrees and 200 season, so it's not that thick. People answer. If you do have a very thick paper ended some paper, then that really allow you to draw more wettable years. Then you can definitely have that advantage of going with a layer of POSIX, layer of visceral Benton Tesla. But we're here, oh, data's only possibility of 2-3 models as I have already layered up with a pistol box. So if you redo it or if you order it, victory damages of people and then letting nothing will orally of that particular portion. So you have to use it very wisely also further sharpening thing, as I already told you. Do not try to sharpen it with a local sharpness Ot, teach sharpness. You have to buy an expensive shop, not good quality sharpener. Or you can shop it using your knife as well. So that my, that pay you, that literally saved the lead of that particular pensive. As you know, that begs a lot. So you have to be very conscious when sharpening it. So these, this particular segment is just mean for the, for showing you how you can actually add that detail and what are the possibilities actually, you may have to the details of the particular on the particular Baldry. So this is why I've mostly Dad Labs it because it's not something that you need, really need to learn. It's something that you really need to see that this kind of possibility that you do have you can achieve. So the most important part for any kind of portrayed, right? Is that how you should begin? What is the process? What did they approach? And the results? I think you guys, I'm very much confident. And you can definitely achieve that as well. Because if you have that kind of knowledge of getting light and cheats in the particular portrait when you have a certain knowledge of hues are how to create a saturation, then finishing is not something which is a very big task for you. So for understanding the finishing Porsche, you need to understand that night in sheets and how you should go from dark to light. And then adding colors which is actually not there in the portrait, then you have your own interpretation. Our own expressionism for creating such, for adding such color into the portrait as late. So also I am also suggesting you to do not try to copy the exact image. There's one blue tac professional artistically. So draw your own interpretation user ONE variation of colors and create your own creative portrait rather than our artistic poker, rather. Go middle, realistic portraits, but use your own interpretation as well. Don't just follow point by 0. Let's say bar by bar. So I am using the chalkboard pencils as when you get so you can see or hear, I used HSO_4 Benson, I've used obese three blocks and I am using It's to Benson's as well. So all the three different materials have been used in the single portray. And many of the other artists are also using bandwidths and says, But I have not included that in this particular ring because few of the artists are using it for the background portion, but you have to be very careful about using those is bad based on because if you use somewhere in the middle of double operate or let's say in the features of the Wolcott other material mix of pistols, our vista pencil won't really or early work to the bandwidths to. So for that you need to have a colored pencil. And that is why you have to be very conscious about when you are using the PAM distance you can use in the backgrounds are the larger area. Let's say you have to finish the globals are you have to show some mega ohms, then it is most recommended to use amperage. So that's like as it really beautifully created and really make the portrayed more easier as compared to the other colored media. That's a wet media. A little bit difficult as compare to that. So it's an easy way to actually being something like with the use of Pompeii. Since as you can see that I'm moving towards the finishing of the portrait and have mostly Finnish menu abortion. There are few portion which is still left and that can be addressed later on as well. So as you see that I have already covered the hands on that particular corporate as well. But it's not something that which is, which needs to be mentioned. What here we thought this pole, this glasses only meet four procreate rowing and how you actually use subspace term for it. Creating features of the particular voted. So other features are not that important for me. That is where I'm not finishing it according to the requirement. I'm just leaving it. Just be like that only so that you can refocus on the particular team, the features of the face, how you should actually achieved the face. And I will get the semblance From the really rich and how you can create your own interpretation as well. So I think that I have almost created each and everything. What is actually need to be. Let you know. And I don't think that I have left anything in this time of four pit. And I hope you'll really understand each and everything what I have done you your here and if something which is left out to get mentioned in the project class or you can comment in the comments section which is given below. So if anything, which is there in your mind and you want to ask with me, you can exactly as the same portion and I haven't tried to definitely get you give you the correct answer and possibly advice what is suitable for you. So I hope that you really get each and every details, what needs to be to be given and what is actually required for the history, right? And this try, try from your own so that you can actually see how you actually can gain confidence or bass tones. As confidence is the most important thing for any portrait drawing spatially for pistols, because pistons are much more messier than anything other, anything different or anything. As compared to, let's say, bit colored pencil. It's much more can be much more messier than anything else. So that is why I advise you to flow with the B-cells and try it and see how the, how you can identify an evolved to be so happy to any friends.
30. Preserving pastel artworks: So now let's talk about how to preserve the histones. And it's artwork. So preserving a pistol artwork, it's something which is very important and very crucial because based on growing need to have some kind of preserve aeration so that it can last for a longer duration because it's a very dry powder element and it vanishes or it spread so easily, whatever you draw. So it's very important for someone to basically preserve it for the longer time so that he can, he or she can do retain it for longer time. So there are many possibilities on which you can actually preserve it for the longest time and save it from the environment. And so the first option which is available that is known as fixated, which is already there for some kind of graphite drawing or some kind of charcoal drawing has when so many of the artists use fixated for that thing as well. So this is something which is very much a label and many of the artists are using. This is fixated, which is a one kind of Executive MBA level in the market. There are many kind of fixated. But what you actually need to see in the fixating when you are going to. But j's it, that it should be colorless and it should have very good quality and it should not change the actual color of the trying what you are making actually. So you know it very well. So it's nothing like something which need to be explained again. So it is a normal fixated, fixated which can be used. I'm going to show it to you that how to actually I have used it on my drawing and what are the actual result? I have seen? Here is a small video on it. You can see. So we are here in the our outdoor, always use fixative in outdoor, not using inside the room or inside the hall. Because the gases which are coming out from these scans are very dangerous for your lungs. So always have a mask on your mode and get off your eyes as well that uses specs and then use it on the outside and then use it in the vertical direction. And you can see that I'm reporting my drying and then layering it. Firstly are pretty evenly and having a certain distance from the drain, which is our own targets in 30 to 20 centimeter. And pressing the evenly novel the can evenly and go it for at least three layers. So this is the second layer and you can see that the color is not coming out. And the results of that particular kind of fixating is very good. And you can see that the color of the drying is also not changing. So this is something which is very important for you to check whether you are using the correct. Executive or not. So if the color is changing, not away. So development for you to use. It shouldn't be colorless. That should not change the color, and then it should not smell badly. So there are many kind of etcetera which are very cheap. And they smell very badly because it's having a very handful. Films are gases. So always see the word quality or those watch for the good quality. And then here I am using it for the job or grinding as well. So you can see, you can use it for the charcoal drawing and you can find a very good results or there. And you can see the little kind of color has been changed or the background of that particular thing. What I border, what I have put behind the drawing. So again, here I am doing the three layers. And you can see the results are very good. Very less change in the color and there's nothing coming out from the drying. Which is very, very impressive for the particular kind of fixated. This is the most important testing of the of the fixative that should not lead. Dust. Your boundary element should come up. If they come out even after using the fixated fixated as not of your use? I'm again using it on the basal drying and you can see I'm doing it again in a similar manner. Dont not use of executive in the horizontal direction and or putting a drying in the, in the surface or ground and used again in the horizontal direction. Do not do that because it's not recommended. So use it in the vertical position. It will definitely give you a very good results. As far as my experience concern. So this is the way that you should actually use the fixated. And it'll really help you to retain peaceful drawing for the longest time. And you can see the very little amount of color is still coming out as a big time to basically get dry in fixed on the drain resident. Now the other options if someone don't want to use et cetera, because fixative actually, many of the artists, including me as well, are not in the favor of using the fixative onto their basal rank because somehow it definitely reduces the brightness and the lightness of the portrait. And it certainly changed a few of the columns up to certain extent. Also, a, smells bad and it's very, not very feasible. Every time you use it. So the other options which are available who don't want to use succeeded. That is saving, saving your drawing through birth papers, butter paper, or tissue papers. So these papers are, as you know it, they are very thin paper and many good brands are actually using the paper with the, with this kind of paper as well. Let me show it to you. So you can see that these kind of paper company actually make this kind of paper Widow murder paper as well. So company actually knows that if someone want to draw something here, so he can actually preserve his drawing with, with this kind of whether paper or tissue paper. So you can actually say we saw a few of my art works. I can show it over here and how I preserve it for the longer time. You can see that this is that I have at light and actually destroying had been made by me. So this, you can see that it didn't spread with the, with the time. Also, you can see here there are some MAC which you can't stop too, actually the ripple with other paper. So this is the way actually we should. This is the best and easiest way to actually save your drawing. And there's another drying which has been done by me. We can see that I have just saving read this paper thing and nothing has been changed with time. I have done this drying to year back, almost two years back. But the brightness and the colors are as it is, as it was in the first day. So you can see that this much of brain you can save and with just a paper thing. So this is the best and easiest way actually to preserve your drawing. Also, few of the artists also use this transparent sheets as well onto it. First, apply the butter paper and then use the transparent sheet for saving it like a frame thing and save it. You can save it for the longer time and preserve it. Whenever you want to show it to someone. You just have to put it up and then you can show the original content. So these are the way actually, this is the best way and the most economic way actually do preserve your drawing. If you do not have that kind of papers, which actually comes with this kind of papers, actually sanded papers are usually comes with this butter paper attached with it. So you can buy these kind of tissue Professor Butter papers in the market. And you can actually preserve it using the transparent sheet as well if you want to, want to put into it. So it will be definitely save your drawing for the longer time. Now, the last option which is available with you and what you can actually do that is frame your grain. So this is also a very common practice, but artists actually used to do they draw something and then the frame it out. And in the local market from the local market. But this is again, a very, not a very economic one. It's a little bit costly. This one is also a little bit costly. I can see what this one is the most economic for saving the software syndrome. So these are the options which are actually available for saving the piston ring.
 Ankit Jasmatiya, Fine Artist