Transcripts
1. Class Trailer: I've loved art and
illustration my whole life, and I loved fashion
my whole life. And when I discovered fashion
illustration years ago, I immediately wanted
to try it out. So I found the first fashion illustration
book I could find, get my hands on, and I grabbed a sketchbook
and I dove in. I filled so many sketchbooks, and as I continued to sketch
and continued to sketch, my interest and my excitement
grew from the practice and exploration that I continued with
illustration of fashion. And many, many sketchbooks
later with vast improvements. I've had the opportunity to
work with top luxury brands, such as Fendi, Coach, Neiman Marcus and
many others doing fashion illustration
at live sketch events as well as marketing materials. I still sketch every day, and I feel like my
sketchbook practice is so important for me to stay inspired and continue
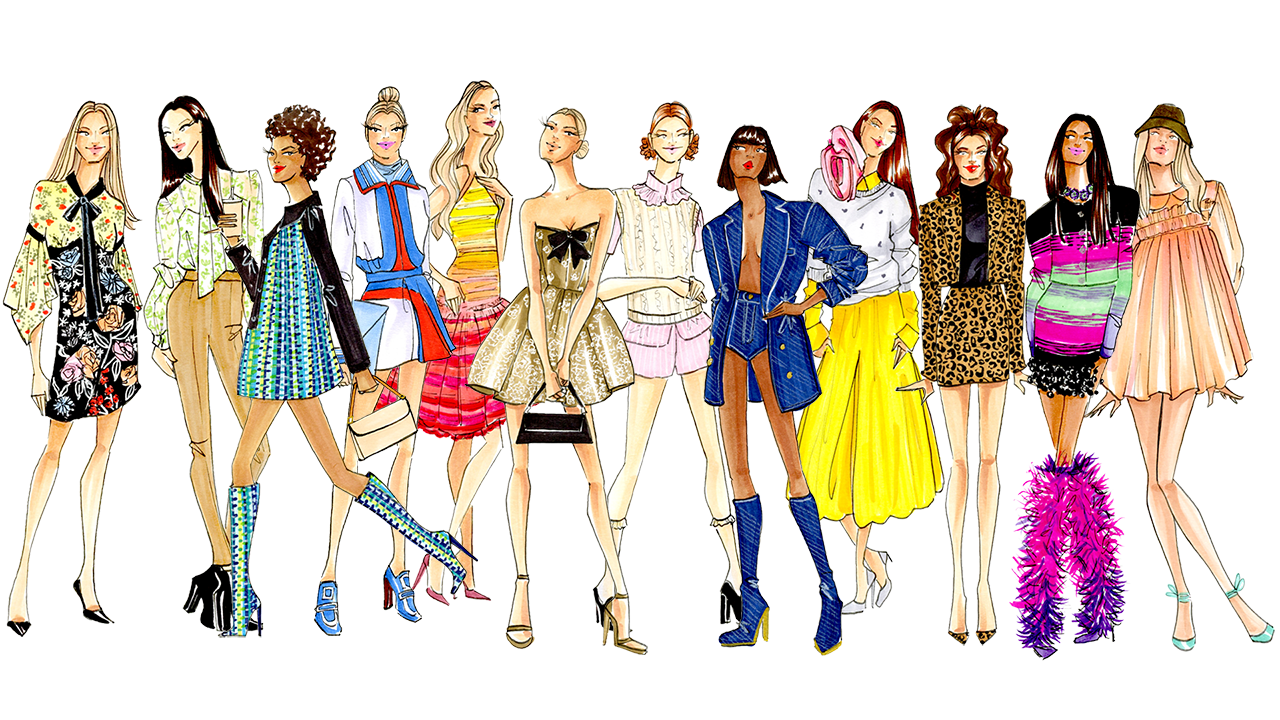
to grow my skills. In this class, I'm
going to give you ten different fashion
illustration poses that you can practice
in your sketchbook, and I'm going to
introduce you to some fashion industry
newcomers to really inspire your sketches and inspire your
sketchbook practice. At the end of this class,
you're going to have a sketchbook filled
with figures and you're going to be able to see your growth from beginning
to end. Join me. Let's get started. Let's get inspired and let's dive
into our sketchbooks.
2. Class Project: The project for this class will be a finished
illustration of two figures side by side using two different poses
that we cover in the class. You will be practicing
ten different poses, and by the end of the class, you can pick the two poses
you're most comfortable with to illustrate for
your final project. The only supplies
that you'll need for this class are a sketchbook, a pencil, an eraser and pens. You'll also need access to a Google search so that you can look up designs from the
designers that we cover. I also have a Pinterest
board for every designer. So if you want to look
on my Pinterest to get ideas and look at all of the different garments
from the designers, you're more than welcome
to do that, as well. I've also provided some resources
in the project section. This includes a list of different books and
other resources, including websites
that I like to use to refresh my skills and
to learn different things. I've also got a list
of artists that inspire me and also help
me to stretch my skills. So definitely take a look at that if you want some
additional resources. Remember that the
goal for this class is improvement, not perfection. The aim is for you to develop a sketchbook practice that
you can do consistently so that you can see your
skills grow over time because the only way to improve your skills is to practice.
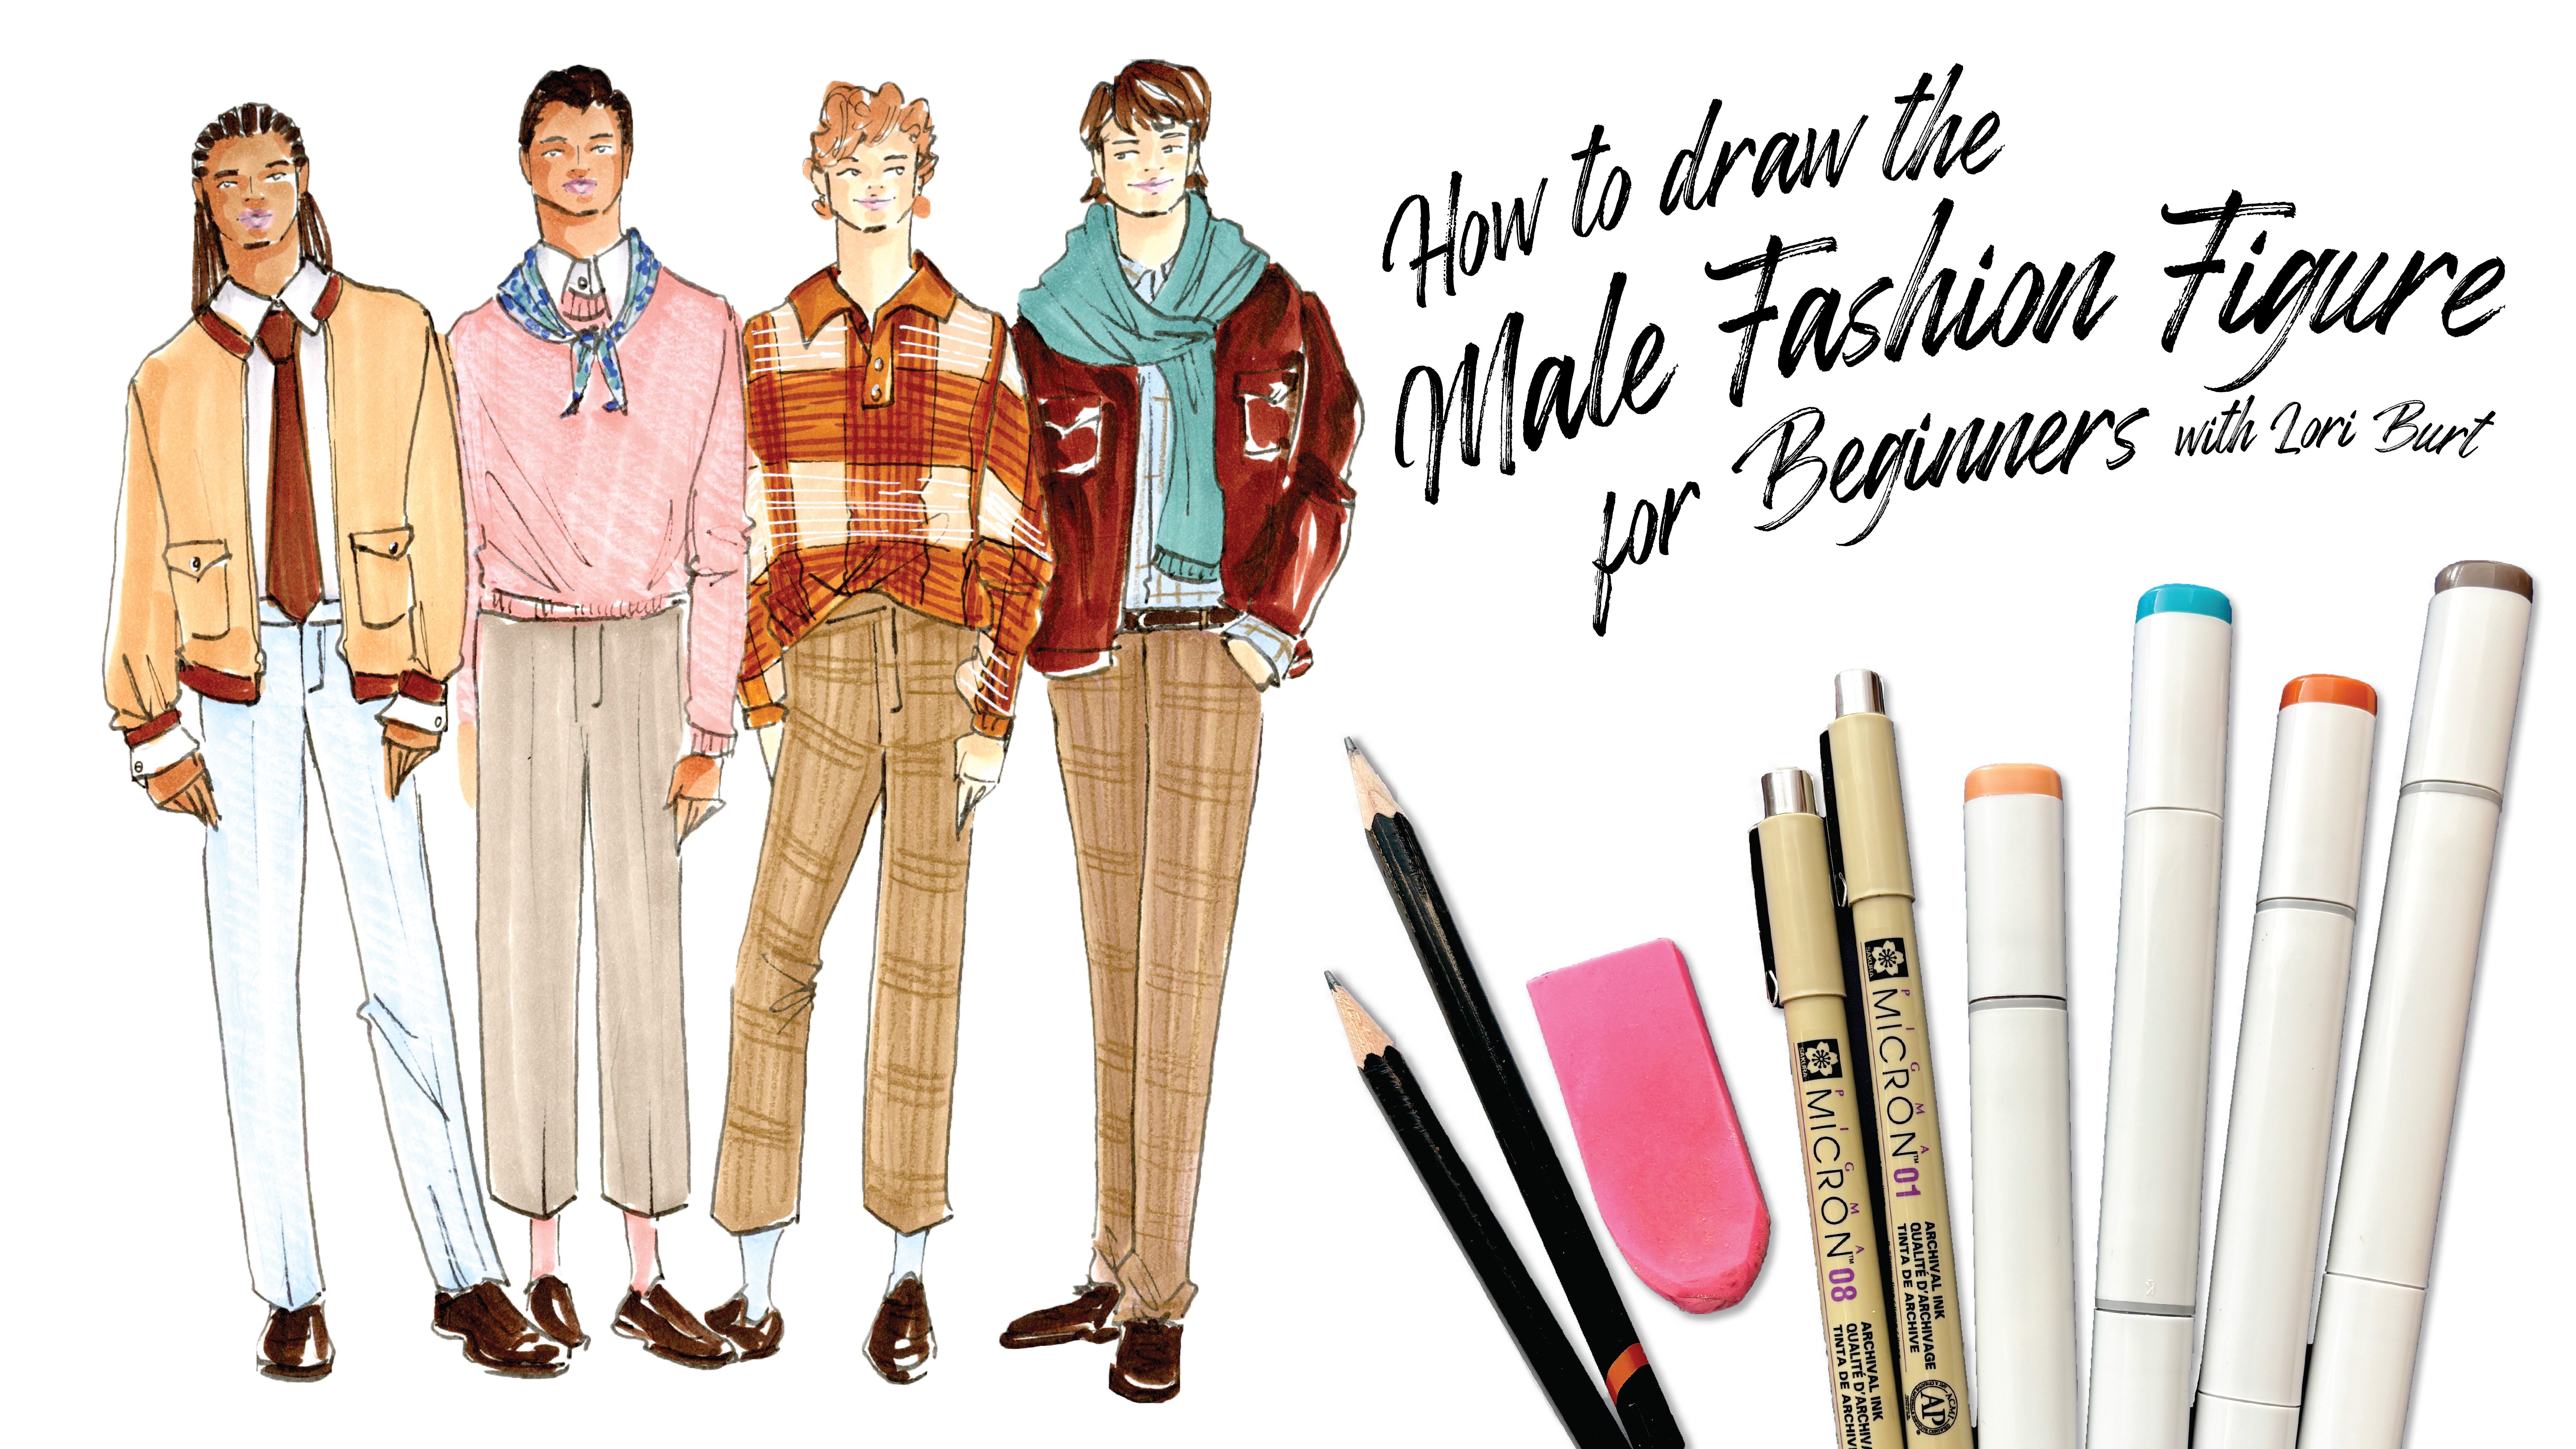
3. Quick Note: So just a note before
we get started, this class really is meant
for all skill levels, but you're going to get the
most out of this class if you already have a basic
knowledge of the fashion figure. The fashion figure is 9-10 heads tall with elongated limbs
and an elongated neck. If you don't have that
basic foundation, you can always pop over to my beginner's guide to
fashion Illustration and take the first couple
of lessons just to get that firm base of
the fashion figure. Again, this class is really
for all skill levels, but that basic knowledge is going to help you progress
just a little bit further.
4. Pose 1: Casablanca: Hello and welcome to day one
of our sketchbook practice. Today we're going to start
off with the walking pose. It's a common pose in
fashion illustration, so I thought it would be a
great one to warm up with. It's dynamic in that
you learn movement in the figure and you can do different things
with the limbs, the arms, and that back leg
as it's walking forward. I think it'll be a great
one to start with. If you want, you
can also reference this pose in my
previous classes. We go over this pose as
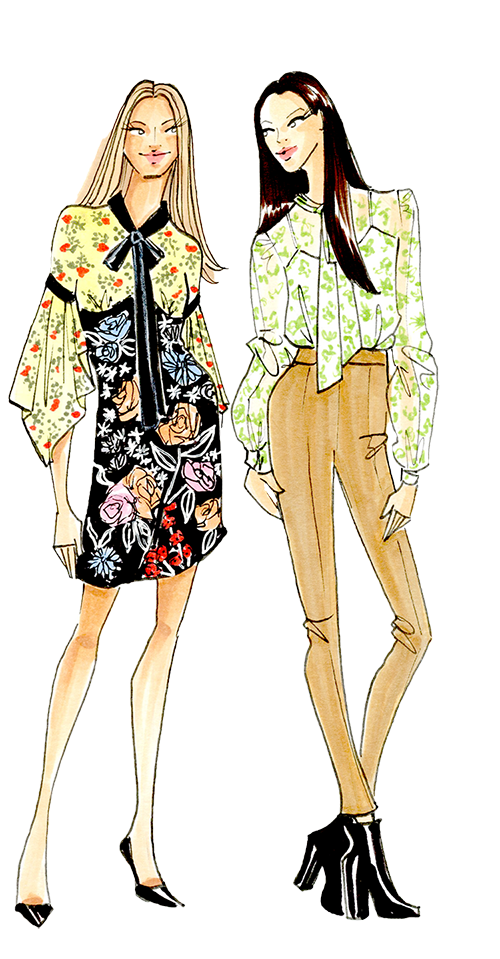
well and you might be able to glean some extra little tidbits if you want to do that. So the designer we're
going to start with today is a label
called Casablanca. Casablanca was started
in 2018 by Shiraf Tajir. He's a French Moroccan and he
is a self taught designer. He did not go to fashion school, which absolutely blows my mind, although his parents were Alias, so he did grow up
knowing a lot about sewing and garments and how to put things together
and aesthetic. His brand is really known
for that old world luxury. There's a lot of
printed silks and very beautifully
tailored garments throughout all of
his collections. He's been really climbing
the ranks recently and he's had collaborations with
New Balance and Bulgari. He's a really
incredible designer. Casablanca is a
really fun label. I'm really excited to show you Casablanca, let's get started. All right. I'm ready to dive
in and start sketching. I've got my Kanson mixed media. It's a nine by 12 size
sketchbook and I'm just going to flip open to a
blank page to get started. We're going to start I'm
using a Derwent twoH. They're pretty light
and I like that because I like to
draw a lot of lines, they're easy to erase at the end when I'm finished
with my whole sketch. Use whatever it is
that you want to use. I'm going to use myH. So the first pose we're going to start with
is the walking pose. It's the most common pose in fashion illustration
that you'll find. It's a great one to start with and to warm up with because it teaches how to sketch out
balance and movement. At the same time, you want your figure to
look like it's moving forward but also be balanced
but not so balanced, I guess, that it looks like
a statue kind of frozen. I have covered this pose
in my previous courses. If you want a little
bit of a deeper dive, feel free to go
back and reference the walking pose in
my previous courses. But I'm going to go
ahead and get started. I'm going to sketch a couple of figures on the page
and with each figure, I'm going to vary
different parts of the walking pose just to create some practice for
myself and to stretch myself. I'm going to go ahead
and get started. I'm going to start with the
head and work my way down. With the walking pose, your shoulders and your hips are going to be sloping
opposite directions. Wherever that collar bone is, you can draw a line all the way down as straight as possible and that's going
to be your balance line. That's going to
help you visualize how to get this
figure in balance. Again, those shoulders and the hips are sloping in
opposite directions. Then I'm going to bring this leg just right across that line. Then for the leg that's behind, because that hip is lower, I'm going to keep that knee just slightly lower than the front. Then for the arms for
this first figure, I'm just going to keep
them pretty basic. This one's going
to be out in front since the opposite
leg here is out in front and this arm
is going to be behind because the
opposite leg is behind. I'm going to go ahead
and fill out my figure. With this first figure, I'm going to keep this
leg towards the front. I'm not going to push
it too far behind. I'm going to keep it the
standard walking pose. With this, that means I'm going to what's
called foreshorten. I'm going to
foreshorten this leg. I'm going to draw it shorter to give the illusion
that it's pushed backwards, just like that. I am going to see all of
the top of that foot. There's my first walking figure. I'm going to go ahead
and dress it now. I'm going to put my inspiration
photo from Casablanca up on the screen and get
started on dressing my figure. With the outfit, I'm not going to do it too
detailed because again, this is really about
sketching our figures, but I'm going to get
some basic lines down and then I'll finish
it off with my pens. Let me at her pointe. I'm not going to sketch
in the sunglasses because I'm really just trained to focus on the figure here. And she's also got
this bag in her hands. All right. So there's
my first walking pose. I'm gonna go ahead and
finish it off with my micron pens,
starting with an eight. All right. So something like
that or my walking figure. I'm going to do a
little bit of detail in the micron number one. There's my first walking figure. At the end, once I've
sketched all of them, I'll go back and
erase so that we can look at those final lines. But I'm going to
move on to my next one and I'm not going to
talk too much about it other than I will let you know I'm going to
be trying to vary the arms a little bit and the leg the back
leg a little bit, just to stretch myself and
give myself that practice and change up the pose a
little bit. Let's get started. Just. All right. So for this pose, I've pushed that back leg a little bit farther
over to the side. I think that it conveys a
little bit more sassiness, a little bit more confidence. I've also changed the
arm up a little bit. I'd like her to be, I think, holding some sort of bag or holding a
clutch of some sort. And then the arm that's out front just hanging,
something like that. I'm going to go ahead and
put my inspiration photo up and get started
on the outfit. Yeah. Kaa Alright, so I finished with my sketch
as far as the outfit goes. I'm just going to take
my number eight micron and finish with my lines. H, All right. I'm just going to finish
up with my number one to sketch on some of
the smaller details. All right, there's
my finished pose with the garments drawn on. Again, I'm just trying to
get it down on the page, sketch out my lines and move
on to my next walking pose. I'm going to go ahead
and move on and start another variation
of the walking pose. Just. For this one, I have put her arms in pockets
and this is always a little difficult for me because the elbows are just
all over the place. I feel like it's hard to get a real easy read on where
the elbows are going to go and how they're going
to fit in and how it's going to look appropriate
on the garment. So it's a little difficult.
It's a little bit harder, but I wanted to stretch
myself a little bit. Again, the leg is also
in a different position. A, if you've noticed, each of my figures are they have a different
leg in the back. I've tried to vary that again, just to give myself a
little extra practice. So I'm going to put up
my inspiration photo for this one and go ahead and get started finishing it up. All right, so I've sketched
all my preliminary lines. I'm going to go ahead and get my number eight micron and
put down the final lines. Alright, and I'm just going
to grab my number one and do some finishing details. All right, that finishes
up my third sketch. I am going to end it
here and erase all of my pencil lines and kind of show you what the final
illustrations look like. This finishes it up
for the walking pose. Remember to try and
fill your page with as many figures as you
can, vary each figure. Remember that this is
really about practice, not perfection by challenging yourself to try different
things with each figure, you're going to
learn a lot, even if you really don't like the way they've
turned out or whatever. Don't worry so much about
that. Just practice. Just really practice
and stretch yourself, and I will see you
in our next lesson.
5. Pose 2: Marine Serre: Welcome to day two of
the sketchbook practice. Today we're going to be looking
at another walking pose. This is going to
be a side walking pose completely from the side. This is a great pose because it gives you a
different perspective on how the weight shifts as a figure is walking
from the side. Also, it'll give you a chance to practice the side view
of the human face. The fashion designer
we're going to be looking at today is Marine Sa and she is a really rising up and coming star
in the fashion world. She graduated in 2016 from a Belgian fashion
school and then started her label in 2018. She is really known
for sustainability. She is really trying
to change that. In the world of
fashion, she uses a lot of recycled and
upcycled materials, and she is known for this half moon print that she splashes throughout
all of her collections. Her collections are a
little bit futuristic, a little bit otherworldly, but really beautifully tailored. I'm excited for you to get
to know her and get to know her label and let's jump into our day two of our
sketchbook practice. All right. Welcome to day two of
our sketchbook practice. We are going to be doing a
walking pose again today, but it's going to
be from the side. This one can be
pretty challenging. I find this one to be
really challenging myself because it can tend
to be a little bit awkward. But if you keep in mind some
basic rules of the figure, you can continue to practice
and really improve. I'm going to go ahead
and get started. I am going to vary my
poses a little bit. This one, I'm going to start
with an awkward way to draw this one where both
legs are pretty straight. Generally speaking,
that means that the stride is at its
very longest point. Rarely do you have
both legs straight. But we're going to
practice it that way first just to give ourselves kind of that
visual practice of balance. We want to make sure our
figure is balanced and then I'll show you some other
variations of this pose. Before we get started too, I do want to just
highlight one thing. This is from the
fashion poses for fashion Illustration
product where they give you 100
different fashion poses. This is actually wrong
because if you can see this leg that is in
front that's going behind has this arm
also going behind. Normally, this arm would
be in the front if it was actually accurate to
the way that a person walks. I thought that was interesting. I started sketching
this one from this fashionary pose and I could not get
it to look right. It just felt funny to me. Then I realized, Oh, yeah, this arm should actually
be going this direction. But I do think that
this pose looks better with the arm
going backwards. I'm going to actually have
this leg in front or this leg, I guess, in front
moving forward. I'll show you what I
mean. Let's get started. I'm to start with the
head and the neck. And for this first one, there's not going to be a
ton of arch in the back, but there is a little bit
of arch, keep that in mind. Remember too with
this side view, your shoulders and your hips are actually pretty parallel. You don't need to vary the
slopes on this pose as much. Because this back
arches a little bit, you do have to compensate
for balance with your hips. Then I'm going to
put this leg moving forward because I want this
arm to be moving backwards. And then because we're
on a straight on view, I'm going to put this
leg the same place, start the same place as
this front leg and push this one backwards
and just put my leg, my feet markers right there. Do that. Your shoulder is really going to be pretty
much right below your chin. It might feel a little
bit funny at first, but Then again, for
balance purposes, this foot isn't going to
be flat on the ground the same as this one because
you are still in motion. You are walking, not to have both feet
planted at any one time. I'm going to do
something like that. Then this arm it's a little bit exaggerated, but
I'm going to push it back. And maybe she could be holding something something like that. Then this arm that's
hidden behind, you can do something
like that where you've got your thumb here
and then fingers here. But this one's really the
side too that you can vary, maybe she's holding a cup of coffee or maybe she's
holding her phone or, think of it that way. There's my first pose. I'm
going to go ahead and put my inspiration photo up and
get started on dressing her. Okay, so I've sketched in
all my preliminary lines. I'm gonna go ahead and get my number eight micron
and finish it up. All right. Then I'm going
to finish up by taking my number one micron and just finishing up
some of the details. All right, there's
my finished sketch for my walking pose. The next couple, I'm going to vary the legs a
little bit because you don't normally see
two straight legs. Usually, one of them
is bent in some way. I'm going to show that in
the next two sketches. I'm going to go ahead
and get started. All right, so here is the second walking
post that I've done, and as you can see, I varied
the legs a little bit. Instead of having this really stiff feeling of the figure, I've made it a little bit
more fluid and a little bit more casual looking
by just bending the knee. Honestly, that's
how people walk. People walk with
their knees bended. So definitely try this out. Again, I just feel like this arm should be
moving backwards. I find it awkward
when I drop forwards. So I've kept that the same, but then I've changed the
legs up a little bit. So it looks like she's just
got this spring to her step. I'm going to go ahead and put
up my inspiration picture and get started on
finishing this pose. Those are my final
lines for this one. I do want to express to you too, don't feel like you
have to do everything exactly like what your
inspiration photo has. Feel free to take some
liberties and sketch it the way that you feel like it looks best or that you're most
comfortable sketching it. I can't really tell
with this photo if this is a dress or if this is a vest over the top of a
shirt and then some shorts. But I'm sketching it as a
dress because I think it looks super cool as
that line dress. I'm taking a few liberties, but I'm going to go ahead and finish up with my
micron number eight. Then I'm going to go
ahead and finish up with my number one by doing a few
of the details on the face. Remember with the
sidewalking pose to bury the legs a little bit
with each sketch that you do and remember that that hidden arm can also be
fun to play around with. So go ahead and fill a page, fill a few pages with this pose. It's hard to squeeze too
many poses on there. So go ahead and
fill the page and I will see you in our next lesson.
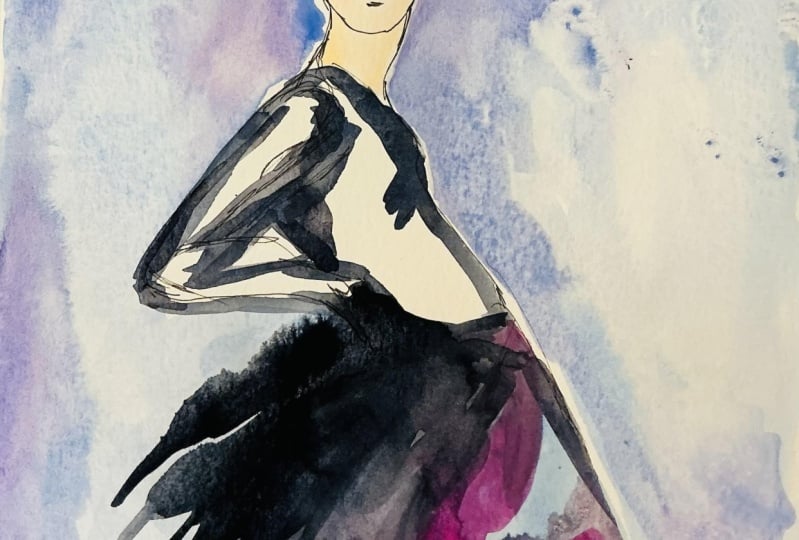
6. Pose 3: Molly Goddard: Hello and welcome to day three of our
sketchbook practice. Today we're going to be
taking a look at this pose. This is a really glamorous pose and I feel like it's great to practice this one
because it allows you to practice shifting weight
through your figure. You could really
exaggerate the legs and the arms in this
pose and it reminds me of evening wear and those
glamorous evening gowns. So I'm excited to
practice this one today. The designer we're
going to be looking at today is Molly Goddard. I'm so excited about this one because she is such
a fun designer. She went to the London
College of Fashion and started her label in 2014. She is from London. She grew up near
Portobello Road, so she really has a love of vintage and those beautiful
hand done techniques. She uses a lot of tool, silk organza, and all of her
collections and designs, and she really wants to preserve that hand
done technique, that old world technique. She even has an installation at the Metropolitan Museum of Art in their costume institute. So she's really, really an up and coming star if not already made a huge
splash in the fashion world. She's a really fun designer. I can't wait to dive in, so let's get started. And the next pose we're going to be working on is really
one of my favorites. I feel like this exudes that old Hollywood
glamour feeling. This one is a little
bit more difficult to vary as far as the legs go, but you can definitely do some
fun things with the arms. Let's go ahead and jump
in and get started. For this pose, you're going to start off just like you would the walking pose where you are going to be varying the
shoulders and the hips. They're going to be tilted
in opposite directions. The more severe
those slopes are, the more attitude your
illustration is going to have. Keep that in mind, that
could be something fun to practice and
play around with. And then this leg is
going to come down just like it would for the walking pose, exactly the same. We're going to try and keep
it close to that center line. Then this leg, because she's standing is going
to be out front and it's kicked to the side and just exuding that kind
elegance and demurenss. So for the arms, I'm going to put them
both on the hips. I think that's pretty fun and it exudes a
lot of confidence. I'm just going to
finish it up here. Then I'm going to
finish the legs. And for this one, this leg
is going to be in front, you won't see this portion
of this leg on this side, but I like to just make
sure that I know where everything's going
and I like to sketch that in just for
my own reference. Something like that, and sketch those facial
features in real quick. Again, this is really
similar to the walking pose, your torso and your
hips are the same. This is your weight bearing leg. This is going to be the same
as the walking pose as well, and we're just
changing up that leg and we're having some
fun with the arms. She is not moving, she is standing still, so we need to make sure
that balance is our focus. I'm going to go ahead and put my inspiration photo up and go ahead and finish this sketch. This is a bubble shaped skirt. It really is whitest right around this area
and then comes in. Sometimes it can be hard
to know what to do. You don't want it to go
straight across because obviously this leg is pushing the skirt
forward a little bit, and then you just
have to make sure and note that in your drawing. When you think about putting
the clothing on the figure, just make sure you know what's coming more forward
and make sure to draw in the the wrinkles or
the folds appropriately. Just a little tip there. I'm going to go ahead and grab my number eight and finish
up my illustration here. That finishes up
my larger lines. I'm going to go ahead
and grab my number one and do some of the
finer details. I'm going to move on
to the next figure, and I'm going to change it
up by changing the arms a little bit and possibly exaggerating the
leg a little bit more. Here's my second figure, and you can see I messed up here a little
bit with the arm. Obviously, this
shoulder is higher, so this hand is going to
be higher than this hand because of the difference
in where the shoulders are. Then this leg, it's
not super exaggerated. It's hard to exaggerate
it, I guess, a whole lot without
ruining the balance of the figure or the
proportions of the legs. I'm going to go ahead and put my inspiration photo up and
finish up this illustration. I've gone ahead and sketched out my lines for my
inspiration photo, and I'm going to
go ahead and take my number eight and put
down those final lines. I've got my final lines down. I'm going to go ahead and grab my number one micron and finish a couple
of small details. All right. That finishes up for this one. Next one, I'm going to do. I'm going to vary the arms
a little bit more again. So's go ahead and get started. Okay. So for this pose, I've decided to make her look a
little bit bored, she's got this arm
lazily over to the side and her elbow resting on it and not knowing what to
do with this other arm. This leg is not quite as exaggerated of a bend
as these two are, but I think it just adds to the look of boredom
or nonchalance. I'm going to go ahead and put up my inspiration photo and get
started finishing this pose. A. I finished up with that one. Sometimes tool can be
really hard to sketch out. I'm trying to be mindful of the lines that I
put down a lot of the tool is probably going to be illustrated more with marker and color
than with lines, and we're trying to really
focus on pose here. Just keeping that in mind, I'm
going to go ahead and grab my number eight micron and go ahead and do my final lines. So I'm going to go ahead and
grab my number one and do some final finishing
touches on my sketch. There are my final
three figures on this glamorous sassy pose. I'm going to go ahead and erase my pencil lines so you can see the final sketches ended up. There's some parts and pieces
that I'm not happy with, they're not perfect, but that's the reason that
we're doing this. We're doing this to
improve, it's practice, not perfection, go ahead
and erase my lines. All right. Those are my
final three figures. Go ahead and fill up your
page with this pose. As you can see, I've
varied the shoulders, I've varied the way that the legs are which leg
is popping out front. Make sure you do vary your poses and that'll
help with practice and understanding of the balance and just the basic overall
shape of the figures. Go ahead, get started and I will see you in the next lesson.
7. Pose 4: Kevin Germainer: Hello, and welcome to day four of our sketchbook practice. Today we're going to be
looking at this pose. I really like this
pose because it reinforces balance
in your figure. If you cross one leg over front, you're going to
cross the other arm the opposite direction,
that kind idea. This one isn't necessarily
one that you can do a lot with the arms and legs. This is one that you just
have to rote memorization, just keep practicing
the exact same way. But feel free to
exaggerate in any way that you want to and really
have fun with this figure. Today we're going to be
looking at the designer, Kevin Jamaer and he is
a really fun designer, bright, colorful, little bit costume, really fun designer. He's from Switzerland. He graduated fashion school
from the UK and he is really trying to create luxury through sustainability
or sustainable luxury. He uses a lot of upcycled
and recycled materials. Recently, he did a collection where he used a bunch of buttons from somewhere that he found in Asia, just being discarded. He really does try to take
unused materials and then use them his designs,
which is great. It's great direction
for fashion. His designs are also very
colorful, very vibrant. The silhouettes
are really unique. And as I said before, it borders a little
bit on costume, but it reminds me a lot
of that 60s 70s disco era of really shiny and glittery and lots of
color and more is more. I'm really excited
for you to see Kevin Java, let's jump in. Alright, so I've got
my supplies ready. I've got my mixed media paper. I've got my pencil, my
erasers, and my microns. Today's pose is going to be a very confident
glamorous pose again. It's kind of similar to the
pose that we did yesterday, but it's just building
off that a little bit. So we're going to bring that leg the front
leg all the way forward rather than kind of popping the bottom of
the leg to the side. So going to go ahead
and get started. You're going to start
off just the same as you would the walking pose. That walking pose is really kind of a building block
figure for so many figures. So I'm going to go
ahead and get started. So as you can see, this is exactly like how you would
start the walking pose. You've got the shoulder line and the hip line that are sloping
in opposite directions, and then you've got this leg, the weight bearing leg kind
of coming to the middle. Kind of if you kind of draw a line down the center
from the color bone, you can see that your
foot is going to be right about center. So I'm going to take this
other leg and I'm just going to put it forward a little
bit. Just like that. The knees are going to
be pretty close to even. That's just because even
though this hip is lower, you'd expect the
knee to be lower. But where this leg comes out a little bit
and rests in front, it's going to actually
it's going to be about the same height
as this knee here. I'm going to go ahead
and do the arms in a way that's
little I don't know, modest feeling, I guess. Okay. I definitely going to
have to clean this arm up when I do my final lines. With this back leg, I'm
going to do it just as as we just both legs
are facing forward. Your big toe would
be right here, so you'd have a natural slope
up with your big toe here. Um So that's kind of
my preliminary figure. I'm gonna go ahead and
put my inspiration photo up from Kevin Jama. Go. Alright, so there's
my final sketch. I'm going to go ahead and
grab my number eight micron, and I'm going to do
all of my final lines. And I will say that
the skirt area, I would normally finish
with marker and with color. And I'm not going to
I wouldn't normally put a lot of lines down first. I do the color first
and then add the lines so the pen doesn't
muddy up the color. But I'll try and add in some of that texture just to kind
of finish everything up. Alright, so now I'm going to
grab my number one micron, and I'm just going to go
through and do a few details. Got. And for the skirt, like I said, I normally wouldn't be drawing
this stuff in right now. I usually wait add color first, because no matter
what marker you use, even the best alcohol
based markers are going to cause the ink to kind of re wet and then
you're going to get some muddiness and smudging of the ink, no matter
how dry it is. All right, so there's my final
pose with my final lines. I'm going to try
and mix up the arms and the leg a little bit, and
I'll show you what I mean. So I'm going to jump
into my next figure. All right. So here's
my second figure. And as you can see,
what I've done is I've positioned the leg so that this back leg
is facing sideways. And I think having it be like this is just a
little bit more stable. I think it visually looks like the figure is a
little bit more stable. And then the arms,
I'm just creating a very soft kind of tightness around the
figure with the arms. So I'm going to go
ahead and put up my inspiration photo and get started on the rest
of the illustration. Alright, so that's how I'm
going to leave the sketch. I'm gonna go ahead and grab
my number eight micron and do some of my final
lines. And, yeah. All right. So that's how I'm
going to leave this sketch. I will say this probably
wasn't the perfect designer to pick to really be able to finish those legs and see how those
legs differ from these legs. That's why I've taken some liberty and made
sure that you can see the tops of these
really fabulous boots. But you get the idea, and I love a strong shoulder with a tapered kind of
view of the figure. I think it looks really great. So of course, a lot of this texture will be
finished up with color. But as far as the sketch goes, this is the final
sketch for this one. I'm going to go ahead
and do one more. I'm going to vary a little bit again with the arms mainly. And yeah, let's go
ahead and jump in. Got that. Okay, so for this final sketch, I haven't really varied
the legs too much, but I've changed the arms a bit. So I'd like for this
one to have her either holding a purse or maybe
even some shopping bags. We'll kind of see where it goes. So I'm going to go
ahead and put up the inspiration photo for this one and finish
up the sketch. Gas. J. G. Alright, so there is my finished figure
for that last pose. Go ahead and keep
trying out this pose, vary the arms and even the legs if you'd
like a little bit. Search for those
inspiration pictures. Fill up as much as you can. Practice. Not perfection, and I will see you in
the next lesson.
8. Pose 5: Markarian: Hello, and welcome to day five of our
sketchbook practice. We're going to be looking
at this pose today. This is a very
confident pose with that leg popped out and
the arm on the hip. There's not a lot that you can do changing up the
limbs on this pose, but I do encourage you to change with the leg
that's popped out, change where the foot points. That can really change
the feeling of the pose, whether it's a little bit more subdued or a little bit
more powerful and outgoing. Try that out as
you're sketching. Today we're going to be looking
at the label Markarian. It was founded in 2017
by Alexandra O'Neil. She's the designer
behind the brand and she is from Colorado. She loved looking
up at the stars as a young girl and named her fashion label Markarian because it means bright
cluster of stars. I'm really excited to take a
look at her as a designer. She's really known
for evening wear. She's really known
for beautifully tailored, lacey girly looks. The magic in her clothing
is really in the details, we're going to look
close at some of her garments and
I'm really excited to dive deep to take
a look and she's a really fantastic
designer. Let's dive in. I've got my sketchbook ready
to open to a blank page. I've got my pencil, my eraser, my pens all ready to go and ready to jump
into this next pose. This pose is a very
confident, strong pose. It focuses on balance, so it's a great one
to practice with. This one pretty much starts
the same as our walking pose. A walking pose, it's
just such a great base. It pretty much starts the same, but the legs are just a little bit different and
I'll show you why. I'm going to go
ahead and jump in. O. See already that the torso and the hips are pretty much the same as what you would
do for the walking pose. They're sloping
different directions. But then this leg,
rather than drawing it all the way to the
front here and making this the one leg that is holding
all of the weight, for this pose, we
draw a little bit to the side where it is going to be bearing
most of the weight. This other leg is also going to be bearing some
of the weight, too. So they're a little
closer together, but this leg is a little bit
further out from the center than what you might have for a pose that
is a moving pose, but it all ends up
being pretty balanced. So I'm gonna do the arms here. Alright, so there's
my final pose sketch. I'm gonna go ahead and put up my inspiration photo and get started finishing
my illustration. Alright. So this is a
pretty simple dress. It's really more kind of in the fine details that
the beauty comes in. I'm gonna go ahead and finish up my illustration with my
pens. Got my number eight. All right. And there you have the final
version of this pose. I'm going to go ahead
and start on the next one and mix things up
just a little bit. Okay, so as you can see, I've changed it up
just a little bit. I've turned that
leg so it's so that this leg is facing the
outside direction. And this leg is, again, the main weight bearing leg, but the weight is still divided between the
two pretty well. And then I've crossed
her arms in the front, hopefully maybe holding a
handbag or something like that. I think this just
kind of creates a nice contrast
between such a strong, confident pose and then you've got kind of these
arms crossed in front that makes
it feel a little bit more approachable
and a little bit softer. So I'm going to go ahead and put my inspiration photo up and
finish up this illustration. Alright, so I'm going
to go ahead and grab my number eight and finish up So that's my finishing
sketch for this one. I'm going to do one more and try and vary the arms
a little bit, as well. Okay, so I'm going
to start over. Sometimes that happens, right? I've got I was thinking about doing the opposite direction
because I did these two both kind of in the same leg bearing the same weight, and I
wanted to change that. And then as I was sketching, it just got all turned around. So here we go.
Gonna start again. Okay, so this is my
finishing sketch. I think you could probably tell I had a
little bit of trouble switching my brain so that her shoulders were tilted the opposite direction
of these two. And in doing so, I just
kind of fell apart, which illustrates the point that you need to practice
in order to get better, and I should be really fluid
switching between the two. So just a great learning
point right there. So I'm going to go
ahead and throw up the inspiration photo for this look and
finish this one up. Okay. Oh, this one is
getting frustrating. I'm gonna go ahead and grab
my number eight and hopefully just finish these lines off and finish up
this illustration. Oh Okay, so this would normally
be kind of where I stop with this look as
far as sketching goes. I'm I'm gonna overlay the lace a little bit just
to kind of give you an idea of how
I would do that. Alright, so there's
my final pose for that really strong kind of confident post
that we started with. Each is a little
different as you can see. So jump into your sketchbook, start sketching those figures, play with how the
arms are moving and change up the legs where you can and see what
you come up with. And I will see you
in the next lesson.
9. Pose 6: Romeo Hunte: Hello, and welcome to day six
of our sketchbook practice. Congratulations on
making it this far. Today we're going to be
looking at this pose. This is a lot more
casual pose than what we've been doing and by casual, I really feel like it's
casual from the waist down. You can play around
with the arms and change the feeling of the pose by placing arms on the hips or changing what
is going on there. Maybe they're holding a
bag or coffee or whatever. Feel free to play around
with with the arms, I mean, the sketch in general, but
it's a much more casual pose than what we've
been looking at and I'm excited to dive in. The designer we're going
to be looking at today is Romeo Hunt and Romeo Hunt
started his label in 2014. He grew up in New York and was really influenced in the 80s
and 90s by his surroundings. Tommy Hilfiger was a
mentor to him and you can definitely see those influences come through in his designs. There's a lot of rugby stripe, there's a lot of prepi,
but at the same time, it's all really oversized
and at the same time though, he's really brought it into more of a modern
cut and silhouette, so it's not quite what it was. It's really a lot of fun. When I look at his designs. I can definitely see New
York in the 80s and 90s, but at the same time
brought into today. I'm really excited, of course, prep is something
that I really love. I'm really excited to
check out Romeo Hunt, let's get started. All right. I've got my blank
sheet of paper. I've got my pencil, my
eraser, and my microns. I'm ready to get started
with this next pose. I really like this
pose because it's a very casual looking pose and a very natural looking pose. It really helps you
get a natural feel with your figures so that
they don't look super stiff. It's great because it's
a three quarter view. So there's an arm that
you can't really see and you have to keep that perspective as
you draw your figure. Both legs bear some weight, but that back leg is going to be the one that is really
weight bearing, so that's going to be the
one that really affects. If your figure looks
balanced or not. So let's go ahead and
jump in with this pose. This one, the shoulders and the hips are going
to be sloped again. But they're sloped in a different way because if you were looking at
her straight on, they may not be sloped. This is really a
slope to convey that three quarter view and less
about conveying that balance, although it does
affect the balance. Then you're going to
see more of this leg, more of the front of
this leg than you are this leg, keeping that in mind, So it's similar to other
poses that we've done, but just a little bit turned. And then this arm, you're
gonna see all of it. So your bus line is gonna hit right
underneath this armpit. Oh, that sounds terrible,
doesn't that armpit? Right underneath this arm. And then this arm, you're really just not going to see much other than this hand if that's
what you choose to do. So there's my figure. I'm going to go ahead and put up my inspiration photo from Romeo Hunt and get started
finishing up my figure. All right, so there's my final sketch lines for this figure. I'm gonna go ahead and grab my number eight micron and
drawing my final lines. All right, so there is my final sketch lines
for Romeo Hunt. I'm going to go ahead and
move on to the next figure. And the next figure, I'm going to vary this
arm a little bit. These legs are a
little bit difficult to vary with this
three quarter pose, but I'm going to go ahead
and change up this arm a little bit. So let's jump in. Okay, so I'm not super happy
with this foot over here, but we'll see what happens
as I finish up the sketch. So I've got my figure
kind of sketched out. Now I'm going to
add the clothing. So I'm gonna put
up my inspiration photo and finish the spin up. Okay, so this is
the final lines. Oh, I did forget one thing, and this is something a lot
of illustrators forget, if you look, is drawing the back of the jacket
between the legs. So anyway, I'm going
to go ahead and grab my number eight micron and
do all of my final lines. And I'm going to
be sure to pinch this in right there where
the arm is on the waist. Want to make sure and convey that that arm is
affecting the material. Alright. No finishes up my second casual natural looking pose just with a
change in the arm. I'm going to do one more. I'm going to change the
direction that she's facing. And I'm going to change
this arm up a little bit just to kind of
give some variation to the sketches that I'm doing. So Okay, so for this one, this is kind of my
finished sketch lines. As you can see, I wanted
to add a bag to this one, and then I wanted to flip
it so that you could see changing up the
direction that you're sketching the pose can
be very, very helpful. So I'm gonna go ahead and
put my inspiration photo up on the screen and go
ahead and get started. Okay, so this one was a little more challenging
than I had expected. I'm just so in love
with that plaid that I love this look. The sleeves are unzippered, so it was a little bit difficult to kind of find that balance, and I realize that I haven't really seen many
bags from Romeo Hunt. So this kind of just
generalization, I figure she'll she probably wants a really big bag
considering her kind of oversized kind of eccentric
sleeves and coats. So anyway, I'm gonna
go ahead and grab my number eight micron, and I'm going to jump into
finishing this illustration. So this is part of what we work through when we're going through just practicing with our
figures and perspective. I'm pretty sure that bag isn't going to look
like that right there. There's something about
it that bothers my eye, but I'm just getting
my ideas down. I'm just going to
work through it. And then, you know, with my next sketch, hopefully, I will have learned some
things and I can improve. So again, this is just this
is sketchbook practice. It's not perfection, and I'm trying to capitalize that
in this moment, as well. So So this leg
that is out front, you're gonna see more of that leg than you
are of this one. So, you know,
rather than drawing this line up here and
covering this leg, I'm drawing this leg
in front of this leg. I'm moving I'm putting this line as more dominant
than this back leg. So keep that in mind,
too with perspective. What should go behind what? Alright, so that's
going to finish up my figure for this last outfit. I did have some issues. I think was kind of difficult to figure out how that bag is going to
look on that arm. But again, I just want to really push that it's not about
perfection, it's about practice. And this is something obviously I need to practice a little bit. So grab your sketchbooks, fill up your pages
with this pose, really have fun with it, play around with the arms, and I'll see you in our next video.
10. Pose 7: Bach Mai: Hello and welcome to day seven of our
sketchbook practice. Today is going to be a
relatively straightforward pose, a standing pose,
but from the side. We're going to have a hand
that's placed up on the chest, which is going to give it a
little bit of a casual feel and it's going to be great to practice our proportions
from the side view. So this is the pose
we're going to be looking at just to
familiarize yourself. And then the designer we're
going to be looking at while we sketch this pose is Bach May. He was born and raised
in Houston, Texas. He studied and
graduated at Parsons, and then he went over to Paris, studied in Paris,
received his masters, and went on to work for some of the largest fashion
houses in the world. Chanel Mason
Margala. Where else? Oh, Oscar De Lorenta,
Calvin Klein. Then he was actually
mentored by John Galiano. He's got quite a resume and his designs are very
dynamic, very sculptural. I think his designs work
well with aside pose and I think you're
going to really find his designs interesting. I'm excited to dive in. I'm excited to get started. Let's do it. All right. I am ready to dive
into a new pose. I've got blank sheet of paper. I've got all my supplies. At the ready. With this one, I'm just going to try to vary
the direction of the pose, which when you're
drawing one side, sometimes it's
really hard to get your brain to flip it and still keep balance and
visual continuity. So a great way to
stretch yourself in your sketchbook is just do
this pose from your left side, then your right side, then your left side,
then the right side. I'm going to go
ahead and jump in, and because this is
a side view, again, your shoulders and your torso or your shoulders and your
hips are going to be parallel, but they're just going
to be a little offset from each other as far as
the balance line goes. I'm going to go ahead
and And your neck too, with these ones, it is
always going to be either kind of straight or a little bit more straight or
set back a little bit. You're never going to have it like that unless
you're laying down. I mean, you can see how
awkward that looks. I mean, she's not standing with her neck like that, right? So with the side view, your neck is always going
to be a little bit pushed back and then you're
going to have your shoulders and
that back arches, even if the front is still
relatively straight. Then you've got your bus line. And your hips and your shoulder is here,
your hip is here. So if you connect those dots, there is a little off center to your shoulders and your hips. But that's just part of
creating that balance, right? So then one leg that's straight up and down that's
bearing the most weight, your weight bearing leg, and then you're going
to have one leg that is just resting by
its side like that. And then the shoulder
is going to be if you you want to do
a true side view, your shoulder is
going to be pretty much straight down
from your ear. Because this is a
rounded surface, your hand isn't going
to sit flat on that. I mean, I draw
things all in shape, and I think the palm of
the hand is going to be wrapped around that section
of your hip or your hip, and then the hands are
going to be going down. It doesn't have to
be really detailed, but generally speaking, a square and a triangle is
what's going to happen there. And then if you want to put
this leg out front first, This kind of resting leg. You know, this is going to be
a relatively wide section, even though your figure
might be a very thin figure, you're getting a very wide view of what that part of the
body looks like, right? So my waist is going to be
a little higher than that. So I'm going to have
it more like that. Got a lot of lines
going on here. And then this leg. And with this one, you're not really going to
see whatever foot is behind, but they're pretty much in line with each other with this pose. And then this hand
I'm going to put or this hand that's
kind of unseen. I'm going to rest it on
the chest area here. Something like that, looks like she's got some
sort of growth. Now we're back. There's a lot of
lines going on here. I'm going to get started on the final illustration so that you can really see
where the lines are going. Okay. So I've got a
lot of lines going on. So follow with me. I'm gonna grab my number eight, and you're going to
see how these lines are all really
gonna fit together. All right. So since I still
have a lot of lines going on, I'm actually going to take
my eraser with this one any race so that you can really see how the
figure turned out. You can't really tell
what her legs are doing under this
particular dress, but I did like this dress that they photograph this
dress from the side, so it could be a little bit
easier to wrap your mind around how this figure is
going to look and move. So I'm going to go
ahead and start my next one and this one we'll be
sure to show the legs in. All right. I'm going
to get started. Okay, so here's my second pose. I forgot to flip this one, so I'll flip the next one. I'm gonna go ahead and put
up my inspiration photo and get started finishing
this illustration. Okay, so that finishes it up for my pencil lines
for this sketch. I'm gonna go ahead and
grab my number eight. And I have taken a little bit of liberties with this garment. I wanted to show these
legs from the knee down, and the dress probably goes
just maybe right to her knee, so I am shortening it a bit, but that's the benefit of
being the illustrator, right? Okay, so that finishes it
up for this illustration. I'm gonna go ahead
and flip the next one and see if my
brain can handle it. But I Okay, so I flipped the pose. I'm gonna go ahead and put up my inspiration photo and get started finishing
this sketch. Okay, so I finished
my pencil lines. I'm gonna go ahead and sketch in my pen lines, starting
with my number eight. Alright, so that's how
this one has turned out. I feel like I feels
like the torso, the hips are a little bit
long, and I don't know. It could be a little
bit because of the garment that I chose
which seems where they are, but this one looks a
little bit awkward to me. I feel like I need
to practice this. I wasn't I was fine
with the pencil sketch, but now that it's finished, it just feels a little
elongated to me in a weird way. So obviously need to
continue sketching. I'm going to turn the page.
I'm gonna keep going. Do the same page, sketch this pose, get
familiar with it, and I will see you
in the next lesson.
11. Pose 8: Sergio Hudson: Hello, and welcome to day eight of our
sketchbook practice. Today we're going to be
looking at this pose. This pose, I think is
difficult because you really have to mirror both
sides when you're looking at a figure
straight up and down. It's always been
something that I've had a hard time with. I prefer to sketch where the weight is focused
on one side or the other. To me, that's a little
bit easier to make it look normal and proportioned. But when you're looking at a
figure straight on like this and trying to sketch it
and mirror both sides, it can be a little more
difficult than you think. This is a great one
to practice with. I also chose this
post because of the designer that we're
going to be looking at. The designer we're going
to be looking at today is Sergio Hudson Sergio
Hudson is fantastic. He grew up in South Carolina, a very small town
in South Carolina in the United States
and he launched his line in 2014 after
winning style to rock. He grew up in the fashion world. His mom was a tailor and
his sister was a model. He had a lot of inspiration
growing up in that world, but he is a very classic
designer, in my opinion. His designs are very
sharply tailored. They're very elegant. A lot of them are monochrome
and they're very body con. But he just does such
an impeccable job with his tailoring that everything he makes looks luxurious
and expensive. He uses beautiful
materials, of course, and I really gravitate
towards his looks because of the monochrome that he sprinkles throughout
all of his collections. He'll do a full
look in all pink, a full look in all yellow,
a full look in all orange. I'm really excited to dive in. I think it'll look great. Practicing with this pose and Sergio Hudson.
Let's take a look. I'm all ready to get started with the next pose that
we're going to practice. I've got my supplies ready
this pose, I debated, I went back and forth because
it's a very unnatural, a little awkward looking pose. You don't see people
pose like this. This is more of
something you see as a doll or as a doll,
as a paper doll. But even though it's
a little bit awkward, it's also very prim and proper and it does remind
me a little bit of Barbie. Plus, it's a great
pose to practice symmetry and really
getting that balance down. I tend to draw this direction, so all of my drawings
tend to look a little bit tilted if
I'm not really aware. This is a great one to practice getting your poses down
in a straight line. I'm going to probably
turn my sketchbook a little bit just to make myself a little bit more comfortable
because like I said, this one's an awkward pose. So we're really working on
symmetry with this pose. So I'm going to go ahead and
jump in and get started. Also, all of my figures for this one are going
to be exactly the same. This is one where repetition,
repetition, repetition, if you continue with
that repetition, it's going to pay off tenfold with all of
your other poses. It's going to help
you understand visually other poses
because it is. It's just a bit it's
a little bit awkward. It's a lot like seeing
a doll in a box. So I'm going to go
ahead and jump in. So everything is
straight up and down, and it just feels
so wrong to me. But again, it's really good to practice things that you're just not very
comfortable with, right? So that's what sketchbook
practice is all about. And that's what
we're gonna do here. So I'm gonna bring the legs down so that the feet are right next to each other,
kind of here and here. Then I'm going to move
on to the arms here, and they're going
to be straight down with the hands kind of
hitting right below here. And you're not gonna
see all of the arm. Part of this arm is gonna
be a little bit hidden. I'm going to try with my next figure to lessen
that gap a little bit and bring these legs in
a little bit closer without changing
where my feet land. So let's go ahead
and give that a try. Also, I'm going to
sketch a couple of figures before I put up my
inspiration photos this time, since they're all
going to be the same, so I'm just going to
do a couple more, and I'm going to edit
and change as I go. Okay, so I'm finished
with that one, and you can see a huge difference in just moving those legs together
a little bit. The thigh gap isn't so strange. And I've also tucked the
arms in a little bit more, which I guess makes
it look more like a cutesy doll pose rather
than this kind of awkward, weird statue kind of
thing going on here. But I think the balance
on this one and the symmetry on this one is
much better than over here. So I'm going to do one more, and then I'm going
to go ahead and put my inspiration pictures up
and finish these sketches. Alright, so I'm finished
with my third pose. I think I need to really
watch the length of my legs, as you can see, they've kind of gotten longer with each
pose that I've done. Really, I need to be ending my leg about right here to give that calf and the ankle a little bit more visual
balance, I think. I've also made her a
little bit bustier, which I mean, that's fine,
too. Definitely drawing. Making sure to draw
different sizes is also a way you can stretch
yourself and practice. So I'm going to go ahead and put my first inspiration
photo up for this one, and I'm gonna get
started finishing each of these sketches. Okay. So that's how I'm
going to leave this one. A lot of the detail
in our hair would obviously be conveyed with
color once I finish it. But I'm happy with the
way it's turned out. I don't like I said, I
don't love the gap there. I do think my leg length
is a little bit off. You know, this one's maybe a little bit shorter
than this one, but definitely
improved on this side. So I'm gonna go ahead
and move on to this one. I'll put up my inspiration
photo and get started. All right, so there's my
second finished look. Happy with the way
that turned out. I'm gonna go ahead and
move on to my next sketch. Alright, so this one's
a lot more simplistic. Again, the details would
come with the color, but I liked how the silhouette
is a little bit doll like where the waist is
really pinched in, and then there's this
exaggerated hip line on the dress itself. So I think it fits well with this pose that looks a little
bit like a doll as well. So I'm gonna go ahead and
get started finishing. I've got my number eight
micron, and I'm gonna jump in. Alright, so there are
my three sketches for this kind of doll
like kind of pose. This is a great one again to practice symmetry and
balance and really kind of stretching yourself
to make things look a little bit more
stiff and less natural, but still kind of fun. So go ahead, fill
up your sketchbook, get this pose down, practice, and I'll see you in
the next lesson.
12. Pose 9: Ming Ma: Hello, and welcome to day nine of our
sketchbook practice. I'm so excited to jump in today. It's going to be a
bit of a challenge. We're going to be looking
at a pose that's just a little bit more dynamic than what we have been looking at. This is the pose we're going to be doing and as you can see, the shoulders are
tilted a little bit, but still front facing
while the hips are facing a different direction and you're getting more of that
three quarter view. It's going to be a
bit of a challenge to make sure our proportions
are just right and also staying on top of balance. But it's
going to be great. It's going to stretch us, we're going to learn,
it's going to be great. So the designer we're
going to be looking at today is Ming M, and
I'm really excited. He's a very dynamic designer. He's been skyrocketing to success since he
started in 2018. He graduated from Central St. Martin's with a bachelor's and master's and
shortly thereafter, he started his own
label in China. He's based out of
Shanghai, I believe, and he a really thoughtful,
very dynamic designer. He takes these Chinese
elements and then incorporates them into Western silhouettes
and Western techniques. He uses a lot of Eastern
fabrics or fabrics that originated really
from the East and then puts them into these
Western silhouettes. He's a really neat designer. I absolutely love looking at his designs and I hope you
do too. Let's dive in. All right. I've got
my supplies ready. I'm ready to dive
into this next pose. This pose is pretty
dynamic, in my opinion. You've got the hips that are facing one direction and
you've got the torso that's front facing the head you can play around with how
that's going to be directed. But I'm going to tilt my paper here just a little
bit and I'm going to go ahead and just
dive into the pose. I'm going to start with
the head and our neck is going to be facing is going to be slanted
a little bit this way. We're going to
have our shoulders tilted and it's going to have our waist going
the opposite direction. Again, we've got
that. With this pose, because the hips are
turned a little bit, this is going to be the side of the hips just
to keep in mind, you're going to be
showing more of this leg or I guess not
necessarily more of it, but more of the side of it. I'm just going to keep my face
straight on for this one, maybe just a little bit turned, but And then the arms are what's most
difficult for me. Because sometimes when
they're tucked like this, it's hard for me to make them look like they're
appropriately long. So I'm going to just block
them out a little bit. I'm actually going to
sketch in my legs first. Here you can see this knee is kind of just slightly higher than
that one because we've got this hip
dropped a little bit. See. And this hand is going
to be turned inward. Going to draw our square
and our triangle. Then this arm is tucked a
little bit behind on this side. S, what I mean, man, it's difficult but not
necessarily on the bottom. I'm going to have to
fix that a little bit. Same with this one. It's tucked just a
little bit here, but then you're able to see
most of this forearm portion. Square. It's a really long hand. I have to fix that a little bit, there's my first figure. I'm going to go ahead and draw a couple more
figures for this one because this is just a little
bit more difficult pose. I want to sketch them
all out before I start adding the clothing to it. I'm going to go ahead and
start on my next pose. So there's my second figure. I'll clean it up a little bit
when I get to the clothing. So I'm going to go ahead
and draw one more. Okay, so those are
my three figures. I'm gonna go ahead and put up my inspiration photo
for each one as I move through the illustrations
to finish them up. So let's jump in and get started. Okay. So here's my first
one. I'm going to go ahead and start with my pens, and once I get all
my lines down, I'm going to erase so
that you can kind of see how it all
turned out because I've got a lot of lines
happening in certain places that make it a
little bit difficult to see what I've done. So Okay, so there's my first sketch. I'm gonna go ahead
and grab my eraser. I'm gonna erase the lines so
that you can kind of see how everything turned
out. All right. There's my first illustration. I do have the urge to go
through and refine some of these lines that
I've done that don't look quite as good
as I wanted them to. That's part of the
problem drawing so many lines and being so sketchy is sometimes I can't really see where
I want things to go, but you get the gist of it and we've been saying
in this class, it's practice, not perfection. I'm going to go ahead and move on to my next figure
and I'm going to put up my inspiration photo for this figure and get started. This one's a little bit
more of a simple outfit. The details in the color and
the texture of the clothing. I'm going to go ahead and grab my number eight pen and sketch the final lines on here and then erase again so that you can see how everything
turned out. I think these are pants. I'm not quite sure
because it's black. Black doesn't show up
great on the runway, but I think they're
pants, that's how I'm going to illustrate them.
So I'm going to dive in. Alright, I'm going
to go ahead and grab my eraser and erase. Alright, so there's
how my second figure has turned out. I'm
pretty happy with that. I'm gonna go ahead and put up my inspiration photo and get
finished on my last sketch. Okay, so finished
with that sketch. I'm going to go ahead and
grab my number eight here, grab my number eight and get started with finishing
my final sketch. I lost myself a little
bit in a line right here, but I'm going to go
ahead and use my eraser, finish up by erasing my lines just so you can see the figure a little
bit more clearly. This finishes it up
for this pose for me. I'm going to continue sketching
this in my sketchbook. Just continue to get
some of that practice. I encourage you to do the
same, fill up your page, get familiar with this pose
and when you're ready, I will see you in
the next lesson.
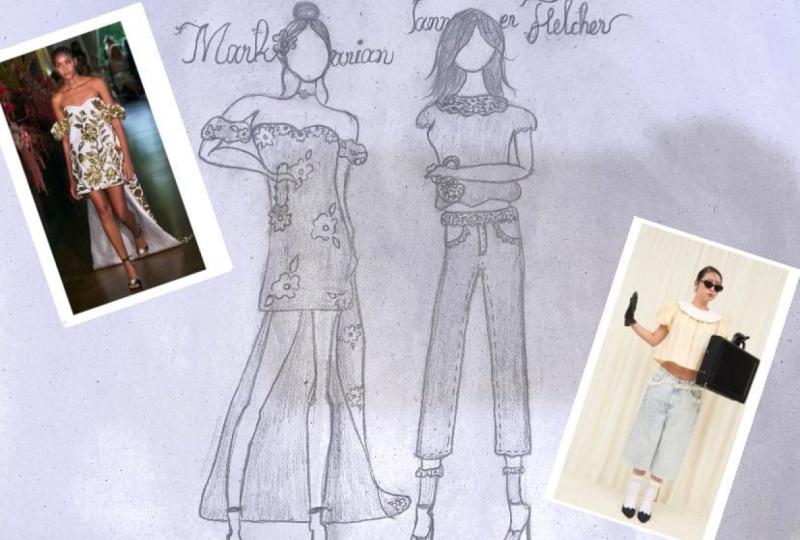
13. Day 10 Tanner Fletcher: Welcome to day ten of
our sketchbook practice. Congratulations on
making it This far. I hope your sketchbook
is filled with wonderful sketches of
beautiful fashions and that you found some really
fun designers along the way that you have
found inspiration from. Today we're going to be
looking at this pose. This pose is pretty difficult. We're ending on a
difficult pose. It's a three quarter turn
walking, pausing, pose. Hands are clasped on the front, which can be difficult to figure out how to fix those hands. This one might challenge just a little bit,
but that's good. We're all about practice. The designer we're
going to be looking at today is Tanner Fletcher. This label was created by Tanner Ritchie
and Fletcher Cassel, they met in college,
they started their label in
2020 Mid pandemic. They're both from the Midwest, but they are Brooklyn
based designers now and they are really known for
their genderless fashion. Everything they design
can be worn by everybody. They really aim to make
clothes for everyone, women's wear, not men's wear, but clothes for everyone. Our designs are really whimsical and they draw on
inspiration from the 60s and 70s as well as
color palettes, I think, from the 80s and even 90s, they layer a lot of their clothing and
you can see some of their inspiration in the
really big bows from the 60s and a little bit of 70s. Their silhouettes too are a little bit they draw a little bit on
that vintage silhouette, but the quirky details of their collections
make their clothing so much fun to look at. I'm really excited to dive in. I'm excited for you
to take a look. Let's get started
on our last day. All right, so I'm
ready to get started. I've got my paper
in front of me. I've got all of my supplies, pencil eraser, so I'm
ready to get started. This is the pose we're
going to be looking at, and I think this pose is great. This is another
three quarter pose, and it's great
because it stretches our ability to think about
balance in the body. I mean, all of these poses have really focused on balance
in different ways, and this one is no exception. I like that it's
three quarter turn. I like that it's more
casual looking pose, and you can do different
things with the hands, but it's definitely one that
will take a little bit of practice to get used to because it's kind of that
three quarter view. So let's go ahead and
jump in, get started. I'm going to tilt my
paper a little bit for this one and start
with the oops, start with the head, and work my way down. With this one, because it's
that three quarter view, this shoulder will be
shorter than this shoulder because this one is a little bit pushed back, it's a
little bit hidden. Keep that in mind.
And then again, with the three quarter view, this part of the
hip is going to be less visible than this side. So you're really
getting more of kind of a side view of this hip than
you would if you were full, you know, facing full front. So things to keep in
mind with this pose. Then this is where I feel
like this one for me gets a little bit awkward I feel like I should
be putting this leg down to anchor that figure. But with this pose, this leg is actually going to come out
in front a little bit, and then this leg is going to be pushed back
just a little bit. The knees should be
roughly the same height. This one might be a
little bit dropped, but not by much. So and then the hands you can kind of play
around with a little bit, however you're most comfortable, but the legs are always what kind of gets me
with this one because it just feels it doesn't feel
right as I'm drawing it. But once I get the feet sketched in it generally starts to feel
a little bit better. A lot of lines going
on here again. So my Again, you're getting
that three quarter view. Your thighs are
actually going to be a little bit wider than what you might draw if you
were looking at the figure from the very front. You're getting this
and this that would normally be on the very side that you wouldn't see from
a front facing figure. Then this foot is going to
come up just a little bit to match more of where
this foot lands. I'm going to tuck that arm back. So All right,
something like that, like I need to
keep going because I'm not super happy with the
way this has turned out, but that's what sketchbook
practice is, right? So I'm going to go ahead and put my inspiration photo up and I'm going to finish this sketch off. Okay, so that's all I'm going
to do for my sketch lines. I'm gonna grab my
number eight micron, and I'm gonna finish
the illustration. So there's kind of my finished sketch with my finished lines. I'm gonna erase a little
bit just so you can get a little bit better perspective. I really went crazy
with the lines on this. Okay, so there's kind of my finished sketch, my
finished illustration. I'm gonna go ahead and
move on to the next one, and I'm going to do probably like hand on the
hip kind of thing. Okay, so I'm going to talk about this one
just a little bit. This one. This is really
hard pose for me, but I think that I want
to show it because it definitely is one that
frustrates me and stretches me. So the one thing
that I wanted to mention is even though the
shoulders are tilted here, the waist on this one,
the top of the hips, it's not quite as tilted
as maybe your shoulders are depending on where you're
going to put your arm. So where my arm is up
on the hip on this one, that means my shoulders being
pushed up a little bit. And so my shoulders
are naturally tilted a little bit more than
my waist will be. So this one, I feel like
looks just a little bit, a little bit funny,
but hopefully once I get the figure dressed, it'll look a little bit better. So I'm going to go
ahead and put up my inspiration photo and get started finishing
this sketch. So with this one, I took a few liberties as far as the
hair goes and the shoes go. So I know I've got a lot
of lines going on here. I'm gonna go ahead and grab my number eight micron and get started kind of putting
the final lines down. Mm hmm. Alright, so there's my
final sketch with this one, and I'm also going to take a minute and just erase
so that you can see kind of how it turned
out since I've got just a mash of lines right here. I think the legs look
a little bit funny. I probably had too many lines
going on to take my pencil, I think that it probably
should be a little bit more This leg should be
just a little bit wider. So I'm going to take note, and I'm going to move
on to my third figure and probably stick to this pose and just kind of keep on trying with the same arrangement
of arms and legs. So I'm gonna dive in. Okay, so here's that figure. I feel like this one went
better than the other two. So practice, right? Practice improves our skill. So I'm gonna go ahead and put up my last inspiration photo and go ahead and get started on
finishing my last figure. Okay, so I'm going to grab my number eight and
finish up this figure. This one is This is a
good example of how to hide something maybe that you don't
love, how it looks. Putting a long skirt, I should have done a long
skirt on this one. Putting a long skirt
obviously hides kind of the positioning of
the legs and helps you focus on the feet
a little bit more. So, I mean, there's
always those kinds of tricks, too, to keep in mind. I'm going to go ahead
and finish this one up. So this concludes our tenth pose for our sketchbook practice. I hope that you feel
like your skills are really improving. And as we go into
the next lesson, we're going to use all
the skills that we have really kind of
refined and worked on throughout these ten poses. We're going to put
two of them together, and we're going to do
a final illustration. So I will see you
in the next lesson. And
14. Final Project: Hello, and welcome to
our final project. You made it through. You've done all ten poses. You've been
practicing, I'm sure, and I can't wait to see all
of your practice pages. You've made it to the
final project and now it's time to pick those
poses that you want to either practice more or the ones that you feel like
you've gotten really great at and put those together
in a final illustration. So before I get started and jump into my final illustration, I wanted to talk about
one more designer who I absolutely love. Her name is Snow Zu Gao, and she is the one
that I'm going to be using for inspiration
for my final project. Snow Zu gao is an Asian
American designer. She graduated from
Parsons in 2016, and there was a lot of hype
about her senior collection. She promptly started her
label in 2017 and since then, she's just rocketed skyward. Everybody really loves her look, her
aesthetic, her design. She's really known for mixing those Eastern and Western styles together in a really
beautiful way. She mixes a lot of
print and pattern. You'll see a lot of florals
mixed with suiting, you'll see a lot of
construction really well, beautifully
tailored suits, and then there will
be a little bit of deconstruction on the side, whether it's a flowy dress or some blousy sleeve on one side. She's a really
interesting designer. She really draws upon her roots, uh, from I believe
she's from Shanghai. So she draws upon those roots. She has just a
really keen eye for mixing these beautiful
textures and patterns, and I'm really excited for
you to get to see her. Let's dive into
the final project and take a look at
Snow Zuko. All right. I've been practicing
all of the figures. I've filled up a
full sketchbook with practice and I've moved on
to a smaller sketchbook, just to sketch out
some thumbnails. These are the poses that I've chosen and I've
done a couple of thumbnails just to
figure out position and whatever else and just practice drawing two
figures together. I'm going to go ahead and get started with my final
illustration here. Again, these are the two
poses that I'm going to be using for my final sketch. Let's go ahead and jump in. I'm going to do this one first. So again, I've got my
shoulders tilted one way, my hips tilted the other, and I'm just doing exactly how we practice
the pose pretty much. You know, kind of
keeping in mind that balance line and making sure that the weight
kind of looks well dispersed. That's how I'm going to
finish this first figure. Again, I've got
the angles right. I've got my arm hanging
a little bit to the side and I feel like the
weight it looks balanced, so I'm happy with the
way that one looks. I'm going to go ahead and
move to the next one. When positioning the next pose, it's difficult to gauge
the distance sometimes. I'm going to try and keep in mind that I want
them close together, but I don't want it to look like they're encroaching in each
other's space too much. D. Okay, so there's what I've
got for my second figure, and I'm going to have to play around with it a
little bit once I get to the finishing portions with the hands and, of
course, with the feet. These are all just sketchy
lines at this point. But I'm pretty happy with
the proximity that they are. Again, with sketchbook practice, a lot of times is sketching
it like this and then moving on trying sketching it again and again and
again and again, I'm happy though with
the way this turned out. I'm going to keep
these two together and go ahead and finish
up with dressing them. These are the two looks
that I've chosen. I'm going to start
with this one and then I'm going to move on to
this one. Let's jump in. Okay, so those are my finish
lines for this first look. I'm gonna go ahead and
grab my number eight and go ahead and finish
this illustration. Okay, so those are my finished
lines for this first look. I'm gonna go ahead and
move on to my second look. And Okay. So those are my final lines. I got a little bit
carried away down here, so I'm just going to
reinforce that with my pen. Go ahead and finish this
lookup with my number eight. Okay. Okay. So those are my final
lines for both poses. I'm going to go ahead
and take my eraser, erase all my pencil lines so you can see exactly how everything turned out and make any kind of last minute marks
that I want to do. Okay, so that's how
my final two figures turned out. I'm
pretty happy with it. I think this one is maybe
a little off balance, but at this point, I
think it looks fine. I think it looks okay.
So I'm going to use my number one micron and just kind of go over
a few of the details that I want to finish
off a little bit better. And yeah, I think it
looks pretty good. Okay. This finishes it up
for my two poses. I feel like the sketchbook
practice always pays off and I'm really happy with the way that these
two turned out. I hope that you've enjoyed sketching and I hope
that you continue your sketchbook
practice and that this class gives you
some things to practice. I look forward to seeing all of your sketches in the gallery, make sure that you post your
projects in the gallery, and I look forward
to seeing you soon. Mm hmm.
15. Thank You Video: Thank you so much for
taking this class. I hope that going through these poses has really
helped you develop a great sketchbook practice
and that you've been able to see your skills grow
from beginning to end. If you have any questions, please put them in the
discussion section and I will be quick to answer those
as soon as I see them. Once you're finished
with your final project, please post that in
the gallery section. It's really motivating for other students to
see your progress and to see your projects, and it's really inspiring
for me as well to see what you guys do when it comes
to these final projects. Also, if you post your
work on Instagram, feel free to tag me
LB Project Print. I love sharing student
work on my Instagram and it's a great way to
continue your practice. Thank you so much again and I'll see you in the next class.
 Lori Burt, Fashion Illustrator and Graphic Designer