Transcripts
1. Intro to Fashion Fabrics: Fashion is really all about using different fabric to create these beautiful ideas
that have come from your head and being able to put those
ideas on the runway. Fashion illustration
is really about conveying these beautiful
textures and prints and fabrics that these
designers have used and being able to
represent them on the page. Hi, I'm Lori and I'm a
fashion illustrator. I've had the opportunity
to work with brands such as Neiman Marcus, pixie, beauty, coach, Nordstrom,
as well as many others. And in working
with these brands, I've had to be able
to create a lot of different fashion fabric. In this class, I'm going to
show you how I create all of these great fabrics
like denim and sequent and shine Plaid for. So if you are looking
to up your game a little bit in fashion
illustration, and you want to learn how to create some of these
beautiful textures. I really hope that
you take my class. It's gonna be a lot of fun. We're going to explore
a lot of fashion. And if you love fashion, this is certainly
the class for you.
2. Class Project and Materials: For the class project, you are going to create a
fashion illustration with at least one of the fabrics
that I talked about in class. We're going to explore fashions
that use these fabrics. And we're going to
practice by sketching out at least two illustrations that have these fabrics Incorporated. I'm going to show you how I use different techniques to create those textures and fabrics. And in the end, you're
going to create an illustration and post
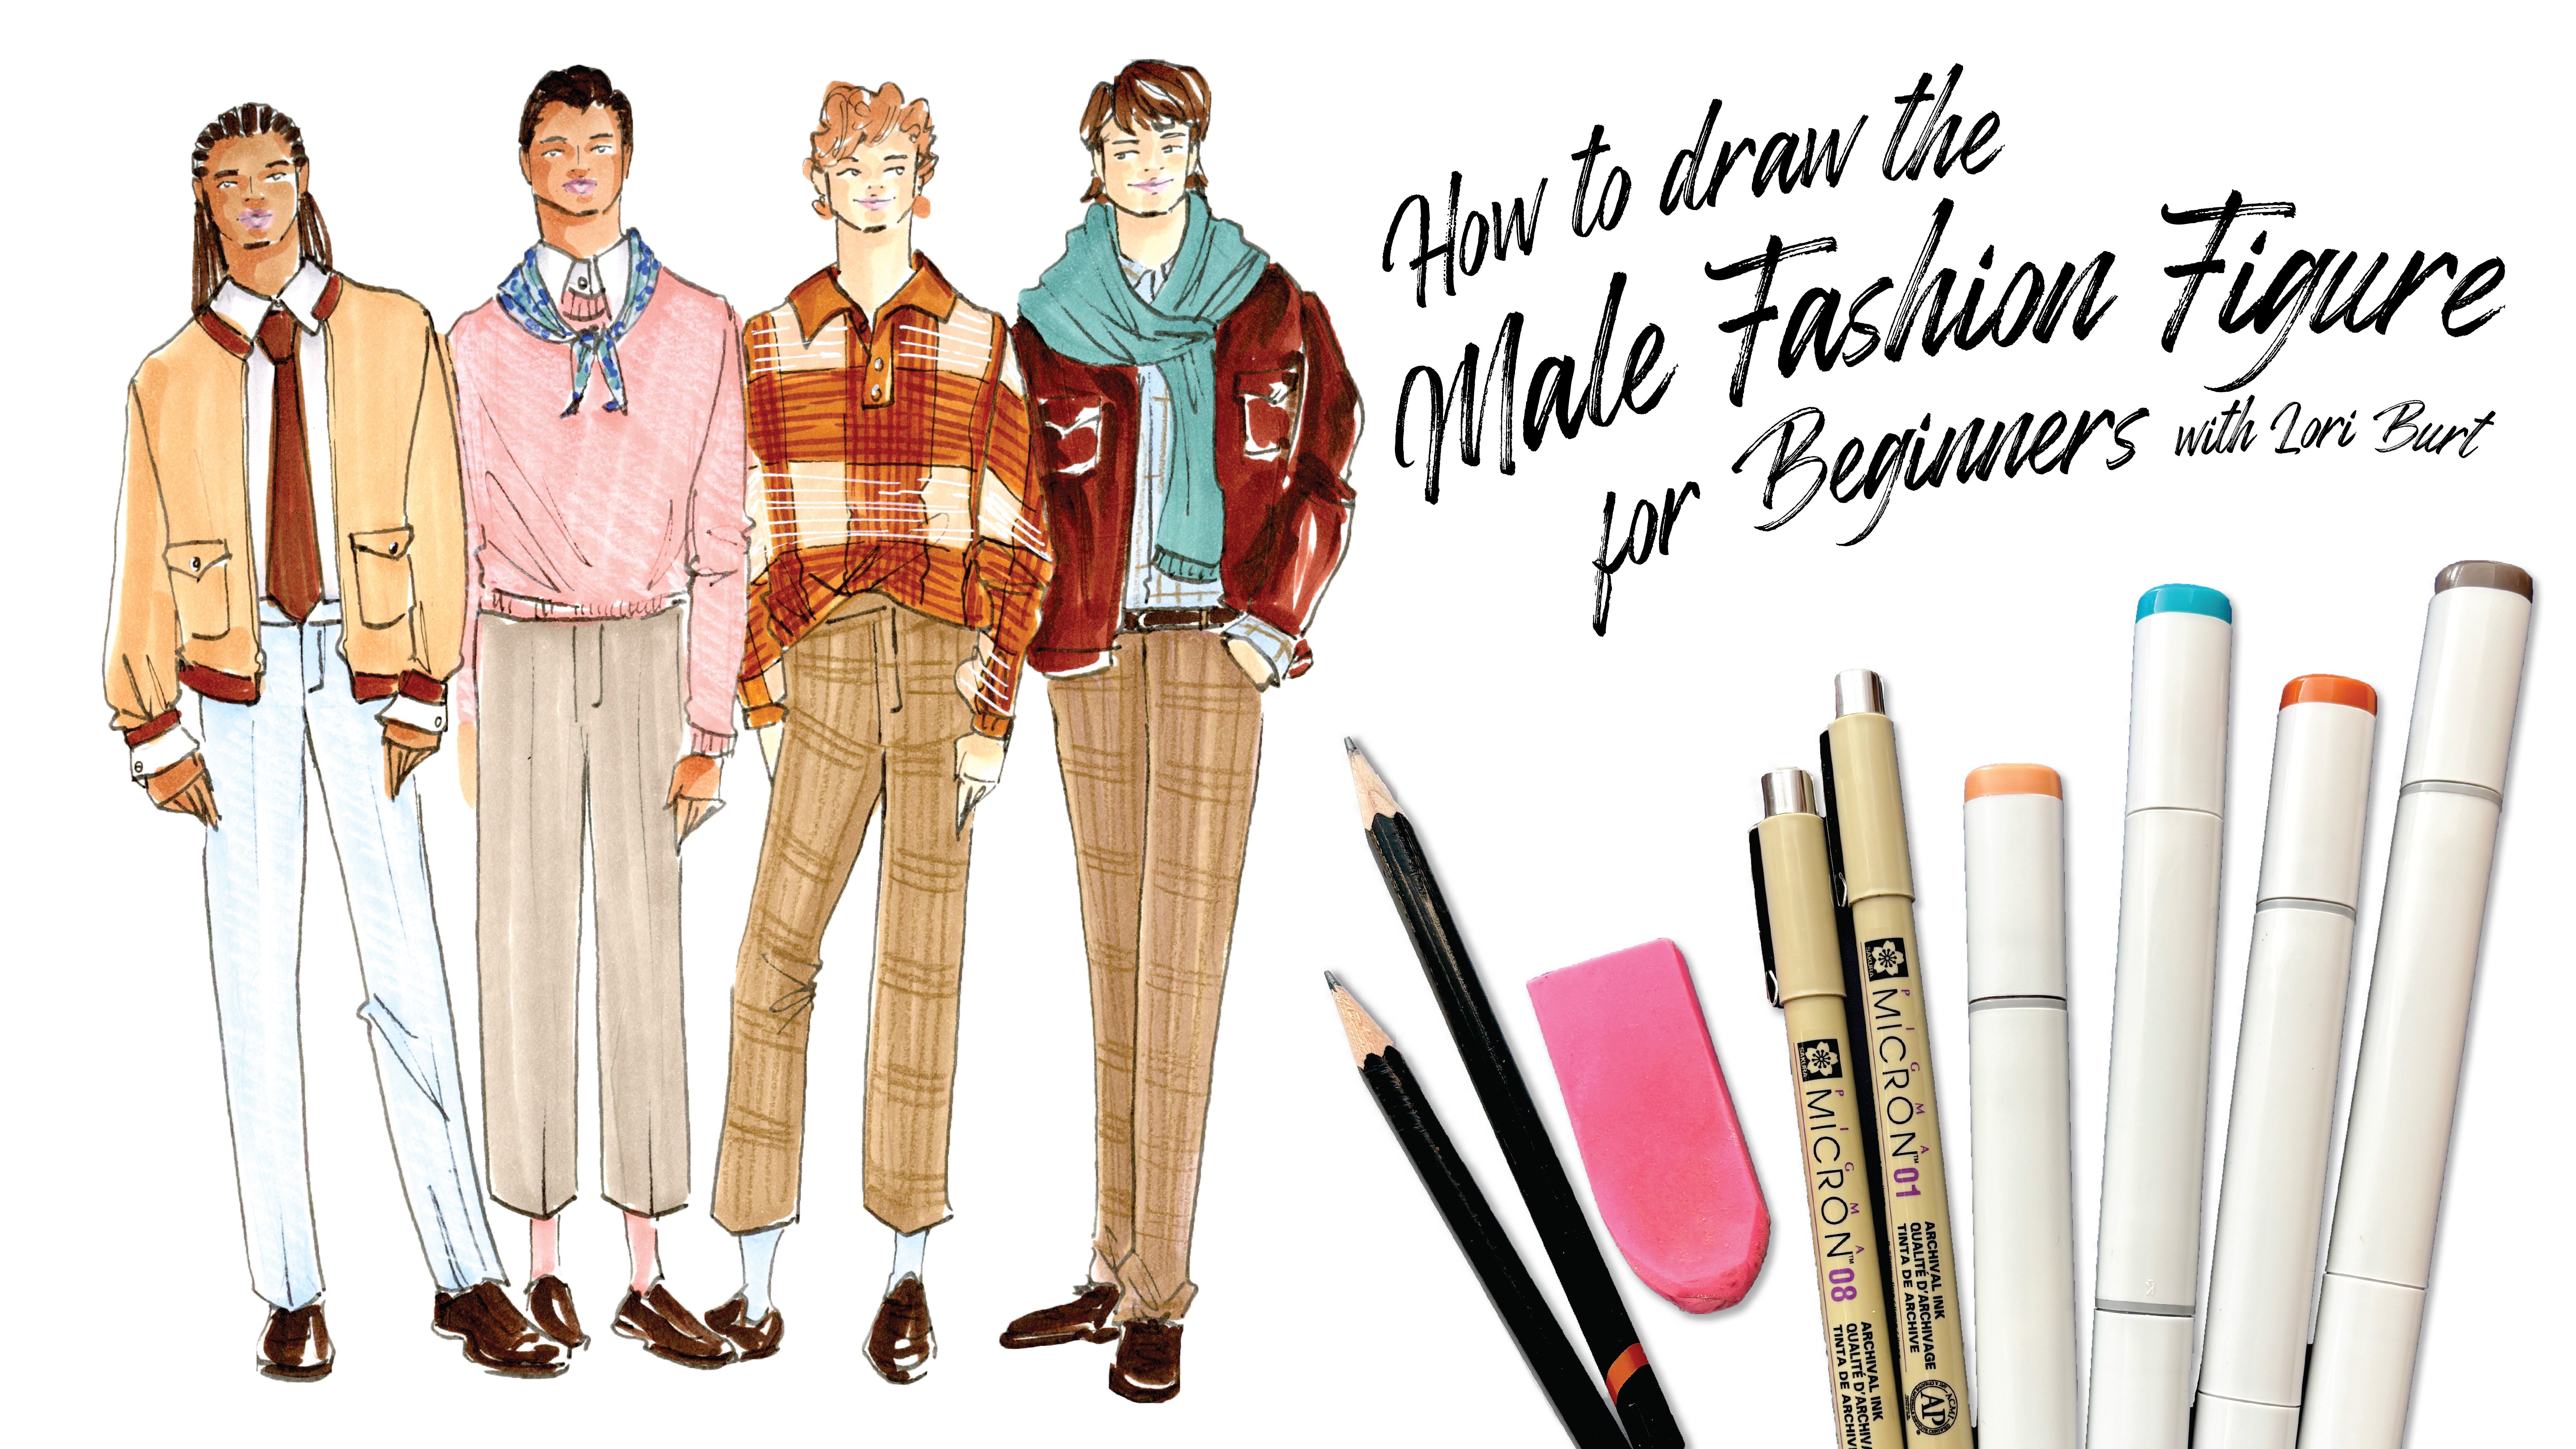
it to the project gallery. The materials you'll
need for this class include a sketchbook,
pencil and eraser. You'll need pens at
least two sizes. I like to use the Micron pens, markers preferably
alcohol-based, but whatever markers you
have will work just fine. A white and black
colored pencil, as well as others. If you prefer. A white opaque pen, I like to use the
uni-ball signal, white opaque pen and the pencil sharpener to keep
everything nice and sharp. Alright, let's get started.
3. Fabric Examples in Illustration: So part of the reason I love
fashion illustration is because it's not an exact
representation, right? It's sketchy, it's
quick, it's artistic. It's your interpretation
of what you're seeing. So I thought it
would be great to take a look at some
fashion illustration that incorporates some of the fabrics that I'm going to
talk about in class. So that you could get an idea of what we're
really looking for, what fashion illustration
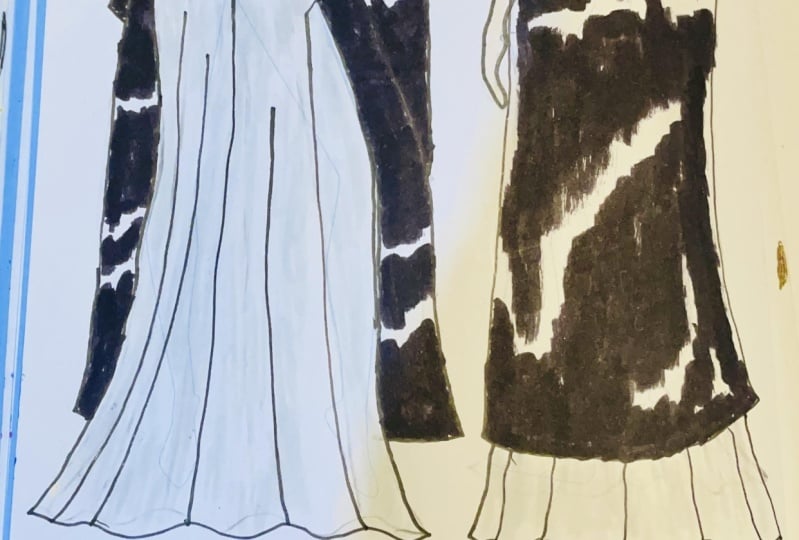
is really all about. So let's dive in. So the first fabric we're going to take a look at is denim. And as you can see, these are all illustrations
that incorporate denim. You can see they're
all pretty different. The first one is very dark. It almost looks
like there's maybe a little bit of a shine to it. The second one is
pretty monotone. The third one, there's a
little bit more dynamic to it. You can see a little
bit of the seams. You can see where
there's some shadowing. And then the third and fourth are really different as well. But overall, all of them have the same attribute of
being blue or indigo. And they all have a little
bit of variegation, even if it's just slight. They have a little bit of lighter and darker tones
to them mixed up a bit. A few of them like the
first one and the last one, you can definitely see
where there's white seems. So those are some of the
things we're going to be looking at when we
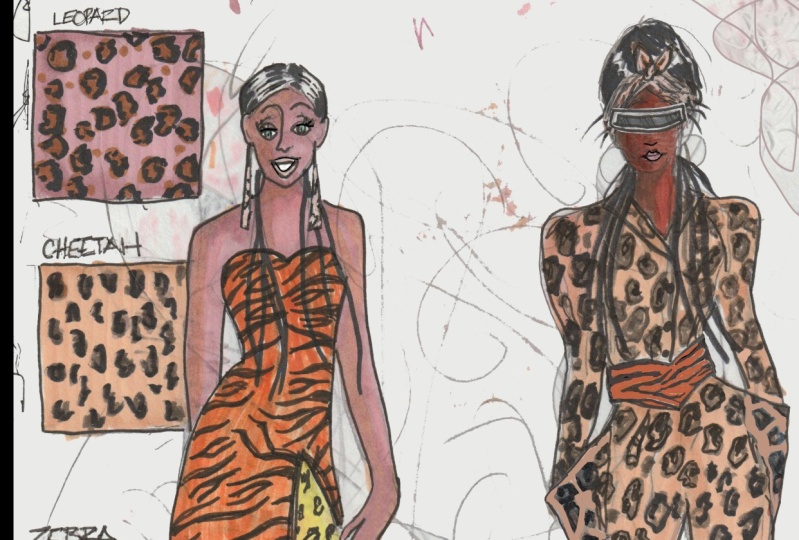
illustrate denim. So the next fabric we're
going to talk about is animal prints and the
examples here, all leopard. The first example is this beautiful tan brown skirt with these kind of
half black circles. The second one is also leopard, That's a brown dot with these
black dots surrounding it. Same with the third example. And then the fourth example
is really kind of abstract. You can tell that
there's definitely a print and animal
leopard print there, but it's a lot more
sketchy and less exact. So all three of these are great examples of leopard print. They're beautiful,
they're sketchy, they're illustrated
there interpretive. We're gonna be looking
at a couple of other animal prints
in the lesson, but these are all great
examples of leopard print. The next fabric we're
going to look at is lace. And lace really varies
across the board. It's usually just hinted towards at least
from what I've seen. And these two examples
I thought were really great representations
of a very delicate lace, but also a fishnet stocking
with tool over top. So the first one is this
beautiful lace cover up top. And you can tell that it's
embroidered a little bit. And then it's got the
lace netting detail. And then the second one, she's wearing these
great fishnet stockings. And you can tell
that the skirt is a, a tool kind of possibly
with lace over top. Both of them are a little bit
abstract and interpretive, but you get exactly what
they're trying to convey. This fabric that we're looking
at is sequence and shine and sequent and shine is a
lot of fun to illustrate. It comes across in a
lot of different ways. And these three illustrations are just beautiful examples
of sequence and shine. So the first one, you can really see that
they're beautiful. Sequence pants, a sequin dress. You can see where
the light hits it. You can see some shadowing. But overall it's very sparkly. It gives off a
very sparkly Look. The second one is the same. She's done beautiful shadowing. And there's just this
beautiful sparkly shine to it that is
certainly conveyed. And then the last one you can tell are these
beautiful silk dresses. He has left a beautiful white
line where the light hits. And you can tell that there's
some beautiful draping. And he's been able to
really highlight where that light hits in a way that makes it definitely
look like silk. This next fabric that we're
going to look at is for and for can be really
tricky to illustrate. The examples that
I've chosen are two vastly different
types of illustration. And I loved that. I loved that they highlight
that you can do it in two different ways and it still
comes across on the page. So the first one is
relatively simple. You can definitely tell that her hat and her coat
or trimmed in for, it looks like probably
a very fine soft fur, but it's relatively
simply illustrate it with color and a few
extra pencil strokes. The second illustration is
much more detailed with color. But overall, you can
definitely tell that there's a lot of there's a lot of softness to it and there's a lot of shadow
and light to it. So both are great representations
of for illustration. This fabric is obviously print, and print can be illustrated
in so many different ways. Over all, the color and
expression of all of these beautiful
illustrations really conveys the fineness
of each print. The first one is a
beautiful print that, that is mostly red. You can tell that it's large and some spots at small and others. But overall you can
kinda feel like it's maybe a little bit
Spanish influenced. The second one is just this beautiful floral
yellow and green print. And you can tell it's not exact, it's not super detailed, but you can see that it's
a floral print dress. And the third one is this beautiful large floral
print of pink and brown. And it's just
absolutely gorgeous. It's not exact either. And it's beautifully done in a very sketchy,
illustrative way. So all three are
great examples of large print or print fabrics. And they are all represented
in different ways. But overall, you
can tell exactly what the artist was
trying to communicate. This last fabric we're going
to take a look at as plaid. And these illustrations
are some of my favorites when
it comes to plaid. This first one is
this beautiful, rich watercolor illustration
with this red plaid. And you can tell she
hasn't been overly exact with the
lines which I love. I think it's very, very representative of
fashion illustration. The second one is this beautiful illustration of this blue and
reddish pink plaid. And I love how where the
colors have crashed. He's done these
big black squares to show that intersection. The third one is this
beautiful yellow plaid. And I just really think this one totally reminds
me of clueless. I love how beautiful
this one is. This one is more of a mixed media illustration where you can tell
they probably used, He's probably used marker or watercolor and then done
colored pencil over top of it. But again, you can see
where each of those lines intersects with the black being a little bit
thicker in those places. And then the last one
is this really cute, again, very academic
looking plaid. And it's really
well represented. And again, with the overlapping stripes
and coming together with those big thick squares
where the stripes overlap.
4. Denim: Okay, so the first
fabric that we are going to start
with is denim. Denim is one of my favorite fabrics to
illustrate because it's very easy to create a denim look and it gives you a lot
of bang for your buck. It can make your illustration look really finished
and really cool without having to put
too much effort into the finishing of the denim look. So some things to remember about denim is that denim is
made using a twill weave, which means it ends up having a ribbed texture
all the way through it. And a twill weave is kinda like two threads under,
one thread over. And generally speaking, denim is made with an
indigo dye thread, a dark blue thread, and a white thread. So that kind of gives you
that variegated look, that textured look all
the way through the denim having the blue and the
white thread mixed together. So I'm going to
demonstrate a light wash, a dark wash, and a
medium wash. And then we're going to move
over to two denim looks. And I'm going to show
you how it looks on a finished illustration. So let's go ahead and
start with a light wash. I'm just going to use
a really light blue. This is a frost
blue Copic marker. And I'm just going to fill in. We're here for the light washes. It's a little bit
harder to convey a real variegated
look on the denim. But what I do is once I
get the area filled in, I generally use either
a white colored pencil, medium blue. This is called a cloud
blue, or a darker. While this isn't dark, but a little bit darker
blue as well, depending on what the
denim looks like. So with the light, with the white, it's going to, it's going to really bring
out a lot of white and you may not be able
to see it very much, but it's still going to give
you a little bit of texture. So hopefully you can see
where that white is. Then if you use the light wash, if you use the light
to medium blue, you get a lot more striations. You can really see a lot more of the of the different
tones of blue. So it does darken the
light a little bit, the light marker, but it's
great to see the variegation. And then the blue like
that, the darker blue. So once I have one
line going one way, I then go back over it. Not everywhere, but just
a few places in the, in the perpendicular direction. So just like that to
kind of give you that, that idea that there's two
different color threads. So you've got the
light coming through, but you also have some dark, some dark lines as well. And then this for I mean, most of you probably know, but this is just
a cross hatching, crosshatching technique. And this does really well
to create that denim look. So that's how I do a light wash. So the dark wash, I use a really dark
I'd really dark blue. This is called I get
this is just a Copic. I'm just going to fill
in my square here. So one thing you'll notice is
when I color in the denim, I don't worry so much
about there being dark, darker areas and lighter areas. That's going to just help
confirm that denim texture. So with the with the dark denim, I usually just use a
white colored pencil. But sometimes if you, if
you want a more even tone, you can go in with
a little bit of a light blue instead
of a real stark white. So I'm just gonna do that cross
hatching technique again, where I'm just kinda
going over it. I'm not worried too much about the distance
between the lines. So that's the white and then
this is the light blue. And you can see
that on the dark, there's not a huge
difference in them, but you can tell
that the white is certainly picking up more of
the texture of the paper. So then again, I just
kinda go back over that with Some more
crosshatching, going the opposite direction. So and then you could know, kinda drawing your
your denim seem kind of something like that. So that's the dark
wash. And then lastly, we're gonna do the medium wash. And again, just filling in my square but not worried too much about overlapping markers, strokes because it's
just going to add to the variation in color. So with the medium wash, I usually only use a white. The white doesn't,
it's not real stark. It's not a real stark
contrast, but it's enough. I'm just using a Prismacolor. You can use whatever you want, but you can kinda see the difference between
the light wash, the dark wash, and
then medium wash. And also the difference in using the three different
colored pencils. With the medium wash. You could, you could
go back through with with the darker
blue pencil and create even more of a contrast if you wanted something that was just a little bit more textured. So something like that. So, alright, well we're gonna, I'm gonna go ahead and shift
over to these two looks. This is an ally, a look from the
spring, summer 2023. So one thing with
denim that you will have to have is a
pencil sharpener because it's really
important to always have a very sharp tip colored
pencil when you do denim. So I always have a ton of white, white and black pencils
on hand for that reason. So first thing I'm
gonna do is outline where some of my
black lines have been lost because I just
feel like that kind of adds to the definition
of the denim itself. So it's going to
add a couple of, these are just bold
lines where I feel like the dentin materials probably
a little bit crunched. Then we're just gonna
go ahead and go over the top like that. And then Thursday is really fabulous feathers at the bottom and I think
they're actually black. But I'm just going
to do them blue. Alright, so That's kinda
the denim jumpsuit look. And then I'll come
back in and finish for her pearls after we're
done with this look. So this is also all denim. This is actually a ribbed
section right here. And I thought that would be
good to demonstrate really how to define a ribbing pattern. And Denham, I'm gonna
do this one in a, in a medium wash or a light to dark or
medium to dark wash. So this is actually
a smoky blue Copic. Alright, so with a medium wash, you're really going
to be able to see some of the shadows. So I'm going to
take another color and other blue that's
slightly darker and I'm going to go back over it with with that marker just to bring
out some of the shadows. So because denim is not shiny, it's not going to
have extreme shadows or extreme highlights. So you don't have to worry
too much about that, but I'm just going to
go back in again with my white pencil and
I'm just gonna do the cross hatching
technique to start. And I'm gonna go back into
the core set and take that really sharp pencil and do
these courses lines here. All right, and then I'm
gonna do one other thing. Again. I'm sharpening my pencil. And I'm just gonna
do the Theme lines. There is the denim
jumpsuit blog. So I'm gonna go back over
with this one and just show you this pen touch to go back over it to
create some pearls. So this is basically
a paint marker. It's a quick dry,
permanent, opaque, white, medium point head marker. That would spell them out. Alright, so those are our two denim looks from
Elias spring, summer 2023. Go ahead and try it
out on your own. Experiment a little bit with denim and see what you think. And I will see you
in the next video. We'll be working
on animal print.
5. Lace: Alright, so the
next fashion fabric that we're going to
talk about is lace. And lace to me is so feminine. It can still look very, very delicate and
very, very sweet. But then it can also look really rock and roll and kind of punk when you get into the
fishnets and the ripping. So it's kinda like
a mark Kazaa versus Betty Johnson kind of thing. And I love it for that. I love that it can be both. The one thing that you'll
want to remember with lace is that you want to be able to see the skin tone
through the lace. So even if the garment itself, when you see it in person or when you see the
photograph, it does. You can't see the the skin tone. You still want to convey that it's lace in an
order to do that, you want to be able to see
some skin tone through it. So make sure I'm start
with your skin tones. Make sure you put all of
your skin color in first. And then the lace texture is
always going to come last. So I'm going to
demonstrate how I do two different lease
lease textures. One that's a little
bit more delicate, and one that's a little
bit more fishnet. So I'm going to
start with the one that's a little
bit more delicate. And I'm going to start by
using my number five micron. And I'm gonna do the
larger details first. And keep in mind, again, this is fashioned
illustrations so you're going quick sketchy. It doesn't have to be perfect. So I'm just gonna go
ahead and get started. Oh, and the other thing I wanted to mention is if there are shadows in the areas
that you're doing lace, make sure and put those shadows and before you do the lace, because you really
don't want to go back over with your markers once
you put down your micron. So I'm just going
to start by just kinda doing floral shapes, but nothing that's like super recognizable as an exact
replica of the laser itself. Okay, so now that I've got
my main flowers in are my main shapes in for the
larger parts of the lease. I'm gonna go back over the whole swatch
with a number one. So this is a really
fine point micron. And I just use a cross
hatching technique. I tried to go pretty
close together, but it really doesn't
have to be perfect because lace is so, so, so intricate and delicate
with the wave on it. It just doesn't
have to be exact, exact distances from each
other kind of thing. So you could leave it like this. And it's still really
conveys itself as lace. But I like to go back over
the other direction just because it creates a
little bit more opacity. Okay, so you can see now how it looks a lot more like lace. Then the last step is, I'll usually go back in
with a thicker micron, like a ten or 12. And whatever spaces
are truly filled in, I'll kinda go back
over it so, you know, doing something like this
so that you kinda get the sense that these
are the bigger pieces. Then of course all of these
pieces are woven together. So again, I'm going
to use my number ten. And I'm just gonna do these little scribbles
really is all they are. Yeah, something like
that. So that's more of an intricate, detailed piece of lace. Course you can
always spread those out and do more of just
the crosshatching. Just this cross hatching
technique can make for a really, really fine mesh as well if
that's part of your ensemble. So then going to the fishnet, I'm just going to
add in my skin tone. Alright, so fishnet
is obviously a much thicker, much thicker lace. And depending on how
spread out the fishnet is, how wide the gaps are, that will denotes the
way that you draw it in. So I'm actually going to
use the number eight. You don't want to
go too thick with your pen because then it can just muddy up your leg or wherever you've
got the fishnet. So I would go no larger
than a number eight micron. And then just once. Definitely a running out. But then it's just it's
kinda the same thing as the lace with the crotch
cross hatching technique. But you're you're
leaving a wider gap. And you are, You do have
to pay attention to making sure that the
widths are even. They don't have to be perfect. But with fishnet, you do, you can distinctly
see each line. So this would be
more of a fishnet. In fact, this kind
of reminds me of a Christmas Story, the leg lamp. That's how I would
convey the leg lap. Alright, so we're gonna
move over to our looks, and this is a Dolce and
Gabbana look from spring 2022, and this one is Isabel Murat
from this fall, winter 2022. I've already drawn
in my skin tone, so I'm going to move
on to the last detail and the lace detail
is on the top. The skirt is a shiny
sequence skirt. So I'm not going to
do too much detail on that because we covered
that in a different lesson. But I'm gonna go ahead and
just sketch in the skirt. And then with the lace detail. Again, you want that skin
tone showing through. I'm just going to gently go through my shirt just like this. And then I'm gonna
take my darker. And then as you can see, the color is black. So I'm gonna go ahead
and fill in the color. Alright, so now
we're gonna move on to the last detail itself. And this one. This one's kind of a mix between between a fishnet
and an intricate because it's got more of
a fishnet between the, the larger parts of the lace. So I'm going to start
like I did here. And I'm just going to
use my number five. And I'm going to go ahead and do the larger
parts of the lace. Okay, so now we've got the
lace conveyed and I'm just gonna go back over it
with a number one. I might even try. Well, I'm going to
use a number one, but I think for this print, you could really use a number two or number three to go back over it with the
crosshatching because it is kind of more of a fishnet. So now that I've got
the crosshatching done, I'm gonna go ahead
and go back in with a with my number five, the same one that I
did my flowers with. And I'm going to connect all of the larger pieces in a
diagonal, diagonal way. Okay, so something like that for the dolce and Gabbana look. Then moving on to
the Isabelle morons, Isabel Murat look
is also a lace top, but it is extremely delicate. It's pretty much a
completely stop. And then black pants. I'm gonna go ahead
and do my skin tone. And then I'm also
going to do the pants. Alright, so I'm going to
start on the big flowers. I'm going to use a number five and I'm gonna
do the big felt, the, excuse me, the big flowers and they are
kind of in a pattern. I'm on the sides of her torso. So I'm going to start
at the top and just and then these flowers
are relatively filled in. And then I was going
to go ahead and denote that that's her bus line
isn't really shown. Her collarbone is, but her bus line isn't
quite that pronounced, but I just want it to be
apparent in the illustration. Actually going to go back over the big flowers right now with an eight and color
them and a little bit. Then this lace detail
is a very fine mesh. I think it's meant to
be almost translucent, so I'm actually going to use 0.05 and this micron
is so, so, so, so fine that you have to
be delicate if you use a 0.005 because you can bend
the tip very, very easily. So I'm just gonna do that same kind of cross
hatching technique. Alright, so something like that. Then this print
actually doesn't really connect or this pattern doesn't really connect,
diagonal connection. So nin, So I'm just going
to leave it like that. The last little detail
I'm going to do with their lips and their champagne. So go ahead and
practice on your own. Really explore
different kinds of lace textures and lace designs. And I can't wait to see what designs you end up illustrating. When you're ready, go ahead and move on to the next lesson.
6. Animal Print: Alright, so the next
fabric we're going to illustrate is animal print. And animal print is so, so, so, so fun. It really elevates your sketch
and it is so eye-catching. An animal print I think is
pretty straightforward. I'm going to start by doing a leopard print and then I'm
gonna do a cheetah print. I should have grouped
these a little bit better, but leopard and cheetah
are very similar. And then after I
show you those two, I'm going to show how I
illustrate zebra and Tiger because Zebra and Tiger
are very similar as well. I'm not sure again why I drew it out like this, but
we're gonna go with it. Then once I show you how I
illustrate those prints, we're going to move on
to some Roberto Cavafy. Looks. We'll go ahead and get started. Over here on this side with the leopard print.
The leopard print. You start with a base, the
leopard and the cheetah, you start with a base color and it's usually a
pretty light brown. Again, the rule you want to always start light
and go darker, because once it's dark, you can't really change. You can't really go back. So with leopard print, the things that stand out
most number one are the base, but then you have a dot
and it's surrounded with black, with black dots. So I'm going to start here
and with the leopard print, I'm not going to worry
too much about the lines. That's really streaky. But with leopard print
you do get some, you get some, some darker
shades and lighter shades. So you kinda pick
where you want some of those lighter shades to
be and then fill in. Go back over the areas where
you want darker shades. So something like that. You can see that I'm not
being overly careful because it's not animal
print isn't perfect. As you can kinda see,
I've done dark on the outside with a lighter
shade on the inside. So once you have
your base color, I go over it. I go and draw some some dark
kind of kidney bean shapes. So kind of like that where you've got kind of a fat
end and a thin end and they kind of loop around
and kind of just do them all over lots of sizes. This is getting a little bit. And you can even add
another almost like a dot. That kind of
completes the circle. All your kidney bean shapes. We're gonna go
around the edges of them with some black dots. So get your blackout.
Start here. And the black kind
of encircles them. So the black will cover
up wherever the hole was or where that kind
of other shape that the opening of
the kidney bean is. It'll kind of cover that up. I got a mom. Alright, so that's how I
illustrate left leopard. It's pretty straightforward,
it's pretty easy. Just your three steps,
your base coat, your big dots, and then the black dots
surrounding the bigger dots. So I'm going to
move on to cheetah. Cheetah, I usually start with
a much lighter brown tone. So there's not as much variation in a cheetah print as
there is in leopard. So you don't have to
do the darker sides. You don't have to vary the tone, but definitely a
much lighter brown. And then I'm gonna go
back in with a dark, or really dark brown. And with the cheetah, you, you only do 11 spot, you don't then go in and
add spots to your spots. So with the cheetah it's there
just a little bit longer. You just kind of, you know, kind of and they're not they're not quite
kidney bean shaped. They're, they're definitely
not around spots. But they definitely, you definitely don't want quite
the same kidney shape as the leopard print. Alright, so you can kind of see the difference between
the leopard and the cheetah leopard is obviously a darker brown tone, a
little bit more reds, and you can change the size of the dots to be a little bit longer as well if you wanted to, but then you're going around the outside that those dots
with another color of black. Whereas the cheetah is really
just two different colors. It's a lighter blue Yonder, brown on the bottom, with really deep dark
brown spots covering the, covering the lighter tone. So next we're going
to move on to Zebra. Zebra and Tiger are
very, very similar. It's really just the base
coat that's different. So with Zebra, What
I'm gonna do is I'm going to kind of think
about this as a 3D shapes. So I'm going to think, think about it like this
is the back of the zebra, this is the upper part and this is the belly of the zebra. So I'm just going to add in some really light
shadows because you're, you're zebra print isn't gonna, it's gonna have
folds in the fabric. It's going to have,
you're going to have no, maybe something like that. It's not gonna be
perfectly flat and those folds on white
come across as gray. So you're going to
add a little bit of gray first and then I'm
going to take a black. And it's basically drawing lines that come together like this. Like you're kind of almost
interlocking those lines. And you're just using different
pressure to create thick, a thicker width and
then a thinner width. And kind of get the
idea where these are kind of interlocking lines. And it's really all about
playing with the width. What I like to do just to really refine it and make
it kinda finished and polished looking is
go back over the edges of this line with my
micron, with my pen. Moving onto tiger,
tiger up and do the same thing as the
Zebra with the stripes. But I'm going to actually
start with with a base color. Essentially you're doing
the exact same thing as you did with the zebra print, where you're just forming
those interlocking lines. I'm with the tiger. However, they're
not quite as long. They're a little bit more
thick and end more pointed. Well, not more pointed, but they're thick to thin
quicker than the zebra lines. So remember when you're
creating these prints that it's not an
exact replication. Fashion illustration is about
doing things a little bit quicker and making it a
little bit more sketchy. You can certainly
take your time. You can study animal prints
and really make it very detailed in and do more
of an exact replica. But this is how I create these animal print swatch
it are these animal prints. And I'm going to move on to the, the looks from
Roberto Cavaliere. This coat has a much
larger leper print than the body suit itself. So that's gonna be fun to
play with a little bit. So the first thing
I'm gonna do for this one as I'm just going
to do that base coat. Alright, for the next step,
I'm gonna go ahead and do the darker spots and then
the dark around the edges. And for this one, the dark spots aren't super dark like this. They're just a hair darker
than the actual base coat, so I'm going to use
just one shade lighter. The reason that I did a bigger a bigger square
or a bigger circle rather than the kidney bean shape is because that's really what it looks like on the code itself. Really the print. So it just kind of
adjust it there. So now I'm gonna
go back over and do the outsides of each spot. Alright, so I've got the coat
done and as you can see, I tried to just mimic that print a little
bit more accurately, like it shows on the model. And you can see like
pretty much every spot has an outline to it, but it's, the outline is different widths
in different places. So now I'm gonna go ahead
and do the body suit. And the body suit has a
smaller, much smaller dot. So I'm gonna do a
much smaller dot, but I'm going to keep
to that lighter brown. So alright, so now I'm done with the spots. I'm gonna go ahead and
go back through and do the outline of each
spot much more like this. Alright, so you can kinda see the difference between the
coat and the body suit. Not, not a huge difference, but you can see that
these spots are smaller than these spots. And you can, even if you wanted
to create more contrast, you could even go back in with
that kind of mid tone and really accentuate
where these spots are, creating just a little
bit more of a difference between the coat
and the body suits. So anyway, I'm going to
move on to the zebra coat. So for the zebra look, it's gonna be a zebra
top and zebra boots. And I'm just going to
go in with my warm gray and do kind of show where the shadows are
going to be first. Alright, so now that we're
done with the shadows, I'm going to go back in with my zebra lines and I'm
going to go this direction. Alright, so now that I've
got my stripes on it, I'm gonna go ahead and
go back through with a pen and refine the lines. Alright, so that's how I
illustrate animal print. Go ahead and practice
on your own. I can't wait to see what
you come up with and what your final animal print
illustrations look like. And once you're
ready, go ahead and move on to the next lesson.
7. Floral Print: Alright, so for the
next fashion fabric, we are going to look
at floral print. Floral print can vary. It can be very small, it can be really big, really, I guess what I mean by floral print as it can
be any kind of print, whether you've got flowers or whether it's
something else, insects, animals, you know, any, any kind of print on your material leaves,
the tropical leaves. This is my take on how I
do large printed fabric. So I'm going to illustrate
these two fabrics. One has a large floral
print that goes all the way through with a
mid-tone blue background. And the other one
is a yellow with white flowers that have just a little bit
of blush in them. Let's go ahead and get started. I'm going to start
with this blue, this blue floral print. And I'm gonna do this up here. It looks like there's
even some butterflies, but the main thing that you want to remember
when doing any kind of printed fabric is in
fashion illustration. It's all about illustrating the main points of the fabric. So I'm not going to
get mired down in the really tiny details are in the really specific
details I should say. I'm going to capture the overall feeling and
look of the fabric. So I'm gonna make sure and capture the bright pink flowers, maybe a few of the
light blue flowers, and then the dark blue leaves
and the mid tone leaves. So I'm going to start with the light blue flowers because they seem to be a
little bit more on the top, the very top of the print. And I'm just going to kind of put them where I
think they kind of go. I'm not going to
worry too much about being overly accurate, but just kind of drawing
a couple here and there. I'm going to move on to
the dark pink flowers. And then I'm gonna go
back in with the mid-tone blue or ultramarine blue. Some of the leaves. Again, I'm not worried about the placement being super accurate
with these leaves. I'm just trying to capture the fact that there are a lot of these shaped leaves in and around and kind of
scattered throughout. So now I'm gonna go
in with a really dark blue because there's
just a few really dark, dark leaves in the very back. And again, just kind of a nod to them being there,
something like that. And then the background
is this really pretty smoky blue that I'm going to go ahead and
fill in a little bit. I know that there are white
butterflies here and there, but they're not a huge part
of the pattern itself. And so I'm not going to
worry too much about, about including
those because it's just It's just a representation
of what this looks like. So I'll leave some
white spots here and there and
filling accordingly. So now that I've got the
colors down where I want them, I'm gonna go back in
with my number one and I'm just going to fill
in the line detail. I have a little bit of
whitespace here, which is where, what are the butterfly
wings kind of shows. I could, if I wanted
to kind of put a little nod to a butterfly wing there,
something like that. But I'm just really
not worried so much about exact
detail or accuracy. I'm worried about getting the colors right and
getting the shapes right because that's what stands out most to
me in this sprint. This is kind of how I
do a larger prints. So moving on to the next prints. This is a yellow background with white flowers and there's a fair amount of black
ink work on the flowers. So what I'm gonna do is kind of visually map out
where I want some of those bigger flowers
to be and kind of outline them with
my marker like that. So I'm not trying to get it exactly like the placements
of the flowers exactly right. I'm just looking at the pattern, seeing that there's usually
a big flower and a couple of small flowers around it and then some spots here and there. So that's kind of
what I'm doing. I'm just kind of
outlining where I think the larger flowers are and then where the smaller
flowers might be. Something like this. Then I'm gonna go
back through and Color in that background, avoiding where I kinda feel like those white
flowers would be. Then I'm gonna go back into
it with a larger size micron, probably a number five. This is the number five
and I'm going to sketch in those flowers where I've
left those whitespaces. And they're really
kind of kind of remind me of like Dr. Seuss
flowers a little bit. I probably didn't leave quite as much white as I should have. Um, so kind of getting the gist, I'm gonna go back in with my yellow and really hit
some of the background a little bit harder so that there's a little
bit more definition to where the flowers are. I'm gonna go, I'm gonna take my number one and do a little, a few finer details. Do some little spots, some work fine lines. So you can kind of start to see there is definitely resemblance, but it's not exact, right? Really quick sketchy
representation. And on a garment,
you're gonna be able to recognize that these are
the two same fabrics. So the last thing
I'm gonna do is I'm actually going to go back in with my white uni-ball
pen and kind of create some bigger white areas
in where the flowers are. And hit some of those white dots around with the unit ball. Right? So that's how I would
do the yellow plural. So now we're going to move on to a couple of floral looks. One of them, this one is by Zimmerman and it's this
beautiful purple look. And this one is by Philip plane and it's this
beautiful green tropical look. So let's go ahead and get
started on the Philip plane. This is a really beautiful
tropical leaf kind of print. And you can get really
detailed with the leaves. I am not, this is very
small representations, smaller illustration, so
I'm not going to worry so much or get bogged
down with the details. I'm really going to focus
on where the colors are and where some of the
larger leaf shapes are. Okay, so I'm just going to
start on the jacket here. And I know that there's like
some of these leaves that are kinda look like that. Somewhere. Tropical
leaves like this. I loved the inside
of this jacket to, it's an animal print and
it's just so fabulous. Sometimes too, when you are, when you have very small
details are very small shapes, but you're representing them on a smaller garment or on
a smaller illustration. Just adding a shape is going
to represent it just fine. So I'm not, I may not get
the exact leaf leaf shape. Perfect. But as long as
it's a leaf shape, I think that's good enough. Okay, so I'm going to switch up my greens to a lighter green now and I'm just
going to continue to do a few smaller leaves. Alright, and then I'm gonna
go back in with a yellow and do a couple of
these yellow flowers. Now that I've got that
kind of laid out, I'm gonna go back in with
a darker green and just creates a little bit of depth
on the leaves themselves. Alright, so now I'm
gonna go back in with my number five and I'm
an outline some things. I'm going to outline some of the flowers and
some of the leaves. And by outlining this print, it's going to give me
a little bit better, um, ability to add in
the black background. Then I'm going to now
go back in with my black and fill in spots
on the background. I'm not gonna be overly
perfect though with it, because as you can see, there's, there's, there's
some white flowers. There's also a fair
amount of shine to it. So I'm not going to
be I missed a spot. I'm not going to be exact
with the background. Alright, so now that I've
done with the black, it looks a little bit uncapped or
unfinished a little bit. So what I like to do, especially when
the background is darker and I have
to add it in last. I like to go back over my
outlines with a number five or something that's just a little bit
thicker or not. Maybe middle, middle of
the road with the microns. Just to kind of really fresh enough and crisp up those edges. Alright, so I'm going to call
it good with the pattern. And then I'm gonna go back in with a white and just add in
some highlights and details. Alright, so that finishes
up that Look for me. That's how I and sketch out these kind of more
complex patterns. And I think it's a really
good representation of this Philip plane look. So I'm just going to
finish up the look by coloring the person's
shoes and the hair. Alright, so that finishes
up the Philip plane. Look. We're going to move over
to the Zimmerman look. This is a really pretty
purple floral print. And it's, it's really, the things that stand
out most to me are just that dominant dark flower, purple flower with
the pink background. And there are some small
leaves here and there. But the main thing I'm
going to focus on is that really dark purple flower. So let's get started. And I'm going to go back into it with this really bright ultra, ultra marine blue and do some highlights on the
flowers themselves. Alright, so the background to this is a really light pink, and then there's some
dark pink flowers kind of speckled through. But I'm gonna go ahead and put
down the light pink first. Hari, something like that. So I don't really have a room
in this illustration to do, to do the leaves. But I think it's okay
because it really is representative of what
this garment looks like. The overarching piece that stands out is these bright
blue purple flowers. So I'm gonna go back in
now with my number five. And I'm just going to outline
some of these flowers. Last thing I'm gonna
do because this is a shinier kind of
silky material. I am going to go back in with my white unit ball and just kind of put
some highlights in here and they're great. So I'm just going to finish up this sketch by
finishing her hair, sunglasses, and a little
bit of the shoes. Alright, so that finishes
up the two fluoro looks, the Philip plane
and the Zimmerman. Again, I just want
to reiterate that the most important piece that
I think when illustrating floral any kind of pattern
is to make sure and pull out the main visual
cues that you see, whether it's shape of the
flower, whether it's color. And really just convey
that overarching piece. You don't have to
be detail oriented. It doesn't have to be
an exact replication. But by just pulling out those main pieces and representing
those in your garment, you're gonna be able to have a really successful
illustration. So go ahead and
practice on your own. I can't wait to see the floral
illustrations that you do. And when you're ready, go ahead and start
with the next lesson.
8. Fur: Alright, so the
next fashion fabric that we're going
to talk about is for and for is a lot of fun. It can be a little bit
difficult to illustrate and really have all the little fine hair texture come through, but it is definitely
doable and it's super fun. So I'm going to show you
two different kinds of, for one that's a little bit softer and lays a lot flatter, It's a lot finer. And then one that's
that teddy bear for fabric that was popular a few
years ago. I think it was. It looks almost a little bit
more matted and currently. So I'm gonna go ahead and
start up here with four. You want to make
sure to remember that even though it's
kind of monotone, there is going to be some
variation in shadow and light, and it's going to be all over so you are gonna
get some shadows, but overall it's going to all blend together a little
bit more than other fabrics. And also for is very almost. When you illustrate it,
you almost have a blurry, very soft blurry hue around it. That's another good
way to think about, to think about for,
at least for me. So for this top one, I'm just going to do a really
light blonde kind of fur. And I'm going to start with, for you want to always
start light and go dark, which is true for most,
most illustrations. So I'm just going to go ahead
and add color in my swatch. And I'm not going to, I
don't care too much about overlapping lines
or the variation in dark and light tones. Because with for you, you're going to
have a lot of that. So i'm, I'm also going
to go over the edges and kind of create this
kind of blurred line. Because that's what That's what for kind of
does with your eyes. It kind of blurs. It blurs that it doesn't create
a hard edge for your eye. So can I just go over the the, the, the border here. And with the finer for your strokes are going
to be a little bit longer. And they're also going to
generally go the same way. You're going to
have some strokes that go against the grain. But for the really
nice high-end luxury, for look, that's really, really soft and shiny. It's going to be just, it's all going to kind of go the same direction
for the most part. So then once I've got
my main color down, my, my lightest tone, but light is to
medium tones down. I'm gonna go back over it with
a little bit darker tone, but not super, super dark. This is, and I'm
going to just go over the edges and it'd be
really super light. And I'm not gonna
do the whole edge. I'm going to skip some areas. But again, I'm just
trying to kinda keep going the same direction. You might have one or two that
go a different direction. But as you can see,
for the most part, they all kind of comb
in the same direction. Then I'm gonna do that in
the middle of this swatch to just kind of go in the same
direction with this color. And not, not like everywhere, but, but a lot. I'm going to do a lot and I'm gonna do it all
kind of going down. I wouldn't wanna do one going up because that just
isn't the case. It's just not not something
you're going to see necessarily with your eye on
the middle of the fabric. Maybe you could do
that over here, but not in the middle. So as you can see, you're starting to get
that kind of feel. And it's that long kind of
soft, luxurious, silky look. Then if you want, this is, this is you don't
have to do this part, but I like to go over some
of the darker areas that I, that I can see with an even
darker marker and just really lightly define some
of those pieces. Just really super, super light. It's all about with,
for it really is about variation in
color and tone. Really just kind of
something like that. Just really light. So that's three
different colors. Starting with the lightest and then starting with the lightest, going to a medium and
then using the dark. If you so wish too. For the very finishing touch, I'm actually going
to go over it with a number five micro
or excuse me, a number one micron. It's really, really fine. And this just helps
that illustrative, sketchy look to me. That tops off your illustration. So again, I don't
do it everywhere, but I try and keep the strokes really close
together for these, for the really
nice, long, shiny, kind of luxurious for luck. So something like that. So that's gonna be your kinda
long, fluffy, shiny fur. I'm gonna do another
swatch down here. That's really more
of like I said, the matted teddy bear for look or the fo for
really is what it is. And I'm actually
going to start with the dark to medium tone. And I'm just gonna go over
my whole swatch here again, I'm not too worried about
how variegated the color is. Then once I have my
color laid down, I'll go back in with
this kind of bumpy, I guess bumpy kind of stroke where you're
kind of creating these kinds of spots, almost hit the
edges a little bit. Then once I do that, I'm going to take the
same color and do what I did up here and do some of the some of that kind of strokes that make the
appearance of here hair. So I'm not going to do
them quite as long. And I am going to go back through the middle and do
those strokes as well. This kind of fur texture has a lot more variegation and as far as a shadow and
light goes, and it also, you can, you don't have to all
go the same way with your, with your brushstrokes,
with your marker strokes. Because it's a lot more matted. You're gonna get a lot
a lot more direction in your hair and the fur. So you can kinda see how the how the texture is
kind of starting to come, come to life a little bit. Okay, so then once
I have that in, I take my dark marker and do the same thing that I
did up here and kind of just go through and do some of the
some of the hair strokes. But i'm, I'm doing it in a random way because
this kind of texture, you're kind of going
in all directions. It takes a long time, but it's almost
meditative to do. Alright, so there's kind of
got more matted look that I do and then how I do it. And then I'm gonna
go back in with my number one and I'm gonna do the same thing
as I did up here, but just with shorter strokes. Right? So those are the two
different for textures that how I illustrate the
two different for textures. So we're gonna go ahead and move over to our fashion figures. And these are both looks
from Michael Kors. They are just
absolutely beautiful. I love, I love these two books. Of course, I'm a huge
fan of Michael Kors. Going to start with this
first one and it is a yellow, it isn't all yellow ensemble and a yellow big
yellow fur coat. So I'm actually going to
start with a really light yellow and I'm going to
do the whole the whole. Alright, so now
I'm gonna go back over it with a brighter yellow, since this really is a true
bright yellow fur coats. So now I'm gonna go back in with a little bit darker yellow and create some of those shadows
just a, just a little bit. So something like that. And I'm going to
go back in with my light yellow and I'm just gonna do a little
bit of blending. Alright? And then I'm gonna take my number one and I'm gonna go through and just do
a little bit of a, are just some strokes to represent some of the fur
on the inside of the code, as well as some more
on the outside. So something like that. And I'm just going to finish
up the sketch real quick. Alright, so that concludes
the yellow fur coat. I'm going to move
on to the town. Look. This is all one color. There's not a lot of
variation in the drafts, the boots, and the coat. So we're gonna
get, I'm gonna get the three colors that
I used over here. In this one, we're going to go ahead and do this, this look. Okay, so let's start
with my lightest color first and just go
over the whole look. Alright, so for the
next part I'm going to use my medium tone and just go over it with
those same kind of strokes. This one too is a very
fine for or a very kind of it looks like a
very soft long for. So gonna do the same
thing as I did here. Alright, so now that
I've done that, I'm gonna go back
through with my darkest and just do some
hints here and there. And I'm just using the
lightest of pressure. Alright, and now I'm gonna
go back through with my number one and just really highlight some of those first. Alright? And I'm just going to
finish up my sketch. Alright, so that's
how I illustrate for go ahead and practice on your own and certainly try out the
techniques that I've, that I've talked about here. And when you're ready, go ahead and
illustrate your fur. Look, I can't wait to see what your illustration turns
out to look like, and I look forward to seeing
you in the next lesson.
9. Shine and Sequin: So the next fashion fabric that we are going to talk about is fabrics that have some
shine or some sequent to it. These fabrics are sometimes a little bit more
delicate to work with. The key to shine or too shiny fabrics is to
really identify where your light sources
and then where that light source is
hitting on your garment. So once you've identified
where your light sources, whether it's straight
in front of you, whether it's coming
from the side, whatever part of that
garment is closest to the light is going to end up
catching most of the light. And then once you can map out where those light spots are, you just have to not
put any color on them, at least not to begin with. So the first thing that I'm going to show
you is just shine. I'm gonna do shine here and
I'm gonna do sequence here. And I'm just going
to use a blue. So if our shine is kind
of in the middle here, you want to color just
kinda up to that point, kind of leaving that pass white. So I'm going to leave a path here just kinda like that where it doesn't
have to be perfect, but you can see where
the light is hitting that that, that garment. And then with, of course
with the kopecks, you can either go
back over wherever you're kind of your shadows are with the same color
and map those out, or you can use a darker color and map
out your shadows as well. So once you have
your shadows down, that's that you can pretty
much call it good for shine. You can go back over the edges
a little bit with lighter, a lighter tone of the marker
or the color that you used. And that kinda adds
a little bit of a blurred effect to the, to the line of the light. So something like that where you have the really bright white
spots right down the middle, but then it slowly fades into something that's a little
bit, a little bit darker. And then you've got your
really dark shadows. And of course you
can, you can also go back over those shadows with an even darker and
even darker color to really highlight
those shadows where those shadows
are gonna be. So I'm gonna do the
exact same thing here, but I'm going show you
how I do sequence. Sequence is the
exact same beginning and then you just continue
with a couple of other steps. So I'm going to go over my
swatch with my mid tone. Kinda being mindful
of where the Shinar, where I want the shine to be. So something like this hole right there. So my my highlight line is kind of rate right
in here in this area. And I'm just going to take my lighter color and blend
the edges just a little bit. This isn't a necessary step, but I like the way that
it looks personally. And then I'm gonna go
back over a couple of spots with my the
same color with my, I'm just adding some pretend
shadows here and there. Denoting maybe
folds and fabric or something, something like that. So once you get to this stage, the next is putting on the
shadows of the sequence. So your sequence, because they sit a little bit
off your garment, they're going to have a
little bit of a shadow. Some of them, not all of them. And that shadow is going to be more apparent once
the light hits it. So I'm going to take a black
and I'm just gonna do dots. And I'm mainly gonna do dots around my main highlight areas. I don't want to cover up
the white necessarily, but I want to get
really close to it. And then I'm gonna put a
couple others around some of the some of the edges
of the shadows. So something like that. Then I actually use two
separate pens to do the white. I start with this
recollections opaque marker because it gives a nice kind
of halo around the dots. And then I go back over
it once it's dry with the unit ball signal,
white opaque pen. So I'm gonna go, I'm going to take
my recollections. And as you can tell, this is more of a felt tip, which is what gives it a
pretty halo around the dots. And I'm gonna go back over. All of my black dots first. So you can already see some of the sequence really
starting to come to life. I'm going to continue with
this and I'm just gonna do a ton of white dots. Alright, so you can stop
right here if you want. I think this is a
beautiful effect. It definitely shows
shine and sequence, and it's certainly conveys
the texture of the material. But what I like to do is to
go back over it, like I said, with the unit ball and
just get some really, really bright whites
here and there. So I don't go over
every single dot, but just some of them with that really,
really bright whites. And then last but not least, again, this isn't a step
that you have to do, but I do like to do a couple of little sparkle lines which are just basically a cross through, through some of
the sequence that are that are kind of close
to where the shine area is. And this just kinda adds
that extra little bit of confirmation about how
shiny the material is. Just something like that. So there you've got sequenced, so it's a little bit hard to tell with the shine on a swatch. It's really easier to
tell on a garment. Let's go ahead and move over to our fashion illustrations. This is a Bagley, Michigan
spring summer 2023. It's this beautiful light
blue sequence to peace. And then this Tom Ford, that is just a stunning,
shiny, sparkling number. So I'm going to go
ahead and start with the Bagley me, Scott, and I'm going to start
with the light blue color. So immediately I can
see that there's, there's gonna be
some shine here. My light source is
coming down this way. There's gonna be some shine
here, some shine here. And probably on the two leg areas here and a
little bit on the bow. So I'm going to try and avoid
those areas a little bit. Alright, and now I'm
gonna go back over with a little bit darker color. It's this kind of Robin's
egg blue just to really be able to see some of
my sequent areas. Alright, so at this point, even though this is
a lighter color, you can still see how the China's coming
through where I've got these highlighted areas. So now I'm gonna go through with my black Prismacolor and I'm
just going to do some dots. Alright, so now
that I've got my, my shadows for my sequence set, I'm gonna go ahead and go back over with my recollections. White felt-tip pen. Okay. So now that I've got
all the shadows covered, I'm going to stick
with my recollections, felt tip white pen
and I'm just going to add in a ton more white dots. Okay, so the other thing
I wanted to mention real quick is when you
are doing your sequence, it is totally fine to go over
the edges of your outline. When you think about shine
and sequence, it does, it does kind of break up
that line of the garment. And so I think it really
adds to the texture. If you do add sum of the sequence to the actual
line of the garment itself. So now that I'm done with
the White felt tip pen, I'm gonna go back over
with my unit ball and just really try and bring out some of those white bright lights. Alright? And then last, I'm going to take my number one micron and I'm just gonna do a couple
of those little stars. Alright, so that does
it for the garment. I'm just going to
quickly finish up her hair and her
lips and her shoes. Alright, so moving
on to the Tom Ford, look, this is a really
pretty pink jacket. A rust color County and a really beautiful
purple Gaucho pants. So I'm gonna go ahead and start with the jacket and
I'm just going to use my mid tone pink to go
over most of the jacket, avoiding the areas
where I see highlights. So I definitely see a
highlight on the color. Of course, my my light source is going to be right in front, so I definitely see
a highlight there. There's probably going
to be a highlight here, maybe a little bit here. And of course, down on
the sleeve here and here. So same with, with
the other pieces. So that's it for the jacket. I'm going to move to the
Komisar using kind of a, I'm actually going
to use a dark dark, rusty orange for
the camera Saul. And then moving to the pants, I'm going to use a
mid-tone purple. So you can see I've used the sketchy kind of brush
stroke he kind of way to, to with the marker
in order to convey those shine, shine areas. So now that I've done that, I'm gonna go back
over with my darker, my darker colors and
really put in some of those shadows. Right? So you can see at this point, if I just wanted to shine
light on the blazer, I could be done at this point. But the pants and the
chemists all definitely have more sequence to
sparkly kind of look. So I'm gonna go ahead
with my black Prismacolor and I'm gonna put down
just some really light, light shadows are some
very small shadows because these sequence are much, much smaller than the
faculty me she can look. Okay, so something like that. Then I'm going to next
get my recollections. Opaque felt-tip marker and I'm just gonna go
over my shadows. All right, so now I'm going to take keep with my felt-tip and I'm just gonna go
over some of the, some of the light where it's
really light and shiny, I'm going to stick to
those areas because again, this is a much smaller sequence, so it's not necessarily
an all over sequence. It's more of a shine
rather than a sequence. So I'm just going to stick
to my main highlight areas. All right, so I'm gonna go
back over with my unit ball, but I'm only going to hit a very few amount of
areas on this look. Alright, and there you have
it for the Tom Ford look with the shiny sequent
pants and cancel and the really beautiful shiny
jacket, silky jacket. So I'm just going
to finish it up. I'm just going to
finish her her lips, her hair, and her shoes. Right. So there you have
it for shine and sequence. Go ahead and practice
on your own. I'm really looking forward to the looks that you
choose to experiment with and what your final
illustrations look like. Once you're all finished
and ready to move on, I'll see you in the next lesson.
10. Plaid: Alright, so the last
fabric we're going to talk about is plaid, stripes kingdom, all of that. It can be a really, really
fun fabric to sketch out. And it definitely
reminds me of academia. It reminds me of
the movie Clueless. It's just kinda one of
those preppy kind of feel fabrics that can be really fun and add a lot
of life to your illustration. So plat, however, I don't illustrate it the
same way every time. It really depends on
whether or not there's a darker color underneath or There's lots of
different colors. So I'm going to show
two different examples and show you how I do two different kinds of plaid or at least two different
patterns of Plaid. So this first one is a
Phillip Lim look and it's kind of a darker a
darker plaid, a darker color. And just going to start
off with a dark brown. And I'm going to go
over the whole swatch. You can see that
underneath the face, I guess the base
color is that dark brown and then you've got
your stripes over top of it. So the next thing I'm
gonna do, the stripes. The colors that I see in
this are that dark brown and then of course the black
stripes, the white stripes. And then there's a
real thin red stripe. I'm going to use my dark
gray and I'm going to do the black stripes
just to kind of get the feel of where they are. And as you can see, I'm not using an actual black, using a dark gray. So from there I'm gonna do a couple of going
this direction. The next step for this
one is the white. And I like to use a white colored pencil
because with plaid, It's usually there's a little
bit of texture to it too. It's not a real sometimes it can be a
little bit felt, feeling. So I like to use
the colored pencil because it really takes the texture from the paper and shows through
to your fabric. So again, it doesn't
have to be exact, an exact replica of the pattern, but I'm just gonna go outline
each stripe with the white, like it shows in the Cloud. And then in a second. So the next thing is kind of going back over and
really showing the black because it
isn't it it is gray where the gray lines aren't overlapping or
aren't overlapping, but where they are overlapping, it gets a little bit darker. So from here I'm just going
to do something like this. This isn't exactly the way
that it looks, but again, it's about representing rather
than exactly executing. It looks like so. Do something like that. And then now I'm gonna go
back over with my read and do that really
thin red stripe. And again, I'm using
a colored pencil. That's kinda what I
would do or how I would represent this plaid
by Philip, Philip Lim. And you can even go back over the brown areas and do something a little
bit darker like this. Sometimes plaid can go, can be difficult to change
after the fact or edit after. But this one lends
itself nicely to that. So here's how I would
represent that one. This one here, I'm going
to do a Zimmerman plaid. This was part of
their 2021 collection and I absolutely love it. It's very seventies, but I absolutely love it
and I'm going to start with a very light tan. So this one has a
white it looks like a white base or it
has white in it. So I'm certainly going to leave the swatch white
and then go over it with my life.
Something like that. Then where are these
lines overlap? You can tell that
there's a much it gets much darker in those areas. So I'm gonna go back
over it with a brown that's slightly
darker than this one, but just in the areas
where they overlap. So this is basically how
I do give them as well, whatever color the kingdom is, I'll just do all my
stripes and then go back over these little
square areas where the stripes overlap and it
creates a really nice kingdom. So from there, I'm just
going to add a couple of extra brown lines
here and there. They aren't actually
really on there, but because there's
because there's so many white lines and other lines showing through some of the yellow
lines as well. This kinda helps just convey or kind of make it look a little bit more
like that plaid. From there, I'm going to get my colored pencil again
and I'm going to go back through these lines on
the outside, on the inside. So something like that. So as you'll notice
with these plots, it's not an exact
representation. But again, that's what I love
about fashion illustration. You're kind of doing as
much as you can without, without getting too muddy. So the things that stand out the most to you
in these patterns, in these clouds, the
colors that stand out the most and the shapes
that stand out the most. That's what you want to
represent in your clothing. So moving on to R2 looks. So this first look is actually a Burberry resort
2023 collection. And this one is a Philip plane fall winter 2021 collection. Both are kind of
different plants, but I thought it would be great to demonstrate both of them. I'm going to start
with the Burberry. And the Burberry is similar
to this one in that it has a brown under
undertone or brown. It's like kind of
like stripes on top of on top of the brown. So I'm going to start by
putting the brown down. But before I do the brown, there are some orange highlights that I wanted to put down. Because if you
obviously if you try and put the orange
over the brown, It's not going to with markers, it's not going to look
exactly like that. So I'm just going to add
the orange stripes first. Now I'm gonna go ahead and
do the coats in brown. So then the inside
of the coat is this lovely kind of
pumpkin yellow color. So I'm gonna go
ahead and add that. I'm going to do
the black stripes. And again, I'm going to
start with a really dark gray and kind of
work my way darker. So this is a really
large print plaid. So there's really only like
123 stripes that you see or, or Plaid areas that you see. So just keeping that in mind. Okay, so that's all I'm
going to do for that. Well, even though you
can't really see it, i'm I'm gonna put it in
there, straight there. And just to even
out the pattern, I'm going to put
another stripe there. So even though that's not
exactly what it looks like, it is, that's what that's how I'm going
to represent it to. So next I'm gonna go
back over with my white and add in
the white areas. So something like that. So now I'm gonna go back
over actually with my black and fill in those squares
where the gray lines overlap. Then if you wanted to, you could go back over some of the white areas
where the whites, the white lines
intersect and use a white opaque pen to really
bring out those white areas. Alright, so there's
the Burberry plaid that the other thing I'm going to do to finish off this plaid portion
of this outfit. I'm going to take a
number one micron and I'm going to outline, actually outlined
all of the stripes. So something like that. And if you wanted to,
you could even go back over the gray lines with something just a
little bit darker. Gray that's just a
little bit darker than what we were using. Alright, and then I'm just
going to finish up her outfit, which is an all black
leather outfit. I forgot one thing on
the burglary look, there is a red
stripe going through this area, something like that. So the next look is
a Philip plane look. And this one, it looks
like it's kind of a black or gray stripe
over a light pink fabric. And this is, it really
looks like it's a very textured fabric as well. So I'm going to be using probably a lot of
colored pencil. But to start, I'm just going
to add all of the light. While that dries. I'm actually
going to use a, a really, really light gray because
as you can see where the gray lines overlap a little bit is really where you get these dark black squares. So I'm just going to
use a very light gray to denote where those lines are. Okay, so something like that. And now I'm going
to go back over the squares where
the lines intersect. And I'm gonna do a
little bit of black. I know right now it looks really different than what
the pattern looks like. The next thing I'm going to
do is I'm actually going to take a black colored pencil. And I'm gonna do these kind of, I'm just light
lines across all of the areas where the black, the gray lines are. So I'll show you what I mean. Alright, so you can see how it's starting to come together. The one thing I will
say about Plaid is that colored pencils are really your friend when
it comes to Plaid. Because of that
textural element that some plants have that
kind of silty feel. So I'm gonna go back over
some of these lines, are some of these squares
and just make them a little bit more square with
my darker gray. I did go ahead and do some
lines with the dark gray to just to kind of help some of those lines
come through a bit. So as you can see,
there's also a lot of white because the
background of this, of this plaid is so light. A white colored
pencil isn't going to show through quite as
much as I want it to. So I'm going to
use my white pen. I'm gonna go do, go over it and do all of the small white lines because those are a very important
part of the plot. They are very noticeable. So I'm gonna go
ahead and do that. At this point, I would
feel comfortable just leaving it
if you wanted to. But there is some fringe, there is some other details. I'm going to use. A chrome tend to do some of the silver details
that are left. And then I'm just going to
finish off her, her shoes. And so those are the two fashion illustration looks that Philip plane
and the Burberry. I hope that you've gained
some knowledge as to how I represent plaid on
fashion illustrations. And I encourage you to practice. I can't wait to see the
plaid looks that you guys pick out and that
you illustrate. And I can't wait to see
your class projects.
11. Thank You!: Thank you so much
for taking my class. I love talking about fashion
and fashion illustration. So thank you so
much for listening. I hope that this class
has provided you with some new ways to create
those fashion fabrics. And that it's been helpful. I can't wait to see what she
put in the student gallery. And I hope that
you have a lot of fun creating and
exploring fashion.
 Lori Burt, Fashion Illustrator and Graphic Designer