Transcripts
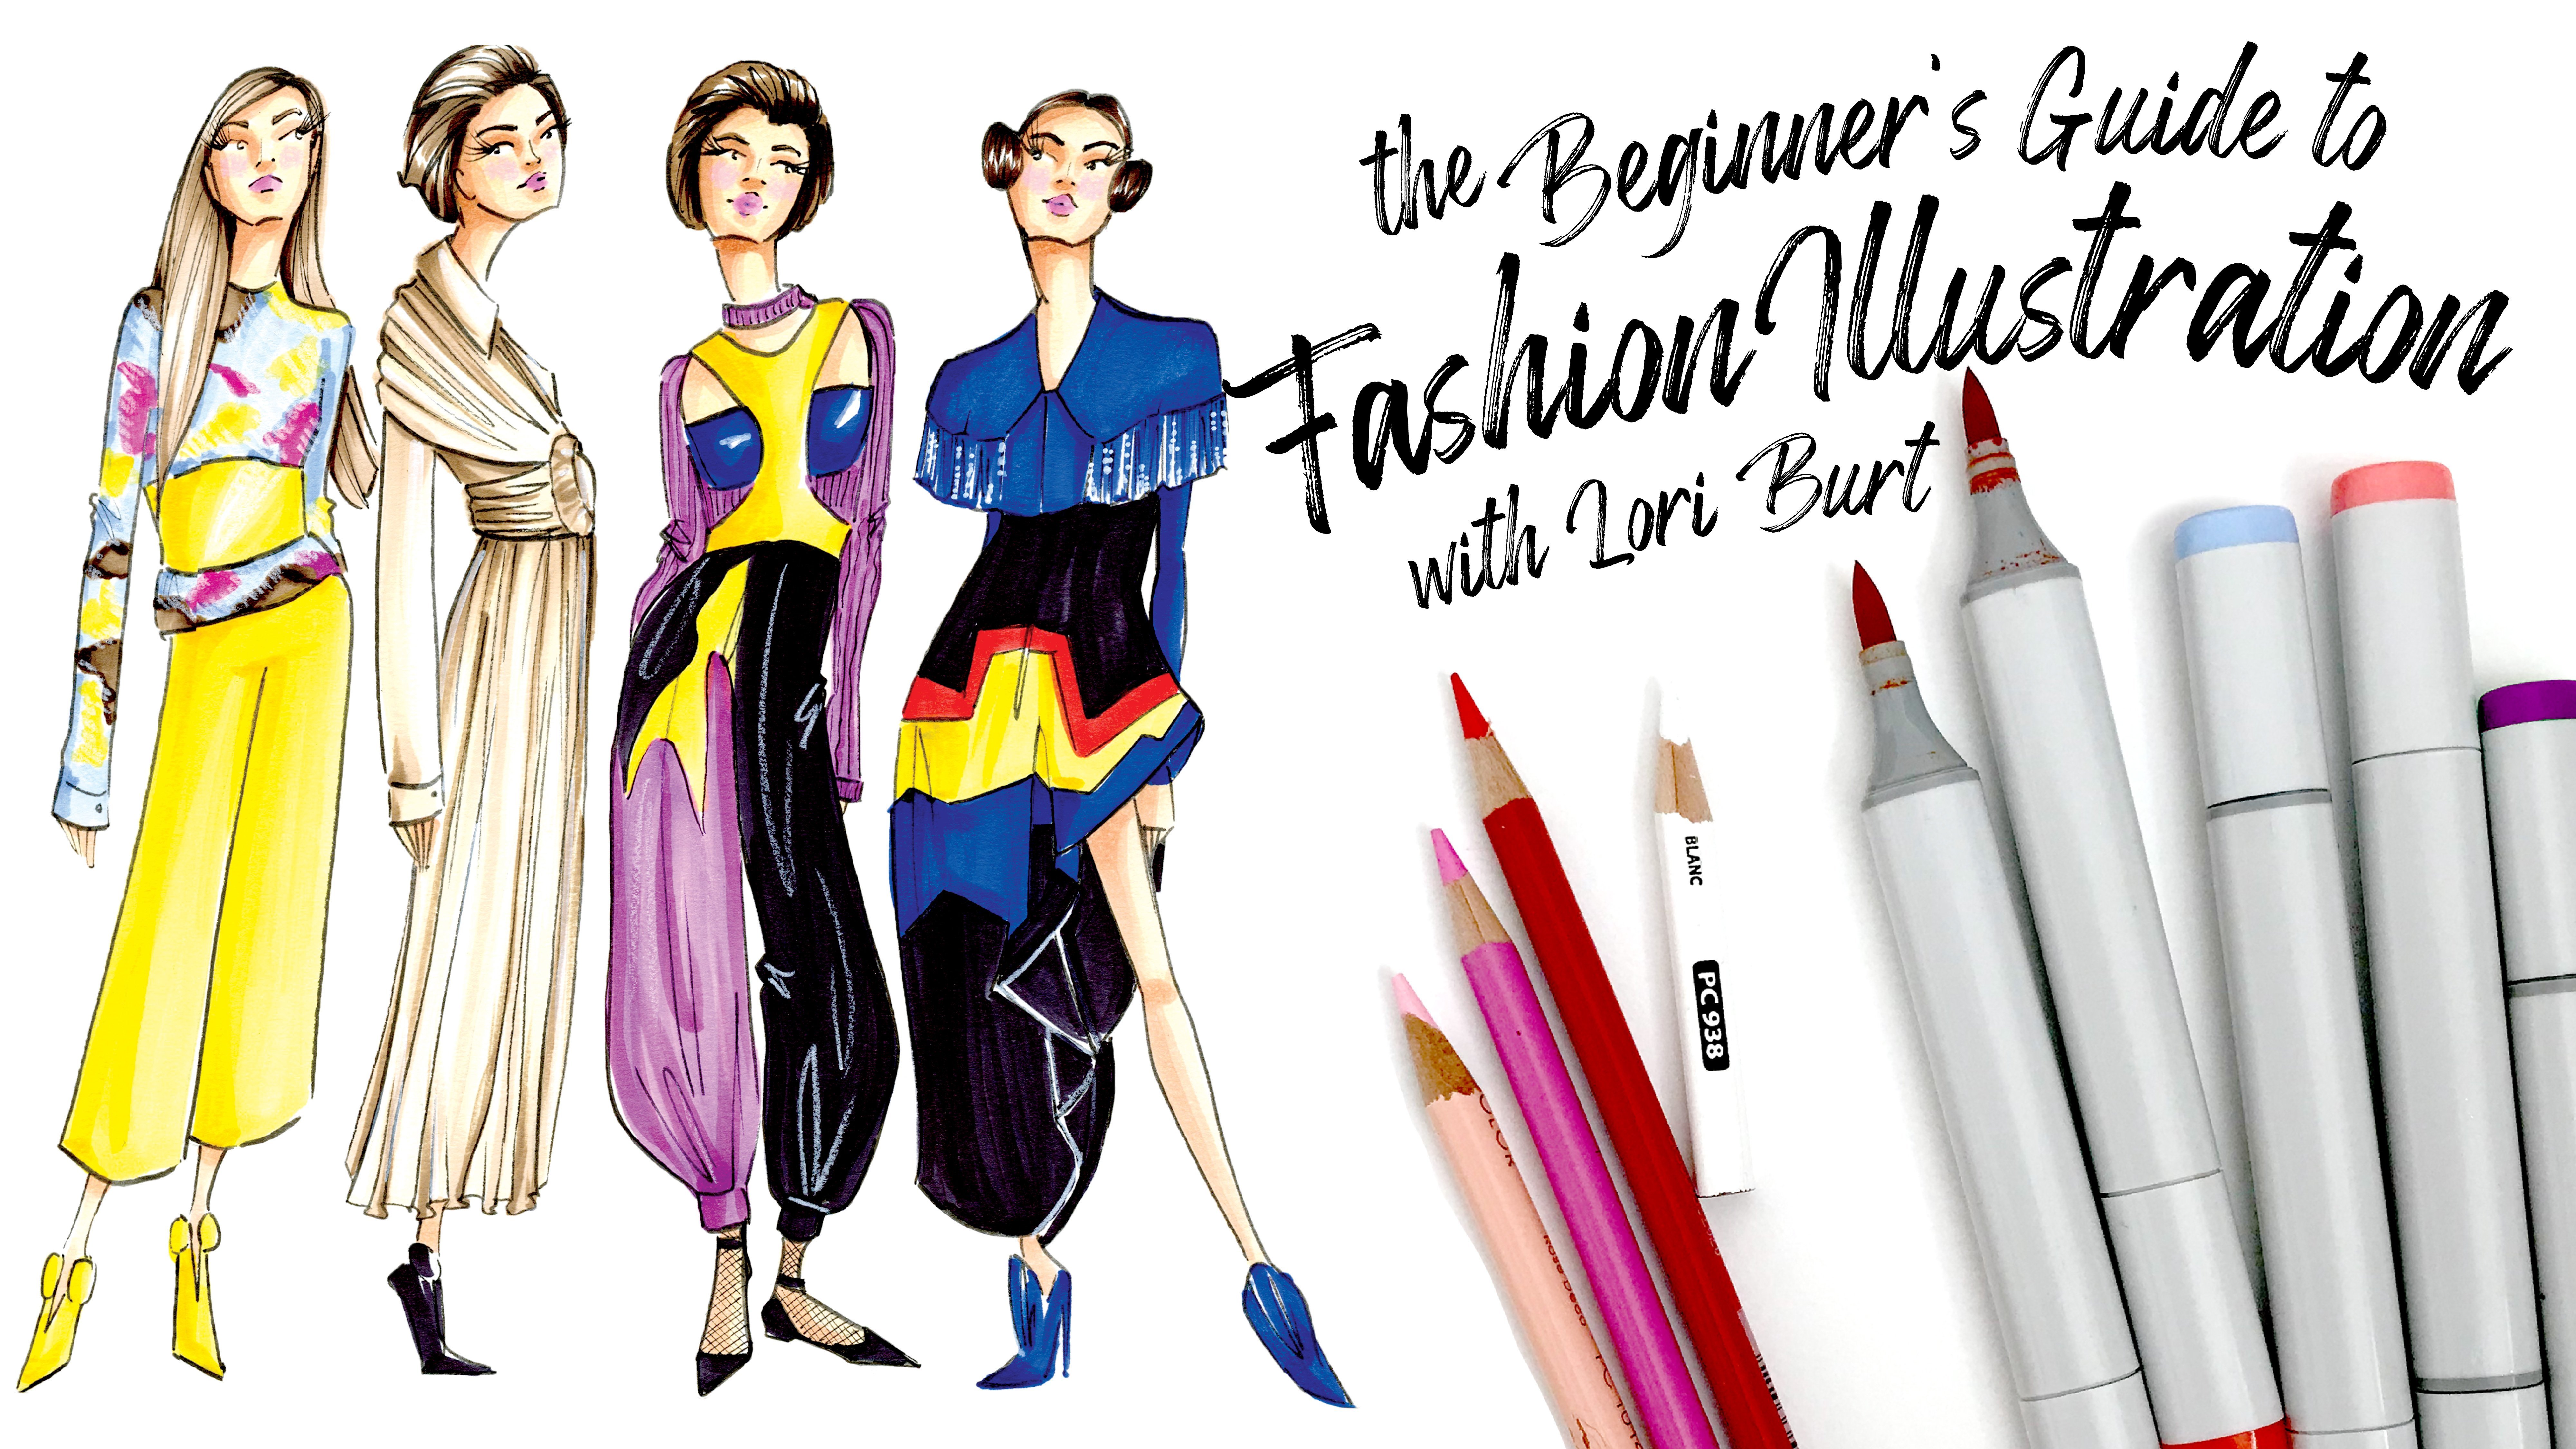
1. Introduction: Hi, I'm Lori, and I'm
a fashion illustrator, and I do a lot of
live sketch events. And in a live
sketch environment, you have to be able to sketch
quickly and confidently, and you have to be able
to sketch men, women, kids, dogs, birds,
pets, everything. Through my experience, I've developed a method of sketching fashion figures that
breaks them down into easy and
understandable steps. Including the male
fashion figure, which I do find kind of
challenging sometimes. In this class, I'm going to show you this method
of starting with a stick figure and
moving it all the way to a finished illustration
that you'll be proud of. I've created this method
to be super easy, and with a little
bit of practice, you're going to
be able to sketch male fashion figures
with confidence. And you might even
want to dabble a little bit in live
sketch yourself. Either way, I hope that you
join me for this class.
2. Your Project: To class project, you're
going to be creating one male fashion figure using
a photo of your choice. And when you're finished
with your illustration, I'd love to see it. We all would. So upload it
to the project gallery and include your photo that you used for inspiration
for your illustration. I've also created some
resources for this class. First, there's some resource
pages that have guidelines to show you exactly where things need to fall on the
male fashion figure. There's a materials list, as well as my favorite
art supplies list, and there's a list of
places you can go to find inspiration as well as other resources that you can
use for additional learning. All right. Now let's talk about the supplies you
need for this class.
3. Supplies Needed: Mm. Hi, welcome.
Before we get started, I just wanted to
talk a little bit about a few supplies that you'll need to get started
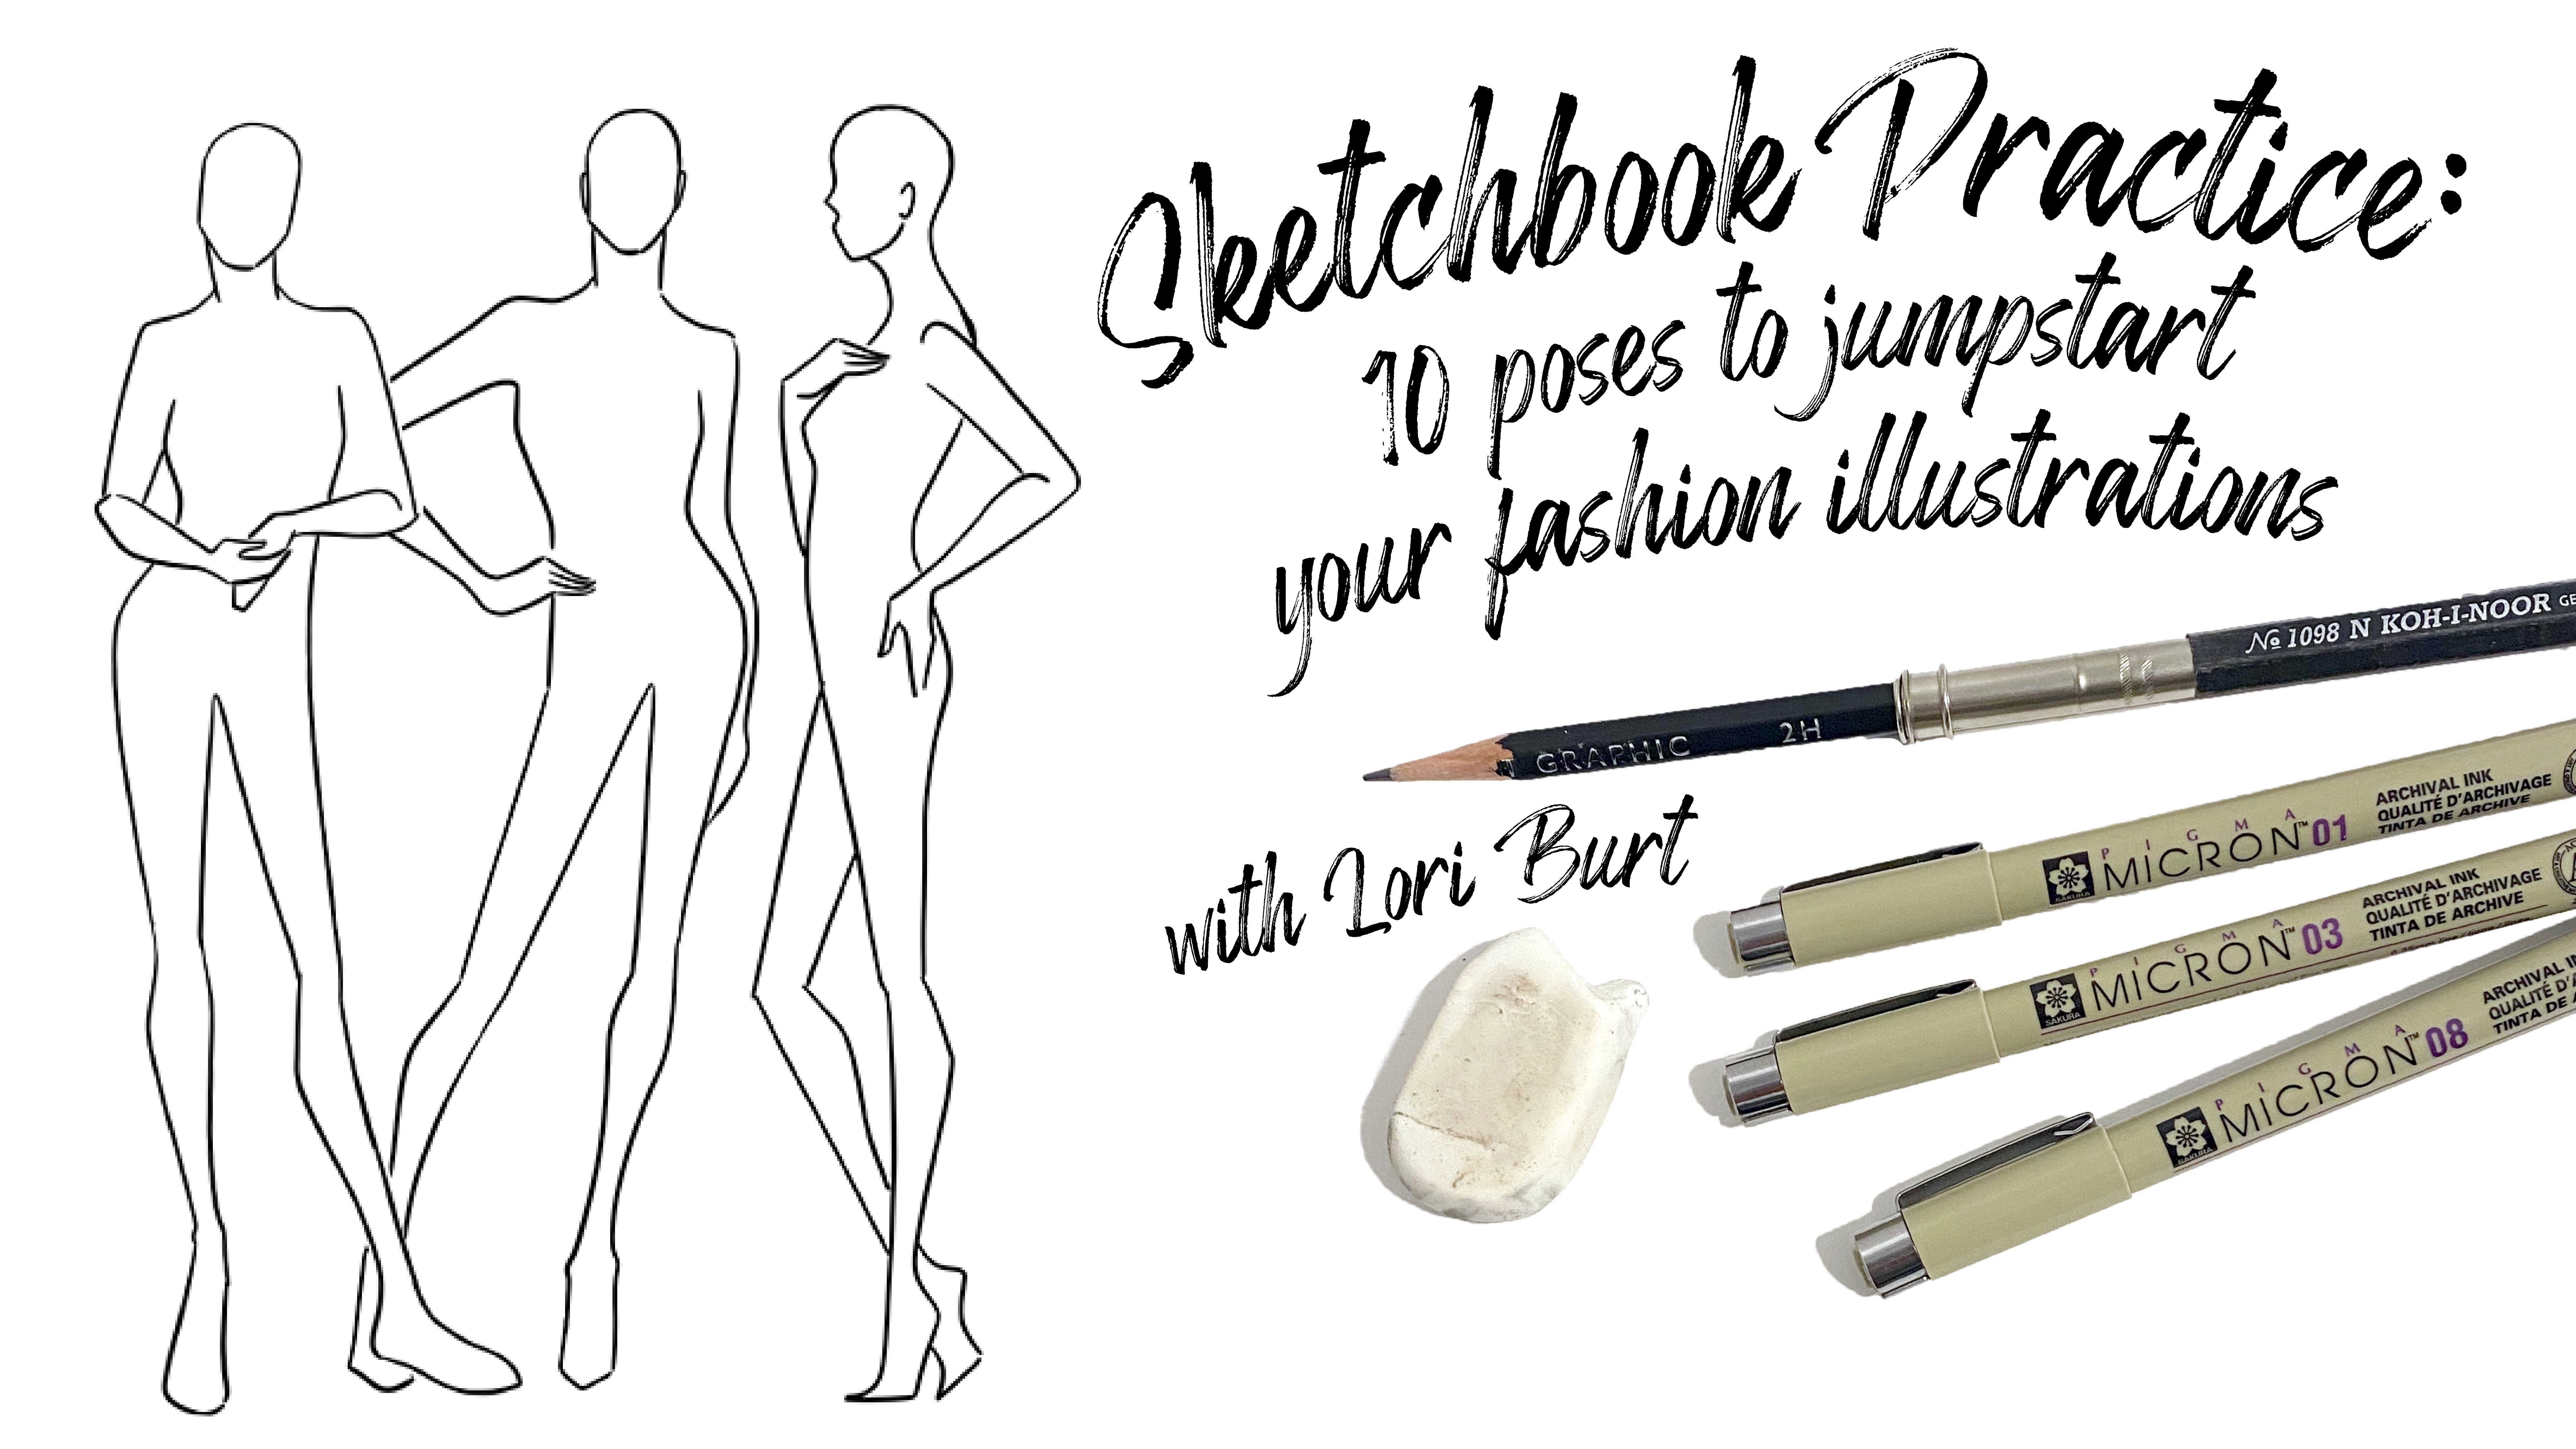
with the class. First, I highly suggest you print out the resource
pages that I've provided, especially the blank page. These are what I'm going to
be working on to begin with, just to help you get
an understanding of proportion and where things fall on the male fashion figure. These will make it a lot
more understandable. I really highly recommend that you have these printed out. You can also download these to a digital platform like Procreate if you want
to work that way. But just so I'm going to be working with pencil and paper. Second, you'll want
a light pencil, one that makes light lines. I really suggest a two
That's my preference. But any hard lead
pencil will be great. It's great to have a hard
lead to do these sketches with because they don't smudge as you go over them
with your hands, they're easy to erase and two H is really
the one that I like. I really like Derwent. But really any pencil you want to use to begin
with will work great. Just as long as it's erasable,
it doesn't smudge much. That's really what
you want to look for. The next thing you'll
want are pens. Any pen will do, but I
highly suggest a pen that's got archival ink
or fast drying ink. I really like microns
microns are my go to. I've tried a lot of different
ones and microns seem to be the best for my process. I really like the number
eight or the number five. It depends on how thick you
want your outline to be. Five is going to be a little
bit smaller than an eight. But these are great because
they dry really fast and once they're dry and
you go over them with an eraser, they're
not going to smudge. Plus, once you add color with whatever medium
you're going to use, they don't bleed
into that medium. These are my
recommendations, but again, feel free to use what you
feel most comfortable with. I also like to have a variety of tip sizes because then I can add different
kinds of details. I do like to have a three and
a one on hand as well just to get detail on the face and detail in the outfit if need be. The next thing you're going
to want is an eraser. Any eraser will work honestly. I really like the Mr.
Penn premium erasers. These are plastic erasers and
they don't produce a lot of the little shards that you
get with a normal eraser. So they tend to be a
little less messy, but really any eraser is going
to work for our purposes. So make sure you have an eraser. Then lastly, make sure that you have a blank
piece of paper, either in your sketchbook or even a piece of printer
paper, whatever you need. Just a blank piece
of paper that you can do your final
project on that doesn't have those guidelines so
that when you upload it to the project gallery,
it looks good. It looks just the
way you want it to. Those are the supplies
you'll need to get. Quick pause. Color is not required for the
final illustration. However, because I'm going to be coloring all of
my illustrations, I'm going to talk a little bit about the
materials that I use, specifically alcohol
based markers, and I've detailed
out the exact colors in the resource section if
you'd like to know that. I'm not going to
talk a lot about coloring since it's not required
for your final project, but if you'd like to
color your final project, feel free to use whatever
medium you like. Now,
4. Illustration Inspiration: Yeah. All right. So before we dive
into sketching, I wanted to explore
just a little of the wide range of style
in fashion illustration, specifically male
fashion illustration. This is so you can gain not
only inspiration and ideas for your own sketching and
your project for the class, but also to emphasize the fact that all
illustrators are different, that different styles are great and to encourage you
to keep practicing and not just focus on what you
may perceive as your failures or get frustrated with not getting it quite as
quickly as you want to. Let's keep that in
mind, and let's explore some male
fashion figures. So the first book I
want to take a look at is a relatively new book. It's called Illustrated
Men drawing and rendering the male fashion
figure by Lamont O'Neal. He is a very prolific, extraordinarily talented
fashion illustration artist. He's taught for a
long time as well, and he's just phenomenal. His illustrations are great. He's a great one to look at
and gain inspiration from. He wrote this book,
and this book has some really great examples
of Illustrated men as well as the difference in male and female fashion
figures to kind of help you understand the difference
in the body types. And I like this comparison here because it really
shows you know, the woman's body has a
lot more curvature to it. The male figure is
really just a rectangle. There's very little angle
to the male fashion figure. It's very much a
square and a square. So this book has
this great example, comparing the two figures
to kind of help you understand some of the
differences as you're sketching. So the first example of
fashion illustration I want to look at is just these
gestural sketches. This is a great way to kind
of help you understand movement as well as
the structure of a male fashion figure
or the male body. I really like how they've used a really thick pencil
and they've just gone crazy in what they see. This one, too, is a
really nice illustration. I love the use of color here. And while it's a pretty general illustration, you can tell they're all men, they're all standing
casually around, and the colors are great. Just a couple of
interesting examples there. And then this one, I
really like this example. It's not necessarily
overtly male, but I love the emphasis on the clothing textures
and the clothing colors. I love this is obviously a ShirPA with probably
some sort of wool trouser, a really nice wool overcoat
that's very oversized. Probably maybe some
denim overalls and some sort of textured shirt with a colored shirt underneath. I just love the emphasis here on the fabric
and on the clothing. I thought that was a
really fun example. Uh, the next example I
wanted to look at is this. This is an ad from 1976 for
these Western style shirts, and I think that this is
absolutely so much fun. They've done an
incredible job at really conveying how
fun the shirts are, that they're very much a Western style print,
and that they're for men, you know, I think that the
figures are really great, but just the overall feeling
of style and color that, you know, these lines give
is really, really cool. So really fun way
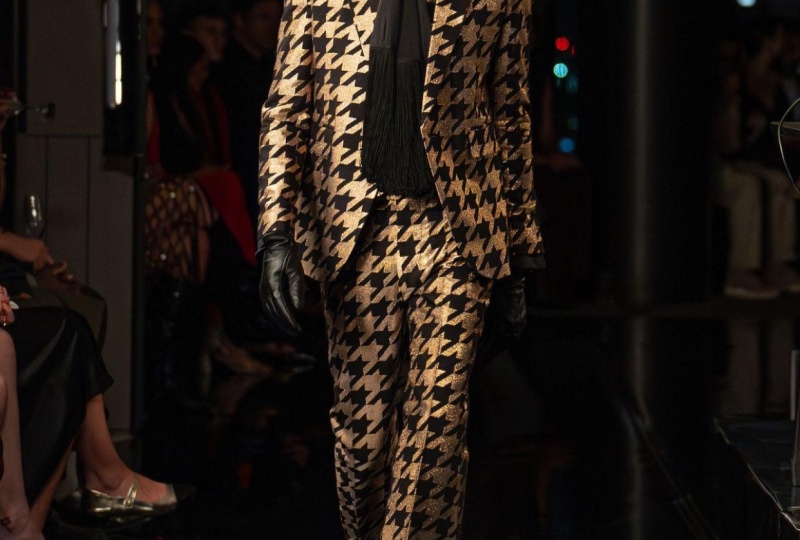
to render plaid. And then this one
I wanted to take a look at because
this is kind of where male fashion illustration
started with the rise of magazines
in the 30s and 40s. You got a lot of very traditional
illustration in there, very kind of accurate
illustration for figures. And the male fashion figure, this was definitely very
traditional for the time. And I think he looks
very debonair, very posh with his colored
polo shirt and his wool pants. I really like the hounds tooth rendering on this illustration
and the shoes as well. There's a lot of emphasis to the style of what this
clothing kind of evokes. So I liked that one. The next book we're
going to look at is 100 years of
fashion Illustration. There's not a lot of
examples in this one, but there are a few that I thought were worth checking out. This one, first of all, I really like this example because
the illustrator has not really cared too
much about being super accurate with the lines or staying in the
lines with the color. They haven't, you know, cleaned up their sketch. They've really put kind of this sketchy style into
their illustration, and yet it still really
conveys a chicness, a polish, you know, somebody who's kind of put themselves together
these blazers. Plus, I really like the
limited color palette, which would be kind of fun
to explore in your project, maybe just using two,
possibly three colors. But, there's just very
little detail here. But overall, you can see exactly what the illustrations
trying to convey. So really great example. And then this one
definitely one of my favorite fashion
illustrations in this book. I grew up in the 90s. These sweaters were everywhere. While I think they could
have been done in color. It may have taken away from them being on a figure if
they were, possibly, but I love that they've really
emphasized that these are just really crazy prints,
really fun prints. And you can see, too, with
this male fashion figure, you have got a very
square square body, very broad shoulders and very square torso that really
conveys this is men's wear. This is sweaters
and tops for men. Really kind of a fun way to illustrate these four
different sweaters. So last but not least, we're going to
look at this book. This is the sourcebook of
contemporary fashion design. And these are illustrations
from fashion designers. So they're not really
meant for editorial, but I do think they're
really great to look at. So these illustrations,
I think, are great. They they've put emphasis on
the material a little bit. You can definitely
tell that it's a much blockier figure that this is a male
fashion figure. And I just really like
that it's not perfect, but it's very stylized and
really fun to look at. So that one was one I
wanted to check out, and then next is this one. This one I thought was
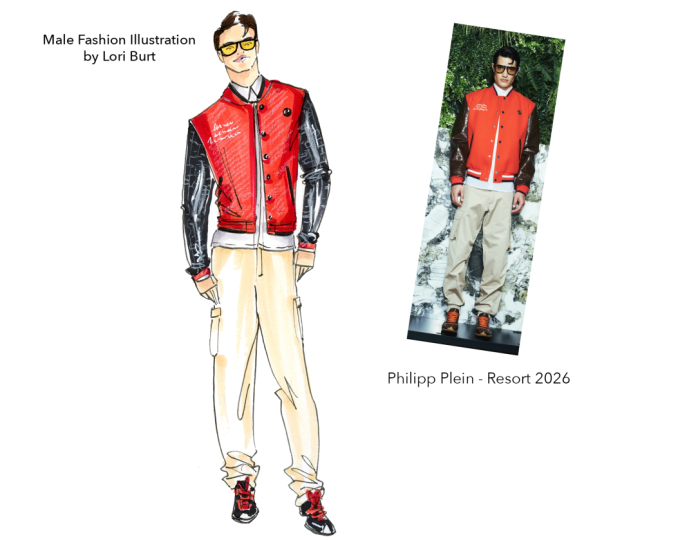
fun because you could see sketch to runway. This is the jacket and the look. This is how it turned
out on the runway. I like these figures because while they may not be
quite as wide or as muscular as you tend to see with male
fashion illustration, you can still see it's
very much a rectangle. There is not a whole lot
of curve on the body, which goes to really
convey that this is a man. I love that, you know, the texture on the
jacket is emphasized. Of course, I love
that it's pink. So really kind of a neat
illustration to check out. And then next, I wanted
to look at this one. This one is very much more
in the vein of cartoon, and I thought that was really interesting when it comes
to fashion illustration. You don't see a lot
of this kind of illustration when you look at more traditional or historical
fashion illustration. But I thought, you know,
it's just really super cool. I like that they've used
a photograph to kind of put the print of the
sweater in there. And you can tell maybe more because of the facial
hair than anything. But you can tell that this is definitely a male
fashion figure, a little bit more blocky, but just a really
cool style as far as illustration goes because
you don't see it that often. And then last but
certainly not least, I wanted to show you
these illustrations, although these are fashion
designer sketches, they very much
could be editorial. I think his sketches song zio, I think his sketches are
just really, really cool. And they remind me
a little bit of, like, a Marvel villain, you know, like a
comic book villain. I love you can definitely tell it's
male because obviously, you've got that very
blocky, blocky figure. But I just absolutely love how he's rendered the
different fabrics. He's kept the color
palette pretty limited. And his sketches are just fun. They evoke a lot of feeling, especially in the faces. You know, this one, he hasn't
gone into too much detail. You get the impression, it's definitely a purple suit
for a man. Same with these. I think this one is a
little bit more feminine, but you can still tell that
it's a male fashion figure, and you can tell that the
emphasis is really on this skewed pocket and the
texture of the sweater. So just really kind of cool. So again, I wanted to make sure and check out a few examples of fashion illustration
for men before we get started so that you can kind of gain some inspiration. And remember, there's
all sorts of styles. So let's go ahead
and get started.
5. Male Stick Figure: We've gathered our supplies and we're ready to dive
in and start sketching. I wanted to highlight just
a couple of things before I get started to think about
as you're moving forward. The main difference
that I found with the male fashion figure versus the female fashion figure is
that with the male figure, you're dealing with
squares and rectangles. The female figure is more
triangles and circles. The male figure is a
very blocky shape. It's built of, like I said,
squares and rectangles, keeping in mind that
you're not going to have the dramatic
angles that you have with a female figure is going to help just a
little bit moving forward. Then I'm going to be using this four B pencil just so that you can see
what I'm sketching. I generally like to use a two H when I'm doing my own sketches because
it erases so well. I'm just going to use this one so that it shows up
a little bit better, and you can see what I'm doing. Alright, so let's dive in. Oh, and we're also going to be doing a very common
standing pose. This is just a very common pose, and it's a very casual pose.
It looks very natural. And that's why I wanted to use this one in this first
sketching phase. Alright, let's dive in. I'm
going to start with the head. And as you can see, all
of these things are where everything should land is highlighted on this
resource page, head, shoulder line, waistline, hips, crotch, knee, and ankle. So I'm sticking to
that pretty much. I mean, keep in mind
this is just a guide. So let's go ahead
and get started. I'm going to start
with the head. And when I sketch a head, I usually go just a little
bit over this line. The male neck is much whiter
than the female neck. You're generally going
to come right down from that jaw line into the neck. So that will be one
thing that establishes a male fashion figure versus
a female fashion figure. And then the shoulder line, he's going to be kind of again, his weight is going to
be shifted to one side, so we're going to
have, you know, this angle with his
shoulders and his hips. But not a huge angle. Keep that in mind,
not a huge angle. So for the shoulders, it's just going to
be angled slightly. And then you're just going to
really just draw a square. It's going to be very sharp. There's not very much tapering
in at the waist at all. And then for the hips, I'm going to start here
and I'm going to angle it the opposite direction
of the shoulder line. Again, this is that kind of
contraposto where you've got weight that's distributed
unevenly on the legs. Making it look just
much more natural. Again, the hips are a rectangle. There is no curve to the
male figures hips and it's just ever so slightly more
narrow than the shoulders. The shoulders, if you're
drawing them pretty broad, the hips are going to be just ever so slightly tapered in, but they're still going to
be a box with zero curve. If you can see this
too, the waistline, where you're going to
have your belly button is much higher than
where your hips hit. The hips on a male fashion
figure are just ever so slightly dropped versus
the female fashion figure, so something to keep in mind. We've got our square
for our torso, square for our hips. You'll notice that I
don't connect these. That's because this is where you're going to have just ever so slight of curvature that
you can play around with. Normally, I even will just draw it in with
a little dotted line. So the main thing with the stick figure is
getting your blocks in. So we've got our torso block, our hip block, and now we're going to move
on to the legs. So this is the leg
that's going to be supporting all of the weight. And if you see on some of
my other resource pages, I've got a straight
line moving down. This is your plumb line
or your center line. And if you keep this kind of in the forefront of your mind, it's going to help you
keep your figure balanced. So you're going to want a foot of the leg that's holding
all of the weight, you're going to want it to
end at the top of that line. So we're going to do our thigh, our knee, and then our calf, and then our foot is
going to be here. There's our first
leg, our second leg. We're going to have this
knee just ever so slightly lower than this knee because this hip is
dropped just slightly. And then this leg coming in, pinching in just a little bit, and we're going
to have, I guess, if this is technically
his ankle, we're going to have a foot
here and a foot here. So then moving back
up to the shoulders, male fashion figure has
these muscles here. Female a female figure does too, but they're not nearly as
dramatic as it is for a man. So you're going to have these lines denoting
that muscle structure, and then you're going
to have your shoulder. The other thing with
a male figure is because they've got a
kind of more muscle, I think, anyway, more muscle structure up here than a female. And they're just bulkier. They're just more
square and bulkier. Their arms tend to curve
more out like this, versus with a female,
you might have it more tucked in a
little bit more elegant. A male figure is going to have their arms on a slight
curve away from their body. So you've got the
shoulder joint here, you're going to draw a line
angling slightly away from the body and then coming back
in after that elbow point. So away from the body to the elbow and then back
in towards the body, to then go to the hand. And the elbow is going to hit right about the same
place as that waist line. So I'm going to go
through one more figure, a little bit more abbreviated, and then I'm going to
finish out the page so that you can kind
of see me work. All right, so this next figure, going to draw the head in here and get that really
kind of thick neck. Going to do shoulders, not quite as broad as
that first figure. And then I've got my hips here. In just no shape,
absolutely no shape, just a rectangle and going
to do that for my waist. Moving on to the
hips and the legs, going to keep in mind
my center line here. Hips, thigh, knee, and Ankle. I mean, you know, ankle roughly. Hip, knee, ankle, foot. Then moving back up to
the shoulder, again, we're going to curve those
hands out or those arms out. So that top part of the
arm is going to move out. And that's a little dramatic
that and then this. So we're moving away from
the body back into the body, away from the body
back into the body. And got that male figure. Alright, I'm going to
finish out my page, and I encourage you
to do the same. Alright, so I've finished
up my mail stick figures. I encourage you to go through a couple of these
pages and really get a feel for where everything
on the mail figure lands. And in the next video, we're going to be adding all
the curves to our figures. So once you're ready, go ahead and hop onto that next video.
6. Adding Shape: And All right. So I've drawn up some
stick figures with a lighter pencil so that you can see as I add shape a
little bit more clear. I wanted to just go over
a couple of things. Keep in mind that this
is a pretty general way to sketch in the shape
for a male figure. If you want to be
a little bit more accurate or you want
to study this further, it would be great to study
the muscle structure, and you can get really accurate
in your illustrations. But this is really
just adding shape generally so that I know where the clothing is going to
fall on the male figure. So some things to keep in mind, there's very little difference between the male
and female figure, but the differences
the few differences that there are are rather large. So the male figure is very
straight in the trunk area. There's no curve really
in the trunk area, so you're not going to get
any of those dramatic angles. That's going to make your figure look a little bit more
feminine if you do. And then the width of the
limbs are going to be ever so slightly thicker than you would see on a female
fashion figure. So the upper arms and the thighs are going to
be a little bit thicker. Than a female figure. Keeping those things in mind, I'm going to go ahead
and jump in to sketching the shape on these
male fashion figures. And I'm going to
use a red pencil so that you can clearly
see how I do this. All right, so starting
with this first one, there's really not
much difference, you know, in the face
shape at this point. The male head is a
little bit more angular, but it's really
about the neck and the neck coming down
from that jaw line. And then the shoulders, they're going to be a
little bit down sloping, and then you're going
to have kind of a little bit more defined
shoulder muscle right here. And then that is
going to come down. It's going to be a little bit thicker here than what
you would, like I said, draw in with the
female fashion figure and it's going to taper just
a little bit at the elbow. Then it's going to come
back out just like a bowling pin shape
where you've got a thicker area here and
a thinner area here. The thicker area is going to
be closer to the elbow area. Then I'm just going
to draw a square for the hand and triangle
for the fingers. Then going back up
to the torso again, it's going to be
very, very straight. It does taper just a hair toward when you get
to the hip area, but just ever so slightly. It's not going to be
super noticeable. Again, I'm going to do this same thing over here with the arm. It's going to taper
at the elbow, and then you're
going to get kind of that bowling pin shape again, draw a square for the hand and then triangle with little lines through it for the fingers. And then the thighs are going
to be a little bit wider. You're not going to have
too much of a thigh gap like you can do with the
female fashion figure. And then the knee,
sometimes I like to just kind of sketch
in a little circle because their knees you can kind of define the
knee a little bit, and sometimes I
feel like that adds a little bit more definition to the muscle structure
in the male leg, and that can add to an
overall look of masculinity. So again, we're just going to do that kind of bowling pin shape
for the bottom of the leg. The calf area here is going
to be a little bit wider, and it's going to taper in
down towards the ankle, and then you're going to
have your foot there. Next on this side, have your thigh area
and then your ankle, and this foot is going to be slightly lower than this foot just because this hip is
dropped a little bit, and then going to have
a straight line there. So overall, really not too hard. You've just got a little
bit thicker here, a little bit thicker
here than what you would normally sketch in for a
female fashion figure. You've got a little bit more
definition on the shoulders, possibly a little more
definition in the knees and a very straight
rectangle of a torso. All right, so I'm going to do this again and talk
through it on this one. So again, I'm just going to outline that face,
add in the ears. You've got that
kind of thick neck, and then the shoulders that slant down just
ever so slightly, kind of that defined
shoulder muscle tapering in at the elbow, and then again at the wrist. And just making sure making sure that this
area is very straight. It's pretty much like
a straight line. And just a slight taper
into the elbow here, and then again, that kind
of bowling pin shape. And then I'm going to
move down to the thigh and the calf muscle and kind of maybe define
that knee a little bit. That's a little dramatic,
but you can get the idea. Foot there, and then
again with the in. This foot being a little
bit lower than this foot. So again, just I mean,
pretty straightforward. You don't get to have quite as much fun with the
male fashion figure as far as, you know, curves and adding
that kind of drama to it. But it's pretty basic
once you get it down. It's just a rectangle with, you know, your limbs. So I'm going to do the next two, and I'm just going to
go a little bit quicker do time lapse through
it so you can see. I encourage you to continue practicing with this blank page, adding shape to
your stick figures. So let's jump in. So there is the shape on all
four of my stick figures. Again, I encourage you
to continue practicing, adding shape to your
stick figures before you jump into the next video. Get really comfortable with
the way that this shape looks on the stick figure so that you can jump
into the clothing. And once you're
ready, go ahead and start the next video.
I'll see you there.
7. Adding Clothing: All right. So I've got a couple of figures finished up
to the shape stage, and now I'm going
to add clothing. I'm going to talk
through how I sketch in the clothing and then
finish it up with my pens. I thought it would be great
to do one look that's very structured and one look that's a little bit more baggy and
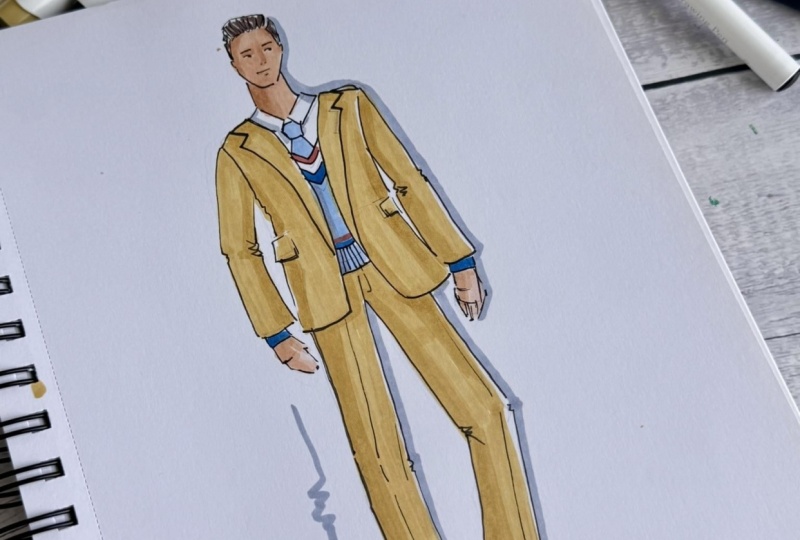
loose fitting clothing. Ah, so the first look I'm
going to start with is going to be a structured suit. It's this look here from
Tom Brown from fall 2026, his men's wear collection. It's a really fun look. I wanted to do something
bright and colorful because it feels like a lot
of times with men's wear, you get a lot of
the same shapes, and the only thing to really spice it up sometimes
is the color. I really like Tom
Brown as a designer. He does some really
super fun stuff. So if you want some inspiration for your
look for your project, he's a great one to explore. You can look at all of his
stuff on vogue.com runway. All the collections are there. But let's go ahead and dive into this really cool
mustard colored suit. I always start with the top sketching about
where I think the eyes are, maybe add the hair line
a bit so that I know. I think men's hair
can be difficult too because yeah,
I don't know why. I just think men are a
little harder to draw than women in lots of ways. Then I'm going to head
down to the collar. I'm sticking pretty close
to the body here because it's very structured and
very close to the body. Then I'm going to sketch
in his suit jacket, which again, just really
hugs his shoulders. And it looks like
it goes about down to his thigh about right there. It's kind of a short jacket. And while there's not a lot
of shape for men's wear, there is a slight taper at the waist with suit
jackets generally, kind of a curve, and Again, I'm trying to stick
pretty close to the body and get that. As close as I can, again, fashion illustration, you
just don't have to be exact. The suit jacket does
fit really well, it does definitely hug his body pretty tight
and then the arms are just you've got that
little bit of a curve there, so you're going to
see a little bit of bunching right here. You can just do a
couple of squiggles to denote the creasing there. The jacket, you can see the sleeves of the
sweater poking through. But the jacket, you can tell it's meant to be a
little bit short. That's what I'm trying
to keep in mind. Then heading back up
to his sweater vest, Tom Brown has that
signature color palette of red, white, and blue. And then he's got a
waistband on his sweater and then sweater comes
down to maybe right there. Okay. Then moving
down to his pants, his pants I mean, they're just little columns. They don't show the shape, which actually is nice
because you don't feel if it's difficult to sketch the shape of your male figure, sometimes you can hide that in the way that a
man's clothes fit, which has saved me on more than one occasion
with live sketch. But because essentially
the legs are just, you know, big tubes. There's just not
any real I mean, of course, they have to be
the right size for the man. But let's see that. Again, just straight lines down, but I'm still keeping it
close to where the legs are because they are
very fitted pants and they are little cropped, then I'm going to
add the shoes in. Cam back up to the hands, my little triangles
to show fingers. I'm not going into too
much detail there. So there's basically my outline. So I'm going to grab my
number eight micron, and I'm going to go ahead and do the outlines to my figure. Alright, so something like that. I'm now going to
take my number five. Actually, I'm going to
take my number one and sketching his facial
features a little bit. There is a structured suit. I'm going to move on to the next one before
I do some erasing. This look is from
Louis VitanFall 2025. I'm gonna go ahead and pick up my pencil and find it here. I'm gonna pick up my pencil and I'm going to start sketching out this look from
Louis Vuitton. Next, you can see the
collar really goes up to the bottom of his ears. I'm going to try and
keep that correct. It's this fun shirpA it looks
like it goes down to here. It's fun Sharpe that has maybe
another collar underneath. Then moving to the jacket, the arms of the jacket
actually look pretty fitted. And it looks like he
might no he does not have anything else showing. And then he's got the jacket buttoned and the jacket maybe
goes down to about here. And you can see, too, this is
the other great thing about menswear talked about
it a little bit with the pants here because
there is very little shape, and maybe you're a little bit frustrated trying to get
that real masculine look, you can hide a little bit of their body in their clothing. And so you can see
with this jacket where it's a little bit looser, not quite as fitted as
like a suit jacket. Just drawing a baggy
shape can hide some of maybe your insecurities as
you sketch the male figure. Again, that's been
a saving grace sometimes with my live sketch. All right. This
jacket, I will say, because the shoulders are
broader than the hips, you do want to taper it. Even for a baggier silhouette, you do want to taper it so that it is a little bit more
narrow towards the hips. Then he's got these shorts on that really come
right below the knees and Something maybe like that. You're going to have a
little bit of creasing here where his leg is
bent a little bit, and then you've got these
really big boots on. And some pretty
thick socks as well. Improvise a little bit. I can't really see what
the side view looks like, but it does look like they're laced and they've got
these like a sneaker. I'm not going to go into too
much detail with the shoes. And then I'm not going to
draw the bag in there, but just keep his hands the way that we've
been drawing them. There's my pencil
lines for this look. The jacket, looks like
there's a line there. The jacket over the
jacket and the shorts, and the big boots. I'm going to go ahead and
grab my number eight, and I'm going to sketch
in my final line. Alright, so here are my
final illustrations. I'm going to go ahead
and grab my eraser and erase my pencil lines. Alright, so I'm really happy with the way that both
figures have turned out. The structured look, I
think, looks pretty good, as you continue to learn
the male fashion figure, these structured looks
are going to get easier. I'm going to go ahead and put
down a little bit of color so that we can just
quickly finish them off. Moving on to the clothing, going to use a mustard
yellow for the suit. And then I'm going to pick
up a gray for the sweater. And then a red and a blue
for the stripes here. And then a light
blue for the tie. And then I'm going
to go back in over his face with the darker tone. So I'm going to do that,
too, with the suit. I'm gonna go back in with a
darker kind of brown yellow. That's all I'm gonna do
for the Tom Brown look. I'm gonna quickly finish
up this Louis Baton look. I'm gonna use a bush
green for the jacket. Can use a light walnut
for the shorts. Actually gonna do a pale sepia and a dull ivory for this
jacket on the inside here. And then I am going
to go over his face a little bit to add some shadows. And then the great thing, too, if you are using markers, alcohol based markers,
a lot of times, if you let them dry and
you go back over them, you can create just that one hue darker, one shade darker. Alright, so here are
the two final looks. In the next video,
I'm going to go all the way from start
to finish so you can see fully how to go from stick figure to a
final illustration, and then you can get
started on your project. I'm really excited
to see what you do. So let's go ahead and
jump into the next video.
8. Start to Finish: Okay. So we have our blank page. We've practiced our
stick figures going from stick figure to shape and
then adding clothing, and we're ready to go from
start to finish with a figure. Things to remember and keep in mind as we
go through this. We're going to be keeping a square or rectangular shape in the body in the trunk area. The limbs are going to
be a little bit thicker, including the neck,
and we're going to keep a good eye on
our balance line. Here's the inspiration photo I'm going to be working from. Feel free to use this one
as you watch this video, or you can use your own. Either way, just remember
for the class project, make sure that you use your
own inspiration photo. And there's lots
of resources and suggestions as to
where to look to find something
that would inspire you in the resource
section of the class. So let's dive in. Okay, so we're going to get started
here with the head. Gonna be slightly tilted to the side and that neck is
going to be nice and wide. Go ahead and draw in our very square
shoulders, square body, and her hips and then her legs. And this is kind of
that center line that I'm keeping an eye
on as I arrange his body. And then this is
going to be that leg. And the shoulders going to be
a little bit slanted down. That muscle is going to be
pretty pronounced there. We're going to have
a very angular face. Obvious jaw line and
then going back up to the arms slightly away from the body and
then curving back in, slightly away from the
body and curving back in. So something a little
bit like that. Now I'm going to
add the shape in. So keeping in mind, we've got some muscles here. We want to keep at the forefront and kind of tapering in at the elbow and then coming
back out and tapering back in at the wrist and just doing that kind
of square hand, keeping this body nice
and square and creating just that ever so slight
curve in the stomach area, and then straight
down pretty much with the hips and heading
into the thigh area, tapering at the knee, and then that curve
there for the knee. Going back up here, keeping these thighs just a little
bit thicker, no thigh gap, and adding in the
calf muscle there, a slight curve there, not much, keeping that knee in my mind and making sure
that this comes down. Just so. Alright, so we put
our stick figure together. We added shape over
our stick figure. I think it looks pretty good. And I'm going to move
into the clothing. I picked this look
because I felt like it was a good mix between something slightly
structured and slightly baggy or baggy, so that I kind of got the experience and the practice of doing something that's
kind of in the middle. So Okay, so we're going to
head into the jacket area, and something like this and he's got a colored shirt on underneath that's buttoned
tight up to his neck. Then the shoulders,
you can tell, are very, very stiff. They slant down a little bit
and we're just going to keep that tightness all
the way down to here. So it looks like
the jacket doesn't go maybe it extends maybe
a little bit further down. Maybe I'll put it to there. But generally just maybe
about right there. And because he's kind
of curved to this side, that's where you're going to get a little bit of bunching. So and then same with this, it just comes straight off the shoulder and kind of tapers in and down right to
where the jacket is. So moving back up here, putting in this
part of the jacket, you really don't get to
see the shirt underneath very much, which is fine. And then the arms are
a little bit puffy, but they're also not
hugely oversized, and they kind of taper
in to the bottom there. So I do something like that. And since that arm is curved, we're going to
make sure and keep that squiggle there to denote that there's a little
bit of bunching right there. So I'm going to put the
bottom of the shirt in, and it sticks out just a bit. And then the pants
are pretty baggy. So you can see that the bagginess the folds and the curves really are accentuated down
here at the bottom, and there's a pocket here. So I'm just going
to keep that in mind as I put my lines together. These are kind of a cargo pants. So I'm going to keep in mind that there's
pockets on the side and that the folds and bunching happen mostly
at the bottom here. And it looks like
there's probably like maybe a cinch at the
bottom, something like that. So starting from here, we're going to just kind of
draw in some simple lines. And then the crotch here. There's a little bit
of bunching here. Again, just some
squiggle lines to denote that bunching and then
again, bunching there. Going to make sure to keep
that pocket in there. And actually, I don't want
that line. I want this line. And then he's wearing
some sneakers. So just go to quickly
do his hair line here. Of course, you don't have
to do any kind of face. That. Alright, so there's
thick figure shape, clothing. Now I'm going to
put my pencil down, pick up my pen, and I'm going to draw in
all of my final lines. Okay, so I'm gonna put
the number eight away, and I'm going to go ahead
and pick up my number one. I'm going to do a couple of small details on the jacket
and possibly on the shoes. No So, something like
that. You could also add. Sometimes it's kind of nice
to add seam lines, you know, where you know that they kind of stand out and
make the garment look a little bit more finished. Um, so, something like that, maybe add some laces down here. Alright. So we've
gone all the way through the process
from stick figure all the way through our lines. I'm going to go ahead
and pick up my eraser, erase all my pencil lines,
and see what it looks like. Alright, so here's our
finished illustration. At this point, if you want
to upload your project, you don't have to add color I'm going to add
color just to finish off the sketch and
show that this is the look that I was
trying to illustrate. I love the color of the jacket, and I like his glasses, as well. So I'm going to hop into color. I'm going to do a very
abbreviated color version, and I'll walk you
through what I'm using. Use whatever media you want to add color if
you choose to do so. I'm going to be adding marker. That's where I'm
most comfortable. But certainly, you know, anything that you
have will work great. I'm going to be using
alcohol based markers, and I'll tell you the colors as I walk through
the illustration. Alright, so he's got a
little bit lighter skin. I'm going to use Bisk, which is E 30 in a Cpk. Then I'm going to
move into his jacket. I'm gonna be using
a light Rouge, which is R 14. Alright, so I
realized I don't have a refill for Light Rouge, R 14, but I do have a refill for
R 17, lipstick orange, which is pretty much
it's pretty close to the same color. Okay. So moving on to the arms. I'm gonna go ahead and
use black for the arms. All right. And then the shirt is white, but I want to create a little
bit of shading on there. So I'm just gonna use a really light gray.
This is a C one. Alright, so moving
on to the pants. I'm going to use E 53 raw silk. I'm gonna go over that
with a different color. Okay, I'm gonna go over
it with eggshell E 50. I use a dark bark for his hair. And I'm gonna come
back to the red and do with lipstick red, R 29, just a little
bit of shadowing. I'm gonna do a little bit
of shadowing on the face. All right. So there
is my final look from stick figure all the way through to color finish illustration. I think it turned
out pretty well. I'm pretty happy with it. Again, you don't
have to add color, you don't have to finish
it to this point. Just the final illustration itself in Penn will be enough
for your final project. But if you want to add color,
that's always great, too. There is my final
illustration. Okay.
9. Thank You!: Thank you so much
for taking my class. I hope that you've learned a little bit more
about how to sketch the male fashion figure and
that you're feeling a little bit more confident in
illustrating male figures. If you'd like to
know when any of my future Skillshare
classes drop, you can follow me
here on Skillshare. If you want to know what
I'm up to, what I'm doing, you could always subscribe to my newsletter on my
website, lori.com. And if you want to just
check in once in a while, you can follow me on Instagram and see what I'm up to there. Thank you again for
taking this class. I really enjoy
sharing my love of fashion illustration
and fashion in general. So I'll see you next time.
 Lori Burt, Fashion Illustrator and Graphic Designer