Transcripts
1. Intro: So these are some of
my really old comics I did when I first started out. I kind of started drawing comics because I was quite
a daydreamer, and I think I still am. And drawing comics was
a way I could bring those daydreams into
the real world. All I needed was pen and paper. I've always felt
that my characters became more alive when
I put them in comics. It's like they really
start to live and breathe more so than when I just draw them in
single pictures. I didn't go to art school. In fact, I went to
business school, so there wasn't really anyone to properly teach me
how to draw comics. I had to learn it on my own. So I just learned how
to draw comics from reading and studying
comics that I like. On my own, I tried to figure out what made the art look good, what tools they
used to draw with, and also what makes
a good story. It is now many,
many years later, and I just never
stopped drawing comics. Over time with more practice, I saw my comics improving. I've drawn comics about
other worlds, sci fi stuff, and I've also explored
just drawing stories about my own life where
I'm the main character. And when my first
kid came along, I chronicled the first 2.5 years of being a first time dad. For this comic series, which I did for the National University Hospital
in Singapore, I chronicled the COVID
pandemic and helped them to deliver sound medical
advice to the public. And nowadays when I feel like
I just need to slow down, I do diary entries in
the form of comics. So I found that using comics, I could tell so many
kinds of stories. Drawing comics can be
pretty challenging, but also really fun. So I'm happy and eager to
share this art form with you. Welcome to my skill
share class where I will teach the basics
on how to draw comics. Hi, I'm Andrew, and I'm a professional illustrator
based in Singapore. I'm also the author of
two graphic novels, Monsters Miracles and Monies and the Oli Comics Diary
of a First time Dad. I'm breaking this comic
class into two parts, and this is class one, which
you're watching right now. In class one, we're going to
start from the beginning, how to draw characters. Particularly, we're going to
draw people, as in humans. But don't worry, I'm
just going to keep it really simple and basic. We're going to learn
how to draw them from five different views that you'll probably need
when you draw comics. We're going to
start with the head first and then the full body. And then different poses. And for the final
project for class one, we're going to get you to draw your character interacting with an object in such a way that it tells a continuous sequence. That makes sense. In class two, we'll then move on to
learning how to draw and complete story
all within one page. So if you're ready
to learn how to draw comics, let's get started.
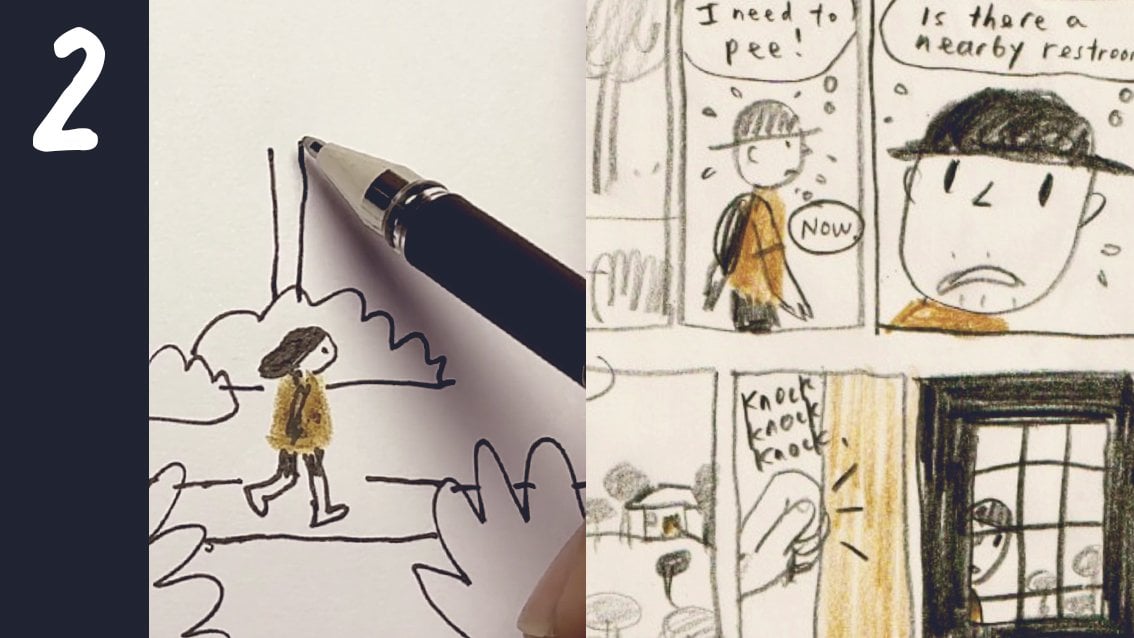
2. Tools: Drawing comics, there could be many kinds of tools that
you could be using. But for this class, we
just want to focus on storytelling and making it
clear, simple, and effective. So this is what I
propose we use. You can use your sketchbook or just loose paper like this. This is just a four
photocopy paper, a pencil, I would recommend a
darker pencil like a six B. If you don't have a six B, a four B all the way to a
nine B will work as well. So long as it gives
you a nice dark line. Also have an eraser ready to make it easy for you
to amend anything. For those of you who are more experienced and feeling
more confident, you could use a pen. Is a Unibal broad
with black ink in it. If you would like to use a
tablet to draw on Procreate, feel free to do so, too. So you could use
the six B pencil on Procreate or mercury. But if you're using Procreate, avoid creating too many layers, perhaps just one or two layers so you don't stress yourself.
3. Head: Front view: Welcome to the first class, and I'm glad you have joined. Now, if you look at any comics are pretty much filled with pictures of either people or backgrounds or people
in backgrounds. And sometimes animals and, okay, some strange
creatures, too. But here, we're just
going to learn how to draw a basic comic. So we're just going to do
people and backgrounds for now. Now, drawing humans can
be pretty complicated. So I was thinking, let's just
keep it to really simple, basic drawings of people. So to learn how to draw a
very simple human head, we're going to use
a ping pong ball. Okay, I'm going to
use this marker to divide the head into
two hemispheres. So this center line
will represent the middle half of the head. Okay, so now, let's
just add some eyes. The eyes will
usually be either in the center of the
head or higher up. Let's just let's just put
it in the center for now. So it's one, and, of course, eyes are more or
less equal distance. Well, mine's not
actually equal distance, but never mind, more or less. Even my face is
not that perfect. And then we're going to have
the mouth or will be here. Let's just give
it a smiley face. And as for the nose, I'm just going to use this
piece of blue tech here. O. Stick it there. Now,
let's just see. Well, okay, a bit crooked, but never mind just
representative. And you can see this is
the face facing forward, one quarter sideways,
and three quarter back. I thought of teaching
to do the ears, but let's just do
without the ears for this class because we
want to just keep it simple. For comics, we're generally
drawing really small. So let's just practice drawing a really small head like this. That's a circle. But of course, people's heads aren't
exactly always a circle, maybe for a little kid's head, it's kind of like a circle. So let's just draw a few
different other shapes that are modifications
of a circle, like, for example, an elongated
circle more like adult's head. If we want to bring it to a more exaggerated
cartoony character look, we can do a more almost like
a carrot or potato hit. Alright, all you can do, of course, almost
like a trapezium hit. All the different
head shapes will help differentiate
the characters from each other. Alright. So we're just doing
the front view here. And of course, you'll
probably be thinking, This is really straightforward, but don't worry, I'll
get more complicated. So for now, we can see
that the center line is there and just
draw the eyes, okay? For example, this one. The nose is kind of
complicated, right, because it's right now, it's just pointing
straight at you. So that's just represent
it by a like that, like a C, but it's angular. So that's kind of like
a V tilted on its side, and then we're going to
have them out. All right? Let's just try different
variations of this. Now for little kids, I
noticed that the eyes are usually either the
halfway mark here or lower. So for example, if I want
to make this a younger kid, I can bring his eyes a bit lower. That looks
younger, right? Looks like almost like a
little baby or toddler. Now, if we bring the eyes
further up like this, you'll notice that he
looks a bit more grown up, a bit more mature, the nose can be in any
shape that you want. For example, we can give him a nose here and then
a little bump there. Okay, so just be creative in however you want
to do the nose. That gives the character its distinctive look so that you can tell the
characters apart. Okay, now for the mouth, you can also shift it up and down. You can put the mouth
really low or really near the nose or
just in the middle. So let's just do one that's
just really low, okay? Sometimes, the more
you exaggerate it, the more interesting
the character looks. Okay, let's try these other two. Just fit it in however you like. Okay. We'll put this
somewhere here. Yeah. We'll give this guy a really sharp, long
nose like that. And I'm gonna put this guy here. Sometimes the mouth can
be longer or shorter. Okay, this time we're gonna adjust the eyes here, why not? We'll make the eyes
really close together. Some people's eyes are further apart and some are really close. Okay? And this one
we'll just give his nose round like that. And then we're just going to
put the mouth really small, everything's towards
the center of the face, and that gives it its
own special look. Let's just do one where it's just a funny shaped
head like this. So that can simulate
the hair already. And then, okay, let's just
give it normal eye lengths, and can even put a nose like
that. I mouth like that. Okay? So for the hair
of the first one, Oh, man, have we put the hair? You know what? I think
we'll need ears. So let's just add
the ears, then. Let's just add ears here, and ears can be higher
up or lower too. Just put them and they
can be big or small. Alright. Here we go. Ears there. At first, I didn't
want to include the ears because from
different angles, they can look a
little complicated. But I was thinking that if
we're going to draw kind of almost almost representative
of a human head, then ears might come in useful. I've never done this before, but it's kind of fun. Okay, so ears kind of
pop out a bit, okay? Pop out a bit at
the angle, right? Okay. So they're not completely
flat against the head. So therefore, if we look
at from the front view, we do we do see a bit
of it popping out. Of course, some
people's ears are more flat to the side and
some ears pop out more. So everyone's different. Okay, now we can add
things to the head. Like, for example, this
is a little kid and we can add just hair like that. Okay. If you want,
you can add eyebrows, that can add a very distinctive
look to a character, too, but I'm just going
to skip the eyebrows for this class just to
keep things simpler. How about for this one,
we just give him a little like a little hat, a black hat like this. And this one you can
think of your own, but, um let me see what
do I do with this one? You can give him a comb
hair you like that. This one, we don't
have a female yet, so let's just make
this a female. Let's give this a shape like this and covers the
ear, so like so. And this one, well, this one already has
its own hair shape, so this is a bit more special.
4. Head: ¼ view: So the one quarter
view looks like this. So again, draw small, and let's just start with
the round head here. And if it helps you, let's draw the center line
which has shifted from a center position to
a curved line like this. Just think of crescent moon. Drawing the crescent moon here. Okay. And that will tell
us where to put the eyes. The eyes has shifted here. So this okay, let's just write the one quarter
view. One is here. And one is here and as you can see the circle has
kind of flattened out. So let's just make this a bit more round and
this one is a bit flattened out because now
it's tilted at an angle. So it's like this, my hand
flattens out like that. So for the nose,
from the front view, you can't really
see the angle much, but from the one quarter view, the nose jets out more. So if you did a little
kind of arrowhead nose, this arrowhead nose can
protrude a bit more, and the mouth would
be more like this. Alright. And you can see that the ear from going
on the side of the head has now moved to inside the circle.
So let's just do this. Right. As for the adult guy, the center line would be there. The eye would be here. Oh, sorry. For this guy, the eye
is higher, right? Now, the nose will be here and protrudes out
just a tiny bit more. And then the mouth
will be like this. And the ears somewhere the
same level of the eye. So let's just make it the
same level of the eye, but remember that it is
within the circle now. Try it out with your
own characters. I'm just going to
draw these other two the eyes are lower here. The nose comes out a bit more. The mouth is somewhere there. The ear is about the
same level as the eye. And then we're going to have
this lady, which is broader. I guess it still keeps
the trapezium look. Okay? Of course,
this is exaggerated. Centerline comes
here. So this time, the eyes are really
close to the centerline. As for the nose, the line
usually starts out from the center line comes out and goes back
to the center line. The mouth goes across
the center line, so her ear will be here, but it will be covered. We're just going to put the ear. Well, here. So long as it's within somewhere
towards the back, not too close to the eyes, let's just fill in the hair. Now the character is
at a one quarter view. We can actually see more
of the side of the head, and therefore we can see, well, let's just color this. But we can see more of
the side burn this time. So if we were to draw a hairline
on this ping pong ball, it would be something like this. I know everybody's hairline
is slightly different, but let's just keep it straight. And then, of course,
on the side, sometimes there's
this bump here, curve here, and then it goes to the side burn, and
then it goes up. Let's just do the other side, side burn, and then it
goes around the ear. Towards the back. And, and
it goes around the ear. Yeah, we go. So therefore, if we tilt the head, we can see the side burn now. From the front view, you
can't see it too well, so you can shade a bit of it. But from the one quarter view, you can see this
part a bit more. Alright? Now, for this guy, it's easy. He just has a hat and the heat is kind of rounded all around, so there's not much of a change. For this guy, let's
just give him a side, do the side thing. He has a parting here, but because it's from this side, the parting goes all
the way to the edge, and we can't see the other side. Just like you can't
see the a side burn, you can't see the other parting. Actually, his eyes
were lower, wasn't it? Let's just give
him eyes that are lure and he's like that. As for this lady, she
has a fringe there. And, of course, it
covers her ears, and it comes down like that. So there we go. Oh, yes, as for the strange character, I'm now wondering should
I have drawn him. But let's just draw him for fun, let's just see what happens. Okay? So that will be the
same hair shaped thing there. Let's draw the
center line there, and the eyes like
this, like this. And this weird nose, angular nose, and then the mouth goes across
there and the ears here. So this is what we have so far. Of course, if we want
to make it interesting, we can always add
things like a beard. For example, who should we
give a beard to? Not the kid. Maybe maybe this guy, okay? So if you want to do a beard, it comes down from the side burn here in front of the ear. So let's just do a beard
here from the front view. You might see a bit of it here, here, and there. Alright? Oh
5. Head: Side view: Pretty straightforward. The
side view looks like this. So for the side view, let's
just draw the circle. Remember to draw a small. If we notice in the side view, we only see one eye, and we don't see the center
line anymore because the center line has moved
from here right to the edge. So let's just draw one
I here, and at first, we drew the I really
round, really round. Once it tilts to the side, the eye flattens out. So let's just draw kind
of a flattened out eye to simulate that is on side
and the nose protrudes out. So this is a little boy. Actually, should be drawing
his eyes a bit lower because we want him to look
more like a little boy. Let's just draw his
eye a tiny bit lower, and then he looks cuter and the nose comes
out roughly here. So protrudes from the side now, the mouth we only can
see half the mouth. We don't want to make
the mouth too big, just half, like this. And now how about the ear? The ear has moved into
the shape even more. So kind of like near
the center of the head. And now let's just do the hair. So he has a fringe there. He has side burns. Let's just color it so we can
see the shape immediately. It goes over ear and Mm hmm. Actually, a hair actually
comes down a bit further. I think I didn't
do it that well. So, okay, hair does
come down further. Hair comes down
further until here. Okay, but we don't have
to make it too realistic. Let's just go to the
next guy, the adult guy. Same thing. He's taller, his eyes are higher. His nose is It's because
the nose is on the edge, you might want to do it just coming out from
his face like that. So it actually becomes
part of the outline. And then his mouth
is below here. His ear is somewhere
in the center, but in the same level of the
eye, he has the same hat, which looks the same all around, and now he has a
beard. It comes here. Now let's just do the
other two quickly. You're in the center. His
eyes are a bit lower. Some people do have kind
of a straight side part, and some people have more
of a bump. Comes here. He just has a big forehead lady. Now, actually, people's
face from the side, it may not always be
rounded like that. So people's face is more flat. So you could adjust
that if you wanted to. But of course, if you
want it to be just the same all around to keep
it simple, you can, too. I'm just going to make
it a bit more flat here. Her eyes are here. He nose is coming out from
just below the eye here. And yes, I don't have. I can
get rid of that line there, and mouth is here. Everything's really
close together. Her ear is here, but it's covered,
and her hairs here. There you go. How about
the funny shaped guy. So he's more of an
abstract character. Um, yeah, I want to make him from the front
a bit flatter here. And his nose is kind
of like this, I guess. It's kind of like a
panel that sticks out, a rectangle panel
that sticks out. So that'll be how it
looks like from the side. Eyes there, there, and
the ear is too hot. Closer to the
middle of the head. Alright, we did the side view.
6. Head: ¾ view: Now, let's do the
tree quarters view, which is like this. When I was growing up, this was a slightly more
complicated view for me, but I found it pretty useful. Like when I need to
draw a character looking at something
and we're looking over the character's shoulder
or when a character is facing another
character, but at an angle. Alright, let's just start with the three quarter view of
the boy, a simple circle. If you notice, we can't
really see the eye here, especially if it's tilted
a bit more forward. Sometimes you can see a bit, but oftentimes you
can't really see it, but you do see a nose sticking
out past the horizon. And if we turn the head
a bit more forward, more extreme three quarter view, the nose gets
smaller and smaller. So let's just draw
the tip of the nose. The boy has a very
small nose in itself, not as big as this nose. So let's just draw a
very tiny nose here on the lower end because
his eyes are quite low. I can't see the mouth either. So this angle, you'll
notice that we only see the side view of the ear, kind of like this because the ear is
tilted at that angle. Some ears are tilted
more, some are less. And the ear is kind
of like forward. So it's a bit on this position. It moved more to this
part of the circle. How I would draw
it is like this, just like a outline
of a letter see, kind of like a
banana or sausage. If I were to draw it bigger, it'll kind of look like this. Okay. And I don't have to be too fussy on how the shape
is Rush roughly, you know, just a rough
sausage there, a bit curved. And of course, if
you move it more, this is not a real
ear, but a real ear would have another
component here. If we move the
head more forward, we'll see this component here. If you don't want to define
the component too much, sometimes I would
just do it like this, just to give an impression, I don't have to close the shape. Oh, yeah, one interesting
to note is that, although we can't see the eye, sometimes a person might
have longer eyelashes. So the longer eyelashes will stick out past the
horizon line here. The horizon, not
the face, I mean. So it'll be like this.
If the eyes are open, it'll open up like that. All right. Well,
I row that great. But if the eyes are closed, the eyelashes will
tiled downwards, right? And the nos there.
So there you go. That can actually
simulate whether the eyes are open or closed. Now we're going to do the hair. At this angle, we see a lot
of the side part of the hair. So it actually comes down here. You don't even see the
front fringe anymore. So it's just a side
burn and it goes up. Let's just draw the back
part of the ear here, and it goes here,
and it goes here. If we look here, there we go. And, of course, we
can just shade it. You can always give
smaller details like hair sticking out or
whatever you like. Okay, let's just see
whether we can do it with the other alternate shapes. So his nose comes down there
and it comes down there. So when it's around the horizon, it'll probably just be the little thing
sticking out there. You don't see the other parts, the other parts will probably
be hidden behind the head. And his ear, let's just
draw that funny sausage. And this funny
sausage thing will be in line with his eyes, which is a bit higher like that. He doesn't have hair. He has the beard which starts
in front of the ear. And then we have the head, which looks the same all around. Do you want to give
him eyelashes? Maybe not for this guy. The
guy with the big forehead, maybe your characters will be
more interesting than mine. I mean, this guy is a bit more interesting because
of his big forehead, but if you make a
character's nose even longer or maybe
bigger or smaller, just something more extreme, you'll get a more interesting
look for a character. This one, he has a very
strong triangular nose. So we don't want to show too
much of a noses just a bit. It is disappearing over
the horizon of the cheek. Now, the banana shape, think about where the eye is. Usually the ear is on the
same level as the eye. And then note his
sight thing here. His sight thing is
quite pulled back. I guess you can see the edge
of it there. It goes over. If you notice how
barbers cut their hair, they cut it over the ear and then there's a
bit of flesh around the ear. Okay. And then it comes here. And then I'm going to
color it. That's it. How about eyelashes? Okay, let's just give a closed eyelashes. See how it looks
like. Like here. Yeah, it looks like
he's looking down, always pondering, always
closing his eyes. Now for the lady here,
it's gonna be like this. Okay, just roughly the rough
curve trapezium shape. Mm, I've done away with the flat part because that belongs to the
front of the face. Oh, remember that for her, everything is kind of squeezed into the
center of the face. So with such a big surface area, would we be able to
see the nose at all? So, maybe not. So in this case, maybe I won't even
draw the nose, and let's just see
whether it will look like a three quarter view. So her hair would just be here. And, um, here like
that, I guess. Yeah. It might be
just like that. I'm so tempted to
put the nose there, but I think the nose will be actually here on
the front of the face, so it won't be seen. If it won't be seen,
it won't be seen. So let's just not draw it. Now, for the abstract guy that I have here, how
shall I draw him? We'll just draw it like this. I guess it's more flexibility
in how we draw him because he's the least
realistic of the batch. I can still give him
the sausage ear, but his nose is so thin. His nose is so small, so we might not be
able to see his nose. We just give him a small
detail there since he doesn't have any other
detail. Okay. Yeah. Alright, I guess we'll
just draw it like this. If we do try to draw a nose, which I think shouldn't be seen, it'll be super small, but it may not be necessary.
7. Head: Back view: So we've done the
three quarter view, and now we're just going
with the back view, which is super simple because it has the least
amount of details. Same as the front
view, and we can see the two ears sticking
out for the kid. And of course, we have to take
note of where the headline comes down here. Then we color. That's it for this guy
with the elongated head, his ears, higher up, his head. We don't see his beard, nothing. So that's it. Now for
the pointy head guy. I guess if you want to
study where the hair flows, can shade it. Well, okay, you can't
really see anything. So supposing if he was
a blonde haired man, you might want to do like this. You can just see the lines, and he will look like a blonde haired man or a
light colored hair man. And now for the lady, this
is super simple, right? The ears covers the ears again. Now, if every now and
then, during the comic, she pulls her hair back and
then ear may stick out, okay? So, of course,
hopefully that does not get mistaken for the nose, which does look like
the nose right now. So let's just get rid of it. That's it. There's nothing
more to add for this lady. Now for funny head man, he's just a funny shape
and two ears. That's it. So these are all the
views I have done, the front view,
one quarter view, side view, three quarters view, and the back view. So at this point, if you
have yet to try it out, create at least two
different character heads and draw them out
from all five views. Feel free to base
them on yourself, your family members, your
siblings, or your friends.
8. Full body: All 5 views: So right now, I'm going
to see if I can mix something that would
represent the body. This will be our model for
drawing a simple human. Why does it make it simple? It's because it gets
rid of the neck part. The head sinks into
the body like this. We're going to do the five
views for the whole body. We've already done
the hid. Now let's do the head together
with the body. Okay, so the front view, we'll do the head like this. It's a ball, but the bottom part is going to be
covered by the body. See? We did away
with the neck here. For the body, we'll use
a mid tone color pencil, something that is not too light
and not too dark, either. Just a middle darkness. I'm going to use this Darwin
intense pencil that I have, but it doesn't matter so
long as it's mid tone. This is a cylinder,
but from the front, it looks like a rectangle. So let's just draw rectangle. And then we will draw the hands. We don't want to draw
the hands too short because people's hands end
up around the groin area. So let's just draw
it a bit longer. Let's just do two lines
instead of one line because we want to advance
beyond drawing stick figures. And for the hands,
three bumps like that. All right? Just three bumps. It doesn't matter, something like number three,
but has three parts. The other one, one, two, three, and then the
legs. Like this. And the feet, they go,
Let's not draw them like this because people
don't really stand like this. But if you're
looking at eye level and you're looking
at somebody's feet, they will kind of angle
out something like this. So more like this. Okay. And for the
front, just the hair. I'm using my character here. So roughly the nose. Oops, I mean the nose too high. If a mine, more or
less and the ears. Okay, so that will be
our simple character. So the one quarter
view looks like this. You know how the
had works already. But for the body,
you'll notice that this arm is in front, followed by the body, and then this arm is
partially blocked. It's behind the body. And then there's
going to be a lick in the front and a leg behind, and the feet point out this way. Well, this feet is not exactly, but more or less, you know, as you can see, I
did a center line here. It goes to the side. Okay, so the one quarter
view going to draw the head, which is sunk into the body, so don't draw the
base of the circle. It's still a rectangle because the cylinder
is the same all round. And then we'll have the
hand in front like this. The squiggles. And the other hand, well, if he's pushing his hand
out like that, like that. Okay? And remember to draw
the hands long enough. And then the leg in
front and a leg behind. And the angle would be somewhere
pointing out like this, kind of moving out in
a direction like this, but just a slight
different angle. As before, you know how
to a quarter view hit. There we go. So take
note that I drew this leg slightly shorter
than the other leg. So it's like this and
slightly shorter. That's just because of the
angle that we're looking at. Of course, in different angles, the position, the height
of the legs will change. But let's just keep it like this for now. I think
it does the job. For the side view,
let's turn it, and it's going to
look like this. We can see this arm and the
body, and the other hand, it's pretty much blocked by the body unless
it's sticking out, and then you can see it. The back leg, we can see
it if it sticks out. If not, we can't see it or
unless it's from an angle, if we're looking at the angle, and then we can see
the other foot. But if we're looking
at eye level, that means we're
looking at another person from this angle, and we're looking
down at their legs, we'll probably see a bit
of the other foot there. But of course, if we want
to do a simple view, just completely side view, we won't see the other
foot or the other leg. So this is how we're going
to draw the side view, hid, coloring the body,
keeping it simple. We're going to draw
the hand in front. No, maybe I need to
sharpen my pencil. Okay, let's draw the hand. Three squiggles. And then, okay, let's just make the
hand come out and three squiggles and maybe
he's holding a cup of coffee just to show
you what hands can do. One leg here. If you want to just keep it
really simple, that's it. Doing at an angle, you can do a slide just slightly like that. And that's seeing it from a
slightly different angle, you're looking down at the legs. Alright, the hid. Side, the eyes. You can draw them in
any order you like. But you'll find that
as you draw smaller, the smaller details
don't really matter. It's more about
the overall shape that makes the
character recognizable. One of the fun thing to note is that when you're
drawing characters in a comic world where you're not doing a comic
that's really realistic, you can also make
the arm more like a stuffed toy arm where instead of it
bending at the elbow, you can actually give him
bendy arms and bandy legs. Of course, if you
give them bendy arms, then you have to make
sure that it's consistent throughout all your characters because then in the universe, all your characters will
be bandy arm people. And this is what I did in this series that I illustrate for. Everybody has bendy arms. As you can see here, no elbows. Alright, now we're going to
do the three quarter view. Remember the nose,
we hardly see it. For the body, it's kind of similar to the one quarter view. This hand is in front and
the back hand unless oops. And for the other
hand, unless it goes behind, we can't see it. And we're going to
have one leg in front and one leg behind. And of course, we can
tilt it at an angle. This leg is going
to look longer, and this leg is going
to look shorter. Let's draw the head, the body, the one arm in front. Let's just make the
arm move up like this. Maybe it's waving
and one arm behind it just sticks out and we're
going to have the front leg, the leg that's closer to us, pointing like this, I guess because it's
pointing this direction. And this leg bit
shorter pointing in that direction like that. Okay, let's just draw the
shape there. There we go. Alright. If he does look
like he's missing pants, you can always just add some pants to all
of them, alright? He does look like he needs
some pants. That's fine. Just give him some black shorts. And now we have the back view. Pretty straightforward. It's
kind of like the front view. We have the head, the ears, the body will make him
tiny bit fatter, the legs. And this is the part where
it's a bit strange, right? We kind of see the legs
jutting out sometimes, but there's some
foreshortening going on. So, for example, if
it's really close up, we just see the tips if
he's slanting his legs. So in a way, it jets
out just a little bit. Definitely not like that because his legs not sticking
out from the side. Just stick it out
just very little bit. Now, the hands again, bring it down to the crotch area or slightly below is fine. The back of the head,
just understand that the hairline is kind of
like this, and there we go.
9. Full body: Design variations: Let's explore some variations. We can maybe give it
a trapezium shape. Just a really big
trapezium shape. We could also give it a very long shape,
maybe a tall body. Or we could give it a, some other weird shape, like something like a pair. Or this could be just because the outfit the person is
wearing looks like this, or it could be
something like this, something like some
strange dress. And then the head
just sticks out. We don't draw the
bottom because it's sinking into the body. Supposing we're doing
a one quarter view, you can draw the mark there. She was waving there. Just gonna draw the rest. Giving bigger legs here. There's lots of permutations
you can try out, so go ahead and try them out. Make your character
one of a kind.
10. Full body: Different poses: Now let's practice drawing our characters in a
few different poses. Better yet, let's make
them useful poses, poses that you'll probably
use in a comic story. For example, if he's standing
still and then suddenly he notices somebody
to his side and he looks to the side. So
let's just draw that. I kind of accidentally drew one leg longer
than the other, even though the body
is facing the front. And when I did that, it
looks like she has placed one leg in front and
one leg is behind. So, in a way, that's
how I would simulate somebody walking toward me, make one leg bigger
and one leg behind. What about somebody running? That could be a useful pulse. Okay, if somebody running, they're kind of leaning forward. So let's just lean
this rectangle there. And one leg can be
at this angle here, and the other leg can
be at this angle here. Now they think which leg
is actually in front. Okay, let's just say
this leg is in front. Okay? We can give
him black pants. Okay, maybe this legs in front this leg
looks a bit bigger. Okay, if this legs in
front, when people run, that means this
hand goes forward. Right? So, there we go. They clench their
fists, so maybe you can just do shorter, shorter bumps. The back leg is in front. The back hand will swing behind. And, of course, if he's
tilting his head, well, see. Let's see if he
can tilt his head one quarter view this way. So that he's kind of
looking behind as he's running and he's
shouting or something. Give him some funny
hair. There we go. Does he look like he's running? If you want, you can
give him a bit of shadow just like this. Now, when a person is
walking, um, well, it just comes with observation from looking at people walk. I think that is really
helpful in itself. But, if I were to put it in
a nutshell here, let's see, supposing if I give this
body a kind of a tropezium, perhaps it's a
longer one because maybe it's a longer dress. How do I draw a person walking? Okay, so maybe this this foot
will be slightly like this. Maybe I shouldn't have drawn a dress because then
you can't see it. Oh, well, now it's a true dress. Like this. A sea trow dress. Oh, my goodness. Okay, so
it could be a raincoat. Now decide which legs in front. I guess this legs in front.
This licks in front. Actually, she could
be twisting her body, or he could be twisting his body straight
center line here, and this one is actually
one quarter views. So yeah, he could be doing that. So yeah, so maybe
this is a raincoat. Yeah, we can do this
as a raincoat, see? With some pockets on the side. Well, it can be a
female or a male. So up to you. So sometimes the back
leg is under shadow, and I'll color it dark because
it's under the body as well as on the back and
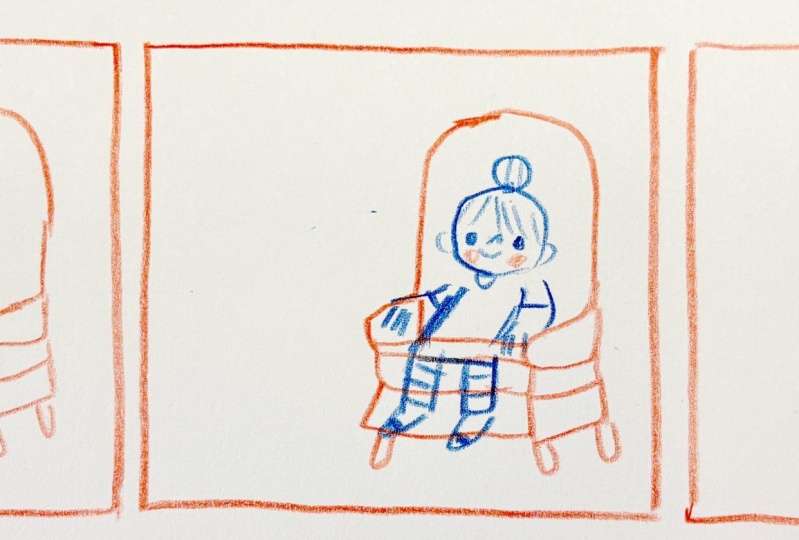
then I'll put a shadow. That's optional. Now, for somebody sitting down, I think that would
be really useful. Okay? So supposing
if we drew a chair, and I think for now, a sideways chair would
be most manageable. Okay? However simple, you
want to draw a chair, you can draw a bean bag if you want to make it
even more simple. Okay, so just draw the hid. The body will be like this, and then the legs will stick out from here and bend
around the chair. We're just doing a
complete side view thing just to keep things
simple and uncomplicated. Okay, and maybe
there's a table there. And he's having coffee. Coffee, some smoke. And if you want, maybe he is looking at the
camera icking the third wall. Or is it the fourth wall? Okay. Anyway, he's looking at the camera and he's talking. Um, go to make it
a female or male. Let's see. Let's just
give him a hat like this.
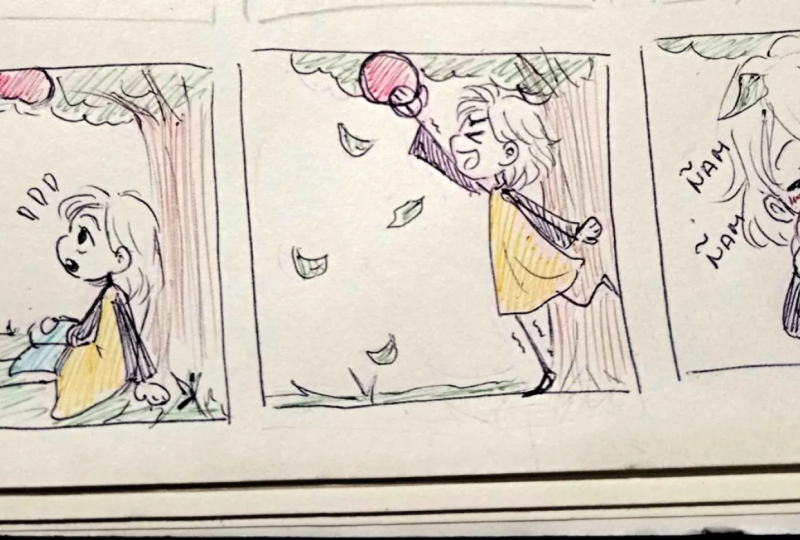
11. A character interacting with an object: So what we're going to do is get our characters interacting
with one object. First of all, we want
to draw comic panels. So this is how I do it.
I do it without a ruler. Just do your best to keep
the lines straight and neat. Not trying to aim
for perfection, just trying to make it neat. A simple box, and then leave a tiny gap in between the boxes. So this is two panels, and this is the third panel. So we're just going to
do a three panel comic. Don't worry if the panels
are not perfectly equal. There are many kinds
of objects that we can make our characters
interact with. And this one, let's just have
our character interact with a maybe a cup cup like
this cup like this. I'll draw my character walking This will be a side view pose. One legs in front of the other, give him some pants. I guess if this legs in front, this hand, I'll decide
which legs in front. This legs in front, this
hand will be moving back. That's how humans walk. I'll just give him a head so
he looks a bit more like me. He's walking towards
a let's say, a table. On top of the table, I'll
just put my little cup. I can put a shadow
below him like this. Now I'm going to get him to
grab the cup and drink it. That will be a tree
picture sequence. The table is always going
to be in the same position, so I'm just going to put
the table there and there. It doesn't need to
be exactly the same. Sometimes when there
are little flaws in it like this or like this, I try not to see
it as a mistake. I just see it as
charming instead. All right. So he's
getting closer. And I think that
thinking a sequence. Oh, I forgot his ear here,
and he's looking down. So when he's looking down, the nose will point down. And his body and his legs
will probably be together. Maybe I just see one leg because
the other leg is behind. I'm just going to get him to grab the cup with
his right hand here. Shadow. I guess he's
going to drink. So if he's drinking, he's going to tilt
his head a bit up. So it's kind of like
doing an animation. Maybe he's closing his eyes. I'm going to draw the cup first. Okay. And then the
water goes this way. Now that I know that
the cup is there, I know where to place the hand, and the right hand will
go the side of the cup. And there we have it, I have done the character into
three different poses, and just with these three poses, I've told a very simple
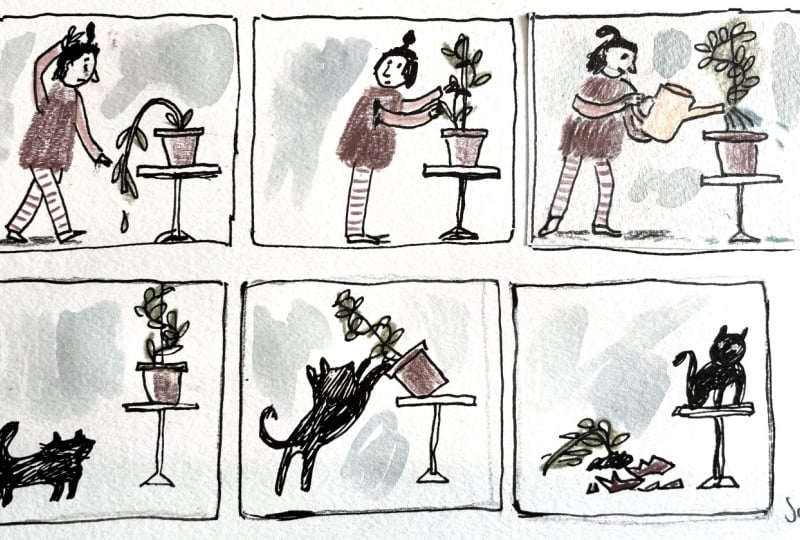
sequence or a very short story. Let me do another
example with a tree just to give you some extra
ideas on what is possible. So again, three panels
without using a ruler. Keep the space really
close to each other. Let's have a tree
with some fruits. And our character. Let's have a boy this time, or maybe a girl. Okay, let's have a
girl. And this time, she is let's have her running. When you run, one hands behind, one hand is forward. And if this hand is
forward, this legs behind. Okay, maybe she has long hands. Just keep it to an
object and a person. We'll do backgrounds later.
Now, what can we do? So tree will still be more or
less in that same position. More or less the same shape. I know it's a bit
off, but it's fine. Let's have her jump up and grab this froit with this hand. Her jump up like that? Just putting the shadow away
from her feet makes her look like she's jumping higher. And maybe I make
the feet too long. And when I'm growing smaller, I need a sharper pencil. Let me go. So she
got this fruit. And then let's make
something happening. Let's just say she
got the fruit. So there's always
a passing of time every time we go
to a next panel. Sometimes more time could have passed and
sometimes less time. So this one, perhaps
a bit more time has passed. She's looking down. And she is holding the fruit. And perhaps all the other
foods have dropped. So those She's holding one, one, two, three, four,
five, six, seven, eight. So perhaps all the other
foods have dropped, and she has got one. So this is another
short story sequence with just a character
and object.
12. Which part of the action to show: When we see a character
perform an action in real life or in an animation, we're actually seeing
the character in many different poses as they
are performing the action. This is a boy kicking a ball, and these are just sum of
actions in the whole sequence. I'm sure there are actually
more in between each action. However, when we translate
this into the comics medium, we have a limited amount of space to communicate an action. Sometimes we might
have one panel, sometimes we might have two
panels or sometimes we have the luxury of six panels to
communicate somebody running. Oftentimes we have to work
within the limitations. So here's a question for you. If we only had one panel to
show this boy kicking a ball, which part of the action
would you choose to draw 1-7? Here we see him
looking at the ball, about to kick the ball, almost about to touch the
ball, making contact, making contact, and
the ball is having some impact and the ball
flying off his foot, and then him watching the
ball that has flown off. Which one would you choose? Have an answer in
your head? Mm. So I would choose this one. So this is toward
the end part of the action of kicking
a ball, if you notice. And I think it's the
clearest part of the action that communicates
a boy kicking a ball. When I was around 10-years-old, my dad bought me
this drawing book, and one of the pages stood
out for me, even till today. It covers which
pose would be more effective in
communicating a punch. And here you can see
that the best pose is the one before
and the one after. And therefore, when
I look at a lot of Marvel comic punches, I do agree that the
punch looks the most powerful and effective in
the final pose of the punch. So keeping that in mind, supposing if we had two panels to communicate a boy
kicking the ball, which two poses
would you choose? 1-7? Make a guess, and then I'll show you
what I would choose. Taking the advice from how to
draw comics to Marvel way, the first parts and the last
parts tend to communicate the action most clearly
or most effectively. So I could choose
one of these two, and then I think this one
doesn't show the ball anymore. So I think I prefer this one. Sometimes you do have to think a bit and see what works
best for your story. This one looks a
bit more passive, so maybe I'll go with this. Some pans. What do you
think? Does this work? Here, you'll notice
that I added this line here and I would call
this a little symbol. This is also a symbol. If I want it, I could actually
put something like this. Symbols don't actually
appear in real life, but somehow they communicate
little meanings to us. This line would
communicate the journey of the ball and these
little things could communicate an impact or it
could be a jagged thing too. Now let's look at a fresh one. Let's do the same exercise. This is a girl seeing a cat and then deciding
to pick up the cat. Here you can see I used a
little symbol here too. These are not sweat drops. If these were sweat drops, which would be more like this, it would look like
she's in a panic, but these are just
lines, and for me, I tend to use this a lot when I want to make it
seem like the person is suddenly paying attention to something or being surprised. If we only had two
panels to play with, let me draw the box a
little neater this time. Which two poses would you
choose to communicate a girl seeing the cat and
then picking up the cat. I noticed that when
I spoke the action, I actually said two actions, seeing the cat and picking
up the cat and sometimes that would determine which
pose I would choose. If it's seeing the cat and
then picking up the cat, I would choose this because this is seeing the cat and
picking up the cat. If I told myself that I just wanted to show the girl
picking up the cat, I would disregard the seeing the cat part and
perhaps I would choose this because this is the
start of the action of picking up the cat and this is the end part of
picking up the cat. In your mind, being clear
in what you want to communicate can help you
decide which pose to show. This is seeing the cat
and picking up the cat. You'll notice that
between this and this, there is a length of time
that we have skipped. One thing to note is
that this space between two panels is actually
a length of time. And that time can span between 1 second to 5
minutes or even longer. You can think of it
as before and after. But of course, the
sequence next to each other should make enough
sense for the reader. Because supposing if I had to do another sequence that
happened 1 hour later, for example, she is
sleeping in bed. Sorry for the untidy drawing. Just a demonstration. It might be good to
add back at home, just so that the reader
understands that a lot of time has passed and a
lot of events have passed, and in this case, the
location has changed, too. We want to make sure that
the reader isn't confused. So that's it for choosing which part of the
action to show.
13. Class Project: So this will be a class project. Use just one character that
you have designed so far, and I want you to
put your character in a simple sequence like this where your character is interacting with
one other object. So pick an object, a cup, a cat, a dog, a plant, or even a tree. Start by drawing three panels. If you want to draw
a few more panels, it's up to you, you can, but three panels at least. And remember, there's
no need to use a ruler. Want to keep this really casual, and not using a ruler will
help you to kind of tell your brain that this is just a very casual
thing, nothing serious. Place a tiny spacing about
two MM between each panel. As for the sequence of events, you could break it down
with this rough guide. For the first panel,
the character encounters an object,
the second panel, the character interacts with it, and for the last panel, you can just show what happens next. For this project, there is no need to draw any backgrounds, just the character
and the object. It does not need to be
funny or some genius idea. It can be totally mundane. And if you want
to make it funny, just make it funny enough
to amuse yourself. Whatever your character does, double check that when you
read through it again, it is clear visually what
the character is doing without any explanation because when people read your comics, you're not going to be there
to explain what's happening. The pictures need to communicate everything to the
reader on its own. When you're done, simply
take a picture or scan it, make sure the comic is upright
so that when we read it, it will be the right
way up and post it onto the Skillshare website
so that we all can take a look and
learn from each other, and I'll give my comments. So I look forward to
seeing your mini comics, and after that, I
hope to see you in part two of the course.
 Drewscape, www.drewscape.net