Transcripts
1. Hello and Welcome!: If you've never painted
an abstract artwork, this class will be your first. It's amazing what
you can obtain with just one brush and
a couple of colors. After finishing a bachelor's and master's degree
in fine arts, I have learned a lot of painting
techniques that help me expand and explore many
art skills and concepts. Since 2018, I've been working in art restoration while
also developing a strong passion for teaching both online classes
and also in-person. Abstract art can be a beautiful experience
through which you can express yourself while also learning basic
concepts about color, value, and shape. Hello, my name is Christine, and welcome to a new
abstract painting course. Playing with simple shapes, you will create a pleasant sense of balance in your artwork. You will learn how
to use contrast to create harmony in
your composition. You will understand the
importance of using a limited color palette when
creating abstract paintings. Using the plasticity
of your paintbrush, you will make your creative process much more
fun and enjoyable. You don't need any prior
experience with acrylics. Every step is detailed
and well-explained. Whether you want to decorate your home or make a
painting for a loved one, welcome to the course.
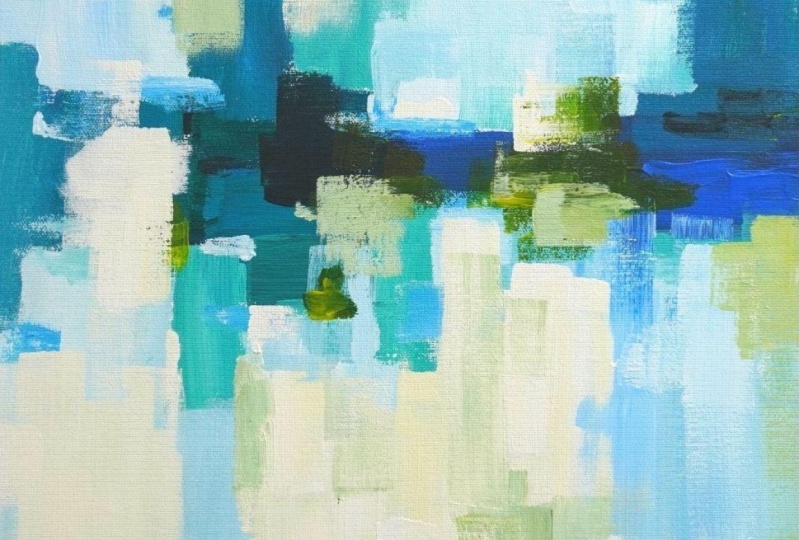
2. Materials: For gorgeously colored but
easy to make painting, you will need the following
materials: A canvas that has 40 by 40 centimeters or any
kind of squared canvas, one single medium flat brush, this is a synthetic one, and the mixing plate where you can add and mix the colors, and a couple of napkins for
discharging the brush from excess color or any
other messy accidents. The acrylic colors you
will need to create this abstract
acrylic painting are the following colors:
Titanium white, plenty of it, some warm and vibrant cadmium light yellow, obviously blue, this cyan blue dark, a small amount of tylor green, some beautiful and
vibrant orange color. This orange color is matte, but it doesn't matter. You need just a
very small amount. Let's not forget of black, just a small amount
of black to get some dark and contrasting
nuances of blue and turquoise. Now that you know
what it's needed, make sure you have a good source of light and a free table, an easel, or a wall
to place your canvas. Now let's get into
the first step.
3. Big Shapes - Establish The Direction: Let's take a step back
before starting to better understand some core principles
used in this painting. As you can see, the paintbrush is pretty stiff. You can wash it before
starting to not be dry and let the colors better get between the hairs and fill
the paintbrush. The color palette is ready. Here we have the colors. There is the cyan blue, black, phthalo green, yellow, and of course, titanium white. The color palette is
limited so the colors can harmonize and better blend
and combine on the canvas. In this exercise, you
will see how easy it is to give a direction
to your composition. The most important
tool and friend for this adventure is
your paintbrush. As you can see, it
is pretty wide and thick and can be used
in multiple ways. You can use the wide side of the brush or the thin side to create shape diversity or better navigate between
the different shapes. Now let's spread with the
brush some of the blue on the mixing plate but not too much so they don't
get dry too fast. Now when you are taking
color with your brush, it is important to
fill it with color and not take the color just
with the tip of the brush. When creating the
main big shapes, it is very important to not use the tip of the brush to
create the main shapes. By using only the tip, the shapes you create
are not clear, the edges are undefined, and the direction of your composition is
hard to establish. What you want to do is to fill your brush with a
generous amount of color and use the entire body of the brush to
describe the shape. Of course, this implies
to press on the brush. By pressing on your
brush on the canvas, the shapes described
will be much more expressive and will create
interesting textures. Start with simple shapes
and basic colors so you can later add
secondary nuances. Another important thing
is to apply generously the color so it can
stay wet a longer time. Let's now create
the second shape on the opposite
side of the first. We will use the phthalo
green this time. It don't matter
if you still have the color from before
inside your brush. Let's now take the color and apply it on the
bottom left side. Make sure the edges of the
canvas are covered with color and then press and drag the brush to
describe the shape. Of course, you don't have to
use only horizontal shapes. You can add vertical
shapes as well. Now to diminish the
conflict between the two very edgy shapes, we will create a color bridge by mixing on the plate
the two colors. Let's go to the mixing
plate and mix some blue inside the turquoise or
the other way around. It doesn't really matter. Now we will use the
entire surface of the brush to drag some
color from the top, down to the turquoise shape. Flip the brush to use the color from both sides and
repeat the movement, focusing on
describing the shape. This is all you need
to know for this step. Let's start painting. The canvas is ready and the mixing plate
is nice and clean. Make sure that the
mixing plate is dry as well so the colors can
stay nice and thick. Of course, here is the
medium flat brush, the simple plastic
brush, short and sturdy. Now we will start to add the
colors to the mixing plate. The colors will be used
in multiple steps, so make sure the
quantity is generous and the plate is large enough to
have space for all of them. Let's start by adding a
generous quantity of cyan blue, because you will
use plenty of it. The next color will
help you obtain more intense nuances
of blue and turquoise. Let's add just a
tiny bit of black. Try to use it scarcely and keep it away from other colors, especially from white
because we don't want any grayish colors
in this painting. The next color is this intense turquoise that
can be used in combination with white and blue to create new interesting
color variations. Of course, if you
don't have turquoise, you can create it by
mixing a darker shade of blue with this beautiful
bright yellow. A little bit of warmth
in these colors will make the nuances slightly
more sweet and lovely. Now, the last color you
will use is titanium white. This white is very
good to create new color nuances without introducing other
kinds of paint. Of course, before starting, make sure the brush is
clean and dry so you can obtain a pasty and nice
color consistency, and maybe create some
interesting textures. Don't be afraid to use and mix
generous amounts of color. In this step, you will focus
on creating a couple of simple color blocks displayed horizontally on the
middle of the canvas. The objective is to play some strong colors in order to create the focal point
of this painting. Now we will start playing
with the blue color, getting some of that thick
paint into the brush, and spreading it on the plate to see how it blends
with a dark color. Let's search for a deeper, darker nuance of blue. You can flip your
brush from one side to another to obtain
a uniform color. Let's make a bigger
quantity of this color by mixing more of the blue
and a tiny bit more black. Don't spread too much
color on the mixing plate in order to have space
for the next nuances. You'll use the same mixing plate and colors in multiple steps. If you want, you can add even
more black to the color, but don't forget that
acrylic colors tend to appear slightly darker
when they get dry. After you found a
beautiful dark blue color for the first shape, let's see where we can place it. In this acrylic painting, you will use only horizontal
and vertical directions which will help you trace
beautiful rectangle shapes. Let's place the first
horizontal rectangle on the middle right
side of the canvas, slightly higher from the middle. Place the tip of the flat
brush on the place from where your shape starts
and where it ends. In this case, on the
edge of the canvas. After you've decided the start and the end of
your brush stroke, let's start from the left
side of the shape and drag the brush to the
right pressing generously. Repeat the movement
and flip the brush to help the color
get into the fibers. Let the brush create thick textures so the canvas
can have a good coverage. Looking closely at the textures, they create some small stripes
of light along the shape that gives it that
subtle feeling of a long stripe of color. Of course, these
stripes are much more obvious on dark color textures. Let's grab a lighter shade of the blue and put it
on the bottom of this first shape so that it don't look like a
hole in the canvas. Now, the first
shape is finished. Very simple and straightforward. A strong, beautiful
color to start with. So is the time for the
second one that you will place it to the left
side of the first shape. Make sure you link the
two shapes and make the second one maybe a
tiny bit lighter in tone. As you can see, the shapes keep expanding to the left side of the canvas, slowly changing in
tone and shade, but keeping the direction
of the textures. Now that we've
reached the middle of the canvas with this
intense nuance of blue, it's time to introduce another color slowly
into the blue. Let's introduce some of this turquoise into
some clean blue. There is no need to
clean your brush. The paint is still fresh, so it will mix very well with
a turquoise from the plate. Just a little bit of
turquoise to shift the blue into a
warmer nuanced color. Now let's create the third shape continuing to the left side. Keep in mind to hold your
brush horizontally and use its corners and wide
surface to cover the canvas in a
very efficient way. As you move to the left, you can introduce even
more turquoise to create a smooth and interesting
gradient between colors. Now let's create a very beautiful turquoise
square to the left. As you can see, two strong brushstrokes
are enough to cover what's left of
the white canvas. After this bluish turquoise
square is created, it's time to add some
white to this color. Use the corner of the
brush to grab a tiny bit of white and mix it with
a turquoise and blue. Mix it in one place repeatedly until the
turquoise becomes visibly slightly lighter than all the other nuances
used previously. With this color, you will create three shapes overlapping
the dark turquoise square. One on the bottom, flipping the brush in order to discharge the brush of color. Now let's grab some more of the same color and add it to
the left side of the shape, creating one more square. We've almost reached
the left side of the canvas with this
beautiful shades of blue. Now, at the end, let's change the direction of the last shape and
place it on top, overlapping the turquoise
square just a tiny bit. Now, this short and
beautiful step is done. Let's move to the next one
and continue expanding the blue nuances around the shapes that you've
already created.
4. Medium Shapes - Expand the Color Variety: Let's take a very
short break and see how we can build the
secondary shapes. These shapes will be of lighter tones and smaller
sizes than the first. Let's mix on the plate a
little bit of white with the turquoise or the blue
color from the previous step. In this step, you will create a big variety of color nuances, so don't be afraid to mix
different quantities. The places where you
will want to create these shapes are around
the main shapes. You can overlap the edges
of the shapes to create a connection between them
through color and shape. Of course, these
shapes can vary. You can make them longer
or vertical if you want, but try to stay away from diagonal shapes to not create
conflict between them. The next step is
all about playing with two colors
and white in order to expand the
composition slowly to the edges and away
from the middle. By adding more white, you can progressively reach
the edges of the canvas while still keeping the main
direction of the big shapes. Don't forget that you can use the paint from the canvas to create color variations in
your new secondary shapes. Once your secondary
shapes are placed, you can add smaller details by using the thin side
of the brush or the white tip of it to
disrupt any kind of pattern created or
re-balance the composition. Of course, it is very important
to press on your brush in order to have decisive and
very expressive brush strokes. In this step, we will play
around the first shapes created with darker and lighter blue
and turquoise nuances. You will alternate between horizontal and vertical
moves as you will slowly transition
to vertical lines further into the creation. What you will want to
focus on this step is to create more color variety
for your composition. Let's start by mixing
a little bit more cyan blue into the light turquoise
created previously. Give it a light mix
to fill your brush and obtain a smoother
color consistency. Fill your brush with
a good amount of color and now let's
begin from the top of the first shape and trace a tall vertical
line on the edge, getting the color
nicely into the fibers. Now, we will expand with some smaller shapes
to the left side, creating something
like some stairs. Let's make three shapes that
blend on the right side and overlap just a tiny bit with the blue shape
from the bottom. Now, the transition
between the edge of the canvas and the dark
colors is much smoother. Of course, as you extend
the color variety away from the focal point
to the edges of the canvas, some of the contrast
starts fading slowly. An easy way to anchor back the attention to the horizontal
lines from the middle is to add over the shapes from before small accents
of a darker color. Let's grab some of
this turquoise and mix it with the black
from the corner. Don't forget that
black can easily overpower any other color
so, use it scarcely. Let's mix the black and the turquoise right
next to the black, away from the light color
nuances from the mixing plate. After a quick mix, the color is ready
to be applied. Let's move over to the left
side over the light and dark turquoise and add
over their intersection a strong brushstroke of this color using
the entire surface of the brush to create interesting shapes
and small details. If you want, you can
create even darker nuances to create small lines using
the edge of the brush, but don't make these
lines too obvious, just gently touch the canvas. Let's look for another place for one more dark-colored accent. This time you will use the
thin side of the brush to create some stripes on the
right side of the canvas. This will create a little bit of variety in shapes and brushwork, thus breaking the lego
look of the shapes. If you feel like
bringing attention to another spot that
you find pretty, you can place a couple more of these lines created by the
thin edge of the brush. If your brush gets too
heavy from the color, you can use a dry napkin
to discharge the brush, but don't wash it. Keep some of the
previous color inside the brush to create
interesting future nuances. Now, that we've
reached a darker tone for the middle of our
shapes it's time for some lighter tones
that will be placed further away from the
shapes from the middle. You will use turquoise
and white to create a lighter nuance and expand the color variety to the bottom
left side of the canvas. Let's spread some
of these turquoise on the mixing plate
and then add to it just a tiny bit of this titanium white and mix them in one place. After your color is ready, you can place it over the blue light turquoise
from the bottom left side. Let's create one more
horizontal shape over the first one and maybe get a little bit
more outside of it. Even though the color
we've created was light, it combined with the
color from the brush on the canvas arriving to a
very similar tone with the one from underneath
because we want to expand even more the color tones
to some lighter ones. Let's take a little
break and make sure the brush is discharged
from the axis color. Because the brush is
flat and quite thin, it's pretty easy to clean. Just wrap it's tip in paper and press the color
outside the brush. After you feel that your
brush is lighter and a bit cleaner it's time for some
even lighter nuances. Let's get to the mixing plate and grabbing some of
the white once more, let's edit the color
created previously. Mix it in one place. Flip your brush from one side
to the other to help the white get into that turquoise
and make it lighter. This time, the tone of the color should be somewhere in between the lightest turquoise
from the canvas and the original white
color of the canvas. Let's move to the left
side of the canvas and dragging the brush vertically to the bottom of the canvas, create a long strip of color as wide as the brush
repeats the movement a couple of times
until the colors gets very nicely into the
fibers of the canvas. Let's break a little bit
of the contrast from the bottom of this shape
from between the two, and now you will use the
same color to create one more rectangle on the top of the dark
turquoise nuance. Drag the color
upward and elevate it until it's shaped
like a square. As you can see, the light turquoise is very
beautiful and fun to watch. Let's add some more of it on the right side as well to
balance the composition. You can use the thinner
side of the brush to create a smaller shape
on the bottom of the first and mix just a little bit of the color
into the one from the top, as the blue from the top
is still pretty wet. Now, let's grab some
of the blue color from the middle to create a
darker shade of turquoise, and add it to the left
side of the canvas, right over the edge
to close the line created by the shapes over
the middle of the canvas. Let's fade the edges of
this little shape as this side of the canvas doesn't really need to be in focus. After this is done, you are ready for the next step, so let's not wait longer.
5. Conquer the Big White: Before getting into this step, let's look at the ways you will cover the free space
from the canvas. To paint these spaces, you will need to use
a very light color, but not clean white. If you use clean white, the shapes you've
created will still look as strange from
the space from around. So, let's give a light mix
to this white and add to it a small amount of any blue
shade used previously. As you can see,
this color is much better integrated
into the painting now and the cold blue can create a very nice and subtle
color variation. When covering with
this light color, make sure you don't leave blank canvas between the shapes. It is much better to overlap a color than to
have blank canvas. As for the previous steps, keep applying the new
bright color using vertical or horizontal motions. After you've covered the
canvas with this color, you can create a playful
interaction between the shapes. For doing this, your brush needs to be
discharged of colors, so make sure you
use a clean napkin to pull the color out
of the paintbrush. Then you can drag the color
from the big shapes over the white colored spaces to create interesting
color textures. These textures will
create that tiny bit of diversity needed in
this abstract painting. After this textures
will be created, you will be able to use clean white to disrupt those
strong directions. You can use the white
paint to introduce back color contrast by overlapping it with the big dark shapes. Now let's get back
to our painting. This step will be very
satisfying as you will play with some very light blue nuances and cover half of the
canvas, the bottom side. Let's just start by getting rid of the excess
color from the brush. Squish the brush
on both sides and inspect it for any
small chunk of color, but don't wash it
because you will need that tiny amount of color to shift the bright titanium white into a cold,
nuanced white. When covering with
this cold white, the bottom of the canvas, you will use vertical
motions to grab some of the colors from
the top and drag them over to the bottom to create
small color variations and give a sense of direction to the brush stroke
and the textures. Make sure you have free
space on the bottom of your canvas and nothing
stands in your way. After you are done
creating your cold white, you can start applying it
to the bottom right side, massaging the surface of the
canvas with the brush to get that color inside the
textures of the fabric. If you need to create
more of this cold white, you can grab a small amount of any cold nuance from the plate
and add it to the white. The cyan blue from
the top is perfect for turning this white
into a cold one. Mix the two colors
into one place until your colors are
nice and uniform. Then you can continue covering the bottom side of
the white canvas. After discharging the
white color on the canvas, you can go to the top edge of the white color and
drag down some of the dark color from
the top to create interesting lines and textures
over the bottom side. Keep these textures aligned and fade them as they get
closer to the bottom. By doing this, you will
reduce the conflict between the edges of the shapes and the light color
from the bottom. They will much better
harmonize and blend by just slightly going
over their edges. Now, let's continue to the left with some more of this
cold white color. If you need more color, you can always grab
some more of the color from the top and add
it to the white color. Of course, you can make a
larger batch of color from the start and apply it
over the entire surface. But a little bit of color
variation can enrich quite significantly the
complexity of your artwork. Let's place one more
long light brush stroke over the dark shape
from the top, dragging its beautiful
color to the bottom and mixing it into the
rest of the white. Remember that acrylic
colors tend to dry out a little bit darker
than their wet form. So, avoid adding too
much blue to the white. If your color gets too dark, you can add more titanium white back into it and
give it a quick mix. Let's move to the left
side and continue covering the white canvas with this
beautiful cold white paint. Make sure you use
the white color to cover the blank canvas
from between the shapes. Progressively, you can
cover the bottom side of the turquoise shapes and
after that you can go over the turquoise shape
from the top and drag this still wet turquoise color over the cold white
from the bottom. To cover the surface of
the canvas even faster, you can blend the
colors on the canvas, so it don't really
matter the nuance of blue you use to
color the white. If your brush creates
color variations, it is no problem, but make sure they follow the vertical elongated
shape created. Getting closer to the
bottom left side, let's go to the mixing plate and grab some more of
the white and add it below the blue shapes using the entire surface of the
brush to cover the canvas. As before, make sure you
cover the edges from between the colors and there is no more blank canvas
left to be seen. Pay a little bit of attention to the edges of the canvas as well and make sure the
colors cover them very well. Now let's move further into the next step to
cover what's left from the canvas with the
same cold nuance of white.
6. Playful White Nuances: Now, it is time for the
top side of the canvas. You will continue
covering the white of the canvas with a
cold nuance of white, so make sure you're mixing plate has enough white color on it. To make the process much easier, you will grab the
canvas and flip it so the uncovered canvas can
stay on the bottom now. As you can see, by
flipping the artwork, you can help it regain
some balance by fixing angles and
inclinations of the shapes. Let's position it
right in the center, and now you can start
once again mixing some of the color from before
creating some more of it. Let's add some more
titanium white right next to the spot where you
want to create the color, and then you can add to
it just a small touch of the blue from the top
and give it a light mix. Let's continue
covering the canvas, focusing on the edges of the canvas and the ones
of the blue shapes, very lightly, and loose,
and very relaxing. This brush can very easily
cover big surfaces, so this process can be
very fast and effortless. Let's move further and cover the edges of the
turquoise shapes. By lightly wiggling
left and right your brush as you drag it down, you can make your
painting process a tiny bit more efficient as this motion helps the color get into those textures
of the canvas. Moving more to the
left and covering with this white the canvas using vertical motions to get a
smooth and clean surface. Let's make a beautiful
clean white edge with the blue shape
from the middle, and then drag the color
from the top down to create some more interesting textures just like for the other
side of the canvas. If you feel like
creating more of these interesting
effects, for example, you can grab just
the tiny amount of one color from the
plate, for example, this turquoise, and add it right or the edge from
between the two colors. This can be useful
in the case in which the blue shapes from
the top are dry. Just a little bit of color
variety and vibrance into the flat white will make
it beautiful and lovely. Let's continue covering the
bottom edge of the canvas. Remember to give some
extra attention over the edges of the canvas and the ones made with
a blue shapes. After this, you are
ready to create some beautiful
interventions over the edges from between
the colors to fade some harsh lines and
harmonize the colors. For that, you will create
a light turquoise color, so let's use the light color from the brush and mix it with the light turquoise color from the mixing plate to create
an intermediate nuance, and now let's use this color around the
turquoise shapes to disrupt a little
bit of their shapes using vertical and
horizontal moves. Let's cut the corner of this
turquoise square and add on the top near the other long shape
two horizontal lines, one over the cold white, and one more over the dark
turquoise from the bottom. This color works like a bridge
between the other colors, harmonizing and softening the
highly contrasting edges. Let's move to the bottom left side and continue
creating some of these textures over
the white paint and over the edge of the shape. Use the color scarcely. Don't take too much color with your brush from
the mixing plate. But when you apply it, use bold and simple moves. Don't soften the textures by repeating the brush
stroke too many times. Keep them nice and textured. Let's make some more of this beautiful light
turquoise and place it right over the textures from the left side using
horizontal moves. Now that we have
created a little bit of variety for the turquoise
side of the painting, it is time to add some small
light blue brush strokes, so let's mix some of these
gorgeous blue into the white to obtain a
very soft light blue. Make sure that the brush doesn't hold too
much color in it so you can create some
interesting textures and effects. With this light blue, we will once more play
around the edges of the beak shapes and
create small bridges. Let's say right on the top of this beautiful blue
block of color and below of course
to make the shape maybe look thinner
and more subtle. These small brush
strokes help you create fluidity in your creative
and colorful language. Let's add some small brush
strokes over the right side of the canvas over these 90
degree angle as well, and over the right
edge of the canvas. Some of these shapes
can seem too blocky and rough against the
soft white nuances, so you can use the blue
to cover a little bit of this corners using vertical
and horizontal moves. With one more brush stroke, let's break this big
mass of turquoise and add a little light
window in it's shape. Further into the step, you will use some clean white
in order to bring maybe a little bit of calmness to a couple of two energized spots. Let's get to the
mixing plate and give a quick mix to what's
left of the white. You can make the color a bit
more pasty so it can be able to cover generously and maybe
make some textures as well. The spots where you will
want to apply this white is where you feel like there
has been a pattern created. These patterns tend to
attract too much attention, so it's best to
calm them a little. Let's say in this bottom
left corner the colors are a little bit too agitated
for the edge of the canvas. Move along the bottom
side and follow any brush strokes that attract your attention
in an unpleasant way. After you feel
like the bottom of your canvas is a bit less messy, you can move to
the top and do the same over the cold
white nuances. Here on the left side right on the top of
the beak blue shape, it seems like the textures
are creating a big mess because they describe too
many directions and nuances, so let's make a hole in them to bring a little
bit of calmness. Make the white patch of
color look less blocky, and fade the edges
of the white shape by adding small details
over it's edges, and fade down the
shape so it can blend into the big
mass of cold white. Now, you can grab some more color and
move to the right side, and find another place to put
some of these clean white. This white can help you enhance other colors as well by
placing it on the edge of a shape or you can place small white brush strokes
inside the big shapes to create even more contrast and enhance the focal
point obviousness. Using the thin
side of the brush, you can go along the
edges to make them look slimmer or straighter. Don't forget to
alternate between vertical and horizontal motions to avoid repetition and create a pattern among
your brushstrokes. Now, this beautiful abstract
painting is getting more interesting by just playing with a couple of cold blue nuances. Now because in the
next step we are going to use warmer nuances, let's clean the mixing plate
and the brush so you can have plenty of space and
clean vibrant colors.
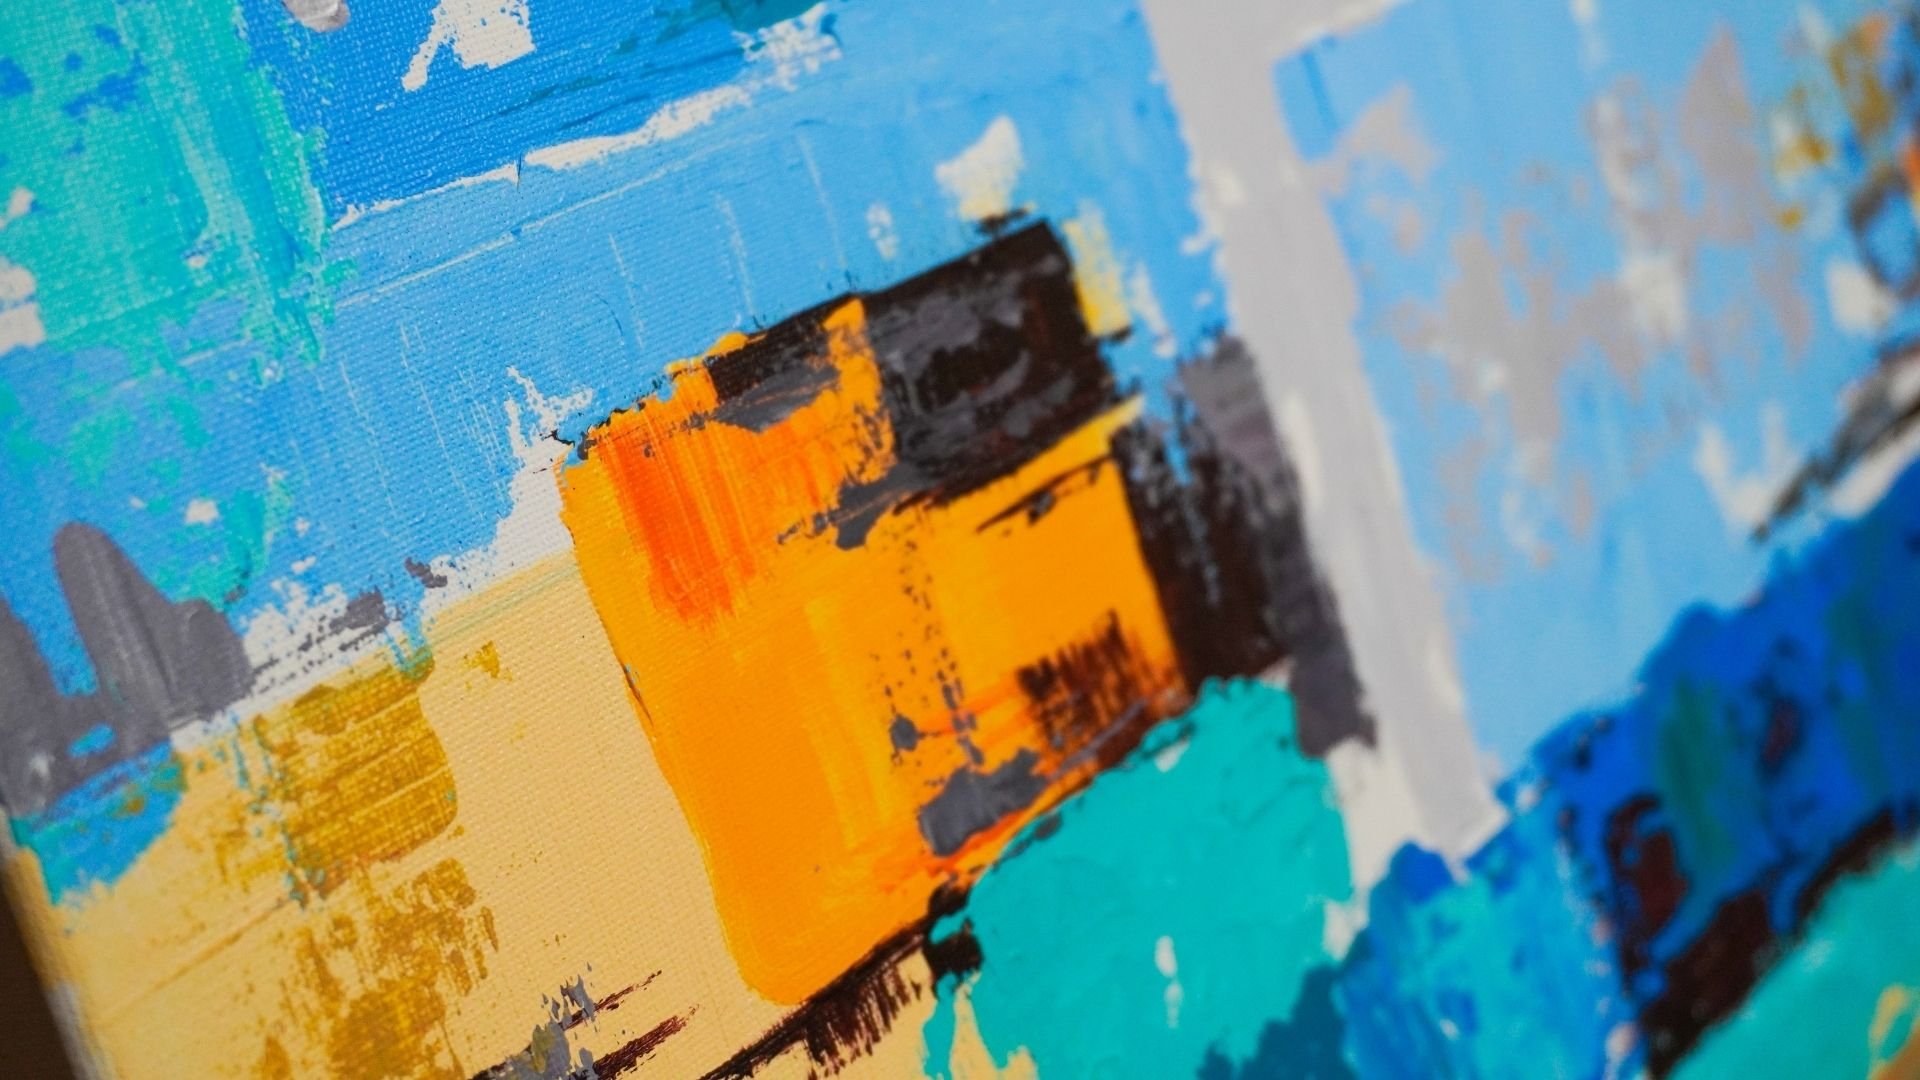
7. Sprinkles Of Yellow: Now it is time to introduce
some warm-colored shapes, so let's firstly see
how we can do this. These shapes will create color contrast with the
rest of the composition, so you will want to
keep them close to the main shapes and
away from the edges. When introducing new colors, you can do that by firstly mixing the new
color, in this case, yellow, with a color already
existent in the painting. By mixing the yellow with a tiny bit of blue or turquoise, you will obtain a
light green color. This light green color will create a bridge between
the standalone color, in this case, yellow
and the painting, so let's add this green in the middle of the painting
choosing three spots, make the shapes smaller
than the main shapes, and closer to the
secondary colors. After this middle nuance has found is placed
on the Canvas, you can add small accents of yellow to create some
bright contrast. Apply the color generously, but keep the size
of the shape small by using the tip or
the side of the brush. Make sure you firstly follow
the middle nuance created, and then you can add
this color by its own, following the big shapes
and their direction. As you can notice,
the yellow can have a great luminosity when
applied over light color, but if you apply it
over a dark color, the yellow stands out
through contrast. Now, let's get into
this step to play with some warm-colored shapes. Now, as you can see, the Canvas is back in
its initial position, the small brushstrokes from the last step are harmonizing
with a big shapes, creating a beautiful
bands of color and light. Now, as you can see, the mixing plate
is clean and dry, and the brush as well, so it's time to create
our new color palette. Let's start with a
small amount of blue. This cyan blue can be useful
if you want to quickly cover mistakes or help the new colors harmonize better
with the painting. The next color that
will beautifully contrast with the
blue is yellow. By combining yellow
with blue or turquoise, you will obtain a couple of diverse nuances of
green that will help the painting regain some of the color play we all desire. Of course, let's
add to our mixing plate a little bit of turquoise. This time, you will need just a small amount
of these colors, so you don't need
to add too much. But when you are painting, it is always better
to have your colors available so you don't interrupt
your creative process. The next color you
might want to add to your artwork is just
the touch of orange. It's up to you if you
want to use it or not, but the contrast
between blue and orange is one that you might want
to have in your painting. At the end, let's
not forget to add a bigger amount of white to help those warm nuances
get into the bottom and the top of the Canvas
into the cold whites. After all the colors and the white are placed on
the mixing plate, you are ready to paint. Let's start by mixing
a little bit of orange into a small
amount of turquoise, these two colors are very
well pigmented and vibrant. The orange color brings
that warmed that it's needed to give a healthy and strong green
color to start with. Very intense and
Christmassy this green. Let's add some yellow to make it a tiny bit more
fresh and luminous. As you may already know, acrylic colors tend to get slightly darker
when they get dry, so make sure you keep that in mind when you are
mixing your colors. For the moment,
you don't want to add white to make the
colors seem lighter, but make sure you add
enough yellow to make the color seem more
vibrant and fresh. Make this green just a tiny bit darker than the blue
nuances from the middle. After you have found the beautiful green
neurons to play with, it's time to create some
gorgeous green shapes over the blue shapes
from the middle. You will want to
limit the number of green shapes to just a couple
of two or maybe three, so let's start by
placing over the blue, a couple of green brush strokes. This time, you don't have
to make them too big, just play with this green
color around the middle, and place small accents. This can help you
identify the places where you will want to
build your green nuances. As you can see, the green is slightly darker than the
blue from underneath, which will help the next
color contrast and pop out. Now let's get back to the
mixing plate to create the next green neurons by adding more yellow to
the previous color, keep the color nicely packed on the mixing plate to not waste
it by spreading it around. Let's add more yellow and a tiny bit more
turquoise to make this green color
more vibrant and closer to the colors that
you've applied previously. After real quick
makes on the plate, this time you will create
some more extended shapes that will overlap with the white sides from
the top and the bottom, this will make the
green appear more vibrant because of the
white from underneath. As for the shapes from before, keep your directions
limited by holding the brush horizontally
or vertically. This is very
important if you want to keep the style
of this painting. You can add even
more turquoise to the color and then
use this color to get closer to the turquoise nuances from the left side of
the composition. Remember to use
these green nuances scarcely and not create
big shapes out of them. You don't want to spread the focal point too much
on the size of the Canvas. Now, let's grab some yellow on our bright green brush
and apply it over, and next to the
places that you've found suitable for your greens. As for the previous steps, you will want to use the
thin side of the brush as well to create shapes
of different sizes. Use clear and short
moves to obtain striking and colorful
yellow accents. If your moves get
too repetitive, make sure you diversify
them by adding vertical brushstrokes
or steel ones. Looking for another place
to add some of this yellow, and it seems like we can add some bright yellow accents over the left side of the
Canvas to spread the focal point and make
it seem less decentered. This yellow-green sits very well just right next to
the bright turquoise. Let's add one more
bright green accent on the top right side to create the link between
the yellow accents, and the top side of the Canvas. As you can see,
the shape overlaps the dark nuance of green and the cold white
from underneath. This color is very
thin and transparent. Now we will make it look
more opaque and less vibrant by adding a small amount of white to this bright green. The color obtained
should look like a clayish color and should
have a low color intensity. Let's create with this greenish-white two more
shapes around the middle of the Canvas to create
a link between the green shapes and the top and the bottom
side of the Canvas. The two sides that are
painted with a cold white. Now that we have placed these
beautiful white accents, it is the time to move to the next step and spread
them to the top and the bottom side making our colorful composition much more whole and well-balanced.
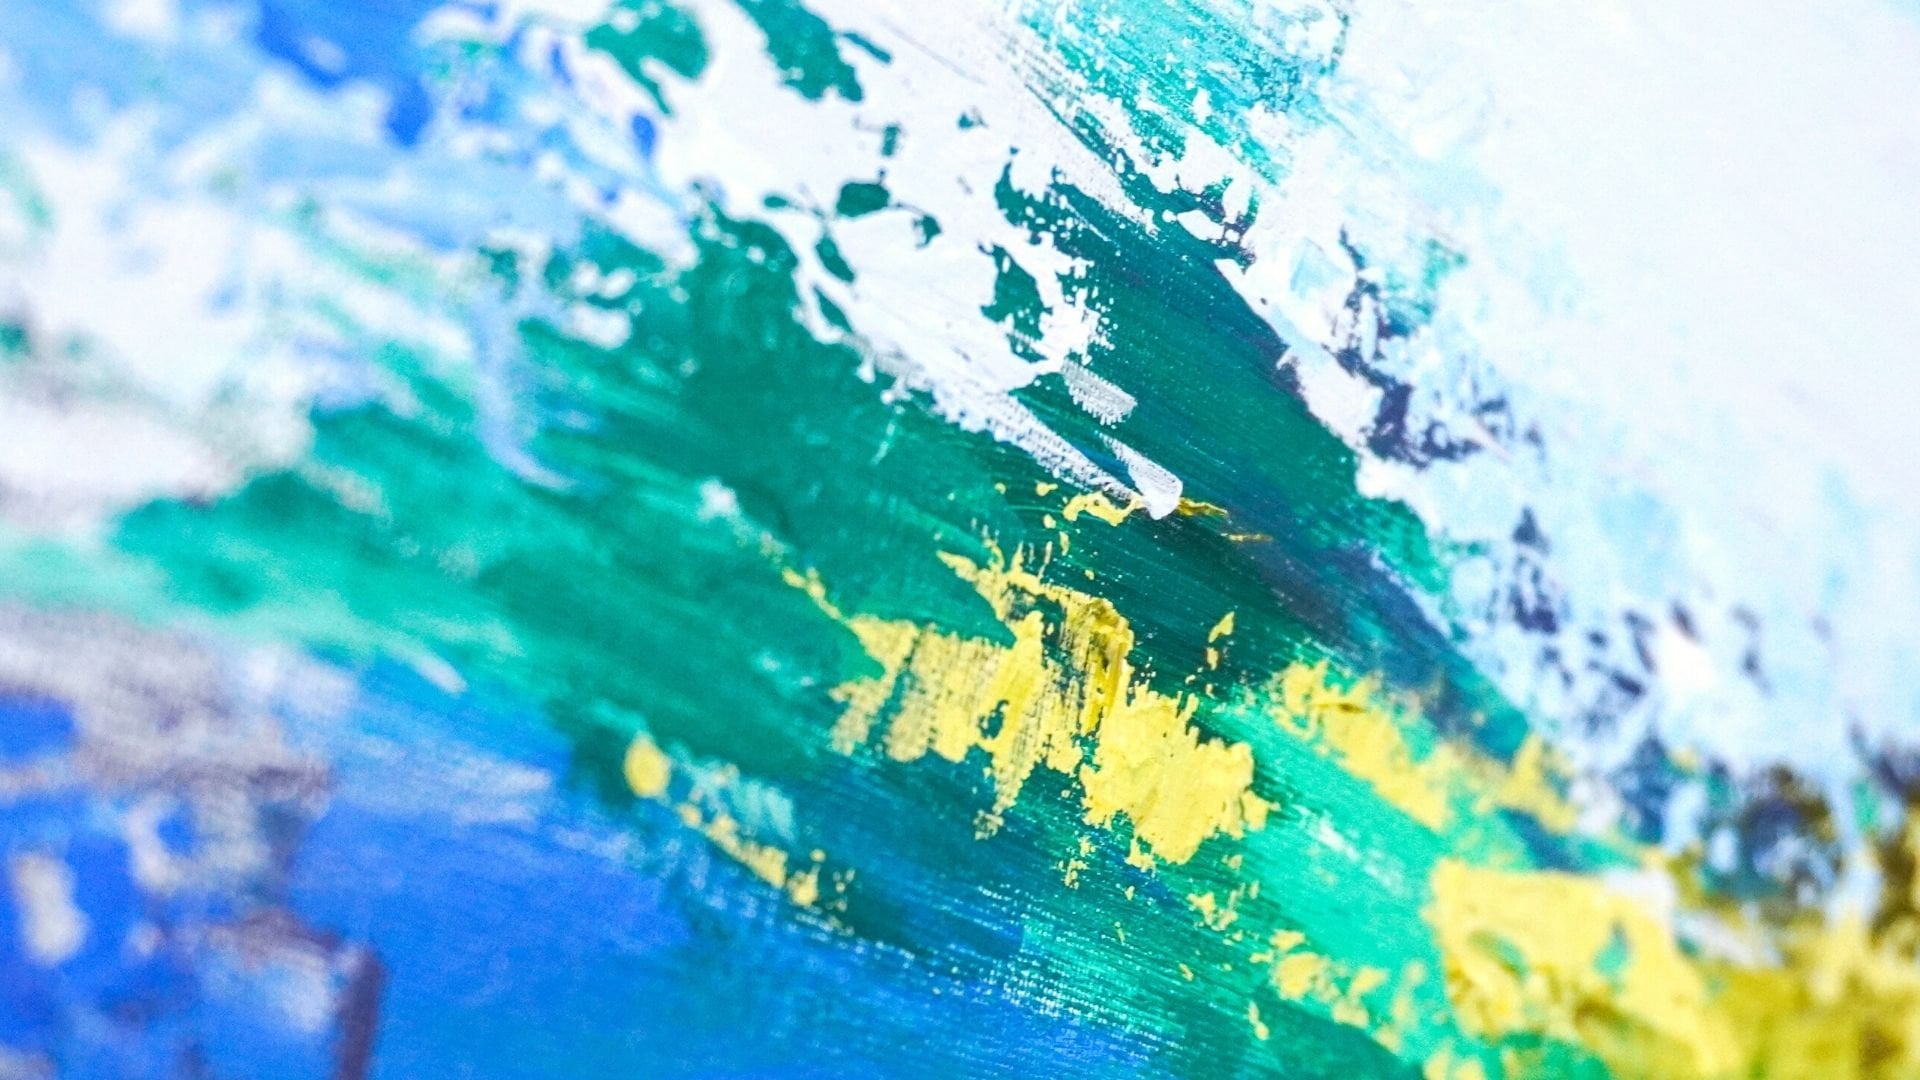
8. White Stands for Light: Now the first
yellow accents have found their place in the
middle of the Canvas, it's time to bring warmth to the brighter side of
the Canvas as well. For that, you will use a
small amount of the greenish, yellowish color
created previously, and you will combine it with
a generous amount of white. This step will be very
satisfying and beautiful. Let's get into it. Because we want to make this
white color very light, the first thing is to make sure the brush is not heavily
loaded with color. After this, let's spread a
little bit of white onto the mixing plate and add to it a small amount
of clean yellow. Mix it very well
together until you see a very small
change in warmth. If you can distinguish the
difference between the titanium white and the
color you're mixing, it means that the color
is ready to be applied. Let's start from the bottom
of the canvas and create some very beautiful and
thick vertical brushstrokes. Don't forget that you can use the thin side
of the brush to create small breakthroughs
in the dark colors. Another way to enhance the
look of the painting is to build this brush strokes
in a diagonal manner. This will make the
painting look a bit more dynamic and playful. Look at the difference
in brightness between the cold white
and the yellow white. This cream color will
soften the cold look of the painting by just adding a small amount of
yellow to the white. Now that these beautiful
blocks of white have been placed on the
bottom of the Canvas, you can fade the edge of these shapes over the
cold white from around. After this, it is time
to move further on the left side and create some more stripes of
this yellowish white. After the blocks of
white are placed, lightly go over them and spread them over the cold
white from the bottom. As you can see, the yellow is
visibly shifting the white into a darker
and visible color. If you want, you can add
over the yellowish white, small brushstrokes of clean white to break the flat
look of the white blocks. Let's extend the white and add luminous brush strokes
to the right side, blending the clean
white with the cream white and create
smooth transitions. Let's move to the top edge of the canvas on the
left side to bring a little bit of light
over the top as well to balance back
the composition. As you can see, the blue shapes from the middle
become more and more clear and obvious as we get nearer to them with this
beautiful cream white, another accent of clean white on the bottom
middle of the Canvas. Now that the big white
shapes aren't done, it is time for some
small light flickers for this layer of color as well. Let's use the white
tip of the brush to create some small cuts
into the blue shapes. Let's lift up this side
of the blue horizon by covering its bottom side with this beautiful
bright white. Now, as for the
other white shapes, let's disrupt it's clean
and contrasting edges by lightly going over them with a front
edge of the brush. A light brush stroke
over the top side, and now on the
right side as well, changing the direction of the brush stroke to
a horizontal one. Let's place one more small
white brushstroke near the light turquoise
shape to accentuate the contrast and near the turquoise from
the bottom as well, creating some medium-size
blocks of white color. It seems like the warm wide
brush strokes are getting more and more immersed into
the look of the painting. Let's move a bit lower on the right side and cover
a bit more of the edge, lifting up the color
from bottom to top and creating
interesting textures. A small accent of color, and your beautiful abstract
painting is almost finished. Let's get into the last
step to add some more of this beautiful clay color over the cold white and the warm white to harmonize
and bring together all these beautiful colors from this gorgeous abstract painting.
9. Calm Clay Accents : Now for the last step, you will reintegrate
the clay color over the white nuances
from the bottom, and the top, and the middle
of the canvas as well. Let's grab a little
bit of white on the brush and then mix it with a small amount of that bright yellowish-green
created previously. Mix the color in one spot to
keep its thick consistency. Now, let's start
applying it over the warm white nuances
from the bottom. At first, use the colors
scarcely and slowly expand the clay-colored
surface following the direction in which you've
applied the warm white. As you can see, the color is
rather pretty dry and thick, which is very good. This will create
interesting textures and beautiful color variations. Let's extend the color
around the white and create small
aisles of color. Lightly go over the
blue nuances as well, and now let's look for another spot marked
to the left side. As you can see, these
colors are used very scarcely and the shapes
created are limited. After two or three
brush strokes, you should move to another place to create
your clay shapes. Let's now introduce
a little bit of this clay white back in the middle of the
composition over the yellows and the
greens to create a link between the clay color and the bright greens
from the middle. You can see how
beautifully the dark turquoise contrasts
with the clay color. Now is the moment for the
top side of the canvas. Let's fill our brush with some
more of this final color. Now, you will brush it over
the cold and warm white creating the third nuance of white for our abstract painting. This top of this turquoise shape seems a little bit too blocky, so let's paint the
top-left side of it, covering it with this
beautiful clay color. At the end, you can create one more small variety
of this clay nuance, so let's add to the color a small amount of yellow
from the top of the plate. This color should feel a
little bit dry on the brush so make sure you don't saturate
your brush with paint. Let's look for an empty spot for this light green over some light nuances of
blue would fit perfectly. We don't want it to
stand out too strongly. It seems that it
would fit great on the bottom right side of
the canvas along the edge. Keep the shapes simple and don't expand too much on the surface. As you can see, the color from
the brush is very dry and the color sticks only to the strong texture
of the canvas. A small touch of this light
green on the bottom middle of the canvas and this beautiful abstract
painting is finished. It was such a fun
and relaxing time to play with different
blue and green nuances. Thank you so much for taking
this easy-going class. If you enjoyed it, make sure you leave
a review and share with us your beautiful
abstract painting. Thank you once more
for your interest in art and see you in
the next class.
 Cristina Handrea