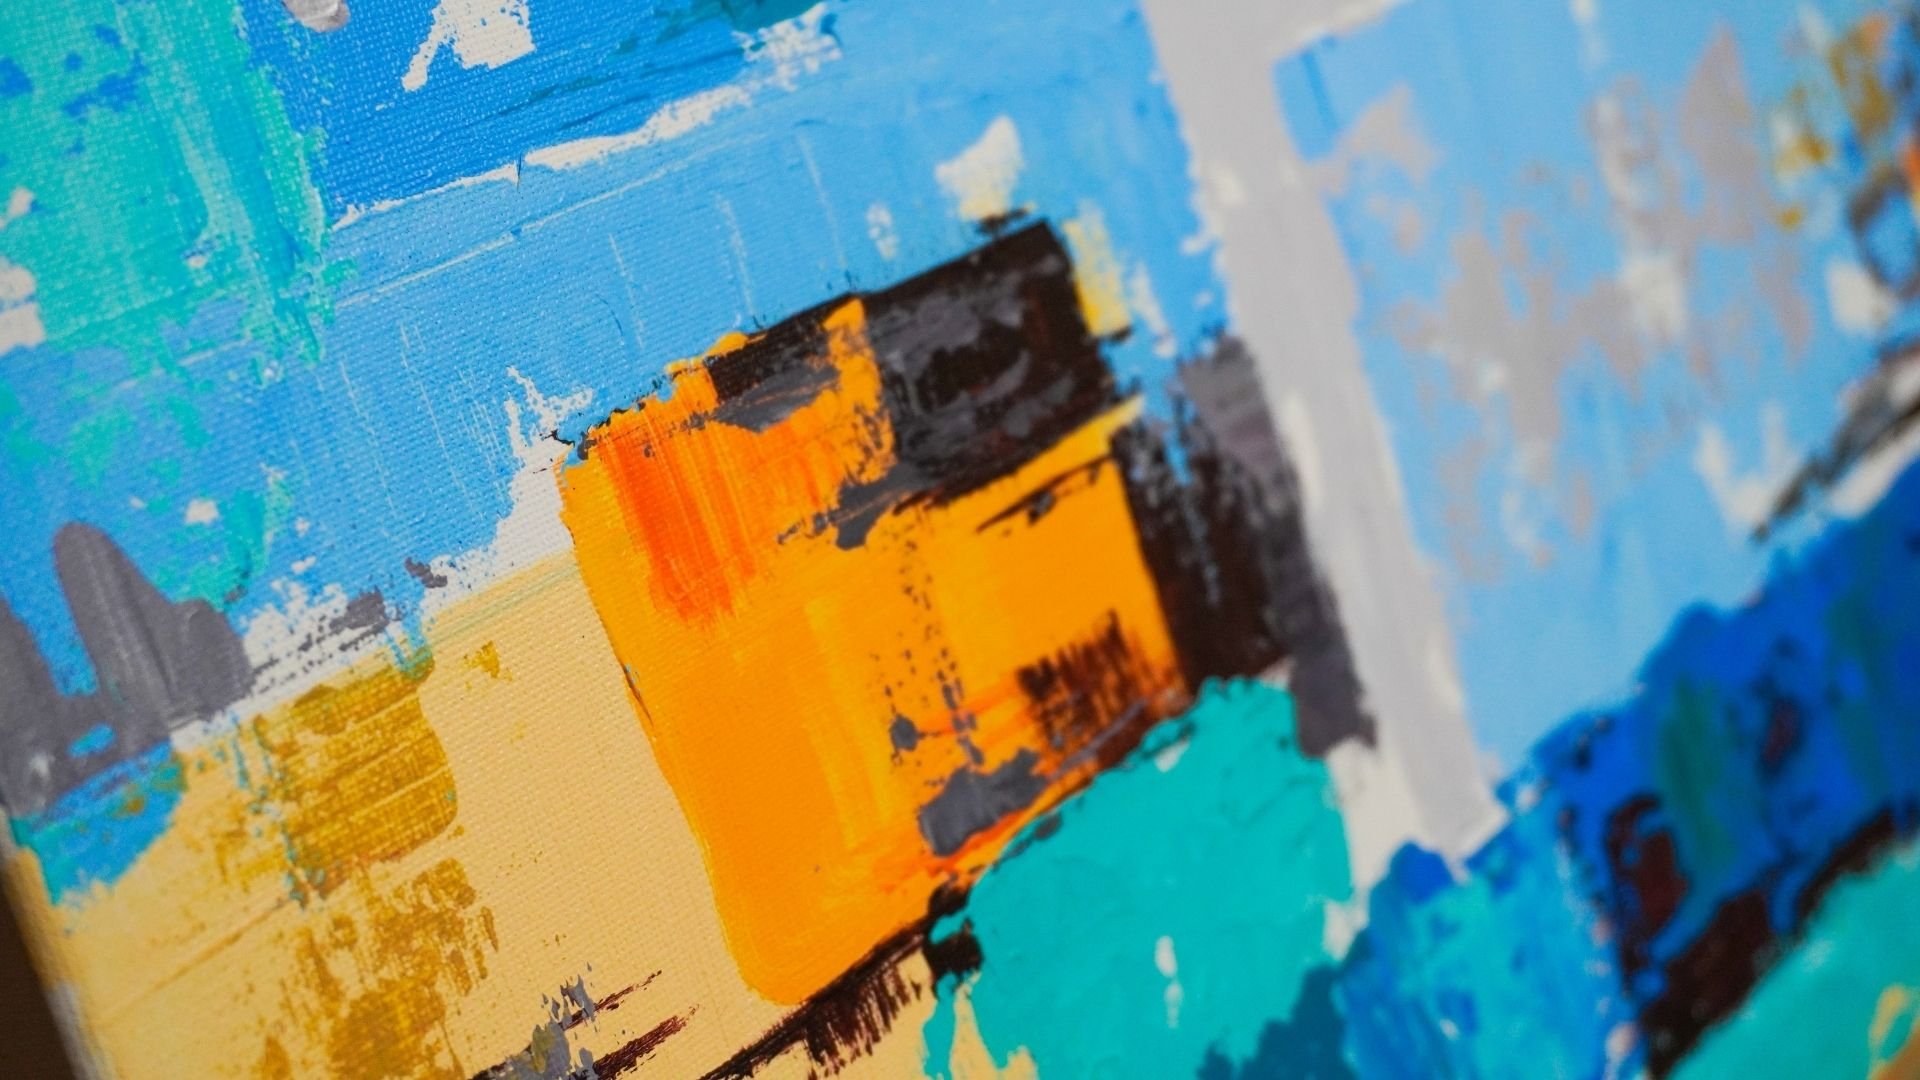
Transcripts
1. Welcome: Hi, my name is Christine
and welcome to a new abstract
painting course with one flat brush and just a
couple of acrylic paints, you will get to create a
vibrant abstract artwork. You will understand how to use a limited color
palette in order to create vibrant contrasts and
unique color combinations. Using the flat brush, you will play with
different shapes and bring harmony to
your composition. You will have fun
applying gold foil to your painting in order to
give it a luxurious look. You don't need any
experience with acrylics. You will receive
all the guidance needed to arrive at
a beautiful artwork. If you are ready to have a wonderful time playing
with acrylic angled foil. Welcome to the course.
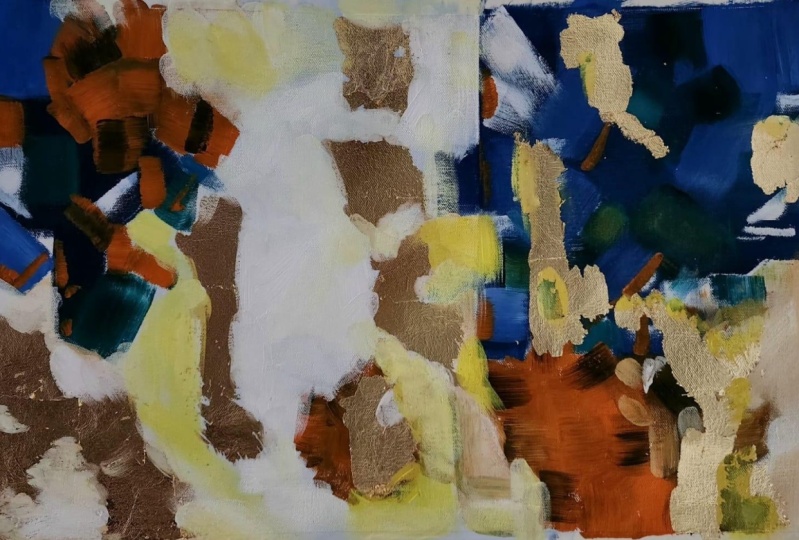
2. Materials: For this abstract painting, you will need the
following items. A canvas that has 40
by 60 centimeters, a small flat brush to apply
the glue for the gold foil. A big flat brush to
apply the acrylic paints some beautiful
gold foil sheets. The next acrylic colors, plenty of titanium white, little bit of some
bright orange, some vibrant cyan blue that will shine very brightly
next to the orange. A little bit of cadmium yellow and some
gorgeous phthalo green. There's some turquoise
accents and the, of course, let's not
forget of black. Very helpful and
powerful black Mars mixing plate for mixing the colors and some clean
napkins for cleaning your brush of excess
color from time-to-time. Now that you know
what it's needed, Let's create this fun and
vibrant abstract painting.
3. Dark Blue Shapes: In this beautiful
and simple step, you will get to create some
big dark blue shapes on the top right side
of the canvas and the smaller one on
the top left side. This step, we'll begin by
adding to the mixing palette a good quantity of blue and just a small quantity of black. Try to keep some
distance between them. You can later add some more
black to the color palette, but it's always better
to use black scarcely. With this dark nuance of blue, it will cover about
40% of the surface. So you will need to add a good quantity of this
color on the palette. After the two colors are
added to the palette, you will start to mix
them in the space between them using
the flat brush, you will gradually add
the black and the blue, keeping some distance
from the clean blue. Keep mixing the blue
with the black by brushing the color in one place. Flip your brush from
one side to another to have a uniform
color in your brush. As you can see, the blue starts
to have a uniform color. So keep mixing until there are no more stripes of
black in the color. Try to not add too much
black from the beginning, acrylic colors tend to appear
darker after they are dry. After the color is well-mixed, you can start applying
the color on the canvas. The first area
where you will work is in the top-left
side of the canvas. The shape will be a
bit longer vertically. So let's start
applying the color, starting with a vertical motion and covering the left
edge of the canvas, press on the canvas
so the color comes out of the brush
at the beginning. Try to keep the
shapes simple and clean so you can later
play with their shape. Let's create another
direction to expand to the right
side, this shape, you will live from the
bottom of the shape to the right with another
smaller rectangle. Let's grab some
more color and make the last shape much more
pronounced and clean. Now you will continue down
with another lungs shape, keeping some distance from
the left edge of the canvas. Now, after these simple
shapes are done, you will start to play with the straight edges
you've created. You will want to
break this edges so they can see more organic. You will add one
more little square on top of the lung
vertical line. Press harder until
all the surface you've created is covered. After this, let's get rid of these two straight
angles from the bottom. Let's place another diagonal
brushstroke on the edge of the canvas to get rid of those 290 degrees
angles as well. This will be the first shape. Even though at the beginning the shapes had a
very squarish look by just altering the edges with two or three brushstrokes. Now the shape looks much
more organic and it is less possible to describe it
as a symbol block of color. And with this, the first
shape is finished. Now you will create the second
area of dark blue color. Let's move to the mixing palette and add some more of this black. So you can make more quantity. Keep your colors separated on the plight until you
decide to mix them. And now let's grab the
brush and as before, take some of the black
and mix it into the blue. This time you will want to make a bit more color than the four, as the shape you will
create is a bit bigger. Keep mixing the colors
until you arrive at the same nuance of
dark blue from before. When mixing the color, make sure you press hard
enough on the brush so the color from the
brush can come out and mix with the rest of it. After you are satisfied
with the color obtained and there is
enough color made, you can take some of the
color and start creating some marks to the limit the space where you
will place the shape. You will place a sign on the top middle side
of the canvas, a little bit to the right side. Then you will place one
more line below it, reaching almost the
middle of the canvas. And then another line going to the right on the
edge of the canvas. Now let's use the edge of the brush to link
the three spots, starting with the
one from the bottom. You can use this
edge of the brush to have a more precise
way of limiting. Let's add the vertical line. And now you can grab
some more color from the mixing plate and
start filling this shape, starting with the top edge. Make sure the edge of the
canvas is nicely covered. Use both of the size of the brush to have
a quick coverage. Let's spread some more
of the color applied, making sure all the corners
and edges are filled. Take your time to fill
all the little spots. When filling wide areas, use all the body of the brush to quickly fill the surface
of the painting. You can use different
motions to help the color gets into the
fibers of the canvas. You can also take the
excess color from other areas and move it in
the places where it's needed. Let's make sure the shape is
nicely filled with color. Just move your brush, use different
directions and press on the brush to take that beautiful
color out of the brush. There you go. In no time this beautiful
square has appeared, Let's make sure all its
surface is nicely covered. Take a bit of time to check all the surface for
little white spots. And now you can
take some more of the color from the
top-left corner, making sure you don't
modify the edges. Now let's take some more of the color from the mixing plate, and now you are
ready to play with the edges of this big
beautiful square. Let's start by adding on
the bottom left side of it a beautiful long rectangle
directed downwards. Now let's move to
the right side of this shape and create
a shorter rectangle. And after this is done, let's make sure the two
shapes continue upwards. Now, you will add one longer
rectangle to the right, linked with the side of
the one from before. Let's make sure the
shape from before, it's a bit longer. And now let's create one more little shape
outside the big square, going to the left, just one more little square. Now you can start to play
a little bit more with the shapes and make the square from the
left a bit bigger. Now as for the shape from
the top-left corner, you will want to get rid of the straight lines and
the 90 degrees angles. So let's add a diagonal it over the 90 degree angle of the
shape from the middle. And now you can move
to the left side. And using the wide
side of the brush, you will press on
the brush to live a beautiful and white mark over the 90 degree angle from
between the two shapes. Let's make this bottom
edge a bit longer. And now let's get rid
of this angle as well. Look at how organic and
beautiful those shapes look now, and this step is finished. You can move to the next step without letting the colors dry.
4. Cyan Blue Over Dark Blue: Now you have finished creating
the dark blue shapes. You will use some green
cyan blue to create some beautiful and
bold brushstrokes on the surface of
the two shapes. For that you can use. What is left from the
blue from before. Give you the light mix so it can nicely spread
on the surface. And after that you are
ready to apply it. Let's start applying it over the blue shape from
the top-left side. As before, you will want to
start with a simple shape. So let's create a
beautiful square right in the corner of the canvas. Don't press the March or
brush too much the canvas. Just apply a couple of heavy brushstrokes to create
a bit of texture as well. And now let's take some more of this beautiful blue and make
the square much more organic by adding on its side some very bold brushstrokes
that cut the angles. Now let's add some
beautiful blue over the big dark blue shape
from the top right side, starting with a simple square. And now let's play with the
direction of this shape by applying the new
blue diagonally, getting away from the
right edge of the canvas. And now let's
create a new shape, a little bit detached from the end of the last
going to the right. Now in the space left between
the cyan blue and the edge, you will add one
more shape right on the edge to break that block
of dark blue from the side. Taking some more color, you'll want to cut that straight line
from the left side of the cyan blue shape once more so you can avoid an edgy look. Now, it looks much more organic. Take your time to
identify on your artwork any edges that you feel like they disturb the
flow of the shape. Let's add one more
little spot of color on the top of
the last brush stroke. And now the same cyan blue, you will create one more
shape over the left side, letting some dark blue in
between the two shapes. At first use big blocks of color and does not
expand much in space. Keep the color concentrated
in small spots. Do not rush to
cover the surface. Now, let's continue down with another shape detached
from the top one, a shape that fits nicely
over the dark blue shape. As you can see, the
shape from the top is similar with the
one from below. They look like two arrows
pointing down this. And the fact that
the two shapes have too many straight edges disrupt the organic flow of
the artwork to bring harmony between them and
the rest of the artwork, placing a vertical
line on the top edge. Now that shape is much
more calm and static, unlike the one from the bottom. After this, as for the
blue shape from the right, you will want to add
outside the arrow from the bottom, some
small brushstrokes. Anywhere you can see
a straight line. Put your brush in that place. This will quickly
soften the harsh edge. Now you don't want to repeat this for every straight edge, you can move on and
continue this shape with a smaller blue rectangle
detached from the shape. Now it's time to move over
once more to the left side and add a couple
more brushstrokes to add a bit more variety. So you will create another
beautiful rectangle, displays diagonally with the
left edge of the canvas. And with this, you have finished creating the main directions of the composition by playing with some bold and colorful shapes. For the next step, you don't need to wait
for the colors to dry. Now let's move on and play with some cold nuances of white.
5. Cold White Shapes: In this, you will get
to cover with color a big portion of the composition with a
beautiful cold white. For that, you will use a little
quantity of the dark blue left from the previous step to give a cold nuance to the white. For that, you will
firstly need to use a clean and dry
paper towel to get rid of the excess
color from the brush. You don't need to clean
it completely just a little bit so you don't
color to match the white. After you have made sure
your brush is ready, you can put a good
amount of white in a clean spot from
the mixing plate. This Whites should
be enough to cover about 50% of the surface. After you've added the
color on the mixing plate, you can start to slowly
mix the white with just a little bit of the
blue from the plate. You will see how just a
little bit of this blue will quickly give a cold
color hint to the white. So don't rush to add too much. Just keep mixing
a small quantity until you arrive too cold white. As you may know,
acrylic colors tend to get a bit darker
after they are dry. After the cold wide is obtained, you will start to cover with it the empty canvas from
the top middle side, use plenty of color to
have a good coverage. Later, you can spread it on the surface as much as you want. Let's continue taking
some color from the plate and move lower in-between
the two dark blue shapes. Make sure the top
edge of the canvas, It's very nicely covered. Now let us get lower on the
canvas and make sure you nicely covered the edge
formed with a blue shapes. You will later create some beautiful bridges
between the two colors. But for the moment, let's make sure the space
from between the shapes is nicely covered with
this clean, cold white. Let's make sure all the
edges from the right are covered and there are no empty
canvas spots left behind. And now let's drag
the color from the top to the lower
side of the canvas. When you apply the
color on the canvas, it doesn't need to be
perfectly uniform. You can apply a thick layer
of color and then mix it on the canvas until it
looks nice and smooth. Let's move lower on the canvas and continue applying the color. Let's grab some more of
the color and look at the edges created between the cold wide and the dark blue. As you can see, there are some
very strong edges created. So now it's the moment to play a little bit with
those straight edges. Let's discharge some
of the color on the empty space between
the two dark shapes. And now as before, anywhere you see
a straight line, you cut it with your
big flat brush. Look at that beautiful
round shape graded. Let's now play some small spots of white over the dark blue, just to disrupt a little
bit of that harsh limit. Now let's move to
the right side and play around the edge
of the blue shape. Placing a couple of small brush strokes to
cut those red lines. Three beautiful cuts. And now let's create
a little island of blue by cutting that shape
outside the big one. Don't overdo it. Just a couple of small cuts and let's give it a
rest and continue spreading the beautiful cold white over the lower
side of the canvas. As you can see between the big dark shape
and the white one, has been created almost
a straight line. This feeling is created by those straight angles from
the top middle of the canvas, the ones made with the edge. You can simply create a much
more organic feeling for the two shapes by introducing some big brush strokes of
white on the top side, near the edge over
the blue using diagonal moves to avoid
making more 90 degree angles. And now let's continue
covering with this wide the bottom
middle side of the canvas, progressively moving
to the right side, a little bit below the blue. And now you can continue
covering with this white, the bottom edge of the canvas. Moving the color to the
left and making sure the edge is very nicely
covered with color. Use different
directions when moving the colors so you don't
make stripes of color. This will also help you cover
in a more efficient way your surface in case you
use your colors scarcely. Let's move the color
around and get rid of those darker spots of
white from the edges. If your color is not entirely
mixed, when you apply it, you can mix it on the canvas
using a brushing motion, using both of the
sides of the brush. By doing this, you
will as well make sure there are no little spots
of Canvas left uncovered. Look at that smooth
color left behind. Let's cut that straight
angle from the top. Now you can continue to expand the cold white parts
of the canvas. The next place you
will apply white is on the bottom side
of the right edge. So let's grab some
fresh color from the mixing plate and apply a
generous quantity of color. And of course, you can
move higher over the blue and play with a couple
of bold brushstrokes. Getting the two colors, shapes, get to know each other. A bit of white over the dark blue and a bit of
blue over the white. A short exchange of nuances. Let's cut a little bit more of that bottom edge
from the blue. To get rid of that uncertain
dark brushed angle, it is better to have both interventions over the
colors than uncertain spots. So make sure there
are no spots of blank canvas left
between the colors. And now let's continue down with a cold white shape until you made the bottom
of the canvas. Let's place a small brush stroke over the edge of the blue. And now let's play some more
with edge from the right and the apply another block
of white over the edge. Now as you can see on the
left edge of the dark shape, there are three vertical lines
that get inside the shape because they are of the same length and the
almost the same shape, they attract too much attention. You will want this rub their shape and make
them look a tiny bit more organic by adding a little bit more
color over them. Change the position of the brush using the edge of
it or the corner. So you can make some
different kinds of shapes, a beautiful brushstroke
over the line from the top. And now those three shapes look nothing like one
another anymore. You can look over the edge of the blue and
check if there are any areas you can improve by
adding very small details. Now let's take some more
color and get rid of the little dark spot or detailed from the bottom right
edge of the canvas. Let's add a bit more of this
white and the bottom corner. And now you are ready for a
new step and the new color, they're not wait for
the colors to dry. So you can play a little with a new color and the
ones from the Canvas.
6. Turquoise Accents: For the beginning of this step, you will want to
clean your brush with a dry napkin until you get rid
of the colors from before. As long as you work with just either cold
or warm nuances, you don't need to wash
your brush between steps. If you do want to
clean your brush, makes sure it is dry
so you don't damage the consistency of the colors with a water from the brush. And now you are ready
to introduce to your mixing plate the
beautiful phthalo green. You don't need to add too much of the color for this step, but it is better to have
more color to work with. After the paler green is
added to the mixing plate, you can start to mix it with a little bit of the two
blue nuances from before. This will make a third
beautiful nuance of blue with just a
little hand of warmth, because this color contains
both of the blue nuances. It will go very
well between them. So let's play with
this turquoise, making another shape on the
lower side of the others. As before, make sure you disrupt the straight
lines created by the brush by adding smaller
details on its edges. Let's take some more
turquoise and start introducing some of it
over the cyan blue edges. Taking some more
color and adding some little turquoise accents over the cyan blue
shape from the middle, you can press on the brush harder to mix the
two layers of color. Because you are working
on a wet surface, you can take the color from one place and move
it to another place, just like for this blue
placed over the turquoise. Now you will move to the top
right side of the canvas and play with the straight
edges of the blue shape, cutting the shape and maybe extending it a bit
more to the left side. Look at that dark blue from
the middle of the shape. This paler green is
very good for creating a beautiful gradient between the dark blue and the cyan blue. As you did for the cyan blue. Now it's time to play
some little accents of color over the dark
sides of this shape. Let's place just a couple of small shapes using the
small edge of the brush. Let's now the sand
on the right side of the beak shape and place
a couple more turquoise excellence getting into
that beautiful cyan blue and over the white as well to keep the colors clean your wants and that rub
the brush on the canvas. Just press with the color on
the brush over the places. Let's take a bit more
turquoise and this time lightly go over the
white from the middle, right over the edge
with a dark blue. Just a little accent of
this turquoise over the white and the shape from
the right side is finished. Now you will start placing some turquoise accents over
the shape from the left side. Before doing that,
make sure your brush doesn't have any more
white color from before. Let's clean the brush
just a little width and give the turquoise a
light mix on the plate. After this, you can grab some color and move
to the left side, placing some beautiful
and bold brushstrokes. The cyan blue and the dark blue. Try creating shapes of
different sizes and forms to make them feel
organic and pleasant. Now with your brush, almost dry, with just
a little bit of color, you will play some
very bold brushstrokes over the edge with a cold white to create a beautiful bridge
between the two colors. Taking just a little bit more turquoise and moving over
the top of the shape, playing over the cyan
blue textures to obtain a bit of diversity
over the shape. Let's bring the blue edge
from the bottom a bit lower and place a couple
of more blue accents over the dark blue, the white from the right. Using the small
edge of the brush, not dragging the color but pressing over the
layers so they can mix just a bit
together to create some new and unique nuances. With this, you have
finished creating the cold nuances
of this painting. From now on, you will
create using beautiful, warm and earthy new answers. Before moving to the next step, you'll want to let
the colors dry out completely and clean the
plate and the brush. By doing this, you will keep your colors bright
and beautiful. So let's move to the next step.
7. Orange Shapes: In this step, you will create three beautiful and big
shapes of warm nuanced color. This color will be created by
mixing a small quantity of black with some bright and
beautiful orange color. This orange color has a light consistency and we'll mix very easily with the black. If your orange acrylic color
has a thicker consistency, make sure you mix the two colors very well
before applying it. The first nuance, you
will want to obtain a slightly darker
nuance of orange. Don't add too much
black at the beginning. After this nice and warm
nuance of orange is obtained, you will start applying
it on the top-left side, between the blue and the white. Let's take some of
these beautiful orange and start sculpting some beautiful shapes into
the canvas at the beginning, starting with some medium
shapes and then adding to their edges small details to
create interesting shapes. Make sure you leave some small accents of color
between the orange shapes. So you don't create just
a simple massive block of color over the intersection
of the two cold colors. As you can see, there
are still visible some small places where
the white miss the blue. Now you will want to
extend a little bit of the orange color over the white using the thin
edge of the brush. This will help you have a bit more control
over the shapes. Let's extend the
orange a bit more and bring the white
inside its shape. And now you will start to apply some brushstrokes over
the blue as well, making some beautiful
bold marks. Don't overdo the shapes. Keep them packed and nice. Still letting some
little spots of blue visible between
the big orange shapes. And now let's go back to the color plate and
grab some of the Clean, an intense orange
and the applied scarcely in the middle
of the orange shapes, creating some more intense parts of orange to increase
the contrast. Let's place on each of the big four parts
of the orange shape. And other brighter wanted to create something like
some highlights. And now once more, taking some more clean orange, you will continue placing on the outside edge
of the blue shape, some clean brush strokes with
some beautiful textures. You can play with their shape, making them more
interesting and nice, make them smaller than
the other orange shapes. Let's move lower
to the left side and place two more little spots of orange using the edge or
the corner of the brush. If you notice any spots
that you don't feel like they make sense like this
little hole and the orange. Make sure you cover it with a very steady and
beautiful brushstroke. Now let's move higher
and do the same for the white edge from the top because it looks pretty messy. And an interesting. Adding some orange really helps to bring back
its integrity. And now you have finished the main shape for the
first orange spot. Now you will move lower over the white canvas from
below the blue and start sculpting with the brush some big and beautiful
blocks of orange color. You can start from the top, from the edge with the
blue and move lower. So pressing with
confidence on the brush, Let's play some of these beautiful orange to
fill that empty canvas. Let's take some bright orange
and place some bold accents over the blue with the
corner of the brush. And now you can move lower and
continue the orange shape, directing it diagonally on the opposite side from the blue. Now that you have established the direction of
the orange shape, you will start to
add on its sides and over the white some
darker nuances of orange. So let's mix on the plate some
more black in the orange. Don't worry if the
color gets dark, you can always add more orange to make
it much more bright. Now that this warm and beautiful
orange brown is created, let's place it on
the right side of the orange shape and reach
the bottom of the canvas. It seems like this lower
side of the canvas can manage a much more
darker nuance of orange. Let's make this
brown even darker until you arrive to a
classic dark brown. Now, let's cover the
rest of the right side or the canvas is blank.
Don't be afraid. Covered the edges of
the blue and the white. Now it seems like a good time to use the color from the
brush to play some of this dark brown over the orange side from
the top-left as well. So let's grab some color
and following the places where the blue is coming out
from underneath the orange, you can place over
those spots a couple of beautiful color accents to create a bit more depth
to the orange shape. Two or three clear
brushstrokes will be enough to bring that orange
above the other colors. And now let's get
back to the shape from before and add more of the brown color until you fill all the space still
the edge of the Canvas. Don't forget to follow the
right edge of the brand shape. Using the corner of the brush, you will place a couple of
little point the brushstrokes, making them of different
sizes and shapes. Let's change the
color and go back to the beautiful orange mixing a little bit of it into
the brown from before. And now you will
move over the edge with the white from
the left and create some diagonal
directions following the inclined direction
of the big orange shape. It seems like there
was a little bit too much black on the
corner of the brush. If it happens to apply a
color that is undesired, do not try to spread
it to get rid of it. You can either cover
it after it's dry. Let's take some more of
this beautiful orange from the mixing plate and
fill the rest of the shape. Just focusing, uncovering
the blank spots. Now on the orange
surface of the shape. As you can see, there is
plenty of color to play with. If you want. You can play with your brush over the
textured made to cut some straight
lines to this Thurber with that clear
direction of the shape. After this is then as before, you will want to
introduce the orange over the blue shape to
integrate them better. Let's get some of that
clean orange and place some small clean brush strokes over the dark areas
of the right side. Not too many, just three or four as for the top left side. Now let's cover a little bit more of the blue
from the metal to create another point where the orange great
contrast with blue, making short the
edge from the bottom is nice and clean and smooth. Makes sure all the edges
are covered with color. Now that all the orange
is placed on this shape, you can now, as for
the top-left corner, bring a little bit of
contrast inside the shape, placing some darker and nuanced
accents just to or free. There'll be enough making
them of different sizes. And now you are ready for the last orange
shape that will be placed over the cold white just below the middle
left side of the canvas. Let's place right here a
beautiful warm rectangle shape. Now as before, you will
want to get rid of the straight angles
and get outside the shape with some
smaller patches of orange. Let's place to diagonal
accents of color. And the third one on the top, Let's place a small brush stroke on top of this one
and smudge it a bit. Taking some more
orange color from the plate and moving
over the last corner, covering it with this
beautiful orange. Let's make this shape a
bit more round by filling the bottom side of it with
some more organic lines. By adding details to
the size of the shape, you can expand it as
further as you want. Haloing a simple rule, wherever you see
a straight line, you cut it with color, or you add on its outside
another patch of color. This can create some very
interesting abstract shapes that can have a familiar look because of its organic look, just like seeing animals
in a cloud formation. Let's make the middle of the orange shape a
bit more uniform because it is already pretty
complex on the edges. And now at last, to break a little
bit of the rhythm from between the
orange and the blue. Let's add one more
little spot of orange color next
to the turquoise, right on the edge
of the blue shape. And with this, you
have finished creating the second strong elements
of the composition. Look at the wonderful
contrast created between the nuances of
blue and the orange ones. Now, it is time
for the next step. Make sure your colors
are dry and your brush and the mixing plate are
cleaned and dry as well.
8. Cream White Nuances: In this fuel bring
a little bit of softness to your artwork by introducing a very
delicate color that will bring all
the colors together. And we'll help you tame
some of the shapes. For the beginning,
you will need to have your brush clean and dry. Then to create a
beautiful cream color, you will firstly need to make
a beautiful brown color. For that, you'll need some beautiful orange,
some bright yellow, and just a tiny
bit of black cube the three colors apart from
the rest of the plate, to let some space
for the white color. Now let's mix the
three colors until you obtain a very warm and
pleasant, not the color. You don't have to make too
much of this color just enough to give a warm tint
to the beautiful white. After you have obtained
that peanut butter color, you can take a little
bit of the color and place it in another
clean spot on the plate. After this, you will want
to clean the excess color from the brush so the
WIP won't get too dark. Now, let's place a
beautiful amount of white next to the
little batch of brown. Now you are ready to mix
these beautiful cream color, makes it nicely and
press on the brush so you can get out of it
the rest of the color. As for the cold, nuanced white, you'll want to give it just a small hint of
color to this white. As you can notice, acrylic paints tend to get a bit darker after they are dry. If you want to make the color a bit more shiny and bright, you can add a little bit more
of this beautiful yellow. This will cut out a
bit of that clash. Look after the beautiful
cream color It's obtained some of the color and move to the top
side of the canvas, right on the edge between the cold white and orange shape. Here you will create a
beautiful bridge between the warm orange color
and the cold white. As before, you will
want to live from a bigger shape and then place smaller shapes on
the orange surface and on the cold white surface. Let's make sure that
this slide bash is covering the top edge
of the canvas as well. Let's play some more
beautiful accents of badge lower on the edge
of the orange shape, detached from the
bigger cream shape. Now you will move between the two big shapes from
the bottom right side, between the orange and the blue, you will want to create some beautiful
cream textures with your brush on the left
side of this shape, starting with a bigger
shape at the beginning. As you can see, you can
sculpt with this white in both of the shapes to create
interesting new shapes. So let's use this screen to
create another shape over the orange using diagonal
lines to describe this shape. Let's take some more color
and continue the shape on the lower side with much
more horizontal lines. Just so the cream shape
and the orange shape won't seem so dependent
on one another. After this, you will
move on the right side of the orange shape
and once more, using the cream color and
the corner of the brush, you will cut a bit of the orange shape
creating new volumes. Take some more white and covered that darker spot from the
middle of the green shape. Now you can continue creating another beautiful
green color spot on the middle of the right edge, starting with a
vertical rectangle. And then you can
distort its shape by placing smaller brushstrokes on its edges and outside its shape using the
color very scarcely. Now you will move lower on the edge of the orange
shape and you will continue sculpting
into the orange may be covering those
smashed colors. Don't look interesting
or beautiful. Everything that feels
like an anesthetic edge, cut it with a good
quantity of color. Now you will create a
slightly lighter nuance of green wide by mixing
some more of the titanium white and
a little bit more cadmium yellow into the beautiful cream
color from before. You can add as well a bit more peanut
color from before and mix those colors until you
arrive at a very light nuance. And now with this color, you will cover the bottom-left
corner of the canvas. Firstly, discharging the
brush along the shape, efficiently covering the
white of the canvas. And then you can move your
brush from left to right to get that color into the
fiber of the canvas. After the beautiful shape is
covered by this cream white. And you've made sure there are no blank canvas spots left
near the blue from the top, or the white from the right. You can take some more color and move over the shape
from the bottom middle and play some more of this lighter version of green
in the middle of the shape, using the thin
edge of the brush. Taking some more color and moving to the shape
from the right edge, placing a smaller rectangle
inside the first one. Now let's take some more
color and move back to the big shape from
the left side and get that color very nicely spread on the edges with a blue color
and the edge of the canvas. After this, you will
want to move over the orange shape from the
middle of the canvas and create on the
bottom left side of it some cream textures over its edge and its shape using all the size of the brush to
create interesting shapes. Let's get back to the shape from the barn right side and get some more cream white into the orange using the
sides of the brush. Let's move lower and create
a new shape over the orange, using the size of the brush, twisting it on the Canvas to find new and interesting shapes. Don't forget to place your
brush with confidence on the canvas to have
beautiful and charming shapes. Now, let's move lower on the right side of the
orange shape and place over the green color from before a couple more patches
of the scream white color. Moving lower over the
small shape from the edge. And now you can extend that
shape to the bottom and to the right side to
cut a little bit of that parallel
stripes of color, so it doesn't look like a flag. And with this, you have finished
another beautiful step. Now, you will want to
let all the colors dry completely and clean your
brush and the mixing plate.
9. Apply Gold Leaf Glue: This step is very
important and interesting. You will get to apply the
glue for the gold foil. This will require a bit of
attention and patients. Also, to make this step easier, you will need to
place your Canvas horizontally in cases not have a light source that
can reflect into the glue you are going to
apply to make it more visible. This glue is water-based
and it will need to sit for about 20 minutes before
applying the gold leaf. To apply this glue, you will need a
small flat brush to easily create some
beautiful patches of Cl2. Let's start applying it. Living from the middle
left side of the canvas, creating some beautiful
little squares over the cream white areas. You don't have to apply the
glue in a very thick layer. But make sure the shapes
you are creating have a smooth edge and the glue
it spread in a uniform way. As for the colors, you will want to apply
this glue firstly creating rectangles and then adding
around the straight edges, little details, cutting the corners or expanding
the shape to the sides. How focusing on creating some interesting shapes over the cream wide area from
the bottom left side. Now the bottom left side of the canvas is ready
for the gold foil. Let's move to the next shape, the small one from the sender. Here, as before, you will create a bigger rectangle shape. And then you can add smaller
details on its sides. Make sure you keep the
glue shapes a bit more packed so it can be easier
to apply the gold foil. Now you will create another shape over the
colors from the middle. Firstly creating a square and then expanding it to the sides, modifying its shape
in a diagonal manner. So it can later move
upwards to the right side. Let's add a tiny bit more blue and then you can
move to the top over the light blue right in its center and place one
more beautiful square. And now let us move to the top edge of the
canvas and create another big beautiful shape over the blue and the
white cream as well. Now let's move to the top
right side over the blue. As before, great, the
rectangle displaced vertically a very
beautiful long shape. Now on a darker color, the marks you are making with the glue are much more obvious. As you may see the
glute sense together in smaller places because
it's water-based. You don't have to
worry about this. If you insist a bit more, it will remain in the
spots you desire. After you are done
placing the glue, wait for about 20 minutes
for the glue to dry. You can test the
glue with the tip of your finger to see if
it's ready for the cold. It should stick but not lift
too much from the Canvas. Let's move to the next step.
10. Apply Gold Leaf: And you have waited
for 20 minutes. You can see that the glue, it's much less visible. Now you are ready to
apply the gold foil. If you are gold foil doesn't
come with transfer sheets. You can gently grab them from the corners and apply them over the areas where we have applied the clue whether you have
transfer sheets or not. You shouldn't worry about the textures from
the foil because you will later press on its surface very
lightly with a brush. If you have smaller areas where we want to
apply gold foil, you can gently wrap it
or cut it with scissors. And now that you've covered all the spots where
you have put glue, you will use a clean dry
brush to gently press on the gold foil so it can make
full contact with the glue. When pressing with the brush, you will want to live from
the middle of the foil and go to the sites to not
create too many folds. Now let's move lower and gently
press down the gold foil. As you may see in the areas
where it is glue applied, there is no problem
for the fall to stick. So you don't have to press too hard on the brush
for the moment. Let's move to the next
beautiful shapes and make sure all the entire
surface of the gold foil. Guess the chance to
stick to the glue. If your brush stars together and lift foil
from the painting, there is no problem
because it means that underneath there
is no glue left. If the surface of
the gold foil is too small and you cannot
brush its surface, you can simply tap
over it a couple of times to make sure the gold
foil stuck to the clue. If you have bigger
pieces of unstuck foil, you can rip them off and
place them on smaller spots that you are not able to cover with the big
sheets of foil. And now before getting rid
of the excess gold foil, you can let it sit for five to ten minutes so the
glue can be entirely dry. Now let's move to the next step.
11. Gold Leaf Shapes: In this step, you will
use the same brush from the previous step to get rid of the excess gold foil
from the canvas. This time you'll use at first genital rubbing
motions to pick up the little flags
after you got rid of the big pieces of gold
foil that are not stuck, you will want to
erupt the edges of the gold shapes to
make sure the girls, it's stuck to the canvas and
there are no slides left. This step is rather fun and it doesn't require
too much attention. Just make sure you rub
very well the edge of the gold shapes so you get
rid of the excess cold. Let's move to the next
shape from the middle, looking for the edges
of the shape to be very nicely pressed
on the canvas. And then you can move higher
and detach the excess cold. When rubbing the gold foil, you will notice
that the hairs of the brush gets
underneath the foil. This is a very good technique
to lift and get rid of those stubborn edges that are
not attached to the canvas. If you notice that
your gold leaf has too many folds
across its shape, you can press along
their length. You don't rape the folds. Let's move to the right
side and get rid of the excess called from over the blue and from the top edge. As you can see, the
gold and the blue create a very
beautiful contrast. Let's rub a little bit more
in the middle to reveal those beautiful stripes from the bottom and the
middle of the Canvas. Look at those beautiful textures created with the help
of the gold leaf. The shapes look very much like the ones created
with acrylic colors. Now let's move to the
last step and create some beautiful cream patches
of color over the gold.
12. Cream White Accents: For the last step,
you will want to re-create the beautiful
green color that will help the cold foil patches integrate into the
abstract painting. You'll begin this
step by adding to the mixing plate a little
bit of the orange, a drop of black, some yellow, and the
good amount of white. After you have placed all
the colors on your plate, you will firstly grab your beautiful flat brush and mix a tiny bit of
black into the orange, mix the two colors
just in-between until you arrive to a
beautiful orangey brown. Les. Take a small
quantity of this brown and place it on
the plate a bit lower. And now let's start mixing
the color into the white, starting with just the
color left on the brush. Don't mix all the white. After you have mixed the
color very well in the white, you can keep some for later. Now. As you can see, the color
looks a little bit too pink, so let's add some
beautiful yellow to it to make it seem much more
jelly and creamy. And after you have
given it a good mix, you are ready to place it over this rate edges of
the gold shapes. As you remember from
the previous steps, you will use the thin edge
of the brush to create some marks over
the straight edges and over the straight angles. Let's move over the shape from the middle and do the same. Covering with a
white brush stroke, the straight angle from
the bottom left side, and the one from
top side as well. Now let's move to the cream wide from the top
of the canvas and place on the edge of the canvas some accents of the screen wipe, twisting your brush to
create interesting shapes. If you want, you can use
this wire to cover some more of the blue and the orange from the
middle of the canvas, making the wide shape
a bit more pronounced. Let's create one more
little white cream shape right in the middle of the canvas where
all the colors are meeting to create a
bit more contrast. Now you will move lower and
create over the orange shape from the bottom some more
smaller patches of this cream white to make the
orange shape a bit more narrow on the bottom to disrupt
it strong diagonal shape. Now, you will want to create on the top edge of the canvas, right in the middle
over the gold foil. A little shape to break
the straight edge of the gold foil created with
the edge of the canvas. Let's move lower on
the left side and cut those two corners created by the gold foil, this
little corner. And now let's get rid of the new straight line
from the left side. And with this, you have finished creating your abstract artwork. Congratulations, and thank you so much
for taking the course. If you enjoyed creating this
beautiful abstract painting, make sure you leave a
review and of course, share with the rest of the world your own beautiful artwork. Thank you once more and see
you in the next course.
 Cristina Handrea