Transcripts
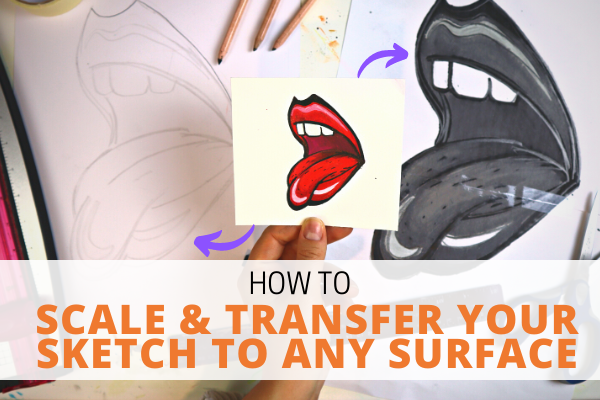
1. Welcome to the Class: [MUSIC] Do you have a drawing
that you want to scale and transfer onto a Canvas
without having to redo all of the work but you're
not quite sure how to get the right proportions or
really where to start? If this sounds like you, this class is going to show
you several easy ways to transfer your creation
onto any size Canvas without having to redo hours
of work because time is of the essence and you
want to be busy making art, not dreading it. Hi, there. My name is Amanda, also known as The
Buzzed Artists, and I'm a self-taught
acrylic artists, ready to show you
the magical world of painting and how to
unlock your creativity, and actually love
the art process. Over the years, I've learned to scale and transfer lots of drawings onto
different size Canvas quickly and efficiently, so I can stop
procrastinating and make more art that I love. My class, scale and transfer, will show you several
different ways to scale your drawing or image
onto any size Canvas, or support that you desire, and you'll be following
along with me step-by-step on how I
go about doing that. You're also going to
learn how to quickly and cheaply transfer your image to Canvas using simple
tools and items that you probably already have
lying around your house. Most importantly, you'll be able to use these techniques that I show you and apply them
for your own artwork, transfer projects,
making you an absolute scaling and transferring wizard
without breaking a sweat. Without much further
ado, I will see you inside for the next lesson. [MUSIC]
2. Supplies You'll Need: Hey there and welcome
to this class. I'm so excited that you're here. Before we dive in, I want to just walk you through a
few of the supplies that you'll be needing in order to do the techniques that we
illustrate in this class. Number 1, you're going
to need an image or a drawing of your choice
that you want to transfer. In case you don't have one, I will include the
drawing that we will be using for this class
specifically in the class notes. So be sure to go ahead and check that out if you don't have your own image or
drawing to scale. Next you're going to want
to choose your support, aka, your canvas,
your canvas paper, whatever medium that
you want to have your drawing transferred onto, you want to have that picked out and you want to know what that size is so that you can
apply it in these lessons. You're going to want
to use some sort of scanner and if you
don't have a scanner, you can just use a camera or your camera phone to take
a picture of your drawing so that you can then digitally bring it
into your computer, which brings me to the
next thing you'll need, which is access to
a desktop computer. You're also going to
need some tracing paper or transfer paper if
you happen to have one. In the event that you
don't have transfer paper, going to need some sort of
charcoal pencil or chalk. You're also going to need
a regular pencil, a ruler, and a calculator, although this one might be
optional for you, and you're just going
to need a little bit of masking tape. Oh gather all your
supplies and I will see you in the next video.
3. Scaling Method I (Part 1): Now we're going to
talk about how to use a more traditional way of scaling an image
to any size canvas, and that is using
the grid system. This is a very common one
used by a lot of artists. We're going to walk
through how you go about, and do that. So really the grid system
is going to utilize boxes. You basically will do
a grid on your image, and then a grid on
your final support. Then you just draw
what you see in each of the little boxes that
you've made in the grid. That's pretty much that, you're taking a lot of shortcuts to make something go from so super small to whatever size you want. So you can use a pencil
for this part or would I actually prefer to use
some sort protector, something that's got
some clear area to it, and a dry erase marker. Usually what I'll do is I'll put my image at the corner
of the protector, and that's where
I'll draw my grid, I don't want to ruin
my original drawing. So this is a really
cool hack that I found that really works well. I'm making sure that my
corners of my drawing match up the corners of the paper here [LAUGHTER] so I can get a more accurate read. So before we begin, we got to take
something into account, which is size, and proportions. You'll notice here that the image that I
have is more like a square versus the 11 by 14
is more like a rectangle. So that can lead to a
little bit of wonkiness if we don't take into
account that shape. In order to just help us avoid any future delays we're just
going to do a simple trick, which is we're going
to try to make the square look more
like a rectangle. That's really all
we're going to do. So I'm just going to
do a little bit of simple math here,
proportionality wise, if I want this to be
fitting on 11 by 14, I need to make that adjustment
on the original drawing. I'm just going to use the
rules of proportionality. I've measured out the lengths, and the widths of this
drawing so I know that this is 4.5 inches by 5 inches. We already know that 11 by 14, these proportions
are not the same, more like a square, this
is more like a rectangle. So I'm going to try to figure out what do I need to change for one of these dimensions in order to have this
proportionally fit. I definitely want to bring
in the sides a bit more, so that means I'm going to
be adjusting the widths. So I just make sure
lengths to lengths, widths to widths are
in the same areas. We said we're going
to change the five, 11 is to 14 as X, this to 4.5. I'm just going to do some
cross multiplication, 14X is equal to 11 times 4.5, 14X is equal to 49.5. X is equal to 3.54. What this tells me is
that my new knew needs to be 3.54 inches. So if I go back here, we already see that this
is five [LAUGHTER] inches, which is not going
to work for us. We need it to be 3.5. So we're going to find
the center point, this length here, which
if it's five inches, it's going to be 2.5. Then from there this should
be 3.54 inches total, so 1.76, that's like
right around here. So that in total should
give me 3.54 inches. With that being said, I'm just going to
draw in my lines. So these should be
pretty much proportional to what 11 by 14
canvas should be. Now, I figured out
my composition, I figured out this
is the grid layout, so this is the boundary of my grid that I'm
going to be making. Now what I'm going to do is
draw in one inch squares. So I'm just going to take
my ruler starting at the boundary of the
boxes that I made. I'm just going to
make one inch lines, so if you have grid that
goes outside the box, that's okay, just mark the
final grid line point. Repeat that on the top. You want to make sure
you're staying consistent with how you're
marking everything. Then I'm going to do
one inch for sides. Then we're going to
just connect the dots. So now you've created
your grid system. Now we're just going to
go ahead, and label them. I like to label across
as the alphabet, so each grid is going to have
its own separate letter. So this will be A, B, C, D, and this will be 1, 2, 3, 4, 5. So what I just essentially
did here was a grid system with a naming convention. If I want to look for grid B2, I just go to B, go to two and see where they
overlap, and that's B2. So that's just a really
easy way for you to figure out where everything is. Just as a reminder, these are our reference
borders for our drawing. So that's how you
can go about making a grid for your drawing. I'm going to show
you how to go ahead, and make a grid for
your final support, and then how you can use the grid system in
its full actuality. [BACKGROUND]
4. Scaling Method I (Part 2): [MUSIC] [NOISE] Now,
it's time to draw the grid onto your
final support, this is our 11 by
14 canvas paper. In order to do that, we're not necessarily going to
be making one inch by 1 inch grid that we
did with our image, we're going to be
doing a little bit of extra math to figure out what size those boxes need
to be for our new grid. Let's assume a little demo. [NOISE] This is our 11 by 14, and this is our drawing image. By measuring it, I know
that the width is 3.54, then I know that our
height is four-and-a-half. In the previous step, we figured out that these are pretty proportional
to one another. What we're going
to do is to find the new length of our grid. We take the length of our support over the
length of our drawing, and define the new width. We do the width of our support over the width of our drawing. The length of our support, we know is 14 inches, and the length of our
drawing is four-and-a-half. Then the width of our
support is 11 inches, width of our drawing
is 3.54 inches. 3.11 inches is 3.107. We know grid for our support needs to be
3.11 by 3.11 inches. We're going to go ahead
and add those grid lines. Let's start at the edge
and measure out 3.11, just about this
length right here. You can try your best, it doesn't have to be perfect. [NOISE] We're going to do
that to the sides as well. Now, you just go ahead
and connect the dots. You've just created a grid, and you'll notice here that
it's the same amount of boxes that we had for
our reference grid. We have 1, 2, 3, 4, 5, 1, 2, 3, 4, 5 boxes and it's cut off
like how this one is. Then we also have 1, 2, 3, 4 across same as this. That's how you
ensure that you have the same amount of
boxes throughout. Now that you have your
boxes all set up, it's now time to transfer. Just for reference, I'm
going to call these A, B, C, D, and I'm going to
say these are 1, 2, 3, 4, 5. I'm going to look at each and every single respective box and draw what I see in the box. Let's start with 1A of
our reference picture. I notice that it's about this much of that
line that's in there, so you just draw it in. Then I go to 2A [NOISE], 3A halfway [NOISE]. Then you're just
going to repeat, go box by box. [MUSIC] As you can see, practically in minutes,
I've been able to replicate and transfer and scale something that was
so small or a 1/2 by almost 4 inches to 11 by 14
and it worked out perfectly. That's how you can go ahead
and use the grid system to transfer and enlarge any drawing or image
that you have. [MUSIC]
5. Digitizing your Image: [MUSIC] Now we're going to
talk about how to digitize and adjust your image so that
it's read on your computer. First of all, you're going
to take your image or your drawing and you're
going to put it into your scanner and then scan that right into your
computer. Pretty easy. If you don't have a scanner,
here's another trick. Make sure that you have
all the ample lighting in a room, take your image, take a phone and take a straight on picture of that image, which you can then email or air straight into your
desktop computer. Now, before you start cropping away at
your scanned image, you're going to
want to take a look at your final support, aka the thing you're going to be transferring your
drawing or image onto. You're going to want
to know first of all, what size you're going to be using and you're
going to want to know what orientation you're going to want your final
support to be. In our case here, I'm using an 11 by
14 canvas paper and I'm going to orient
it in the portrait, that means vertically oriented. I'm going to keep in mind
those dimensions and that particular
orientation for when I am adjusting my scanned image. Be sure to do that first before you do any more cropping
or going forward. Now that we've got that settled, let's get into some editing. Once you scanned
in your picture, you're just going to
go to your desktop and look for that picture, which is right here, then double-click it and
we're just going to do a few minor adjustments. I'm just going to
crop this picture to the size that I want. I'm using a Mac here for
my editing software, but you can use whatever
computer settings you have in order to do these
little editing details, every computer should have one. If we want to get something
that's a little bit closer to a proportion
of an 11 by 14, then we would want to
crop this so that it has more of a 11
by 14 proportion, meaning we have a longer
height, shorter width. This is just a really
quick eyeball trick to get you to get this close to
proportion that you like. Once I have this all
cropped, which I'm liking, what we're going to
do next is adjust the picture resolution
so that we can make sure that this is nice
and crisp and clean for when we're blowing it up
in the next lessons. I'm just going to go over to my Tools and go to Adjust Size. I'm using a Mac so this is the presets that are
in the Mac already. I believe that PCs
have a similar thing. You just going to
have to go through the default picture editing
programs in order to do this, but they're pretty
simple to find. I'm going to make sure
that my resolution is at 300 pixels per inch. This is basically going to reconfigure your picture
so that there are going to be 300 pixels per inch of that picture
so when it blows up, it's actually going to
look very clear and crisp and we'll click "Okay", and we are ready to move
on to our next steps. [MUSIC]
6. Getting the Right Proportions for your Digital Image: Let's say you want to get the dimensions of your
scanned image to be exactly on proportion to
that of an 11 by 14 Canvas. How do you go about doing that? Well, it just involves
a little bit of math, but totally possible. First, you're going to
want to figure out what the actual dimension size
of your scanned image is. If you just go to adjust size, you'll see that it's a width
of 1.39 by 1.84 inches high. That is illustrated here. You can see in
terms of values of the widths and lengths in comparison to the final
support of 11 by 14, the numbers are
starting to look right. The width 1.39 is
less than 1.84, just like 11 is less than 14. That, we have an indication
that we're close, we're close to a proportion. But how do we make sure
that this is pretty much on par to the exact proportions
on 11 by 14 Canvas. First of all, you're going
to want to decide which of the dimensions of your scanned
image you want to change. For our sake, I'm going to choose the bigger of the values, the length, and we're
going to call this X. All we're going to do is a simple proportionality
multiplication. We're just going to
compare width to width, height to height of both our final support
and our scanned image. Eleven is to 14, as 1.39, which is our scanned
image dimension, is to X. We need to find out what X is
in order to understand what the exact proportionality
dimensions need to be of our scanned image to
match that of 11 by 14. Solve for X. 11 times X equals 14 times 1.39, 11X is equal to 19.46, X is equal to 1.77, which means that our
desired length for the scanned image
needs to be 1.77 inches in order for this to be proportional
to that of 11 by 14. How do we go about doing that? Well, we can go back
to our image here, and we can see that it's at 1.39 and the height is at 1.84. What we can do is just
crop this even more so to fit that of a 1.77
that we calculated. I'm just going to
eyeball this and then check to make sure
that we're getting close. We're supremely close. I can maybe cut off just like a tiny pixel more
if I wanted to. That should get me right
to 1.77. There we go. I just edited this perfectly so that it'll fit the exact
proportions of 11 by 14, but that's the trick. If you want to get
something that's extremely close to 11 by 14 as possible, you're just going to have
to do a little bit of a proportionality multiplication
in order to get there. But it is totally possible. I hope that helped you out. [MUSIC]
7. Scaling Method II: [MUSIC] Hey there and welcome to this lesson about
how to digitally scale your scanned in image. We're going to be using
a particular site that I personally
loved to use for scaling my image
to any size that I want and it's called
rasterbator.net. This is something that I
discovered a few years ago and it is a godsend. Basically, you take
any scanned image like a JPEG or a PNG, specify the size you
want to scale this to, and you specify your
printer page size and it'll print out your entire poster with
the specification that you wanted using your
printer paper size, and then you can
assemble it all together to make a big poster. The first thing you're
going to want to do is to click on "Create Your Poster" and then you're
going to be brought to a select source image page. You can either upload your
file or drag your file image. I'm going to just go ahead
and drag the file image. Once your image is uploaded, it's going to bring
you to the next step, which is the sizing. This is where you're going to be toggling and playing around
with the settings to get it to the exact size of the poster that you
are looking to make. The first thing I like to
do is go to paper settings. This is where you specify the printer paper settings
that you actually have. For me, I want to
print all of these on US letter sizes and we'll just do that in the
portrait mode for now. I usually uncheck
the add margin box and then I'm just going to direct your attention over to this area over here where
it says paper size. Poster size with margins
and margins cut away. What I'm going to do is
I'm going to switch over to inch because that's
what I'm familiar with, but you can keep it
in millimeters if that's what you're
more comfortable with. Then it's going to show you dimensions with margins
and with margins cut away. What you're going to want
to pay attention to is poster size with
margins cut away. You're going to want
to pay attention to this set of dimensions here. This is going to be
the final total size of your poster when
it's blown up. As of right now with the
settings that are put into this, this poster size is going to be 34 by 43 inches.
That's pretty big. What we're going to
do is adjust and toggle output sizes as well as the sheets to get to the number that is as close as possible
to the number we want. We're going to attempt to do
11 by 14-inch poster size. We're just going to go
ahead and start toggling. I'm going to start with
1.2 and you can see here poster size margins cut
away we're at 10.2 by 12.93. We're getting pretty
close to 1.3 wide. Yeah. Look how
that's pretty close. You're going to see
in the GUI here, there's a set of lines, each of these boxes represents 1.58 by 11 US letter
piece of paper. That when it gets all assembled
it will look like this. If you're happy with
that, that's cool. If you want to change
things around, you can change the
sheet orientation. You can also do it
in landscape and then readjust the
sizes as you see fit. Some of these may not
be extremely perfect, but it gets you really
close to an 11 by 14 in this case here I
have a 10.94 by 13.86. That's pretty close with me. Again, this is up to you if
you want to keep toggling. But what's going to
happen here is that the current configuration
I have here is that it's going to take up two sheets
worth and it's going to be about 10.94 by 13.86 inches. When you're doing this, play around with the toggles, play around with the landscape
or portrait orientations, as well as width and height and output size to get
a poster size with margins cut away as
close to what you think is good for your canvas. Once you have something that you're good with, that
you're happy with. You're going to
hit "Continue" and then you're just going to
hit "No Effects" for style. Hit "Continue". I'll leave
that as is hit "Continue". Then we're just going to hit "Complete Two-Page
Poster" and then it's going to start to create
a PDF copy of this image, lips, 11 by 14 poster. Here is the saved poster
from Rasterbator. By double-click on that,
I'm just going to show you what it's going to look
like as an output. Then you can see here, this is the first
page is going to get printed out and the second page, that's what's going
to look like when printed out on my printer. All you got to do is
hit the "Print Button". It's going to print these
out individually and you just have to
assemble them together. Pretty simple and
straightforward and that's why I love
using Rasterbator. A great way to scale images to any size that
you're looking to do. Take some time to
play around with this website to put your image in and scale it to whatever
size that you see fit. [MUSIC]
8. Scaling Method III: [MUSIC] Now another
way that you can take your image and adjust it to any size that you like is
with Adobe Acrobat Reader. This is a free resource and I think it's actually
fantastic to use. What you're going
to do is just go to
acrobat.adobe.com/us/en/acrobat/pdf-reader.html. From there you're going to click "Download Reader" and
follow the steps, and get it probably
download it to your desktop. That
would be great. Once you have that installed, you're going to go
back to your picture. What we're going
to do is convert this picture into a PDF. What you would have to do
is go File, Export as PDF. I'm just going to make sure
I got it properly named. [MUSIC] Now I have my PDF right here.
Double click on that. This should open using
the Adobe Acrobat Reader. When you open up your PDF, it's just going to be a ton of whitespace with a tiny image. One thing we can
do is we can scale our original image so that it'll mostly fit your standard
size printer paper, which in my case is 8.5 by 11. We'll just go back
to our picture. We'll go to adjust size. Then I'm just going
to put 8.5 by 11. That's very close. Click "Okay " then
I'll go back to File, Export as PDF. Place that image. Now I zoom out.
That should give us a much more better
representation [MUSIC] and scale
for our picture. If you're happy with that and you don't want to
blow it up anymore, just go to the printer
icon up to the left, and you're going
to see a bunch of toggles to choose from. I'm going to make sure that this print and
grayscale is unchecked. But again if you want to save on ink when you're printing, the printing grayscale
option is great. Then you're going
to want to go to page sizing and handling. This is where we're going
to make our scaling magic. This is very similar to
how Rasterbator works, where it's going to print
out multiple sheets of paper that you
put together in order to form the bigger image. We're going to go to Poster, and you can see in the
GUI here that there's a large rectangle
with a dotted line. These represent two pieces
of paper put together, and on each piece of
paper is going to be a portion of that drawing, which then when you
put together will form 11 by 17 output. Of course 11 by 17 also includes
all of that whitespace. We can go ahead and
go to Tile Scale, and just work around the
numbers a little bit. We can hit 140, and that'll make
this even bigger. That makes it 17 by 22. If we want to go with 11 by 14, we'll just have to keep working with this until we
get something that we like. This is the best that I can do. I have it scaled
to 111 percent as two pieces of paper
that will produce 11 by 17 total dimensions. But because there's
so much white space, it's probably going to
be more like an 11 by 11 to 11 by 12 picture. I think I'm happy with this. Out of the two methods
digitally that I've shown you, this is the least
favorite of mine, but it still gives you
a lot to work with. Once you have the tile scale
that you are happy with, you're going to go
ahead and hit "Print". From there it should
pop up your printer and the corresponding images should start to print on your printer. That is how you can
go about scaling using Adobe Acrobat Reader. [MUSIC]
9. Assemble and Transfer to Your Canvas: [MUSIC] Here's my printout of a scaled version
of this drawing. Look how crazy that is. We went from going
from this size to a large size that's going
to fit our 11 by 14 canvas. What we're going to do now
is cut out the pieces, some of them together, and then get them
ready for transfer. You'll also see that
these are cut lines, so you know exactly where
it is you need to cut. [NOISE] Then once you
have everything cut out, we're just going
to take some tape, align your edges of your paper. There you go. Now, I'm going to show you how you
can go ahead and transfer this drawing
onto your canvas. I do this with an
extremely easy method that doesn't really use much. You could use one of two things. You can either use
some transfer paper, [NOISE] basically,
a very thin piece of paper that has carbon on it. It'll technically take whatever
lines you draw on top, and transfer it
onto your canvas. The way to use transfer paper, you want to make sure that the darkest part of
the transfer paper is facing down onto
your final surface. Then place your drawing on top of that transfer
paper using a pencil. You just want to carefully apply those pressure points along the outlines of whatever
you want to trace. Once you're done,
you simply just lift everything up and it
should easily transfer. If you don't have
transfer paper, I'm going to show you
this other method. You can simply just
turn this over and then grab a piece of
charcoal like this, and then apply your charcoal
around the entire image. We're just going to go ahead
and do that because that's actually a way easier
and cheaper method. [NOISE] You're just going to turn your charcoal
to the side, [NOISE] and just lay
down your lines. [NOISE] You can go side to side, up and down, all over. [NOISE] Way gets you to [NOISE] get most
of your medium out. [NOISE] Of course, wherever
you put your tape, that might interfere a
little bit so you can always just take the tape and
move it back a little bit. That's totally up to you. [NOISE] Next, I usually like
to take a little bit of Kleenex, crumple it up, and just smooth out the layer so that it doesn't make it as messy when we're
doing our transfer. Totally optional, but
this is just something I found that helps. Now, we're ready
for our transfer. We're going to take
our final support, this is 11 by 14 and you're going to turn
over your scale, and then you're going to
place it exactly where you want it to go on your paper. I think this looks good. I'm
just going to want to take a little bit of
masking tape and just secure this down so this doesn't move while you're
doing your transfer method. Now, you're going
to grab a pencil. You're going to carefully make an outline of whatever
you want to transfer. I'm just going to do
an outline of my lips, and that should hopefully transfer everything that I want. You only want to put pressure
on the areas that you want to have transferred. Then once you have
everything traced out, just going to remove your tape and you're going to slowly lift, and voila, you now have transferred the
small little drawing onto an 11 by 14 canvas. That's how you can use a
simple little transfer trick to take any full
image that you have ready to put onto
your canvas and do it with ease without
having to redo a lot of work. [MUSIC]
10. Scaling Method IV: [MUSIC] We've gone
through several methods on how to scale and transfer a drawing onto a
different canvas of any size of your choosing. But there's actually another
way that artists like to take and transfer their work onto different size canvas. That is by the use
of projectors. The main gist of how a
projector works is that it takes your drawing
or your image, blows it up and allows
you to trace out the drawing or the image
onto another canvas. An awesome tool for many
artists who want to save time on their projects without having to do
all the extra work. On the world of projectors, there are typically
two that a lot of artists like to use. One is a typical
projector that uses a light bulb with some
lens combinations to help you magnify your drawing and then you would just need
to get a super dark room, project that drawing onto a wall or onto a canvas,
and then you trace. Then there's another
type of projector called a digital projector, which takes it to
the next level. You don't necessarily need
to have a super dark room. You can take a digital copy of your image or any image
that you're looking to do, then magnify and focus it onto your surface to which
you can then trace. Both of them have their
pros and their cons. More manual projectors do take a little bit
more finagling, have a bit more hardware
associated with them. Parts may break, light
bulbs may go out, and you may need to
replace those parts. However, they are pretty
inexpensive versus digital projectors tend to
be a bit more expensive. However, you don't need to worry about overheating within
your mechanism parts. Sometimes even better
clarity and quality and magnification of your image
with a digital projector. Now, of these
projectors, the company, Artograph, makes both kinds. They make the manual type as
well as the digital type. They are both highly
recommended depending on the type of projector
that you're looking for. For the manual projectors, they have the easy tracers, and for the digital projectors, they have the flair
layer series. All of these have come
highly recommended and have worked for
many types of artists, from the canvas
painters all the way to the mural painters, where they have to really
blow it up on a wall. If you want to check out what these specific projectors look like and what they can do, you can go into the class
notes and find that out. But this leads me
into my next point, which is maybe you're not quite sure if having an art
projector is right for you and you don't
want to have to be spending all that money in order to try it out and see
if it is the right choice. In the next couple of videos, I want to show you how
you can actually make your own type of
projector, a manual type, as well as a semi-digital type, and use it in your own
art projects to magnify and scale it onto any size
canvas of your choosing. These will involve materials, a little bit of DIY, and it will include a lot of common household
objects that you probably already
have lying around. If you're interested in
learning how to make your own DIY art projectors, be sure to hop on over to the next two lessons.
I'll see you there.
11. BONUS: Build your Own Manual Projector: In this lesson, I'm going to
show you how you can make your own manual art projector, which can blow up and scale your image to any size that you wish onto your canvas
or any support. This will involve a few
materials from you, so let's head on over to the desk and see
what we got to do. For this project,
you're going to need a 20 by 30 inch black foam board, an Exacto knife, duck tape preferably black, a ruler, a light source, or just your regular phone
with a flashlight setting, clear page protector or
any form of acetate paper, as well as a dry erase
marker or a Sharpie. The first thing you're
going to want to do is to measure out and cut out the faces of your box because we're
going to be making, as you can guess, a little
box for projector body. I will include the build plan for this with all the dimensions that you're going to need
and you're going to be using the foam board
and Exacto knife, as well as the help
of your ruler, figure out your dimensions. Then, using your duck tape, you're just going to assemble everything together
and of course a bill plan also shows you how everything is put
together as well. Once everything is assembled, you've got yourself a nice
little box with the front face open so that you can actually project your image
onto the wall. [MUSIC] Just to show you
how this is going to work, your acetate paper,
your page protector will go on the front
face of that box. You're going to go
take your drawing that you want to transfer, put it inside of your page protector or on the bottom of
your acetate paper, and then using a Sharpie
or a dry erase marker, go over the areas that you
want to have transferred. You can see this is what my transfer is going to look like. [MUSIC] Then, taking
your light source, in my case I'm just
using a phone. I turn on the flashlight setting so that it's
at its brightest and connect as a way to project and shine the trace that I made
straight onto the wall. Then you're going to grab
a steady little table or a little surface and then
position everything into place. Now, you can either
tape your phone to the back of the
projector wall, or you can just use a simple little phone
stand that works too. Then you're just going to secure your page protector
paper on the top, shut the lights and
then you can adjust your protector position
going forward and backwards and adjusting it
to the exact size you like. As you can see, when
I push it forward, the image gets smaller. When I pull it back, the image gets bigger. Depending on how
big you want this, you're going to have
to play with how far away your projector
is from the wall. Then once you're satisfied, you get your desired support, overlay it on the
projected image, and then go at it with a
pencil and start tracing and you're going to get
a nice scaled image. Pretty cool for a DIY project. [MUSIC]
12. BONUS: Build Your Own Digital Projector: Hey there. In this lesson, I'm going to show you how you
can create your own version of a digital projector
or as close to a digital projector as
you can make [LAUGHTER] within the confines of
your house and materials. Let's head on over to the desk
and I'm going to show you exactly what it is that you
need, and how to make it. Check you're going to
need is a shoebox, and if you don't have a shoebox, you can just grab a 20
by 30 black foam board, in case you want to build it to the dimensions that I have
for the shoebox here. You're also going to
need black duck tape , an X-Acto knife, black acrylic paint,
and a paintbrush, a smartphone, and a
magnifying glass. Preferably, one that has
3-10 times magnification. Plus a glue gun with
some glue sticks. Start by taking your shoebox and turning it to
the side like so. Then, you're going to take your magnifying glass
and you're going to be cutting a hole into
that side of the box. Pop out the glass in
the magnifying glass, create an outline using any marker or pencil
that you have on hand. From there, you're just
going to want to cut that out using
your X-Acto knife. You want to open up your
box and paint the insides totally black to help your projector perform
at its finest. Just a little hack in case you run out of black acrylic paint, you can also substitute using black construction paper and
just a little bit of glue. [MUSIC] Once
everything has dried, you're going to grab
your magnifying glass, get a heated glue gun, and just add here the glass to that hole that you created
on the side of the box. [MUSIC] Then you're going to want to find a
steady surface, and place your box facing
the wall directly. Now for the digital
part of your projector, you're going to be using a
smartphone and you're going to orient it to the
side like this. Now, because you're using
a magnifying glass, the image needs to be
adjusted so that it appears correctly on
the projector itself. The first thing you're going to want to do is make sure you have a digitized version
of your sketch. You can use the previous lessons in this class to do that. Then it's time to adjust
your digital image. You can do this in several ways. You can do this on your
smartphone using apps like Canva or even the built-in features
of your phone or my case, I just decided to do
it on my computer and then send it to my phone. What you're going to
want to do is take your image and flip
it horizontally, and then you're going to rotate it 90 degrees counterclockwise. Be sure to save that
orientation and make sure that that image
ends up on your phone. [MUSIC] Then finally, you're
going to want to adjust the screen brightness
to the max setting on your phone display so that your projector will have
the maximum lighting. Now it's time to take
the show on the road. I picked up an iPhone stand or something just
to keep my phone as close to upright at
90 degrees as possible. Tip it to the side like we
talked about previously, placed it inside the shoebox, closed the cover, and shut the lights, and then it was time to
test this puppy out. You can adjust the
focus and clarity of your picture by moving the
box forward and backwards. You can also move
the iPhone stand on the inside forwards
and backwards too, to get the perfect focus
that you're looking for. Then all you have to do is
just take your final support, put it right over the image as projected on the wall and trace. Then you've got yourself
a scaled image using a do-it-yourself
digital projector. Pretty neat. [MUSIC]
13. Congrats & Next Steps: [MUSIC] Hey there, I hope
you enjoyed this class and learned just a few extra
techniques that you can use to scale and transfer your hard work onto any
size canvas that you wish. I would love to see how you
apply these techniques, so be sure to share your
scaling and transferring projects onto the project
section of this class. With that being said, I wish you all the best in your
creative journey, and happy arting. [MUSIC]
 Amanda Rinaldi, Teaching you to Art with Confidence