Transcripts
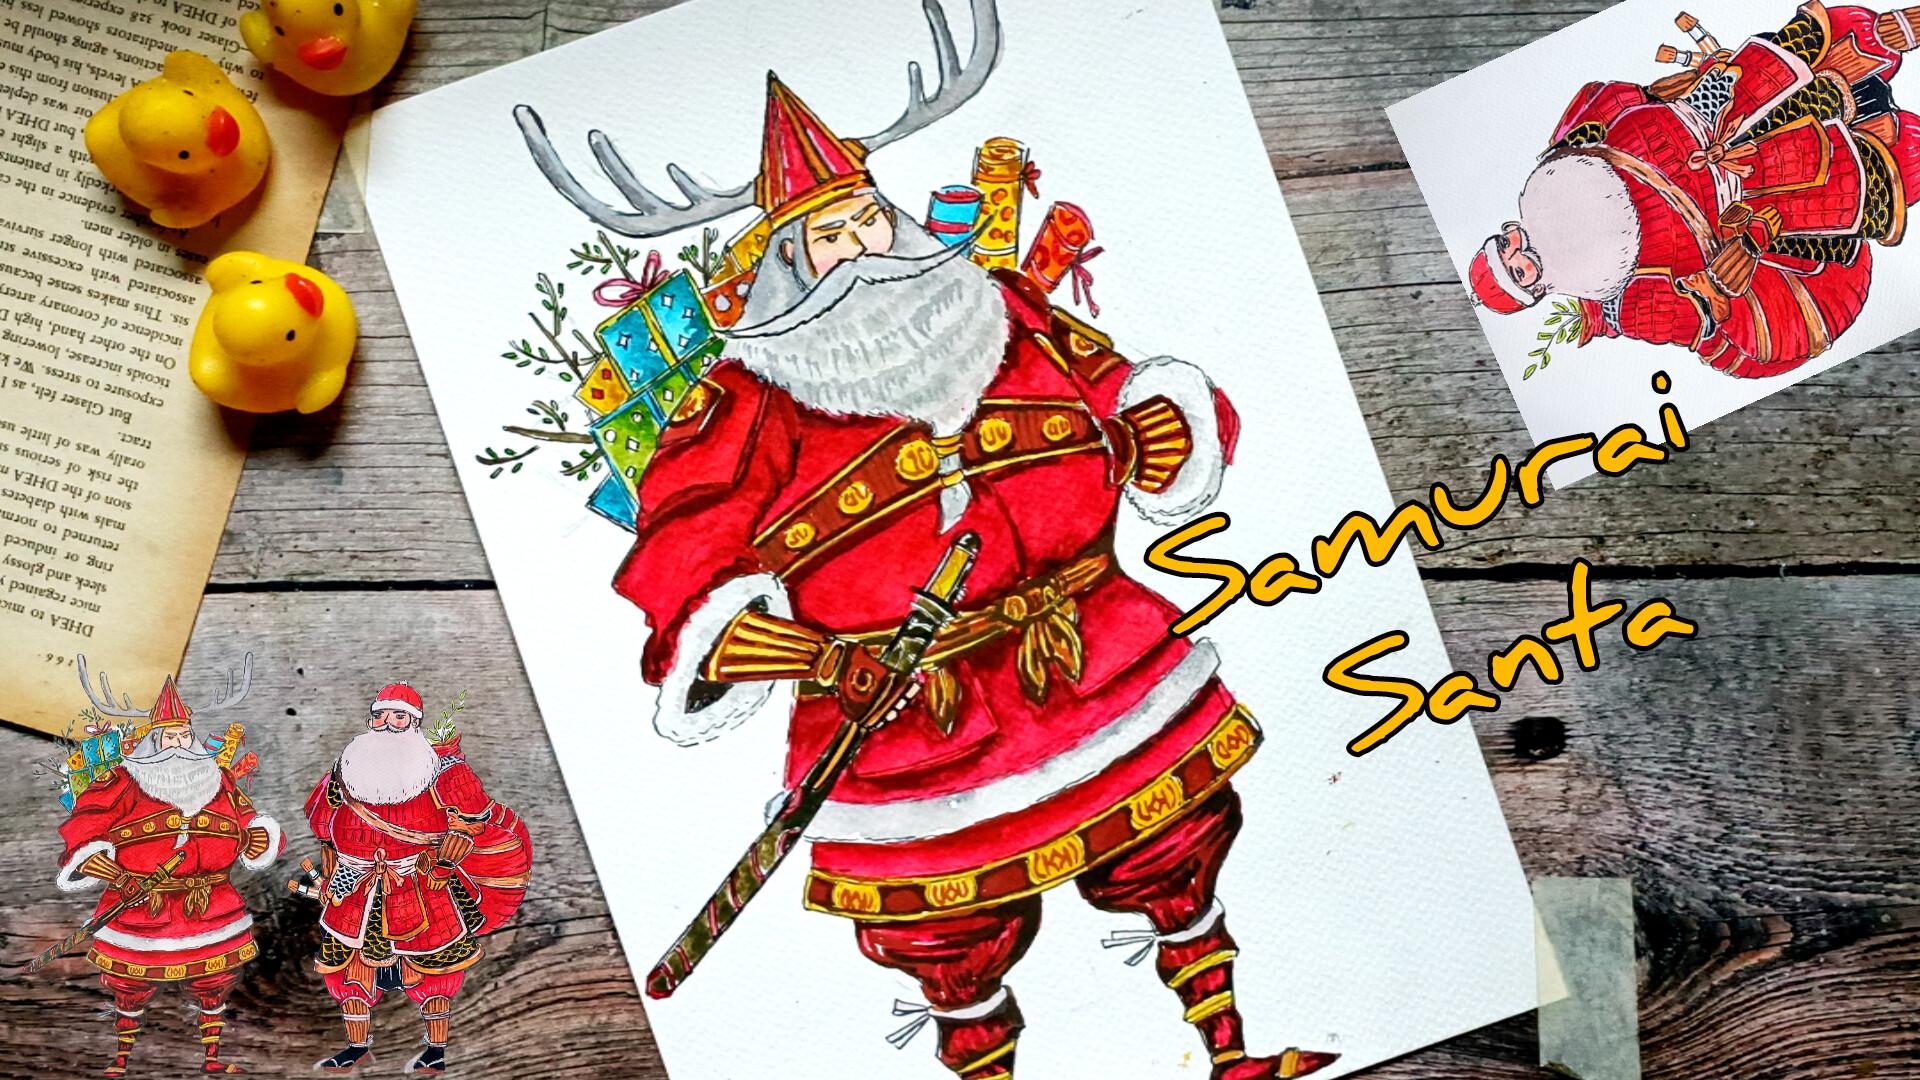
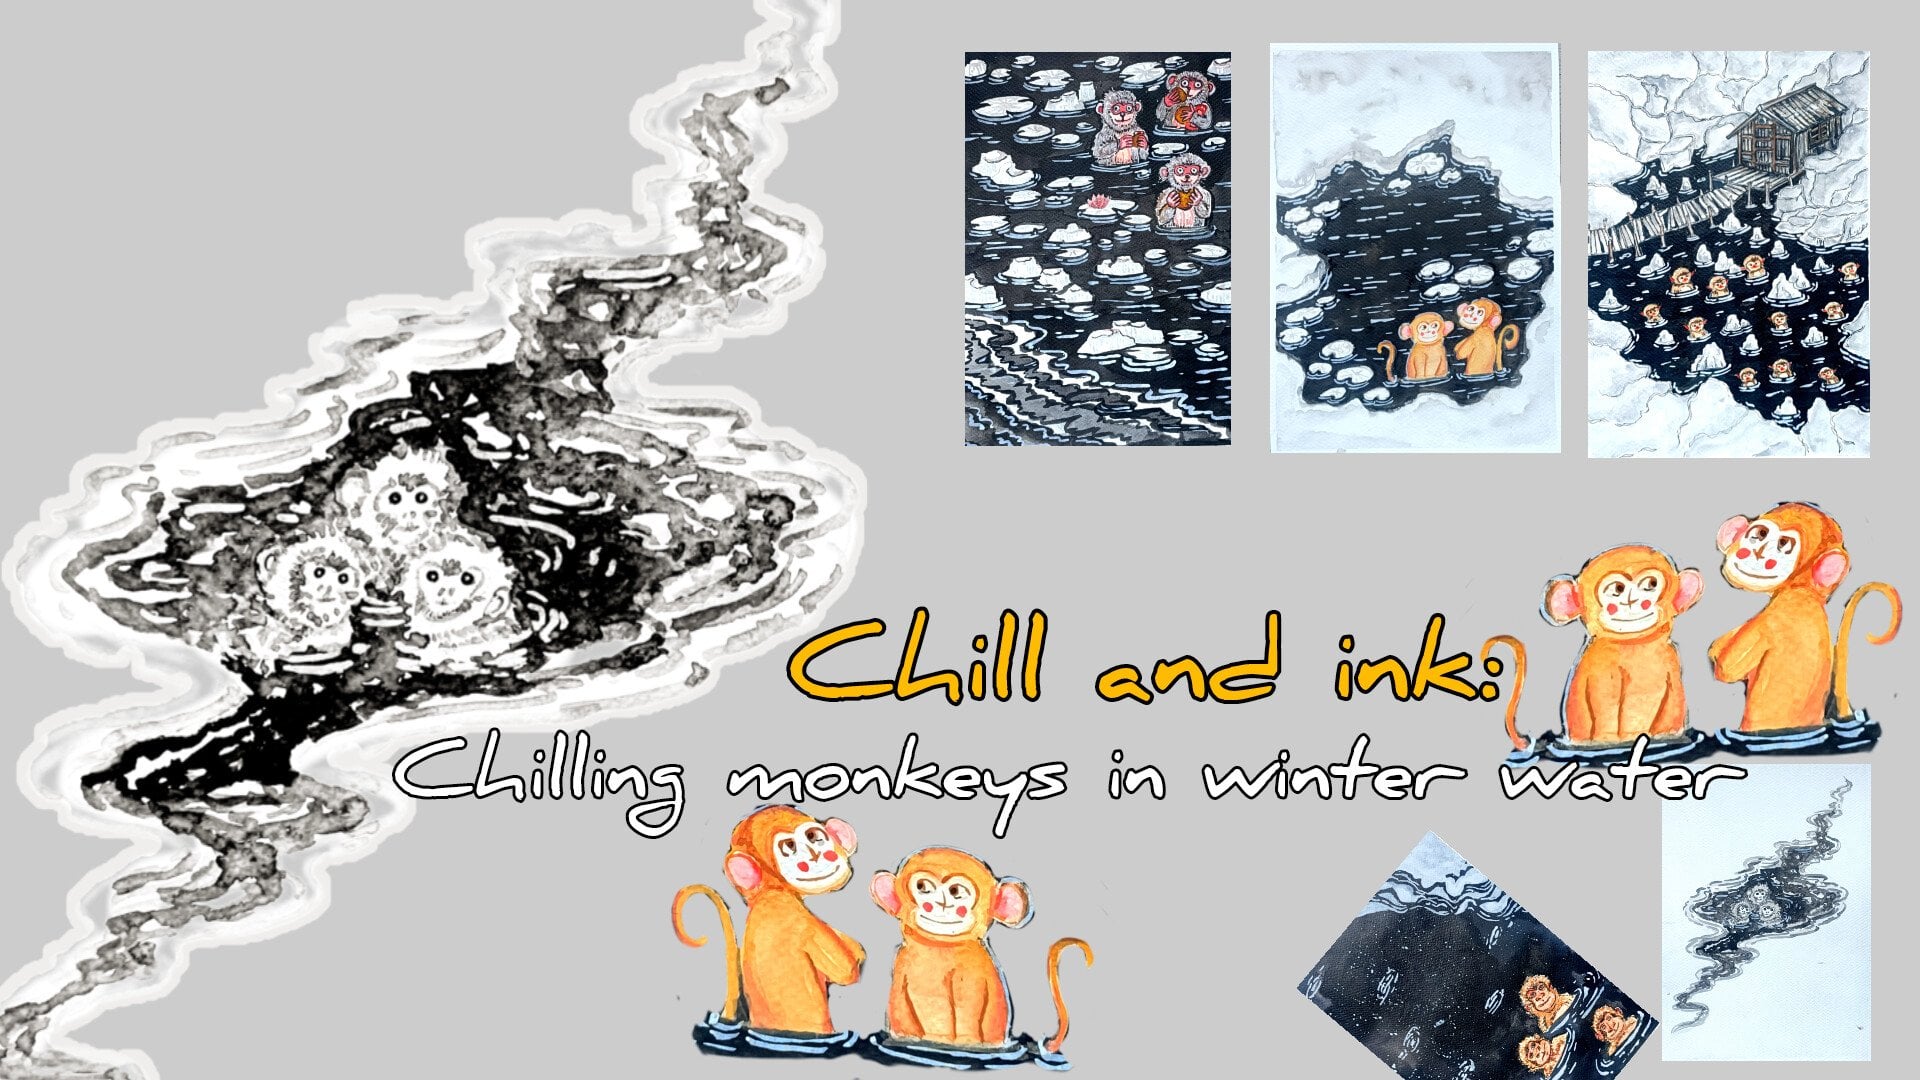
1. Welcome and introduction: Welcome to Centa Samurai, a fester watercolor
class holiday charm meet warrior spirit. In this class, we will paint two bold and imaginative
center characters reimagined as legendary
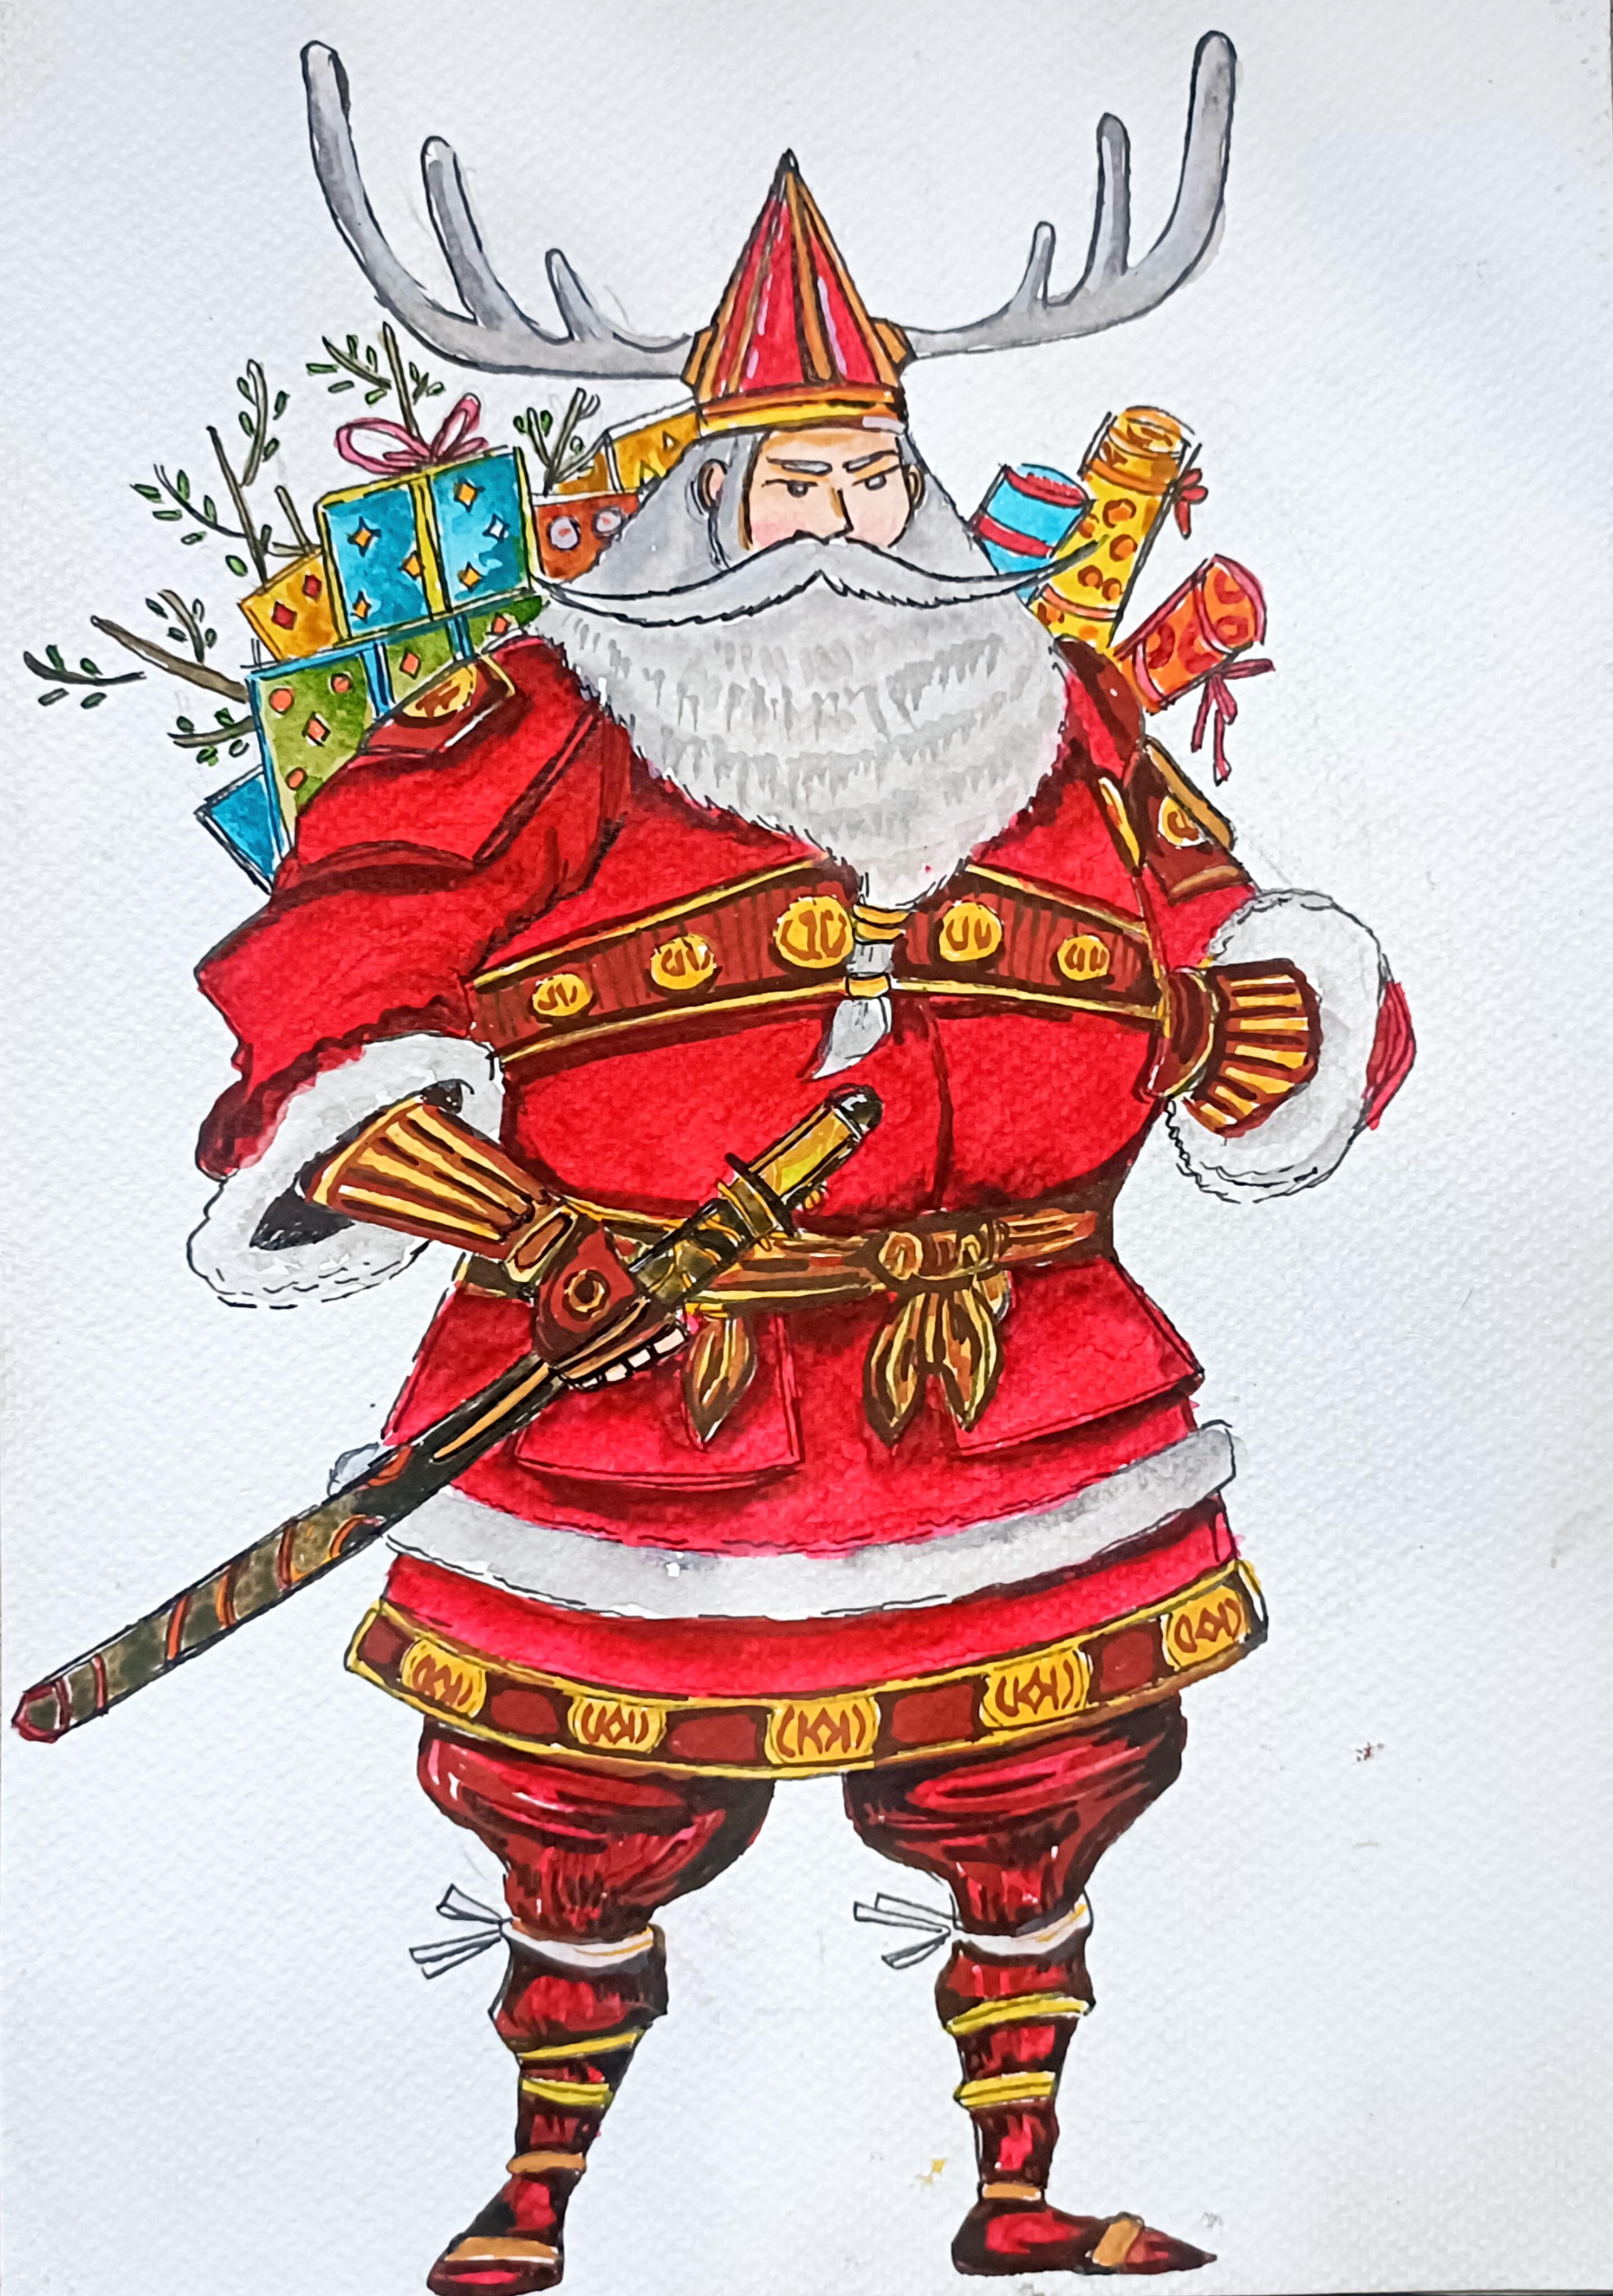
samurai warriors. First, we have the
reindeer general, a commanding center with antler inspired head gear and
scrolls of festive duty. Then we have Senta of
the red armor der, a noble Cena outfitted in a traditional red samurai armor ready for winter adventure. We will start the class with simple sketching
techniques in which I will show you how
you can easily draw the various components
of the Santa's body, how you can use proportion to make the drawing much easier, and few additional elements that we'll be adding
for our projects. Then we will explore
the watercolor basics, the things that we'll
be using our project. Then I'll be showing you
how I'll be using layering, sading, adding texture,
creating depth, and using controlled vases to bring out details in fabric, fur, metal and
holiday accessories. Once we are familiar
with the technique, we will move on to our two
full watercolor projects. Most lessons are
taught in real time, allowing you to paint
along comfortablely, and enjoy the process
at your own piece. Whether you are a
complete beginner or an intermediate artist, this class is
designed to be fun, relaxing and
creatively inspiring. Hi, I am Michelle an
artist from India. This is my Skillshare profile. I teach classes on oil pastel, watercolor, and paint
and ink illustrations. This is one of the class that
is related to this class. You can check this
out. Apart from this, you can also check my work
on Instagram and YouTube. If you are interested,
join me in this class as we festive
storytelling with artistic technique to create two powerful and joyful
Santa samurai illustrations. I hope you will join
me in this class, and let's have a lot of fun.
2. Class project: For your class project,
you can create both the center
SRI illustration, the reindeer general, and
the center of the red armor. And apart from
this, you can also upload any work in
progress photos, sketches or practice seats, your color taste or
watercolor texture if you explore
different techniques. I would love to see your
creative interpretation, different color armor details or some of the addisona
elements you have used. Feel free to share feedback, ask question or
request guidance.
3. Supplies: For this class, you will
need very basic supplies, pencil and eraser to do the
initial pencil sketching. If you have needed eraser, that would be most preferable, masking tape to secure the paper if you are going
to use loose sets. Then we need watercolor. Here I'll be using
Camel's watercolor. Camel's artists watercolor, you can use any
watercolor you have. We just need five to six color. If you have gauze, you can use gauze instead of the watercolor. I'll also be using a little bit of gauze for some
of the sections. I'll be using this red ink
to do the first flat vase. If you don't have, you can
just use the watercolor or the gauze as the primary
layering on the first flat vase. I'll also be using
a little bit of white ink for some
of those sections. And then we have fine liners and theraspin to do the outlining and also for adding the final touches,
Watercolor brushes. A watercolor brushes of small
sizes will do the work. Then we need water cooler paper. Here I'm using Bustos 300 GSM, 25% cotton water paper. Just ensure that the density of the paper is around 300 GSM. And lastly, tissue paper. These are the basic supplies that you will need
in this class.
4. Proportions: Welcome to the first
tutorial video. In here, I'll be showing you how you can use proportions to make the process much
faster and much easier. In here, I'll be
showing you how I'll be creating the proportions
to create the project. I'll be starting with a
very simple straight lines, and I'll be either dividing
into four sections or each sexon depending upon how detailed project we
are going to create. So just simple straight lines, determine the top
and bottom for that, then divide into four
different sections. For our two main project, I use the proportions
lines to create them. For this one, the
reindeer chamber, I divide the line into four
section, and for this one, I divide it into eight
different sexton and then did the outlining. I'll be using this
proportion to create our Santa starting with
a triangular same. So this will determine
the placement of Santa's head and the
upper half of its body. A small circular C for the centas face and
the head and the cap. And this large circular
C for the centas body, then we have got Step two
triangular somewhat of rhomboid C for the cenas thighs and remaining
section of its leg. So this is just a very simple proposal that we'll be using. Here's a little bit
more detailed one. And here, I'm dividing
into different section, a total of six
different sections. Instead of adding the
head for the per section, I'll be adding it a
little bit below it, since we'll have to add the
cap on top of its head. Let's do the rough outlining for the remaining section
of Santa's body. So this will be Santa's
stomach and the hip area. And here, I'm not
creating the circular c. I'll be using this kind of elliptical
C for the centasystema, the lower half of Centa's body. And yeah, so this is just another simple C that we'll be using to
create our Santa Claus. Now, let me show you
how I'll be creating the armor plate just
below the centa suast. So here, I'll be showing
this rough example, how I'll be creating it. So this part is just
below the centa suist. I'll be using this kind
of parlo gram See you can say rectangular seeps a
bit curvy or rectangular se. For the first one,
I'll be creating two different plates
for the centers armor. For the lower section of it, I'll be creating
fur like Aperion. This is just a very simple one. Apart from this, I'll also
be creating few pockets. And here, there will be
a knot, one or 2 knots. Sides of the centers,
I'll be placing the katanas or you can say swan. Here's another one.
For the second one, instead of creating
two plates armor, here, we'll be hemming. Here I decided to
create multiple ones. Four or five layers of the plate armor for the
center, as you can see. I'll be using different
colours to create the plate armor and I'll also
be using texture for it. This is just a simple way. You can create the plate
armor for our centers. How you can create the face, it's very easy another
circular C and using intersecting lines to determine the placement of its eyes,
nose, and the mouth. I won't be creating
much detailed feces, but if you want,
you can do that. B large mousta bit
fluffier beard. So this is how we'll be creating very simple find fees
for our Santa Claus. So let me show you how
we'll be creating in here. Triangular C at the intersecting point for the centas nose, a bit large Mustas Centas I, triangular C for the centas cap, and at large, a bit
fluffier and large beard. You can check out my
last class in which I created a lot of faces. You can use that as
a guideline to make the features a little bit
more detailed and defined. After doing this kind of pencil sketching to create the
proportion for the centas body, then we'll be adding a
little bit more detailing. I'll be using simple saves
to do the outlining and then go in with the file iron or the brass paint to
do the outlining. This is how we'll be proceeding, we simple sieves and
adding more details as we go and making our centers look more mighty
and more strong. This is how we'll be
proceeding with our project. If you have any
doubts or queries, you can ask me in the
discussion section, and I'll be seeing you
in the next video where we'll be doing the outline
for the first center.
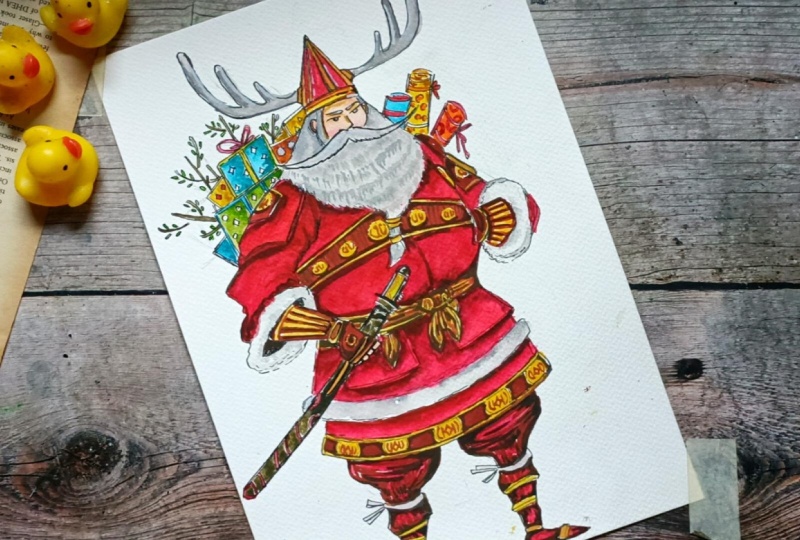
5. Pencil sketch of Rindeer General: Welcome to the first project,
the Reindeer General. In here, we'll be using
the same proportions that I showed you
in the last video, starting with a straight line to determine the length
for the centas body. If you want to make
it a bit larger, bit smaller, you can do that. This is our straight line, and this will be the
height of our center required Al mei making a
little bit of adjustment. Dividing the straight line
into different sections, four different sections
of equal length. Now let's create the triangular, large triangular C
for the cenas body. The widest part of the triangle within the center's stomach. For the upper part
two, I'll be using the triangular shape to create the centaspes and centas beard. In here, I'll be
creating the centaspes. This will be the outline for rough outline for
the centers beard. And below this, we'll be
creating the centas body, the stomach and the cenas waist. Let's create somewhat
tough circular s for the centas stomach
and the waist. This will be the upper
part of the cenas stomach, and this will be the lower part. I'll also be using
this triangular set to add the centashand. Let's do the remaining senson
just below the cenas vest. The armor plates,
the armor plates that the Santa Samurai
will be wearing. Creating this kind of somewhat
curvier rectangular set. The center will be
wearing two plates armor. So let's make another one. This is just a rough outline. If you want to make adjustment
in here, you can do that. This will be the layering.
So for taxire in here, we'll make rating for texture. A small section of the other
side wll will visible. And for the centers, lying, alm creating this kind
of triangular theme. As you can see, I made
a bit of changes. Placement on the centers
is a little bit lower than the outline that we created for the centas body proportion. You don't have to stick with the outlines you have created. If required to make
changes and adjustments. Let's take a closer look though. In here, we'll be creating
the centasphesV small portion of the centasphes
will be visible. Most will be covered by
the centas Mustas and the beard and the
helmet and the cap. Only this portion will
be visible in here, we'll be creating centas
eyes and the nose. This will be the Santa's
ear. This is the hair line. Let's extend the hair line on the other side too
on top of this. In here, we'll be creating the large helmet for
our reindeer General. Instead of this kind
of cap or helmet, you can create other kinds. In here, I'll be
creating reindeer horns. Instead of this, if you want, you can create
other kind of horn or you don't have to
even create this. You can just skip it plain and simple triangular see
for the Santas cap. Now, let's do the outlining
for the remaining section. In here, I'm starting
with the centas mousts. In here, I'm creating a large
mustas for our Santa Claus. This will be the outline
for the centas meat on the other side. Let's extend it. So this large beard
will be covering the upper section of
the cenas stomach. There will be some meat tied to the cenas medium
for the lower half. Now let's do the remaining
section in here. On this left side, I'm
starting with the plate armor. So this will be the portion that will be covering
the cena soldier. This will be the
Samurai Santas armpit. Most of the section
of the centas upper arm and the lower arm, the soldier and the
hand won't be visible. It will be covered
by the plate armor, creating this kind
of somewhat of triangular C for the middle
section of the cenas stomach. In here, we'll be creating
patterns and design. These are also part of
the centas armor play. For this side, only
a small portion of the cenas hand will be visible. Let's create the outline for the centers and on this side. Santa's hand is
inside his pocket. So only small section of
this side will be visible. But if you want, you can
create the whole hand. So this will be the
centa's pocket. And this will be the
small section of the center's hand
that will be visible. In here, I'll be
creating the plate armor for the cena's arm. And this will be the
four that will surround the center's hand but
part of the Santa solion. Right now, it's not
making that much sense, but when we'll be doing the outline with the fine
liner and the breast pan, the details will become a bit more clear and bit
more apparent. Let's make this sweep a
little bit more detail. In here, we'll be creating
circular patterns using downs and occurs. So Santas moody is facing
in this direction. So it'll be the
middle section of the centatema extending this line. And in here will
be the cenas bad. We'll be creating
one or 2 knots, one at the middle and one not on the right
or the left side. Let's complete the outline
for the sand of the center. This section will be
the centas elbow. This will be the
remaining section of the centa's lower arm. In here, we'll be creating the plate armor for
the centa's hand. The upper portion will
be covered in the fur. And for the lower
section, I'll be creating the gauntlet
for the centas arm. So this will be
covered in the fur. And now let's extend the remaining section
for the cena's hand, starting with the
triangular C and then we'll be adding the
remaining section, the fingers and the palms. Here to this MRI center will
be covered in the gloves. Since the center will be
holding a large cutana sword, four fingers will be
visible on this side, and a small portion of the center's thumb will be
visible on the other side. These are the four fingers
for the centers and the upper section are the
part of the centas gloves. Outline. Let's do a graph
outline for the centas cutana. Japanese swords are called
Katana and he is holding on and our Samurai Santa is holding one of the
katana on this hand. When these we are
done with the outline for the upper part
of the centas body. If you want to make adjustment,
feel free to do that. Now let's do the remaining
section, the lower half. So this will be the middle
portion, and in here, I'll be creating this
kind of simple knot. One more knot in here. The clothes are wrapped
around the cantas stomach, and that is connecting
it to the rest of the cantas armor plate for the region just below
the centas waist. We'll be doing a little
bit of detailing later on. Multiple layers of
the plate armor. Amparious plates attached to different section of their body. In here, I'll be using
grease to create the fur like appearance
and texture. For this first SRI Santa, I'm not creating that much
detailing plate armor, but if you want,
you can do that. Let's create the second plate
armor for the lower half. You can add a lot of detailing
for the centa's armor. In here, I'll be using
grease to create the fur like
appearance and taxia. And with these we are done
with part of the centaslin, let's do the remaining portion. So this portion will be
just about the centas knee. The upper portion will be a
little bit more fluffier. The lower portion,
the remaining portion of the centa link I'll be making it a little bit more cartoony so it's a bit smaller
and bit thinner. Let's create somewhat of
triangular see in here. And this will be
the center's knee. Here, there will
be cloth wrapping around the different section
of the center's lower ling. Now, let's create the remaining section of the centers ling. One of the cenas ling
will be facing towards the left and the other
will be on the right. And as you can see,
I made a little bit of changes to the proportion
that I created in. The line for the centas leg is just beside the centas knee, but I made a little
bit of changes since I placed the centas
head a little bit up, so that's why I had to create the legs a little bit lower. There will be two or three
clothes wrapped around for the lower section
of the centas leg. In here, too, if
you want, you can create the plate armors. I'll be keeping the
things a little bit easier for the lower half. Now, let's add a little
bit more detail. Let's do a rough outlining for
the Sentas facial feature. So this will be the
Santas eyebrow. Very small eyes and
a bit large nose. I'll be using skin color, a little bit of cure, and a bit of red to create
rosy checks for our center. Let's make the outline for this antler a little bit
more detailed and defined. This is just a rough
pencil sketch. And I'll see you in the
next do we are gonna be doing the outlining and
adding more details to this.
6. Brush pen outlining: Welcome to the second venue. In here, I'll be using this
Brs pin to do the outlining. We'll be adding detailings and making some changes
wherever required. In here, I'm starting with
the fees of our Santa Claus. Bottom section of Santas
helmet or the care, I'll be dividing into
two different sections, and we'll be using two different or three different colors
to do the coloring. In here for the triangle C, let's make it a bit larger. And here too, I'll be dividing
into different sections. Creating this kind of
a straight line to divide this into
different sections. Here we'll be using golden along with the yellow to
create somewhat of golden hue for the upper
section of the Santas helmet. From in here, I'll be creating the outline for
the Santas antler. This is optimal. If you don't want, you don't have to do this. You can increase or
decrease the size. You can increase the
number of the antlers and you can also add
some accessories to it. So in here, I've created
three spikes on the antlers. In here, I'll be
using combinations of grease in the white
to do the coloring. Let's do the outlining
for the last one. With this, we are
done with the helmet. If you want to make
genius adjustment, you can also add
accessories on top of it. Now, let's do the outlining
for the cantas phase, starting with the
centas here line, the small C for the centas here. In here, I have cleated
a bit large moustache. If you want, you can
make it a bit smaller. Or if you want, you
can also make it a bit more bossier,
a bit more longer. You can also add beads on
the ends of the centas Musa. I'll be adding a few beats at the bottom of
the centas began. Very simple eyebrows. And I'll also be creating very simple eyes later on for now. Let's do the remaining section. So Centashir Santa's
hair line on the other side. Now
moving on to the right. And here, only a
small section of the Santa's hair
line is visible. For this side to, let's
do the outlining. Finally, let's do the outlining
for the Santas big beard. I'll be creating
this kind of lines to give it a little
bit of texture. A Bossier texture for
the Santas beard. Here, I'll be adding two rings, and just below it, I'll also
be adding one more ring. And this will be the pony tail. So this is the pony tail
of the Santas beard. Let's do the outlining for the remaining section of
the centas beard. I'll be starting with a bit of light pass with
the grease and use two or three layerings
of the colour to create centas beard
and mustache. Moving on to the centa soldier. So this is the arm plate. This is the armor plate, and Let's create a small
emblem in here. For this ingen we'll
be using a bit of darker sets of the y to
create a little bit of sad Now moving on to doing the outline for
the cenas remaining arm. A little bit of this
kind of line to create the Santas elbow. This
will be the fur cone. So this will be furry, a bit of broken lines to do
the outline in here. Here, too, we'll be using rays and whites to do the coloring. Santa's arm, so
Santa's gauntlet. To make it a little
bit more detail and add more coloring to it, we'll be using yellows. We'll be using yellow
burn sienna and a little bit of ocher to do the coloring for the
gauntlet and the hand. The gloves the Santa
will be wearing. The gloves too is divided into different section
when we'll be using different colors to make it a little bit more
vibrant and interesting. This region just below
the Santa's gauntlet will be a little
bit darker inside, so I'll be covering it
with the black or brown. This region to the upper part. So this region in the
upper region will be covering it entirely
with the blacks or the browns later on. Santa's thumb won't be visible. It's covered by the katana. In here, I'm greeting very
simple katana, Japanese soon. Instead of this,
if you want, you can make it a bit more detail, add more designs and
more patterns to it. This is a very simplified
version of the katana. We'll be using two or
three colors to color it. I'll be using mostly a bit
darker tones and a bit of yellowish tone to give it
a little bit of golden hue. Also, I'll be
adding and creating a few design and
patterns on top of it. Outlining from the
centers taste. In here, I'll be creating
this kind of triangular seam. And inside this, I'll be
creating more emblems, circular seams using yellows and the orchard to create patterns and a little bit
of designing later on. Moving onto the other
side of the center. For this side, the entire
arm cents is not visible. Let's do the outlining for
the things that are visible, the centas emblem, as well as a small section of
the armor plate is visible. This will be the cenas hand that is inside Cintas pocket in here. The cents gauntlet, a small section of this is
visible in this perspective. Instead of this, you
can do a little bit of changes and make the Santa's
hand a little bit straight, and he's holding a
bag full of gifts. So this will be
the Santa's elbow. And now let's connect it
to the Santa soldier. We use another armor plate
on the Santa's hand. A small section of
this is visible. And let's do the outlining for the Santa's emblem
on the side, too. Somewhat of hexagonal
s for the centas emblem that we just
created on the left side. For the emblems, I'll be
using curs and burned Sianas moving on to
the centas waistline. So this will be the knot
at the centa's waist. Instead of this, if you want,
you can create belt tomb, but I decided to create cloth wrapping around
the cena's waist. Here I'll be using
yellows, occurs, and brown to do the
coloring in layering. Sending Santa's
stomach on this side. Cloth wrapped around
the Santa's waist. Here, I'll be tying
another knot, a smaller knot in here. Just below the Santa Katana. Let's create water in here too. Outlining for the
centas middle section. So with these, we are
done with the upper part. Now let's do the outlining
for the remaining, starting with the katana. Here I'm using a
bit of broken line to do the outlining to give it a little bit more
organic fill later on. If required, I'll be going
back with the breastbin or the fine and do the
outlining once again, creating very small digits
for the centas finger. In here, you can
create any kind of design pattern or you
can just keep it simple. I decided to add a little
bit of designs and pattern. You can create any kind
of design as you desire. In here, I'm just creating very simple designs in this form, a little bit of curvier a little bit of curvier
and maybe lines. This kind of somewhat
semicircular c. This is the
very simple Katana that Reindeer
General is holding. Let's create the armor plate
for the lower section. There will be two armor plate. If you to make adjustment
where where you see you can decrease the sap and size you can increase or
decrease the number of the armor plates or you can just keep it a single armor
plate as you before. We have got two armor plates in here or you can
concede it to be, or you can consider this to be two small pouches that
is attached in here, adding more lines
to do the outlining here to add a little bit
of more depth to it. Here we'll be doing
a little bit of seeding to make this region
a little bit more darker. For this region in here, I'm creating a bit
of broken line. Since this region will be
a little bit fluffier, so a bit of broken lines
to do the outlining. In here, too, if you want
to add designs and pattern, you can do that for the second for the
second armor plate, I'll be adding more
designs and pattern. Now let's do the outlining
for the second armor plate. Adding it just below
the first armor plate. Let's do the outlining
for the lower half. Outlining for the
remaining section, creating boundary in here. We'll be creating
the same kind of designs and pattern
that we'll be creating for the triangular seat that we added on the top
of San tastiest. Doing the outlining for
the remaining section. Let's add another
outlined section in here. In here, we'll be using
yellows and cause you to do the coloring for the layering and then for the insides, I'll be going with the
burned sienna or brown. Moving on to the Santa's leg, starting with the cantas thigh. This kind of set a
somewhat of triangular ip. Here we'll be using
combinations of red, brown, and a little
bit of burned Siana. There will be cloth wrapped
around the Santa's ankle and the lower part of the Santa's
leg. This is optional. Instead of this, if
you want, you can create armor plates
for the leg too. Moving on to the
cena second lane. Starting when doing the
outlining and adding a little bit more detailings in form of cloth wrapped
around Santa's knee. These are opthal
If you don't want, you can just leave it as it is. Make simple links for the cena. This are the upper section
of the centas leg. Now let's do the remaining
portion, the lower half. So the clothes will be wrapped around the Santa's
leg in here too. You need a little bit of broken
lines to add a little bit of texture for the cloth that
we'll be adding later on. The regions where I
added this kind of line, I'll be creating
the resemblance of the cloth wrapping
around those areas. We'll be using yellows, chars or white to do the coloring for the
clothes later on. So with this, we are done with a basic outlining for the entire section of
the center's body. Now we'll be adding extra
and additional details. Let's add more clothes wrapping
around the center's leg. For some of the
sections in here, I'll be using rates
and a little bit of highlighting to sow a little bit of reflection for these regions. Creating very simple eyes
for our Santa Claus. Tiny semicircular C for
the cantas eyeballs. Making this side
of the centas me and a bit more defined
and pronounced. I forgot to add one more knot in here on the left side of Santas, Wach line sing
outline for another not in here, very simple sign. Just like we for the first knot. Creating the outline for the
Santa soldier, this side, too, creating clear distinction so creating clear
distinction in between different section
of the Santas body. Now, let's erase it, and then we'll be adding
more detailing. On one side, I'll be
creating the outline for three or four scrolls on the right side and
on the left side, I'll be adding four
or five gift wrap. Instead of the ink has tried and then only do the erasing, otherwise, you will get a little bit of
smudging of the ink. So this is how it turned out the outlining for
our ruined gen bro. And as I was mentioning in here, I'll be creating a little bit of designing or pattern or emblem. Just creating this
kind of broken lines to do the outlining
for the circular C. Using colour to create the patterns
and emblem later on, but for now, just creating
the semicircular se. A bit of semicircular
s for the emblem, adding the same kind
of s for this side. If you want, you can create
a little bit more detail for the Santa's pet armor. Now moving on to the lower
part of the cents armor plate, here, I'll be creating
this kind of pattern. We'll be using the same
kind of design or pattern that I'll be using for the upper section, the Santas chair. If you want, you
can use or create different kind of
pattern and textures. Now, let's do the outlining for the Santas gift and the scrolls. In here, I'm going back with a pencil to do the outlining. This is optional.
If you don't want, you don't have to create
the scrolls and the gift. I believe if you keep the samurid Santa as it is,
it will look far better. If you want, you can just
follow along with me and do the outlining for you gift
packages on the Santa's back. Here, I created four
or five gift packages. Let's do the outlining for them. I'll be keeping it bit simpler. If you want, you can
create different seeps and sizes and change
the placements too. Instead of the gift packages, you can also create the
outline for the large bang, a large bag on this left
side of the Santa Solon. Let's do the outlining
for the remaining one. On top of this, I'll also be creating this kind of
small branches and adding few laps for it and creating few
lips surrounding it. All branch and two
or three stems coming out of it and
few leaves five or six. Adding another stem for it and very small seeps
for the leaves. These are optional,
too. If you don't want, you can just keep it simple. Et's create one more in here. You don't have to strictly follow the outlines
that you have created. Feel free to make changes and
adjustments as you see fit. On the other side,
I'll be adding three scrolls on the
centers right soldier. And as for these gift packages, I'll be using bright
colours to do the coloring and I'll also be adding a
few patterns to it, some kind of polka dots,
small circular seats, or triangular seats to add a little bit of more interest
to the gift packages. So this kind of
simple seems to add a little bit of pattern and designs for the gift packages. I'll be using blues,
greens, yellow, oranges, and a little bit
of red to do the coloring. And I'll also be doing a
little bit of seeding to add a little bit of more
characteristics to the gift packages. Let's create one more
gift package in here. Extending this gift
package a little bit. And yeah, with these
we are done with outlining for the gift packages. If you want, you
can add few more. You can also create
more gift packages on its right shoulder. In here, I'll be creating
this kind of cylindrical sea too so that there are three or four scrolls
on the center. Tying it with the ribbons, we'll be using red to
do the coloring for the ribbons and
also in here too, I'll be using
bright colors to do the coloring, blue, yellow, screens and bright pinks, if required, creating the third and the final
scroll in here. With these, we are done with
outlining for our center. If you want to make changes, add more accessories,
you can do that, and I'll see you
in the next video.
7. Colors watercolor and gouache: Come to the second
demonstration video in here. I'll be showing you
how I'll be using the watercolor gauze ink to do the coloring
for our sientas, creating shadows, doing
gradient, creating shadows, adding a little bit
more detailing, glazing and doing weight on wind as well as wet
on dry techniques. For this project, I'll
be using the ink. So this is a riding
that I'm using. Apart from that, I'll also be using the watercolor and gauze. This is the watercolor
that I'm using. Let's use a little bit of gauze. In here, I'm just
doing a flat passe. Later on, we'll be
doing a little bit of blending for all the colors. Using the ink to do
the blending for the ink for the watercolor, I'll be using the watercolor
and for the gauze. I'll be using the gauze, and I'll be sewing
the things that we'll be doing and the things
you should avoid. We will wait for it to
dry until it dries. Let's talk about the consistency of the colours that
we'll be using. For some of the sections, we'll be using with by lighters, the consistency of
the color in here. As you can see for this ocher, I mixed a lot of water. Here we have got medium
consistency of the color. I used a little bit of
less water for this. Here for the third one, I did not add a lot of water for it. So mostly we'll be using
the light consistency as well as the
thicker consistency. We'll be using the
lighter consistency of the color to do the
first layering and the thicker consistency
to do the outlining or or to add the detailings
or add highlights. Now let's talk about the gradient creation as
well as flat vase, credit as and different kind of vases that
we'll be using. In here, I'm using the rating
to create the flat pase. A flat pass is a smooth, even layer of color
applied across the paper with no visible
streaks or color changes. I'll be starting with
the rating to do the flat pass for the primary
layering for our center. And this is how we'll be
creating the flat pass. In here, we have got gradient
or you can say graded was a gradient is a
smooth pndson from dark to light from one
colour to another or both. Here I'm using only
a single colour to create this gradient or
you can say graded was. For our projects, we'll
be using this grad along with a darker side
of the maroon or brown to create a kind of gradient to depict the sados as well as
a little bit of highlight. In here, I'm using
the skin tone to do a flat vase for the centaspz. In here, I'll be showing
you how we'll be using a little bit of
weight ton weight technique to do the coloring. A flat vase with a skin tone
for the space of the center. And then on top of this, we'll be adding a
little bit of ocher. So it will blend on its own. In here, I'm going
with a bit of ocher, a bit thicker consistency of the ocher and primarily adding it on for the regions where I'll be making the face a
little bit more darker. So just below the centa
has a little bit of the centas moustache and two
strokes for the centers I. This will blend a
little bit sone. But to make this
process a little bit more smoother, in here, I'm using a little bit of water to blend the colors together. We will wait for it to
dry a little bit and then add the coloring or
detailing on top of it. So this is how
we'll be doing some of the section for
the cantas piece, as well as for Santa's
meand and some part of the Santas costume,
the Samurai Center. Now let me show you
how we'll be creating the beard and the
moustache for the center. In here, I'm using a bit
thicker consistency of the gray to create the outline
for the centas mousta. Later on, we'll be
doing a little bit of radiant creation in here. But for now, let's move on
to the Centas mean using the thicker consistency
of the gray and now going with the
water to create a flat was. Spreading this gradient.
And by spreading this, you can see a little bit
of gradient creation, the upper region a bit darker and the lower region
a bit lighter. In here, I'm using the
same consistency of the grain to define the seep of the beard a little bit more. We'll wait for it to dry
a little bit and then add a bit thicker consistency of the grad to do the
outlining once again. I added a little bit
more water in here, so I'm using the tissue paper and a dry brush to soak it up. You can also use the
tissue paper directly. If you have not added
that much color, you can use the tissue paper
directly just like in here, spreading the
colors a little bit for the centers moustache. Right now, I'm going with
a bit thicker consistency of the gray and
creating these kind of small strokes to
create a little bit of appearance here for
the centas beard. On top of the flat
creating this kind of small strokes to
make the beard look a little bit more denser and add more volume
to the beard. This is how we'll be
creating the centas beard. We'll be using a bit lighter
tones of the grease and also using a little bit of white to make it a little
bit more detailed. Now for the Santa's armor, after doing the
flat with the ink, we will wait for it to
dry, and when it dries, I'll be going with a
bit darker tone of the red to create a little
bit of sado In here, I'm spreading a little
bit of this red with the ware to create a bit of darker region
for the upper side. Let's see the second one.
In here, I'm using brown. So this is one of the
things you should avoid. Instead of using a bit
darker side of the red, in here I directly jump with
the fair and darker side, and to blend these two colors, it will be a little
bit difficult, as you can clearly
see the two colours are not blending that much. So this is something
you should avoid. We'll be doing the
coloring and layering. I'll be starting with the light, and then on top of it, I
fill darker side of the red. And then finally, I'll be using the brown in here, just I sod. If you directly use the
darker side of the color, then you'll have to
faze problem like this. If you want to rectify
this, you can add a little bit more red and do
another blending in here. Till it dries, let's
do the third one. I am using darker side of
the pink to do the blending. Until now, it's wet
on dry and now. And now in here, I'm
going with the water to blend the two colors
together a little bit. It will blend on its own, as the intensity of the two colors are not that different. In here, I'm using amu Jew mixed with a
little bit of ocher. So in here, I'm using a medium
consistency of this color. We will wait for it to dry
and then on top of it, we'll be going with the ocher, a bit higher consistency of the ocher to create the
designs in the pattern that we'll be using for
our Santa Samurai till it dries in here. Once again, I'm using this
bit concentrated watercolor. Another flat as with the red. So here I'll be showing
you how I'll be doing the coloring
for the late armors, as well as adding patterns
and design on top of it. For this too, we'll be
waiting for it to dry. And then when it dries, we'll be adding layers of colours on top of it and create texture as well as a
little bit of pattern. This flat was has already dried. In here, I'm doing a little bit of outlining with this brown. Here I'll be showing you
how I'll be clearing the gauntlet for the
Samurai centers and. For the gauntlets
and the gloves, I'll be either starting
with the ocher or Camboc or a bit lighter
sad of the yellow. And on top of it, we'll be
adding ocher and finally, we'll be going with
a brown to add details and create this
kind of divisions. This is just a simple demonstration
for our main project, we'll be making it a
little bit more detail and also create a
little bit of gradient. We'll be creating the
gauntlet in this manner. And this is how we'll be creating a little
bit of gradient. On top of this ocher, I added a little bit of
this brown, and in here, I'm going with the
water to blend the colors together
a little bit, using the water to blend
the colors by spreading the brown and overlaying this on
top of the entire section. We want to wait for it to dry, will blend on its own and we lose a little
bit of intensity. Let me show you how we
creating the fur texture. I'll be using rays mixed
with a little bit of white and create this kind
of small strokes to create the fur texture. This is one of the way in
which I'll be creating it. I'll also be doing a little bit of blending of the
colors with the water. If you want, you can make
it a little bit more darker using a bit darker
intensity of the grease. Here's another one in here. I'll be keeping
it a bit lighter. I'll be doing a flat vs for the insides with the water
and spread the colors. Small strokes on one side, small strokes on the lower side. If you want, you can
also do a little bit of flat pass to blend the
colors a little bit, like in here, add it
for the upper section. So this is just a simpler way in which we'll be creating it. So as you can clearly see how
we created the fur in here. Now let me show you
how we'll be creating the cenas thighs, and thug. So I'll be starting
with the red. I'll be starting with
the red and creating this kind of small strokes
for the entire region of the cents cenas thigh,
sin, and the foot. Small and random strows following the contour
of the canta speed. We will wait for
it to dry and then add another layer
of the coloring on top of it until
it dries in here. As I mentioned,
we'll be rectifying this using a darker side of the d to blend it
once again for this one. If you added more water, you can use the tissue paper
to soak it up. And in here, as I
was mentioning, I'll be showing you
how I'll be doing the coloring for
the plate armor. We started with a flat for. Now, in here, I'm
using a darker tone of the red, not brown but red. And in here we are
spreading the color a little bit to blend with
the remaining section. As you can clearly see
the regions where we added more red has become
a little bit darker. So that's what we
were aiming for. But the regions just below the outlined secon we'll
be adding more reds and brown to make that
region a little bit darker too so that there
is cado casted in there. We'll wait for it to
dry until it dries leads to another layering of
coloring for the cena spot. In here, this is just
a rough demonstration. And right now I'm using a bit darker intensity
of the ocher to overlay it on top of the red not covering the entire
sexon as you can see. Okay. Redefining the outline
for the Santas food. The goal here is to so that a little bit of reds
would be visible. The goal in here is to so that a little bit of reds
would be visible, also the ocher but we'll
be mostly covering it with the darker
sets of the brown to give it a bit
darker coloring. I waited a little bit for it
to dry, and it has dried up. Now in here, I'm using a
darker tone of the brown. This is the final layering of the coloring with the brown, so a little bit of the rain as well as the
ocher would be visible, and the remaining section will be covered with this brown. And to increase the intensity
of the red a little bit, we'll be doing another flat
as when this brown dries up. This is just a rough demonstration
for our main project, we'll be adding more details, adding clothes wrapped
around the Santa's foot. For now, let's
continue with adding the lines on top of
the reds and the ocho. Small and large strokes with a brush to create
this kind of lines. Outlining the lower portion of the Santa's foot
with this brown. And we will wait for it to
dry a little bit and then add another layer of
the red flat on top of it to increase the
intensity of the red a little bit and to give the lag a little
bit of red tone. So this color has
dried up in here. If you want, you can do the
third layering of the brown. We'll be doing it for
our main project, but in here, I
won't be doing it. But in here, I'll be showing
you how you can create the different kind of pattern or texture on top of
the armor plate. For one of the project, I'll be creating the patterns
and the designs. Instead of doing
this in this way, overlaying it on
top of the water. I'll be starting with
a fine liner to do the outlining and then
add color on top of it. But instead of
this, if you want, you can proceed in this way. Overlaying this brown and
creating this kind of s. Now to create pattern. So in here, I'll be creating
this kind of pattern. Instead of this, you can create any other kind of the patterns. And as you can see, I'm not making this uniform or straight. This is to just give
it a little bit of more organic feel
to the plate armor. This is to show that different
gene mains are linked in here to create this
kind of plate armor. If you want, you can create your own designs and pattern
for the armor plates. And right now, I'll be showing
you how I'll be creating this kind of pattern designs
for the circular seams. So this has tried up the Cambou circular set
that we created. And on top of this in here, I'm using a bit of cha to create the patterns
in the design, starting with
creating the outline. And I'll be creating
simple shapes like this to create the emblem or
a pattern or design. It's very simple
say. On top of this, I'll also be using a little
bit of brown to make it a little bit more bolder and to create a bit of
shadows on the sides. But in here this
time I'm showing you how different kind of
designs I'll be creating. You don't have to
create the same kind of designs that I am doing. Feel free to create your
own patterns and design. This is just a
simple demonstration for our main project
we'll be making it a bit more detail and add more colors and
characteristics to it. Let's create for like
taxi for the upper part. This small brass strokes to create this kind of appearance. Come on. You can also use a little bit of white
or gray to create some of the highlights or
do so reflection. When the whole thing dries up, I'll be going back
with the fine liner or the brosin to do the outline
for some of the section. For some of the
section, I'll be using uniform lines to create
the outlining for others, I'll be creating a
bit of broken lines, especially for the
facial feature, I'll be doing uniform
and straight lines to do the outlining for the
eyes, nose, mouth, as well as the beard and the moustas a bit of checked line to create the outlines for the
moustache and the beard. Here's another
rough demonstration of how we'll be doing
the outlining for the canta space. Tiny eyes. Triangle see for
the Santa's nose and a bit larger moustache. A bit of this kind
of lines to create a bit of bossy appearance
for the moustache. And as I was mentioning,
this has dried up. In here, I'm doing another flat fast with the
red to give it a little bit more
rediston to give it a little bit more rediston
to the Santa's foot. This demonstration video is not turning out the
way I expected. I made a little bit of mistake. But for our main project, we'll be making things correctly. And here, I'm using a little
bit of lighter tone of the right to create blessing
effect for the Santa space, semicircular C for
the Santa's checks, and a little bit for
the Santa's nose. Now let me show you
how we creating the gauntlet for
the Santa's arm. We'll be dividing
different section. The gauntlet color that I showed you with orchards
and the browns. I won't be creating
it in that manner. We'll be coloring
it in that manner, but the outline
will be like this. We'll be using sads of the
yellows and orchards and a little bit of brown to do a little bit of gradient creation. Lastly, if required,
we'll also be using a little bit of fine liner
to do the final outlining. Bing sees a little bit curvier. Oh so this is how we'll be creating the
gauntlet for the Santa's arm. How we'll be creating the cloth wrapping around
the Santa's waist. Very simple and organic same for the clothes that will be
wrapped around Santa's waist. We'll also be using this kind of clothe for the
centa's lower half, for the centa's feet
and the cantas leg. Now let me show you
some of the patterns in the design you can use
for the armor plates. Here's a simple
scale life version. And then we have the kind of pattern that we created
with the watercolor. Starting with a
simple square sip and then creating this kind
of design inside it. Different in males
linked with each other. So here's third one, a little bit different
from the first one. Just making the seats a
little bit more larger, adding another on just below it. Instead of this feel
free to experiment on your own and create different kinds of pattern and the design. Now, let me show you
how I'll be doing the coloring for the folds
of the centas cloth. And here, I'm using a bit
higher consistency of the d and discreting this kind
of small and broken lines, the upper section
in a bit darker than the lower section
in a bit lighter. So this is how we'll
be doing the coloring for the folds on the
cloth, as you can see. It will be a little
bit more defined, and we'll be using
two or three sets of the color to create the fold. And with these, we are done with this demonstration video. If you're ning
questions, you can ask me in the
discussion section, and I'll see you in the
next video we'll be doing the coloring for our center,
starting with the flat.
8. Flatwash with ink: Welcome to the third
part. In here, we'll be doing the first
laying of the color. For the flat vase in here, I'm using this red ink. I'm using the red ink instead
of using the gauze or watercolor since it will provide me with a uniform consistency. Using this red ink as the primary layering and
doing a flat vase with this. You can use the water color or case to do the primary layering. But since I had the ink, so I decided to use this. I'll be covering all the sex in which I'll be adding the red. The ink that I am using in
here is not waterproof. So when we'll be doing the
layering on top of it, it will mix with
the other colors. If you are using waterproof ink, then it would be a little bit challenging to do the
blending later on. Then I would advise you to
use watercolor or gauze, preferably watercolor
thelen since the blending with the watercolor
will be much more easy. Moving onto the other side. For the scrolls in
the background, I won't be using the red. I'll be using the
red for the top of the centas hand for
the middle section and cenatema both of its hand and the two armor plates
just below the centas waist. Carefully doing the
coloring for this section, carefully doing the outlining, and then let's fill the
entire section with this red. Apart from this, I'll also be
using burned scanner to do the first layering
for the designs and the pattern that
we'll be doing. For now, let's
continue with doing the flat pass for the upper
half of the centas body. H you have to bit caucus while doing the
outlining small regions. In here, carefully outlining
the Santa's hand and the catana and then we'll be filling the entire
region with the red. After this rise, we'll be doing two or three layers
of the coloring to create somewhat of
gradient as well as a little bit of seeding
for the Santa's body. I'll be adding a bit darker tone of the red and a little bit of brown just below the regions where I want to smooth the sas. And with these, we are
done with the upper half. Let's do the coloring for
the remaining section. Carefully doing
the outlining and then we'll be filling the
entire section with the red. Instead of this red if you want, you can use any other colour that will be interesting too. You can use the
blue, you can use yellows and green too.
That will be interesting. So we'll have green, blue and orange or
yellow centers. For the knot that we
have created in here, we'll be using combinations of yellows and char to
do the coloring, carefully filling the color
for this armor plate. Going over the outline
for the lower section and then we'll be filling the
remaining section with the red. Most of the video in this
class is in real time, so you can always
follow along with me. Put some of the
repetitive process or the process that is going
to take a lot of time. I have speeded that process or I have not included
that section. Those are some small
and minute things that you can do on your own. Now, moving on to
the lower half, the last armor plate in here. Carefully filling the
entire section with this. After this, I'll also be adding a little bit of red
for the Santa sling. And with this, we are almost
done with the armor plates. Now for the red
for the cantasling some small and large
strokes of the red. And we'll be adding colours
on top of it later on, but for now, just small and
large streaks like this. For all the different
section of the santas ling, I'll be adding these red lines. We'll be covering most of it. Some of the red will be visible, but most of them will be
covered by the other colors. Add the color in for
the Santa's hat. You'll have to at
causes since we have to add color in between
the small lines. If you want, you can also
use the red to colour the gauntlet and the gloves
of the center and also for the catana with this we are done
with a flatwash with this red ink for the
entire center's body. Right now, in here, I'm
using burnt sienna. For the chest and for
the lower armor plate, I'll be using this. Here, I'm using a bit thicker
consistency of the color. Apart from the circular
saves that I have created, I will be filling the entire section with this burnt sienna. You'll have to carefully
outline the circular. You have to carefully
outline the circular seeds and then fill the
remaining section with this burnt sienna. Instead of this
color combination, if you want, you can use other
color combinations, too. I'm using this
burnt sienna to do the coloring in here to so
that it's made of lather. Carefully filling this
for the small section. For the rings on
the centas beard, I'll be using a little
bit of yellow and a little bit of orchard
to do the coloring. Now let's move on
to the other side. In here, too, carefully filling the entire
section with this, outlining the circular
saves that we created. And as you can see for
the boundaries and the outlines that we created
earlier with the two lines, I have not added the
burnt sienna for it. We'll be using lighter sets of the colour to do the
coloring later on. I'll also be using
this burnt sienna for the centasqtlet and the
emblems that we have created. And with these, we are
done with the chist now. Let's do the coloring for the armor plate and the emblems that we
created for the center. Ensure that the consistency of the color remains the same. If you will use lighted set, then the intensity will
decrease a little bit, so you'll have to do two or
three layerings of the color. Now for the Santa gauntlet, leave a little bit of
white space in between, the same kind of done
in the earlier video. We'll be doing the same
thing for the other hand. And in here, I'll be using
lighter sets of the yellow or Cu gone to fill the
white sections. If you're not that confident, you can use the pencil to do the outlining or you can
use the fine line to do the outlining and then fill the rest of the space
with the Manciena. Create small strokes with the breast to create the kind of lines and leave a little bit
of white space in between. Slowly and carefully creating
these lines for the sand. For the cantas gloved hand. In here, too, let's add a little bit for the
middle section. Moving on to Santas gloved hand, doing the outline with this
and a little bit for the inside too, square C. Instead of this, if
you want, you can cover the entire
section with the brown. In here, I'll be using a little
bit of yellow or camo for the center for the remaining
part of Santa's glove. And with this, we are
done with both the hand. Now moving on to the
Santa's t. Here, too, we'll be using two or three color combinations,
burned Siena, and then a little
bit of yellow or camo jiu creating small strips throughout the entire region and leaving a little bit
of space in between. You'll have to wet courses
and careful while adding it near the Katana
and the gloved hand. Later on we'll be using a bit darker side of the red and the brown to create a clear
distinction between the Santas, and the Katana and
the waist cloth. Adding a little bit of
brown for the knot. And yeah, with this,
we are done with the upper half with
this burnt sienna. I'll be using a little bit
for the lower section too. Now let's add the brown for the lower half of
the armor plate. In here, I'll be creating
the same kind of pattern or design that we did for the
upper part, the chiste. Carefully filling these regions
with this burned sienna. You can do the outlining
first and then fill the entire region
with this burnt sienna. Or instead of this, if you want, you can do the same coloring, use green and the
white to create for, like, appearance or texture. In here, I forgot to add
the burned sienna for the Santa's thumb.
Now continuing on. Finally, let's add the born
sienna for the last one. And with these, we are
done with the born sienna. Moving on to the leg. I'll
be surrounding the read as well as overling
a little bit of born sienna for some
of those sections. Doing the outlining
and then covering some of the red with
this burned sienna. Insure that the consistency of the burned sienna
remains the same. Instead of using this
color combination, if you want, you can use
other color combinations. In the demonstration video, I was not able to create
this kind of lag, but this is how
we'll be doing it. This is the second layering
of the color on top of this. We'll also be
adding a little bit of darker sets to create a little bit more
clear distinction to depict a bitter sados as
well as a bit of reflection. For all the sections,
we'll be doing the same thing, filling
the burned Siena, as well as overlaying this burnt sienna a little bit on the red, as well as surrounding
some of the reds. We'll have to be a bit cautious
and careful since we have to fill the small regions
with the burned sienna. Be precise, and let's continue
doing the same thing. If you want to extend the side of the leg a little
bit, you can do that. So we are done with
the upper part. With this, we are done
with the upper part. Now let's do the coloring for the remaining section
of the Santa spit. If it is a little bit difficult, you can just completely
fill the entire section with this brown,
and then later on, you can use if
you're using gauze, you can use the red and
overlay it on top of it a bit darker and thicker
consistency of the red. You can just completely cover
the entire section with the brown to create
brownileks for our Santa. Leaving a little bit
of red to be visible. Going over the outline. Doing
the same thing for this. Going over the
outline region and then feeling this burned Siena. And with this, we are done with the burned Siena for both
of the center's leg. I'll also be using a little bit of burned Siena for the centers helmet for both upper and the lower regions of
the centas helmet. I'll be adding a
little bit of it. Burn Siena for the upper and the lower region for
the centers helmet. Going over the outline
for this region, making it a little bit more distinct and a bit more clear. Ding it for the cantas
armpit in here too. You can use this to make some of the regions a little bit more clear to clarify the
outlines a little bit more. Later on, I'll be
using the browns and burns hanna to create the folding to make
the foldings of the clothing a little bit more clear and a bit more prominent. I'll be adding less
burn sienna for the regions where I
want to sew shadows. In here, I'll be creating
a little bit of sados. Moving on to the lower
half of this armor plate. In here, too, we'll be
creating a little bit of sados a little bit
just below this belt. So you've got the rough
idea of what I mean to see. Add the McNM wherever you think that region will be a bit darker or there will be shadows. And with these, we are
done with this video. I'll see you in the
next video when we adding more coloring
and detailing.
9. Coloring the reindeer general: Let's continue
where we left off. I waited for the colour to dry. It has dried up. Now, in here, we'll be creating sados and add a little bit of more
dimension to the painting. In here, I'm using
the red watercolor, a bit concentrated
watercolor and adding it just below the regions where there will be shadows. Mostly, I'll be adding it near the outlined regions
and the regions where there will be folds
in the cloth or there are chances where the
sados will be casted. So yeah, let's continue
with this red. In here, we are just overlaying this on top of the
ink that we used. Oh we'll be just overlaying this color on top of the ink and then later on, using a little bit
of water to blend the two colors to create
a smooth gradient. Adding it just below this
lower region of the katana. Now in here, I'm going with the water to blend this
color a little bit, using this water to
blend the colors. And as you can see, it is
blending smoothly with the ink that we used earlier as well as creating
a bit of gradient. When rise up, you can
clearly see the difference. The regions where we added this bit darker side of the red will be a bit darker and the remaining region will
be a bit lighter. It this is the second
layering of the red. On top of this,
I'll also be adding a third layering with a bit darker tone of the
red or maroon. Phone let's continue
with this red. If you want, you can
also mix a little bit of burned sienna with
this red to get a little bit of darker
side of the red. In here, I mixed a little bit of burned sienna with this red, and now let's do a little
bit more coloring. In here, I'm adding it
just above the cenas was smaller strokes
with the brass, a little bit carefully
near the catana. Now, once again,
going with the water to blend it with the
remaining section. You have got the rough
idea what we are doing, and yeah, let's continue
with the remaining section. A little bit just above
the outline section or where there are
different colors. Add a little bit of this color, a bit of darker side of the red, mixed with a little
bit of MurcianaO you can just use simple in. And then we will do a little bit of blending of the
colors with the water. Adding it just below
the armor plate. Once again, going
in with the water, doom blend the two colors
a little bit of water. If you want, you can cover
the entire section with it, but only spreading this
color a little bit. You can clearly
see the difference just by adding
this little bit of red to create a little bit of sados and a little
bit of gredent. The upper part
looks more vibrant as compared to the lower sun. The upper part look more vibrant as compared to the
remaining section. Going in with the water
to blend this color. Let's do the same thing
for the Santa's helmet, adding a small streak of this red on the sides of
the lines we created. In here, I'm not using water since we have very small space. I'm overlaying this red on top of the earlier
red that we used, just covering the
red that we have, as well as overlaying
a little bit of red on top of the burn
Sienna we used earlier. It won't affect the
burn Siena since the intensity of the burn
Sienna is much higher, but it will make the legs of cantas a little bit more radius. We will wait for it to
dry until it dries. Let's do the coloring for
the gift parcels we have. You can use colors US I'll also be doing a little bit
of gradient creation by blending two colors. For this first one in here,
I'm using light blue. For now, let's continue
with the blue. I'll also be using blue
for one of the scrolls, right now, adding blue for this small parcel that
is visible in here. On top of this blue, I'll be going with a bit
darker to of the blue to do a little bit of
blending later on for now, moving on to the
one of the scroll. As I mentioned earlier,
if you don't want, you don't have to add this
gift parcel or the scrolls. You can create only
the reindeer General, the SamRI Santa. So this is going to take
a little bit of time. Instead of doing the coloring for the scrolls and
the gift parcel, in here, I'm going to use
Camboj for some of the section. Let me show you where I'll
be adding this Cambo. Here I'm using a bit thicker
consistency of the Camboj. I'll be filling it
I'll be filling it for the circular and the semicircular
seeps that we created. So this is going to take
a little bit of time. Let me show you where
I'll be adding it, and I'll add it on my own. So this is how it turned out. I added this Camuji for the chest area for the emblems
on both the soldier plate. I also added for the
gauntlet in hand, a little bit for
the Samurai katana, and then a little bit of
this for the waist bend. I also added a
little bit of this for the gift parcel
and the scrolls. Let's do the remaining section. This time in here, I'm using a bit concentrated
form of this hooker. I'll be creating this
kind of designs or you can say pattern for
the circular seats. Instead of this, if
you want, you can create your own designs pattern. You can also use brighter
colors like red, blue greens to create gems
imdate on the circular seeps. But I'll be creating this
kind of simpler saps, simple pattern or designs for all the emblems for all the circular saves
that I have created. Thank you. You'll have to be a bit cautious
and careful to do the outlining or create
the stecture or design. Instead of this, if you want,
you can use the file and do the outlining to create the different kind of
patterns or design. Use a bigger consistency of the color so that it
will be clearly visible. Now in here, I decided to
add a little bit of pattern or design for the scroll,
this Calois scroll. You don't have to do this
or if you want to you can create any other kind
of designs or pattern. Let's add this car for
the Santa solar plates. The same kind of designs that we created for the chest region. Now let's move on to the
lower section. In here too. We'll be creating
the same kind of design that In here two, I'll be creating the
same kind of design that I saw you in
the earlier video. In here, if you want to use
other color combination, you can do that, or you can
just leave it as it is. Creating this simple design for all the circular shape
that we have in here. Later on, I'll be going with the darker side of the brown to do another layering of color
on top of this beside it. And with this, we are
done with this section, adding in a little bit
of this ocher to do the outlining for the upper
and the lower region. If you want, you can use this
ocher to do the coloring for some of the clothes that
we have for the Santa speed. I'm doing this. And with
this, we are done with cher. Now I'll be using the brown. In here, I'm using brown. Let's let's make the
distinction a bit more clear. Adding a little bit of
brown for the Santa sand. Now here, let's completely feel this upper and
the lower region. So I'm using this
grand to create a clear and prominent
distinction between different section of
the Santa's body. The regions where
there are a lot of burnt sienna and a lot of red and the distinction is not that much clear.
I'll be using this. In here, let's make this
a little bit more clear. For the upper and
the lower regions, I'm using this brown. Later on, we'll be
doing a little bit of planting. Let me so what I mean. Using this to create a
little bit of outline near the circular seeds
that we have in here. You'll have to be a bit
cautious and careful and create small strokes to
do the outlining in here. This is often if you don't want, you don't have to do this. Adding for this edge. And yeah, with this, we are
done with this lower section. Now moving on to the
waist band in here. I'll be overlaying this on top of the burned sienna that we used earlier and create a clear distinction between
some of the sections. We'll be doing a little bit of outlining and a little
bit for the insides too. Covering both the yellow
and the burned Siena or the ocher that
we used earlier. Extending the sides
a little bit. Seed consistency of the
color remains thin, a bit thicker consistency of this brown to
do the coloring. Making this region a little
bit more darker to sort at the cado casted by the katana has made this region
a bit more darker. Let's add a little bit of brown for the second knot
we have in here. Adding a little bit of brown
for the sides of the knot. Now, for this cento, creating a little bit of
broken lines with the brown. Doing the same thing
for this lower section. Now let's do the coloring
for the remaining section. In here, I'm using a
bit thicker consistency of the gray for the antlers. We'll be using a
little bit of fat spread it later on and add
a little bit of white. For now, let's use this gray. Now in here, I'm going with
the white to spread it. This will create a
little bit of gradient. The sides of the antler
will be a bit darker inside and the remaining
section will bit lighter. Let's spread the
color a little bit. Is that the color does not
come out from the outline. Is that the color remains
inside the outline regions. Now, let's create for texture, small strokes with brown. If you want, you can
do a flat vase and then add another layer
of grease on top of it. This small and tiny strokes, let's do the same
thing for the cena. Right hand, inserting
the outline regions and then adding small
strokes with the gray. Here I decided to do
a flight v first and then add another layer of
coloring on top of it. And we will wait for it to dry a little bit and then add
another layer on top of it. Let's do the coloring for the
entas Mustas and the Band. In here, I'm using a bit thicker
consistency of the gray. This is a little bit
lighter and sad as compared to the one we
used for the antlers. Here two, we'll be doing
both the flat base and a little bit of
blending with the water. As you can see the Mustas I added only a little bit of
this for the upper region, we'll be doing the
same thing for the cenas B two for some of the sections and then we'll be going in with the
water to blend the color. In here, I'm using water
to spread the color. Treading the gray
that we just use with the water to create some
up graded flat for. So as you can see the region, the middle region of
the centers be it a bit lighter as well as the lower
half of the cenas most. When this dries a little bit, we'll be adding another layer
of the gray on top of it. Will it rise, lets to
the remaining section. Here, once again,
I'm using a bit thicker consistency of the gray. I'll be spreading it
a little bit in here, once again, going with the
water to spread the color. Here, by mistake, I
added a lot of gray. So using tissue
paper to soak it up, you can also use the dry
breast to soak the color. Spread the colour
with the water to create somewhat to
create somewhat of graded platas adding this for the clothes on
the Santa sweet. A little bit of grey
will do the work. Tell it, let's do the coloring for the gift parcels
that we have in here. I'll be using some simple
light color and do a little bit of seeding and do a little bit of
flat pass for this. Since this is not that
much important in here, I've increased the speed
you want to follow along with you can just reduce the speed or you
can pause the video. Earlier, I already colored
some of the gift parcels, and right now I'm using a
darker tone of the blue to do a little bit of
gradient creation in between the lighter
and the darker side. I'll be doing the same things for the other sets of the color, a bit darker side of the yellow for the yellow colored parcel, a bit of red or orange for the red or orange
colored parcel. I'll also be trying to create a little bit of
pattern or designing, coloring the ribbons and add more details wherever
I think it's required. Here I'm using the
tissue paper to soak the excess water,
otherwise, it will spread. I'll also be coloring
the katana and adding a little bit more detailings
wherever it's required. Here, I'm going in with
lighter consistency of the grade to make the bead and the mousts a little
bit more detail. So using this lighter
consistency of the grade to create
more strokes on top of the flatwash that
we used earlier to add more volume
to the cantas beard, its mosas and the here line, here I'm using sap green to do the coloring for the small
leaves that we created. And for this one, I'm
using a sap green to blend it with a yellow
parcel that we have in here. Using brown to add the coloring for the brands that
we have in here. We'll be continuing with adding a little bit more coloring,
adding more details, or do a little bit of
sading for the gifts and the parcels that we have
in here and the scrolls. And with these we add with this do. I'll see
you in the next one.
10. Final detailings: Let's continue
where we left off. So this whole video
is in real time. Let's start with doing the
coloring for the canta spheze. In here, I'm using a bit
thicker consistency of the skin tone to do the
coloring for the canta spheze. Right now, I'm using water to spread the color
a little bit, adding it for the
cantas ear too, since I used a little
bit more skin tone. So using this tissue paper to soak that color
up a little bit. Now, a little bit of ochre for the regions just
below the centashat and a little bit below
the centas eyebrow and a little bit just
above the centasmstas. Oh skin tone to do the coloring
for the Santa fingers, the four fingers that
are visible in here. In this video, we'll be
adding the final detailings covering some of the mistings as well as adding more shadows, more highlights
wherever it's required. In here for the Santa Katana, create any kind of
design pattern, texture, as you see fit. In here, I'm using Oka to
create a little bit of design. You don't have to use the
same color combination or design pattern
that I'm doing here. My katana did not turn
out to the VI home. Now, in here, once again, I'm
using a little bit of ker for some of the cloth wrappings that we have for
the Santa spade. For the Santas gloves, adding a little bit of ochre. Now, let's do the coloring
for the other section. Right now, in here, I'm
using a little bit of red to create Rosi
sticks for our cana. The skin color that we
use was not dried up, so using the drybrus to spread the colour to blend it with
the remaining skin color, a little bit of red
for the Santas here. Now let's do the
coloring for this side, the side of the Santa's helmet, a little bit of char color, and for the white lines
that we have in here. Here too, I'm using this ched to completely fill this
entire region with it. Instead of this,
if you want, you can use other color combination. You can also use gray or white. With this with the upper side. Let's add a little bit more
characteristic to the face, a little bit more ochre making these rings
a little bit more darker with the ocher
for the upper regions. Now in here, I'm using this
burnt sienna mixed with a little bit of brown to create this kind
of simple lines. Completely filling this entire region with this simple line. If you don't want, you can
just leave it as it is, but I decided to
add a little bit of texture pattern for the side. Small simple straight lines. Add a little bit of
coloring for this emblem. This side of the armor
plate that we have in here, I forgot to add the
coloring for it. So once again, I'm using Oka to add the
coloring for here. In here, I'm using a little
bit of darker side of the brown to make the outline of this katana a little bit more clear and a bit
more distinct since this was not that much clear to create a clear
distinction between a different part of the katanas and the hand that is holding it. Adding a little bit
of coloring for the gift parcel we have in here. Saves we have
created, you can use any color combinations
as you see fit. For the scrolls in
here, I'm using a little bit of red to
do the coloring to make the outlines a little
bit more to make the outlines a little bit more distinct and
a bit more clear. Let's do the coloring for
the side of the parcel. For the ribbons of this gift
parcel, I'm using blue. For this one, I'm using yellow. In here, I'm just randomly
using the colour to do the coloring for the gift
parses and the scrolls. We will wait for it to dry. Till it dries in here, I decided to use a little
bit of white to make the distinction a
bit more clear to add a little bit of
highlight for the katana. The cantana that I created did not turn out the way I expected. I made a little bit of
mistakes with the coloring, and I should have made it a
little bit more distinct, a bit more clear and used a bit lighter shades of
the coloring for it. Using this white to make the moustache a little
bit more lighter and sin, adding small dots for the
center side with this. When the water color dries, we're moving back with
the bras pin to make the outlines a bit more
clear and distinct. Sides of the cenas and using a bit thicker consistency
with the white and yeah, adding small strokes with the white to create
a clear distinction. To add a little bit of
highlight in here, too, for the centa helmet
on one side of the achar adding a little bit of small strokes of the white. For this gift
parcel, I decided to create this small
circular seams. And it is not looking that good. Later on, I'll be covering
it with the black. Now, add more white wherever
you think it's required. And I waited it for to dry. And right now in
here, I am using the as paint to
do the outlining. We'll be making the
distinction a bit more clear. The regions that are
covered by the gauze are two or three layers
of the coloring has become a little bit duller. So using the breast paint
to do the outlining, you'll have to be patient
and slowly do the outlining. Since we have used a lot
of layering of the colors, your breastbin might not work. You can also use the black watercolor to do the outlining. Let's try to salvage this cutana making a little bit more
distinct bit more outlined, going over the outline
for the centers finger. In here, I'll be
adding more details, more outlining with
the breastpan. Feel free to do the
outlining in your own way. And if there is no
requirement for the outlining in your case,
you don't have to do this. Using a little bit
of red gelpen to do the outlining for the ribbons
that we have in here. I decided to use the gel pen
since if I used watercolor, it would have take a
little bit more time. So I decided to use the gel
pen to do the outlining. Once again, going back
with the bras pin to make the outlines a bit more
prominent, a bit more clearer. Since this is going to
take a little bit of time, I decided to increase this SP. If you want to follow
along with me, you can reduce the speed or
you can pause the video. Let's make the centas foreach a bit more clear and
a bit more defined, outlining the sentas
eyebrows, eyes, and the nose, making the Santas helmet a
little bit more detail. So going over the outline and, yeah, with these, we are done with our first Centas project. Reindeer General, I hope
you enjoyed this painting. I had a lot of fun
painting this. I made a little bit of mistake
with the Centaskatana. But overall, this project
turned out pretty well, and I'll see you in
the next project.
11. Santa of the red armor pencil sketch: Welcome to the second project, Santa of the Red Armor Order. I have divided this project
into four different sections. This is the first one. In here, we'll be doing this sketching. Pencil sketching for
our samuri Santa. Here I've already started with a straight line for the
length of the center. And now let's divide this
into different sections. In here, I'll be dividing into
eight different sections. This will be a little
bit more detail. Divide it into eight
equal sections. Now we will be doing the outlining for the
different section. In between this first
and the second, I'll be creating the
outline for the centaspes. The upper section will
be for the centasphas. Now let's create the outline for the cents middle section. In here, I'm
creating a bit large circular C. This
large circle will occupy both the
center's stomach as well as the upper part
of the cena's thigh, or you can see upper
part of the cena's leg. Create this kind of circular
sep for the centaspez. So this will be the
centa spuezO top of it. We'll be creating the outline
for the cap later on. Let's add a little bit more
detail for this circular sap. In here, we'll be creating
the save for the cenas beard. The centa suze won't
be this much broader. We'll be making a little
bit more adjustment and linking the
sap a little bit. This is just a rough outline
for the centas stomach, as well as the upper
part of the centa's leg. Sketching out a rough guideline
for the Santa's beard. In here, I'll be making
this kind of laffer beard. If you want, you can
make the beard a bit more conical like
the last project. Now let's sketch out the
guideline for the centastoach. This middle person will be the Centas waistline. In
here, we'll be creating. In here, we'll be sketching out the guideline for the
Santas cloth that will be wrapped around that will be wrapped
around Santa's waist. For this center,
we'll be creating different armor plate of different sizes and
different designs. This are just a rough outline. Feel free to make adjustment
and changes as you see fit. I'll be creating this kind
of large rectangular steel, a little bit curve
at the bottom. This will be presenting
the centas armor plate. We'll be adding more later on. But for now, let's do the rough outline for the cenas arm. So this will be the armor
plate for the center soldier. If you want, you can
create the same kind of seep we used for
the other center. You can also create
embelem on top of this. But for this center, we'll be using the fine liner to do that. But for this center, we'll
be creating different kind of armor and different kind
of seeps in the design. This will be the middle
portion of the centers arm. And now let's do the
remaining section. The outline for the remaining section for the centers arm, creating another kind of cylindrical C for
the centers forearm. Now, let's create
the cenas palm. The forefinger of this
hand will be visible, the four fingers
of the right hand, creating another armor
plate just beside it. Do the outlining for
the second hand. Let's do the outlining for
the center's left hand. For this end, most of it will be covered
by the center systemer. Only a small portion of
its hand will be visible. So these are the outlines for the centas armor plate
for the center soldier, outline for the
center's forearm, and a small section of Centas palm will be visible in here. I'll be adding the
katanas later on now. For now, let's extend
the armor plate a little bit with
different kind of design like this a bit curvier armor plate for
the bottom section. In here, I will be creating
the fur like texture. Instead of using the whites
or the grease in here, we'll be using golden colours. Let's create one more armor
plate for the middle section, doing the outlining for it. Two or three ribbons
like clothes in here. Primarily for the center,
we'll be using reds, Cam use a little bit of ochre and brown, a little
bit of black. So a total of four or five colored to do the
coloring for the center. Creating the outline
for the centers feet. So this will be the upper
section, the center's thigh. And now let's do the
remaining section. In here, too, we'll be creating the plate armor for the
center's lower leg. We'll be creating a
little bit different kind of lake for the center suite. If you want, you can
create the same kind of designs that wedded
for our first project. But here, I decided to keep
things a little bit simpler. Moving on to the cena side, doing the outline
for the Centasca. So this is just a
pencil outlining. Now let's create the outline
for the bag of gifts. Our cena is carrying
this large bag, and it's full of
gift and parcels. And I'll see you in the
next video were using the fine liner or the
breastpin do the outlining
12. Outling the samurai santa: Let's continue where we left off for the center of
the red armor order. In here, we'll be
doing the outlining. Right now, I'm using the
brastpin to do the outlining. You can use fine line and Bast
pin or whatever you have. You can also use hail pin, ballpoint pin, bras pin. Just ensure that the
color that you are using to do the
outlining is waterproof. This is going to
take a little bit of time since apart from
going over the outlines, we'll also be adding a little bit more additional details. And for some of the section, I'll be increasing the speed, the section that
will be repetitive. And for those section
where I'll be increasing the speed,
I'll be mentioning it. So if you want to
follow along with me, you can just pause the video
or you can reduce the speed. For now, let's do
the outlining for the centaspix creating
small ears for the center. For the center spes, we'll be using the same
color combination, skin tone, a little bit of red for the rosy cheeks
for the center. As for the beard, we'll be giving a little
bit of pinky hue. Apart from the gray, we'll
also be using a little bit of red to create pinky hue
for the centers beard, cenas usa top section
of the cenas heat, and as well as for
the furry texture for some of the section
of the armor plate. Going over the outline for the armor plate for
the Santa soldier. In here, we'll be creating the kind of pattern
that we practice, starting with creating this
kind of a bit broken lines, and then we'll be
creating a bit of large triangular sap Simple kind of outlining to create a
little bit more texture and pattern for the
Santas armor plate. Instead of this, if
you want to create a bit more detailed patterns and design, feel
free to do that. Creating the outline
for the centas album. For this region, we'll be using a bit darker colour to make
it a little bit more darker. Doing the outline for
the centasGntletd hand. In here, we'll be creating
the same kind of design, a little bit same
kind of design like we did for our first project, doing the outline
for the canta spam. Here, too, I'll be starting
with the red ink to do the flat and then add
two or three layers of the bit darker tone of the
red or a little bit of brown to create a little bit of seeding for the
different sections. Creating four fingers
for the sand. Now moving back to the
centers armor plate in here and creating
this kind of design. So a little bit larger
rectangular sieves. Instead of one lines, I'm
just adding two lines to give it a little bit
more characteristic. Simple lines to
create simple design. You can create other
kinds of designs. Apart from the simpler design, I'll also be using two
different kind of design for the lower section for
the armor plates. For this video, apart
from doing the outlining, I'll also be doing a
little bit of coloring. I'll be using a little bit of golden brass paint to do
the coloring for some of the armor print and
a little bit of the black for some of
the shadowy reasons. Moving onto the other side and
creating outline for this, a cloth wrapped
around Centas chast. So this will be tied to the
back behind the centas back. In here, I used bit of broken lines to create the outlining. Later on, we'll be making the outlines a bit more
bolder and more detailed. A pouch attached to
the centas waistband. Let's do the outlining for
the upper part of this. We will be adding a little
bit more detailing later on. For now, let's continue
with the remaining section. In here, the upper
section of the back, that is a little bit open. Here, I'll be adding few plants, small stems, and a few branches. If you want, you can create the outlines for some
gifts or parcel or you can create the outlines for the scrolls like we did
for our last project. Moving on to the other
side and creating the outlines for the
centas armor plate on this Only a small section
of its armor plate on this left hand
will be visible. Here, I'll be creating a little bit more detailed armor plate. I'll be adding the same kind of design as for the
lower armor plate. Moving on to the center's
stomach and creating the knot, the clothes tied around
the center's waist. Let's make it a little bit more detailed as compared to
the first project we did. Adding few more lines to give it a little bit more texture. Now, let's do the outlining
for the remaining section. For the section, you
are not that confident, start with a bit of broken lines and then add more
detailings to it. We'll be using Camboj
a little bit of white to add the
coloring for it. Now moving on to creating
the outlines for the armor plate just
below the center's waist. In here, I'll be creating
six to eight armor plate of two different varieties. Near the center waistline, I'll be creating a bit
smaller armor plate, and as we move away from it, I'll be making the
armor plate a bit more larger and a little
bit more curvier. The armor plates near
the center suite are a little bit rectangular
s. But in here, as you can see, I'm making them a little bit more curvier. And for the bottom
section in here, we'll be using and creating a little bit of
fur like texture, creating the outline
for the armor plates on the other side. Let's do the outlining for the larger armor plate in here. Here too, we'll be
creating a little bit of pattern and designing. For now, let's do the outline
to create a little bit of separation for
different armor plates. Getting one more armal plate
in the middle section. One more armor
plate on this side. Now let's do the outline for the large back that
the Santa is carrying. Adding outline for another back. So centers is carrying
two armor plate. Moving back to the
centers left hand. Let's do the outlining for
the remaining section. Only a small portion of
this hand is visible. I'll be doing the outlining for the cenas katana later on. Create outline for the ribbon like cloth hanging
from the armor plate. Create one more in
here. Now, going over the outline for
the center's leg. Making the upper
part of the centa ling a little bit fluffier. Now for the remaining
section of the centas foot. Going over the outlines that
we created with a pencil. And now let's add a little bit of souls to the centas feet. Moving back to the
centa stomach in here, I'll be creating the
pattern that I was talking about by simple kind of pattern. So in here, I'll be creating
somewhat of the same kind of pattern that we did for
the Santa soldier pleat. A little bit different.
For the middle section, we'll be making them
a little bit curvier. Top and the bottom
we'll be getting this kind of rectangular shapes, making the outlines
a little bit more bolden with this kind
of bit curvier lines. And that's for the
middle section, a little bit of pointed edges
for the middle section. Instead of this kind
of pattern or design, you can keep it plain and
simple like our last project, or you can create your
own patterns and design. Continue on with this kind
of design on the other side. Now, let's create
simple rectangular see for the remaining section. Only a small portion
of this is visible. The other is covered by
the centers wise cloth. With this, we are done with the stomach and the right soldier. Let's do the same thing
for the left soldier. The same kind of design
equidt for the right soldier. No put the Santas hand in here. I'll be creating
the same kind of simple designs that we
use for our last project, plain simple lines, doing the
same thing for this hand. So with this, we are done
with the upper part, almost done with the
upper part, we'll be adding the fecal
feature later on. Designs for our
armel plate in here, starting with the broken
lines to divide it into different
horizontal sections, doing the same
thing for this one. For the top three armor plate
that I created in here, I'll be creating the
same kind of design that I showed you in the
demonstration video. Cutting dividing this into
different rectangular sieves. And then we'll be
creating a little bit of conkep C for the
bottom sections. Doing the same thing
for this arma glt using two lines to divide it into
different rectangular saves. Apart from this
two armor plates, I'll be doing the
same thing for one of the larger armor plate just
beside the right armor plate. For now, let's
create this kind of conceb seats for
the bottom section. The same kind of design that I showed you in the
demonstration video. Moving on to this one,
doing the same thing, two lines to create this kind of curvier s for the
bottom section. And yeah, with this,
we are done with a simple C and
pattern for this one. We'll be creating
the same kind of pattern and design
for this one, too, starting with the two
straight lines to divide into different
particle sections. The other armor plates,
we'll be creating the steel pattern and designing, like I showed you in the
demonstration video. Well now, let's divide
into different sections. In here, I'm just
creating this kind of carbre lines to
make this division a little bit more easier. So these designs
are somewhat sam to the other two that
I was mentioning, but I decided to make it
a little bit different. Overall, as you can see
these are somewhat same, but for the upper section of this rectangular seams
that we are creating, instead of the straight
lines in here, I am making them a little bit curvial the same
as the bottom section. Now moving on to
the lower section, the clothes that are
hanging in here. So just simple plain lines. We'll be using a little
bit of darker side of the coloring to add a little bit more
detailing for the folds. Moving on to the Santa's foot. In here, creating
three or four lines to represent clothe wrapped
around the Santa's foot, the armor plate in here, wrapped around with the clothes. Hitting some small
ribbons in here. Hitting the outline
for the centasFree. So our samoid centa in
here is wearing sandals. Moving back to the top in here, let's create the outline for the plants that I was talking about. Very simple one or two stems
visible with few leaves. Instead of this, as
I was mentioning, you can create the
outline for the gift, basil, scrolls or anything else. You can also do the outlining of the sorts and catanas in here. Moving on to the
left side in here, creating small catanas
two small catanas that are visible in here. Only a small section of the samurai katana
is visible in here. Moving back to the centaspiece, let's create the facial feature, starting with the
centas moustache. Here I decided to
make the moustache a little bit smaller as compared
to the first project. Now let's do the outlining for the cenas eyebrows
and the simple eyes. Feel free to make
changes in adjustment to the centaspas in the facial
feature as you see fit. Now, let's make the centas bead a little bit more defined. So making the outline a
little bit more distinct. Adding a few lines to give it a little bit more
bossier effect, so a little bit more flafier
effect with the lines. Making the outlines
for the centas cap a little bit more detail. Instead of this
simple cents cap, you can create armor
like helmet or you can just create triangular C for the cents cap that will
be interesting too. Now moving to the Santa's bag, creating this kind of
small designs and pattern. So clothes wrapped around these small parcels and
the bags that Santa is carrying for one of the
armel plate in here, simple design, simple
rectangular seams. Moving back to the
other bag that Santa is carrying
during the same time, creating the same
kind of curvy lines for the clothes wrapped
around these two bags. In here, too, if
you want to create a little bit of
pattern and design, you can do that.
Now let's erase it. In Insure that the
color has dried up, the ink pen, jail pin, or
breast pin that you have used, and then erase it lightly. For some of the section, I'll be adding a little bit
more detailing, like in here for the beard. The bottom section of the beard is not that much
clearly defined, so making the beard a little
bit clearly distinct from the remaining section for this large armor plates in here, as I was mentioning,
I'll be creating this kind of scales
like pattern. For all the armor
plates visible in here, I'll be doing the
same thing, this kind of simple pattern and design. And with these we are
done with this one. Let's do the same thing
for the middle section, the middle armor paten here. Feel free to make changes and
adjustment as you see fit. And with these, we are almost
done with this middle one. Now moving on to the third one, same kind of scales
like pattern. Apart from this, we
have got one more. Only a small section of that
armor plate is visible. But for now, let's
continue with creating the small scales like
pattern in here. Adding a few more
scales like pattern and then we'll be done
with this armor plate. And with these we are
done with this one. Let's create the scales for the last armor plate
that is visible in here. Co. And with these, we are done with
creating the patterns and design for all armor plates. If you want, you can add a little bit of more
detailing as you see fit for the armor plates
for the cantas leg, too. If you want, you can
create different kind of designs and pattern. Now for the Santa suite in here, I'm creating this
kind of line so that the cloth is
folded in here. And for this armor plate
in here for the canta sue, just plain simple lines to divide into different sections, moving on to the left leg
and doing the same thing, plain simple lines,
plain simple two vertical lines to add
this kind of pattern. I decided to add a little
bit of more pattern for this armalpldT
section of the armor pad, simple scale like pattern. And with this, we are done with most of the outlining sections. Erase the pencil marks
if there is any. And in here, right now, I'm using this
sparkling golden color. So I'm using this
brass paint to add the coloring for the different
sketes that we created. Instead of this, you can use the Cambog or the light
yll to do the coloring. I'll be adding this for
some of the section of the different armor
plates like in here. Instead of doing the
coloring right now, you can do the
coloring later on. So if you're going to
use gauze or you can use a little bit of concentrated white colour to do the coloring later on when the primary layers or the flat was dried up to add a little bit of
coloring and detailing for the different scales
for the armor plates. So right now, I'll
be adding this for all the scales that we created
with this golden color. So this is going to
take a little bit of d, so I decided to
increase the speed. If you want to follow
along with me, you can reduce the speed or
you can pause the video. Instead of using
the light colors to create the coloring
for the scales, you can use black color to
do the coloring later on. In here, I'm using blacking to add the coloring
for the inside. So for all the skills
that we created in here, for the inside of
it, I'll be adding it. This two is optional. Instead of this, you can use
the red to color it all. And for now, I'll be continuing on with
this blacking to add the coloring for all the skills like pattern in the texture
that I have created. And as you can see, I'm
also adding it for some of the regions that will be
a little bit more inside. So black for those region. And now filling the
rest of the skies that we created with this black. You can use the watercolor
to do the coloring. You can use the sail pin or the boilpoint paint or the
file line to do the coloring, if you're going to
follow along with me. If you're going to
follow along with me and use the same color
scheme, otherwise, you can use completely
different colored scheme to do the coloring for
the different sections. For now, I'll be continuing
on with this black and carefully adding in between different
section of the scales. One more thing that you can do is you can just completely cover the entire section
with a black or red and then use
the white colour, white watercolor or white
ink or white jelly pin, white acrylic will
do the work and create this kind of skills
when the colour dries up. For one of the section, I'll
be adding the color later on on top of the black
using the white ink. And with this, we
are almost done with the coloring for all the
scales that we have in here. Adding a little bit
for the upper part. And here I decided to mix some of the
section a little bit more darker and making the outline a little
bit more defined, adding this a little bit in
here for this armor plate. And with these, we are
done with this video. I'll see you in the next video, we will be doing the
flatba and the coloring. Oh
13. Flatwash with the red ink: Welcome to the
third part in here. I'll be in here. I'll be using this
aid to do the flat s. If you don't have raiding,
as I mentioned earlier, you can use the
diluted watercolor or gauze to create the primary
layering or flat was. I'll be doing this
flat was on top of all the plate armors
that we have created, both the soulder
plates, the stomach, and the lower armor plates, a little bit for
the center's foot. And in here, I'm adding
it for the cenas cap. A little bit cautious
and careful while adding it near closed
or small species. Going over the
outline of the beard. And now let's do the
outlining in here and we'll be and then we'll be filling the entire space
with this red ink. I use this grading to
create the flat vase, since it will provide me with uniform and consistent color throughout the entire flat vase. With a Gauss and water color, you'll have to bit
causes and ensure that the intensity of the
color remains the same. But here in here, intensity will remain the same.
That's why I'm using it. And also, this ink that I'm
using is not waterproof, so it will blend smoothly with the
watercolor or the gauze, carefully going over
the outline for the cloth wrapping
around the cena suis. After coloring
this, I'll be going with the Camboj to
do the coloring. Instead of the Camboj
if you prefer, you can use the yellow or ocher, that will
do the work too. But I decided to use the same color that I use
for the armor plates, the designs in the pattern
for the armor plate. Now, adding it for
the canta spam. Adding it for the
sand. Now let's do the coloring for this
three armon plates. The armour plates in the front
and one on the back side. We'll be using lighted seats of the color and with
low intensity, the outlines that we created with the bras pen
will be visible. Instead of this, if you want, you can do the
outlining later on as I showed you in the
demonstration video. Carefully going over the
outline with this red ink. Now let's feel the remaining
section with this read. H And when these we are
done with this plate tar, moving on to the first one. In here, carefully
adding it beside the center spa and the cloth wrapping around the cena's fast. Here, to like the
earlier project, we'll be doing one or two more
layering of the coloring, starting with a bit lighter, starting with a bit
darker side of the red, and then a little
bit of brown or a little bit more darker side of the red or maroon to do the layering on top of
it to create a gradient. And now let's feel the
rest of the space. And with this, we are done
with the front three. We have got one more
on the other side. For now, let's do the
coloring for the Santas four. Carefully going over
the outline and then feeling the rest of this
piece in here with this. As to create the shadows and a little bit of sedied regions, I'll be adding the darker center of the red or the maroon
or brown just below the outline section just below the armor plates
and a little bit above the center's foot, too. I'll also be adding the red for the center's bag
that is carrying on its back and for the other soldier plate on
the center's left hand. Adding it for the
center's left hand. The outlines that
I created in here, I'll be going in with the
yellow or the Camujo later on. F now, let's feel now, let's feel the two armor
plates with the red. The second armour plate
that is visible in here, you can use other color
like Ambuji or brown to do the coloring to so that the two armour
plates are distinct. In here, I'm adding the
color for the cantas bag, filling in inside this
outlined section. I'll be adding color for
both the bags with this red, and for the clothes that
are wrapped around it, I'll be going with the Cambogiu, a little bit of ochre, and also a little bit
of white later on. But for now, let's feel the remaining section
of the Santas bag. Both the two projects
of the center samurai Santa took me around 90 minutes, 80 to 90 minutes. Carefully filling the coloring
for this small section. And with this, we are done with the second bag that
Santa is carrying. Let's do the coloring
for this first one. So the remaining
section outlining the armor plate
and then we'll be filling the remaining
section with the red. And with this, we are
done with two red bags. In here, I'm using Cambo ju. I mixed a little bit of burned sienna with this
to get this kind of sad. Instead of this, if
you have dark orange, you can use that too. So this is somewhat
of orange color or somewhat similar to
the color of the peach. In here, I'm using a
bit thicker consistency of this color to
do the coloring, moving on to the other leg. Carefully filling this section. And with this, we are
done with the feed. Now, let's do the coloring for the large clothes
that are hanging, so the one like seats. For the two of the clothes, I'll be using this and
for the middle one, I'll be going with
the black later on. And when this tries,
I'll be adding a little bit of brown on top of it to add more detailings and create a little
bit of screening. And with this, we are
done with the second one. Now, moving on to the
small bag that Santa is carrying on his
hip, on his waist. Adding it for the
Santa's gauntltd hand for the middle region in
here, the Santa's elbow. Instead of this, if
you want, you can use other color combinations
as you see fit. I'll be referring this color
as Cambo to avoid confusion. Adding this color for the cloth wrapped around Santa's waist, carefully and cautiously adding it for the smaller regions. And yeah, with
these, we are done with the coloring for the knot. Adding this color for this
middle section, later on, I decided to cover this
region with the black, so you don't have to add
the color for this one. Now for the Santas katana, adding this cull for
the upper part of the cenas katana and now for the remaining
section, the lower part. And in here, I'm leaving a little bit of white
speech in middle. Adding the colour for
the cenas other end. Is the consistency of the
color remains the same. I forgot to add the coloring
for this armor pred. This section of the armor plate. So using the reading to
color it once again. Adding a little bit
of more red ink in here to make this region
a little bit more darker. Adding it for the side too. Since this ink is
not waterproof, the two colors are
blending a little bit, and the region where
we added another near, it's a little bit more darker. You can also use the water
to spread the colors, adding it for the upper
side of the Santas ***. Here, too, I forgot
to add the coloring. And with these, we are
done with the red in here. Right now, I'm using the black, so center slipper or the center
sandals will be in black. Carefully going over
the outline region, leaving a little bit of
white space in here, we'll be going with the
brown or a little bit of pinkish color to add
the coloring for here. Since this was going
to take a little bit of time and this was
repetitive process. I colored it on my own. So these are the two paintings, one before coloring and
one after coloring, I added the color for
the rest of the species, the white species in
here with the Cambo. And apart from that, I also
created a little bit of pinkish color using a bit of diluted red
mixed with the red, and I used it for the
cantas wast cloth, as well as a little bit for
some of the armor plate. Now let's continue with
the remaining section. In here, and you see the
same color that I created, a little bit of white mixed with a very diluted
consistency of the red. And for the cantas bead in here, I also mixed a
little bit of gray. Instead of this
colour combination, you can use the same
colour combination that we used for our
earlier project, only gray in the white. But in here, I decided to create a little bit of pinkish
coloring for our Santa's beard, completely covering the entire section for the centas beard and the moustache with this a little bit for the
upper part too. I decided to use this colour
to keep the same thing for the Centas beard
and the subsection of the Santas armor plate. And in here, right now, I'm going with
medium consistency of the gray and overlaying this on top of the primary flat was that we created
with the earlier color. Small stocks with this gray to make this beard
a little bit more bossier and create
a little bit of fluffy texture for
this large beard. As you can see, I
primarily added it for the lower region and a little
bit below the centers. Most right now in here, I'm using skin tone to do the coloring for the cenas face, carefully adding it in here
for the cenas to small ears. In here, I'm using a
medium consistency of the skin tone to do the coloring for the Santa special feature. Adding a little bit just below
the centas moustache tune. These we are done
with the skin color. We will wait for it to dry
a little bit until it dry. And here, I'm using
gray to create small sados around
the centa's foot. I'm a diluted consistency
of the gray to create very small sandos just
beside the centa's foot. If you want, you can create
a bit larger sido in the form of circular see or
somewhat of elliptical see. In here, I'm using a
little bit of water to decrease the intensity of
the skin tone a little bit. It was looking a little
bit more darker, so that's why I used water to remove it a little
bit of the coloring. Now, let's make the Santa
checks a little bit rosy. So using a little bit of red, it will blend on its own because of the wet
and wind technique. I'm going with the white to make this a little bit more fluffier, so a bit larger strokes
with this white on top of the green
that we used earlier, not covering the entire
green that we used earlier, but most of the section
with this white. Carefully going over
the outline region near the centas moustache, and now here too. Most of the regions
of the grease and the pink that we used
earlier is covered, but on the stries
you can still see the visibility of some
of the grease strokes. Going over the outline to ensure that most of them is covered. Yeah, when it dries up, the small strokes
that we created with the green will become a
little bit more apparent. The visibility of this
white will decrease a little bit. Now it's
spreading the water. Now using the water to
spread the color for the santastic that
we used earlier. Also spreading this color
for the upper part to to create a little bit
more darker region. Right now in here, I'm
using sap green to do the coloring for few of the leaves that are visible in here. A bit lighter consistency of the sap green for the
coloring of the sleeve. If you want to make this
a little bit more detail, you can go in with
another set of the green. And now let's add more
detailing to the plate armor. In here, I'm using brown
and adding it on the sides, adding it on the sides of this lower section of
the armor plate. And I'll be adding it
for all the region where there will be shadows. Use a bit water consistency
of the color so that you can spread it
easily with water later on, adding it for the two bags
that we have in here. And now in here, I'm using
water to spread the colour to blend it with the Camboo juice sand that we used earlier. Spreading the color
in the middle and now moving onto
the other side. Covering the entire
section with this flat, the flat was we are creating
with this water by spreading the brown that we just added
over the Cambo from earlier. Now doing the same
thing for this region, doing the same thing for in
here, a little bit of brown, just below the centers
beard and on this side, the upper and the lower
side of this cloth. If you want, you can also use
this to do the outlining. In here, I'll also be creating a little bit of
gradient in here for the Santa's arm plate on the
canta, the contiltd hand. Going in with the
water to spread the colour to do a
little bit of blending. Spreading the color
a little bit, doing the same thing
for the armor plate in here, the contiltd hand. The colin he has to make this look a little bit more rustic, doing the same thing
for this region, the lower armor plate for
the Santa's legs in here. Creating the outline for
the different section and then we'll be using a little
bit of water to spread it. Or instead of this,
if you prefer, you can just leave it
as it as the outline. Instead of single lines, you can see to add a bit more
characteristic to it. I'm creating two lines. Now let's do the same thing
for this leg, the left leg. Create pretty small and precise
lines to create this kind of outlined section for different panels of
this armor plate. And I decided to not
blend this color. If you want, you
can go in with a. If you want, you can add
a little bit of water to blend this a little
bit to create gradient. But it's looking pretty good, so I decided to
keep it as it is. Adding a little bit of brown for the allowed section in
the center sandals. Now, these two colors, the
camo from the armor plate, and this bag is looking
somewhat of same intensity, so adding a little bit
of brown in here too. And with this Vard
and with this video, we will wait for the
colours to dry and then add another
layering on top of it, as well as do the outlining and I'll see you
in the next video.
14. Final detailings and extra outlinings: Welcome to the last to of the center of the
red armor order. In here, we'll be adding
the final detailing. Here, I'm starting with
a bit darker side of the grain to create a
little bit of gradient. For most of the
outlined section, I'll be adding the red for upper and the lower section and then go in with the
water to spread it. Adding another layer
of red on top of this, the centers large bag of gift. This is optional. If your project looks good, you don't have to add more
layers of the coloring. And now in here, I'm spreading
the color a little bit, spreading the colour
to blend it with a flatwash of the ink
that we used earlier. And you can clearly
see the difference. The upper and the lower part are dark and the middle
part is a bit lighter, ding it for the second one. So a bit more red
near the first bag, and then we will be spreading
it for the second one. You don't have to use water
even to spread the color. If the tip of the brush
is only dipped in the ink and the upper section is
not dipped in the water, then you can use
the upper part of the brush at an angle
to spread the color. Let's do it for the centas line. In here, too, just
near the plate armor, near the centas waist bend. Use a bit darkens the right outlining
this armor plate, too. Instead of this,
you can also use maroon or brown too that
will create a bit more. That will create a bit
more intense ingredient. Let's go in with the
water to spread it. Just spreading the
colour to blend it with the remaining flatwash
of the red ink, doing the same thing
for the Santa food. Moving on to this one, spreading
the color in here, too. Spread the color a
little bit more in here. Now moving onto this side, the armor plate in here, carefully adding a
little bit of red near the bottom
section of this cloth. Now, let's spread the color. Sometime I'll be using
water to spread the color. Otherwise, I will just use the bras at an angle
to spread the color, moving on to the
center the stomach in here too for the
outlined region, add a little bit more red to create a clear
distinction between centas armor plate of
the centa soldier and the centas armor plate
of the centtomach. Oh adding it carefully
below the Santa's beard, adding it on this side near
the Santa soldier plate. I'll also be adding a
little bit for the top and the bottom section of
this cloth that is around Santa's chest surrounding
the knot in here. Adding a little bit
for this side too. Right now I'm going with
water to spread the color. Spreading the color the
column will blend on its own. And now let's do it
for this armor plate. A bit more for the upper
and the lower side. Now, adding it in here. For this entire
region, I added it. So for some of the region, you will have to go once or twice, create a bit of coloring
and a bit more gradient. In here, instead of
doing more layering, I decided to create the
small strokes to give better appearance
that the clothing is a little bit folded
in some sections. This is small strokes, following the conto curve seep
of the Santas bag. Spreading the color a little
bit for the Santa soldier. Another layer of
the color in here. The reasons where the gradient
is not that apparent, you have to do more layering of the colour till you
are satisfied with it. Or if you are satisfied with how your painting turned out,
you don't need to do this. Adding a little bit
more in here for this. Creating this kind of triangular
see for the centas palm. And now let's spread the
color that we just added for the centas foot using water to spread the
color a little bit. Now for the clothes
in here as a seeing, are we creating this
kind of small lines so that to sort that there
are folds in the cloth. In here, I'm using the burned
sienna to create the folds. So just going over
the outlines that we created earlier
with the breast pane, simple and straight lines. I'm also wearing the thickness
of the lines a little bit, the upper part is a little bit more thicker the lower part, the lower part are
a bit thinner. For some of the clothe wrapping, I'll also be using this
burnt sienna a little bit to make the outlines a little bit more clear, a bit more crisper. Okay. Treat these kind of small lines so that there
are folds present in here. This region is not distinct and clear. Coloring of the clothes
and the gauntlet are of somewhat of
same intensity. So right now in here,
I'm using brown to make the outline of the
gauntlet a bit more clear and a
bit more distinct. Later on, I'll be
using a little bit of black or a
little bit of white to make the outline a little bit more
distinct from each other, doing the same thing for
this gauntlet in hand, going over the
outline to make it a bit bolder and more darker. Now in here, I'm using white. Here I'm creating a little
bit more clear distincon in between different sections. Also, I'm using this
white to create a little bit of highlights, too. Adding a little bit of white. The armor plate in here, I used a little bit of pink mixed with the white to
do the coloring. But right now I'm using white to make it a little
bit more lighter. Adding a little bit more
white for the cantas stomach, letting a little
bit more white for the cantas beard to give it a little bit
more fluffier look. And now in here, I'm going with the bras bean to make some of the outlines a bit more clear
and a bit more distinct. Insure the color has tried
and then do the outlining. If it is a little bit
difficult for you to overlay the fine line or
the breastpin on top of it, you can use the
small breast with the blacking to
do the outlining. Making the distinction
bit more gear for the separation in between
the different section, like the armor plate in here and the center
of the stomach. Going over the outline
for the elbow plate. Adding a little bit more line, just the fold that we created. Braspin on the top
of the folds that we created with the bit darker
tone of the red earlier on. For the section where the
outlines are not that clear, I'll be using this
breast pain to make the outlines a
bit more distinct. Instead of this,
you can also use white jail pin or
white ink if you have. If you want to use that
to create the outlines, then you'll have to
create a little bit of broken lines to do the
outlining with the white. Moving on to the lower side,
the armor plates in here. This will take a little
bit of time since we have to do the outlining for
lots of element in here. In here, I created
very small shadows just below the centers foot. If you want, you can
make it a little bit more bigger or bit larger. Let's do the outlining for the center lower
part of the foot. The armor plates
around the center sin. Making the lines bit more clear. One more tip you can use to the outline is to
use the paint slowly. If you overlay the paint fastly, then the ink point come out, but slowly and gradually,
you can use it, apply a bit of preset to do the outlining
with the bras pin. With the fine linens, I find
it a little bit difficult to create the outlining on top of the watercolor or the gauze. So I generally prefer to use the breast pain or watercolor brushes
to do the outlining. Making the outlining more clear for the armor plates in here. Let's make the outline
more clear in here, too. So these are some of the steps
that take a bit of time. Instead of this, if
I would have used a bit lighter tone of the
coloring, lighter red, and lighter yellows and ocher, then I would not have
to do this outlining. So it's a balance in between, using the darker
intensity of the color and doing and going over
the outlines once again. Now let's make the outline
of this cloth wrapped around the knot of the cloth
a little bit more distinct. This black section of the
cloth that is visible in here, I'll be using whiting to create
a little bit of pattern, the scales like
pattern later on. Now let's continue with
outlining with a bras pin. Moving on to this section. So I'll also overlaying
some of this black on top of the white let me use
earlier for the highlights. Now moving onto the other side. Let's make this region
a little bit darker. Going over the outline for
the katana that Santas is holding. Santa is not holding. It's just fastened
to the Santa's west. Now, going over the outline
for the centas beard. Small bras stroke
with a bras pin to maintain the rough texture
for the centas beard. Going over the outline for the
remaining facial features, starting with the centasmstas. Centasee Now let's do the
bottom of the centas cap and fine and fine outlining
centaseys and nose, creating these kind of
small strokes, too, so that the beard
is a little bit posier and a bit fluffier. Outlining some of the
leaves of the plant. Now, just add more outlining wherever you think
it's required, the regions that
are not that keen. Once again, here I am
packed with the white. Here I was going
to do a little bit of more detailing and designing. I decided to create
another pattern, skills like pattern
for this section. Then I gave up since it was
going to take a lot of time and it was not looking that great. You don't
have to do this. Here I was just experimenting. I would advise you not to
follow along with me in here since it did not
turn out that good. Go using this white to create a little bit of highlight
for some of the section, just adding it a
little bit below the black outline
that we did earlier. Moving on to the Santas food, going over some of the lines. Now for this black
one, for the fold of this black cloth,
I'm using the white. Now, let's make the
distinction a bit more clear and between
the Santa's pouch, the Santas bag that is
holding on its waist, the Centasqntilt it armor and the cloth wrapped
around Santa's chest. So it's using white to make the outlines a bit more distinct. Okay. Here too, making a clear distinction
in between this armor plate and all the bags that Santa is carrying a bit of white for
this cloth tied around. And in here as I was mentioning, I'll be creating a
scale like pattern, the same we did for some
of the armor plate. This is optional.
If you don't want, you can just leave it as it is. Now, all the things that
Al me doing is optional, you don't have to do it. If you're satisfied
with your painting, you can just keep it as it is, or you can follow
along with me and add a little bit more details
a bit of more coloring. Going over the
outline, the inner outline for this
region with the white. Adding a little bit of
white for the cents e, a little bit for the
top of the centa cap, clear distinction
between this armor plate and the upper part of
the Santa soldier. Here, let's create this kind
of pattern scale pattern. Let's make the outline a
bit more distinct in here. For this section, there are
two armor plates in here, a little bit of white
strokes to create a distinction between
the two elements, the two different section
of the armor plate. The outlining with the
black and the outlining with the white are
somewhat different. With the white, you
can saw a little bit of reflection as
well as a highlight. And with the black,
you can just make the outlines a bit
more bolder and clear. Now, I'll be just adding a
few lines here and there, the regions where I want to sow a little bit of
highlight or so a bit of reflection or just to make the distinction a
bit more clear. Now, once again, going back with the white to redo the eyes, I added a little bit
of white earlier for the pupil on the les
of the cantas eye. A bit of the outlining
for the upper part too. Let's make the outline for
the cap a bit more bolded. And once again, a
little bit of more outlining for some of
the section in here. I decided to make the armor
plates a bit more distinct. So for some of the section, adding few lines to make the
distinction a bit more gear, the different section
of the armor plate. If the armor plates
in your painting is visible, you don't
have to do this. In here, some sections were
not that clearly visible, so I decided to do this. For this armor plate, earlier, I used a lot of white to
do the outlining in here, using black to go over the
outlines of the white. Now I'm adding this on top of some of the section
where we added white, where I added a bit of
more white than necessary. So for those section,
I'm adding this black. And with this, we are
almost done with this a little bit more detailing
for some of the sections. I was not looking
that much great, so adding a little
bit more outlining. Making the outline for the
here line and beard line a little bit more clear in here. Doing a little bit of more
outlining for this side of the bit and creating more
smaller strokes in here. Here we added a lot of fight to do the outlining
for this armor plate. Going over the outlines of the white that we did earlier as well as
surrounding it. I'm not covering it,
but as you can see, I'm surrounding the white that
we used earlier and to do the highlight center's
palm to in here, going over this triangular seep that we used that we created. Now for the cloth
wrapped around it, creating a clear distinction
between the cloth and the small cloth that is hanging around
the center's waist. Bit of broken lines
to do the outlining. Add a few more
lines if required. Otherwise, with this,
we are this project. Yeah, I hope you enjoyed this. I'll see you in the last feedne.
15. Conclusion: Thank you so much
for joining me in this SRI Santa watercolor class. I hope you enjoyed painting this festive warrior
as much as I enjoyed guiding you through each step, weeks
bloat sketching, building simple shapes,
adding armor details, and using watercolor techniques
to bring both characters, the ruined real, and the Santa of the red
armor ordered to life. Whether you followed the project exactly or added your
own creative touches, I'm really proud of the effort
you put into your artwork. Now that you have
completed this class, I would love to see
what you created. Please upload your class
project in the project gallery, your final paintings,
your sketches, you practice seats or
even your color taste. Seeing your process is one of my favorite parts of teaching, and your work also
inspire other students. If you enjoyed this class, please consider leaving
a review or feedback. It helps me improve
future classes and also helps more
students discover this one. Thank you again for
painting with me today and for spending your time learning and creating something special. Keep practicing,
keep experimenting and have fun with watercolor. I'll see you in my next class.
 Vishal Munshi