Transcripts
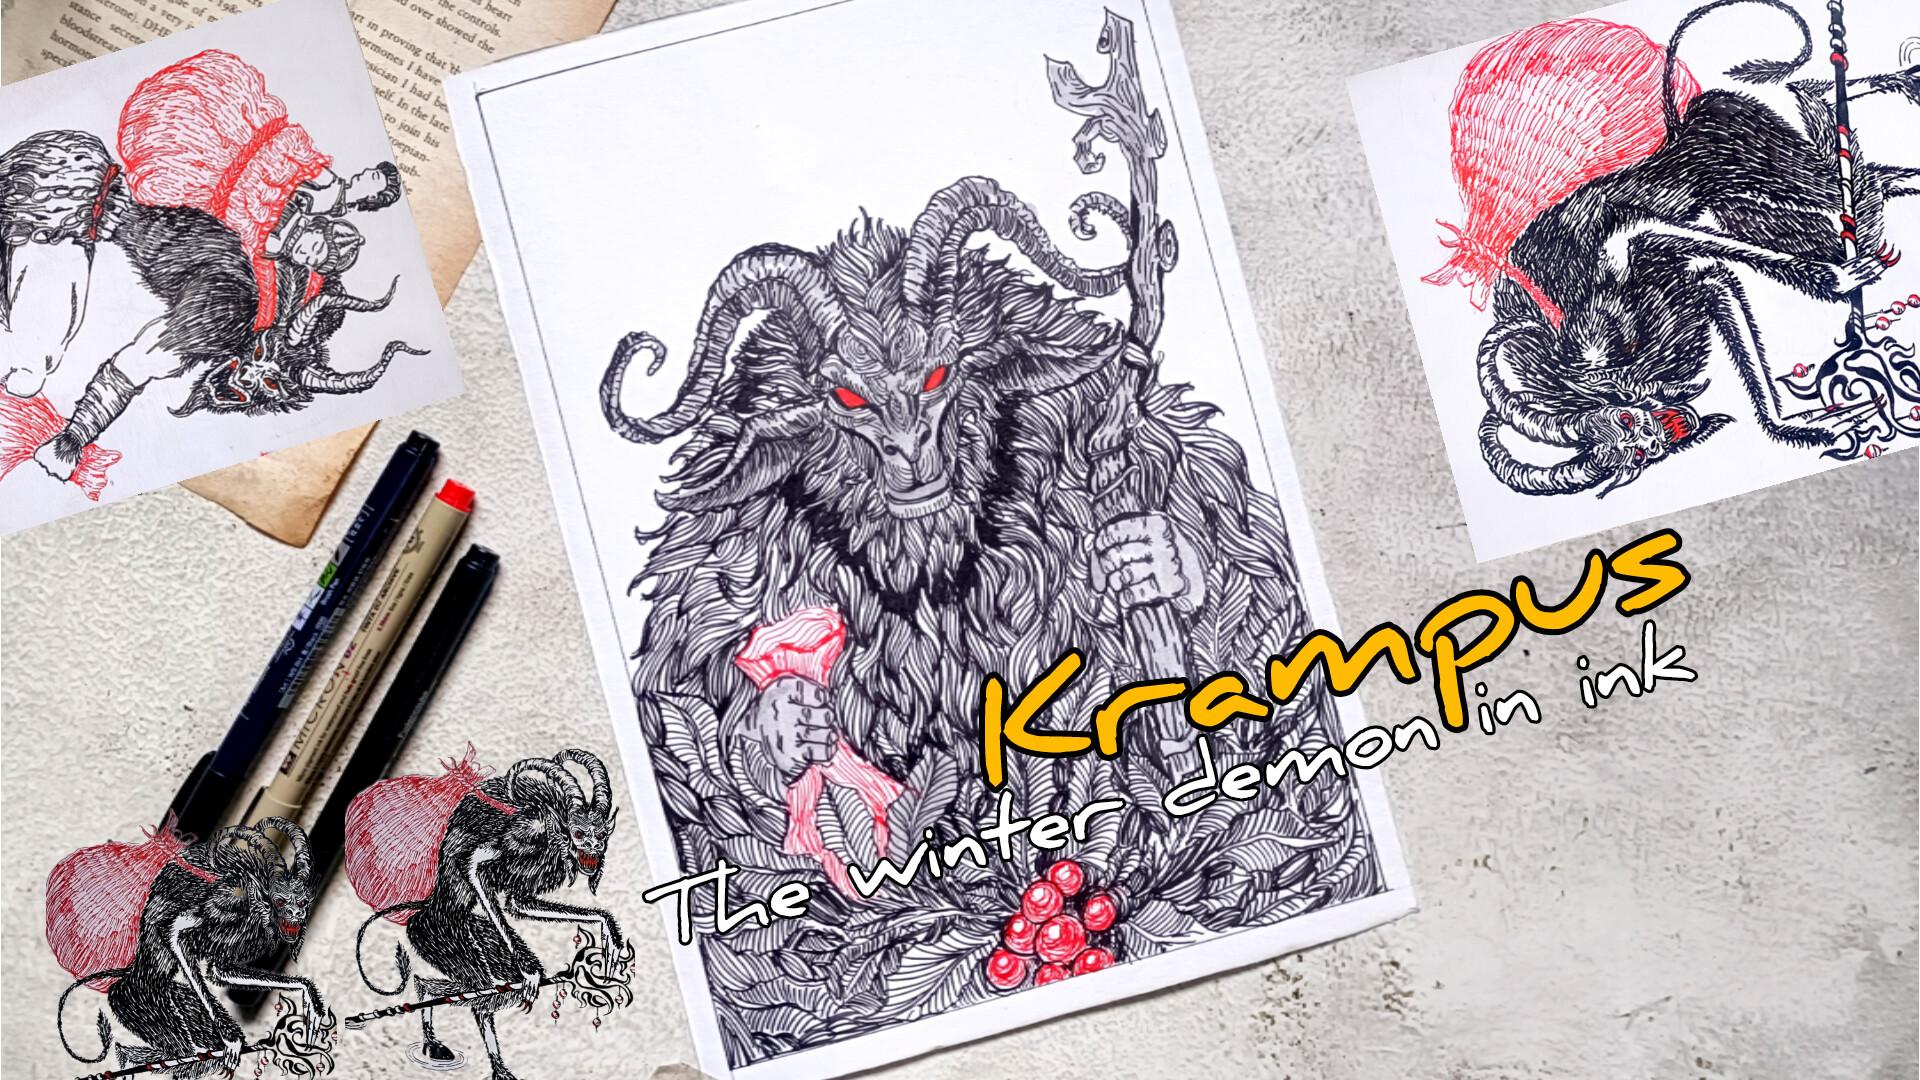
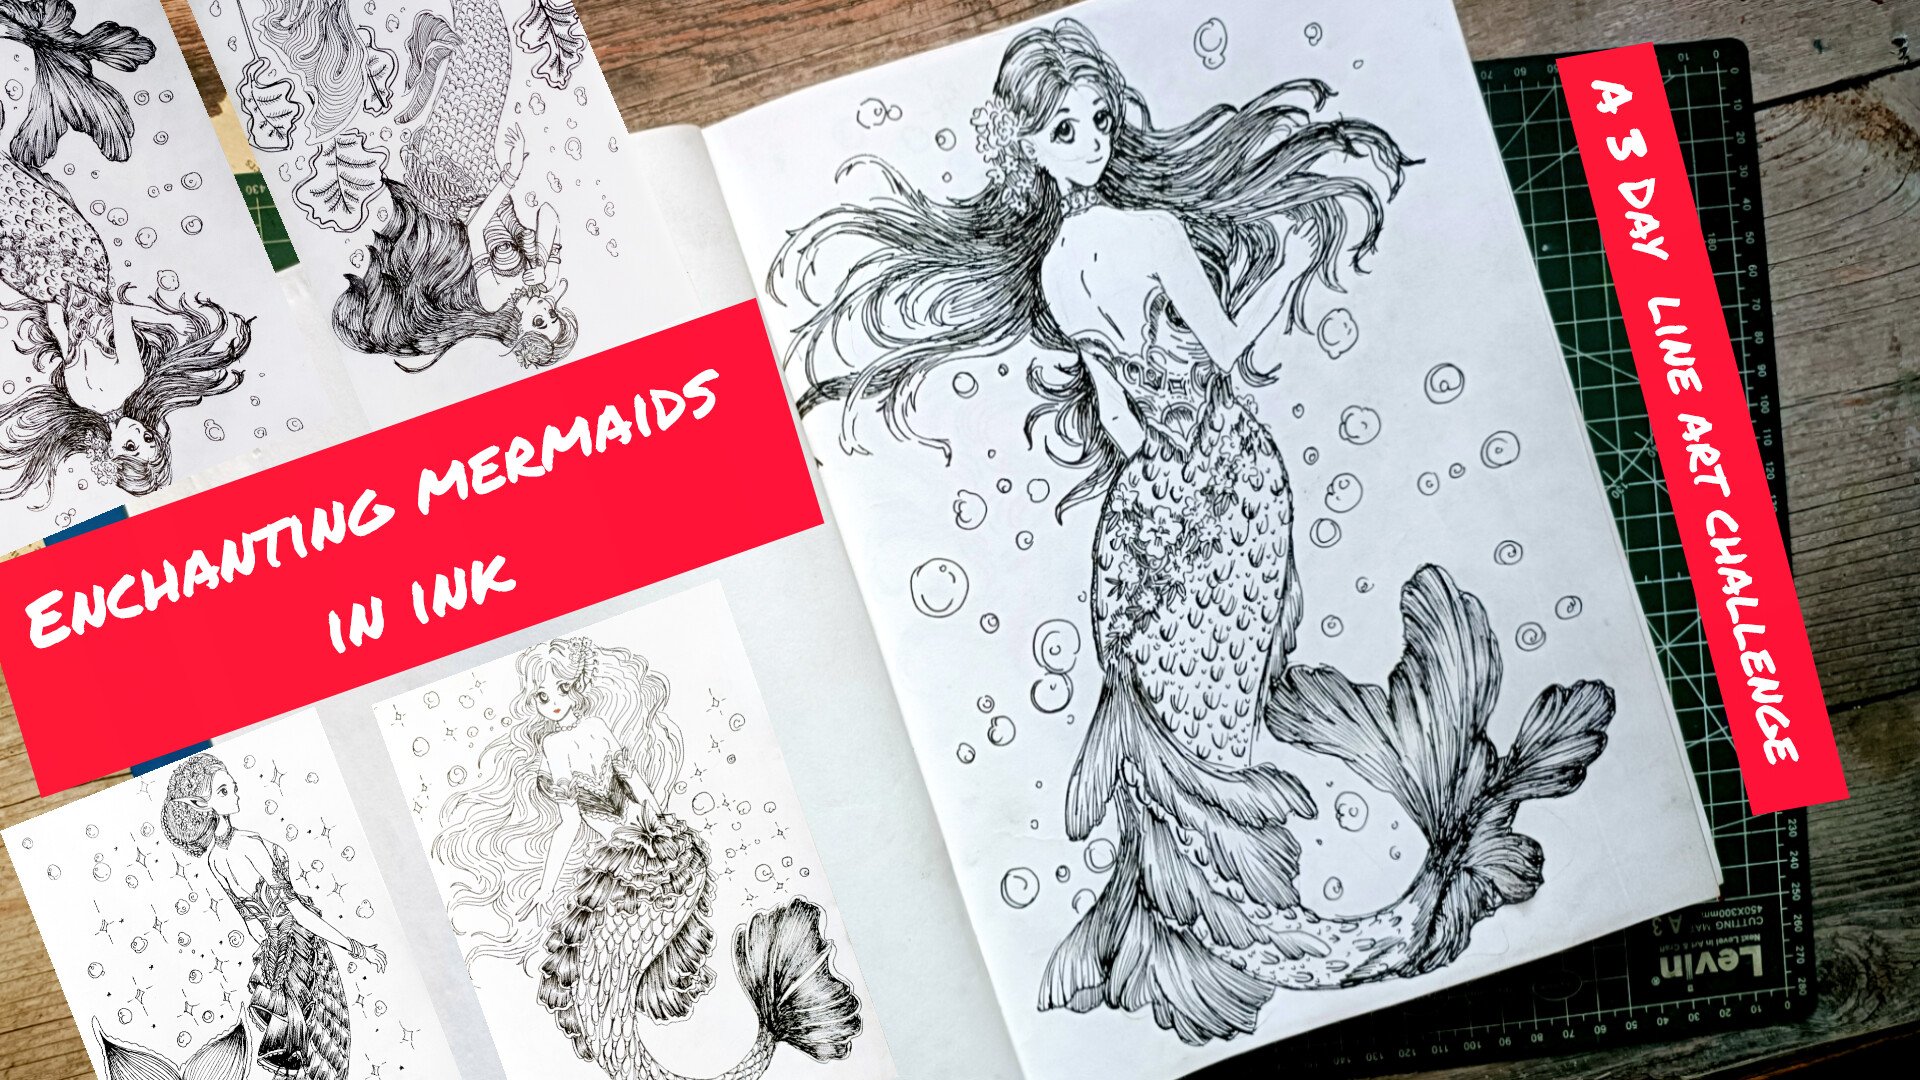
1. Welcome and introduction: Hi, and welcome to my
new class Krampus, the Winter demon in Ink. In this class, we'll be
illustrating three dark, chilling and highly
detailed crampus artwork using fine
liner and brass pants. Our projects in Kun crampus
the WinterFest Barden. Next, we have Crampus burden, and lastly, we have the
silent stalker of you. So these are the three
illustration that we'll be completing
step by step. Before we begin
our main project, we will start with
some essential basics. I will walk you
through the supplies. We'll be using fine liners dust pins and how each tool can enhance our final artwork. After that, we will practice few important in techniques
such as hatching, cross hatching, scrabbling,
seeding, and stippling. This technique will
help us create texture, depth, and dramatic shadows
throughout our illustration. Next, we will explore how to draw the various
elements that appear in our crampa scenes like
creating detailed leaves, drawing the rough burlac
sac that campus carries, sketching robes, chains
and iconic horns, developing expressive
crampaps and rendering beads class
and other airy features. Before we move into the project, let's talk about the
Krampus a little bit. Krampus, the half goat, half demon figure from
Central European legends who appears tuning winter season to Panis misbehaving children. The myth, rich in
symbolism and dramatic imaginery is perfect for creating bold and
striking in illustration. So that's why I choose
to create this class. Once we have covered the basic, we will dive straight into
our three full project, most of which are in real time, so you can easily follow
along at your own piece. This class is perfect
for beginner to intermediate or anyone
who loves folk lore, creature, and ink illustration. Hi, I'm Sal an
artist from India, and this is my
skill set profile. You can also find more of my work on YouTube
and Instagram. So let's begin and
bring the winter Damon to life one
line at a time.
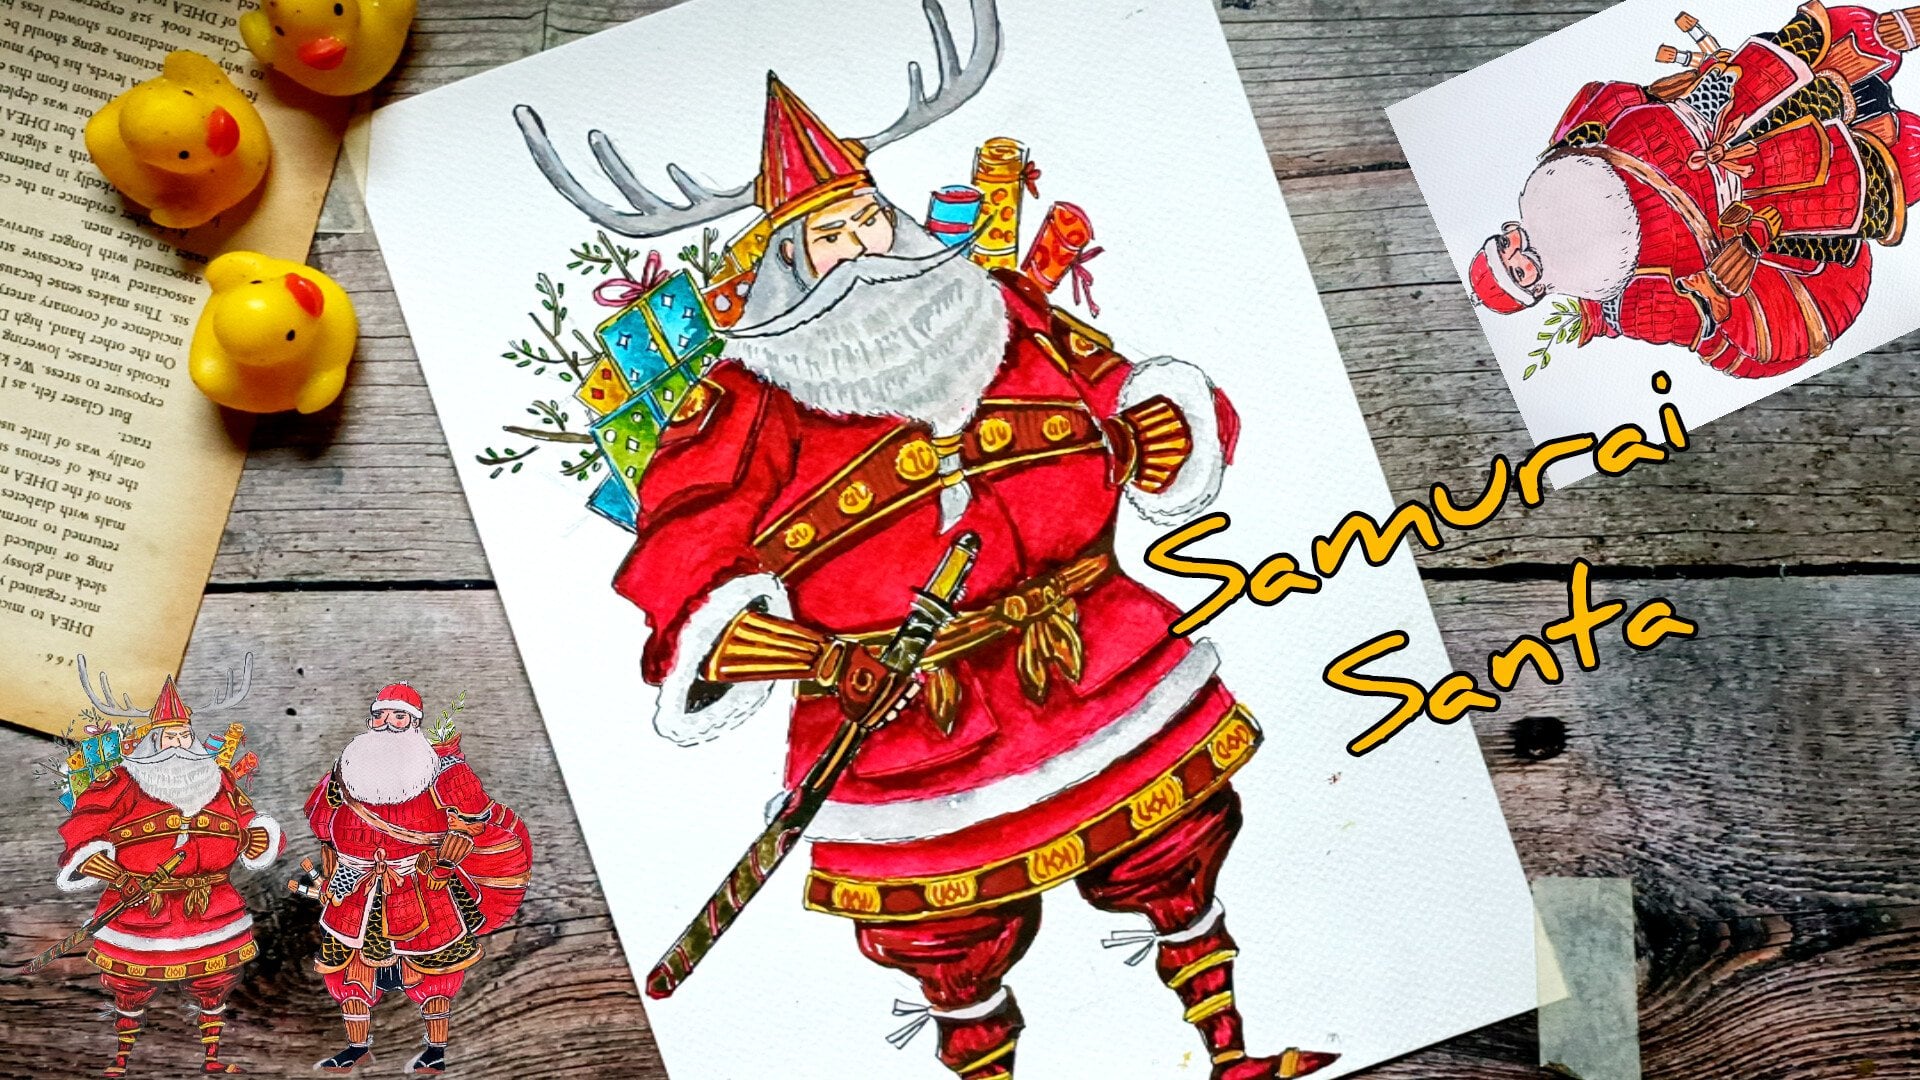
2. Class project: Your class project,
you can create three campus illustration using the technique we learned
throughout the lesson. You can follow along
with me in real time and recreate them
artwork or you are welcome to design
your own version of the campus using elements
and techniques we practice. Once you finish your artwork, please upload your project
in the project gallery. I would love to see your campus designs, your practice seats, and even any experiments
you try along the way, whether it's different horns, texture, poses or background. Feel free to also
see your thoughts, your process, and any
challenges you faced. Your feedback and reviews help
me improve future classes, and I'm always excited to
celebrate your progress. I can't wait to
see the terrifying winter demon you create.
3. List of supplies: This class, you will need
very basic supplies, pencil and eraser to do
the basic sketching, basking tip to secure the paper, fine liner or bras pin to do the outlining and
adding the detail. Mostly, I'll be using the bras
pin, this Tambo bras pain. Then if you want, you can use the colored fine liner ora
pin to do the coloring. I'll only be using the
red, but if you want, you can use the
greens for the leaves and blues for the other details. Apart from this, if you have any other kind of paints
that you want to use, you can use that gel pin,
normal wallpoint paint. Et cetera. I'll also be using a little bit of green colour
for some of the section. If you have a sparkle pin, you can use that to greet a
little bit of highlights. You can use the white
gelpin to add highlights. I'll also be using
this normal red gelpin for some of the section. You can also use ink
to color ler section. And in here, I'm using
this 200 DSM paper. So these are the basic supplies that you will need
for this class. Mostly, I'll only be using
the Tombo breast pin, a little bit of red gelpin and
other things are optional. If you want, you can use them, but I won't be using them. So you just need a breast pin, a fine liner, and you are
ready for this class.
4. Different pens : Welcome to the first part
of the demonstration venue. We will start with testing out the different supplies
that we have. In here, I've got lots of paint, but mostly I'll only using these tube as paints
from the tombo. You can use whatever
supply you have. In here, I'll just be
sewing a different kind of line that I can create with a
different spin that I have. With this breast pain, the
tumble breastpin I can create uniform and
consistent lines like this. Mostly, I'll be using
this. Apart from this, you can also use the fine
liner Sakura micron fine line. It will do the same
thing. Just ensure that you are using a bit
thicker knee for it. In here, I have got this 0.2 MM. And with this, I can
create bit smaller lines. Even if you have got
thin micron pen, you can just go with the
lines to make it a bit mold, make it a bit more bolden. I also have this
steel MM micron pen. So if you want, you can
use the micron pink. If you want, you can
use micron pain too to do all the sketches. Then you can also use gelpin. This is normal gel
pen that I have. You can also use normal
wallpoint paint. In here, I have got manaca
paint from Jikpurataki. With this, I can create
very thin lines like this. I won't be using it, but if you want to create
some minute details, you can use thinner
ns to do that. You can also use Brs pins. With the brush pens,
the main advantage is that you can create
dynamic lines, why dynamic diamonds
lines with art thickness. Just by wearing the
freezer and the angle, we can create different
kind of lines. Here I've got another one, black one, so if you want, you can use it to do the
hatching and cross-hatching, it will make the
process bit more faster and you can create
more dynamic lines with it. I also get this dust
pain with less ink, and I'll be using this to create this kind of
texture if required. I also have got this
gray paint from ZikuratakeF one of the
project, I'll be using it. So in the earlier
demonstration video, I also recorded for more pins. So you can check out all the pints and supplies
you have to create different kind of live
and different varieties in different kind of line. Apart from that, you can also
use colored fine liners. Here I have got red,
blue and green ones. You can use green one to create
leave.Thise are optional. I won't be using the
greens or the blue ones. I'll only be using the red ones to create the red erries and a little bit of red for the eyes and the butlaps for the Krampus. You can also use blue to add a little bit
of detailing or do a little bit of coloring with
it. These are our optional. These are all optional.
You only need a single fine Landon bras pen, and you can create all the
illustrations in this class. Now I'll be showing you some of the techniques that
we'll be using. Mostly we'll be using
hatching and sading. So let's start
with the hatching. So in here, I'll be
showing you hatching, cross-hatching, stippling
and scribbling. So mostly I'll be
using hatching, hatching is a technique made by drawing parallel lines
close to each other. The closer the lines, the
darker the area appears. It's commonly used to create
form, light, and shadows. Here I've shown you
two examples one with more space in between and
another one with less space. Apart from the normal
hatching lines, I'll also be creating this kind of bit broken hatching lines. This kind of skin hatching
line for some of the section. I'll also be creating a little bit curved hatching
lines like this. As see lines and for
some of the regions, I'll also be folding
the lines a little bit. So we'll be using varieties
of hatching line. So we'll be using varieties of hatching lines
in our project. Apart from that,
I'll also be using this kind of circular
hatching line, a combination of both broken and parallel hatching
lines in this form, a concentric circle form. Now, we have got sdingH we can use the hatching
to create seeding. So as I just mentoned just by adding the lines bit
more closer to each other, we can create a
little bit of sing. So to do this, I'll
be starting with all the lines equally distant. And then for the region that I want to make
it a bit darker, I'll be adding more
lines just like this, another way in which
I'll be using it. So I'll be creating lines like this
parallel to each other, rows of lines like this, and to create a
little bit of sading, I'll just be adding another
row with more lines to it. So these are the two
kind of sdings that we'll be using along
with the hatching. Next we have cross-hatching. This technique, the
cross-hatching melts upon hatching by adding another layer of lines that
crosses over the first set. More layers create darker
tones and stronger depth. You can create this
kind of hatching lines, and then we have
this one vertical and horizontal intersecting
lines to do the hatching. You can also use this kind of broken lines to
do the hatching. Here's one more example using this wet curve
line to do the hatching. With the hatching, you
can add more depth and a bit more volume
to the painting. With cross-hatching, you can add more depth and more volume. Mostly, I'll be using hatching to give the projects
bit simpler. But if you want, you can
use cross-hatching too. Let me show you how we can incorporate siding along
with the cross-hatching, starting with a simple
cross-hatching, and then to make this
region a little bit darker, the top left side, I'll be adding more lines
and doing a bit more cross-hatching on the upper side of this region to make
it a bit more darker, more vertical and horizontal lines to make the
region bit more darker. Next we have stippling.
Next, we have a stippling. With a stippling, you can
create very fine detailing. It takes a little bit of
time, so I won't be using it. Basically, stippling
uses small dots to create sading and texture. Areas with more dots appear darker while few
dots look lighter. This is just a normal
stippling example. Now let me show you how we can create a little
bit of darker regions, also a gradient with it. Starting with simple
and uniform stippling. And for this side,
the right side, I'll be adding more dots to make it a little
bit more darker. This stippling is great for soft texture and
gradual sealing, and it creates
very fine artwork. This takes a lot of
time. That's why I won't be using them,
but if you want to add. But if you want to incorporate this in your project,
you can do that. And lastly, we have
got scrubbing. It's also called scumbling. It's another technique
that if you want to use, you can use it for the
heads and a little bit of texture for some of the
section of the cramps. Scribbling is a
loose method using random overlapping
lines or marks. This kind of random
lines With this, we can do a lot of seeding
just by adding a lot of lines, a lot of scribble line on some of the regions to make
that pillon bit more darker. This is quite faster as compared to all the
techniques hatching, cross-hatching,
stippling, and seeding. But for this, the
problem is you cannot create crisp and
detailed outlines. Now let me show you how I'll be creating hairs using
hatching techniques, hatching and a little
bit of seeding. I'll be starting with creating
this kind of outline, put the strips of the hairs, and then we'll be filling
it with the hatching lines. I will be starting with
uniform hatching lines and they will be
concentrating at the end. And to do a little
bit of seeding, we'll be adding more
rows of hatching lines on top of each other to
make it a bit more darker. We'll be using this
for this project. Apart from this will also using this kind
of hatching lines to create small here like texture
for some of the project. So using this kind of lines to do a little
bit of hatching, Now, let me show you how we creating how we using the
hatching lines to create texture and bit
of more volume to the horns and the
antlers of the campus. So here's an example
of a straight horn. We'll be using this kind of bit broken and bit curved
hatching lines to add a little bit
of texture and detail for our horn.
Here's another one. I decided to make it a
little bit more defined. So we have got two sides of the horn that is
visible for both sides, we'll be doing the
same thing, a bit of broken a bit of broken
and curved hatching line. I'll be making one
region a bit more darker by adding more
lines on that sign. Here's another one, a bit
long and a bit more curved. The two sides of the
horns are visible. For the lower regions,
we'll be adding more lines, doing a bit of more sading with the
hatching lines to make that region bit more darker and for the remaining section, we'll be starting with
doing this kind of bit rough outlining to create a bit of rougher texture for. Just like the earlier two,
we'll be using this kind of bit broken hatching lines and filling the entire
regions with it. To make any region
a bit more dark, you just have to add
more hatching lines and do a little bit of seating. And you can also use other techniques
like cross-hatching, stippling, or scribbling. So you can experiment in here. You can experiment in here with different kind of
techniques and see what you are more
comfortable with and that you can
use Non project. So for the edges, I added a bit more
dark lines to make that region bit more darker in here too
in the upper part, I added more lines
to make it a bit more thicker and
bit more darker. Depending upon the regions
where we want to sew shadows or draw attention
to the outline region, we'll be adding more lines and doing a little
bit of sading. And with this, we are
done with the basics. Now. Here's some of the
example simple example for the kind of leave
that we'll be using for one of the project
for the Krampus, the Warden of jungle,
this kind of leave. We'll be making the
leaves a bit more detail, a bit more larger, but
here's our example of it. Here too, we'll be using
a lot of hatching lines. For our mean project, as
you can see it in here, we have created lots of leaves, and instead of making them
a bit simpler like this, we'll be making them a bit more detailed bit more defined. Now, here I'm using the red el paint to
create the red berries. Simple circular seep like this, doing a little bit of circular
hatching lines to create this kind of simple berries,
simple red berries. If you want to make it a
little bit more detail and do a little bit of
hatching, you can do it. So here's another
example of leaf, starting with a simple seep Now adding the veins coming
out of the mid drops. Filling the entire regions
with these hatching lines. Now, to make it a
little bit more detail, I'll be doing a little bit of sading just beside
the mid drops. For the edges, I'll
be adding a bit more sding and for the
remaining section, we'll be doing a
bit less sading. You can also make
some of the means a little bit more darker. After that, we'll be also doing the outlining once again to
make it a bit more distinct. In here, it turned out
a little bit ugly, but for our main project,
we'll be making it. But for our main project, we'll be making it a bit more better. You can also use the
green fine liner sketch pen bras paint
to create the leaves. I won't be doing it,
but if you want, you can create this
kind of simple leaves. For all the leaves we'll be using a lot of hatching lines. Make the outline and the
mid drops a little bit more darker by going over the
lines twice or thrice. Here's another simple
kind of leaf that if you want to incorporate in your
project, you can add them. Here, too, we are doing
simple hatching lines, simple circular hatching lines. And yeah, these are some
of the simple things, simple techniques that we'll be using in our main project. In the earlier demonstration
video, I also included this. But in this one, we have got a little bit more explanation and a little bit more examples. And yeah, I'll be seeing
you in the next part.
5. Burlap sack: Welcome to the second
part of the tutorial. In here, we'll be creating two different kind
of burlap saps, two different kinds of robes, two different kinds of chains, and a simple sketch for
the head of the campus. Starting with a simple same
like this for the burlap sap. In here, I'll be
using the red colour and blue colour to
create the burlap saps. And these are a little
bit easier version of the burlap saps that I'll be creating in here
for our main project, we'll be making it
a little bit more detailed and adding
more folds for it. Let's create the outline
for the second Mrlepsap. So this one is
lying on this side and is a little bit slanted. You don't have to stick with the outlines that you have created, feel free to make
changes and adjustment. And with these, we
are done with the basic pencil sketching
for the two Blap saps. Going with the gel pen
to do the outlining. In just creating
simple rope for it. Mostly, we'll be using the
broken hatching to create this butlpsap For the
region near the roof, make it a little
bit more denser by adding more lines and doing
a little bit of seeding. Going over the outline
for the entire section, the remaining section
of this burlap sap. Try to create little
folds for it for this upper part and
a little bit for the lower section for the folds, make that region a
little bit more darker, a bit more wilder with
more lines here too, for the bottom region,
two or three folds present in this burlap sap. And now, we'll be feeling
most of the region, the upper part and
the lower part of this burlap with this kind
of broken hatching lines. And for both the regions, the upper and the lower
part will be doing a little bit of
sading particularly near the folded regions. We'll be making that
regions bit more darker with more hatching lines
and a bit of more sading. Create this kind of
simple hatching lines, bit broken and a bit ragged. I'll be making the lines a
little bit more longer near the folded region as well as
near the outline regions. And apart from that, for all the remaining regions, I'll be keeping it a
little bit uniform. Making the folded region a bit more darker with more lines. This is a very
simple demonstration for the burlap sap
that you can create. With these, we are
done with the first one. Let's create one more. And here this time,
I'm using blue. So mostly, I'll be using red to create
the Blapsp instead of this. If you want you can use other
colors, you can use blue. You can use greens or
other color that you have. We'll be doing the same
thing in here, too. For this region just above
the rope we have created, creating this kind
of hatching lines, make this region a
little bit more defined. Make the folded
region a little bit more darker, bit more denser. And let's feel the upper section with broken hatching
lines and doing a little bit of sading doing a little bit of
sdingnear the rope, creating this kind of a
little bit of outline for the folded region
of this burlap sap. Now, let's do the
hatching a bit of curved broken hatching with the
remaining section in here, the same kind of hatching lines that we did for the first one. For the regions near
the folded region, add more lines and
a bit longer lines and for the remaining section, keep the lines a bit uniform. If you want to
experiment with it, you can use cross hatching
to create the Blaps up, you can use scribbling
or stepping to. Make the outlines a bit more darker by going over the
lines twice or thrice. And with these, we are done
with a very simple Blap saps. Now, let's create simple rope. In here, I'm using sacora
micron pen to create the rope. We'll be dividing the ropes into different
sections like this. The ropes that we'll
be creating for the project will
be quite simpler. Make the outlines a
little bit more darker and do a little bit of
sading near the edges. Two or three lines
for the outlines and a little bit of sading
for some of the edges. And this is how we'll be creating a very simple
verson for the rope. Mostly, I'll be using
red color for the rope. Now here's another one. It's
a little bit detailed one. So in here, we have this kind of alternative pattern like this. Here, too, we'll be making the outlines a bit more darker, adding a bit more
lines for the edges, as well as do a little
bit of hatching for both sides for both the sides of the robe that we
have created like this. A little bit of
hatching on both sides. So these are the two simple
ways that I'll be creating the rope for the one lap
sap for our project. This is how I'll be adding a little bit of
sading if required. Here's another one, a
little bit of sading on both sides of this
elliptical see of the rope. And yeah, with this, we
are done with the rope. If you want to create other kind of rope feel free to do that. Let me show you how I'll
be creating the chain. I'll be using the chains
for one of the project, starting with the simple C S Make the C sap a little
bit more defined. And lastly, connect
the remaining section of the C saps that we have created to create this kind
of simple linked chain. I'll be doing a little bit of seeding on two sides
of the chains. For the other side, we'll be making the other side
a little bit darker by doing these kind of lines and doing a little
bit of seeding. This is one of the
simple ways that we can create chain.
Here's another one. This is kind of a bit
rectangular and sap. Here, a little bit of
seeding on one side. Let's create another
one linked with it. These are the simple way you can create simple chain
for the projects. And let's create a very simple grotesque illustration for
the Krampus head. Starting with the simple
intersecting lines, and now creating this
kind of outline. Seems the seep of a mask. This will leave me the
two thirds of its space. Below it, I'll be creating the mouth and adding the horns on the two
sides like this. Simple kind of horn or antler. So now let's do the outlining
for the eye socket, just below the
intersecting lines, vertical, the horizontal lines, creating the eye socket. I'll be adding the nose just
above the triangular same. Make the nose. You can make
the nose bit more large, a bit more crooked, bit long. So any kind of nose you prefer, in here, I'm just
making it quite simple. The remaining
section of its face, its face will be a little
bit like the goat's head, so like this, so I'll be creating open mouth what do of the illustration, and I'll be sewing long teeth that is visible
inside the mouth. So this is just a simple
sketch for the Grampas. We'll be making adjustments and changes depending
upon the project, creating this kind of
large droopy ears. So this is how you can create the Crampa head using
the reference line, the intersecting lines
and the mask like scene. Let's do the outlining and adding a little bit
of detailing to it. In here, I've increased speed, since for all the illustration that we'll be creating
the three projects, we'll be creating different kind of pieces for the cramps head. Only the way that will be creating
the hatching lines and doing the seeding
will remain the same. But most of the things
the kind of eyes, the nose and the mouth will be making changes
and adjustment. Since this was going to
take a little bit of time, I decided to make this process
a bit faster, bit quicker. If you want to follow
along with me in here, you can pause the video or
you can just reduce the spin. But you have got the rough idea how I'm creating a simple piece. I'll be trying to make
the chicks a little bit sunken and a little bit
more grotesque looking. And to do that for the fees, as well as the checks,
I'll be adding more lines, a little bit of cross, a little bit of hatching
along with the sting. We'll be trying to create
wrinkle like appearance as well as leathery appearance for its face by adding
more lines to it. If you want to add a tongue that is optional,
you can do that. Mostly, I'll be using
red for the eyes as well as for the mouth and the tongue if
you're going to add. The ears, I did not addit
any kind of accessories, but if you want, you can
add accessories like this. And here I added three earrings. To create a hair like texture, I'll be creating this kind
of simple line for the face. I'll also be creating
this kind of this kind of bit large
beard for its phase. Depending upon the project, we'll be making some
changes to the kind of here and the beard and the
moustache if required, we'll be making the
changes as we go. And basically, you have
got the rough idea how you can create
the different kind of pieces for the campus, and I'll be seeing you
in the first project.
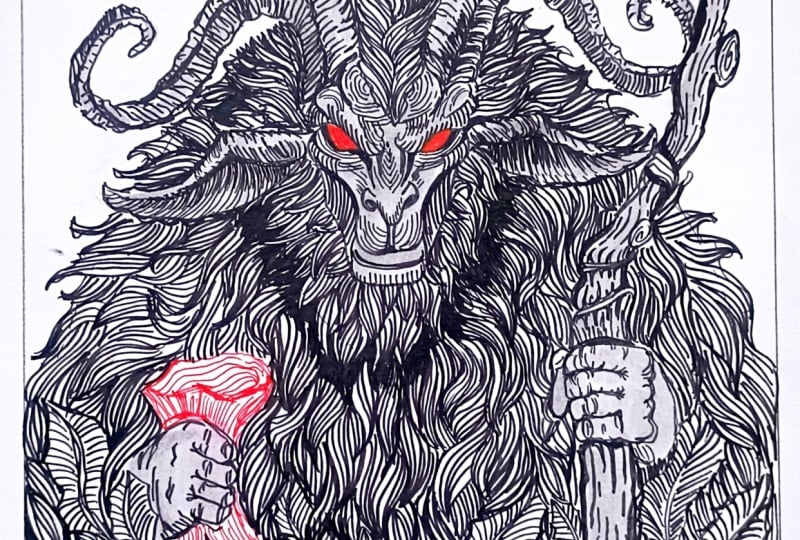
6. Basic sketching: Welcome to yet another scary and terrifying illustration
of the Krampus. Here we have got another
full body illustration. As usual, I am starting
with simple saps. A combination of simple saves to sketch out the guideline
for the scrampus phase. I have divided into two
sections for the upper part. I'll be adding the
horns later on. Sketching out the guideline
for two large ears. When we'll be going over with the fine or the ink
pink to add the detail, we'll be making a little bit
of adjustment and changes. This is just a simple
basic pencil sketch. So feel free to make changes
and adjustment as you go. I'll be adding the horns, a bit larger and bit curvier horns. Let's do the outlining
rough outlining for the rest of
the Krampus body, somewhat of this
kind of circular C, a combination of
circular and triangular. This will be the main
portion of its body, the chest in the back. Now for the remaining section. This rampus has got
a very thin stoma. For the lower section
of the crampus ling, just simple sep like this. I'll be dividing the crampus ling into three
different sections. This is the second, and now
let's do the third one. Outlining for the
second ling, this leg. Some portion of this
leg won't be visible. We'll be creating
hoof like foot later on campus for the Krampus now. Let's do the rough outlining
for the Krampus horns. For this rampus,
I'll also be adding the tail as well as staff, a large wooden staff
he will be holding. For this crampus both
arms will be visible, and he has got some very
wicked, thin and long arm. Feel free to make changes
and adjustments to the seaps and the sizes of the arm
and the rest of the body. For his forearm, as you can see, I decided to make
it a bit larger. The palms and the finger
will be larger, too. In here, I'll be
creating the staff Oden stuff with a little bit of decorations and detailing. Now let's do the outlining
for second hand. Upper part of the hand will
be covered by the chest. Only a small portion of its
upper arm will be visible, long thin fore arm, long pointed palm and fingers. I'll be making its finger more
scaring and more righting. I'll be adding nails later on, adding this kind of men, adding this kind of beard like mean on both side
of Krampus face. Now let's do the outlining
for the burlex sac that this Crampus will be
carrying a bit larger. Upper part of it will be a bit smaller than the lower
section, as you can see, I have made it a bit larger, and I'll only be using
the d to do the coloring. Here we have got the
tail for the Krampus. Let's do the remaining
section of this burlap sap. This is the rough outlining
that we have come up with. If you want to add more
aliment, feel free to do that. If you want, you can
create a small children. If you want, you can add one or two small children in here. In here, I'm just making
a rough outlining. If you want, you can add it. But it's going to
be a little bit difficult for me to
do it since I'll be creating a bit more detail stuff that the scrampus
will be holding. But if you are going
to keep but if you are going to make small
stuff or normal stuff, you can create one or two
small kit that is following the Krampus that will make the whole painting
a bit more scary. You can make the
children holding one of the finger
of the Krampus. That will make the
whole illustration look a bit more scarier. And with these we add and with
a rough pencil sketching, I'll be seeing in the next media doing the outlining and
adding the details.
7. Outlining with fineliners: Let's continue where we
left off in this video, we'll be doing the outlining
and adding fine details. So for the Crampus face in here, I'm starting with
the crampus nostril, two small dots like this. And now let's encircle it to make a nasty and
frightening nose. Feel free to make changes and
adjustments as you see fit. If you want, you can make
the nose a bit more pointed, or you can also make the
nostrils a bit more larger. Campus mouth, I'll be sewing large canine teeth
that are visible, and for the insights, I'll
be using red to color it. But for now, just create
simple canine for its teeth. If you're not that comfortable
with directly using the breast pain to
do the outlining, you can start with
the pencil sketch and then do the outlining. But since these are simple facial feature that I'm adding, I believe that you can
do it quite easily. To make the cramps face
look a bit more scary, I'll be adding wrinkles and
a lot of lines to give it a little bit tired and
exhausted look as well as making it look more
frightening and scary. Creating the outline for the
eyebrows, large eye sockets. For the eyes, I'll be using red. The entire section will
be covered in the red. Below the eyes, adding
these random lines. Now let's make the eyebrows a little bit curvier
for the top. For the entire forehead, I'll be filling it
with the curvy lines, a little bit of hatching. Make the outlines a bit
more ragged so that you can so that they are some
kind of texture and patterns. For now for the campus chin, a little bit of ragged lines, a bit sour feature for its chin so the chin is
a little bit hollow, just add few lines and make
that region a bit darker. Now let's do the
outlining for its ear. Elf like ear bit
larger and crooked. In here, if you want,
you can add earrings, or you can see that
some section of the ear has been torn
off or is missing. Following the contour of the ear and adding few lines
in here and doing a little bit of
seeding to create a little bit more realistic
look for the ear. The other side of
the crampus chin and make the lines bit bolder to sew a clear distinction
on the other side. And as I was
mentioning, a bit of hatching lines for
the entire section of the campus forehead. In the middle, I'm leaving
a little bit of space, later on, I'll be
adding few lines. But for now, following the
contour of the eyebrow, at curvier hatching lines, making the lines a little bit longer and bit curvier
for the middle section. With these, we are
done with the ear. Now, let's do the second ear. A small section of the
ear will be visible. A little bit of seeding on the side to sew a
little bit of chatter. In here, we have got large
beard or you can say mean. Simple, small bruss
strokes to make it look a bit more hairy and a
bit more frightening. Mostly I'll be using
this rust paint to do the outlining as well as
detailing and coloring. If you want, you can use
the fine liner hail pain or normal wallpoint pain. You'll have to just
work a little bit harder to make the lines
a little bit more darker. Otherwise, you can
easily create this kind of illustration with the
normal Ballpoint pen, jail pin or fine liner. Moving on to doing the
outlining for the horns, start with broken lines, and then we'll be
adding details. We'll be adding
details, a little bit of seeding for some
of the regions. In here, we are trying to
so that there are a lot of curve lines and a lot
of texture in here. There are different
section in the horns. To so that there are
different section and partisans in this horn
creating this kind of lines. And for one of the sides, I'll be making them
a little bit darker and the other side will
remain a bit lighter. Just above its head,
add a lot of lines. As you can see on the
right side I'm adding a bit more lines so that this region is a
little bit darker. Start with creating
a little bit of hatching line and on top of it, do another layer of
hatching line to create a little bit of sading
to add a little bit of mount texture and volume too so that the horn is three
dimensional and it's cylindrical. Doing the same thing
for this second one, starting with the broken lines. The end portion of this
horn won't be visible. It will be covered by
the back of this cramps. The same thing,
starting with this kind of mid car hatching lines. We are creating this kind of curve hatching lines so that
this is cylindrical and s the regions where I want
to so that there is a little bit sados add more
lines in those regions. I'm also trying to depict a little bit of
different section in this horn to show a clear distinction for
those different section. I'll be adding a bit more
lines for those regions. And with these we had two
horns for our campus. Now, let's do the soldier. We have got a little
bit of hairy solu, the middle portion, the
top of the middle portion, I'll be keeping it
a little bit plain. And for the remaining section, I'll be adding lots of here, small strokes with the breast to create here like projection. And just below the soldier, I'll be adding more
lines below the soldier, we'll be adding
more lines to sew a little bit of shadows
and use this to create a little bit of clear
distinction in between the soldier blade and the
remaining section of its body. This is our first
laying for the here. On top of this, I'll be doing one or two more layerings to create a little bit of sating. Et's do the outlining
for its hand, and then we'll be adding more here on some of the sections. I won't be covering the entire section of its hand with a here, but for some of the section, like the upper part of its hand and a little bit
for the lower part, just around its elbow I'll
be adding here's there. Outlining for its
pam and the finger. Let's do the outlining for
its taste on another hand, and then we'll be
adding the more texture in the form of hairs. I'll be moving from one
portion to another portion so that I can keep the
whole thing in proportion. Doing the outlining
for its finger. This is not clear in here, but I just did simple outlining for its fore finger that
are visible in here. For the upper part of its palm, I'll be adding he later on. Let's do the outlining
for its back. For the upper portion just
below just behind its head, I'll be adding more lines to
make that region bit more hairy and to create a clear
distinction between its head, its back, as well as
the suldier plate, as well as the shouldier
blade of its hand. Rough outline for the rope or the burlcac that
I'll be carrying, I'll be using a later on. Doing the outlining for the remaining
section of its back. A small brush stroke
with this to create a rough outline for its leg. If you want to make the upper part of the leg a bit larger, the thigh, a bit larger,
you can do that. Outlining the remaining
section of its leg. It's got a very small torso. If you want to make it
a bit more broader, you can do that in here
as I was mentioning, I'll be adding here,
outlining its second leg. The lower portion is not
that visible in here. But you can clearly
see in how I did the second lay,
creating its tail. If you want to make it a little bit spiky and a bit more edgy, you can create small horns and small spikes through the
entire section of its tail. Later on, I'll be covering the entire section
of its tail with the he Simple outlining
for its second hand. Three fingers are visible
and one of its thumb. In here, I'm doing the outlining for the staff that is carrying. As you can see in here, I'm starting with a straight
line for the staff, and then I'll be adding a
little bit of curb lines a little bit of detailing.
For the upper section. I was not able to record
the whole section, but the upper part of the stuff, I created this kind of design, feel free to create any
kind of design pattern. You can also add
spikes to the staff. This part of its pam, I'll be covering it with a here, small brussel strokes,
layers and layers of brussel stroke to
create here like taxi for the entire section. For the upper part
of its forearm, I'll be adding the hair, and
for the remaining section, I'll be leaving it
plain and simple. Let me use this
small bustoke to do the outlining so you
can see what I mean. For this entire section, I'll be completely
feeling it with a small burustroke to
create hair like texture. I don't want to make
this region hairy, only a small resemblance
of the hair in here. And for its elbow to, a little bit of the elbow
in the lower region, small brush strokes in here. I don't want to make
this region hairy, only a small resemblance
of the hair in here. But for the elbow,
I'll be adding more brush strokes to
make it a little bit more hairier and to create a bit of distinction between the
elbow and its torso. And with these we are done
with our first hand for this crampus let's do the same
thing for the second one, starting with the lower
section of its hand. And for the elbow,
I'll be adding more strokes later on,
moving on to the upper part, making the upper
part bit hairier using this small brush stroke to act as a outline for
this upper part. A little bit more
lines for the elbow, covering the entire section of the elbow with these
kind of lines. And now let's feel
the remaining section of this hand here. I'm just doing small
hatching lines. I'm just creating small brush
stroke with a little bit of hatching and a little bit of seeding and a
bit of hatching, making the outlines of this hand a little bit more
darker with more lines. Let's extend the
hairs a little bit. As I was mentioning, I'll be making the soleal
a little bit more darker with more shading later on to create clear distinction. For now, let's add the class for our Krampus and on the
upper part of its finger, create small lines so
that it's hairy too. He has got hairy fingers. I'll be adding red for
the class later on. For now, just create
simple lines. Covering it in the hair. You'll have to vary
the size of the brush stroke depending upon where
you are adding the hair. For its back, we'll be creating a bit more larger bro stoke as for its height to
a bit larger stoke, but for smaller
regions, we'll be adding creating
small brush strokes. Adding a few more
lines for its soldier. And now let's make its
tail a little bit hairy. In here, I'm making it still
a little bit more broader. Later on, I'll be
adding more texture. I'll be only covering up
to this in this video, and I'll be seeing
in the next video we'll be adding more detailings.
8. Final details: Et's continue where you left of for the silent stalk of fuel. In here, I'm starting with
the red to do the coloring for the Burlac sap that
this cramps is carrying, creating the kind of rope that I showed you in the
demonstration we knew. Instead of this, you can
create other kind of rope. In here, I'm creating the
different kind of rope. Simple scribbling
to make it a little bit more darker a
bit more distinct. The knots for this rope and let's do the
remaining section. In here, if you want to make the Blap sap a bit more larger, a bit more smaller,
you can do that. Feel free to make
changes and adjustment. Now let's do the remaining
section of the Black sap. I'm starting with a broken line. So if I have to make
adjustment, I can do it easily. I'll be using hatching, a
lot of hatching and a lot of sealing to make the upper region as well as the lower region, the sides of the lower
regions a bit more darker. Hatching and the
seeding, I'll be wearing the length of the strokes that
I'll be creating in here. For the upper part, I'll be creating a bit smaller stroke, but for the lower part, I'll be making the strokes a bit larger. Here, I'm just creating
simple folds of the Mrlax sap to make it a
little bit more realistic. Now for the upper part,
small hatching lines to make it a little
bit more darker. For the bottom region, too, cutting this kind of lines too so that to create the folds for this Merlapsap Let's make the outline a bit more
bolder and darker. For the entire region,
we'll be filling it with this kind of
small hatching lines. I'll also be following
their contours. So for some of the regions, I'll be making the
lines a bit curvier. Mostly, I'll be
using this broken hatching lines for
the entire section. This is our first layering
of the hatching lines. On top of it, we'll be
adding more hatching lines. And as you can see,
I'm wearing the len. For the upper part, we
created bit smaller lines, and as we move away,
I'm making the lines a bit more larger here,
the bottom section. Once again, bit smaller lines. I'll be coming back to
the burlap sa later on. For now, let's do
the coloring for the remaining section of this crampus body,
the upper part. In this region, I'll be making a little bit more darker to create a clear distinction between its shoulder blade and
the remaining portion of its hand and its chest. For now, let's create only
this small hatching lines, a bit curvier wherever required. We'll be completely feeling the entire upper part of its body with the
hatching lines. So this region, as
I was mentioning, making this region bit darker, a little bit of seeding in here. With this sading I'm creating
a clear distinction. Beside its face two, I'll be doing a little bit of sading. For now, let's add the lines. Insure that the lines
that you are adding near its face is facing
in a different direction, not in the same direction of its beard, the man or the ear. Otherwise, it will become
a little bit confusing. Since this is a
repetitive process and it's going to take
a little bit of time, in here, I've increased the
speed to create the here. If you want to follow
along with me, you can pause the D or
you can reduce the speed. As I was mentioning
for the region behind its neck, I added more lines, a little bit of shading to make that region bit
more darker so that the cado cast it by the horn and its head is making that
region bit darker. For the torso, I'll be keeping
it a little bit like this. But for the upper
region, I'll be adding more lines to make it a
little bit more darker. Now for its thigh and the leg, in here, this is in normal spin. The upper part of its thigh, I'll be making it a
little bit darker. So I'll be adding
lines close to each other and doing a little
bit of sading too. And you can clearly see the
difference, the upper part, the torso is quite lighter
and in here, as you can see, I'm adding lines more
closer to each other, and it's becoming
bit more darker. For the upper region
of its thigh, I'll be making it
darker like this. And as we move away from it, I'll be decreasing intensity a little bit and
making it lighter. Once again, in here, I've
increased the speed. Since this is a
repetitive process and it's going to take
a little bit of time, doing the same thing
for the other leg, the other thigh, I left a little bit of a space
in between the two thigh, a little bit of small
white line to act as a distinction in
between its two thighs. Now, let's do the
remaining portion of its leg, the lower portion. Just plain simple
hatching to add hair like texture and as I'm moving
away from the upper part, I'm adding the
lines a little bit more farther apart to make
them a little bit lighter. Like it said, I'm not
covering the entire section, but only a small portion of it. The upper part of its foot. Above its hoof. So in here, I created this kind of
hoof goat like hoof for the foot and doing normal scribbling to fill
the region with this black. If you want, you can cover the entire region
with the black, but I left a little
bit of a space in between the different
scribbling lines are used. And with these, we
are done with the primary layering for the hair, for the entire body
of this crampus. Now we'll be adding detailing, making some regions
bit more darker, doing the coloring
for the burlaxac that this campus is carrying, as well as adding more tiny and minute
details wherever required. In here, for this region, for its chest on the other hand, creating a clear
distinction by adding more lines to make this
region bit more darker. For the staff, it's carrying. You can create any kind
of design or pattern. In here, I'm just
keeping things simple. For some of the
section, I'll be adding more thicker lines and making them a little
bit more darker. You can create other
kind of designs pattern I'll also be adding a few ornaments
hanging from the simple circular beads or
circular ball like seams. For now, I'll be creating
this kind of line. For now, I'll just be doing
this kind of random seeps. If you've created
other kind of stuff or added more
designs and pattern, please hear your artwork
in the project section, making some of the regions a bit more bolder, a
bit more darker. Still, if you want, you can do the outlining for the child
that is in the background. It will be a little
bit challenging, but it will make the
whole painting a bit more scaring and bit
more frightening. Let's make this region
a bit more point in. Making the sides a
bit more thicker. And these are the kind of
ornament I'm talking about. Simple circular bead like same. These are optional.
If you don't want, you can just leave it as it is. I'll be adding a few more. Let's add one more in here. I'll be using a rate to do a little bit of
coloring later on for the upper and
the lower side of the circular beads
we have created. I decided to add two
or three in here too. For the lower region of
the staff, if you want, you can create this kind of
ornaments hanging from it. I'll be creating the same kind of design pattern that I
did for the upper part, a bit of curved lines. So this kind of simple
pattern or design. And for some of
the section, I'll be completely filling
it with a black. I'm using this black
to feel the region to sew a clear distinction between
its foot and the staff. For some of the regions, I'll be completely
leaving it with the white and for the
other like in here, where there is overlapping, I decided to fill this
region with the black to so that leg the leg of this crampus lies
behind this staff. Let's add a little bit more
black for this region, too. If you want to do
a little bit of coloring for the stuff,
you can do that. You can use the watercolor, gelpin or acrylic that will make it a little
bit more interesting. In here, I decided to cover
the section with the black. Let's make this region
a bit more darker. Now I'm just overdoing it. But yeah, with these,
we are done with the stuff that this
Crampus is carrying. Me lines to make some of the wegians look a
bit more hairier, like in here, too, adding more lines so that this
side is hairy, too. Small brush is too since only a small portion
of this is visible. Making the lower portion of
itself a bit more darker. With this, we are done with the lower part of
the cramps body. Let's move on to the upper part. We have to still do
the coloring for the burlap sap that
he is carrying. Before that, let's add the coloring for the
ornaments in here, as I was mentioning
for the upper and the lower part, a
little bit of red. If you want, you can do the coloring for the entire
region with the red. You can also use this
red for the staff. You can create bit of
pattern designs with it. I decided to do a little bit of coloring for the
staff with the end. Just filling some of the
random section with this red. And with this, we are done with the coloring
for the stuff. Let's do the coloring
for its nail. Covering the entire section
of its nail with the red. For inside of its mouth, too, I'll be going
in with the red. With this, we are done
with its lower section. Let's do the upper
part for its mouth. Here filling filling
this red in between the different canine as well as for the inside of its mouth. Instead of using this red to do the coloring, you can
also use the black. And with this, we are done with the red for the mouth, the eye. If you want you can
also do a little bit of coloring for its soldier, but it won't be
looking that good. I was going to do it,
but then I decided no. Only for the burlap
sap and some of the small section,
I'll be using the red. Let's do the burlap sap. This two is going to be
a bit repetitive and going to take a little
bit of time in here. Once again, I have increased
their speed, and as useful, if you want to follow
along with me, you can reduce their speed or you can just pause the video. This is the second
layer of hatching that I'm doing on top of it. I'll be doing another
layer of hatching to make the regions a
little bit more darker. I'll be doing another
layer of hatching later on to make the region a
little bit more darker. Let's make the tail
look a bit more hairy. So on both the
sides of this tail, I'll be creating this kind
of hair like texture, small bras stroke for
the entire region. Let's cover the entire region of its tail with this
small bras stroke. And The lower part of it still, if you want, you can
add a little bit of red that will be
interesting too. Making the lower part a
little bit more hairier. And yeah, with these,
we are done with that t. For this region, let's do a little bit of sading. For this side, making
this region a little bit more darker so that
the ado casted by the burlap sap is
making this region a little bit darker.
This region, too. Another layer of
hatching on top of this. Using this to do a
little bit of outlining. Adding more line for
its chest to show a clear distinction
between both hands. Now, just beside its face, making the region
a little bit more darker, small brass strokes. On this side too, for
the upper part of its here to small brass strokes to sow that a
little bit of hair. If you want, you can
use a little bit of white to do the coloring
for the eyeballs. Now I'll be adding
more hatching lines wherever I think it's
required to make that region a bit more darker or to create a clear distinction between
different sections. Let's make the elbow a little
bit more broader in here. I decided to make the horn
a little bit more darker, so I'm creating another layer of outline for the lower
region of the horns. Doing the same thing
for this horn, too, making the lower
region a bit more darker. Making the outline a bit
more distinct to show a clear distinction between its horn and the remaining
portion of its back. And yeah, adding a few more
lines for the upper part too. Now, add more lines wherever
you think it's required to create a bit of seeding
a bit more darker regions. And with this, we are done with the silent stalker of the
erasing the pencil sketches. Later on, I add this kind of spiral pattern just
below its hoof. I also did a little
bit of mod siding for the Mlvsap that is carrying. And this is how it turned out the silent stalker of the I'll be seeing you
in the next project.
9. Krampus's burden sketch: Welcome to this project
Krampus Burden. Let's start with simple saps to create a rough outline for the seep of this Krampus
starting with the feas. In here I'm starting
with this kind of rectangular see for the feas. Now, let's divide into
two different sections. In this circular part, I'll
be adding the eyes and nose and for the
remaining section, I'll be adding the mouth. Let's do the remaining section. This campus is facing
towards us and a bit tilted. So a large section of
its back is visible. For the back in here,
I'm creating this kind of bit large circular sep, a little bit tilted
circular seep like this. This will be the upper
part of it body. Now for the remaining section, it's abdomen, back,
and that torso, dividing this into further
different section, rectangular seep like
this and this kind of and then this kind of
cylindrical shape, a bit conical cylindrical shape. This will be the
hip for our campus. He will have long
and strong leg, so this will be the thigh. A bit of elliptical
se for its thigh. Feel free to make changes and adjustment to the
saves in the side. In here, I decide to
make this crampus a bit more muscular and
a bit more stronger. I'll be dividing its leg into
four different sections. This is the second
one. For this section, I created this conical s. Now for the remaining
section of foot, this will be divided
into two sections. This will be the upper foot. We'll be making this
region a little bit hairy. In here, I'll be creating a bit large and monster like foot. Instead of this, if you want, you can add the
hoof for the foot, like the traditional depiction, goats hoof for the Krampus foot. But in here, I
created this kind of fit and I'll be adding
details later on. For now, let's do
the second leg, starting with the thigh. Most of the thigh of the
second leg is hidden. A bit of conical and
bit cylindrical shapes for the remaining
section of its foot. So this is how we'll
be creating its foot. If you want to make
changes adjustment, if you want to make it a bit easier and simpler,
you can do that. Now for it's arm So we have
got the Krampus left hand. So let's do the outlining
for the Krampus hand. This arm is visible in here. I'll be making this arm
a bit more muscular. This will be his elbow and the remaining
section of its hand, creating this kind
of conical same. We'll be adding the
details later on. In here on this upper part, I'll be creating its soldier. And if you want, you can
create another hand in here. Only a small portion of
its hand will be visible. The soldier will be
lying behind this chest. Or otherwise, you can create it sand on the other
side like this. This vds elbow and the
remaining section of Pizzar. So he is carrying
or holding the bag, the burlap sack on the back. If you want, you
can create a staff. He is holding a larger staff. Instead of the staff in here, I'll be adding the burlap sap. Let's do the outlining for
the burlap sap on its back. So instead of the burlap sap, if you want, you can
create a basket like this, and initially, I
was going to create basket like this and
burlap sap on its hand. But then I decided to
create burlap sap. So if you want, you
can follow along with this and create this
kind of basket. Otherwise, you can just follow
along with me and later on we'll be converting this
into large burlap sap. In here, I'll be
creating two children. He's carrying two children. I'll be making the
both children sleepy. Instead of this, if
you want, you can add another things inside the
lap sap or the basket. Making it seem a
bit more thicker. Let's do the detailing
for its head. So horn creating its ears, this kind of pointed
ear and for the horns. Are we making the feas
a little bit larger? This is just rough This is just a rough sep
that I have created. Extending the feas
a little bit more. Making the horn a
bit more broader. With these with the basic
shapes for the Krampus body. This is just as simple a sketch. We'll be adding more
details later on, and I'll be seeing you in the next video where we'll
be doing the outlining.
10. Outlining with black and red: Welcome to the second
part. In here, we'll be doing the outlining, and I'm using the
breast paint to do the outlining,
Tombos breast pain. Instead of this, if you want, you can use the
normal ballpoint pen, gel pen or fine liner. Instead of that you'll be
creating a bit thicker and bit darker lines to create a little bit
of contrast in here. Right now, I'm starting with doing
the outline for the horn, and I'm creating this kind of bit broken lines to
do the outlining. We'll be using this kind
of broken lines to create a little bit of rough taxia for the entire
section of its horn. I'll be trying to
create a little bit of three dimensional
C for the horn. I'll be dividing into
two different sections, and for those section, the lower parts and
the upper parts, I'll be dividing into
different sections. I'm not able to really
convey what I meant to say, but you will see what
I mean to see when we'll be adding more details. This is just a outlining. This is just a normal outlining, defining the seeps and giving it a little bit more volume. When we will erase
this pencil sketch, then we'll be adding bit more details
using bits of sading a bit of hatching and adding
texture and patterns. Let's do the outlining
for its face, making this region a
little bit more curvier. In here, I'll be
creating its eyebrows, extending this below it will
be creating its eye socket. In here, I'm creating
a bit smaller eyes. If you want, you
can make them eyes. If you want, you can
make the eyes bit. You can make the eyes
bit more larger. Now, let's do the nose, starting with the
VC for the nose and now making the nostrils. So he has got big nose. And to make it a little
bit more sinister, I'll be adding more
detailing in the form of a little bit of shedding
and hatching later on. And to create a bit
of rough texture for the entire face and to so that there are hairs
covered in here, as well as it's looking a little bit leather
like and rough. To do that, we'll be
adding lots of lines, small and large lines to create that kind of exhausted,
tired and scary look. Creating its cheek and the
mouth. This is the mouth. And here I'm swing that
its mouth is open, and inside the mouth, will be filling it with the
large canine teeth. If you want, you can also create a large tongue coming
out from its mouth. This will be his beard. Now let's do the
outlining for its mouth. On both sides of its mouth, as well as just beside
its chin and the hid. I'll be adding lots
of hair later on. For the section where we
want to draw a tension, use a little bit of thicker line to make that region a bit more bolder and to create a distinction in between
different section. In here, I'm creating this
kind of canine teeth. For the inside in here, I'll be filling it
with the black. Instead of the black, if you want, you can go
in with the red. So completely filling the
entire region with the black. If you want, as I
was mentioning, you can still add
the large tongue coming out from its mouth. Adding few lines
on both sides of the checks to make it
a little bit hairy. Adding a bit more lines for the upper part of
its skull, the head. Now for its hot, as
I was mentioning, I'll be dividing
into two different section so that this is a little bit three
dimensonal dividing into two different section. Adding this kind
of hatching lines to so that there are different
section in this horn. For the entire region, we'll be creating this
kind of line for the horn. Earlier, we used a bit of broken lines to create the outlines, make those lines a little bit curvier so that they are
different section of the horn. And for some of
the sections we'll be adding a little
bit of shading. With this, we are done with the outlining for
the first horn. Adding a little bit of
seeding in this side, just below the second horn. Now, doing the same
thing in here too, dividing this into
different section, a little bit of broken lines, a bit of hatching lines, following the conto
the curve sweep of the horn and adding
the lines in that way. If you want to do the
coloring in here, you can use a little bit of gray for the sides of the horns. So for both the
sides, you can do a little bit of
shading with the gray, a small streak of the
breast paint to do the coloring for the
gray if you want. Making the sides a
bit more curvier. So with these we are done with the basic outlining for
the face of this campus. We'll be adding here later on. For now, let's move to
its rest of the body. We'll be creating
this kind of here. So this is a soldier. Per part. Now, in here, I'm defining
the outline for that soldier. For the upper part,
we'll be adding a bit more lines to make that
region a bit more harrier. And for the remaining section, we'll be following the we'll be following the seep
of its body and adding the here in that way to create the hairy texture
for its entire body. Adding a little bit
of tiny strokes, creating a bit of
tiny strokes for the sides of its face to
sew a little bit of hair. This is the first
layering for its hair. We'll be adding a bit more
layers of the hair later on. Just besides this horn, doing
a little bit of seeding. To make this project a bit more vibrant and a bit
contrasting, in here, I'm using the red
for the burlap sac, creating the outline
for the burlap sac. In here, we'll be
creating the rope like texture that I saw during the demonstration video making the rope a little bit more thicker and a
bit more detailed. Instead of using the
red if you want, you can only use the black to do the coloring and outlining
for the entire section. Erasing the rough skies that
we did for the children. I'll be making a little
bit of adjustment. Insert that the
ink has dried and then lightly erase
the pencil marks. Ink is going to
create the basket, but later on decided to
create large burlap sap. In here, I'll be
creating a bit of different kind of outline
for the children's, and I'll also be changing
a s for the burlap sap. If you want to continue
with this kind of basket set for the burlap app,
you can proceed with that. Create the outline for
the children once again. I creating children is
a little bit trickier, you can create other things
inside it's Blap sap. This is going to be a
little bit trickier. I'll be trying to fit
two children in here. The plan was to create
three or more children, but then I gave up on that idea since it was going to be
a little bit difficult. I'll be creating the outline for two sleepy children in here. The both children will
be a little bit sleepy. This one is wearing a cap. Second one. For the
second one in here, I started to create a
little bit of droopy head. Then later on, I made a little
bit side view of the face. If you are going to create the children inside
the Map saps, you can create any kind
of children facing in any way as C fit or otherwise, you can just simply follow along with me and create
this kind of bit simpler and create this kind of bit simpler
faces for the kids. Let's do the outlining for
the faces of the kids. For the second one,
I created a bit of conical hand and a bit
of whimsical face. If you want, you can
do the outlining for that, instead of that. But instead of that,
I'll be turning into the side view of the face. Creating a little bit of pattern for the lower part of the cap. Oh You can create any kind of texture
pattern as you see fit. You can also use the
red to do the coloring. This kind of simple
hatching lines to create the pattern
for the top of the cap enough for the
remaining section of its body. Only a small portion of its
back is visible in here. The other will be
inside the Blap sap. Uh doing a little bit of hatching for its back. So this is our first kid. Now, let's do the second one. So he's wearing a jacket. A small portion of its
hand will be visible too. Instead of creating
two children, if you want, you can only
create one children too. In here, I made a little bit of changes, as I was mentioning, I'll be sewing the side
view of the children, and I won't be adding the
cap on top of its head. Feel free to make adjustment to your sketch and do the
outlining as you see fit. Only a side view of its face is visible and he's a
little bit slippy. So both the children are a bit slippy for the entire
region of its head, covering it with
scribbling lines. The second child does
not come out the way I want it, but it's okay. Now let's do the remaining
section for the burlap sap. I'll be adding the eyes,
nose, and the mouth later on. For now in here, I'm just doing the outlining for
the Burlac sac. A A large burlap sap that is
scaring the two children. If you want, you can
continue with the basket. But in here I created
this large burlap sap. The other side of
the burlap sap. And we'll be using
the hatching lines, but curvier and broken hatching lines for
the entire section. The rope tied around
this burlap sap. Let's create the rope like
texture for this one, using the hatching lines
for this entire region. So for the both side
of this burlap sap, on its back, the Krampus back, I'll be creating this
kind of hatching lines. I see that the ink that
you are using is dried up, and then you rease
the pencil marks. I'll be doing the outlining of this project in
different sections. We started with a
peace, then did a little bit of outlining
for that soldier. And in here, we did
the outlining for the two children and
the Mur lap sap. And now, I'll be adding a
little bit of detailing for the Mur lap saps and the ropes, doing another row of
hatching in here. Simple straight lines
close to each other. And now for the outlining, making the outlines
a bit more darker. Making the outlines
a bit more darker, doing the same thing
on this other side. Making the outlines a bit
more darker and bolder. Now for the rope in here. In here, we are creating a bit more detailed kind of rope. Instead of this, if
you want to create the same kind of rope that
we created for the back. Inside this we'll be
using a little bit of hatching lines to
add the detailings. Well now, let's continue with the entire
section with this. In here, instead
of using the red, you can also use the
black for the ropes. And instead of this single rope, you can create multi pelmls too. And for the insides, we are doing a little bit of sading and a bit of hatching. Using this hatching lines to
the sating for this rope, the outside region as well as the outlines
are a bit more darker, doing a little bit, adding a little bit more red
for those regions. And with these, we are
done with this rope. Now let's do the
remaining section, starting with the upper part
of this Mrlapsap in here. We'll also be creating
the texture for the robe. Right now we are
doing the outlining. Later on, I'll be coming back to add the texture for the robe. We now, let's create
the texture for the remaining section
of the burlap sap, creating this kind of bit darker and bit bolder outlines to sew the folds for the Mrlapsap adding a little bit of small
lines for this region, too. In here, creating this kind
of bit more broken lines following the carp sweep of
this upper part of the row. Yeah, we'll be adding this
kind of line for Ola lines we created to sew the
folds for the Mr lap sap. And for the remaining section, we'll be using the hatching
lines to fill the bulla sap. Using this kind of bit
broken hatching lines. For the regions near the rope, we are creating a
bit smaller lines. And as we move away from it, we are increasing the sizes
of the hatching lines. Let's do the texture
for the rope in here. Simple rope in here,
simple kind of rope. Instead of this, if you
want, you can treat the other two kinds of
rope that we have created. Move to the second rope in here. Adding few more
hatching lines in here. Make the sides and the folding
regions a little bit more darker for the remaining
section of this Mr lap sap. For the remaining section
of this burlap sp, we'll also be creating
this kind of lines to sew the fold for
both the region, the lower side, as well as the region
just below the robe. And then we'll be using a
lot of broken hatching, as well as sending
to do the coloring, a little bit of coloring
for the burlap saps, as well as we'll also be making the outlines of the burlap
subs a bit more darker. And since this is going to
take a little bit of time, and this is a repetitive
process in here, I've increased their speed. If you want to follow
along with me, you can reduce the speed or
you can just pause the video. For the region just below the rope as well as for
the bottom section, we are starting with a bit
smaller hatching lines, and as we move away from it, we are making the sides of the hatching lines
a bit more larger. As for the lower regions and the outlines, as
I was mentioning, we are adding more lines to make the regen a bit more
darker to act as the outlines with
these we are done with the outlining for our Blaps up as well as the
hatching and the seeding. Moving to the remaining
section of this campus, doing the outlining
for the soldier and filling the rest
of this region with the hair using this kind of small hatching lines to create
a texture for the here. The region behind
its horn as well as its head should be a
little bit more darker. So do a little bit of seeding on those regions to
make that pigeon bit more darker and
a bit more distinct. Now moving on to the solar, doing a lot of
hatching to create the hair like texture for the entire region
of the solder. Following the same the
conical C put soldier and adding the lines
in that manner to make the form
a little bit more three dimensional to give it
a little bit more volume. This is our first
layer of siding. This is our first
layer for the here. We'll be adding one more
layer on top of it to make the upper part
of the soldier a little bit more darker. Now for its back, we'll be adding the here in
two different sections. One will be facing on the right, other will be on the
left, like this. We'll be leaving a little
bit of space in between. Doing a little bit
of seeding in here, two or three layers
of hatching lines to make the region
a bit more darker. Adding the lines a bit more carefully near the
face for the children. And I'll be covering up
to here in this video, and I'll be seeing
in the next video, we'll be doing more outlining and completing this project.
11. Adding hairs: Let's continue where we laptop. In this video, mostly we'll
be doing outlining and creating hairy texture for the
entire body of the campus. We'll be starting with
small strokes and then we'll be increasing
the size of the strokes. Mostly we'll be doing
the hatching lines, a bit curved hatching lines. And for the regions near
the outlines section, we'll be adding a bit more lines to sew the sados also for the different parts of its body to sew a
clear distinction, like for the soldier in here, the stomach, the torso
for all those regions, we'll be doing two or three
layers of the hatching to create a little bit
of sados L in here, just below its soldier, I added a few more lines to sew a clear distinction between its soldier blade and
the remaining section, the chiste We'll be doing the same thing
for the entire section. We'll be wearing the
intensity for some of the sections, otherwise, covering the entire section, the upper part of its body, and most part of it with
a hair like texture. Here I created this kind
of small hatching lines to add a little bit more detailing for its torso and the stomach. Now let's do the
outlining for the cloth. He's wearing this torn and
ragged cloth around its waist. I'll also be creating
two chains linked to it. Doing the outlining. I'm making the outline of this cloth
a little bit larger. Feel free to make changes and
adjustments as you see fit. Here too, we'll be creating
this kind of line to add a little bit of texture to
sew the folds in the cloth. And these are the two chains
hanging from its hips. At the bottom, I'll also be creating simple handcuffs
attached to it. These are optional.
If you don't want, you can just leave it as it is. With this, we are done
with this. If you want, you can use the green colour to do the coloring for this one. Very simple and basic
seats for the handcuff. For both the upper and the
lower part of the handcuff, do a little bit of hatching
and a bit of seating to sew shadows but present in the top and the bottom
of the handcuff. And now for the entire
section of its cloth, we'll be doing a little
bit of hatching, wet of card, hatching lines,
a little bit of seeding. Before doing that, let's
do the remaining section, the upper part of
its body, the torso. In here, I'll be decreasing the intensity of the
lines a little bit. The upper part will
be a bit more darker. The lower button here
is a bit lighter. Make the outline of the clothe tied around it's a
bit more distinct. Creating folds for the clothe, a darker and a bit more broken
lines to create the folds. In here, apart from
the hatching lines, I'll also be creating this kind of small dots like pattern. These are optional.
If you don't want, you can just only do
the hatching lines. We'll be wearing the length
of the hatching lines, a bit curvy hatching lines. For the upper and the
lower part will be adding a bit more lines and
for the middle section, a bit less lines, fewer lines
for the middle section. Simple dot like pattern.
Now let's do the hatching. More lines for the
bottom section. I'm also wearing the sizes of the lines for the lower
part and the upper part, I'm starting with
the smaller lines, and as we move
towards the middle, I'll be increasing the size of the hatching
lines a little bit. If you want to make this a
little bit more detailed, a bit more darker,
you can also do the cross-hatching for
some of the sections. Is that the ink
that you are using has dried up and
then do the erasing. Otherwise, there are chances
that the ink might smudge. Now let's do the
outlining for its thigh. I'll be coming back to it later on to add a little
bit more detailing, small section of its cloth
on top of its thigh. Now, let's add more lines to make it a little
bit more darker. Create the kind of lines
and a little bit of clothes that is hanging
from the remaining part, making the side a little
bit more broader. In here, I'm using a little bit of grade to create somewhat of distinction between the handcuff and the
rest of its cloth. This is Optional.
If you don't want, you can just leave it as it is. Doing a little bit
of seating for the regions near the
handcuff and the chains. We will move on to
doing the outlining for the remaining
section of its foot. For its thigh, I won't be doing the hatching
or adding hair. If you want, you can cover the
entire body with the hair, but I'll be keeping the
thigh and the upper part of its in bits clear
and bit lighter. I'll be doing a little bit
of hatching in here to sow the different muscles
present in the foot. Here we have got a
muscular campus. Now, let's do the remaining
section of its foot. Make this region a
little bit broader. Mostly in here, I'm doing
a bit of broken lines. Later on, we'll be
covering most of the lower section of this here. With these, we are done with the outlining for
the first foot, a bit rough outlining. Sorry, the lower portion of
the foot is not visible, but you've got the rough
idea how you can create it. Make this region
a little bit more darker for its knee, a
little bit of hatching. I'll be adding the hair,
starting from here. For the upper part of the in, make the hairs a bit smaller,
and as we move away, we'll be increasing the size of the lines as well as doing somewhat of uniform hatching for the entire section of
its remaining foot. For the outline section
to add a little bit of more defined strokes so that the hairs are sticking
out from both the sides. And yeah, we'll be covering the entire section of its foot, the remaining section with this. If you want, you can also
cover the upper part, the thigh, the knee, and the upper part of its in. So this is the kind of
foot that I created. Only three finger of
the foots are visible, and I also created
claw coming out of it. Instead of this, if you want, you can create the
hoof goats hoof, the traditional kind of
food for the Krampus. For the foot in
here, I'll only be adding the lines
for this section. Only a small portion of the foot will be covered with the hair. In here, I'm creating
bit smaller strokes for the hair texture. A little bit more hair to make the outline regions
a bit darker, a bit more distinct
and so more hairs. With these we are done with
the first foot for the camps. For the second one, I'll be using a bit of
hatching lines for the upper part of
the thigh in here. Since this is covered in Sadows, I'm just doing simple
hatching lines to cover this entire section. Instead of this,
if you want, you can fill the entire
section with a hair, but I decided to
make this region bit darker and do simple hatching
lines to do a little bit of sading we'll be creating the same hair like texture for the entire
section of its foot. In here, I'm just doing simple hatching lines for
the middle section, and mostly for the edges and the sides and near
the outline regions, we'll be creating
hair black texture, making the lines a
little bit curvier. Since this is also in the
sados upper part of its foot, that's why I did a little
bit of hatching lines. Make this region a
little bit darker. And just below its
first thigh to make the region bit darker
to sow a clear distinction. The two different thighs, as well as the shadows cast by the first thigh and the
upper part of its body, doing the outline for the
remaining section of its foot. The lower part of its foot
is a little bit bent. Creating very
simple food for it, adding the claw, only one
claw is visible in here. Only one finger of the
foot is visible in here. Defining the outlined section
for the higher texture. And yeah, we will be filling
the entire section with this small brass stroke to
create a higher texture. Since this is your
repetitive process and it's going to take a little
bit of time in here, I've increased the speed. If you want to follow along, you can pause the PD or you can or you can reduce the speed. So with this, we are done
with the upper part. For the fingers in the foot, I'll be creating these kind
of small lines and doing a little bit more outlining to create a bit more
molder outlining. Now let's move on to the pace. For the face in here, we'll
be adding more texture, more lines to make it a
little bit more hairy. So for both the
sides of its face, covering it with here, a bit smaller here, a bit smaller here
and a bit curvier. Adding more smaller strokes, a bit curvier strokes for the here on both sides
of its checks. Adding a little bit of
this kind of line just beside the nose for its head, too, a little bit
of hatching lines, a bit of scribbling to fill most of the
region of its head with the lines extending this
here for the upper part, too, doing the same for the skull, the
upper part of its head. With this we are done
with here for its face. Now, let's do the remaining
section, it's arm. Here we have got a muscular arm. The lower part of its hand
will be wrapped in cloth. But if you want, you can
read the hairy texture. Starting rough outlining and I won't be adding the here for this section, the
middle section. In here, I'll be sewing that the hand is wrapped
in the cloth. We'll be creating
these kind of lines, a little bit of carb
hatching lines. Make the outlines a
little bit ragged. Now let's do a little bit of seating using
the hatching lines. Some of the lines
are a bit larger, others are a bit smaller. With this we are
done with the spot for the remaining
section in here. In here, if you have a spice, you can create the wooden staff. You can create any kind of design or pattern for
the wooden staff. Since I don't have
that much spice in here, I won't be creating it. Instead of this.
Instead of that, I'll be creating another
large burlap sap. For this region in here,
create the taxa for the here, the lower part of its
hand is covered in here, but since it's wrapped inside the cloth,
it's not visible. But for this region, ith
be a little bit visible. Oh in here, once again, I'm going with the art to do the outlining
for the burlap sap. You can design any
kind of burlap sap. You can create a staff
or any other thing it's holding, it's your choice. In here, I decided to make
the bur laps up a bit larger and we'll be
doing the same thing, making the outlines
a bit bolder, creating fold by adding two or three lines to make the folds bit more distinct,
bit more bolder. Then doing the hatching lines to do the seeding as well as being the entire section of the burlap sap with
this kind of lines. Now for the lower
region to create folds. This is just rough outlining, we'll be adding more
lines for the outlines as well as the folds
that we have created. But this two is going to
be a repetitive process. So in here too, I have
increased their speed. As you can see, I
outlined the regions a little bit more to
make it more distinct. And now for the
remaining section, we'll be doing the
hatching lines, bit curb hatching lines, curved broken hatching lines
to feel the entire region first and then we'll be doing a little bit of seeding
for the lower regions. I'm also wearing the
sizes of the lines. For the middle section, we have got somewhat uniform lines, and for the lower section, we have got bit larger
than a small one or indeed a little
bit of seating for the lower region to make
it a bit more darker. And with this, we are
done with burlap sap. Adding the red for the
remaining section of its eye. If you want, you can also use a little bit of
red for its horns. For the clothes tied around
its hip, I'm using the red. If you don't want, you can
just keep it as it is. With this, we are
done with the red. If you want, you can add
more red anywhere you want. For this section, as
I was mentioning, making it a bit more bolder, adding more lines in here to so that it's a little bit more hairy as well as to create a clear distinction
in between its back, its chest and the soldier. Also be adding more
lines just behind this burlap sap to make
it a bit more clear. A section of its abdomen and the back is covered
by this MrLpsap. That's why this ports, the torso in here is looking quite
small and quite thin. And if you want you
can do a little bit of more shading for some of the regions to make them a bit more bolder, a bit more darker. In here, I decided to
do a little bit of mod sading a bit more curved line for the beard and the
hair like texture. Now for its mouth,
creating this kind of small broken lines to add a little bit
more texture for it, a bit of ragged and a
bit of ragged mouth. And with these, we
add with the mouth now for the kits in here. I'll be creating very
simple facial feature, both the kits are being sleepy. If you want, you can
create another kind of facial feature for the feces. Also, if you want, you can do the coloring for their clothes. Now let's do the outlining. Very simple outlining,
eyebrows and closed eyes. Simple s for the nose
and very simple mouth. Doing the same thing
for the second one, starting with the eyebrows, closed eyes, and
very simple mouth. A bit more detailing for
the ear, simple dot. Adding a little bit more detailing for the clothes
for the second kid. Creating this kind of
baton Ts are optional. If you don't want, you
can just keep it simple. You can also do a little
bit of sading for one side. We are done with the
outlining for the kids, add more details wherever
you think it's required, lightly erasing the pencil skit, Insure that the ink that
you use has dried up. Now, we'll be adding
more detail for the regions wherever
it's required. If you want, you can
treat it second hand. Per part of its hand
won't be visible. It will be lying
behind its chest, but the lower section
will be visible. If you want, you can
create lower section of its hand and its palm
and in his palm, he is holding the staff or anything else. This is optional. If you don't want, you
don't have to do this. This is how you can proceed with creating the
outline for it. You can also create
a staff in here. It will be a bit
trickier to adjust it, but if you want, you
can proceed with it. I'm just showing
you as an example. If you want, you can
do that. I'll be keeping things a bit simpler, but if you want, you
can proceed with it. In this way, you can
create the staff. Instead of stuff,
you can also add another Burp sap
that is holding. Instead of creating its
second hand in here, you can also create
the second hand on the other side as I showed
you in earlier sketch, the first video of this project. The staff, you can also
so that it's holding a spear or something
more weapon like. This is just a rough
idea that if you want, you can proceed with it.
I won't be doing this. And we are almost done with
this project, Krampus Burden. If you want to add
more highlights, more detailing, more sketching, more sading, you can do that. Making the eyes a
little bit more darker. Small, a little bit of
red for its nostril, too. For the upper part of its gum, upper part of its mouth, the gum, I decided to
add a little bit of red. Yeah, we are done with it. I'll only be adding a little bit of highlights if required. I hope you enjoyed
painting this campus. And I'll be seeing you
in the next video.
12. Warden of the jungle sketch: Welcome to this project, Campus, the Warden
of the jungle. Let's start with the
sketching here I'm using this simple cross section line vertical and
horizontal line to create the depth seat for
the feats of our campus. The set that we are
creating in here is similar to the
seep of a mask. For the horizontal line, we'll be adding the eyes and and a little bit just below
the intersecting lines. I'll be adding the nose and for the bottom section, I'll
be adding the mouth. I'll be making the face a
bit more larger later on. And in here, on both sides, I'll be creating
large curvy horns. Let's create a rough
outline for the horn. Later on, we'll be making it
a little bit more detained, giving it making it a little
bit more three dimensional. But I'll be creating
this kind of large and curvous
horn for our Gramps. Let's make it a little bit
more detailed and defined. I'll be dividing the horn into two or three
different sections so that it's three dimensional and to add a little
bit more volume to it. So we'll be creating the
horns like this so that the horn is a
little bit bent and a little bit curved for
some of the sections. Let's do the same
thing in here, too. Instead of creating
this kind of horn, you can create other kind
of horn you can create long and straight
horn or you can create bit large and
bit more curvier horns, or you can get a little
bit more curved and a little bit more bent horn or one of the horn is missing. So you've got lots of
options to choose from. Feel free to create
any other kind of horn as you see fit. I'll also be creating the
ears just below the horn. Large ears, large pointed ears. And we'll be covering the entire grampuspece with large men. So large here, we'll be
surrounding it with a large ear. This will be the upper part of its head until here
until this section, we'll be creating
the hairs, the mean. And now let's create
the large pointed ears. The ears will be a little
bit droopy along this side, creating this kind of bit
curved triangular set for our ear for the
ear of the campus. Instead of this, if you want, you can feed other kind of ears, bit large ear or
bit droopy ears. Let's divide the face
into different sections. This will be the upper
portion of its head, the forehead, and in here, we'll be creating the nose. Define and bit detailed nose. In here, we'll be
creating eye socket. Just below this one, we'll
be creating the eye socket, and I'll be making the face a little bit
more triangular in C. As I was mentioning that I'll be extending the side of
the feast a little bit. This is going to be the
mouth of the crampus. Here we have got sunken chicks. This will be the simple fees for our campus, the
warden of jungle. In here, we'll be creating
a bit more darker. In here, we'll be doing a lot of hatching lines to create a bit more darker
theme for the hair, the hairs for the mean of the rampus create
a rough outline for the entire body
of the campus, the upper part of the body. I'll only be creating the
crampus till it's chest. And if you want, you can extend
it a little bit further. Both of its hands
will be visible. On its right hand, he'll
be holding a staff, a wooden staff, and
on its left hand, he'll be holding a bag. And for the right hand and here, we have got a large
wooden staff. Don't want to create the hand,
you don't have to do this. You can only create up to it. You can only create up to its chest and the hands
will be covered by the bearings and the
plants that we'll be adding later on at the
bottom of the pinch, adding the cloth for
the thumb in here. Let's create the
rough outline for the Crampus ooden stuff. Here I'm creating wooden stuff. Instead of this, you can
create other kind of stuff with different kind of patterns
and texture or designs. The bottom section of the
stuff won't be visible. It will be covered
by the leaves. Now, on this side, adding the hand a little bit
lower than the right one. So only a small portion of its finger will be
visible in here, too, since he'll be holding
a large sack on its hand. I'll be covering most
of the section with a here like texture so
you don't have to worry. That's why I'm not creating the outline for its
arm and the suldier. This is the simple rough
sketch for our campus, the warden of the jungle. In here, we'll be
creating lots of leaves and small berries at the bottom. And with this, we are almost
done with pencil skit. If you want to make
adjustment and the changes, you can do that.
You can do that. You can make some of the
things a bit more bigger, bit smaller and change
the placements. So feel free to make
changes as you see fit, creating the eye
socket for our cramps, making the noes a little
bit more detailed. We'll be adding lots of line for its face alongside
its nose, eyes, and the mouth to make it
look a bit more wrinkled, bit old and bit more
lathering to give it that kind of bit grotesque
texture to the face. And here, with
these, we add with the basic pencil sketch
for our grampus. And here I decided to do the
outlining on the border, and I'll be seeing you
in the next video. Oh
13. Outlining the face: Let's continue where we
left off we have already sketched out the rough
outline for our Grampa. Now in here, I'm
using the Tombos bras being to do the outlining
and adding the details. In here, I'll be doing
the rough outlining, and then later on, I'll
be adding more detailing. Mostly, we'll be
using hatching lines, a bit curb hatching lines
to create the texture. For now, let's do the outlining for the fees and the horns, and then we'll be adding the
detailings for the body, the hands, and the
remaining section. For most of the section, I'll be creating
this kind of line a bit rough and textured line. So for the horn in here, create this kind of
bit textured line. Doing the same thing
for this one, too. Still, if you want
to make changes to the sap and the sizes of
the horn, you can do that. Just roughly going
over the pencil and squish that we have created
for the outline of the horns. I'll be making the
bottom section of the horns a little bit
more thicker later on. For now, just do the rough
outlining for the horn. With this, we are done
with one of the horn. For the second one, I did not did the outlining since I'll be doing the outlining for the staff first and
then add the horn. I want to show that the horn
is lying behind the staff. That's why I did not outline it. Going over the outline for the stuff that we have created. I decided to make
this Oden stuff. Instead of this, if you want, you can create other
kind of stuffs, bit more detailed pattern or
a bit more textured stuff. I'm creating this
kind of groove to add a little bit of texture
to this Oden stuff. Instead of this, if
you want, you can create a plain and
simple staff, too. Making this person a
little bit more thicker. And now let's do the
outlining for the upper part. I'm dividing the upper part of the staff into few
different sections. Now going back to the horns and let's do the outline for
the remaining section. With these we are done with the horn and the wooden stuff. Now, let's go over the
outline for its face. Creating the outline for
its eyebrows and the eyes. If you want, you can
create a bit more detail and bit larger eyes. Moving on to the nose, making it a little bit more darker. In here, I decided to make
the nose a bit more broader, a bit more pointed and
we'll be trying to make it a little bit more grotesque by adding more lines later on. Adding these kind
of lines to make the nose appear a
bit more thicker. For the mouth, we have got goat like mouth
for our cramps, the sunken chicks
on both the sides. Doing the outlining
on this side. When we are done with
the upper part of the fees of our campus. Now let's do the
remaining section, the jaw and the remaining
part of its mouth. So this is the
outline section for the fees of our crampus. We'll be adding lots of lines and lots of detailing later on. Moving on to doing the
outlining for the ears. You're going to start
with broken lines and then later on add more details. Going over the outline
for the second ear. Here, too, I'm using a bit of broken lines to
do the outlining. Later on, as required, I'll be adding a little bit
of texture and use a lot of hatching lines and
do the sealing for the ear to make some of the
regions a bit more darker. With these, we are done
with the basic outlining for the ear, moving
back to the horn. As was mentioning, I'll be dividing this into two
or three sections, adding this line in the
middle of this horn. Adding this kind of
bit broken lines to divide the horn into
a different section, create this kind of bit
broken and curved line to add a little bit of texture, doing the same
thing in here too, creating this kind of bit
broken and bit curved line to divide the horn into
different sections. Let's move on to the finger. Doing the rough outline for
its finger and the thumb. For the thumb, we have
got a large claw in here. Now, let's do the rough
outlining with this kind of broken lines for the
entire seep of its body. We have got triangular seep for the upper part of its body. Another rough outline
for the mean. Here we'll be creating the mean for our crampus Now, let's erase the upper part, and then we'll be
adding a little bit more detailings in here, I have increased the speed, so that's why it seems that time is erasing it quite fast. Let's take a los look,
and we'll be adding a little bit of
detailing starting now. Adding the lines
for its forehead. So we'll be creating mostly
this kind of line to create here texture for
the entire section. A bit of curve lines and
doing the hatching following the contour of the following the contour of the curvy lines. Instead of doing
uniform hatching, I am wearing the thickness of the lines a little
bit as well as placing some lines a bit more closer and others bit
more farther apart. And for the outline of its body, we'll be creating this kind of bit spiky hair for
some of the sections. This kind of bit spiky hair. And for the regions where
you want to draw attention, you can just add
more lines to make that region a bit more darker
and a bit more distinct. Like in here, for this side, on the right, I added a bit more lines to make that
region a bit more darker. To source the caos
casted by the horn is making that part of the
here a bit more darker. Let's do a rough outline
for the main of the campus. Rough outline like
this, and then we'll be filling the entire section
with this kind of lines. Do the rough outlining and
then feel it and then peel the entire section
with this kind of curve hatching lines. Now let's do the remaining
section of its main. This kind of simple
hatching lines, but curvy hatching lines. And for different here patches, just in the direction of
the curvy lines a little bit and create a cluster
of hatching lines, concentrating at a point. I'm not able to
properly convey it, but you have got the idea
of what I mean to say. I'm creating this kind of
hatching lines to create the here texture for
the mean of our campus. This is the first
layer of the here, and after this, I'll be
adding another layer of here. And after this, we'll be
creating another layer of hair to make the mean
a little bit more thicker and a bit more bossier. Moving onto the other side
and doing the same thing. So this process is going
to take a little bit of time since we have to
create lots of lines. Pase and t. Yeah, just follow along with me and
create this kind of line. You can vary the
length of the line. If you want to make
it a little bit curlier, you can do that, too. Instead of this kind
of bit curve line, you can make the lines
a bit more curvy or spiral light C and then add more hatching lines to make the mean of this
grampus a bit more curlier. And with this, we are done with the first layer of the here. Now let's create second one. The same kind of hatching lines a bit curvier hatching lines and creating these kind of pointed spikes for
the end of the hair. And to sew a clear distinction between different
layer of the hair, you can make the earlier hair
a little bit more darker. For the pointed
edges of the hair, you can add few
more lines to make it a little bit more
distinct and apart, or you can do a little bit of seeding at the bottom
section of those hairs. We are done with this left side, moving on to the right side
and doing the same thing. Creating he just below the ear. For this layer, as you can see, I'm making the sizes of the
here a little bit longer as compared to the
first one that we just did beside the face. Feel free to experiment on
your own and you can create different length of the here
for the mean of our campus. Adding a little bit
more lines to make the hair a little bit more
thicker and bit more denser, doing the same
thing in here too, making the hair a
little bit more thicker and denser by
adding more lines. Adding few more lines in here, just above the here to make
it a bit more thicker. Now, just try to create a definite seed for the
mean of our campus, add more lines wherever
you think it's required. You can make the
mean a little bit more denser by
adding more lines, or you can add another layer
of here just beside it. But I think it looks fine. I'll be adding more
distinction in between the mean and the remaining
section of its body later on. For now, let's at the
texture for our horn. To create texture for our horn, we'll be using this kind of simple hatching lines and also be doing a little
bit of seeding for some of the regions to
make that region a little bit more darker
or a bit more pronounced. Simply follow the curved sweep
of the horn that we have created and create this kind of bit broken hatching lines. And in here on this side, I wanted to so that
this is a little bit darker by the sido casted by
the upper part of the horn. For the lower section,
as you can see, add a bit more lines
and a little bit of sading to make that region
a little bit darker. Here, too, for the region that you want to make it
bit more darker, you can just add
a little bit more lines and do a little bit of sdingF the lower section and to create bit
lighter section, you'll just have to add lines a little bit
more farther apart. Make the middle sexion a
little bit more darker. Do the outlining once
again wherever it's required to make those
region a bit more darker. A little bit of seeding
on this side to make it a bit more distinct
and a bit more darker. And with these, we are
done with the first hot. Let's move on to
the second horn. We'll be doing the same thing. Simple hatching lines following this curve and tour of the horn. If you want to make
it a little bit more distinct and
bit more darker, instead of using hatching lines, you can use the
cross-hatching line for some of those section to make
that region bit more darker. It will take a little
bit more time, but that will make the horn
a little bit more distinct, a bit more darker and
a bit more pronounced. You can also use
scribbling lines to create this kind of
sading for the horn. But I'll be sticking
with the simple hatching lines to create the sados and a little bit of sading for the entire
section of the horn. Like in here for
this curved section, I'm adding a little
bit more lines to make it bit more darker. Now, moving on to this side, creating this kind of
bit smaller broken lines to add a little bit of
less texture on this side. Continuing on with
adding more lines to add more texture for
the remaining part of the horn we have gotten here. Add more lines to the
outlined region to make it a little bit more
distinct and a bit more darker. And with these, we are done with a half portion of our horn. Let's continue with more lines
for the remaining section. For this region, making it a little bit more darker by
adding a bit more lines. Here on this region, make it a little bit lighter. I'm adding few lines in here. Oh for the remaining
small section, simple hatching lines
following this card section, following the curved
contour of the horn. And with these, we are
done with both the horn. If you want, you can use a
little bit more lines to make some of the regions a little bit more darker and a
bit more distinct. Let's add a little bit
of texture for the face. Simple hatching lines
to create this kind of wrinkle and leathery appearance for the face of our cramps. We'll be covering most of the
sections with this kind of simple lines in here, just beside its horn, dividing into two different section. And in here, I decided
to create this kind of concentric circle like lines we get a little bit distinct
from the here line. Instead of doing
this, if you want to keep the fees clean and simple, you don't have to add this
kind of line and you can keep the fees simple simple and
clean with minimal lines. But I'll be creating
this kind of leery and gots look for our cramp. So I'll be creating this kind of lines for most of the
section of its face, making the eye socket a
little bit more distinct by making the outlines a
little bit more darker. When you are adding this
kind of lines for its face, just ensure that you
are not adding it in the same manner that you
added it for the here. What I mean to say
that the direction of the lines would
be a little bit different from the direction of the lines we
use for the here. Now for its nose, creating
this kind of lines. Eatery appearance for
one side of its nose. On the left side, add a bit more lines so that this region is a
little bit more darker. And on this side, creating these kind of small
lines to do a little bit of seeding for the upper
part of its mouth. Let's let's cover it
with this kind of hatching lines parallel
hatching lines for this entire region. And yeah, these, we are done with the upper
part of the piece of our Krampus decided to make the eyes a little
bit more distinct, adding few more lines
just below the eye. And now for the
remaining section, the sunken part of the cheek of the crampus make these lines a little bit more darker
and a bit more distinct, and then we'll be covering the entire section with
the hatching lines. So parallel curved
hatching lines. So with this, we are done with the check and the jaw
line of our campus, dividing the mouth into
two different section in here to creating these
kind of small lines to make it a little bit more
darker and a bit more distinct and following the contour of the jaw line and
extending it to its face. And with these, we are done
with the face for our campus. If you want to add more lines, add more details,
you can do that. Yeah, I'm satisfied
with how it turned out. Let's do the detailing
for the ear. Here I've already started
reading this kind of round and curvy lines
to make the ears outline a little bit more distinct and a bit
more textured. For this region, let's do a
little bit of hatching to so that this region a
little bit more rounder or a bit more curvier, creating this kind of bit
slanted hatching lines. Now for the remaining section, making the outline
a little bit more distinct by adding
more lines in here. So the upper part of the ear, make it a little
bit more distinct. And now for the
remaining section, I'll be completely filling with this kind of curved
hatching lines. And for the upper
part, I'll be doing a little bit of shading
by adding more lines. For now, just add the lines
following this curve scene. Adding these lines in here too. And for this upper
part, add another pair, a more lines in here to do
a little bit of seating, simple parallel lines, simple parallel
hatching lines to make this region a
little bit more darker. For the remaining section, the upper part of the ear, adding more lines, following
the curved seep of the here. Lower part of the
ear a little bit more thicker and adding this kind of bit curvy lines to make it a little
bit more texture. And with these we are
done with this first ear, moving on to the second word, we'll be doing the same thing. Put the ear apart from this. If you want, you can add
multiple or single earrings. You can also create
torn and ragged ear or some part of the
ear is missing. Continuing on with
creating this kind of line following
a sep of the ear. And with this, we are done with the upper part of the ear. Make the lower part a
little bit more texture. Now on the same thing,
are we hatching lines, filling the entire
section with the lines, and then we'll be
doing another layer of hatching lines to create
a little bit of sading. Doing a little bit of
sading on this side. For this ear, I
decided to make it a little bit more darker to sow the cadocastd the staff and the horn is making the ear
a little bit more darker. And with this, we are done with this second part of the video, and I'll be seeing you
in the next video.
14. Creating hair and leaves : Welcome to the third part of the project. In here, I'll be. In here, we'll be
creating most of the texture for the remaining
section of it Swati. Here I've already started with creating the
rough outline for the here like texture for
the remaining sex bots body, this kind of random
saves a bit pointed random seep for here for
the entire sexanabots body, doing the same thing on the side too.This kind of
sieves to so the here. We'll be doing the same
kind of thing that we did for the mean of
the Krampus phase. Just add random
this kind of here for some of the section
and later on we'll be making a little bit
more defined following the seep of the here that
we have just created. Create a rough outline for
the hand of the Krampus. You don't need to create
the entire section, only a small portion
of its hand. We'll be covering the
rest of it with a hair. We'll be creating
this kind of hair? We'll be creating
this kind of here and doing a little bit of
seeding and hatching. And to create a clear
distinction between the he of its body and the here that we
created for the mean, we'll be doing a little
bit of seeding like this for the region just below the
man that we have created, we'll be adding lots of lines and doing a little
bit of hatching and a little bit of sading
like this to make those region a little bit more distinct and
bit more clear. You've got the rough
idea what a mean to see for the outlined section of the mean that
we have created, simply adding more
lines and making those regions a little
bit more darker. You can just start
going over the outline with the kind of small
lines to do a little bit of siding to create a
clear distinction between the mean and the
mean of the crampuspece and the remaining section and the remaining here that
we'll be creating for its bonning and after doing this, I'm just creating
the same kind of hair that we did for the pace. Just create some random
seed for the here and then following that small
seed that you have created, just add more lines
to make that here a little bit more thicker and
a bit more detail defined. As you can see, I use a small seed and for
the entire section, I just added more
lines to create the hair like texture for
the remaining section. And for the empty
spaces in between, just add more lines, following the curb seep and just
fill it entirely with it. We'll be doing the same thing
for the entire surface. We'll be doing the same thing
for the entire section. We'll be doing a
little bit of seeding beside the man that
we have created, and for the remaining section, we'll be creating
the here like taxie. Start with creating this kind of small and large seeds for the here and then fill the entire section with
the hatching lines. And as for the area
near the mean, just do a little bit
of seeding and create this kind of bit darker outline. For the Ear two, if you want, you can add a little bit more outlining to make the ear
a little bit more darker. This process is a bit repetitive and it's going to take a
little bit of time. Also change the
direction of some of the hires to make
it a little bit more distinct here too, for the upper part, making
the outline of the mean a little bit more darker
by just adding more lines. Basically, we are just filling
the entire section with the black for the
here near the main. With these, we are done
with this section. For some of the section, make the outlines a
bit more bolder to sow the different strands of
here that we have created. Now in here too, is using the simple saves that
we have created and creating large strands of here, following that curd
sieve and using hatching lines and to create a bit more bolden and
bit more dustin region just add more lines
on those regions. This process is quite
simple and easy to do. In here, I decided to do the
outlining for the mean first and then we'll be covering
the remaining section with the here like texture. Adding a lot of
black near the mean, and then we'll be creating the here simply, just like this. And for the empty and the middle again
just filling it with a curved line
following the seep of the here strength
that we just created. Now for the bottom
section in here, adding more blacks to make
it a little bit more darker. And with this, you can clearly
see that we have created a clear distinction between the face and the remaining
section of its body. The mean in here
that we create is quite bold and quite different
from the entire section. And now mostly I'll
be creating this kind of here strands and just do the hatching lines to make it a little bit more darker,
a bit more bolder. If you want to create a little
bit more detailed here, you can use a bit
more thicker paints. You can use a bit more
thicker breast paints or more thicker fine liner. You can start with a
thicker fine liners to do the outlining
and for the insides, you can use a bit thinner or normal fine liner
or the brass pin. In that way, you can add
a little bit more variety to the hair of the Krampus. Adding it for the remaining
sexon just above the ear. And with this, we are done with the upper part of the cramps. Now for the remaining
sexan just below the ear and beside the
staff that we have created, filling this region with
simple hatching lines. Make the outline of the ear
a little bit more darker. Adding more lines in
this region, too. Create simple pointed edges for the here streaks and then add more lines following
that curd sp. I decided to add a little bit of detailing Wood green textire
for the wooden stuff. Let's do that,
creating this kind of mid broken lines
following the street, following the curd seep
of the wooden stuff, and also make the
outline a little bit more wolder and a bit
more darker to create a clear distinction
between the body of the Krampus and the
wooden stuff he is holding. Moving on
to the upper part. Create this kind of
green texture for the bodun stuff that
we have in here. For this region in here,
I decided to create this kind of circular
or spiral pattern. And for the remaining
sexton I'll be doing this simple bit curvier
and normal hatching lines. Make some of the regions
a bit more bolder and a bit more darker by
adding a few more lines, especially the regions near
the horns and the here. Making this region a bit more darker beside the
horn that we created. I was not able to
record the upper part, but I added more lines for the remaining
section of the stuff. You have got the rough
idea and you can create with simple kind of pattern with the hatching line for
the upper part too. And with this, we are done with the upper section of
the wooden staff. Now, moving back to the here. Once again, we are going
to do the same thing, following the curved set
with the hatching lines and filling the entire section
with the here strands. Divide the entire section of its body into different section. In that way, you can
make this process a little bit more easier
and you can create a little bit and you can add a little bit more variety to the different hair strengths
that you are creating. In here, I decided to speed
things up since it's going to take a lot of time and the processes are
quite repetitive. For our hands too, I just did the same thing,
same simple thing, adding this kind of bit
broken and curvy line following the cylindrical
sip of the finger. Let's add the here for
the entire region. If you want to follow
along with me, you can just pause the video
or you can reduce the spin. Now, this is in normal spin. In here for this lower
region of the wooden stuff, I decided to create
simpler pattern. And for these
lines, I decided to make it a little
bit more thicker. So for some of the lines, I'll be adding two
or three lines to make those regions
a bit more darker. And this is in normal spin. I decided to do
the outlining for the berries with
this red hail pen. I decided to do the coloring for the berries in here to divert your attention so that you
don't get bored with creating simple lines for the hair
texture for the grampus body. You can vary the seeds and sizes of the berries
that we have created here you can increase or decrease the number
of the berries. For most of the section, the lower part of this illustration, we'll be creating this
kind of holly leaves. So create as many
leaves as you want. We'll be making the
outlines a little bit bolder and bit
darker later on. And here, too, we'll be using
lots of hatching lines. We won't be doing the seeding, simple hatching lines for the entire section of the leaves. If you want you can leave this
section a little bit clear and create the burlap sap that the Krampus
will be holding. Or instead of that, you can
just follow along with me and uncover these regions
with lots of leaf. These leaves are optional. If you don't want to add this, you can simply create the
hair for the entire section. A. I decided to do the outlining for the
fingers so that I don't create hires or the
leaf on top of it. Using the red paint to do the outlining for the burlap
sap that he's holding. Only a small portion of
this will be visible. Now, let's create the
outline for more leaves. For the mid ups, I'll
be adding thicker lines to a clear distinction between the two
halves of the leaf. I'll also be wearing
the sizes of the leaf a little bit for the larger areas, alvegrating bit larger leaves
and for the smaller areas, alvegating bit smaller and alvegrating bit smaller leaves. You can start creating
simple branches, and on top of it, you
can add the leaves. Instead of creating
this kind of leaf, if you want, you can
create other kind of leaf. And you can also
add berries among the leaves put other sects into. In here, I only added the
berries at the middle portion. But as son if you want, you can add multiple berries at multiple different sections. Since this is going to
be a repetitive process, in a, once again, I have
increased their speed. If you want to follow
along with me, you can pause the video or
you can reduce their speed. Small and large leaf for
most of the section. Basically, I'll be
trying to create the entire bottom half of this illustration with
this kind of leaf. But for the upper part,
I'll be adding the leaves, but most of the leaves
will be quite smaller and there will be a lot of spec in between
different leaves. And with these, we are done with the outlines for the leaf. And now I have decreased
the speed to the normal and we'll be creating this kind of simple hatching lines for
the texture for the leaves. Simple hatching lines following
the seep of the leaf. Instead of this, if
you want to create other kind of texture or
pattern, you can do that. You can divide the leaves
into different section. You can add a bit more detail, define veins coming
out from the mid ribs. This toe is going to
take a little bit of time and this process
is repetitive, so be present and just
add kind of lines. If you want to make the outlines of the leaves a little
bit more distinct, you can add more lines for the outer regions of the
leaves that we have created to make the distinction bit more clear between the
leaves and the hairs. Once again, in here, I have increased the
speed since the process is repetitive and it's going
to take a lot of time. If you want to follow
along with me, you can pause the VD or you
can just reduce the speed. I'll be adding the lines for all the leaves that
we have in here, simple hatching lines following
the seep of the leaf. If you want, you can
also do a little bit of sading for some
of the regions. I won't be doing it. I'll
be keeping it quite simple. To add a little bit more
characteristics to the leaves, you can add a little
bit of sding and to make it a little bit more
bolder a bit more darken, you can also use a little
bit of cross-hatching. So you can do a little
bit of cross-hatching for the lower part or on
one side of the leaf. And as I was mentioning,
if you want, you can add multiple berries or a few berries in
between different leaves that we have in here. We have got only a few leaves
remaining five or six. So yeah, let's
continue with creating this kind of simple hatching line for the remaining leaves. And we have got only two leaves, and I have decreased the speed, so let's add the
hatching line for the remaining two
leaves we have in here. And with these, we are
done with all the leaves. All that is left is
to create the he like texture for the remaining
section of the crampus body. By entire sexton, I mean, we'll have to add the lines in between the leaves
that we have created. Let's be patient
and read more lines following the seep of the strand here that we have created. I decided to feel
the empty spaces in between different leaves with
these kind of blinds and make a bit clear distinction between the leaves and leaves its stem and the rest of the section the heat
from the Krampus body. So filling the entire region
with this kind of bit curvy hatching lines
and making some of the regions a bit
more darker with sding to sow a little bit
of cado casted by the leaf. Cadose casted the leaf
has made this region, the lower part of the
Krampus body a bit more darker then we'll be
extending this sadose and the hatching lines that we have created and merging it with the hair line that
we are creating for the remaining section
of the crampus body. Once again, here, I
decided to increase the speed since this is
a repetitive process. So we'll be feeling
the entire section for the cramps body with this
kind of hatching lines. For the upper part, the
process is quite simple, but for the remaining section, the section in
between the leaves, we'll have to add a little
bit more detailings to a little bit of seeding to so
here distinction in between the leaves and the here and also to create
a little bit of sados the cado casted by the leaves on the here to make those regions
a bit more darker. Doing a little bit of seeding in between the berries
that we have created. On this side, too, I
did not add the hair, so creating some random
strokes of the hair and then filling the
entire region with the kind of hatching lines. This will start with creating random streaks of hair and then fill the remaining section
with the hatching lines. You can clearly see by doing
a little bit of sading for the regions in here
in between the leaves, we have created a bit more clear distinction
in the upper part in between the upper part of the Krampus body and the leaves that we have created in here. As we move towards the bottom, I'll be doing a little
bit more sading and make the regions a bit more
darker and a bit more bolder. And I'll only be covering up to here in this third
part of this project. And I'll be seeing in the
next start where we'll be using the red colour
to do the coloring.
15. Using gray brush pen: Welcome to the last
part of this project, Krampus, the Warden
of the jingle. In here, we'll be adding
the final detailings. In the last video, I was not able to add the
detailing for this hand, so just simple
adding this kind of simple hatching lines
to add a little bit of wrinkles for the hands and
the fingers of the Krampus. If you want to make
this a little bit heir, you can create small
texture for the here. Now, for the burlap
sap is holding, simple hatching lines
will do the work, following the sweep
of the Blap sap and creating this kind of
simple hatching lines, let's do the outlining for the upper part of
this burlap sap. Make the outlines a bit
more bolder and distinct. Now for the inside
of this burlap sap, creating this kind of
horizontal hatching lines. We are done with the
upper part. Let's do the same thing in here,
the remaining section. Simple hatching lines following
the seep of the lap sap, as well as just encircling some of the leaves
that we have in here, filling the remaining section
with the hatching lines. And with these, we are
done with the bulapsap. Now we have got the
barriles in here. For the berry, just
creating this kind of simple circular see following
the seep of the berry. And for the outline region, make them a little
bit more bolder, bit more darker with more lines. And for the remaining section, simple curvy lines like
this and a little bit. For the upper part,
add few more lines, make it a bit more distinct. Making the lower regions a little bit more
darker with more lines. If you want, you can
cover the entire section of the berries with the red, add more lines wherever
you think it's required. So you can cover the
entire section of the berries with the
red like this and leave a little bit
of white space for the highlight or a little
bit of reflection, doing the same thing
for the remaining two or three berries
that we have in here. And with these, we are
done with the red berries. Not to make the berries a
little bit more distinct. I'm going in with
the black br pin to do the outlining for
the berries once again. Instead of this, if you
want to only use the red, you can use the red to do the outlining and make it a bit more bolder with more lines. Now, adding more lines wherever I forgot
to add the lines. Simple hatching lines for
the wooden stuff in here. Now, for some of the section, I decided to make them a little bit more distinct
a bit more darker. This is opsonal, so in here, I'm using gray color to make the leaves a little
bit more distinct. If you don't want
to do this, you can just leave it as it is, since this does not make
that much of a difference. For the campus, I decided to completely
cover it with the red. Instead of doing
this, you can create is in the pupil or the inside of the eye using the grey
for the campus hand. This is optial if you
don't want to do this, you can just leave it as a desk, but I decided to make the hands
a little bit more darker. Adding it for the
horns of the campus. If you want, you can also add a little bit for its
face and here now. I also decided to use it for the wooden stuff that
we have in here. The reason I choose to use this grieve for some of
the Saxon is to make those sexton somewhat
of same color or same consistency as that of the hair that
we have created. That's why I decided to use it. As I was messing using a little bit of green
for the face too, mostly for the upper
part of its face. Adding a little bit for its Eat. I decided to cover the
entire section of its face with the grease covering the entire section
with the gray. And with this, we are done with the Krampus Warden
of the jungle. This took a lot of time. Let me know how much time it
took you to create it. And yeah, with these we are done Krampus the
Varden of the jungle, I'll be seeing you
in the next video.
 Vishal Munshi